Berserker.
:^)
- Joined
- Jun 8, 2009
- Messages
- 18,990
Link to original post: [drupal=4382]Smash Bros Wii U and 3DS[/drupal]
This place became a placeholder for some posts
Anyway....
Playlist:
Super Mario Galaxy - Toad Brigade
Luigi's Mansion - Toad's theme
Mario Party 4 - Toad's midway madness
Mario Sports Mix - Toad Park
Mario Kart Wii - Toad factory
Mario Strikers charged - Toad's theme
Wario's Woods - Versus
Introduction:
Toad (Also known as Kinopio) is one of the main protagonists in the Mario series. Just like Yoshi, he is a singular character from the other toads. His debut started out with Super Mario bros. which became famous world wide then he was one of the playable characters in Super Mario bros. 2. He's been a tutorial type character and item keeper since Super Mario Bros. 3 until Super Mario Sunshine. In Super Mario Galaxy 1 and 2, he is the trusty Toad Brigade captain (Wearing a red vest) who guides and helps Mario in the quest to gather the power stars and to save Princess Peach. He becomes a playable character in New Super Mario Bros. Wii (Blue Toad and Yellow Toad) and in New Super Mario Bros. Mii. He also appears in Luigi's Mansion 2 as a companion to Luigi through out the adventure. He's also appeared in various spin off titles in Mario plus he had his own game, Wario's Woods, where in he was the main protagonist. Toad is known for being important and iconic to the series along with Mario, Luigi, Peach, Wario, Bowser, Yoshi and Donkey Kong despite his roles compared to the other 7. He's been one of the most celebrated characters in Mario's 25th anniversary.
Stats:

Toad is known for his quick speed and superhuman strength that surpasses even Mario and Luigi's! Unfortunately, his size and weight make him easy to KO however which also shortens his range. However, his moves are heavily based on his ability to use mushrooms and spores to his advantage in the battlefield. He also has some items that can buff or add new effects to his attacks. He has a lot of ways to keep away and to rack up damage using his array of projectiles, traps and defense tools.
WEIGHT:

SPEED:
SIZE:
JUMP:
RANGE:
AIR MOBILITY:
FALLING SPEED:
Wall cling: Yes
Wall run : Yes (While clinging, move the control stick at any direction (Depending on where you are clinging on) to run on the wall
Crawl: No
Some things you should know
The colors of the font symbolize.....
Normal ground attack
Normal aerial attack
Grab/Throw
Spore attack
Mushroom attack
Shockwave attack
As for the KO %, assume the enemy does not DI and the weight of the enemy is the same as Mario's.
Neutral special : Item swap

Toad pulls out an item. Each item has a different effect to his standard attacks, mushrooms and spores. You'll get to see how the mushrooms look like during the effect once we reach the smashes section. As for the spores, go see the forward special. To use the item, click the A button. The effect wears off in about 30 seconds. If you want to stop using the "effect of the mushroom", then click A again.
The rotation is as follows:
Super mushroom -> Golden mushroom -> Mega Mushroom -> Life mushroom
Super mushroom

Golden Mushroom

Mega Mushroom

Life mushroom

Forward Special : Spore shot

Toad shoots out a ball of spore with medium priority. Without any item effect, it deals only 9% damage and it tracks the enemy at medium speed (Ganondorf's speed). Toad can make the spore shot bigger by attacking it with one of Toad's attacks involving spores. The bigger it is, the higher it damages. These spore attacks' damage though does not affect the size. It still makes it grow normally. Each time the spore shot grows, the damage increases by 2% and the knockback obviously increases (I won't be specific with what the knockback of the move is if it became "bigger" than the usual size. Good luck finding that out by yourself.... Just judge it by the damage). If you want it to be at its max size then use Toad's spore based attacks 10 times. Although, this fact seems sort of useless when it comes to the golden mushroom form of the spore shot. The knockback of the normal spore shot is low. It kills at 240%.
Super Mushroom version: Spore mine


Picture 1 : Mid air, Picture 2: On ground
Toad's spore shot acts as a mine. Yes. It can be used in mid air. It's flat on ground when Toad uses it on the ground. If the enemy steps on it, the spore trap emits spores that deal 11% damage to the enemy. Oh yeah. You can also put 3 of these spore mines at the same time. They last for around 13 seconds. If you want to detonate them manually, just input forward and hold B. They do not damage Toad. Like what I said before, you can make the spore mine bigger by attacking it with any spore based attack. It has good knockback and it's capable of killing at 145%.
Golden mushroom: Spore spread shot


Picture 1 : Base form, Picture 2 : Spread
Toad's spore shot travels extremely fast. It travels at one direction though but that depends which enemy is the nearest and where is the enemy. This spore shot can only travel from a certain range just like Fox's lasers. Although, once it reaches it range limit, it scatters into 8 small balls of spore and scatters around in a distorted motion. Each of the small spore shots deal 5% damage. Also, if the spore shot hits the enemy and at the same time, it remains in it's normal base form, it deals 9% damage PLUS it will scatter so that's some additional damage. This form of the spore shot though is affected by spore based attacks but are you fast enough to hit the spore shot with an attack? The knockback is extremely weak and... it can't kill.
Mega mushroom: Giant spore shot

His spore shot are as big as bowser and it tracks the enemy. It deals 17% damage although if you make it bigger, imagine the incredible damage and knockack... And most importantly, THE SIZE! Shielding the attack is kind of useless. Well, it deals a lot of shield damage so if your using a character with a small shield then your shield will most likely break. It's capable of killing at 125% with out any growth effect.
Life mushroom: Defense spores

Toad infuses himself with protective spores. Toad takes lesser damage than the usual (-2%). Unless the damage of the attack is 2% or below, the damage remains the same.
Downward special : Mushroom manipulate

Toad raises his hand upwards. Notice that he is holding a small mushroom. While Toad is doing that, you have access to manipulate the small mushroom into a useful tools. Click B to make Toad put his hand down and go back to fighting! Here are the 3 other options other than that:
Forward

Toad manipulates the small mushroom into a mushroom charger in front of him. He can put it in mid air also. He can put a max of 3 mushrooms chargers. Enemies can also interact with the mushroom charger. You can rotate the mushroom charger. While your holding analog forward or backward, move the analog at any direction to rotate the mushroom charger. In the air while rotating, you'll fall SLOWLY. As in, even slower than Jigglypuff's falling speed. Once you rotated it, that's the last time you can rotate it until it disappears of course which takes about 15 seconds. If you're making the mushroom charger face down while it's near the ground, then you'll just make yourself hit the ground. Note that this move has high priority and it will clash through any projectile with out even haltering although melee attacks are a different story. It deals 12% damage and it can kill at 138%. To destroy it, you need to rack up 19% damage. It applies also for the other versions of this attack.
Downward

Toad manipulates the small mushroom into a rotating mushroom block. Remember that block from those mushroom levels in Mario Bros? That's it alright. You can't make it grow and it can't smash (Squish) opponents or something like that. It's as fat as umm.... 3 kirbies and it's as tall as ganondorf.. You can only summon one mushroom block. To destroy it, you need to rack up 35% damage. Then again... It applies also for the other versions of this attack.
Upward

Toad manipulates the small mushroom into a mushroom platform. Yep. That's right. Remember those levels in Super Mario Bros. with the mushroom platforms? That's what I'm talking about. Their height is as tall as maybe 2 ganondorfs. You can stand on these things just like in Mario bros. You can also make it larger by feeding it with spore based attacks. If you want it to be at its max size then use your spore based attacks 5 times on it. You can only summon one mushroom platform. To destroy it, you need to rack up 55% damage...... Oh and for the third time, It applies also for the other versions of this attack....
Super Mushroom
Mushroom charger

While Toad bounces on his mushroom charger, a spray of spores come out from the back of the mushroom charger which damages 8% making it effective as a tool for Toad to run or retreat from the enemy. It has really weak knockback and.... it can't kill.
Mushroom platform

Picture 1 : Growing....., Picture 2 : Shrinking
The mushroom platform grows taller (4 ganondorfs) and (1 Ganondorf) smaller randomly. Yup. That's all.
Mushroom block

The mushroom block has a track to follow. The track is as thick as 1/4 of battlefield and it's as tall as 4 ganondorfs.
Golden Mushroom
Mushroom charger

This is where it gets reeeaaaallly crazy. When Toad jumps on the mushroom charger, the charger automatically aims at the charger built after it then blasts him there then so on and back to the 1st then 2nd then if there is, the 3rd one where in Toad has the same travel speed as the usual (The mushroom charger with out any effect). If there's only one mushroom charger then you will be blasted to whatever direction it's facing and.... you'll most likely get killed. Why? When Toad bounces of the charger, the travel speed is DEMONIC (As fast as Captain Falcon). So if you're planning on use a golden mushroom with the mushroom charger, place 2 chargers or 3. Still has the same damage and knockback.
Mushroom platform

The mushroom platform randomly wobbles. The wobbling shakes off the enemies but it does not do any damage. Also, Toad cannot be shaken off the platform.
Mushroom block

The speed of the rotation is extremely fast (Captain Falcon speed). Not even Sonic can stay on the block for a long time.
Mega mushroom
Mushroom charger

It's now chargeable. While charging, you can't flinch against attacks but you will still take damage. You can't even get grabbed out of it. It can deal from 17% - 34% damage. Also, a spray of small spore shots is scattered in front of the mushroom. Each small spore shot deals 4% damage and of course... IT CAN'T KILL.
Mushroom platform


Picture 1 : Mushroom mountain, Picture 2 : Climb Mario! Climb!, Picture 3 : Collapse.....
Mushroom platform? More like.... MUSHROOM MOUNTAIN! Toad summons a mountain below. The starting however of this attack is really SLOW. As in... As slow as a warlock punch. The mountain is as is big as The mountain can also release a cloud (Maybe a fog) of spores come out and deal 2% damage per second. It will release a cloud of spores if you hit/attack the mountain with a spore based attack 10 times. Enemies can climb the mountain but it's not easy especially with you distracting them. It takes quite a long time to finally reach the top (4 seconds without stopping). After 12 seconds, the mountain will begin to collapse and fall to either the left or right direction... The collapse can attack you and the enemy. It deals 30% and it's capable of killing at 65% so watch out.
Mushroom block

The mushroom block becomes extremely big. It's as long as 4 kirbies and as tall as 2 ganondorfs. The starting though is slow (As slow as 1/2 of Ganondorf's u-smash frames/speed).
Life mushroom
Mushroom charger

You don't bounce on it anymore. Instead, the mushroom charger emits power spores that increases your damage by 2%. Enemies can also benefit from this.
Mushroom platform

Arrrrgghhh. The Toad house looks terrible... Sorry :<
It's not a platform anymore... It's a Toad house! Toad gets in the house and takes out a random item. Enemies can also get inside the house to get a random item. The house stays there for about 5 seconds.
Mushroom block

Toad summons a green mushroom block. The green mushroom block is quite small compared to the other mushroom blocks. It's only as big as Bowser. It actually moves as fast as Zelda towards indirect spore attacks. Toad can move the block by attacking it.
Upward special : Mushroom trampoline

Toad summons a mushroom trampoline below him which disappears right away right after Toad bounces on it. Toad can deal 10% damage while he's rising plus it has low priority. This is Toad's standard recovery.
Super mushroom : Higher bounce
Toad bounces higher than usual......... Umm.... That's all...
Golden mushroom : Propeller follow up

After bouncing, Toad pulls out his yellow propeller cap and flies upwards! The propeller deals 2% per hit. He can also drill downwards which deals 4% per hit also and it also works as a semi spike meteor smash. It has low priority.
Mega mushroom : Spore rocket

Toad bounces BUT he does not enter into a helpless state yet. Toad opens his palms and puts his hands down then he rockets upwards using his spores. The spores deal 16% damage. Toad's head deals 13% damage. This move has high priority. Aim wherever you want to boost to!
Life mushroom : Second recovery

Picture 1 : Toad's helpless, Picture 2 : But he can recover again!
Well.... It actually works normally.... BUT WAIT! When you're in a helpless state, YOU CAN DO IT AGAIN! .......... That's all.
 Attacks
Neutral attack : Use item/Remove effect

Toad uses or consumes the current item selected in his neutral special. If you want to remove the effect of the item consumed, then click A again. Toad will release out the effect through spores that come out from his head. As said in the description of the neutral B, the effect lasts for 30 seconds.
Dash attack : Mushroom shield

Toad bashes the enemy with his mushroom. Basically, it acts like a shield. It has high priority and it deals 8% damage.... Which obviously means that it has weak knockback. It kills at 175%....
Hold it... It's not over yet...
If you hold A, Toad will keep holding the shield. Move the control stick around to aim Toad's shield. He can hold it for 5 seconds and it's INDESTRUCTIBLE.
Super mushroom : Spore blow

Toad's shield emits spores that blow away the opponent. It does not do any damage but it deals moderately good knockback and it can kill at 138%.
Golden mushroom : Spore rain

After charging with his shield, Toad aims his shield upwards and shoots out 7 spore bullets that rain on the enemy. The spore bullet deals 3% damage.
Mega mushroom : Mushroom rocket

Toad's shield flies off and tracks the enemy. It deals 13% damage and it can kill at 130%. It still has a high priority since it's just a shield rocketing towards an opponent...
Life mushroom : Plant

Toad plants the mushroom shield on the ground.... That's it... I guess.
Forward tilt : Mushroom turret

Toad summons a mushroom in front of him. The mushroom fires spore bullets that deal 3% damage to the nearest enemy. It shoots out 5 spore bullets (Not simultaneously) each 1 second. Use your D-tilt on it to power it up. Notice that if the mushroom turret starts glowing, it means that it can fire a huge spore shot the can deal 15% damage and kill at 130%. The turret can be destroyed if you deal or rack up 22% damage. It stays in place for 10 seconds.
Super Mushroom : Spored area

The mushroom leaks out spores that stay flat on ground. Once the enemy steps in the spored area, they take 2% damage per second. The enemy is slower on the spored area and they'll need to do a double jump if they want to get out of the spored area. It acts like mud so.... Single jumps won't work.
Golden mushroom : Mushroom gun

You can treat these turrets as items (Which means you can throw it). You can also shoot with it like it's a gun. Once the polka dots turn red, it means you can't shoot with it and you'll have to wait for 4 seconds until it cools down.
Mega mushroom : Mushroom force

The mushroom turret acts like a rocket and flies at an upward diagonal direction. It also shoots out spore shots every 1 second as always. Once it hits the enemy, it explodes and deals 12% damage and it can kill at 136%. You can also make it drop spore bombs that fall slowly to the ground by inputting forward A again. They deal 10% damage and they kill at 140%. You can only summon 1 mushroom turret while the mega mushroom effect is in place.
Life mushroom : Power mushroom

The mushroom is thrown forward (1 stage builder block). It emits red spores that consume the enemy's power. How much strength it consumes depends on the weight. Wait wait.. Hold on... It doesn't decrease the health or something like that. It doesn't even weaken the enemy. Anyway, just see the following details below:
Super heavy - 5% per second
Bowser
Donkey Kong
Snake
King Dedede
Charizard
Ganondorf
Heavy - 4% per second
Samus
Yoshi
Wario
ROB
Ike
Captain Falcon
Link
Medium - 3% per second
Wolf
Lucario
Ivysaur
Mario
Luigi
Sonic
Ness
Lucas
Light - 2% per second
Pit
Diddy Kong
Ice Climbers
Toon Link
Peach
Marth
Shiek
Zelda
Super Light - 1% per second
Falco
Olimar
Zero Suit Samus
Fox
Meta Knight
Pikachu
Kirby
Mr. Game and Watch
Squirtle
Jigglypuff
The spores last for 3 seconds. After 3 seconds, the spores are consumed by the mushroom. Toad then must run to it and consume it. No. The enemy can't consume it. The power stored inside the spore adds up to Toad's attack damage for 9 seconds. Toad has some red glow around him symbolizing that he swallowed the mushroom.
Downward tilt : Spore emit

Toad emits spores that deal 3% per hit (12% in total). It has moderate knockback and it can kill at 135%... Actually, this move is meant to grow spore projectiles or mushrooms. It can be used for spacing thanks to its long range. Hold A to keep doing this move. The starting and ending lag of this move is a bit slow... This attack has low priority but then again, this move's use isn't for attacking.
Super mushroom, golden mushroom and Mega mushroom : Quick growth
It makes any spore or mushroom grow 2 times more than the usual. No effect on the damage and knockback.
Life mushroom : Healing spores
Toad emits spores. The spores stay there for 3 seconds. Once you step inside, it will heal you by 4% per second. If the enemy steps in it, he'll get healed also. Once the clouds disappear, you need to wait for 5 seconds until you can use it again.
Upward tilt : Mushroom trap

Toad throws a mushroom upwards. The mushroom emits yellow spores below itself. If anyone except for Toad enters the yellow spores, the mushroom emits a rain of spore bullets that deal a total of 12% damage if you don't DI out of it. You can control/move the mushroom (It moves as slow as Peach). Input Up A again then Toad will hold his hand which is covered in yellow spores then use the control stick to move the sentry. You can click A to make it drop a spore bomb. To stop controlling it, input up A again. The mushroom stays there for 7 seconds. It also disappears once it's able to shoot out a rain of spore shots.
Super mushroom : It's a trap!

Toad hides the mushroom under the ground. If the enemy steps on the spot where the mushroom is, the mushroom quickly emits spore shots that deal a total of 9% damage then it disappears. It stays there for 14 seconds.
Golden mushroom : Triple blitz

Toad summons 3 mushrooms. Toad can't control them but the mushrooms automatically target their own enemy.
Mega mushroom : Spore laser

The mushroom emits a powerful spore laser with high priority that lasts until the mushroom disappears. It's a single hit attack that deals 17% damage. It has good knockback and it can kill at 128%. You can control the mushroom.
Life mushroom : Metroid mushroom lol

The mushroom appears on top and as usual, emits yellow spores but... the result is different if the enemy steps on the spores. The mushroom emits a vacuum spore that sucks the enemy. The mushroom is stuck on the enemy's head. You can still control the mushroom but it brings the enemy while moving and it's slower (As slow as Ganondorf's dash speed). Click A to make the mushroom suck the opponent's health dealing 4% damage only although.... After doing that, the mushroom quickly spits the enemy at a random direction. The mushroom goes back to Toad then Toad eats the mushroom losing 2% in his damage meter.
 Smashes
Forward smash : Spore sword


Picture 1 : A part of the 3 hit slash attack, Picture 2 : A part of a flurry
Spores appear from Toad's hand. The spores form up into a sword as tall as kirby. Toad then slashes the enemy 3 times. The first hit deals 4 - 9% damage then the second hit deals 3 - 6% damage then the third hit deals 8 - 14% damage. If you hold A during the first slash, Toad will follow up a rapid flurry of slashes that deal 3% per hit. The knockback is quite powerful and enough to kill at 125%. This move has very high priority. Despite it's advantages in terms of strength, power and priority, the starting and ending lag is slow (As slow as Ganondorf's f-smash starting and ending lag).
Super mushroom

The sword can shoot out spore bullets during the attack. The spore bullets deal 4% damage. They have extremely weak knocback and they can't kill.
Golden mushroom

The sword's attack speed is increased by 0.5 seconds. The damage is decreased by 4% (The 1st hit with out being charged deals only 1% damage). The KO % is increased by 10%.
Mega mushroom

The sword's attack speed is decreased by 0.5 seconds but it deals 6% more damage than the normal damage. The sword is also longer than usual (As tall as Mario). The KO % is decreased by 5%.
Life mushroom

The sword is POISONOUS! Hit the enemy and he'll take 2% damage per second. The effect lasts for 6 seconds. The damage is reduced by 5% and the KO % is increased by 7%.
Upward smash : Spore wave


Picture 1 : Punch causes a shockwave, Picture 2 : Spore wave
Toad's hand is infused with spore... He does a short leap and punches the ground causing a mario sized spore wave that deals 12 - 20% damage and travels from around 1 stage builder block. If the enemy is directly hit by Toad's fist, he takes 22 - 30% damage. The shockwave has high prioritystrong knockback and it can kill at 125%. Toad's fist has high priority and tremendous knockback and it can kill at 65%.
Super mushroom : Pit

Toad still does a short leap then punches the ground (As always). Toad then removes his hand from the ground and... Oh look... A pit as wide as 2 kirbies. The spore clouds coming out from that pit shows that there are spores in the pit so if the enemy falls in it, they're gonna suffer 15% damage in the pit and the spores will knock them out of the pit! It is capable of killing at 135%.
Golden mushroom : Spore wall

Toad still does a short leap then punches the ground as usual BUT instead of a spore wave, a spore wall appears. The name says it all. It acts like a wall and it's as tall as Bowser. It doesn't stay there though. It only protects you from attacks then it spreads out (Not into spore bullets).
Mega mushroom : Mega stomp

Instead of plunging his fist into the earth, he uses his butt and causes a huge circular shockwave coming from his butt. The shockwave deals 25 - 34% damage but being hit by Toad's butt directly gives a whooping 35 - 45% damage. The knockback is extremely powerful. You probably knew that because of the damage it deals. The shockwave can kill at 61% and Toad's butt can kill at 55%. Both moves have tremendous knockback.
Life mushroom : POW block

Toad pulls out a POW block and throws it down to the ground. It does not do any damage and the knockback is incredible enough to kill at 130%.
Downward smash : Spore repulse

Toad gathers spores in his hands and causes a weird repulse that has high priority. It deals 10 - 19% damage. The knockback of this move his good enough to kill at 129%. If it's fully charged, Toad will emit spores from his hands which deals 4% damage per hit which can't kill.
Super mushroom : Spore blower

A spore blower comes out from Toad's hands. The spore blower releases out white spores that blow away the opponent.
Golden mushroom : ROTATION

Toad..... ROTATION!!! Remember Neji's rotation? Yeah... Toad will do that except it's made out of spores. The rotation shoots out spore bullets that deal 4% damage. Obviously, it can't kill.
Mega mushroom : Spore explosion

Toad's hands release an explosion full of spore. It deals 21 - 28% damage. It has high knockback, the priority is as high as usual and it can kill at 129%. Though, the attack's start up is as slow as Ike's d-smash so it's best not to spam this move.
Life mushroom : Healing spores
Toad's hands emit spores that heal 2% per second if you step on it. Enemies can also be healed by it. The spores stay in place for only 2 seconds. After the spores disappears, you need to wait for 4 seconds so you can use it again.
 Aerials
Neutral aerial : Spore emit

Actually, this is just the aerial version of Toad's d-tilt except it's quicker and it has shorter range. It also deals only 6% damage (2% damage per hit) and it kills at 175%.
Super mushroom, golden mushroom and Mega mushroom : Quick growth
It makes any spore or mushroom grow 2 times more than the usual. No effect on the damage and knockback.
Life mushroom : Healing spores
Toad emits spores. The spores stay there for 3 seconds. Once you go in it, it will heal you by 4% per second. If the enemy goes in it, he'll get healed also. Once the clouds disappear, you need to wait for 5 seconds until you can use it again.
Downward aerial : Spinning mushrooms

Toad summons 3 mushrooms. They stay in place in mid air. The mushrooms spins and deals 7% damage. It has weak knockback and it kills at 160%. The mushroom stays for 12 seconds. You or the enemy cannot destroy these mushrooms. This move is not affected by any mushroom power up. As for the use... Wait for the f-air....
Forward aerial : Spore beam


Picture 1 : Spore beam, Picture 2 : Rebound!
Toad shoots out a beam of spore which has low priority. The spore beam deals 10% damage being able to kill at 157%. When Toad shoots a beam of spore, the spore beam quickly goes to any spinning mushroom (If Toad is FACING one) then it is rebounded to another mushroom then it's rebounded to the last mushroom. Asides from it's interaction with Toad's d-air, it can be used for camping.
Super mushroom : Spore barrage

Instead of it being rebounded, the beam stretches to the the next mushroom. It still deals the same damage and knockback. It still deals the same damage and knockback.... BUT..... It forms a triangle then in the middle forms some sort of huge green spore cloud that shoots out spore shots that travel fast.
Golden mushroom : Mushroom explosion

Once the spore beam touches the mushroom, it will rebound to the next one BUT the mushroom that rebounded the beam explodes into spore spread shots that deal 6% damage each.
Mega mushroom : Spore shape

Instead of it being rebounded, the beam stretches to the the next mushroom. It still deals the same damage and knockback. It forms a triangle then a cloud of spore appears in the middle. However, the difference is that this move tracks the nearest enemy it encounters.
Life mushroom : Protective field

The beam stretches and forms a triangle. Cyan spores come out in the middle. Enemies can't go through the spores. Not even Toad can go through it.
Backward aerial : Spore grapple


Picture 1 : Grapple, Picture 2 : Hardened spore
Toad emits spores and forms it into a grapple. Toad's spore grapple latches to the nearest mushroom (Any sort of mushroom like the mushroom block, platform, etc.). It can reach up to 4 stage builder blocks. Once it latches, the spores start solidifying then they become a part of the mushroom they latched on. Toad can walk on the spores. Actually, anyone can walk on it. The spores stay there for 9 seconds and to destroy it, you'll need to rack up 27% damage against it. Wait.... This move isn't just a walk in a park or something like that.. There's a brown solidified spore (Er.... it's not poop :I) also (The picture says it all). If Toad's standing on the brown spores, Toad's down B - down will change into a mushroom barrel. The mushroom barrel rolls downwards and smashes the opponent dealing 13% damage being able to kill at 135%. These barrels can be punched away if the enemy has good timing. Donkey Kong anyone? Oh... And enemies can interrupt Toad's grapple IF it's in it's cloudy form. All the enemy needs to do is to attack the grapple. If it solidifies.... you'll need to rack up 27% damage.
Super mushroom - Conveyor spore

The spores act like those conveyor belts from the stage builder.
Golden mushroom - Mushroom harvest

Mushrooms sprout from the spores. The mushrooms limp at Ganondorf's speed towards the enemy. Once they latch on the enemy, they deal 3% damage per second on the enemy.
Mega mushroom - Gluey spore

The spore seems the same. Enemies can walk or run on it. Wait a minute... They can't jump? Maybe it's because there are spores on their legs which disable them from jumping if they land or step in the spore (The "solidified" one).
Life mushroom - Slippery spores

The solidified spores are slippery.
Upward aerial : Toad spin!

Toad spins around! Toad swiftly spins like a copter and lifts Toad upwards. He can deal 9% damage (3% per hit) and this move has low priority. The spinning lasts for 0.5 seconds. Any spore based attack touched by this move will simply split up into small spore shots spreading out dealing only 3% damage. Toad can still recover after.
Super mushroom : Spore vacuum

Toad's spinning causes a cloud of spore to appear. The spores start sucking up enemies. Once the enemy has made contact with the cloud of spores, they start twirling in a circular motion then they are blown away. The enemy takes 11% damage. The knockback is alright. It can kill at 140% only
Golden mushroom : Spore bullet frenzy

Toad while spinning throws out spore bullets. The spore bullets deal 3% damage.
Mega mushroom : Spore blast

Toad then spins EXTREMELY FAST! The spinning causes a huge spore BLAST (As long as 5 kirbies lined up together) dealing 27% damage! The spinning though takes some time (5 seconds). It can kill at 115%!
Life mushroom : Spore buffs!

Toad spins and emits buffing spores. The spore increases his attack (+2% damage) and defense for 6 seconds.
 Grabs
Grabs


Toad can grab in mid-air and ground. He can move and jump while holding the enemies.
Pummel : Throw

Toad throws the enemy or object dealing 11% damage. It can kill at 155%.
Downward throw : Jump

Toad jumps on the enemy dealing 8% damage capable of killing at 145%.
 FINAL SMASH

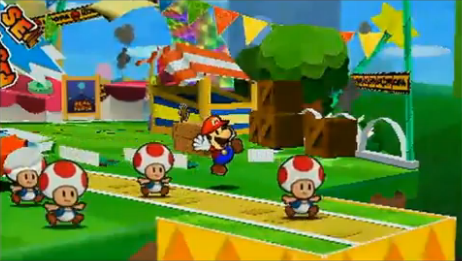
Toad pulls out a trumpet! A plane crosses the stage and a number of toads drop from the plane! The toads land on the stage. As for the toads who fell... well, it sucks to be them. The toads start assaulting. They can do what Toad can do. Holy ****. You know what that means right? You must survive for 15 seconds. The toads though are significantly lighter than Toad... In fact, they're a bit heavier than Waddle Dees but they're still easy to deal with UNLESS YOU GET A CHANCE TO GO NEAR THEM. While the chaos is happening, Toad is just there behind an announcer's table watching. He's invulnerable so it's no use to attempt to hit him. The good thing about this though is that the toads aren't as smart as a human player so take advantage of it! After 15 seconds, the Toads quickly run off stage then Toad jumps out of the table then he goes back to the fray!
Regarding spore attacks: When you combine a melee/direct spore attack to a indirect spore attack/ spore projectile then the spore projectile will grow. The growth will depend on what is stated in the move. If it didn't say anything then it can grow 6 times and the damage increases by +3%.
Direct spore attack + Indirect spore attack
Playing with spores: Toad can play with his spores... Remember Toad's Spore trap on ground? You can play with it! You can splash it towards opponents although it will become smaller.... but the spores that splatter from the spore trap form spore traps too! It's just... Smaller.... and it deals only 3% damage unless they merge or something.
Shockwave attack + Spore trap on ground
He can also play with those spores that usually stay in the air or the ones that remain there for an amount of time. He can use his propeller cap or his upward aerial to spread them out (Making the spores act like spore spread shots now) dealing 3% damage.
Upward aerial/Propeller cap + Spore cloud
There are some spores that stay on air. You remember the rotating mushroom block? If it TOUCHES any sort of spore or if it's near one, the spore will automatically latch on it and act as a spore mine (Yes... That includes the life mushroom version of any indirect spore based attack). You know what that means? It's gonna be dangerous for the enemy to go near any mushroom block if it has any sort of spore trap on it. Oh... Remember? You can actually detonate these spore traps and make them emit spores.
Mushroom block + Any spore shot/projectile in mid air
You remember the u-smash's super mushroom version? It makes a pit full of spores. The spores aren't seen though. The picture shown only shows some puffs of spore coming out from the pit. You can fill it up with spores using Toad's d-tilt. If you use the life mushroom version of his d-tilt, you'll fill it with healing spores which lasts for 3 - 6 (6 if you used the d-tilt for 3 seconds OR use the d-tilt 3 times) seconds. If it's the normal, super mushroom, golden mushroom or mega mushroom version, it will be filled with damaging spores. If the enemy falls in the pit, he'll receive a whooping 19 - 29% damage. This can kill at 130 - 120% (Requires 10 seconds of using the d-tilt if you want it fully charged OR you can use the d-tilt 10 times).
Downward tilt (Any version) + Upward smash (Super mushroom)
You know.... You can put mushrooms inside the pit (Remember the u-smash's super mushroom version?). That includes the downward aerial : Spinning mushrooms. How will it move around if it's in its mega mushroom version? It can't. One mushroom is stuck inside the pit so they can't move around. You can put the mushroom turret inside the pit. Any mushroom that gets inside the pit powers up since there are spores inside the pit. If it's kept there for 1 - 3 seconds (3 is the max time), the mushroom's damage will be added by 2% per second (6% maximum). You can also put the mushroom trampoline (Upward B) inside but... it's not a good idea. Toad needs it as his recovery. He can't put his Mushroom trap (Upward tilt), mushroom charger, mushroom platform and mushroom block inside the pit.
Any sort of mushroom except the Mushroom trap (Upward tilt), mushroom charger, mushroom platform and mushroom block inside the pit +Upward smash (Super mushroom)
You can use d-throw on the enemy... ON THE PIT. You might say that is impossible but you forgot... Toad can move while carrying the enemy. If Toad uses his D-throw (Jump), the enemy will be sent into the pit.... For some reason, the enemy is staying in the pit for 2 seconds....
Downward throw + Upward smash (Super mushroom)
Oh... And during those 2 seconds. You can fill up the pit with spores. It deals 17% damage and it automatically sends the enemy out of the pit. It can kill at 134%. If you're kind enough, you can heal the enemy using the life mushroom version of Toad's d-tilt.
Downward tilt + While the enemy is inside the pit
You can also fill that pit with any sort of mushroom WHILE the enemy is inside it. The spores inside the pit are attracted to the mushroom causing the spores to rise up. The mushroom will quickly rocket upwards into the sky dealing 15% damage to the enemy killing at 138%.
Any sort of mushroom except the Mushroom trap (Upward tilt), mushroom charger, mushroom platform and mushroom block inside the pit + While the enemy is inside the pit
Move
|
How many of this projectile can be used
|
Color
|
Type
|
Forward tilt|Normal : 2, Super mushroom : 2, Golden mushroom : 2, Mega mushroom : 1, Life mushroom : 1| Blue |Mushroom
Upward tilt|Normal : 1, Super mushroom : 1, Golden mushroom : 1 (Actually 3 but... you get it right?), Mega mushroom : 1, Life mushroom : 1| Yellow |Mushroom
Upward smash|Everything : ** (Infinite or any time), Super mushroom : 2 pits only, if you do another one then it won't cause some sort of pit|None|Normal
Downward aerial|Everything : 1| Red |Mushroom
Backward aerial|Everything : 1| Green |Spore
Forward aerial|Everything : 1| Green |Spore
Forward special|Normal : **, Super mushroom : (Air : 2, Ground : 2), Golden mushroom : **, Mega mushroom : 1, Life mushroom : 1 (After the effect is over, you need to wait for 5 seconds)| Green |Spore
Downward special (Side)|Everything : 3| Magenta |Mushroom
Downward special (Down)|Everything : 1| Magenta |Mushroom
Downward special (Up)|Everything : 1| Magenta |Mushroom
Just in case you change Toad's color pallet....
Move
|
Normal
|
Red|Yellow|Green|Purple
Forward tilt|Blue|Cyan|Turquoise|Dark blue|White
Downward and upward special|Magenta|Purple|Pink|Plum|Indigo
Forward special/Forward aerial|Green|Red|Yellow|Green|Purple
Upward tilt|Yellow|Light yellow|Dark yellow|Orange|Pale orange
Downward aerial|Red|Brick red|Bright red|Flesh|Brown
 Playstyle
Overview
Toad is a defensive set-up character. He has a vast array of projectiles and traps that can help him keep away in the battle field. He has several ways on how to camp and zone and control the stage.
Traps and defense
Constructing traps and defenses are the first things you'll need to do at the start of a match. You'll need to start controlling the stage and creating obstructions. Be careful with the type of defense/traps you use. You'll need to choose the right one and where to place it.
The super mushroom is the best item to use when you're constructing your defenses. Most the moves are built for being barricades, defenses and traps. Toad's mushroom block (Super mushroom) is mainly used as an obstruction especially since it travels around the stage. It's even good with out using the super mushroom. You can also try putting any sort of spore near the mushroom block (Life mushroom version recommended) so it can be attracted to the mushroom block latching to it. The spore trap is good if it's at your front or back so that when the enemy gets through your defenses, you can quickly run away while your enemy still needs to jump over the traps. It would be better if you put 1 on ground and 1 in the air. Mushroom turrets and his Mushroom traps are his frontal defenses. The mushroom turrets quickly react and shoot the opponent. You can put another mushroom turret. It's a great idea if you use the super mushroom counterpart of this attack... Unless of course, you're focusing on constructing your defense. While the mushroom turret does its job, the Mushroom trap is mainly controlled by you. You can control its movement around the stage. If you want it as a trap though, then use its super mushroom version. Toad's u-smash (Super mushroom) is also a great obstruction that you can easily modify. You can fill it with spores or a mushroom. You can even dump the enemy inside it. Toad's spinning mushrooms are his main defenses in the air. It serves as a barrier between Toad and the enemy PLUS it can shoot out spore bullets (Or whatever item you're using). Toad's u-air super mushroom version is a good trap to use in the air. Unlike most of his traps, this one can actually kill at quite low percents (For a move in Toad's moveset).
Once you're done with creating your traps and defenses, it's time to camp and rack up damage.
Camping and racking up damage
Before doing any sort of camping, it's ideal to stand on a mushroom platform and camp there. Use the super mushroom version against characters who can't jump that high. Use the golden mushroom version if you want them to stay away. Use the mega mushroom version if you want to just stay in a higher place.
Toad's spore shot as a normal special and a golden mushroom special is Toad's main projectile to rack up damage. It travels as far as Fox's lasers and they quickly burst into spread shots. Toad's forward aerial, the spore beam, is great as a normal attack and a golden mushroom special too just like the spore shot. The normal spore beam is a standard projectile... Umm... Yeah it's generic... It would be better though if you make it interact with his spinning mushrooms (Golden mushroom version, super mushroom, mega mushroom version and normal version) since it covers a lot of range and a chunk of damage. Toad's mushroom turret is self - explanatory. Deals damage. Shoots out spore bullets. If you really want to be in a hurry to rack up damage then use the golden mushroom counter part of the mushroom turret since you can use it like an item and shoot enemies! Toad's Mushroom trap is probably the only thing Toad actually controls. He can control where it's suppose to move despite the slow speed. It is slow but it doesn't matter because the enemy is most likely (That depends if you did it right) distracted by the traps surrounding him and the spore projectiles rushing to him. You can also use the golden mushroom version of his Mushroom trap. It will move by itself and it tracks its nearest enemy. The life mushroom version of this move can be used as a camping tool. You can also troll the opponent by dropping him in some pit, spore pit or spore trap. You can use his b-air (Grapple) IF you want to because it's actually better as a move to retreat. You can use the barrels to camp and rack up damage. Toad's spore sword (Super mushroom) is also a good option to camp with. You can use it against air borne opponents if you're standing on a mushroom platform or block and grounded characters. Why? It covers a lot of range. Toad's upward aerial is mainly used for destroying spores and making them spread around. You can also use its golden mushroom version to fend off aerial approaches. Mushroom house (Life mushroom : Downward special - Up) is.... Actually... Useful... No seriously. Despite the choice of item being random, it's still useful. You can bring out a bob-omb! Or... A beam saber... It really depends but we all know one thing. Items... Rule....
Going for the kill
After racking up enough damage, it's time to go for the kill. It's really hard though since most of Toad's ways of killing aren't "strong" enough so you might take long racking up damage.
Toad's spinning mushrooms + spore beam (Mega mushroom version) is one of his best options to kill opponents. Toad does not have to go near the opponent which is the best part since Toad has hardly any options when he's up close. Toad's upward aerial (Mega mushroom) is Toad's option to kill in the air. It has a slow start up so avoid using it casually. It's great against air borne opponents. The mushroom mountain is also a viable option to kill opponents since you can punish opponents while they're climbing the mountain UNLESS they can fly. Just watch out once the mountain starts collapsing. It can kill you too. Toad's Mushroom trap mega mushroom is also a great KO option. It damages 17% plus it can kill at 128% (Well.... With DI... It's at 145% most likely)!
Spacing/GTFO
Despite Toad's huge disadvantage with close range combat, his still has moves that can make enemies gtfo from your territory.
His f-smash is a great example. Both golden and mega mushroom version can work as spacing options. His golden mushroom spore sword is fast and quite powerful enough to kill at 135%. The mega mushroom version is useful as a spacing tool because of it's wide range and it's tremendous knockback but in trade, the speed is lacking so it's not spammable. Toad's d-smash is his best but weakest option. All versions (Except the life mushroom version) including his normal version can work as an option for spacing. Toad's super mushroom version can blow off opponents. His golden mushroom version (Rotation) can shoot out spore shots that can make the enemy sent backwards or mid air but then again, it can't kill. His mega mushroom version though is quite risky due to it's short range but the knockback and damage is worth it. Just use it if it seems safe. Lastly, The U-smash super mushroom version (The pit) is a great tool for close encounters. You can grab the enemy and throw him down to the pit. It's not a "GTFO" but it's more of a move you'll use so that the enemy is stuck which means you can run with out being worried about anything.
Retreating, buffing and healing
For retreating, spore grapple (b-air) and mushroom charger are his main options.... The end.
Time to go to the buffing and healing part :Life mushroom. Remember that item. Use the item because most of the moves are mainly used for defending, buffing and healing yourself.... You can do this while staying in one spot as your enemies struggle against the defenses, traps, projectiles and turrets he's facing.
You only need to know what moves to use when healing and buffing. I really don't have to get into detail with this:
Forward special : Spore shot (Life mushroom)
Downward special - forward : Mushroom charger (Life mushroom)
Downward tilt : Spore emit (Life mushroom)
Downward smash : Spore repulse (Life mushroom)
Neutral aerial : Spore emit (Life mushroom)
Upward aerial : Toad spin (Life mushroom)
2 on 2
Toad's array of projectiles and tools for traps and defense can really help teammates. He also has the ability to buff and heal his teammate. If Toad's teammate is great at defense, then I guess good defense + good defense = godly defense. However, there's not really much use to broadening defense when it's good enough already (Looks at the Snake and Falco doubles). Toad would be of great help to rush down characters. Once Toad or his teammate racks up enough damage, both of them can go for the kill but I suggest Toad to just stay and continue spamming projectiles and constructing defensive obstacles.
Overall, Toad is a great partner to be with thanks to his defensive capabilities and support. It only gets troublesome if one of you screws up.
Against Toad
This is gonna be kind of hard to deal with even with balanced characters such as Mario or Kirby. You'll need a rush down demon. Seriously... Toad's defense is gonna be hard to break. It's either you challenge him to a defensive fight but the problem is Toad can even heal and buff himself while defending himself using his moves. That's why it's best to use a rush down demon. To stop Toad from doing any move! Once you get to Toad, he's gonna be in a quite iffy situation. He doesn't have much options when he's up close other than retreating. Avoid letting him escape. He'll most likely use his mushroom charger to get out and rebuild his defenses.
Toad's recovery is quite standard. It's not easy or hard to edgeguard. Just use the moves with long range and I guess that's it. Unless of course, Toad uses his upward aerial with the golden mushroom effect then I guess you'll have to find another way other than just out ranging Toad.
 Alternate costumes

 Taunts
Upward Taunt - I'm the best!

Toad says "I'm the best"
Downward Taunt - Shout

Toad shouts "Yahooo!!!"
Side Taunt - Spin!
Toad spins with glee!
 Extras
Victory:

Lose:

Entrance:

Kirby hat:

Codec conversation:
Snake: Otacon, there's a talking mushroom here! Is it edible?
Otacon: It's not edible. That's Toad, Snake. Toad serves as the Royal guard of Peach.
Snake: Well, he's not doing a good job at it. Bowser still kidnaps Peach all the time. This guy looks easy.
Otacon: Hold it right there. Toad isn't what you think he is. He has superhuman strength that enables him to carry anything no matter how heavy it is. He can also emit spores and summon mushrooms to come to his aid
Snake: Can't I just eat the mushrooms?
Otacon: I don't think that's the type of mushroom you'd eat. They're used for combat, not meals.
Snake: I see where those super mushrooms come from...
Otacon: Don't get the wrong idea Snake....
Stage


New Super Mario Land! A weird name, but I think you get the point. This stage will keep the tradition of Yoshi's Island and the two Mushroom Kingdom stages. In that this stage is modeled after a general field theme. Except this time it will be in a mold reflecting the New Super Mario Bros. series and the Super Mario 3D Land game. This stage would also be the possible home field for a playable Toad.
The stage design itself will be based around the athletic areas in New Super Mario Bros. Wii.

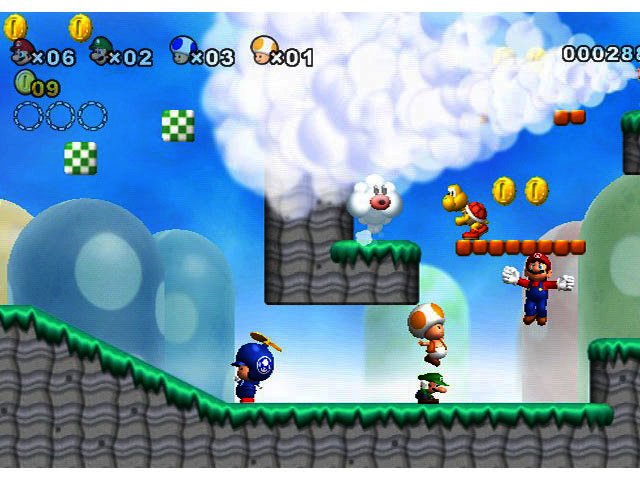
Which means you will be up in the clouds, so clouds will pass along the back ground and floors. You will also see Bullet Bill turrets firing their signature ammo (Bullet Bills) as they strafe along the background sky line. Sometimes the occasional Bullet Bill won't want to linger just in the background and will find it's way going from one end of the stage to the other. Paratroopa's will occasionally fly into the stage from the side, allowing you too jump atop them (or attack them some other way), "de-winging" them and making them a standard Koopa. Further attack will cause them to retreat into their shell, allowing them to be used as an item.
On both sides of the stage are solid ground, in the middle are the large mushroom platforms that lower under weight. Above the platforms are a line of standard brick boxes. To keep the platforms going higher all you need to do is break the boxes.
Also above is another "floor" of standard ground, since in most Mario games there are normally multiple layers to a platform. The blocks will act as a kind of bridge between the second floor of platforms. Above that will be the famous music blocks that act as a spring, you can hop on one to launch you into the air. Or hit one and be repelled back, kind of like a mild bumper.
To the end of every floor will be a pipe, jumping in one will send you to the pipe of another platform. Beyond the stage to the right, acting as a small island of it's own, will be three pipes that you can move on. Going down into one of them will only send you to another pipe somewhere on the stage
Stage Example:
...........♪............♪
.........♪...............♪
...____■■■■■■■■______
++____...--..--...____++--_
Stage Name: New Super Mario Land
Stage Icon: Mushroom
-Tracks-
New Super Mario Bros. Wii - Overworld
New Super Mario Bros. Wii - Athletic
New Super Mario Bros. Wii - Beach
Super Mario 3D Land - Main Theme
Super Mario Bros. 3 - Athletic (Super Mario Galaxy)
Super Mario Bros. 3 - Super Mario Bros. 3 (Melee)
Super Mario Bros. 2 - Overworld (Melee)
Super Mario World - Yoshi's Island (Melee)
Super Mario 64 - Bob-omb Battlefield (Brawl)
Super Mario Sunshine - Delfino Plaza (Brawl)
Super Mario World - Title / Ending (Brawl)
Wario's Woods - Versus
Want to see the animations?
http://ssf2expansions.motionforum.net/t915-toad-the-civillian-of-the-mushroom-kingdom-update-6-17-11
-----------------------------------------------------
Credits:
Berserker 01 - Moveset and pictures
StarPhoenix - Stage : New Super Mario Land
Medvock - Toad sprites
AEM - Toad animations
CheddarX - Sonic sprites
AJ Nitro - Mario sprites
Boo - Mushrooms
------------------------------------
Note: This is my first moveset in this thread....
This place became a placeholder for some posts
Anyway....
Toad

"I'm the best!"
Toad, the loyal servant of Peach joins the brawl!
"I'm the best!"
Toad, the loyal servant of Peach joins the brawl!
Playlist:
Super Mario Galaxy - Toad Brigade
Luigi's Mansion - Toad's theme
Mario Party 4 - Toad's midway madness
Mario Sports Mix - Toad Park
Mario Kart Wii - Toad factory
Mario Strikers charged - Toad's theme
Wario's Woods - Versus
Introduction:
Toad (Also known as Kinopio) is one of the main protagonists in the Mario series. Just like Yoshi, he is a singular character from the other toads. His debut started out with Super Mario bros. which became famous world wide then he was one of the playable characters in Super Mario bros. 2. He's been a tutorial type character and item keeper since Super Mario Bros. 3 until Super Mario Sunshine. In Super Mario Galaxy 1 and 2, he is the trusty Toad Brigade captain (Wearing a red vest) who guides and helps Mario in the quest to gather the power stars and to save Princess Peach. He becomes a playable character in New Super Mario Bros. Wii (Blue Toad and Yellow Toad) and in New Super Mario Bros. Mii. He also appears in Luigi's Mansion 2 as a companion to Luigi through out the adventure. He's also appeared in various spin off titles in Mario plus he had his own game, Wario's Woods, where in he was the main protagonist. Toad is known for being important and iconic to the series along with Mario, Luigi, Peach, Wario, Bowser, Yoshi and Donkey Kong despite his roles compared to the other 7. He's been one of the most celebrated characters in Mario's 25th anniversary.
Stats:
Toad is known for his quick speed and superhuman strength that surpasses even Mario and Luigi's! Unfortunately, his size and weight make him easy to KO however which also shortens his range. However, his moves are heavily based on his ability to use mushrooms and spores to his advantage in the battlefield. He also has some items that can buff or add new effects to his attacks. He has a lot of ways to keep away and to rack up damage using his array of projectiles, traps and defense tools.
WEIGHT:
SPEED:
SIZE:
JUMP:
RANGE:
AIR MOBILITY:
FALLING SPEED:
Wall cling: Yes
Wall run : Yes (While clinging, move the control stick at any direction (Depending on where you are clinging on) to run on the wall
Crawl: No
Some things you should know
The colors of the font symbolize.....
Normal ground attack
Normal aerial attack
Grab/Throw
Spore attack
Mushroom attack
Shockwave attack
As for the KO %, assume the enemy does not DI and the weight of the enemy is the same as Mario's.
MOVESET
 Specials
Neutral special : Item swap
Toad pulls out an item. Each item has a different effect to his standard attacks, mushrooms and spores. You'll get to see how the mushrooms look like during the effect once we reach the smashes section. As for the spores, go see the forward special. To use the item, click the A button. The effect wears off in about 30 seconds. If you want to stop using the "effect of the mushroom", then click A again.
The rotation is as follows:
Super mushroom -> Golden mushroom -> Mega Mushroom -> Life mushroom
Super mushroom
Golden Mushroom
Mega Mushroom
Life mushroom
Forward Special : Spore shot
Toad shoots out a ball of spore with medium priority. Without any item effect, it deals only 9% damage and it tracks the enemy at medium speed (Ganondorf's speed). Toad can make the spore shot bigger by attacking it with one of Toad's attacks involving spores. The bigger it is, the higher it damages. These spore attacks' damage though does not affect the size. It still makes it grow normally. Each time the spore shot grows, the damage increases by 2% and the knockback obviously increases (I won't be specific with what the knockback of the move is if it became "bigger" than the usual size. Good luck finding that out by yourself.... Just judge it by the damage). If you want it to be at its max size then use Toad's spore based attacks 10 times. Although, this fact seems sort of useless when it comes to the golden mushroom form of the spore shot. The knockback of the normal spore shot is low. It kills at 240%.
Super Mushroom version: Spore mine
Picture 1 : Mid air, Picture 2: On ground
Toad's spore shot acts as a mine. Yes. It can be used in mid air. It's flat on ground when Toad uses it on the ground. If the enemy steps on it, the spore trap emits spores that deal 11% damage to the enemy. Oh yeah. You can also put 3 of these spore mines at the same time. They last for around 13 seconds. If you want to detonate them manually, just input forward and hold B. They do not damage Toad. Like what I said before, you can make the spore mine bigger by attacking it with any spore based attack. It has good knockback and it's capable of killing at 145%.
Golden mushroom: Spore spread shot
Picture 1 : Base form, Picture 2 : Spread
Toad's spore shot travels extremely fast. It travels at one direction though but that depends which enemy is the nearest and where is the enemy. This spore shot can only travel from a certain range just like Fox's lasers. Although, once it reaches it range limit, it scatters into 8 small balls of spore and scatters around in a distorted motion. Each of the small spore shots deal 5% damage. Also, if the spore shot hits the enemy and at the same time, it remains in it's normal base form, it deals 9% damage PLUS it will scatter so that's some additional damage. This form of the spore shot though is affected by spore based attacks but are you fast enough to hit the spore shot with an attack? The knockback is extremely weak and... it can't kill.
Mega mushroom: Giant spore shot
His spore shot are as big as bowser and it tracks the enemy. It deals 17% damage although if you make it bigger, imagine the incredible damage and knockack... And most importantly, THE SIZE! Shielding the attack is kind of useless. Well, it deals a lot of shield damage so if your using a character with a small shield then your shield will most likely break. It's capable of killing at 125% with out any growth effect.
Life mushroom: Defense spores
Toad infuses himself with protective spores. Toad takes lesser damage than the usual (-2%). Unless the damage of the attack is 2% or below, the damage remains the same.
Downward special : Mushroom manipulate
Toad raises his hand upwards. Notice that he is holding a small mushroom. While Toad is doing that, you have access to manipulate the small mushroom into a useful tools. Click B to make Toad put his hand down and go back to fighting! Here are the 3 other options other than that:
Forward
Toad manipulates the small mushroom into a mushroom charger in front of him. He can put it in mid air also. He can put a max of 3 mushrooms chargers. Enemies can also interact with the mushroom charger. You can rotate the mushroom charger. While your holding analog forward or backward, move the analog at any direction to rotate the mushroom charger. In the air while rotating, you'll fall SLOWLY. As in, even slower than Jigglypuff's falling speed. Once you rotated it, that's the last time you can rotate it until it disappears of course which takes about 15 seconds. If you're making the mushroom charger face down while it's near the ground, then you'll just make yourself hit the ground. Note that this move has high priority and it will clash through any projectile with out even haltering although melee attacks are a different story. It deals 12% damage and it can kill at 138%. To destroy it, you need to rack up 19% damage. It applies also for the other versions of this attack.
Downward
Toad manipulates the small mushroom into a rotating mushroom block. Remember that block from those mushroom levels in Mario Bros? That's it alright. You can't make it grow and it can't smash (Squish) opponents or something like that. It's as fat as umm.... 3 kirbies and it's as tall as ganondorf.. You can only summon one mushroom block. To destroy it, you need to rack up 35% damage. Then again... It applies also for the other versions of this attack.
Upward
Toad manipulates the small mushroom into a mushroom platform. Yep. That's right. Remember those levels in Super Mario Bros. with the mushroom platforms? That's what I'm talking about. Their height is as tall as maybe 2 ganondorfs. You can stand on these things just like in Mario bros. You can also make it larger by feeding it with spore based attacks. If you want it to be at its max size then use your spore based attacks 5 times on it. You can only summon one mushroom platform. To destroy it, you need to rack up 55% damage...... Oh and for the third time, It applies also for the other versions of this attack....
Super Mushroom
Mushroom charger
While Toad bounces on his mushroom charger, a spray of spores come out from the back of the mushroom charger which damages 8% making it effective as a tool for Toad to run or retreat from the enemy. It has really weak knockback and.... it can't kill.
Mushroom platform
Picture 1 : Growing....., Picture 2 : Shrinking
The mushroom platform grows taller (4 ganondorfs) and (1 Ganondorf) smaller randomly. Yup. That's all.
Mushroom block
The mushroom block has a track to follow. The track is as thick as 1/4 of battlefield and it's as tall as 4 ganondorfs.
Golden Mushroom
Mushroom charger
This is where it gets reeeaaaallly crazy. When Toad jumps on the mushroom charger, the charger automatically aims at the charger built after it then blasts him there then so on and back to the 1st then 2nd then if there is, the 3rd one where in Toad has the same travel speed as the usual (The mushroom charger with out any effect). If there's only one mushroom charger then you will be blasted to whatever direction it's facing and.... you'll most likely get killed. Why? When Toad bounces of the charger, the travel speed is DEMONIC (As fast as Captain Falcon). So if you're planning on use a golden mushroom with the mushroom charger, place 2 chargers or 3. Still has the same damage and knockback.
Mushroom platform
The mushroom platform randomly wobbles. The wobbling shakes off the enemies but it does not do any damage. Also, Toad cannot be shaken off the platform.
Mushroom block
The speed of the rotation is extremely fast (Captain Falcon speed). Not even Sonic can stay on the block for a long time.
Mega mushroom
Mushroom charger
It's now chargeable. While charging, you can't flinch against attacks but you will still take damage. You can't even get grabbed out of it. It can deal from 17% - 34% damage. Also, a spray of small spore shots is scattered in front of the mushroom. Each small spore shot deals 4% damage and of course... IT CAN'T KILL.
Mushroom platform
Picture 1 : Mushroom mountain, Picture 2 : Climb Mario! Climb!, Picture 3 : Collapse.....
Mushroom platform? More like.... MUSHROOM MOUNTAIN! Toad summons a mountain below. The starting however of this attack is really SLOW. As in... As slow as a warlock punch. The mountain is as is big as The mountain can also release a cloud (Maybe a fog) of spores come out and deal 2% damage per second. It will release a cloud of spores if you hit/attack the mountain with a spore based attack 10 times. Enemies can climb the mountain but it's not easy especially with you distracting them. It takes quite a long time to finally reach the top (4 seconds without stopping). After 12 seconds, the mountain will begin to collapse and fall to either the left or right direction... The collapse can attack you and the enemy. It deals 30% and it's capable of killing at 65% so watch out.
Mushroom block
The mushroom block becomes extremely big. It's as long as 4 kirbies and as tall as 2 ganondorfs. The starting though is slow (As slow as 1/2 of Ganondorf's u-smash frames/speed).
Life mushroom
Mushroom charger
You don't bounce on it anymore. Instead, the mushroom charger emits power spores that increases your damage by 2%. Enemies can also benefit from this.
Mushroom platform
Arrrrgghhh. The Toad house looks terrible... Sorry :<
It's not a platform anymore... It's a Toad house! Toad gets in the house and takes out a random item. Enemies can also get inside the house to get a random item. The house stays there for about 5 seconds.
Mushroom block
Toad summons a green mushroom block. The green mushroom block is quite small compared to the other mushroom blocks. It's only as big as Bowser. It actually moves as fast as Zelda towards indirect spore attacks. Toad can move the block by attacking it.
Upward special : Mushroom trampoline
Toad summons a mushroom trampoline below him which disappears right away right after Toad bounces on it. Toad can deal 10% damage while he's rising plus it has low priority. This is Toad's standard recovery.
Super mushroom : Higher bounce
Toad bounces higher than usual......... Umm.... That's all...
Golden mushroom : Propeller follow up
After bouncing, Toad pulls out his yellow propeller cap and flies upwards! The propeller deals 2% per hit. He can also drill downwards which deals 4% per hit also and it also works as a semi spike meteor smash. It has low priority.
Mega mushroom : Spore rocket
Toad bounces BUT he does not enter into a helpless state yet. Toad opens his palms and puts his hands down then he rockets upwards using his spores. The spores deal 16% damage. Toad's head deals 13% damage. This move has high priority. Aim wherever you want to boost to!
Life mushroom : Second recovery
Picture 1 : Toad's helpless, Picture 2 : But he can recover again!
Well.... It actually works normally.... BUT WAIT! When you're in a helpless state, YOU CAN DO IT AGAIN! .......... That's all.
Neutral attack : Use item/Remove effect
Toad uses or consumes the current item selected in his neutral special. If you want to remove the effect of the item consumed, then click A again. Toad will release out the effect through spores that come out from his head. As said in the description of the neutral B, the effect lasts for 30 seconds.
Dash attack : Mushroom shield
Toad bashes the enemy with his mushroom. Basically, it acts like a shield. It has high priority and it deals 8% damage.... Which obviously means that it has weak knockback. It kills at 175%....
Hold it... It's not over yet...
If you hold A, Toad will keep holding the shield. Move the control stick around to aim Toad's shield. He can hold it for 5 seconds and it's INDESTRUCTIBLE.
Super mushroom : Spore blow
Toad's shield emits spores that blow away the opponent. It does not do any damage but it deals moderately good knockback and it can kill at 138%.
Golden mushroom : Spore rain
After charging with his shield, Toad aims his shield upwards and shoots out 7 spore bullets that rain on the enemy. The spore bullet deals 3% damage.
Mega mushroom : Mushroom rocket
Toad's shield flies off and tracks the enemy. It deals 13% damage and it can kill at 130%. It still has a high priority since it's just a shield rocketing towards an opponent...
Life mushroom : Plant
Toad plants the mushroom shield on the ground.... That's it... I guess.
Forward tilt : Mushroom turret
Toad summons a mushroom in front of him. The mushroom fires spore bullets that deal 3% damage to the nearest enemy. It shoots out 5 spore bullets (Not simultaneously) each 1 second. Use your D-tilt on it to power it up. Notice that if the mushroom turret starts glowing, it means that it can fire a huge spore shot the can deal 15% damage and kill at 130%. The turret can be destroyed if you deal or rack up 22% damage. It stays in place for 10 seconds.
Super Mushroom : Spored area
The mushroom leaks out spores that stay flat on ground. Once the enemy steps in the spored area, they take 2% damage per second. The enemy is slower on the spored area and they'll need to do a double jump if they want to get out of the spored area. It acts like mud so.... Single jumps won't work.
Golden mushroom : Mushroom gun
You can treat these turrets as items (Which means you can throw it). You can also shoot with it like it's a gun. Once the polka dots turn red, it means you can't shoot with it and you'll have to wait for 4 seconds until it cools down.
Mega mushroom : Mushroom force
The mushroom turret acts like a rocket and flies at an upward diagonal direction. It also shoots out spore shots every 1 second as always. Once it hits the enemy, it explodes and deals 12% damage and it can kill at 136%. You can also make it drop spore bombs that fall slowly to the ground by inputting forward A again. They deal 10% damage and they kill at 140%. You can only summon 1 mushroom turret while the mega mushroom effect is in place.
Life mushroom : Power mushroom
The mushroom is thrown forward (1 stage builder block). It emits red spores that consume the enemy's power. How much strength it consumes depends on the weight. Wait wait.. Hold on... It doesn't decrease the health or something like that. It doesn't even weaken the enemy. Anyway, just see the following details below:
Super heavy - 5% per second
Bowser
Donkey Kong
Snake
King Dedede
Charizard
Ganondorf
Heavy - 4% per second
Samus
Yoshi
Wario
ROB
Ike
Captain Falcon
Link
Medium - 3% per second
Wolf
Lucario
Ivysaur
Mario
Luigi
Sonic
Ness
Lucas
Light - 2% per second
Pit
Diddy Kong
Ice Climbers
Toon Link
Peach
Marth
Shiek
Zelda
Super Light - 1% per second
Falco
Olimar
Zero Suit Samus
Fox
Meta Knight
Pikachu
Kirby
Mr. Game and Watch
Squirtle
Jigglypuff
The spores last for 3 seconds. After 3 seconds, the spores are consumed by the mushroom. Toad then must run to it and consume it. No. The enemy can't consume it. The power stored inside the spore adds up to Toad's attack damage for 9 seconds. Toad has some red glow around him symbolizing that he swallowed the mushroom.
Downward tilt : Spore emit
Toad emits spores that deal 3% per hit (12% in total). It has moderate knockback and it can kill at 135%... Actually, this move is meant to grow spore projectiles or mushrooms. It can be used for spacing thanks to its long range. Hold A to keep doing this move. The starting and ending lag of this move is a bit slow... This attack has low priority but then again, this move's use isn't for attacking.
Super mushroom, golden mushroom and Mega mushroom : Quick growth
It makes any spore or mushroom grow 2 times more than the usual. No effect on the damage and knockback.
Life mushroom : Healing spores
Toad emits spores. The spores stay there for 3 seconds. Once you step inside, it will heal you by 4% per second. If the enemy steps in it, he'll get healed also. Once the clouds disappear, you need to wait for 5 seconds until you can use it again.
Upward tilt : Mushroom trap
Toad throws a mushroom upwards. The mushroom emits yellow spores below itself. If anyone except for Toad enters the yellow spores, the mushroom emits a rain of spore bullets that deal a total of 12% damage if you don't DI out of it. You can control/move the mushroom (It moves as slow as Peach). Input Up A again then Toad will hold his hand which is covered in yellow spores then use the control stick to move the sentry. You can click A to make it drop a spore bomb. To stop controlling it, input up A again. The mushroom stays there for 7 seconds. It also disappears once it's able to shoot out a rain of spore shots.
Super mushroom : It's a trap!
Toad hides the mushroom under the ground. If the enemy steps on the spot where the mushroom is, the mushroom quickly emits spore shots that deal a total of 9% damage then it disappears. It stays there for 14 seconds.
Golden mushroom : Triple blitz
Toad summons 3 mushrooms. Toad can't control them but the mushrooms automatically target their own enemy.
Mega mushroom : Spore laser
The mushroom emits a powerful spore laser with high priority that lasts until the mushroom disappears. It's a single hit attack that deals 17% damage. It has good knockback and it can kill at 128%. You can control the mushroom.
Life mushroom : Metroid mushroom lol
The mushroom appears on top and as usual, emits yellow spores but... the result is different if the enemy steps on the spores. The mushroom emits a vacuum spore that sucks the enemy. The mushroom is stuck on the enemy's head. You can still control the mushroom but it brings the enemy while moving and it's slower (As slow as Ganondorf's dash speed). Click A to make the mushroom suck the opponent's health dealing 4% damage only although.... After doing that, the mushroom quickly spits the enemy at a random direction. The mushroom goes back to Toad then Toad eats the mushroom losing 2% in his damage meter.
Forward smash : Spore sword
Picture 1 : A part of the 3 hit slash attack, Picture 2 : A part of a flurry
Spores appear from Toad's hand. The spores form up into a sword as tall as kirby. Toad then slashes the enemy 3 times. The first hit deals 4 - 9% damage then the second hit deals 3 - 6% damage then the third hit deals 8 - 14% damage. If you hold A during the first slash, Toad will follow up a rapid flurry of slashes that deal 3% per hit. The knockback is quite powerful and enough to kill at 125%. This move has very high priority. Despite it's advantages in terms of strength, power and priority, the starting and ending lag is slow (As slow as Ganondorf's f-smash starting and ending lag).
Super mushroom
The sword can shoot out spore bullets during the attack. The spore bullets deal 4% damage. They have extremely weak knocback and they can't kill.
Golden mushroom
The sword's attack speed is increased by 0.5 seconds. The damage is decreased by 4% (The 1st hit with out being charged deals only 1% damage). The KO % is increased by 10%.
Mega mushroom
The sword's attack speed is decreased by 0.5 seconds but it deals 6% more damage than the normal damage. The sword is also longer than usual (As tall as Mario). The KO % is decreased by 5%.
Life mushroom
The sword is POISONOUS! Hit the enemy and he'll take 2% damage per second. The effect lasts for 6 seconds. The damage is reduced by 5% and the KO % is increased by 7%.
Upward smash : Spore wave
Picture 1 : Punch causes a shockwave, Picture 2 : Spore wave
Toad's hand is infused with spore... He does a short leap and punches the ground causing a mario sized spore wave that deals 12 - 20% damage and travels from around 1 stage builder block. If the enemy is directly hit by Toad's fist, he takes 22 - 30% damage. The shockwave has high prioritystrong knockback and it can kill at 125%. Toad's fist has high priority and tremendous knockback and it can kill at 65%.
Super mushroom : Pit
Toad still does a short leap then punches the ground (As always). Toad then removes his hand from the ground and... Oh look... A pit as wide as 2 kirbies. The spore clouds coming out from that pit shows that there are spores in the pit so if the enemy falls in it, they're gonna suffer 15% damage in the pit and the spores will knock them out of the pit! It is capable of killing at 135%.
Golden mushroom : Spore wall
Toad still does a short leap then punches the ground as usual BUT instead of a spore wave, a spore wall appears. The name says it all. It acts like a wall and it's as tall as Bowser. It doesn't stay there though. It only protects you from attacks then it spreads out (Not into spore bullets).
Mega mushroom : Mega stomp
Instead of plunging his fist into the earth, he uses his butt and causes a huge circular shockwave coming from his butt. The shockwave deals 25 - 34% damage but being hit by Toad's butt directly gives a whooping 35 - 45% damage. The knockback is extremely powerful. You probably knew that because of the damage it deals. The shockwave can kill at 61% and Toad's butt can kill at 55%. Both moves have tremendous knockback.
Life mushroom : POW block
Toad pulls out a POW block and throws it down to the ground. It does not do any damage and the knockback is incredible enough to kill at 130%.
Downward smash : Spore repulse
Toad gathers spores in his hands and causes a weird repulse that has high priority. It deals 10 - 19% damage. The knockback of this move his good enough to kill at 129%. If it's fully charged, Toad will emit spores from his hands which deals 4% damage per hit which can't kill.
Super mushroom : Spore blower
A spore blower comes out from Toad's hands. The spore blower releases out white spores that blow away the opponent.
Golden mushroom : ROTATION
Toad..... ROTATION!!! Remember Neji's rotation? Yeah... Toad will do that except it's made out of spores. The rotation shoots out spore bullets that deal 4% damage. Obviously, it can't kill.
Mega mushroom : Spore explosion
Toad's hands release an explosion full of spore. It deals 21 - 28% damage. It has high knockback, the priority is as high as usual and it can kill at 129%. Though, the attack's start up is as slow as Ike's d-smash so it's best not to spam this move.
Life mushroom : Healing spores
Toad's hands emit spores that heal 2% per second if you step on it. Enemies can also be healed by it. The spores stay in place for only 2 seconds. After the spores disappears, you need to wait for 4 seconds so you can use it again.
Neutral aerial : Spore emit
Actually, this is just the aerial version of Toad's d-tilt except it's quicker and it has shorter range. It also deals only 6% damage (2% damage per hit) and it kills at 175%.
Super mushroom, golden mushroom and Mega mushroom : Quick growth
It makes any spore or mushroom grow 2 times more than the usual. No effect on the damage and knockback.
Life mushroom : Healing spores
Toad emits spores. The spores stay there for 3 seconds. Once you go in it, it will heal you by 4% per second. If the enemy goes in it, he'll get healed also. Once the clouds disappear, you need to wait for 5 seconds until you can use it again.
Downward aerial : Spinning mushrooms
Toad summons 3 mushrooms. They stay in place in mid air. The mushrooms spins and deals 7% damage. It has weak knockback and it kills at 160%. The mushroom stays for 12 seconds. You or the enemy cannot destroy these mushrooms. This move is not affected by any mushroom power up. As for the use... Wait for the f-air....
Forward aerial : Spore beam
Picture 1 : Spore beam, Picture 2 : Rebound!
Toad shoots out a beam of spore which has low priority. The spore beam deals 10% damage being able to kill at 157%. When Toad shoots a beam of spore, the spore beam quickly goes to any spinning mushroom (If Toad is FACING one) then it is rebounded to another mushroom then it's rebounded to the last mushroom. Asides from it's interaction with Toad's d-air, it can be used for camping.
Super mushroom : Spore barrage
Instead of it being rebounded, the beam stretches to the the next mushroom. It still deals the same damage and knockback. It still deals the same damage and knockback.... BUT..... It forms a triangle then in the middle forms some sort of huge green spore cloud that shoots out spore shots that travel fast.
Golden mushroom : Mushroom explosion
Once the spore beam touches the mushroom, it will rebound to the next one BUT the mushroom that rebounded the beam explodes into spore spread shots that deal 6% damage each.
Mega mushroom : Spore shape
Instead of it being rebounded, the beam stretches to the the next mushroom. It still deals the same damage and knockback. It forms a triangle then a cloud of spore appears in the middle. However, the difference is that this move tracks the nearest enemy it encounters.
Life mushroom : Protective field
The beam stretches and forms a triangle. Cyan spores come out in the middle. Enemies can't go through the spores. Not even Toad can go through it.
Backward aerial : Spore grapple
Picture 1 : Grapple, Picture 2 : Hardened spore
Toad emits spores and forms it into a grapple. Toad's spore grapple latches to the nearest mushroom (Any sort of mushroom like the mushroom block, platform, etc.). It can reach up to 4 stage builder blocks. Once it latches, the spores start solidifying then they become a part of the mushroom they latched on. Toad can walk on the spores. Actually, anyone can walk on it. The spores stay there for 9 seconds and to destroy it, you'll need to rack up 27% damage against it. Wait.... This move isn't just a walk in a park or something like that.. There's a brown solidified spore (Er.... it's not poop :I) also (The picture says it all). If Toad's standing on the brown spores, Toad's down B - down will change into a mushroom barrel. The mushroom barrel rolls downwards and smashes the opponent dealing 13% damage being able to kill at 135%. These barrels can be punched away if the enemy has good timing. Donkey Kong anyone? Oh... And enemies can interrupt Toad's grapple IF it's in it's cloudy form. All the enemy needs to do is to attack the grapple. If it solidifies.... you'll need to rack up 27% damage.
Super mushroom - Conveyor spore
The spores act like those conveyor belts from the stage builder.
Golden mushroom - Mushroom harvest
Mushrooms sprout from the spores. The mushrooms limp at Ganondorf's speed towards the enemy. Once they latch on the enemy, they deal 3% damage per second on the enemy.
Mega mushroom - Gluey spore
The spore seems the same. Enemies can walk or run on it. Wait a minute... They can't jump? Maybe it's because there are spores on their legs which disable them from jumping if they land or step in the spore (The "solidified" one).
Life mushroom - Slippery spores
The solidified spores are slippery.
Upward aerial : Toad spin!
Toad spins around! Toad swiftly spins like a copter and lifts Toad upwards. He can deal 9% damage (3% per hit) and this move has low priority. The spinning lasts for 0.5 seconds. Any spore based attack touched by this move will simply split up into small spore shots spreading out dealing only 3% damage. Toad can still recover after.
Super mushroom : Spore vacuum
Toad's spinning causes a cloud of spore to appear. The spores start sucking up enemies. Once the enemy has made contact with the cloud of spores, they start twirling in a circular motion then they are blown away. The enemy takes 11% damage. The knockback is alright. It can kill at 140% only
Golden mushroom : Spore bullet frenzy
Toad while spinning throws out spore bullets. The spore bullets deal 3% damage.
Mega mushroom : Spore blast
Toad then spins EXTREMELY FAST! The spinning causes a huge spore BLAST (As long as 5 kirbies lined up together) dealing 27% damage! The spinning though takes some time (5 seconds). It can kill at 115%!
Life mushroom : Spore buffs!
Toad spins and emits buffing spores. The spore increases his attack (+2% damage) and defense for 6 seconds.
Toad can grab in mid-air and ground. He can move and jump while holding the enemies.
Pummel : Throw
Toad throws the enemy or object dealing 11% damage. It can kill at 155%.
Downward throw : Jump
Toad jumps on the enemy dealing 8% damage capable of killing at 145%.
Army of Toad
Toad pulls out a trumpet! A plane crosses the stage and a number of toads drop from the plane! The toads land on the stage. As for the toads who fell... well, it sucks to be them. The toads start assaulting. They can do what Toad can do. Holy ****. You know what that means right? You must survive for 15 seconds. The toads though are significantly lighter than Toad... In fact, they're a bit heavier than Waddle Dees but they're still easy to deal with UNLESS YOU GET A CHANCE TO GO NEAR THEM. While the chaos is happening, Toad is just there behind an announcer's table watching. He's invulnerable so it's no use to attempt to hit him. The good thing about this though is that the toads aren't as smart as a human player so take advantage of it! After 15 seconds, the Toads quickly run off stage then Toad jumps out of the table then he goes back to the fray!
Moveset interactions

Regarding spore attacks: When you combine a melee/direct spore attack to a indirect spore attack/ spore projectile then the spore projectile will grow. The growth will depend on what is stated in the move. If it didn't say anything then it can grow 6 times and the damage increases by +3%.
Direct spore attack + Indirect spore attack
Playing with spores: Toad can play with his spores... Remember Toad's Spore trap on ground? You can play with it! You can splash it towards opponents although it will become smaller.... but the spores that splatter from the spore trap form spore traps too! It's just... Smaller.... and it deals only 3% damage unless they merge or something.
Shockwave attack + Spore trap on ground
He can also play with those spores that usually stay in the air or the ones that remain there for an amount of time. He can use his propeller cap or his upward aerial to spread them out (Making the spores act like spore spread shots now) dealing 3% damage.
Upward aerial/Propeller cap + Spore cloud
There are some spores that stay on air. You remember the rotating mushroom block? If it TOUCHES any sort of spore or if it's near one, the spore will automatically latch on it and act as a spore mine (Yes... That includes the life mushroom version of any indirect spore based attack). You know what that means? It's gonna be dangerous for the enemy to go near any mushroom block if it has any sort of spore trap on it. Oh... Remember? You can actually detonate these spore traps and make them emit spores.
Mushroom block + Any spore shot/projectile in mid air
You remember the u-smash's super mushroom version? It makes a pit full of spores. The spores aren't seen though. The picture shown only shows some puffs of spore coming out from the pit. You can fill it up with spores using Toad's d-tilt. If you use the life mushroom version of his d-tilt, you'll fill it with healing spores which lasts for 3 - 6 (6 if you used the d-tilt for 3 seconds OR use the d-tilt 3 times) seconds. If it's the normal, super mushroom, golden mushroom or mega mushroom version, it will be filled with damaging spores. If the enemy falls in the pit, he'll receive a whooping 19 - 29% damage. This can kill at 130 - 120% (Requires 10 seconds of using the d-tilt if you want it fully charged OR you can use the d-tilt 10 times).
Downward tilt (Any version) + Upward smash (Super mushroom)
You know.... You can put mushrooms inside the pit (Remember the u-smash's super mushroom version?). That includes the downward aerial : Spinning mushrooms. How will it move around if it's in its mega mushroom version? It can't. One mushroom is stuck inside the pit so they can't move around. You can put the mushroom turret inside the pit. Any mushroom that gets inside the pit powers up since there are spores inside the pit. If it's kept there for 1 - 3 seconds (3 is the max time), the mushroom's damage will be added by 2% per second (6% maximum). You can also put the mushroom trampoline (Upward B) inside but... it's not a good idea. Toad needs it as his recovery. He can't put his Mushroom trap (Upward tilt), mushroom charger, mushroom platform and mushroom block inside the pit.
Any sort of mushroom except the Mushroom trap (Upward tilt), mushroom charger, mushroom platform and mushroom block inside the pit +Upward smash (Super mushroom)
You can use d-throw on the enemy... ON THE PIT. You might say that is impossible but you forgot... Toad can move while carrying the enemy. If Toad uses his D-throw (Jump), the enemy will be sent into the pit.... For some reason, the enemy is staying in the pit for 2 seconds....
Downward throw + Upward smash (Super mushroom)
Oh... And during those 2 seconds. You can fill up the pit with spores. It deals 17% damage and it automatically sends the enemy out of the pit. It can kill at 134%. If you're kind enough, you can heal the enemy using the life mushroom version of Toad's d-tilt.
Downward tilt + While the enemy is inside the pit
You can also fill that pit with any sort of mushroom WHILE the enemy is inside it. The spores inside the pit are attracted to the mushroom causing the spores to rise up. The mushroom will quickly rocket upwards into the sky dealing 15% damage to the enemy killing at 138%.
Any sort of mushroom except the Mushroom trap (Upward tilt), mushroom charger, mushroom platform and mushroom block inside the pit + While the enemy is inside the pit
Other things to clarify
Forward tilt|Normal : 2, Super mushroom : 2, Golden mushroom : 2, Mega mushroom : 1, Life mushroom : 1| Blue |Mushroom
Upward tilt|Normal : 1, Super mushroom : 1, Golden mushroom : 1 (Actually 3 but... you get it right?), Mega mushroom : 1, Life mushroom : 1| Yellow |Mushroom
Upward smash|Everything : ** (Infinite or any time), Super mushroom : 2 pits only, if you do another one then it won't cause some sort of pit|None|Normal
Downward aerial|Everything : 1| Red |Mushroom
Backward aerial|Everything : 1| Green |Spore
Forward aerial|Everything : 1| Green |Spore
Forward special|Normal : **, Super mushroom : (Air : 2, Ground : 2), Golden mushroom : **, Mega mushroom : 1, Life mushroom : 1 (After the effect is over, you need to wait for 5 seconds)| Green |Spore
Downward special (Side)|Everything : 3| Magenta |Mushroom
Downward special (Down)|Everything : 1| Magenta |Mushroom
Downward special (Up)|Everything : 1| Magenta |Mushroom
Just in case you change Toad's color pallet....
Forward tilt|Blue|Cyan|Turquoise|Dark blue|White
Downward and upward special|Magenta|Purple|Pink|Plum|Indigo
Forward special/Forward aerial|Green|Red|Yellow|Green|Purple
Upward tilt|Yellow|Light yellow|Dark yellow|Orange|Pale orange
Downward aerial|Red|Brick red|Bright red|Flesh|Brown
Overview
Toad is a defensive set-up character. He has a vast array of projectiles and traps that can help him keep away in the battle field. He has several ways on how to camp and zone and control the stage.
Traps and defense
Constructing traps and defenses are the first things you'll need to do at the start of a match. You'll need to start controlling the stage and creating obstructions. Be careful with the type of defense/traps you use. You'll need to choose the right one and where to place it.
The super mushroom is the best item to use when you're constructing your defenses. Most the moves are built for being barricades, defenses and traps. Toad's mushroom block (Super mushroom) is mainly used as an obstruction especially since it travels around the stage. It's even good with out using the super mushroom. You can also try putting any sort of spore near the mushroom block (Life mushroom version recommended) so it can be attracted to the mushroom block latching to it. The spore trap is good if it's at your front or back so that when the enemy gets through your defenses, you can quickly run away while your enemy still needs to jump over the traps. It would be better if you put 1 on ground and 1 in the air. Mushroom turrets and his Mushroom traps are his frontal defenses. The mushroom turrets quickly react and shoot the opponent. You can put another mushroom turret. It's a great idea if you use the super mushroom counterpart of this attack... Unless of course, you're focusing on constructing your defense. While the mushroom turret does its job, the Mushroom trap is mainly controlled by you. You can control its movement around the stage. If you want it as a trap though, then use its super mushroom version. Toad's u-smash (Super mushroom) is also a great obstruction that you can easily modify. You can fill it with spores or a mushroom. You can even dump the enemy inside it. Toad's spinning mushrooms are his main defenses in the air. It serves as a barrier between Toad and the enemy PLUS it can shoot out spore bullets (Or whatever item you're using). Toad's u-air super mushroom version is a good trap to use in the air. Unlike most of his traps, this one can actually kill at quite low percents (For a move in Toad's moveset).
Once you're done with creating your traps and defenses, it's time to camp and rack up damage.
Camping and racking up damage
Before doing any sort of camping, it's ideal to stand on a mushroom platform and camp there. Use the super mushroom version against characters who can't jump that high. Use the golden mushroom version if you want them to stay away. Use the mega mushroom version if you want to just stay in a higher place.
Toad's spore shot as a normal special and a golden mushroom special is Toad's main projectile to rack up damage. It travels as far as Fox's lasers and they quickly burst into spread shots. Toad's forward aerial, the spore beam, is great as a normal attack and a golden mushroom special too just like the spore shot. The normal spore beam is a standard projectile... Umm... Yeah it's generic... It would be better though if you make it interact with his spinning mushrooms (Golden mushroom version, super mushroom, mega mushroom version and normal version) since it covers a lot of range and a chunk of damage. Toad's mushroom turret is self - explanatory. Deals damage. Shoots out spore bullets. If you really want to be in a hurry to rack up damage then use the golden mushroom counter part of the mushroom turret since you can use it like an item and shoot enemies! Toad's Mushroom trap is probably the only thing Toad actually controls. He can control where it's suppose to move despite the slow speed. It is slow but it doesn't matter because the enemy is most likely (That depends if you did it right) distracted by the traps surrounding him and the spore projectiles rushing to him. You can also use the golden mushroom version of his Mushroom trap. It will move by itself and it tracks its nearest enemy. The life mushroom version of this move can be used as a camping tool. You can also troll the opponent by dropping him in some pit, spore pit or spore trap. You can use his b-air (Grapple) IF you want to because it's actually better as a move to retreat. You can use the barrels to camp and rack up damage. Toad's spore sword (Super mushroom) is also a good option to camp with. You can use it against air borne opponents if you're standing on a mushroom platform or block and grounded characters. Why? It covers a lot of range. Toad's upward aerial is mainly used for destroying spores and making them spread around. You can also use its golden mushroom version to fend off aerial approaches. Mushroom house (Life mushroom : Downward special - Up) is.... Actually... Useful... No seriously. Despite the choice of item being random, it's still useful. You can bring out a bob-omb! Or... A beam saber... It really depends but we all know one thing. Items... Rule....
Going for the kill
After racking up enough damage, it's time to go for the kill. It's really hard though since most of Toad's ways of killing aren't "strong" enough so you might take long racking up damage.
Toad's spinning mushrooms + spore beam (Mega mushroom version) is one of his best options to kill opponents. Toad does not have to go near the opponent which is the best part since Toad has hardly any options when he's up close. Toad's upward aerial (Mega mushroom) is Toad's option to kill in the air. It has a slow start up so avoid using it casually. It's great against air borne opponents. The mushroom mountain is also a viable option to kill opponents since you can punish opponents while they're climbing the mountain UNLESS they can fly. Just watch out once the mountain starts collapsing. It can kill you too. Toad's Mushroom trap mega mushroom is also a great KO option. It damages 17% plus it can kill at 128% (Well.... With DI... It's at 145% most likely)!
Spacing/GTFO
Despite Toad's huge disadvantage with close range combat, his still has moves that can make enemies gtfo from your territory.
His f-smash is a great example. Both golden and mega mushroom version can work as spacing options. His golden mushroom spore sword is fast and quite powerful enough to kill at 135%. The mega mushroom version is useful as a spacing tool because of it's wide range and it's tremendous knockback but in trade, the speed is lacking so it's not spammable. Toad's d-smash is his best but weakest option. All versions (Except the life mushroom version) including his normal version can work as an option for spacing. Toad's super mushroom version can blow off opponents. His golden mushroom version (Rotation) can shoot out spore shots that can make the enemy sent backwards or mid air but then again, it can't kill. His mega mushroom version though is quite risky due to it's short range but the knockback and damage is worth it. Just use it if it seems safe. Lastly, The U-smash super mushroom version (The pit) is a great tool for close encounters. You can grab the enemy and throw him down to the pit. It's not a "GTFO" but it's more of a move you'll use so that the enemy is stuck which means you can run with out being worried about anything.
Retreating, buffing and healing
For retreating, spore grapple (b-air) and mushroom charger are his main options.... The end.
Time to go to the buffing and healing part :Life mushroom. Remember that item. Use the item because most of the moves are mainly used for defending, buffing and healing yourself.... You can do this while staying in one spot as your enemies struggle against the defenses, traps, projectiles and turrets he's facing.
You only need to know what moves to use when healing and buffing. I really don't have to get into detail with this:
Forward special : Spore shot (Life mushroom)
Downward special - forward : Mushroom charger (Life mushroom)
Downward tilt : Spore emit (Life mushroom)
Downward smash : Spore repulse (Life mushroom)
Neutral aerial : Spore emit (Life mushroom)
Upward aerial : Toad spin (Life mushroom)
2 on 2
Toad's array of projectiles and tools for traps and defense can really help teammates. He also has the ability to buff and heal his teammate. If Toad's teammate is great at defense, then I guess good defense + good defense = godly defense. However, there's not really much use to broadening defense when it's good enough already (Looks at the Snake and Falco doubles). Toad would be of great help to rush down characters. Once Toad or his teammate racks up enough damage, both of them can go for the kill but I suggest Toad to just stay and continue spamming projectiles and constructing defensive obstacles.
Overall, Toad is a great partner to be with thanks to his defensive capabilities and support. It only gets troublesome if one of you screws up.
Against Toad
This is gonna be kind of hard to deal with even with balanced characters such as Mario or Kirby. You'll need a rush down demon. Seriously... Toad's defense is gonna be hard to break. It's either you challenge him to a defensive fight but the problem is Toad can even heal and buff himself while defending himself using his moves. That's why it's best to use a rush down demon. To stop Toad from doing any move! Once you get to Toad, he's gonna be in a quite iffy situation. He doesn't have much options when he's up close other than retreating. Avoid letting him escape. He'll most likely use his mushroom charger to get out and rebuild his defenses.
Toad's recovery is quite standard. It's not easy or hard to edgeguard. Just use the moves with long range and I guess that's it. Unless of course, Toad uses his upward aerial with the golden mushroom effect then I guess you'll have to find another way other than just out ranging Toad.
TauntsUpward Taunt - I'm the best!
Toad says "I'm the best"
Downward Taunt - Shout
Toad shouts "Yahooo!!!"
Side Taunt - Spin!
Toad spins with glee!
ExtrasVictory:
Lose:
Entrance:
Kirby hat:
Codec conversation:
Snake: Otacon, there's a talking mushroom here! Is it edible?
Otacon: It's not edible. That's Toad, Snake. Toad serves as the Royal guard of Peach.
Snake: Well, he's not doing a good job at it. Bowser still kidnaps Peach all the time. This guy looks easy.
Otacon: Hold it right there. Toad isn't what you think he is. He has superhuman strength that enables him to carry anything no matter how heavy it is. He can also emit spores and summon mushrooms to come to his aid
Snake: Can't I just eat the mushrooms?
Otacon: I don't think that's the type of mushroom you'd eat. They're used for combat, not meals.
Snake: I see where those super mushrooms come from...
Otacon: Don't get the wrong idea Snake....
Stage
New Super Mario Land! A weird name, but I think you get the point. This stage will keep the tradition of Yoshi's Island and the two Mushroom Kingdom stages. In that this stage is modeled after a general field theme. Except this time it will be in a mold reflecting the New Super Mario Bros. series and the Super Mario 3D Land game. This stage would also be the possible home field for a playable Toad.
The stage design itself will be based around the athletic areas in New Super Mario Bros. Wii.
Which means you will be up in the clouds, so clouds will pass along the back ground and floors. You will also see Bullet Bill turrets firing their signature ammo (Bullet Bills) as they strafe along the background sky line. Sometimes the occasional Bullet Bill won't want to linger just in the background and will find it's way going from one end of the stage to the other. Paratroopa's will occasionally fly into the stage from the side, allowing you too jump atop them (or attack them some other way), "de-winging" them and making them a standard Koopa. Further attack will cause them to retreat into their shell, allowing them to be used as an item.
On both sides of the stage are solid ground, in the middle are the large mushroom platforms that lower under weight. Above the platforms are a line of standard brick boxes. To keep the platforms going higher all you need to do is break the boxes.
Also above is another "floor" of standard ground, since in most Mario games there are normally multiple layers to a platform. The blocks will act as a kind of bridge between the second floor of platforms. Above that will be the famous music blocks that act as a spring, you can hop on one to launch you into the air. Or hit one and be repelled back, kind of like a mild bumper.
To the end of every floor will be a pipe, jumping in one will send you to the pipe of another platform. Beyond the stage to the right, acting as a small island of it's own, will be three pipes that you can move on. Going down into one of them will only send you to another pipe somewhere on the stage
Stage Example:
...........♪............♪
.........♪...............♪
...____■■■■■■■■______
++____...--..--...____++--_
Stage Name: New Super Mario Land
Stage Icon: Mushroom
-Tracks-
New Super Mario Bros. Wii - Overworld
New Super Mario Bros. Wii - Athletic
New Super Mario Bros. Wii - Beach
Super Mario 3D Land - Main Theme
Super Mario Bros. 3 - Athletic (Super Mario Galaxy)
Super Mario Bros. 3 - Super Mario Bros. 3 (Melee)
Super Mario Bros. 2 - Overworld (Melee)
Super Mario World - Yoshi's Island (Melee)
Super Mario 64 - Bob-omb Battlefield (Brawl)
Super Mario Sunshine - Delfino Plaza (Brawl)
Super Mario World - Title / Ending (Brawl)
Wario's Woods - Versus
Want to see the animations?
http://ssf2expansions.motionforum.net/t915-toad-the-civillian-of-the-mushroom-kingdom-update-6-17-11
-----------------------------------------------------
Credits:
Berserker 01 - Moveset and pictures
StarPhoenix - Stage : New Super Mario Land
Medvock - Toad sprites
AEM - Toad animations
CheddarX - Sonic sprites
AJ Nitro - Mario sprites
Boo - Mushrooms
------------------------------------
Note: This is my first moveset in this thread....