
-
Welcome to Smashboards, the world's largest Super Smash Brothers community! Over 250,000 Smash Bros. fans from around the world have come to discuss these great games in over 19 million posts!
You are currently viewing our boards as a visitor. Click here to sign up right now and start on your path in the Smash community!
It appears that you are using ad block :'(
Hey, we get it. However this website is run by and for the community... and it needs ads in order to keep running.
Please disable your adblock on Smashboards, or go premium to hide all advertisements and this notice.
Alternatively, this ad may have just failed to load. Woops!
Please disable your adblock on Smashboards, or go premium to hide all advertisements and this notice.
Alternatively, this ad may have just failed to load. Woops!
Make Your Move X - Congratulations winners! MYMXI start date OCTOBER 10TH!
- Thread starter BKupa666
- Start date
- Status
- Not open for further replies.


Smady
Smash Master
MYMini


I find this introduction to be incomprehensible, so let just get this over with.
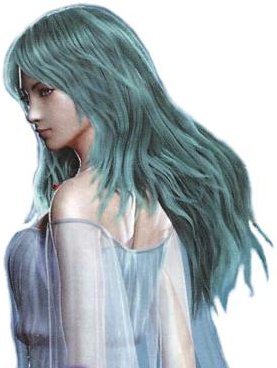
We are the Maenad, superior life forms created by the will of our creator originated in the Final Fantasy 4 universe. We train and travel to multiple universes outside our own to create, study, and find planets to experiments to see if they are evolved enough for our creator to settle. We also study on our abilities so that we can best serve our master when we return to the blue planet in the Final Fantasy 4 universe for our crystals.
I was the very first Maenad to be created and was the one used to mass produce my younger self. Unlike the others, I was created from the data given by my creator’s crystal based from the information gathered from the blue planet. My memory was little from my birth; however it was clear that I was created under the image of a certain black mage. Though I was defeated, I was able to find the way to my creator and learn about what I am capable of. From there and with the rest of my younger selves, we sought throughout the universe and beyond the final fantasy 4 timeline to find a planet that is best suited for my creator's to settle and hone our skills. When we discover this universe of Brawl, my creator decided to send me into this world to see if its evolve enough to inhabit.
My current stats:
Weight - 6
Run – 3
Walk - 4
Jump - 4.5
Second jump - 6
Fall speed - 7
Air movement - 4
Traction - 2.5
Do you seriously wish to know about me? Sigh...Fine!

B - Holy/Flare
We Maenads are capable of alternating our choices of white and black magic at any time. As for myself, I can cast holy as my primary spell. Upon testing we have discover that it’s best to use to cast the spell in an arc like fashion. My spell is very potent that the Holy spell will scatter and spread out into several light particles which can quickly harm anyone whom was already caught or tried to evade my spell. Some of my past opponents claim that this effect is similar to that of an explosion causing 1% damage per particle. If the controller is tilted upward, we will send one to the skies bypassing everything and everyone. The holy spell will remain in the sky until we decide to have them to quickly descend from the skies above the enemy by tapping the controller stick downward. Due to the sheer power and concentration of the spell, we cannot cast holy spell if two or more exist on the field. It’s annoying to have this restriction, but we know our limitations and the dangers on overexerting ourselves.
Our natural skills in magic far surpass any inferior being. When we feel like Holy isn't required, we can change our incantations to cast flare instead. By holding the special button for a second, my flares will set forth and pierce anything. The most standard of flares will target itself into the position of the nearest opponent near the caster. Flares will connect at that position 0.9 seconds with a small unblockable hitbox. My Flares can always do 20% damage capable of killing foes around 89%.
Down B - dual hold
We maenads are capable of casting multiple spells at one sequence. We are more optional than your standard run of the mill mage. When we activate our attack, we first cast reflect from the first to the fourth frame to push back any fired or thrown projectiles at us. Such attacks are futile to begin with against us. After the fourth frame, we then transfer the magic from the reflect spell to cast hold in front of our position. Personally I was never a big fan of such low level white magic, but if it effective on such lowly beings, then I won't mind toying with them a little longer. My hold spell can trap any person whom is on the ground when this white vortex field is active. When trapped, they are held in my magical power. No matter how much they struggle, it’s futile. I can choose to end it by pressing the special button to cancel my stance and maybe if I'm nice, I could play with them. When my hold caught our opponent, I can do several things to our opponent. The only thing that appears to be inconvenient is the fact that we can’t use this attack until the white magic effect has worn out. We are currently working on a way to bypass this restriction. We are currently studying a way to bypass this restriction.
Binding glare - By pressing the special button again, I can absorb the white magic and cast this unique spell to keep them there for 4 seconds. This should be plenty of time to finish them off. This spell was taught to us by our creator by using charka together with white magic to paralyze our opponents by simply gazing at them.
Mini - by tilting down, we amuse ourselves by shrinking our opponents to the size of my shoe. To be honest, some of our past victims look so cute when they are so tiny, we almost felt sad having to kill them. We heard that an item called a poison mushroom can do this same effect and is somewhere in the brawl world. One of our maenads has been dispatched to the mushroom kingdom to find and take any information no matter what it takes.
Silence - by tilting away from us, we cast silence to stop our foes from using special attacks. Several inferior beings hone their magic ability above even their own body. It’s annoying to even see them before me. Our silence spell will make sure they can't use any special attacks for 8 seconds. This should be enough time to accept their obvious weakness.
Curse - by tilting towards us, we are able to curse our foes lowering their basic attack and defense. The same we can say for the opposite, its also annoying to see those whom hone their strength above their spiritual power. Our curse spell can reduce their attack power and damage for 8 seconds.
Confuse - by tilting upward, we are able to confuse our opponents. We maenads oddly find it amusement in toying with our foes. We confuse on our victims and to see what they do when their whole control scheme messed up. With every button and direction altered for 5 seconds, just seeing what they do is hilarious.
Up B - hidden wing
It’s only rare that we have to resort on using magic to save us in our time of need. Our float magic is so advance that it can do much more than levitate above ground. When we use float, the magic around us will lighten our decent speed and increase our jumping potential. Also we can add temporary wings upon ourselves allowing us to jump multiple times in the air. We also have the ability to glide in the air, but that takes up a lot of magic and can render us helpless after gliding. We are still making ourselves powerful enough to keep this effect just like our creator wish for us to.
The only flaw other than not being able to attack and can be attacked. After some debate, so we decided to cast blink around ourselves just after we cast float. Our blink spell allows us to project 5 illusions of myself. Every time I double jump or get hit while the float spell is in effect, an illusion fades away. When I try to jump if the blink spell effect has worn out, I will instantly glide as a last resort.
Side B - speed slash
We had came to acknowledge that the slow spell is among the most powerful white magic there is, so we had consider which method is best to execute this spell with little to no chance of this magic getting reflected or backfired. From frequent experiments against many inferior species, we has found it to be the most efficient to cast haste on ourselves and cast slow on the weapon for the best melee damage and a high chance of slowing with little consequences.
When we begin the attack, we will be idle for 4 frames so that we can cast haste on ourselves. After the spell is complete, we quickly move 5 meters in our direction (5 stage builder blocks) and deliver a powerful slash using our daggers if we overlap our enemies. As we move, we dash almost instantly that it only takes 1 frame from us to reach from one point to another. When we slash, our daggers will have a slowing effect. If it hits an opponent, they will be launched very slowly for 3 seconds...enough time for us to execute a following attack. If the attack misses the target, then the slow spell from the dagger will affect us as well. This is why we cast haste on ourselves to negate the effect, but the recovery time is still costly. After recent research, we had discovered that we can use this attack with very little recovery time. It seems like the slow side effect does not affect us while in the air, however using this in the air does not slow the opponent if our attack hits. We heard that the item called "timer" has the same effect as our slow spell. We are currently researching the origin of this item to help boost its effectives.

Side smash - meteor
We take pride on our strength in magic and power. In our youth, we were taught the most advance spells and master it with little difficulty. It makes us slightly chuckle when such inferior beings complain that it took their entire lifetime to master this feeble spell.
We make sure our meteor attacks cover as much around us as possible. When we cast meteor, we create them above and behind us so it can cover us from air attacks. It will then fall until it crashes about 1 meter in front of us (1 stage builder block). Our meteor spell is highly potent, but we can only bring out one. It would not be fun to fill the sky with meteors when playing with others since one is enough to take out a weaken army. Our meteor can do 16%-23% damage and much more when charged.
Up smash - tornado
We had acknowledge that this spell is truly effect, however it is not what we desire to maximize our efficiency overall. We hone our tornado magic so that it doesn't just reduce our opponents to a near fatal state. By adding dark elemental magic into this spell, we are able to achieve a damaging effect into the tornado capable of doing mortal damage with no resistance.
We cast our tornado around us damaging the space above us as well and a quarter of a meter around us (1/4 stage builder block) around us. This modified tornado consume only little magic power in us, so we can cast this spell very quickly and recover after casting as well. At most, our tornado can do up to 5%-29% % damage, but its effectiveness only depends on how high my opponent is when the spell ends.
Down smash - quake
This black magic spell has mixed reception among us maenads. Some found it useless because it doesn't provide the necessary efficiency in air combat or when going against an air-born enemy. Others, including myself, found this spell to be useful in power. Personally I often use this spell if my opponents have some resistance on them or to provide a good way to terminate my foes.
When we cast quake, the earth below us around 1.2 meters around us will rupture causing an earthquake that will damage anyone who is within the range. Though it can do 12%-16% damage at most, quake is known to dispose our foes when they are borderline healthy.

Normal attack - protect dagger
Even in the most basic attacks, we cannot let ourselves to be harmed during such times. We were taught to protect ourselves during our attacks. Thus we decided to cast protect around ourselves to prevent any unnecessary counterattacks from the enemy.
Our method of executing two weak slash attacks and follow it with a rapid piercing style attack repeatedly doing 1% damage each until we decide to end it. Just after we execute our attack, we cast protect ourselves to gain super armor until our attack ends.
Forward tilt - sleeping dagger
Our weapons are made with the same power which our creator uses to create his crystals. This allows our weapons to not only capable of storing information, but also allows us to focus magic in its infinite magical space. In fact, not too long ago, our creator told us a story about an inferior extinct species was somehow able to crystal forge weapon from his creations and ended up calling it the Grand Dagger. To our surprise when that he came back to retrieve it, the entire race whom try to control the weapon's power had let its power go to their head. Either armies fought over it for its power supply or warriors fight each other for it, or being consumed and corrupted with power. Their world lies in ruin by themselves as a result.
Getting back to the subject, we focus our sleep spell on my dagger. After our vertical slash made its round, a sleeping aura is spawn from the dagger for 0.2 seconds. This will most likely put any of my foes to sleep if there were to somehow spot dodge my attack. It does less damage than a plain attack, but as we mention earlier, we prefer our attacks to have an effect on our opponents to make our missions more effective. The weapon alone can do 8%-12% damage, but I don't expect the weapon to actually put anyone to sleep unless they’re stupid enough.
Down tilt - cura slash
We focus our weapons with the power of both black magic and white magic to slice our opponents with minimal effort as possible. This attack is no exceptions since it’s infuse with healing magic.
Our attack doesn't focus on damage, but focus more on healing. When we attack, we swipe our sword downward horizontally that it looks like we are aiming for the opponent's feet...though sometimes I actually want to torment my victims by actually cutting them off. When my dagger hits this way, not only it does send them a fair distance, it may spike them if they are in the air. Overall, this attack does heal them 6% to 9% damage, but if I can strike my opponent at the tip of my blade or graze them, the healing effect is doubled. Of course our more recently created Maenads were confused on the importance of healing our enemies. That usually was the case, until we introduce them to the silent doom technique.
The silent doom spell was develop from my creator's race which can be only cast on those whom had their body healed by a healing spell. Even if it was healed by zero damage, the silent doom spell will still take its place. From observation, from at 0%, it will countdown until it reach 25 minutes when the opponent will be affected by the doom spell facing their death instantly. Also for damage the opponent has healed, the doom timer will decrease by that much damage times 10...like for example, if my opponent heals 3% by my hands, the current doom timer that was currently on 22:42 will decrease to 22:11. Or if they pick up one of these heart containers I been hearing about, regardless of how much damage recovered, their currently time will decrease by 1000 seconds from 22:42 will change to 6:01.
Of course, Silent doom must be activated first before using this dual effect.
Up tilt - break blade
Our weapons can be modify with black magic so that it can have an lethal effect on our opponents, Our Maenad tend to make full use of the break spell when it comes to melee combat, even myself came to enjoy trapping our foes into stone statues and shattering them apart every now and then.
We attack with a moderate amount of power in this attack as we swing vertically above us. Alone, our strength is enough to do 12%-16 damage to them with enough power to dispose the moderately strong ones when they are weak. However the tip of our blade is infused with the break spell. If our daggers were to hit the opponent only around the sharp edge of the dagger or if my dagger was to ever graze the opponent, the opponent will be petrified and turn to stone.
In this strange world of brawl, we have learned that the effect of petrification is similar to being frozen. However due to the recent study of the brawl inhabitances, the difference is that the opponent will fall twice as fast and can break out in 2.2 seconds at most. They can also break free from the spell if someone were to him them again or if the crash to the ground. They can't instantly die because their body is originally developed as a trophy, but they would still take 10% from breaking free from our spell.
Dash attack - dash slice
Sometimes we need to attack instantly that we don't even have a millisecond to even cast a spell when desired. Personally I find it inconvenient since I been there at one time in my existences...and that was during my first mission.
When we use our dash attack, we stop instantly and swing our weapon around us in a circle slicing anyone whom is around us. Come to think of it, this is the only attack that we use that only relies on our raw power. Our attack does 10%-13% damage capable of killing my foes when they are slightly weak.
Ledge attack - rising dagger
We do not consider being in such a position to be hanging over the edge. Though most of us doesn't tend to use any ledge tactics in battle, a few Maenads has found pleasure in toying their foes by giving them a since of winning. By feinting injury and dangle themselves over a cliff, they actually use an advance version of blink and make an illusion in battle while the real manead either attacks the fool off the cliff or destroy the edge of the cliff sending the foe downward. I never know such inferior beings can be so foolish.
If we actually have to attack from a cliff, we quickly thrust our weapons forward to get anyone in front of us out of our way doing 5% damage in the process.
100% ledge attack - dagger thrust
As I said before, we do not consider being in such a position to be hanging over the edge...not to mention there has been ever a situation of one of us Manead has been greatly weakened. We don't recall ever having to use this kind of attack...ever.
If in any case we do have to use this attack, we would have to swing our dagger upward as we recover from the ledge doing 3% damage. But since we haven't debated about ledge recovery, I'm not even going to bother with it.

Air normal - shell attack
Normally the shell spell suppose to protect the user from magical damage, however by applying black magic to it, we can make our shell shield act like an light based force field. From the light of the shell shield emits several light waves that shocks any foes that goes near the shield or me. We never actually used it because we hardly had anyone come near us in air combat. But just in case, I should relearn this just for the occasion.
When we attack with shell, we surround our body with a shield made of pure light energy so that it can attack at all sides around us doing 1 to 3 percent damage. The lights around the shield can hit the foe up to 9 times and the shield can be very potent that it can even cancel out heavy projectiles. Like we said, it is a shell spell after all.
Air forward - time dagger
Like Slow, the Stop spell has always been an interesting spell to use on the battle. However unlike slow, stop can fail if the enemy resistance is high enough. We decided to take the same formula of fusing our weapons with black magic in a similar experiment. Eventually we were able to make our weapons so that we can stop time around our helpless foes as we do whatever we please to them.
We attack with a moderate amount of power in this attack vertically in front of us. This attack does 7% damage and can take out the moderately average ones when they are weak. However, like our break spell modification, the tip of our blade is infused with the stop spell. If our daggers were to hit the opponent only around the sharp edge of the dagger or if my dagger was to ever graze the opponent, the opponent will be frozen in time.
When we cast our spells, we make sure its used efficiency. If the opponent is stopped, they cannot move, flinch, or fall for 2 seconds. All they can do is to wait out as we damage them during the time. A very effective spell, is it not?
Air back - poison dagger
Our first method of toying or torture our foes are to poison the victim so that we can take information from them. Even though this method is primitive now, we still found several uses for this spell. Not to mention that this spell can be easy used as a fused weapon for our crystal weapons, we decided to give this formula a try in battle.
Similar to our cura dagger, this type of attack does not do damage. Instead it will poison the opponent doing 2% damage for each second. The effect will die out after 3 to 7 seconds has pass depending how fresh the attack was. Even though our attack does no damage, it can still send the opponent quite far.
Air down - elemental level 4
Our element spells we cast is at its purest form and can be casted by us in almost no time compare to the inferior ants that we destroy in the past. At most, they can only cast level 3 element magic in their lives and at most, would take 6 or more seconds just to let loose a little fire. Such people are not worthy for my creator civilization to regrow. Regardless of each elemental spell we use, it always does 11% to 15% damage.
When we cast our element spell, we thrust our arms downward and cast our spell underneath ourselves. We never pick our favorite element, so instead we let ourselves choose whether to cast Blizzaja, Firaja, or Thundaja randomly. It’s interesting to know that each spell has its own different effect.
- Firaja would burn the opponent and send them forward. Usually the moderate strong ones would go down from this.
- Blizzaja would send my opponents down like a meteor. Even the healthy of my foes cannot recover from such an attack from the depths.
- Thundaja can hit our foes 4 times before sending them upward. It usually kills the modernly weak, but it can do more damage than it should as the shock can do 4% damage each.
Air up - bio
On every civilization that ever has black magic; all can say that the Bio is well known for its usefulness in its ability to cast instantly. Not only that, but this magic has non-elemental properties making it strong against multiple resistances. We attempt to boost the level of this powerful spell, but after many failed attempts on countless targets, we had decided to just boost the magic power on the original Bio spell. Interesting enough after we are able to power up our Bio spell, the bacteria around the spell grows more powerful as it can eat away the opponent’s life force. Also using healing magic while our victims are under the effect of bio, it will go to them instead of the person whom is supposed to be healed. This discovery is most interesting to say the least.
When we cast bio, we aim our left arm in the air and cast the spell quickly and effectively. When the attack hit, it does 5% damage and leaves bacteria on the enemy for 12 seconds doing 1% damage every 3 seconds. Our spell alone can be powerful enough to blast away anyone to the sky whom is weak enough in health. I should remind you that during the bacteria effect. The healing damage from my doom blade and cura dagger will be negated and the silent doom timer will not decrease...also healing items will not work for them.

Grab attack - handler
We don't like to reason, so we often just let our actions speak for ourselves. In any case, what information would be good if we were to actually listen to such vile creatures whom are not sincere? At least when we do decide to torment the enemy for the location of our crystals, we tend to bash them with the end of our weapons for 2% damage until they give in. I could just confuse them of course, but that only when I don't have the time.
Grab forward - dark slash
Our magic ability is several eons advance than these inferior species that we had develop a new type of element that is unknown to most worlds that we observed. Our dark element is the purest form from effect magic like death and tornado.
By using our attacks with this magic, we can achieve extra damage than we can normally deliver.
Originally when we use this throw, we pierce our opponents with our daggers doing 6% damage in the process, but the dark element channeled with our weapons doubles the damage of this attack. Also the damage this attack does doesn't decay when used over and over again. This information had become useful and motivated us to study more about the dark element.
Grab down - drain
Most of us don’t like the drain or osmosis spells because of its long casting time and ineffectiveness against moderately strong enemies despite countless moderations, we cannot find a good use to use this spell in battle until one of us whom was toying with their victims on a crystal recovery mission. By casting Drain on the enemy and harden the magical aura around the drain spell, we can control its power and trap the foe inside it like a temporary shell. We Maenads use this method to effectively use drain.
For this throw, we surround our foes in a drain spell and slam them to the ground to make sure we take some health from them and do 1% damage in the process. The drain magic will reduce the force of slam attack and will simply release the foe, slightly knocking them away from us. Some of us had noticed that if we dash grab our opponent after this attack; we would most likely grab our foes again. It would usually continue until the opponent is moderately weak. At that point the opponent is no longer in a position to grab anymore. Judging from the reports of our reconnissis missions, they call this a chain grab. One of us is spying on someone called "Dedede" for more information as we speak.
Grab back - silent doom
Doom spell is one of our most used attacks since its can usually bypass many resistances. As we mentioned earlier, we used our technique to modify our weapons to incorporate with black magic to cast doom when hit, and white magic and so that it can release an aura to speed up the doom countdown. One slice from our dagger will begin the countdown. After cursing our opponents with the silent doom, it’s all a matter of time.
After the doom countdown is activated, we change our magic to a mix of black and white energy. Originally our attacks would do 8% damage, but the white magic fused with our dagger is greater than the damage we trying to deal. Because of the two magic auras focusing at a single point together, it can cause a random effect. From what I seen, it has a chance of doing 4% damage, heal 2% damage, or does no damage at all when it hits after the silent doom effect is activate which means the attack can still reduce the countdown of doom by 20 seconds. In power, my attack can still capable of killing our foes that are physically weak in health when hit.
When the enemy doom countdown reaches to 0, their body will become motionless and will be down as helpless as a useless ragdoll. A second after they touch the ground, a death spirit takes the corpus to the top of the arena bypassing any and all objects, characters, and walls impervious to any attacks. The death spirit is already disposing the body, so we don't need to worry about the cleanup or any other distractions in some cases.
Grab up – element 2
After much study on our previous battles, we had came to acknowledge that its can to be our advantage to abuse any kind of tactic that doesn't tend to kill our enemies. Some of us have thought of a way to cast level 2 magic while the opponent is helpless in the air since, after all, our magic is so advance that we can cast level 2 magic just like a standard attack. So we modify our grappling technique to better practice this theory in a real battle.
After we toss our opponents upward above, we cast Fira, Blizzra, or Thundra (all level 2 magic) directly on the opponent just after the opponent is thrown. The physical damage and the magical damage will be infused into this one attack doing 12%-15% damage. Since it’s a level 2 magic spell, it might take a long while to kill our opponents...but from this experiment, we have a good use for our level 2 magic. The force of the spell will send our foes in different ways just like element 4.

Manead army
I'm feeling generous, so I might call a younger manead (CPU level 7) to back me up in battle. She only a rookie, but she's been trained to handle tough missions like I'm currently doing right now. She doesn't have a strong life as she only 75% of health on her.
Anytime if I should desire, I can focus my magic towards my younger self for her to warp 7 meters (7 stage blocks) in front of my position. We are then given the okay to activate our band attack that will sure to terminate anyone and anything in our way. However we Maenads follow three different attack strategies depending on their crystal weapons
Scimitar users - they focus on melee attacks, but they very weak on magic. Their weapons can reach 2 times farther than my dagger. The effects are more likely to take effect, but its time is reduced by half.
When we band together, we attack in a fury of attacks that can destroy anyone caught in our barrage of cross slashes that can destroy anyone at 38% doing 53% total damage.
Staff users - they focus on magic attacks, but their melee attacks are weak. Their weapon doesn’t inflict any effect damage, but when they use black magic or holy spells, their attack power and duration is doubled.
When we band together, we can a great flare which is many times greater than my flare. When the spell is cast, the area between us will explode capable of killing at 47% and can catch multiple opponents with ease doing 34% damage at that.
Small dagger users - Often sent on missions, they can fight just like me. Only difference is that their defense and attack power is low to moderate at best. They have a dagger similar to mine, but it’s shorter affecting their range as well.
When we band together, I will cast Blizzaga and she will cast Firaga at the same time. The combination of the two spells will petrify anyone whom is caught in the blast while doing 30% in the process. If there is anyone turned to stone after our attack, we then proceed to use our speed dagger attack together to finish off the job doing 30% damage. This band attack usually destroys anyone who is at their healthiest…usually around 16%
Now that I told you everything about myself and the Maenads, I suggest you leave us be to our mission.
What? You want to know about my mission and personality? Never had I encounter someone whom wishes to learn about me. Fine…

What? You want to know about my mission and personality? Never had I encounter someone whom wishes to learn about me. Fine…
My original mission was to scout the universe for my creator, but during the mission, a strange aura has surrounded me upon entering the brawl world and drained most of my ability to summon. As the original Maenad, my natural ability of magic was derived from the mage I was created after and the data provided from the crystal that gave birth to me. This also includes the ability to summon powerful monsters to my aid. These blue planet inhabitances called them "Eidolons". It might be a little irritating knowing that only I can summon these creatures, but as for the moment, the aura has separated me from my ability to summon most of them. Upon entering this world, the only Eidolon I have is Bahamut…the same eidolon whom I travel to this area at the time.
After some time looking around, I found a little round creature holding a green orb with a pink flame in the middle in a large mid-air temple. It would appear to throw the object into the air playfully until it was dropped into the ground. The orb shattered and a chocobo was summoned from the orb. The little creature ran away from the winged eidolon and the chocobo return into the green orb once again. Knowing the situation, I decided to take the orb and fuse it with my body regaining my ability to summon chocobo once again. However many more orbs are scattered around the world of brawl.
I will tell you the remaining eidolons that were lost from me. If you find a green orb, you should return it to me.
Shiva – This female being cast a spell called diamond dust which can freeze anyone in their place like statues. While frozen this way, the opponent even takes damage per second. I like this one because of her efficiency.
Raumh – this old man cast a spell called judgment bolt which cast a storm of thunder around the field and cast a fury of thunder on a random opponent. This one is useful because even after being struck by the thunder, there is a chance for the enemy to be stun randomly for several seconds.
Irift – this creature charges in the direction where I’m facing and cast hellfire behind his wake. The flames he leaves behind can greatly damage anyone. This creature is one of my most used for interrogations. It doesn’t kill, but does lots of damage to my victim
Titin – this oversize behemoth stomps on the ground and cast Gaia’s wrath. The entire environment will begin to shake capable of damaging anyone whom is standing on the ground at this time. I try to be cautions around him because his kill ratio is very random. Sometimes he would only trip the opponent when they are injured to the point of death, or his wrath would destroy the healthiest of mortals.
Odin – This warrior was supposed to be a former king of the blue planet. His allegiances are very questionable to say the least. Sometimes he would attack my enemies with ease or sometimes he would attack me. In any case, when he attacks, it usually kills anyone instantly…so I tend to not summon him in battle.
Asura – this beastly woman is the supposedly queen of these creatures. Her ability is random as many others, but allows her to either heal everyone by 30%, cast a protective shield around the user halving damage and knockback for 15 seconds, or bring back anyone who is out of action an extra stock which starts at 120% (if a stock match exist). I rarely use her in battle, but her abilities are something that should not be ignored.
Leviathan – This ocean serpent is the supposedly king of these creatures. His ability tidal wave is second only to Bahamut in pure power and efficiency. As it is a water base attack, it can be very effective on certain situations. This is the one summon that I wish to find most of all.

As you would guess, we Maenads prefer to be very aggressive in combat. Our attacks, combined with magic, are already known to us to be the perfect combination of offensive and defense combat. All of us Maenads have our unique fighting style, but it usually best for me to have more than one method of battling depending on my mood.
Aggressive/precision game – Resistances is futile, just accept your end so I can finish my mission.
Most of the time I would be very busy, so I have no time to play around with such annoying insects. My attacks overall are moderately fast in attack speed and recovery leaving a small margin of error against me if I should ever miss. However that is different if I were to ever run to someone who tends to flee at the sight of my presences. These pests cannot run away from me since my speed slash skill (side B) can aid me by traveling very fast enough to break the sound barrier in the air. I could also decide to cast flare (special B/hold) to make them come out of hiding, however I find it better to just go towards them very quickly and cautiously.
We tend to attack with precision to make the best of our effect attack to link each other to best dispose of our foes. I did recall one encounter which my opponent didn’t last for more than 8 seconds. When he was near the edge at 0%, I was able to get a clean hit on my opponent with my time dagger (air forward), halting the time around him. Then use poison dagger (air back) to poison him. Before the time around him return to normal, I hit him with my sleeping blade. The attack didn’t make him flinch since he was stopped in time, but as soon as he recovered; he was affected by the sleep aura and fell to sleep. I then use the speed dagger attack (side B) to knock him over the ledge in slow motion for a little while. During that, I cast element 4 (air down) and the Blizzaja spell spike him down to his death.
Spacing/counter game – Feeble minds are so easy to mess with.
In the case we need to space ourselves if our enemies are faster in speed or longer in range, our standard attacks isn’t going to cut out. In most cases, we have to protect ourselves by either spacing ourselves with my special attacks and aerial attack, or countering their attack with one of my own. To most of you, it would be a foolish way to stop an attack, but my magic would protect me from any physical harm. Let me give you an example from my most recent battle. I was able to send my foe off the cliff, but he would activate his recovery attack to get back up and to greatly harm me in the process. My choice is to use my protect dagger attack (natural A) to intercept. Sure I take the damage, but the protect shield around me did not make me flinch. The two blades exchanged between us and my opponent was staggering in the air near me. A tornado (up smash) would then finish the job.
Though most of our attacks are melee based and lacking range, we should not be cautions to use any attacks that can be most beneficial. Other than our holy/flare spell attack (special B), we can use our attacks to space ourselves as well as preventing anything unnecessary. When we go against someone whom uses a lot of projectiles, we usually approach our enemy with our shell shield (neutral air) to carefully approach our prey with little worry about any unnatural interference. Also this attack also hits when landing and have very little recovery frames after landing, so I usually get an extra hit on the way if it hits at the right position. Some cases I decided to space myself using the effect attacks. Like when I use time dagger (forward A), I rarely freeze my opponent by accident because they think they saw an opening. Or some times, my opponent would just run after my sleeping dagger attack (side A) after it missed…only to get caught in the sleeping aura afterward.
Playing/waiting game – I have my fun until I'm done.
Sometimes, we just want to play with our “toys” before we exterminate them. As we mentioned, we can declare their death by using our silent doom attack (back throw). After that, it’s all fun and games at that point. We could just chain grab the enemy by using our drain spell (down throw) until they cannot be chained anymore. However even though they can’t be grabbed like that anymore, we can just heal them. Our two attacks, cura blade (down tilt) and silent doom (back throw after activation) can heal our opponents until they are healthy again allowing us to chain grab them again and recover our damage as well. I would mention that it would speed up the doom countdown, but that won’t be fun to know.

When the time comes to investigate a person or to terminate someone, I shall arrive into the field near the target on Bahamut. I’m not leaving until my mission is complete or all pests are exterminated.
As you may have known, I found it funny to toy with our victims or in some cases, we maenads can't help but to taunt occasionally. I might question our victim ability to fight back. Usually I would ask "Are you done resisting?!" Or sometimes I would twirl my weapon rapidly to get a better feel of it before I make my next attack. In most cases, would create pure white magical energy and pure black magical energy and form together into a ball to simply play with. Well sometimes, it gets boring to fight such weak inferior beings. So I have to keep myself occupy. Most of the time I often toss it over our heads when we done playing with it. However there was an incident of which one of them accidently bounced into my victim and it exploded doing 1% damage in the process. That unlucky person launched very high considering that it was a very small ball. I found it very funny, but didn't consider using a bigger version of this ball in battle since then because it would consume a lot of my magic.
When I complete our mission, which has a 98% possibility rate, I may send a link to my creator telling him "Target capture", or warp out of the area leaving no trace of our presences or our actions. Sometimes I may summon a chocobo to hug. Actually, I personally find these winged creatures to be so cute. I just want to hug one for a while. Don't tell any other maenads about this or I will exterminate you instantly. I doubt that I may lose any mission that I'm given to, If that ever happen, I will refuse to accept my defeat and teleport out of the area to plan my next action to take revenge on those whom defeated me. To us maenads, failure is an embarrassment. To lose to inferior beings will not be tolerated on any level and must be exterminated using any and all means.
I'm impressed that you have a great attention span for an inferior race; however you now know too much about us that we may make you a possible target. I suggest that you leave before I change my mind.
MarthTrinity
Smash Lord
My MYmini entry for the week
Agi
Smash Lord
Democratic Experiment
Alright, let's get this started! To avoid any confusion, I'm going to explain things a bit. There are two voting "booths," if you will, and you can vote up to five times in each. The first one, the public one, is on its own separate article on the Stadium, which can be found here. It's a Polldaddy poll. Due to the nature of Polldaddy, it's probably going to get heavily vandalized with troll votes. As such, the Polldaddy will not count towards the final results.
The second booth consists of the Private Messages sent to me, agidius. Not MT or KRool as it has been for past contests' voting. All votes are strictly confidential, and all votes will be counted. The results from this booth will determine the winners. You are only eligible to vote if you have accumulated points in Smady's User Rankings this contest. For convenience's sake, if you are on the list of candidates, you are on the list of voters.
The second booth consists of the Private Messages sent to me, agidius. Not MT or KRool as it has been for past contests' voting. All votes are strictly confidential, and all votes will be counted. The results from this booth will determine the winners. You are only eligible to vote if you have accumulated points in Smady's User Rankings this contest. For convenience's sake, if you are on the list of candidates, you are on the list of voters.
Voting begins NOW, and ends next Sunday, the 4th of September.
Candidates (Choose five)
BKupa666
Barbasol
BlackFox
Chaos Swordsman
Chris Lionheart
Dark Paladin X
Darkslash
Darth Meanie
Daviddreamcatcha
flyinfilipino
ForwardArrow
Gcubedude
Getocoolaid
half_silver28
Hyper_Ridley
JOE!
Junahu
Katapultar
KingK.Rool
kitsuneko345
KoJ
koolerkid
Koric
LegendofLink
LordVaati
majora_787
MarthTrinity
MasterWarlord
Monkey D. Awesome
n88_2004
Nicholas1024
phatcat203
Pikmin3000
Pizzamasta
Plorf
SirKibble
smashbot226
SmashDaddy
Sonic the Baron
TWILTHERO
Tanookie
Tirkaro
UserShadow7989
vVv Rapture
Zook
Zook
Perpetual Lazy Bum
GIGAN

INTRO
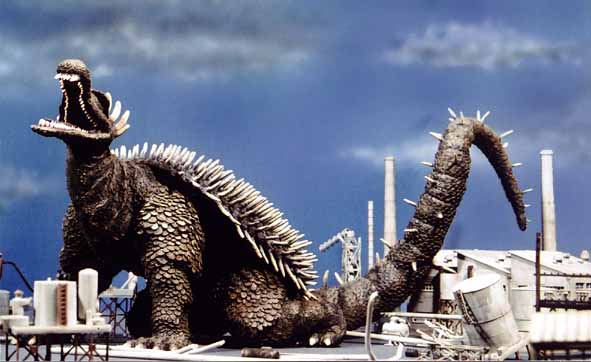
Gigan is a monster from the Godzilla universe. Depicted as a giant bird-insect-reptile-robot, he is depicted as a cruel, violent, alien cyborg (and occasionally as Mothra's arch nemesis), and was the first Godzilla villain to make the big grey guy bleed. Though his hooks are more prominent, his main weapon is actually a buzzsaw located in his abdominal region (shown in the above picture as a row of spikes). This saw is made of a rare alien alloy that is super durable and strong enough to cut through almost any material. He has also been seen to use hidden shuriken-like blades located in his shoulders, grappling hooks in his claws, and a laser that blows up after traveling a short distance, shooting out a cluster of smaller lasers.
In Brawl, Gigan is a brutal and sadistic opponent, using his saw to constantly chip away at his victims before finishing them off.
Size: 9/10
Weight: 7/10
Ground Speed: 8/10
Traction: 10/10
Air Speed: 7/10
Fall Speed: 5/10
Glide: Yes
Glide attack: Yes
Crawl: No
Wall Cling: No
Gigan is a large and heavy character, but definately feels a bit lighter than he should. He's comfortable both in the air and on the ground, and falls at a pretty average rate. He also has a glide and glide attack.
MOVESET
SPECIALS
Neutral Special: BUZZSAW
Gigan starts his signature attack by pushing out his torso a little bit, pulling his arms and head back as his saw begins spinning viciously. The saw has very high priority and generates a hitbox every .1 seconds, and each hit deals 1% and basically no knockback; opponents can DI out of it, though. After 1.5 seconds have passed, the attack deals low horizontal knockback. His saw begins spinning as soon as you tap the Special button, and Gigan can cancel this attack at any time by letting go of the special button; however, it takes a while for the saw to recharge, and cannot be used again for a quarter second, preventing Gigan from chaining multiple Buzzsaws together one after another.
By sheilding after using this attack for 1.5 seconds, Gigan can store the attack. The next time he uses this move, it deals an impressive 17% and strong horizontal knockback on the very first hitbox before becoming a normal attack, KOing at around 150%.
Up Special: ANTI-GRAVITY BOOST
Snapping his wings wider, Gigan shoots upwards 1.5 body lengths. On his way up, his entire body does 6% and weak knockback. Once he reaches the top of his ascent, he goes into his glide at full speed. This is obviously Gigan's best option for recovery, and can also be used to move swiftly across the battlefield.
Side Special: GRAPPLING CLAWS
Pointing a hook forward, Gigan shoots a small claw on a tether, which travels 3 SBBs before retracting back into his claw. The claw can be aimed at either a 90 degree, 45 degree, or 0 degree angle in front of him on the ground, and a 90 degree, 45 degree, 0 degree, 315 degree, or 270 degree angle in the air. On its way to its destination, the claw deals 5% and weak upwards knockback to opponents. In its very last few frames, though, the claw deals 10% and set knockback towards Gigan, placing them directly in front of him. Even if the opponent is shielding, they are still dragged towards Gigan!
Though tricky to land, this is one of Gigan's most valuable techniques, and opens up plenty of options for him.
Down Special: RAZOR DISC
In each of Gigan's shoulders is a small, razor-sharp disc, which he can use as projectiles. Upon using this move, the discs are shot out one after the other, and travel 4 SBBs before losing their velocity and falling back to Earth. Each disc deals 5% and medium knockback towards Gigan; they also bypass all super armor and deal a large amount of damage to shields.
Gigan can not use this attack again until he either picks up both discs, or both discs vanish (either by being thrown off the stage, disappearing after 15 seconds, being eaten, or anything else that destroys items).
GRAB GAME
Gigan launches his grappling hooks forward 2 SBBs, in a similar fashion to his side special; this time, however, his hooks latch onto his victim and don't let go. Once Gigan has hit a character with his grab, they are on a leash of sorts; they can't willingly move beyond that radius of 2 SBBs from Gigan, but they can otherwise attack normally. However, if they move any closer to Gigan, the tether's radius decreases to however far they are from him, like one of those dog leashes. By using his side special, Gigan can rip his hooks out of his victim, inflicting 5% and making them flinch; otherwise, it ends after 10 seconds.
If Gigan or his grabbed foe receive knockback that would knock either of them out of the grab's radius, both characters receive half of that knockback, and the grab ends.
GROUND ATTACKS
Jab: WILD SLASH
Gigan flails his hooks in front of him wildly, cackling in his twisted voice. The move comes out almost instantaneously, and lasts for .25 second. In this time, Gigan swings his hooks 4 times, dealing 2% per hit. The very last slash has very weak knockback. This move is a very good combo move, and can be thrown into most ground combos to slap on a little extra %. It is possible to DI out of this attack, though, if the foe is at a high % or if hit with the tip of the attack, so be careful.
Dash Attack: BERSERKER BARRAGE
Gigan swings his hooks in front of him in great arcs, letting the momentum carry him forward. He makes 6 slashes over the course of 3/4 a second, traveling half the length of Final Destination in the process. Each slash deals 2% and weak backwards knockback, making it easy to catch opponents in the initial few hits and carry them along for a decent bit of damage. Even better, Gigan has slight super armor for the duration of the move, allowing him to plow through projectiles with ease! However, each slash has low priority compared to other melee attacks, so don't get too reckless with this one.
Forward Tilt: REAP
Gigan leans forward and swings a claw out in front of him. Opponents hit with this attack receive 6% and moderate, largely horizontal knockback. By tapping the attack button quickly afterwards, Gigan lunges forward 2 body lengths and brings up his other hook in a vicious ark, swinging it above and infront of him. This secondary attack inflicts 8% and moderately strong upwards knockback. This is a pretty useful move, as it can end combos, set up the opponent to be Grappling Hooked (at low percentages, and even then, the timing can be tricky), give Gigan some breathing room, and chase opponents whole roll away from the initial attack. The secondary hit has quite a bit of endlag, though, so be wary.
Up Tilt: STING
Putting that wicked tail to use, Gigan bends over and makes a stab with his stinger. His tail extends quite a bit during this motion, stretching out to 1.5 SBBs. The length of his tail deals 6% and weak upwards knockback. The very tip of his trident-like stinger, though, inflicts 9% and pretty strong knockback towards Gigan. Also, opponents behind him will be hit by his tail as he brings it up, recieving 6% and average upwards knockback. This attack has a tiny bit of startup lag, and a tiny bit more end lag.
Down Tilt: ACHILLES'S SLASH
Gigan makes a swift ankle swipe in an attempt to knock his foes off their feet, and at the same time jumps back 2 full body lengths. Opponents hit by this move take 6% and no knockback; however, there is a 50% chance that they will be tripped. This move is a good combo finisher, as it gives Gigan enough room to get readt for another combo (and hopefully get ready for a tech chase).
Forward Smash: LASER
Screeching to a halt, Gigan leans forwards as a red-hot laser shoots out from his eye. The laser travels 4 SBBs before bursting into 4 mini lasers, which fan out at a 90 degree angle. The amount of damage a foe takes from this move depends on what point of the laser they come in contact with. Within 1 SBB of Gigan, they receive 9% and medium upwards knockback; 3-2 SBBs, 7% and weak backwards knockback; 4 SBBs, 3% and flinch; very tip of the main laser, 12% and strong knockback towards Gigan; mini laser, 2% and no knockback/flinch.
The laser happens very quickly and travels very fast, but the cooldown is long enough that you can't effectively spam this attack.
Up Smash: SKYWARD LASER
With a screech, Gigan turns towards the screen, looks up, and lets loose a bright red laser. This laser traveles a very short distance (about as far as a capsule is tall) before exploding into 7 mini lasers which fan out above him. These mini lasers travel 1.5 SBBs upwards, spread out equally between 11 o'clock and 1 o'clock, before fading away and deal 4% each and weak downwards knockback, while the main laser inflicts 15% and strong knockback straight upwards.
Down Smash: TAIL THRASH
Gigan looks over his shoulder and begins to flail his long tail about wildly, hitting an area as long as a SBB and as tall as Kirby. Any opponent hit by this attack takes a mere 4% and weak knockback, but it also turns Gigan around as soon as he hits someone.
AERIAL ATTACKS
Glide Attack: FLY-BY SAW
With that horrible screeching noise, Gigan's saw starts up mid-flight, generating a hitbox along the underside of his torso. Unlike most gilde attacks, this one can be held down and released at will, and does not cancel his glide (rather, the special button cancels it). The saw deals 1 hit every .1 second, and 1% per hit, and has excellent priority. This attack is capable of inflicting massive damage to opponents unlucky (or foolish) enough to be caught in it; however, as Gigan's glide is quite fast and has to hold back to end it, unwise use of this move could result in Gigan self-destructing.
Nair: DOUBLE KICK
Putting those sharp feet to use, Gigan makes a one-two kick in front of and beneath him. Each kick deals 5%, and the second hit is a weak spike.
Fair: STING
Gigan thrusts his tail in front of him at a slightly downward angle. The length of his tail deals 7% and weak knockback, while the stinger on the tip does 13% and is a light meteor smash. The length and speed of this attack makes it useful for short hopping Fairs as an approach, but the sweetspot is in a rather awkward place, making it difficult to sucessfully meteor smash foes.
Bair: VICIOUS SLASH
Gigan twists his body a bit, outstretching his claws; then, after a breif charge, he swings his hooks viciously behind him. Although it suffers from a sizable amount of startup lag, this attack deals 14% and strong horizontal knockback, KOing at 160%, making it one of Gigan's better kill moves.
Uair: SLASHSLASHSLASH
Gigan looks upwards and hisses while he slashes his hooks above him frantically. He makes a total of 3 swipes in a row, with each hit doing 4% and the final one has moderate upwards knockback. Gigan really stretches his arms out for this one, giving it excellent range above him and covering the area directly above him; however, it does not hit at all below his head.
Dair: SWAN DIVE
Assuming a swan dive pose, Gigan gets that saw a'spinnin'. The attack generates 14 hits over the course of .75 second, each hit dealing 1%. It has high priority, just like all of his other saw attacks.
FINAL SMASH: FINAL WARS
WARNING: THE FOLLOWING COLLAPSE CONTAINS PICTURES
PLAYSTYLE
SUMMARY
With several attacks that deal a large amount of damage up close, Gigan wants to make it so his victims can't get away from him. Rather than using his own speed and mobility, though, Gigan prefers to use his ranged attacks to reel them in, creating a pit like an ant lion opponents can't escape from. Gigan's battle plan is a fairly simple one:
1. GET YOUR VICTIM CLOSE TO YOU.
Gigan has a lot of moves that drag his opponents towards him and/or prevent them from getting away, such as his side and down special, parts of his forward smash, and his grab, and if those fail, you always have that dash attack and up special.
Imagine a bubble around Gigan, 3 SBBs wide and 2 SBBs tall, and a smaller bubble inside of that which is 1 SBB wide. The edge of the big bubble and the inner bubble is red, and the area between that bubble and the out edge is blue. The red area is Gigan's happy zone; while the opponent is in one of these areas, Gigan has plenty of opportunity to use his most powerful attacks. While on the outer edge, Gigan can use his side special to pull his foes towards him, setting them up to get buzzsaw'd and generally combo'd. The blue area is Gigan's sad zone; his opponent is too far away to get sawed, but too close to be hit by most of his sweet spots. Always try to keep your opponent in one of your happy places.
2. CHOP UP YOUR VICTIM WITH YOUR SAW.
All of Gigan's saw moves are extremely fast, coming out pretty much as soon as you input them, have a ton of priorty, and tack on damage pretty quickly. You want to use his saw as often as possible. Spam it.
3. DON'T LET YOUR GUARD DOWN, DON'T LET YOUR VICTIM ESCAPE.
Gigan is vulnerable from behind and above him, and his victim manages to roll behind him or get above him, he's in a bit of trouble. Gigan should always make sure he has complete control over a melee fight, and if he doesn't, he should get out of there ASAP. If you're unsure about what an opponent will do after you finish a combo, use your down tilt to give yourself some breathing room and prepare to draw them in close again.
Gigan also has a few attacks that can be used as predictions to counter foes. His Uair can be thrown out in anticipation of aerial assaults, as its wide range is likely to hit them if they get above you. His down smash is also useful if you predict your opponent will roll behind you, changing an place you really don't want Gigan to an opportunity to use your saw.
COUNTERING GIGAN
As a character who likes to fight up close, projectiles present a challenge to Gigan. While you can power your way through most projectiles with your dash attack, some are simply too powerful and/or slap on an effect Gigan would rather not have. Gliding is generally a better option to deal with projectile spammers, as Gigan is a fast flier and tricky to hit in the air. His glide attack also eats up some weaker projectiles.
Aerial fighters are also a huge pain for Gigan, as his own aerial moves generally concentrate on hitting opponents that are at or below his own level. He pretty much needs to use his side special to bring them down to his level.
Characters with a large amount of super armor piss Gigan off, as they tend to just trudge through his saws and hit him out of it. Worse still, Gigan can't use his grab to set up combos, unlike most characters.
Extremely mobile/small characters are even more difficult to deal with. Gigan's sweet spots are pretty small, and characters that are able to predict where they will appear and outmaneuver Gigan will pretty much wreck him.
INTRO
Gigan is a monster from the Godzilla universe. Depicted as a giant bird-insect-reptile-robot, he is depicted as a cruel, violent, alien cyborg (and occasionally as Mothra's arch nemesis), and was the first Godzilla villain to make the big grey guy bleed. Though his hooks are more prominent, his main weapon is actually a buzzsaw located in his abdominal region (shown in the above picture as a row of spikes). This saw is made of a rare alien alloy that is super durable and strong enough to cut through almost any material. He has also been seen to use hidden shuriken-like blades located in his shoulders, grappling hooks in his claws, and a laser that blows up after traveling a short distance, shooting out a cluster of smaller lasers.
In Brawl, Gigan is a brutal and sadistic opponent, using his saw to constantly chip away at his victims before finishing them off.
STATS
Size: 9/10
Weight: 7/10
Ground Speed: 8/10
Traction: 10/10
Air Speed: 7/10
Fall Speed: 5/10
Glide: Yes
Glide attack: Yes
Crawl: No
Wall Cling: No
Gigan is a large and heavy character, but definately feels a bit lighter than he should. He's comfortable both in the air and on the ground, and falls at a pretty average rate. He also has a glide and glide attack.
MOVESET
SPECIALS
Neutral Special: BUZZSAW
Gigan starts his signature attack by pushing out his torso a little bit, pulling his arms and head back as his saw begins spinning viciously. The saw has very high priority and generates a hitbox every .1 seconds, and each hit deals 1% and basically no knockback; opponents can DI out of it, though. After 1.5 seconds have passed, the attack deals low horizontal knockback. His saw begins spinning as soon as you tap the Special button, and Gigan can cancel this attack at any time by letting go of the special button; however, it takes a while for the saw to recharge, and cannot be used again for a quarter second, preventing Gigan from chaining multiple Buzzsaws together one after another.
By sheilding after using this attack for 1.5 seconds, Gigan can store the attack. The next time he uses this move, it deals an impressive 17% and strong horizontal knockback on the very first hitbox before becoming a normal attack, KOing at around 150%.
Up Special: ANTI-GRAVITY BOOST
Snapping his wings wider, Gigan shoots upwards 1.5 body lengths. On his way up, his entire body does 6% and weak knockback. Once he reaches the top of his ascent, he goes into his glide at full speed. This is obviously Gigan's best option for recovery, and can also be used to move swiftly across the battlefield.
Side Special: GRAPPLING CLAWS
Pointing a hook forward, Gigan shoots a small claw on a tether, which travels 3 SBBs before retracting back into his claw. The claw can be aimed at either a 90 degree, 45 degree, or 0 degree angle in front of him on the ground, and a 90 degree, 45 degree, 0 degree, 315 degree, or 270 degree angle in the air. On its way to its destination, the claw deals 5% and weak upwards knockback to opponents. In its very last few frames, though, the claw deals 10% and set knockback towards Gigan, placing them directly in front of him. Even if the opponent is shielding, they are still dragged towards Gigan!
Though tricky to land, this is one of Gigan's most valuable techniques, and opens up plenty of options for him.
Down Special: RAZOR DISC
In each of Gigan's shoulders is a small, razor-sharp disc, which he can use as projectiles. Upon using this move, the discs are shot out one after the other, and travel 4 SBBs before losing their velocity and falling back to Earth. Each disc deals 5% and medium knockback towards Gigan; they also bypass all super armor and deal a large amount of damage to shields.
Gigan can not use this attack again until he either picks up both discs, or both discs vanish (either by being thrown off the stage, disappearing after 15 seconds, being eaten, or anything else that destroys items).
GRAB GAME
Gigan launches his grappling hooks forward 2 SBBs, in a similar fashion to his side special; this time, however, his hooks latch onto his victim and don't let go. Once Gigan has hit a character with his grab, they are on a leash of sorts; they can't willingly move beyond that radius of 2 SBBs from Gigan, but they can otherwise attack normally. However, if they move any closer to Gigan, the tether's radius decreases to however far they are from him, like one of those dog leashes. By using his side special, Gigan can rip his hooks out of his victim, inflicting 5% and making them flinch; otherwise, it ends after 10 seconds.
If Gigan or his grabbed foe receive knockback that would knock either of them out of the grab's radius, both characters receive half of that knockback, and the grab ends.
GROUND ATTACKS
Jab: WILD SLASH
Gigan flails his hooks in front of him wildly, cackling in his twisted voice. The move comes out almost instantaneously, and lasts for .25 second. In this time, Gigan swings his hooks 4 times, dealing 2% per hit. The very last slash has very weak knockback. This move is a very good combo move, and can be thrown into most ground combos to slap on a little extra %. It is possible to DI out of this attack, though, if the foe is at a high % or if hit with the tip of the attack, so be careful.
Dash Attack: BERSERKER BARRAGE
Gigan swings his hooks in front of him in great arcs, letting the momentum carry him forward. He makes 6 slashes over the course of 3/4 a second, traveling half the length of Final Destination in the process. Each slash deals 2% and weak backwards knockback, making it easy to catch opponents in the initial few hits and carry them along for a decent bit of damage. Even better, Gigan has slight super armor for the duration of the move, allowing him to plow through projectiles with ease! However, each slash has low priority compared to other melee attacks, so don't get too reckless with this one.
Forward Tilt: REAP
Gigan leans forward and swings a claw out in front of him. Opponents hit with this attack receive 6% and moderate, largely horizontal knockback. By tapping the attack button quickly afterwards, Gigan lunges forward 2 body lengths and brings up his other hook in a vicious ark, swinging it above and infront of him. This secondary attack inflicts 8% and moderately strong upwards knockback. This is a pretty useful move, as it can end combos, set up the opponent to be Grappling Hooked (at low percentages, and even then, the timing can be tricky), give Gigan some breathing room, and chase opponents whole roll away from the initial attack. The secondary hit has quite a bit of endlag, though, so be wary.
Up Tilt: STING
Putting that wicked tail to use, Gigan bends over and makes a stab with his stinger. His tail extends quite a bit during this motion, stretching out to 1.5 SBBs. The length of his tail deals 6% and weak upwards knockback. The very tip of his trident-like stinger, though, inflicts 9% and pretty strong knockback towards Gigan. Also, opponents behind him will be hit by his tail as he brings it up, recieving 6% and average upwards knockback. This attack has a tiny bit of startup lag, and a tiny bit more end lag.
Down Tilt: ACHILLES'S SLASH
Gigan makes a swift ankle swipe in an attempt to knock his foes off their feet, and at the same time jumps back 2 full body lengths. Opponents hit by this move take 6% and no knockback; however, there is a 50% chance that they will be tripped. This move is a good combo finisher, as it gives Gigan enough room to get readt for another combo (and hopefully get ready for a tech chase).
Forward Smash: LASER
Screeching to a halt, Gigan leans forwards as a red-hot laser shoots out from his eye. The laser travels 4 SBBs before bursting into 4 mini lasers, which fan out at a 90 degree angle. The amount of damage a foe takes from this move depends on what point of the laser they come in contact with. Within 1 SBB of Gigan, they receive 9% and medium upwards knockback; 3-2 SBBs, 7% and weak backwards knockback; 4 SBBs, 3% and flinch; very tip of the main laser, 12% and strong knockback towards Gigan; mini laser, 2% and no knockback/flinch.
The laser happens very quickly and travels very fast, but the cooldown is long enough that you can't effectively spam this attack.
Up Smash: SKYWARD LASER
With a screech, Gigan turns towards the screen, looks up, and lets loose a bright red laser. This laser traveles a very short distance (about as far as a capsule is tall) before exploding into 7 mini lasers which fan out above him. These mini lasers travel 1.5 SBBs upwards, spread out equally between 11 o'clock and 1 o'clock, before fading away and deal 4% each and weak downwards knockback, while the main laser inflicts 15% and strong knockback straight upwards.
Down Smash: TAIL THRASH
Gigan looks over his shoulder and begins to flail his long tail about wildly, hitting an area as long as a SBB and as tall as Kirby. Any opponent hit by this attack takes a mere 4% and weak knockback, but it also turns Gigan around as soon as he hits someone.
AERIAL ATTACKS
Glide Attack: FLY-BY SAW
With that horrible screeching noise, Gigan's saw starts up mid-flight, generating a hitbox along the underside of his torso. Unlike most gilde attacks, this one can be held down and released at will, and does not cancel his glide (rather, the special button cancels it). The saw deals 1 hit every .1 second, and 1% per hit, and has excellent priority. This attack is capable of inflicting massive damage to opponents unlucky (or foolish) enough to be caught in it; however, as Gigan's glide is quite fast and has to hold back to end it, unwise use of this move could result in Gigan self-destructing.
Nair: DOUBLE KICK
Putting those sharp feet to use, Gigan makes a one-two kick in front of and beneath him. Each kick deals 5%, and the second hit is a weak spike.
Fair: STING
Gigan thrusts his tail in front of him at a slightly downward angle. The length of his tail deals 7% and weak knockback, while the stinger on the tip does 13% and is a light meteor smash. The length and speed of this attack makes it useful for short hopping Fairs as an approach, but the sweetspot is in a rather awkward place, making it difficult to sucessfully meteor smash foes.
Bair: VICIOUS SLASH
Gigan twists his body a bit, outstretching his claws; then, after a breif charge, he swings his hooks viciously behind him. Although it suffers from a sizable amount of startup lag, this attack deals 14% and strong horizontal knockback, KOing at 160%, making it one of Gigan's better kill moves.
Uair: SLASHSLASHSLASH
Gigan looks upwards and hisses while he slashes his hooks above him frantically. He makes a total of 3 swipes in a row, with each hit doing 4% and the final one has moderate upwards knockback. Gigan really stretches his arms out for this one, giving it excellent range above him and covering the area directly above him; however, it does not hit at all below his head.
Dair: SWAN DIVE
Assuming a swan dive pose, Gigan gets that saw a'spinnin'. The attack generates 14 hits over the course of .75 second, each hit dealing 1%. It has high priority, just like all of his other saw attacks.
FINAL SMASH: FINAL WARS
WARNING: THE FOLLOWING COLLAPSE CONTAINS PICTURES
After letting out a battle cry, Gigan shoots forwards until he comes in contact with an opponent (or reaches the edge of the stage). If he manages to hit, one, he gives them a shoulder check, sending them soaring into the sky. Suddenly...

Rodan swoops down and chatches them in his claws! He flies away with them, pecking them with his vicious beak, and drops them to their death.
...Or so they think! All of a sudden---
Anguirus bursts out of the gound! He rolls up into a ball and rolls over the opponent 18 times, before picking them up with his mouth and hurling them into the horizon.

Luckily King Cesar is just hanging around over the horizon, and round house kicks them into outer space.

...Where they meet Space Godzilla who lasers them back to Earth.

Thankfully, the force of the opponent's impact into Zilla's skull is so hard it removes him from history.
After Zilla is erased from existance the opponent falls back to the stage as if meteor'd from the very top of the blast zone, taking 100% and being stunned as if their sheild was broken.
Rodan swoops down and chatches them in his claws! He flies away with them, pecking them with his vicious beak, and drops them to their death.
...Or so they think! All of a sudden---
Anguirus bursts out of the gound! He rolls up into a ball and rolls over the opponent 18 times, before picking them up with his mouth and hurling them into the horizon.
Luckily King Cesar is just hanging around over the horizon, and round house kicks them into outer space.
...Where they meet Space Godzilla who lasers them back to Earth.
Thankfully, the force of the opponent's impact into Zilla's skull is so hard it removes him from history.
After Zilla is erased from existance the opponent falls back to the stage as if meteor'd from the very top of the blast zone, taking 100% and being stunned as if their sheild was broken.
PLAYSTYLE
SUMMARY
With several attacks that deal a large amount of damage up close, Gigan wants to make it so his victims can't get away from him. Rather than using his own speed and mobility, though, Gigan prefers to use his ranged attacks to reel them in, creating a pit like an ant lion opponents can't escape from. Gigan's battle plan is a fairly simple one:
1. GET YOUR VICTIM CLOSE TO YOU.
Gigan has a lot of moves that drag his opponents towards him and/or prevent them from getting away, such as his side and down special, parts of his forward smash, and his grab, and if those fail, you always have that dash attack and up special.
Imagine a bubble around Gigan, 3 SBBs wide and 2 SBBs tall, and a smaller bubble inside of that which is 1 SBB wide. The edge of the big bubble and the inner bubble is red, and the area between that bubble and the out edge is blue. The red area is Gigan's happy zone; while the opponent is in one of these areas, Gigan has plenty of opportunity to use his most powerful attacks. While on the outer edge, Gigan can use his side special to pull his foes towards him, setting them up to get buzzsaw'd and generally combo'd. The blue area is Gigan's sad zone; his opponent is too far away to get sawed, but too close to be hit by most of his sweet spots. Always try to keep your opponent in one of your happy places.
2. CHOP UP YOUR VICTIM WITH YOUR SAW.
All of Gigan's saw moves are extremely fast, coming out pretty much as soon as you input them, have a ton of priorty, and tack on damage pretty quickly. You want to use his saw as often as possible. Spam it.
3. DON'T LET YOUR GUARD DOWN, DON'T LET YOUR VICTIM ESCAPE.
Gigan is vulnerable from behind and above him, and his victim manages to roll behind him or get above him, he's in a bit of trouble. Gigan should always make sure he has complete control over a melee fight, and if he doesn't, he should get out of there ASAP. If you're unsure about what an opponent will do after you finish a combo, use your down tilt to give yourself some breathing room and prepare to draw them in close again.
Gigan also has a few attacks that can be used as predictions to counter foes. His Uair can be thrown out in anticipation of aerial assaults, as its wide range is likely to hit them if they get above you. His down smash is also useful if you predict your opponent will roll behind you, changing an place you really don't want Gigan to an opportunity to use your saw.
COUNTERING GIGAN
As a character who likes to fight up close, projectiles present a challenge to Gigan. While you can power your way through most projectiles with your dash attack, some are simply too powerful and/or slap on an effect Gigan would rather not have. Gliding is generally a better option to deal with projectile spammers, as Gigan is a fast flier and tricky to hit in the air. His glide attack also eats up some weaker projectiles.
Aerial fighters are also a huge pain for Gigan, as his own aerial moves generally concentrate on hitting opponents that are at or below his own level. He pretty much needs to use his side special to bring them down to his level.
Characters with a large amount of super armor piss Gigan off, as they tend to just trudge through his saws and hit him out of it. Worse still, Gigan can't use his grab to set up combos, unlike most characters.
Extremely mobile/small characters are even more difficult to deal with. Gigan's sweet spots are pretty small, and characters that are able to predict where they will appear and outmaneuver Gigan will pretty much wreck him.
KingK.Rool
Smash Lord
- Joined
- Nov 26, 2005
- Messages
- 1,810
I've commented Maenad and Mismagius in my comment zone, there. I'll try to get Gigan within the hour also. Damn, if I'm going to be looking at recent sets, this comment zone thing is a pretty terrible idea, isn't it? 
Zook
Perpetual Lazy Bum
MISMAGIUS
I walked into this set with low hopes, but left with a nice taste in my mouth. The whole invisibility/obscuring the screen thing has been done before, but it's usually just tacked without really adding anything. With Mismagius, though, we have a slow, mostly short-ranged power character that uses its screen obscuring to try to get its opponents to walk into her most powerful moves, which is a pretty fun idea, if you ask me. I love the concept. Even the filler moves are charming and fun, so bravo. I really liked this set. Do make more. :3
I walked into this set with low hopes, but left with a nice taste in my mouth. The whole invisibility/obscuring the screen thing has been done before, but it's usually just tacked without really adding anything. With Mismagius, though, we have a slow, mostly short-ranged power character that uses its screen obscuring to try to get its opponents to walk into her most powerful moves, which is a pretty fun idea, if you ask me. I love the concept. Even the filler moves are charming and fun, so bravo. I really liked this set. Do make more. :3
Hyper_Ridley
Smash Champion
Does anyone know a place where I can get those "characters" used in the rage comics? *shifty*
HollowKnight
Smash Rookie
Hyper_Ridley, I just looked up "rage comics" on Google and followed the first link, then used the "Rage Builder." I don't know if there is a better way.
Also, I appreciate the positive comments from Rool and Zook. Nice to know people like the set!
On a different note:
MYmini Entry:

Also, I appreciate the positive comments from Rool and Zook. Nice to know people like the set!
On a different note:
MYmini Entry:
GOOMBA
This is a half decent attempt at a Goomba set, but part of it does feel rather misguided. Having a pity Final Smash mechanic is certainly something we've never seen before, and has quite a bit of potential. However, while Goomba does a nice job of implementing his trademark squashing into the set, it feels strange that his playstyle has him intentionally becoming 'killed' to attain a Pity Final Smash. Why is a generic enemy aware of the reward that comes from getting killed, and why does he want to purposefully harm himself to attain it, rather than simply defending himself? The set itself is intentionally simplistic, with you cutting out the parachute props and not using his shoe and whatnot, to the point where it becomes quite harmful (the lack of aerials is inexcusable, because there's no reason Goomba should not have aerials, really). The set has a meager, charming feel, somewhat like the Goomba itself, but is not without flaws.
CONFAGRIGUS
Coming off of Hoppip's success, Confagrigus is a great follow-up, although I still prefer the former a touch. Confag is quite potent compared to other minion sets, considering his mummies can't be touched until they attack first. This gives them quite a long stay on stage, giving them plenty of time to work toward Confag's ultimate goal. Speaking of which, mummifying an opponent then countering them without their specials is an awesome concept, but I feel it boils down a bit too much to gimping for my sake, what with opponents losing their Up Specials. Either way, while his grabs feel quite overpowered, I enjoy his methods for positioning opponents, especially the additional string on mummified victims. While it's not the most in-character playstyle element ever in how it reflects on Confag's motivations, it's still a great take on increasing hurtbox size, and it definitely beats filler you could have used. Seal of approval from me, although not nearly on Hoppip's level, due to not delving into concepts as new.
flyinfilipino
Smash Master
We need another Poke-set
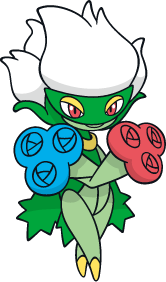
Roserade is a Grass/Poison type Pokemon from the 4th Generation. It evolves from Roselia via Shiny Stone, and is the final form of Budew. The flowers on its hands are beautiful, but they also conceal poisonous thorny whips that it wields with the graceful movements of a dancer.
Size---<@Medium
Roserade is about as tall as Mario.
Weight---<@Medium
She's about as heavy as Peach.
Run Speed---<@Fast
She runs about as fast as Pikachu.
Jump Height---<@Average
Her jumps are comparable in height to Sheik's.
Aerial Movement---<@Medium
She moves easily through the air and is a tad bit floaty.
Roserade can wall jump, but she does not wall cling, crawl, or glide.
Jab---<@Magical Leaf
Roserade performs a quick, diagonal slashing motion with one flowered hand, which deals 3% damage and quite low knockback, only enough to push the foe away slightly if it hits. At the same time, however, a multitude of small, glowing green leaves will be left hanging in midair following the trail of motion Roserade's hand took to strike the opponent. Immediately after the hitstun of the first hit wears off, the leaves will suddenly zoom in and hit the foe, flinching them several times and dealing 3% more damage. If you hold the A button (or continue mashing it), Roserade will continue to perform slashing motions with both hands, simultaneously conjuring leaves to home in on and batter the foe.
Forward Tilt---<@Thorny Spiral
Roserade points an arm forward as a thorny vine and a handful of petals emerge from her flowered hand. Then, she spins her arm in a tight circle, causing the vine to spin into a distinctive spiral. The vine reaches out about a Bowser-width in front of Roserade, and has a rather wide hitbox as well. Foe hit by this move are hit and flinched multiple times for a maximum of 9% damage before being knocked away horizontally with medium knockback. Additionally, this move will cause any flower petals on the ground nearby to be blown forward a good distance. This move is quick to start up, but has a bit of end lag.
Down Tilt---<@Lashing Vines
Roserade turns and faces the screen slightly as she swings both of her arms downward, releasing a thorny vine from each. The vines slam into the ground on either side of her, causing a few flower petals to pop up. Contact with the vines deals 8% damage and medium horizontal knockback. This move is a tad bit slower to start up than her Forward Tilt, but has less end lag.
Up Tilt---<@Malicious Snare
Roserade turns toward the screen slightly as she flings an arm across her body, extending a thorny vine into the air about a Ganondorf-height above and in front of her. Contact with a foe deals 6% damage and medium vertical knockback, unless you hit the foe in the air with the very tip of the vine. In that case, the vine latches on to the foe and Roserade slams them down into the ground for 8% damage. With good aim, you could also even do this next to the edge to spike a recovering foe. If you hold Up on the Control Stick and hit A again while the first vine is out, Roserade will do the same thing with her other arm and release a vine on her other side at the same time, so you've got both sides covered.
Dash Attack---<@Deadly Bloom
Roserade runs at the foe, then makes a leaping somersault, spinning head over heels in an straight path low to the ground, covering the distance of about 1.5 platforms. Any foes she comes into contact with are hit multiple times for a maximum of 8% damage, then knocked upwards slightly. In addition, any petals on the ground that Roserade passes over while somersaulting are kicked up and get carried along with her, to be dropped off at their new location once the move ends.
Forward Smash---<@Torture Vine
Roserade draws both of her arms back and extends thorny vines from each. Then, she slams both of them down above her head to the ground in front of her, causing some flower petals to pop up. The vines reach out a platform's length in front of her, and if a foe is hit by them, they will take 16% damage and high horizontal knockback that KOs at around 110%. You can also catch foes at the start of the move who are directly behind you for about half the damage and knockback (in the opposite direction, of course). If you hold down the A button, Roserade will leave her vines on the ground to act as a damaging floor, pricking foes' feet and flinching them while dealing 2% damage. If you're lucky and a foe spot-dodges this move (which they might, since there's a bit of start-up lag), you could rack up some good damage as they touch the vines multiple times. As soon as you let go of the A button, Roserade will snap her vines up and retract them, an action that deals 10% damage and above average upward knockback to an unlucky foe.
Down Smash---<@Prickly Storm
Roserade spins around gracefully for a bit while letting her vines and flower petals whirl around her. The vines form a cage-like hitbox around her that covers all sides and about a Bowser-width of horizontal distance. Foes can get hit multiple times by the attack for a maximum of 18% damage before being knocked away at a low horizontal angle with above average knockback that KOs at around 125%. There is some end lag, however.
Up Smash---<@Graceful Ascension
Roserade throws both her arms back one after the other while extending her thorny vines and releasing some flower petals. The vines take on a circular shape as she does so, and cover more distance above her than Down Smash. Contact with the vines deals 12% damage and above average upward knockback to foes. This is Roserade's fastest Smash Attack, but KOs later than the others, at around 140%.
Neutral Aerial---<@Painful Pirouette
Roserade spins around like a ballerina with her arms extended and moving, letting her vines and flower petals surround her in a wavy pattern. The hitbox isn't as wide as Down Smash, but this move is a quick and effective aerial repellent, dealing 7% damage and medium horizontal knockback.
Forward Aerial---<@Doom Spiral
Similarly to her Forward tilt, Roserade twirls a vine in a spiral in front of her - except she does it with both hands this time. This move deals a maximum of 14% damage in multiple hits before knocking foes away horizontally with medium knockback. This is a pretty effective approaching move, and like Forward Tilt, pushes any flower petals nearby in the air forward a bit.
Back Aerial---<@Stealth Vine
Roserade reaches upward with an arm as a vine slithers out and moves behind her. If there's a foe within a character width behind her, the vine will snag them and Roserade will fling them over her head and slam them down. If they hit the ground, they'll take 10% damage. If there's no ground below...well tough luck! They just got spiked. Since the vine reaches a good distance below and behind Roserade, you could even snag a grounded foe behind you and fling them to their doom if you are standing next to a ledge. Be careful though, because if you don't grab a foe, this attack doesn't really do anything and could leave you vulnerable.
Down Aerial---<@Sub-Rosa
Roserade points downwards at a 45 degree angle with both of her hands as a thorny vine and some flower petals shoot out from both of them. The vines come out very quickly and can reach a distance of up to nearly two Ganondorfs. Foes hit by this move take 7% damage and medium knockback. Roserade's fall speed slows down a good bit when you use this move, making it a tad spammable, despite the small amount of end lag.
Up Aerial---<@Blossoming Rose
Roserade points an arm straight up, just like for the Back Aerial, except instead of a vine, this time there's an explosion of flower petals instead. This move produces twice as many flower petals as most of Roserade's other moves. The hitbox is comparable to Ivysaur's Up Aerial, though not as strong, and it doesn't make Roserade move downwards. Foes caught in the burst of petals take 8% damage and above average upwards knockback. The petals then drift lazily towards the ground as usual.
Grab---<@Ensnaring Brambles
Naturally, Roserade has an extended grab similar to Link and the others; she reaches out with a thorny vine in an attempt to snag the foe and wrap them up. However, in the event that she misses the foe with her vine for whatever reason, you can immediately press the grab input again at any point to have her reach out with her other hand/vine, in a sort of "double-grab" (take that, spot-dodgers). And yes, her vine does also double as a tether recovery (although you can't input the grab twice in this case).
Pummel---<@Constrict
Roserade tightens the vines binding the foes body, and the prickly thorns do about 2% per hit. Average speed for a pummel.
Forward Throw---<@Arduous Vines
Roserade briefly releases the foe, then starts rapidly waving her arms up and down with her vines extended, which causes them to undulate in a wavy pattern not unlike soundwaves. The opponent is hit multiple times before Roserade snaps both vines at once, sending the foe flying horizontally with 10% damage and above average knockback.
For future reference, all of Roserade's throws release a handful of flower petals during execution.
Up Throw---<@Rose Ejection
With the foe still in the grasp of her vine, Roserade flicks her arm forward, causing the vine to move quickly in a high arc with the foe wrapped up at the end. You can control the distance that the vine moves by tilting or smashing the Control Stick forward as you see fit, though the foe can attempt to button mash out. The vine can reach a max distance of about half the main Battlefield platform. Once the foe reaches the end of the arc, they get released not too gracefully onto the ground, taking 10% damage in the process. Like with the Back Aerial, if there's not ground there, it'll result in a spike. Obviously, this is more useful on smaller stages where the edge is usually not too far away.
Back Throw---<@Masquerade Dance
Roserade pushes the wrapped-up foe forward a short distance, then leaps swiftly over their head and behind them. While in midair, she wraps the foe up with more vine. As soon as she lands a short distance behind the foe, she pulls back hard, causing the foe to spin around rapidly while being unwound from the vine. The foe takes 10% damage and then falls over in a prone position.
Down Throw---<@Punishing Rose
Roserade briefly releases her foe and runs up and kicks them while simultaneously somersaulting backwards into the air. As the foe stumbles to the ground, Roserade extends her whips and slams them onto the grounded foe from midair five times, causing petals to pop up with each hit. This throw does a total of 13% damage while leaving the foe in a prone position on the ground a short distance away.
Up Special---<@Petal Dance
So you may have noticed that almost all of Roserade's attacks make some mention of flower petals that appear and get left on the ground. Well, they're not just there to look pretty. When you use this move, Roserade starts spinning very rapidly in place, faster than she does in some of her other moves. After a brief moment, a whirlwind starts up that covers a distance of two Bowser-widths on either side of Roserade, and reaches as high up as the distance Marth's Dolphin Slash covers. Any flower petals on the ground get whipped up by this wind and start spinning around every which way like a tornado around Roserade. By default, this attack produces a handful (around 7) of petals to spin around, but depending on how many were on the ground to start with, this could add up to a total of any number of petals. Petals spinning around in this tornado do 4% damage to any foe upon contact and deliver low upward knockback. Once a petal hits a foe, it disappears. Roserade stops spinning after a second or two, but the tornado goes on for about a second after that, allowing you to take advantage of a foe hopefully caught up in it. Any petals that didn't hit a foe stop spinning and lazily drift back down to the stage. If you use this move in midair, Roserade will kick up any petals on the ground a short distance below her in addition to any petals floating around in the air in the vicinity. Also, this move acts as Roserade's vertical recovery, as the tornado will lift her up the distance of Mario's Super Jump Punch (you can move the Control Stick left or right slightly to cover some horizontal ground), though she will be left in helpless state afterwards.
Side Special---<@Aromatherapy
Roserade points one of her flowery hands ahead of her as a pink smoke begins to gradually emanate from within, along with some flower petals. You can hold B to allow the pink smoke to slowly waft forward in a stream, and you can let go at any time to allow the stream of smoke to break off from Roserade and begin traveling forward slowly on its own at Zelda's walk speed (once the stream reaches a length of half the main Battlefield platform, it breaks off on its own). Roserade can only release two streams of smoke at a time. The smoke is actually a concentrated version of the lovely aroma of Roserade's flowers, and it is irresistable to any foe. If a foe makes contact with the smoke while on the ground, they will stop what they're doing and begin to walk forward as slowly as possible and follow the stream of smoke, appearing to be in a pleasant trance. Once a stream of smoke makes contact with the foe, it will stop moving forward and hang in the air, and the foe will continue walking until they reach the end of it. During this time, you're free to do whatever; scatter petals, grab the foe, charge a Smash attack, grab a snack, etc. The foe can button mash to try to snap out of it, but it's twice as hard to escape from the aroma as it is to escape a grab. If a foe makes contact with the smoke in midair, as long as they're not already in the middle of an attack, they will become entranced by the smell and not be able to use any attack until they touch the ground.
Down Special---<@Kiss of Death
Roserade points a flower hand forward, and this time, several shorter thorny vines shoot out from it. These vines have the same range as Lucario's Force Palm attack, and if a foe is caught in them, they are pulled in close to Roserade. She draws the foe's face to hers and appears to kiss them, though this is covered up by Roserade's other flower hand. Once this occurs, Roserade pushes the foe away for 5% damage and weak knockback as a handful of flower petals bursts from her hand. However, instead of being pink like regular petals, these start out tinged a deep purple, but turn the regular pink once they hit the ground. Hmmm? The effects of these special petals aren't apparent until you use Petal Dance. If a foe comes into contact with the any of the petals that came from this move during a Petal Dance, they will take 10% damage and high vertical knockback. It seems Roserade was able to conjure up a specialized poison perfectly suited for the foe during their close encounter! Since these petals don't look any different from the other petals once they touch the ground, your foe might get a little paranoid trying to avoid being hit by petals of any sort.
Neutral Special---<@Assassin Rose
Roserade points a flower hand downward in front of herself as a thorny vine shoots from it and into the ground, appearing to channel the power of nature. A brief moment later, a thorny vine will shoot out from the ground in a burst of flower petals behind the foe and lash at them. It will always appear behind the foe, no matter which direction they're facing and is a Ganondorf-length long. If it makes contact with them, it will deal 9% damage and above average horizontal knockback. This attack is somewhat laggy, so only use it when the opponent is at a distance.
Final Smash---<@Black Garden
Roserade has grabbed the Smash Ball! When you activate her Final Smash, she draws her arms close to herself, then shoots forward as a massive amount of thorny vines erupts from both hands. The vines curl up and form a brambly mess the size of a full Smart Bomb explosion in front of Roserade. Any hapless foe that touches these vines gets sucked in to the brambles and is dealt a painful 30% damage before being shot out horizontally with very high knockback that's sure to KO.
Roserade plays differently from a lot of other characters. The mechanic that permeates her moveset is the petals that she produces by performing almost all of her moves. These litter the stage over the course of the fight and are ultimately used to rack up crazy damage from all over the place later on. But first, you've got to use your standard moves to make these petals in the first place. And while you could just stand there and mindlessly spam moves at nobody to produce plenty of petals, chances are you're going to be in the middle of a good fight, so you've got to be on the offesnive.
Roserade's standard moves all have good range and damage-racking combo ability. Her jab is effective and can lead to Forward Tilt, which is probably a move you'll be using a lot, not only to get foes off you and deal lots of damage but also to move petals on the ground to more opportune places. For example, if you find that you have too many petals concentrated in one area and not enough on another part of the stage, you can scoot them over if you want. Dash Attack is also good at putting petals where you want them while also doubling as a decent approach. Down Tilt is also effective at keeping you covered from all sides, and Up Tilt can punish foes who try to approach from the air in addition to starting combos. Roserade's Smashes are all solid KO moves and pretty self-explanatory. With all the damage-racking you'll be doing, these are sure to result in quick KOs. Her Aerial attacks are also solid. Forward Aerial fulfills the same purpose as Forward Tilt on the ground, and is also a good approach. Down Aerial is similar, and can pester foes on the ground. Back Aerial can be a surprise gimp for an inattentive opponent, and Up Aerial is useful for putting petals in places where they'll be useful.
Roserade also has powerful throws, and foes are going to want to keep away from you to avoid them. Up Throw is useful for putting foes where you want them to be, such as into an area with many petals or into a cloud of Aromatherapy. Down Throw leads into a a Down Aerial or two very well. Back Throw leaves the foe vulnerable to any number of things, such as Down Aerial, or Aromatherapy or Petal Dance, so it's quite versatile.
The Special Moves bring everything together. Once you've covered the stage in petals by attacking the foe, the fun can begin. Petal Dance, which starts out the match relatively useless, suddenly becomes a force to be reckoned with, as the foe will be hard-pressed to find a safe place to avoid being bombarded by petals. If you were able to pull off a couple of Kisses of Death, the match will become all the more chaotic, as the foe will have no idea which petals could lead to them being KO'd more easily. Aromatherapy can help you greatly by making the foe vulnerable to Kiss of Death, or even just grabs and or smashes. If you're able to produce large streams of smoke, you'll shrink the stage even further for your foe, forcing them into the air or having to find other ways around the smoke. And if your opponent gets too good at keeping away or camping, well, that's what Assassin Rose is for.
In conclusion, Roserade is a pretty in-your-face character. She's got good range and damage output, which only gets better as the fight goes on. She has the potential to control the stage well and put lots of pressure on the foe to keep away from her, which only helps her further. A good Roserade player will be able to overwhelm most any opponent.
@>---Roserade---<@
Roserade is a Grass/Poison type Pokemon from the 4th Generation. It evolves from Roselia via Shiny Stone, and is the final form of Budew. The flowers on its hands are beautiful, but they also conceal poisonous thorny whips that it wields with the graceful movements of a dancer.
@>---Stats---<@
Size---<@Medium
Roserade is about as tall as Mario.
Weight---<@Medium
She's about as heavy as Peach.
Run Speed---<@Fast
She runs about as fast as Pikachu.
Jump Height---<@Average
Her jumps are comparable in height to Sheik's.
Aerial Movement---<@Medium
She moves easily through the air and is a tad bit floaty.
Roserade can wall jump, but she does not wall cling, crawl, or glide.
@>---Standard Attacks---<@
Jab---<@Magical Leaf
Roserade performs a quick, diagonal slashing motion with one flowered hand, which deals 3% damage and quite low knockback, only enough to push the foe away slightly if it hits. At the same time, however, a multitude of small, glowing green leaves will be left hanging in midair following the trail of motion Roserade's hand took to strike the opponent. Immediately after the hitstun of the first hit wears off, the leaves will suddenly zoom in and hit the foe, flinching them several times and dealing 3% more damage. If you hold the A button (or continue mashing it), Roserade will continue to perform slashing motions with both hands, simultaneously conjuring leaves to home in on and batter the foe.
Forward Tilt---<@Thorny Spiral
Roserade points an arm forward as a thorny vine and a handful of petals emerge from her flowered hand. Then, she spins her arm in a tight circle, causing the vine to spin into a distinctive spiral. The vine reaches out about a Bowser-width in front of Roserade, and has a rather wide hitbox as well. Foe hit by this move are hit and flinched multiple times for a maximum of 9% damage before being knocked away horizontally with medium knockback. Additionally, this move will cause any flower petals on the ground nearby to be blown forward a good distance. This move is quick to start up, but has a bit of end lag.
Down Tilt---<@Lashing Vines
Roserade turns and faces the screen slightly as she swings both of her arms downward, releasing a thorny vine from each. The vines slam into the ground on either side of her, causing a few flower petals to pop up. Contact with the vines deals 8% damage and medium horizontal knockback. This move is a tad bit slower to start up than her Forward Tilt, but has less end lag.
Up Tilt---<@Malicious Snare
Roserade turns toward the screen slightly as she flings an arm across her body, extending a thorny vine into the air about a Ganondorf-height above and in front of her. Contact with a foe deals 6% damage and medium vertical knockback, unless you hit the foe in the air with the very tip of the vine. In that case, the vine latches on to the foe and Roserade slams them down into the ground for 8% damage. With good aim, you could also even do this next to the edge to spike a recovering foe. If you hold Up on the Control Stick and hit A again while the first vine is out, Roserade will do the same thing with her other arm and release a vine on her other side at the same time, so you've got both sides covered.
Dash Attack---<@Deadly Bloom
Roserade runs at the foe, then makes a leaping somersault, spinning head over heels in an straight path low to the ground, covering the distance of about 1.5 platforms. Any foes she comes into contact with are hit multiple times for a maximum of 8% damage, then knocked upwards slightly. In addition, any petals on the ground that Roserade passes over while somersaulting are kicked up and get carried along with her, to be dropped off at their new location once the move ends.
@>---Smash Attacks---<@
Forward Smash---<@Torture Vine
Roserade draws both of her arms back and extends thorny vines from each. Then, she slams both of them down above her head to the ground in front of her, causing some flower petals to pop up. The vines reach out a platform's length in front of her, and if a foe is hit by them, they will take 16% damage and high horizontal knockback that KOs at around 110%. You can also catch foes at the start of the move who are directly behind you for about half the damage and knockback (in the opposite direction, of course). If you hold down the A button, Roserade will leave her vines on the ground to act as a damaging floor, pricking foes' feet and flinching them while dealing 2% damage. If you're lucky and a foe spot-dodges this move (which they might, since there's a bit of start-up lag), you could rack up some good damage as they touch the vines multiple times. As soon as you let go of the A button, Roserade will snap her vines up and retract them, an action that deals 10% damage and above average upward knockback to an unlucky foe.
Down Smash---<@Prickly Storm
Roserade spins around gracefully for a bit while letting her vines and flower petals whirl around her. The vines form a cage-like hitbox around her that covers all sides and about a Bowser-width of horizontal distance. Foes can get hit multiple times by the attack for a maximum of 18% damage before being knocked away at a low horizontal angle with above average knockback that KOs at around 125%. There is some end lag, however.
Up Smash---<@Graceful Ascension
Roserade throws both her arms back one after the other while extending her thorny vines and releasing some flower petals. The vines take on a circular shape as she does so, and cover more distance above her than Down Smash. Contact with the vines deals 12% damage and above average upward knockback to foes. This is Roserade's fastest Smash Attack, but KOs later than the others, at around 140%.
@>---Aerial Attacks---<@
Neutral Aerial---<@Painful Pirouette
Roserade spins around like a ballerina with her arms extended and moving, letting her vines and flower petals surround her in a wavy pattern. The hitbox isn't as wide as Down Smash, but this move is a quick and effective aerial repellent, dealing 7% damage and medium horizontal knockback.
Forward Aerial---<@Doom Spiral
Similarly to her Forward tilt, Roserade twirls a vine in a spiral in front of her - except she does it with both hands this time. This move deals a maximum of 14% damage in multiple hits before knocking foes away horizontally with medium knockback. This is a pretty effective approaching move, and like Forward Tilt, pushes any flower petals nearby in the air forward a bit.
Back Aerial---<@Stealth Vine
Roserade reaches upward with an arm as a vine slithers out and moves behind her. If there's a foe within a character width behind her, the vine will snag them and Roserade will fling them over her head and slam them down. If they hit the ground, they'll take 10% damage. If there's no ground below...well tough luck! They just got spiked. Since the vine reaches a good distance below and behind Roserade, you could even snag a grounded foe behind you and fling them to their doom if you are standing next to a ledge. Be careful though, because if you don't grab a foe, this attack doesn't really do anything and could leave you vulnerable.
Down Aerial---<@Sub-Rosa
Roserade points downwards at a 45 degree angle with both of her hands as a thorny vine and some flower petals shoot out from both of them. The vines come out very quickly and can reach a distance of up to nearly two Ganondorfs. Foes hit by this move take 7% damage and medium knockback. Roserade's fall speed slows down a good bit when you use this move, making it a tad spammable, despite the small amount of end lag.
Up Aerial---<@Blossoming Rose
Roserade points an arm straight up, just like for the Back Aerial, except instead of a vine, this time there's an explosion of flower petals instead. This move produces twice as many flower petals as most of Roserade's other moves. The hitbox is comparable to Ivysaur's Up Aerial, though not as strong, and it doesn't make Roserade move downwards. Foes caught in the burst of petals take 8% damage and above average upwards knockback. The petals then drift lazily towards the ground as usual.
@>---Grab/Throws---<@
Grab---<@Ensnaring Brambles
Naturally, Roserade has an extended grab similar to Link and the others; she reaches out with a thorny vine in an attempt to snag the foe and wrap them up. However, in the event that she misses the foe with her vine for whatever reason, you can immediately press the grab input again at any point to have her reach out with her other hand/vine, in a sort of "double-grab" (take that, spot-dodgers). And yes, her vine does also double as a tether recovery (although you can't input the grab twice in this case).
Pummel---<@Constrict
Roserade tightens the vines binding the foes body, and the prickly thorns do about 2% per hit. Average speed for a pummel.
Forward Throw---<@Arduous Vines
Roserade briefly releases the foe, then starts rapidly waving her arms up and down with her vines extended, which causes them to undulate in a wavy pattern not unlike soundwaves. The opponent is hit multiple times before Roserade snaps both vines at once, sending the foe flying horizontally with 10% damage and above average knockback.
For future reference, all of Roserade's throws release a handful of flower petals during execution.
Up Throw---<@Rose Ejection
With the foe still in the grasp of her vine, Roserade flicks her arm forward, causing the vine to move quickly in a high arc with the foe wrapped up at the end. You can control the distance that the vine moves by tilting or smashing the Control Stick forward as you see fit, though the foe can attempt to button mash out. The vine can reach a max distance of about half the main Battlefield platform. Once the foe reaches the end of the arc, they get released not too gracefully onto the ground, taking 10% damage in the process. Like with the Back Aerial, if there's not ground there, it'll result in a spike. Obviously, this is more useful on smaller stages where the edge is usually not too far away.
Back Throw---<@Masquerade Dance
Roserade pushes the wrapped-up foe forward a short distance, then leaps swiftly over their head and behind them. While in midair, she wraps the foe up with more vine. As soon as she lands a short distance behind the foe, she pulls back hard, causing the foe to spin around rapidly while being unwound from the vine. The foe takes 10% damage and then falls over in a prone position.
Down Throw---<@Punishing Rose
Roserade briefly releases her foe and runs up and kicks them while simultaneously somersaulting backwards into the air. As the foe stumbles to the ground, Roserade extends her whips and slams them onto the grounded foe from midair five times, causing petals to pop up with each hit. This throw does a total of 13% damage while leaving the foe in a prone position on the ground a short distance away.
@>---Special Moves---<@
Up Special---<@Petal Dance
So you may have noticed that almost all of Roserade's attacks make some mention of flower petals that appear and get left on the ground. Well, they're not just there to look pretty. When you use this move, Roserade starts spinning very rapidly in place, faster than she does in some of her other moves. After a brief moment, a whirlwind starts up that covers a distance of two Bowser-widths on either side of Roserade, and reaches as high up as the distance Marth's Dolphin Slash covers. Any flower petals on the ground get whipped up by this wind and start spinning around every which way like a tornado around Roserade. By default, this attack produces a handful (around 7) of petals to spin around, but depending on how many were on the ground to start with, this could add up to a total of any number of petals. Petals spinning around in this tornado do 4% damage to any foe upon contact and deliver low upward knockback. Once a petal hits a foe, it disappears. Roserade stops spinning after a second or two, but the tornado goes on for about a second after that, allowing you to take advantage of a foe hopefully caught up in it. Any petals that didn't hit a foe stop spinning and lazily drift back down to the stage. If you use this move in midair, Roserade will kick up any petals on the ground a short distance below her in addition to any petals floating around in the air in the vicinity. Also, this move acts as Roserade's vertical recovery, as the tornado will lift her up the distance of Mario's Super Jump Punch (you can move the Control Stick left or right slightly to cover some horizontal ground), though she will be left in helpless state afterwards.
Side Special---<@Aromatherapy
Roserade points one of her flowery hands ahead of her as a pink smoke begins to gradually emanate from within, along with some flower petals. You can hold B to allow the pink smoke to slowly waft forward in a stream, and you can let go at any time to allow the stream of smoke to break off from Roserade and begin traveling forward slowly on its own at Zelda's walk speed (once the stream reaches a length of half the main Battlefield platform, it breaks off on its own). Roserade can only release two streams of smoke at a time. The smoke is actually a concentrated version of the lovely aroma of Roserade's flowers, and it is irresistable to any foe. If a foe makes contact with the smoke while on the ground, they will stop what they're doing and begin to walk forward as slowly as possible and follow the stream of smoke, appearing to be in a pleasant trance. Once a stream of smoke makes contact with the foe, it will stop moving forward and hang in the air, and the foe will continue walking until they reach the end of it. During this time, you're free to do whatever; scatter petals, grab the foe, charge a Smash attack, grab a snack, etc. The foe can button mash to try to snap out of it, but it's twice as hard to escape from the aroma as it is to escape a grab. If a foe makes contact with the smoke in midair, as long as they're not already in the middle of an attack, they will become entranced by the smell and not be able to use any attack until they touch the ground.
Down Special---<@Kiss of Death
Roserade points a flower hand forward, and this time, several shorter thorny vines shoot out from it. These vines have the same range as Lucario's Force Palm attack, and if a foe is caught in them, they are pulled in close to Roserade. She draws the foe's face to hers and appears to kiss them, though this is covered up by Roserade's other flower hand. Once this occurs, Roserade pushes the foe away for 5% damage and weak knockback as a handful of flower petals bursts from her hand. However, instead of being pink like regular petals, these start out tinged a deep purple, but turn the regular pink once they hit the ground. Hmmm? The effects of these special petals aren't apparent until you use Petal Dance. If a foe comes into contact with the any of the petals that came from this move during a Petal Dance, they will take 10% damage and high vertical knockback. It seems Roserade was able to conjure up a specialized poison perfectly suited for the foe during their close encounter! Since these petals don't look any different from the other petals once they touch the ground, your foe might get a little paranoid trying to avoid being hit by petals of any sort.
Neutral Special---<@Assassin Rose
Roserade points a flower hand downward in front of herself as a thorny vine shoots from it and into the ground, appearing to channel the power of nature. A brief moment later, a thorny vine will shoot out from the ground in a burst of flower petals behind the foe and lash at them. It will always appear behind the foe, no matter which direction they're facing and is a Ganondorf-length long. If it makes contact with them, it will deal 9% damage and above average horizontal knockback. This attack is somewhat laggy, so only use it when the opponent is at a distance.
Final Smash---<@Black Garden
Roserade has grabbed the Smash Ball! When you activate her Final Smash, she draws her arms close to herself, then shoots forward as a massive amount of thorny vines erupts from both hands. The vines curl up and form a brambly mess the size of a full Smart Bomb explosion in front of Roserade. Any hapless foe that touches these vines gets sucked in to the brambles and is dealt a painful 30% damage before being shot out horizontally with very high knockback that's sure to KO.
@>---Summary---<@
Roserade plays differently from a lot of other characters. The mechanic that permeates her moveset is the petals that she produces by performing almost all of her moves. These litter the stage over the course of the fight and are ultimately used to rack up crazy damage from all over the place later on. But first, you've got to use your standard moves to make these petals in the first place. And while you could just stand there and mindlessly spam moves at nobody to produce plenty of petals, chances are you're going to be in the middle of a good fight, so you've got to be on the offesnive.
Roserade's standard moves all have good range and damage-racking combo ability. Her jab is effective and can lead to Forward Tilt, which is probably a move you'll be using a lot, not only to get foes off you and deal lots of damage but also to move petals on the ground to more opportune places. For example, if you find that you have too many petals concentrated in one area and not enough on another part of the stage, you can scoot them over if you want. Dash Attack is also good at putting petals where you want them while also doubling as a decent approach. Down Tilt is also effective at keeping you covered from all sides, and Up Tilt can punish foes who try to approach from the air in addition to starting combos. Roserade's Smashes are all solid KO moves and pretty self-explanatory. With all the damage-racking you'll be doing, these are sure to result in quick KOs. Her Aerial attacks are also solid. Forward Aerial fulfills the same purpose as Forward Tilt on the ground, and is also a good approach. Down Aerial is similar, and can pester foes on the ground. Back Aerial can be a surprise gimp for an inattentive opponent, and Up Aerial is useful for putting petals in places where they'll be useful.
Roserade also has powerful throws, and foes are going to want to keep away from you to avoid them. Up Throw is useful for putting foes where you want them to be, such as into an area with many petals or into a cloud of Aromatherapy. Down Throw leads into a a Down Aerial or two very well. Back Throw leaves the foe vulnerable to any number of things, such as Down Aerial, or Aromatherapy or Petal Dance, so it's quite versatile.
The Special Moves bring everything together. Once you've covered the stage in petals by attacking the foe, the fun can begin. Petal Dance, which starts out the match relatively useless, suddenly becomes a force to be reckoned with, as the foe will be hard-pressed to find a safe place to avoid being bombarded by petals. If you were able to pull off a couple of Kisses of Death, the match will become all the more chaotic, as the foe will have no idea which petals could lead to them being KO'd more easily. Aromatherapy can help you greatly by making the foe vulnerable to Kiss of Death, or even just grabs and or smashes. If you're able to produce large streams of smoke, you'll shrink the stage even further for your foe, forcing them into the air or having to find other ways around the smoke. And if your opponent gets too good at keeping away or camping, well, that's what Assassin Rose is for.
In conclusion, Roserade is a pretty in-your-face character. She's got good range and damage output, which only gets better as the fight goes on. She has the potential to control the stage well and put lots of pressure on the foe to keep away from her, which only helps her further. A good Roserade player will be able to overwhelm most any opponent.
---<@
tirkaro
Smash Champion
First off, you can use any attacks you'd normally use while you've got a webline in hand, and even dodge/shield.
Secondly, you can't move beyond the radius of the webline while you're gripping with it. If you try, the webline will cause you to move in an arc consistent with what you'd expect from normal physics. (This can be used to webswing, for instance.) However, the webline will break if it suffers too much damage (15%) or tension (KOing knockback from the center of final destination is enough to break a full health webline. For lesser-health weblines, scale down proportionately.). Additionally, weblines will only take half damage when they aren't fully extended (think about it, it's a lot easier to cut a rope if it's held tight than it is if it's swaying around), adding some spacing to Spidey's game.
Thirdly, you can interact with the webline itself via the grab button. This will be covered in detail later.
However, there is one downside. Spidey only has so much webbing in one cartridge (Twice Final destination's length), and when it runs out, he has to reload before using any more webbing moves. Reloading takes one second, and is accomplished by simply using ANY webbing-based move. You can also move and jump once while reloading, allowing a little defense. Lag is low.

Smady
Smash Master
User Rankings #15, #16
Welcome to the User Rankings! Every Monday, I'll be compiling the entire of the last week's activity in the thread and showing off, just who is the most active member? The point of this exercise is to recognise the most dedicated among us – those make your movers who are currently pushing the boundaries, as well as highlighting all movesets made by them.
To get on this list, you need to have made a moveset in this or a previous Make Your Move, as well as having posted in the Make Your Move 10 thread. The cut-off point for tallying is 5PM on Monday EST, 3PM PMT or 10PM GMT; other removals or changes are at my own discretion. The breakdown of points is as follows:
30 points for a Moveset
5 points for a Comment
4 points for a Secondary Submission
2 points for a Secondary Submission Comment
1 point for a Regular Post
+Regular Posts do not stack
+Secondary Submissions are MYminis, Joke Movesets and other miscellaneous submissions
5 points for a Comment
4 points for a Secondary Submission
2 points for a Secondary Submission Comment
1 point for a Regular Post
+Regular Posts do not stack
+Secondary Submissions are MYminis, Joke Movesets and other miscellaneous submissions
Return of the catch-ups! Or rather, return of the massive set projects and newcomers en masse. It's a great time, this past fortnight being one of the most active in a long time and full of promise, with many newcomers showing up and mostly posting Pokesets, but there's no complaining here. Very good times indeed, keep em rolling into the last couple of weeks, guys. And yes, this is as late as ever. I may just make this officially a fortnightly thing in MYM11. We shall see.
Unsurprisingly in first was JOE!, posting a whopping six sets altogether for Trainer JOE!, a six-part Pokemon Trainer moveset making use of six different Pokemon from fifth-gen. This is a rather special set indeed: capitalising on simplicity by combining together Pokemon into strategic teams. Highly recommended reading. MT placed in second with twenty comments, a set, two minis and one post. The set in question being Hostile Elder Oak, a living tree from the Earthbound series. If you thought Trainer JOE! got barely any reception, this poor ent got even less. A shame, but one that can be put right by reading and commenting, so get on it y'all. More surprisingly in third was Rool, giving us his finale of the ghostly Pokemon in Gengar, which is more invisibility shenanigans, in a nutshell. This along with his standard monstrously big catch-up commenting. ForwardArrow came... fourth, though was originally third so eh. This due to mass commenting and an impressive two sets in Hoppip and Cofagrigus, the former being the very start of the fortnight. An impressive showing for a person new to the contest... what a starlet he is! One can only dream of what such an ambitious newcomer can accomplish.
Remember to check out the stadium to find all of the sets mentioned.
Overall User Rankings


Points: 183, Movesets: E.E.D. Soldier, Trainer JOE!


Points: 138, Movesets: Slowbro, Hostile Elder Oak


Points: 131, Movesets: Gastly, Haunter, Gengar

Points: 121, Movesets: Hoppip, Cofagrigus

Points: 67, Movesets: Spider-Man, Galaxy Man, Concrete Man, Mafia Man, Portal Man, Caterpie

Points: 66, Movesets: Garbodor, Doctor N. Tropy, Mr. Banbollow

Points: 64, Movesets: Sir Weston, Klobber, Baron K. Roolenstein, Pennywise, Sakurai

Points: 51, Movesets: Wario, Vlad Plasmius, King Barbovor, Dirty Bubble, Sid's Toys

Points: 50

Points: 35, Movesets: Gigan

Points: 34, Movesets: Robo-Link MKIII, The Fighter, Chen

Points: 34, Movesets: Mismagius

Points: 30, Movesets: Enrico Pucci, Commander Shepard, Gallade, Sonic & Tails, Chess Man, Yanmega

Points: 30, Movesets: Dry Bowser, Venom, Satana, Malzahar, Goomba

Points: 30, Movesets: Evil Naruto

Points: 30, Movesets: Team Pedestal

Points: 30, Movesets: Pierrot, Doppleganger Arle, Maenad

Points: 30, Movesets: Roserade

Points: 29, Movesets: Victini, Krillin

Points: 12, Movesets: The Flying Dutchman, Robo-Patrick

Points: 6, Movesets: Kabutops, Ghost Rider

Points: 4, Movesets: Bad Girl, Admiral Bobbery, Man Ray and The Dirty Bubble

Points: 4, Movesets: Charlotte, OVER

Points: 4, Movesets: Ashley, Viewtiful Joe, Geno, Belome, Colors Sonic, Sora

Points: 4

Points: 3, Movesets: Omastar
ForwardArrow
Smash Ace
- Joined
- Aug 17, 2011
- Messages
- 502
Maenad
Let me put this bluntly, this set is not up to our current standards, or even close. There really isn't any sort of playstyle here, with the summary basically just describing what the moves do, not really how they fit together. You might have had something with the doom clock, but it was never really capitalized on and pretty much has no purpose. The creativity here feels very forced and I would almost prefer it if you just used Sakurai-like inputs instead. The writing style is also grating, with Maenad really not being the most interesting person to hear a first person telling from. You also go off on little tangents of backstory, which are entirely unnecessary and throw off the already lacking flow of the set, plus the grammar errors and such feel wrong in a set for some sort of "superior race". It's not even balanced, with a lot of attacks being either blatantly overpowered or nigh-useless.
Maybe I'm just a bit star struck by some of the fantastic movesets we have gotten over the past few contests, and our increasing standards have made it impossible to appreciate a set like this. I see you put a lot of effort in, and I commend that. Maybe it would be good to start anew from here, reading some sets and comments from throughout the contest to get an idea of how to make a set better.
Edit: MarthTrinity and Rool are right, that really wasn't right of me to say that. There definently were things in there that were honestly kind of interesting, and I want to see you continue making sets. Just take what I say for a grain of salt.
Gigan
I'll admit that Gigan is far from the most creative or zany set in the world, being very down to earth and meant more for Smash Bros that the standards of our contest, which I can appreciate. That said, the set actually has a decent playstyle, with the ways and the need to keep your opponent in the "happy zone" as you put it, and it works pretty well. It has some slight problems, like a complete lack of KO moves and the downsizing is somewhat ridiculous. That said I still like this set, even if it's not entirely up to our standards, it works very well for what you want it to be, and there's no real arguing it didn't fill it's purpose.
Roserade coming shortly, by the way.
MarthTrinity
Smash Lord
Hate to correct ya Smady but you majorly under-repped me on the points. I posted twenty comments this week, two MYmini's and a moveset. That puts me at -AT LEAST- 138 for this week, not including any other posts I may have made...otherwise good work with the User Rankings as always! Actually, I realized it was probably my own fault there! I had a Weedle in the previous post which would bring my point total to around where you have me at, my apologies Smady.
Also Jesus Christ ForwardArrow. Calm down. "Nonetheless, by no stretch of the imagination can this set be called good, or even decent." is more than a bit harsh.
Also Jesus Christ ForwardArrow. Calm down. "Nonetheless, by no stretch of the imagination can this set be called good, or even decent." is more than a bit harsh.
KingK.Rool
Smash Lord
- Joined
- Nov 26, 2005
- Messages
- 1,810
And in fact, I called Maenad not only decent but good in my comment. Apparently my imagination is more than flexible enough for both of us.
Smady
Smash Master
I didn't even look at your Pokemon.Hate to correct ya Smady but you majorly under-repped me on the points. I posted twenty comments this week, two MYmini's and a moveset. That puts me at -AT LEAST- 138 for this week, not including any other posts I may have made...otherwise good work with the User Rankings as always! Actually, I realized it was probably my own fault there! I had a Weedle in the previous post which would bring my point total to around where you have me at, my apologies Smady.
Also Jesus Christ ForwardArrow. Calm down. "Nonetheless, by no stretch of the imagination can this set be called good, or even decent." is more than a bit harsh.
This week was a little different from usual. I had counted up last week's data, I just ran out of time to actually format it. So when I came back to it, it was very confusing as to where the data ended exactly, so I think that's probably why I missed out on some of your posts. Sorry, I'm usually not that sloppy.
MarthTrinity
Smash Lord
Tis not a problem at all. I probably should've just mentioned it in chat instead of saying it in the thread but I wanted to catch it before we got too far ahead in the next week. That and I have terrible memory and would probably forget. T'was just an accident, it's to be expected EVENTUALLY when you're doing this so often as you're normally spot on with this. Probably wouldn't have even noticed had I not made a mental note of my comments. Keep up the great work Smady ;P

Davidreamcatcha
Smash Ace
- Joined
- Feb 9, 2011
- Messages
- 629
And that's how I decided I would do something different as a mini this week.
What would I do as a mini, exactly?
Why, one of the most under-rated extras...
FLYING DUTCHMAN ANIMATIONS
Jun telling David what this week's mini is.
Standard Pose
The Dutchman has both arms in front of himself, hands curled up. His mouth forms a ghostly smirk as he waits for his foe's next move.
Idle Pose
The Dutchman leans his head forward, letting out a yell of "Arr!"
Walking:
Practically identical to his standard pose, nothing to see here, folks.
Running:
Same, only hunching over even more.
Dashing:
The Dutchman leans forward, hovering above the ground as he moves forward as though he were a fish, his ghostly tail moving back and forth behind him.
Jump #1:
The Dutchman swipes under himself, hoping to propel himself into the air.
Jump #2:
Placing both arms in front of him, the Dutchman jumps upwards.
Crouching:
The Dutchman hunches forward, placing his ghostly tail on the ground. He doesn't crouch much, though, making him a rather huge target regardless.
Swimming:
Not used to swimming in his ghostly form, The Dutchman has a slow swim as he bodystrokes.
Spot Dodge:
The Dutchman instantly disappears for his spotdodge. When he reappears, he leans his head forward and lets out a cry of "Boo!" All of the Dutchman's dodges outside his air dodge are laggy, giving him a much needed weakness.
Air Dodge:
The Flying Dutchman seamless turns into a thin green mist, swooping into the background before going back into the foreground.
Shield:
The Flying Dutchman refuses to stoop down to the level of your mere bubble shields! The Dutchman projects a green shield around himself, slightly less stronger then the average bubble shield. The ghosts of those who were sent to Davy Jone's locker (represented by cartoony ghosts, think Pac-Man ghosts but with the Scream's expression) fly constantly around the shield. If the Dutchman grabs out of this, he points forward, which causes one of the ghosts to lean forward and grab for him, before reeling them back to the Dutchman, being a cosmetic effect.
On another cosmetic note, whenever the Dutchman has his shield broken, the ghosts fly upwards towards the top blast zone, looking much happier: they've been saved from their horrid fates.
Tripped:
When the Flying Dutchman trips, he falls from his hovering position and lands facefirst in the dirt, taking longer than most characters to get back up.
Dizzy:
Grasping his forehead, the Flying Dutchman wobbles back and forth, occasionally swiping his hands out as if to counterattack his foe while he's dizzy.
Eating:
Taking a second to equip a sock on his tail, the Flying Dutchman leans down and eats whatever he's been presented with.
Sleeping:
The Flying Dutchman leans his head back and begins taking a ghostly nap, snoring all the while. Between his snores, he can be heard mumbling "I'm the Flying Dutchman..." over and over.
TheSundanceKid
Smash Lord
majora_787
Smash Hero
I will either have this done in time or I won't, but my next major project will be to reimagine one of my old MYM3 movesets. I doubt it'll take too long, maybe a couple of weeks...
*Opens moveset in question*
...... Oh dear... This'll take a lot longer than I thought... How long do I have?
*Opens moveset in question*
...... Oh dear... This'll take a lot longer than I thought... How long do I have?
tirkaro
Smash Champion


MasterWarlord
Smash Champion
MAGUS
Mismagius has some good smokescreen tactics. Just generically hiding behind it like countless other MYM sets to cause general confusion for camping isn’t all that interesting, but with Mismagius’ ability to turn into the enemy. Swapping the foe’s controls around fits in surprisingly well, as once the foe gets out of the smoke they still won’t even know if they’re the real deal or not due to their character not responding to their inputs correctly. One thing I think that could’ve been improved upon in this main good formula is having the moves that Mismagius keep while transformed be the moves to manipulate the smokescreen, most notably Will-O-Wisp and the dtilt so that you could fake that you haven’t transformed into the foe yet more easily, as Mismagius doesn’t need -3- true KO moves to use while in the form of the foe. True, most of those inputs are on the standards, but they probably should’ve been promoted to more important inputs anyway considering the entirety of the moveset outside the Specials and Standards is filler. Yes, the filler in this moveset is indeed massive with a ton of inputs which serve no real purpose in further Mismagius’ game (Smashes, aerials, grab-game) when she will get tons of generic attacks from imitating the foe, but this is hands down the best moveset I’ve read to pull off turning into the foe while having it be remotely relevant.
This moveset is pretty much what Tatari tried and blatantly failed to do back in MYM 8.
GIYGAS
While Gigan does have a lot of filler in his movelist, most of it is not –truly- irrelevant to his game as he’s a simplistic combo character. The interesting part of him is how he tries to keep his foe in his ideal range/prevent them from getting to a specific range, and that tether-link grab he has is the main thing that makes the moveset appealing. He has a couple other moves that enable him to drag foes to his ideal range, though honestly what I think Gigan needed was more moves to get them into that range rather than moves to capitalize on them once they’re already in said range. In any case, the moveset is written very well in such a way that it is very conscious of all of the intended playstyle pieces put into it, and while an alright spin to bring to combo characters I generally find they are incredibly difficult to do truly well - you’d probably be better off trying something that has a more ambitious playstyle, as those are generally easier to pull off than the combo genre. Again, though, this is quite decent as a combo based set.
ARCEUS
Team Pedestal are a member of a genre that can instantly give it enough creativity for some people to give it a pass – simply being in the Hugo style in any form gives you plenty of points. The only reason this is so, though, is because of the very low quantity of sets in this genre – two of them were made by me, and the other three are a lot more tame on the basic Hugo concept than either my sets or yours (Infected, J, and RTS Army). For having not 5 but 6 characters, sure you have a fair handful of interactions, but it’s all very obvious stuff that would be hard to –not- do with so much fodder to be manipulated. Even Hugo who could be considered the starter of the genre had more to it than just ganging up, as he had the mechanic of forcing foes to look towards Hypno’s constantly swinging pendulum. When posted directly after Sid’s Toys which fuses the Hugo’s core concept of 5 characters at once with momentum, there’s just really not that much for me to appreciate in this set. Really, the mentality for this can be applied to how Hazama and Dormammu aren’t that creative of boss movesets. Sure, there’s no other combo based of camper based boss, but that’s only because it hasn’t been made – it’s a painfully obvious concept. Team Pedestal is worse in this regard than Hazama because it doesn’t introduce anything new at all to the relatively untouched genre. The moveset will still have an audience among people who think Hugo and Sid’s Toys are too zany and prefer a dumbed down version of it, Rool will now doubt eat this up as Hugo lite (Lord knows Junahu won’t for hating the characterization of Pokemon in general).
Complaints that you personally would find more relevant are about the characterization in the moveset – and I pretty much have to judge said characterization, seeing nobody else can. The most awkward thing is undoubtedly you intentionally encouraging killing off Zarek so that Alice will follow around the killer in what’s supposed to be revenge for killing her baby, but what actually turns into defending them with her hitboxes. . .The other aspect is Konstantin randomly being the one who has to be killed for the team to lose a stock (Outside killing 3 of them). Declaring Konstantin the leader of the team, much less without the actual trainer present, feels incredibly awkward. The team really has no leader without the trainer present, and Ike would obviously rip Konstantin’s guts out if he so much as proposed as being the official “leader”. Yes, it’s balance, but that feels like an obvious reason to include the trainer even if he doesn’t do anything – considering how useless he is, let him be the fodder who has to get murdered to lose a stock. Hugo couldn’t do anything at all to defend himself in his set, and he has a hell of a lot more reason to be able to do than the Pedestal main character who you specifically left out of the set because he was so wussy. Honestly speaking of him not being here, I struggle to see Ike working together with the others in any form without the trainer, much less to see the other join up with him in brutally beating down on a foe all-together (Even the likes of Carlita and Alice) with Beat Up.
caterpie
Rool’s caterpie is better than your individual Caterpie moveset, but Butterfree makes your moveset as a whole undoubtedly better. Honestly I miss some of the inventive stuff with the webbing from Rool’s incarnation, but this seems to be somewhat intentional on your part to avoid retreading any ground from Rool’s version. What you come up with is something that isn’t touched upon as a central focus too often in MYM with Caterpie’s ability to slow down the foe’s movement and attack speed to the point of eventually getting them to 0%, and considering there’s so little Caterpie can do on his own it manages to actually work and not be broken. Sure, Butterfree is able to use the string shot with a competent moveset to back it up, but seeing you have to go through a large amount of work to get to Butterfree it works. I actually like Butterfree’s set to a degree as you levitate around powders, it being the main enjoyable part of the set as a whole (Very intentional on your part), and the String Shot leftover flows into it awkwardly well. The one thing I loathe is how obscenely gimmicky Rage Powder is, much less how big of a catch it is when you can just heal them of it to ensure they keep the damage forever. Aside from that, there’s also the fact that Butterfree does indeed keep String Shot on evolution, which is largely just a game mechanic and feels incredibly random for Butterfree. By your logic, Metapod should also be able to defend itself with Caterpie’s entire moveset during the evolution process – the missing inputs on Butterfree really come off as nothing short of laziness. Considering the potential Rool brought up in his caterpie but blatantly spat upon, I also would’ve liked to see you give it your all for an individual Caterpie moveset – you’d already proved you could do a grab by pinning the foe with Tackle, and String Shot could also easily count as a grab. I know you intended for Caterpie to be intentionally terrible to mock Rool’s caterpie, but I feel it was a bad direction to take when you could’ve just one upped his with yours.
Mismagius has some good smokescreen tactics. Just generically hiding behind it like countless other MYM sets to cause general confusion for camping isn’t all that interesting, but with Mismagius’ ability to turn into the enemy. Swapping the foe’s controls around fits in surprisingly well, as once the foe gets out of the smoke they still won’t even know if they’re the real deal or not due to their character not responding to their inputs correctly. One thing I think that could’ve been improved upon in this main good formula is having the moves that Mismagius keep while transformed be the moves to manipulate the smokescreen, most notably Will-O-Wisp and the dtilt so that you could fake that you haven’t transformed into the foe yet more easily, as Mismagius doesn’t need -3- true KO moves to use while in the form of the foe. True, most of those inputs are on the standards, but they probably should’ve been promoted to more important inputs anyway considering the entirety of the moveset outside the Specials and Standards is filler. Yes, the filler in this moveset is indeed massive with a ton of inputs which serve no real purpose in further Mismagius’ game (Smashes, aerials, grab-game) when she will get tons of generic attacks from imitating the foe, but this is hands down the best moveset I’ve read to pull off turning into the foe while having it be remotely relevant.
You could count Spy as turning into the enemy, seeing it’s just as fake as Mismagius’ transformation in this moveset, but this is the best one to do it in actual Brawl match, which is still plenty an accomplishment.
GIYGAS
While Gigan does have a lot of filler in his movelist, most of it is not –truly- irrelevant to his game as he’s a simplistic combo character. The interesting part of him is how he tries to keep his foe in his ideal range/prevent them from getting to a specific range, and that tether-link grab he has is the main thing that makes the moveset appealing. He has a couple other moves that enable him to drag foes to his ideal range, though honestly what I think Gigan needed was more moves to get them into that range rather than moves to capitalize on them once they’re already in said range. In any case, the moveset is written very well in such a way that it is very conscious of all of the intended playstyle pieces put into it, and while an alright spin to bring to combo characters I generally find they are incredibly difficult to do truly well - you’d probably be better off trying something that has a more ambitious playstyle, as those are generally easier to pull off than the combo genre. Again, though, this is quite decent as a combo based set.
ARCEUS
Team Pedestal are a member of a genre that can instantly give it enough creativity for some people to give it a pass – simply being in the Hugo style in any form gives you plenty of points. The only reason this is so, though, is because of the very low quantity of sets in this genre – two of them were made by me, and the other three are a lot more tame on the basic Hugo concept than either my sets or yours (Infected, J, and RTS Army). For having not 5 but 6 characters, sure you have a fair handful of interactions, but it’s all very obvious stuff that would be hard to –not- do with so much fodder to be manipulated. Even Hugo who could be considered the starter of the genre had more to it than just ganging up, as he had the mechanic of forcing foes to look towards Hypno’s constantly swinging pendulum. When posted directly after Sid’s Toys which fuses the Hugo’s core concept of 5 characters at once with momentum, there’s just really not that much for me to appreciate in this set. Really, the mentality for this can be applied to how Hazama and Dormammu aren’t that creative of boss movesets. Sure, there’s no other combo based of camper based boss, but that’s only because it hasn’t been made – it’s a painfully obvious concept. Team Pedestal is worse in this regard than Hazama because it doesn’t introduce anything new at all to the relatively untouched genre. The moveset will still have an audience among people who think Hugo and Sid’s Toys are too zany and prefer a dumbed down version of it, Rool will now doubt eat this up as Hugo lite (Lord knows Junahu won’t for hating the characterization of Pokemon in general).
Complaints that you personally would find more relevant are about the characterization in the moveset – and I pretty much have to judge said characterization, seeing nobody else can. The most awkward thing is undoubtedly you intentionally encouraging killing off Zarek so that Alice will follow around the killer in what’s supposed to be revenge for killing her baby, but what actually turns into defending them with her hitboxes. . .The other aspect is Konstantin randomly being the one who has to be killed for the team to lose a stock (Outside killing 3 of them). Declaring Konstantin the leader of the team, much less without the actual trainer present, feels incredibly awkward. The team really has no leader without the trainer present, and Ike would obviously rip Konstantin’s guts out if he so much as proposed as being the official “leader”. Yes, it’s balance, but that feels like an obvious reason to include the trainer even if he doesn’t do anything – considering how useless he is, let him be the fodder who has to get murdered to lose a stock. Hugo couldn’t do anything at all to defend himself in his set, and he has a hell of a lot more reason to be able to do than the Pedestal main character who you specifically left out of the set because he was so wussy. Honestly speaking of him not being here, I struggle to see Ike working together with the others in any form without the trainer, much less to see the other join up with him in brutally beating down on a foe all-together (Even the likes of Carlita and Alice) with Beat Up.
caterpie
Rool’s caterpie is better than your individual Caterpie moveset, but Butterfree makes your moveset as a whole undoubtedly better. Honestly I miss some of the inventive stuff with the webbing from Rool’s incarnation, but this seems to be somewhat intentional on your part to avoid retreading any ground from Rool’s version. What you come up with is something that isn’t touched upon as a central focus too often in MYM with Caterpie’s ability to slow down the foe’s movement and attack speed to the point of eventually getting them to 0%, and considering there’s so little Caterpie can do on his own it manages to actually work and not be broken. Sure, Butterfree is able to use the string shot with a competent moveset to back it up, but seeing you have to go through a large amount of work to get to Butterfree it works. I actually like Butterfree’s set to a degree as you levitate around powders, it being the main enjoyable part of the set as a whole (Very intentional on your part), and the String Shot leftover flows into it awkwardly well. The one thing I loathe is how obscenely gimmicky Rage Powder is, much less how big of a catch it is when you can just heal them of it to ensure they keep the damage forever. Aside from that, there’s also the fact that Butterfree does indeed keep String Shot on evolution, which is largely just a game mechanic and feels incredibly random for Butterfree. By your logic, Metapod should also be able to defend itself with Caterpie’s entire moveset during the evolution process – the missing inputs on Butterfree really come off as nothing short of laziness. Considering the potential Rool brought up in his caterpie but blatantly spat upon, I also would’ve liked to see you give it your all for an individual Caterpie moveset – you’d already proved you could do a grab by pinning the foe with Tackle, and String Shot could also easily count as a grab. I know you intended for Caterpie to be intentionally terrible to mock Rool’s caterpie, but I feel it was a bad direction to take when you could’ve just one upped his with yours.
Nicholas1024
Smash Lord
- Joined
- Mar 14, 2009
- Messages
- 1,075
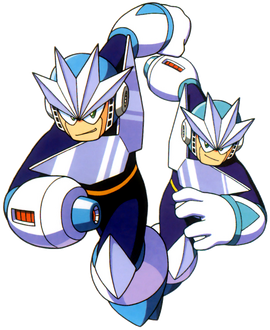
Gemini Man joins the Brawl!
Introduction:
Gemini Man is one of Dr. Wily's Robot Masters from Megman 3. He is capable of doubling himself, and uses that power to confuse or overwhelm his opponents. However, even without a clone to help him, he is a very tricky opponent to deal with, especially when he brings his Gemini Laser into play, as the weapon bounces off the walls, floor, and ceiling to come at Megaman from unconventional angles.
Stats: (Yes, I'm actually doing a stats section)
Size: 6/10
Weight: 7/10
Range: 10/10
Power: 5/10
Jumps: 8/10
So, pretty good stats across the board for Gemini Man. Of note would be his amazing range, thanks to having a double that can do his dirty work for him, not to mention his large array of weapons.
Specials:
Side Special: Gemini Duplicate
Gemini Man's signature trick, he immediately splits into two duplicates about a stage builder block apart, you will control the one in the direction you've pressed the control stick. (That will also be the real one.) Now for a bit of exposition about your double.
The HP of the clone is taken directly from Gemini Man's energy supply, and can range from 10-50% of stamina, depending on how long you hold down the button. (Full charge is only half a second, so it's not that hard to create a full health clone on demand.) However, there's a catch, and that's that for every 2% of health your clone receives, Gemini Man himself takes 1% damage. Clones operate independently of the player, using a level 9 AI, and take knock back like a normal character (they're considered to start with 50% damage for knock back purposes). Additionally, friendly fire is ON between the Gemini Man clones(ever wonder why he didn't pull out the laser with his clone active in the boss fight?), so don't kill your buddy.
However, there's an important trick to this move that every Gemini Man player must master, and that's that if you press this input when a clone is already out, you'll switch to controlling the other Gemini Man. Keep in mind that the "real" one doesn't change, you'll simply switch from controlling the real Gemini Man to the fake, or back to the real one. There is ZERO lag on switching, it happens instantly.
A few final notes, like with the Ice Climbers, if the real Gemini Man dies the fake one will disappear immediately, and if you're controlling the fake Gemini Man and die, you'll return to controlling the real one. Lag is low on creating a new clone, aside from any charge up time.
Neutral Special: Gemini Laser
You knew this was coming, as Gemini Man's signature attack, it of course plays a very important part in his move set. The Gemini laser does 10% and decent knockback. It will pass right through opponents upon hit, and upon hitting the stage, it will reflect in accordance with physics. That is to say, if it's traveling at a 45 degree angle downwards and hits the floor, it will travel at a 45 degree angle upwards after impact. (Think of it like reflecting light off a mirror) It travels at Ganon's run speed and will disappear after traveling 3x Final Destination's length, or going off a blast zone. Additionally, the beam is a reflector, projectiles that hit the beam's side will bounce off of it with a 3% power boost (and some minor added knockback). (The tip does not reflect, but causes normal projectile clashing.) The length of the beam is decided by how long you hold down the button to fire (Just release the button when the beam is at the desired length). Each Gemini Man can have up to 1.5 BF platforms of laser out at one time, lag is low.
Up Special: Gemini Jump
A simple move, Gemini Man will immediately perform a literal third jump and he has heavy armor through the move. (For those unfamiliar with it, think of Snake using his cypher recovery, only attacks doing 7% or more in a single hit can interrupt the move.) You can aim it via the control stick, and as far as recoveries go the move is excellent, with a range better than Yoshi's second jump but the move is quite punishable, due to having no hitbox.
Down Special: Gemini Recording
When you use this input... wait, nothing seems to happen. Well, what actually occurs is that your movements have started being recorded. Press the button again to stop the recording. When you next use the side special to switch characters, the other duplicate will Gemini Jump to the recording's starting point, before mimicking your actions through the recording. Upon being hit or finishing the recording, it will then Gemini Jump back to the start of the recording and begin again. To stop the recording, simply quick-switch to the other Gemini Man , that will permanently disable it (you can quick-switch back, if you want to). You can only have one recording at a time, if you already have one prepared, pressing this button will disable the previous one (and you'd have to press it again to start a new recording). Obviously the benefit of this move is that it let's you control your clone's actions, letting you predict what they'll do and act accordingly. Of course, the trap of this move is that it let's the enemy predict the clone's actions (should they have guessed where you started the recording), and they can punish accordingly. Lag is nonexistent, as there is no sign when you use this move (aside from your clone's actions).
Standards:
Jab: Arm Cannon
THE signature move of the signature character in Cacpcom's signature series, as you might expect Gemini Man also has an arm cannon. These shots are the size of Wolf's blaster, and do 4% with weak knockback, traveling at Pika's run speed. Additionally, you can aim these via the control stick, and shoot them as quickly as Falco's laser. Finally, if you hold down the input, Gemini Man will begin charging a shot. At full charge, which takes a second, he'll fire a kirby-sized blast doing 12% and good knockback, though slightly bad lag (It travels at the same speed as the smaller shots). Releasing the button before full charge will just fire a normal shot. Finally, Gemini Man can still move and jump while charging, and he can hold a fully charged shot as long as he wishes, but he can't attack until you use the shot (or cancel it via dodge/shield.) Lag is low, and shots fired will travel up to 3x the length of Final destination. One last note, starting a recording cancels the charge, and you can switch characters while charging, and the AI will still have the charge stored. (While charging your character will start to flash, so it's quite noticeable.)
Forwards Tilt: Gemini Barrier
Somewhat like Pit's down special, Gemini Man pulls out a sizable mirror shield from nowhere (Look, if Link can keep a small armory's worth of weapons in his pockets, I can get away with this) and holds it out in front of him as long as you hold down the button. As you might expect, this is a reflector, however the interesting bit is that you can angle the shield up to 45 degrees via the control stick to control where you redirect your laser (and other shots). Lag is fairly low. One nice thing about this is that the AI LOVES this move, and will almost always reflect your laser and shots to keep them in play so long as it has the space to do so. On it's own this move does no damage, but it does protect you from frontal attacks.
Up Tilt: Hologram
When you use this move, an additional Gemini Man will appear right on top of you, moving like a normal character with level 9 AI. However, being just a hologram, this one does not actually do or take any damage, and disappears after 3 seconds of confusing the opponent. Consider how confusing it is for the opponent to dodge your barrage of projectiles bouncing and reflecting EVERYWHERE when only half of them are real! However, to prevent yourself from suffering the same confusion, your AI duplicate will never use this move. Only one of these can be present at a time (per duplicate), lag is low.
Down Tilt: Homing Beacon
If you just tap this input, Gemini Man will press a hidden button on his arm, causing any Gemini lasers onstage to change directions immediately towards his location (This looks as if they hit an invisible wall and bounce towards you). If you hold this input however, he'll fire, creating a small white light on the ground, and when you next tap this input (only one beacon is allowed per duplicate at a time, placing an new one overwrites the old one), the lasers will move towards the light you planted instead of your present location. Beacons can be destroyed by taking 10% damage, and after using this move you have to wait at least 5 seconds before the same duplicate can use the move. (The AI usually won't use this unless it's a guaranteed hit on the opponent.)
Smashes:
Forwards Smash: Magnetic Blast
Gemini Man fires a powerful shot from his arm cannon after taking a half second to charge. This blast is the size of Olimar (it looks like a larger red-colored version of one of Wolf's blaster shots), and does 10% with good knock back, with the shot traveling at Pika's run speed. The interesting part is that as long as you hold down the button, you can aim the blast via the control stick, however it has a somewhat large turning radius of 3/4's a battlefield platform. Therefore, the best way to use this is while your duplicate is busy hounding the foe, use this to make rapid passes, angling the blast's approach to get multiple shots at the opponent by bouncing it off of your lasers. Alternatively, you could start the smash then switch to your duplicate, keeping the opponent busy while the AI aims for you. When you release the button, the blast will continue traveling forward in a straight line until it passes off the blast zone or hits something. Only one of these is allowed at a time (again, per duplicate), if you use this move again when one of them is already out, you'll resume controlling it after a quarter second of lag.
Up Smash: Duplicate's target
This is a rather odd move, as while you charge the move Gemini Man will flash blue, yellow, and red (in that order), changing colors six times a second. When you release it Gemini Man will fire a small pellet (direction given by the control stick) that travels until it hits the stage (this will NOT hit opponents or minions, and cannot be reflected or such in any way. Altering the stage itself like EED soldier will work, however). Anyway, at the point where it hits the stage, your AI duplicate will aim all further projectiles of the appropriate type towards that point on the screen (This will remain true even if you switch which duplicate you're controlling). Blue = Gemini Laser, Yellow = Arm Cannon, and Red = Homing Blast. You can have one target of each type on the stage at a time (TOTAL, not per duplicate), to eliminate one simply fire a new target of the appropriate type. (Should the target pellet go off the blast zones, the duplicates will simply aim the shots towards the enemy like normal. As you might guess the computer won't use this.)
Down Smash: Flare Wall
A simple move, Gemini Man fires a red circular shot up into the air much like one of Snake's Mortars (At min charge it goes up to a low BF platform, at max charge... it goes pretty far up.) When it comes back down and hits the stage (until then it's a rather poor projectile of 5% and minor knockback), it creates a small wall of fire that's about a pikmin thick and 1-3 SBB's high (depending on charge). This wall lasts a full second, and will reflect any projectiles it comes into contact with. Should the wall come up in the middle of a Gemini Laser (a rather difficult feat, considering the laser's reflective properties), it will split the laser in two, with the half after the wall continuing on its course, and the other half being reflected by the move. Additionally, it does 10% and mild horizontal knock back to opponents, lag is ok.
Grab Game:
As per the standard for my sets, Gemini Man has a very unusual grab game. First off, this grab can be done in midair or on the ground, and rather then grab the opponent, it'll cause Gemini Man to continue work on a little... project. That is to say, much like how Concrete Man constructs weapons with his grab game, Gemini Man creates solid platforms to bounce his lasers off of. Each duplicate has a separate platform-in-construction, and the computer will NEVER use this move on their own, creating platforms is your job.
Control Stick: Aim cursor
While in grab mode, Gemini Man will have a cursor over his platform-in-progress that you can move via the control stick at Ganon's run speed.
Standard "Pummel": Add Pole
If the cursor is over a legitimate slot (that is a space not occupied by Gemini Man OR another Pole but still connected to the structure), Gemini Man will shoot out a Pole egg in that slot. Pole eggs are the size of a concrete shot *set plug* (That is to say, they're half a stage builder block in width and height), and are the basic material you'll construct these platforms out of. If you're starting a new platform, Gemini Man will automatically use this once for a starting point.
Special "Throw": Place Structure
While you hold down this input, Gemini Man is free to run and jump and otherwise move around, though you can't dodge or shield. When you release it, Gemini Man will place your makeshift platform in the direction you hold the control stick, and it will remain there until destroyed. You can have as many of these constructions on stage as you want, lag isn't too bad. If the opponent is in the way of the structure placement, they take 5% damage and end up prone on top of the platform.
Shield Button: Cancel
What do you think it does? This causes Gemini Man to magically put the structure back into hyperspace (in the same way every video game character manages to carry around a small arsenal). When you next use your grab he'll resume work on the structure.
What on earth are these Pole thingies?
Poles are a minor enemy in Gemini Man's stage that hide within their eggs until broken. Once the egg is broken the Pole (a little... spherical blue tadpole-like thing slightly smaller than the egg) will emerge and home in on the nearest opponent, doing 3% and very minor knock back, while moving at Ganon's walk. Poles and their eggs are both rather fragile, and can be destroyed by taking so little as 1% damage. Their main strength is their sheer numbers, unless you use something like a charged arm cannon shot (hint hint) that doesn't disappear on contact, they have to be destroyed one at a time. As platforms, the pole eggs count as solid objects and cannot be dropped through, and your laser will only destroy a single egg when it hits, making these makeshift platforms an ideal way to manipulate your laser. If the enemy wants to avoid that, they have to destroy the platforms and risk the Pole's wrath... which isn't terribly threatening, except there will likely be large numbers of Poles not to mention your own efforts towards their destruction...
Aerials:
Neutral Aerial: Teleport
As we all know, Megaman has a teleporter he uses to get in and out of the stage, and Dr. Wily has installed an unusual variation in Gemini Man. When you use this (you MUST have a duplicate out or nothing happens), Gemini Man will stall in midair, and after some average lag a white glow over a circle with stage builder block radius (centered on the robot master) will appear over each duplicate, and the two circles (along with everything inside them) will instantly swap places with each other. This can be used to get the fake Gemini Man on the front lines in place of the real one, as well as make an alternative to reflecting all those midair projectiles. However, if you hold down the A button instead of tapping it, there will NOT be a swap, and it will merely be there to fake the opponent out. (Note that you can use this to confuse them about which duplicate you're controlling as well as which one is the real Gemini Man. Ah, mind games.) Lag is ok. By the way, both Gemini Man duplicates must use this to perform the teleport, and the computer will only use it if they see you using it as well.
Forwards Aerial: Dual Blast
This is another move that's mainly useful with a duplicate, as Gemini Man stalls in place and shoots a DBZ-style energy blast (about the size of Samus's charge shot) that does 3% damage and minor forwards knockback, travels at Ganon's run speed, and does not disappear on hit. Lame, huh? Well, the trick is that you need to switch to your duplicate and have HIM fire another blast, if the two shots meet in midair, they cause a devastating explosion (0.75 stage builder block radius) that does a rather nice 15% with great knock back. Each duplicate can only have one of these at a time, you can't just spam and hope for the best. Lag isn't the greatest either, but along with the barrage of other projectiles you can use this to finally overload the opponent.
Down Aerial: Mist Cloud
With this input Gemini Man expels some vapors that form into a stage builder block radius cloud of miss (lasts for 7 seconds, obscures everything inside one). As you might have guessed, one point of this is that it confuses the opponent, giving them a lot of trouble trying to distinguish the real Gemini Man from the duplicate and holograms. (As a rule they want to attack the real one, since the duplicate can be replaced at the cost of half the energy given to it.) Additionally, if you fire your forwards smash into one of these, the magnetic blast will diffuse into the cloud, making it a hitbox of 5% and stun that must be escaped out of at grab difficulty. (Being stunned like that makes the opponent a perfect target for your Dual Blast, for instance...)
Up Aerial: Plug Ball
When you use this move, Nicholas1024 will begin plugging all of his MYMX sets, including Spider-Man, Galaxy Man, Concrete Man,
*15 minutes later*
and finally, *secret final set*. Oh wait... wrong kind of plug. Let's try this again.
When you use this move, Gemini Man will use what's more or less a copy of his fellow robot master Plug Man's weapon, creating a small globe of electricity (a bit smaller than kirby) above his head that does 7% and minor knock back that remains as long as you hold down the button (it moves with Gemini Man). However, if the ball comes into contact with a platform or other part of the stage, it will begin circling it at pika's run speed (like the Hothead item, except it doesn't fall off platforms.) To make this more useful, this move does not damage your poles, and is just large enough to ignore 1-pole gaps in the platforms. Lag is low, and you can have as many of these out as you want (potentially making your pole platforms a zone of death for the opponent.) However, a plug ball will expire after traveling 5 times FD's length, OR its platform is destroyed. (Not just split up into pieces, as it will orbit the pieces, I mean when the last pole it's attached to is destroyed.)
Back Aerial: Mirror Mode
When you use this, your computer duplicate will begin mirroring your movements and attacks until you press the input again. (This is quite literal, you're more or less controlling BOTH Gemini Man duplicates at once but with inputs mirrored on the duplicate.) If you use the down special or side special in this mode, you'll remain controlling both duplicates, but now the computer duplicate is firing and moving in the same direction as the one you were originally controlling, to let you focus twice the firepower on an offstage opponent. This move is instant (the CPU will never use it on their own, obviously).
Playstyle:
Quite obviously, Gemini Man is a combination of the camper and duplicate tropes that MYM has come to expect. However, you can't just make your duplicate and hope for the best, with Gemini Man's lack of an effective close range game the opponent will kill of the duplicate in no time (or worse, the real one if you happened to switch.) No, the down special is the key to an effective Gemini Man player's game, switching back and forth between the duplicates at light speed, using their attacks in combination to create a death zone of projectiles. There are two main keys to this, your gemini laser and your grab game.
The laser is the most important projectile in your entire move set, it deals damage, murders shields (especially in tandem with other projectiles), outlasts dodges (when you use a longer laser), and best of all, reflects and boosts your projectiles. However, a laser that's simply being reflected back and forth in a straight line doesn't help much, as the opponent can easily hop over it, the reflecting ties up your duplicates for too long, and it won't help in reflecting other projectiles. No, it's far better to bounce the laser off the stage and your grab game platforms.
Speaking of your grab game platforms, Poles are more or less Gemini Man's setup, except you do it during the fighting rather than before it. Every spare moment that you're not reflecting a projectile, firing a new one, or controlling your duplicate should be spent making a platform for your lasers and up-air. As far as the kind of platform you make, that's more or less up to the player, you can make an extended line for use over a large area, a solid block for a longer period of reflecting in one spot, or a more complicated structure for your own personal ideas. Don't forget that you can use these in combination with the up-air to lock off zones of the stage from the opponent as to destroy such a construction they have to destroy the pole eggs, then the poles they've released, all while dealing with Gemini Man's projectiles and the orbiting plug balls.
As far as other ways to manipulate your projectile go, the forwards tilt is an obvious candidate, and likely to be one of your most used moves in any match. More advanced methods include your homing beacon, which obviously sets up for a forwards tilt reflection in the direction of your choice. However, don't forget you can place it somewhere beforehand to give you an easy way to murder a dodging opponent, and give you one last method to redirect a stray projectile that's going out into space. Additionally, your down smash flare wall is a great way to set up reflections that the opponent effectively can't stop, while also being a hitbox (I hate how autocorrect tries to turn that into "hatbox" *grumble*) and locking off yet another area of the stage.
But wait, there's more! Your neutral aerial teleport is a fun tool for moving your projectiles around in unconventional ways, and can even be used for lol-worthy gimps if you're feeling particularly insane. (Not recommended, but if you REALLY want to...) On a more practical note it gives you a way to save the "real" Gemini Man from being gimped if you're desperate and a Gemini Jump can't quite make it. Additionally, there's one last method for manipulating projectiles, and that's by controlling your duplicate. Your duplicate's target creating up smash let's you control where they aim with their projectiles and reflections (by individual projectile type for added control!), and of course the down special recording or back-air mirror mode gives you complete control over what the duplicate's up to, at the cost of ridiculous predictability. (Thankfully you can switch it up quite easily by quick-switching to the duplicate and doing something else or canceling the mirror mode.)
Speaking of manipulating projectiles, let's move on to the stuff you want to reflect. Arm cannon shots from your jab are more or less the basic tool in Gemini Man's arsenal, spammable, easy to use, but nothing special. (On that note a charged shot is great for taking out a badly made Pole platform, just fire and forget.) Your other main tools are the magnetic blast to chase down the opponent (this is great thing to leave a computer duplicate doing, as they can do it as well as you can, letting you focus on more complicated stuff), and the dual blast for a killing blow when the opponent is completely overloaded. Additionally, your mist cloud, while not strictly a projectile, will confuse the opponent as to which Gemini Man is real, and can be used in conjunction with hologram mind games for even more fun. Alternatively, you can turn it into one massive trap with a magnetic blast, which sets the opponent up rather perfectly for a killing dual blast blow.
Overall, Gemini Man requires quick reflexes and an even quicker mind. When played properly you can completely overload the opponent between your own character and the duplicate in a 2v1, but reflecting the projectiles properly to keep them as a threat requires using your laser, grab game, and all your various tools in conjunction with one another, and some major planning ahead of time. On the other hand, if you lose track of things, you could very well end up murdering your duplicate with your own projectiles, and being completely outmatched with no duplicate, no projectiles, and MK spamming down air knocking you away from the stage for a gimp... More seriously, Gemini Man has little in the way of reliable non-projectile moves to stop an opponent with, and is easily dealt with in a 1v1. The learning curve is pretty steep, but when mastered Gemini Man is a force (or should that be two forces?) to be reckoned with.
Edit:
Final Smash:
Since you guys REALLY wanted one...
Mecha Giga Bowser
Yep.
HollowKnight
Smash Rookie
Gemini Man:
I really enjoy the concept but I believe their are some problems with some of the ways you chose to execute them. While I would comment on some of the move choices for certain inputs , like the BAir, or the complexity of the Grab Game, that wouldn't really be providing criticism on how to improve your set as a whole. The biggest flaw I found was not something you have control over, but still could've been avoided. Using a level 9 CPU as the duplicate poses many problems. At a casual level, a player could simply summon a duplicate and run. Considering the CPU is better then many casual players, it would wreck any fun in casual matches. It also poses a problem competitively because it basically makes the fight a temporary 2 against 1, even though the duplicate has drawbacks. Then there are always the ways to exploit CPUs into suicide that just tops it off. Basically, basing the duplicate off a CPU is not a very stable system and I believe there are better ways to do it. For one, you could pull something similar to a Hugo moveset and have Gemini man and his duplicate spawn together at start like Ice Climbers and use some clever way to control both, which would have really sold the moveset for me. If you had gone the extra mile and came up with a clever way to control both, this set could have been very, very good. As of now I feel that the Pole gimmick with the Grab Game and the CPU duplicate make the set a little too awkward to go above and beyond, but I could still see the good qualities of the moveset shine through as I read. Its a good set, it just needed the push to make it anything that would tower above the average level of movesetting. Close, but no cigar from me this time.
I really enjoy the concept but I believe their are some problems with some of the ways you chose to execute them. While I would comment on some of the move choices for certain inputs , like the BAir, or the complexity of the Grab Game, that wouldn't really be providing criticism on how to improve your set as a whole. The biggest flaw I found was not something you have control over, but still could've been avoided. Using a level 9 CPU as the duplicate poses many problems. At a casual level, a player could simply summon a duplicate and run. Considering the CPU is better then many casual players, it would wreck any fun in casual matches. It also poses a problem competitively because it basically makes the fight a temporary 2 against 1, even though the duplicate has drawbacks. Then there are always the ways to exploit CPUs into suicide that just tops it off. Basically, basing the duplicate off a CPU is not a very stable system and I believe there are better ways to do it. For one, you could pull something similar to a Hugo moveset and have Gemini man and his duplicate spawn together at start like Ice Climbers and use some clever way to control both, which would have really sold the moveset for me. If you had gone the extra mile and came up with a clever way to control both, this set could have been very, very good. As of now I feel that the Pole gimmick with the Grab Game and the CPU duplicate make the set a little too awkward to go above and beyond, but I could still see the good qualities of the moveset shine through as I read. Its a good set, it just needed the push to make it anything that would tower above the average level of movesetting. Close, but no cigar from me this time.
Kholdstare
Nightmare Weaver
- Joined
- Oct 10, 2008
- Messages
- 1,440
my bad, mispost, was testing a moveset (WARY)
There's something up ahead, sir... Oh? Freeze it at all costs, soldier!
You guys already know, I'm sure, but Ice Man is a Robot Master from the Mega Man games. He appeared in the original game, as well as its "remake," Mega Man: Powered Up. In the latter, he is shown to have a sort of inferiority complex that's caused him to have a rather humorous split personality. His second personality usually only comes out when he's intimidated by something, and results in him talking to himself like a general. The "soldier" personality often replies, resulting in dialogue that's strange, to say the least.
Upon defeating him, Mega Man receives the poorly-named Ice Slasher, which doesn't slash at all, but basically just shoots a icy projectile that can freeze enemies. Ice Man's weakness is the Thunder Beam (in the original game) or the Hyper Bomb (in Powered Up), and his Ice Slasher is…Fire Man's weakness? Yep, all those years playing Pokemon taught you wrong, apparently.
Lots of Ice Man's attacks involve creating ice. Unless stated otherwise in a move, the properties of that ice are these: it remains on the field for an indefinite amount of time, it can be destroyed by being dealt 30% damage, and pieces smaller than a Party Ball can be knocked around. Smaller pieces will go farther when hit.
Another purpose of several of Ice Man's attacks is to incrementally freeze opponents. There are different levels of being frozen, though, and they affect the frozen player like this:
LEVEL 1 -- No graphical change, dash speed and jump height are minutely decreased. Takes five seconds to wear off.
LEVEL 2 -- Slight bluish tint. Dash and jump noticeably, but not painfully lowered. Shield deteriorates twice as much as normal from hits. Takes four seconds to wear off (to level 1—other levels are like this too).
LEVEL 3 -- Very blue shade. Dash and jump cut to 2/3 of normal. Shield wears out double speed from hits and while being held normally. All moves have minor increases to startup lag. Wears off after three seconds.
LEVEL 4 – Parts of body covered in ice. Dash and jump 1/2 normal. Shield deteriorates double speed and cannot reach more than half of full power. Moves have significantly increased startup and ending lag. Take half damage and knockback from attacks. Wears off after two seconds.
LEVEL 5 -- Frozen solid. No movement, no attacks, nothing. But they get superarmor and take half damage from attacks. Takes two seconds to wear off, and reverts back to Level 2 freeze when it does.
Note this also. Items have an invisible freeze meter. If an item would be pushed to level 3 freeze, it will be frozen solid and act like a block of ice, unable to be used for its original purpose. Now, onto the moves and stuff… Stuff first…
Size 3/10
He’s kind of a small guy, around the same size as an Ice Climber (duh, he looks like one too).
Weight 2/10
Aaaaaaaand he’s not very heavy. Poor little guy gets knocked around easy.
Speed 4/10
Not slow, but not especially fast. Gee, Ice Man, aren’t you good at anything?!
Jump 8/10
Finally! Ice Man is a good jumper, with both of his jumps.
Fall 2/10
And he falls very slowly. Lots of air time.
Traction 10/10
A perfect ten! No tripping for Ice Man! He doesn’t even slip on ice!
So Ice Man doesn’t have much going for him here. Statistically, he looks like kind of a typical light-weight, with a relatively small size and not much speed. His only real redeeming stat is his jump height, but that’s not going to save him the match. Ice Man’s strength lies not in any of these things, though, but in his ability to manipulate his opponent. This seemingly weak character is balanced out by some powerfully useful attacks.
Okay, seriously, enough with the stats, now the fun part.
Down Special Icicle Burst
For this move, Ice Man extends his arms and yells, “Go!” Takes about as long as Snake’s Down Special, and isn’t entirely unlike it. See, now all the ice you have out that’s within a Smart Bomb’s explosion's radius of Ice Man is going to make itself useful. All that ice will quickly crack a bit and grow a series of sharp icicles all along the surface. The icicles are small, but turn that ice into a sharp hitbox that deals 10% damage and weak upward knockback. At the instant they come out, the icicles are a little more powerful, dealing 12% and slightly better knockback, but that’s not really a detail worth losing sleep over. You won’t be winning any matches by trying to set up that extra 2%. It mostly just makes you feel good about yourself.
But wait! There’s more! If you use this move and it hits a chunk of ice you’ve already cracked--that’s already lined with sharp icicles--this will cause the ice to shatter into a million pieces! Small chunks of ice fly off in every direction for a short distance (like Jigglypuff’s Standard Combo-ish distance), dealing multi-hit damage up to 20% to anyone they hit. This if the opponent takes any of this damage, it will add a level to their current freeze. At the end of this multi-hit is a blow that deals strong diagonal knockback, making this your primary KO move. Not to be deceiving, it’s not retardedly powerful like a homerun bat smash or anything, but it is a strong hit with good KO potential. Note, you can’t do this to natural ice (like on the Ice Climbers’ stage), or ice that another Ice Man player makes, just ice that you create.
Also, remember, at Freeze Levels 4 and 5, your opponents have ice on them!! Use it to your advantage! You can’t miss! (Unless they dodge…) It is worth noting, however, that the knockback for this move at level 5 is severely reduced, so don’t think it’s going to be that easy. Their superarmor won’t protect them completely, but it won’t let them go far.
Neutral Special Ice Slasher
Could it be anything else? Ice Man shoots forward a projectile of ice that moves about as fast as Samus’s charge shot. It’s a little faster on the execution, though. But you can’t charge it, just shoot. This is your primary tool for freezing opponents, as impact with the “slasher” deals 5% damage and adds a level of freeze to whoever it hits. It won’t stop until it hits something or goes off screen.
As a nifty bonus, you can also shoot this at any vertical walls on the stage, which will be frozen for a space about Kirby’s height if you do. It stays that way indefinitely. Characters can’t wall cling or wall jump off that spot, but more importantly, you can use your Down Special to blow that ice up in your opponent’s face, or on some stages, to even turn a stage wall into an edge-guarder.
Up Special Ice Platform
Blowing cold air beneath him, Ice Man forms a platform of ice the same size as one of the ones floating on Battlefield. This is kind of slow (not super slow, but kind of), but Ice Man hovers in midair while doing it, so the time won’t hurt your recovery, just run you the risk of getting hit by opponents. The ice platform can’t be passed through like Battlefield’s, but Ice Man is the only one who can stand on it. Well, others can try, but they’ll slip off the side they’re closest to immediately, tumbling through the air as if they were footstool jumped on after sliding off. And it won’t count as them hitting ground, so if they try to use this platform to recover, they can’t. They don’t get their Up Special back. Nothing. Also, this is the only ice you can create that can’t be destroyed by other players.
So basically, this just gives Ice Man an endless recovery of creating platforms, right? Wrong. Only one of these platforms can exist on the stage at a time, so you had better place it well, or you’re in trouble. Of course, if the situation is requiring you to put the platform in a different place, your Down Special could be used to break the ice. Just know this: you’ll have to wait two seconds after it breaks to make another one, so this doesn’t give you potential for an infinite recovery.
Side Special Chill Wind
Ice Man blows a gust of cold wind forward. It covers a distance forward twice the distance as Charizard’s fire breath, but as high as Ganondorf’s height. This pushes anyone in its way forward really hard, and sends them tumbling through the air onto the ground. It deals no damage, though. The push has a set distance of about half of Final Destination that it pushes opponents it hits. Downside, though: this move is very slow. Like, Falcon Punch slow. Still, with its great range, you should be able to use it for pushing around your opponents as long as you can keep them at a bit of a distance. Most likely, you’ll be pushing them into your ice, or your ice into them, whatever the case may be.
Basic Attack Flurry
Holding his hand forward, Ice Man sprays a short-ranged flurry of ice. Similar to Ice Climbers’ Blizzard attack, but slightly shorter range and faster to execute. These little ice shards will fly for about a second if you hold the button, although you can release it to cancel after a quarter second, or anytime in between. They deal multi-hit damage up to 6%, and add a level of freeze to your opponent. The ice doesn’t stick around, though, so you can’t use the Down Special on it.
Forward Tilt Cube Toss
So let’s talk about other moves you can use to spread ice around. This is a pretty straightforward one: Ice Man throws a big cube of ice forward, about half the size of Kirby. The arc is like Olimar with a purple Pikmin, and about the same speed. Getting hit with it will deal 6% damage with weak knockback, and make the block break and disappear. Note: the breaking is not like the Down Special, don’t get any ideas. So, maybe you figured out that if you want the block to stick around so you can use it for your Down Special, you can’t hit anyone with it. If an ice block makes it to the point where it’s sitting on the stage, it will cause any previous ice block to vanish, and will sit there indefinitely or until broken. Either Ice Man breaks it via the Down Special, or an opponent beats it up enough.
Up Tilt Stalagmite
Yay, more ice attacks (he has a lot of them, duh)! So Ice Man holds his hands to the air, and a small frozen stalagmite shoots up from them. It’s about twice as big as a Pikmin. It takes a little time to shoot up, but deals 5% damage or sweetspots at the tip for 13% and pretty good upward knockback. Anyhow, afterward, Ice Man will just drop the icicle. Yep, straight to the ground. So it just lays there until something happens to it. I think you can figure out what.
Down Tilt Ice Pillar
Let’s make ice that can do other things! Ice Man slaps the ground in front of him, and a pillar of ice about ZSS size pieces itself together there. It’s a little shorter than her, but whatever. This does take time, but the ice pillar is rather useful. First of all, the piecing together process deals 3 hits of 2% damage each, so…yeah. It’s an effective wall, blocking all hits (except fire hits…) And of course, it’s ice. You need ice. But it can also be pushed around by Ice Man. Press up against this wall for half a second, and it’ll slide forward, staying upright. It slides at about the speed of Kirby’s walk, and anyone it hits will take 4% damage and weak upward knockback. If it collides with a wall, it will break (again, not like the Down Special’s shattering).
Dash Attack Speed Skater
So now we’re going to try something that applies ice directly to the ground. Ice Man breaks out of his dash into a quick slide, as the ground beneath him freezes as he passes. Covers roughly ¾ of a battlefield platform. He moves at his normal dash speed, still. This is fast at the beginning, but a little slow when it ends, because Ice Man actually runs out of ice while sliding, and faceplants on the ground. Yeah, that means you’re in the prone position to finish. Anyway, he also deals 9% damage and okay backward knockback if he hits someone, but once again, that’s not the real purpose of this move, though you may use it to add space between you and your opponent if you’re in a jam. Obviously, since this ice is on the stage, it acts like other icy areas, opponents slip more often, etc.
Side Smash Iceball
Ice Man leans over and pushes along the ground, forming a snow…err…iceball. He actually moves forward while you charge. At full charge, he’ll go a battlefield platform. The ball gets bigger, too, and deals more damage. When you release, he’ll let the ball keep rolling. It moves as fast as half of Jigglypuff’s walk speed, dealing 5% to 18% damage and moderate diagonal knockback. The size can range from the size of a Pokeball to the size of Kirby. You can have up to three of these on the field at a time, but they’ll break if they collide with anything, including each other or your opponents.
Up Smash Snow Burst
Put your hands up! Ice Man shoots three snowflake-looking projectiles up, one straight up and the other two at angles. They go as high as the low battlefield platform, then come back down. The outside ones will hit the ground half a battlefield platform away from Ice Man. While flying through the air, they deal 4% damage and no knockback. When they hit, they cause sharp icicles the size of Link to shoot up from the ground. These only last a moment, but deal 10 - 15% damage, or 18 – 28% at the sweetspot point. The knockback is pretty good, but not great.
Or you could press A again while the flakes are airborne to solidify them. This means they’ll just hit the ground and sit there instead. They will bounce, and can easily be knocked around, but this is one of the easiest ways to spread a lot of ice around quickly. In this form, they don’t do any damage on their own, and are only useful for the Down Special. If they collide with an opponent, that opponent will flinch, but take no damage.
Down Smash Mega Freeze
A powerful move for getting things frozen. Stretching both arms out, Ice Man lets out a blast of cold air both ways. Distance changes with charge. Weakest is just right next to him, but strongest is a quarter of Final Destination in each direction. Deals 10% damage and adds two levels of freeze to anyone it hits. Kind of slow, though. Also, if you charge all the way, it will freeze the ground at a couple of random spots within the range of the blast.
Neutral Air Cold Hands
Ice Man holds his hands forward and they turn a glowing blue color. This is a relatively fast move, but has little range. If Ice Man’s hands touch an opponent during this move’s short time, he will grab their hands and a chunk of solid ice will encase both Ice Man’s hands and your opponent’s. This means that they’re stuck to you until the ice breaks, which will happen after two seconds. During this time, you both control both of you. That sounds confusing. Each of you has some control over where you, as a collective twosome, go. Jumping does not work while you are frozen to each other. Like Bowser’s slam attack, the person with lower damage % has more control. You can also each press the A button to give the other a little kick for 3% damage, but this will sacrifice your mobility and give your opponent more control every time you do it. When the ice breaks, you’ll both suffer pretty bad ending lag, but Ice Man’s is a little worse, so use this when you really have a reason to (like to get your opponent near your ice.) This also adds one level to your opponent’s freeze.
Forward Air Icicle Slash
I know it sounds a lot like Ice Slasher, okay? But this one actually slashes, because Ice Man holds his hands above his head and a long icicle forms in them, about the size of Marth’s sword. He then swings it down kind of slowly, more like Ike’s FAir, but slightly faster. About the same range, though. If you miss, that’s it. Boring. But if you hit, it deals 8% and the icicle breaks in half and Ice Man will jolt back in shock. This increases the ending lag, but the two halves of the icicle will drop to the ground below. Of course, that means you have ice to use your Down Special on, but it doesn’t stop there. The icicle halves act as battering items, so you (or another player) can pick them up and swing them at each other. The range and damage are cut in half now, but the effect remains the same: if you hit with it, the icicle will break in half. This can happen until each piece breaks into an eighth of the original icicle, at which point it’s quite small and only deals 1% damage when swung. (But it’s still great for your Down Special, and there are more of them now!)
Back Air Snowy Breath
Ice Man whips around and releases a cold gust from his lungs. This covers an area about the height and twice the width of a Party Ball behind him, and happens quick. The damage done is relative to the current freeze level of your opponent. At level 0, it will deal 2%; at level 1, 5%; at level 2, 9%; at level 3, 14%; at level 4, 20%; and at level 5, 28% damage. The knockback is low and fixed backward, and after the damage, this adds a level of freeze to your opponent.
Up Air Blizzard Cloud
Ice Man blows a gust of cold air upward, forming a light blue cloud about the size of Bowser. This is a little slow, and you can only have one at a time. The cloud does nothing until at opponent touches it, at which point it will erupt in an icy blizzard that deals multi-hit damage up to 20%. It adds a level to their freeze too. It then has to recharge for three seconds before it can do it again.
Using the Down Special on the cloud will first turn it into solid ice, making it fall out of the sky to the ground. In other words, this has a 3-part Down Special transition, instead of two like most things. The falling ice chunk deals 10% damage and pretty good downward knockback too, so this is a good gimping move, and one of your only formidable KO options outside of the Down Special.
Down Air Hailstorm
I almost put my name there. I’m just used to spelling it that way. Ice Man will stall in mid-air for a short time and shoot two sets of three small hail chunks downward. Each set has one that goes straight down and two that go at about 20 degree angles. This takes a while, because Ice Man pauses significantly before he does it the second time. Little lag on the front and back, though, just in the middle. The icy projectiles are pretty fast, like smash thrown items, and deal 8% damage and weak knockback toward Ice Man. They’ll break upon impact with the ground…
…unless you’re low enough to it. From high up, those tiny pieces of hail can’t take the impact, but if used from less than the height of Battlefield’s low platforms, the ice chunks will just sit on the ground for you to make further use of. They also double as throwing items here, but will break once thrown and they hit something.
Grab Freeze Frame
A quick puff of cold air from Ice Man freezes the opponent in front of him in a block of ice just their size. Better range than a hands-on grab, but not by too much, and a tad bit slower than most. This can hit multiple opponents if they are close.
Pummel Chill Out
Ice Man’s pummel can only be used once per time he grabs someone. He does virtually the same animation as his grab. This adds one level of freeze to the opponent, and this freeze will last twice as long as a normal freeze of that level before wearing off.
Forward Throw Shove
Boring name, sorry. Ice Man leans forward and gives his frozen victim a shove. They’ll slide forward along the ground for half the length of Final Destination (or until they break the grip, which is the same as from the initial grab), then their icy prison will topple over and crash to the ground, dealing them 8% damage. Anyone they collide with along the way takes 10% and moderate knockback. Because of this, it’s more useful in free for alls than one on one. Opponents won’t slide over the edge, don’t get any bright ideas. They’ll stop at ledges and walls and such.
Back Throw Shatter
This looks like a pretty normal BThrow. Ice Man grabs his victim (lol, he already “grabbed” them, but you know what I mean) and slams them to the ground behind him. This does a measley 4% damage, but the encasing of ice they were trapped in shatters, leaving behind five small pieces of ice that cover a very short distance. What this means is you basically have a minefield of ice to blow up on someone if you can get them to step into it again. Using this a second time will erase the old ice pile.
Up Throw Ice Lift
A platform of ice appears under the opponent, and starts to lift them up. It will lift them until they break the grab grip, like the FThrow. Aside from going higher, so you could KO someone off the top if they’re either really bad or at obscene damage, you can manually stop their ascent by breaking the rising ice yourself (Down Special, duh). If they break out themselves, they’ll take a measley 3% damage as they do.
Down Throw Ice Sculpture
Ice Man takes a second to sculpt a perfect replica of his frozen opponent, then the ice around them breaks, freeing them. This is slow, and if your opponent breaks your grip before you finish, the ice sculpture will just melt away. But if you finish it, it’s quite nice, because once you use three freezing attacks on the sculpture, it will start moving around. It will have basically the same movement properties as the person it’s a replica of, though it won’t attack, and it is a little slower than them. It will weakly try to follow them around as long as they’re somewhat close. Anyhow, if you want ice that homes in on your opponent, this is how you get it.
Final Smash Frenzy Freeze
Ice Man is invincible and stuck in place for this FS, like Ness or DK. For ten seconds, chunks of ice of random sizes (ranging from about the size of a Pikmin to Bowser) will jut out of random spots in the stage, without warning. As they do, they deal 18% damage and flinching knockback. A quarter second later, though, they’ll explode into bits, dealing multi-hit damage up to 18% again and high upward knockback. These chunks will only jut from the top of the stage, or walls on the stage if it has them. One chunk appears roughly every half second. Everything returns to normal after this.
Playstyle Summary Cold As Ice
It’s probably not that hard to figure out going through the moves, but I’ll summarize here: Ice Man relies on crippling his opponent through freezing enough to force them into the ice he’s placed on the stage, which he can then use to KO via his Down Special. That’s the essence of it, now let’s pick apart the steps.
First, you need to freeze your opponent and slow them down. The moves you have at your disposal with freezing power are listed here, with particularly noteworthy freezers highlighted:
Neutral Special (Ice Slasher) [notable for being a projectile option]
Down Special (Icicle Burst)
Basic Attack (Flurry)
Down Smash (Mega Freeze) [notable for adding two levels instead of one]
Neutral Air (Cold Hands)
Back Air (Snowy Breath)
Up Air (Blizzard Cloud)
Pummel (Chill Out) [notable for extended freeze time]
That’s a relatively small list, when you look at the entire moveset, so this part of the game is a little tricky, as your opponent knows what to expect. Don’t forget, then, to spread ice around at the same time. Having ice around helps you distract your opponent and force them into compromising positions. Of special note also here is the BAir (then why didn’t you highlight it, Haylstorm?! Answer: because it doesn’t freeze well, it just works well with the freezing) which does increased damage once you’ve done a little pre-freezing to your opponent. The Up Air is also a good option to do once you’ve done the majority of your freezing, because after it helps finish the freezing process, you can turn it into useable ice via the Down Special. Try forcing your opponents into that Up Air with your Up Throw (Ice Lift).
Also set up your Up Special platform pretty early. If you stay on top of the match from the beginning, you can place it just beyond the edge of the stage, so you can use it as an extension of the stage to use to press your opponents further out. Aside from using it to stand, you can blow it up in their face when they start coming back to the stage.
Use the time while your opponent is slow and frozen, hopefully at level 5 so they’re stuck completely, to get a large pile of ice made. In one-on-one matches, a large pile is more effective than spreading the ice everywhere, as you’ll be more likely to KO by blowing it up. And with only one opponent to worry about, you can continue to slow them down and push them, via your Side Special (Chill Wind) to that large pile. Sometime before you plan to KO, but after you’ve set what ice you think you need, set up the icicles on all your ice. This will further distract your opponent and free you from having to double hit the Down Special once you get them close. If the Side Special is still too slow after freezing your opponent, consider the Forward Throw (Shove) to manipulate them. Elusive opponents can also be cornered with the Down Throw (Ice Sculpture) for an easier time getting the ice to them. If you have to rely solely on your moving ice replica, though, you’ll need to push them to higher percentages to KO. Oh, and also, never skip out on the Pummel before throwing. It’s virtually always worth it.
KOs are also more easily scored on opponents with level 4 freeze. This is trickier, because it’s the shortest freeze level, so pushing your opponent to it with the Pummel is good if you can. Otherwise, the timing can be a difficult factor. Of course, if you’ve placed enough ice around the stage, you don’t need it sitting on your opponent’s face, now, do you? Besides, even if you can’t land level 4, having them frozen to any degree helps you manipulate them, since they’re slowed down by it.
Do everything you can to make sure your opponent takes the hit from the ice, because if you don’t and you miss, you’ll have to start over. All your ice will be broken, and you’ll be at square one. Unless, of course, you’ve set up multiple piles far enough away from each other, which is a smart idea. You can start by somewhat haphazardly placing the ice on the stage, then use the set knockback distance of the Side Special to push it into a few convenient piles. Of course, it isn’t a bad idea to leave some of it scattered throughout, so use the Side Special a little earlier than you’re planning to use the Down Special. Continue to use what projectiles you have, Neutral Special, Forward Smash, etc., to keep your opponent on their toes, then lure them into one of your several traps and shatter it!
So maybe you can see how this wouldn’t work so well in a free for all battle. You can maybe slow one opponent down, but it’ll be tough to do three or even just two. Ice Man does not excel in free for all battles, but your best strategy is just to go crazy with your ice. Spread it around, all over the place. The Down Air (Hailstorm) and Up Smash (Snow Burst) are particularly good at this, and your Forward Air (Icicle Slash) can also be useful for getting the ice around. It’s basically a cycle of spread, explode, repeat here, and as I said, it’s not as good as in a one on one environment. Still, you can wreak a lot of havoc if you play your cards right.
Focusing on one person here will be the death of you, for sure, so just hit everyone at once if possible. Your Down Smash can cover the range to slow down everyone a bit and give you a little upper hand, and don’t forget that your Forward Throw can slam multiple opponents. For that matter, your grab can snag multiple opponents, so if you can successfully pressure them all into the same area, or just get lucky and catch them fighting each other, you can score some big points there. If you do grab multiple opponents, the Back or Down Throws are recommended, as their effects are nice to have twice or three times. Nothing like an ice sculpture of each of your opponents working for you! The principles of Ice Man’s game remain the same here, but the basic difference is that you should be focused on a more widespread attack strategy, instead of targeting specific areas for high damage blasts.
Well... That was fun. Hope you guys like it.
ICE MAN

You guys already know, I'm sure, but Ice Man is a Robot Master from the Mega Man games. He appeared in the original game, as well as its "remake," Mega Man: Powered Up. In the latter, he is shown to have a sort of inferiority complex that's caused him to have a rather humorous split personality. His second personality usually only comes out when he's intimidated by something, and results in him talking to himself like a general. The "soldier" personality often replies, resulting in dialogue that's strange, to say the least.
Upon defeating him, Mega Man receives the poorly-named Ice Slasher, which doesn't slash at all, but basically just shoots a icy projectile that can freeze enemies. Ice Man's weakness is the Thunder Beam (in the original game) or the Hyper Bomb (in Powered Up), and his Ice Slasher is…Fire Man's weakness? Yep, all those years playing Pokemon taught you wrong, apparently.
Pre-Moveset Notes: Ice & Freezing
Lots of Ice Man's attacks involve creating ice. Unless stated otherwise in a move, the properties of that ice are these: it remains on the field for an indefinite amount of time, it can be destroyed by being dealt 30% damage, and pieces smaller than a Party Ball can be knocked around. Smaller pieces will go farther when hit.
Another purpose of several of Ice Man's attacks is to incrementally freeze opponents. There are different levels of being frozen, though, and they affect the frozen player like this:
LEVEL 1 -- No graphical change, dash speed and jump height are minutely decreased. Takes five seconds to wear off.
LEVEL 2 -- Slight bluish tint. Dash and jump noticeably, but not painfully lowered. Shield deteriorates twice as much as normal from hits. Takes four seconds to wear off (to level 1—other levels are like this too).
LEVEL 3 -- Very blue shade. Dash and jump cut to 2/3 of normal. Shield wears out double speed from hits and while being held normally. All moves have minor increases to startup lag. Wears off after three seconds.
LEVEL 4 – Parts of body covered in ice. Dash and jump 1/2 normal. Shield deteriorates double speed and cannot reach more than half of full power. Moves have significantly increased startup and ending lag. Take half damage and knockback from attacks. Wears off after two seconds.
LEVEL 5 -- Frozen solid. No movement, no attacks, nothing. But they get superarmor and take half damage from attacks. Takes two seconds to wear off, and reverts back to Level 2 freeze when it does.
Note this also. Items have an invisible freeze meter. If an item would be pushed to level 3 freeze, it will be frozen solid and act like a block of ice, unable to be used for its original purpose. Now, onto the moves and stuff… Stuff first…
Stats
Size 3/10
He’s kind of a small guy, around the same size as an Ice Climber (duh, he looks like one too).
Weight 2/10
Aaaaaaaand he’s not very heavy. Poor little guy gets knocked around easy.
Speed 4/10
Not slow, but not especially fast. Gee, Ice Man, aren’t you good at anything?!
Jump 8/10
Finally! Ice Man is a good jumper, with both of his jumps.
Fall 2/10
And he falls very slowly. Lots of air time.
Traction 10/10
A perfect ten! No tripping for Ice Man! He doesn’t even slip on ice!
So Ice Man doesn’t have much going for him here. Statistically, he looks like kind of a typical light-weight, with a relatively small size and not much speed. His only real redeeming stat is his jump height, but that’s not going to save him the match. Ice Man’s strength lies not in any of these things, though, but in his ability to manipulate his opponent. This seemingly weak character is balanced out by some powerfully useful attacks.
Okay, seriously, enough with the stats, now the fun part.
Specials
Down Special Icicle Burst
For this move, Ice Man extends his arms and yells, “Go!” Takes about as long as Snake’s Down Special, and isn’t entirely unlike it. See, now all the ice you have out that’s within a Smart Bomb’s explosion's radius of Ice Man is going to make itself useful. All that ice will quickly crack a bit and grow a series of sharp icicles all along the surface. The icicles are small, but turn that ice into a sharp hitbox that deals 10% damage and weak upward knockback. At the instant they come out, the icicles are a little more powerful, dealing 12% and slightly better knockback, but that’s not really a detail worth losing sleep over. You won’t be winning any matches by trying to set up that extra 2%. It mostly just makes you feel good about yourself.
But wait! There’s more! If you use this move and it hits a chunk of ice you’ve already cracked--that’s already lined with sharp icicles--this will cause the ice to shatter into a million pieces! Small chunks of ice fly off in every direction for a short distance (like Jigglypuff’s Standard Combo-ish distance), dealing multi-hit damage up to 20% to anyone they hit. This if the opponent takes any of this damage, it will add a level to their current freeze. At the end of this multi-hit is a blow that deals strong diagonal knockback, making this your primary KO move. Not to be deceiving, it’s not retardedly powerful like a homerun bat smash or anything, but it is a strong hit with good KO potential. Note, you can’t do this to natural ice (like on the Ice Climbers’ stage), or ice that another Ice Man player makes, just ice that you create.
Also, remember, at Freeze Levels 4 and 5, your opponents have ice on them!! Use it to your advantage! You can’t miss! (Unless they dodge…) It is worth noting, however, that the knockback for this move at level 5 is severely reduced, so don’t think it’s going to be that easy. Their superarmor won’t protect them completely, but it won’t let them go far.
Neutral Special Ice Slasher
Could it be anything else? Ice Man shoots forward a projectile of ice that moves about as fast as Samus’s charge shot. It’s a little faster on the execution, though. But you can’t charge it, just shoot. This is your primary tool for freezing opponents, as impact with the “slasher” deals 5% damage and adds a level of freeze to whoever it hits. It won’t stop until it hits something or goes off screen.
As a nifty bonus, you can also shoot this at any vertical walls on the stage, which will be frozen for a space about Kirby’s height if you do. It stays that way indefinitely. Characters can’t wall cling or wall jump off that spot, but more importantly, you can use your Down Special to blow that ice up in your opponent’s face, or on some stages, to even turn a stage wall into an edge-guarder.
Up Special Ice Platform
Blowing cold air beneath him, Ice Man forms a platform of ice the same size as one of the ones floating on Battlefield. This is kind of slow (not super slow, but kind of), but Ice Man hovers in midair while doing it, so the time won’t hurt your recovery, just run you the risk of getting hit by opponents. The ice platform can’t be passed through like Battlefield’s, but Ice Man is the only one who can stand on it. Well, others can try, but they’ll slip off the side they’re closest to immediately, tumbling through the air as if they were footstool jumped on after sliding off. And it won’t count as them hitting ground, so if they try to use this platform to recover, they can’t. They don’t get their Up Special back. Nothing. Also, this is the only ice you can create that can’t be destroyed by other players.
So basically, this just gives Ice Man an endless recovery of creating platforms, right? Wrong. Only one of these platforms can exist on the stage at a time, so you had better place it well, or you’re in trouble. Of course, if the situation is requiring you to put the platform in a different place, your Down Special could be used to break the ice. Just know this: you’ll have to wait two seconds after it breaks to make another one, so this doesn’t give you potential for an infinite recovery.
Side Special Chill Wind
Ice Man blows a gust of cold wind forward. It covers a distance forward twice the distance as Charizard’s fire breath, but as high as Ganondorf’s height. This pushes anyone in its way forward really hard, and sends them tumbling through the air onto the ground. It deals no damage, though. The push has a set distance of about half of Final Destination that it pushes opponents it hits. Downside, though: this move is very slow. Like, Falcon Punch slow. Still, with its great range, you should be able to use it for pushing around your opponents as long as you can keep them at a bit of a distance. Most likely, you’ll be pushing them into your ice, or your ice into them, whatever the case may be.
Standards
Basic Attack Flurry
Holding his hand forward, Ice Man sprays a short-ranged flurry of ice. Similar to Ice Climbers’ Blizzard attack, but slightly shorter range and faster to execute. These little ice shards will fly for about a second if you hold the button, although you can release it to cancel after a quarter second, or anytime in between. They deal multi-hit damage up to 6%, and add a level of freeze to your opponent. The ice doesn’t stick around, though, so you can’t use the Down Special on it.
Forward Tilt Cube Toss
So let’s talk about other moves you can use to spread ice around. This is a pretty straightforward one: Ice Man throws a big cube of ice forward, about half the size of Kirby. The arc is like Olimar with a purple Pikmin, and about the same speed. Getting hit with it will deal 6% damage with weak knockback, and make the block break and disappear. Note: the breaking is not like the Down Special, don’t get any ideas. So, maybe you figured out that if you want the block to stick around so you can use it for your Down Special, you can’t hit anyone with it. If an ice block makes it to the point where it’s sitting on the stage, it will cause any previous ice block to vanish, and will sit there indefinitely or until broken. Either Ice Man breaks it via the Down Special, or an opponent beats it up enough.
Up Tilt Stalagmite
Yay, more ice attacks (he has a lot of them, duh)! So Ice Man holds his hands to the air, and a small frozen stalagmite shoots up from them. It’s about twice as big as a Pikmin. It takes a little time to shoot up, but deals 5% damage or sweetspots at the tip for 13% and pretty good upward knockback. Anyhow, afterward, Ice Man will just drop the icicle. Yep, straight to the ground. So it just lays there until something happens to it. I think you can figure out what.
Down Tilt Ice Pillar
Let’s make ice that can do other things! Ice Man slaps the ground in front of him, and a pillar of ice about ZSS size pieces itself together there. It’s a little shorter than her, but whatever. This does take time, but the ice pillar is rather useful. First of all, the piecing together process deals 3 hits of 2% damage each, so…yeah. It’s an effective wall, blocking all hits (except fire hits…) And of course, it’s ice. You need ice. But it can also be pushed around by Ice Man. Press up against this wall for half a second, and it’ll slide forward, staying upright. It slides at about the speed of Kirby’s walk, and anyone it hits will take 4% damage and weak upward knockback. If it collides with a wall, it will break (again, not like the Down Special’s shattering).
Dash Attack Speed Skater
So now we’re going to try something that applies ice directly to the ground. Ice Man breaks out of his dash into a quick slide, as the ground beneath him freezes as he passes. Covers roughly ¾ of a battlefield platform. He moves at his normal dash speed, still. This is fast at the beginning, but a little slow when it ends, because Ice Man actually runs out of ice while sliding, and faceplants on the ground. Yeah, that means you’re in the prone position to finish. Anyway, he also deals 9% damage and okay backward knockback if he hits someone, but once again, that’s not the real purpose of this move, though you may use it to add space between you and your opponent if you’re in a jam. Obviously, since this ice is on the stage, it acts like other icy areas, opponents slip more often, etc.
Smashes
Side Smash Iceball
Ice Man leans over and pushes along the ground, forming a snow…err…iceball. He actually moves forward while you charge. At full charge, he’ll go a battlefield platform. The ball gets bigger, too, and deals more damage. When you release, he’ll let the ball keep rolling. It moves as fast as half of Jigglypuff’s walk speed, dealing 5% to 18% damage and moderate diagonal knockback. The size can range from the size of a Pokeball to the size of Kirby. You can have up to three of these on the field at a time, but they’ll break if they collide with anything, including each other or your opponents.
Up Smash Snow Burst
Put your hands up! Ice Man shoots three snowflake-looking projectiles up, one straight up and the other two at angles. They go as high as the low battlefield platform, then come back down. The outside ones will hit the ground half a battlefield platform away from Ice Man. While flying through the air, they deal 4% damage and no knockback. When they hit, they cause sharp icicles the size of Link to shoot up from the ground. These only last a moment, but deal 10 - 15% damage, or 18 – 28% at the sweetspot point. The knockback is pretty good, but not great.
Or you could press A again while the flakes are airborne to solidify them. This means they’ll just hit the ground and sit there instead. They will bounce, and can easily be knocked around, but this is one of the easiest ways to spread a lot of ice around quickly. In this form, they don’t do any damage on their own, and are only useful for the Down Special. If they collide with an opponent, that opponent will flinch, but take no damage.
Down Smash Mega Freeze
A powerful move for getting things frozen. Stretching both arms out, Ice Man lets out a blast of cold air both ways. Distance changes with charge. Weakest is just right next to him, but strongest is a quarter of Final Destination in each direction. Deals 10% damage and adds two levels of freeze to anyone it hits. Kind of slow, though. Also, if you charge all the way, it will freeze the ground at a couple of random spots within the range of the blast.
Air Moves
Neutral Air Cold Hands
Ice Man holds his hands forward and they turn a glowing blue color. This is a relatively fast move, but has little range. If Ice Man’s hands touch an opponent during this move’s short time, he will grab their hands and a chunk of solid ice will encase both Ice Man’s hands and your opponent’s. This means that they’re stuck to you until the ice breaks, which will happen after two seconds. During this time, you both control both of you. That sounds confusing. Each of you has some control over where you, as a collective twosome, go. Jumping does not work while you are frozen to each other. Like Bowser’s slam attack, the person with lower damage % has more control. You can also each press the A button to give the other a little kick for 3% damage, but this will sacrifice your mobility and give your opponent more control every time you do it. When the ice breaks, you’ll both suffer pretty bad ending lag, but Ice Man’s is a little worse, so use this when you really have a reason to (like to get your opponent near your ice.) This also adds one level to your opponent’s freeze.
Forward Air Icicle Slash
I know it sounds a lot like Ice Slasher, okay? But this one actually slashes, because Ice Man holds his hands above his head and a long icicle forms in them, about the size of Marth’s sword. He then swings it down kind of slowly, more like Ike’s FAir, but slightly faster. About the same range, though. If you miss, that’s it. Boring. But if you hit, it deals 8% and the icicle breaks in half and Ice Man will jolt back in shock. This increases the ending lag, but the two halves of the icicle will drop to the ground below. Of course, that means you have ice to use your Down Special on, but it doesn’t stop there. The icicle halves act as battering items, so you (or another player) can pick them up and swing them at each other. The range and damage are cut in half now, but the effect remains the same: if you hit with it, the icicle will break in half. This can happen until each piece breaks into an eighth of the original icicle, at which point it’s quite small and only deals 1% damage when swung. (But it’s still great for your Down Special, and there are more of them now!)
Back Air Snowy Breath
Ice Man whips around and releases a cold gust from his lungs. This covers an area about the height and twice the width of a Party Ball behind him, and happens quick. The damage done is relative to the current freeze level of your opponent. At level 0, it will deal 2%; at level 1, 5%; at level 2, 9%; at level 3, 14%; at level 4, 20%; and at level 5, 28% damage. The knockback is low and fixed backward, and after the damage, this adds a level of freeze to your opponent.
Up Air Blizzard Cloud
Ice Man blows a gust of cold air upward, forming a light blue cloud about the size of Bowser. This is a little slow, and you can only have one at a time. The cloud does nothing until at opponent touches it, at which point it will erupt in an icy blizzard that deals multi-hit damage up to 20%. It adds a level to their freeze too. It then has to recharge for three seconds before it can do it again.
Using the Down Special on the cloud will first turn it into solid ice, making it fall out of the sky to the ground. In other words, this has a 3-part Down Special transition, instead of two like most things. The falling ice chunk deals 10% damage and pretty good downward knockback too, so this is a good gimping move, and one of your only formidable KO options outside of the Down Special.
Down Air Hailstorm
I almost put my name there. I’m just used to spelling it that way. Ice Man will stall in mid-air for a short time and shoot two sets of three small hail chunks downward. Each set has one that goes straight down and two that go at about 20 degree angles. This takes a while, because Ice Man pauses significantly before he does it the second time. Little lag on the front and back, though, just in the middle. The icy projectiles are pretty fast, like smash thrown items, and deal 8% damage and weak knockback toward Ice Man. They’ll break upon impact with the ground…
…unless you’re low enough to it. From high up, those tiny pieces of hail can’t take the impact, but if used from less than the height of Battlefield’s low platforms, the ice chunks will just sit on the ground for you to make further use of. They also double as throwing items here, but will break once thrown and they hit something.
Throws
Grab Freeze Frame
A quick puff of cold air from Ice Man freezes the opponent in front of him in a block of ice just their size. Better range than a hands-on grab, but not by too much, and a tad bit slower than most. This can hit multiple opponents if they are close.
Pummel Chill Out
Ice Man’s pummel can only be used once per time he grabs someone. He does virtually the same animation as his grab. This adds one level of freeze to the opponent, and this freeze will last twice as long as a normal freeze of that level before wearing off.
Forward Throw Shove
Boring name, sorry. Ice Man leans forward and gives his frozen victim a shove. They’ll slide forward along the ground for half the length of Final Destination (or until they break the grip, which is the same as from the initial grab), then their icy prison will topple over and crash to the ground, dealing them 8% damage. Anyone they collide with along the way takes 10% and moderate knockback. Because of this, it’s more useful in free for alls than one on one. Opponents won’t slide over the edge, don’t get any bright ideas. They’ll stop at ledges and walls and such.
Back Throw Shatter
This looks like a pretty normal BThrow. Ice Man grabs his victim (lol, he already “grabbed” them, but you know what I mean) and slams them to the ground behind him. This does a measley 4% damage, but the encasing of ice they were trapped in shatters, leaving behind five small pieces of ice that cover a very short distance. What this means is you basically have a minefield of ice to blow up on someone if you can get them to step into it again. Using this a second time will erase the old ice pile.
Up Throw Ice Lift
A platform of ice appears under the opponent, and starts to lift them up. It will lift them until they break the grab grip, like the FThrow. Aside from going higher, so you could KO someone off the top if they’re either really bad or at obscene damage, you can manually stop their ascent by breaking the rising ice yourself (Down Special, duh). If they break out themselves, they’ll take a measley 3% damage as they do.
Down Throw Ice Sculpture
Ice Man takes a second to sculpt a perfect replica of his frozen opponent, then the ice around them breaks, freeing them. This is slow, and if your opponent breaks your grip before you finish, the ice sculpture will just melt away. But if you finish it, it’s quite nice, because once you use three freezing attacks on the sculpture, it will start moving around. It will have basically the same movement properties as the person it’s a replica of, though it won’t attack, and it is a little slower than them. It will weakly try to follow them around as long as they’re somewhat close. Anyhow, if you want ice that homes in on your opponent, this is how you get it.
Final Smash
Final Smash Frenzy Freeze
Ice Man is invincible and stuck in place for this FS, like Ness or DK. For ten seconds, chunks of ice of random sizes (ranging from about the size of a Pikmin to Bowser) will jut out of random spots in the stage, without warning. As they do, they deal 18% damage and flinching knockback. A quarter second later, though, they’ll explode into bits, dealing multi-hit damage up to 18% again and high upward knockback. These chunks will only jut from the top of the stage, or walls on the stage if it has them. One chunk appears roughly every half second. Everything returns to normal after this.
Playstyle
Playstyle Summary Cold As Ice
It’s probably not that hard to figure out going through the moves, but I’ll summarize here: Ice Man relies on crippling his opponent through freezing enough to force them into the ice he’s placed on the stage, which he can then use to KO via his Down Special. That’s the essence of it, now let’s pick apart the steps.
First, you need to freeze your opponent and slow them down. The moves you have at your disposal with freezing power are listed here, with particularly noteworthy freezers highlighted:
Neutral Special (Ice Slasher) [notable for being a projectile option]
Down Special (Icicle Burst)
Basic Attack (Flurry)
Down Smash (Mega Freeze) [notable for adding two levels instead of one]
Neutral Air (Cold Hands)
Back Air (Snowy Breath)
Up Air (Blizzard Cloud)
Pummel (Chill Out) [notable for extended freeze time]
That’s a relatively small list, when you look at the entire moveset, so this part of the game is a little tricky, as your opponent knows what to expect. Don’t forget, then, to spread ice around at the same time. Having ice around helps you distract your opponent and force them into compromising positions. Of special note also here is the BAir (then why didn’t you highlight it, Haylstorm?! Answer: because it doesn’t freeze well, it just works well with the freezing) which does increased damage once you’ve done a little pre-freezing to your opponent. The Up Air is also a good option to do once you’ve done the majority of your freezing, because after it helps finish the freezing process, you can turn it into useable ice via the Down Special. Try forcing your opponents into that Up Air with your Up Throw (Ice Lift).
Also set up your Up Special platform pretty early. If you stay on top of the match from the beginning, you can place it just beyond the edge of the stage, so you can use it as an extension of the stage to use to press your opponents further out. Aside from using it to stand, you can blow it up in their face when they start coming back to the stage.
Use the time while your opponent is slow and frozen, hopefully at level 5 so they’re stuck completely, to get a large pile of ice made. In one-on-one matches, a large pile is more effective than spreading the ice everywhere, as you’ll be more likely to KO by blowing it up. And with only one opponent to worry about, you can continue to slow them down and push them, via your Side Special (Chill Wind) to that large pile. Sometime before you plan to KO, but after you’ve set what ice you think you need, set up the icicles on all your ice. This will further distract your opponent and free you from having to double hit the Down Special once you get them close. If the Side Special is still too slow after freezing your opponent, consider the Forward Throw (Shove) to manipulate them. Elusive opponents can also be cornered with the Down Throw (Ice Sculpture) for an easier time getting the ice to them. If you have to rely solely on your moving ice replica, though, you’ll need to push them to higher percentages to KO. Oh, and also, never skip out on the Pummel before throwing. It’s virtually always worth it.
KOs are also more easily scored on opponents with level 4 freeze. This is trickier, because it’s the shortest freeze level, so pushing your opponent to it with the Pummel is good if you can. Otherwise, the timing can be a difficult factor. Of course, if you’ve placed enough ice around the stage, you don’t need it sitting on your opponent’s face, now, do you? Besides, even if you can’t land level 4, having them frozen to any degree helps you manipulate them, since they’re slowed down by it.
Do everything you can to make sure your opponent takes the hit from the ice, because if you don’t and you miss, you’ll have to start over. All your ice will be broken, and you’ll be at square one. Unless, of course, you’ve set up multiple piles far enough away from each other, which is a smart idea. You can start by somewhat haphazardly placing the ice on the stage, then use the set knockback distance of the Side Special to push it into a few convenient piles. Of course, it isn’t a bad idea to leave some of it scattered throughout, so use the Side Special a little earlier than you’re planning to use the Down Special. Continue to use what projectiles you have, Neutral Special, Forward Smash, etc., to keep your opponent on their toes, then lure them into one of your several traps and shatter it!
So maybe you can see how this wouldn’t work so well in a free for all battle. You can maybe slow one opponent down, but it’ll be tough to do three or even just two. Ice Man does not excel in free for all battles, but your best strategy is just to go crazy with your ice. Spread it around, all over the place. The Down Air (Hailstorm) and Up Smash (Snow Burst) are particularly good at this, and your Forward Air (Icicle Slash) can also be useful for getting the ice around. It’s basically a cycle of spread, explode, repeat here, and as I said, it’s not as good as in a one on one environment. Still, you can wreak a lot of havoc if you play your cards right.
Focusing on one person here will be the death of you, for sure, so just hit everyone at once if possible. Your Down Smash can cover the range to slow down everyone a bit and give you a little upper hand, and don’t forget that your Forward Throw can slam multiple opponents. For that matter, your grab can snag multiple opponents, so if you can successfully pressure them all into the same area, or just get lucky and catch them fighting each other, you can score some big points there. If you do grab multiple opponents, the Back or Down Throws are recommended, as their effects are nice to have twice or three times. Nothing like an ice sculpture of each of your opponents working for you! The principles of Ice Man’s game remain the same here, but the basic difference is that you should be focused on a more widespread attack strategy, instead of targeting specific areas for high damage blasts.
Well... That was fun. Hope you guys like it.
And I just realized I'm posting this right after another robot master...lol.
Zook
Perpetual Lazy Bum
GEMINI MAN
This set takes unsmashness and brings it to a whole new level. For the most part, you make it work. The interactions between his various projectiles is interesting, and the idea of littering the stage with vast amounts of huge, moving projectiles is an interesting one. Unfortunately, the grab mechanic is so convoluted and confusing that it fails to reach that 'create a million surfaces to bounce your lasers off of' style of play that I think you were going for. How am I supposed to use 'throw' to place platforms (which is done by moving the control stick), when moving the control stick already moves a cursor on the unmade platform? Couldn't he just use platforms to camp waaaay off the stage and be unbeatable? What is the point of the weird Pole thing? How big are the platforms he creates? Can I angle them to change the angle his Gemini Laser makes? Why don' you describe what Poles are in the Pole section? (I originally thought they were just regular poles lol) I think this moveset has a lot of potential, but it just isn't polished as is.
On a happier note, I really liked the idea of being able to program your clone with the Down Special.
ICE MAN
I really you had a section in the front of this set explaining the properties of ice rather than explaining it in the Up Special. Other than that, I enjoyed Ice Man quite a bit. Clever enough to be interesting, realistic enough that I can see myself playing as him and enjoying it. It's written in a nice tone.
This set takes unsmashness and brings it to a whole new level. For the most part, you make it work. The interactions between his various projectiles is interesting, and the idea of littering the stage with vast amounts of huge, moving projectiles is an interesting one. Unfortunately, the grab mechanic is so convoluted and confusing that it fails to reach that 'create a million surfaces to bounce your lasers off of' style of play that I think you were going for. How am I supposed to use 'throw' to place platforms (which is done by moving the control stick), when moving the control stick already moves a cursor on the unmade platform? Couldn't he just use platforms to camp waaaay off the stage and be unbeatable? What is the point of the weird Pole thing? How big are the platforms he creates? Can I angle them to change the angle his Gemini Laser makes? Why don' you describe what Poles are in the Pole section? (I originally thought they were just regular poles lol) I think this moveset has a lot of potential, but it just isn't polished as is.
On a happier note, I really liked the idea of being able to program your clone with the Down Special.
ICE MAN
I really you had a section in the front of this set explaining the properties of ice rather than explaining it in the Up Special.
Other than that, I enjoyed Ice Man quite a bit. Clever enough to be interesting, realistic enough that I can see myself playing as him and enjoying it. It's written in a nice tone.professor mgw
Smash Champion
A moveset I created for Paper Mario
Paper Mario

Paper Mario is the main character of the paper mario series. With the help of his partners, he sets out on adventure in order to save the world!.... but most importantly peach. With his trusty hammer, paper manipulation skills, and the trusty aid of his companions, Paper Mario is ready to Smash!
STATS:
Weight: 6/10 (a 10 would be bowser, a 1 would be jigglypuff, you should understand how this is going now)
Jump: 6/10
Double Jump: 5/10
Run Speed: 6/10
Air Mobility: 6/10
Float: 6/10
Size: Short, a little taller than olimar, *but same width as kirby due to his odd body shape and giant hands.
~Paper Mario is a pretty balanced character, he has a good amount of close, mid, and long range attacks.*
SPECIAL MOVES:
N-Special- Partner Swap
- Paper Mario swaps between 2 of his partners, Koops and Admiral Bobbery. Paper Mario will shout out a "ya!" followed by Koops or Admiral Bobbery swapping out. They will swap out in a circular motion standing straight, making it look like a cylinder. The purpose of Partner Swap is to change Paper Mario's Side Special's action. The swap will take 1.5 seconds, rendering Paper Mario vulnerable & unable to perform any attacks or moves.
S-Special- Partner Attack
- Paper Mario uses one of his two partners in order to assist him. Both Koops & Admiral Bobbery have different attacks.
Partner Attack #1: Shell Toss - Koops goes into his shell and Paper Mario kicks it forward. The distance koops goes is 3/5th the distance of battlefield. If shell toss is shielded, it will inflict 4% on the opponent & cause him/her to bounce up the height of *captain falcon (unless perfect shielded in which it will toss back to mario.) The down-side is that any move that causes 12% DMG & over that clashes with Koops will cause him to flip on his back (like squirtle when footstooled while using his side special), rendering Paper Mario's side special and neutral special useless for 4 seconds. DMG: 8%
Partner Attack #2: Bomb - Admiral Bobbery walks the distance of 2 kirbies, turns red & then explodes. Perfect shielding the move will only destroy 1/4th of a normal shield, while regular shielding the explosion will destroy half the normal shield. *DMG: 14%
Down Special - Ground Pound
Paper Mario levitates in the air directly above him(the height of 2 paper marios ontop of each other from the ground up) does a quick flip and pounds the ground (or a opponent below.) It has VERY little start-up lag and little ending lag, making it good to punish rolls, also a good move for players who can predict well. In the air, instead of using his butt to pound, he carrie the pixl appears under him and ground pounds, then disappears once he touches the ground. DMG: 13%
Up Special - Spring Jump
Mario cringes himself into a paper spring, then spirals upward. Holding the special button + up for 2 seconds or more will give him the distance of sonic's up special, a regular up special will give him height of luigi's up special. If charged for 2+ seconds directly under someones head, it will spike them. Hitting the opponent with your head will cause damage but no knockback. *DMG: 3%
BASIC ATTACKS:
Jab - Swing Swing Pawnch!
Paper Mario takes out his hammer and swings it at the height of overalls buttons jab 1, swings towards the ground jab 2, then does a mini uppercut jab 3. *J1+2 DMG: 2% *J3 DMG: 3%*
Dash Attack - Hammer Lunge
Paper Mario runs forward and lunges his hammer forward out in front of him, same distance as mario's DA. Lags a little bit towards the end of the move. *DMG: 6%
TILTS:
Forward Tilt - Airplane Poke
Paper Mario turns his fist into a sharp paper airplane and attacks forward. A little longer than diddy kongs F-TILT. DMG: 9%
Down Tilt - Carrie Dash
Carrile the Pixl comes from the side of Paper Mario's feet, hitting the opponent in front of him making them pop upwards. *DMG: 5%
Up Tilt - Air Sweep
Paper Mario swings his hammer in above him, covering a semi-circle range directly above him. DMG: 8%
SMASH ATTACKS:*
Forward Smash - Hammer Smash
Paper Mario brings out his hammer from behind and whacks his opponent in front of him with it. *DMG: 12% FC: 19%
Down Smash - Ground Sweep
Same as King Dedede's D-Smash except the range is right around paper mario. Ending lag is minimal DMG: 14% FC: 21%
Up Smash - Spring Punch
Paper Mario twists downwards then when released spirals upwards with a spinning punch. DMG: 16% FC: 22%
AERIAL ATTACKS:
Neutral Aerial - Diamond Spin
Paper Mario takes the form of a paper ball and rapidly spins. He has the diamond star spinning around him which makes to quick cycles. Getting hit by either cycle will either knock you back or keep you close in, the effect is random. DMG1: 4% DMG2: 6%
Forward Aerial - Airplane Mode
Paper Mario folds into a paper airplane and attacks at a forward + diagonal/downwards angle with a fast speed, the distance is two kirbies. Once he reaches the the end of his range he backs flips into regular mode, during the flip he is unable to perform anything for 1.5 seconds. Very punishable if shielded. DMG: 11%
Back Aerial - Back Kick
Same as Mario's B-air, covering 1/3 less distance as it. DMG: 9%
Up Aerial - Hammer & Cudge
Paper Mario uses his regular hammer and Cudge the pixl hammer to attack. He strikes upward first with his hammer in his left hand, then immediately afterward with cudge in his right hand. *DMG1: 7%. DMG2: 8%
Down Air - Thoreau Smack
Paper Mario shoots out his pixi thoreau (shape of a hand) and does a sweep attack, similar to Paper Mario's u-tilt except it over the bottom half. DMG: 10%
FINAL SMASH - ART ATTACK!
If you played PM:TTYD then you already have an idea of it. Your opponent freezes in place for 10 seconds, during that time you have to draw circles around your opponent using the ruby star. A complete circle with a 1 inch radius with deliver 10% damage, 2 inch; 12%; 3 inch; 14% and so on.*
GRAB & THROWS:
Grab- Same as mario's except he only grabs with one hand and 1/3 less distance. His pummel is him taking out his hammer and whacking the opponent on the head with his hammer. DMG: 2% per pummel.
Up Throw- Thoreau grabs the opponent and launches him down, the opponent then pops back up far. DMG: 7%
Back Throw- Paper Mario twists his body forwards then after releasing the twists spina and throws the opponent backwards. DMG: 10%
Forward Throw- Same as Mario's. DMG: *6%
Down Throw- Goombella pops out and uses HeadBonk, bumping heads with the opponent. The opponent crunches down and bounces up diagonally & away
Shield- Paper Mario holds Barry in his hand and he creates a shield. Ending lag is same as yoshi's egg.*
TAUNTS:
Up Taunt - Stylish
Paper Mario puts his thumb up and winks facing you. Then a couple of small stars come onto him & disappear
Down Taunt - Piccolo the Pixl
Piccolo plays a 3 second melody in which after it's over it heals Paper Mario by 1%. It will not heal him if it's interrupted.
Side Taunt - Tippi the Pixi
Tippi comes out and dances around Paper Mario in a circular motion.
Entrance - Paper Portal
A paper portal pops up, followed by paper mario vertically rolling out in a citcular motion then jumps out. Then the portals goes back down.
Victory Pose - Paper Mario tips his hat downward and slightly grins, then walks away off the screen 2 seconds before his victory theme is done
Losing Pose - Paper Mario fully tips his hat down shaking his head and turns around.

Paper Mario
Paper Mario is the main character of the paper mario series. With the help of his partners, he sets out on adventure in order to save the world!.... but most importantly peach. With his trusty hammer, paper manipulation skills, and the trusty aid of his companions, Paper Mario is ready to Smash!
STATS:
Weight: 6/10 (a 10 would be bowser, a 1 would be jigglypuff, you should understand how this is going now)
Jump: 6/10
Double Jump: 5/10
Run Speed: 6/10
Air Mobility: 6/10
Float: 6/10
Size: Short, a little taller than olimar, *but same width as kirby due to his odd body shape and giant hands.
~Paper Mario is a pretty balanced character, he has a good amount of close, mid, and long range attacks.*
SPECIAL MOVES:
N-Special- Partner Swap
- Paper Mario swaps between 2 of his partners, Koops and Admiral Bobbery. Paper Mario will shout out a "ya!" followed by Koops or Admiral Bobbery swapping out. They will swap out in a circular motion standing straight, making it look like a cylinder. The purpose of Partner Swap is to change Paper Mario's Side Special's action. The swap will take 1.5 seconds, rendering Paper Mario vulnerable & unable to perform any attacks or moves.
S-Special- Partner Attack
- Paper Mario uses one of his two partners in order to assist him. Both Koops & Admiral Bobbery have different attacks.
Partner Attack #1: Shell Toss - Koops goes into his shell and Paper Mario kicks it forward. The distance koops goes is 3/5th the distance of battlefield. If shell toss is shielded, it will inflict 4% on the opponent & cause him/her to bounce up the height of *captain falcon (unless perfect shielded in which it will toss back to mario.) The down-side is that any move that causes 12% DMG & over that clashes with Koops will cause him to flip on his back (like squirtle when footstooled while using his side special), rendering Paper Mario's side special and neutral special useless for 4 seconds. DMG: 8%
Partner Attack #2: Bomb - Admiral Bobbery walks the distance of 2 kirbies, turns red & then explodes. Perfect shielding the move will only destroy 1/4th of a normal shield, while regular shielding the explosion will destroy half the normal shield. *DMG: 14%
Down Special - Ground Pound
Paper Mario levitates in the air directly above him(the height of 2 paper marios ontop of each other from the ground up) does a quick flip and pounds the ground (or a opponent below.) It has VERY little start-up lag and little ending lag, making it good to punish rolls, also a good move for players who can predict well. In the air, instead of using his butt to pound, he carrie the pixl appears under him and ground pounds, then disappears once he touches the ground. DMG: 13%
Up Special - Spring Jump
Mario cringes himself into a paper spring, then spirals upward. Holding the special button + up for 2 seconds or more will give him the distance of sonic's up special, a regular up special will give him height of luigi's up special. If charged for 2+ seconds directly under someones head, it will spike them. Hitting the opponent with your head will cause damage but no knockback. *DMG: 3%
BASIC ATTACKS:
Jab - Swing Swing Pawnch!
Paper Mario takes out his hammer and swings it at the height of overalls buttons jab 1, swings towards the ground jab 2, then does a mini uppercut jab 3. *J1+2 DMG: 2% *J3 DMG: 3%*
Dash Attack - Hammer Lunge
Paper Mario runs forward and lunges his hammer forward out in front of him, same distance as mario's DA. Lags a little bit towards the end of the move. *DMG: 6%
TILTS:
Forward Tilt - Airplane Poke
Paper Mario turns his fist into a sharp paper airplane and attacks forward. A little longer than diddy kongs F-TILT. DMG: 9%
Down Tilt - Carrie Dash
Carrile the Pixl comes from the side of Paper Mario's feet, hitting the opponent in front of him making them pop upwards. *DMG: 5%
Up Tilt - Air Sweep
Paper Mario swings his hammer in above him, covering a semi-circle range directly above him. DMG: 8%
SMASH ATTACKS:*
Forward Smash - Hammer Smash
Paper Mario brings out his hammer from behind and whacks his opponent in front of him with it. *DMG: 12% FC: 19%
Down Smash - Ground Sweep
Same as King Dedede's D-Smash except the range is right around paper mario. Ending lag is minimal DMG: 14% FC: 21%
Up Smash - Spring Punch
Paper Mario twists downwards then when released spirals upwards with a spinning punch. DMG: 16% FC: 22%
AERIAL ATTACKS:
Neutral Aerial - Diamond Spin
Paper Mario takes the form of a paper ball and rapidly spins. He has the diamond star spinning around him which makes to quick cycles. Getting hit by either cycle will either knock you back or keep you close in, the effect is random. DMG1: 4% DMG2: 6%
Forward Aerial - Airplane Mode
Paper Mario folds into a paper airplane and attacks at a forward + diagonal/downwards angle with a fast speed, the distance is two kirbies. Once he reaches the the end of his range he backs flips into regular mode, during the flip he is unable to perform anything for 1.5 seconds. Very punishable if shielded. DMG: 11%
Back Aerial - Back Kick
Same as Mario's B-air, covering 1/3 less distance as it. DMG: 9%
Up Aerial - Hammer & Cudge
Paper Mario uses his regular hammer and Cudge the pixl hammer to attack. He strikes upward first with his hammer in his left hand, then immediately afterward with cudge in his right hand. *DMG1: 7%. DMG2: 8%
Down Air - Thoreau Smack
Paper Mario shoots out his pixi thoreau (shape of a hand) and does a sweep attack, similar to Paper Mario's u-tilt except it over the bottom half. DMG: 10%
FINAL SMASH - ART ATTACK!
If you played PM:TTYD then you already have an idea of it. Your opponent freezes in place for 10 seconds, during that time you have to draw circles around your opponent using the ruby star. A complete circle with a 1 inch radius with deliver 10% damage, 2 inch; 12%; 3 inch; 14% and so on.*
GRAB & THROWS:
Grab- Same as mario's except he only grabs with one hand and 1/3 less distance. His pummel is him taking out his hammer and whacking the opponent on the head with his hammer. DMG: 2% per pummel.
Up Throw- Thoreau grabs the opponent and launches him down, the opponent then pops back up far. DMG: 7%
Back Throw- Paper Mario twists his body forwards then after releasing the twists spina and throws the opponent backwards. DMG: 10%
Forward Throw- Same as Mario's. DMG: *6%
Down Throw- Goombella pops out and uses HeadBonk, bumping heads with the opponent. The opponent crunches down and bounces up diagonally & away
Shield- Paper Mario holds Barry in his hand and he creates a shield. Ending lag is same as yoshi's egg.*
TAUNTS:
Up Taunt - Stylish
Paper Mario puts his thumb up and winks facing you. Then a couple of small stars come onto him & disappear
Down Taunt - Piccolo the Pixl
Piccolo plays a 3 second melody in which after it's over it heals Paper Mario by 1%. It will not heal him if it's interrupted.
Side Taunt - Tippi the Pixi
Tippi comes out and dances around Paper Mario in a circular motion.
Entrance - Paper Portal
A paper portal pops up, followed by paper mario vertically rolling out in a citcular motion then jumps out. Then the portals goes back down.
Victory Pose - Paper Mario tips his hat downward and slightly grins, then walks away off the screen 2 seconds before his victory theme is done
Losing Pose - Paper Mario fully tips his hat down shaking his head and turns around.
JOE!
Smash Hero
why is paper mario heavier than normal mario?
http://www.smashboards.com/showpost.php?p=11841700&postcount=250
http://www.smashboards.com/showpost.php?p=11841700&postcount=250
gcubedude
Smash Apprentice
- Joined
- Aug 15, 2009
- Messages
- 83
Team Pedestal
I really like this moveset. I like the interactions between teammates, as it gives a lot of personality to the moveset. Each Pokemon’s role in the set makes sense, especially when you consider their individual personalities. The whole thing works very well, and it was really fun to read and imagine. Also, I enjoyed the backstory section at the top of the moveset, as I feel that was necessary to allow us to fully enjoy the moveset
However, there are a few balance issues, which are normally the last thing I look at, but some of these things are just too huge to ignore. Carlita’s Focus Punch may have more startup than a Falcon Punch, but considering the whole team moveset thing, along with Konstantin’s Mean Look or Ike’s Roar, it’s not that hard to pull off, which makes the massive damage + KB obscenely OP. Another thing is the range on some of the moves. I mostly imagine any set that I read being played on Final Destination, so when I see numbers like 2.5 BFP’s in Ike’s pummel, it’s a little surprising. I mean, I’m pretty certain if Ike was near the middle of FD, Roar would cover the whole stage. Of course, I guess some of these issues can be ignored since most of the OP attacks will hit your teammates as well, so you won’t be able to completely spam these attacks.
Overall, an awesome read.
Galaxy Man
I gotta say, this set surprised me with how good it is. I’m impressed with how so many seemingly-random elements, like the USmash minion and the grab-game, can come together and make a pretty good playstyle. The many projectiles give Galaxy Man some decent ranged option, while the USmash minion and the spike trap Dtilt offer great control over the opponent. The grab is pretty awesome, as it also gives you great control over not just your opponents, but any projectiles as well. Gravity Well/Repulsion Blast are really fitting, and I love how they can curve projectiles, which can make it tough for an enemy to avoid them properly. The Wormhole Seed is also well-done, as it turns one of his projectiles into a portal of sorts. The portals top off the set, as they give Galaxy Man great control over a lot of stuff, and provide him with many ways to attack the foe in unorthodox ways. Honestly, I don’t have much to complain about; this is a pretty awesome set.
Overall, a fantastic read.
The Flying Dutchman
So I went into this set expecting something fantastic, since I’ve heard a lot of positive things about it (plus an 8 on Warlord’s rankings means it must be good). And I have to say, I was mostly not let down. The Fly works very well, as it’s both in-character and a great central piece of the set. The way most of the moves have some sort of push effect works with the Fly, and I can see how they’d make sense on the Dutchman. Then there’s the grab, which is very unique, especially when mixed with the Fly.
Overall, an awesome set
Also, since someone asked me in the chat, I'll go ahead and post what word I use in the "Overall, a/an (adjective) set" part of my comment, to give you a number comparison to other sets I've read and commented:
1) decent
2) okay
3) nice
4) good
5) great
6) awesome
7) excellent
8) fantastic
9) wonderful
10) amazing
MarthTrinity
Smash Lord
Random group of comments both old and new! I've got a little over a week to finish up commenting -EVERY- set in the contest. I'm sort of jumping around at this point but eh, what can you do? Still trying my best to comment it all~<3
Gallade
"You get faster the more worn down you are? Funny. Trying to finish the job before going limp?"
E.E.D. Soldier
"You've got more important things you could be drilling than the ground, meathead."
Paper Mario
"Paper thin is more than a little embarassing when it comes to size...I'd rather avoid papercuts downstairs as well thank you very much..."
N.Oxide
"Such an obvious alt doesn't even get a witty comment, hmph."
5 Minute Move Man
"For your sake I sincerely hope that that's just your name and not what I should expect of your performance..."
Ice Man
"You're as cold as ice...you're willing to sacrifice our love...urk. That's gonna be stuck in my head now..."
Gallade
"You get faster the more worn down you are? Funny. Trying to finish the job before going limp?"
I'm not entirely sure what it is about Gallade...but I had the absolute hardest time actually bringing myself to comment it. That's not to say it's a bad set or anything, of course not. I just COULD NOT motivate myself to comment it for whatever reason. I guess we'll start with what most people seem to dislike about the set; Steadfast. As for me...Steadfast isn't a deal breaker in either way. It's an adaption of Lucario's mechanic that gives him a boost in the department that's important to him instead of just boosting damage. It's not really that great of a mechanic but it's certainly not ruining the set any by being there, it just kinda...makes him better when he's dying. I will say right now that I'm rather surprised Warlord likes this set as, to someone who is familar with combo based characters from other fighting games, Gallade is a pretty typical combo character in those respects. I mean, he's got hit confirm stuff going on, ground bounces, simple links and stuff like that that an actual combo character would actually have. That and Warlord hates combos. I guess he doesn't realize that a LOT of combo characters are more than just mindlessly mashing inputs.
That aside...I guess I'm pretty middle ground when it comes to Gallade. I don't dislike it like Smady does but I'm not in love with it like Warlord is. I do like some of the more fun sounding concepts here such as outrunning your projectiles while under the influence of Steadfast though. Unlike Warlord, I feel the Down Smash counter is fairly meh. It takes a very big twist from the rest of Gallade's offensive themed moveset and changes it for one defensive themed attack. Simply put, it feels weird there, even if it is meant to increase his life span. The grab game feels a bit iffy as well seeing every single throw is essentially just used as a combo starter. Seeing as Gallade's "grab" can be blocked as well...it makes me question why you'd ever want to use the grab to start combos, especially seeing that it doesn't scale with Steadfast.
Complaining aside, it sets out what it set out to do just fine. It's not exactly a thrilling set but it's certainly a gutsy one seeing as it's not very often people go out of their way to base a moveset around combos. I'm not a huge fan of the set personally but I can see why people would like it (and likewise why they would dislike it). With that said though, it's certainly not a bad set at all, just not my kettle of fish for a MYM moveset I suppose...perhaps because I have a hard time theorycrafting combos for MYM movesets when I can't actually play them and test them out myself...
E.E.D. Soldier
"You've got more important things you could be drilling than the ground, meathead."
So we've got an OC by JOE! here...interesting. As you've mentioned yourself in the past, E.E.D. Soldier seems to be mostly about making the stage into a giant toybox to mess around with than having some sort of super deep playstyle. One thing I note right off the back is that you seem to have run out of inputs with this set as there's some that don't really seem to fit the input you've placed them on. Up Tilt being a move that pulls stuff out of the ground seems rather strange and having such a key input on the Back Aerial is also rather weird to me. This is especially strange considering how much of a cop-out the grab game seems to be. It's really just rather bland, even though you have the two seperate grab versions there.
I wil say though that the writing style does tend to get in the way a little bit here. A -LOT- of the moves make references to animations of other moves previously explained with no more information about them. It's not a big deal or anything but it makes the reader constantly scroll about so that they can picture the move in their head. Like I said, nothing huge but it makes the set a bit clunky at times to read.
Ignoring some questionable inputs and the meh grab game, E.E.D. Soldier certainly has some some fun stuff to play around with. You pretty much took the concept of a stage manipulator and increased it to an extreme which does exactly what you intended; a big toybox with lots of options to play around with. Shattering the stage to pieces is a pretty fun idea that I'm sure lots of players would love to mess around with (although the Forward Tilt is fairly meh...). Stuff like the Forward Aerial smashing pieces into the stage or the Up Aerial being used to drill up into the stage are also very awesome.
Overall, E.E.D. Soldier certainly is an interesting set. He, to me, doesn't seem particularly focused on any one type of playstyle...but he was pretty much intended to be made as a character purely for having fun messing around with. And as that...he does a pretty darn good job of it. The idea of smashing up the stage and throwing pieces of it around, causing sandstorms, moving the stage around...all of that sounds very, very fun which means you certainly succeeded in that aspect. A fun read with some fun concepts, if not a bit unfocused in what he's totally doing.
Paper Mario
"Paper thin is more than a little embarassing when it comes to size...I'd rather avoid papercuts downstairs as well thank you very much..."
First and foremost...why do people believe that bright neon green text is a good idea at all when it comes to writing a moveset? Not only is it a right pain to read, it's horribly unappealing to look at. I'd rather have plain white text with colored headers than having a pure green wall of neon death. With that said, I suggest looking at some other movesets (Ice Man above you is a very nice example actually) of what a moveset could look like for good, readable organization. Typically, one should pick colors that suit the character or the theme of the set. For example, blues and such suit Ice Man whereas reds would most certainly not. Needless to say, neon green doesn't really suit Paper Mario very well...
Moving onto the set itself...I seriously question the Neutral Special and why it is the way it is. Why are Bobbery and Koops the only two partners in the set? Not only are they rather random choices for partners...they're only two random partners out of however many Paper Mario has had. While you're not expected to make a move for every single partner in the series, it would've been nice to see more than two random TTYD partners. Maybe including partners as attacks would've been a better way to represent them...or at least give a few more options than just those two. That...or you could've decided to focus on a particular game. As it stands, Paper Mario seems to fall somewhere between TTYD and SPM...without a real focus on either. It's also somewhat disappointing to see Paper Mario sharing a few moves with Mario, especially considering people who support Paper Mario typically try to push the fact that he wouldn't be like Mario if he were in Smash.
As it stands, Paper Mario is somewhat bland. Many of his attacks are strangely plain, especially given all the potential he gets from his various partners. Even if you just wanted to use the partners as random "props" who show up for one move (like Goombella in the Down Throw), it would probably feel a bit more like a Paper Mario set than just a set for Paper Mario without...well...what makes him Paper Mario.
With a bit more focus on the character and his abilities (instead of his hammer which is generally more Mario RPG in general rather than Paper Mario), this could've really gone somewhere. Either by playing off the partners more or by playing off the fact that he's made of paper (seriously, why's he so heavy if he's made of paper?), you could've captured the character much better while having a more unique moveset.
N.Oxide
"Such an obvious alt doesn't even get a witty comment, hmph."
Nah.
5 Minute Move Man
"For your sake I sincerely hope that that's just your name and not what I should expect of your performance..."
Yet another moveset on the moveset list that's rather hard to comment. It's not really your work and it was clearly meant as a joke set/something actually coming out of MYM Survivor. I said I'd comment everything on the list so here we are. There's some interesting moves in this so congrats to everyone who made these up. Obviously not counting these towards the User Rankings seeing as they're hardly comments as much as acknowledgements...
Ice Man
"You're as cold as ice...you're willing to sacrifice our love...urk. That's gonna be stuck in my head now..."
Well howdy there fresh mea-...er...newcomer! Welcome to MYM! Right off the bat I notice that your set looks very nice which leads me to believe you've either done your research or you're an EVIL, EVIL ALT ACCOUNT. Just kidding of course. But yes, good work here on the organization. Everything's in order, nicely emphasised, headers and good color usage...good job man.
As for the set itself, the whole "levels of freezing" thing is pretty darn cool and it's certainly nifty to see a newcomer diving directly into the realm of special mechanics to add a hook to your moveset. Starting with the Specials...the radius of two Smart Bomb explosions (I assume that's what you meant and not the bombs themselves) would pretty much cover most stages with absolute ease. Seriously. Smart Bomb explosions are massive. Also, the Down Special being first comes acrossas rather strange seeing as it discusses what happens after ice is placed down...before any moves explaining how to do -THAT- are even shown to the reader. Ice Platform had some real potential to add some mindgames/defensive play to Ice Man but was avoided sadly. Would be kinda cool if Ice Man maybe -WANTED- his opponents to make their way over to his icy platform before freezing them to it and shattering it from a safe distance. There's a lot of nifty ideas here and there but I have one random problem in the set. Building levels of cold seems waaaaaaaaaaaay too easy. Seriously, for something as painful asthe higher levels of freezing, it really doesn't seem that hard to rack up. Sure, you probably won't be freezing the opponent to Level 5 all that often...but they're almost certain to be hanging around Level 3 or so at most times. It's not really that big of a deal but it certainly encourages the Ice Man player to toss out as many freezing moves as he can as FAST as he can in order to keep the opponent frozen solid.
That said, the moveset has a certain charm to it that I can't quite place. It's very well written, smartly written too. It has a solid grasp on playstyle and, while the sheer number of freezing attacks seems a bit redundant to me, nothing feels terribly filler-ish here except maaaaaaybe some of the throws (Down Throw especially seems incredibly awkward, rather unsuiting and rather random for the moveset...). Overall, a great start you've got here and a rather impressive first moveset! I hope we get to see you post some more stuff up either this contest or next!
Thanks, Zook. I added ice stuff to the pre-moveset notes and took out what parts were in the Up Special, so hopefully that helps a little! Appreciate the compliment.ICE MAN
I really you had a section in the front of this set explaining the properties of ice rather than explaining it in the Up Special.
Thanks for all the input. I decreased the DSpec range to just one Smart Bomb explosion. I guess I didn't think about just how big that was... While I was making it, I tried to balance out the painfulness of the higher levels of freeze with making them wear off faster, but they might still last too long. Oh, well. And I admit, the throws are what made this moveset take as long as it did. I couldn't think of a U or DThrow for a long time, and consequently, they're what I probably consider the worst moves in the set. So I can see your complaint. *shrug*Ice Man
"You're as cold as ice...you're willing to sacrifice our love...urk. That's gonna be stuck in my head now..."
Well howdy there fresh mea-...er...newcomer! Welcome to MYM! Right off the bat I notice that your set looks very nice which leads me to believe you've either done your research or you're an EVIL, EVIL ALT ACCOUNT. Just kidding of course. But yes, good work here on the organization. Everything's in order, nicely emphasised, headers and good color usage...good job man.
As for the set itself, the whole "levels of freezing" thing is pretty darn cool and it's certainly nifty to see a newcomer diving directly into the realm of special mechanics to add a hook to your moveset. Starting with the Specials...the radius of two Smart Bomb explosions (I assume that's what you meant and not the bombs themselves) would pretty much cover most stages with absolute ease. Seriously. Smart Bomb explosions are massive. Also, the Down Special being first comes acrossas rather strange seeing as it discusses what happens after ice is placed down...before any moves explaining how to do -THAT- are even shown to the reader. Ice Platform had some real potential to add some mindgames/defensive play to Ice Man but was avoided sadly. Would be kinda cool if Ice Man maybe -WANTED- his opponents to make their way over to his icy platform before freezing them to it and shattering it from a safe distance. There's a lot of nifty ideas here and there but I have one random problem in the set. Building levels of cold seems waaaaaaaaaaaay too easy. Seriously, for something as painful asthe higher levels of freezing, it really doesn't seem that hard to rack up. Sure, you probably won't be freezing the opponent to Level 5 all that often...but they're almost certain to be hanging around Level 3 or so at most times. It's not really that big of a deal but it certainly encourages the Ice Man player to toss out as many freezing moves as he can as FAST as he can in order to keep the opponent frozen solid.
That said, the moveset has a certain charm to it that I can't quite place. It's very well written, smartly written too. It has a solid grasp on playstyle and, while the sheer number of freezing attacks seems a bit redundant to me, nothing feels terribly filler-ish here except maaaaaaybe some of the throws (Down Throw especially seems incredibly awkward, rather unsuiting and rather random for the moveset...). Overall, a great start you've got here and a rather impressive first moveset! I hope we get to see you post some more stuff up either this contest or next!
And man, I wish I thought about the USpec mindgames. Didn't even cross my mind. >_<
I don't know if I'll be able to finish another set this contest (doesn't it end pretty soon?), but I do want to try this again. It was very fun, if nothing else, so I will definitely be posting another sometime.
tirkaro
Smash Champion
みんな死んでいく…これも市のせい…
(Everyone's dying... This is also Ichi's fault...)
(Everyone's dying... This is also Ichi's fault...)
幻妖-OICHI-言惑

Oichi (AKA, Ichi) is the younger sister of the great Devil King Oda Nobunaga, and the wife of Azai Nagamasa. As one can tell, she's a rather melancholic woman, and pretty much the Universe's eternal chew toy if her luck is anything to go by. She believes just about everything wrong in this wretched world is all her fault, a conclusion not helped by the fact that she also has great demonic powers which happen to occasionally turn her into a murdering psychopath. And that's not even going into the whole killing all the people you love and getting killed in just about everything she appears in thing. Man, and you thought you had it hard.
Her appearance in MYMX is a combination between her SB2 and SB3 selves. Her incarnation here is during the events of SB3, when she freely uses her demon/shadow powers willly-nilly, with no real effort made to keep them in check. However, she can still use her trademark Naginata from her other appearances, which was absent in the third installment. And of course, if you want a good idea on how she operates, click here and here.
Her appearance in MYMX is a combination between her SB2 and SB3 selves. Her incarnation here is during the events of SB3, when she freely uses her demon/shadow powers willly-nilly, with no real effort made to keep them in check. However, she can still use her trademark Naginata from her other appearances, which was absent in the third installment. And of course, if you want a good idea on how she operates, click here and here.
STATS
Weight- 0.5/10
Speed- 2/10
Fall- 4/10
Power- 7/10
Range- 9/10
Aerial Movement- 7/10
Ichi is no pushover despite her lithe frame. She can unleash a multitude of deadly attacks upon the stage, though she needs some real slick thinking to get any actual damage in. She stands about a Marth tall, and her slow speed makes her a supposedly easy target. And even worse, she can't even block! But she has ways to make up for this, as you can expect.
NEUTRAL SPECIAL- OPEN, NETHERWORLD

except... for only one thing... that every single
person should vanish..."
Ichi limps her body, strangely even more than usual, as thin, shadowy hands from the netherworld enter directly below her. Before she can fall down, the gangly hands break her fall and begin to carry her around. This takes about .8 seconds. So be prepared, for you have activated Oichi's main mechanic here.
These dark hands aren't just for show. They're a vital part to Oichi's complex playstyle consisting of "winning, and not dying." For now, all you need to know is that when this move is in effect, Oichi moves a good deal faster while being carried by the hands of the underworld, bringing her speed to a good 7/10. Pressing B again or causing Oichi to get hit will completely dismiss the arms, no matter where they're located. (We'll get to this in a moment.)
DOWN SPECIAL- BREAK AWAY, DEMONS
"Wait! Listen. A voice. Can you hear it?It's calling to me from far away..."
With zero lag time whatsoever, the arms of the underworld break off from Oichi, forming their own character directly in front of her, consisting of 3 arms attached to a small puddle of darkness. This collection of hellacious ticklers is about a Ganondorf tall and a Bowser wide, like a thick cluster of Wallmasters. You can control them by moving the C-stick left or right (Classic controller and WiiU tablet is 2nd analog, Wiimote is tilting the controller left and right, Wiimote+Nunchuk is twisting the Nunchuk), as they obviously cannot jump or crouch. They move at the speed of Pikachu's walk, and have pretty odd properties; being shadows, they aren't solid objects, meaning characters and projectiles pass right through them. Making things stranger, when confronted with an obstacle, they amorphously climb around it, the shadowy puddle clinging to the object just like a real shadow would, and pass right above it. And sorry to say, but if you think this mechanic is a bit overwhelming, just wait until I tell you that even this mechanic has it's own mechanic! Don't get angry now, just let me make this quick!
Even though the arms act as their own character, their entire control method is limited entirely to the Specials, Grabs, and Shields. They make up for this shortcoming however, by incorporating a leveling system! The hands can go up to 3 levels, each level providing a different moveset entirely! But likewise, the higher-leveled movesets are always objectionably better than the lower ones. And as the final drawback, the arms' level instantly reset to stage 1 the moment you dismiss them away. Which also automatically happens every time Oichi gets hit, giving more incentive to protect her at all costs. Let's go over this shall we?
Default | Deal 40% damage | Deal 75% damage
Gives access to a rather weak moveset based around poking and spacing| Gives access to a stronger, but still low priority, moveset based around constant pressure and stage controlling| Gives access to an uber moveset that does everything the last 2 could, but better
UP SPECIAL- LAUNCH OUT
LEVEL 1- This move can only be performed when the dark hands are attached to Oichi. When this happens, one arm shoots out diagonally upwards about 1.5 Ganondorfs long, and deals 4% damage with good upwards knockback and high priority. As you could perhaps guess, this is a standard tether recovery, meant to be used in the air to save a falling Ichi. Making things even easier, the arm with automatically home onto the ledge if such a situation happens.
However, the ground variation has one edge over the aerial one: While the arm is launched out from the ground, Oichi can immediately follow it up with up to 2 Shield Button attacks(more on that later). But after these 2 attacks, the arm immediately retracts back. This provides an extra layer of anti-air protection for Oichi's fragile body.
LEVEL 2- This does the exact same crap the last level does, but better. This time, the arm is 2 Ganondorfs long, and you can actually control which direction the arm launches out from, whether you be in the air or ground. (You get a .5 second input opportunity during this move's animation) This is especially useful in the air, where she can basically fire her arms in all 360 degrees. Making this deal even sweeter, she can now fire 2 arms at a time! And yes, each of them can be followed up with up to 2 Shield button attacks. And finally, hitting the ground with the aerial version of this attack will cause the arms to pull themselves and Oichi to that location, allowing her to do things like easily Fastfalling, or quickly zipping from place to place.
But the main attraction about this version is the fact that the arms can now perform this move whilst separated from Oichi! This gives yet another factor to this move: Hitting Oichi with this attack while the arms are separated will cause the arms to drag her right back to their location, providing some interesting spacing and recovery options. One such is if Oichi is in a jam, the arms can pull her right back to safety. Or if Oichi is falling off stage, the arms can quickly make their way to the ledge and grab her before she falls. Don't worry, they automatically know how to place her on a ledge. But remember, the arms can't jump at all, so you're kinda limited in that regard.
LEVEL 3- The main noticeable difference is that the arms can now be shot out 3 times, and are 2.5 Ganondorfs long. That's pretty amazing. But the real magic happens once you use this move when the arms are de-attached from Ichi. This time when an arm grabs her, the arm will actually hold her by the torso! The arm carrying her is now capable of moving in 360 degrees, so long as it's in range of 2.5 Ganondorfs from the shadow puddle. Thus, Ichi can use her Neutral and Up Aerial attacks in this state, and the remaining arms can use the Shield attacks for extra pressure. This creates a nasty, nasty keepaway game, and when used properly, can ensure Oichi will almost never get hit. But if push comes to shove, pressing Up B again will make the arm throw Oichi in a specified direction, about 2 BFPs away. Ichi has .6 second of recovery time from being thrown, but she should be able to survive.
SIDE SPECIAL- GO AWAY
LEVEL 1- The level 1 variation is a fairly standard projectile, which is to be expected from a fairly standard spacing set. The hands fire a Shadow ball sized....Shadow ball in a .5 second time frame, and this ball moves veeeery slowly, about the speed of a Jigglywalk. As slow as it is, it actually homes in on the opponent, applying a good deal of pressure to what would normally be a mediocre projectile. It does 6% damage and small knockback, and will disappear after 4 seconds if it hits nothing. And likewise, Oichi can only have one ball out at a time.
LEVEL 2- It looks the same as before, but with a little twist. This time the projectile moves slightly faster and does 10% damage with small knockback. This it doesn't actually home in on the opponent; rather, it goes straight forward. This time you can throw out 2 balls at a time, AND as an added bonus, pressing Side B again will cause them to freeze in the air for 5 added seconds! While the balls are frozen, the Shadow Arms can grab them using either the Up Special or the grab attack. When an arm is preoccupied with holding a ball, it can't attack anymore, but it can throw them using the corresponding shield button! Like an item, you can throw them in any direction, and they move a good deal faster, much like how a thrown item would.
You can use the "frozen" state balls to apply some nice pressure on the opponent, but you should probably want to throw them if you need a decent projectile at hand.
LEVEL 3- While the level 3 balls have the same general properties as the Level 2 ones,(as in it still only does 10% and has the same speed and whatnot) this time the balls home in on the opponent once again AND you can fire 3 at a time! And as such, if you get all 3 out at the same time and press Side B again, they'll freeze in midair. But this time, pressing Side B AGAIN, makes each Shadow ball break out into 3 more mini-shadow balls that deal 4% damage each and home in slightly quicker on the opponent.
If that wasn't good enough, you can grab each ball with the arms again.(But you can't grab the mini-balls.) However, if you manage to grab all 3 balls, each of the Shadow Arms will start a .7 second animation where they actually fuse all the balls together to make one gigantic ball of death!! This one ball is then withheld by the right arm, and can be thrown like a really big Bob-omb for 26% damage with great knockback! It's kinda like having Samus' charge shot in the palm of your hands.
SHIELD ATTACKS
"Not to worry....I shall be perfectly quiet..."
We talked about "Shield attacks" quite a bit, so let's finally explain them for once. As said before, Oichi herself has no shield! Instead, the R and L buttons are reserved for the Shadow Arm's basic Melee attacks. Both the buttons are reserved for either the Left or Right hand. (The third hand is used for the Up B and Grab attack.) They also utilize a similar Combo System from the Basara games, both in input and execution. So likewise, the hands themselves are very combo based.
LEVEL 1-
The level 1 version of the arms are only 1 Ganondorf long, and are somewhat weak and easy to DI out of, exemplifying the whole zoning/poking nature of the Level 1 set.
LEVEL 2-
This time around, the arms extend their range to an unstoppable 1.5 Ganondorf's length! The victims will have a harder time DIing out of these combos, but it's still something to be wary of.
LEVEL 3-
This is where Oichi's just-about-everything game is at it's absolute most dangerous! The arms have now extended to an unholy 2 Ganondorfs length, are much harder to DI out of, and are sure to dish out immense amounts of pain!
GRAB- PLEASE DON'T GO
Yes... that hurts, doesn't it?We're in the final stretch for these awesome shadow attacks here, so let's make it count with one of the more obvious uses for what's essentially a giant vortex of hands! HOWEVER, there's one thing of real note when it comes to grabs: Grabs, no matter what level they're on, can only be done while the hands are attached to Oichi's body. It's mostly for balance reasons actually.
LEVEL 1-
For this incredibly lazy, typical tirkaro style grab, the arms disappear off of Oichi and form a small puddle in front of her that quicky rises up to become a giant, 2 Ganondorf tall, 2/3 BFP wide Pillar of stray shadow arms. It takes about 1 second to recover from though, meaning you really don't want to whiff this.
So what if you don't mess up? Then the arms take the opponent up in the pillar of arms, and...hold them. Then, they move forward about 4 BFPs and set the opponent on the ground, dealing no damage at all. (You can let go of them at any time by pressing Z again though.) Not so much of an attack as much as a spacing tool.
LEVEL 2-
Alright, this is where the real grabs come in! While the same rather laggy animation plays during this grab, this time you have actual control over what the arms do to the poor adversary.
PUMMEL-
aka, JESUS CHRIST TIRKARO ISN'T GIVING SIZE 6 HEADERS FOR THE THROWS, OBVIOUSLY HE'S SKIMPING OUT ON THEM AND DESTROYING MYM FROM THE INSIDE OUT RAAAAGHGHFGHJGLD
FORWARD THROW-
One of the shadow arms imbues a strange looking ball of darkness into the opponent, and then tosses them 2 BFP away. This also does zero damage, but it does has it's use: For 20 seconds, the opponent will have a dark glow radiating off of their chest; pressing Z again, no matter what you're doing, while the foe is glowing will make them teleport directly in front of Oichi! This is actually a really important shortcut for getting in on the enemies to attack with Ichi herself, though somewhat situational.
BACK THROW-
Yeah, you should have expected this. Basically, the exact same as the forward throw, except the arms throw them 2 BFP backwards, and pressing Z will make the opponent teleport back 2 BFP away from Ichi. This is even more situational than the above, but it's far from useless. Since Ichi herself is so fragile, this is a good way to set the opponents back and into the zone of the Shadow Arms, which she should always be behind lest the opponent is weak enough.
DOWN THROW-
Same as the level 1 throw, but with a different ending: right at the end of the Arm's little journey, they drag the opponent into the ground and deal 15% damage! And after that, a small white ball of energy will arise out of the shadowy puddle which absorbed the opponent, and fly into Oichi's chest, healing her by said 15%. After which, the hands spit the opponent out from the abyss and merge back into Oichi.
Yes, it's another cheap status effecting/healing type move, but she did have it in the actual games, and it's just as useful here. Oichi needs any real chance she can get to recover energy, as she takes damage like wet origami.
UP THROW-
The most straightforward throw, a 2 Ganon tall spike arises under the adversary and impales them in the chest, carrying them in the air said height, dealing 16% damage. The spike then remains there for 2 seconds, leaving Ichi free to roam around/space accordingly while the opponent is still suspended.
LEVEL 3-
PUMMEL-
Oichi somberly strokes the victim by the check, and softly belts out this rhyme:
"On and on the road does go, down into the depths below
Off you went to call the king, you wish to hear the Devil sing..."
It's quite a mouthful for sure, taking around 6 seconds to finish, so it's quite easy to break out of. But at higher percentages, it's not entirely impossible. So basically, once you manage to sing that entire song to the opponent, the darkness begins to slowly swallow them into the ground, where they're never seen again. Or actually until they respawn, minus one stock. Basically, it's a one hit KO.
FORWARD THROW-
The shadowy arms throw the victim about 2 BFP away. But before they can get off the ground, the arm itself transforms into some kind of rushing current of dark-water and shoots at an arc, directly at the opponent, dealing 20% damage and some upwards knockback. Also, if Oichi has to deal with more than 1 opponent, any enemy that makes contact with the dark current takes 8% damage with slight upwards knockback.
BACK THROW-
The arm takes the opponent and pushes them real hard into the ground behind Ichi, and leaves a faint glowing mark on the opponent's head. This attack on it's own does 15% damage. So what makes this move so special? Well this is where the obligatory forced moveset interactions come in; For as long as the glowy mark remains on your opponent, (Which is for 10 seconds) the fused "Mega-ball" as seen in Ichi's level 3 Side B will finally have the ability to home in on the opponent. And it functions a bit differently than the smaller auto-homing shadow balls, as in it's a lot more stuck up and relentless; for as long as the foe is glowing, the Mega Ball simply won't give up it's pursuit. If it misses, it will constantly turn back again until it gets a hit in. Think something like an automatic version of Volt Tackle.
DOWN THROW-
Don't get too excited, for it's a generic status inducing throw: Ichi imbues a shadowy glow upon the foe's feet, dealing 1% damage per second and slowing their movement speed by half for 12 seconds. It has it's uses, given that level 3 Oichi is essentially a damage racking spacing character turned up to 11, but it's more obvious use has to be if you use this, then chain grab the opponent into the Up Throw....
UP THROW-
The arms throw the victim's body 2 SBB up in the air, and detach from Oichi's body, forming a flat puddle of shadow right in front of her. As soon as the body comes down, the puddle turns into a giant spike 1 Ganondorf tall, that does 15% damage each hit. The puddle will then keep doing this for 10 seconds. Sounds kinda overpowered, but the main idea here is for the opponent to first DI themselves away from the initial spike, and then run away as the puddle chases them down at the speed of Zelda's run for said amount of time. Even if your foe avoids all the attacks, it'll still keep them pressured long enough for you to manipulate them. And even then, slowing them down via the Down throw ensures further that your enemies won't make it out unscathed.
NEUTRAL ATTACK- FLOWER PICKER IN SPRING
So now we're finally done with what was essentially a moveset for an incomprehensible cluster of demons, we're finally onto Oichi's moves themselves. One thing to note is that Ichi plays as a foil to the Shadow Arm's abilities. While the arms are really only good for racking up damage and providing a good defense with it's sheer offensive capabilities, Ichi specializes in actual kill moves and knockback. So likewise, her attack speed is incredibly slow, and are pretty much useless lest used in tandem with the arms. The Neutral attack here pretty much exemplifies this trait, as she takes .7 seconds to twirl around with her Naginata in hand, sweeping the ground elegantly. It does 2% damage with some decent forwards knockback, but it's mostly used as a haymaker; the main effect of getting hit by this sweep is automatically getting in a "knocked down" state, no matter how little damage the opponent has taken.
DASH ATTACK- TREMBLE, MY BACK
Rather straightforward, Ichi clumsily stabs forward with her long Naginata, but takes about .6 seconds to recover from it. The attack itself does 3% damage and very decent knockback, making it quite ideal if you're in a hurry to knock the opponent back, or if you need a quick way to space the opponent out of range while they're preoccupied getting combo-heavyweighted by the arms. It's quite situational beyond that though.FORWARD TILT- GENTLE BLOSSOMS
Ichi splits her Naginata in two and does an elegant little battle-dance in which she twirls around with a blade in each hand, keeping herself elevated so that the blade in the front side is levered upwards, and the blade in the back is levered down. This attack has about .4 seconds startup time, and deals 5% damage with good forwards knockback. Main difference between this and the neutral attack is that this one is a bit safer to use, and covers Ichi at all times. However, it's slightly weaker and doesn't have that nifty knockdown effect.UP TILT- HEAVENLY EMBRACE
The rope on the end of the pole connecting the twin Naginata blades extends in an upwards-diagonal direction, going about one Mario long. It has a rather nasty ending lag time of .7 seconds, but if she does catch an enemy in her blade, she deals 4% damage and grappling-hooks the opponent right down in front of her, in a "knocked down" state. One of the few Naginata moves that doesn't knock anything back, this is once again a space-controlling tactic, meant to put a jumping opponent right in range an actual kill attack. This isn't perfect however, since a rather fast-reacting opponent can probably get up faster than you can wind up an attack. Having the shadow arms on hand is recommended in this situation.DOWN TILT- TWIRLING PETALS
Oichi sets her Naginata to the side and starts twirling it, the blades being swung by the ropes, making a perfect circle around Oichi for as long as she swings it during this move's 3 second duration. Basically, it creates a giant hitbox around Ichi that deals 2% damage per hit and good knockback. Think of this as the closest thing she has to a shield, but with one major flaw: It has about .4 seconds of startup time and .8 seconds of cooldown time. I shouldn't have to mention that having the arms around is vital to make up for this.FORWARD SMASH- EMBRACE MY CHEST
Ichi stabs the Naginata forward as the ropes holding the blades extends about 1 BFP; any target caught in this high-priority grab box is then dragged in front of Ichi and takes 6~8% damage. Yes, essentially a clone of the up-tilt, but with some differences: aside from the obvious change in direction and damage, the "charging" aspect of the move and the less punishing whiff time of .4 seconds allows for more accurate hits. However, it doesn't have the knockdown effect of the up tilt, making you even more susceptible to punishment if you're unprepared.UP SMASH- REAPER
This is it, the obligatory main "Kill Move" of Ichi's. Pretty much what a lot of this set is leading up to. Oichi takes .8 seconds to lift her Naginata in the air and slam in right in front of her, doing 8% damage, but great knockback that kills at about 120%. It's simple, but vital when knocking your competition out of the park. But obviously, the pretty nasty startup time is supplemented by another .8 sec cooldown time, meaning you still need proper placement of your arms if you need to play it safe.DOWN SMASH- DIVINE HOPE
Ichi reflects upon the last ray of hope in her mind, slowly healing herself by 2% per second. If you're playing particularly safe with your Ichi, you'll probably need to use this move a lot, since she needs every bit of health she can get with her light frame. There are some real downsides to this though; Every 2 percents you heal is takes 5% off of your Shadow Arm's level, which can drain surprisingly fast. The other thing is that using this move in tandem with your arms will make your shadows slow down by half, both in movement and attack speed. This all probably means you should be more conservative with this ability if you rely on the arms a lot.(And you probably will.)BACK AND FORWARD AERIAL- PETAL FLOAT
While Ichi doesn't have the best offensive options in the air, she does have good aerial movement compared to her rather poor grounded speed. This is in part helped by the fact that she has an MvC-style airdash that can be used once in the air, that instantly takes her 3/4ths a BFP forward or backward. However, landing on the ground about .7 seconds within the airdash will cause Ichi to stumble a bit, causing .7 seconds of cooldown time on landing.NEUTRAL AERIAL- LILY COMBINATION
Putting that Naginata to work, Ichi does a quick 3 hit combo with her blades, each doing 2%, the last one having good knockback. The startup time is significantly more brief than the usual 'gata attacks, but the cooldown is an expected .5 seconds. While good as an aerial attack itself, it's main use is in tandem with the Shadow's level 3 grab attack, where it acts as an excellent method to deal knockback while keeping up the pressure with the Shield attacks.DOWN AERIAL- MUNEN
Since Ichi has such little weight, her fall speed corresponds as well. But this can be compensated by usage of this little move:When in the air, a giant shadow hand (One independent from the usual ones) comes out from directly below Ichi and drags her down instantly, leaving her to fall on her body and hands. This puts her in a "knocked down" state, from which she has to take the time to get up. The might of her getting dragged down creates a 1 BFP-wide shockwave that does 5% damage and good upwards knockback from the ground. But of course, be wary of the obvious ending lag of .4 seconds on top of the knockdown state.
UP AERIAL- DEVOUR THOSE INTESTINES
Ichi does a single upwards sweep with her Naginata in the air, which does 5% damage and good upwards knockback. Think of this as an alternative to the Nair, both being used for offensive aerial control, and to be used in conjunction with plenty of Shadow Arm attacks. But of course, this one has been compacted into a single slice of slightly less damage, only .4 seconds of end lag, and in a differing direction. FINAL SMASH- 呻け死の華
Ichi finally loses it. She slumps down to the ground as she slowly whispers to herself this tune:"Wander freely, wander far, off beneath the Devil's star
In the dark, the girl so bright, got up to see the day by night
Her fear in hand, her fear in heart, her fear did tear her soul apart
The white of flesh, the white of bone, the worms will leave your soul alone
On and on the road does go, down into the depths below
Off you went to call the king, you wish to hear the Devil sing..."
During that whole mouthful, all hell breaks loose on the stage: Characters gradually take damage 1% per second, the arms heavily rain upwards from the ground, doing 4% damage and some upwards knockback per hit, and everyone's movement speed is cut by half. If that's not enough, a group of humanoid shadowy figures pop out from the ground, and slump around while grabbing people like a ReDead, doing 9% damage per grab. But once that ironic nursery tune is over after 20 seconds, she regains what little she has of herself, and the vengeful spirits stop their assault.
PLAYSTYLE
"Lord Happy is like the sunshine...thank you sunshine... I am indebted to you for all you've done...."
Oichi is largely about control and pressure. When playing as her, always, ALWAYS keep your shadows out, and always stay behind them. Even if your enemies are at higher damage, one false move could easily take Ichi out. Play it safe by controlling with the Shadow Arms, and try by all means to keep them within range.
When starting out, Ichi is very much a zoning and poking character, with little room for anything else. The goal here is to either go straight in with the shadow arms to rack up damage quick, or calmly manipulate your opponent into rushing in whilst playing defensively, and let the damage rack up itself. Your ultimate objective is to get your arms up to at least Level 2, and by god try to stay there. Remember, letting Oichi just get hit once causes the arm's level to go back from square 1. From there on out, the arms are complete killing machines that rack up damage faster than anything, not to mention their INSANE amount of range. Oichi herself is pretty much a 100% useless character without them. But obviously, your opponent won't actually be going after the arms, as they can't be damaged. No, what you really want to do is use the arms to defend Oichi from getting hit, hence why she should ALWAYS remain behind them. No, this doesn't mean that you should keep the arms attached to Ichi at all times, as Oichi is a LOT more susceptible to mistakes, damage, and general sucking without proper spacing. Her ideal positioning should be at least 2 BFP away from any enemies. Luckily, Ichi has many tools for zoning, even at Level 1, which her play should center around accordingly.
Once you get your opponent to a higher percentage, you can slowly close in this little gap, but don't completely disregard it! Pressure is always your best friend, no matter what the situation is. Oichi is always a terrible, useless abomination without some Shadow Pressure. When you're ready to deal the final strike, keep your opponent preoccupied with a shadow combo or similar maneuvers and close yourself in for the blow.
Now finally, let's talk Level 3. Level 3 is extremely hard to get to and maintain, but thanks to it's horrendously improved options, slick thinking can make your Level 3 high last longer than usual. Mix things up a lot with the shadow attacks, and keep your pressure at it's most insane via the frozen shadow balls and it's subsequent effects. While racking up damage like this, it's safest to take a bit away from your Levels via the Down Smash for the sake of Ichi's fragile stamina. But you should still be very conservative with that move too, since it slows the Shadow attacks to a crawl.
tl;dr: Ichi cannot dodge for crap, don't get hit, use Level 1 Shadows for poking like a coward with occasional hints of rushdown, use level 2 to space and control like all hell, and use level 3 to unleash all hell in what will probably be a short amount of time. It should all be incredibly self-explanatory really.

Goodbye....
ForwardArrow
Smash Ace
- Joined
- Aug 17, 2011
- Messages
- 502
Sorry I haven't been commenting as much guys, busy with school and working on a set.
Oichi
Nice to see you attempting a serious set for once. I think you did this before in Adachi, but this is a better set than that one by a long shot. The ability for her to fight by proxy from a range or united with the arms to cover up her pathetic weight and rather lame regular attacks is fascinating and well executed for the most part. She has some neat interactions, like holding down the foe to land KO moves with the hands. That's not to say this set doesn't have quite a few problems, though. Some of the status effects caused by the attacks create interesting interactions, but don't really contribute to the overall playstyle(the main thing being the ruins that cause the giant shadow ball to home, which seems kind of unneccesary and largely useless). The real problem here though is that matches involving Oichi seem to end WAY too fast. The foe can kill her easily before Level 2 and after that Oichi basically kills them immediately because she becomes so absurdly powerful. This could be changed with some numbers tweaking(okay, maybe a LOT of numbers tweaking), but it's still a pretty big problem. Not to mention Level up mechanics come across as awkward to me personally, though that's just personal preference. Still, it wasn't all that bad, and it's nice to see you attempt a serious set and have it at least sort of work out.
Also, Final Smash should've been Kangaskhan.
Gemini Man
I think Hollow Knight and Zook already explained the big problems here, but I'll point out that the Up Tilt is kind of a waste of an imput. It really just confuses you nearly as much as the foe, and is too "set at the start of the match and pretend it never happened from that point on" for my liking. It also does a lot of stuff that really doesn't make any sense for Gemini Man. I mean, I don't think Gemini Man is the type to go and build random platforms to bounce his projectiles off. It's kind of Pokemon Syndrome-ish. Also I know you're aware of it, but the plugs for your other sets are actually pretty annoying and it'd be best if you avoided doing so in your future sets. That said, the ways that you can play with your clone are actually pretty cool, so it's not all bad here, just really awkward at points.
StreamOverlord
Smash Rookie
- Joined
- Aug 25, 2011
- Messages
- 2
Evil Naruto
Evil Naruto
What About This Everyone:
Evil Naruto:
http://fc01.deviantart.net/fs71/f/2011/235/f/5/evil_naruto_mugshot_by_streamoverlord-d47lrjj.png
Description:
Evil Naruto was created by the Curse Jutsu Master in the game Naruto Shippudien: Ultimate Ninja Storm 2 as the Ultimate Ninja from all the chakras of the 37 Curse Dolls that were recollected and used Naruto,s chakra because of what the Curse Jutsu Master sayed when he was found beaten by his greatest creation that off all the chakras,the one from Naruto was the strongest one and that gived him the form of Naruto in Sage Mode and wanted to use him for destroy all the Elemental Nations but he went berseck and beated his creator and had a fight with Naruto Uzumaki and his friends and after a long rough fight he was defeated and dissaspeared in a poof of smoke giving the sensation of that he might return someday.
Alternate Costumes:
1.Red Rage Costume:In this form his colors change:His trench coat turns dark red like sage naruto,s and his jumpsuit turns red as his eyes and his hair turns light red giving the impression of him staying angry .http://www.smashboards.com/images/smilies/mad.gif
-Used in Red Team.
2.Blue Calm Costume:In this form his colors change:His trench coat turns dark blue and his jumpsuit turns sky blue as his eyes and his hair turns light blue giving him the impression of staying calm.http://www.smashboards.com/images/smilies/glare.png
-Used for Blue Team.
3.Green Sad Costume:In this form his colors change:His trench coat turns dark green and his jumpsuit turns lime green as his eyes and his hair turns light green giving him the impression of staying sad because of seeing he wasn,t normal. http://www.smashboards.com/images/smilies/scared.png
-Used on Grren Team.
4.Yellow Orange Costume:In this form his colors change:His trench coat turns neon orange and his jumpsuit turns yellow as his eyes turns bronze and his hair turns orange giving him the impression of happy because he acts like Naruto. http://www.smashboards.com/images/smilies/bee.png
5.White Hebi Costume:In this form his colors change:His trench coat turns white and his jupsuit turns purple as his eyes turns yellow and his skin is brown as his hair turn dark gray giving him the impression of using the Curse Seal and this works just like Wario,s 2nd costume A.K.A. the old one.
http://www.smashboards.com/images/smilies/reverse.png
Stats:
Heigth:5/5-Because he adopted the form that Naruto have in Shippuden and by that they are the same weight,but in his White Hebi Costume he is slightly tall and in his Yellow Orange Costume he is slightly down.
Weight:3/5-Because he adopted Naruto,s form that make him the same weight as his but he is slightly faster as Fox and/or Falco but ironically his weight affect him to fall down more fast as Bowser.
Movement Speed:4/5-Because he is permanentely in Sage Mode he is fast as Naruto in that form giving him the ability of having his speed like Fox and/or Falco and nearly as Captain Falcon and/or Sonic.
Jump:4/5-Evil Naruto can jump at high speed.His 1st jump is rolling on the air like samus but slightly down but his 2nd jump is rolling more higher on the air like sonic.
Fall Speed:4/5-Because after going up he fall down to the ground like Bowser but slightly weaker but still hard if the player don,t recover him before landing on the ground.
Entrance:Evil Naruto appear and rises up from a purple smokescreen as he get his arms folded ready for fight.
Walking:Evil Naruto does not walk but "run" slowly across the stage.
Running:Evil Naruto rum more faster in the stage like a flash.He is beaten in speed by Sonic and/or Captain Falcon.
Waiting Movements:Evil Naruto just stood there with his arms folded or just take them off and looks around before folding his arms again.
Sleeping:Evil Naruto just put his head down as he down his hands and stood there asleep.
Stunned:Evil Naruto jumps back stunned with purple sparks around his body as he stuns around left and right.
Smashed Off-Screen:Evil Naruto is smashed off-screen and "screams" as he goes.
Moveset:
A:Evil Naruto gives a punch with his fist. 5% damage,no knockback.
A,A,A:Evil Naruto punchs twice and then gives a roundhouse kick. 17% damage,low knockback.
Dash Attack:Evil Naruto runs to the opponent then go down and do a up kick.(Like Naruto and/or Lee when they do their barrages combos.)
13% damage,medium knockback.
Side A:Evil Naruto jump and do a somersault kick to the opponent.
9% damage,low knockback.
Up A:Evil Naruto go to his knees and do an up kick.
12% damage,low knockback.
Down A:Evil Naruto put his leg to the air then bring it down damaging who is close to him.
11% damage,low knockback.
Side Smash:Evil Naruto will stay quiet unlit the A button is off,and then he jump slightly high and attack with both legs doing more damage to the opponent.
16% damage,medium knockback.
Up Smash:Evil Naruto will stay on his knees unlit the release of A button,in the release he make a stronger up kick that do more damage.
21% damage,high knockback.
Down Smash:Evil Naruto will stay in quiet unlit the button A is off,then he will give a downward punch that have high damage.
18% damage,medium knockback.
Aerial Attack:Evil Naruto jump in the air and then he make a high kick that will do much damage.
15% damage,medium knockback.
Side Aerial:Evil Naruto in the air will give a crushing punch that do much damage.(Like Naruto when he punched Gaara during the invasion).
20% damage,high knockback.
Back Aerial:Evil Naruto suddently shifts and dellivers a downward punch to the opponent knocking him/her back.
24% damage,high knockback.
Up Aerial:Evil Naruto jumps high and then he deliver a double axe strike to the opponent.
22% damage,high knockback.
Down Aerial:Evil Naruto jump in the air then he will do a axe kick to the opponent,s head,stunning him/her.
32% damage,very high knockback.
Grab Attack:Evil Naruto trap and hold an opponent by the troath,then he procceds to puching his victim with a poisoned fist unlit he let go of his victim.
4% damage for each one,no knockback.
Forward Throw:Evil Naruto will drop for a second his victim before he gives a crushing punch that will make the opponent go back.(Like Naruto when he punches Gaara at the end of the Invassion Arc).
20% damage,high knockback.
Backward Throw:Evil Naruto will drop on his back his victim before he do a crushing throw that sends his opponent knocked back.
18% damage,medium knockback.
Upward Throw:Evil Naruto will drop up his victim before he make a rising punch that sends his opponent upwards.
22% damage,high knockback.
Downward Throw:Evil Naruto will jump as he trows his victim downward before he strike his opponent with a Rasengan sending his opponent more down.
16% damage,low knockback.
B:Rasengan Barrage
Evil Naruto will do 2 Kage Bushins and each one will charge 1 rasengan on each hand and then he will walk forward and strike his opponent with the rasengans that will expand to a extent and then explode sending the enemy to fly,but this attack can be avoided by doing a double jump,getting away from his range,using the shield and/or evade.
12% damage if is incomplete,26% damage if is complete,high knockback.
B+Side:Whirlwind Shuriken
Evil Naruto will throw a big whirlwind shuriken like Naruto in the game Naruto Shippuden:Ultimate Ninja Storm 1,but this one he throws it in vertical mode unlike the horizontal mode doind that the enemy get more damage like the normal one.
13% damage,medium knockback.
B+Up:Kamawari no Jutsu
Evil Naruto will subtitude himself with a-out of nowhere-log and get higher on the air saving himself from defeat and the he will do a reverse roundhouse kick to the opponent that will damage him/her.
11% damage for the reverse roundhouse kick,low knockback.
B+Down:Underground Kage Bushin Strike
Evil Naruto will do a Kage Bushin that will go underground and a few seconds later the bushin will re-appear a few meters away emerging from the ground as he deliver to the opponent a rising upperpunch that will send his opponent up away.
14% damage,medium knockback.
Final Smash:Fuuton:Rasen Shuriken
Evil Naruto will make 2 Kage Bushins that are going to help him in getting the natural chakra and adding the forming of the rasengan to the final where the attack will look like a green-blue orb with a 8-pointed shuriken surrounding and rolling over it making it look feral and then after a few moments he will put it up his head and then he,ll launch the Rasen Shuriken foward the opponent and in contact it will explode in a devasting blast that wil send his opponent flying away stunned with a high change of not recovering on time.
124% damage,very high knockback.
Shield:Evil Naruto will protect himself in a dark purple shieldfield.
Taunts:
Taunt 1(Up):Evil Naruto will raise his right fist into the air.
Taunt 2(Side):Evil Naruto will put 1 of his arms behind in a dark way.
Taunt 3(Down):Evil Naruto will do a dark roar before gettin normal.
Victory Poses:
Pose 1:Evil Naruto will put his arm in his chest before put it down.
Pose 2:Evil Naruto will put his fist on his hand,later he sign to him.
Pose 3:Evil Naruto will put his arms on his head and do a dark smile.
Losing Pose:Evil Naruto will stay on his back with his head down and arms folded.
But he don,t care about who,s the winner since he respects everyone who can give him a good fight like the original Naruto.
Kirby Hat:Kirby will have a hat lile naruto,s hair but white and his skin turn black.
Symbol:Evil Naruto,s symbol is the Leaf village symbol.
Wii Remote Chime:Evil Naruto,s chime is a kunai clashing on another.
Snake Codec:
Snake:Hey Colonel,¿what hapenned to Naruto and why he is acting like this?.
Colonel:Huh,¿what are you talking about sna-WHAAAAAAAAA,NOT HIM,¡EVERYTHING EXCEPT HIM!.
Snake:¿Eh?,Colonel,¿why are you screaming like that?,he couldn,t be that bad,¿could he?.
Colonel:No Snake,your right,he can,t be bad,¡HE CAN BE WORSE THAN THAT BAD,SNAKE!.¡HE IS THE ULTIMATE EVIL NINJA WEAPON!.
Snake:¿What the devil are you talking about,Colonel?.Just tell me who is this guy and why are you scared of him.
Colonel:Alright,alright Snake,i,ll tell you why I,m afraid of this guy and why you should be scared of him too:He is Evil Naruto,a Curse Doll that taked the form of Naruto when he is in his Sage Mode and was created by the Curse Jutsu Master,a ninja who wandet to create the "Ultimate Ninja" and use him to destroy all nations and countries,still the reason behind that is unknown but back to the history he managed to get all the Curse Dolls he dispersed around all the zone of the Land Of Fire and used all the recolected chakras to create this one in front of you called Evil Naruto who he denominated as the "Ultimate Ninja" but he went berseck as he attacked his creator and was going to complete his function of destroying all the Ninja World,but he was defeated by the true Naruto Uzumaki and his friends after a hardly rough and difficult battle,then he dissapeared in a smoke protector giving the impression of him being permanentely defeated...¡BUT HE,S HERE BY NOW SHOWING THAT HE,S STILL INDESTRUCTIBLE!,¡OH GOD,OH GOD!.
Snake:...Whoa...oh my,if what you tolded is true then maybe all of us are on great troubles;but still im gonna beat him no matter what happens because if Uzumaki and his allies we,re able to beat him then maybe I have a chance of defeating him now.
Colonel:¿¡WHAT?!,¡OH GOD,SNAKE ARE YOU INSANE!...but still...alright Snake,I,m counting on you and good luck...you will really need it,Snake,you,ll really do.
Snake:Oh god,why me...oh well then let,s go you dawn doll.
Unlockable Music:
*Somewhere I Belong-Linkin Park
*Heavy Violence-Toshiro Masuda,Naruto Soundtrack
JOE!
Smash Hero
no reposts, go back and edit your old one
mentholcase
Smash Cadet
So it is 100% assured that it won't negatively impact a moveset's judgement if it is missing all that stuff like alternate costumes, Snake codecs, results screen poses, start of match entry, playstyle, matchups, SSE role, life story, etc & etc... ?The basic dictionary definition of a moveset is a compilation of the moves a character possesses in Super Smash Bros.
...
As with movesets themselves, quality takes precedence over quantity by a long shot.
But so far, I have come up with alternate costumes, an assist trophy, & a stage to go with my entry in progress tho.
- Status
- Not open for further replies.