• Welcome to Smashboards, the world's largest Super Smash Brothers community! Over 250,000 Smash Bros. fans from around the world have come to discuss these great games in over 19 million posts!

    You are currently viewing our boards as a visitor. Click here to sign up right now and start on your path in the Smash community!

Make Your Move 11 - It's Over, Duder!

MasterWarlord

Smash Champion
Joined
Aug 24, 2008
Messages
2,902
Location
Not wasting countless hours on a 10 man community
IGGY KOOPA


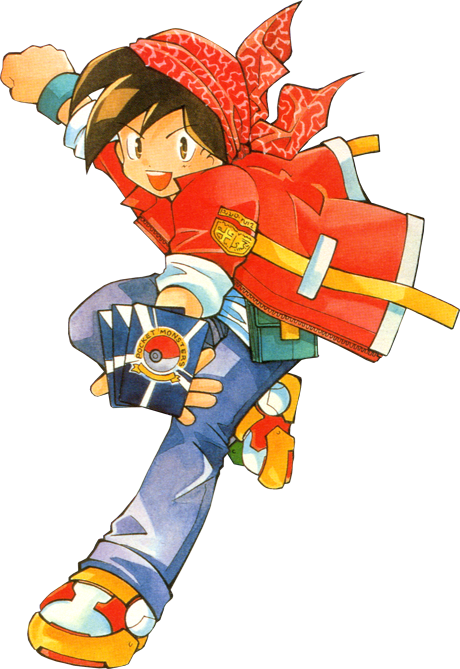
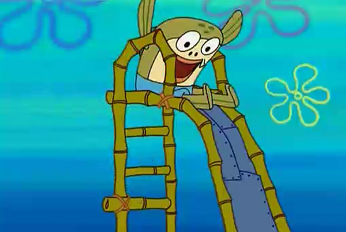
Iggy Koopa is one of Bowser’s seven children – at least one of Bowser’s seven children who he personally spawned, considering Bowser Jr. is obviously adopted. Iggy is the twin brother of Lemmy Koopa, and while the resemblance was originally somewhat strong, particularly with the identical hair, the redesign has made that former trait rather questionable. In New Super Mario Bros Wii, he has gained the personality of a more hyperactive bratty/arrogant type with his redesign, constantly taunting at Mario within his two fights against him to the point of bordering on insanity. Iggy’s nerdy glasses aren’t just for show, being retained in his redesign, and as is law in children’s media is an overly intelligent inventor, having made several mechs for the Koopalings to use in Yoshi’s Safari. Considering he already has a magical wand from Kamek, though, he needs no such mechs to help him Brawl. They’d make the match end much too quickly for Iggy to properly enjoy himself.

STATS


Aerial Control: 10
Size: 7
Aerial Speed: 6
Jumps: 6
Weight: 5.5
Ground Movement: 5.5
Traction: 4
Falling Speed: 4

Iggy stands as tall as his father does in his idle position, but Bowser’s rather hunched over in his Brawl stance, meaning Iggy isn’t physically taller than him. On the other hand, Iggy is very thin in his new redesign – presumably from spending countless time between his limited game appearances in Bowser’s dungeon – and it’s generally a lot worse to be wide than tall. If you’re afraid of projectiles, that’s what crouches are for.

SPECIALS


Down Special – CHAIN CHOMP CHARIOT


Iggy summons a Chain Chomp the size of Bowser a platform in front of him and a “chariot” underneath him that’s connected to the Chain Chomp by his platform long chain. The chariot is as wide as Bowser/tall as Wario and is solid, but there’s a portion in the middle of it only as wide as Iggy is where characters can “sit” inside of it, decreasing their height by that of Wario’s. Iggy by default summons himself into this chair, decreasing his hurtbox as he gets pulled around. In addition, Iggy’s able to hide his hurtbox entirely inside his seat in the chariot if he crouches. If outside characters are too wide to fit in this hole, they can still stand on top of the “chariot”.

The Chain Chomp moves forward at Ganon’s walking speed if undisturbed, turning around at edges, but if any character gets in front of him he will do a lunge outwards at the enemy a platform forwards almost immediately, dealing 20% and knockback that KOs at 90% with his front as the hitbox. If Iggy wants to control the chomp more directly, he can input Down Special with the chomp already out to tell it to turn around, or input a Special Dsmash to order it to do the lunge attack regardless of whether or not somebody’s in front of him or not – a nice way to catch foes stupid enough to roll in front of it.

The chariot weighs as much as Jigglypuff at 50% while Chomp weighs as much as Bowser at 50%, them perfectly capable of taking knockback. The catch is that the chariot will –never- be able to drag the Chomp if the knockback dealt would knock it out of the chain’s range. On the other hand, if Chomp takes knockback, he’ll always drag around the chariot. Iggy has to be wary about losing his chomp off the edge, especially considering he can’t attack it himself. If he does indeed lose the Chomp, the normally lagless set-up’s start-up lag is increased by 1.5 seconds if Iggy wants to summon another Chomp. There’s no limit to how much this can stack, but it gets reset to lagless when Iggy loses a stock.

Side Special – FIREBALL


Iggy leans forward and fires a green projectile from his wand nearly identical in appearance to Luigi’s fireball. The fireball travels at the slow speed of Jigglypuff’s dash, but has slight homing capabilities, chasing after any character that comes within a Bowser width of it. Of course, the projectile’s vertical movement is twice as slow as its’ horizontal movement and it has to turn around in a half-arch if the foe goes behind it, but it’s enough to provide the foe some degree of extra pressure. The fireballs last until they hit something they can damage or until they travel Final Destination’s width. You can only have 2 out at a time.

Considering how long the fireballs last, this move is excellent fodder for simplistic camping. This obviously gets much better when you use the Chain Chomp as a meat shield and have it pull you around while you camp.

Neutral Special – WAND TOSS


Iggy turns to face the camera and winds up, during which time you can angle his toss in literally any direction, then goes to throw his wand. It travels at Meta Knight’s dash speed initially before slowing down to nothing after 1.5 seconds, and the fall speed of the wand is only that of Jigglypuff. The wand is a hitbox that deals 10-1% and knockback that KOs at 160-300% based off how fast it’s going. While you can feel free to throw the wand off-stage due to being able to resummons it back into your hand with Neutral Special instantly, the wand can be out-priotized by anything and takes knockback like Jigglypuff at 85%. If it gets destroyed, you’ll have 2 seconds of lag to create a new one upon using this move.

The wand is perfectly capable of defending itself, though, as if you use any of Iggy’s moves that involve his wand Iggy will use magic to animate the wand wherever it is regardless of whether or not he’s holding it. Take note that Iggy throws the wand in such a way that it spins around en mass when he first throws it, and while it still spins beyond the initial .3 seconds it’s a very slow spin – this is actually beneficial to Iggy, as it lets him aim the wand moves if he waits for the wand to spin into position. Iggy and the wand take lag independently of one another, meaning Iggy can have the wand do something then still go to attack himself, but Iggy must still go through the start lag of the wand’s attack.

Up Special – BLASTBACK


Iggy holds his want in front of him with both hands before firing a constant beam out of the wand that does a token 1% and flinching. This pushes back Iggy 2 Platforms over the move’s duration before he goes into helpless, but Iggy is able to angle the move as he goes, potentially able to travel upwards/downwards a single Platform during the move’s duration or anywhere in-between, able to change where he’s going in mid-flight to weave around enemies attempting to gimp him.

The spikes on Iggy’s shell deal 1% and constant set knockback at a rate enough to pull the foe along with Iggy as he goes backwards. This has rather impractical gimping purposes due to Iggy actually entering helpless at the end of the move, but Iggy can angle the move in the middle of his flight to get his shell up off the foe to drop them off at some point while he continues on his way. This enables you to whizz past a foe and drop them in front of the chomp before you go to the safety of the chariot alone.

Using this move with the wand by itself, the back of the wand is a hitbox like Iggy’s shell, but the fact the hitbox is just the back of the wand means it’s very easy for foes to DI out of. Iggy must channel the wand for the move’s entire duration so he can direct it properly.

STANDARDS


Neutral Attack – SPARKLER


Iggy holds his wand out in front of him with a childlike wonder in a pose very much like his official art at the top of the moveset, causing his wand to constantly flicker with green fire that deals 5% and flinching on contact. So long as Iggy holds A, he can proceed to press left and right on the control stick to swish the sparkler in an arch over his head/anywhere in-between based off what he inputs. Wherever the wand goes, the trail of green fire follows, lasting for 2 seconds and still dealing just as much damage. Iggy can move the wand fast enough to completely surround himself with a half circle of green fire, but the fact he has the wand so far extended out means you can roll into/air dodge down into Iggy’s safe zone, probably before he comes out of the move to boot. The most practical time when you would want such a defense is when there’s minimal Koopa to be hit inside the half circle when you’re seated in your chariot.

If the wand is already in movement (Whether or not it’s in hand), you can create a fiery sparkling trail by just inputting your jab that can cover far more than just yourself, making it go all over the stage. Most notably, the natural spinning of the wand when it’s thrown makes for excellently jagged trails that are annoying for enemies to pass through.

Dashing Attack – SHELL SPIN


Iggy withdraws into his shell, performing a crappy version of his father’s Up Special with the same lag, but a smaller hitbox and 70% of the power. Notably, if Iggy comes into contact with a wall, he will continue the move and double the speed he’s going at and double the power of the move. This caps at 3 times, Iggy going 4x as fast and having 2.8x the power of Bowser’s Up Special, and Iggy can come out of this at any time if he so wishes. While he’ll have awkward ending lag, he’ll continue sliding during it to give him a free retreat.

What walls does Iggy have to bounce against? Aside from just bouncing a single time against the side of the chariot, if he starts the move on top of his chariot, he’ll fall down into the seat along the way and bounce back and forth inside of it. This is an easy way to utterly decimate foes who are intending to steal your perch and are intending to use it to defend themselves from Chomp/sitting in it to prevent you from getting back into it.

Forward Tilt – KOOPA CLAW


Iggy puts his towering height (For his age, anyway) to use as he leans forward extensively, then extends out his claws and rakes them inwards, dealing 10 hits of 1% and flinching. If he’s in the chariot, he’ll end up scraping the edge of the chariot with his claws. Not only does this let you pull somebody into the chariot should you want to, the hits where Iggy’s scraping against the side of the chariot will have doubled damage, making the move deal 15% in all.

Up Tilt – MAGIC BLAST


Iggy crouches very slightly to make sure his oversized hair doesn’t catch fire as he thrusts his wand upwards, it gaining a green fiery aura that deals 7% and vertical knockback that KOs at 150%. The crouch is the main beneficial thing about the move, as it enables Iggy to minimize his hurtbox to the point pretty much no attacks can get to his hurtbox without hitting the disjointed hitbox directly above it when inside the chariot.

Down Tilt – MAGIC BURST


Iggy fires his wand downwards at his feet in front of him, dealing a single hit of 6% that has a 50% chance to trip foes, otherwise dealing mediocre knockback. If out of your chariot but the Chomp is still around, it’s a simple way to stun the foe for said chomp.

Inside the chomp chariot, Iggy’s magical blast will cause the chariot he’s in to get propelled into the air a Ganon height briefly, as well as a Kirby width in the opposite direction Iggy was facing. This causes the chariot to become a hitbox that deals 10% and knockback that KOs at 150% on the way up, and causes it to deal 12% and spike foes on the way down, sending them into prone once they hit the floor. If it lands on them again while they’re in prone before they can get up (Quite likely), they’ll take an additional 5% and bit of stun. Note that in this move and all others where the chariot becomes a hitbox, the walkable top of the chariot never becomes one unless stated otherwise.

SMASHES


Forward Smash – DOG CHASING CARS


Iggy stabs his wand into the background/foreground, dealing 10-20% and .6-1.2 seconds of stun to dodging foes. After extending out the wand, Iggy turns his head to look at the Chomp and says “here boy!” to the Chomp in gibberish, rapidly shaking the wand. This causes the Chomp to turn to face Iggy if he isn’t already, then to lunge after Iggy. If Iggy isn’t in his chariot, the Chomp will continually chase him, giving Iggy direct control over where the Chomp goes until it reaches him, but if it does reach him before a foe he’ll take the damage and knockback from the Chomp (20-30% and knockback that KOs at 90-65%).

If Iggy –is- in the chariot, then the Chomp will go into the background/foreground as it runs slightly to go after the wand specifically. By the time the Chomp reaches Iggy in the chariot, the Chomp will have moved far enough so that the chariot will start getting pulled by the chain, causing the Chomp to run around in 3D circles to chase after the chariot. The Chomp is still a hitbox as he goes through the dodge planes, moving at Mario’s dash speed. This lasts for 4-8 seconds, and as the chariot moves it’s also a hitbox 60% as powerful as the Chomp. If foes –do- manage to get on top of the chariot somehow, they’ll find that the force the chariot’s being pulled around at means there’s a constant push effect on it as strong as Dedede’s inhale to send them off of it. This also applies to Iggy, but he’s presumably safely tucked away inside the chariot seat. Iggy gains the ability to perform other attacks 1.5 seconds into the move if he’s in the chariot, but can do so instantly if not.

If Iggy tosses his wand when he’s already being chased, Chomp will stop becoming hostile to Iggy and chase after the wand directly before turning around to bring it back to his master, being a hitbox the entire time. This can indeed be used when the Chomp would almost be done with the move anyway to extend the amount of time he’s a hitbox. The wand can still attack within the chomp’s teeth as it’s being brought back to Iggy, as the head of the wand still points out of the Chomp’s mouth. If Iggy wants to keep the wand inside the Chomp’s teeth for extended periods of time, he’ll want to start up the fsmash when he’s not holding the wand, as then when the Chomp reaches the wand he’ll permanently keep it within his teeth, him only dropping it if he takes knockback to knock him 3+ platforms.

If the wand uses dtilt while in the Chomp’s teeth, the Chomp will be treated identically to how the chariot is if Iggy’s in the chariot when he uses the move, though Chomp will only go up half as high as the chariot due to his weight. This does not interrupt anything the Chomp is currently doing.

Up Smash – ROAR


Iggy turns upwards and does a wimpy roar, dealing a petty 4-8% with no hitstun but with a decent strength wind hitbox that can KO foes at 140-110%. While it’s an okay defense to hit foes coming down into your chariot seat, Chomp imitates his master shortly after Iggy starts it up, turning upwards and roaring as well. The roar hitbox is as wide as Chomp and 4 Ganons tall, and while it only deals 10-18% it deals significant hitstun to foes based off how close they were to Chomp. At point blank, it stuns them for a sickening 2 seconds, while no stun takes place if foes are so much as 1.5 Ganons above Chomp. Foes naturally prefer to approach over Chomp rather than daring to roll past him when Iggy can potentially hold him back or hit them with a ranged attack of some sort as they roll past him. . .

Down Smash – ROLLOVER


Iggy whirls his hand around in a circular motion for a crappy but overly fast hit of 6-12% and knockback that never KOs, saying “Rollover!” in gibberish as he does so. This causes Chomp to roll forwards at Ganon’s walking speed, becoming a hitbox that deals 10-20% and knockback that kills at 180-100%. Iggy is free to do things that don’t involve commanding Chomp almost immediately after inputting dsmash.

Chomp’s chain starts to get wrapped around him as he rolls, causing the chariot to get reeled in to Chomp over the duration of the move. While Chomp will only roll until the chariot comes right up against him at minimum charge, he will continue rolling with varying levels of charge, enabling him to not only bring the chariot on top of his head, but to be able to flip it upside down as it falls down in front of him, becoming a hitbox that deals 10% and spikes foes as it falls, and deals 20% and pitfalls foes it squishes into the ground. Assuming Chomp keeps dragging the chariot around, he’ll flip it right side up when he drags it over his head a second time – and he will indeed do it twice if you fully charge the move. I’ll go over how a flipped chariot behaves in more detail in the next input.

Aside from smacking the foe with the chariot as it falls down, you can charge the move just barely to position the chariot on top of Chomp. Getting Chomp to stand still long enough to truly take advantage of the perch is incredibly difficult to the point of not being particularly worth the effort, but it makes a superb evasive maneuver. If you’re going to fall anyway and the foe is directly pursuing you, have Chomp roar with Usmash to slide down his back while Chomp’s roar hitbox replaces where you once were.

AERIALS


Down Aerial – GROUND POUND


Before we begin the move, another thing I should tell you about how the physics of the chariot work – if a character is standing on a side of the chariot, the chariot will tip in that direction slightly, more-so based off their weight. If multiple characters stand there, it stacks. It’s generally not enough to tip the chariot over unless a 15 or so in weight can be reached, though if they stay on that side for extended periods of time it can indeed flip. If a character very suddenly comes into contact with a side of the chariot, though, it’s treated as if the character had been standing there for roughly 3 seconds based off how fast it was – this can be done either by being spiked into the chariot or by using a stall then fall dair onto it most commonly, though anything else similar will work. Characters with high fall speeds fastfalling from a distance even has a slight effect on it.

This move, as you’d expect from the name, is one of those stall then fall dairs. Due to Iggy not being quite as manly as the normal user of this type of move, this only deals 9% and knockback that KOs at 170%, but the 5% flinch resistance during the move can sometimes enable him to get back down into his chariot safely, and the landing lag isn’t as terrible as most of these moves.

Why would you want to tip the chariot? Just before it tips you can use your dash attack to bounce around in the middle, then when it tips over you can actually let gravity take you out of the seat and use your built up momentum on actual outside foes. Aside from that, you’ll want to try to squish foes under it who wanted to stand on top of the chariot, as it’s a hitbox that deals 10% and spikes foes on aerial foes and deals 20% and pitfalls grounded ones. Iggy’s immune to the spiking hitbox, but he –can- be hit by the pitfalling hitbox, so he’ll have to retreat back to the middle of the chariot so that the harmful parts come down to his sides.

If you do indeed get trapped under the chariot, you can use your utilt to get out then use your utilt on the side of the chariot as it falls back down to flip it back over. Still, Iggy is perfectly capable of taking advantage of this position by attacking with his wand while he remains 100% safe, though be cautious if the foe goes to knock the chariot over the edge – you’ll have to fastfall out of the upside seat and go around the chariot before you can ever attempt to recover. If they are intent on doing that, you can just use the utilt a single time to bring the chariot up then try to knock them under the harmful parts.

Forward Aerial – SKULL BASHER


Iggy brings his wand behind his head before slamming it down in front of himself, using no magical properties of the thing and instead opting to use it as a simplistic blunt weapon. This deals 10% and spikes foes as powerfully as Rob’s dair. This is Iggy’s way of spiking foes onto the chariot to tip it over and begin a gimp/crush them against the ground with it. The fact that it’s a wand move means Iggy can have his wand start up the move even while he rapidly goes back and forth inside the seat of the chariot with his dash attack, blocking the safest haven for foes to run to and being able to pursue them when they run out from under the chariot. Needless to say, a generic spike is also useful for simply smacking foes down attempting to go over the chariot/Chomp.

Neutral Aerial – SKEWER


Iggy withdraws into his shell and spins around 3 times at a rather slow speed that can be sped up by how much you mash A during the move’s duration. Mashing A also causes Iggy to rise in a similar fashion to Luigi’s Down Special, but to a far lesser degree. The shell deals a token 8% and knockback away from the shell that KOs at 140%, but if the shell comes into contact with anything solid it will impale into it and latch on for as long as Iggy holds down the button or until he’s hit by an attack that does 8% or more. If a foe is in-between Iggy and the object he impaled himself into, then they will get grabbed, taking 4% per second until they escape after the initial 8%.

Impaling foes against the ground will generally just result in you getting punished, as if Iggy comes out of the move upside down he has bad landing lag. Impaling them against the chariot is the way to go, as it enables you to stick to a specific part of the chariot as it turns around, enabling you to bring enemies underneath the chariot with you to crush them as it turns. It’s also pretty much the only way to get the enemy to specifically come into the upside down seat of the chariot with you, at which point you can decimate them with your Dashing Attack.

Back Aerial – KOOPA KICK


I won’t beat around the bush, Iggy needs a proper horizontal spacer to deal with foes when they’re both in mid-air underneath a falling chariot, and more non-wand based spacers in general.

The kick has decent range due to Iggy going horizontal in mid-air, and deals 7% and knockback that KOs at 150%. Like so many of these sorts of MYM kicks, Iggy gets propelled in the opposite direction, taking the knockback of his own attack, giving him a nice option if the foe is too skilled in close combat over him to flee. Iggy can also kick off of his chariot, the Chomp, and any other sort of wall to abandon ship and flee when need be without having to land the kick on the foe, propelling himself forwards 3 platforms at 1.25X Captain Falcon’s dash speed. Yes, because of the logic of this move, Iggy does indeed have the ability to wall kick.

Up Aerial – EMBERS


Iggy holds his wand far above his head with both arms as it starts to gain a green fiery aura. Iggy can hold this move out for up to 2 seconds, during which time it does 7 hits of 1% and flinching per second. When a foe is attempting to jump over Chomp/into the chariot, you can catch them from underneath, then mirror their DI to keep them inside the hitbox as they fall, preventing them from doing jack until they reach the ground unless they’re overly floaty, in which case you can do a bit of juggling until Chomp reaches your horizontal position.

GRAB-GAME


Grab - GRAB


This is a generic physical grab, but Iggy has perfectly good uses for a generic grab in order to delay enemies for his Chomp or wand to hit them. In addition to this, Iggy is able to grab foes standing on top of his chariot while he’s sitting in it, making it generally a lot safer of a place to use what with how reduced Iggy’s hurtbox is.

Pummel - SLAM


Iggy grabs the foe by the wrist before slamming them over his head onto his opposite side, dealing 1% and bringing the foe to Iggy’s opposite side/turning Iggy around. As you can guess from the light damage, the move is incredibly spammable, making the animation play out much how it does in various cartoons. If you get this move off 4 times in a single grab, Iggy and the foe will become a cartoonish blur for as long as you keep mashing/the foe escapes so that you can’t see which side of Iggy the foe is currently on. You can input any throw out of this pummeling, with Iggy instantly interrupting the pummel to perform the throw laglessly.

Forward/Back Throw - RELEASE


Iggy generically tosses the foe to one side 1.25 Bowser widths away from himself, dealing 5% in this completely lagless throw with next to no animation. This leaves the foe in prone if and only if you had a cartoonish blur pummel going.

The purpose of the pummel and these two throws is to disorient them enough so that the foe has to input where they want to go at pretty much complete random if they don’t want to be met by an immediate tech chase. Iggy’s advantages for tech chasing include a potential wall in his chariot, the ability to grab prone foes with Down + Z, and his ftilt to enable him to reel foes back in without even moving if he predicts their roll correctly. His biggest advantage of all, though, is his wand. If the wand is spaced the distance a roll distance from where the foe will go, Iggy doesn’t even have to chase after the foe if they go in that direction and can just have his wand do the job.

Why do you want to bother with something as simple as tech chasing. . .? It’s not the damage you want so much as just to stall the foe as long as possible so Chomp can come kill them, making your ultimate goal a regrab to start it all over again.

Down Throw – ANKLE BITER


Iggy chomps the foe for a token 8% and knockback that KOs at 160% with no other notable properties. If Iggy grabbed the foe while sitting in the chariot or when the foe was otherwise at a higher elevation than him, though, he’ll end up chomping their ankles/feet/etc, causing them to trip and take 10%. The foe’s ankles are still pained after the throw, giving them a very simple but very useful status effect for the next 20 seconds – all moves that would have a chance to trip the foe now always trip them, making the dtilt that much more useful when tech chasing the foe.

Yes, you can potentially chain-grab a foe infinitely with this various stuff under the chariot, but most foes can infinite you just as easily with either a grab or an infinite jab. It won’t last forever anyway, as Chomp won’t get the memo you have things covered and will continue to lunge at the foe regardless of the chariot blocking him, slowly pushing it towards the edge.

Up Throw – TOSS UP


Iggy throws the foe into the air for set knockback of 2 Ganondorfs, then shortly after throws his wand at them if he has it in hand or it’s within 2 platforms of him, dealing 8% to the foe. From here, the wand remains above the foe, in an obvious position to fair them back to the ground. They can easily fastfall or air-dodge to avoid it, but not if they’ll fall down into Chomp. In that case, they’re left with little choice but to attack the wand, in which case you can assault them directly from below. These uses are small time, though, when you can use fsmash to make Chomp go on a murderous rampage to get the wand then just give it to the foe.

Chain Grab – BY THE REIGNS


If you input Down Z, Iggy will reach downwards as he grabs, able to grab prone foes and put them into his main grab, but more importantly reaching down off the side of his chariot/down to the ground to grab Chomp’s chain. Note that you can still make your normal Down B inputs to direct Chomp around while you are in this grab stance. Iggy’s “throws” never cause him to exit this stance and are just more pummels, you can exit the stance by inputting any button other than Z or Down B.

Chain Pummel – JUMPCHAIN


No, Iggy is not Sloth – he is not stupid enough to degrade himself to playing jump rope with his chain. Rather, he swings the entirety of the chain in such a way that the enemy must play it, creating one hitbox where the chain currently is immediately and another a Ganondorf above it slightly later. The first hitbox knocks foes into the second while the second one knocks them to the ground, both dealing 8%. The area in the middle is the safe area foes will want to stay in to avoid this move, making it the area you want to block with a fireball or two. Note that if you use this move outside the chariot closer to Chomp on the chain, that while the size of the hitbox will decrease the move will come out much more quickly, though you need at least a Bowser width of chain at minimum for this to work at all.

Forward Chain Throw – REEL IN


If in his chariot, Iggy attempts to simply reel his chariot in to Chomp, moving towards Chomp in the chariot at the speed of Ganon’s walk and able to cancel out at will. Note this (As well as all other chain throws) still works if Iggy is standing on top of a flipped chariot. Otherwise, Iggy climbs up the chain, moving at 75% of his dash speed to give him a situational extra recovery.

Back Chain Throw – OVERHEAD THROW


Iggy attempts to throw the length of the chain in the opposite direction it currently is. All this will do under normal circumstances is just make the chain rise into the air a bit and become a hitbox that deals 7% and vertical knockback that KOs at 150%. If the Chomp was already moving towards you, though, Iggy will be able to assist his momentum and fling him to the be the same distance he was from him but on the opposite side, the Chomp remaining a hitbox as he goes through the dodge plane as usual. This can also slow down the Chomp’s momentum by half if he was moving –away- from Iggy, making him hit foes who thought that Chomp was going to whizz past them and able to save him from suiciding. While most chain throws are useless if you grab the chain right next to Chomp, you’re actually able to decrease Chomp’s momentum by up to 75% if you grab the chain immediately next to him.

Up Chain Throw – CHAIN THRUST


Iggy thrusts his chain, causing a little “hill” in the chain to spawn in the portion of the chain immediately in front of him as tall as Wario. This “hill” does 4% and flinching per second and drags foes with it, moving forward at Ganon’s dash speed. This lets you drag foes away from you and into Chomp with ease, much less if Chomp is coming towards the chariot. This move also causes the chariot to raise into the air at the start of the move (Assuming Iggy’s in it) similarly to when Iggy uses his dtilt, but it only rises half as high with half the power.

Down Chain Throw – BOUND IN CHAINS


Iggy attempts to swing the chain around into a loop to lasso foes. This does nothing but turn the chain into a hitbox that deals 5% with weak downwards knockback as it slams down unless the Chomp is coming towards you, in which case he will cooperate enough to enable you to make a loop out of the chain, turning the chain into a grab hitbox. Foes grabbed by the chain take 1% per second, and will be automatically released if anything is done to the chain that would realistically release them. Unless they’re going to escape immediately, you’re best off just letting Chomp finish them.

FINAL SMASH


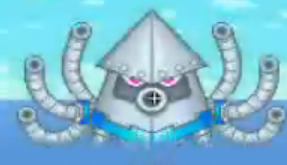
Iggy summons a gigantic 10 star blooper mech. The main body is 2.25x Bowser’s size, while all 6 tentacles are platform sized. The mech can float through the air with the same logic as real Bloopers, having free flight movement as fast as Jigglypuff’s dashing seed. Inputting B has the tentacles shoot out blobby projectiles at the nearest foe, while he has four A attacks of swiping said tentacles in the four cardinal directions for 12% and knockback that kills at 100%. The Blooper also has a grab with all four tentacles that catches anybody attacking his main body for amazing range and a lingering hitbox that will hit dodging foes, but long lag. If grabbed, you can throw the foe in any direction for 20% and knockback that KOs at 75%, dealing an extra 10% if you throw them at the ground/into a wall. The Final Smash lasts 12 seconds.

Chomp functions normally during the Final Smash, though without you to help him a daring foe may take this as a chance to kill him. Of course, you’re more than well equipped enough to defend him enough with this alternate moveset thanks to your sheer range.
 

BKupa666

Barnacled Boss
Moderator
Joined
Aug 12, 2008
Messages
7,788
Location
Toxic Tower
BOWSER


Bwa ha ha! Did somebody page the king of awesome? Who needs a crummy Koopaling movement when you can settle for a Bowser appearance instead? Without further ado, I present this autobiographical guide of how to play me, the Koopa King, complete with musical Koopa accompaniment.

STATISTICS


  • Fall Speed: 10
  • Size: 10
  • Weight: 10
That's right, three perfect 10s! I'm lean, mean, prime final boss material right here! The biggest, baddest, strongest brawler you've ever seen! No one even comes close to matching my beastliness.
  • Aerial Movement: 6
  • Jumps: 5
  • Traction: 5
  • Movement: 4
Ha, and would you look at that? No weaknesses either! Not only am I so incredibly big and strong, I'm still fast enough to keep up with the rest of the brawlers! Bwa ha ha...and who even needs to worry about wussy stuff like recovery and attack speed? Nobody's going to even come close to knocking me off the stage with their puny blows...they'll all be cowering at my feet instead!

TRAITS


Behold my shining pride and joy! You think you can dent a shell this burly? Ha! You idiots will just dent your fists up trying. If you try and come at me from behind, I can also spike you silly without moving a muscle. Bwa ha ha...it'll take some real firepower to bust this beauty up.
  • Bowser's shell is a constant invulnerable hitbox. If an enemy touches it, they take 5% and set knockback a battlefield platform away. Dashing into Bowser's shell deals an extra 2% for each 1/10 a character has for their dash speed stat.
  • An attack must deal at least 10% damage to hit Bowser through his shell (weaker attacks merely clash against it harmlessly). Bowser's head, body, and tail can be hit, however.
  • Game of Origin: Original
I doubt any of these clowns have learned anything from the Super Stupid Bros., but I should keep my tail safe anyways. I paid good money for this baby to look so spiky, and I don't need any mushroom munchers banging it up or swinging it around anymore.
  • Bowser has a very large tail, about the size of Mario (as he's a fair bit larger than his Brawl self). He is quite vulnerable to opponents attacking it from behind.
  • Bowser is also immune to grabs from the front, but if he is grabbed by his tail, it is twice as hard for him to escape the grab, and throws deal about a third more knockback to boot.
  • Despite these downsides, Bowser's shell still defends him from pummels or throws that smack against it during their animation. If they deal less than 10%, he's immune to it (thankfully saving him from what would assuredly be an infinite from King Dedede).
  • Game of Origin: Super Mario 64
My shell can also help me out when I'm crouching down to see eye-to-eye with my victim. If anyone ends up falling from a height, I'll be there with my shell to prove a nice, soft landing, like a true gentle-Koopa.

  • It takes Bowser as long to crouch or rise as it does for other characters to crouch -and- rise. He covers his head with his claws and leaves his shell pointing spikes up. His shell is now completely immune to damage, but his tail and head remain vulnerable.
  • Game of Origin: Mario & Luigi: Bowser's Inside Story
And, as always, your favorite end boss has got another new trick up his spiky sleeve. I can tread slowly forward and backwards if I decide I want to keep an eye on the bozos entertaining me. I'm not just doing this to conserve my strength...I also look so powerful when I'm stomping forward at my trembling enemies. Makes me much more...boss-like. Bwa ha ha... This way I can also use my shell as a shield against my opponent. Much less important than menacing them, of course...
  • By tilting the control stick back lightly, Bowser walks backward at a slow pace; he turns around and dashes as usual if you smash the stick. 'Moonwalking' enables Bowser to space himself from opponents, aim his projectiles by walking and attacking simultaneously, and even walk backwards to hit opponents with his shell (although this does leave his tail open).
  • Game of Origin: New Super Mario Bros.

SPECIALS


Down Special - Bowser Bomb

Aww, the weaklings are gazing up at my marvelous figure. Too bad they're about to be Bowserized by it! I plummet down to their level with overwhelming speed, using my bulging bulk to smash them a short distance into the ground. Being the certified Stomptologist I am, I can drive those stuck piglets clean off the map if I keep up the pressure. Ha! It's a wonder I don't shatter through the stage myself with all my trademark force...
  • This iteration of Bowser Bomb is similar to the Brawl version, but instead of knocking opponents away, Bowser brings opponents down to earth with him, dealing 21% and pitfalling them. The move has twice its regular lag all over, although Bowser has a few more frames of startup super armor to compensate.
  • Bowser also drives his victim a Marth into the earth for every Ganondorf he plummeted. This indentation lasts for ten seconds after the victim mashes free, being one and a half Bowsers width.
  • Bowser can create an indentation without burying an opponent, although opponents have an easy opening to attack Bowser as he leaves the pit. If they get stuck inside, however, opponents will want to escape quickly, before Bowser gets in after them.
  • By continuously using Bowser Bomb on one portion of stage, Bowser can break clean through the stage to blast zone below (entering his aerial state, rather than plummeting to his doom). If he breaks through with a victim, he can proceed by gimping them, although he is not immune to this himself.
  • Game of Origin: Super Mario Bros. 3
Neutral Special - Fire Breath

My flames are hotter than the sun! I'll exhale a blazing stream of fire to push enemies away from me, blazing in agony. I'll do crazy damage too, especially against fools foolish enough to try to fight through my flames. I do run out of breath after a while, though...I have to save some air for laughing at my victim's woes, after all.
  • Rather than breathing a wimpy stunning trail like in Brawl, Bowser quickly lets forth a massive fire storm, as long as Ganondorf and as thick as Bowser himself. The stream pushes opponents away with half FLUDD's force, dealing 5% per half second.
  • As powerful as it is, Bowser's new fire decays to its pathetic minimum size twice as fast as his Brawl stream, hampering its use somewhat.
  • Bowser can angle his fire breath in any direction to catch opponents at different angles. His signature attack is very handy for sweeping opponents right into a pit, or pushing them back into a pit they're attempting to leave.
  • Game of Origin: Super Mario 64
If I hold my breath, I'll start chomping, storing all that fire in my mouth. My fury is released as a dangerous fireball, bouncing off of walls and blasting opponents back with the power you all know and love me for. And if I hold that fire in even longer, look out! My massive blue fireball can home in on foes, immolating them on contact! Nobody matches my firepower!

  • If you tap the input instead of holding it down, Bowser will charge up a fireball for up to two seconds, before releasing it automatically with little lag. The fireball can be stored, but it cannot be charged afterward. The charge is lost if Bowser uses his regular Fire Breath.
  • The fireball deals 8-17% with decent set knockback, and ranges in size from that of a Soccer Ball to that of Kirby. His projectile travels in the direction of his choice at Luigi's dash speed, bouncing off solid objects and walls in its path.
  • A fully-charged fireball glows blue and homes in on the nearest foe. It deals 22% damage and can KO around 105%.
  • Three fireballs of either kind can be onstage at once, herding opponents around, trapping them in pits by bouncing off of walls, and just giving them a roasting good time in general.
  • Game of Origin: New Super Mario Bros.
Side Special - Dark Claw

Breaking out some good old-fashioned black magic, I deliver a ferocious spinning slash, roaring as the sheer momentum boosts me through the air. Behold my dark powers, as my claws rend anyone near me with wicked purple flames. I don't travel very far while slashing, but big bad Bowser was built for style, not for speed. Pah...all speed is good for is running away from my fearsome roar. Bwa ha ha...

If I catch anyone stupid enough -not- to run, I'll be on them like stomp on a Goomba. I'll feed my victim a few of my patented slashes, before grabbing them and crushing them down into the ground. I pity the fool who I catch if I'm recovering. I'll drag us -both- all the way to the blast zone, or just bounce off their head to bring them closer to their imminent doom. Who knows...maybe I'll knock some sense into their little bitty brains, so they won't get in my way next time.

  • Bowser pauses for a split second, before spinning around once, with his claws (glowing purple) outstretched an Olimar to either side. He has slightly less momentum on the ground and in the air as Spinning Kong.
  • If Bowser claws a victim, he'll grab them and flip upward, Flying Slam style, dealing 9% worth of dark magic slashes. The remainder of the move is similar to its Brawl version, dealing 7% upon impact with the stage, KOing around 150%.
  • Bowser can also tap down while holding an opponent to increase his fall speed slightly, ramming his opponent into a pitfall effect onstage for 9%, or tap up to automatically footstool his victim, dealing an extra 7%.
  • Game of Origin: Super Mario Galaxy, Super Smash Bros. Brawl
These claws aren't just for show, you know. If I slash into a wall, I'll dig into it with my claws, getting a grip on the wall so I can climb up and down freely. Just let that flusher-face plumber -try- and wall jump past me now! I'll bring him down to where he belongs: with his face -in- the dirt! If I'm feeling particularly vicious, I might just shove some dirt down to bury him, so I don't have to bear looking at his ugly mustachioed mug. Of course, as much as you'd like me to, I can't hang around with you all day. The great and terrible Bowser has a schedule to keep!
  • If Bowser uses Side Special against a vertical wall, he'll cling to it, with the ability to climb up and down it at Ganondorf's dash speed, jumping off by using a dodge input. His shell provides him with its regular defense during this time, but Bowser falls helplessly if his head or tail is attacked.
  • Bowser's weight will pull him down at half his climbing speed if he remains stationary. He releases his grip on the wall automatically after five seconds, and cannot regrab a wall until he reaches the ground.
  • Bowser can hang onto a pit wall, using his shell as a blockade to keep opponents inside as he climbs down. Bowser can also climb to safety after smashing through a stage, although opponents can grab Bowser's tail by tapping Z in midair, forcing him to carry them up or waste precious time shaking them off with the control stick (moderately easy).
  • For every second Bowser climbs on a pit wall, he claws down half a Marth's worth of dirt. Although this fills in some of his handiwork, Bowser can bury opponents, first in a pitfall, then underground entirely, where they suffer 2% per half second and must mash up to the surface.
  • Game of Origin: Original
Up Special - Koopa Clown Car

With a snap of my claws, I summon my personal aircraft to appear beneath me. No one can match Lord Bowser's sense of style, eh? I can cruise around in my Clown Car for as long as I want, or simply hop out, leaving it to descend while chopping opponents with its propeller. If an opponent dares to hop in, the Car will even flip over on them, raining on their parade by raining them to the ground! Bwa ha ha...what's that you're saying? I'll plummet helplessly if I laze around in my ride too long? Shut up! I filled this baby to the brim with gas before I left the castle...I'm positive!
  • Bowser causes his Clown Car to appear under him with .5 second startup lag. The Car is Bowser's size, flying him around at Ganondorf's dash speed. He has three seconds flight before the Car peters out and drops him helplessly. The Car's propellers deal multiple stunning hits of 3%.
  • If Bowser's head is attacked, he is launched, as the Car vanishes. Although Bowser can't be damaged through the Car, if opponents deal it 20% in one hit, or 20% over one second, the Car tips over, releasing Bowser in a footstool effect before disappearing.
  • By tapping A, Bowser can jump out of his Car, leaving it to descend at Ganondorf's walk speed, slicing opponents beneath it. One Car can be onstage at a time, lasting thirty seconds and having 45 HP. It serves as a platform for Bowser, who can crouch to enter it and fly, although the Car tips over if an opponent stands on it without Bowser, putting them in a prone state.
  • If Bowser lands on the Car with Bowser Bomb, he still breaks through the ground underneath as the Car plummets down with him. He can leave his Car at the bottom of a stage he's about to break through, landing safely on it as he does so. Opponents can still land on the Car or footstool him once he's inside, however, meaning Bowser can't get careless just yet.
  • Game of Origin: Super Mario World

STANDARDS


Jab - Hammer Barrage

Oh yeah! Just because you haven't seen these babies for a while doesn't mean they sting any less! Here, I lob up three small hammers in an arc to 'nail' opponents in the face. Bwa ha ha...Anyone who dares jump into my range will be knocked back by the power of my toss. Oh, and this time around, I've been working on my aim. Stay on your toes, you cute little weakling!
  • Bowser hesitates for .4 second before tossing a trio of hammers in an arc a Battlefield platform in front of him. The hammers fall until they hit a solid object, although Bowser can move after throwing them. There is no limit to how many hammers may be onstage at a time. Because they fall somewhat slowly, Bowser can hit opponents into falling hammers for extra damage.
  • He can angle his hammers in any direction during the brief startup period. Bowser can also toss hammers while walking forward or backwards, defending his massive frame and improving the accuracy of his aim.
  • Each hammer deals 5% and weakly spikes opponents; hammers combo into each other at lower damage levels, carrying opponents along the arc to an ideal location, or into prone if they land on the stage. Hitting Bowser at close range while he's tossing hammers deals 10% with knockback KOing around 155%.
  • Game of Origin: Super Mario Bros.
Dash Attack - Bowling Shell

Time for 360 degrees of pure Koopa defense! I curl into a ball and begin rolling across the stage, ready to knock my opponents down like pins. Trying to resist my awesomeness? Get this...instead of just knocking foes flying, I'll snag them on my spikes and drag them along with me. Bwa ha ha...enjoy the ride, fool! I'm have to take a moment and laugh at their poor crushed ambitions after I'm done rolling out...
  • Bowser quickly curls into a spiked ball before rolling forward at Ganondorf's dash speed. He rolls for a default of a second and a half, although the player can tap A to both prolong his rolling and increase his speed (to a maximum of Mario's dash speed). Bowser exits the move automatically at ledges, and cannot turn around.
  • Opponents who come into contact with this Bowser ball are impaled on his spikes, suffering 3% per half second and 5% every time they are crushed against the ground. They are able to mash free with double grab difficulty; Bowser stops rolling automatically if this occurs.
  • Although Bowser suffers from a second of ending lag, he can stop rolling when his opponent is behind him during their rotation, forcing them to use a slower, stronger attack to hit him through his shell, hopefully slowing them down enough to retaliate.
  • If he builds up momentum for half a second, Bowser is able to roll up and down the sides of his indentations onstage. Bowser can snag an opponent and roll them down the long wall for extra damage, before releasing them and climbing out with Side Special.
  • Game of Origin: Super Mario Galaxy
Forward Tilt - Fuhrer Fury

Grrrr...Now I'm mad! No more Mr. Nice Bowser! When I'm mad, my rage becomes too big for you to handle! I'll come at you and stomp ya, slash ya and crunch ya like bacon! Get outta my way, because no matter where you are, you're in deep crud until I stop! Yeah! I'll pummel you around like it's my job, because it is! Sometimes I just get so angry, you know!!
  • Bowser growls briefly, before marching forward, a bit slower than he moves while dashing. While doing so, he slashes, stomps and chomps in front of him at random, fast enough to avoid being interrupted from the front. He moves forward a character space every time the button is inputted.
  • Each of Bowser's attacks deal 5% and slight set knockback, allowing Bowser to pummel opponents while pushing them forward along the ground with the move's hitbox, which covers Bowser's entire body, no matter what action he is performing.
  • Bowser can storm forward as long as he wishes, and can turn around mid-input with a bit of lag, using his shell for defense all the while. His furious blows can pummel opponents at close range, as well as push them into pits, fireballs or hammers.
  • Game of Origin: New Super Mario Bros. Wii
Down Tilt - Fist Pound

I rule my Koopa Kingdom with an iron fist, and I'm more than happy to show it! From my crouch, I lift my fist and smash it to the ground with enough power to level a building. Bwa ha ha...look at that! I created a winding shockwave, topped with a star to prove my strength to all who stand before me. As if they need confirmation...they're already stumbling in my presence -without- my shockwave.
  • Lying flat on the ground, Bowser lifts a fist and slams it to the ground, as if performing a motion of angry defeat. His pound creates a shockwave a platform wide and as tall as a Deku Nut (with a small star at its front), which travels forward at Mario's dash speed for three seconds.
  • Opponents Bowser pounds take 12% and are hit into the shockwave, which deals 7% and stuns opponents in place for half a second. The shockwave winds down walls, approaching opponents inside pits and serving as an edgeguard. Two shockwaves may exist at a time.
  • This is a rare fast tilt, although Bowser crouching prior to using it adds some lag. While Bowser will most often be stunning opponents in the range of Down Special, Bowser can also prevent opponents from teching off pit walls after being hit by his projectiles, forcing them to fall back down rather than continue escaping up.
  • Game of Origin: Original
Up Tilt - Throwdown

Trying to thwomp me from above? Come -on-...get down here and fight, you cowardly cretin! I reach up to the skies to grab opponents trying to land their pathetic cheap-shots on me, grabbing them by the ankles and slamming them down to their rightful place...at my feet!
  • Bowser slashes one claw into the air above him, with slight startup lag. If he slashes a victim, he'll grab them in his claws and throw them brutally to the ground, where they enter their prone state in front of him.
  • Getting grabbed by Bowser deals 4-5% from his claws, while being slammed to the ground deals 9%. If opponents are thrown at the ground from high up, they'll be able to cancel their momentum after a while to avoid the damage (although if thrown into a pit, Bowser can punish them regardless).
  • Aside from throwing opponents down as an anti-air, Bowser can also turn his throw into a standard gimping maneuever.
  • Game of Origin: Original

SMASHES


Forward Smash - Crushing Blow

And for the finale, one KO punch! I rear back to concentrate all my power into my fist, before slamming opponents with strength enough to drive them backward across the ground. Of course, it does take a while to concentrate -so- much power, but who cares? You want the great and terrible Bowser to taste your combos? You're about to taste my fist instead, you miserable ******!
  • Bowser rears back, as a star formation appears around his fist, before releasing a powerful punch, sliding forward along the ground up to a character width.
  • Victims suffer 26-35%, but instead of being sent flying, they are punched across the ground, stunned, from half of Battlefield to three-fourths of Final Destination. They do not stop at edges, although their momentum carries over as they leave solid ground.
  • While Bowser suffers from the end lag of Falcon Punch, this move is a great damage-racking and spacing option. He can slam opponents range for Down Special or any projectile, into pits, or right off the stage itself.
  • Game of Origin: Mario & Luigi: Bowser's Inside Story
Down Smash - Earthquake

Remember all my monologuing about trembling opponents? Well, if my foes had it bad earlier, they better listen to my monologuing about running and -scram-, because Bowser's coming to town! I crouch down, before stomping the ground with all the force of a natural disaster. Anyone close enough to me begins stumbling, shaking and quaking back and forth helplessly like Koopa jello! Bwa ha ha...even if I've already smashed a foe deep into the earth, my supreme stomping will still give them the ultimate headache. I'm so good, I'll be taking over the universe any day now, just you wait!
  • Bowser stomps his feet down multiple times rapidly, causing the are a platform to either side of him to quake uncontrollably for up to a second.
  • Opponents who hit Bowser's feet directly suffer 32-40% and must mash out of a pitfall with triple grab difficulty. They suffer only 10-15% from the earthquake, but stumble uncontrollably away from Bowser at their walk speed for one to three seconds.
  • If opponents come within a platform of any edge, they'll wave their arms wildly before falling off it with a footstool effect. With their terrible stumbling traction, they'll also be sitting ducks against laggier moves, particularly Down Special.
  • Opponents buried in the stage with climbing dirt from Side Special (or D-Air) are automatically hit by Bowser's earthquake if he stomps on top them, due to their lack of dodges. He can build some quick damage this way, although Bowser's significant end lag prevents him from stunning underground opponents for an infinite.
  • Game of Origin: Super Mario 64
Up Smash - Great Ball of Fire

Grr...all this fighting is making me hungry. And guess what? There's no need to wonder what's for dinner...you're on the menu! I belch out a comet of fire so big, it could incinerate a planet, then watch as it follows my foe around. Barbecue never looked so fresh, running for its life from my roasting rage! Even if I'm not hungry, I can still use my fireball to keep opponents on the move. There's no resting when I'm your enemy!
  • Bowser inhales for half a second, before spitting a fireball as large as his Brawl self straight up. The fireball pursues the closest opponent at up to Ganondorf's dash speed for two to four seconds, dealing 19-26% and knockback KOing from 135-120%. One mega fireball may exist at a time.
  • If no opponent is within half of Final Destination of Bowser, the fireball merely descends in an arc to the ground a platform in front of him, creating a high-priority blaze lasting from four to eight seconds. Bowser can walk through his fire with no side effect, while opponents suffer the move's regular hitbox.
  • Aside from herding opponents around, Bowser's fireball is a great anti-air, as well as a defensive mechanism on the ground. Although he cannot hide his entire body inside the flame, he can still defend his more vulnerable parts, such as his tail.
  • Game of Origin: Super Mario 3DS, Original

AERIALS


Neutral Air - Mighty Roar

Take a listen to my majestic roar and tell me it doesn't make me more awesome than any other villain in my league. Actually, don't, or I'll fry you to a crisp...here, I just let a big roar rip, with it echoing all over the arena. My powerful deep voice blows back any lightweights in the vicinity as if they were made of paper. I can hold out a big long roar, stretching my head around to push foes back all around me and add to my awe-inspiring image, but I have to stop after a while. He who roars last, roars best!
  • Bowser faces the screen and breathes in air for half a second, pulling in opponents with a slight vacuum effect, before letting out a massive roar, shown as a shockwave slightly smaller than a Smart Bomb blast in front of his mouth. Opponents inside the roar's range when it is unleashed take 10%, and are pushed to the perimeter of the shockwave.
  • Bowser can hold the input to continue roaring, being able to do so for up to a second and a half, or until hitting the ground (after both, he suffers almost a second of lag, coughing slightly). During an extended roar, Bowser's head can be angled in any direction, catching opponents trying to jump over him, or dragging caught victims into pits or projectiles.
  • If Bowser roars around projectiles or his Clown Car, he can move them in to the roar's perimeter as well. This can be used to direct projectiles into opponents, as well as push U-Smash fire to a new location or his Car into opponents struggling to recover from the stage, bumping them back to their doom.
  • Game of Origin: Original
Forward Air - Flame Pillar

Are you ready for me to turn the heat up? Of course you're not, but no one can stop the King of Koopas! I lean my head down and soar forward while breathing out a colossal column of fire beneath me. If I breathe fire onto some delicate little projectile, I'll reduce it to ashes, before burning the fool that had the gall to toss it at me. Bwa ha ha...I'm too hot to touch!
  • Bowser tilts his head down and begins gliding forward at .75 times Ganondorf's dash speed, breathing a column of fire as thick as Marth and as tall as Ganondorf beneath him. Opponents hit by the flame are pushed to its end, suffering 3% per half second. If they hit Bowser's head as he soars, they take 5% and are knocked into his flame.
  • He can glide forward breathing fire for up to three seconds, before inhaling his flame back in for .55 second end lag. He is unable to use the move again until he hits solid ground. Opponents in the flame at this time are pulled in and chomped by Bowser, enduring 15% and a powerful spike.
  • Bowser's fire disintegrates any projectile it passes through. Between his head, shell and fire, Bowser has quite a bit of defense while soaring, although his belly and tail are wide open. Because of this, the move serves as a mediocre recovery in a pinch.
  • Game of Origin: Super Mario Galaxy 2
Back Air - Impale

You want check out my spiny shell so bad? Get your grubby paws off it and stand in line with all your weakling friends! I lean backward and thrust out my shell, introducing opponents to my spiny spikes. It seems they just can't get enough of me...some might say they've become a bit too attached for their own good! Bwa ha ha...my foes become impaled on my shell, allowing me to fall down and crush them against the stage. If I thrust my shell into a wall, I'll dig into it just as easily to put the hurt on enemies from a secure location.
  • Bowser performs his regular B-Air, with slightly more landing lag if he whiffs. However, if he snags an opponent, he impales them on his shell, forcing them to mash free with double grab difficulty while dealing 3% per half second.
  • If Bowser lands while carrying an opponent, he deals a nice 16% and pitfalls them, refreshing the double grab difficulty period of stun. He can increase the likelihood of landing this effect as well as suicide KOing under the stage by fastfalling.
  • By using B-Air into a vertical wall, Bowser impales himself onto the wall, gaining access to his tilts and Specials in midair, although he loses his shell defense as a result. Bowser can remain on a wall until he suffers 15%, with the ability to dodge free at any time (he must land before impaling the wall again).
  • If he spikes his Clown Car, Bowser sticks into it, causing it to rocket off the top blast zone at Sonic's dash speed due to its leak. This can KO Bowser off the screen top if he fails to pull away, or if he rams into the stage underside, although it can be a quick escape for him after breaking through the stage.
  • Game of Origin: Super Smash Bros. Melee, Original
Up Air - Swooping Punch

Don't think all my showing off in midair made my fists forget about you! I reach back with one fist, rising into the air like the star I am, before using my weight to punch down at top speed. You want to tag along with me in the air? Can't let you do that, weakling...I'll rise out of your little reach, then punish you for even trying to get on my level. Even your flimsy wings can't save you now, fool!
  • Bowser faces down and lifts a fist upward a Mario, rising upward at Ganondorf's dash speed. He suffers .45 second startup lag, but has slight super armor on his lower body as he ascends, preventing immediate interruptions from below. His fist deals 3% and slight stun while he rises.
  • Upon release of the input, Bowser roars and punches a Mario straight down, plummeting to the ground at Sonic's dash speed, able to DI slightly side to side. His fist deals 16-17% on impact and spikes opponents with great force. If Bowser punches an opponent on the ground, he pitfalls them with double the regular strength. He can cancel the move after plummeting one Ganondorf.
  • If an aerial opponent comes after Bowser, he can rise above them before punishing their approach with a powerful punch, although his fist gets stuck in the ground upon landing for close to a second of landing lag.
  • Bowser can rise during the first part of the move for up to three seconds, granting him a bit of recovery. This is hard to rely on, however, as Bowser does not sweetspot edges. He must rise about the stage before DIing onto it as he descends. Under the stage, he can DI onto his Clown Car if he falls below it.
  • Game of Origin: Super Mario Galaxy 2
Down Air - Titanic Temper

Trying to find some green pipe to hide underground in? Here, I'll help you out! I plummet down to the ground at full speed, bringing down anyone under me and ramming them into the earth. Just to prove my dominance over other stomping wannabes, I can continue jumping up and down once I land, even surprising opponents with an acrobatic flip. Who's laughing now, Jumpman? Me! Bwa ha ha!
  • Bowser pauses for .3 second, before stretching his feet down and plummeting at Dedede's fall speed. Opponents caught under his feet take no damage, but are dragged to the ground, where they take 18% and are stomped completely into the ground, having to mash out as if from pit dirt. Bowser can tap A while dragging a foe down to footstool them, dealing this damage earlier while spiking them with insane force.
  • During the .6 second landing lag, Bowser can stomp the ground twice more with additional taps of A, with him jumping up a Kirby height both times, performing a front flip on the third stomp. These stomps deal a lesser 9%, but bury opponents nonetheless, and automatically hit opponents buried underground from the first stomp or from pit dirt. Needless to say, this is a terrific, if somewhat predictable damage-building strategy.
  • Although Bowser can suicide KO by stomping an opponent to the blast zone, the fact that he is locked into the stomp while the opponent can DI away to escape with some difficult, this option can be a bit of a gamble.
  • By stomping onto his Clown Car, Bowser causes it to sink at triple its regular speed. While this isn't incredibly fast, it can still push opponents trapped in its propellers toward the abyss more quickly, dipping them down for the KO before allowing Bowser to fly it back to the stage.
  • Game of Origin: Super Mario Galaxy

GRAB-GAME


Grab - Tailspin

Bwa ha ha...even my tail is covered in awesome spikes! If an enemy tries to swing me around by it, I'll swing it around at them instead, sticking them on it before seizing them in my claws. There's no escape this time!
  • Bowser swings his tail around in front of him rapidly, with it extending slightly to reach almost a platform in front of him. Foes hit by his tali are impaled on his tail spikes, suffering 5% before they are grabbed off by Bowser.
  • While the startup is quite rapid, as Bowser is able to swing his tail around to grab opponents attempting to attack it, he must deal with end lag almost as long as that of a tether grab, making his tail even more vulnerable if he misses.
  • Game of Origin: Original
Pummel - Fire Blast

Now that I've got my opponent in my grasp, they're -really- gonna feel the burn! I breathe in all the air I can, before torching their face with a monster ball of flame. My fire is so powerful, it even blasts them out of my cruel grip! Let's just see those weaklings try and approach me swinging their little swords now!
  • Upon one tap of the input, Bowser begins inhaling in place, holding his victim in front of him. His opponent can escape during this time, albeit with slightly more difficulty than usual, due to Bowser's inhaling pulling them in slightly. With a second input (or after a second of inhaling), Bowser blasts his victim with an increasingly large fireball, dealing anywhere from 1-12% and blasting them back a set distance, from one to three platforms.
  • Although this pummel can build damage in a pinch, Bowser will most often use it for spacing purposes, as it knocks opponents out of his grasp and into a variety of ranges. Depending on his desires, he can blast them a short way back before Bowser Bombing them, or further back as projectile targets.
  • Game of Origin: Original
Forward Throw - Drill Claw

With a stunning slash, I keep my victim from running away, before drilling them with a punch that will make more than just stars spin. I'll punch my foe so hard, they start spinning like a twister themselves, drilling into the ground with my momentum. No one can get enough of Bowser's knuckle sandwiches!
  • Bowser releases his opponent and slashes them, dealing 4% and stunning them briefly, before following up with a powerful punch. His punch deals 9% and turns his opponent into a spinning whirlwind from one to three seconds, depending on damage.
  • If Bowser's spinning victim is allowed to sit in place, they'll drill themselves into the ground. If an opponent drills for less than two seconds, they become pitfalled with varying strength, while if they drill for two or more seconds, they become trapped underground, as if from pit dirt.
  • Opponents attacked while spinning slide along the stage horizontally at a moderate pace rather than being launched, allowing Bowser to push them around easily. F-Throw combined with F-Smash is quite useful in this regard.
  • Game of Origin: Super Mario RPG: Legend of the Seven Stars
Back Throw - Shell Saddle

Want to see what it's like to be the mighty Koopa King? Well, then, climb aboard! I hoist my opponent back over my head and plop them down on my spiky shell, forcing them to stick to me like used toilet paper. I can either fling them off carelessly, or carry them along with me, giving them a nightmare ride they'll never forget!
  • Lifting his victim behind him without turning around, Bowser slams his opponent down on his shell, impaling them onto it for 8%. Opponents are able to mash free with triple grab difficulty.
  • Once his opponent is stuck, Bowser can walk his opponent backward, using them as even more protection from behind. Stuck opponents are automatically hit by dash attack and B-Air as well.
  • With a smash of the control stick, Bowser will turn around, flinging his victim off a horizontal set to put some distance between them, dealing an additional 5% in the process.
  • Game of Origin: Original
Down Throw - Pancake

I bet you common fools have been waiting for this one, huh? Holding my victim to the ground, I spread my arms wide and collapse on top of them, chuckling as they struggle helplessly at their situation. When my armor abs land on them, they get crushed into a floaty little pancake, perfect for me to blow away even more easily. I can't wait to try this one out on Peach! Bwa ha ha!
  • Bowser performs his regular iconic D-Throw, dealing 12% and crushing opponents into a Bowser-width cartoony flat version of themselves for three seconds (effect does not stack). Opponents can mash to lessen this time, during which they cannot attack, can only waddle side to side at Mario's dash speed, and have one average jump. Their fall speed also becomes pathetically half as slow as Jigglypuff's, while their aerial movement becomes twice as potent.
  • The opponent's flattened state provides Bowser with some defense, due to his opponent being unable to attack his massive frame. Their flattened state also provides Bowser with an easy target to Bowser Bomb or repeatedly footstool for a gimp.
  • Game of Origin: Super Smash Bros. Melee
Up Throw - Ball Bounce

You want me to set you free? There you go...with me coming up right after you! I toss my victim straight up, before curling into a spiky ball and bouncing up after them repeatedly. Of course, the wimps I'm fighting aren't the type to stick around and fight back, so they'll probably flee my ball of doom to the side. But, if I bounce long enough and my opponent is too stubborn to move, I can force them right off the top blast zone! Like they say, the sky is the limit! Bwa ha ha...
  • Bowser tosses his opponent straight up a Ganondorf, before curling into a ball and bouncing up after them, dealing 5% and knocking them a Ganondorf higher. With repeated taps of A, Bowser can continuously fall back down and bounce back up a Ganondorf higher from his previous bounce to hit his victim higher and higher into the air.
  • While Bowser falls back down, the opponent can DI to either side to escape his hits, with this being easier to do after repeated hits, due to Bowser having to fall a further distance before bouncing back up. Bowser falls at the speed of Dedede fast-falling, making multiple hits possible and forcing opponents to either DI to the side (possibly over a pit) or attack back.
  • By air dodging, Bowser can cancel his bouncing at any time. This, combined with his ability to continue bouncing, even after an opponent has escaped, allows him to get a respectable distance into the air fairly quickly, without summoning his Clown Car. This can be used as a precursor to his aerials, or as means to quickly exit a pit.
  • Game of Origin: Original

FINAL SMASH


Final Smash - Growth Spurt

Bwa ha ha! I've stolen the Smash Ball right before your eyes, and look at that! The stars are shining down upon me, and I have one in front of me to prove it! I devour the star with a chomp to sprout into an even bigger, badder brute. In fact, my new size dwarfs yours almost as much as my new power does! I don't even need to stomp into the stage to get rid of you now...I can swipe you away with just one claw, or just torch the entire stage and watch it burn. My galactic state will last forever, and nothing shall stand in its way! Breathe a sigh of relief, because it'll be your last! I shouldn't even have to tell you why...
  • A Power Star appears in front of Bowser, who gobbles it up and grows to a massive size, vanishing from sight briefly. A second later, he stomps in from the side of the screen, with his body leaning over the stage and his head reaching up to the top blast zone, staring down at the stage.
  • In this state, Bowser can tap A to swipe his arms in front of him once, covering a third of Battlefield's distance and dealing 23-24% per hit, with knockback KOing around 65%. These swipes can be angled to utterly destroy any portion of the stage they hit for the duration of the fifteen second Final Smash.
  • By tapping B, Bowser can also breathe a massive ball of fire four Bowsers large at the stage, lighting the entire platform and a Marth above it ablaze for five seconds. The fireball and the blaze it produces deal many rapid hits of 3-4% throughout their duration. If Bowser becomes too lazy to gimp his victim by methodically destroying the stage, he can always force an opponent into the air with his fire, before swatting them away like flies.
  • If Bowser suffers 100%, the Final Smash ends, as he shrinks back to his normal size offstage and falls helplessly. While he cannot dodge, he can walk slowly forward and backward to both dodge blows and close in on the stage he wants to torch or destroy.
  • Game of Origin: Super Mario Galaxy 2, New Super Mario Bros. Wii

PLAYSTYLE


Time to look back at all my attacks and remind you how awesome I am, huh? Well, no one can bully opponents like Bowser! I'm loaded with ways to smack lightweights around, whether they're making their stand in my path, or fleeing like a little rabbit. If they try to take to the air, I'll crush their sky-high dreams by crushing them into the ground. That's right, fool, nose in the dirt and I might spare you...Or, I might just keep on stomping you down, pulverizing you until you're too weak to resist my awesome finishing blows.
  • Bowser is loaded with spacing moves to position his opponent right where he wants them at all times, which is a vital part of his game. If his opponent ever gets Bowser in a poor position, his size sure won't do him any favors. He can stomp backward to space himself to some extent, but his best option (and this mechanic's primary purpose) is to prepare some forceful attacks instead.
  • The Koopa King is able to bully opponents into a convenient position from all manner of positions. At close range, he's got dash attack, F-Tilt, F-Smash and all throws except D-Throw, while from a range, he can use various projectiles, such as Neutral Special, jab or U-Smash. Should an opponent take to the sky, Bowser can try to bring them down with U-Tilt, or go after them himself, pushing them back to earth with really any aerial suiting his current position.
  • Bowser is also equipped with a number of moves to pitfal or stun his opponent, allowing him to either rack a bit of damage, or more importantly, crush them into the stage with Bowser Bomb, which cannot be used otherwise for generic set-up due to its lag. Some prime disabling options include holding an opponent to the stage with Clown Car propellers, as Bowser can smash his Car through the ground with Down Special, as well as D-Tilt, D-Smash at close range, B-Air and U-Air. Burying an opponent into the stage entirely with D-Air, while slightly predictable, opens up plenty of opportunities for Bowser Bomb as well, while ensuring some extra damage.
Once you're pummeled up enough, it's time to start the real stomping! By leaping up and bombing down on you, I can crush you into a nice cozy hole in the arena. Not only does this limit your room to fight back against me, it eliminates your room to escape -from- me! If you try, I can knock you senseless just as well as I can outside the hole. I can also simply reign supreme from on high, blasting fireballs down at you for safe damage. Also, the more I crush into the stage, the closer I bring you to the bottom blast zone, where your fate is as good as sealed. Bwa ha ha...the best ideas are the cleverest ones! I used this strategy against Mario when I invaded the Mushroom Kingdom with my children. That pesky plumber wouldn't stop running from my deadly stomps, but I've learned from my mistakes this time...he can't escape if I keep him locked down like a Chain Chomp!
  • Once his opponent is unable to defend against it, Bowser can use Down Special on them to smash them down into the stage. Once he's down in this enclosed space with a victim, he must keep on pummeling them to stun them, allowing him to keep on smashing them into the stage.
  • Because opponents will prioritize jumping out of the pit highly, Bowser must work just as hard to keep them from doing so. His spiking and spacing aerials can prove invaluable here, especially B-Air, which enables him to stick to a wall and pummel opponents regularly. In addition, Side Special climbing puts Bowser's shell in a position that limits foes' room to jump free without being spiked back down, while dropping pit dirt on them, burying them for Bowser to bomb down on again. If Bowser reaches the top of a bit before an opponent, he can always bouncing fireballs, hammers and D-Tilt shockwaves down on them to hinder them even more.
  • If Bowser finds himself facing an opponent that will obliterate him at close range, he can use these escape-deterring strategies for damage-building, rather than engaging in combat at close range. This is much slower than simply knocking opponents around, but can get the job done in a pinch.
Now that I've broken through the stage, you're nothing but Koopa history! I'll stick around just long enough to introduce you to the bottom blast line, before getting myself back up to safe ground. That's right, I stomp on living on the edge by living -below- the edge! My midair moves reign supreme, slicing through you as you flail helplessly like a -pathetic- Blooper out of water. Once you're gone, I can ride my Clown Car back to safety, or climb back up the side of the hole I stomped. If you dare hop onto my Car or grab my tail, I'll get really mad and hit you while you're down, until you're down so far you can't ever recover. No way am I coming down off the screen with you unless I want to in the first place! Now -that- would be humiliating...
  • With no stage to support him, Bowser must partake in a quick, dangerous gimping game before escaping back up to the stage. This is the most crucial part of his game: if he slips up while gimping, his lack of common sense will result in him falling to his doom like a Disney villain. If he doesn't carefully make his way back to the stage, he may not make it back at all, or may end up bringing his opponent back up with him. Bowser wouldn't be Bowser without a strong touch of risk in his playstyle, now would he?
  • To minimize said risk, Bowser can take a few precautions before breaking through the final portion of stage. By placing his Clown Car at the bottom of the pit, Bowser provides himself with a villainous getaway vehicle, while gaining a platform to attack opponents from. Climbing to safety with Side Special on a pit wall also helps, although Bowser's options for defense are more limited as he climbs. During both options, he must fend off opponents standing on his Car or trying to grab his tail, which, while not difficult, can cause him to suicide with his fast fall speed.
  • His aerial interactions with his Car also gives him means to do more than simply spiking opponents, or D-Throwing them before breaking through, then performing multiple footstool jumps. By roaring his Car into an opponent or trapping them in its propellers before sinking to the blast zone, Bowser can use it for spectacular gimps as well. B-Air into the Car to deflate it gives him a last-ditch recovery option.
  • Being the spiteful character he is, Bowser does have his suicide KO methods as well, which can be used if he has a stock advantage, or is clearly going down himself, and wants to get something out of his hard work. Side Special carries over from Brawl as a valid option, as do B-Air, U-Air and D-Air (if Bowser does not cancel the latter two). Down Special again can drag opponents to their doom with Bowser as well. If all else fails, Bowser can simply hop over top a character and use his shell's hitbox to spike them to the point of no return.

BOSS STAGE


Bwa ha ha...is that the best you can do? I've eaten Goomba jerky tougher than you idiots. Before I leave, I'd like to actually face a challenge. I'll smash not one, not two, but three of you fools, all at the same time! We're going to my place this time, which you'll find is chock full of fiery lava. And unlike last time you saw me there, I'm not about to fall for some stupid trick, melting away in the lava...I've been practicing my swimming skills. It's your turn now! You so-called brawlers started with me, now just try and finish with me!


  • When Bowser is pitted against three opponents, his famous laugh is heard, as a fiery aura appears around his character icon. This signifies the activation of Bowser's boss mode, where the Koopa King receives a number of dangerous buffs. This mode also takes place on Bowser's iconic boss stage from the original Super Mario Bros., where Bowser has a number of interactions to further rain pain down on his opponents.
  • Bowser's bridge has received a few minor alterations to increase its viability for combat. The bridge itself is three-fourths Bridge of Eldin's length, with a Battlefield's distance on either side, leading to ledges rather than walk-off blast zones.
  • The stage's ceiling is nonexistent, and the bridge's lava rests a good three or so Ganondorfs below the bridge, rather than directly under its surface. Opponents who contact the lava are dealt 10% and bounced up vertically with the force to KO around 150%. Bowser is unaffected by his own lava, and is free to swim around in it without the threat of drowning. Of course, you'll have to drop that axe somehow before opening up the fiery pool...the bridge is drop-through, but even foes of Bowser aren't that foolish.
I've truly set the stage for an epic showdown this time! Three fools can't possibly trap such a powerful king and push him around like a feather! I'm bringing out all my power this time to ensure you lose all doubt about my might. My size is a disadvantage? I'm not big enough for you idiots? I'll even grow a few sizes to make you eat your words. Chow down...it'll be your last meal, tiny.
  • Bowser receives a number of buffs to both his stats and moveset in his boss incarnation. He appears twice as large as he regularly does for his boss appearance, giving him just slightly less bulk than Giga Bowser, and adding quite a bit of damage and knockback to his attacks as a result. He weighs three times as much as usual, being nigh impossible to budge until he's been dealt several hundreds of damage.
  • Bowser's shell deals double the regular damage to opponents who dash into it. Attacks must deal 25% or more to hit Bowser through his his; anything less damages the attacker as if they ran into it.
  • Bowser does not flinch from attacks dealing less than 10%, and suffers half of other moves' regular hitstun. He is immune to set knockback, pitfalls, and other similar traps. He can still be grabbed by the tail, although he escapes grabs four times as quickly as usual; considering he remains stunned twice as long when grabbed regularly, Bowser escapes twice as fast as normal characters here.
  • Whenever he moves, Bowser creates a shockwave a character width in front of him, dealing 10% and stunning opponents. By simply walking around, Bowser can deter offensive approaches and force opponents into the air. Walking backward creates the shockwave behind Bowser.
  • Bowser pushes the ground down beneath him whenever he uses just one Down Special; by holding down the input as Bowser falls, he can descend through the stage as much as he wishes in one plummet, allowing him to actually set up pits without stunning an opponent first.
  • Bowser can spam Neutral Special as much as he wishes, with no limit on his fireballs, as long as the B button is mashed. Approximately two fireballs are released per second this way.
  • Bowser's Koopa Clown Car now has 90 HP, and appears twice as large as usual to accommodate its owner, who can use it exclusively for spacing and damage-racking purposes, due to not needing to recover.
  • As long as the input is held, Bowser tosses a volley of hammers in a high priority stream of iron and pain. He does so with minimal lag, just like in his old boss fight, being difficult to punish until he lets up.
  • Bowser's grab, pitfall attacks, burying methods, and grab hitboxes are three times more difficult to escape from.
  • Up to three mega fireballs may be produced by Up Smash.
Welcome to my humble abode! You want to get out in one piece? Too bad you're forgetting something...I live here, genius. And I get things done! I'll pull out trap after trap until you feel like you're trapped in a cage. But only fat f...ools would pull a stunt like that, right?
  • Bowser can perform Down Smash while standing in front of the iconic axe on the stage, causing it to drop and destroy the bridge, which crumbles into oblivion over two seconds, opening up the pool of lava below.
    [*]If he is too lazy to get to the axe, Bowser can use Down Special to tilt the bridge diagonally to that side for three seconds, before it falls back into place. This allows Bowser to either use the slant to boost the momentum of moves such as Dash Attack, or try to pressure opponents under the side of the bridge open to lava before it falls. The latter spikes opponents down into the lava, where they end up ricocheting up and down between the lava and the bridge underside until they can tech free and jump up through the bridge (which is drop-through).
    [*]Down Special into the lava itself creates a tidal wave on each side of Bowser, which deals 20% and terrific horizontal knockback. Each Ganondorf he plummets adds a Ganondorf to the wave's height, which is 1.5 Gerudo geriatrics by default.
    [*]If Bowser breathes a Neutral Special fireball into the lava, it will vanish temporarily. For the next nine seconds, however, a sentient fireball will leap up and down two Ganondorfs above the bridge, once every three seconds. The fireball deals the same damage as usual, but becomes more of a threat when coupled with Bowser's regular fireballs. If a foe is forced into the lava with an Up Smash fireball on their tail, a giant leaping fireball will emerge to terrorize them further.
    [*]If N-Air is held down for its full duration, Bowser will call down a spiky ceiling across the entire stage. This extends down a Marth from the top blast zone for seven seconds before rising, although Bowser can roar twice more to lower the ceiling more in Marth height increments. Although the spikes only deal 9%, Bowser can either bounce opponents between the lava and ceiling, or simply juggle them into the ceiling himself. These aren't all sunshine and daisies, though, as the spiky ceiling is the only trap Bowser is not immune to.


EXTRAS


Up Taunt - Koopa Laughter

You all just can't get enough of my wicked laugh...and guess what? Neither can I! Bwa ha ha! This one speaks...er, laughs for itself!

Side Taunt - Smoking the Competition

After successfully torching an opponent, I lean forward and snort in disgust at their feeble efforts, releasing smoke in the process. There's nothing about the great and terrible Bowser that's -not- smoking hot!

Down Taunt - Challenger Approach

Gwa! I'm ready to stomp you into space bits! So why are you all the way across the stage? I beckon you to confront your destiny with one claw, stomping and roaring angrily all the while. I didn't come all this way to be turned down by a weakling!

Entrance - Fearsome Flight

While all you commoners appear out of thin air with your flashy explosions and magic, I ride down from above in my Clown Car, laughing at your boring attempts to make an entrance. You want intimidation? I stomp down as my Car flies away, eager to pound you to a pulp. Let's get this thing started!

Victory Pose #1 - Fist Pump

Oh yeah! Winning never felt so good! I leap forward, shaking the entire screen, before pumping a fist into the air. Hey, I'll get to the galaxy conquering part in a minute...right now, I want to use my bragging rights on those losers in the background!

Victory Pose #2 - Victorious Laughter

Hey, there's no shame in being smacked down by a big, studly boss, but come -on-! I expected my foes to put up at least -some- resistance! I rub their humiliating loss in their face, laughing back at them, before turning my back to them and continuing.

Victory Pose #3 - Bonfire

Bwa ha ha! I'm taking over the world by storm, and by that, I mean by -fire- storm! I spin around once, surrounding myself with a ring of burning flame, before folding my arms and glaring forward. I demand the respect I've earned!

Victory Theme - Koopa's Theme

While I have so many sweet themes to choose from, I stick to playing the deep, dark organ-filled tune everyone loves after I stomp my opponents. An awesome theme to accompany an awesome villain! You idiots didn't think I'd keep on sharing my rival's sunshine happy theme, did you? The Koopa King shares with no one!

Loss Pose - Begrudging Respect

What? Is this some kind of joke?! The great and terrible Bowser never loses, he just decides to spare the losers he's up against. Grah...I'll clap for you this one time. At least you seem to be somewhat competent, unlike all the other fools I've stomped without a reason. Looks like my choice in rivals is stellar, as always! Bwa ha ha...
 

Katapultar

Smash Lord
Joined
Nov 24, 2008
Messages
1,257
Location
Australia
Incomplete Set #10


Yasuna Oribe


Yasuna Oribe is one of the main characters of the manga/anime Kill Me Baby just like Agiri is, so you can probably expect some sort of crazy playstyle right off the bat...except Yasuna is not only a normal person (in her world that is), but a very, very stupid one; she randomly hangs around with a blonde twin-tailed no-nonsense assassin schoolgirl whom she's constantly trying to taunt, she never learning her lesson even after comically having a knife held to her throat, having one of her hands broken or simply being tied to something - for Brawl comparison, that's like trying to tease the Ultimate Chimera by continuously dodging its biting attempts which are in fact more erratic and versatile than you think to the point where you will inevitably die. Essentially speaking, Yasuna's purpose in the series is to bring up random topics and crap as incentive to screw around and leave you with a sour taste in your mouth, which kind of sucks.​


Stats

Like Zelda without her suit on but Ness' height.​


Mechanic

Yasuna starts off every match with a suitcase Japanese peeps take to school. It acts like a throwing item in the same vain as Mr. Saturn (but without shield damage), but if thrown by a foe it'll go as far and inflict as much damage as a thrown item capsule. Yasuna can still use her standards while holding, but if she taps Z suitcase she'll end up "unlocking" the suitcase, which'll cause it to lay down open on the floor and be able to store up to 4 items thrown into it. The suitcase will automatically lock itself once picked up, and when thrown whilst unlocked all its contents will quickly spill out with 1/2 of their smash-thrown speed, distance and power to the point where a character can be bombarded with multiple projectiles at once. Please be aware however that because she's not super-human compared to the other characters in her series, any item Yasuna throws is done with 1/2 of their normal speed, distance and power. This means Yasuna's foes are more capable of taking advantage of Yasuna's suitcase than she herself can...or so you may think...​


Grab

Yasuna reaches out with bad range, but once she grabs her foe she'll end up being grabbed by them instead! Suppose that's what she gets for actually trying to take on the big boys; in any case, Yasuna will find herself completely unable to escape from her foe's grasp, which also counts if she were to be trapped in a grab-based situation such as being pitfalled or frozen. And thus in times where force doesn't exist, Yasuna can only try and talk her way outta her inevitable death! She in fact has a set of throws she can use whilst being grabbed, though if her foe is kind enough to not use one of their Pummels or Throws on her for 2 seconds she will automatically be released...good luck with that.​


Pummel


Standards


Standard

Yasuna takes out a random​


Dash Attack

If she's holding an item, she'll throw it out behind her as if she'd smash thrown it there.​


F-tilt

Yasuna takes out a water pistol as holds it as an item, which she can fire with a tap of A; the small jet of water travels 2 Platform's distance and inflicts no damage, but if the foe was currently taking taunt damage it'll end up doubling! This is a rather risky move however as the water deals no hitstun to impede the enemy's advance on Yasuna, and if she's attacked or grabbed she'll end up dropping her water pistol, where in a much more competent being's hands (another character), it'll actually give off a brief FLUDD effect that can be used to gimp Yasuna! Note that Yasuna can throw her water pistol like a Ray Gun, but it'll only inflict a mere 1% whereas with another character it'll actually inflict the same amount of damage and knockback as said thrown item which can make for a good KO'ing tool.

If Yasuna was taunting her opponent with B while shooting at them with her water pistol she'll end up adding on taunt damage as she challenges her opponent to shoot her with her own water pistol! This forces the opponent to actually pick up her gun and shoot her with it if they don't want to take the damage, but otherwise said damage will subside if they can KO Yasuna.​


Smashes


F-Smash

Yasuna starts taking out money from her wallet while you charge the move, which oddly enough, actually detracts from her damage percentage at 10% every 0.2 seconds until her damage has risen to 150% where she'll have no more "money". Releasing the attack will have Yasuna hold out of money until you cancel out of the move with another action, where foes can take said money in order to have said amount detract from damage and be added onto theirs...but with a price. You see, Yasuna wants to hire her opponent for her team! If the opponent takes the money from Yasuna they'll end up becoming her ally for 5 seconds per 10% they got paid, will heal off all taunt damage they would've taken from Yasuna and will have access to all the items she has sprawled out on the stage. They can still attack her however in order to end the alliance, though they'll keep the taunt damage and will lose access to the items.​


Specials


Neutral Special

Yasuna calls out to the nearest opponent and calls them a coward; this forces characterization on the opponent by making them "angry" and consequently forces them to take an unavoidable 0.5% per second, which doubles with each passing second if Yasuna continues to taunt (otherwise she can cancel out and move whilst enemy takes damage). If Yasuna is attacked or grabbed by her foe however all the "damage" they took will be healed off! How long can you run away from your foe for?​


Side Special

If Yasuna has less damage than her foe(s), she will taunt them about it in the same way as the Side Special until you re-use the input, but if she's attacked she'll end up taking whatever damage she would've taken plus the total difference between her damage and the foe's! Oddly enough however, she will in fact be healed said damage if her damage was higher than that of the attacking foe's, though she'll still take the damage and knockback of the trigger attack; in any case however they can simply wait, take damage, and have her suffer more overall.​


Up Special

Yasuna bends down before stupidly flying out towards the nearest foe at half the distance of Wolf's recovery with her hands outstretched, but she misses she'll end up falling towards the ground and comically slamming into the ground for punishable lag. If Yasuna gets her foe however, she'll end up grabbing onto them by their legs and adding her light weight and falling speed onto theirs, though otherwise her foe can move normally and can attack as Yasuna reacts to their movements under the proper laws of physics. In the air Yasuna can fast-fall in order to drag her foe down with her for a suicide KO, but hey, taking your foe down with you is far better than being outright beaten by them!​


Down Special

Yasuna points to the foe she last attacked or was attacked by (or the nearest one at the start of the match) and starts calling out about the fact that they're an assassin! It's funny because she does this regardless of whether she's facing an actual assassin character or not, and while her accusatory words do nothing of the sort to rile up her enemy, they do attract the attention of enemy assassins who gatecrash the Brawl in order to get their kill! It takes 2 whole seconds for Yasuna to finish her accusatory line, but completing it will not go without a reward...

Because 8 seconds afterwards, an enemy assassin will jump down from the top of the screen and fall onto a random part of the stage! Making his somewhat irrationally grand entrance with an evil laugh of sorts, this assassin is as tall as Snake (with the same stats), and is dressed in a business suit with a black mask over his face that keeps only his eyes visible. After landing, the assassin will dynamically point at the accused character and arrogantly claim that he'll kill them, an arbitrary line that takes him a whopping 5 seconds to complete...he won't even bother to fight back against his enemies during this time, and can be knocked away with a powerful attack to send him packing for good. If he finishes his line however, he'll take out a bunch of knives and attempt to throw them at his target as fast projectiles that inflict 2% apiece with the slightest of flinching, though they can very easily be out-prioritized and the assassin will run out of them once he's used up 8...

Which is when he'll start to resort to rather inhumane tactics to win: by taking an innocent girl hostage! And by "girl", I mean he'll attempt to chase down Yasuna like a mad dog and hold her in an inescapable grab with a knife to her throat! He'll then tell his target to drop their weapon and stop what they're doing, or else he'll kill his hostage! Unfortunately, he's too stupid to realize that the character he's trying to kill is also trying to kill Yasuna, and thus they'd more than happy if he killed her for them! If the targeted foe would take 3 seconds to approach the assassin or attack/set-up for that amount of time, he will in fact stay true to his threat, which is marked by words of "do you want to be assassinated?", which is followed up by slicing Yasuna's throat and consequently making her suffer 38% that'll KO her at 0%! Yasuna's pretty dumb though, so she won't so much be scared as she'd see the situation as a joke of sorts, which allows her to use her taunting moves like the Neutral Special and Side Special!

The assassin will continue to chase Yasuna for all eternity until he's disposed of due to being the incompetent buffoon he is, but if he'd step over a weapon on his way he'll pick it up and use it against his original target! He does this with the same efficiency as a "normal" character would do and can in fact pick up Yasuna's crappy toys to use against his target, so he can essentially be turned into a weapon of sorts for Yasuna if one is left on the floor for him.

Oh, and by the way, Yasuna can in fact use her Down Special even if there's an assassin on the stage, which'll cause her to state the obvious and make another assassin appear! This assassin will in fact ONLY target the previous assassin and none of the enemy players before jumping away once his job's done, but that doesn't mean you can't just call in ANOTHER assassin to kill the assassin you previously called in! If you try to call in a 3rd assassin however be aware that the second one will actively try to take Yasuna hostage due to the fact that an assassin is targeting him, though the third assassin will ignore this threat and attack him along with Yasuna to the point where said girl probably won't get her throat sliced but she'll still take some major damage. Yasuna can also rat out an assassin who's currently holding her captive with a use of the Down Special along with other players who try to hold her, but in the former's case it'll get a throat slicing that'll cost her a stock. The "called" assassin will still appear, however.​


No prizes for guessing when this was made if you read the stats. Was kind of over-representing the meh-ish series with Agiri anyway. There were fun ideas, and I had more in my head, but spreading them out throughout the set was difficult without making them redundant; this was going to be a character with no real attacking options aside from just annoying the crap out of foes. Some of it is fitting to character, while other parts, well....does she really have THAT much money?
 

MasterWarlord

Smash Champion
Joined
Aug 24, 2008
Messages
2,902
Location
Not wasting countless hours on a 10 man community
VAATI

Wind Hitboxes are something we’ve all been using universally in movesets as passively as prone, so it really is nice to see them finally get a competent moveset dedicated to them. The actual long lasting streams of wind and the wind that the bat can easily control by just abusing his 20 jumps to charge the smash are the main things that let this be more than just a gimmick, as having multiple wind channels out at the same time opens up much more exciting possibilities. Rather than simple projectile manipulation with wind hitboxes, the main purpose of them outside pushing the foe is in the Bat’s glide/when he turns into an army of mini bats, which is pretty bloody brilliant. That said, I think not having the fireballs also be affected by wind was a mistake, as fanning the flames to create a trail of fire just seems painfully obvious. Yes, it’s not a Special, but it really feels like it should be. That’s a complaint of something that I feel could’ve improved the set even further, though, not really a criticism. The set really does a great job of having more simplistic moves that still fully appeal to me in their relevance in a manner I haven’t felt this strongly about since Kabutops, and how well you’ve mapped the inputs out with the air smashes and such leaves one with a far better taste in their mouth of intelligent design than in said set.

LESS DESERVING SSB4 CANDIDATE THAN KRYSTAL

No, I don’t have anything against usmash. I’m more forgiving of that Krillin aerial as well after it’s been explained it has a purpose. Generic attacks are sometimes needed. Dash Attack however is indeed a crime against humanity. Medusa seems like a character who would be doing a lot of close range pressuring anyway, so I see her doing plenty of said dashing, and even if she wasn’t, you’re the one who’s made such a point of dashing attacks being to STOP your dashing.

Yes, now that I’ve responded to your bait, I’ll actually comment the set. Why do I feel she’s pressure based? Because of that broken move that turns foes into stone, which while broken enough by itself, also has the typical Junahuness of invalidating playstyles that the rest of us abandoned after MYM 6. The constant threat of this move forces the foe to be incredibly cautious, and with the mindgame animations in the Specials with one of them being for said broken move and another for a shield, things get outright horrific. The rest of her game must be taken in this context, in which case it’s actually pretty interesting with her ability to defend and attack simultaneously with those various shield moves, attacking at mid range with her tail, and even having various background shenanigans. No, you don’t make a point of it, but you really don’t need to. The rest of her more simplistic game becomes far more interesting in this context.

Ignoring random characters being screwed over, the only thing that prevents me from liking this moveset is how OP it is. You’d think it’d be an easy fix, but the more generic attacks in the rest of the set rely heavily on being in the context of the obscene pressure provided by turning the foe into stone/the mindgames with it. There is some balance in the set that I feel was left intentionally, as the foe will want to attack Medusa from behind. If she has to constantly turn around, her tail becomes fodder to be hit, and it’s overly obnoxious to turn around in mid-air. The set does indeed leave a terrible taste in your mouth after finishing, but there’s incredibly deceptive amounts of depth here.

MEN IN GAUZE

I really don’t see the complaints being leveled about the stupidity of the AI partner when you can freely swap control between them. You even propose a bold solution of trapping your partner so he can’t do anything stupid, then later switching control to him while having a free fortress built around you. Crawling under the bottom of the pyramid while the foe has to jump over them is pretty brilliant, and I actually like that wacky utilt as it enables the Mummy to extend over a block, then attack diagonally downwards at the foe on the other side. Switching mummies is all too natural when you can just take turns which one rests inside the tomb healing, and does a great job of forcing the foe to actually play your game.

Magic syndrome is mostly taken from the boss fight from what I can tell from the video I grabbed, though vertical teleportation seems to be something you invented and feels incredibly tacky, no matter how relevant. Considering that the mummies are indeed just wrapping, it feels almost OOC they don’t wrap themselves around the foe, especially when you have stuff like that (Even if the rest of it is taken from the boss). “Mind control” feels like it’d work very very well on this set, especially when you have a second mummy to still attack them with. They need to be properly wrapped up before they’re buried in the pyramid, yes? You even talk about keeping one mummy in there with the foe to sacrifice him!

Yes, again, it’s a suggestion to improve an already great set. It’s basically the closest thing to a complaint I have. The aerials are justified because of the utilt, though the throws are indeed pretty boring and stalling for the other mummy is already accomplished by simply grabbing at all.

FRANKENSTEIN

Pity for the character you have chosen is difficult to hand out when you’ve made a moveset for a gigantic robot who can launch rockets and bullets (Which were entirely unused) out of his elbow and has full control over lightning rather than Frankenstein’s monster. You can even pull off generic heavyweight earth tropes relating to pounding the ground, thanks to the boss fight. Yet the moveset for the most part plays as a moveset for a randomly large Borris Karloff, ignoring how any suspense of disbelief for the monster’s characterization was already lost in the Specials. The playstyle flows, yes, but it’s so simplistic and basically relies on the random largeness of the character entirely for unique flavor when giant characters for the sake of giant characters aren’t exactly all that fresh anymore. Yes, I know what you’re trying to do with the Special Smashes, and that would work great on a –regular- moveset. On a moveset with no aerials, though, it comes across as lack of inputs.

TOTALLY CORRUPT GURU WHO DELETED PC’S VOTES’ MOVESET

I think I actually prefer the stuff done with prone in the standards to the projectile manipulation later in the moveset, as tech chasing with portals is far more interesting positioning than the generic spacers found in most sets. I’m really surprised we haven’t had a set that makes good use of poking foes through portals until now (And we have had a LOT of sets with portals), but it works astonishingly well and allows Death to only put his melee hitboxes into the cage without bringing his hurtboxes. Of course you have the obvious playstyle of making a cage and flooding it with projectiles, but this moveset reminds me of Baron with the sheer versatility it presents with the combinations of portals and walls you can block off. Mindgames abound when the hands can also grab either Death or the foe, functioning more than just as token walls, then positioning them at a certain portal. If I had any complaint for this moveset, it’d be yet another suggestion in that I think the four portal cap should be removed so I can still have portals to play around with the foe regardless of having four portals to form a box with the hands. How would you balance it? I have no bloody clue, so that’s a pretty hilariously weak “complaint”, but the possibilities could become literally limitless with even more portals.


>>>NEW MAIN CHAR OF SURVIVOR <<<NEW

You’ve really done an amazing job with the presentation of the moveset that there’s enough here for even MW to give you a full paragraph talking about it – the sheer quantity of quality musical headers, the systematic showcasing of which games you’ve taken moves from (An excellent decision to make such great use of Bowser’s superb source material), and obviously Bowser’s writing style all come together to give the set an amazing sense of characterization. I do have some nitpicks, though – I think that you should’ve tried to make it 100% clear what the animation of the move was in the first person summary, then talked only about details later on. As is, I’m having to read the animation of every move pretty much twice, and by the end it gets slightly tedious due to the first person writing style being more cocky and menacing than humorous. The second nitpick is we’ve advanced past musical headers in favor of playlists – yes, it’s cool that you have music from the same game as each move, but humans read too fast for that to really take proper effect anyway, leaving me to have to scroll up further into the moveset to try to find my place and click the next bit of music.
You are also a terrible person for putting the Mario Party 7 music in the main set over the MP2 music.

As far as the actual moveset, I could make comparisons to the other various sets that knock foes through the stage (Yes, the finished moveset sat and rot for a long time, but many of those sets existed –before- Bowser was finished). . .But this is destroying an entire column of stage to knock the foe into rather than sending them through it, with you having a great pressuring game the entire time. It feels far more fitting here than on most other characters, and while Bowser’s gimping game once he and the foe reach the bottom of the pit isn’t much to write home about his numerous options for climbing back up the gap are truly something. The set seems to lack much flow when it’s not doing stuff with the pit game outside vaguely pushing them towards the pits, though in the least it manages to do great things for Bowser’s character and makes him a unique character to fight –against- what with the mechanics with how Bowser’s grabbed.

The one thing I don’t like about the set is the boss mode. Ignoring generic number crunching related things that make him feel underpowered, Bowser seems like his set would flow far better on a generic stage than the custom one. If you had a generic tacked on boss mode, I’d accept it fine and dandy, the set deals with both 1v1 and 3v1 well enough, especially with Bowser’s ability to walk backwards and attack foes on both sides. His room for making pits is overly limited when the majority of the stage is the scrawny little bridge, making much of his game irrelevant. You also bring in the almost entirely ignored concept in mainstream movesetting of giving boss Bowser a specific stage, and then barely take advantage of it, not having him interact with it when he could do obvious stuff like bombing the lava to form tidal waves.
 

Nicholas1024

Smash Lord
Joined
Mar 14, 2009
Messages
1,075
Bowser is indeed the king of the koopas, and it's a rather fun idea to stomp the opponent down into the stage and make the earth their prison before spiking them through what's left of it. (Although that DOES sound vaguely familiar... ;)) Anyway, although the writing style is fun to start out with, it does become a bit repetitive later on, there are only so many ways Bowser can brag about his totally awesome strength what with being the king of the koopas. (Bwahaha.) However, I wish there was a bit more focus on his shell mechanic, as it just doesn't really feel like it plays into the set THAT much. Also, I feel like you could have compressed the moves a bit, as Bowser has three attacks that involve stomping the ground (two I could understand, but I think the down smash and down air could be combined). Additionally, the up smash feels a touch repetitive, considering you already have homing fireballs from the neutral special. And not so much a complaint as an amused note, I see you managed to take Dark Bowser's B-air and tweak it... who himself took it from Brawl Bowser's B-air. (At some point we'll need a Dark Bowser Remix to re-re-reuse it in another slightly different fashion...)

Anyway, on the whole, good job here Kupa. The set's not quite flawless, but the flaws are ultimately minor, and the play style's quite fun. (So, since only one koopaling set has been released, does this mean that the movement's been abandoned?)
 

LegendofLink

Smash Apprentice
Joined
Feb 17, 2008
Messages
164
Location
Pennsylvania
Iggy Koopa
So, I think I've figured out the modern hallmarks of the "Warlordian" moveset: impaling foes on things, and physics abuse. Iggy does both of these things. In fact, Iggy does a lot of things. Lets start from the top. Typically, if there happens to a particularly impressive stat that a character possesses, the set makes use of this as a unique attribute. Iggy has a whopping 10 in air control... which he really doesn't use for much aside from trying to impale foes with the neutral aerial (how does that even work, anyway? Does he just tilt while moving to more easily stick himself to whatever surface he hits?). Next we have the chariot. this is where your patented physics abuse comes in. the chariot and Chain Chomp can both be knocked around/swung around/blasted around and what not which as usual is logical and intuitive. You never really do much to address the fact that the chomp is pretty easily juggled off stage by most characters, though that may just be a balancing factor. The smash attacks that control the Chomp also do a good job of giving some options for control, though I'm really starting to dislike background/foreground abuse just tacked on to moves just because, especially since characters typically become invincible while dodging, so even attacks that are more than simple vertical strikes (like most spinning attacks in Brawl) can't hurt them while they dodge. Next we have the wand, which basically allows for ease of camping from the chariot as you move it around with the up special and spread it's hitboxes all over the stage. What seems to make this a moot point is the side special, which you state has very little lag, and is a relentless homing projectile. You also place no limits to the number of them you can have on stage, which means that the move is so spammable that against slower characters you probably wouldn't even need to summon the chariot to zone them out completely. Just a limit of 2-3 fireballs on screen at once would easily fix this though, so it's not too big of a problem. Now, as for having all of the concepts come together, its a little hit or miss. The chariot makes for a nice mobile camping platform, but it's so slow and easily deflected that Iggy is almost better off using his rather good mobility and camping options, especially if he uses the up special to get around. If you decide to make the chomp more useful and use your smashes to better control it, you can no longer split your fronts of attacks between the chomp and the want either. All in all, Iggy seems to be better suited for playing like Tutankoopa with more mobility than hanging out in the chariot as intended, making a lot the interactions rather superfluous, though what this set does well, it really does well.


Bowser
Now, I'm probably going to catch a good bit of flack for this comment, but this moveset just has a lot of things that annoy me. Alone they would be classified as simple nitpicks and ignored, but I just keep finding them everywhere I look here. While making pits is really cool, both as a damage racking tool and a KO method. It simply doesn't work on a lot of the stages that exist in Brawl or any SSB game. So many stages have very thin platforms, making a lot of the pit interactions pointless. Assuming a thicker stage, there are still some problems. Bowser has an impressive fall speed of 10, which means he is not suited to be in the air at all. Ending up below the stage is a death sentence unless he recovers immediately, which means he can't really duke it out for a gimp. Bowser being able to cling to walls and climb them so easily also rubs me the wrong way. Not that it's mechanically bad, but it just doesn't seem like something Bowser is capable of doing with his size and weight. There is a good bit of redundancy in the set as well, with no less than three separate moves that slam Bowser into the ground from the air to pitfall the opponent. The up air is especially wonky sounding, with Bowser being able to fly upwards for three seconds and at a rather leisurely pace at that. It just seems silly when I picture the move being performed. This set is also has started to make me hate impaling opponents. It's gotten to the point that if Marth was a MYM set, his neutral special and up smash would impale the foe on his sword so he could fling them off with another attack.

Now to get off the hate train before I make everyone hate me. The shell mechanic is a really good idea, and does a lot for making a slow character such as Bowser be able to -stay- slow and still be effective. The Fire Breath, hammers, and various pushing moves also go a long way toward making the pit-gimping playstyle tick once you get past my complaints. The writing was also nice, with the bullet points being great for those who don't care for in character writing and just want to know what each attack does. I can very much see why people like this set but it just has too many problems in my eyes that add up over the course of reading it, leaving me feeling rather annoyed when I think about the set as a whole.
 

ForwardArrow

Smash Ace
Joined
Aug 17, 2011
Messages
502
Iggy Koopa
Warlord I think it's obvious that I love this set quite a bit from my comments in the chat, but I figured I'd go into a bit more detail. While there are some similarities to Tutankoopa, I feel that his methods of manipulating the chomp are different enough from Tutankoopa's for me not to really care that much. And yes LL, the cart and chomp can be knocked around... Iggy is perfectly capable of defending them through various means. Not to mention he'd probably be somewhat OP if you could not, what with how easily he could hide away in the cart and such. Anyway, I do love the ways he can play with the chomp, though he can do far more than just fool with the chomp. He can use the cart to camp, or more notably flip it over and take advantage of it's flipped state. It's all really fascinating stuff as usual, I can't really find a lot to complain about here, the main thing being attacks that awkwardly interact with the chariots walls when Iggy is outside it. I really don't feel that is particularly neccesary and just some additional Warlordian creativity. I suppose it's useful to make the inside of the carriage a safer place for Iggy and such. The stuff that actually utilizes chomp is completely brilliant though.

Bowser
Bowser's game with the pit is incredibly well done, if you ask me. It's deep, it's not flowcharty in the slightest, and the game he plays at the bottom of the pit where he gimps them really is a lot of fun and original. The writing style is obviously top notch, as are the headers even if as Warlord said there's no way you'll get through them all while you're reading the set. I guess my main complaint comes from the fact that outside the games he plays in the pit, which are really cool don't get me wrong, Bowser honestly isn't nearly as interesting as Warlord said, mostly just coming down to some very basic spacing stuff. That... and I don't really feel there's quite as much TOO the set as with Baron or Pennywise. He just doesn't really feel like he has the same level of depth. This isn't so much of a complaint as a lack of a positive quality those two sets had, but whatever. This set is still fantastic, and probably the best possible representation of Bowser we could possibly get.

Sayaka
I admit I think LL and DM are giving this set a bit too much credit personally, as I would not say it's one of my favorites so far. Probably mostly because of me recently reading Bowser, Iggy, and Death, but what are you gonna do? Anyway, I was initially really way of this set what with it being so heavily combo oriented... but then the end really turned the set on it's head. Sayaka is going to have to manage her combos to keep herself from going berserk, which makes her a lot more strategic to play. Not to mention due to the need for her swords, there are definitely variables in how effective her combos actually are. I certainly have some minor complaints though. I feel Berserk form is a bit too durable, and it just seems like it allows her to survive longer at the end of a stock which is kind of bizarre in a lot of ways. That and the damage percents strike me as a bit too high, which is a really nitpicky complaint but she is a bit too insane at damage racking. Combo characters should normally deal lower damage on their attacks, if you ask me, since your creating strings of them to do larger amounts. Lastly... I sort of felt the set could have done with more ways to space the swords around, that would have made her game feel like it had far more depth. That probably would have been hard to pull off while keeping it in character though. Good job here Kibble, this easily blows Jenna out of the water and I'd argue it's a pretty darn good set even by our modern standards.

Chaos 0
Remember when I said Bowser wasn't so much lacking in any sort of meaningful way gameplay wise as he just did not have any extensive positive qualities? Well, the same complaint applies to Chaos, except MUCH more so here. Chaos feels very bland on a whole with most of his attacks, which would be fine if it came together into an exciting playstyle... but all it feels like is very basic zoning. As you said in the chat, it's offensive zoning which is something new, but just because something is new doesn't mean it's interesting if the set does not really bother to develop it much. In Chaos' case, he just has some very basic moves to make sure the foe doesn't get super close to him, which do their job effectively... but I feel they don't really give him much depth at all. That and really I don't see how he's so effective at zoning to be honest. He can hit foes from a good distance away, isn't really bothered by projectiles, and the Forward Smash I guess can force them to stay between those 3 hitboxes? Either way, I feel he's playstyle, while interesting against defensive characters, doesn't work at all against anyone reasonably agressive, just basically forcing him to resort to using his massive range and hoping for the best. And I just generally feel that the set just doesn't really do anything particularly unique and is the furthest thing from exciting you can get. Then again, I guess that's what you want LL, hyper simple sets with no actual nuances to them. Bah.
 

JOE!

Smash Hero
Joined
Oct 5, 2008
Messages
8,075
Location
Dedham, MA
@FA @Chaos0:

try and picture him not in a vacuum, and picture him actually in-combat against another character, his moves are a lot cooler when you picture him like that. And trust me, it takes a more steady hand to make something simple yet good as opposed to "fantastic" and good.

werd
 

MarthTrinity

Smash Lord
Joined
Aug 9, 2007
Messages
1,954
Location
The Cosmos Beneath Rosalina's Skirt
Rushed set for my birthday. Woo!

REZNOR

Reznor is the name of the (multiple) Dino Rhino-esque enemies located within each fortress in the SNES classic Super Mario World. Reznor acts as the miniboss between Koopalings, much like Boom Boom in SMB3. Unlike Boom Boom however, Reznor always uses the same tactics each time Mario encounters him. Reznor fights Mario while riding a giant rotating wheel suspended over a bridge which is, in turn, suspended over a pit of lava. Once Mario eliminates two Reznor, he must eliminate the others quickly or be forced to ride Reznor's wheel.

STATS

Traction: 10
Falling Speed: 7
Size: 7
Weight: 7
Aerial Control: 5
Jumps: 4
Ground Movement: 4
Aerial Speed: 3

Like Ivysaur, Reznor is a character who moves about on all fours. That said, Reznor is a good bit taller and wider than Ivysaur as well as a fair bit heavier. This means that Reznor's fall speed and aerial control and speed are both rather poor...but they could be much worse. At first glance, Reznor is a fairly slow and bulky character...fortunately, he doesn't have to move a whole hell of a lot in order to win his fights!


SPECIALS

UP SPECIAL: THE WHEEL OF FATE

Reznor opens his maw wide as he lets out a loud roar! This roar does nothing, surprisingly...but it -DOES- activate his recovery option as well as a key part of Reznor's gameplay; his wheel. After Reznor roars, a giant wheel with four platforms about the size of the one in the Stage Builder will spawn directly beneath Reznor, with him on the very top platform. This wheel will then begin rotating clockwise indefinitely. Reznor may only have one wheel on stage at a time and cannot instantly summon a new one if he needs to recover again; there's a two second period of time where the first wheel vanishes and the second appears.

This slowly rotating wheel provides Reznor a solid vantage point to control the flow of battle from. Fortunately, his recovery is rather rubbish and there is one major way to tackle him on his own turf; bump Reznor from below. Hitting Reznor from below will deal knockback as normal and totally bypass Reznor's surprising vantage point benefits from the wheel! Once Reznor gets on his wheel, shaking him off and forcing him back to the stage can be quite the problem but it's very possible.

DOWN SPECIAL: REZNOR REBELLION

...Especially when multiple Reznor enter the battle! Yes, Reznor is never seen alone in SMW and the same thing remains here; Reznor is, for all intents and purposes, one collective group of dinosaurs. So yeah! Pressing the Down Special will cause another Reznor to let out a loud roar and drop down from the ceiling to the spot you're at! If you're standing on the stage, the new Reznor will land exactly where you were. If used on your wheel however...the new Reznor will land on the nearest available platform no matter what! These Reznor however aren't as smart as you are and won't attack with your full movepool...or even move for that matter. Once summoned, the new Reznor(s) will firmly anchor themselves on the ground or on their wheel unless knocked into the air (in which case they'll automatically try and redirect themselves towards land/the wheel and perform their Down Aerial).

The Reznor player may switch between each Reznor providing they're on the same platform as the other Reznor by inputting a roll command in the direction of the Reznor you want to control. This can also be done while on Reznor's wheel, switching your control to the next Reznor clockwise from you. Needless to say this means that Reznor can't roll like most characters can. Up to three other Reznor's may be summoned at a time (for a total of four) and each Reznor not player controlled has 50 stamina. To remain true to his roots, only three additional Reznor can be summoned per stock.

NEUTRAL SPECIAL: FIREBALL FLAMBÉ

This is the one attack that the CPU summoned Reznor's will actually use on their own! It also happens to be Reznor's only actual attack in the game he's from. Opening his maw wide once more, Reznor will pause for a brief second before spitting out a fireball in whatever direction you pointed the control stick. This fireball is slightly smaller than the Hot Head item and will travel fairly slowly through Reznor's wheel, other Reznor and fall-through platforms...but will -NOT- travel through the stage itself. Being hit by this fireball deals about 9% damage and mediocre horizontal knockback...but can get quite deadly when you realize that all four Reznor will/can be shooting these at once. Each summoned Reznor will spit out a fireball every four seconds, allowing for a constant barrage of fireballs if you time it properly. These fireballs from the CPU Reznor will automatically aim at the opponent.

These fireballs also have a nasty side effect. Each one that strikes the stage will blow a massive chunk out of the stage! This Bowser sized crater will remain for the next -THIRTY- seconds. Yes, you read that correctly. Thirty seconds. This means that the stage will be an absolute mess in very short order with all four Reznor blasting holes out of the stage. Of course...there is -ONE- area that will remain unaffected by the fireball barrage. Reznor's wheel. Forcing the opponent to deal with Super Armored Reznor's on the wheel as well as an onslaught of fireballs can ruin anyone in very short order...

SIDE SPECIAL: RAMPAGING REZNOR

When used on the ground, Reznor simply charges ahead like an angry rhino. This increases Reznor's speed to that of Fox's...but makes him rather difficult to control or turn. Colliding with a foe while charging will deal 13% damage and medium/high knockback to the foe. Reaching an edge while charging will cause Reznor to stop instantly and shake his head while grunting.

If used on the wheel however, Reznor will let out a grunt before lurching forward! This causes the wheel to spin incredibly rapidly, acting as an enormous hitbox that doesn't do any damage but will create a large push to anyone on the wheel or touching it (much like FLUDD)! Needless to say, this is an effective way to hurl foes off your wheel if they're harassing you as well as an effective ko method...but it's very possible to fight against the push. Note however that the push is slightly weird for this move. If you touch the right side of the wheel, you'll fly downward. If you touch the bottom you'll fly to the left...essentially, you fly clockwise. After two seconds, the spinning will stop and Reznor will be briefly vulnerable.


SMASHES

SIDE SMASH: FIREBALL BARRAGE

Opening wide, Reznor coughs forth a continuous spray of 2-5 fireballs, depending on how long this move was charged for. Each fireball will deal 5-10% damage depending on the how long the move was charged for and will typically fly forward up to two Bowser widths. The knockback for this move however is fairly weak...which -DOES- allow it to hit quite well with it's multiple hits.

Something to note about each one of Reznor's Smashes...inputting a Smash command will cause all of the Reznor in the match to immediately use the same Smash attack. In the case of the Side Smash, they'll use it in the direction they're facing unless they're in the middle of spitting a fireball. This allows not only for insane defense on your wheel but also massive stage control via greatly disjointed hitboxes and such.

UP SMASH: REZNOR TORCH

Reznor borrows a page from his cousin Mini Rhino and faces upwards, inhaling as he does so. Once the Smash is released, Reznor will breathe a mighty jet of flame directly above him! At minimum charge, this flame is the size of Mario while it grows to the size of 1.5 Ganondorfs at full charge. Contact with these flames will deal 12-17% damage and medium/high upward knockback. Coupling this with the fact that, like Reznor's other Smashes, all active Reznor will use this at the same time...well, this can cover a massive amount of space, especially if used while on the wheel.

DOWN SMASH: VOLCANIC SPREAD

Facing downward, Reznor coughs a charged Aura Sphere sized fireball directly beneath him. This fireball will travel downward until it reaches the stage in which case it bursts and causes two Pokeball sized fireballs to bounce to either side of the impact zone approximately a Mario width away.

Hitting the full sized fireball will deal 10-15% and moderate downward knockback whereas the smaller fireballs will deal 5-8% damage each and slight horizontal knockback. Charging this move will actually increase the amount of miniature fireballs released by the burst up to five small fireballs that spread out further relative to charge. This is an amazing move to force opponents away while on the ground and will go through the wheel's platforms if used on the wheel, effectively creating a nasty wall of death with them.


STANDARDS

JAB: SNAPPING YAWN

One may not really see the use for this move until they realize a key part of Reznor's gameplay; confusion. You see, only the real Reznor counts towards a ko when knocking him off the stage. When there are -THREE- other Reznor on the wheel with you and with the ability to switch between Reznor at will, it can easily confuse your opponent as to where exactly you are. Of course, it can confuse you too, especially if you're trying to play into this game.

What this move does is cause your active Reznor to open his mouth wide as if he were going to spit out a fireball...but then not spit out a fireball. Duh. This -WILL- give away your spot unless you manage to cover it up with a CPU Reznor using his fireball at the same time...but it also acts as a rather weak jab hitbox that deals 5% damage and "gtfo" knockback.

DASH ATTTACK: STAMPEDE

A rather basic Dash Attack but really, it's not too often that Reznor should be dashing anywhere. Once used, Reznor will burst forward with surprising speed for a full battlefield platform in length before whipping his head upwards in an attempt to toss foes into the air. Contact with Reznor while charging or while he gores upwards will deal 10% damage and moderate upward knockback. The thing that makes this different than your Side Special however is that any CPU Reznor will use this attack along with you in the direction they're facing with equally damaging results. Fortunately (or unfortunately) they won't use this if they're on the wheel.


SIDE TILT: RING OF FLAME

Reznor, continuing his fire-abusing motif, coughs up a ring of flame that grows to nearly double his height onces it's a Mario-width away from him (but starts out only about the height of Ivysaur. Yes, Reznor's going to have his foe jumping through hoops in order to reach his wheel and reach safety! The flame wheel is pretty wide, so hopping through it is the only sure way to make it to safety. Getting hit by the ring of flame will deal upward knockback as well as about 8% damage. Couple this with an onslaught of Reznor fireballs and jumping through a hoop may not be as easy as it sounds.

Not that it sounds particularly easy anyway.


UP TILT: SNAPDRAGON

Or snapdinosaur perhaps. Either way, Reznor faces upwards and then hops a tiny bit in place, attempting to snap at the foe above him. If successful, Reznor will grab them, shake them around slightly and then toss them away. This process not only deals some solid damage (around 10%) but also holds them long enough for your Reznor fireball barrage to kick in and really put on the pain. Tossing them aside however only deals fairly weak knockback so make sure you have something to follow this up with. Also, only the main Reznor will use this...so it can be surprisingly good at catching the opponent off guard.


DOWN TILT: EARTHQUAKER

Getting enraged, Reznor begins to stamp his feet, acting as a low priority hitbox (as well as the small area around him) as he does so. Anyone nearby will be tripped and suffer 7% damage. The main catch of this move however is that the shockwaves created by this stamping will cause any opponents nearby to immediately fall through any drop-through platforms they're standing on and enter a freefall.

Considering Rezor's wheel happens to be made up of drop-through platforms...this can be an excellent escape tool or even an excellent gimping tool depending on where your wheel is placed!


AERIALS

NEUTRAL AERIAL: RING OF FIRE REMIX

The ring of fire returns for this move...although its execution is a fair bit different than in the Side Special. While falling/in the air, Reznor will pause and spin in place, exhaling a stream of fire. After this, he'll drop down. What this does is actually leave a ring of fire suspended in the air where Reznor was. Considering how wide Reznor is, this shouldn't be too hard to pass through...although passing through it may be what Reznor wants; remember, you're always under fire against Reznor! Touching the ring will deal 8% damage and moderate upward knockback.

DOWN AERIAL: SEISMIC SLAM

This aerial was briefly mentioned in the Down Special but now we'll explain what it actually does! When knocked loose from one of the wheel's platforms, Reznor will automatically try and get over said platform again and perform this move. Pressing this input causes Reznor to suddenly increase in speed as he falls downwards! Contact with a foe while falling will deal high downward knockback as well as around 12% damage. Landing this move on a grounded opponent however will force them through any drop-through platforms or simply deal high horizontal knockback is they're on solid ground. This move is excellent for getting people off your platform so they can't just assault you from there...


FORWARD/BACKWARD AERIAL: FLAME THRUSTERS

Seeing that Reznor's recovery becomes insanely limited once he uses his primary form of actually...doing anything...Reznor needs a bit of assistance in the form of his aerials! Pressing either aerial will cause Reznor to forcefully fire a jet of flame in that direction. This will push Reznor in the -OPPOSITE- direction that he used the move (IE: Use bair and fly forward). Contact with the flames will deal 11% damage and moderate horizontal knockback whereas contact with Reznor himself will deal 13% damage and higher knockback. The flame is only about as long as Bowser's Neutral Special and will push Reznor about the distance of Captain Falcon's Side Special. Needless to say you won't want to be using your forward aerial to actually fight foes unless you have room to escape...

UP AERIAL: VOLCANIC SHOWER

Reznor faces upwards and begins violently coughing up a shower of fireballs! This spread of fireballs (five in total) will fly upward Mario's height before arcing and falling back towards the ground! These individual fireballs will deal 6% each and weak knockback...but this move can cover a massive amount of area very quickly and can deal a nasty chunk of damage if used at close range.


GRAB GAME

Reznor has no hands...but for his grab, Reznor bites down on the foe and, for his pummel, surprise! He chews on them! This is a pretty wide range grab considering the huge size of his mouth and the pummel can be done fairly fast (and deals 2% per bite).

FORWARD THROW: DINO PASS

Reznor's Forward Throw varies in usefulness depending on if he has more Reznor out. Pressing forward will cause Reznor to lean forward...then pressing the control stick in the direction of the nearest Reznor will cause Reznor to toss the foe to them, allowing you to reposition the foe to your liking. Tossing the foe to the furthest Reznor will allow you to press towards an edge/somewhere else and hurl the foe in that direction. Each "pass" will deal 10% damage...so tossing the victim about can be a quick way to build up damage...especially if you happen to be close together...say...on the wheel? Note that passing between Reznor doesn't extend your grab timer...

DOWN THROW: IMPACT CRATER

With the opponent in his mouth, Reznor jumps upwards a short ways before slamming the foe directly into the ground beneath him with tremendous force! This attack deals a solid 12% damage and some moderate upward knockback. Most importantly however, this helps blow a huge chunk out of the stage in a single strike! Yes, by slamming the foe into the ground, Reznor will smash a Bowser-sized crater into the ground directly below where he was providing this is used over solid land. An effective way to smash up the arena if push comes to shove, it'll also force opponents through your wheel if it's used there, depositing them out below where Reznor reigns supreme.

UP THROW: CLAY PIGEON

If you know what a clay pigeon is, you should have a general idea of what this throw does. Essentially, Reznor will hurl the opponent upwards and take aim, launching a fireball up after them! This fireball deals 5% damage and slight upward knockback...but this throw is considerably better with a multitude of Reznor's on the field! If used with multiple Reznors, all of them will launch a fireball at once, dealing 5% for each fireball and still only slight upward knockback. Quite good for damage racking if used with a full "team."

BACK THROW: SUPERHEATED

Turning around, Reznor will spit the foe onto the ground behind him, simple, no? After this, Reznor breathes a jet of superheated flame over the foe! This deals a nasty 14% damage and will also put the opponent into a "pitfall'd" state as they're melded to the stage itself! If a Reznor blows out a chunk of stage that the opponent is fused to, they'll simply fall downward, still stuck to a part of the stage until they break free! If, of course, there is no ground remaining for them...well...then they're simply done for I suppose! A great gimping tool when the chunks of stage start to wear thin for your opponent's footing!


FINAL SMASH
REZNOR'S FORT

Reznor grabbed the Smash Ball! When he activates his Final Smash, he lets out a massive roar, shaking the entire stage! When the camera zooms out, Reznor (complete with three other Reznor!) will be on his wheel, center stage! The arena will also be changed to a replica of his SMW arena. IE: There will be lava below the stage and a very thin bridge. The platforms on Reznor's wheels also have -spikes- on the bottom, effectively making him much harder to budge! That and...ya know? A thin wooden bridge is much easier for fireballs to shatter than the normal stages! This will force foes onto your wheel...or into the flames!

PLAYSTYLE

Reznor is a character who benefits most from smaller stages. The smaller the stage, the easier it is to wreck it and force the opponent onto your wheel. Set up for Reznor is fairly brief; simply get the wheel where you want it and position your Reznor crew accordingly. Opponents will naturally want to get onto the wheel in order to save themselves from the crumbling stage below...but being close to Reznor is a deadly place to be. Up close, Reznor can assault you from all sides with his gang, switch to a better vantage-Reznor, bombard you with fireballs and a slew of other projectile attacks. Getting in on Reznor is difficult...but getting once you're in, you're still not out of the woods yet!

Your CPU Reznor buddies will do a pretty good job of wrecking up the stage with their "homing" fireball attacks, but make sure you both assist -AND- protect them. Remember that each Reznor is not only a valuable ally but a potential "hopping point" for your control. The wheel will be the best vantage point for all four Reznor's to hang out on as it lets them fire down upon the stage -AND- the opponents. Place it near the center for the best sniping point or over the edge if you'd rather gimp the foe.

Confusion plays a big factor for Reznor. Since there are four indentical Reznor on stage (max) at a time, any one of those Reznor could be the player at any given time. When positioned on the wheel (and with the Side Special), Reznor can essentially "shuffle" himself up, effectively creating a "Three Card Monte" sort of scenario where the other player has to keep track of where the -REAL- Reznor is. After all; killing a fake one will simply waste your time...and it's not too easy to tell who's who if they're all spinning about hurling fireballs at you.

TO BE CONTINUED​
 

BKupa666

Barnacled Boss
Moderator
Joined
Aug 12, 2008
Messages
7,788
Location
Toxic Tower
KRAEHE
The anti-trap motif isn't as problematic as I think others are making it out to be. Although I haven't seen the anime, it seems perfectly in-character for her to sneak around, turning traps against opponents while creating her own when necessary. This is where Kraehe's set becomes a bit shady, and not just organization-wise. Coating the stage with enemy blood feels a bit tacky, as he's drawing an endless supply of what's essentially goop from their wounds. When it's made through tossing a feather rather than being directly applied to the stage, it also feels like an excuse to include the interaction with Raven Blood. The smoke games opens up a bit of extra playground potential, with its potential to hide corrupted or 'pure' traps that may or may not exist. This doesn't seem to carry over well when Kraehe is playing opponents without traps to contribute, as her blood and feathers don't offer as much room to maneuver here. Kraehe is a cool shot at a versatile anti-trap set, although it does feel rough around the edges at times.

SAYAKA
The use of item-like swords throughout Sayaka's moves serves its purpose fleshing out her combos throughout the match. Her multiple mechanics also turn her seemingly combo-centric playstyle into more of a cautious hit and run character; although it seems a bit strange for her to be aware of her imminent destruction as a character, her berserk and grief modes do a great job boosting her above the pack (of both your sets and those in the contest). Depending on the player, Sayaka can handle her combos and, by proxy, berserk mode conservatively or more freely, opening up a fairly versatile style of play for use. At a certain point, I do feel advanced players would be able to abuse berserk mode to the point where she's obliterating her opponents quickly, while they aren't contributing to her Gem's damage due to being used as a punching bag. Yes, she's eventually penalized, but not before she gains the easy lead. For general play, however, Sayaka's item-based rushdown juxtaposed by her cool mechanics creates quite the palatable set. Welcome back to the big leagues, Kibs!
 

MasterWarlord

Smash Champion
Joined
Aug 24, 2008
Messages
2,902
Location
Not wasting countless hours on a 10 man community
JUNAHU ANTI TRAP SET

Yes, she can make her own trap to manipulate. Yes, she can play like a standard campy character with what’s essentially a pummel KO – this set blatantly feels like it belongs in the past with the likes of the horde of generic MYM 6 campers, and while they were okay for their time due to us simply focusing on more flowing movesets this does very little to stick out. The set tries to claim it’s more unique by simply presenting using the foe’s traps as the focus rather than your own. Considering you can’t rely on this even with characters who do have traps (As we have very few pure trap characters now and most can function at least competently without them), this just feels like Junahu’s trope of randomly locking out various playstyles for no good reason. Toon Alligator (Pegasus) tried this as a playstyle in the past – it was met with similar reactions then, and that was MYM 6. . .

Yes, of course the set has some degree of flow into this trap playstyle, but she really painfully needs another trap to manipulate, and I thought you would’ve at least played off the minion or the pummel KO or –SOMETHING-. This character has no shortage of potential, considering you’ve done far better with Pussycat, and I doubt converting traps of all things is particularly in-character to start with, so don’t give me that crap.

THE STUPID CAT

Excuse the “imaginative” title for the comment, it was a request.

I don’t care that you have a bunch of attacks to defend against Mario’s jab with the fluffy tail. I’m concerned with how little you have to deal with the attacks that deal –over- 9%. Ganondorf spamming his dashing attack back and forth seems like all too viable of a strategy to defeat this character. Most of Kyubey’s mobility attacks are mobility and don’t offer direct protection, and the one background attack he has still leaves it quite predictable where out of the background he’ll come. Yes, I have to block you from getting to your corpses as you just run away en mass. I find it insanely tacky they can’t be attacked and knocked off the edge, but even then, with how much Kyubey runs around and how pathetically light he is, it would be pretty easy to just zone Kyubey to die in the same place each time so there’s minimal ground to defend. Kyubey’s talking only has so much range, and aside from that he has no options whatsoever from a range until making a contract. This could be fixed easily by buffing it to infinite range, yes, but even most of the Brawl characters (Let alone MYM, who can also dump traps on the corpses) have projectiles that would burst out laughing at this phase of Kyubey’s game, and those that don’t can either compete with Kyubey’s mobility or have almost an entire moveset of attacks with which to OHKO Kyubey.

If you people want to talk about “Fun”, this phase of Kyubey’s is more unfun than putting the controller down for 20 seconds while the foe dies to Spiritomb’s aftermath. Constantly running with no way to take advantage of distance you make between yourself and the enemy, barely able to do anything when you get up close to them, and dying over 5 times per stock if you’re playing –well- feels like the most frustrating of any moveset I’ve ever read to play. What’s your reward if you can somehow get past this conceptual unbalance? Conceptual overpoweredness that needs conceptual underpoweredness to "balance” it that largely amounts to some generic buffs to Kyubey’s moveset and what essentially amounts to an ammo bank on the foe you can use as an alternative KO mechanic. Because grabbing the foe for 7 seconds straight wasn’t enough to be worthy of a KO.

MRS. BANBORVOR

Now that I’ve set the tone for the comment with –that- disturbing visual. . .

I don’t see much reason for wanting to position the foe about with the spear once you’ve impaled them, because you can’t position them in a certain position without bringing your spear to the same place. Sure, you can use this time to extend the spear to the range you want, but delaying the foe to get time for set-up isn’t exactly a revolutionary concept in MYM. Where does that leave to take foes? Pits, where you can essentially play melee range camping as you jab down at them into it. While somewhat interesting, I can’t help but notice how disturbingly forced it is that a lightweight female protagonist who you detail can’t hold up the extended weapon properly can randomly make pits. That, and the wall seems to serve almost no purpose at all. You can’t attack from behind it, so the only practical purpose would be preventing the foe from running. . .But the foe wants to get as close as possible to Kyoko because of how horrifically vulnerable she is up close with that extended spear of hers and how rarely she’s vulnerable. Yes, she can retract it instantly, but I find that utterly ******** when she has to go out of her way to extend it out and you make a point of her having to take time to retract it later. Ignoring my stance on that, if she is forced to resort to playing as a Brawl character she’ll fail terribly at it with her lack of any redeeming qualities combined with her hilarious weight (Is that a balancing factor? Because it’s not a bloody pony. You can give her a bloody 3 or 4) and recovery.

One of the main draws of the set, racking up momentum in the chain, feels very very impractical because of how specific of a range she has to keep the foe in, at least if she wants to hit with the tip. Kyoko comes off as too awkward and clunky to get in a lot of hits using the ranged playstyle, making it feel like it really only benefits her properly if she plays as a Brawl character. I also am utterly astonished that you never, y’know, use the actual chain as a hitbox throughout the entire moveset. Would be a better use of it than this awkward mechanic.

REMOTELY SERIOUS KIBBLE SET

Hit and run has been very rarely touched upon in MYM, and you make it very clear that it’s a natural fit for this character with her losing herself in the berserker stance. If you’re just directly attacking the foe, then yes, she’s still kind of boring, but things become far more interesting with the swords impaled in the ground coming into play, giving her specific places to run to. She also has to do things like spreading the swords around, and they even manage to serve a dual purpose in making the combos vary wildly based off how many swords are immediately around you. It’s shocking to see how aware you are of playstyle when you so recently made Thor, much less you actually coming up with a unique playstyle so soon and not having to do something like a generic camper to get back in the swing of things. Your usual style of interacting off a mechanic to make individual moves more creative for the sake of it is still present (Though harder to see due to the simplistic character), but it actually works here, considering how much things vary based off sword placement. The more irrelevant moves at a glance have much better purpose when thinking back on the set, as they generally contribute to the run part of hit and run – sliding the foe along the ground serves as spacing, while that fsmash KO move for the sake of a KO move lets covers plenty of ground and has almost no lag if she continues to flee.

My only real complaint is letting foes pick up the swords seems like a bad decision, as without her swords she becomes fairly incompetent. If the foe is concerned with getting rid of Sayaka’s swords and ignores her, then she’s forced to pressure them. . .But nope, she can’t pressure them too much, or else she’ll kill go berserk and kill herself! You vaguely imply she can just make more swords if foes do that, but if that’s the case then spamming the swords as projectiles feels like a bit too broken of an option for Sayaka when she’s trying to defend herself. This complaint also applies to when she fights thoroughly defensive characters, as then she has little choice but to constantly pressure the foe – she definitely wouldn’t make the cut for MYM Brawl. Of course, she’d bring plenty of class to a regular fighting game, and fit in quite snugly.

NEW>>> WHEEL TO BE RIGGED WITH MAGNETS <<<NEW

Reznor has quite the interesting game going on his wheel where he plays king of the hill with the foe, and even if the foe doesn’t want to approach because of Reznor camping, him destroying the stage will give them little choice but to play Reznor’s game. Where else are they going to go when there’s nowhere else to stand? The game with multiple Reznors on the wheel provides quite interesting once you get there with Reznor’s moves to knock foes through the platforms. While it’s all very unique, it’s also surprisingly in-character for such blatant stage ****, to the point that the Reznor group becomes very crippled if the foe takes the place of one of the Reznors.

I’m not sure if I like that the primary phase of Reznor’s game being so overpowered being balanced by him struggling to do some set-up is such a good idea. Obviously he’s not gonna start on the wheel or with four, but his general slowness comes across as a bit awkward as he his few tools to accomplish the initial set-up. Of course, focusing on that would be pretty boring and it’s a fairly needed balancing factor, so that gets a pass, if a shaky one.
 

ForwardArrow

Smash Ace
Joined
Aug 17, 2011
Messages
502

THE STUPID CAT

Excuse the “imaginative” title for the comment, it was a request.

I don’t care that you have a bunch of attacks to defend against Mario’s jab with the fluffy tail. I’m concerned with how little you have to deal with the attacks that deal –over- 9%.

The corpses left behind by more powerful attacks are a more significant benefit than you seem to realize. Kyubey's highly mobile and could certainly lure foes away from the corpse, before rushing back and eating it. He's faster than most characters and should not have all that much difficulty getting to it and eating it before the foe can stop him.


Ganondorf spamming his dashing attack back and forth seems like all too viable of a strategy to defeat this character. Most of Kyubey’s mobility attacks are mobility and don’t offer direct protection, and the one background attack he has still leaves it quite predictable where out of the background he’ll come.

They don't offer direct protection, but they get him out of the foe's range, while keeping them within range of the Neutral Special. I don't see how they are entirely ineffective at all.


Yes, I have to block you from getting to your corpses as you just run away en mass. I find it insanely tacky they can’t be attacked and knocked off the edge, but even then, with how much Kyubey runs around and how pathetically light he is, it would be pretty easy to just zone Kyubey to die in the same place each time so there’s minimal ground to defend.

...he's easy to zone? He has crazy mobility, and could pretty easily run away to lure the foe after him. And he can force foes to leave them in different locations via Down Smash + Down Special, anyway.

Kyubey’s talking only has so much range, and aside from that he has no options whatsoever from a range until making a contract. This could be fixed easily by buffing it to infinite range, yes, but even most of the Brawl characters (Let alone MYM, who can also dump traps on the corpses) have projectiles that would burst out laughing at this phase of Kyubey’s game, and those that don’t can either compete with Kyubey’s mobility or have almost an entire moveset of attacks with which to OHKO Kyubey.

Projectiles aren't actually a big deal to him, you realize. Ones that deal 9% or less he can casually dismiss with his tail. And projectiles that deal more than 10% tend to be highly predictable and easy to dodge.


If you people want to talk about “Fun”, this phase of Kyubey’s is more unfun than putting the controller down for 20 seconds while the foe dies to Spiritomb’s aftermath. Constantly running with no way to take advantage of distance you make between yourself and the enemy, barely able to do anything when you get up close to them, and dying over 5 times per stock if you’re playing –well- feels like the most frustrating of any moveset I’ve ever read to play.

You're still a part of the action really, and you should realize that dying far from means you've lost. This isn't like Spiritomb where you're just not doing anything, you're actually fighting the foe here. I don't see how he's any less fun if you're aware dying here is no worse than just taking some damage as another character.

What’s your reward if you can somehow get past this conceptual unbalance? Conceptual overpoweredness that needs conceptual underpoweredness to "balance” it that largely amounts to some generic buffs to Kyubey’s moveset and what essentially amounts to an ammo bank on the foe you can use as an alternative KO mechanic. Because grabbing the foe for 7 seconds straight wasn’t enough to be worthy of a KO.

...aw come on, no appreciation for the hyper Warlordian grab game in the second form? I practically made that specifically FOR you. :urg:

MRS. BANBORVOR
Now that I’ve set the tone for the comment with –that- disturbing visual. . .

I don’t see much reason for wanting to position the foe about with the spear once you’ve impaled them, because you can’t position them in a certain position without bringing your spear to the same place. Sure, you can use this time to extend the spear to the range you want, but delaying the foe to get time for set-up isn’t exactly a revolutionary concept in MYM. Where does that leave to take foes? Pits, where you can essentially play melee range camping as you jab down at them into it.

You are aware that she can also use Down Smash on them while they are in pits, or try to grab them when they escape, Up Tilt them when the grab fails... there's plenty of reason for her to position them into a pit just fine. That, and you can also kind of move them off the edge, from which you can swing them downwards to spike them in a gimping maneuver. Oh and the Forward Smash and Up Aerial position just fine without ever using the spear head.

While somewhat interesting, I can’t help but notice how disturbingly forced it is that a lightweight female protagonist who you detail can’t hold up the extended weapon properly can randomly make pits.

She mostly cannot use the extended weapon "properly" as a balancing factor really. She can just fine in the actual series, but I feel making her mobile with such a huge hitbox would make her kind of insanely good. Not to mention magic and such.

That, and the wall seems to serve almost no purpose at all. You can’t attack from behind it, so the only practical purpose would be preventing the foe from running. . .But the foe wants to get as close as possible to Kyoko because of how horrifically vulnerable she is up close with that extended spear of hers and how rarely she’s vulnerable.

The wall makes it harder to escape from pits, and she can slam the foe against it repeatedly with the Down Smash. That and you can use it to block the foe from recovering after you've moved them off the edge with a Side Special or Forward Smash.

Yes, she can retract it instantly, but I find that utterly ******** when she has to go out of her way to extend it out and you make a point of her having to take time to retract it later. Ignoring my stance on that, if she is forced to resort to playing as a Brawl character she’ll fail terribly at it with her lack of any redeeming qualities combined with her hilarious weight (Is that a balancing factor? Because it’s not a bloody pony. You can give her a bloody 3 or 4) and recovery.

She's not very good at playing as a Brawl character because she's meant to take advantage of her range. Also her weight is mostly using the logic of Zelda being a total lightweight despite being taller than her and wearing much heavier clothing. Maybe it's weird logic but eh.

One of the main draws of the set, racking up momentum in the chain, feels very very impractical because of how specific of a range she has to keep the foe in, at least if she wants to hit with the tip. Kyoko comes off as too awkward and clunky to get in a lot of hits using the ranged playstyle, making it feel like it really only benefits her properly if she plays as a Brawl character.

She... doesn't really have that much trouble building momentum in the chain as long as there's a lot of distance between her and the foe. The chain still deals some damage and flinching and such to keep on the pressure, the momentum is only used up if you hit with the tip. And you might think hey then how do you hit with the tip? Use one of the moves that turns it back into a spear, the momentum is still there unless you go a bit without attacking. Not to mention the foe struggling to get through all the various hitboxes of your chain while they're trying to escape a pit, you can plenty well build momentum like that.

I also am utterly astonished that you never, y’know, use the actual chain as a hitbox throughout the entire moveset. Would be a better use of it than this awkward mechanic.

The chain IS used as a hitbox, just not as the only one in the attack most of the time.


Responses are in bold and such. I'm actually rather happy I'm getting this kind of criticism... I need a good reason to step up my game and be aware of my flaws. I don't really think you're correct about a lot of these things, but I will give you that you have some valid points.
 

majora_787

Smash Hero
Joined
Jun 23, 2007
Messages
6,122
Location
Texas
IGGY

I don't have much to do, so I guess I'm commenting on a Warlord set today... Hmm...

I like the specials and how they recreate stuff from New Super Mario Bros. The more interesting stuff, anyway. The up special is entertaining as well. The standards are something too, being kept from being too dull by combining them with the chariot and whatnot. The smash attacks also are interesting. I particularly like the up smash. Not much I can say that I don't like about this set. It's something. I tried to make this a productive comment, but I wouldn't be surprised if this never gets read. :p Because bad commenter.

I haven't commented in a while actually. Oh well. This was a nice read, something good and entertaining. IMO. Yeah.
 

SirKibble

Smash Champion
Joined
May 2, 2008
Messages
2,400
Iggy Koopa
To be honest, when I first read this set, I didn't particularly like a lot of it. For the most part, I got hung up on the fact that between the Chain Chomp, manipulation of the chariot, your magic wand, and--oh, that's right, you have to pay attention to Iggy himself, too--I felt like there would just be too much going on at a time in different places of the stage to make Iggy accessible to anyone who wasn't pro and had chosen to main him and master all his intricacies. But the more I think about it, the more this set is growing on me. Iggy has several interactions that are potentially complex, but they're all quite optional. The only one of the aforementioned factors that's really necessary to play decently with Iggy is the Chain Chomp, and the chariot manipulation and wand manipulation are beginning to strike me as more of advanced techniques for more serious players. In other words, I'm impressed with how Iggy seems to have a very effective learning curve. He's not impossible for a new player or casual to pick up and play as, they'll just miss out on some of his niftier tricks. And yet, they're all there and relatively obvious, so they can probably figure out how to use and abuse them if they really want to. So, in the end, I'm finding I'm quite a fan of this set, actually. Excellent work, Warlord.


[ Comments coming later for Bowser and Reznor ]

EDIT: nix that, Bowser and Reznor will just be in my next post.
 

flyinfilipino

Smash Master
Joined
Sep 11, 2007
Messages
4,319
Location
North Carolina
@Reznor: Hey, an MT set! MUST COMMENT RIGHT AWAY.

Reznor's pretty cool and a great throwback to Super Mario World (the first Mario game I ever beat...well, besides Super Mario Kart). As a generic mini-boss, Reznor doesn't have much to pull from, so his main gameplan is pretty much ripped straight from the game. Reznor joins the club of movesets that enjoy altering/destroying/making pits/turning into Swiss cheese the stage; it doesn't always make sense on some stages, but it's like Reznor's signature move, so yeah. The wheel is a given, and it's nice that it's relatively easy to set up your formation. Summoning the other Reznor seems kind of pointless outside of the wheel though sincethey don't do anything. You probably shouldn't spend much time outside the wheel anyway, but it does make Reznor's gameplan kind of limited. Reznor's other attacks are rather suitable for him, and I liked the reference to Mini Rhino. I also liked that ring of fire Side Tilt; I was gonna use it for another set (chew).

Overall, I know it was a rushed set for your birthday, but it's actually not bad, all things considered. I hope we can continue to see more from you in the future, MT! :bee:
 

majora_787

Smash Hero
Joined
Jun 23, 2007
Messages
6,122
Location
Texas
Majora's 2-Hour Set Special! :D

* * * MELLO * * *

L's Second Successor​


Mihael Keehl, better known as Mello or M, is the eldest of L's two successors, raised at Wammy's House—Watari's orphanage for gifted children in Winchester, England; he is also friends with Matt, another exceptional student at Wammy's House. When Roger decides that Mello should work with Near to capture Kira, he refuses, citing an inability to work with somebody he is considered "second" to. He leaves the orphanage soon after, stating "I'll find my own way," and eventually seeks help from the Mafia.


Mello is a smart character; however, his mechanic actually is not performed by him. Mello's friend, Matt, comes out and sets up surveillance equipment and other things from some inputs. These have varying effects on Mello and the opponent; anything from the opponent's recovery having a 25-50% chance of malfunctioning for a period of time, to Mello automatically dodging a particular group of attacks. However, setting up surveillance equipment without letting Matt die is the hard part; even if Matt stays alive, the equipment can be sabotaged easily.


* * * STATS * * *


WEIGHT: 7
SIZE: 8
GROUND SPEED: 2
AIR SPEED: 5
FALL SPEED: 9

Mello is... a pretty ordinary human. He hasn't got much going for him; he's not gigantic and buldging with muscles. He isn't fast. He can't fly. He's not even really a heavyweight. But none of these stats matter for what Mello has got up his sleeve: his brain.


* * * SPECIAL MOVES * * *


Neutral B: MAFIA LEADERSHIP​
Mello points forward in the direction he's facing, and one of his goons will appear on stage next to him. They have Mello's exact stats, and have different AIs. Each member's AI depends on how many mafia members are on stage. The first two will protect Mello. The next three will passively attack opponents. The last two will actively hunt down and attack opponents. Mafia members have 20 hitpoints, but can be constantly replaced. The biggest problem with Mafia goons is when they die; they lie on the ground and usually don't disappear. For each one you defeat, there is a 50% chance that they aren't actually dead and will jump up and attack you for 10% damage! A good way to tell is if the bodies disappear; if none of the mafia members' bodies disappear, then there is at least one still alive. If they DO disappear, then they were all dead. Mafia members can be attacked by Mello, but will not fight back usually. Their normal attacks deal 5% attacks, and range depends on their weapons; brass knuckles, chains, or small handguns.

Side B: KIDNAPPING​
Mello slaps on a biker's helmet as a motorcycle appears next to him. He climbs aboard, and after a full second, he starts moving at Captain Falcon's run speed across the stage! Mello can jump about Bowser's jump height/distance when on this motorcycle, but there is a half second lag between when the button is pressed and when he jumps. If Mello runs directly into an opponent, he will force them onto the back of the motorcycle with him, and they will have to work to escape this as if it were a double-strength grab. If the opponent escapes, they'll take 10% damage and get flung in the opposite direction of the moving motorcycle. Mello can jump off of the bike with a press of the A button when he is on it. He can use this move to force his opponents onto the bike, drive off the side of the stage, and then jump off to safety at the last second! If the motorcycle hits a wall or a high ledge, it will explode in a fiery blast that will deal 20% to Mello and anyone in range. Characters with a size over 10 will cauyse it to explode on contact as well. Mello must wait five seconds before making a new bike.

Up B: RELUCTANT ASSISTANCE​
The shinigami Sidoh appears next to Mello and flies him upwards for two seconds at the speed of Sonic's run. It cannot be controlled, but Mello gets one jump after the special which he can use to make a recovery. If opponents are hit by Sidoh when this move is used, they will be shoved hard to the side for 13% damage. This isn't the best recovery, nor does it have much of an alternative use. However, it can injure opponents with aerial protection because of its high priority.


Down B: MATT​
Mello takes out a phone and calls someone. After a second and a half or so, Matt appears somewhere on the stage far from Mello or the opponent(s). This move is used simply to bring Matt to the arena. Matt will avoid being in the battle, and will await orders to begin setting up his "devices". He has 20 hit points just like the mafia members, but cannot be summoned again after he is killed. Mello can summon Matt once per stock, making it dangerous to simply summon him whenever. If Matt has any devices set up on the stage, he will stay relatively near the last one built. If one gets broken, he will run to it and begin fixing it, which takes two seconds. Matt is armed, and if an opponent confronts him he is able to attack with his own handgun that deals 10% damage.


* * * STANDARD ATTACKS * * *


A: FREEZE​
Mello will call Matt for one second, who will stop all work that he was doing. This move can be used to quickly allow Matt to defend himself while working on his techs. Matt must restart what he was doing after this input is pressed. He will return to work when the opponent's attention is off of him for three seconds.

Dash Attack: SHOULDER TACKLE​
Mello rams his shoulder into his opponent as he runs, dealing 3% damage and low knockback. This is a move that can be used to allow Mello to forge a path to Matt if he has to.

Up Tilt: SURVEILLANCE TECH​
Mello will take a second to call Matt, who will also stop for one second. After the one-second phone call is over, Matt will take three seconds to set up a surveillance camera on the stage. This camera is called the Surveillance Tech, and allows Mello to have a combat advantage against opponents. If the camera has line of sight to his opponent, Mello will have a 25% chance of autoblocking / dodging each attack. Matt can give the signal multiple times to have Matt upgrade the camera to as high as level 3, which will give Mello a 75% chance of autoblocking/dodging attacks. The camera, however, has 10 hit points and can be destroyed very easily. Upgrading the camera will take another two seconds, leaving Matt open. Characters block line of sight, meaning that Mello will need the opponent to be between him and the camera for it to actually work. Multiple cameras can erase this problem.

Side Tilt: SABOTAGE TECH​
Mello will have another one-second phone conversation with Matt, who will take three seconds to set up a laptop. The laptop will affect the opponents and will pick one random special. The special in question will have a 25% chance of malfunctioning! Matt can be ordered to upgrade the sabotage tech to level 3, where that special will have a 75% chance of failure. The computer has 10% hit points, and can be destroyed like the other techs. To switch the special that is affected, all of the computers must be destroyed and a new one must be made. When a move malfunctions, its startup will be doubled, and the move user will detonate for 13% damage.

Down Tilt: SMOKE TECH​
Mello will call Matt *again*. You get the drill by now. However, Matt will set up what looks like a gas canister... This gas canister, when attacked and destroyed by ANYONE (it has 5 hp), will let off a cloud of poisonous smoke that will be a 1 BF platform diameter circle. The smoke will deal 2% per second to anyone in the cloud. Matt can level up the gas canisters, making them 2 or even 3 platforms in diameter. Level 1 smoke clouds last for three seconds, while Level 3 smoke clouds last for nine.


* * * SMASH ATTACKS * * *


Forward Smash: HANDGUN​
Mello takes a half second and pulls a gun on his opponent! This move is extremely fast and deals 14% damage. The bullet is 'to scale' to Mello, making it an abysmally tiny projectile... but it deals large knockback, hefty damage, and it's fast. When Mello reaches for his gun, block!

Up Smash: LAUNCH PAD​
Mello calls Matt for a second and a half. Matt will cease whatever he is doing, and create something that looks like a hole in the ground with a metal grate over it. After five seconds, the grate will open and a large missile a battlefield platform long will shoot upwards and go offscreen. The missile will come back down after another five seconds, locked onto a random opponent. It will detonate on contact, dealing 22% damage. How do you dodge it? Keep moving! It's not a homing missile. And yes, if the missile hits an overhang on its way off screen, it WILL detonate prematurely.

Down Smash: IMPORT​
Mello has ANOTHER conversation with Matt for one second. (Talkative, no?) A supply crate will appear next to Matt, and any and all mafia members will go straight to him. Matt and the mafia members will be equipped with shotguns, which will deal 20% damage, but only get five shots before they return to their old weapons. Shotguns also take two seconds of startup lag before firing. *click, click*


* * * AERIAL ATTACKS * * *


Up Aerial: SIDOH'S ASCENCION​
Sidoh appears behind Mello and grabs onto him, flapping his wings heavily and propelling them upwards a ways before disappearing. Opponents hit by Sidoh's head or wings take 12% damage. This move can be used multiple times in a row, but because of Mello's fall speed, it mostly just lets him hover awkwardly in the same general area.

Forward Aerial: QUICKSHOT​
Mello stops in the air and pulls his gun, shooting three times: straight ahead, and up/down at 45 degree angles. Each bullet does 20% damage and is extremely fast, but it's generally easy to dodge this move. Mello can use it once every five seconds.

Back Aerial: SIDOH'S RETREAT​
Sidoh appears behind Mello and grabs onto him, flapping his wings forward and propelling himself and Mello backwards. This move is strange, in that Mello can use his forward aerial while this move is occuring. He can also go straight from this to his up air. Opponents hit by Sidoh's wings or by Sidoh's back will be knocked backwards for 13%.

Down Aerial: CLEAR THE FLOOR​
Mello pauses in mid-air and shoots below him twice. This move only does 12% damage, but stuns opponents heavily for three seconds. This move can be used in conjunction with back air and up air to detonate gas canisters and get out of the area quickly and easily!

Neutral Aerial: STOLEN NOTEBOOK​
Mello pauses in mid-air as Sidoh holds him up. He takes out a... Death Note?! Oh god, here we go... This move affects all opponents within one battlefield platform of Sidoh and Mello. They collapse to the floor and begin siezing for five seconds, taking 3% per second. However, Mello continues writing in the death note, and the opponent gets back up... that's not how they'll be dying, I suppose?


* * * GRAB GAME * * *


GRAB​
Mello grabs his opponent forcefully around the neck/by the shoulders, depending on how big they are.

PUMMEL​
Mello pulls back and knees his opponent hard in the stomach repeadedly for 4% damage!

Up Throw: CARRYAWAY​
Mello holds his opponent off the ground as Sidoh picks them up and carries them high over the middle of the stage. The opponent must work twice as hard to escape Sidoh's grip. And when they do, he throws them down violently, dealing 10% damage on landing! This move is one of Mello's opponent-restraining tactics, which is nice since you can't use one more than once at a time.

Forward Throw: GUT SHOT​
Mello pulls his gun on his opponent. You know where this is going! He shoots the opponent in the stomach for 20% damage, and roundhouse kicks them to the floor. This throw is good for damage racking, but counts toward the "five seconds between gun attacks" rule.

Back Throw: STORAGE​
A gigantic shipping crate appears behind Mello, and he shoves the opponent inside and locks it. This throw does no damage, but the opponent is forced to get out of a 3x strength grab. The box can of course be rigged with smoke containers, and it will get inside the box, making this good for pinning opponents in place.

Down Throw: C4 YOURSELF​
Mello straps a black box on his opponent and releases them. After eight seconds, the opponent will be enveloped in a large explosion that deals 30% ... Unless they pass the box to someone else, which they can do by touch. The box can be passed between opponents, Mello, Matt, Sidoh, and mafia members, making it a REALLY awkward game of hot potato for everyone! If an NPC has it, it will detonate when they die.


Final Smash: RIOT​
Mello makes a phone call, and suddenly, the stage is overrun by dozens of mafia members! They respawn when killed for twelve seconds, and all start with shotguns. Mello is invincible and dresses up like the other mafia members to blend in with the crowd. Matt's techs become indestructable, as well!


* * * OVERVIEW * * *


Mello's goal is to use Matt to create a cheap advantage over his opponent. While he does this, he must also somehow keep Matt alive. He can do this by causing all sorts of chaos, trapping opponents in containers, using Sidoh to distract, set off gunshots, set off smoke bombs, and let his grunts run amock over the stage. The chaos can be used to get a kill or two in and of itself, but... You know.


* * * EXTRA * * *

Taunt

Mello's taunt. This had to find its way in somehow! Mello's taunt is to take out a chocolate bar and start eating it. The chocolate bar can heal up to 100% damage... BUT, the thing is, it does this by taking 2% off of every attack that hits Mello. So one chocolate bar will weaken 50 blows! It's an interesting little easter egg, even if it is marginally helpful.
 

flyinfilipino

Smash Master
Joined
Sep 11, 2007
Messages
4,319
Location
North Carolina
And now for a different kind of Trainer...


Mark joins the brawl!


- Introduction -

Who's Mark, you ask? Mark is the player character in Pokemon Trading Card Game for Game Boy Color. He plays the Pokemon TCG and travels all over his island, defeating Club Masters and earning Medals. Sound familiar? Yep.

In Smash Bros., Mark doesn't really do any of the battling: his Pokemon cards do that. That's what they're for, right? Mark carries around a deck of Pokemon cards, and when he uses an attack he swipes a card from it, instantly causing something to appear beside him (usually a Pokemon) and attack the foe. I guess you can just assume that the Pokemon are some kind of solid holographic projection, or something. Anyway, the Pokemon usually linger around as hitboxes for a second or two. For the most part, you can bring forth two different Pokemon at a time and even move around between attacks, which can lead to some interesting strategies!

To view images of each card, just click on the name of the attack. You probably know each Pokemon anyway. And here's some catchy music from the Pokemon Trading Card Game if you wanna listen while reading:

Mason's Lab/World Map
Normal Duel
Imakuni's Theme
Water/Rock/Psychic Club
Club Leader Duel
Grand Master Duel
Pause Theme

- Stats -

Size - Medium
Mark is about as tall as Pit.

Weight - Medium
And he weighs about as much as Pit.

Dash Speed - Average
And he runs about as fast as Pit.

Jump - Average
And he jumps about as high as Pit (though not multiple times).

Fall Speed - Average
He falls about as fast as Pit.

Air Speed - Average
And moves through the air about as well as Pit.

Traction - Average
His traction is as good as Pit's.

Mark can't crawl, wall jump or wall cling. Just like Pit! Though he can't glide either.

- Special Moves -

Neutral B - Caterpie

Playing Evolution cards to upgrade your Pokemon to big, bad bruisers is a major strategy in some decks. So we'll take the concept and apply it to this one attack! When you use this move, Mark swipes a card and a little Caterpie appears in front of him. How cute! And then it spits a line of webbing straight ahead for about the same length as Sheik's Chain before it vanishes. Any opponents hit by the String Shot become wrapped in sticky webbing and are unable to do anything but try to button mash out of it, like a grab. When a foe breaks free of the webbing, they jump into the air a little bit, so you can't keep String Shot-ing them over and over. Naturally, you can use this to incapacitate the foe and hit them with another attack.

However, something different happens if you use this attack at least one minute into your current stock. Instead of Caterpie, a Metapod appears! Looks like Mark drew the right card and evolved Caterpie. When it appears, Metapod uses Harden and flashes with a metallic glint. From here, this attack functions essentially exactly the same as Pit's Mirror Shield move, reflecting projectiles and repelling physical attacks. Once hit, Metapod disappears; otherwise it remains in play for about a second. And finally, if you use this move after at least two minutes have passed in your current stock- you guessed it, a beautiful Butterfree will appear before Mark instead! When it appears, it gives a quick flap of its wings before vanishing, sending a Bowser-sized cloud of blue powder forward. This is Sleep Powder, and naturally, it causes any foes hit by it to fall asleep. Like any other sleep move, the higher the foe's damage, the harder it is to button mash to wake up. The cloud doesn't linger at all, so make the attack count. Also, it goes without saying that if you lose your current stock, you'll have to start all over again with a wee Caterpie when you use this move.

Side B - Voltorb

Mark swipes a card and a Voltorb appears on the ground in front of him, which starts rolling forward at the speed of Samus's Super Missle. It travels for a distance of nearly two Battlefield platforms before slowing to a stop. If it hits anything while rolling, it does what Voltorb does best: explodes! It'll deal 10% damage with moderate knockback. It'll also explode about a second after rolling to a stop if it doesn't hit anything else. Voltorb can roll off edges and it follows terrain and gravity, so be aware of where it is; it'll explode on you if you're not careful!

Down B - Ditto

Mark swipes a card, and a Ditto appears beside him! Ditto stays close to Mark and follows him around wherever he goes for about 5 seconds before disappearing. But what does it do? Well, Ditto uses its transformative ability as a sort of defensive mechanism. If a foe's attack is about to hit Mark, Ditto will rush in and immediately Transform into the foe and perform the same attack at the same time, causing them to clash. Well, how's this any better than just shielding the attack? Remember, you're able to play two Pokemon at a time, and Ditto's Transform is automatic, so while your foe is busy clashing with Ditto, you have a chance to prepare a counterattack!

Up B - Gust of Wind

Hey, this isn't a Pokemon! It was a pretty good Trainer card back in the day, though. This attack doesn't make any Pokemon appear. If used in mid-air, Mark swipes a card and a gust of wind will cause him to swiftly be lifted high into the air like Sonic's Spring attack, complete with a couple of leaves thrown in for visual effect. You can move slightly left and right with the Control Stick as you rise to gain some horizontal distance. You can't use Gust of Wind again until you touch the ground, but you're not left in helpless at the end of the move. And while this attack will never affect your opponent, it has one more application; you can use this to send Pokemon flying as well! If used on the ground, the gust of wind experiences a slight delay as it starts up in that particular spot. This gives you time to move out of the way so you don't get caught up in the wind too. If a gust of wind catches any of your Pokemon as they appear during an attack animation, it will lift the Pokemon sky-high in mid-attack. Applications of Gust of Wind, both practical and non-practical, might become apparent to you as you read each individual move that follows.

- Standard Attacks -

Jab Combo - Hitmonchan

Who better to execute a jab than the Punching Pokemon himself? Mark flashes a card from his deck and a Hitmonchan instantly appears right in front of him, firing continuous, rapid-fire punches that deal 2% damage and flinching knockback per hit for as long as you hold or mash the A button. When you stop holding or mashing the A button, Hitmonchan will continue to rapid-fire punch for about 1.5 seconds before vanishing.

Forward Tilt - Scyther

Mark swipes a card, and a Scyther appears facing him about 1.5x Battlefild platforms away, ready to strike. After a split second, the Scyther lunges in Mark's direction with a slashing blade extended, so fast that it's nearly invisible. It stops right in front of Mark before vanishing. Any foe that Scyther came into contact with during its dash takes 7% damage and moderate horizontal knockback. However, the knockback is in Mark's direction! You can use this to knock a foe at a distance into Hitmonchan's jab, or a number of other moves that we haven't even gotten to yet.

Up Tilt - Pidgey

Mark swipes a card and instantly, a flock of four Pidgey will emerge from the ground beside him and fly upwards at a 45 degree angle with a flurry of flapping wings. The Pidgey fly to about Bowser's height before vanishing, each dealing 2% damage and low upward knockback as they hit the foe. This is obviously a good juggling tool, and the best part is that even though there are four Pidgey, they all count as one Pokemon, so you can prep another attack at the same time!

Down Tilt - Diglett

Mark swipes a card, and pop! A Diglett pops out of the ground a small distance in front of him. Diglett is about as tall as a crouching Pikachu, and deals 4% damage and low upwards knockback. This attack is highly spammable, as just as suddenly as Diglett appears, it retreats back into the ground again. There's also a 5% chance that when you use this move, a Dugtrio will pop up instead, dealing 12% damage and above average knockback.

Dash Attack - Tauros

Mark stops running and swipes a card, causing a Tauros to appear beside him with a loud cry and already in the process of a raging charge forward. The Tauros will charge at Bowser's dash speed for about 1/3 the distance of Final Destination before disappearing, running off of platforms and even the stage if need be. Any opponent he comes into contact with will take 10% damage and above average horizontal knockback. Keep in mind that you'll only able to summon one other Pokemon until Tauros ends his stampede.

- Smash Attacks -

The charging animation for all of Mark's Smashes is the same; he prepares to pull a card from his deck. Your opponent won't know what's coming!​

Forward Smash - Charizard

Hey, he's already a character in Smash Bros.! As Mark swipes a card, a Charizard appears beside him with its head drawn back, ready to unleash a deadly Fire Spin attack. Charizard breathes a stream of fire at the ground in front of Mark, which begins to circle and form a twisting column of flames as wide as Kirby and slightly taller than Bowser. Opponents touching the Fire Spin are sucked in and lifted slightly off the ground, taking a maximum of 21% damage in multiple hits. Charizard maintains this attack for about two seconds before disappearing, and as the flames dissipate, any foes that were trapped by them are launched away with above average knockback at a diagonal upward angle. Take advantage of the lingering hitbox to add to your opponent's pain with another attack!

Up Smash - Venusaur

As Mark swipes a card, a Venusaur appears beside him, and you can briefly see him absorbing tiny glowing light particles into the flower on his back. Then suddenly, a great beam of light erupts from the flower, reaching the height of the highest platform on Battlefield. The Solarbeam is about as wide as Kirby and lasts for just a moment with an added half-second of cooldown. Any foe struck by the blast takes 20% damage and high vertical knockback. This move is slightly telegraphed, but its range and power can make up for it. Besides, you have other moves that you can use in conjunction with it in order to get your foe into the right position.

Down Smash - Blastoise

Mark swipes a card, and a Blastoise appears beside him. What's he gonna do? Blastoise retreats into his shell and starts spinning rapidly on the ground while blasting water from the cannons on his back, causing it to spray on all sides. The Hydro Pump attack hits both in front of and behind Mark, and the total range spans an entire Battlefield platform. Opponents struck by the force of the water are sent flying horizontally with 16% damage and above average knockback. Blastoise keeps spinning for about two seconds followed by a brief period of end lag. If you use other moves to cover Mark's vulnerable sides during this attack, you'll have a pretty solid defense!

- Aerial Attacks -

Neutral Aerial - Starmie

Mark swipes a card and a Starmie instantly materializes in front of him, spinning happily in place in mid-air. Any opponents that come into contact with Starmie are dealt rapid hits of 1% damage (with a maximum of 7% damage) with flinching knockback. Starmie spins in place for about two seconds before disappearing and can trap opponents with multiple hits spinning attack, so consider placing Starmie strategically as an obstacle to your foe.

Up Aerial - Beedrill

When Mark swipes this card, a Beedrill appears in the air behind and above him. Then, the Beedrill quickly swoops down and then back up again in a shallow arc over Mark's head to hit foes with its twin poisonous stingers. Its entire flight covers nearly the distance of a Battlefield platform, so he gives pretty good overhead coverage. Opponents hit by Beedrill take 8% damage and above average knockback. This move might be slightly tricky to aim; try making the foe vulnerable to attack by making them run into Starmie first!

Forward Aerial - Raichu

Pikachu gets all the attention, so now it's Raichu's turn! Mark swipes a card and a Raichu appears beside him. It curls its body, and after a split second, it looses a powerful beam of electricity in a 45 degree angle downward. This Thunder attack deals 10% damage in three hits, after which the foe is sent flying with moderate knockback. The bolt of lightning is a little bit longer than Ganondorf is tall, so shorthopping this move curtails its potential a bit. Raichu discharges electricity for about 1.5 seconds, so make the most of the attack by jumping as high as you can!

Backward Aerial - Gengar

Mark pulls this card out and Gengar instantly appears at his back, facing the opposite direction. It makes a loud cry as it suddenly grows slightly in an attempt to scare off any foes. And it works too, as this attack deals great knockback! Unfortunately, it does no damage, has kind of a limited range, and only works if your foe is facing Gengar. It's not all bad news though, as Gengar pops up very quickly, so you can certainly catch a hapless foe off guard. This'll teach them to sneak up behind you!

Down Aerial - Farfetch'd

Mark swipes a card, and a Farfetch'd appears beside him at head level. Is it going to attack with its leek? Nope! Farfetch'd seems to be holding a large pot the size of Kirby in its feet, and after a split second, he lets it fall. Opponents that make contact with the pot take 9% damage and moderate knockback, although if a foe is unlucky enough to be directly under the pot when it hits them, they'll get spiked downward. The pot falls until it hits an enemy, the ground, or the bottom blast zone, after which it will disappear; however, be aware that Farfetch'd will stay on the battlefield as long as the pot does.

- Grab/Throws -

Grab - Alakazam

When you input a grab, Mark swipes a card and an Alakazam appears next to him. It raises the spoons in its hands in front of itself as they glow with purple psychic energy, and then sends them flying forward! The two spoons are connected by a stream of psychic energy. If the stream hits a foe, they'll get snagged and helplessly carried along back to Alakazam as the spoons make a return trip. From here, the opponent will be in a grab state in front of Mark. The spoons fly at the speed of Falco's Blaster shot and travel a Battlefield platform's distance before coming back to Alakazam. Also, it should be noted that while you have a foe grabbed this way, you won't be able to use any other attacks besides a pummel or a throw (so no chaingrabbing!).

Pummel - Damage Swap

And now Alakazam uses its signature Pokemon Power from the TCG! Each time you tap A while your opponent is grabbed, Alakazam will heal 1% damage from you and give it to the foe instead! This is signified by a pulsing aura that occurs each time the transfer is made. Note that you don't actually need to have any damage on you in order to hurt the foe; this pummel will do 1% per hit otherwise.

Up Throw - Dragonite

Mark swipes a card and a Dragonite swoops in from the side of the screen at high speed to snatch up the foe and take them off-screen! Then, the sound of something falling very fast is heard, followed by Dragonite clutching the foe while diving straight down at the ground from the top of the screen. He releases them at the last moment to send them crashing into the ground in a vicious Slam attack before flying off towards the camera. The foe then takes 10% damage and above average vertical knockback. Like Kirby/Meta Knight's Up Throw, this becomes more effective the closer you are to the top of the screen. It's also a good set-up for an Up Smash!

Forward Throw - Mr. Mime

Mark swipes a card and suddenly, a car horn is heard. From behind Mark, a Mr. Mime appears, and he seems to be driving an invisible car! Mr. Mime and his invisible car ram into the grabbed foe, sending them flying with 9% damage and moderate horizontal knockback. And the crazy mime doesn't stop either, that rascal. He'll keep driving until he covers a platform's worth of distance before disappearing.

Down Throw - Machamp

Mark swipes a card and a Machamp appears to grab the foe himself! He holds the foe up in the air with his two upper arms while giving them a couple of quick punches to the gut with his other two fists. Then, he finishes by leaping into the air and slamming the foe down into the ground with Seismic Toss. The foe is pitfalled into the ground and takes a total of 10% damage. I guess now is as good a time as any to mention that if you use your Down Tilt on a pitfalled opponent (whether from this move or anything else), a Dugtrio is guaranteed to pop out instead of a Diglett!

Backward Throw - Snorlax

Mark swipes a card, and a large Snorlax appears behind the grabbed foe, facing the opposite direction. It stretches its arms and lets out a huge yawn...and starts falling backwards! Oh no! It lands right on top of the foe with all 1014 lbs. of its body, sending the foe flying backwards with 12% damage and above average knockback. This is Mark's strongest throw, so use it when you're too lazy to set something up with his other throws.

Final Smash - Articuno/Zapdos/Moltres

The three original Legendary Birds make for a fitting Final Smash, no? Mark holds the three cards together in the air in one hand as you activate this move. First up is Moltres; the firebird appears above Mark's head and flaps its dazzling wings, causing a tall sea of flames to erupt in front of him! The flames reach about as high as two Ganondorf lengths and span an area nearly half the size of Battlefield. Any opponents caught in the fire take 15% damage in several hits. Next to appear is Articuno; it appears over Marks's head and spreads its wings wide, sending a flurry of large hailstones at your foes! The hailstones pummel pretty much the same area as the fire did, although they reach a little higher. Opponents caught in the hail take around 15% more damage in multiple hits. And for the big finish, Zapdos appears; it flaps its wings with a crash of thunder and launches a big lightning bolt that covers the same large area to hit foes! Opponents hit by the bolt take 15% more damage and are launched away with high knockback.​

- Playstyle -


majora_787

Smash Hero
Joined
Jun 23, 2007
Messages
6,122
Location
Texas
MARK

I won't lie, I like this set. It's something that RESEMBLES pokemon syndrome, but it manages to be perfectly unique. Every move is just a pokemon card. No sets within sets like an actual pokemon trainer, no character swapping, no other weird stuff. I do find it weird that only ONE move isn't a pokemon, but that's just a nitpick. This had some cool ideas, even including the evolution that you had going on within. I almost wish you had used the evolution mechanic more throughout the set, though.
 

MasterWarlord

Smash Champion
Joined
Aug 24, 2008
Messages
2,902
Location
Not wasting countless hours on a 10 man community
TEAM –GREAT- ROCKET

Having recently finished playing TCG and the unreleased state-side TCG2, I was very excited to see a set for this. . .With the approach you took with just having all the moves summon Pokemon, you could've done so very much, but you opt for the Pokemon just generally helping each other out by lingering a hit and pushing them with Gust of Wind. The moves are quite clearly for creative animations on individual moves when you have things like Pidgey turn into a flock and still count as one Pokemon.

You could’ve done a lot with how you chose to do the set, but how you chose to do the set doesn’t feel like a very good representation of the TCG. Not only are trainers (The metagame of the original TCG) and energy almost entirely unrepresented, you’re playing fully evolved monsters with almost every move. I also think that a set to universally represent the TCG is awkward when you’ll rarely find a deck out there with more than 2 types. The TCG theme is barely present at all outside having the Pokemon do the same attacks as in the cards to the point you could think it's a set meant to represent Pokemon gen 1 in general.

Obligatory praise for sexy organization.

ForwardArrow said:
The corpses left behind by more powerful attacks are a more significant benefit than you seem to realize. Kyubey's highly mobile and could certainly lure foes away from the corpse, before rushing back and eating it. He's faster than most characters and should not have all that much difficulty getting to it and eating it before the foe can stop him.
Lure them away with what? The only threat he has from a range is talking. Blocking them off from a range seems all too practical, and it’s not like eating a corpse has no lag at all. You’ll just get killed as you’re eating.

FA said:
...he's easy to zone? He has crazy mobility, and could pretty easily run away to lure the foe after him. And he can force foes to leave them in different locations via Down Smash + Down Special, anyway.
I’m not stupid enough to run past him. I’m going to keep myself between him and the corpses, then do a dsmash as he tries to get past me, and that’s if I’m a -brawl character-. For those that didn’t see in xat, the main defense Kyubey has is simply how few attacks hit him. Ganon doesn’t need more than his dash, dtilt, and uair when he just has to land hits in any form, and Kyubey’s attack speed does very little when there’s a pretty low ceiling for how fast attacks can get. Sure, maybe he can –fight- Ganon, but Ganon has too realistic of a shot. Wario and DK 100/0 with him tons of fast, powerful attacks that do both over and under 9% and hit the ground – Wario’s bike in particular laughs Kyubey out of existence.

FA said:
Projectiles aren't actually a big deal to him, you realize. Ones that deal 9% or less he can casually dismiss with his tail. And projectiles that deal more than 10% tend to be highly predictable and easy to dodge.
You’d be surprised what we could come up with in MYM Brawl, but even in regular Brawl, Zelda’s Side B wrecks his shit.

FA said:
...aw come on, no appreciation for the hyper Warlordian grab game in the second form? I practically made that specifically FOR you.
NEXT.

FA on Kyoko said:
She mostly cannot use the extended weapon "properly" as a balancing factor really. She can just fine in the actual series, but I feel making her mobile with such a huge hitbox would make her kind of insanely good. Not to mention magic and such. Also her weight is mostly using the logic of Zelda being a total lightweight despite being taller than her and wearing much heavier clothing. Maybe it's weird logic but eh.
Might’ve wanted to keep that consistent, then.

FA said:
You are aware that she can also use Down Smash on them while they are in pits, or try to grab them when they escape, Up Tilt them when the grab fails... there's plenty of reason for her to position them into a pit just fine. That, and you can also kind of move them off the edge, from which you can swing them downwards to spike them in a gimping maneuver. Oh and the Forward Smash and Up Aerial position just fine without ever using the spear head.
What you were quoting me on I wasn’t denying that you could do all of this. I was saying that poking at a foe inside of a pit wasn’t the cleverest of ideas and felt awkward on this character, put in just to make some more flow.

FA said:
The wall makes it harder to escape from pits, and she can slam the foe against it repeatedly with the Down Smash. That and you can use it to block the foe from recovering after you've moved them off the edge with a Side Special or Forward Smash.
Why not slam them against the side of the pit instead?

FA said:
She... doesn't really have that much trouble building momentum in the chain as long as there's a lot of distance between her and the foe. The chain still deals some damage and flinching and such to keep on the pressure, the momentum is only used up if you hit with the tip. And you might think hey then how do you hit with the tip? Use one of the moves that turns it back into a spear, the momentum is still there unless you go a bit without attacking. Not to mention the foe struggling to get through all the various hitboxes of your chain while they're trying to escape a pit, you can plenty well build momentum like that.
Perfectly fair.
 

Koric

Smash Apprentice
Joined
Feb 10, 2006
Messages
84
Location
Aiken SC

Marian, the former damsel in distress, has arrived to Brawl.​


Marian is a character from the Double dragon series (a spinoff based on Renegade which was a location of the Kunio series). She serves as Billy Lee’s girlfriend and/or possible love interest often has to be the damsel in distressed as she is often kidnapped by the shadow gang or by an unknown power. During the first game, she was KO’d before she was kidnapped by the shadow gang. The second time she was kidnapped, the shadow lord created an illusion to make it look like she was murdered. And the last time she had disappeared without a reason…only to appear before them while being completely processed by the spirit of princess Noiram, an incident which she has no memory of.

As time progressed during peace, Marian suddenly wishes for us to teach her how to fight. Though we reluctantly agreed with little confidence, it had become clear that she was able to execute their style during the first sparing session. Even with her obvious weaknesses, she is still capable enough to improvise and execute their techniques one way or another. As time progresses, Jimmy and I was really surprised on how dedicated Marian was to her training.

After much rigorous training she accidently discovered an ancient magic within her during a sparing session…the locked power of Noiram that was remained after the double dragon along with their allies defeated Noiram inside her. Despite Jimmy’s warnings, she trains herself and alongside the double dragon everyday as well as controlling her newfound power until one day she would be even with me.

- Billy Lee


Stats :

Size – 4.8
Weight – 3
Walk speed- 6
Run speed- 7
Air movement – 3
Jump – 6
Double jump – 3
Fall speed - 4


Advance techniques

Up smash – Spin kick

A signature technique of the Double Dragon, it’s known for its effectives against multiple enemies and gravity defying properties. It is often used frequently against common and powerful foes alike.

Upon execution, she slightly jumps with her left leg just slightly above the ground. Her body spins around with her right leg exposed for 7 times attempting to strike anyone on each side of her. The attack is executed slowly, but has a very fast recovery rate. The attack can do 16% damage only capable of killing at 173% at least while covering 9/10 of a stage builder block on both sides. It’s not known for its kill power in Marian’s case, but it has enough priority to even stop MK’s tornado.


The first technique that Marian perfected, a part of us was happy, but for some reason Jimmy became more cautious than ever. I wonder why…


Side smash - Viper kick


A powerful technique devised and mastered by the double dragon that transforms the user's ki into power. If mastered, the ki may have a chance to transform into creature based from the user's ki.

Unlike the double dragon, she is able to execute this attack not using her palms, but with a forceful kick. The ki will starts to surround her as she begins to crouch. During the execution, the ki travels around her from the body to the left leg making her a moving hit box as she travels over 1 ½ stage builder blocks. The attack in general can do 14% damage capable of killing at 143%.

Occasionally she might release too much of her Ki that the form of her attack may take the form of a snake's head. At that form, her range is increased that it can cover 2 ¾ stage builder blocks in total with higher knockback power and damage than her usual viper kick. The chances for her to execute this type of enhanced viper kick are around 7%. Be warned, the recovery time after this enhanced attack is costly


master mentioned that this attack was first used among us to be one with our true self based on the Chinese year. After looking at Marian using this attack, it makes us wonder if a dragon is compatible with a snake.


Down smash - Twin Flames


A projectile attack used by princess Noiram during the time she possessed Marian. It sticks on the ground like glue as it travels in a straight line across the room. Its damage is considered great as a projectile.

Using this attack, she emits twin ground fireballs that travel a half of a stage builder block on both sides doing 3% each capable of killing at 145%. After it traveled that far, it then flies upward surrounding her until the flames reach a stage builder. The flames are consistent, so it will not disappear when they hit someone or something allowing it to hit up to 7 times if the opponent is at full health. If it does hit an object, it will travel through it instead.

When we saw her use a ground fireball for the first time by accident, the skin of both Jimmy and me begin to crawl when we witnessed that attack. She has no knowledge on where she acquired this ability, but sadly we feel like she must not know for her own safety.


Standard techniques


Down tilt - foot sweep


This is a standard technique for marital artist around the world. Marian crouches to the ground and extends her leg in front of her as she spins attempting to strike the opponent's lower leg.

This attack can cover 8/10 of a stage builder block doing 7% damage. It’s not an attack to rely on for killing, but it has a high rate of tripping the enemy on the spot unless they have high damage. This attack isn’t known for killing her opponents, but more for setting up attacks or to just mess them up.


Side tilt - front flip


Marian uses her natural skills to perform a standing front flit while slightly jumping forward capable of hitting the opponent twice while covering some distances. Perhaps she was once known for her gymnastic skills...

Each only does 3-4% damage providing little knockback behind the two hits as she flips forward about 6/10 of a stage builder block. It is not known for its killing power, but its startup and recovery time is really fast. Marian would have little exposure with the range and frame rate of the attack. This attack cannot be canceled if it collides with a different hit box.

At this point we aren’t sure why she retains her original gymnastic form in battle. It’s annoying to stress her on the important of combat often enough, but I can’t help but ponder that such a technique might have its advantages…nah


Up tilt - rising uppercut


As one of the most devastating attacks of the double dragon, it’s often carried out in various teachings and executions. From a crouching position, executes a focused uppercut to the opponent launching them very high.

This attack has little range in front of her and can cover 6/10 of a stage builder block in height. It can do 6% damage capable of killing at128%. The attack execution is very quick as it comes out at frame 3.


Dash attack – sliding kick

This technique can execute a slide on the ground in a form of a karate kick to take down moderately strong foes. The attack is rarely used among the double dragon.

This attack has a good priority as she slides for 1/12 stage builder block. As she slides, the hit box will remain until she stops. Also the slide can reduce her size o 2 during the animation allowing her to slide under a few high attacks. The attack often launches the opponent upward lightly while doing 3% damage.


Ground recovery attack (back to the ground)

Marian recovers quickly by spinning her body covering both sides around her until she balance herself with her arms doing 2% damage. She then quickly returns to her stance.


Ground recovery attack (front to the ground)

Marian quickly press her arms to the ground and lift her body into a semi-handstand. She then twirls her body with her legs extended once striking all directions doing 5% damage. After her spin, she flips herself into her fighting form quickly.


Ledge attack

Marian quickly gets up with a small rising knee attack doing a good set knockback as it does 3% damage. This attack will make Marian move forward by half a stage builder block at the end.


100% Ledge attack

Marian struggles to get back up and executes a mid-range crouching kick doing 3% damage. This kick attack can even cover 2/10 of a stage builder block behind her


Grappling Techniques


Like the double dragon, they then to grab for the head before they do anything else. Her grab range is 3/10 on her normal and dash grabs. Her grab range is 4/10 on her pivot grab.

Keep in mind that she has several special grab attack. The basic grab attack acts normally, but her up throw and down throw grab attack is timed based so the opponent can break out depending on how long they had been at that position and/or how fast the buttons was pressed.


Pummel – slap

This common quick slap can do 2% damage per hit. The attack is executed at a near moderate speed.

What’s wrong with a fighter slapping every now and then? As long it can harm anyone, its okay by my standards.


Up throw – close strike (grab attack)


The double dragon focus on their grab attacks by lowering their heads to striking range when close. Its an effective way to deal damage to them.

When she uses the attack, she may either attacks using a knee attack to the head doing 2% damage, or a hard elbow to the top of the head dealing 6% damage, then finally the boot to the head launching them forward doing 3% more damage capable of killing at 122%.

She may choose to end the attack at that point with a boot to the head as long the controller stick is still held up, or may tilt the controller stick in a different direction to attack a different way. Tilting on different directions after a knee or elbow will allow Marian to perform a slam (tilt back – 7% damage), a push (tilt forward - no damage), a DDT (down – 15% damage) that leaves the opponent and yourself on the ground, or by just pressing the attack button to attack with another random knee or elbow. Of course you can still have Marian to boot the opponent by tilting the control stick up once again. Keep in mind that only the boot can launch the opponent.

Marian didn’t mind getting physical when learning our grapples, but she didn’t felt confident when trying to learn the headbutt (down). We don't blame her though...


Back throw – heavy slam


Used often to finished in throws, the opponent is fiercely thrown at a great length. however Marian is clearly not strong enough to chuck any man or woman over with ease. So instead of the double dragon way, she decided to slam her opponents instead.

When executed the opponent be thrown to the ground behind Marian. The impact will launch the opponent upward doing 11% damage capable of killing at 176%. It only has a growth knockback so it has little to no knockback at perfect or very low health.


Forward throw - psychic toss


The psychic toss is a powerful attack that was originally used by Princess Noiram during the time she had control over Marian at Egypt. This was Noiram’s most powerful attack.

First, Marian pushes the opponent forward to build some distances between her and the opponent making the opponent stagger and exposed to an attack. (Think of it as Bowser’s grab release with a slower recovery for the opponent). If the controller stick remains tilted towards the opponent after she completes her push, she will then expose her arm and begin charging. When its charging, it flame aura will slowly channel thorough her body instead of slowing her animation. By releasing the controller stick, she releases the attack capable of doing 11% damage that may kill at 146%.

If you are able to hold the forward stick towards the opponent for 0.9 seconds without getting hit, she will automatically release a fully charged psychic blast that can greatly affect the opponent and anyone 3 ¾ stage builder block nearby her, so it best to be concern with at close range. At full power, she can kill even the heaviest opponent at 95% doing 23% damage as well as doing 5% to anyone nearby personal with a chance of killing them at 189% as they are launched in the same direction as the unlucky opponent in front of Marian. Be warned, the enemy can still attack when Marian is charging and can block this psychic throw. When she takes damage from the opponent while charging, the damage and knockback she received from that attack is tripled.

Though Marian has no knowledge on what happened during the Rosetta stone mission, she seem to retain some of Noiram’s magic during her training when we tried to teach her the dragon fist technique. Lucky her current power is no where as powerful as Noiram (thank goodness).


Down throw – tackle to ground pummel (grab attack)

In the past, the double dragon would any advantage they have to dispose their foe even if their opponent is down. In the world where they live in, all is necessary to survive.

She takes down the opponent to the ground leaving her on top of the opponent. From there, she will continue to attack the opponent face as long she is on top of them doing 1% each quick like punch.

From there by tilting the controller stick left or right, she will get off the opponent and roll on that direction or by tilting up or down, she will simply stand up. Either all, the opponent will still be lying down once she get off. Be warned, she will be knocked down if the opponent is released from this grab attack making her exposed to attack.

I did tell her to not be afraid to get close to your opponent, but after she learned her mysterious powers, I think she often gets too close to Jimmy more often for her grappling attacks. Somehow as scary she may be, it makes me jealous sometimes.


Z air attack – grab throw


An air type grapple attack that allows Marian to grab her opponents in the air often used on high terrains such as skyscrapers and mountains

Instead of a chain like attack that ranged grabbers like link used, she will grab while in the air with the same range as her throw. When grabbed, she instantly chucks the opponent with very little gravity doing 4% damage with a set knockback. It will always launch the opponent in a short distance regardless of the damage

Because of the height of the attack hit box, she cannot to grab anyone standing that is smaller her in height. She can still grab them as long they are in the air.


Air Combat Techniques


Normal air - flying kick


A standard martial arts move, she extends her leg to the point that it’s lined up with her body to execute a kick in the air.

Marian attacks with an adequate kick that does 8% damage at most providing little knockback. The range can cover at least 8/10 of a stage builder block and its hit box can cover the majority of her body except for above her. This attack also has a good priority making it an ideal move for spacing if necessary.


Back air - elbow smash


One of the most devastating attacks, the attack is devised to attack any opponent with a high elbow to the face capable of taking down foes regardless of their weight and height.

Upon execution, the attack can do 14% damage capable of killing at 112% at the starting hit box. Afterwards as the attack animation become stationary, it can do 7% at most while providing half the knockback. The attack can covering 4/10 range with the hit box exposed for 12 frames with a quick attack and recovery speed rate overall. It might be good for spacing in some cases.

Surprisingly through practice, she was able to get the style down to an acceptable level, but it’s no surprise that the execution had to turn out very differently even though it makes this technique more mobile.


Forward air – rising knee


Another of the double dragon techniques, she defines gravity and performs a forward knee attack as she thrust forward. Though it’s not a powerful, she executes it flawlessly in an instant.

During the knee attack, she instantly hops forward with accelerated speed and air movement with her knee in place (the hit box comes out at frame 2). The knee thrust animation lasts for 16 frames with its hit box surrounding that area doing little damage to those who over lap it. The attack can do 8% damage capable of killing at 159%. The attack recovery for this attack is fast in air and on ground. (She cannot hop forward or speed up again if she uses this attack again twice without landing)

During the first 5 frames of the knee attack, it has a hit box that a devastating effect. If it hits the opponent upon the knee release, the damage is altered that it can do 23% damage capable of killing at 84%. (Think of the effect as C.falcon’s knee.

It’s really surprising on how effective Marian perfected this technique. It’s more shocking that she was able to perform this in mid-air as if she was on solid ground. Then again, we shouldn’t talk as we can also defy gravity with our spin kicks.


Air up - rising drill


Using her personal experience, Marian hops upward and performs an upward drill kick that can hit multiple times.

The attack is capable of hitting the enemy for up to 6 times with good range and priority. Each hit can do 1-2% damage while the last hit can do 4% damage capable of killing at 179%. The attack recovery after landing is rather long, so make sure you are high in the air when using this.


Air down - moonbreaker kick


Marian performs the same drill kick to smash the opponent. Unlike her up air kick, this attack only hits the opponent twice.

This attack has the same range as that of the rising drill. It can do 13% damage capable of killing at 135%. If the attack hits directly below Marion legs, the opponent will be launched downward. Also the attack can hit again during its recovery after touching the ground before the attack finished.


Special Techniuqes


Special B - Hawk


A fire based attack derived from Princess Noiram. The bird flies around in a path in an attempt to hit anyone in its path.

When she uses this attack, she holds her left arm forward and quickly forms a small bird on her arm. After 8 frames, the bird will be at its full form and instantly fly off forward. The bird can very slowly go upward or downward depending if the opponent is above or below it. It can do 6% damage at most.

We were shocked when we learned that she is capable of this after she executed it by accident during training. For some reason she was able to replicate a hawk using her powers perfectly, yet she still has no memory on what happened at Egypt...


Up B – High shot


Noiram levitates to a high and safe place and releases a fireball at the position of the enemy. She then slowly lands on the ground.

However, Marian can only jump really high...higher than her jump and double jump combine. (But not as high as sonic's spring.) At the peak of her jump, she throws a fireball at a 45 degree angle below her (if she overlaps a ledge, the attack will cancel). The fireball can do 9% damage at most and has a low priority against projectiles and thrown objects.

We were sure she wasn’t able to jump that high before. Then again that is to be expected since Noiram’s power is surging through her body. Who knows what she would learn next...


Side B - leap kick

Marian leaps 2 stage blocks forward then executes a reverse flip kick. The then backflips 2 spaces behind to where she was at before her attack.

This attack has a high priority on both hits, but she goes through the opponent when she makes her first leap. When the opponent is hit during her back leap, they will be launched back with a lowered knockback. The first hit can do 8% damage capable of killing at 154% while the second hit does 3% that can kill at 196% alone at the center of a small arena. (She cannot go over the ledge either way).


We had to admit that she often get us off guard with a few hits of this defensive technique alone. At times, she would be so agile that it’s tough to keep up at times.


Down B – snake


This attack was originally created by princess Noiram using her mystical powers. As she turns herself into a fire snake, she descends into the ground only to reappear in an attempt to snag us from under us.

When this attack is used Marian changes into a snake and descends to the ground striking anyone whom is near her as well as immunity to attacks that time. She then reappears either two stage builder blocks to the left or right, or surface to the spot where she first used the attack. The attack is strong enough to do 13% damage when she uses the attack and when she rises. The snake can push the opponent several feet at most during the start up, but when she rises from the ground and strike the opponent, it can kill at 99%. It’s a good kill move, but only if you predict your opponent well.

We suffer a few injuries when we fought Noiram in Egypt, but we often had to keep moving if we want to survive against her. Marian would often wonder where she had this power from. Sadly I feel like she mustn’t know for her own safety.


Final smash - Princess Noiram

Ever since her hidden power has come to light, we fear this might happen sooner or later. The spirit of former princess who had reside inside Marian even since she was last kidnapped has been fully awaken to the point when she processed Marian completely once again. The last time, even with Jimmy, Chin, Ranzou, and I…we barely got out of there alive with her body unharmed despite our damage done to her. Jimmy and I often train daily knowing well that Noiram’s procession over the stronger Marian will be very troubling.

When Marian activates her final smash, her clothes and hairstyle will transform to that of the Egyptian princess and will autumnally levitate in midair slightly above ground. Her moves are limited, but most of them are powered up versions of Marian attacks. She cannot jump unless she uses her up + B. Once she executes 8 attacks or last for more than 24 seconds on the field, she transforms back to Marian.

By pressing the A button not related to a smash attack, she can create a giant fire like shield that can cancel out anything and can do 20% damage to the opponent providing little knockback.

Down smash - EX twin flame

Like Marian’s down smash except the flames travel solely on the ground. The damage they can do is double and can kill at 102% and can reach for up to 17 stage builder blocks.

Side smash – EX psychic toss

A very strong version of Marian’s forward throw it can affect everyone on the arena in front of Noiram regardless of distance. Unless the attack hits someone who is less than a stage builder block away, it will always do 5% damage with a knockback that can kill at 190% assuming the opponent was attacked on the center. If it opponent is on Noiram’s range however, they will sure to die at 64%.

UP smash – EX spin kick

Using from the knowledge and experience she learned from Marian, Noiram was able to duplicate the spin kick when Marian body was weak enough (which leads to Marian learning spin kick). Noiram uses the attack with twice the efficiency and speed even though the animation lasts for more than twice than the normal spin kick does. Along with her magic, she is able to create a fire tornado for a short while that can reach more 5 stage builder blocks above her as well as 1 ¾ stage builder blocks around her. A hit from the fire tornado will launch the opponent upward capable of killing at 86% while doing 17% damage at least.

Standing special – EX flame bird

Noiram fires a much bigger bird towards the nearest opponent. The bird can do twice as much damage and knockback as before and can lock on to them. The bird will last for up to 4 seconds.

Side special – Fang

This move is slightly similar to Samus’s standing grappler beam in many ways. Noiram extends a flame like snake and extends it in front of her up to 12 stage builders long. Once the snake grabs someone before it reaches its limit, the snake will act wildly with the opponent in its mouth until it will ultimately slam the opponent on the ground. The attack can do 34% damage and leaves the opponent on the ground.

If the snake grabs someone when they are no solid ground below them, the snake will instead launch them downward doing no damage, but with a knockback that can kill them at 23% in average.

Down Special – EX snake

Unlike Marian’s snake, Noiram’s can quickly turn into a fire snake three times her size and submerge into the ground. Afterwards, she can instantly appear below the opponent regardless of how far they are from her. The attack damage is doubled capable of killing the opponent at 92% at any part Noiram’s snake form.

If the opponent is outside the arena, she will instead resurface on the nearest ledge.

UP B – EX air fireball

Instead of jumping, Noiram will begin to fly for as long as she wants while she can move to any direction by using the controller stick. As long she flying in midair, she can fire as much fireballs as she desires. The damage of the fireballs is the same, but it now capable of killing at 133%

By landing on a platform or the ground, she can stop flying.


11/26 I decided to change her down throw since it doesn't seem right in a way. I also decided to not add anything else like .gif as it doesn't look good in general. The quality can still be confusing at most and can slow down computers.
 

Katapultar

Smash Lord
Joined
Nov 24, 2008
Messages
1,257
Location
Australia
Lucio Fulci is a moveset that, to my surprise, didn't seem to be as well-received as i'd think it to be though that's just the opinion of the others form what I've heard. Time to hear mine.

Quite frankly, I'd never heard of this guy or Romero before you posted their sets and enlightened the community with them; like, a good deal of my education actually comes from Make Your Move. Anyways, I noted that you took mention of Fulci's films being gory and the man himself being a visual stylist and an atmosphericist. I took this to mind and realized that you, whether it be your natural style or just a recreation exclusive for this moveset, did just those things....

You being the zombie-master of MYM manage to capture the inevitability of the "zombie apocalypse" thing in an arguably better fashion than Romero what with the Fulci player having no way of stopping it; I like how you take your time to explain the concepts about the Gates of Hell and the Italian-Style zombies that kill their victims in a gory fashion over the Americanization virus thing that Romero's zombies do...Fulci's zombies just seem so ridiculously unstoppable compared to Romero's, which all the more adds to the fear especially with they actually being able to kill players.

Your descriptive ways actually kinda scared me a little, to which I can say you aced that area; your choice of image for the zombies that the readers will see first is an excellent one that gives off a sense of, what can I say...indirect fear. It massively helps that you link the actual zombie images and youtube videos instead of cramming them in the actual set to stuff in readers' face. (your descriptions made me too scared to even click on them, as I could already imagine the zombie in my head...)

Perhaps, in my opinion at least, one of the most if not brilliant part(s) of the set would have to be that Final Smash. Maybe not in gameplay, but like you said, atmospheric stuff; your descriptions are so enigmatic and create a demanding sense of inevitable demise that it's one of the best Final Smashes literary-wise. That said, it seems like a bit of a waste to give up all your zombies just to inflict 45% on the foe maybe aside from the fact that it gets rid of all of them....or is the scaryashell zombie bit supposed to KO the foe instantly? You never really say so, but it's scary that you don't!

Maybe I haven't really gone into the whole playstyle jazz, and I don't really intend to as other people do that. Maybe aside from the while good, yet wooden-board looking headers but still good, I can say for sure that if anything, this set definitely succeeds in the department of set atmosphere...kind of ironic considering the reputation of Fulci's works from what I've heard. I think I've more to say but I can't think of it right now.


I don't know how many people have read it, probably a lot. But I must say, Jack Skellington is an absolutely amazing set. No really. I know for sure from your two mini entries and previous moveset that your writing style is on a completely different level but here it's put to such a good use with the entire Halloween feel and the character of Jack himself, which is displayed to such a ridiculously good extent and makes the set so enjoyable to read (the "bony" organisation helps with this to as much of a degree as it can; if you're not Ju-boy organisation can only get you so far); I don't need to tell you that the same goes for the playstyle as well in the case of such and the character. That and entire premise manages to work itself around Brawl too. Octavia had a more formal feel to herself, though in my opinion it is here where you put your talents to such a use that they shine through. Should it be alright to say, this is definitely one of my favorites in terms of movesets.

Also, it's funny because Jack Skellington would have a TERRIBLE match-up against Fright Knight because the latter negates skywards KOs with his ectoplasmic storm...then again it's only fitting, hehe (I totally wish I'd done that as an Event Match for the mini!). Also love those references you be making near the end of the set if you know what I mean...


Here's for Kyokou Sakura while she and Sayaka have the page. I can obviously see that you weren't going for a super-awesome moveset (or maybe you're hoping for this one to be received as such...) what with the simple enough organization (I'd personally expect, for a Madoka character, something more elegant-looking) and there being no Final Smash (but then again it's blatantly obvious what the Final Smash would be in the first place). I'd kinda imagine Kyokou as being a bit faster with her energetic personality (that and it seems that if you had your way you'd give every Madoka character a 1 in Weight); nice to see you get the obligatory food-love implemented in a way that's not TOO imposing but still has some kind of effect, cause it just has to be. It's also interesting to see you make no mentioning of the spear until the first move, which is a nice way to go I suppose, though it kinda feels as if Kyokou doesn't have the spear on her at the start of the match...or is that the case? Come to think of it, that actually suits Kyokou just fine.

Despite being a close-combat character Kyokou seems to be the type who has a deal of versatility in how she'd play what with the nature of her weapon. I feel to some degree that making Kyokou a bit of a camp-ish character and making her spear change in length and CURVE it makes it a wee bit awkward to imagine some of the attacks (the curving might be a misunderstanding on my behalf though); it'd be hard and overly detailed to get things explained to readers though it seems a bit of the information requires the reader to make their own judgement on how it works. I feel it only gets more awkward when you start mentioning freaking pits for a Magical Girl character. Upon reading the playstyle section I could actually understand your viewpoint with the extending of the spear (I had an over-exaggerated point of view on it and thought of Kyokou fighting with a spear as wide as half of Final Destination or something) and use of wall, though the whole pit thing still comes off as awkward to me. You'd probably argue that impalement is in-character for Kyokou but it just doesn't seem right and like you said she's not an inhuman monster (though wrapping the enemy up and throwing them around would be a-okay)

Hmmmm, I probably have a few bits of uncertainty here and there but you were really trying to represent this wonderful anime character to the best of your interpretation and ability, were you not? I can say you definitely got the important points down like Kyokou not being a powerful character and she having good-attacking range; though you probably wouldn't think it Kyokou is a character who seems to be able to be interpreted in a surprising number of ways. For all I know you (or somebody else) could have made her into a character with an excellent aerial and recovery game with the use of those walls, or even a character who could make further use of her walls by dragging enemies through them to inflict massive damage. You could have easily made more use of Kyokou's walls but chose not to, which is fine by me. I don't think this set is THE best representation of Kyokou Sakura in SOME ways (maybe more character love?) but is still a fine set by all means.

And while I'm here I might as well say that my idea of Kyokou involved making the Side Special the wall-summoning technique and give Kyokou the ability to wall jump off of it as a form of recovery (as she retreats by wall-jumping like mad in her introduction), with she having Lucario-esque wall-jump ability and have a recovery for each Special with insane recovery ability that'd make her difficult to KO. Probably wouldn't have suited her that well though.


So this is what you meant about the "King of Awesome" that entire time you had it in your signature....I thought you meant Ronald McDonald. What with those obvious hint at Bowser being your favorite villain/character of all time or so, I can definitely say that you've done the best you can for him in this moveset. It's great to see Bowser's arrogant, brutish personality play a big role in the first-person writing and in the moveset, especially with it being non-existent in Brawl's beast variation of the King. This is essentially, a MYM variation of Bowser, and one that's arguably a far more faithful adaption of the games than that of the Brawl version.

You definitely manage to get it right with how Bowser should be portrayed IMO by keeping his brute strength and fiery fury; you even manage to give the shell some much-needed attention, as well as the hammers that were absent from Smash! Not to mention there's no sign of the pitfalls of magic syndrome or minion summoning which is a big plus (the dark bits like the Side Special are perfectly okay however, as they at least show this side of him). I'm not a Mario/Video Game fanatic or anything but having played Super Mario 64 I can definitely say I enjoyed the appearance of those shockwaves which strangely electrocuted Mario whenever he got hit by them. (also it's amusing when you mention in the Playstyle section that Bowser is a spiteful character who can suicide kill when Ju-boy mentioned the same thing about him in his characterization article, something else you manage to keep about him)

I may just be repeating myself here but Bowser's personality is a rather amusing one that seems a bit downplayed in some of the Mario games (I say that never having really played any of the Mario & Luigi games however), but here it works to give the literary side of the set a high level of fun and amusement which I love. That and the awesome 3v1 Boss Fight (it'd be funny if Boss Bowser fought Boss Dark Bowser...)


Even if it's a 2 hour set AND a Death Note character, it's still awesome to see an anime moveset for a character who's not had a moveset done for them beforehand. Not really familiar with the character all that much from not being a sheep and watching all the episodes or so, but I at least know who he is if anything. Considering the universe this character comes from pulling off a working moveset in a fighting game would not be an easy task.

I find your perception of what kind of stats a "ordinary human" would have in a fighting game kinda weird as I'd kinda expect a person like Mello to be faster and probably weigh less unless he's supposed to have equipment "weighing him down". But that's just my opinion (though it'd probably be good if you maybe changed the running speed to a 5/6 or something and reduced the weight a little so it'd help him get around the stage). Also when you mention Captain Falcon's "run speed" you mean his Dash Speed right? I mean it'd be pretty awkward if the motorbike was moving THAT slowly lol (I think it's that you perceive "Dash" speed as being "Run" speed. There's nothing wrong with it or anything and I guess on most parts I'd still understand what you mean in the first place via common sense).

When I actually delve into the set, I realize that Mello has a good deal of moves that have him "call Matt" (and for one second, which is a bit of a while though you're probably trying to be realistic I guess). No, I'm not complaining about it in terms of redundancy or anything but it does have a good bit of mindgame-ish feel to it which works in well with the character (I THINK) and the series feel overall; it'd be pretty cool if you made a bit more use of this though how I'm not too sure.

I guess the playstyle obviously revolves around Mello trying to protect Matt, though to some degree it'd probably be good it Matt was actualy invulnerable to attack as I doubt he'd leave himself in the open like that in the actual series itself. If anything Mello's conversations seem a bit long and to some degree he's the one who needs the protecting...but then again you do have those Mafia members to help you, no?

For the most part I'm fine with everything you've displayed though I feel as if the Aerials may get a little bit tacky in the form of the two that require Sidoh (along with the throw) and the rather...repulsive D-air (I'm sorry if that was too harsh); 5 seconds seems a wee bit overpowered to some degree and while I guess it wouldn't be OOC for Mello to actually use the Death Note it just seems so out of place in that one move. If anything perhaps you could have made the Aerials involve Matt in some way where he assists you from the ground but then again you did make this in 2 hours so it's forgivable.

As a final bit of criticism (sorry), I feel as if some of your descriptions are rather vague and don't give enough detail as to how the move would fully work. Example? Let's see....if anything it'd come in the form of the Mafia Neutral Special and Down Smash, where you don't really describe the attacks or anything to a understandable degree; I think you had this same "problem" back in MYMX or so though here you're going for a more complicated kind of get-go what with the traps and minions compared to the more simplistic approach of the last contest so I can't say you haven't changed. Imaging how the character fights is one thing but trying to get it down on paper and make others understand as well as you do is another.

Considering that it's hard-as-hell to think up and muster the energy to make something like a moveset in 2 hours as well as not try to be too perfectionist about it I reckon you did a pretty good job with what you had and all.


What's this? A Pokemon moveset that takes straight from the TCG? Well this is certainally something new; I kinda know the TCG a little if only for having people I know around me who played it but don't anymore because of the new messed-up rulings. Hmmmm...come to think of it you did make that moveset for Yugi back in MYM4...are you by any chance a player of either or both of the TCGs? Guess there was bound to be at least one in the entirety of Make Your Move considering some of the uniqueness among the members you wouldn't expect.

I guess there is quite a lot of potential to be had what with all the Pokemon cards with it being your job to make something of it. The moves are rather simplistic but have a lot of variety to them and are pretty fun.


I don't think I've ever commented on one of your sets but that doesn't mean I can't start now! What with your last few sets or so I'm getting used to the nature of the type of characters you make sets for, it being fun to get some variety from different people.

It seems that you've taken the liberty of a few justified "magic syndromish" based moves or so though it seems kind of awkward for what's her name to randomly turn into a snake unless she's done it in her own games, though complaining about something so trivial wouldn't be very nice. Something I don't think you've really done in your sets, is describe certain attacks beforehand of what they are and so on and have that protagonist guy give some input, which I guess gives off a sense of mastery/fear that works with the whole idea of her being underrated like you said in the last bit of the set that's covered. (those gifs look fun though I feel you do a good enough job describing the attacks at hand; maybe you could get one of the other MYMers to help you. I wonder if it's possible to upload the images from that website onto something like Photobucket?)

You seem like the kind of person who makes movesets for the sake of doing so and has a good bit of fun doing so what with you having continually returned since the days of MYM9. You may not be the most prolific MYMer around but it's nice to see you come in and show us what you've got.
 

majora_787

Smash Hero
Joined
Jun 23, 2007
Messages
6,122
Location
Texas
Yeah, Mello was hard to write. I just kinda had to work with what I had. But I worked off the basis of this simple playstyle formula: Use minions to protect Mello and distract the opponenent. Use Mello to contact Matt and set up techs. Use the techs to give Mello an advantage in battle. Use Mello to break people.

He doesn't have much to work with. I also used stats comparable to other human characters, which is kinda... yeah.

That aerial was me running out of ideas. The sad part is, my next set will be even harder. But it'll get easier as I go through my to-do list. Han'nya has MUCH less to work with than Mello. I'll be hard pressed to make it work, but. Challenge accepted.

Also, yeah. I find run and dash interchangeable often in my head. It happens a lot.
 

Smady

Smash Master
Joined
Apr 29, 2007
Messages
3,307
Location
K Rool Avenue
I have a LOT of sets to read

Random Fulci comment ahoy! I was not a fan of the predecessor to Lucio Fulci, so perhaps that would better explain my fascination going into this set and seeing what all the hubbub was about. I can see why people would like it: very functional and interaction-heavy, largely making use of these logical traps that let you play as a quasi-director, quasi-survivor at the same time. Albeit, I read Warlord's comment before going into this moveset, but it also did strike me that the characterisation was confused, or at least not obvious, as it dabbles in quite a few different genres. One moment, Fulci's conjuring up humans to fight and the next he's entombing them with a bunch of zombies. This would be less significant if not for the fact that Fulci generally just treats the actual foe like an obstruction to his fun... which is cool if you look at it from a characterisation angle. It all ends up feeling more appropriate in a mode format, as trying to balance Fulci competitively would be stupidly hard. Not to say that's a bad thing.

I want to look past these smaller problems due to how unique the set feels to play as, but there are technical issues that blur the vision even more. Some of the moves sacrifice creativity entirely for the sake of functionality – the up air and up special in particular, which are both useful and create nice dynamics that are more than suitable for Fulci, but are both going for this overly simplistic feeling. It's there to compliment other attributes of the set, though there really is not that much in the set to begin with to justify having a lot of stalling, to overrun the foe with zombies. He does have some really neat ways to influence the horde as a survivor; he's amazingly well-equipped, plus the multiple moves you can use to set-up the zombies to attack opponents, it's usually clever. I find it hard to particularly like, though, given the fair hand you use with so many of the moves. Maybe it makes sense more for an old man to have such lame options available when not dealing with zombies, but again, the message is very confused and the set gives off some extremely mixed signals about what exactly it's trying to do. All of that in mind, I'm not quite sure how I feel about this one. That could very well be the purpose of the set.

Iggy Koopa's really good with the functionality in ways that aren't immediately obvious, squeezing out all potential from the one prop he summons. The interactions with the wand work into a simpler zoning playstyle that's effective alongside manipulating the chomp, and it seems very necessary to go for something like that when you already have the ingredients for a complicated mess with how mechanic-y the chariot has to be. As someone who didn't particularly like Tutankoopa, I appreciate the depth here while not bogging the set down in flowcharts – even more than Le Quack, you pretty much have the one bottleneck and there is at least a Brawl set below the chariot that lets Iggy work remotely without it. It's all really fun and intelligent construction of a smart and unique playstyle, when it's competing with a top ten set by Rool, of all people.

While your restraint is indeed impressive with the concepts, I did find that you went a little overboard with some of the flow with the chariot itself. Being able to tip it multiple different ways, hiding in it like a bunker and playing around with it as a generic wall slash seat come off as cool if slightly awkward by themselves, but together it ends up making the set feel too blatant in some of its interactions. Generally, I think that having there be a small part of Iggy's playstyle centred around just fighting over the chair is a bit excessive and it would be better if you just left that part of the equation alone, as you already do amazing things with the chain and chomp. Still, definitely my favourite set of yours that I've read and that's including Gangreen Gang.

A lot of feedback on Bowser goes without saying. It's a fantastic execution of all the smaller concepts about the character, which is amazing in of itself with how much scope it covers and the writing style only makes this more enjoyable. Having Bowser leaping around and spamming his down special to make pits is reminiscent of his Super Mario Bros. 3 boss fight in a way that I hoped you'd replicate, and you did so sublimely here, alongside the car being a safety net for him. To be honest, I don't know if I like the concentration on pits primarily – I imagined Bowser as breaking the stage down in blocks like he does in his fight [as meta as that sounds] and this would actually make pits more accessible than with indentations; I don't think this is the best direction you could have gone in for the character. Fighting in a pit so directly like this is imaginative, unique and refreshing for gimping, but it feels a little bit out-of-place when given such a big focus. What also keeps me from loving the set is that outside of the pits, Bowser's game mostly relies on some very basic, if satisfyingly Bowser-ish pressure. Certainly, though, the best remix in recent memory and a great tribute to the character.

With sets like Reznor, it's hard to gauge where the characterisation should come into proceedings and when it shouldn't. You capture most of the important aspects well – spamming fireballs, camping on the wheel and the stage destruction plays into these two aspects well enough to easily justify the unsmash concept of it all. You have plenty of interesting ways to play with forcing the opponent to have to try and mount your wheel by use of the remarkably layman hoops to jump through, as well as some pure mindgames with switching around the Reznors. The extremely pure mindgames of spinning the wheel, while the opponent has to keep an eye on it and your projectiles, was definitely the highlight of the set for me.

At the same time, there is redundancy – prime examples being the standard dedicated to faking out the foe by opening your mouth, slightly different hoops and fireballs, and some very convenient ground pound-y stuff. There also didn't seem to be much beyond a token KO move or two when you actually get the foe on the wheel, which felt like a missed opportunity when you take in mind the filler. I'd say it's a fair set at worst, though people may like it a lot more if they're willing to see past my problems due to the character. I'm fairly ambivalent, but I definitely appreciate how well you pull off the feel of Reznor.

Mello was shockingly good for a one-day set, especially compared to your Make Your Move X sets, Majora. It's rough around the edges, but man, the concepts are very much there now. The idea of being able to spam mafia men onto the stage at any time to basically just cause a distraction is great, if quite a bit unbalanced [which is easily fixed by number crunching and more explaining]. I also feel like Matt, being one member of the Ambiguously Gay Duo alongside Mello, should probably just spawn with him and likewise with the aerial minion – it's awkward to have to spawn these manually with particular inputs. This would also free up space for a special and you could blatantly move the stupid bike onto a less important input to make room for some basic minion ordering around, as that's one thing you missed out on. With some moves specifically designed to save Matt and a little more thought put into the mechanics [as well as some major jumbling around of inputs], this set could be on-par with similar minion sets like Kobold Clan. That, and explaining moves a lot more in-depth, which is something you are getting better at. Good job, Majora.

I found some fun in reading Trainer Mark for sure – having Pokemon linger out on the field two at a time doesn't break the mould in terms of flow, but it does allow for some basic combinations of very creative inputs. The moves outside the specials are all fine and definitely the whole thing is an awesome idea, but I feel the execution would have been a lot better had you focused core mechanics into the specials. You touch on evolution with neutral special and I feel like using a stacking mechanic here, or something serving the same effect, would have helped make the Pokemon feel more versatile and useful. Similarly, I feel like juggling mechanics for a card game like this would have probably been a better way to go than the other specials you had. The moves are all so simple outside the specials, you had plenty of room to play with them all at once.

That said, I still took a good deal of enjoyment out of reading the set, because it does expand on the concept misused in Moon Child – start lag all covered up by the same card swipes, meaning the opponent is never sure what you're doing next. Especially when you can then pile on another Pokemon alongside the first, the combinations and mindgames approach diabolical levels. Heavy mindgames on a card game set is very, very good stuff indeed. Because the flow between the Pokemon isn't significantly strong, it's hard to give the set too much credit for this, but it's still a very fresh concept and greatly helps differentiate the set from anything else we've seen before. So yeah, I do like this set all things considered. Especially without a playstyle section and how much depth there could be with more description, I'll give the set benefit of the doubt on a lot of this stuff.

This is also the first Koric set I've read this contest, and there have been three. I'm amazed at my incompetence. Marian is archetypal of your sets, but definitely makes some strides to improvement. You no longer have needless levels in a move that mean pointless charging up, which definitely helps work toward a general, but working rushdown playstyle. The writing style still needs a lot of work, but I do as well sense that you're improving here too. The set itself is a lot of punching, kicking and slamming, with some projectiles thrown in. Even when taken directly from the game, this sort of playstyle is very overused and should be avoided by giving her a unique attribute – for example, projectiles that hit the opponent while she's charging, or something that gives her more obvious personal traits. Granted, you pick characters who are very hard to make sets for. While the set isn't too inspired, your set making is very original and if you're happy to do your own thing like this, I can't say I disapprove. It's great to have you with us.
 

flyinfilipino

Smash Master
Joined
Sep 11, 2007
Messages
4,319
Location
North Carolina
@Mello: The word "Mello" makes me think of lots of things; Mello Yello, mellophones...but I digress.

And so we have another Majora set; you're on roll here, sir. I'm assuming this guy hails from Death Note because that's what it sounds like, but I don't know anything about Death Note really, so any references are just going to go over my head (hippo). But anyway, Mello's Specials start out with some thug summoning. You're a little light on the details here, but I can basically get the idea of how they're supposed to behave. I imagine there's a limit to how many you can summon at a time. :p I like the Side Special; it's crazy and cool. I have an issue with the Down Special, though; Matt seems to be an important fellow, important enough that he should probably just spawn alongside Mello instead of wasting an input summoning him manually. Down Special could then be replaces with one of those nifty tech moves, or something.

The lack of damage done by Mello's standards kind of worries me, although you have to find a place for those moves somewhere. The techs themselves are pretty cool and focus on shuttin down your opponent's attacks. They're not very realistic, but this is Smash Bros., so whatever. The setup of each tech taking a couple of seconds seems like a weak spot, but I guess that's what the mafia is for, huh? The shotguns given to the mafia thugs in the Down Special seem a little strong, but the startup lag kind of mitigates that, perhaps too much (a quick number fix could help out here). Mello has a cool aerial game with that Sidoh guy (though Forward Aerial seems a tad too strong?), but I'm not too keen on the Down and Neutral Aerials. Down Aerial's three second stunning seems out of place to me, and though I don't know much about Death Note, using a Death Note for an aerial attack seems out of place as well. Mello's throws are very nice for keeping the foe restrained while Matt does his business. Forward Throw seems to do a lot of damage, and the pun for the Down Throw is so (hippo)!

So, overall, I feel like Mello is a big improvement for you, majora. Even if this is a one-day set :p. Mello's gameplay is focused on getting Matt to help you out, and you give him plenty of tools to achieve this goal. There are a couple of rough edges, but I liked it. Keep up the good work! :bee:

MARK

I won't lie, I like this set. It's something that RESEMBLES pokemon syndrome, but it manages to be perfectly unique. Every move is just a pokemon card. No sets within sets like an actual pokemon trainer, no character swapping, no other weird stuff. I do find it weird that only ONE move isn't a pokemon, but that's just a nitpick. This had some cool ideas, even including the evolution that you had going on within. I almost wish you had used the evolution mechanic more throughout the set, though.
And thank you for the comment, majora! And that is certainly a good idea; though I guess I just wanted to make Caterpie feel special for being the only Pokemon that could evolve. :bee:

TEAM –GREAT- ROCKET

Having recently finished playing TCG and the unreleased state-side TCG2, I was very excited to see a set for this. . .With the approach you took with just having all the moves summon Pokemon, you could've done so very much, but you opt for the Pokemon just generally helping each other out by lingering a hit and pushing them with Gust of Wind. The moves are quite clearly for creative animations on individual moves when you have things like Pidgey turn into a flock and still count as one Pokemon.

You could’ve done a lot with how you chose to do the set, but how you chose to do the set doesn’t feel like a very good representation of the TCG. Not only are trainers (The metagame of the original TCG) and energy almost entirely unrepresented, you’re playing fully evolved monsters with almost every move. I also think that a set to universally represent the TCG is awkward when you’ll rarely find a deck out there with more than 2 types. The TCG theme is barely present at all outside having the Pokemon do the same attacks as in the cards to the point you could think it's a set meant to represent Pokemon gen 1 in general.

Obligatory praise for sexy organization.
You're right, it's not the most accurate or complete representation of the TCG, though I wasn't really intending for it to be. Most of the Trainers from the first three sets weren't very flashy, and I kinda struggled to find a use for Energy. This was mostly an experiment in trying something new with Pokemon, and I do acknowledge the fact that there are many, possibly better ways to pull this off, but I chose a simple route. Perhaps I can expand upon some mechanics in the future. Regardless, thanks for the comment, MW! :bee:

What's this? A Pokemon moveset that takes straight from the TCG? Well this is certainally something new; I kinda know the TCG a little if only for having people I know around me who played it but don't anymore because of the new messed-up rulings. Hmmmm...come to think of it you did make that moveset for Yugi back in MYM4...are you by any chance a player of either or both of the TCGs? Guess there was bound to be at least one in the entirety of Make Your Move considering some of the uniqueness among the members you wouldn't expect.

I guess there is quite a lot of potential to be had what with all the Pokemon cards with it being your job to make something of it. The moves are rather simplistic but have a lot of variety to them and are pretty fun.
Thanks for the comment, Kat! And thumbs up for remembering Yugi (my first moveset ever!), it was an inspiration for creating this one. I was mostly just a collector of Pokemon cards because they were pretty, I didn't actually play with them much. I did play YGO! a lot back in the day though. :bee:

I found some fun in reading Trainer Mark for sure – having Pokemon linger out on the field two at a time doesn't break the mould in terms of flow, but it does allow for some basic combinations of very creative inputs. The moves outside the specials are all fine and definitely the whole thing is an awesome idea, but I feel the execution would have been a lot better had you focused core mechanics into the specials. You touch on evolution with neutral special and I feel like using a stacking mechanic here, or something serving the same effect, would have helped make the Pokemon feel more versatile and useful. Similarly, I feel like juggling mechanics for a card game like this would have probably been a better way to go than the other specials you had. The moves are all so simple outside the specials, you had plenty of room to play with them all at once.

That said, I still took a good deal of enjoyment out of reading the set, because it does expand on the concept misused in Moon Child – start lag all covered up by the same card swipes, meaning the opponent is never sure what you're doing next. Especially when you can then pile on another Pokemon alongside the first, the combinations and mindgames approach diabolical levels. Heavy mindgames on a card game set is very, very good stuff indeed. Because the flow between the Pokemon isn't significantly strong, it's hard to give the set too much credit for this, but it's still a very fresh concept and greatly helps differentiate the set from anything else we've seen before. So yeah, I do like this set all things considered. Especially without a playstyle section and how much depth there could be with more description, I'll give the set benefit of the doubt on a lot of this stuff.
You're right Smady, evolution is something I could have probably made more pervasive in the set, but I guess I made the focus on combining Pokemon attacks and mindgames and stuff. There's definitely room for improvement, but I appreciate your criticism. Thanks again, SD! :bee:
 

Zook

Perpetual Lazy Bum
Joined
Jul 30, 2005
Messages
5,178
Location
Stamping your library books.
Gotta go to work soon, so I'll crank out a comment before I go.

MARK

The best thing about this set is the animations. They're all very cute. Mark plays like a defensive character, summoning Pokemon to defend him as he summons more. I wish you included a playstyle section at the end; he just seems like he would play like a bland defensive character, but I could have overlooked some things. Oh, well. As Warlord said, it doesn't feel very TCG-y. You were onto something with the evolution mechanic, but unfortunately it's only in one move. Even then, it takes too long to evolve Caterpie. A minute is a long time in Brawl, let alone two. Energies are also completely ignored, and I know that you could've done something cool with them. Overall, I feel like Mark is a pretty meh set. He doesn't do anything unique (outside of the cute attack animations) and doesn't showcase the Pokemon TCG very well, but hey, maybe you weren't trying to do that and just wanted to make a fun little set.
 

Smady

Smash Master
Joined
Apr 29, 2007
Messages
3,307
Location
K Rool Avenue
MYM11 User Rankings #5

Welcome to the User Rankings! Every Monday, I'll be compiling the entire of the last week's activity in the thread and showing off, just who is the most active member? The point of this exercise is to recognise the most dedicated among us – those make your movers who are currently pushing the boundaries, as well as highlighting all movesets made by them.

To get on this list, you need to have made a moveset in this or a previous Make Your Move, as well as having posted in the Make Your Move 10 thread. The cut-off point for tallying is 3:59PM on Monday EST, 5:59PM PMT or 11:59PM GMT; other removals or changes are at my own discretion. The breakdown of points is as follows:
30 points for a Moveset
5 points for a Comment
4 points for a Secondary Submission
2 points for a Secondary Submission Comment
1 point for a Regular Post
+Regular Posts do not stack
+Secondary Submissions are MYminis, Joke Movesets and other miscellaneous submissions
There was some doubt as to the continued activity this Make Your Move after the Halloween rush, and while things have certainly slowed down, we got a refreshing kicker in terms of sets last week, gaining two of the failed Koopalings sets and a whole bunch of magical schoolgirls on top of that. Not a bad week at all and it marks one of the first times in memory of Warlord taking the spot spot on the overalls. Your move, Smashbot.

In first place, predictably, is Warlord, posting a slew of comments on pretty much everything alongside his fifth set this contest, Iggy Koopa. Iggy has a very versatile playstyle focused on playing with his multiple cool toys, while juggling the foe along with them; recommended reading for sure. Next up was Kibble, posting a bunch of comments and a set as well, the hitherto best-received Kibble set in years, Sayaka Miki. From what I can tell, it's one of those sets that opens up at the very end and seems like a welcome return to form for our SirKibble. In third, FA was only slightly less impressive than Kibble with his continued rampage of commenting in the contest, posting Kyoko Sakura afterwards to solidify his position. Fun with weapons is all you need to know about that one. FA's rampage is only second to Warlord's at this point! Good work all around, guys, hopefully we keep it up.


Remember to check out the stadium to find all of the sets mentioned.

Overall User Rankings


Points: 90, Movesets: Gangreen Gang, Le'Quack, Hammerhead, JJJ, Iggy Koopa

Points: 55, Movesets: Sayaka Miki

Points: 51, Movesets: Vol Opt, Kyubey, Fruit Yummy Mummy, Gatsaf, Kyoko Sakura

Points: 45

Points: 41, Movesets: Majora's Sceptile, Leviathan, Deviljho, Jinouga, New Destroyman, Garrick, Mello

Points: 40, Movesets: King K. Rool, Double Header, Bowser

Points: 40, Movesets: Kimiko, Pokemon Trainer Mark

Points: 36, Movesets: Swalot, Death

Points: 30, Movesets: Reznor

Points: 30, Movesets: Rulue, Malcolm, Marian

Points: 25, Movesets: Farfetch'd, Chaos 0

Points: 10, Movesets: Box Man

Points: 10, Movesets: Mouse Man, Wolf Man, Flat Top, Lucio Fulci

Points: 10, Movesets: Fefnir, Harpuia, Phantom, Leviathan

Points: 6, Movesets: Kobold Clan, Fire Snake

Points: 1, Movesets: Marvin the Martian, Freaky Fred, Pussycat Puss, Count Chocula, Princess Kraehe
 

LegendofLink

Smash Apprentice
Joined
Feb 17, 2008
Messages
164
Location
Pennsylvania
Reznor
Man, MT. If there's one thing you're really good at, it's making the way a character fights just make sense, regardless of the character in question. Blowing up the sage to force them to ride the wheel is really awesome, and the fact that you can make do without the wheel if there are a decent amount of drop-through platforms for a custom configuration of Reznors is a nice touch. I do find the number of moves that are simply another flavor of fireball a bit boring, but there is really nothing you can do about that, so really great job overall.


Mello
Now this isn't exactly a character that I would have considered it possible to make a moveset for, but you certainly proved me wrong. It feels a bit broken, both balance wise and conceptually in a lot of places, with the sheer amount of minions you can clutter the stage with, to the devices that create random chances of things happening (random chance is a big no-no in my book). It does create an interesting dynamic of setting up the arena to guarantee your victory if you planned ahead well enough, a major theme in Death Note, so great job there. It has a lot of problems, but it's an admirable approach to the character, and a definite step above your previous work.


Mark
Now this a really cute concept, and one that really deserved exploring at that. I'm not as much of a stickler for "proper representation" of the TCG as much as I am for carrying general themes through the moveset correctly (as I've made a few sets based on TCG characters in the past). What's important here is that you've made a set for a player of the TCG and not just a character from it. For me, this demands that the themes of the set revolve around planning, timing, and the synergy of card choices. Mark pulls these off wonderfully, with the way you have to chose the placement and combination of the pokemon carefully, all while keeping mobile to stay out of combat yourself. The set could certainly use some refinement to allow the cards to interact a bit more or work together in neat ways, and several of the attacks (the evolution special, the randomly evolving Diglett , and the Farfetch'd, for example) come off as kind of lame. I really like this set though, as it pulls off it's concept wonderfully without compromising itself on gimmicky TCG mechanics.


Marian
Marian is simple, and to the point, and I can respect that, but it's not going to get too much praise from the audience you have here. As others have said, your writing is definitely improveing, and something you could do to improve it some more is being a little more even with your numbers. Rounding to an even 10 or 5 is a let easier to imagine, and not using so many fractions for distance and time would also be helpful. It's a lot easier to picture 0.75 than 7/10 or something similar, even if the amount of difference between them mathematically is rather small. Other than that, there's nothing to really critique the set on, as there's really not much there to critique. It's simple, functional, and would probably work pretty well in a real game setting. If that's what you're going for, then go for it.
 

smashbot226

Smash Master
Joined
Sep 1, 2007
Messages
3,027
Location
Waiting for you to slip up.
Smashbot's Not-So-Weekend Roundup

So yeah, you all better feel fortunate I'm taking the time out of my day to do this. I'm very busy between doing nothing and nothing.

I read Iggy Koopa prior to even beginning this post so it's probably the freshest in my mind sans Bowser. So Iggy likes riding around in his Chomp-drawn carriage while... well, that seems to be it. There's some additional humbuggery with the wand, throwing out the wand for attacks separate from Iggy, but it feels irrelevant to the main goal of the set, which is really just to stampede the foe. Hell, you could have benefited from moving the grab hitbox from Iggy to the wand, regardless of how many moves you allocate to the wand already. Luckily, it's a nice change of pace from your usual movesets, even if your main draw appears in the Dash attack. Either way, 3.5/5 for actually posting a goddamn Koopaling moveset.

Bowser... my God, Bowser. I'm pretty sure Smady has already said all of this but the way you implement even the tiniest characteristic of the character, an aspect that Brawl itself passes off as just for looks... Well, you really put effort into the set, drawing upon almost every appearance of his. Needless to say, the writing style just makes the set that much more enjoyable. Hell, I should just give you a 5/5 for giving Bowser his proper USpec. Like LoL, however, there are some parts of the set that just seem off to me. While I'm not going to doubt that Bowser's goal to bury his foe into the stage is proper, I do feel that the character in question is more concerned with bashing his foe's skull in. That and... crawling on walls just feels weird to me. That doesn't change the fact that this is probably the best remix of an already official set for SSB. 4.5/5

I'll be honest, when I read Reznor, I thought you made a set for Trent Reznor. Something I'm not ENTIRELY opposed to, but eh, four triceratops on rocks also makes perfect sense for a moveset. I do find it a little strange that FSmash seems to be a better version of NSpec that the other Reznors can't do. Oh well, I guess that's the appeal. And then the rest of it seems like the most overpowered set in the contest, regardless of where you are. It only SEEMS that way because if even one of your platforms is displaced, it can really screw Reznor's game up. This elaborate sort of playstyle really makes for an interesting gameplan. Just the wheel is a very new and interesting mechanic. 5/5

I guess I should go back a page and look over the characters I missed, starting with Sayaka. As far as I can tell, this lady is a part of the same series as Kyubey, who I should also give a reread and will probably recomment this week, along with Gerrick. Anyway, Sayaka herself reminds me of Vergil from UMVC3 in that she can summon swords that benefit her the most and depends on quick movements/attacks. But then she evolves into a strange sort of combo character that relies on her swords to chain attacks into each other. Naturally, I was worried about the strength of the set until the surprise of a playstyle section. Really helps balance out what would be an overpowering set in my opinion. All in all, I'm happy you're back... ish... Kibble. I was starting to feel lonely as a fossil. 5/5

Is it wrong I get the urge to call Kraehe Crepe? Yes? Okay then, I'll keep to Kraehe...p. She's freaking weird. Hell, even the writing style emits bad vibes. And some of the content in the set feels awkward. While you mention in the playstyle... well, there is no playstyle. So moves like DTilt and USmash seem awkward in comparison with attacks like DSpec and NSpec. Some sort of clarification would be nice as to what Kraehe wants to do with the opponent but from what I get, she likes keeping the opponent away with traps and projectiles. There's some neat variety between each input that definitely shows some thought put into the set itself. 4/5

BACK TO THE FUTURE!!! Kyoko is another character from the Magic Girl series or whatever. The specials, at first, read very awkwardly- seeing a girl even keep a grip on a spear possibly as long as Final Destination just gives off an awkward visualization. Still, there's a nice half-and-half between range options: spear for long range but crappy short range and chain for close range and slow moves. Since several moves flow between each form, there seems to be a lack of innovation on quite a few inputs. As if the flow between forms makes up for the somewhat dull moves. Still, it's quite a fun set to read and visualize. 3.5/5

Mello is the cooler of the two successors and blatantly the one who should have been the one to live. No, seriously. Screw Near. Anyway, the Matt mechanic's random effects- well, any mechanic that utilizes randomness for that matter- seems rather forced into the set to make it more interesting than it can be. Hell, a lot of Mello seems to be based a lot on chance, from Matt to whether or not the Mafia is dead... wait, what? This so-called randomness for Matt is actually allocated to the tilts? That's... better. Cool, even. Like what FF says, Mello is probably your biggest jump in quality. My personal favorite set of yours. 4/5

Cardcaptor Mark... oh, it's based on the Pokemon Card Game? Oh. Okay then. So it's basically not like any other Pokeset, even taking trainers into account, because, well, yeah. He's a card user. You could have tried a bit harder on the statistics section, but that's just me. Being able to use two attacks at the same time also seem in-character and further separate Mark from other Pokesets. There's a sincerely amazing mechanic with potential in evolution, specifically in Caterpie. I'm not going to ask that much of you since the set is already great, even by Pokestandards, but this evolution mechanic could be really great. There's still some problems with certain inputs with not much to offer, but all in all? Great set. 4.5/5

Marian is a Double Dragon character who should not have a set before any of the actual playable characters in the first one. Yet here we are. With some Noiran crap or something. Oh well, I can suspend disbelief- this IS MYM after all. There are a couple of problems that extend from beyond the set content: the writing style is kind of messy and while I like the digs at the game itself, some tweaking with the explanations/side dialogue would immensely help. Maybe get someone to proofread your sets prior to posting. Onto the set itself... you definitely focus on a rushdown set for Marian, although it'd help a lot more were you to post specials first, then normals/tilts, then smashes, then aerials, then grabs. It's the most common pattern in how several sets are posted and, unless the mechanic states otherwise, really help out the reader, since the specials usually relate to the main playstyle. Otherwise, the moves themselves have plenty of potential if you work a little more on it. 2/5
 

Akiak

Smash Ace
Joined
Jul 28, 2007
Messages
820
Location
In my secret laboratory.
Mello
I know you've already got like 10 comments on this set, but since it's my favorite anime character we're talking about, I don't care.
Before I start, there's a little problem in the stats: why so slow? He spends most of his anime screen time running around, he should have at least an over average run.
The way you incorporated Matt was the best part: the techs are all really interesting and add a lot of depth, although I'm not a big fan of randomness. I'll have to agree with Smady thought that the Down-B is a wasted input, since you could have made Matt appear the moment the first tech is ordered.
The addition of the mafia goons is a great idea, but it's very unbalanced. I think the goons should die like Matt once per stock, that would balance it out and prevent spamming. I love all three of the smashes, they're well-thought and work well in combination with the goons wreaking havoc around the stage, especially the down smash which is awesome. The aerials are also well-thought; they stand out for their versatility, I really like the idea of Mello using his F-air during the B-air etc. The only thing missing here is probably a more interesting use of the Death Note, which had a lot of potential as an alternative killing method one way or another (maybe as a new Down B?).
So anyway you've got tons of great moves which all work together very nicely. I was expecting a big, immersive, playstyle section, but instead I was pretty disappointed. Work on the playstyle, it's the only thing left to improve on. That aside, great job, this set is your best so far.
 

Illusive

Smash Apprentice
Joined
Dec 20, 2007
Messages
119
I'll get around to the fine details of zweilous later, but I can't help but post (after seeing a Bowser moveset get posted)

MEWTWO

Mewtwo returns to Smash, but this time, he has a moveset fitting of his power. His smash attacks and specials resemble final smashes, and he has many, many options for KOing at low %. However his approach isn't particularly great, and he's not exactly the heaviest character (although his recovery is very, very good). However it's next to impossible to get him from afar, and the nature of his special attacks mean you don't want to leave him alone and wait for the approach.

Notes:
Weight: Below Average
Jump height: Great (same as in melee)
Running Speed: Fast (he is one of the fastest pokemon in the game; he's only outsped by F-Zero Characters and Sonic Characters)

SPECIALS:

Neutral: Aura Sphere

It resembles Lucario's aura sphere except a purpler shade of blue., but it works a bit differently. When uncharged, they move in a similar way to Mewtwo's shadow ball. The more you charge, the more linearly it moves. However what's notable is 3 things:
1) The hitbox: The move instead of doing little shocks is actually an attack comparable to a decent tilt. It does 8 damage and knocks them away at a 45 degree angle, and the hitstun and knockback is enough that you get a decent charge in. It slightly depletes the charge, but you will almost always get a net gain of charge if it connects
2) The absorption: If an energy projectile hits Mewtwo while he's charging, all the enegy goes into charging the aura sphere.
3) The potential: The sphere is never "fully charged"; you can always "charge" it more (although it has a peak power) and you will always have to double tap B to use it. At full power, the sphere is almost as tall as mewtwo and does 50% damage. However the larger the sphere, the slower it moves; at this size if you're not directly in front of mewtwo, it will be pretty easy to dodge the sphere (and the launch isn't exactly the fastest move ever anyway).
*Note that you can launch spheres approximately as large as Lucario's fully charged aura sphere, and they will travel about as fast and have similar knockback*

Side Special: Psystrike

Mewtwo does a pushing motion with his hands and there's a wave of distortion in front of it. The distortion increases until it distorts the world into a sphere shape with a radius about as large as the radius of a barrel, at which point the ball starts solidifying into a purplish rock that gives an aura and rolling. This is psycho break, mewtwo's signature move from pokemon Black/White. The psychic waves from the distortion reflect all projectiles, but that's not why you're using the move. The ball stays solid until it rolls off the stage, although it does have friction and can slow down. Mewtwo can pick up and throw the ball/rock, but no other character can. It's about as powerful as a thrown beam sword, and mewtwo can throw it just as fast. If it his a character when spontaneously rolling, it stays intact (doing a bit less damage), but if it's thrown, the ball crumbles. There's another way to break the ball though; only one ball can be on the field at any given time, so forming another one will cause the first ball to break apart in a restrained explosion. The way to the most damage is to explode the rolling ball at just the right time before it hits someone.

Up Special: Shadow Force

Giratina's signature move, but this mewtwo is incredibly powerful and isn't afraid to use signature moves of other legendaries. It's basically the same as teleport, but with a twist. Mewtwo disappears, but when he reappears he's shrouded in shadow. When he disappears, if you smash a direction, mewtwo will travel decently far in that direction, and the shadow damage will be a small, incidental amount. If you don't however, mewtwo will reappear exactly where he disappeared and the shadow surrounding him will be massive and KO at low percents. The move's downside is there's a noticeable time between disappearing and reappearing.

Down Special: Doom Desire

Another fitting signature move from another legendary. Mewtwo does his smash attack charging animation, but then nothing happens. Or does it? If you go to where mewtwo did the charging, you will be hit by a grey explosion that makes a slicing sound. The longer the charge is held, the more powerful the explosion and the longer the explosion remains in place (before it goes off regardless). If you start charging another one or do a taunt, the old one activates, although only at half power that it would have if another character walked into the trap. Mewtwo can deliberately set them off under his feet to give him an upward jump; he can't be harmed by the explosion, and he doesn't set them off if he simply walks near where one is set. There's no way of knowing where the "mine" was set; you just have to remember, and it can be set in mid air.


Final Smash: Black Hole

What better final smash than a deliberate evoking of an old glitch. Mewtwo causes a black hole to form where he's standing. This sucks in everything nearby; you better not get close to it. Anything caught in the black hole starts racking up damage at an absurdly fast rate (getting up to 999% is a very real possibility if you get caught early on and mewtwo pounds you with attacks while you're caught). The black hole disappears after 10 seconds, and you have full control over Mewtwo during this time. The only problem is it has no knockback (it just traps and damages characters), so you'll actually have to get a hit in afterwards for it to be as potent as other final smashes.


Normal Attacks:

A: Blizzard
Mewtwo forms a little ball in front of it that does multiple hits. Similar to Zelda's neutral A. If held down it resembles mewtwo's multi hit attack from melee, except with a blue flame (instead of the purple one). Freezes at higher %s.

Forward Tilt: Aqua Tail
Unchanged animation from melee except there's an animation of water coming from behind the tail and if hit the same water distortion thing that blue pikmin do happens to the screen. If angled down it functions very similarly to mewtwo's down tilt from melee, while angled up is similar to mewtwo's up tilt and is good for launching into the air/starting a "combo".

Up Tilt: Thunder
Similar to mewtwo's old up smash, except with a cloud of electricity. Does multiple hits and the last one does good upward knockback.

Down Tilt: Fire Blast
Simialr to mewtwo's old down smash, an explosion of fire (actual fire this time) appears in front of mewtwo in the shape of Fire Blast from pokemon. Good knockback and mewtwo's fastest move that KOs in the same range as most other characters' smash attacks.

Smash Attacks Note: The charging animation for all three smash attacks is the same; mewtwo floats upward slightly, glowing. This is the same as the charging animation for his down special, as well as one of his taunts.

Forward Smash: Psycho Cut
Mewtwo rockets fairly far forward with dark purple swords glowing out of his arms. Multiple hits, with the last hit having good knockback. However the only way to get hit by that last hit is either to get combo'd by the whole move or to be standing in the exact right position; otherwise that last hit is sourspotted and is slightly weaker.

Up Smash: Selfdestruct
A massive (conventional) explosion happens at mewtwo's top half that does 5 damage to mewtwo and makes him flinch on the ground. KOs at ridiculously low percents, but a very high risk move; miss and you're damaged and wide open for a strong attack.

Down Smash: Solar Beam
Mewtwo lets loose a beam of light below him, similar to lucario's final smash (except it doesn't go through any platforms). If caught in the middle (which requires you to walk directly under mewtwo as he's charging) it's almost as powerful as Jigglypuff's rest, but more than likely you'll be hit by one of the sides, in which case it's power is more in line with other down smashes (although it's one of the strongest in the game). Hit's both sides, but has noticeable startup lag and somewhat short range.

Aerials
Neutral: Psyshock
Same as Melee, except now it's given a name
Up Air: Iron Tail
Same as melee, but if hit at the very tip of the tail, it has powerful knockback. The tail is glowing and makes a sword sound if it connects.
Back Air: Dragon tail
Mewtwo whips its tail, which is covered in a dark flaming aura, downwards. The tip does powerful outward knockback, while if hit at close range it's a powerful meteor smash. Has a bit of startup lag.
Forward Air: Shadow Claw
Same as melee, except with a larger range for sourspots (which is a weak, multi hit attack)
Down Air: Earthquake
A stall than fall, mewtwo rockets down and hits any grounded foes up with a strong shockwave. However if they're not on the ground, no damage. If they're buried (like after a DK headbutt) then it does double damage. The higher the fall, the stronger the move

Throws:
Forward: Shadow Ball
Mewtwo forms a ball around the enemy and then launches them forward. They travel forward incredibly fast, and how far they travel depends on damage (with fixed knockback up to 50%). Anyone hit by the thrown enemy takes very high damage.
Down: Earth Power
Mewtwo buries the enemy in a hole like DK's headbutt. The higher the damage, the longer they stay in the hole.
Up: Hurricane
Mewtwo spins the enemy around him a few times then launches him up. An incredibly powerful KO move - the only throw that can reliably KO mario at under 100%.
Back: Psychic
Mewtwo telepathically moves the enemy behind him and then launches them away. Another powerful throw, but easy to interrupt in free for alls.

Taunts:
Down: Same as melee taunt
Forward: Mewtwo laughs, puts his hands together and causes a shock. This detonates the current doom desire.
Up: Mewtwo glows yellow and floats upwards (same as his smash attack charging animation)
 

MasterWarlord

Smash Champion
Joined
Aug 24, 2008
Messages
2,902
Location
Not wasting countless hours on a 10 man community
THE CARNIVAL


Before players are permitted to enter the main stage, they start outside the entrance – a generic walk-off stage the size of Final Destination. The clown will blab his gums significantly about how he will die if he doesn’t get his medicine, and will only let the fighters enter the carnival if they will go get it for him, all in a very spiteful manner. If anybody steps in front of the clown, he will sneeze on them, infecting them with his incredibly under-elaborated on disease. This will cause the victim to automatically die in 45 seconds.

This phase lasts 20 seconds before the characters can enter the carnival, the gate opening and all characters automatically entering inside before the camera changes to show a view of the characters from the side. There are no walk-offs here, with the gate the characters came in through functioning as a wall. If it is too abused, though, the clown will poke his head through the gate and sneeze again. We’ll detail what’s on the other side of the stage eventually, but first, let’s talk about the four things in-between. . .


The first is a tent which becomes see-through if somebody enters it. The chairs can be picked up and thrown, dealing 12% and decent knockback, but if you press jab while holding a chair you’ll collapse it, enabling it to function as a surprisingly decent battering item. More important, though, is the cooler with a random anvil on it. The anvil has the weight of a Metal Bowser at 0%, and will have to be attacked significantly to move it off the cooler. Mike Dawson is incapable of dealing knockback to the anvil under any circumstances. If you manage it, the cooler will automatically open to reveal the medicine inside of it that can cure the clown’s disease. Don’t bother trying to give it to the clown – the moment you find it he dies (Thus making the wall he was guarding chain-grab fodder).


The first of the Carnival Games is the shooting gallery. If you stand in front of the man running the booth, you’ll be forced to engage in a laggy 10 second conversation. Regardless of whether it gets completed or not, you’ll receive a sniper rifle which essentially functions as a “projectile battering item” in that it replaces your jab, dash, ftilt, and fsmash like one, but fires bullets. Quite long range and powerful bullets, mind you, so it can potentially be worth it. After receiving the gun, you can press up in front of the man’s booth to shoot up his targets, forcing him to give you a teddy bear prize. Of course, he’ll be pissed and smack you whenever you come in front of him for 15% and good knockback afterwards. Teddy bears are indeed actual items, which seemingly serve no purpose whatsoever.


The next carnival game on the stage is Spin the Wheel. Standing in front of the man running the booth again engages laggy conversation, but he’ll automatically spin the wheel for you if you somehow engage in it, even if your conversation gets interrupted. There’s only a 10% chance that you’ll win the game, in which point your reward is another useless teddy bear. Note that if you are playing Mike Dawson your chances of winning are reduced by 11%.


The ring toss is the final one of the three games. After talking for a good 10 seconds (Or less upon interruption), the man running the booth will give you a ring, a simple throwing item. If you throw the ring at the giant phallic structure in the middle, it will go around it automatically, defying gravity to do so no matter how terrible your throw was. . .Unless you are playing Mike Dawson, in which case the inverse is true. Winning the game gives you yet another teddy bear.


And now we’ve finally reached the opposite side of the Carnival, after having traveled the entirety of the Bridge of Eldin length stage. Here is the entrance to the mirror maze. If you attempt to enter it, you will instantly appear at the exit to the mirror maze in the background before walking back to the stage, due to you having the intelligence to use the shortcut for the maze. If you are playing Mike Dawson, there will be a 60 second gap before you appear at the exit. What does this do besides give you some lag? Well, if you’re carrying a teddy bear, you will enter the dark world portal inside the mirror maze as you go through it. This will transform your teddy bear into a shrimp baby. When thrown at an enemy, shrimp babies will latch onto the target before ravenously attempting to devour them, dealing 20% per second. The shrimp baby must be mashed off at 4x grab difficulty. Upon button mashing off a shrimp baby/missing with a throw, they will scamper off into the background.
 

Katapultar

Smash Lord
Joined
Nov 24, 2008
Messages
1,257
Location
Australia

Ayano Minegishi


Ayano Minegishi is a character from the slice-of-life anime/manga Lucky Star. Although she's usually featured with the main characters Ayano herself is left in obscurity and thus is not very active in the series. Most of the appearances she makes are with her outgoing childhood friend Misao Kusakabe, who tends to hogs all of the spotlight. Ayano is a very sweet and feminine person who usually keeps to herself; her most prominent hobby is to make sweets as her family owns a cooking business. Ayano looks like the type of person who'd never get angry, but if we've heard anything from her best friend Misao that's quite the opposite if the girl's provoked in a certain way...​


Stats

Size - 5
Ayano is 160cm tall, which is rather small for a human.

Weight - 4
Ayano may be feminine but she's not as frail as one would think...

Ground Speed - 2.5
Of the main cast Ayano is second worst in the athletic department.
Though she tries her best she's shown to be a rather clumsy runner; she's more likely to trip than other characters.


Jump - 2
Ayano once tried the long jump event...I don't think she did very well...

Aerial Speed - 2
Passive Ayano usually keeps to herself, giving her weak aerial control.

Fall Speed - 1.5
Ayano silently drifts through the wind as if she was never there...

Traction - 10
Because both Peach and Zelda randomly have this as their traction.


Specials


Neutral Special -- Rirattanu

Ayano takes out her limited edition stuffed raccoon Rirattanu and hugs him, healing herself 20% a second from the sheer mental comfort the toy provides her; Rirattanu cannot be thrown by Ayano and must be held by her for an arbitrary 20 seconds before she's allowed to put him away again. This healing Rirattanu provides would make Ayano virtually immortal were it not a little mechanic she has that forces her to automatically yield any item she's holding to enemies who use their Pummel on her (foes can still continue their grab afterwards); Rirattanu will also be sent flying with a 0.5 Weight statistic when she takes 20% or is struck 3 times in a row and can be dropped by tripping.

So, the next step is for enemies to throw Rirattanu off the stage right? Except they WON'T be doing that because Ayano loves her stuffed raccoon Rirattanu SO much that seeing him damaged would trigger an unwanted emotion from her...that's right, any enemy who attacks, stands on, knocks a character into or throws/knocks Rirattanu off the stage will make Ayano really, REALLY ANGRY! When this happens, Ayano lets out a distressed scream as the top half of her face darkens; she'll cancel out of any attack or state before gaining quintuple stats, tripping immunity, invincibility (cannot be KO'ed at all) and has all her moves replaced with a really fast punch in the appropriate direction that inflicts 999% and instantly sends enemies flying off for the screen for a OHKO no matter what buffs, super amour, invincibility or reincarnation they have! Ayano calms down after 10 seconds of extreme anger where upon doing so she'll be healed of her damage and negative effects, with the KO'ed victim(s) respawning only at this time for obvious balancing reasons; Rirattanu vanishes upon Ayano becoming angry but can be used by her immediately afterwards. Getting angry is OBVIOUSLY Ayano's only method of scoring KOs or inflicting damage as a matter of fact, so of course her game will revolve around this move.

Making Ayano angry isn't as easy as it sounds however; she actually has to be facing the enemy on the same plane when they attack or step on her Rirattanu in order for her to get angry in the first place, and there must be no obstructions between them; if she fails to accomplish this she can always try retrieving her Rirattanu in order to check for damages on him. The only time this rule is ignored is if Rirattanu is knocked into a blast zone via the enemy throwing or knocking him into there or if Ayano herself is knocked into Rirattanu by an enemy attack, either of which will instantly make her angry!

Enemies could easily guard Rirattanu from Ayano to prevent her from ever seeing damages on him, should that ever happen, but unfortunately they can't do that forever; Rirattanu follows the same laws all items do and thus will vanish after being out of Ayano's grasp for 20 seconds. From there he'll become usable to Ayano again, with another use of him making Ayano aware of all damages done to him. The only way for foes to prevent Rirattanu from vanishing is to hold onto him though doing so will deprive them of their grab game and ability to use items until they KO Ayano...though it's not like they'd actually end up damaging Rirattanu in the first place, right?

To who it's relevant for, makeshift stage hazards or goop-type traps will damage Rirattanu upon touching him so it's highly advised to NOT use them against Ayano...at all. Also, any damage done to Rirattanu by an ally is ignored as to prevent allies from blatantly damaging him to make Ayano angry in Team Matches.


Side Special -- Green Tea

Ayano takes out a cup of green tea and holds it out as an item that can be drank with a Standard Attack input that heals 5% per 0.5 seconds for a total of 8 seconds and cures all negative effects upon being finished. This is a good substitute for Rirattanu if he's absent from you, though Ayano must wait 2.7 seconds for the tea to cool down before she can drink it and has her speed cut in half while she's holding it. In the meantime, other characters can take the tea off Ayano's hands with their Pummel and use it in the same way, with allies being able to take the tea like a normal item to prevent obstructions. In a 1v1 the healing obviously won't do enemies any good, though in FFAs and Team Matches other players would be perfectly obliged to take the tea off of your hands and use it for their own purposes...

Excpet that's not the purpose of the move. You see, tea can be spilled in a similar manner to Rirattanu and will be sent flying with a 5.5 Weight statistic that causes it's contents to spill out and cover up to 2 Platforms worth of ground for a good 13 seconds before it dries out; tea is heavily affected by gravity and real world physics and as such will fall to the floor the moment it goes flying, and will drip through platforms if it was spilled onto one. Characters who stand on the puddle while it's out will have their tripping rate increased based on how long they're standing on it, automatically tripping if they stay on it for a whole 2 seconds; this'd hardly be worth noting were it not for the fact that characters drop Rirattanu upon tripping...and did I mention that green tea is capable of damaging Rirattanu? If anything foes should try to avoid spilling the tea that Ayano provides...if they're holding Rirattanu or he's nearby, that is.

And if that wasn't enough incentive for enemies to avoid the puddle, the feet of characters who stand in it will become soaked and start dripping the tea's contents over wherever they go in the air for 3.5 seconds; additionally, the puddle reacts to spontaneous movement and will be splashed around by characters who dash or perform similar feats of momentum over it (like Fox Illusion for example). I should also take the time to mention that if Ayano drops Rirattanu into the puddle via tripping or ends up dripping/splashing tea on him the 'damage' done to Rirattanu will be completely ignored for simplicity's sake. To prevent Ayano from being able to make puddle after puddle she has to wait 16 seconds once the tea leaves her hands before she can brew up another.​


Up Special -- Peachy Parasol

Ah, the parasol. Easily the most suitable recovery for a feminine female. Taking out a white parasol, Ayano is suddenly blown upwards by a draft of wind (as far as 4 SBBs) before she falls with mechanics similar to that of the Parasol item from melee but without the aerial speed increase. Ayano can use her air game however, which makes her especially difficult to KO since she can use her Rirattanu to heal herself in mid-air and "protect" herself with.

If Ayano becomes angry while she's recovering she'll automatically cancel out of this move and fall with her increased falling speed; she needs not to worry about being KO'ed (she can't be anyway) as inputting the aerials will have her gain Warioman-esque momentum when she punches in that direction that allows her to return to the stage very, VERY quickly...she'll still KO the enemy no matter what so don't worry bout it.​


Down Special -- Extra Pocket

Ayano takes whatever item she's holding and stores it in her clothes to take out again with another input, both taking a good 0.8 seconds to execute; using this move without an item has Ayano try to grab one in front of her to automatically store. This not only lets Ayano carry 2 items at once but lets her protect one of them from being stolen with a simple Pummel by forcing enemies to hold Ayano for the entire duration of their grab to make a small a small exclamation mark to appear above their head and have them automatically take the item off Ayano before releasing her; this can protect Ayano from the enemy's throws should they find the need to search you.

An aesthetic quirk of this move is that it allows you obscure your important items from the opponent's sight. While they'll see you doing this it'll actually be a matter of them -remembering- whether you've stored Rirattanu or not so they don't accidentally send him flying from you...​


Standards


Standard -- Food for Ayano

Ayano takes out one of her 2 favorite foods: tofu! This acts as an item that Ayano will eat upon holding A, and upon doing so for a whole second, will heal her 10%. Tofu can be stored and there's no limit to how many she can have or eat, though each one eaten makes her a bit more pampered and increases the damage and knockback she takes by 0.1, and keeps her in enemy grabs for 0.6 longer. The latter is beneficial to the enemy when it comes to Pummeling you but when they need to take a stored item out of you they'll have to wait longer to do so, which allows you to stall a little for Rirattanu's vanishing.​


Dash Attack -- Whimsical Desperation

Not watching where she's going, Ayano trips and gets sent flying from the momentum! She travels a Platform's distance before landing on her stomach and getting up with moderate lag. This does nothing except let Ayano grab any item she travels past if she's not holding one, which is an excellent way to retrieve Rirattanu. Speaking of which, Ayano currently has no way to take her Rirattanu off enemy hands, am I right? Well not anymore; if Ayano travels past a foe who's holding Rirattanu she'll make a desperate attempt to grab onto her stuffed toy and use as much force as she can to retrieve him in a tug-of-war with the foe; here both players must wiggle the control stick as hard as they can to take control of Rirattanu with the odds being rigged in favor of those who's damage percentage and/or possess more default attack speed. Afterwards both characters are pushed away from each other and the winner will have Rirattanu in their possession...

Except for the off-chance that both characters are pulling with the same amount of force, which will cause Rirattanu to be torn in half! If you're the enemy, you DO NOT want this to happen because if it does Ayano will instantly get ANGRY! That said, the foe has a better chance of winning as their damage percentage will likely always be at 0%, but if Ayano's damage percentage is also at 0% it's almost certain that Rirattanu WILL be torn in half. Then again the foe could just choose not to play the tug-of-war and let Ayano have her Rirattanu, who will always be trying to take her Rirattanu back with some degree of force even without any player input.

While you could get your damage percentage to 0% via means such as your green tea and go in for the kill while the foe's holding Rirattanu, Ayano will check Rirattanu's condition upon grabbing hold of him and can instantly become angry if the circumstances are right; this is an excellent follow-up against foes who've been forced to hold your Rirattanu to prevent Ayano from seeing his damages.​


F-tilt -- Deep Breath

Like many Japanese people Ayano loves to go for walks; it's way better than tiring yourself out by running and is very relaxing. When Ayano uses this move she'll start walking (or continue to do so if you were in the middle of doing so) until you release A. Once the input's released Ayano will take a deep breath to relax herself; this causes her to take no knockback (she still takes damage and hitstun) from the next attack she's struck by for the same amount of time she was walking for after being struck by another attack. You cannot stack uses of this move.

If anything you can use this move to manipulate the knockback you take in conjunction with positioning yourself so that at the very best you end up being knocked into Rirattanu; should a situation like that ever occur enemies can hold Ayano to keep her from being knocked back much to their dismay.​


U-tilt -- Cherished Object

Ayano hugs the item she's holding in desperation of keeping it, which makes it 0.4X more difficult for it to be knocked out of her. It takes 0.5 seconds to do this and can be used up to 3 times in a row on an item, though the effect becomes null when the item leaves Ayano. If Ayano is not holding an item when she uses this move the next item she holds will have the reinforced effect; either that or it's passed down to an item Ayano has stored.

Enemies will somewhat be forced to remember your uses of this move so they don't miscalculate their attacks, though the effect is easily ruined by grabs....if they can use them, that is.​


D-tilt -- Feminine Resistance

Ayano's crouch is identical to Zelda's in animation; it's obviously not the best for ducking projectiles but I'm sure you're all aware that characters take significantly reduced knockback and hitstun when they're crouching, with the knockback usually sending the character back horizontally so they slide across the stage and are knocked down if their damage percentage's high enough...remember how I said that Rirattanu could be damaged if Ayano was knocked into him by an enemy attack? That can actually happen if Rirattanu is lying on the ground behind Ayano; it's much safer for enemies to use their grab on her if she enters this state in order to cancel her out of it.

As for the D-tilt itself, Ayano appears to be 'resisting' for a little animation know-how, which in practice makes her take double knockback but half the damage from attacks for as long as you hold A; since you won't be taking that much knockback in the first place you can use this to throw off enemy calculations by making them accidentally push you into your Rirattanu when they shouldn't have done so in the first place providing he's behind you.​


Smashes

Fun fact: characters take more knockback when they're charging Smash Attacks (about 1.25). Guess what that means?


F-Smash -- Distressed

Ayano looks around frantically while sweating comically, which increases her attacking speed by 1.25 but halves her traction and doubles her chances of tripping for thrice the time spent charging; if Rirattanu's not in Ayano's possession the duration of the effects is doubled.

Speaking of Rirattanu, he appears to be what Ayano was looking for because she'll have a relieved look on her face the moment he comes into her line of sight; this in itself does nothing but if Ayano stares at Rirattanu for 1.4 seconds she'll have automatically check his condition without the need to pick him up (and get angry!)...unfortunately, the enemy can simply turn their back to Ayano while they're holding Rirattanu or use their body to obstruct Ayano's view...how terrible.​


U-Smash -- Taking it in

Ayano suddenly become nervous about being attacked, which causes her to take knockback in the opposite horizontal direction from the next 2-5 attacks she's struck by. If anything this is an incredibly tricky move, as green tea and Rirattanu will be sent flying where Ayano does and thus will end up being spilled "in front of" Ayano and onto the area the foe is (or is presumed to be) with there being a very likely chance of Rirattanu being splashed in the process. You can also use this move to greatly disrupt the normal flow of enemy knockback and by chance confuse them, with they having to use F-throws to knock you back and so on. You can't reset this move's count by using it again, with Ayano taking on a slight nervous appearance to tell you the effect's still in place.​


D-Smash -- Lost in Thought

For all her feminism, Ayano sometimes displays the behavior of a ditz. Here her face gains a blank, comical expression that signifies her temporary leave of the our world to the point where her movement speed is reduced to an inconceivable 1/10ths of it's original amount and has her shield or dodges. One might question why they'd ever want to use this move, though the answer becomes quite obvious when Ayano takes a direct attack from the enemy, which will force them to put more effort into getting through to Ayano and consequently have their attack slowed to Ayano's level for the rest of it's duration. This doesn't work against projectile attacks, mind you, but still has surprising value as Ayano will be launched into the air very, very slowly and once she's stopped flying she'll -almost- cease to fall and as such she can stall and exploit her Aerials to their full use. Being struck head-on from your slowed state is the best outcome however, as foes who grab you will share your slowness for the entire duration of their grab, which definitely works in the favor of both Rirattanu and green tea. Ayano's condition lasts for a good 4-12 seconds and she won't be able to enter the same state for 10 seconds afterwards.

This is a fairly good counter move that puts you in a win-win situation if you use it correctly; essentially, no matter the outcome Ayano will always be able to stall to some degree and/or transition to her aerial game. Foes will have to decide whether it's worth attacking/grabbing Ayano and wasting a good deal of their time, especially if the feminine female has resorted to standing on a green tea puddle where the foe can and will trip from all the time spent on it.​


Grab - Satisfaction

Ayano's grab isn't as much of a grab as it is a way to force approaches, or make enemies pay attention to you in Ayano's case. Here, the feminine female becomes nervous about how to appeal to others as she fidgets and looks both ways for as long as you hold Z. Afterwards, her attacking speed is increased by 0.5 for every second she had to herself (max buff of 5X attacking speed) until she's struck the same number of enemy attacks as the number of seconds spent in this move or if 16 seconds pass; interestingly enough, this speed buff affects the time that "counts" as Ayano using the move such as that of this move as well as that of cooldown timers like that of the green tea. Ayano can stay in this state for as long as she likes but if she tries to release the charge herself she'll continue to charge for 2.2 seconds in that leaves her massively open to attack; on the other hand if foes try to knock Ayano out of her nervous state she'll keep the buff at twice it's effectiveness and duration despite taking more knockback...

If enemies don't want Ayano to gain this move's buff they'll have to be within 1.6 SBBs on the same plane as her, which will cause Ayano to face them out of awareness. Now, providing the enemy remains in the vicinity of the designated area, Ayano will be forced to face them out of in-dominance that prevents her from jumping, turning around or moving past the enemy until they leave her line of sight via turning around/jumping (she can still move back by rolling) or send Ayano flying out of their sight. Ayano is able to move normally while the foe looks at her but for every 0.5 seconds they do so Ayano will lose attacking speed in the same manner as she'd usually get it from the buff to the point where her attacking speed will drop past it's original amount; this is applied even when the foe is grabbing her. The de-buff lasts for 5 seconds but if you want it go away earlier drink some tea or get angry.

While the de-buff is not a good thing by any means, the fact that enemies have to walk up to Ayano and look at her helps put them in the range for your Dash Attack and F-Smash when they've been forced to hold your Rirattanu; if they try to resist otherwise you'll just get a free buff that increases Ayano's healing speed to the point where she can heal off all the damage enemies dish at her and become immortal if they don't at least try to force her out of this. You can use this move to force cheap aerial campers to approach you so they're on the same plane as you, which you'll need against certain wood elves and copypasta deities in order to stand a chance of beating them in the first place.​


Aerials


N-air -- Insight

A small exclamation mark appears above Ayano's head as she becomes a bit more aware from her time in the air, which causes a number of future changes to her damage percentage via healing or damage to be quadrupled for every 0.5 seconds you hold this move for (this isn't slowed by the D-Smash). This is an excellent move to use with Rirattanu and assure you fully heal yourself but at the same time Ayano risks taking massive damage from enemy attacks...on the other hand if enemies don't realize the buff in their damage they may end up accidentally knocking items out of you when they wouldn't expect to. This move cannot stack through multiple uses.​


F-air -- Feminine Reaction

Ayano's body tenses up a little as she braces herself for the enemy's attack for as long as you hold A, this having high start-up lag. If Ayano is struck during this state she'll let out a frightened yelp that proves disruptive enough to cause the offender to drop any item they're holding. This is your ultimate anti-gimping move against enemies who've been forced to hold your Rirattanu to prevent him from disappearing; depending on the situation, enemies will likely have no choice but to let you come back onstage with they having to kill you before Rirattanu is due to vanish if they've any chance.​


B-air -- Semi-Conscious

Ayano becomes conscious about "certain things" that could happen while she 'fixes' her uniform for as long as you hold A (you can still move forward and backwards while doing so to prevent you from constantly moving backwards during this move). This causes all of Ayano's buffs, negative effects and healing to be "stored" for however long you held this move for, the timer starting after you land on ground but the effect still taking place even as you hold the move. This lets you control the flow of Ayano's effects such as her U-Smash, D-Smash and other aerials so you can use them later on if you don't need them right away; any healing Ayano would receive while "storing" her effects will instantly be applied the moment the effects ends too, which lets you control you damage percentage with a good degree of efficiency.​


U-air -- Further Fright

Ayano appears as if something's frightening her, but unless this is the first move she uses after being struck it's use will be little more than aesthetic. You'll know you've pulled this move off successfully when Ayano continues to appear frightened by her enemy for 5 seconds; if said enemy or one of their ranged moves gets within a SBB of Ayano she'll automatically take 20% and average hitstun that, while advantageous to the enemy, can knock Ayano's green tea or Rirattanu out of her. Ayano is unable to get within 1.7 SBBs of her foe while she's frightened.

You can use this move to protect yourself from having Rirattanu grabbed out of you move at best, though you could also discourage enemy approaches by threatening to have your green tea spilled out or have Rirattanu spilled on it.​


D-air -- Natural Fear

Ayano looks down below her for as long as you hold A, which allows her to check anything that's below her; if you're directly beneath Rirattanu for 3 seconds Ayano will automatically check his condition, though enemies can easily pick him up or use their bodies to prevent you from doing so.

If Ayano uses this move offstage she'll become overwhelmed by the abyss below and start panicking! She'll remain in this state for as long as you're offstage and will remain in it for however long she was panicked offstage after returning to the stage before calming down. While panicking, Ayano cannot shield, dodge or heal herself but if she's grabbed by the enemy her erratic movement will prove troublesome for them to the point where they'll suffer a 1 second delay in actually getting hold of her which she can use to escape from the grab; when Ayano does escape she'll be sent back a Platform's distance and is allowed to move in any direction by holding the control stick in that direction...it's actually possible for Ayano to become angry if she's "forced" into her own Rirattanu. If Ayano is not grabbed while she was panicking she'll recall her fear the next time she's grabbed and have the same effect take place; this effect cannot stack and only works once per use of this move.

You can use from your recovery and/or D-Smash to prevent yourself from being thrown by the enemy the moment you return to the stage, and can even get behind them and pick up or position yourself behind your Rirattanu with your crouch to lure enemies towards you, possibly with some green tea in hand if you have some. Just be careful about the effects of being panicked as they can leave you heavily vulnerable to enemy attack and gimping if you use it incorrectly.​


Tips for Playing as Ayano Minegishi


Feminine, patient, and utmost passive, Ayano possesses no move that truly damages or disrupts enemies; she's the type of person who observes and goes with the flow, whether that's setting up when her enemy needs to or preparing for whatever damage they plan to inflict on her. In the case of the latter, Ayano would be very easy KO fodder were it not for her all-important Rirattanu who can both heal her and inflict a sense of fear into enemies...

The first thing enemies will obviously want to do is take Rirattanu off Ayano by grabbing and using their Pummel on her, which if done quickly enough may leave Ayano with some damage from their attack as the healing is not instantaneous. While there are other ways for the enemy to safely rid Ayano of her Rirattanu like jabbing her 3 times in a row the self-conscious Ayano has plenty of ways to manipulate knockback inflicted on her to the extent where this can become rather dangerous to the foe if they accidentally mistime.

Ayano's moves are aesthetic in nature; they give foes numerous options to choose from when combating her instead of forcing them to do one thing. The above situation is a good example of this, with foes who've knocked Rirattanu out of Ayano being able to choose to either hold him while attacking Ayano or throw him towards the other side of the stage so Ayano and her moves won't be able to reach him; the latter is obviously far better for the foe as the former option not only puts Rirattanu at risk but allows Ayano to defend herself with her anti-gimping F-air, or even go in for the kill with her Dash Attack or F-Smash if Rirattanu's already been damaged somehow.

But enough about the foe, what about sweet feminine Ayano? Should the above assumption correctly determine the foe's course of action, which it should (except for the VERY RARE case when you're fighting a foe with NO THROWS), Ayano will have very little to any chance of surviving even the most simple gimping or edge-guarding attempts made by the foe; sure, her recovery lets her cover some decent vertical height but her horizontal movement is weak and leaves her open to being knocked back off the stage where she'll be KO'ed in no time after constantly being damaged. What Ayano wants to do, quite simply, is prevent this kind of situation from happening...

But first, let's talk about a very important move of Ayano's: the Side Special green tea. It's an item that works together with Rirattanu in the sense that you'll either heal up to 80% with it or make a puddle that can either mess around with Rirattanu or make characters trip if enemies decide to knock it out of you. In either case you'll definitely want to have one handy at the start of the match in tandem with Rirattanu, with you being able to store one or the other with your Down Special. Once enemies have taken your Rirattanu you'll need all the healing you can get to survive their attacks, and if they don't want you to heal with your tea they'll have to either take it off of you and throw it off the stage where it won't make a mess, or knock it out of Ayano the easy way; note that as most enemy attacks will (presumably) send Ayano flying diagonally backwards the tea will always spill out behind her so in order to make the most of it Ayano will need sufficient space behind her for it to spread out as well as to minimize the knockback of enemy attacks, with the easiest solution to this problem being your trusty crouching position. If enemies really don't want a puddle being made at this point they'll have to grab and take the tea out of your hands which'll massively slow them down and give you a chance to go after Rirattanu; either that or you could easily stall your enemy when they try to grab you with moves like the Standard and D-air.

That said, even if the foe does spill your tea and makes a puddle it doesn't guarantee your safety as you can very easily be knocked off the stage with no hope of recovery if you don't have Rirattanu; we don't want to go again there do we? It's perfectly fine however if say, Ayano has her Rirattanu with her. If anything you'll probably want to be standing on your green tea puddle and wait for the foe to attack you and transition into your D-Smash when they do...

While we're on the topic, let's talk about Ayano's aerial game and it's improvements upon using the D-Smash from it. Ayano will usually be in the air solely because she wants to recover; she has no way to defend herself with any moves unless the circumstances are ripe for the F-air but she has a good number of options to transition into by using her Aerials. The N-air works extremely well with Rirattanu's healing and lets you heal off virtually all your health with him at the cost of the possibility of taking extreme amounts of damage. Your U-air works discourages approaches in a similar vain to the F-air, though the D-air is probably one of the most useful when it comes to recovering, especially with the spacing it gives you. If anything Ayano's aerials generally serve as buffs for her mainstream game, with the D-Smash allowing you to stay in the air for longer in order to reap the benefits of their effects; one nifty trick is to be knocked into the air from a D-Smash before you use Rirattanu and follow it up with the N-air in order to heal a massive 80% per second...just be careful as you'll inevitably end up taking massive damage from enemy attacks right afterwards.

By now you're likely to understand that surviving enemy onslaughts and keeping them at bay with Rirattanu at risk is essential for the otherwise defenseless Ayano; if you can keep this up for a good 20 seconds Rirattanu will be ripe for disappearing and will come back to you. This essentially creates a bit of an endless cycle where neither player really gets anywhere and at this point the foe may feel to need to hopefully become more aggressive if it's gotten to this stage but aside from that, nothing has really changed.

But of course, Rirattanu will need to be damaged in order for Ayano to actually score a KO in the first place so let's get onto that subject. You can try for a use of the green tea and have the foe spill it on Rirattanu or have Rirattanu be spilled on it via tripping
and make the foe hold him before following up with the finishing Dash Attack or F-Smash; foes will most likely want to stay away from you, which if they do you can simply use your "Grab" to buff yourself so your healing rates go through the roof. If foes still insist on camping even then you'll just have to go up to them and use your Dash Attack. Rirattanu can also be damaged by having Ayano (or another character) knocked into him, which is nearly impossible unless the knockback is strictly horizontal (which is the crouch's purpose) or there enough walls and ceilings around to bounce characters in such ridiculous ways, which will be even more impossible unless you're fighting against a crazy camper or on a badly-built Stage Builder Stage. That said, you can still try to use this method with your D-tilt (crouch), grab-escape transition of the D-air and other knockback-manipulating moves you have until you get to the point where you actually manage to succeed much to your foe's objection.

There's also the third method, which Haruhi forbid, actually relies on the enemy to knock Rirattanu out of you and off the stage, though no enemy would be stupid enough to do that in the first place. But hence, it's actually possible to pull off against competent enemies with a little thing called the memory game; you've got moves such as the U-tilt, Down Special, B-air and what not to mess with the knockback of your opponent's moves and their memory...they're only human after all, unless you're playing against a CPU. With all the time Ayano can waste away doing her girly little things the foe is bound to slip somewhere.

So yeah, it should be clear to you by now that whenever Ayano gets access to her KO move it will have been partially played by the opponent's hand...they (usually) have to damage and knock you around to win, and really they have little choice but to move at Ayano's feminine pace in order to be able to score a KO on her, something that's easy enough to do when an opportunity presents itself or Ayano slips up.


[COLLAPSE="FFA"]Ayano becomes an equally interesting character when you decide to use her in FFA Matches, especially when you take into account her Rirattanu. Essentially, Ayano will be (one of) the least threatening characters in the match if one at all if enemies leave her alone; in Timed Matches there's a good chance that Ayano will be ignored by the other players seeing as how she won't be able to attack them, with she being forced to go right up to her enemies and/or get in the way of their attacks while she's holding Rirattanu to stand a chance of participating in the first place if she's that desperate to do so, which is rather uncharacteristic to begin with. In Stock Matches however, enemies will have to start attacking Ayano some time as it'd be extremely disadvantageous to them if in a 3 Stock match only one of them was left with a single stock to fight a 3 stock Ayano. Because of the chaotic nature of FFAs there's a good chance that one character will end up accidentally damaging Rirattanu, which will cause a stock loss for all of Ayano's foes; it only gets scarier for them when you consider the fact that Rirattanu can be knocked out of foes by other foes and damaged by their traps, summons, or screen-filling attacks/goop if they have any. Ayano also has her green tea which foes might actually want to take off her to heal their damage but it can be knocked off of them by the attacks of other foes...yeah. For foes, it might get so bad that they might be prompted to temporarily join forces against Ayano, who simply has to apply the same strategy she'd usually use in 1v1 matches, only she has far less chance of surviving. Whatever you do, pray, PRAY that you're not using a character with stage-altering mechanics that you can't control like Leviathan or Lucio Fulci, as they'll inevitably damage Rirattanu, and yeah...

Ayano can also be used in a Team Match, where she can give her ally green tea to heal them or let them hold her Rirattanu to put the center of fear on them; Ayano generally excels in partnering with characters who don't need their grab game that badly, have good defensive playstyles that they can use to protect Ayano while they hold her Rirattanu, or, in the off-chance, have some kind of skill or interaction that they can use with items such as being able to produce a weapon for Ayano to use. Somebody like Archer would make a good Counter Guardian for Ayano what with his quick transition from melee to range combat, as well as his ability to produce swords for Ayano to use (fun fanfiction idea is fun).[/COLLAPSE]

Despite her insane survival skills and ability to use a weight-ignoring OHKO move who's triggering can literally shut down summon and trap characters alike Ayano does her fair share of weaknesses. Her most obvious flaw comes from the fact that she cannot to anything to the foe until they knock her Rirattanu out of her, and until then, they're free to do whatever they want for however long they need. If Ayano's fighting against a character who gets better with time she'll have a difficult time fighting back; on the other hand Ayano happens to be good against characters who get weaker over time such as...I dunno, the first character comes into your head. Ayano also happens to suffer at the hands of characters with powerful moves that can kill her quickly, but she's even worse off against characters with special KO conditions like Pummel KOs as they've no need to knock Ayano back in the first place, though Ayano can easily heal off damage and possibly force them to hold Rirattanu so they can't use their grab in the first place. That said, one of the worst possible characters that Ayano could ever be put up against would undoubtedly have to be Kyubey, who's KO mechanic goes as far as to downright IGNORE Ayano's damage percentage and make a new one in the form of the Soul Gem (he's the reason I made Ayano's kill move able to cut through reincarnation).

All and all, Ayano is not a fighter, but a "spectator" who should be treated with respect and care. Her femininity and self-consciousness gives her great control over her own condition; she's a pacifist by nature but one who has the power to threaten everyone else upon being angered. You're naturally going to be helpless a lot of the time as Ayano but you're one of the most threatening characters out there; and who doesn't like humiliating the big boys with a schoolgirl?​


Final Smash - Feminine Days

As a character's Final Smash represents their dream, Ayano's shall be revealed to all: to become a bride. No joke. It's constantly alluded to that she DOES in fact and is the only non-adult to have a boyfriend but we've never seen him, so what better option is there than an arranged marriage? When her Final Smash is activated, the screen whites out as Ayano and her ally (or a random enemy if she has no allies) are seen in a Japanese Wedding Ceremony that was really expensive to pay off! (But this was all done with the Smash Ball so no worries!) From here, Ayano is wearing a wedding dress because that's what she would want to wear if she got married, while the other character is wearing a tuxedo...if they can (their gender doesn't matter). From here, a Japanese person oversees this Shinto-enforced marriage and asks the bride and groom if there are any objections: despite this being a Final Smash it will not warp reality to the extent where it overrides the enemy's character and forces them to fall in love and marry Ayano; they have every right to say YES or NO with A/B respectively; if they don't do anything within 7 seconds it'll be an automatic no, which will make Ayano a bit sad and cause the Final Smash to end...

If the answer's yes however, Ayano and the groom will kiss each other and get married! (yes, this happens REGARDLESS of the other character's gender) If the groom wasn't an ally of Ayano's they'll now be allied with her for the rest of the match; in a 1v1 this'll result in BOTH characters winning the match! (Though I doubt enemies would ever agree to this unless they're going to lose the match anyway, which'd be pretty lame of them) In a FFA or Team Match however Ayano becomes more dedicated and responsible, which triples the healing effects of her moves and halves all knockback and hitstun she takes for the rest of the match...also, as a gift from their family and friends, both characters receive 2 extra Stock! (2 extra Points in Timed Match and 250 Coins in Coin Match)

If Ayano gets the Final Smash a second time after marrying a character she and her ally will each receive a Stock as an anniversary gift!


Davidreamcatcha

Smash Ace
Joined
Feb 9, 2011
Messages
629
MYMINI WEEK #6


Howdy, hoes? You’re stuck with me for 2 things now, apparently! Don’t like it? Too bad.

Your mini this week is short, sweet and to-the-point: make me something clown-related. Anything qualifies here, so long as it relates to clowns or clowny-concepts in some way.

Due to the late start of this MYMini, you have up to next Tuesday, the 22nd, to get your minis in. The new mini will be announced in the Recap, with an additional post on the Stadium.
 

MasterWarlord

Smash Champion
Joined
Aug 24, 2008
Messages
2,902
Location
Not wasting countless hours on a 10 man community
SWEET TOOTH


Sweet Tooth has been summoned from the fiend doll! He starts playing the music on his ice cream truck as he drives across the background of the stage. Eventually he’ll open up shop – inputting up in front of the ice cream truck has you buy an ice cream cone from Sweet Tooth. Ice Cream heals 30% and the whole process is surprisingly fast (Though far from lagless). Sweet Tooth moves back and forth like this for 30 seconds. . .

When he’s ready to go crazy, Sweet Tooth can do one of two things. . .

There’s a 80% chance he’ll go to one side of the stage, then turn around and enter the main playing field before fully stomping his foot down on the gas pedal and laugh maniacally. This causes the truck to move at up to Sonic’s dash speed once it accelerates, dealing 30% and knockback that kills at 60% on contact. Powerful, but after how long Sweet Tooth has been around you deserve to be hit by it if you somehow manage it.

The other 20% of the time, Sweet Tooth takes out a remote control and presses a button. . .It seems that all the ice cream he’s been feeding to the foe had bombs in it. Anybody who ate ice cream will be dealt an unavoidable 50% and sky high knockback that KOs at 60%. Are you sure you want that ice cream now. . .?
 

Davidreamcatcha

Smash Ace
Joined
Feb 9, 2011
Messages
629
Krabby Land is open!? Ohmygoshohmygoshohmygosh! That old Krabs finally did something right! Not only do we get to play in his new amusement park, we may get to meet the one and only Krabby the Klown! This going to be so much f-


Oh.

Luckily, we can get rid of Krabby Land by having a bunch of fights in it! Krabby Land is a grounded walk-off as long as 2 Final Destinations, with an incredibly high ceiling. The pile of junk seen above you lingers in the middle of the background, acting as a monument to Krabby Land's favor.Foes lose about half of their weight in the water, and gravity is much lighter than usual, meaning higher jumps/slower falls. For this reason, most of the matches here end in star KO.


Krabby Land is littered with numerous "rides", most of which lurk in the background. However, if any character passes by them, they are forced to ride them. The first ride, Fort Adventure, stays in the foreground unlike the other rides. Fort Adventure lingers in the middle of the stage, being about as tall as Bowser and as wide as 1.5 Battlefield Platforms. Fort Adventure is completely solid, the only way to get past it is by rolling through the middle of it or crawling, which you will be forced to do if you stand directly next to it (preventing chain grabs). If you're small enough to squeeze through, you can also attempt to do that. Fort Adventure will be demolished if 30% damage is dealt to it, by far the sturdiest ride. Once it is demolished, the barrels will remain onstage as throwing items.


The next ride is Hose World, which lurks at the far right of the stage. This structure is about as tall as Ganondorf and as wide as 2 Battlefield Platforms. This ride is normally passive, but it automatically drips goo onto the stage, dripping enough goo to accumulate a spot as wide as Bowser every...4 seconds. If anyone attempts to pass over the goo, they will enter prone, but will continue moving forward in prone if they had any built-up momentum/were knocked into the goo. Speaking of which, if one gets flinged into the hoses, they will become tangled in them. They have to button-mash out of this with average grab difficulty. Hose World will be destroyed after taking 20% damage.


After this is the Toaster Rodeo, which is directly to the right of Fort Adventure. Both rodeo toasters are as wide and tall as Yoshi. If anyone boards either, they will start riding it back and forth, having to button mash out with 2x grab difficulty. They can be dealt damage while on the toaster, of course.

The toaster builds momentum based on the time someone is riding it, or when it is dealt damage. It begins swinging wildly, in a manner identical to Wobuffet. Also, both toasters will begin popping out toast every 20 seconds, which heals 5% to anyone nearby, turning the match into a psuedo-king-of-the-hill to get the toast. Toaster Rodeo will be destroyed when it takes 15% damage.


Rocketship Fantasia is located to the left of Fort Adventure, it is as tall as Ganondorf, with a barrel the size of the normal ones. Anyone who boards it or is knocked into it will attempt to ride the barrel, having to escape with 3x grab difficulty. However, Rocketship Fantasia is the most fragile ride in the entire park, and will automatically demolish if it is ridden for more than 5 seconds. It can also be destroyed by dealing 5% damage to it.

Once it is destroyed, the barrel lingers on-stage, acting like normal barrels but still being able to be ridden. Players can attempt to knock their foes into the barrels and roll them into other rides, or use this time to make a quick getaway.


The last ride is the Slide, which is about as tall as 1.5 Ganondorfs and lingers on the far left of the stage. Foes who are knocked into it or attempt to board it will climb up the slide and slide down it, causing them to move about for 5 seconds with 3x their dash speed, stopping if they are pushed into other rides. Naturally, the slide is one of the most valuable rides, as you can attempt to use it as a prime tool to knock foes into other rides, or even off-screen.

Starting off, the slide has a 10% chance of being automatically destroyed when you ride it, which increases by another 10% every subsequent ride. Of course, it can always be destroyed by dealing it 25% damage.

Occasionally, Eugene K- I mean, Krabby the Clown will walk through the background with his cheery smile, rebuilding all the rides he passes. If he is dealt 20% as he goes through his stroll, the tomato will fall off his face, revealing his true identity as Mr. Krabs! Mr. Krabs will rush off screen, not being able to appear again until 1 minute has passed. The tomato can be eaten, restoring 15% to whoever decides to, making it a battle of whether or not to beat Krabby up for free healing or letting him restore key rides.
 

SirKibble

Smash Champion
Joined
May 2, 2008
Messages
2,400
Bowser
Oh, my. Let me say first, this moveset is beautiful. The presentation is reader-friendly and captures the Koopa King's character extremely well. The moves themselves feel genuinely "Bowser" as well, and this is one of those movesets where the playstyle seems to have practically written itself, because it's what Bowser really does. He throws his weight around and smashes things and breathes a bunch of fire on top of that. Pits and impalement seem to be swiftly becoming defaults for characters like this, but you know, I don't feel it's a problem here, because it really does seem to suit Bowser. So, yeah, if it wasn't clear, I'll summarize: I think this is a real gem of a moveset.

Reznor
I vaguely remembered this guy before reading the moveset, but once you started, MT, you brought it all back to me. That, in an of itself, begins what I like about this moveset: it's clearly built around the character. The formation of the playstyle here is a natural flow from the character's existing abilities and qualities. The playstyle is unique, yes, but if you'd made this same playstyle with another character, I doubt I'd feel the same. Anyhow, I feel there may be some balance issues, with the sheer volume of some of his attacks with all the duplicates, but hey, who am I to discuss balance anyway? (chew) Anyway, this is definitely one of my favorite sets this contest thus far.

Mello
Been a while since Death Note characters got made, hasn't it? This guy annoyed me to kingdom come and back when I watched the show back in the day, but that's not what we're here for. As others have said, Matt should probably just have appeared alongside Mello, but more than that, I think the flaw in this set stems from too heavy a reliance on him, without him being especially reliable. Mello has a lot of moves dedicated to having Matt do something, and as a result, doesn't do much himself. Hypocritical though it may be, since I was a major user of them once upon a time, tilts and such that don't deal damage or at least knockback or hitstun are not ones a player generally likes to have. It presents Mello with a lack of spacing options, something he sorely needs to be able to call Matt so often and for so long. That said, I feel the ideas behind this set were very worth investigating. Perhaps it was the making of the set in only two hours that didn't allow some of them to be refined a little more? You presented a great concept here but I wasn't so sold on some of the other points. I'd like to see you let a set sit a while and stew over it, Majora--once you've written it all out, I mean--because I think that may be the thing to take the good ideas you always seem to have and make them into something really memorable.

Mark
Well, this is just a giant stack (or maybe deck) of nostalgia. I won't complain about how it's missing some elements of the trading card game, though I think they'd be a welcome addition. I loved seeing all these first generation Pokemon put together in a set. That said, having Caterpie alone be able to evolve felt a bit odd, especially when you didn't do the same thing for Diglett and Dugtrio later. Mark's playstyle also could have been a bit more defined, I think, although perhaps you'll enlighten us with a playstyle section yet. This was a fun read, though.
 

Junahu

Smash Ace
Joined
Nov 15, 2005
Messages
899
Location
Shropshire Slasher
Ayano Minegishi:
Hey Kat. I don't think I've ever formally stated as such, but I have a great deal of respect for you, and seeing you post a moveset has randomly given me the drive to comment movesets again. Yay.

I love, adore, the gradient effect you have going for the headers, it slots in very well with the aesthetics of the set, which are all around quite excellent.


There's a certain crazed edge to this moveset that sounds like it would be quite entertaining to see in action, especially with the insane strength buff if the foe hurts her stuffed animal and the thoughtful battle of wits that arises when Rirattanu is a factor. Problematically though, this means that players WANT the foe to hurt the stuffed raccoon, which means they want to get hit in order to drop it to begin with. I suppose this brings up the question of whether the player is meant to be empathising with Ayano, or simply toying with her emmotional strings in order to make her get mad. Though there doesn't seem to be any freedom to attempt the former, since you need to get her mad in order to KO.


More problematically, for me at least, is that you treat each input as a list of options, with little to discern a jab as being a jab. Which means players will be at a complete loss when playing this character ("forward-tilt just made me walk for a bit" "up-tilt didn't do anything?" "down-tilt didn't do anything?"). This is a criticism I could level at most MYM movesets, but it seems more egregious here.


Still, it was an extremely fun moveset all the same. I liked the emerging depth of Ayano's bizarre playing style, especially since it explores many things that many people tend to outright ignore (dropped items, pummels vs throwing vs grab release, reduced knockback via crouch, increased knockback via smash charging). And while her 2v2 strategy is downright wierd (have her ally hit Rirattanu to get her mad quickly), it could lead to some very interesting matches, where the foes actively try to PROTECT Rirattanu from you and your ally.

And that is one hilarious Final Smash. Finally, a final smash that Doppelori won't mind being hit with


Bowser:
oh, here comes Junahu to poop all over the party like some spiteful old geezer with a bowel disfunction. As one of the only people out there who actually respect and admire Brawl movesets, I've always seen it as a matter of egotism when someone remakes one of those characters. No longer is it a case of fantisising about putting the character in Brawl, since they matter of factly already exist there. Brawl sets are also by far the easiest sets to riff on, because unlike our sets, those ones actually exist and can be analysed. Those sets have to be grounded in harsh reality, while our sets get a free pass to do whatever we want.
So, no, I'm not going to weave some spiel about this Bowser being 'better' or 'grander in scope' than the Brawl one. In fact, I would argue the opposite; that Brawl understands the art of subtlety more than any of us could ever achieve individually.

"So you hate this moveset then?" I hear a collective imaginary audience chorusing.

"I never said anything of the such", I reply. "I said the Brawl moveset is better, and while that sounds pretty damning, please remember that I hold Brawl movesets in extremely high regard. There's plenty of room there for me to love the moveset."
"oh" the audience mutters back, "but we think Brawl movesets are pointless arrangements of kicks and punches, so we're offended by your statements"
"And I'm offended by everyone's assertation that existing movesets must be reviled and villainised"
"We're getting off track here"
"Indeed"

So yes, the moveset itself. It starts strong, and has an excellent 'voice' throughout. The references are nice and it's all wrapped together with the kind of thoughtful Bkupa charm that I don't need to bother explaining. There are many genuinely entertaining ideas scattered throughout. If nothing else, it's a great read.

But Bowser loses quite a bit of his original feral nature in this moveset, particularly with his various status effects, stage manipulation, projectile jabs, homing fireballs... and the koopa clown car. It all comes together to form a playstyle that is far far too smart for Bowser. And it truly pains me to see a Bowser moveset that resorts to gimps. Gimps?! That's how MARIO beats Bowser!
This could be a good representation of a specific form of Bowser, perhaps a 'Toon' or 'Paper' Bowser to go alongside the real deal, but as an outright replacement for Bowser himself? I feel as though this moveset ran in the wrong direction.

Mark:
A very interesting exploration of the differences between the trading card world, and the 'real Pokemon' world. As mere cards, the trading card 'trainer' is encouraged to see his 'Pokemon' as disposable distractions, thrown out in order to harry the foe whilst you slowly evolve and build up your deck. I would have liked to see a little more of this aspect;

Perhaps have Mark throw an energy card at the Pokemon, if he uses the same attack more than once in a row. Doing so would keep the Pokemon out for a longer period of time, and if the Pokemon has enough energy cards when Mark passes the minute mark into his current stock, it evolves. This increases its effectiveness, but reduces the effects that Energy cards have when thrown at that Pokemon.

As for a complaint, since I'm legally obligated to whine about something; there is a slight disjointed relationship between input and action, given that every attack is a swipe of the card that causes a hitbox to appear after a little delay. This is fine for most of the attacks, though I'd argue that the point of the jab is to be immediate. I think the Hitmonchan Pokemon should respond to further inputs of jab, making him punch a few times more, until Mark stops tapping A.
Also, in regards to the animation of swiping each card, it would help if each attack had a unique variation of this animation.


Fulci:
It troubles me to stare into the maw of a moveset like this. What could I possibly say that you don't already know? It's a hilariously visceral, desperate experience, manipulating a zombie uprising, but without the ability or need to control the fundamental elements of it. Zombies seem drawn to Fulci, as if they're chasing him through every reality he appears in. Compared to Romero, who weaves a story around the idea, Fulci is satisfied to simply let it exist, and furthermore abuse it to his own pleasure.
Personally I like Fulci more than Romero (as movesets), even if the acid feels overridingly, bizarrely central (though I expect that's deliberate anyway).
I've yet to figure out why the moveset is in a hidden message. Guilty pleasure? Or are you just being nice to the other movesets by burying this one into a niche-y little corner?

With all your recent derision of the idea of 'forcing the foe' to do something , I find it odd how much this set 'forces the foe' to bleed. His attacks are special, it seems. They come from a universe of illogic and manic gore, and while there are many ways to look at such a set up, it still remains that you're forcing the foe to bleed, using special attacks that uniquely create these wounds. Perhaps it should be the other way around, with only Fulci, the humans, and zombies being able to bleed, since those are the things that come from his universe.
And perhaps some exposition on scrolling stages would have helped too. Perhaps some zombies rise up in parts of the stage the fight hasn't scrolled to yet, so that it's a constant grueling crawl through mutant cadavers.


ForwardArrow

Smash Ace
Joined
Aug 17, 2011
Messages
502
Mouse Man
Okay, I think it's already been said but this set has huge balance problems. He's hilariously overpowered to the point of nigh invulnerability, between his infinites and his ability to pretty much completely avoid being punished with his Mouse Holes. Normally, I don't like to complain about balance, but here it's so bad that it honestly qualifies as a deal breaker. He's probably the most boring character possible to play in 1 vs 1, and in doubles he's still terrifyingly powerful with his ability to use people as weapons against each other, as well as still being hard as hell to actually damage with how easily he can duck into those stupid Mouse Holes. That said, I did enjoy some of the ideas here, his ability to beat opponents with each other in Free For Alls is really fun and I'm disappointed nobody has done a 3 vs 1 set based around that before. I also kind of like Leaning Tower, gives quite a bit of depth to his game, though that depth is nullified by the fact that it's basically one hit and game over against him.

Giant Bat
I really, really enjoy the way Giant Bat can play with his miniature bats using the wind hitboxes, as well as manipulate his own movement. It's all very intuitive and clever, and it gives him a lot of depth without the need for very complex moves. I sort of wish we had a bit more to do with the wind hitboxes beyond just pushing foes and redirecting bats/your glide attack, but meh it's a pretty minor complaint. That and he seems kind of frustrating to play against since a large portion of the time he can spend completely out of your range, but that's not a huge problem here and I would be a hypocrite if I said Hoppip didn't have the same problem. Speaking of that set, it basically has no more reason to exist considering how much better you pulled off the aerial playstyle here. One of my favorites of the contest honestly, and my favorite Castlevania set besides Death. Wonderful job here Jun.

Ayano Minegishi
I strongly dislike the concept you based this set around, basically requiring the foe to fight or Ayano can not win. Not to mention the actual moves throughout the set all come across as very tacky for the most part, even if they do contribute to her playstyle they tend to be incredibly awkward. Apparently relaxing allows you to ignore knockback now. This moveset sort of operates on it's own logic, which I suppose is acceptable but some things here really bug me. That and the fact that she basically wants her beloved toy to be destroyed, because that's the only way she can possibly win.

That said, while I don't like the set thinking it over it's far from lacking in redeeming qualities. The playstyle, as much as I don't like the concept behind it, is at least very flowing and the set actually comes together quite nicely. That, and if you really are trying to make sets solely to be fun and educational, I think this set pulls it off. It certainly has a lot of character to it, working well on her motivations and such, as well as being a very clever idea to implement a character who seems completely impossible. I personally do not like the set, but this isn't something without redeeming qualities. Maybe if the stuff I've said in my first paragraph doesn't matter to you, I'd say you could even be proud of it.

Copycat

This is very clearly another one of those weird Junahu experiments which are blatantly not directed at the Warlordian crowd. Which is fine, it certainly has it's appeal, developing the character of both Copycat and Banette quite nicely, partially through the moves and definently through the writing. The writing here is absolutely phenominal, by the way, I actually was quite amused by some of the jokes and charmed by the personality behind it. My main complaint, when it comes down to it is... well, the set does not actually have a playstyle that I can think of. While the stuff that allows Banette to sacrifice Copycat is clever and such, I feel it does not come together into any sort of cohesive whole. I'll give it credit though, this set very much accomplishes what it tried to do and I can see why you are so happy with it.

Reznor
Is it just me, or has this set been getting WAY more hype than it deserves. Oh yes, the set is fun on paper and a rather clever implementation of the famous mini-boss into Smash Bros. But when you actually think about it, the whole thing falls apart. The set-up phase for the wheel is ungodly bland on a whole, and kind of frusterating to pull off. Once on the wheel it devolves into some very elementary camping, which is both very easy because you have FOUR sources of projectiles and lacking in depth. You'll get through it pretty fast with how quickly Reznor chews through the stage with those projectiles, and then you reach the part of Reznor's game where he just wins. As a matter of fact, he probably steals a couple stocks at this point because the foe basically instantly dies without any stage, since it's IMPOSSIBLE to survive on Reznor's wheel with all his gimping tools. Yes, yes, it's implementation of a difficult characters so you get some pity. But the actual set really falls apart under any sort of scrutiny, and I will go as far as to say I down right hate it. Sorry MT.
 

Katapultar

Smash Lord
Joined
Nov 24, 2008
Messages
1,257
Location
Australia
Ayano Minegishi:
Hey Kat. I don't think I've ever formally stated as such, but I have a great deal of respect for you, and seeing you post a moveset has randomly given me the drive to comment movesets again. Yay.

Wow, awesome! Super glad to see you making a comment on my moveset; I enjoy the perspective from which you do so and it's great that you've kick-started it once more. I also respect you.

I love, adore, the gradient effect you have going for the headers, it slots in very well with the aesthetics of the set, which are all around quite excellent.


Funny that, I was kinda experimenting with the BBCoding for a suitable header as I'm a bit above the whole "ordinary" look for my own sets. I'm VERY proud of those headers and I'm really glad you like them just as much as I do! That said, it's unfortunate that on my part the site I used to get that coloring is gone so I probably won't be able to use it again.

I would have used a simple organisation to represent the series as a whole and use stars with the headers but I thought this kind of organisation was far more suited to the character overall instead of being a contribution to the series.


There's a certain crazed edge to this moveset that sounds like it would be quite entertaining to see in action, especially with the insane strength buff if the foe hurts her stuffed animal and the thoughtful battle of wits that arises when Rirattanu is a factor. Problematically though, this means that players WANT the foe to hurt the stuffed raccoon, which means they want to get hit in order to drop it to begin with. I suppose this brings up the question of whether the player is meant to be empathising with Ayano, or simply toying with her emotional strings in order to make her get mad. Though there doesn't seem to be any freedom to attempt the former, since you need to get her mad in order to KO.


Hmmm, I knew that a problem would arise with the characterization in one form or another (but then again no set is 100% perfect). I totally understand what you mean about the contradictions with wanting to make the foe attack Rirattanu when that's not what Ayano truly wants as a person....in my mind I'd use the foolish justification that a part of Ayano wants to get angry and release her emotions because she doesn't like being downplayed all the time. In both the Lucky Star manga and anime Ayano doesn't get too many lines or appearances compared to the other characters, especially in the anime.

Also, I'm intrigued by your perception of wanting to "toy" with Ayano; it makes soooooo much sense. And yet I never tnought of it...


More problematically, for me at least, is that you treat each input as a list of options, with little to discern a jab as being a jab. Which means players will be at a complete loss when playing this character ("forward-tilt just made me walk for a bit" "up-tilt didn't do anything?" "down-tilt didn't do anything?"). This is a criticism I could level at most MYM movesets, but it seems more egregious here.


First, I don't know what egregious means, I'd better look that up. Second, hmmmm, can't really argue against your point, though when it comes to making a set for a non-hostile character such as Ayano there aren't too many other options unless they were physical actions that interacted with the toy and all. The F-tilt doesn't actually make Ayano walk; it's designed to be used while Ayano is walking or running as the a F-tilt input can be used out of a walk. I'm pretty sure I listed an animation for most of her moves what with the U-tilt and D-tilt so players knew that the move at least did -something-; I had one of your articles in mind with that though I can accept that players would be confused about most of the move's uses. But then again that's not an easy thing to get around with this kind of style I guess...

That is, unless there's a kind of guide to using the character in the fantasy-game all these MYM characters would be put in through the use of good old Melee trophies except they're available when the character is available.


Still, it was an extremely fun moveset all the same. I liked the emerging depth of Ayano's bizarre playing style, especially since it explores many things that many people tend to outright ignore (dropped items, pummels vs throwing vs grab release, reduced knockback via crouch, increased knockback via smash charging). And while her 2v2 strategy is downright wierd (have her ally hit Rirattanu to get her mad quickly), it could lead to some very interesting matches, where the foes actively try to PROTECT Rirattanu from you and your ally.


One thing: I mentioned that allies can't make Ayano angry by hitting Rirattanu at the end of the Neutral Special as that'd be downright stupid and broken at the same time. Still, I'm really glad you've got a good word for this set of mine as it's one of it not the first one where I actually feel that I know what I'm talking about. I started this moveset about 7 weeks ago and originally planned on posting it on November the 4th as that's when Ayano's birthday was. Still, I had to check for spelling and playstyle errors (speaking of which the playstyle was by far the most annoying thing to write but I felt obligated to do it) so it got delayed and I ended up failing on that behalf.


And that is one hilarious Final Smash. Finally, a final smash that Doppelori won't mind being hit with

Oh really? And yeah, I'm pretty proud of my Final Smashes; a time when you get to fool around and have a bit of fun while still trying to be serious.


Ayano Minegishi
I strongly dislike the concept you based this set around, basically requiring the foe to fight or Ayano can not win. Not to mention the actual moves throughout the set all come across as very tacky for the most part, even if they do contribute to her playstyle they tend to be incredibly awkward. Apparently relaxing allows you to ignore knockback now. This moveset sort of operates on it's own logic, which I suppose is acceptable but some things here really bug me. That and the fact that she basically wants her beloved toy to be destroyed, because that's the only way she can possibly win.

That said, while I don't like the set thinking it over it's far from lacking in redeeming qualities. The playstyle, as much as I don't like the concept behind it, is at least very flowing and the set actually comes together quite nicely. That, and if you really are trying to make sets solely to be fun and educational, I think this set pulls it off. It certainly has a lot of character to it, working well on her motivations and such, as well as being a very clever idea to implement a character who seems completely impossible. I personally do not like the set, but this isn't something without redeeming qualities. Maybe if the stuff I've said in my first paragraph doesn't matter to you, I'd say you could even be proud of it.
.
I guess your qualms about tackiness make sense (a lot) and they do come as a bit of a blow to me, but if anything they were really the only way to go with the character so yeah; the whole thing about Ayano not being able to win if enemies don't attack her was supposed to be a piece of characterization that told players that Ayano is a non-hostile person but if you attack her she can attack you - players have to have some kind of patience when using Ayano and be willing to be ignored like Ayano herself is or else they'd be better off picking another character.

The main goal of the set is a bit contradictory I know, though I'm taking that in as a bit of a lesson. And while I guess this kind of moveset doesn't come across as being appealing I'm glad I've got some input that there's characterization and flow, which were both goals I had in mind. In some ways I feel that this set of mine was actually fairly successful to some degree.


And as for Mewtwo, sorry for taking your page; it seemed that you wanted to post your moveset on there. If you haven't looked on The Stadium page of MYM unfortunately your movesets aren't listed there if only because they don't have images...if I had things my way I'd put them on there but unfortunately I can't do squat to that list. I assume you know how to get an image but if you don't, you're free to ask for some know-how.

You seem to have learnt a fair bit from your first set, as this one has a good deal more detail and funk. That said, while I can understand some of the love you have here anyone here could tell you that 90% of your chosen moves don't really fit Mewtwo all that well...or maybe not? I see that you were trying to go for a broken god-like feel that ignores basic balance with good old Mewtwo here and that's much appreciated to all his lovers; to that I can very well say you've succeeded in my books. For the Standards one would expect of your kind, this is a surprisingly good attempt at a moveset.


And heeeere's Renzor; like Kibble I remember him from a Super Mario World game that I thought was totally cool when I went to shops to play it for free on the random GBA console there. I don't remember him in this manner though that's just me (come to think of it from your F-Smash it might have been that mini rhino as I vaguely remember it being in a field). Having 3 classic Mario villains right after 3 magical girl anime characters is a rather odd twist of fate, especially considering all 6 sets were done by different MYMers.

To me, taking advantage of something that's essentially something out of the Stage Builder Mode comes at me as being quite intriguing; those things are huge and here it'd obviously play out as being incredibly intrusive to the match...which is obviously what Renzor is and wants to do from his style of play from what you tell the readers. He's a fortress of a character (even the organisation says so) from what I see as he doesn't even bother to recover or do any of the normal Brawl conventions; he's stuck in his own world where that he forces enemies to come into. I'm quite surprised at the little things you do to stay faithful to the Mario-verse and the Smash World itself; there are, surprisingly enough, no traps or truly forced moves and I definitely like the addition of "bumping" Renzor to stay faithful to Mr. Mario Mario. I'm not to sure about the idea of foes having to kill one Renzor for a Stock as it didn't seem that Mario needed to do such thing...perhaps all the Renzors could have to be killed instead, though that might be a bit less balanced but it'd tell players they can attack any Renzor. But then again you have a bit of a mindgame thing going on.

Despite having rushed this set for your birthday, this is, a moveset that has a way of catching people off-guard if I say so myself. With a simple enough depth it has a bit of a deceptively good feel to it; it's kind of hard for me to really say what it is though I'm sure you understand to some degree.
 

SirKibble

Smash Champion
Joined
May 2, 2008
Messages
2,400
'Tis a good day to comment

Marian
The writing is a little jumbled here. Perhaps a proofread before posting would make the sentences a little more reader-friendly. Nonetheless we have a moveset here that seems very at-home in Brawl. It doesn't shock me or blow me away or anything, but I don't think that's what you were going for. This looks like a very accurate representation of the character (whom I admittedly know nothing about), with you going so far as to draw reasonable inputs from several attacks from the game. It reminds me of the days when MYM was about realistic Brawl implementation, so while you don't innovate or cover any new ground here, I'm glad I read this. It stands out for sheer realism, something we desperately lack these days, if only because we've willfully chosen to disregard it in favor of other things. A nice reminder not to overstep bounds and to make movesets the way you really want, is what this really serves as to me.

Ayano
So this is that anime moveset you were hoping to finish alongside the streak we had last week, huh? I've got to hand it to you, this is unique, Kat. The playstyle is simply radical. And the gradient headers, though simple, are very appealing. That said, I have to level some of the same complaints against this as Junahu did. With literally no damaging attacks, only subtle visual cues about what's really happening, Ayano is sure to quickly frustrate the player who chooses her. And then there's that conflict of interest between her and the player, where the player wants her precious stuffed animal attacked as quickly as possible to make her mad and score a KO, but that would directly contrast her own reasoning and feelings. To me, this moveset does very well in some aspects, but has a few big problems in others, so in the end, I'm not really sure what to think of it.
 
Top Bottom