Welcome to Smashboards, the world's largest Super Smash Brothers community! Over 250,000 Smash Bros. fans from around the world have come to discuss these great games in over 19 million posts!
You are currently viewing our boards as a visitor. Click here to sign up right now and start on your path in the Smash community!
It appears that you are using ad block :'(
Hey, we get it. However this website is run by and for the community... and it needs ads in order to keep running.
Please disable your adblock on Smashboards, or go premium to hide all advertisements and this notice. Alternatively, this ad may have just failed to load. Woops!
X-Naut is a little similar to Frank West in that they're both very grounded and don't do very much with the character at hand. However, you've got a rather unfair advantage in that you have animations for a majority of the moves. While I kid about the unfairness, it's a rather alarming indicator of dedication. Especially when you go out of your way to mark the hitboxes and sweet/sourspots as well. It's subjective to assume this but given these rather impressive animations you've not only got some potential requests but an advantage over... well, I don't want to say EVERYONE else in MYM but it's something. Just, uh, keep working on set ideas and don't mistake me praising your hard work for praising the general set. You've got definite talent, now all you need is to refine it.
Okay, so the synergy here is pretty good. Everything flows with each other well. Granted, the emphasis on the trash may make him feel like a one-trick pon… er, garbage truck, but with so many different ways to utilize the trash, it’s a versatile trick.
On the other hand, the difficulty involved in grabbing, hitstunning, and knockbacking this guy seems unfair to the other players. It does seem like you tried to balance it a little, but not enough (at least for my taste).
Still, this seems like an okay set. A lot of thought was obviously put into it.
Also, I totally dig the Hover Mines. :D
MEDUSA
Love the mindgames here! Those grabs seem fairly overpowered, but I find myself not caring because they do some rather cool things. Those effects will seriously mess with the opponent’s head. Brilliant.
Plus, everything flows together rather well, especially with Vector Plates tying everything together. I can tell that you put a lot of work into this set.
The major problem that I have with this set, actually, is that it might have a bit too much thought put into some of it. I’m mostly talking about her Standards and Smashes. Those moves are the flour of the moveset, so to speak, not the flavoring; they shouldn’t have so much thought put into them that mastering them is almost as difficult as mastering the Specials.
Still, this is a very well-executed moveset. Bravo, Katapultar (Kat? Insert preferred nickname here)!
Frank West was actually going to get a comment in the last block but didn't get in due to me being a lazy-butt. I'm going to make up for that mistake right now... and there's not much to really say about Frank. It's very VERY grounded, but in a manner that makes him easy to envision. While you're definitely willing to look at detractors settled toward your set, I think the biggest problem is how little you do with him; I'm not saying you don't have a general idea of the character but you could do so much more with him than settle for a stunning camera and simplistic specials.
X-Naut is a little similar to Frank West in that they're both very grounded and don't do very much with the character at hand. However, you've got a rather unfair advantage in that you have animations for a majority of the moves. While I kid about the unfairness, it's a rather alarming indicator of dedication. Especially when you go out of your way to mark the hitboxes and sweet/sourspots as well. It's subjective to assume this but given these rather impressive animations you've not only got some potential requests but an advantage over... well, I don't want to say EVERYONE else in MYM but it's something.
Love the mindgames here! Those grabs seem fairly overpowered, but I find myself not caring because they do some rather cool things. Those effects will seriously mess with the opponent’s head. Brilliant.
Plus, everything flows together rather well, especially with Vector Plates tying everything together. I can tell that you put a lot of work into this set.
The major problem that I have with this set, actually, is that it might have a bit too much thought put into some of it. I’m mostly talking about her Standards and Smashes. Those moves are the flour of the moveset, so to speak, not the flavoring; they shouldn’t have so much thought put into them that mastering them is almost as difficult as mastering the Specials.
Still, this is a very well-executed moveset. Bravo, Katapultar (Kat? Insert preferred nickname here)!
Many thanks there! Didn't expect to get such positive wordings, or at least to this extent. Balance and over-elaboration are some of the general problems I have with my sets, as I always feel every move needs to be well..."creative". In any case, people tend to call me Kat, so you feel free to call me that as well!
Also, I've got to say that you're doing quite a fine job with your commentary (love their unique themes that match the character in-question...they fit your username and colorful avatar!) - I'd love to see what your first set would be like, but you take as long as you need to on that.
Gray Fullbuster is one of the main characters of the anime and manga Fairy Tail. Gray is a mage belonging to the mage guild “Fairy Tail,” and a member of its alleged strongest team. Gray is an ice-type “Molder” mage, meaning that he has the ability to create and shape ice to his will. This primarily happens in the form of his signature ability, “Ice Make,” which involved him creating whatever object he states after said phrase. Due to the fact that his training involved adapting his body to the cold by wearing very little clothing, Gray has a subconscious habit of randomly stripping, even in the middle of battle, going from fully clothed to practically naked in no time at all. Fortunately, 99% of the time, he keeps his underwear on. For purposes of Gray’s appearance in Brawl, we’ll stick with the above picture, a happy medium between fully clothed and stripped.
Statistically, Gray is about Link’s size and weighs slightly less. He moves along the ground at about Pit’s dash speed, and his aerial movement is comparable to Marth’s. All in all, he’s a fairly typical character in measurements, perhaps a bit above the average. It should be noted that Gray’s movement, including traction, are not affected in the slightest by standing on icy ground.
Gray’s DOWN SPECIAL takes direct advantage of that fact, since most stages lack icy patches for Gray to excel on. This move, which takes almost as long as a Falcon Punch to use, will cause the ground for one Battlefield platform’s length in front of Gray to turn to ice. If this move is used in the air, the start lag will happen as usual, then Gray will wait until he strikes solid ground to use the move, where it will happen immediately. Alternatively, you can press the Shield button to air-dodge and cancel the move if something goes awry. Gray can cover roughly two-thirds of Final Destination in ice this way before the oldest ice will start giving way to new ice floors you create. On the plus side, if you don’t erase it by creating new icy floors, this ice will last for the duration of Gray’s current stock.
-- Dash Attack
Despite the fact that Gray doesn’t slide on ice normally, this attack allows him to take advantage of the slippery terrain the same way other characters inadvertently do. Gray drops low to the ground and slides forward with one foot outstretched. This attack happens rather quickly, deals 6% damage, and trips opponents. On typical ground, Gray will only slide a short distance similar to that covered by someone like Mario’s Dash Attack, but when used on ice, Gray can travel the full length of the icy floor before the attack ends. Assuming you don’t want to go that far, you can shield out of the attack at any point after the initial short distance. Tapping the control stick the opposite way Gray is sliding produces the same effect.
-- Down Tilt
From his crouching position down on one knee, Gray swings a fist hard into the ground. The range is weak, but the hit deals 10% damage and okay diagonal knockback. On regular ground, that’s all it will do, but punching your frozen floors will have the additional effect of making a barely noticeable indent in the ice. Despite being difficult to see, these irregularities will throw off the balance of anyone else who passes over them, almost always causing them to trip as they do. Gray can create as many of these as he wants, but they fade automatically after about four seconds.
This non-standard-input SHIELD SPECIAL causes Gray to quickly retract his bubble shield and put up a large frozen barrier directly in front of himself. The structure is about as wide as Gray himself, and a little bit taller. It functions as a completely solid object, capable of taking 25% damage in blows before it shatters. The shield may serve a secondary function if placed on a frozen floor, however. Since it is not attached to the ground in any way, any moves with directly horizontal knockback, or strong enough attacks with any kind of horizontal knockback, can push the ice shield, causing it to function as a moving wall that will push anyone in its path along with it. It will retain its momentum if it flies off an edge, but will slow down and stop if it reaches non-frozen ground, travelling approximately one Battlefield platform past the edge of the ice.
-- Neutral Attack
Gray’s standard combo begins simply enough, with a punch from each fist dealing 3% damage. A third press of the Attack button causes him to follow this with a knee attack not unlike our favorite Knee of Justice. This carries Gray forward a short distance and deals 5% damage and a decent amount of directly horizontal knockback. Of course, this is not only good for sending opponents slipping across your ice, but as an easy send-off for your ice shield wall as well.
-- Forward Tilt
For this attack, Gray gives a lunging shoulder slam somewhat similar to Wario’s Forward Smash. It’s quicker and not as powerful, only dealing 7% damage, but like the Neutral Attack’s last hit, deals directly horizontal knockback. Of course, it doesn’t deal a ton, but it’s enough to send an ice shield sliding at a pretty good speed. This attack may be preferable to the Neutral Attack when dealing with the shield, since it doesn’t involve two prior hits and deals less damage to the shield, making it more difficult for your opponents to break it as it pushes them. The Neutral Attack, on the other hand, is generally more useful for hitting your opponents with to send them sliding across the ice.
Gray has a few other structures he can construct of ice, one of which is here, in the form of his UP SMASH. After charging up, Gray creates a single large ice fist that shoots up from the ground a short distance in front of him. It’s about the size of Bowser, and shows up rather quickly, though this attack can be a bit difficult to aim because the hitbox is a short distance in front of Gray. The damage ranges from 9% to 16%, unless the fist is formed over ice, in which case it increases to ranging from 16% to 24%. The straight-upward knockback is fairly good, allowing this to function as a decent KO option when an opponent’s damage gets high. The fist stays behind, acting as a sort of pseudo-wall in that running directly into it will stop a character, but it can be passed by using a rolling dodge. The fist can take 15% damage before it will shatter.
-- Up Tilt
Gray’s Up Tilt actually works as a nice precursor to the above move. Gray clenches both fists together behind his back, then swings them forward over his head all the way to the ground in front of him. This deals 7% damage and downward-forward knockback that sets up really well for the Ice Knuckle’s range. Opponents who hit ice and slide may escape your range unless they try to get up by rolling toward you, in which case they’ll run right into perfect range of the Knuckle.
-- Up Aerial
Gray backflips, kicking his legs upward in a large arc. This is slower than most flip kicks, but has solid range and good upward knockback particularly suited for juggling airborne opponents. Gray’s feet deal 10% damage and somewhat better knockback than his legs, which deal only 5%. Given the nature of Gray’s other moves, you won’t likely try to juggle anyone to their death this way, but you may be able to keep them up long enough to set up some nice surprises for when you let them back down.
-- Back Aerial
Gray drives an elbow backward hard, holding it there for a moment afterward. The sweetspot as he first throws it back deals 14% damage and good knockback, while the remainder of the time it’s a sourspot that will deal only 5% and flinching. Learning to use the sweetspot right can buy you time for setups and even serve as a decent KO move on high-damage opponents.
In a similar manner to his Up Smash, Gray’s DOWN SMASH creates a structure a short distance in front of him. This one, however, comes up a little more slowly, and won’t launch opponents into the air. Rather, touching it while it is forming will deal 10 - 20% damage and no knockback, with a 50% chance of freezing the opponent solid. This increases to a guaranteed freeze if the geyser is constructed on ice. After the spiky mass the size of Bowser has formed, it will stick around, acting as a passable obstacle like the Up Smash Knuckle and also dealing 4% damage and little knockback to any opponent who touches the top. This, like the Knuckle, can sustain 15% damage before crumbling. This move has quite a bit of startup lag, though not nearly as much as the above clip might suggest.
-- Neutral Aerial
Gray swings a fist as he twists his body a full 360 degrees. This hits a short distance both in front of and behind him, dealing 8% damage and weak horizontal knockback. This attack is quick and suffers little lag on either end. Because of the knockback, it can be useful for pushing opponents into the ice geyser’s spikes or, when short-hopped, for pushing them along your ice.
-- Forward Aerial
Gray bends one knee, then extends his leg forward quickly in a powerful kick. Gray retracts the leg quickly after, leaving no lingering hitbox. The kick deals 10% damage and decent horizontal knockback. The applications for this are roughly similar to the Neutral Aerial, with this being a somewhat slower and more powerful option that only hits in front of Gray.
Gray’s NEUTRAL SPECIAL is a chargeable and storable move most easily compared to Sheik’s needles. When released, Gray will fire forward anywhere from one to five small ice arrows, depending on charge, each one dealing 2% damage and flinching knockback. This is a good way to rack a bit of damage on opponents who you’ve gotten to slide away from you, and if they shield, you may just push them back a little harder with all those hits. As a bonus, using this when an ice structure (the shield, knuckle, or geyser) is directly in front of Gray will cause the structure to shatter immediately, automatically adding five arrows to whatever volley you’re otherwise launching. This is a rather quick move, though there is some noteworthy end lag.
For his FORWARD SMASH, Gray forms an upright spinning disc on the ground, then releases it, letting it roll forward. Depending on charge, it moves slower or faster, similar to Jigglypuff’s Rollout, though it is never as slow or fast as Rollout can potentially be. The saucer is slightly larger than the aforementioned Balloon Pokemon, and deals 15% damage and downward-backward knockback to those it crashes into. To make that clear, if Gray launches this at an opponent, it will knock them along the ground back toward him. Use this to close the distance on opponent who slide further away than you want them. The saucer will roll forever unless it strikes a wall, at which point it will break and becomes useless.
-- Grab
Gray’s grab is pretty standard, with average speed and range. Gray grips his opponent with both hands by the collar area.
-- Pummel
Icy magic flows from Gray into his opponent, slightly freezing them. Over the process of five pummels, Gray can freeze his opponent to the same extent as a freeze from a Mr. Freezie item. These are proportionally difficult to break (ie: 3 pummels is 60% [3/5] as difficult to break out of as Mr. Freezie’s ice), and must be broken out of before the opponent can do anything else, even if only one pummel is performed. Visual indication is given of the level of freeze, such as the first encasing the opponent’s arms in ice, the second their torso, etc., but they must always break the ice before they can use any attacks, even those involving non-frozen body parts. Note that throwing opponents who’ve been encased in ice to any degree will cause them to deal 5% damage to any other opponents they hit on the way, as well as ice structures, destructible stage parts, and so forth.
-- Side Throw
Whether forward or backward, Gray delivers a basic shove of the opponent in that direction, dealing 6% damage and decent knockback. Naturally, this is useful for sending opponent sliding on your ice, and is most useful after as many pummels as you can pull off.
Gray’s SIDE SPECIAL is often a good follow-up to that shove. Gray materializes the weapon seen above, and fires off a chunk of ice at about the speed of one of Samus’s Super Missiles. Gray’s lag times are also similar, though a bit slower on the startup. If the icy projectile strikes anything, it will burst in a large explosion comparable to those made by Blast Boxes, dealing 10% damage and okay knockback. Note that unlike many moves whose knockback is minimized when hitting a frozen opponent, this retains its knockback in full. Firing the cannon will also push Gray back about half a Battlefield platform’s length, or up to two Battlefield platforms’ length if he’s on ice (you can cancel the backward slide at any point after the initial half-platform by shielding, which will cause Gray to dig his heels into the ice and abruptly stop). Use this to effectively separate yourself from your opponent, probably so you can get a good setup somewhere before you really kick the fight into high gear.
-- Down Throw
Gray slams his opponent to the ground for 6% damage. This throw will break any ice encasing them, 4% for each time you used the pummel. In other words, this is the throw that turns your pummel into actual damage, though you’ll lose the freeze effect it had otherwise.
-- Up Throw
Gray uses one fist to uppercut the opponent, sending them flying upward and forward with 7% damage. This can be used to knock an opponent into a nearby ice geyser or sometimes as a setup to the ice knuckle.
Rounding out Gray’s Specials is his UP SPECIAL, which creates a set of icy stairs in front of him. The stairway acts sort of like a tether, adjusting its angle to connect to a ledge if there is one within range, or travelling at a 45 degree upward if there is not. Gray will form it such that he is standing on the bottom step, and its range is similar to a 4-Pikmin-long Pikmin Chain. The stairs are a jump-through platform like the bottom of the Halberd stage--they can be passed through going up but not dropped through by any means. Stairs that connect to the stage function as an extension of the stage that both Gray and his opponent(s) can freely walk on, and the bottom step even functions as a ledge that either party can grab. The stairs are surprisingly non-slippery, and opponents who slide onto them will stumble down a couple of steps before being fine. Note that Gray cannot use this move again while standing on the stairs, nor can he use it when he jumps from the stairs, preventing infinite recovery.
However, Gray has a couple of tools to make these stairs dangerous. First of all, he can use the Up Special again to create a new set of stairs, which will automatically destroy the old set. If an opponent is pushing it to reach the bottom step, you might just pull their last hope out from under their feet. Of course, opponents are likely to be wary of this, but if you’re pressuring them at the ledge hard enough, they might fall for it. Of course, you’d have to get away from the stairs before you could make another set. Another trick you might try is to use your Down Special in range of the stairs. Iced over, these “stairs” no longer function as such, and are now nothing less than a slippery slope of doom. The bottom step can no longer be grabbed, and while it functions as a normal slope for Gray, his opponents will slide down it by just standing there (thought it should be noted that they’ll still technically “land,” regaining their mid-air jump and Up Special if they’ve used them, before sliding off the edge).
-- Down Aerial
Gray performs a stall-then-fall similar to Sonic or Zero Suit Samus, travelling slightly forward as he descends with one leg outstretched. Opponents hit will take 9% damage and okay knockback. If Gray strikes an area he’s iced over with this move, the ice will crack and break. In most cases, this is similar to the breakage caused by the Down Tilt, in that it will increase trip rates for opponents who pass over it and automatically disappear after four seconds. However, using this on a staircase (whether it’s been touched by the Down Special or not) will break off the portion of it below where Gray lands, causing it to tumble downward and deal 14% damage and spike anyone hit. This can be used to pull the ledge away from the opponent like a repeat use of the Up Special, or as a means of punishing those who hang around the ledge too much. Or you might simply use it to shorten the staircase so you don’t have to use as much of your frozen floor quota to cover it.
Finally, we reach Gray’s FINAL SMASH. Gray crosses his arms in front of him like the above clip shows (though that’s not him in the clip, obviously), and this Final Smash locks onto the nearest opponent close enough to Gray (there’s a catch area similar to that of Ike’s Final Smash). Multiple light-blue magic circles form around the victim, then Gray’s body dissipates into the air as the foe is completely encased in ice. Iced Shell is a powerful magic requiring the user to sacrifice their own body to encase the foe in ice so powerful it can’t be melted or broken. Fortunately, the powers of the Smash Ball should be able to alleviate Gray’s sacrifice a bit, though perhaps at a slight nerf to the spell’s permanence. Gray immediately respawns via the normal respawn platform, though without having lost a stock or changed damage percent at all, and can attack and push around the frozen foe, who must escape at 8 times the escape difficulty of Mr. Freezie’s ice.
[collapse=Playstyle]-- Playstyle Summary
I believe Gray’s playstyle should have been fairly apparent in the moveset itself, but in case a few things weren’t clear, let me draw a little mental outline for you here:
Gray’s primary method of KO’s is getting frozen or otherwise incapable opponents to slide past the edge of the stage to their doom. You want your ice connecting to a ledge, and to cover as much of the stage as possible with it. Attacks like the Up Smash and subsequent moves that can sort of juggle the opponent are useful for buying time for the setup, or you might just use ice shields and other such structures to close yourself in and get the time you need. Opponents who press you a little harder may be dealt with via the Grab, which will allow you to freeze them and get some guaranteed time. Also, at some point in the creation of the ice floor, you’ll probably want a set of stairs over one end of the stage, since the downward slope makes it even easier to rocket an opponent to their horizontal doom.
Once your setup work is finished, your main objective is to give your opponent a solid push while they can’t do anything to stop sliding. The Pummel and Side Throw are a natural combo for this, while the Neutral Special makes a nice damage racker if your opponents are escaping too easily from the ice. Keep that in mind--frozen opponents will have a harder time breaking out at high damage. Structures like the Knuckle and Geyser give you a layer of defense you can quickly turn into damage for your opponent via the aforementioned Special. Back to the issue of getting your opponent to slip over the ledge, the Down Tilt, which causes opponents to trip and slip on your ice, works well in conjunction with pushing an ice shield with the Forward Tilt or Neutral Attack, since opponents will likely be in the middle of getting up as they fly over the edge if you time it right. At that point, a slippery slope over what was once the stage’s end may be all you need to turn the match heavily in your favor. Several of your other moves, such as the Forward Aerial and the Forward Smash, can also be used to mix it up when sliding your opponent around on the ice.
[COLLAPSE="Gray Fullbuster"]Ohoho, this looks fun. And easy to read too; the GIFs and cooltext ice theme make for a rather dynamic first impression, and show that you put quite the bit of work into gathering the former - nice to see you doing an awesome job at making anime sets. I haven't gotten any further than episode 7/8 with Fairy Tail in the same case with Bleach due to not wanting to get too far into it, but it looks like you picked a pretty good fellow to focus your movesetting sights on....who doesn't like icey characters? Better than Pokemen, that's for sure.
Matching it's shortness, perhaps the set doesn't have the most amazing sense of flow or originality to it, but hey, just imagine how complex a set for Gray could have turned out if somebody like Warlord or Smady got their hands on him! I realize that if Gray does set-up his Down Special ice there will be no proper way for foes to get rid of it and that all his icey moves are guaranteed their bonuses, but that just gives enemies incentive to move away from his territory and makes Gray a bit more technical than he seems, especially given you've also the option to sacrifice a bit of ice for your staircase...encasing the floor in ice strikes me as the kind of thing that could be given a HP unit to occupy foes with in order to give them a chance yet distract them while one sets up, but choosing not doing that or turn the Side Special into a slanted slope for enemies to slide down on to their deaths is quite fitting for a protagonistic character. In other news, the idea of sacrificing your walls for extra ammunition with your Neutral Special strikes me as quite a wonderful one...it's quite easy to appreciate these small things in sets like these, even if said move could perhaps do with a better bonus such as having the arrows possibly freeze the enemy in large numbers despite it obviously being inconceivable that such thing would happen in the series.
Quite a funky set in a good deal of areas like with Angel, and one I hope will give me incentive to make one of a similar caliber.
I can see how that'd work in a contest like this, especially with some of the very-much-elaborated sets I've seen. Pennywise the Dancing Clown, Dark Bowser, Weird Al Yankovic of all people... it's a wonder that these things aren't already elaborate enough that it takes half a year to make a set. XD
Still, it's not as if elaborate sets ruin the whole experience; heck, in most cases, it enhances it, since it shows how much effort went into it. As a whole, I'd say that if that's one of your main "problems", you're doing pretty good. :D
Also, I've got to say that you're doing quite a fine job with your commentary (love their unique themes that match the character in-question...they fit your username and colorful avatar!)
Thanks! I felt like adding some color. Besides, should make it easier to see exactly where any particular review is, so it's practical along with being aesthetically pleasing! XD
Technically, I'm already done; I'm just showing it to a few non-MYMer friends to catch any glaring errors. (That, and I kinda wanted to show it off to them. *is sheepish*)
So, you want a game mode eh? Well, since we're always making Brawl more complex and skill based than it already is, how about we just create some dumbed down stupid game mode for the casuals to enjoy. This mode, based on a rather bizarre but amusing Warcraft 3 map(hence the name, most people who play Warcraft 3 seem to have very bad English) in which you just play a series of several mini-games in which you pretty much just rely entirely on dumb luck. And that's pretty much what this is too. Have fun.
As the rounds go on, you accumulate points based on how well you perform in each event. How many will vary from event to event. There are 6 events in total, after which a winner is determined by who is Smady got the luckiest and accumulated the most points. Without further adieu, we'll move on to the first event. Four players are required to play this mode, by the way. How to play? Just click on the Are You a Lucker button. Where is that? I don't know, go find out yourself. Whatever menu is convenient.
Round 1: For the first round, players will all control Metal Rhyperiors, who spawn on the same platform. Everyone has super armor, and there is also a Grand Doomer on the stage. The Doomer will set up 4 portals underneath the platform, one for each Rhyperior. You can fight it out for who gets what, but the Doomer himself is invincible and has infinite jumps, and because you have Solid Rock and a Metal Coat on a super heavyweight, there's no way you'll actually KO each other before Doomer has the portals set up. At that point, the stage will disappear and each Rhyperior will fall into a portal. One of the portals will teleport to a platform near the top blast zone, while the others will just teleport them to another portal, AKA their death. The winner here gets 300 points, and then this is repeated 2 more times, the second winner getting 200 points and the third getting 100 points. The Doomer makes one less portal each time.
Round 2: For this particular round, you are supposed to survive the longest in a rather... hellish playing field. Your on a standard flat stage, except it's all rather tiny, and everyone is playing as Captain Hook, pre-edit version... and you are playing against 10 Kangs. Like the Grand Doomer from last time, they are invulnerable, and will just create mass bullet hell for you to dodge. You don't get shields or dodges either(not that Hook's shield is worth it), but rather can press shield for 3 seconds of invincibility. Use this whenever you feel like it. The first person to die gets no points, the next person gets 100 points, then 200 and 300.
Round 3: This time, everyone will play one at a time, and we're using Kenji and Hisao. You are placed in front of a series of 4 doors, each with a specific lock. The lock can only be broken with your Side Special, and getting the correct girl at that. If you get the correct one, she'll open the door for you with cripple magic or whatever, before disappearing. If not, the floor falls out underneath the player and he dies. The first door four of the five will work to open it, but the next one only three out of five girls will work, then two and one. You don't know which of the five will actually work, so it keeps you in suspense. If you don't get through a single door you get no points, one you get 50, two you get 150, three you get 300, and all four you get 500 points.
Round 4: This time, two players will get matched up randomly over the course of the event. The players in the match will just press up, side, or down, to get one of three characters. Up gets Chaos 0, Side gets the Flying Dutchman, Down gets Jin-Gitaxias. The fight will then play out in a scripted Rock-Paper-Scissors esque manner that takes place over 20 seconds, in which the winner decimates the loser. The order is Jin beats Dutchman, Dutchman beats Chaos, Chaos beats Jin. The winner is then awarded 100 points, and it is switched to another combination of 2 players. This will continue until all players have played at least 3 times.
Round 5: Next up, everyone gets to be an Item Tree! Everyone is invulnerable, and you are just going to spam spawn items until you get the Transmigration Aura. Once you have that, just touch it and you'll fly off the top blast zone and win, for whatever reason. The first to Transmigrate gets 300 points, the next gets 200, then 100, and finally the poor sap left behind gets none. Starting to see a pattern?
Round 6: For our final round, everyone is put in control of the same character, and has a fight to the death. Normally, this wouldn't be luck based at all. Except everyone is playing as Battleheart. This event requires a bit more skill than the others, largely on the basis that you do get to pick what level ups you take and such. Still, you're mostly just relying on the AI here. Winner takes 300 points, second takes 200 points, third takes 100 points, last place takes none.
Congradulations Winner! You are Smady a Lucker! This is almost as pleasant as that time Big Rigs told you that You're Winner, right?
And I've come back from the dead with a giant wall!
Vergil
Vergil look like a lot of fun, and you do a great job of adapting his moveset from UMVC3 while managing to keep things fresh. Unfortunately, I'm not a big fan of the orb mechanic, mostly because it's near impossible to balance. As it stands, it's not hard to build orbs at all, and the rewards for spending some (namely the sword formations) allow you to easily regain those orbs just from the hits you're guaranteed from pulling them off. It's also one of those awkward mechanics that by nerfing it, you make it nearly useless, so simple number crunching isn't a solution here. Besides that, though, I love the on-hit combo system you have worked out with the teleport, and the attacks are simple and elegant, yet dynamic due to their movement and canceling properties. Definitely a cool set, but it suffers from some balance issues.
Terezi
The mechanic here, while an interesting idea, makes almost no sense. A quater second of lag is a really long time, and it can only be improved by licking the foe. Now this might be okay (if weird) if Terezi actually had any licking moves. He only has three in the whole set, though, meaning that you're going to have a rough time doing just about anything with this character. Add that to the fact that the specials don't do anything for the playstyle and are generally bizarre and nonsensical to anyone who hasn't read Homestuck and the set just doesn't work with itself. There are a few scraps of cool things in the set, but they're disconnected both logically and in terms of actual gameplay.
Medusa
I always loved this character, and this set does a great job of showing off her abilities and playing to her personality. The Vector Plates are a great tool, even if they are very confusingly worded (for reference, the last set with a move this confusing was N. Tropy), and all the other specials do a great job at controlling space. The ability to "implant" her specials is also genius, as you sacrifice your recovery for the ability to stalk the opponent(s) from safety as you set your plans in motion. Where I find that the set suffers, though, is in it's lack of direct physical attacks. Medusa was not a stranger to hand to hand combat, and the plates open up all sorts of opportunities for rushdown tactics. Instead, your options while moving on the plates are rather limited in scope, and your are far better off hitting your opponents into them than using them yourself. Overall a fun and creative set, though said creativity can be a bit restricting when it comes to your tactics.
Garbage Man
This set is very similar to Beezwax (of course), and most of what makes the set interesting comes from the properties shared with Beezwax. As usual for your sets everything interacts logically and intuitively, and bout d you have a lot to interact with. Almost too much, in fact. With the Garbage Man's size, you can easily cover the entirely of a smaller stage with hazards, using your own body to fill whatever gaps there are. Against certain opponents, this can make you nearly unbeatable (though, to be fair, it also severely hampers your own movement and can make you bait for faster foes. ) Combine that with the fact that dumping goop is a lot less interesting than Beezwax's mobile artillery style, and I can't really rate this set above it. It's certainly well constructed, but difficult to balance and not terribly interesting.
Rhyperior
If there's any way to epitomize an extreme heavyweight character, this is it. You're big, you can hardly move, but when you do move, you, in your words, **** **** up. I love the passive hitboxes on movement, and the sheer staying power of the set that allows it to make its slower moves (read: all of them) useful. Aside from possibly being extremely overpowered, I don't have much to complain about here, and I managed to go from initially hating the writing style to laughing at it by the end of the set, so great job, JOE!.
Ratigan
Have you ever played Mousetrap, Kupa? Because this set is essentially the SSB version of it. You spend forever trying to set up a complicated chain of events, only for some schmuck to mess it up, causing you to get really angry. It's a really cool concept for a set, but I can't help but think that you went a bit overboard. I've never liked special-smashes as inputs for attacks completely unrelated to the normal specials, and the things you have on those inputs don't really serve that much of a purpose. They could probably be cut and without substantial loss to the set. The different attacks while your "inner rat" is active are a bit off, too. A few of them seem to play towards planning and setting up, even if Ratigan should be in a blind rage and only focused on tearing the foe to shreds at the time. Aside from those issues, though, it's certainly creative and looks like it would be plenty of fun to play.
Shiftry
I do love a good ninja set, and the ability to vanish into piles of leaves makes for a great ninja mechanic. Unfortuantely, Shiftry does a lot of things that are decidedly un-ninja like, the down special being the biggest offender, with the pummel coming in for a close second. The Shiftry evolution line gets a lot of moves that don't really make sense in once you're past the evolution that gains them, but you seem to have thrown them in here anyway, leading to a mild case of Pokemon Syndrome. Aside from that, though, the set is simple, yet effective. The wind mechanics are cool in a manner similar to Tropius (lets see these two fight, that'll be an interesting match) and overall it's pretty solid.
Gray Fullbuster
When I first heard you were doing a set for this character, I figured you would go crazy with the ice structures. I'm glad you didn't, instead opting for a more reserved and strategic style with plenty of good old fashioned punching and kicking, which is pretty much exactly how Gray fights in the source material. Everything flows well, and I really like the way you use the ice floors for more than generic slipperiness, instead using it as a hazard, power-up enabler, and KO method all in one. I can honestly say that this is exactly how I would want Gray to play in a smash game. Amazing job!
Board the Platforms is a game mode that can be toggled just like stock matches, timed matches or coin matches. We'll shorten it to BtP matches here. When selected, determine the amount of time the game will last (similar to coin/timed matches) then choose your characters and select a stage as usual. For a reason you'll see soon enough, any characters with a size larger than 13 are barred from the roster selection, or basically anyone wider than a Battlefield platform.
The game doesn't look different, but the win conditions certainly are. As soon as the game starts, a BFP-sized circle of light will appear upon a random part of the stage that can be stood upon. Don't worry about the camera angle; for as long as it's there, it'll frequently emit large rings of light that rise up to the height of a Capsule before fading, so anyone can see it. The circle will never appear with any part of it over a ledge either, though it can appear on on any platform on the stage.
Characters will have a point score above their percentages where their scores usually are during coin/timed matches. A character will gain 1 point for every quarter second that he or she stands on that circle, and the character with the most points by the end of the match wins! No good flinching or floating above the circle - you really need to have your feet on the ground upon it for the score to count, unless you're one of those crazy aerials-on-ground folk. If you're more than one character, such as the Ice Climbers or some whacked Hugo set, then you'll need all relevant members on the circle to accumulate points. Nope, those minions and props won't get points for you.
This isn't the camp-fest that you think this might be, though. The circle will disappear then reappear on a different part of the stage after between seven or twelve seconds (could be any time in between that), keeping everyone on their toes as they chase after the coveted spot once more. Note it'll automatically do this if the part of the stage that it was on can't be stood upon (ex. Bridge of Eldin getting bombed, Frigate Orpheon flipping, Port Town Aero Dive moving on, some terraforming character doing their job)
Sometimes, the circles will mix up too. Instead of a single circle of light, two or more circles (depending on the number of characters) will appear instead on different parts of the stage, each hued to one of the active player colors (which are red, blue, yellow and green). Should a character stand upon a corresponding circle, he or she will gain twice as many points instead! Any other character will gain the usual amount of points, so it's a decision to either be greedy and reap the bounty or play modestly and keep opponents out of their own circles.
"So wait, are prone-abusers/pitfalling characters totally screwed here?" Not exactly - in addition to these circles, darkness circles might spawn across the stage as well, which are otherwise exactly the same in appearance and behavior. But so long as a character stands on these, he/she will lose points at a rate of four points per half-second! Not only that, but any characters above these circles will find gravity to be significantly magnified, almost as though they were metal. Naturally, you'll want to jump out of these as quickly as possible, though perhaps some may want to try knock foes into these negative areas to lower their scores. Or, if you're crazy enough, grab foes within this zone and hold them in there to sap their points before repositioning them.
So while the gist of Smash Bros. remains the same (that is, punching foes out of the arena), the methods of reaching victory are certainly altered. Will you keep your feet on the stage and rely on your ground game to knock foes away? Maybe you'll stick to your air game to batter enemies away, resting on the circles when they're well off-stage. Perhaps you'll let the foe reach the circle first before rushing in, in order to knock them well out, or maybe you'll have your grab or smash attacks prepared against anyone who'd try to knock you out of a circle. Is it worth prioritizing the colored circles? Can you take advantage of the dark ones? How would you emerge victorious in this Smash Bros. style king-of-the-hill?
I'm probably not a Lucker. I'm not a huge fan of game modes that force you into being any one character for no reason.
On the other hand, though, I can see the work that went into making this mode more accessible to most people... and the previous paragraph may be based on the fact that I don't recognize half the characters. XD
So overall, I'm gonna go with "Good job, but not my style".
Board the Platforms
I like this mode! King of the Hill is already chaotically fun, but with Brawl's already-chaotic style...
This mode would be super fun to play. Simple rules, so it shouldn't take long to figure them out, but on the other hand, the new strategies that have been opened up because of those "simple" rules make it so that you actually have to think a little more. Any mode that makes you play differently based on your character's style is okay by me. :D
A Completely Unrelated Note
Okay, so my set's ready to go... except for the fact that I have no idea how to get pictures and GIFs from my computer to the post. Can anyone help, please?
(Also, in case you're wondering where the colors went, I couldn't figure out anything that made sense with the modes.)
Rhyperior
Alright, let's not try to pretend otherwise, this set really is a trainwreck. The set is in fact horribly OP, largely due to how utterly ridiculous you make that stupid Rock Blast move(at least the chances of a golden rock/geodude are fairly low, but even then the thing is stupid powerful). It also kind of mitigates any desire Rhyperior has to play at close range, since it's fairly easy for him to roll away with his rolls dealing damage. While this contributes to some basic flow, Rhyperior should be a bloody close range character, not some cowardly camper. His melee moves don't really flow into each other in the least, either, and between that and the writing style I'm left wondering if you were really serious at all when writing this set. I admit I laughed at a couple jokes in there, but it really got in the way of my understanding of the set at points. Pretty much, the set doesn't flow, is OP as heck, and also fairly OoC at points. Not a good combination. Whatever it is, I really miss the JOE that made EED Soldier.
Ratigan
Largely based off Dave's statements in the chat, I was honestly pretty convinced I would hate this set. Moral of the story, don't trust Dave, ever. Because I actually find this set to be really cool... though I have a rather large amount to complain about, unfortunately. Still, this set reassures me a bit after I kind of got concerned about you as a moveset designer towards the end of MYM11(I think Bowser was your only MYM11 set that I actually found noteworthy). That said, let's dive into some criticism.
You would probably know from my comments on various David sets that I hate moves that exist solely to pressure characters into traps. Or at the very least, if that's their only purpose. For what it's worth, that's really prevalent in Ratigan in his melee game, which is rather unfortunate, because at points that stuff is really well characterized. I sort of enjoy that his Dash Attack becomes possibly even suicidal when he's in the enraged state. The characterizations not pitch perfect or anything, but you go as far as you can to capture him, though I sort of wish you made him abandon more of his strategic elements in Rat form, to be honest. Would make more of an interesting decision to protect your traps if you knew you were going to get cut off from them. But this is all off topic, what I do like about the melee moves is that he actually does need them for other purposes than that. Namely, to push around his minions, set off and guard his traps, etc. And at the very least, they aren't as awkward as the stuff I complained so much about in Hook and Grinch.
The actual trap game I love, for a variety of reasons. There really is an incredible amount to do with these traps, making Ratigan shockingly versatile, and the designs themselves are creative and would lend to more interesting matches on their own. As you said, by nature of the way the set works you can't really just place traps everywhere like an MYM5 trap character and get by, and on a whole the way they work together is a heck of a lot more interesting. And hell, you threw in plenty of unique stuff too in how they are set-up, send him into a blind rage if destroyed (honestly, I think this just adds a bit to his game, if albeit I believe it would be occasionally just frustrating), and that you can place them in the background(with more use for them than other background traps, since these ones can actually be dodged). And obviously, you expand upon their uses a fair bit with the blimp and record player, and when they already were quite cool to begin with the set really comes together as something quite awesome.
Aside from that, I can see a lot of devotion to the character throughout the set. How he plays with his minions(they seem to adore him, while he can casually toss them off a blimp) and the afformentioned rat mode really bring to life the character you were trying to display here. It's not perfect, but I would greatly disagree that he comes across as cowardly in this set, what with him being so darn proactive throughout it. I guess my main complaint with the set really comes down to that while it's already good, there are a bunch of awkward things weighing it down(I'm... not exactly fond of how you utilized the mindgames with the record player, it's awkward and used up way more inputs than it needed too). Still, it's hard for me to say a lot bad about the set when you gave him such an extensive degree of depth(it's rather subtle, but he has a not only functioning but very deep and fun gimping game in there), mostly I just feel that if you had pushed it a bit more and made it a bit more interesting it could have been one of your absolute best. It's still one of my favorites so far though, all criticism aside.
Comments for Shiftry and Medusa will come on Sunday or whatever, I don't have time to read those sets today. As for why I'm not mentioning Gray... Kibble and I already discussed my thoughts on him. Not a fan, if I must make it clear.
Okay, so my set's ready to go... except for the fact that I have no idea how to get pictures and GIFs from my computer to the post. Can anyone help, please?
In order to post pictures, you'll first need to upload them to a website that hosts images - photobucket and imgur are both pretty easy-to-use image hosting websites. I recommend the latter. Once you upload an image, the site should give you a bunch of different links to that image - in imgur, they'll be just to the right of the image preview. Look for the one labeled "Direct Link," copy it, and paste it wherever you want the picture to go in your post, right between a set of
tags, and presto you've got an image. Easy as pie, once you're familiar with the process. Though if you're going to have a lot of images you'll want to keep track of, it's probably best to set up an account - not required on imgur, but it comes in handy.
Rhyperior
This is a very well-characterized set - Rhyperior feels extremely powerful (but surely you don't need another person to point out the overpowered bits of the set) and over-the-top, especially with that Solid Rock mechanic - I'm surprised we don't see more sets that use something like this, since it's a pretty basic idea, but has quite a few potential applications - and the damaging rolls. (As a FA-targeted aside, slow and damaging rolls are not going to encourage Rhyperior to use them to run away in the least ) Some people have complained about the writing style being unfitting, but I think it works for Rhyperior, in a Rooligan sort of way, and I didn't find it to be too much of a problem or distraction while reading the set. Not my favorite set of the contest, but it's definitely a solid piece of work.
Have you ever played Brawl with items on before? If so, are you famaliar with the Timer item? In casual matches, it's essentially a giant buff to roll dodges. Granted, if people are actually intelligent (Rare with items on), they can predict where you're going and punish horribly, but used sparingly it could still be immensely useful in heated competitive play anyway.
VS. MODE BOSS BATTLES
Ever think it was just a waste that the bosses were only used for single player and never brought into the actual mode we care about? Being unable to use the bosses as one of our many sandbox tools in VS. Mode is a little disappointing. . .Particularly, all of these various bosses that you've never refought in forgotten unfinished SMs.
This mode does more than just make the bosses stages in Vs. Mode, though. It can be up to a 5 way Brawl, as the boss can still win the match on the results screen if everyone dies. Difficulty is selectable as usual for you to determine just how much of a focus the boss needs to be given in a match. Regardless of how powerful the boss is, though, there's inevitably going to be a hell of a lot of dickery going on. Trust nobody!
Aside from bringing back all of those old SM bosses, this mode serves another particular purpose for MYM - it prevents the terrible cowering FFA politics of MYM sets.
FA: two things, 1) he's taller and lacks the mobility of falco,meaning his rock blast has 1 function, to force an approach. 2) think about what it means to have to go close range with him (hippo).
Pokémon Trainer MYmini #7 - Extra Extra [Ver 2.0]
Time to put all those Make Your Move Pokésets to good use! The way this mode works is like a sort of gauntlet comprised of six stages, each made up of different natural environments from which different sorts of Pokémon spawn, making use of their respective movesets. The first environment is a forest, followed by a beach, then a desert, a power plant, a laboratory, then you go through a mini-gauntlet of its own in the form of a "showdown" with Lance, who uses, unsurprisingly, Dragonite, amongst an assortment of other dragon-type Pokémon from MYM's latest and greatest.
The game is played like the SSE, each different stage varies in its natural hazards, and the Pokémon who appear are, while limited to a list specifically for each stage, randomised as to which you will actually fight. The amount you fight per stage remains largely the same. Rather than a typical brawl, each Pokémon has a set stamina that has to be depleted, though they still do take knockback and extra damage if they hit a wall from said knockback. You, the trainer, start out the first stage with a Pikachu who has the stamina of 100HP. By wearing down Pokémon to 0HP, they enter their usual pose which they'd have if they lost a stamina match. By holding down the neutral special at any time, Trainer Red pops out a Pokéball, and an aiming reticule appears on the screen. If you hit a Pokémon and successfully catch it, it will be added to your team and can be switched to by holding the shield button and then the neutral special. This is possible at any time, but 100% guaranteed if the Pokémon has fainted. Pokémon not out on the field will gradually recover health, giving you incentive to switch them out.
The problem here is that you can only have up to six Pokémon, and if they're crappy, then that's really your problem to deal with, as you can't get rid of them for the rest of that playthrough. Unlike in regular Brawl, Pokémon are susceptible to their type strengths and weaknesses, perhaps making you want to play more strategically, especially when you approach the Lance fight at the end. Depending on difficulty, you can also have other gym leaders like Misty or Brock appear in certain stages, or by messing with the options some more, give yourself Pokécenters to heal one of your fainted Pokémon at which appear between stages. By winning using different conditions, such as difficulty parameters or limiting yourself to certain kinds of Pokémon, you can unlock different trainers to use in this mode, allowing you to branch out beyond the initial Red.
In which I show sign of activity in MYM after 6 contests and review a set.
Gray
First off, I have no idea who Gray Fullbuster is, and him having the Americanised spelling of the word grey is really going to send my spellcheck into madness/expect the occasional subconcious Grey.
The thing I notice first with Gray is the organisation, with key moves being branched under a certain special move. For me this helps the playstyle flow extremely well, and gives me a good idea of what normal is applicable to what special and vice-versa. I know back in MYM5 and 6 I was opposed to the idea of having to actually explain a specific playstyle to people rather than let them use their own judgement on how they would like to play them (and still am in all honesty), I think this is a great way to ease me into a playstyle without going "RAR he focuses on x and x solely and if you do something else then you are bad".
Onto the set, I dig the ice element in general, and the stage modifier is great, especially with the indents you can force into it, and the fact that he uses a slippy surface to control the match and his opponents is a nice idea. The melee focus is always nice, and is an aggressive way for Gray to control where his opponents go to.
The other specials and moves are great, and the Final Smash is simple and effective; although the respawn seems redundant and people unfamiliar with the character would be left wondering 'why have I respawned but not lost a stock after activating my Final Smash?'. However, the stair special is awesome, if only for the idea you can trick people by making stairs for them to recover with, only to turn it to a slope at the last minute and dash their hopes of recovery.
So yeah, in summary Gray is a focused, easy to follow moveset with good ideas and you made his playstyle apparent without force feeding it to me.
I still need to get round to reviewing Warlord's Komodo Bros. moveset, regardless of how irrelevant it is now. I said I'd review it but I left before they were posted.
Card Battle mode is selected like any other mode, such as Stock and Coin matches. In this mode, each character's moves are turned into cards, and put in a deck! The deck is then shuffled and given to them before the match starts. Decks appear around the character's portrait. There can be four cards shown; the bottom, front card is the currently selected card and the rest are behind it.
Now, for how cards work. Playing a card makes the character execute the input shown on the card. Some cards still require the criteria to use them (Dash Attack card requires your character to be dashing) and will give a negative sound if you try to use them without meeting this criteria. Once you use a card, it disappears from your deck and the next card moves into its place.
You are initially allotted 23 cards, one for each input. You get six grab cards, but you can only use a certain throw or pummel once per card. For characters that do not have the usual inputs, the corresponding cards will be added (or taken away). This post will assume that the characters have a normal moveset. Once all the cards are used up, you must take one second to charge your reload input to get your deck back. They come back shuffled, again.
Randomly, special cards can be added. These cards can be turned on or off in the Card Battle menu. They are on by default.
The match ends when the normal criteria are met. You can have a stock, timed, or coin match for Card Battle mode as well.
Now, onto the cards and special moveset functions.
Card Types
The first cards are your Attack Cards. Purple cards are Specials, Yellow cards are Standards, Red cards are Smashes, Blue cards are Aerials, and Green cards are Grabs.
The bottom six cards are, from left to right, Pokemon Cards (lol), Assist Cards, Enemy Cards, Item Cards, Fiend Cards, and Final Smash Cards. Pokemon Cards function as the Pokeball item. Assist Cards function as the Assist Trophy item. Enemy Cards summon any SSE enemy, MYM Story Mode enemy, or any summon, minion, or helper from a MYM moveset. All are aligned to the user's team. The Item Card gives the user a random item (except for an Assist Trophy, Pokeball, Fiend Doll, or Final Smash ball). Fiend Cards summon a Fiend Doll to fall from the sky. Final Smash Cards give the user the Final Smash aura. Special Cards have a chance (None, Low, Medium, or High) of being inserted into a character's deck when they reload.
Moveset
Every character will have the same, universal "moveset" in Card Battle mode. Here is the moveset under the assumption you are using the Wiimote and Nunchuk (the official default controller).
Control Stick - Move Character
The character you are playing as will move when using the control stick, like normal. If they can move, that is. You can also crouch or drop through a platform with the control stick.
C Button - Jump
Pressing C makes your character... jump. The number of jumps depends on the character.
Z Button - Shield
The shield button activates your character's bubble shield. Holding it for too long stresses out your character, and they become dizzy.
A Button - Use Card
Pressing A makes your character use the currently selected card, to the right of their damage percent. Don't worry about direction, it automatically inputs the direction for you. It also functions as the Shuffle command when you run out.
Neutral Special - Drag and Drop
This is how you rearrange your cards. Select a card with this, then use the directional pad to drag it through your deck like you scroll with the side special. Press this again to drop it in between the space you select. Speaking of the side special...
Side Special - Select Card
Okay, this is important. You can navigate through your card deck with the Forward and Back Specials. Left or right moves the currently selected card left or right in the deck; take for instance, the pictured Mario deck up top. Pressing right would move the Down Tilt card into the Selected Card space, where the Up Tilt card is now. The Up Tilt card will move to the very top of the deck. The Front Air and Up Smash cards would shift right one space each, and a new card would be in their place. Exactly as if you would have pressed A to use the Up Tilt. However, the Up Tilt is not gone, just up at the top. Now, pressing left would reverse this whole process, making it the same as it was. Pressing left again will make the card at the top (where the Up Tilt was) move into the Up Tilt card's place, the Front Air card would move to the left, disappearing, the other two cards would move to the left one space, and the Up Tilt would move up, where the Down Tilt was. Pressing right would reverse this action. Understand? It's more simple in practice than in words.
Down Special - Card Break
Card Break is a counter of sorts. If you press the Down Special as the foe uses a card, the two cards will "clash" and both will disappear, with either having no effect. In essence, you used one of your cards to break the other. See? However, this is a risk-and-reward move. You're eliminating one of their cards, but at the same time eliminating your own.
Up Special - Card Break (Recovery)
This is like Card Break in function, but it's not intended to break the opponent's card. If you press the Up Special, the currently selected card will break, causing a small explosion on your character. Using the control stick to select a direction, you take two Stage Builder Units' worth of knockback in the desired direction. This can't be countered by a card break, however. You also deal twice the damage to yourself equal to how much damage that card would have done at the least. Another risk-and-reward.
I always thought Bonus Mode was a cool, if flawed, mode in Melee. Not really something competitive, but a good time waster, you know? So since Brawl got rid of it, let's bring it back...and make it better!
First off, New Bonus Mode has an expanded selection of modes: You can have it act like a Timed match, a Stock match or a Timed Stock match as opposed to Melee forcing you to play it Timed. This play like normal, IE stock ends when everyone except one person is out of stocks, except the person declared winner goes by bonus points. However, the person who would normally win is, for some bonuses, considered the "winner". For example, the Blazing Heart bonus requires you to be down three stocks/points, then come back and "win", IE have the most points in Timed or be the last man standing in Stock. This'll help your bonus, but might not actually make you win the bonuses...this is the essence of winning.
The bonuses have attempted to be balanced a little more, so as to make it more interesting and competitive, but it is still probably a fairly casual thing. A fair deal of stage/character dependant bonuses are present as well.
Aside from that, it is admittedly pretty similar to Melee's bonus mode. Get the most points and win!
I originally intended to get way more bonuses in this post, I was shooting for a minimum of 300...but I mistimed and thought I had one more day, so this is unfortunately being released a bit half-baked. Once voting for the mini ends, though(I don't want to invalidate the voting with edits), I will try to finish this to the best of my ability, even if I don't think anyone cares(Since this is not the most unique MYMini. I just like Bonus Mode).
Good luck everypony!
Bonus List(100)
KO, 750: KO an opponent.
Death, -375: Be KO'd.
Stale Moves, -750: Works the same way as it does in Melee, with the exception of a larger penalty due to more positive bonuses.
The Man in Gauze, 1000 points: Finish fighting King Ramses without one self-KO. (Defined as dying without being hit by the stage/enemies).
Suffer My Curse, -1000 points: Self-KO against King Ramses.
Materialist, 1000 points: Held the most items, not counting regrabbing the same item repeatedly. Disabled if items are turned off. If it's a tie, all tied players get this(minimum 1 item).
Mimimalist, 1000 points: Held the least items, not counting regrabbing the same item repeatedly. Also disabled if items go bye-bye. If it's a tie, all tied players get this(minimum 1 item).
Big Blues, -700: Get KO'd by being scrolled offscreen in Big Blue without being hit into it.
The Power of the Dark Side, x800: KO'd the opponent with a Beam Sword. You get 800 for each KO with a beam sword.
Smash King, 1200: Used the most smash attacks of any player.
Smash Prince, 800: In a 3 or more player Brawl, used the second most Smash attacks.
Smash Duke, 400: In a 4 or more player Brawl, used the third most Smash attacks.
Be Polite, 600: Never taunt during a match.
Be Efficient, 2500: Every use of one specific move resulted in KOing an opponent. Disabled in 1-stock Bonus Matches.
Have a Plan to Kill Everyone You Meet, 700: In a 3 or more player Brawl, KO every opponent at least once.
Right Corner Pocket, x400: Hit a non-grabbed opponent during a throw or with a thrown opponent. You get 400 for every time you hit an opponent this way.
Flawless Victory, 2000: Win without being KO'd once. Disabled in 1-stock Bonus Matches or Bonus Matches under 2 minutes in length.
No-Damage Clear, 300,000: Did not get damaged once during the entire match. Healing down to 0% does not count. Disabled in 1-Stock Bonus Matches or Bonus Matches under 2 minutes in length.
Domination, 1400: Kill opponents 3 times and use a different taunt within five seconds of each kill.
You Must Recover!, 1200: Be knocked off the stage 5 or more times in one life and recover each time.
Stage Panic, -x800: Die to a stage hazard. You lose 800 points every time you do.
Griefer, 1300: KO opponents four or more times with a Meteor Smash.
SSB Smackdown!, 2000: Taunt after every KO you cause and do not get interrupted until finishing at least half the taunt. Disabled in 1-stock matches.
Throw Down, 3000: KO an opponent's last life using a throw.
Around The World, 2500: Use a up throw, forward throw, down throw and back throw in that order, without using any other moves in-between.
Compass, 500: Use all four throws during a match.
Ultimate Plan, 750: Hit an opponent into the Ultimate Chimera, who then KOs them.
Flushed Out, x666: Hit Jafar out of his red smoke after he used Into Red Smoke. You get 666 points each time you do that.
Catch 'Em All!, 1000: Grab and use every Pokeball that is spawned and hits the stage.
Floor It, 10,000: Kill an opponent with your get-up attack.
Landloser, -2000: Self-KO while inside the Landmaster.
Lucky Number Seven, 7777: In a timed stock match, win the match with 0:07 seconds remaining.
Make a Circuit With Me, 1977: In a four player Brawl, hit each opposing player in descending order of their controller slot with an electric attack without hitting an out of order player.
Pow Pow Pride, 1000: Pick up a Golden Squeaky Hammer and don't die or lose it until it's timer is up.
Smash Daddy, 1927: Be the first and last person to use a Smash Attack in a match.
Master Warlord, 600: Get the most KOs in a match.
Forward Arrow, 999: Hit the opponent with every item you throw. Minimum 3 items.
You're Too Slow!, 800: Run for at least twice the distance of your opponent.
It's Perfecto!, 5000: Win a team match without you or your teammate dying once.
Wrestlemania, 1000: Use at least twelve grabs in a minute.
Triforce of Courage, 2000: Never shield during a match.
Triforce of Wisdom, 2000: At least half of the time you shielded, it was a Perfect Shield.
Triforce of Power, 4000: Hit the opponent with both a Warlock Punch and Ganondorf's up tilt.
The Triforce, 8000: KO opponents exactly eight times total.
Jobber, -2000: In a stock match, lose all of your lives without KOing the opponent once.
It's a ONE HIT WONDER!, 5000: With an opponent at 0%, KO that opponent with one move.
Judge Dredd, 9999: Hit the opponent with all possible numbers of Judgement.
Indignation Judgement, 999: Have all of your KOs come from a number 9 Judgement.
Chocolate Milk of Glass, 700: Chuck every grabbable item you have off the edge of the stage.
Super Princess Peach, x200: Awarded every time Peach KOs Bowser.
Standard Mario Plot, -x200: Awarded every time Bowser KOs Peach.
Forevver Alone, 11,000: In a match that lasts five or more minutes, do not move or get attacked for five minutes.
Arwingman, 1400: Spend at least one minute total on top of an Arwing.
Can't Touch This, 2500: Sidestep at least 50 attacks.
Fishing! Fishing! WIN! WIN!, 3000: Spend at least 40% of the match swimming.
Stickyfingers, 300: Awarded when the opponent never escapes a grab in a match.
Butterfingers, -1000: Opponent escapes half or more of your grabs.
Germanly, 1500: Win a match as Von Kaiser after starting the match with not taking over 50% damage or self-inflicting any damage during the first minute.
Berserker, 6000: Connect with at least sixty attacks(multi-hits count as multiple attacks) in one minute.
Ice To Met You, 900: First attack against an opponent froze them.
Switzerland, 1: Never moved, attacked or shielded.
I'm Not Russian, 1700: Never dash during a match.
Audience's Favor, 300: Have the audience cheer for you during a match.
Reckless Charge, 1600: In one minute, deal 100% damage or more to your opponent while taking 100% or more damage, without either dying.
Sir Lounge-a-Lot, 700: Spend at least a quarter of your time on the ground crouching.
Smash Jester, -1200: Got hit by the most smash attacks.
Smash Clown, -800: In a 3 player or more game, got hit by the second most smash attacks.
Smash Hobo, -400: In a 4 player game, got hit by the third most Smash attacks.
Perfect Maid, 1700: While playing on Luigi's Mansion, never directly hit the support pillars(Hitting them with projectiles is a-okay).
Housebreaker, 1200: Break all of the support pillars in Luigi's Mansion while it is up once. Breaking some once and some when it respawns does not count: You have to break all four in one go.
Messy Maid, 500: Break the pillars in Luigi's Mansion 10 or more times total.
By Your Powers Combined, 5000: Hit the opponent with, in order, a special attack, a jab, a tilt, a smash, an aerial and a throw, without using a single other move inbetween. Whiffs are allowed, but only if you whiff with whatever would be next in order.
Blazing Heart, 4000: When down three or more stocks, come back to take the match and win.
Big Eater, 2000: Eat enough food items to recover 100% health.
Heartbreak, 2000: While at 100% or more damage, have a Heart Container spawn next to you and fail to get it.
Valentine's Day, 1000: Heal 200% or more damage(You or your opponent can be healed by this!).
Strike Three, 300: Hit all three opponents at once in a four player Brawl.
Grappler, 900: Get knocked off the stage four or more times and recover via grapple recovery.
Airship Down, 400: Destroy the guns on the Great Fox.
Bloom, Blood Flower, x500: Awarded every time the flower on the Hanenbow stage is made to blood. Only awarded to whoever does the last hit to make it bloom(If multiple people do it simultanously, they all get it).
Game & Master, 1600: Never get hit by the stage hazards of Flat Zone 2.
Firin' Lasurs, 1000: Hit the opponent into the Combo Cannon's laser on the Halberd stage.
Ghost in the Stage, x600: Awarded each time you are hit off and land on the Support Ghost on Yoshi's Island (Brawl).
Randall the Ghost, 1000: When you would fall to your death otherwise, land on Randall the Cloud on Yoshi's Island (N64).
Roar of Suck, 2000: Knock the opponent into Dialga's Roar of Time on the Spear Pillar stage, which then must KO the opponent.
White Out, 1000: KO an opponent at least once on every single stage variation on Pokemon Stadium or Pokemon Stadium 2.
And We'll All Float...Off, 2000: While playing as Peach, never Float.
Master Plumber, 3000: Play Mario Bros. and never be hit by an enemy, thrown or otherwise.
It'sa Me, Luigi!, 2222: KO an opponent with Luigi's kick taunt.
No Fair, 1000: Get hit by Norfair's giant lava wave, but survive.
Pity Bonus, 1: Awarded if a player somehow gets no other bonuses.
Low Tech Victory, 2000: Never use Fox, Falco or Wolf's specials, save for their Side Special, in a match and win.
Lost Cargo, 2000: Suicide with Donkey Kong's Cargo Carry.
You Do Not Know The Power Of The Dark Side, 0: Does not award points. Awarded when one beats Darth Vader in the normal battle terms(IE, depleting all his stocks), but loses the actual Bonus Mode.
Mareep is an electric sheep. I think it has something to do with wool conducting electricity and android dreams.
Size - 4
Weight - 2
Ground Speed - 3
Air Speed - 4
Traction - 6
Jump Height - 7
Fall Speed - 2
All Inputs
Mareep shoots a ball of cotton from its fleece. The cotton travels slowly in the direction used until it reaches a wall or the blast zone. Mareep can shoot as many of these as it wants. B makes slightly faster cotton, A makes normal slow cotton, and Grab makes very slow cotton. Cotton will latch onto foes and slow them down a bit. Cotton will not disappear if a foe is KO'd, and will be attached to them on their next stock. Cotton can stack on foes, becoming woolier and thicker while slowing them down more.
When a foe becomes fully covered in cotton, they suddenly become a Mareep.
When all players are Mareep, the game ends and all Mareep win the match.
[1st Apr-7th Apr]
Fun fact; Palm Sunday has landed right on April Fool's day. This doesn't happen very often (or at all), and I've been caught with my proverbial pants down since I don't have a mini prepared for that event. Anyway, this week ya'll have a choice of mini to do. You only have to do one.
An extra (any extra) about April Fool's, pranking etc.
An item, enemy or stage for some sort of candy/confectionery product [there you go, Sundance]
They can be picked up like items....
They feel like items....
But, if you actually use them....
They do not do what they were meant to do....
Instead they....
AAAAAAAAAAAAHHHHHHHHHHHHHHHH!!!!!
Screamer Items
Yes, if one happens to come across a screamer item and use it on an opponent, they instead are greeted by a jarring face that appear in the background with a ear earsplitting scream taking over the background music. This effect lasts for 3 seconds and the unfortunate soul who grabbed the item will take 15% damage and knockback that KOs at 120% damage. Their opponents also cover their ears and close their eyes trying to tune out the torturous screams. When the face and screams fade away, the foes will have a terrible case of shell shock that lasts for 5 seconds or less if they happened to block when the item was used. How can you tell if an item is a screamer item? You don't. Spawning at 1/5 the rate of real items, they will appear the same as real items. Better hope the next item you grab is not the wrong kind. April Fool's...
(P.S. Those with a weak disposition can shut off screamer items on the item menu. Just go to the button with a person jumping and toggle it off.)
(Fun fact: This review is so old, I did the name thing before the other Angel got posted! And godderpit, even if it's almost irrelevent 13 pages later, I am going to comment it!)
I actually previewed this set in it's entirity before it's posting, so reading it again was mostly a refresher. I actually quite liked this set, to be honest: Perhaps not a MYM topper, but a very solid set. While I can understand some of the critisms about the Handsonic's unique forms not being too different, I think that is a fairly nice change, as making them too different would overwhelm the set I think, while making them simple changes seems to fit well with it as less a weapon change, but a usage change, as it seems like it would be for the character. At best, I think perhaps a move change or two could have been worked in, perhaps a stabbity move with Handsonics 2/3. I also think that the Up Special's clones being hostile makes perfect sense, given that apparantly Angel has not perfected it, in addition to the fact that it makes a fun little casual move: Set a high stock match, summon a clone and lulz can be had. While it may not flow into the playstyle to an extreme amount(Mostly as that would neccesitate much rewriting and probably be fairly OOC, from what I gather), it does work well with her status as a relatively anti-defense, quick but not always KO-able character, as she can weave around and a bunch of Angels can make defending hard...but you have to work to make sure you don't get caught up, either.
Aside from that, Angel plays a simple but fairly nice style of quick attacks and various anti-defense and counter measures, such as a forward smash that functions as a spot dodge, an anti-grab jab, an up smash that is cancellable into a roll, a dash that whittles down shields with ease and a neutral aerial that doubles as a spot dodge, but makes you insanely punishable if you get outprioritized. I also quite love the backthrow, which mimics the motion of her opponent escaping the grab, before slashing at the opponent for good damage and one of her few killing moves. It has awesome mindgame potential, as you can use it when the grab escape would be soon, and the opponent has to wonder if they escaped or the move happened. And if you get it wrong, you'll get hit with a strong backthrow...or Angel will be able to rollchase you, regrab you if you shield for a shieldgrab or follow you in to the air, where she can come at you with quick fairs. All sorts of mindgame-y potential here.
Overall, I quite like it, even if I imagine a lot of it could be thought as a bit "generic". No numberized rating here, as I cannot think of anything witty to give it out of, aaaand that's the entire reason I even have numberized ratings. That and I dunno if my scaling is workin' properly yet.
Now then, on to some other sets. Perhaps a more recent one...
Terezi Pyrope
...To a set I did not like much, which is sad, because I had some high hopes for the Terezi one. There's a few reasons for this which, since this is a comment, I will of course be explaining.
First, the blindness mechanic isn't that bad, even if the method somewhat bugs me. Hear me out for a moment: Terezi's love of the color red, licking it, painting with it and the like is very well documented in terms of Homestuck. To me, instead of licking the opponent, I think it might be more in character for her to use red chalk to basically draw/mark the opponent. The addition of the D3L1C1OUS C4NDY R3D makes sense with working with her smellovision, which seems to be blurry and somewhat defined with acute colors, so drawing and identifying based on the bright red makes more sense than the licking, which seems a bit more like idenification on something she has or just for taste, rather than something to find someone. You could even make it a dual mechanic: Terezi can lick up the red chalk, removing how it buffs her blindness but giving some other buff in return, so you have to pick and choose what you want and when.
Other parts of this set seem vaguely un-Terezish to me, perhaps most notably the CO1NFL1P. Not because it's a coin flip, because Terezi loves her coin flips, but because it always turns up tails. To me, this seems to go into territory more for Vriska, a manipulator of luck, especially since Vriska even manipulates Terezi's coin with her powers at a point. In the Lemonsnout LARP thing, the coin even technically lands in a manner favorable to Lemonsnout. So the fact that it always lands tails and with a favorable effect to Terezi seems sort of odd to me. Dragonsprite's inclusion, while a nice nod to their relationship in the comic, seems odd and almost there just to have Dragonsprite there to me, especially given Terezi's athletic and almost acrobatic ability. And the neutral aerial not being her awesome spin attack from Make Her Pay was vaguely dissapointing, though I do like the move you used there. It could have maybe been used as an up aerial though, maybe with Terezi holding the procured Scalemate up or something for easy noose attachment. Also the side tilt seems kind of silly, though I can see it for Terezi.
Also, you probably could have done with at least one more licking attack. My suggestion? Would have made an awesome pummel: Opponent's escape faster from Terezi's grab the lower she is, which means it's punishable, but it also provides a quick and easy way for Terezi to power up, not to mention it is exactly what I imagine Terezi doing if she grabbed someone(To get them in lick range, just have the segmented cane work as a teather grab). The smashes are just basic, no-frills smashes, but I think that actually works fine with Terezi.
Also, that Final Smash is horribly silly to me.
On the other hand, all is not bad! The nooses are actually pretty cool, once you get the hang of what they do, and W1NGS OF JUST1C3 seems like both a fitting recovery and a cool-but-risky buff to her abilities as well when not used for recovery. My only question: Can she make more than one if one is already out and not on her/in her hands as an item?
Overall, I can't say I particularly liked the set, but the noose as a concept was fairly neat. I really think this would have gone better, for me personally anyway, if Terezi felt more...Terezi-ish. I dunno how to explain it right, but the moveset just does not feel much like Terezi, outside of a few choice moves(Pretty much all the noose/licking ones, Wings of Justice ahd tne Neutral Special, probably the jab too). Sorry broski.
Mareep
Best set ever hands down. Contest's over gaiz.
...Though more seriously, it did at least amuse me.
This does not qualify as a real comment.
X-Naut
I know this set has a lot of comments, but I thought I'd throw another one on to the pile. First off, as has been said before, animations are pretty cool, definitely turns it up a notch. The moveset itself is not complicated, but I do like the Yux Barrier, which functions as a sort of psuedo-counter and gives him approach options with his neutral special, and the potion throw, with it's variety of effects. The Down Smash isn't that bad either. Aside from that, pretty much everything is relatively standard fare. Throws are a bit weak.
Not much to say, I guess, but with the effort I feel was put into this, I thought it deserved another comment.
An Elegant Captain
It probably looks like I am selecting this sets at random now and that is because, aside from Terezi/Angel, I honestly pretty much am, just browsing all the ones I have not commented and nabbing ones that look interesting/I know I should check out. And so we come to Captain Hook.
Let's see, the moveset itself...you've got some cool stuff here, like the Clash, very appropriate for Hook and a pretty nice move, the forward throws(Throws and the like that let you drag your foe around can often lead to cool things, I like seeing them, heh), the presents are in my opinion actually fairly in character at this level of abuse(Hook is a bit of a Dirty Coward, after all!) and Smee is useful here. I also quite like the rope move, useful for a lot of stuff and could provide fun interactions with even non-present items, I am sure there could be some fun use with the present throwing too.
If there's one issue I have, it is the lack of sword-based attacks and the fact that he has few really good ones, despite the fact that, while Hook is a coward, he is still a good swordsman(The end of Peter Pan involves him kicking Peter's *** before Peter stops him with the flag, after all, Kingdom Hearts battle is cannon balls and, yes, sword combos, BBS/CoM are swords + presents...). But Hook has a only five moves that use his sword(Six if you count the F-Tilt, which uses the sword but attacks with the hook). I think a better number would have been about eight: Maybe make the Forward Smash a sword slash with his hook going in the background, so dodging enemies get hit with less from the hook, but the sword does good damage? F-Tilt to a fully sword-based counter? Though you do lose the awesome look of the move...IDK. It just seems like about eight, or roughly 1/3rd of the moveset being sword based, seems like a Hook staple.
Overall, though, Hook 2.0 seems pretty good to me. The presents exist and make note of his cowardly nature, along with Smee, but don't quite overtake the moveset, and he has a good range of other moves both useful and pretty in character. Wish he had more sword moves, maybe some other stuff could be a bit better, but overall it is something I like.
Oh, also, you made extras that I like. Yayzorz.
Kang the Conquerer
Okay, this one was deliberate. I had to check out what one of the most popular sets this contest was, right? 3v1 boss, not usually my forte or my bass, but still.
Starts off with a really nice little platform mechanic that I quite like. Not much to say about it: It's simple, it's effective, it's good. Second thing to note, and I made sure to read the entire set before I posted more than the platform thing: Kang is not a set that cares about balance. Kang is overpowered and knows it...but it's a 3v1 boss set and MYM isn't TOO heavy on caring about balance, so it can fairly easily slide. But don't expect to see a balanced set.
The set itself primarily focuses on simply overwhelming the opponent with too much to take care of, especially using his Kang's Conquerers and Growing Men minions combined with powerful projectiles like his neutral aerial homing missile and up smash rise and fall missiles(Funny enough, those are similar to an idea I had a few days ago...beaten to the punch, I was!). The big bonus of this moveset, however, is his Down Special, Time Warp...which I will admit, I am not as impressed with as some others. 6v2 is pretty cool, but all the minions and such make it seem kind of underwhelming in that respect, as Time Warp will almost certainly be used to put you in situations where you won't be able to do much, as even if there are six of you, you'll probably be facing 12+ Kang's Conquerers, more of which can be summoned of course, and two Growing Men, preferrably at max size, since he transports his own stuff back in time too. Start charging this when your Growing Man is large and let go when you can transport them back in time to face two, possibly if your Growing Man is being whittled down, and they are going to have a very hard time defending, since they are going to have six hurtboxes, two Growing Man, at least one of which is large and the other of which is probably not small, and however soldiers Kang has, in addition to whatever projectiles Kang will fire, in addition to whatever Past Kang will do.
Remember when I said this was not a set that cares about balance? Yeeeeeah.
He'll also power up his Growing Man with his Concussion Beam, not to mention he can arm his troops with his up and forward smash, not to mention having an insanely powerful forward aerial gun that can double as a mine and the ability to buff soldiers with his back aerial.
Did I mention he has a Jab that lets you temporarily banish the opponent, having them respawn five seconds later without losing a stock and with 10% more damage? (Unrelatedly, I wonder if he can use it on Past Kang)
If I had one first and foremost complaint about this set, it's that it can do too much. He can home you, he can summon normal minions, he can summon minions that can bigger and stronger unless you don't attack them and pay careful attention, he can temporarily circumnavigate the minion cap with time warp, he can take you out of close range with his down smash, forward tilt and awesome grab + throws, he can smack you away at far range with his awesome forward aerial, his forward tilt, really most of his ranged move, he can remove foes from the equation with his jab or, to a lesser extent, up tilt. He can peacefully set up by going to the future. He can even make temporary traps with his forward aerial and his up aerial. He really has an absurd number of things to do, to the point it can get a bit grotesque. Part of my worry is fighting Kang would be a bit boring, because while the soldiers are slow, he can probably hold around ten on a standard Battlefield/FD, plus the Growing Man and all his other stuff. It seems like it would be easy for the battle to degrade from "fun, crazy, all out survival brawl" to "getting gangraped by projectiles + minions", especially with Time Warp, since you essentially get 3 extra hurtboxes for what are, honestly with the amount of things that should be on screen when Kang uses Time Warp properly, very little gain.
Aside from that, there's a little bit of what one might call proppiness or what not, though that does not really bug me much...Time Warp is pretty effective, but I could also see some people wanting more out of the time travel mechanic, but I think it is pretty good for this specific set. I feel like something else is sort of nagging at me too, but I am not sure what, I think it might be just a bit of the bitter taste of hype, since I don't think it quite lives up to the best-in-the-contest hype. It is, however, a very good set, probably fairly close to the top, good execution for a nice concept I feel. But I don't think it was as unique as hyped up, I think it could very easily tread into the dreaded unfun territory and that the Time Warp would be much more interesting on a character whose minions were less numerous.
Yeeeeah...not what I'd call my favorite set so far.
Still probably...Top 5? I can't really think of five sets I would put over it. I can think of two though, one of which I still need to comment, so it is at best Top 3 for me...and I still need to check out Necromancer! Ayayayaya...
Chantique
I was going to go to bed after Kang, but...Chantique was right there, she doesn't seem too long and she has a double bladed lightsaber.
This is a set I quite like. That forward throw is pretty awesome(Ride 'em cowgirl!), I can't place my finger on if I have seen something like it before, though...actually, all of her throws are awesome, from one that auto-tilts, to a temporary levitator that requires a holstered saber...the only one I don't really like is the down throw. It seems...off, somehow. Maybe the grave thing, which seems out of place for her. The specials are a bit hit and miss: The side is cool, but I can't help but feel 3x FLUDD's strength might be too good of a gimping tool with the saber, probably should have been 2x and her up special seems way too strong with the saber, although the down special returns to the awesomeness aided by the power of Exar Kun.
Aerials? Cool. Neutral Aerial is meh, but that forward aerial has delicious potential, not to mention it's able to be imagined as looking damn cool to me. Up Aerial was meh, rest were okay, but...dat forward aerial, I like it.
Smashes are...well, the forward smash is good, but the up and down smash don't really do anything for me. I really wish a lightsaber or lightsaber affected attack was included here, since the forward smash makes you lose the lightsaber, cool as the move is. Mostly the Up Smash, which seems really bland and a bit unnecessary, it would be awesome to see some saber or force-boosted-by-saber shenanigans there.
Aside from that, though, I was...pleasently surprised by this set, since I couldn't even remember hearing about it in comments. But it's playstyle is well defined, it has cool sounding attacks that are also functional, an interesting mechanic with the saber and a cool focus on walls. It's biggest problems are that it could use a bit more use for the saber and some balance issues with the specials. And maybe the oddity of the down throw. But overall, I enjoyed it, probably more than a lot of sets I've read in full so far, even if it's not a Kang or a Yutaka.
Jeff Mangum is the lead singer and guitarist of Neutral Milk Hotel, probably the greatest man of all tie. He brings his guitar and singing voice to the Brawl!
HEIGHT: 9/10
Jeff Mangum is like 6'8" or something. I know because actually saw him live last year. Funny story: I was walking around the back of the theater because I got there like 2 hours early, and he was ****ing there, loading his stuff out of his van!! I then experienced the largest fangasm of all time and couldn't bring myself to say hello to him. But he ****ING LOOKING DIRECTLY AT ME!!! So yeah, he's tall.
WEGIHT: 5/10
Skinny.
GROUND SPEED: 5/10
AIR SPEED: 5/10
JUMP: 5/10
IDLE STANCE: Jeff holdsa chicken and smiles awkwardly
NEUTRAL MILK SPECIAL: TWO HEADED BOY
Jeff sings "Twooo headeeeeed boooooy" and shoots sound waves out of his mouth. Any oppoennt struck by the sound grows an extra head, giving all of their inputs a 50% chance of doing something completely different. For example, an attempt to perform a jab could turn into a down smash. Using this move again puts the opponent in a giant glass jar. Jeff can remove them from the jar and have them dance round the room to accordion keys in his parlor with a moon across their face, or feed them tomatoes and radio wire.
SIDE SPECIAL: A BABY FOR PREE
In this song off of On Avery Island, Jeff sings about a young mother-to-be who gets an abortion, or something. Anyways, Jeff sings "And when the day it came to poooour / All her baby's all across the bathroom flooooor" while dumping a bucket of limp, wet babies all across the stage, coving an area the size of a battlefield platform. Running over the wet babies causes a character to ttrip. The effect of this move stacks, so if you're able to fill the stage with limp babies, your opponent will be swimming in them all forever more.
UP SPECIAL: HOLLAND 1945
Jeff rides the comet's flame and won't be coming back again, rising 3 gagnondorfs before entering a freefall. The move is identical to eta Knight's shuttle loop only he rides a comet. The stage looks better from the star that's right above from where you are.
DOWN SPECIAL: OH COMELY
Jeff begins to perform Oh Comely, and is unable to cancel the move until he finishes. If uninterrupted, 8 minutes and 13 seconds later, Jeff wins the match!
JAB: GUITAR SWING
Jeff swings his guitar forward for 7% and low knockback
DASH: ENGINE
Jeff sings "For I am an engine and I'm rolling on" while walking forward, moving his arms like a person immitating a train. He is invincble while in this state for as long as he sings.
Did I mention that I saw Jeff Mangum in person? I wanted to say something to him, but he was busy. I walked right past him, probably came within 6 feet of him. A few minutes later I decided to try to see if he was still there, but he had already gone inside. I was a bit dissapointed, but I also knew he was a very shy person and didn't like much attention, so I wasn't too upset. I was going to ask him if he wanted to go to Panera with my brother and I before the show. Heh.
FORWARD TILT: KING OF CARROT FLOWERS PT. 1
Jeff sticks a fork right into his opponent's shoulder for 11%.''
UP TILT: KING OF CARROT FLOWERS PT. 1
Jeff throws the garbage all across the floor tripping the opponent
DOWN TILT: KING OF CARROT FLOWERS
Jeff opens his motuh like this:
THis is a counter state. If struck by an attack, both Jeff and the other character lay and learn what each other's bodies were for,dealing 17% and very strong knockback.
FORWARD SMASH: KING OF CARROT FLOWERS PT. 2
Jeff summons the power of Jesus Christ himself and wails IIIIIIII LOOOOOVE YOOOOU JEEESUUUS CHRIIIY-IIII-IIII-II-IIIIIIIIIYYYYSSSSSTTTTT" This sends out a shockwave around Jeff, dealing 20% and decent horizontal knockback. Its laggy thoug so watch out!
Those tickets I bought for that Jeff Mangum show were rediculous. Like, $200 a ticket. Luckily I'm a greedy ******* and hoard my money to waste it on things like that. Still, it was absolutely worth it.
DOWN SMASH: SONG AGAINST SEX
In the very last part of the lead track of On Avery Island jeff sings "With a match that's mean and somme gasoline you won't see me any mooore-ooore-oooooore" Like a bhuddiest munk, Jeff covers himself in gasoline and lights a match, killing himself. This may seem useless at first, but perhas it has some other uses...?
UP SMASH: KING OF CARROT FLOWERS PT. 3
Jeff jumps up and over his foe
Mouth open wide and spilling snow
He will hit them until his attack does 16 Percent
And makes a pretty nice dent a dent a dent ooh oooh oooooh
I'm actually wearing the shirt I bought at the concert right now. It's a robot playing a guitar, or something. I noticed it's also on the A-Side of Everything Is, oddly. I wanted to get the phonograph airplane/synthetic flying machine, but they were all out of my size.
IN THE NAIROPLANE OVER THE SEA: A BABY FOR PREE (LIVE VERSIONS)
When Jeff performs this song live, he adds a few more lyrics than the On Avery Island version, often called 'Glow Into You.' I'm pretty sure he sings Glow Into You in another track of OAI but I forget which. Actually I think it's Where You'll Find Me Now. I dunno. Anyways Jeff shoots beams of light from his eyes into his opponent, effectively glowing into them. Glowing opponents take 8% and are unable to move until Jeff stops glowing into them.
IN THE DAIROPLANE OVER THE SEA: NAOMI
Jeff sings a random line from Naomi. Depending on what line he sings, he might taste perfume (it tastes like ****) and throw up, creepily watch the opponent, or take out a dress and mutter "Sooo preeettyyyy...."
IN THE FAIROPLANE OVER THE SEA: IN THE AEROPLANE OVER THE SEA
Jeff sings "What a beautiful face / I have found in this place / That is circling all round the sun" while swinging his guitar in front of him hitting his opoentent in the face for for 15% and spiking them.
IN THE BAIROPLANE OVER THE SEA: LITTLE BIRDS
Jeff opens his mouth, letting free the little birds that live in him. The birds fly to the nearest blastzone, dealing1% per bird to any opponent hit by them. He spits up 10 birds per second.
I couldn't think of any NMH songs that have to do with grabbing (Well, aside from Two Headed Boy Pt. 1, but Brawl is supposed to be a family friendly game). Perfect, Untitled to the rescue. He grabs.
FORWARD THROW: COMMUNIST DAUGHTER
Jeff throws the high enough to reach a mountain top. 10%
BACK THROW: HOLLAND 1945
Guns come and rain on everyone, dealing 20% to every character on stage NCLUDING Jeff so watch out!
DOWN THROW: KING OF CARROT FLOWERS PT. 1
Jeff makes the other character drink until they're no longer speaking making them control like a drunk person
UP THROW: TWO HEADED BOY PT. 2
Jeff sings the most beautiful song ever written, KOing the foe if they're over 200%. If not, they are filled with emotion and land prone, crying.
FINAL SMASH: PREE SISTERS SWALLOWING A DONKEY'S EYE
Jeff takes out a phonograph and plays the final track on OAI. http://www.youtube.com/watch?v=ReZwDbZQRK8 This does no damage nor knockback. Jeff is invincible until the song is done. Your main goal here is hope that the opponent KOs themselves or quits so that you win.
IN THE PLAYSTYLEOPLANE OVER THE SEA
I love you Jesus Christ
Jesus Christ I love you, yes I do
I love you Jesus Christ
Jesus Christ I love you, yes I do
Yes, I visited the chat and posted a set in the same day.
Master Hand joins the Brawl!
He needs no introduction, but for those who (somehow) haven't played the games, Master Hand is the final boss of Classic mode in each Smash Bros game, with a handful of powerful, wide ranged attacks, which are hindered by being rather slow, with wide pauses in between to let the player attack.
Some rather odd stats here. Basically, just like in an actual boss fight, Master Hand cannot be KO'd normally, and takes no knockback or stun from attacks (depending on the character, special status effects MIGHT work, else someone like Caterpie would be utterly doomed in this matchup). Instead you have to deal 300% damage to KO him, stamina style (He's immune to blast zones, in fact. However, he hits an invisible wall at the point where other fighters would be KO'd, so you can't end up too far away from the action by accident). Additionally, Master Hand doesn't actually jump normally, instead you move him freely in any direction with the control stick at a fairly decent speed. A word of warning though, to prevent this from being used for stalling, Master Hand automatically loses when a match goes to time (for stock matches, in coin matches/time matches, whenever he's gone for 10 seconds without giving or taking damage to everything, he loses a point/ 100 coins)
Mechanic:
Now, considering Master Hand's slow powerful move style, what's to prevent the opponent from just running away and camping all day? Well, Master Hand doesn't JUST attack the opponent, his attacks also hit the stage itself. The stage is considered to be separated into individual stage builder-block sized pieces, each of which has 50% health (only destroyable by master hand, platforms have 30% health), and destroying a piece of the stage causes it to crumble. Dealing 25% to a block causes it to crack, which is mainly an indicator of what can be easily broken. Considering the power of Master Hand's moveset, you can destroy large parts of the stage with relative ease, and perhaps even the entire stage. However, whenever the opponent gets KO'd, the entire stage (including what was destroyed) will flash for a few seconds before reforming, if you're "inside" when that happens, you'll simply be pushed back to the outside. Also, the foe can repair/rebuild destroyed stage builder blocks by standing next to where one had been attached, and pressing attack+taunt (as well as a direction on the control stick to indicate which one they want to rebuild/repair.) This isn't quite as fast as Master Hand's destructive powers (repairing one takes the lag of an average smash attack, replacing a destroyed one takes a bit more), but it helps them combat it. (Also, to even things out a little, lighter faster characters generally have quicker rebuild times than the slower heavier characters who have an easier time with just racking up damage on Master Hand)
As a side note, Master Hand does not suffer from stale moves losing power. This is mainly for convenience of remembering what will break parts of the stage when. (Also, many, MANY of his attacks look and behave very similarly to his Brawl versions, so it helps to visualize them when reading through this move set.)
Specials:
Neutral Special: Background punch
Master Hand quickly flies into the background, coming back towards the stage with a devastating punch, doing 30% with great knockback and a range of roughly 2x2 stage builder blocks (however, something hit by only the outer edge of the punch would only take a weaker 15%, so it's less efficient to try to clear a 3x3 area with this). You can move where he'll punch via the control stick (up to roughly a battlefield platform's distance), and lag is fairly bad on both ends. Once the move is finished, he'll float down from the top blast zone at center stage.
Side Special: Stage push
Master Hand quickly sweeps forwards in the direction indicated for nearly FD's length for 25% damage and great knockback. However, should he come into contact with the stage, instead of doing damage he'll start to push it, the effectiveness of which varies on how large the stage piece is. With a complete stage (which we'll say is roughly 20 SBB's worth), the effect will be unnoticeable, with half a stage he'll push it roughly a stage builder block, a quarter stage gets moved a battlefield platform, and anything that's only 3 stage builder blocks or less he'll sweep the entire length of FD (and often off of a side blast zone). Keep in mind that any stage pieces he pushes are added to the move's hitbox should an opponent hit the side of one (He can land on top of the stage piece being pushed, however.) Also of note, if you push two pieces of the stage together (and they weren't already in contact or within half a stage builder block of it before said push), the stage builder blocks that make contact will take damage (ranging from 10% to a full 50% depending on the speed of the push). If an opponent happens to be in between the two pieces, then that's a good 50% damage with obscene knockback and probably a KO. The startup on this is actually fairly quick, but the end lag is rather notable.
Down Special: Drill Rush
The Master Hand flies up towards the top of the screen, before spinning rapidly downwards, doing very rapid hits (as in roughly 15 per second) of 2%. However, the hand doesn't stop until you quit holding the button, meaning that (especially if you'd weakened the stage beforehand) you can drill through large portions of it fairly quickly. However, there is a catch, and that's that these hits don't trap the opponent, and many attacks can beat them out with ease. And if the opponent deals 50% to you within this time, you'll be knocked out of the attack and stunned for a second, giving them even more easy damage. However, aside from that scenario the lag isn't too bad, so use this wisely. (And as a note, if they're in a hole in the ground you made previously, they won't have anywhere to really escape too, which means you can get a good amount of damage on both them and the stage.)
Up Special: Rocket fist
The Master Hand just starts flying around at twice his normal speed, in a vaguely plane-like form. Contact with part of the stage or an opponent deals 25% damage and great knockback (you'll notice that the Master Hand racks up damage and KO's very easily. That's true, but a semi-competent opponent can avoid anything you through at them very easily on a wide open stage, so you need to reduce their running room to make a lot of headway), but Master Hand is not knocked out of the attack on contact with the stage unless he fails to break a block. So if you already weakened large portions of the stage via other moves, you can clean them up all at once with this! This is one of his faster moves lag wise, but still has roughly average smash lag (and he has a 2 stage builder block wide turning radius, so you can't make multiple passes at the opponent very easily. Also, as per usual, when you stop holding down the button, you'll end the attack normally.)
Grab Game:
Master Hand's Grab has great range (being basically the main part of his hand as well as slightly in front of and below him), and even decent speed (about as laggy as a tether grab, which is actually pretty fast for the character), but there's one extra wrinkle. In addition to grabbing the opponent, you can also grab the stage itself, and even opponent's traps (assuming that they're solid, smaller than master hand, and don't explode/shatter on contact. You'll still take damage, but Master Hand has essentially permanent super amor). If the piece of stage you're grabbing is larger than Master Hand, he can't close his fist all the way and simply latches onto it. In that case you simply pull it around via the control stick, with speed ranging from Ganon's walk to half your normal speed (depending on the weight of the stage piece). If the piece of stage is smaller than Master hand (a 2x2 block or less), he simply grabs it as he would an opponent. (You can grab an opponent and stage piece at the same time, but it's unlikely.)
Standard Pummel: Crush
Master Hand tightens his grip, dealing a good 13% damage to any opponent (or one of their traps) that he might have caught. If you're dragging a large stage piece, this will cause Master Hand to break off the 2x2 block he's carrying and grab it as normal. If you're instead holding a small stage piece, Master Hand will crush it into a 1x1 block that's nearly indestructible. (it has HP = to 50 x the number of blocks it originally had).
Special Throw: Position
With an opponent, Master Hand simply tosses them in the direction you input with the control stick (13% damage and decent knockback, it takes a bit longer to KO with this than most moves, default is down). With a stage piece (or trap), Master Hand will carefully place it in the direction you put the control stick, giving you more direct control over how the stage is built. It's not as fast as your side special, but it is more precise.
Standards:
Jab: Finger laser
Master Hand starts pointing in the direction you press the control stick (default is straight down), sending a laser out of his index finger. This does 10% damage to opponents and horizontal knockback, but more interestingly it does not break blocks in the same way most of Master Hand's move set does. That is to say, this instead carves a (thin, roughly an Olimar wide) hole through the stage at the rate of three SBB's per second for as long as you hold down the button. (As a note, to make it easier to make a smooth slope with this, any pieces smaller than half a stage builder block in size fall into the laser and get destroyed by it). This moves is one of the best ways to split up the stage, letting you make all sorts of interesting obstacles.
Down tilt: Karate Walk
Master Hand starts "walking" across the stage with his index and middle finger as "legs" (just like the boss attack), doing 20% damage to opponents, but none to the stage. You have to have stage below you for this attack to do anything. This will move across rugged terrain, but it can't climb ledges 2 SBB's or more in height. (It will just walk up smaller ones as well as drop down cliffs.) However, this can also be used to create even ground, because by pressing the A button again mid-move, Master Hand will unleash a karate "kick" with his finger, covering 2 (vertical) SBB's immediately in front of him and doing 25% damage to the opponent and any stage you hit... and you can kick fairly rapidly... You do the math. Just keep in mind, you're quite vulnerable from above/behind during this entire attack, since only the fingers are actual hitboxes. Lag is (as usual), fairly poor.
Forwards tilt: Poke
Master Hand points ahead of him with his finger (the index one, if you thought otherwise then that's just sad), and moves at a downwards (45 degree) angle for about a stage builder block. This does 15% to the opponent and is surprisingly fast, but more to the point it creates a pitfall in the stage (should you hit ground). What does Master Hand ever want with pitfalls aside from a generic trap, you ask? Keep reading. (You can move the piece of stage with the pitfall while keeping the pitfall intact, but if you destroy the stage piece, the pitfall will disappear as well.)
Up tilt: Slap
Master Hand rises up (if on the ground), before slamming downwards with impressive force. To spare you unnecessary detail, I'll just let you know this is basically a vertical version of his side special, to push the stage downwards. (By holding the A button down, you could instead push the stage upwards, if you're under it.) As a reminder, with a complete stage (which we'll say is roughly 20 SBB's worth), the effect will be unnoticeable, with half a stage he'll push it roughly a stage builder block, a quarter stage gets moved a battlefield platform, and anything that's only 3 stage builder blocks or less he'll sweep the entire length of FD (and often off of a blast zone).
Smashes:
Forwards smash: Missile to the knee
Bowser used to be a final boss, but then he met this move. Horrible puns aside, Master Hand shoots 1-3 missiles (depending on charge time, full charge takes a second), doing 10-20% damage, decent knockback, and travelling at mario's to sonic's run speed. Also, if a missile happens to come within 2 SBB's of a heat signature (an opponent, fire type moves, etc.), the missile will turn to home in on said object, making them someone more difficult to avoid. (They won't home in on each other, just so you know.)
Down smash: Bombs away
Although traditionally a Crazy Hand move, this is surprisingly important. In addition to a normal charge effect, before releasing the button you point the control stick in a direction (and keep in mind tilting vs smashing it!) Once you release it, Master Hand will quickly send out 3-7 bombs in the direction you pointed the control stick, at Ganon's run speed (when tilted, up to pikachu's run speed if you smash the control stick. If you don't press a direction, he'll just drop them.) Now, these bombs will explode on impact with opponents (if still moving) or attacks, and their power varies from 3% on the edge of the blast to 10% in the center (blast is a stage builder block in radius, sweetspot is rather small). However, if the explosion is compressed (that is, they explode on the ground or in the corner), they gain double the damage and knockback as usual. Additionally, if they hit the stage hard enough (they obey physics, and "hard enough" is if their momentum is changed by Ganon's run speed or more), they'll explode. They can also fall into pitfalls, thus giving you land mines (which do very good damage to the stage and the opponent), and they can be tracked by missiles. See the possibilities yet?
Up smash: Finger Lasers Mk II
Now this is the more traditional version of Master Hand's finger lasers, although somewhat more effective then the actual Brawl move. This doesn't deal stage damage, but rather creates a zone of laser death between Master Hand and the stage below him (for as long as you hold the button), with individual lasers doing 10% each, as well as setting off bombs. Three of the lasers stay in the main stage, while the other two sweep the background/foreground, and you can move with the control stick while doing this, meaning your opponent will likely be forced to jump over you if they wish to avoid massive pain. However, a word of warning: Due to the strain of making five lasers at once, Master Hand can only shoot the lasers roughly 2 SBB's worth of distance, so no flying up to the top blast zone and making the zone of death completely unavoidable. Lag is fairly bad as normal.
Side Special Smash: Whisk
Master Hand brushes forwards, doing no damage but creating a wind hitbox that pushes opponents (and bombs) at slightly less than Ganon's run speed. This is mainly for bomb manipulation; if you've decided your bombs are currently misplaced and don't want to blow up the current blocks, this will push them forwards into the opponent or any other bomb-storage pitfalls you might have made. This can also be used to move the opponent from a safer portion of stage into one you've already manipulated with your various tools, as the lag is fairly low.
Playstyle:
Master Hand plays exactly like you'd expect, the all-powerful classic boss battering the stage to pieces with his various attacks, and just a couple mistakes on the opponent's part spelling their doom. Since a half-competent opponent will likely avoid all your attacks at first, your aggression should be mainly focused at the stage initially. Using your specials, grab game, and jab, it's a simple matter to whittle the stage down to size, and place the pieces wherever you will. Once you've done that, you can either finish the job and destroy the stage entirely (and thus the opponent), or you could play around a little in your own personal sandbox. Many seemingly unrelated attacks can fit together surprisingly well, most obviously the bombs interaction with forwards tilt and the other smashes, or positioning two stage pieces one above the other, and up smash lasering anyone foolish enough to stand on the bottom piece, or perhaps using up tilt to smash them together and crush the opponent (SSE style instant KO.) Honestly, Master Hand's possibilities are limited only by your attention and your 300% stamina, so come up with your own ideas.
Addressing inevitable balance concerns:
Master Hand's main balance issue would be the idea of stalling, which just won't work due to the simple condition of him losing in a time-out. Another point you might raise is the possibility of him damaging the stage from where the opponent can't reach. However, this is also impractical due to the simple fact that Master Hand has very few options for damaging things above him or far away from him, and since the opponent can repair the stage, they can afford to wait and dodge if Master Hand wants to try something like shooting missiles from the side blast zone (or if they're a typical MYM set, just out-camp him with their own projectile game.)
[COLLAPSE="Master Hand"]I'm actually quite surprised you kept Master Hand's traditional HP meter from the games, though I can't quite help feel that seems a wee bit forced at most, especially with the system designed to balance the float...granted, those things are actually kinda hard to pull off. And add the fact that the godly Master Hand is able to destroy the very stage his foes fight on, AND rebuild it upon their demise and it'd seem that there's quite a lot you need to chew off. And before it goes unmentioned, there doesn't seem to be any logical implications regarding just how foes are able to fix the stage aside from randomly guessing that the pieces of the stage are scattered in the air, but even if that was the case the input and nature of the command feel strange...it would probably make more sense to me if a piece of the stage that was completely destroyed respawned within like, 20-30 seconds because of Master Hand wanting to give his foes an extra chance to beat him.
I remember the whole stage manipulation thing from the chat long ago, which is quite interesting in terms of approaching the whole boss take in that your attacks actually have some form of consequence even if they miss so enemies do need to approach you more carefully than they would in the Brawl boss battle, and it works as a good fill-in for the un-strenuous time limit players are plagued with in the original. Perhaps there aren't as many ways to manipulate the stage as a I'd like to think or even create for that matter, because while you're being faithful to the original fight and all, almost too much so, do remember that Master Hand is officially supposed to be a manifested spirit of creation while Crazy Hand is the one who destroys...manipulating the stage could feel like creating though, but I'm just merely putting things into simple context.
I'm probably not getting the big picture here and somebody else will, so I'm sorry about that. Your style is usually a very focused, playstyle-orientated one, so perhaps I was expecting a little bit more synergy with the moves, but I wasn't quite all too excited for Master Hand as I thought I'd be, possibly because of the inevitable problems that being about a sense of awkwardness given the character's nature. A very good try at a very difficult genre however, and definitely nice to see your first set for the comp![/COLLAPSE]
Cacturne is a Pokemon from the third generation of Pokemon games. It lives in deserts, remaining completely still during the day but becomes active at night, pursuing weary travels until they collapse from exhaustion.
[collapse=Abbreviations]
I use a lot of short hand in this set. In case you don't know, BFP stands for Battlefield Platform (the length of a platform from the stage of the same name), and SBB stands for Stage Builder Block (the length or height of a block from the Stage Builder).[/collapse]
Cacturne is a bit taller than average, and his movement is rather stiff. He definitely prefers to remain with both feet on the ground.
SPECIALS
NEUTRAL SPECIAL:SPIKES Cacturne causes the thorns covering his body to elongate.
Cacturne's defining feature as a Grass-type Pokemon is his ability to utilize his thorns as weapons. This attack causes the rather nonthreatening spikes that cover Cacturne's body to elongate into sharp, wicked-looking thorns. The thorns enlarge as soon as the input is pressed, and retract back to normal just as fast.
Cacturne's attacks are a bit different when his spikes are out, and some may even have a secondary effect that will be noted in their descriptions. The thorns stick out from his limbs a bit further, too, giving him a Lucario-like "beyond the limb" attack, slightly increasing the range of his attacks; however, opponent hit by just the tip of a thorn take half the damage they would from the attack and a quarter of the knockback.
In addition to bolstering his offense, Cacturne uses his spikes defensively Opponents who attempt to roll, run, or otherwise move through Cacturne while his Spikes are active will receive 3%, though no knockback of any sort. Even when Cacturne uses his sheild some spikes poke out, dealing 1% to any foe that attacks him while shielding.
There are some drawbacks to Spikes, however. Because they puncture his shield, it wears out twice as fast. They also increase his air resistance, dropping his air speed to 3/10.
SIDE SPECIAL:THORN SEED Cacturne produces a small seed, then flings it to the stage. An instant later, a massive thorn erupts from the ground.
A yellow flower blooms in the palm of Cacturne's hand, from which he plucks a glowing green seed the size of a Deku Nut with his other hand. The whole move takes a little longer than Link pulling out a bomb. This seed is actually an item which, once thrown, takes root in the stage and is stuck there until Cacturne inputs the side special again or is KO'd. If the seed hits an opponent before it reaches the stage it puts a flower on their head, as large as if a Lip's Stick was thrown at them, before vanishing.
Once the seed has taken root, though, it becomes a trap. Inputting the side special again causes Cacturne to swing his arm upwards in a dramatic gesture as a massive green thorn as tall as Ganondorf emerges from where the seed was planted, inflicting 16% and upwards knockback that KOs at 100%. After undergoing this exponential growth, the thorn remains on the stage as an obstacle. The thorn is solid; characters must jump over the thorn to bypass it. However, coming in contact with its sharp tip deals 5% and weak upwards knockback. Alternatively, characters could just hack away at the thorn: it has 25 stamina, and crumbles to dust once destroyed. However, it is highly resistant to projectiles, taking only half damage from them. Giant Thorns wither into dry husks after 20 seconds.
If Cacturne creates another giant thorn, the old one whithers into a dry husk. Any attack or movement into it will destroy it, and it is no longer dangerous to jump onto.
Aside from the obvious use as a trap, Thorn Seed can also be used to create a barrier between Cacturne and projectile users, who would otherwise scoff at the cactus. Perhaps it even interacts with other moves...?
UP SPECIAL:FAINT ATTACK With a grin, Cacturne fades out of sight. A moment later, he appears behind his opponent.
After uttering a brief chuckle, Cacturne vanishes in a plume of sand; a second later, he appears behind the opponent farthest away from him. If not interrupted while preparing the move, his recovery is perfect. However, it is easy to tell when and where he will reappear, giving the opponent ample time to ready an attack in preparation.
While recovery is the primary use of this move, Cacturne can also use it to quicky close the ground between him and his victims, bypassing any traps or obstacles they may have set up.
DOWN SPECIAL:INGRAIN
Cacturne digs his roots deep into the ground, a technique his species uses to survive in the desert.
Life in the desert is tough, and one of the ways Cacturne has adapted to the waste is through conserving energy and absorb what little nutrients in the ground exist while prey is scarce. Long, sturdy roots shoot from Cacturne's feet into the ground, anchoring him to the stage. As long as his roots are active, Cacturne can move no faster than his walk and is incapable of jumping. However, he also has constant super armor equal to Snake's Up Special.
If used in the air, Cacturne assumes the sex kick position as a long root emerges from his foot before quickly retracting it. The root is 1.5 BFPs long. Enemies hit by the root are grabbed by it and swiftly pulled towards Cacturne, placing the directly in front of him. The root also works as a tether, bolstering his recovery.
GROUND ATTACKS
JAB:PULVERIZE
A swift punch turns into an increasingly vicious assault.
After drawing his arm back during a very brief charge up (similar to Ganondorf's forward tilt), Cacturne takes a step and makes a straight punch forward, then draws it back as if ready to punch again. This attack deals 5% and just flinching knockback. Cacturne can choose to either end the attack here (with virtually no end lag) or continue his attack by pressing the attack button precisely as his arm is drawn back again. The timing on this is definitely tricky and becomes even trickier when the opponent's damage increases (most characters are able to DI to avoid the third blow at 50%), but the payoff is great.
After pressing the attack button as his arm is drawn back, Cacturne drives his arm into the opponent's gut, grinning in delight at the pain of his victim as they take another 5% and surprisingly strong knockback for a jab, KOing at 130%. However, the attack doesn't have to end here; pressing the attack button again just as the opponent is about to be sent flying away results in Cacturne driving his knee into his victim's groin (or other applicable sensitive area the character may possess), tacking on 3% and crumpling them to their knees before landing prone. Finally, attacking just as the opponent goes prone causes Cacturne to brutally curb stomp his enemy, adding 3% and planting them in the ground.
This attack has a myriad of ways to set up the opponent to Cacturne's liking, be it he wants them close to him (single attack), far away from him/attempt a KO (two attacks), set up a tech chase (three attacks), or immobilize the foe for a brief period (four attacks). In addition, it also does excellent damage once all four attacks are pulled off, though doing so requires great accuracy.
FORWARD TILT:TORSO THORNS Cacturne thrusts his chest forwards, baring his spikes.
With a jerking motion, Cacturns puffs out his chest and extends the three thorns on his torso. The attack comes out very fast, deals 7%, and low knockback.
If Cacturne has his Spikes extended, he shoots out the four spikes on his body at an arcing upward angle; the lowest spike lands half a BFP away from him, whilst the highest lands two BFPs away. Each spike deals 2% and remains in the ground for five seconds once they land, remaining an active hitbox until they deal damage or crumble away. Using this attack again to spread around spikes causes the oldest ones to crumble to dust. It takes a quarter of a second for Cacturne to regrow these spikes after the attack is made, during which he is vulnerable.
UP TILT:NEEDLE ARM
Cacturne swings his arm in a wide arc, delivering an uppercut to his prey.
With no warning, Cacturne flings his arm upwards, turning his whole body with it. The impact of his arm on the way up deals 12% and good upwards knockback that KOs at 115%. Once it reaches the level of his head, he twists his arm backwards before returning it to its resting position, hitting directly above him for 12% and decent knockback. Although the move comes out very quick, the end lag is rather punishable, so don't flail your arms like an idiot.
While Spike'd, Cacturne flings a shower of tiny needles from his arm forwards and then above him. He flings 4 needles forwards and 4 above him. Each needle travels half as far as Shiek's needles but just as fast and inflicts a mere 1% and flinching knockback.
This attack makes for a good punisher, as it comes out very fast and does good knockback. If Cacturne misses while his spikes are out, the opponent still has a chance to get caught in a shower of needles, preventing them from punishing the endlag the move has. DOWN TILT:SPIKED STOMP
A sinister thorn appears from Cacturne's foot as he raises it above his vulnerable enemy.
Cacturne raises a foot into the stomping position as a large thorn emerges from the base of his foot. He then steps down on it with all of his weight, dishing out 8% and knocking them prone. If he misses a foe with this move, his thorn gets stuck in the ground, and he spends a quarter second struggling to get his foot loose.
If used on a prone or tripped foe, the move acts a bit differently. The thorn still does the same damage, but Cacturne pins the enemy to the stage with it and leaves the thorn embedded in them, cackling if he does. While pinned, an opponent is put into a grabbed state, and must button mash to remove the thorn at 1.5 times grabbed difficulty and return prone.
While his Spikes are out, Cacturne produces a glowing green thorn instead of a mundane one from his foot. If it comes in contact with a foe, it does the same damage as the mundane thorn; if, however, Cacturne jabs it into the stage, a massive thorn erupts from the earth directly in front of him a fifth of a second later. This thorn similar to the one created by his Side Special, though noticably thinner; it has only 10 stamina, and does 12% and KOs at 150%.
While the implications of the move are pretty obvious, Cacturne can use this move in ways that aren't obvious at first. Because it comes out so fast, Cacturne can use it as an emergency shield, blocking off charging characters, absorbing projectiles, and punishing characters that think its safe to approach you while jumping.
DASH ATTACK:VERDANT BURST
Glowing with energy, Cacturne emits a shock wave around himself, revitalizing the flora around him.
Cacturne stops in his place and brings his arms up in front of himself, drawing in energy from the ground and faintly glowing green. A quarter second later, a spherical blast of green energy bursts from his body, generating a wind effect out to 2 BFPs around him in all directions. Opponents in this bubble of force are quickly pushed out of it in the opposite direction, and have a chance of tripping; the closer they are to Cacturne, the higher the chance of tripping is.
Aside from pushing opponents, this attack can also be used on the spike hazards Cacturne creates. If any Giant Thorns or the thorns created by Cacturne's Down Smash (scroll down a bit) are in the area of the burst, their active time before shriveling up increases 10 seconds, and Giant Spikes regain 10 stamina.
While his Spikes are active, this move instead shoots out tiny needles from all sides of Cacturne's body. These needles have the same range of the Verdant Burst. Any character struck by these needles take 5% and flinching knockback.
SMASHES
DOWN SMASH:NEEDLE FIELD Channeling his elemental energy into the ground, Cacturne creates an area of dangerous spikes around himself.
Cacturne looks down and crosses his arms in front of him, deep in concentration as his needles glow with a bright green light. After a third of a second charge up, Cacturne stretches his arms above him and looks to the sky as dozens of tiny thorns appear around him in a half-BFP radius.
When Cacturne charges this smash at less than 50%, the needles inflict 1% every time a character lands on them, moves onto them, or stays on them every .25 seconds. If a character is standing over these needles as they emerge, they take 7% and low upwards knockback The needles last for 10 seconds before crumbling to dust.
At above 50% charge but below 100%, the needles grow a bit larger. Whenever a character touches a thorn, they take 2% and flinching knockback. In order to escape the thorns, unless they are at a really high percentage, they must DI out of them. If a character lands in the center of the needles, for example, they will normally be bounced off of them 4 times as they DI to the nearest edge. If a character is standing over these needles as they burst from the ground, they take 12% and upwards knockback that KOs at 125%. These needles also last 10 seconds.
If Cacturne charges the move up fully, the field of needles doubles in size, with a radius of a full BFP centered on Cacturne. They do the same damage as 50% charged needles, but, as they consume so much elemental energy, last only 5 seconds.
But wait, that's not all! If Cacturne has a Thorn Seed (Side Special) on the stage - but not yet turned into a Giant Thorn - Cacturne can instead have the seed count as the center of the field instead of himself by holding the special button during the charge up. Doing so consumes the Thorn Seed in the process.
This move gives Cacturne a decent crowd control option, and also lets him threaten large portions of the stage through the use of Thorn Seeds.
FORWARD SMASH: SUCKER PUNCH
Cacturne leaves himself open, daring an enemy to strike him as he readies a vicious punch.
Cacturne becomes still and looks down, hiding his face behind the leaves on his head, assuming a counter state. If, while charging the smash, Cacturne is stuck by an enemy's attack, he counters the attack and unleashes his smash attack on the spot, becoming a counter of sorts; otherwise, Cacturne automatically uses the attack after a second has passed. Alternatively, Cacturne can choose to save the charge as one would DK's punch, which he delivers as fast as Mario's Forward Smash.
The smash itself is a straight punch that deals 16-22% and KOs at 90-75%. If Cacturne's Spike are active, he also shoots out a large needle from his fist, which travels as far as Samus's Charge Shot and slightly faster than that. This pin missile inflicts 10-15% and KOsat 110-95%. Because of how sharp it is, it travels through characters and obstacles, vanishing only when it touches the stage or travels its maximum length. (Shielding the needle prevents it from harming the character.) The direction the missile is sent can be altered slightly up or slightly down, similar to how you can change the angle of Mario's Forward Smash.The lag on this punch is comparable to Captain Falcon's Forward Smash.
UP SMASH:ARM SPIKES
Giant thorns grow from Cacturne's arms, threatening those above him.
Cacturne faces the screen and holds his arms out perpendicular to the stage as the usually small spikes on his arm grow as tall as Pikachu. These spikes deal 10-18% and good upwards knockback as they emerge from his arm, KOing at 145-125%, and remain active hitboxes until Cacturne crouches, which retracts them into his arms. Opponents who touch the tips of these spikes take 6% and medium upwards knockback, with such low growth that it will never score a KO.
These spines are quite cumbersome. Cacturne can only inch along at Ganondorf's slow walk speed, and is incapable of jumping. Any sort of knockback Cacturne recieves snaps his arm spikes off.
While his Spikes are active, Cacturne instead aims his arm upwards and fires a single spike from it, similar to the one created by his Forward Smash. It deals 10-15%, knockback that KOs at 110-95%, and travels through solid objects.
AERIALS
NAIR:PAINWHEEL
With a quick spin, Cacturne flings his arms out in an attempt to batter his foes. He spins faster and faster until becoming a blur of needles.
Cacturne does a swift 360 with his arms spread wide. Opponents hit by Cacturne's arms take 8% and low knockback in a random direction. You can continue using the attack by mashing the attack button during his spinning animation; after using it for half a second, Cacturne begins to pick up speed, dishing out 10% and moderate knockback in a random direction. After spinning for a full second, Cacturne becomes little more than a blur, dishing out 15% and strong knockback that KOs at 110%. The amount of end lag this move has is proportional to the amount of time Cacturne spins: less than half a second, very little; greater than half a second but less than a second, moderate; a full second or longer, puts Cacturne into a helpless state and lands prone.
While his Spikes are out, the needles on Cacturne's body start to become loose from the inertia and eventually are flung from his body. After spinning for a full second, needles are thrown horizontally from Cacturne's arms every third of a second, traveling 2 BFPs before vanishing. Getting struck by a needle causes 1% and flinching knockback.
DOWN AIR:CLEAT KICK Cacturne punishes foes below him with a thorny kick.
Cacturne raises a foot as a long thorn grows out of its bottom, suffering lag similar to Ganondorf's Down Air. During this animation, Cacturne can aim his foot directly below him or diagonally in front or back of him, depending on how you hold the control stick. Afterwards, he slams his foot down, meteor smashing any foe hit by the needle and dishing out 18%.
With Spikes active, Cacturne does the same animation. However, after making the kick, Cacturne shoots the needle out of the bottom of his foot, which travels as fast as a thrown Pokeball until it hits something. Getting struck by this needle inflicts 13% and weak downwards knockback, making it noticeably less powerful than the standard version (though not necessarily less useful).
UP AIR:DRAG DOWN
Cacturne grabs his foe by the legs and begings wrestling with them, attempting to land on top of them.
Cacturne claps his arms together above him. If he fails to hit anything, he suffers lag as if he missed a grab; if he comes in contact with a foe, however, he initiates a grab. During this grab, both characters can either mash the attack button to pummel their opponent, dealing .5% per pummel, or attempt to escape at normal grab difficulty. If an opponent manages to escape the grab, nothing unusual happens, but Cacturne and the grabbed character are still grappling when they reach the stage, the character that inflicted more damage to the other through pummeling lands standing up, while the one that took more damage lands prone. If a suicide KO is attempted, the character that took the most damage from the pummeling is KO'd first.
FORWARD AIR:AXE PUNCH
Cacturne raises his arm up high, then brings it down in front of him.
Cacturne swings his arm in front of himself in a downwards arc, covering his entire front side and a bit above and below him. This attack deals 14% and moderate knockback that won't KO until 160%, either at a slight upwards or downwards angle, depending on whether you hit with the move before or after it reaches its midway point.
This attack is very useful in positioning opponents. By hitting them with the lower part of the attack, you can knock them into your needle fields, position them above a planted Thorn Seed, knock them on top of a Giant Thorn, and generally move them about as you please.
BACKWARD AIR:SPINAL SPIKES
Cacturne looks over his shoulder as massive thorns emerge from his spine.
Cacturne grins wickedly and brings his arms in front of him, then pumps them back' suddenly, a row of huge spines erupt from his back. Each spine is as long as a Star Rod and cover all of Cacturne's back aside from his legs and head. As these thorns emerge, they deal 15% and knockback that KOs at 100%. After they have emerged, they remain a hitbox for as long as you hold down the attack button, dealing 8% and moderate knockback that won't score a KO until 200%. While these spines are active, Cacturne can DI to move about, though he can't jump, dodge, or make any other attacks.
If used on a solid vertical surface (such as a wall, or, say, a Giant Needle), Cacturne becomes stuck to it, hanging in place for 5 seconds before the needles break. While hanging, Cacturne can still use his Nair, Fair, and Dair, and any special move. After the 5 seconds are up, he is unable to cling to a wall again for 5 seconds.
Obviously, this attack makes it difficult for enemies to approach Cacturne, and he can in turn use it to approach enemies.
GRABGAME
GRAB: CACTUS HUG
With a sudden burst of movement, Cacturne grasps his victim between his arms.
Cacturne leans forward and makes a hugging motion in an attempt to grab his foe. It's entirely mundane.His pummel is also typical: Cacturne tightens his hold on the opponent, pressing them against his thorny body and inflicting 2%.
FORWARD THROW:HEADBUTT
Cacturne slams his skull into his opponent's knocking them to the ground. Cacturne whips his head back, then smashes it into his opponent's skull. The blow deals 13% and knocks the opponent prone half a BFP away.
BACK THROW:SPIKE TRAP
Cacturne creates a patch of spikes and drops his foe into it. Cacturne creates an area of spikes half a BFP wide behind him, then tosses his opponent onto it. The throw itself deals no damage, though the spikes they land on are identical to the stronger version of those created by his Down Smash (2% damage and requiring the opponent to DI to escape). These spikes last for 10 seconds before fading, and disappear if Cacturne uses this throw again.
UP THROW:SNEAK SPIKE
A huge thorn bursts from the earth as Cacturne lets it skewer his opponent. Cacturne brings up his foot, glowing with green energy, then stomps the ground below him. A Giant Thorn is created directly beneath the opponent, identical to the one created by his Spike'd Down Tilt (10 stamina, and does 12% and KOs at 150%). The spike remains on the stage like a normal Giant Thorn.
DOWN THROW:NAIL DOWN
Cacturne nails his foe in place with a thorn through the foot. A large thorn grows from the base of Cacturne's foot as he stomps on his opponent's feet for 11% (or whatever part of them touches the ground) with it, leaving the thorn embedded there and pinning the opponent in place. Pinned opponents can't move, jump, or use any attack that causes them to jump. In order to escape this, the opponent can either crouch for a full second (during which time they yank the thorn out of them), or wait for the thorn to wither away, which happens automatically after 3 seconds pass. Any attack that deals knockback to an opponent also ends the pinned state.
FINAL SMASH: SANDSTORM
Summoning the power of his natural habitat, Cacturne sweeps the stage with a dust storm.
After grabbing the Smash Ball, Cacturne faces the screen and stands still for a moment; a second later, a sandstorm envelops the entire stage. This storm buffets everyone on screen with sand, dealing 4% per second, as vicious winds blow them about the stage, constantly blowing them in a random direction. The dust covers the screen, making it very difficult to see exactly where characters are. After 10 seconds have passed, the sandstorm subsides.
PLAYSTYLE
Cacturne is an opportunistic predator, and specializes in steadily pushing the opponent along into traps, be they literal traps or situations in which the opponent is unable to get away from Cacturne. Cacturne is primarily a close range character, but he posses a myriad of ways to deal with situations that would cause him headaches. Projectile based characters don't cause Cacturne as many headaches as they do other primarily close-ranged characters, as he can easily wade through projectiles with the use of his Down Special and block projectiles with Giant Thorns. Charcters that use obstacles and minions to keep Cacturne away are also easily dealt with through his Up Special.
One of the primary ways Cacturne sets up his opponents to be punished is through forcing the opponent into a prone position. Prone foes can be pinned down with his Down Tilt, allowing Cacturne to place traps around his opponent and limit the amount of options they have once able to get up. Rolling left is out of the option because you planted a Giant Thorn seed there; rolling to the right is dangerous because you're waiting there, free to get off an attack; attacking up isn't a good idea because Cacturne can counter the attack; merely standing up would put you in the middle of a field of spikes. Cacturne must predict his prey to fully capitalize on them. If you can manage to grab an opponent, you could also pin them in place through your down throw, allowing you to set up traps before slamming them with an attack.
Speaking of traps, Giant Thorns give Cacturne a way to constantly threaten parts of the stage. Thorn Seeds can burst into a giant, deadly hitbox in an instant, and are also capable of turning into a field of spikes. Giant thorns can also act as walls, blocking projectiles and fencing off particularly dangerous minions.
Airborne opponents have difficulty dealing with Cacturne, as Giant Thorns and his Up Smash make it difficult to approach Cacturne from above. Opponents who choose to approach Cacturne from above also risk being made prone through his Uair, and those from behind have to deal with his Bair. Cacturne is actually fairly difficult to approach in general, as he can fling needles into opponents before they can reach him. His Spike'd shield can also tack on extra damage to opponents. As Cacturne is immune to his own spikes, he could also wait for opponents in his own spike fields, flinging needles around until the foe attempts to approach.
Cacturne
After Kobold Clan and Fire Snake, I had some reasonably high expectations coming into this set... they were dispersed fairly quickly, as I found out Cacturne really wasn't much beyond a typical trap pressure character. I mean, he can cover himself in spikes, but you don't actually expand on that very well, and you tack on some prone abuse that doesn't do much aside from stalling for set-up and otherwise not flowing into his playstyle at all. I mean, Cacturne doesn't do much besides pressure the foe into or stand around on the needles, with no real way of expanding on his game. It's very, very bland and boring, and with half the moves not even flowing into that it just comes across as a total mess playstyle-wise.
But oh no, the set's failing points don't end there. It actually delves into some pretty nasty tackiness at points. The Dash Attack, of all things, recovers the health of the thorns for god knows what reason, and that Up Aerial is just horrible. Random drag down move with a button mashing competition tacked on that has a really bizarre way of going about suicide KOs? 99% irrelevant aside from lolgroundthemsotheylandinthetraps, and on top of that it's tacky as heck. On top of that, you have the throws that randomly plant traps in a completely redundant manner to your actual trapping moves, which aside from being redundant feels really bad on a bloody throw. Randomly tossing out a trap alongside a throw is bad in general.
So yeah, if you didn't get the message, this set is really bad. Not... much of anything positive to say here, though I guess covering yourself in a damaging hitbox could be interesting, you play on it very little, and it in no way flows with itself or the trap game. Sorry Zook, I like your sets most of the time, but I have to give a big time thumbs down on this one.
Thanks for the comment/review, guys. Just wanted to point out a few things about Master Hand that seem to be overlooked.
First, this was definitely a set made for the character, not the play style. This wasn't about finding a character to perfect the beginnings of a play style idea, but rather me taking an iconic character and seeing if I could construct a somewhat compelling move set for it. (You have no idea how much I wanted to give Master Hand minions and let him have a greater focus on making the stage into his own personal playground, but that would have defeated the point of the set.)
Also, it appears some of the (admittedly a bit limited) play style was overlooked here. For instance (@Geto), the forwards tilt is not mainly there to set up for up tilt or side special (although you could definitely use the pitfalled opponent to stall for time or even just kill them outright), but rather to assist in using your down smash for additional stage destruction. Similarly, the up smash and the up tilt serve two different purposes, one being for damage racking while the other is more for stage positioning. In short, although play style wasn't as big of a focus as normal in this set, it does actually exist, and I tried to lead the reader into discovering it for themselves. The main instance would be the down smash bombs, as Master Hand has plenty of tools for manipulating them: He can easily create slopes with a combination of jab and grab, use forwards tilt to stop them in place, side special smash to start them moving again, or forwards smash to set them off from a distance.
Although your comment was in no way negative, Nick, I would just like to say that my review was merely my take on the set, which in no way reflects the original intent. Watching again, I probably should have gone into more detail (which I did in the lost video) and maybe worded things a bit better. Over all, though, I did enjoy the set and it's fairly obvious that it was meant as a character-centric moreso than playstyle-centric.
Oh, and I was referring to the USmash and Jab in the video, accidentally said UTilt. Accidentally misspoke, and I apologize for that.
Ah, okay. They do still serve different purposes though; the jab's main point is to quickly divide the stage into pieces so you can manipulate it better with things such as side special, up tilt, and grab, while the up-smash is getting easy damage once you've already set up the stage to your liking.
Size: 3
Weight: 2
Ground Speed: 3
Air Speed: 3
Fall Speed: 1
Zombie Master is not very tall and is fairly thin, so his size is low. Likewise, his weight is fairly low. He is not fast, either, with a particularly slow, almost arrogant walk, although the run is more normalized. He also doesn't travel through the air very well and is pretty floaty, so he dies off the top easier. Not really the optimal stats here. His jumps also don't go very high.
He cannot wall jump, wall cling, glide, float or anything, but he can crouch. In fact, his crouch is pretty low, and he moves pretty fast during it, though not as fast as his dash. One thing to note, though not statistical, is the fact that Master Z here was designed with FFA and Team battles in mind, though his playstyle lends to 1v1 quite well as well.
With that out of the way, let's get to the rotten flesh of the moveset.
Recyclable Specials
Neutral Special: Animate
Zombie Master raises his hands up, pretty much exactly like in his card art, as his hands spark with dark necromantic lightning. Imput a direction while he is raising them or they are sparking to choose which minion you summon: If you don't choose a direction, he will merely default to the forward summon. Lightning will shoot out from his hands related to the direction you chose, ripping the ground in front of him for forward, directly shooting to the ground in front of him with down, arcing to both sides of him with up and darting behind him for back, which will cause him to animate one of his ghastly ghoulish undead slaves.
The minions he can summon are, for each directional imput:
Marching forward, the lowly Skull Servant!
Taking to the skies, flying upward is the Red-Eyes Zombie Dragon!
Arising from the ground below will be the demonic Burning Skull Head!
And defending it's master from behind is the large Dark Dust Spirit
Each of these have their own abilities, purposes and HP. For easy readability, information about ease will be incased in spoiler tags, both so that I can show images of them so you get an idea of what they look like without making this section look obnoxious, and for easier viewing by collapsing them when you don't want to read them.
Skull Servant
HP: 40
Size: A bit smaller than Mario
Height: About the same as Mario
Weight: Light, but not super light
Skull Servants are your most basic minions, default and meant to be numerous. You can have up to 5 Skull Servants out.
At first, Skull Servants are relatively worthless minions, shambling around at half of Ganondorf's walk speed, with very stupid AI and not even able to jump high enough to get on a Battlefield platform. But they can mean trouble in large numbers. Big trouble.
As more and more Skull Servants are summoned, they will get faster, be able to jump higher and act smarter, in addition to being granted new moves. This caps at five Skull Servants, where they will move as fast as Pikachu's dash and walk speeds, able to choose between dashing and walking, jumping at Falco's jump heights and with AI comparable to a relatively high level computer, meaning they will try to gang up on you, corner you and overall use something resembling strategy.
Their moves are the following:
Swipe: The only move a lone Skull Servant can use. It's a slow, easily avoided sideways swipe of one of it's skeletal hand, dealing a pathetic 3% damage, knockback that can't KO until 700%+ and little hitstun. As more Skull Servants enter the field of battle, this move gets faster, until it is comparable in speed to Jigglypuff's jab, albeit just a tad slower. Essentially, it's a jab.
Slash (Level 2): As the "Level 2" suggests, you need two Skull Servants for them to start using this move. A Level 3 move needs 3, ecetera. Anyway, as for the move itself, Skull Servant thrusts both it's hands forward, before slashing them to the sides. The initial thrust does 3% damage and good hitstun, while the second does 6% and a bit below average knockback. To imagine what the hitstun is like, imagine Wolf's forward tilt, where the opponent is frozen for a moment until the second hit. It's like that. You can't escape the second hit if you get hit by the first. It's one of the few moves Skull Servant has that does not improve with more Servants and one of their better low level ones, so you'll like that.
Poke (Level 2): Skull Servant crouches down and pokes the opponent with it's hands, with sweetspots at the fingertips. It does 7% damage and little knockback, but the sweetspot has a 20% chance to trip. The scary thing is that, as more Skull Servants pop up, 10% more gets added to the trip chance on the sweetspot, maxing out at 50% with five Skull Servants. Just like in horrormovies, you don't want to be falling to the ground, helpless and ripe for the pickings...
Skull Smasher (Level 3): Skull Servant rears it's ugly little head back, before smashing it upwards for 17% damage and some severe killing upwards knockback. It's head actually snaps off it's neck up for a moment when the move is used before landing back on it's body, so it's range is very large, but it's lag is very bad on both ending and starting, making it uber unreliable as a killer, even if it has some damn good knockback. More Skull Servants will slightly lower the starting lag, but it never really becomes anything but slow.
Chest Cracker (Level 3): Skull Servant rears it's fist back, before punching forward with a strong smash. The startup isn't particularly slow or fast, but it has severe ending lag on whiffs, although if it connects the lag is lessened. While it functions as a killer, it's not particularly strong, but compared to Skull Smasher is made up with by faster startup. Deals 14% damage. Another move that does not change with multiple servants.
Armarang (Level 4): Skull Servant takes off it's arm and, well, throws it forward with it's other arm. It'll fly forward vertically, dealing 9% damage to all who dare cross it's admittedly fairly short, 3/4ths of a Battlefield platform length, before returning to the Skull Servant. Skull Servant can't use Slash, Poke, Swipe or Chest Cracker until the arm returns or, if the arm misses it, about two seconds after that for the arm to regenerate. If there's five Skull Servants out, this move does 11% damage, goes twice as far and regeneration time is halved.
Dead Rising (Level 4): Skull Servant crouches down, similar to Poke, before jumping up for a RISING UPPERCUT! This attack comes out fast, sends skull Servant into the air, does 9% damage and has decent, but not really much of realistic killing, power in it. But it does give Skull Servant a realistic anti-air attack, in addition to finally another attack that is quick. With five Skull Servants, the Skull Servant's fist glows black with a dark magical power as it uppercuts, dealing 1% more damage for each Skull Servant nearby, along with a bit extra knockback. **** yeah.
Shield (Level 5): That's right, it's Level 5 time, and Skull Servants are gonna get a bit more tricky. That's right, now they can shield, just like a normal Smash character! Their shields are only 35 HP, though, so they break easier...and they can GRAB. Oh **** son.
Graveyard Grip (Level 5): One of Skull Servant's "throws", though it's...not really a throw. Rather, the Skull Servant will latch on to the opponent, constantly dealing 1% damage at the rate of 1% per half second, as it digs it's bony hands into the opponent's soft flesh. Once the opponent deals 20% damage(Most forward/back attacks will hit Dry Bones) or takes about 30% damage(From anything), the Skull Servant will detatch. If it got knocked off by damage, then it of course took the damage too, and if it is using this and would die, it detaches and, well, dies.
Skull Throw (Level 5): The other Skull Servant throw. Very basic, Skull Servant basically tosses it's opponent behind it. Not much to say. 11% damage, decent knockback for a throw. Basically the important thing is a minion with shield and throw capability, making it sort of a pain to deal with.
Extension Bluster (Level 5): Skull Servant's one and only aerial attack. Skull Servant raises it's arms over it's head, before slamming them down in front of it, it's limbs stretching as far as they can. This move actually has pretty impressive range and fairly decent startup, but with noticeable end lag. It does a chill 12% damage and good knockback, but sweetspotted, which is right in the middle of the fists, it becomes a pretty strong Meteor Smash, making it one of the killing moves of Skull Servant.
Wightning (Level 5): The only other move Skull Servant has that could count as a "special move". Skull Servant raises a hand to the sky, as it glowers with a dark power, before slamming it into the ground, creating two jolts of dark electrical energy that bounce across the ground, about half as big as Pikachu's Thunder Jolt to both sides. It hugs the ground in a similar manner as well, dealing a crisp 6% damage to whoever runs into it. It'll puff away after a Battlefield Platform and a half, though. This gives Skull Servant a complete, if small, compliment of moves at higher levels, with quick stuff, killer stuff, two projectiles, an aerial and some grabs + a shield...very dangerous for a minion!
Red-Eyes Zombie Dragon
HP: 25
Size: Very large. Probably a bit bigger than Bowser in overall size, in addition to the fact it has those wings.
Height: A good deal of it's size goes into the fact it is fairly tall. It is...well, fairly tall.
Weight: A bit on the light size for it's size though, only a bit above average.
While Skull Servants are your standardized ground troops, the Red-Eyes Zombie Dragon is your standardized aerial troops. The Red-Eyes Zombie Dragon will stay in the air as much as it can, constantly flapping it's wings to fly around and only landing for the ocassionally rest or move. This is not to say that it constantly stays out of attack range, as in generally it will stay flying around the height of between the two platform heights of Battlefield, adjusting for stage and flying lower/higher when want. Still, you can generally hit it. It's HP is low and it has a big hurtbox though, so it can go down pretty fast. You can only have two of these big boys out and they won't attack constantly.
These bad boys can do the following:
Fireball: Red-Eyes Zombie Dragon looks down at the ground and fires a fireball at a 45 degree angle, about the size of Kirby, travelling sort of slowly, though still fast enough to be a projectile and not like a trap or a hazard. The fireball itself is pretty strong, producing 12% damage and , unfortunately, poor knockback. REZD likes to use this when an opponent is dealing with a bunch of other minions.
Rancid Breath: REZD will have to land for this one and will try to land relatively close to the opponent, around a Battlefield platform away, sometimes a bit closer or further away. It will then crouch down, opening it's mouth to unleash a vicious and odorous green-tinted breath, which goes about a Battlefield platform and a fourth. The breath deals pretty weak damage, only 5%, and also little knockback, but it will corrode metals and afflict diseases on the living, presenting the foes with three different possible status effects. It can corrode the foe's flesh, though only on living players, slightly increasing the damage they take and making other minions focus on them a bit more, it can hamper the circuitry of robotic and other cybernetic opponents, hampering their speed and raising the starting lag of their attacks or, for both flesh and robotic enemies, it can either infect the living or corrode even further into vital functions of cybernetics, either way dealing 1% non-flincting constant for 7 seconds, until 7% damage is done.
Screamer: REZD can use this both in the air or on the ground, as it opens it's mouth and unleashes a blood-curdling, almost supermystical scream. This creates a wing hitbox around REZD, expanding outward a little as well, but still very closerange. The wind hitbox will send enemies flying in whatever direction REZD screeched in at about 1.5x FLUDD strength, without damage or counting as a hit. This move, however, also has a curious effect upon nearby minions, sending them into a blood frenzy for about six seconds. They won't move faster, but they'll hit harder and their AI will turn quite aggressive, hunting down enemies with ruthlessness and reckless abandon. This only counts to whatever minions get caught in or right next to the wind hitbox, though.
Dive Bomber: REZD will quickly fly to a part of the stage, any part of it, and hover in place for a moment. Even if it's HP is reduced to 0, it won't die on this part, yet. Then, it will fly straight up into the air and off the screen, rushing at quite a quick speed. At first, it just looks like it has left the battlefield, before it flies straight down where it flew up, passing through any platforms, solid or soft, on it's way to the bottom part of the stage. While it is flying down, it's body is a constant hitbox that deals 8% damage and will spike the opponent straight down, often setting them up for the second part of the attack, as REZD impacts the stage hard headfirst, creating a powerful hitbox at the point of impact which deals 20% damage and high knockback, although that is only for the focus sweetspot at the epicenter, if you only get hit on the outskirts, you'll get dealt a much weaker 11% damage and light knockback.
Stage Scratcher: REZD flies right off the stage, off the stage to the left or right, before flying back from that same direction, wings and body sideways and lined up so it will scratch against either the main stage or any level with a platform in it, before it does so, sparks flying against the stage as it does and slowing it down. The wing scraping against the ground does damn good damage, about 18% and killing knockback, while the wing not scraping only does about 5% damage and pathetic knockback, while the body itself does not even function as a hitbox. Because it's telegraphed and can easily be shielded, roll-dodged, spot-dodged in some cases or double jumped over (Or in rare cases, like Falco, single jumped), it is fairly easily dodged...but two REZD using it in quick succession can be more difficult, and it leaves you more open when the dodges end. Still, easily avoided.
Rush Dragon: REZD puts itself horizontal and rushes to the other side of the stage in midair, before turning around to face the stage best and resume normal attacking. It's entire body becomes a hitbox that deals 10% damage and decent knockback, though not really great, is fairly fast but has some end lag. If enemies are staying in the air a lot, REZD will try to move to a position close to level with them and use this and otherwise try to be annoying to aerial enemies with this.
Burning Skull Head
HP: 25
Size: Small, about Kirby sized
Height: Also about Kirby sized
Weight: Fairly light
Burning Skull Head is the primary knockout minion, although it is hard to use. Unlike every other minion, this guy has no real attacks or a moveset, but instead will fly around the stage, swooping down in wide sweeping motions at enemies, and as soon as it impacts an enemy...KA-BOOM! It explodes in a fiery hellstorm for 15% damage and high knockback, making it quite the killer...if it explodes, though, it itself dies, without leaving anything behind. It will also explode when hit with a physical attack from an opponent, even if it's disjointed nature would mean the explosion itself would miss. So enemies with swords and stuff can take care of this a LOT easier. Projectiles won't make it explode though, although you can kill it with them. If it doesn't catch an opponent to explode on in six seconds, it will stop in place, flash rapidly and, one second later, explode in a much weaker explosion, dealing 10% damage and knockback of below averageosity. However, exploding this way, or dying normally, will leave an inactive skull behind...well, assuming it lands on something solid and doesn't fall off the stage, anyway.
Blast radious on the explosion is relatively small and unchanging in both cases. In addition, you may only control two.
Dark Dust Spirit
HP: 30
Size: Dark Dust Spirit is very big, although not enough to be supermassive or anything, being a little less thick than Bowser, but...
Height: ...The tallest character in the game, though not by too much, it's head sticking through enough of the lower Battlefield platforms to be easily hittable by D-Tilts and D-Smashes
Weight: Dark Dust Spirit is the heaviest minion, clocking in at a weight just barely higher than Ganondorf.
Dark Dust Spirit might be slow and big, but it's an important part of your minion set. In fact, you'll usually summon it first, because of the fact it functions as a giant meatshield, allowing you to summon with more safety behind it. Don't think this thing is useless, though, it has some good tricks up it's sleeve!
DDS moves insanely slow though, with small jumps and a walk speed best described as "Ganondorf-esque". You can only have two Dark Dust Spirit out.
Dark Dust Cloud: Dark Dust Spirit makes some motions with it's hands, before blowing forward, spewing a cloud of dust on to the field. It is about the radius of a Smoke Ball. This cloud, colored like the dirty dust in it's card image, will slow down anything inside it, which moves at 0.75% the speed of what they normally go through the air, walking, dashing, crouching, anything. This also applies to your minions and yourself. In fact, the only thing this does not affect is Dark Dust Spirit itself, as it is used to traversing this dust. The dust also obscures the area around it a little, though not to the extent of, say, a stationary Smoke Ball or Into Red Smoke, it's more just a minor annoyance. DDS won't just use this at random, it uses it with deliberate planning, such as to stall an opponent from getting to it's not-so-humble master, or if an opponent is being surrounded by other minions to help mess with escape. The move itself has average startup, but is a bit slow to end. DDS can only have one Dark Dust Cloud out.
Bluster: Dark Dust Spirit draws a large breath, a somewhat length animation, before exhaling forward a huge burst of wind, blowing enemies up to two Battlefield platforms away at the strength of 2x FLUDD, continuing for a relatively long time...before DDS has to cool down, winded by this. While an excellent keep away move, and a decent gimp even if it can't get enemies who can recover below, it also can blow around your minions/you and generally be a bit of a pain. However, when facing away from Master Z, it gives him good time to set up, and a Dark Dust Spirit hanging near the edge can be dangerous. This move is used a lot less the more minions are out.
Brain Scrambler: Dark Dust Spirit raises a mighty fist, before slamming against the ground, shaking the entire stage. Minions on the ground, save for Dark Dust Spirit itself, will be popped up, much like when a POW block is hit on Mario Bros, while actually characters who are on the ground, even Zombie Master, will be temporarily stunned, opening them to the ripping by the ravenous minion hordes...or the savage beatings of another player. While this move can be awesome, especially if an enemy is pinned down, it is also very easily telegraphed due to a high starting lag and can let an opponent close to Master Z get in a big hit on him. Not to mention momentum can carry minions, mostly Servants, right off the stage. This one is dangerous.
Hell Claw: Dark Dust Spirit swipes forward with a slow to start up, high ending lag move, and one of it's few actual physical attacks. It does a damaging 14% and has above average knockback, but as said, is slow. DDS will also aim this to hit people, as it is aimable up and down, in addition to just hitting in front of it. But it always remains laggy and punishable. Very simple.
So yep, there's your four minins. All important. Lots of stuff. You know, the usual.
It's really all there is to see.
...Okay, I lied, there is one more minion I didn't list. He's not consistant, though, and he can only be used in FFA or 2v2, on stock. Why is that? Because he must be summoned when somebody loses their last stock!
In fact, you might know where this is going: If you begin casting this within ten seconds of someone losing their last stock than, by holding down the B button instead of choosing a direction, Zombie Master will shoot his lightning right off the stage...and in the middle of the stage, or wherever a respawn platform would be, will a zombified version of that character pop up!
They will look the part too. Robots like R.O.B. are rusted and cracked, with sparking wires falling out, while living characters are often rotting, pieces of flesh under skin or even bone visible, perhaps missing an eye or other non-vital organs like some fingers or toes. They copy the moveset of whoever they are a zombie of, with the exception of being unable to shield and therefor grab and having no Specials. They have 70 HP, the stats of the normal character and can be knocked off the stage to be killed like normal. Only one can be summoned per final stock, so don't think you can just summon an army of these. He also cannot zombie-ize a boss or characters who might be TOO supermassive.
The minions have another aspect to them as well, specifically, when they die, they don't die immedietely. Instead, they will usually leave behind a corpse: Skull Servant leaves behind a pile of bones, Red-Eyes Zombie Dragon leaves rotten flesh and broken scales, Burning Skull Head leaves an inanimate and cracked skull and Dark Dust Spirit leaves a dust cloud that, unlike it's moves, does nothing. And as mentioned, if Burning Skull Head actually explodes with it's primary attack, nothing is left behind. In addition, REZD and Skull's corpses can land off the edge a decent amount, leaving them to plummet to die. All corpses will dissappear if they aren't used in 10 seconds. In addition, you know those character zombies I talked about? They never leave a corpse, instead disappearing with a little flash. Oh, and if it wasn't obvious, corpses don't count towards the max of each type you're allowed out...I wonder if that's a loophole, hm? >D
Ah, but how does one use it? Well...
Down Special: Re-Animate
Probably one of Master Z's most important moves is his Down Special, Re-Animate. Remember what I said, about how his minions don't disappear when they die, but crumble into piles of bones, flesh and the like? Yeah, that's for this move. When you're close to a pile like that, press this and Zombie Master will start pouring his re-animated lightning into it. IT doesn't take too long, but it's not exactly fast either, you can definitely be knocked out of it if you use it without proper spacing, cover or just because enemies have good projectiles. But if you do, it is quite the powerful move, allowing you to endlessly hide behind your little fleshpuppets and just keep reviving them for an endless stream of pain!
...Of course, though, things hit by Re-Animate don't come back quite as strong as before, they come back with 5 HP less, every time losing 5 more HP(IE, reviving the same thing three times, it has 15 less HP to start with than it started). If a minion is revived with 5 HP only and dies, it is GONE FOREVAH...which is not really that big of a deal, just summon more, but it does prevent endless minion spam.
What about when it's used AWAY from dead corpses? Well...ehehehe...normally, it does nothing. But remember when I said Master Z was designed with FFA and team in mind?
This is one of the reasons why, along with the Neutral Special of course. Use this away from a minion when any player has recently lost their last life, within the last five seconds, and Zombie Master will let out a mighty necromantic lightning blast over the sides of the stage...and actually revive that person, with one more life, under full control of the original player and everything! They can even still win the game, though they do start with around 20% damage, with heavier characters getting a bit more and lighter characters getting a bit less.
The use of this in team battle is obvious: When a teammate dies, raise them from the dead with Re-Animate! As long as you've got Master Z on your side, he can keep you coming back over and over again, creating a sort of "Shoot the Medic" scenario. Or Shoot the Master, as the case may be. The only restrictions are: Zombie Master cannot revive himself, obviously since he would be dead, and Zombie Master cannot revive other Zombie Masters. You know, to prevent an infinite loop of them reviving themselves.
But why would you ever use this in FFA, you wonder, as you can only recall fallen enemies! Well, if you'll recall, the Neutral Special allowed you to summon quite a powerful little piece, but only when an enemy died on their last stock. So, use this to revive an enemy, especially if your opponents are alive still, kill them again, preferrably quickly, and then animate more of those powerful minions. Essentially, you risk an enemy coming in to play, for the chance to raise yet another powerful ally.
After using this, it takes about two seconds for whoever you raised to return, unlike the minions, who rise quickly after the move is done. They still have respawn invincibility, but for half as long.
Side Special: Soul Taker
Zombie Master will produce some dark lightning, again see card art and previous moves, with a single hand, but unlike the last times, he'll whip this one forward. On contact with enemies, it deals 6% damage, low knockback and low stun. So why use this piece of flaming zombie **** move?
This move's name refers to what you'll do to your lowly minions when you hit them with it, sucking out their soul and instantly destroying them...and absorbing the soul through your lightning. Each soul will heal 10% off your damage counter, though it's not immediete, taking about 3 seconds. This stacks for every soul you get: Wipe out five Skull Servants? In three seconds, you'll get 50% health back. This is very good, because between a fairly bad recovery and bad stats, Master Z does NOT survive long. This boosts his survival.
At the same time, this move can decimate an army. While the corpses will still be around, they disappear at double the speed of normal, and the ones affected by this take an absurd 3 seconds to reanimate, so you're usually better off summoning new partners, but that takes time too! Or you can just kill one or two, but then you heal a pretty small amount...descisions, decisions. In 2v2, there's another descision to be made, too: If you're absorbing souls for healing, your partner can join in as well, simply by touching the stream! It reduces the healing by half, but gives it to both. So destroying one minion gives you both 5% healing over 3 seconds. Destroy a lot of minions and you can restore you and a teammate to full! ...But you'll have nobody guarding your back while he's in the stream and the enemy can disrupt it. Plus, it means you only get half healing.
Descisions...
This move does have a difference between tilt and smash. With a tilt, it's range is one Battlefield platform. Smash it and it's two. Useful for deciding just how many servants to kill! The move itself comes out fast with variable ending lag: It starts out fast, but it gets a little more for each soul absorbed, though it never really becomes all that laggy...but still more punishable.
Up Special: Lightning Whip
Zombie Master produces some lightning, shocking I know, and whips it up as if it was a whip, diagonally and quite far. As you may have guessed, this is a dreaded tether recovery, the gimpable of the gimpables. Hitting with the tip of the whip does 8% damage and some surprisingly good knockback, but other parts are sourspotted for 4% and low knockback.
This does have a bit of an anti-gimpability to it. Specifically, after it extends to it's maximum size, it's going to stay in that position for just a bit. If an opponent grabbed the ledge too early, their invincibility will run out and you'll tether right on. So the timing to just edgehog this is a lot more strict. But it can't outlast any invincibility, if they grab it with the right timing, the whip will retract before their invincibility runs out...unless you activate it a bit later in hopes of making then jump, or perhaps a minion distracts them? Just some food for thought. Used on the ground, it does the same damage and fires at the same angle, but won't tether to anything.
Overall, a relatively poor recovery, but it's not unusuable.
Graveyard Ground Game
Jab: Double Kick
A quick kick, followed by another one! The first does 2% and the second does 3%. This move honestly does not have anything special, usual quick jabness, low knockback and damage, it is basically just a standard quick jab. Not to say that Master Z can't use a good move like that, but it's just...not special.
Not that there is anything wrong with that.
Forward Tilt: Chain Lightning
Zombie Master's hands crackle with dark lightning ability, before he points both of them forward, shooting out a singular lightning bolt. The attack deals 11% damage and has excellent range, going about 3/4ths the distance of Final Destination before petering out like nothing. The except is if it hits an opponent and there is more than one opponent, in which case it won't peter out. Instead, when it hits the opponent, it will immedietely shoot out at wherever the nearest opponent is, gaining just a tad bit of speed as it does, if it misses continuing until it leaves the screen. If it hits that opponent? Then it will, if there are more unhit opponents, shoot out at them, but never never the same opponent more than once. This means in a standard FFA, it can hit up to three times barring minions. Note that although it won't try to hit already hit opponents, it can still do so if they get in it's way.
The lightning itself, while not blazing fast, moves at a relatively quick speed, and the move itself comes out fast...but it's very punishable, as Master Z's back is totally exposed during the duration of the move, which is a bit long, and it has fairly high ending lag, especially for a tilt. You can have unlimited Chain Lightnings out.
Up Tilt: Power
Master Z raises his hand as it crackles with electricity, before unleasing it straight-up, where it tracels about the height of himself up, before arcing into three bolts, two which land next to him and one which lands exactly where he is. This move always does 10% damage and little knockback and is unaffected by Stale Move Negation. Comes out pretty fast, helps protect from non disjointed retaliation, but it's range really sucks...and it has a second use!
Once the lightning reaches it's apex it will, as stated, curve back down. When it does this, and until it finishes soon after, any minion hit by it will be charged with the power of this ethereally necromantic blast, which gives them a little boost. For each minion, they get the following:
Skull Servant: For the next 3.5 seconds, Skull Servant's attacks deal 4% more damage from the charge and giving off darkness-electrical visual effects.
Red-Eyes Zombie Dragon: REZD's body becomes a constant hitbox, dealing 5% eletrical damage as it pulsates through it's body, with some light knockback attached. Also has those darkness-eledtrical visuals. Lasts 4 seconds.
Burning Skull Head: Burning Skull Head will leave an electrical stream behind it as it moves, which deals 7% damage and good vertical knockback to any foe who touches it. It fizzles out after 5 seconds.
Dark Dust Spirit: Gains a new move, which allows it to raise it's fist to the sky, calling down a mighty bolt of lightning. It will strike wherever the nearest opponent was when it was started after a two second delay, dealing 11% damage, good knockback and some keen hitstun. Platforms will block it and using it once removes the charge from it.
It's impossible to get too many minions at once with it, but strategic buffing will allow boosts, such as lining the field with an electric current hitbox or adding something else to worry about with DDS' Lightning Drop.
Down Tilt: Flesh Portal
Zombie Master throws his arm downward dramatically, opening up a dark portal. The initial opening will do 9% damage and low knockback to anyone it hits, but very soon after becomes a non-hitbox. It passively imits wonderful little passing fumes of the delicious smell of flesh ripe for devouring, and the smell of the living for which to apply their wrath.
For the seven seconds this portal remains out, Skull Servants will gather around it, while Burning Skull Heads and Red-Eyes Zombie Dragons will attack the surrounding area more often, though Dark Dust Spirits remaing relatively unaffected, preferring to stand back and influence the battle in their own ways. You can only have one out, but trying to place a new one will just demolish the old one.
While this move can be used to lead your minions and gather them, it also telegraphs where they'll be, so you must be careful against characters who can just snipe them off and fast characters. You'll often need to hit a foe into the gathered crowd, but once you do, it can quickly turn into a bloodbath.
Dash Attack: Darkness Charge
Master Z pushes forward with a shoulder charge, his shoulder becoming envloped in an energy similar to his Down Tilt and necromantic lightning. The move itself does 9% damage and some fixed, fairly average almost straightforward knockback, low hitstun, not all that much interesting stuff. But the energy used to work with the charge provides a use...well, a FFA/2v2 use, anyway.
Essentially, an enemy hit by this move gets the same effect as the Flesh Portal's, as the dark energies leave a residual residue of strong flesh-y scenes, causing your minions to focus on them moreso than any other opponent. In 1v1, this effect is totally useless unless the foe also has minions, because the zombies will already be targetting them, as the only foe there. In brawls with multie enemies, however, you can use this to mark pesky foes with high damage, parts of an enemy team with low stock, all kinds of stuff. This effect lasts for less time than the Flesh Portal however, only four seconds.
In all modes however, it can be used as a bit of a spacer tool with it's fixed knockback, though the fact it's pretty average means it might not always be the best option. If nothing else, it performs the duty of a Dash Attack admirably.
Forward Smash: Blast Lightning
Zombie Master turns around, before turning back and unleashing a torrent of dark lightning. Although it comes out as three swirling lightning bolts, this is a purely cosmetic thing, and it functions as one hitbox. The move itself starts with a bit of a weak for a smart 14% damage and not that high knockback, but this thing goes far, a whole two Battlefield platforms ahead, though since it travels it won't hit it all at once. At max charge, it does 19% damage, deals better knockback and visually it has five lighting bolts. It's startup is a bit slow, but it has low ending lag, so it's not as easy to punish as it could be.
This move doesn't really have any special interactions, but it gives you a strong option to blast away at foes from afar and is, sadly, actually one his better killing moves, even though it can't kill well. While I am sure you would like to hear more, that's all there is to this very straightforward move.
Up Smash: The Oncoming Storm
Zombie Master raises his arms as dark energy gathers in the palm of his hands, before he shoots out three lightning bolts, which go straight up...for one length of Zombie Master's body. After that, they start going crazy nuts. They'll do loop-de-loops, zig zag, dart about and generally be an unpredictable storm of lightning, though at times they will just go straight up. They do 15% damage on contact and disappear when they hit an enemy or go off stage, with some good hitstun and a LOT of shieldstun...but the knockback is very poor, especially for a smash. Lag-wise, it has an average startup and a bit of a slow finish, though still pretty close to average.
This move, especially combined with some Red-Eyes Zombie Dragons, can make traversing the skies a bit of a nightmare, wanting to help keep foes on the ground...but then they don't want to fight all the other ground minions, do they? So it becomes an opponent choosing which is the lesser of two evils...and, hey, forcing the opponent into a bad situation is good for you, huh?
Charging merely increases the damage of this move, up to 18% max, and the amount of stun they do, minimally raising the stun but drastically raising the shieldstun. Master Z can only have six lightning bolts from this out at a time, try to use more with six out and the lightning will fizzle in his hands, leading him to look at them in confusion. Sort of amusing, really.
Down Smash: Burning Skull Mine
Zombie Master summons a Burning Skull Flame, but, as it rises up, instead keeps it down in the ground with it's food, angering it in the process. This won't count towards your Burning Skull Flame count, but only one can be out at a time. While in the ground, the Burning Skull Mine will act a lot like a proximity mine, exploding when any player comes along, be they Zombie Master or be they a foe...it won't explode on minions though, even enemy minions. This explosion only deals 15% damage, 19% fully charged, but it's radius is good and the knockback makes it one of Master Z's better killers, even if it can be tricky to use.
You can tell a Burning Skull Mine is in the ground because the glowing eyes of the Burning Skull Flame are visible in the ground. If, after ten seconds, the Burning Skull Mine has not been detonated, it will self-destruct for an explosion that deals halve damage and knockback. Note that all of this move's explosions will damage minions, even if it won't be triggered by them, so be careful!
The move is a bit laggy to start, quick to finish and pretty straightforward. Use it near an enemy enraptured by the hordes and they'll probably miss it or put it away from a Flesh Portal, perhaps with some bolts from your Up Smash, to try and keep them pinned in.
Death's Cold Hard Touch
Grab: Grip of the Grave
Very standard grab. Zombie Master reaches out to try and grab someone, aiming for the throat. Average everywhere.
Pummel: Life Drain
Deals 1% damage, but is still fairly slow, as Zombie Master enjoys zapping opponents with some touch-lightning. These ones, which will form a closed circuit with Master Z's body, will also heal him 1% each time. That would be why it's fairly slow for 1% damage.
Forward Throw: Lightning Barrage
Zombie Master throws the opponent in front of him for no damage, before he begins zapping them with his necromantic lightning in this long duration throw. Each shock does a pathetic 1% damage and only hits 6 times, so it does a pathetic 6% damage...but it also takes very long and has high hitstun. In other words, other people in the game, or your minions, can wail on your opponent...but your opponent will still take knockback, so it might be a bit hard.
You can also use this to hold an oppoenent in place for a bit so as to taking them out of helping their teammate(Even if it takes you out too) or for one of the laggier or hard to hit finishing moves of your minions, making it actually a bit of a KO move. At higher percentages, you can DI after a few bolts or in some cases, especially the higher you go, even one.
Down Throw: Lightning Hop
Zombie Master kicks off the foe, throwing them to the ground as he hops into the air, shooting a pair of dark necromantic bolts at the enemy as he does. They will do 8% damage each for 16% damage total, while also leaving the enemy in prone. However, the enemy can recovery as soon as they stop getting zapped, so they'll almost certainly recover from prone before you personally can hit them...so you'll have to rely on the minions to do that for you!
Use this with an ally who has prone abuse or with the nearby horde for the most use, though it's still a 16% damaging throw that lets you into the air, so even useful as a spacer, especially if you use it to land on a platform.
Back Throw: Outta My Way
Zombie Master places the foe behind him and, with a sharp kick, pushes the foe two Battlefield platforms behind him, the opponent stopping if they reach a ledge, dealing 9% damage in the process. It can't kill and it's damage is weak, but while Master Z certainly has some ways to keep space, he at times has trouble creating it: This is one of those ways to create it. It doesn't really have anything special aside from that, though: It might create space, but that's all it can do.
Up Throw: Deluxe Shocker
Zombie Master, in a surprise twist nobody would expect, actually throws the foe upwards for his Up Throw! Crazy, I know. The throw itself does 5% damage...but Master Z felt he needed a bit more flair, not to mention damage, so he'll shock the opponent in midair with some more of that nutso necromantic lightning, dealing 6% more damage and some pretty good upward-diagonal knockback. This is also a bit of a spacer, as it sends enemies into the air, but at higher damage percents they can easily DI out of the way of the lightning. It's also got the highest knockback of the four throws, though that's not saying much...
This is, again, a pretty basic throw. I don't think that's all that bad though.
Undead Air
Neutral Aerial: Dark Shock
Zombie Master extends his arms outward, as they crackle with the dark energy of the unliving world...but instead of expelling that energy, he turns it in on himself, letting the black energies of life twisted flow through his veins, sparking and exuding it's corrupted aura as it turns his entire body into a hitbox. The move itself is multi-hit, drawing opponent's in every closer with a suction effect if they get too close, although the multi-hits deal a minor 1% damage, to a maximum of 10...and at the end of the attack, Zombie Master finishes with a flourish, ejecting the energies in a burst of otherworldly aura, dealing 5% damage and, most importantly, some pretty good knockback to anyone caught inside it's hitbox, which extends to just outside his body.
The move itself slows Zombie Master's aerial momentum a lot, but does not negate it, causing him to fall slower and not move as far during it's duration. It's multi-hittedness allows DI yet it's suction pulls the unlucky foe in, and then ends with a bang of knockback, giving him an interesting option to mix up air speed, almost to the point of becoming, for a moment, a living stage hazard. Beware of those with disjointed hitboxes who will want to hit you out of this!
Down Aerial: Wicked Smiting
Generating the lightning of dark energy you all know by now, Master Z chucks it straight down, no frills attached there. If used over a pit or off the stage, the bolt goes all the way down and off the screen, while if you use it over the stage, it will impact against it, releasing two little waves of darkly electrical energy to each side, which tightly hug the ground for half a Battlefield platform before disappearing. The lightning bolt itself deals 8% damage and has somewhat weak knockback, though it is a Meteor Smash: It just won't kill for quite a while, but instead makes a chance-y gimping tool, especially since you yourself can be gimped with that tether recovery. The jolts deal 6% damage and no knockback, but high stun, leaving those who don't notice it in a heated battle to be stunned, obliterated, ripped apart and devoured by the undead horde. This moves come out pretty fast and has some decent end lag, so be oppourtune but don't spam.
Yeah, I like how this turned out. Good way to knock 'em back into the horde and keep them on their toes whenever you enter the air.
Forward Aerial: Death's Touch
Zombie Master gathers energy into a single one of his hands, a process that leads to quite a lengthy startup lag, before jutting it out, his hand GLOWING with an AWESOME POWER, palm and not fist. The hand will release all of it's energy in one glorious burst of damnable energy, dealing an insane 17% damage and some very high knockback, making it another one of his killing moves. The only part of him that's a hitbox is his hand, even the rest of the arm is fine, and the startup lag is severe, though he slows down a little while charging it, just not as much as the Neutral Aerial. You're going to need an opponent in some lag, or caught dealing with something else, to really hit with this move though. On the plus side, it has little ending lag.
A tough to land, laggy move.
Back Aerial: Kick Start
Zombie Master kicks back, very simple, standard BAir-ish, does a meager 6% damage, good lasting hitbox and comes out quick...and has another use once it lands, joy of joys!
When this move hits, you can hit A, which will cause you to jump off of the opponent, essentially a footstool, but instead of vertically, it's horizontally, actually making it a bit useful as a recovery move. You could just end it there...but you can also sacrifice some height for more damage: Press A again pretty soon after kicking off, or during kick off, and Zombie Master will turn around, shocking the opponent with a lightning bolt that deals 7% damage and, regrettably, below average knockback, though combined with the psuedo-footstool distance and possibly using this off the stage, you still might score a kill. You'll lose a deal of height out of this though, as you'll move down like normal as you attack...you are pretty damn floaty though, so you can probably afford it! A natural combo.
Probably Master Z's best aerial, as it deals good damage and comes out quick, and has some options within itself. Use it to help finish off enemies thrown away by the horde or to deal damage-based punishment for those who escape throughout the airways!
Up Aerial: Kick Back
Zombie Master does an upwards flipkick! So original, I know, dealing 10% damage and some decent-but-not-grand knockback on this low-startup, above average end-lag move. Aside from that, though, it is pretty much just an average flipkick, complete with a sourspot dealing half damage and sending the opponent behind the opponent instead of up at the end of the flipkick. It honestly is not all that original and serves only one purpose: To help stop enemies from coming down on top of you for massive damage/massive gimping.
So goddamn original.
Final Smash: Midnight Storm
You wonder what Zombie Master has to do with midnight. But you have no time to contemplate, not just because of the zombies breathing down your neck, but because Zombie Master has grabbed a Smash Ball!
Upon using your smash, Zombie Master will send exactly 20 large necromantic lightning bolts straight into the sky, of the screen and then...continue battling at normal! Three seconds later, they'll start raining down again, at two per second at random parts of the screen for ten seconds. They deal 15% damage and spike, but they'll also heal minions they hit for that much, to the point of even being able to re-animate corpses upon falling on them instantly! Note that the bolts won't go through solid platforms, but will go through semisoft and soft platforms. It's dark energies, if it impacts them, can also let Zombie Master and any teammates he may have be rejuvinated by them, healng 10% if stricken by a bolt.
Yeeeah...that's all I got.
Playstyle
This is going to be brief for now and maybe edited more in later. But Master Z plays a very self-evident style: Summon the horde, pepper the opponent, get space. You'll probably have a hard time summoning some stuff at first, since projectiles can stamp you out and a lot of foes can just approach you or set up their game, so you will probably want DDS first for the big protective body. Your throws will be your primary space maker, along with perhais setting a mine or connecting with an F-Smash. After that, you want to try to break opponent's with your mindless horde, supporting them with long range attacks, powering them up with, well, Power, and cutting down your opponent's options with things like your Up Smash, the Burning Skull Mine and your Down Aerial. Kills will probably come courtsey of your minions, but you can try to help out with your killing moves, two of your throws to set up or try to do it yourself with some offstage shenanigans via back aerial or down aerial spiking. If you can get the opponent vulnearable, FAir can end it quick.
But really...this is a very self-evident set. I really doubt anyone needs this to figure it out.
Cacturne
After Kobold Clan and Fire Snake, I had some reasonably high expectations coming into this set... they were dispersed fairly quickly, as I found out Cacturne really wasn't much beyond a typical trap pressure character. I mean, he can cover himself in spikes, but you don't actually expand on that very well, and you tack on some prone abuse that doesn't do much aside from stalling for set-up and otherwise not flowing into his playstyle at all. I mean, Cacturne doesn't do much besides pressure the foe into or stand around on the needles, with no real way of expanding on his game. It's very, very bland and boring, and with half the moves not even flowing into that it just comes across as a total mess playstyle-wise.
But oh no, the set's failing points don't end there. It actually delves into some pretty nasty tackiness at points. The Dash Attack, of all things, recovers the health of the thorns for god knows what reason, and that Up Aerial is just horrible. Random drag down move with a button mashing competition tacked on that has a really bizarre way of going about suicide KOs? 99% irrelevant aside from lolgroundthemsotheylandinthetraps, and on top of that it's tacky as heck. On top of that, you have the throws that randomly plant traps in a completely redundant manner to your actual trapping moves, which aside from being redundant feels really bad on a bloody throw. Randomly tossing out a trap alongside a throw is bad in general.
So yeah, if you didn't get the message, this set is really bad. Not... much of anything positive to say here, though I guess covering yourself in a damaging hitbox could be interesting, you play on it very little, and it in no way flows with itself or the trap game. Sorry Zook, I like your sets most of the time, but I have to give a big time thumbs down on this one.
I'm don't understand why you seem to think that Cacturne only wants to pressure opponents into his traps; while yes, he does use a plethora of traps and lingering hitboxes, he uses them not mainly as actual traps but rather to create dangerous spots on the stage to prevent the opponent from escaping. Let's look at the Thorn Seed: it does deal good damage and has KO potential, but after its initial summon, it doesn't do much more than just sit there... as a wall. A lot of Cacturne's attacks have horizontal knockback, meaning that Cacturne can use stationary Giant Thorns to catch the opponent, not letting them get far enough away to retaliate. His Down Smash doesn't hinder the opponent unless it is charged up, as if it is charged less than halfway, the trap doesn't even flinch opponents. Even when charged, Cacturne uses them to lock off escape routes and create openings for his sluggish physical attacks. Prone abuse also ties into this concept: Cacturne wants to force the opponent into being vulnerable for just a fraction of a second so he can hit them with his FSmash, UTilt, Bair, Jab, or, yes, Thorn Seed. It isn't just tacked on. All of Cacturne's moves are dedicate to punishing moments the foe leaves themself open, forcing the opponent into leaving themself open, and steadily moving the opponent into KO range.
I didn't do a good job justifying why the Dash Attack revived plants, so here was the idea behind it: it is supposed to be a burst of pure, positive, natural force. The energy pushes away characters and seeps into plants, giving them life. ...Looking at it now, I do agree that it is a bit cheesy, so you have me there. The Uair forces the foe into a vulnerable position, which Cacturne wants so he can set up a KO. The throw creating a trap is completely unnecessary, though. I agree with you on that point. However, it isn't a unique trap that Cacturne can ONLY use with that throw, so I don't believe it to be that offensive.
The last thing I want to touch on is the purpose of Spikes: Cacturne does not cover himself in a hitbox when he uses Spikes (his shield does sort of becoe one, though, which I think is where your confusion is coming from). Rather, Cacturne's Spikes are more like an on/off switch which he can use to alter some of his attacks.
To be quite honest, I was really tired when I read the set and made the comment, so I probably missed a few things. And yeah, when you put it like that the set flows better than I thought... it's just that this type of lockdown still doesn't interest me in the least. It's really obnoxious to play against, and at this point most sets have that sort of thing to be honest. You justified the Up Aerial and Dash Attack a bit, but the former (drag down Up Aerial) has been done so much before it's almost ridiculous and the later just feels really awkward as an attack you can only use while dashing.
As for the spikes, you make a point there, though I guess that brings me to my other point with them, I don't think the downside is really enough to justify not having them out at all times. I mean, they give him some pretty notable buffs to certain moves and losing a bit of Aerial Speed and Shield Time seems more than worth that. Number crunching, but still.
My main problem with the set still stands, it's largely just stunning the foe to land your KO attacks, which is something we have seen before on a frequent basis and not especially fun to play. I'm glad you went ahead and defended your set though Zook. We can't have people just wuss out when their set is disliked(at any rate, you are a braver man than I).
Just because you're a rookie doesn't mean you aren't allowed to make Assist Trophies. I mean, we can't disallow you from that sort of thing just because of your newbie status.
Thanks for the compliment. You are allowed to make whatever you want, although not a lot of people are liable to a lot of the non-set stuff. Or at least comment, anyway.

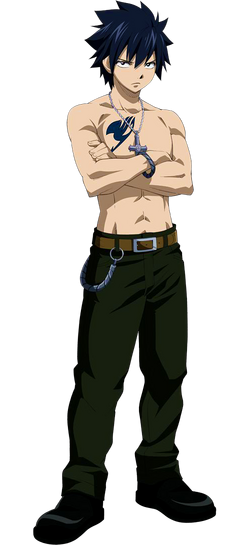


 ) Some people have complained about the writing style being unfitting, but I think it works for Rhyperior, in a Rooligan sort of way, and I didn't find it to be too much of a problem or distraction while reading the set. Not my favorite set of the contest, but it's definitely a solid piece of work.