• Welcome to Smashboards, the world's largest Super Smash Brothers community! Over 250,000 Smash Bros. fans from around the world have come to discuss these great games in over 19 million posts!

    You are currently viewing our boards as a visitor. Click here to sign up right now and start on your path in the Smash community!

Make Your Move 12: Now with accurate title! MYM12 is closed! MYM 13 is Open!

Junahu

Smash Ace
Joined
Nov 15, 2005
Messages
899
Location
Shropshire Slasher
MYmini entry


Retraux Physics
A subset of Brawl Physics which automatically presents itself whenever you play on one of Brawl's atrocious 8-bit stages. If the stage is going to be retro, why not force everything else to be too?


  • Appearances and Sound
    • Only the Keyframes of each player's animations will be shown. The actual attacks and such happen as normal, just with chunky jerky animations (Like Mr.G&W)
    • Character specific noises and voice clips are put through a low fidelity filter, lowering their pitch and making things sound rather grainy. Generic 8-bit sounds replace everyone's jumping, walking, skidding, dodging, and KO noises.
  • Stat kerfuffiling
    • Characters are brought closer together in terms of size and weight. Bowser will be smaller for example.
    • Similarly, movement speeds have very little variance between them. Ganondorf's walk and Sonic's dash won't be all that different.
    • Jumps too are similar across all characters. Even characters who cannot jump at all in other modes of play, are given two jumps here. Jumps in Retraux mode are fairly low, and extremely slow. Then again...
  • Physics
    • Everything is noticeably slower and more inertic than before. Rolls in particular are extremely punishable.
    • Jumps cannot be short hopped
    • Moving around in midair is much less responsive. It's Ghouls and Ghosts style jumping!
    • Shields are represented numerically, with a number between 5 and 1 appearing above the bubble shield. This represents the number of attacks the shield can absorb before breaking. This number restores itself at a rate of 1 every 4 seconds. Different characters have different amounts of shield to use (3 minimum).
    • Grabs can be blocked via shields, but take 2 off of the shield, instead of the 1 taken off via any other attack.
    • Hardcoded combo ejection routines. After suffering a certain amount of damage (exact amount varies between characters) in a short period of time (or one continuous chain of attacks), the player is knocked 1.4 stagebuilder units away from the opponent, and is given 2 seconds of mercy invulnerability. Combo ejection costs 2 shield, and thus won't occur if the player does not have at least that much shield.
    • Initial knockback on all attacks is boosted, but knockback growth is universally nerfed
    • Priority is calculated via (S*C)/T. Where S is the start lag of the attack (in frames), C is a character specific value (certain characters having higher priority than others), and T is the length of time the attack's hitbox(s) have been out. Aerial priority is calculated by C+[(S*A)/T], where A is the length of time the player has been airborne (in halfseconds). Projectile Priority is calculated by C+[(D/T)], where D is the amount of damage the projectile will deal. There are no other forms of priority, and no type of priority inherantly 'beats' another by default. Clashing can occur in midair, using the default ground clashing animations.
    • A hard limit of 3 projectiles onscreen at any one time. If another is fired before any of the others leave, this 4th projectile will move as normal, but will be translucent, and have no effect on anything whatsoever. Once one of the original projectiles leaves play, the 4th projectile pops into life, regaining its hitbox.
    • Moving around constantly for long periods of time will build up fatigue, which gradually slows the player down until they stop still to rest. Slower characters are less subsceptible to this than faster characters.
    • Higher window of opportunity for players to catch thrown items
 

Katapultar

Smash Lord
Joined
Nov 24, 2008
Messages
1,257
Location
Australia
[COLLAPSE="Weird Rider"]I had the liberty of previewing this set, and I'm quite surprised at which the timeframe you managed to get this set completed, so well done on that aspect. I see that you decided to keep the shield invulnerable to attacks instead of using my idea to momentarily disrupt it with attacks, which is fair enough. On that note however, I do have a minor quibble with how you described the "storing" of projectiles - I assume that, it basically means you can rid yourself of the shield temporarily and once you re-boot it it'll go back up, and can store any projectiles inside it as if in a cryogenic sleep. You have the Down Special for getting your bullets in it though, which does weaken that previous statement.

While I haven't necessarily read The Appetizer, Cole does mark an improvement in many obvious areas of your movesetting, such as organization and having better individual moves. The set is not completely exempt from problems though - some of the moves can be a wee bit too straightforward for my liking, such as Side Special and D-Smash generally serving to play off the main shield whilst not looking too natural (this was one of the reasons I suggested the D-Smash's effect be implemented into a mechanic for the shield), but that in itself is not a major problem if only for the fact that it does force a bit of setting-up that kinda weakens some of the synergy of your game. I also believe you really should either massively tone down the D-Smash's range so it doesn't affect every single foe around you or simply make it only deal non-flinching hits and have it's duration be determined by the charge - 6 SBBs is a bit too much when you can cover almost all of Final Destination, and the range wouldn't really matter too much anyway if Cole would be near his shield when applying it. The range in which the move hits would go by okay with me if you made the hits non-flinch though, as that prevents foes from being distracted by unnecessary things when really you want to rain bullet hell on them.

But enough with those quibbles. There's actually quite a lot to like about this set when it gets down to the overall theme of locking enemies in a shield and firing bullets at them, especially when that's not the only application you can use with your shield - you can block off the area between you and your foe to set-up a Side Special to fill your shield with bullets that'll scatter and deal massive damage to does when you then put it down with another use of the Down Special or D-Smash, block off your opponents' summons or traps (I have reason to believe that portal characters would still be able to use them to get inside the shield however, though they'd be at Cole's mercy when he has the Side Special), trap your opponent in the shield and rain bullets on them, or even....camp inside the shield yourself for protection and make lots of bullets! (I don't think you ever elaborate on this however. But regardless, for the last two reasons perhaps the time you can keep yourself or foes in should probably be cut down to 3 seconds) You also do a good job at avoiding any projectile redundancy with the aerial comboing, which actually has relevance when enemies try to jump over your shield in order to attack you, and actually waiting for the enemy to set-up and block off their traps, while may seem strange if not ridiculous, is made rather useful as you DO have bullets in which you can use to camp against your enemies if they try anything funny, and you yourself can set-up anyway as to pressure your foe into possibly doing the same if they rely on it. The Side Special, a rather genius move that wasn't around when I previewed the set, also makes walls completely useless against Cole, if not turn them against his foes since it allows him to shoot them through one, and make use of any on the stage he's fighting on. Really, this is some good stuff when you get down to it - you've really taken quite a lot of care in how Cole works in his fights, which shows with his 2v2 and 3v1 playstyle sections (a new things there with the latter). Quite possibly the closest thing to characterization in the set, or at least from what I can gather. There are also barely any signs of tackiness in the set, which gets massive approval from me.

Not sure how this ranks with Appetizer, but I do quite like what you've done with this character for your first MYM12 set. A very good, well thought-out simplistic set in my opinion. [/COLLAPSE]
 

Hyper_Ridley

Smash Champion
Joined
Dec 21, 2007
Messages
2,291
Location
Hippo Island
IMO it would be kinda cool if there was a way to "officially" mark what engine someone is designing a moveset for. I've had a few ideas for sets myself that would probably be more fun in Melee's engine for wavedashing stuff.

Not to mention that when Smash Bros 4's two versions come around, they're bound to have some engine differences in addition to the conflicts with Brawl's...
 

JOE!

Smash Hero
Joined
Oct 5, 2008
Messages
8,075
Location
Dedham, MA
Except, y'know, this is a community for making sets designed for -BRAWL-.

The Fantasy Moveset Design Contest

Super Smash Brothers is a really cool game, but if there's one thing that tends to get on everyone's nerves, it's the

character roster. Why isn't King K. Rool in the game? Capcom should have pushed for Mega Man in Brawl! Bowser Jr. needs

a spot! You've all seen the whining and the support threads and the theoretical rosters. Now is your chance to actually do

something constructive with those desires! This is Make Your Move, where you can create a moveset for any

character imaginable
. And when I say any, I mean any. It could be from a video game, TV show, your

favorite movie, or anything else you can think of! You think they sky's the limit? The sky is just the beginning!​


says just SSB here, so technically we should be designing for n64... but personally, I interpret it as "smash", and see P:M as the coolest engine yet​
 

FrozenRoy

Smash Lord
Joined
Apr 26, 2007
Messages
1,261
Location
Las Vegas, Nevada
Switch FC
SW-1325-2408-7513
Gravity Lever

An item has appeared...stuck to the stage! It's a...lever? That's odd. Pull it!

Oops, looks like you just screwed up gravity. Good job.

The GRAVITY LEVER is an item that will, at a rare spawn rate, appear, always connected to the stage. It starts in the neutral position, which is to say normal gravity, and by pressing A nearby you can grab the lever. After that, just move it left or right to reduce or raise the gravity respectively. Press A again to let go.

It has five toggleable settings: Super Low, Low, Normal, High and Super High. Low and High are just like Brawl's low and high gravity settings, so no real need to go over them.

But what about, say, Super Low? Well, in this case, gravity is so low, you can actually fly around! When in midair, push a direction to move that way at walk speed: Smash or w/e your control scheme says to dash to move at dash speed. Momentum cancelling is lowered in effectiveness. While the free flight can be used to push against knockback, it's weak, and knockback will go longer, but you can immedietely start to slow it down due to continuous flight.

On super high gravity, people fall faster and can't jump high...to extremes. Particularly heavy or bad jumping characters won't even be able to jump from the ground! People with multiple jumps will find their lesser, smaller, later ones no longer carrying them, even causing them to fall down, especially in the case of...say...DeDeDe. Glides will even be pushed down faster! On the ground, acceleration is more important to dashes, as characters will struggle to reach higher speeds against the heavy push of gravity. Upwards knockback becomes weaker, downwards knockback becomes strong. Momentum cancelling is also a bit stronger.

Now time to post this (barely) in time!
 

Junahu

Smash Ace
Joined
Nov 15, 2005
Messages
899
Location
Shropshire Slasher
MYmini time

MYmini Week #11
Rool's worst nightmare

[23rd Apr-28th Apr]
Your movesets need extras. You must make two (or more) extras for any one of your own movesets this week. Alternate costumes, SSE roles, Event matches, Assist Trophies, Stages... etc etc. Go nuts.

{Taunts,Win poses, loss poses and other animations collectively count as one extra}
 

darth meanie

Smash Journeyman
Joined
Jun 6, 2008
Messages
452
Why Am I Doing This

Battle Frontier Gate Battle


Before you can go to the Battle Frontier, you've got one last fight ahead of you. Can you and your rival put aside your differences long enough to beat Flint and Volkner?


Magmortar & Electivire VS Pokemon Trainer (Player) and Pokemon Trainer (CPU)
Stage: Pokemon Stadium 2
Stock: 3


Magmortar and Electivire make a tough cookie to crack in this team battle. They've been specially programmed to fight a cooperative battle that'll bring most players to their knees. Magmortar immediately sets up an Earth Power wall and Lava Plume to cover the stage while Electivre plays defense, using the reach of Charge Beam to stretch out and hit approaching opponents.

They play a tough defensive game together, with Electivire hopping above walls to poke at enemies with Charge Beam and Thunder Wave while Magmortar maintains a lava moat and pelts enemies with fireballs. The lava moat becomes extra dangerous when the stage turns Icy or Electric, with conveyor belts and slippery floors pushing you into the magma. Up Smash is also a great zoning tool for Electivire on this stage with magma and walls to keep opponents in the air.

Flying stage may seem advantageous at first, but Magmortar is specialized at taking out high up opponents from the ground, and Electivire can also use it to easily deliver an aerial assault without having to worry about magma getting him.

Electivire will also use his chaingrab against walls from Earth Power and can use his spiking aerials to bounce opponents off of magma beneath him for extended, dangerous combos.

And remember, type advantage still applies! Electivire's electric attacks will hit Charizard and Squirtle super effective, and Magmortar's will hit Ivysaur. Squirtle can deal extra damage to Magmortar too though, but with his light weight and vulnerability to lightning, be careful!

The best strategy is to use your rival to help distract the enemy and let them focus on him while you break out stronger attacks and try to separate the two evolved titans.


Jynx


Jynx can now be summoned from Poke Balls! The poor... thing was given the cold shoulder when Magmar and Electabuzz got their evolutions. Jynx sort of slides across the stage in an awkward fashion, and blows lovely kisses at enemies. A bright pink heart flies out about two battlefield platforms before exploding. Opponents touched by the heart are merely flinched and have their controls reversed for ten seconds. If an opponent attempts to shield the kiss though, it instantaneously breaks their shields, leaving them dazed. That'll teach them to insult a lady!
 

TWILTHERO

Smash Lord
Joined
Aug 19, 2007
Messages
1,880
Location
Canada
Week 9: The Cosplay Guerrillas:
1) Roman Bellic by MasterWarlord (6 votes)
2) Barry Burton by SmashDaddy (4 votes)
3) Jayne Cobb by n88_2004 (3 votes)
3) Grumpy Old Troll by Davidreamcatcha (3 votes)
Albert Wesker by TWILTHERO (2 votes)
Goblin Techies by ProfPeanut (2 votes)
Tommy Wiseau by Smashbot (2 votes)
Okita Sogo by Katapultar (1 vote)
Sunburn by Hyper_Ridley (1 vote)
Ghost of the Infirmary by Junahu (1 vote)
Early Cuyler by Kholdstare (1 vote)
Astamon by FrozenRoy (1 vote)
Meat Wagon by ForwardArrow (1 vote)

Congrats to winners! Will have week 10 poll up soonish!

EDIT: There ya go!
 

Smady

Smash Master
Joined
Apr 29, 2007
Messages
3,307
Location
K Rool Avenue
User Rankings Week #10

Welcome to the User Rankings! Every Monday, I'll be compiling the entire of the last week's activity in the thread and showing off, just who is the most active member? The point of this exercise is to recognise the most dedicated among us – those make your movers who are currently pushing the boundaries, as well as highlighting all movesets made by them.

To get on this list, you need to have made a moveset in this or a previous Make Your Move, as well as having posted in the Make Your Move 11 thread. The cut-off point for tallying is 3:59PM on Sunday EST, 5:59PM PMT or 11:59PM GMT; other removals or changes are at my own discretion. The breakdown of points is as follows:
30 points for a Moveset
5 points for a Comment
4 points for a Secondary Submission
2 points for a Secondary Submission Comment
1 point for a Regular Post
+Regular Posts do not stack
+Secondary Submissions are MYminis, Joke Movesets and other miscellaneous submissions
This was a markedly slower week than the previous ones, though it wasn't horribly slow - average for this contest, really. We got a plethora of comments as one positive, though, and finally Warrior of Many Faces actually charts on here as he has a set out! Thus begins the Warrior Age, but will he de-throne Kat's rule of fun and education? We'll have to wait and see. Speaking of which, these two guys both got top spots, and both posted sets too. Azula was Warrior's representative, and needs commenting. I highly recommend Keroro Platoon by Kat, too. Holding up the rear end was myself with some comments or whatever - I did post a lot of them! That's about it for this week, lets hope some higher activity's just around the corner.

Overall User Rankings


Points: 90, Movesets: Azula

Points: 84, Movesets: Agiri, Fibrizo, Yutaka, Kirika, Medusa Gorgon, Cherry, Luxord, Keroro Platoon

Points: 55, Movesets: Smot

Points: 34, Movesets: Angel, Gray Fullbuster

Points: 31, Movesets: Vergil, Yu Narukami

Points: 30, Movesets: Rhyperior, Player99

Points: 30, Movesets: The Weird Rider

Points: 29, Movesets: Doc Scratch, Elsa Maria, Grim Poppet

Points: 20, Movesets: The Coachman, Xigbar, Xemnas

Points: 5, Movesets: Black Puddle Queen, Roxas, Axel, Vexen

Points: 4, Movesets: Dry Bones, Kirby Enemy Team, Billy Hatcher, Larxene

Points: 4, Movesets: Professor Ratigan

Points: 4, Movesets: The Necromancer, Zasalamel, Garbage Man, The Prospector

Points: 4, Movesets: Gardevoir, Tropius, Zexion, Laxaeus, Xaldin
 

Katapultar

Smash Lord
Joined
Nov 24, 2008
Messages
1,257
Location
Australia
Agiri's Extras, lol


Animations

Agiri always puts on a Poker face wherever she goes, not showing even the slightest sign of weakness like the troll she is. She tends to appear in rather awkward ways in the series, with two different openings depending on whether the camera was zooming in on the characters at this time or whether it was zoomed out, and providing that Agiri opted to appear at the start of the match, substitute or not - if the camera was zoomed out, the Agiri will appear onstage in cloud of smoke in a traditional comical ninja style, but if the camera was zoomed in she seemingly won't appear at all, only to suddenly be onstage when the camera zooms out and the battle starts! This only serves to make your hiding tricks all the more tricky for your foe, if only in an aesthetic manner.

As for Agiri's standing animation, she does...absolutely nothing. This is understandable however, as she's confusing her enemy for a substitute and it wouldn't make too much sense for one to actually be able to move about, but expect the unexpected with Agiri...the rest of her animations are extremely casual and composed, with the exception of her Dash which has her actually sprint like a proper ninja, her hands outstretched behind her in the manner you'd expect from Naruto or any other kind of serious ninjas. Her first jump has her suddenly leap off the ground with her hands at her sides yet prepared, while her second jump lets her do a bunch of stylish flips in the air.

And some of Agiri's other animations are just....outright zany. She literally just stands there without worry when shielding, and her roll dodges make her look like a magician since she quickly throws a large blue handkerchief over herself and disappears like magic, only to re-appear from a hole in the ground from her new location. Her dodges are equally crazy, as another Agiri will suddenly appear in the background next to the one with her hand on it, revealing it to be a substitute before throwing it aside in the background and taking it's place - even crazier is that if that "substitute" Agiri is attacked during the dodge it'll actually be "hit" by the move in place and go limp before being thrown aside...crazy stuff, but these animations are much, much faster than I described them, just being outright weird to look at.

Agiri's sleeping, stunned, pitfalled and freezing animations are just as weird, basically following the same procedures as the spotdodging seen before as a new Agiri will take the place of that "substitute" which remains in it's negative state instead of breaking out of it. What's also weird is that Agiri will not show any signs of struggle while she's being grabbed by a foe (even in the face of Bowser's D-throw!), and when she escapes from the grab she'll appear where she was supposed to after being pushed away, replacing herself with a cloth of sorts that is dropped to the ground and instantly vanishes for gimmicky effects: note that despite how this sounds the "teleportation" does not give Agiri any frame advantages over other characters in the same situation as she'll instantly proclaim "ninpo!" afterwards.​


Taunts

The U-taunt is rather troll, as it'll make Agiri sit down and eat some kind of Japanese kebab thing which she tends to do rather often in the series, albeit when she's alone and actually seated on a perch.

One thing you should know about Agiri is that she likes to scam stupid people into buying fake ninja techniques! With the Side Taunt, she'll hold out a green ninja scroll while saying "Do you want to buy a fire jutsu scroll? Only 800 yen!"

The last thing Agiri wants you to know about herself is that she is apparently a clairvoyant, and the Down Taunt will make her point to a random item or player and casually say "That one's a winner.". You may think that Agiri is just fooling around, but the scary thing is that she's actually right almost...all the time. She'll prioritize Pokeballs and Assist Trophies most of the time, and the one she points to will have the best summon - this also works on items that can defect, such as Smart Bombs, Timers and what have you, as well as fakes with mindgames such as those seen in Zexion's set, and also works on players who are winning or have fakes of themselves. If there's nothing for Agiri to point at, she'll appear to point but will say "That one's not a winner". Troll. While this taunt is downright tacky and utterly broken against other mindgame characters despite not working on characters like Doc Scratch, it's also one of the longest in the game and has no benefit to being used with clones aside from making them all say the same thing at once to get a different sounding voice, so enemies are bound to massively punish you no matter what the outcome - that, and if you tried to use this with items on the enemy can very easily take that item and use it for themselves to exploit Agiri's strange magical ninja psychic powers...unless you're in a Team Match, that is.​


Victory Poses

Agiri slides back and forth somewhat festively while humming this tune without stop. Great for trolling your enemies and insulting their loss...

Or to rub salt in the wounds, Agiri will sometimes be seen finishing a conversation with her mobile phone, and an a random old man used in the series as a running gag will suddenly come out of the background and start harassing one of the characters, saying that he's finally found his kitten...what? To prevent forced-characterization, the man is ignored.

For another victory pose, Agiri will sometimes proclaim "I'll help if you treat me to a crepe." whilst sitting on a box, twirling a kunai in-between her fingers. She's not the most reluctant person to help the other mains of the series, but she's not necessarily compassionate either - but then again the series has absolutely no compassion, so trying to bring in something like that for characterization is rather silly.

And finally, the obligatory ninja victory pose, Agiri will sometimes magically vanish in a whirlwind of leaves which are left behind, seemingly and randomly produced from nothing. Hilariously enough however, after about 8 or so seconds Agiri will come back from the sides of the screen to collect the leaves for practical use, because apparently they have healing properties or something like that...or maybe that's just the peeps on the screen imagining that from their imaginations going haywire.

If Agiri loses a match however, it'll probably feel pretty good for the player as she'll actually wallow about in despair, as if trying to make her way through a pitch-black room in an exaggerated manner. She is heard mumbling something incomprehensible, but the winner's voice and the fanfare drown out her voice.​


Character Songs

These were totally released AFTER I finished the set, and tend to play when you fight against Agiri.

Teenage Highschool Ninja Girl
Somewhat Engrishy and contains lots of Japanesey sounding music.
Akichi to Noraneko
More soothing-ish, but casual trollish in that don't expect to be soothed by Agiri...ever.

The former song is more troll, and has a higher chance of playing than the second one, which is basically a bonus song.​


Event Match - Ultimate Mindscrewing

What happens when the masters of mindgames come together for an all-out frenzy? Pure madness!

This Event Match allows you to play as Agiri Goshiki, Doc Scratch, Pennywise the Dancing Clown or Gewn, each with One Stock, and takes place on Final Destination as to ensure there's enough space for all the peeps to play on. It's relatively simple at it's core, but the match in itself will not be an easy one for any of the players. Even more crazy is that you don't get to choose your character out of the 4! To make matters even more messed up, none of the characters will move until Agiri's stealth technique has died down unless you move about first, so you'll have absolutely no idea who you're playing as.​


SirKibble

Smash Champion
Joined
May 2, 2008
Messages
2,400
[collapse=Disclaimer -]
●Author’s Note●

This moveset is probably one of the best examples of where I differ from the established majority of MYM in my movesetting. This moveset is designed with Quote in mind--how I think the character himself is best adapted to Brawl, while maintaining much of his fighting style and personal quirks. I realize there is little flow or playstyle--I didn’t feel it was really suitable. In short, I made this moveset for my own personal enjoyment, with no regard to MYM’s current “quality standards.” Comments criticizing a lack of playstyle or what-have-you are likely to fall on deaf ears.

I would also like to mention that this moveset has Extras, which I would like to count as my mini entry for the week. (CHEW)


Also, it seems some people are taking this set a little too seriously. Not to say it's not a serious entry, but this doesn't mark a drastic style change or anything from me. Quote was made in the same movesetting style I've made all my recent movesets, and just happens to not lend himself to the kind of things most of MYM likes, given my style. In other words, if you desperately hate this set, just see it as a bump in the road. I'm still making movesets the way I have been, and my next one should be much more in the vein of what we're all used to.[/collapse]

●Quote●


Quote is the main protagonist of the game Cave Story (and its several ports and remakes). As the game begins, he wakes up in a dark cave with total amnesia as to who he is or what his past holds. Over time, he discovers that he is currently located on a floating island in the sky, that he is an armed scout robot sent from the surface on a special mission, and that this very mission, failed ten years prior, is crucial even now to the safety of the island and the well-being of the entire world. Throughout the game, various weapons come into his hands, some of which can be upgraded or traded to customize Quote’s arsenal. For this moveset, Quote boasts every weapon from Cave Story, despite it being impossible to simultaneously possess them all in-game.

●Statistical Overview●

SIZE: Somewhat Short
WEIGHT: Moderate
DASH: Moderate
JUMP: Somewhat High
AERIAL MOVEMENT: Moderate
FALL SPEED: Slow​


[collapse=Note - ]Aside from the Specials, moves in this moveset are organized according to the weapon Quote uses during the attack. Quote will switch to the necessary weapon before performing each attack. This does not cause additional lag, but does affect Quote’s gameplay in another way. Quote keeps each weapon out and equipped after using it for a move. If he takes 15% damage while wielding a weapon, the weapon will “level down” and become weaker. This can accumulate during separate instances of using a weapon, and the level down will last the entire stock. Another 20% damage after leveling down will cause the weapon to level down a second time, making it even weaker.

However, Quote can also level up his weapons again by damaging his opponents. For every 20% damage he deals an opponent, a slew of small orange triangles (representing Experience Points gained) will burst out of them, coin-match style. In matches with multiple Quotes, they will be the player's corresponding color, rather than orange. Collecting all the EXP from a single one of these bursts is enough to level up the weapon you're currently holding. Opponents can't interact with the EXP, but depending on where they are when you land the hit that deals that 20th%, you may lose some of it over the ledge, in which case you'll need some from another blow to complete the level up.

All weapons begin each stock at level 3.[/collapse]


●Special Attacks●

●Neutral Special● Machine Gun
Whipping out this all-purpose weapon, Quote lets loose a steady stream of shots. They take the appearance of white balls of energy about half the size of Kirby, firing at a rate of about 8 per second, travelling about half Final Destination’s length, and dealing 2% damage per hit with light knockback. This can be held for up to 3 seconds at a time, and must recharge after use for as long as you used it. Additionally, it can be fired in any of the cardinal directions (up, left, right, down) by tilting the control stick that direction during use. At level 3, firing downward in midair propels Quote upward at about half Jigglypuff’s falling speed, while maintaining any horizontal momentum Quote had prior to starting the move, so it can be used as a supplement to recovery.

When the Machine Gun levels down to level 2, the range decreases to one-third of Final Destination, and it fires only 6 shots per second. The shots are slightly smaller as well. At level 1, the shots shrink to a very small size, travel only one-fourth Final Destination’s length, and deal only 1% damage.


●Side Special● Missile Launcher
This rather large, extra-powerful weapon takes a moment for Quote to steady before he fires a barrage of missiles. Three of them fire out, spreading out to fire at Quote’s eye-level, ground-level, and two eye-levels above the ground. They stall for just a moment after being fired to spread out, then rush forward at about Captain Falcon’s dash speed. On impact with anything, they’ll explode for 12% damage and decent knockback over a small area. Naturally, opponents hit by one missile are liable to get hit into the path of the ones above it, unless they’re at high damage. Due to the long lag times on the move, this can be a rather predictable and punishable projectile, but used at the right time, it can stack up a lot of damage on an opponent and even potentially KO them.

At level 2, only a single (somewhat fatter-looking) missile is fired--at eye level--which deals 20% damage and the same knockback. The level 1 missile is normal-sized, travels a bit slower than the others, and deals only 10% damage with weak knockback.


●Down Special● Whimsical Star
The Whimsical Star is a defense mechanism independent of the levelling mechanics of Quote’s other weapons. This small, star-shaped gadget charges over time similarly to R.O.B.’s laser or Wario’s fart, reaching maximum charge after about one minute. When used, the star will begin orbiting Quote at a decent speed, dealing 1% damage and flinching knockback to anyone it hits. When charged up, it will launch out farther and move in a larger orbit at first, shrinking its orbit over time until it eventually stops, at which point Quote grabs it and it begins charging again. Minimum charge is five seconds, which will cause the Star to tightly circle Quote twice before finishing. At maximum charge, the Star begins circling at half a Smart Bomb explosion’s radius, and will last for about 20 seconds, slowly shrinking its orbit as time goes on. The orbit can be manually shrunk by shielding (this will not affect the time the Whimsical Star stays out), and can then be returned to its natural orbit with another use of the Down Special.


●Up Special● Booster v0.8
Another item that doesn’t have the levelling system of Quote’s weapons is this, the Booster v0.8 jetpack. This essentially functions like R.O.B.’s Up Special, but with twice the vertical speed and half the usage time. Basically, it’s the same, but quicker and a little harder to ration. Quote is free to use any and all other attacks in-between spurts of using the Booster.


●Polar Star Attacks●
The Polar Star is the most basic and reliable gun Quote’s got. Its attack is straightforward--a simple projectile shot that travels a moderate distance before dissipating into thin air. Levelling down affects the Polar Star’s damage and knockback output, but the attacks themselves remain the same, making this a handy weapon at any point.​


●Forward Tilt●
Whipping out the Polar Star if necessary, Quote aims it forward and pulls the trigger. The shot that flies forward is similar to those from the Machine Gun, in that it appears as a white ball of energy. It travels forward one Battlefield platform’s length, dealing 6% damage and weak upward knockback to anyone hit. This has lag such that it can be repeated about as often as Falco’s lasers. Damage decays to 4% and then 2% as the weapon levels down, with the knockback decreasing to the point of just flinching.


●Up Tilt●
No sense in overcomplicating things--this attack is identical to the Forward Tilt, except that Quote fires the shot upward.


●Dash Attack●
Quote points the Polar Star forward and fires a shot like those in the other moves. And what do you know, they have the same properties as well. As long as you hold forward on the control stick, you can keep dashing while firing at the same rate stated above. No funny business here; it’s your Forward Tilt while dashing. There will be a fair amount of end lag if you stop dashing while firing, though.


●Forward Aerial●
Quote performs his Forward Tilt in mid-air!


●Backward Aerial●
Quote points the Polar Star behind him and fires a shot. And sure enough, this shot is just like the other Polar Star shots. It’s not a particularly exciting weapon, you know?


●Blade Attacks●
The Blade is a bit of an out-of-place weapon in Quote’s arsenal, alongside guns and rocket launchers, but it’s a powerful asset, especially considering that it contains the soul of King, who gave his life in pursuit of an objective overlapping yours. Only at level 3, however, is the weapon powerful enough to call the warrior’s soul out for attacks. At level 2, it’s nothing more than a sword, and it downgrades further to a simple knife weapon at level 1.​


●Neutral Attack●
Quote whips out the Blade (if necessary) and slashes it furiously in front of him, making this attack highly akin to Meta Knight’s Neutral Attack. At the same time, a translucent King appears back-to-back with Quote and does the same thing in the opposite direction. Covered from both sides! King won’t show up if you get dropped to level 2, and at level 1 the range decreases by half, but the attack stays the same otherwise.


●Down Smash●
Quote hold the Blade overhead, then slashes it down quickly in front of him, releasing a short-range crescent of energy forward as well. Getting hit by either the slash itself or the energy wave deals 10 - 18% damage with good knockback. At level 3, it will also cause King’s ghost to appear directly over Quote. If an enemy was hit by the initial attack, King will chase after them for up to three seconds, attempting to use the same move (he can use it in midair as well). King has movement speed and jumps similar to Pikachu’s. King will vanish automatically when either three seconds have passed, or Quote uses another level 3 Blade move. At level 2, King does not appear, and at level 1, there is no energy wave.


●Neutral Aerial●
Quote slashes the Blade horizontally in front of him as a short-ranged attack dealing 8% damage and okay knockback. At level 3, King’s soul will remain suspended in mid-air wherever you use this attack, as a trap of sorts. Any opponents who comes within a short distance of him will cause him to break out in a slashing frenzy, hitting in every direction and even causing several slash marks to appear short distances away where he doesn’t actually reach his sword. This whirlwind of slashes deals no knockback, and each hit deals 4% damage, which is likely to rack up quite nicely for those opponents who are within King’s reach. King will stay there for up to three seconds, or until you use another move that requires him. At level 2, aware that King will not be a part of the move, Quote slashes out further, giving the attack better range, as well as dealing 12% damage and slightly better knockback. At level 1, only the slash from the level 3 version takes place.


●Pummel●
I will mention now that Quote’s grab is normal, having somewhat short range but average speed. For the Pummel, however, he employs the Blade. At level 3, he’ll raise the Blade overhead, while King appears and makes rapid slashes at the grabbed opponent. Unlike most Pummels, the button does not need to be pressed repeatedly to cause this to continue to happen. Simply holding the button will cause King to slash at high speed, dealing approximately 8% damage per second. You can interrupt this with a throw at any time. At level 2, Quote is on his own, and will deliver the slashes himself. At this point, the repetition, though it can still be rather quick, must be handled by pressing the button repeatedly, and each slash deals 3% damage. The level 1 Pummel is a hilt beat from the knife, similar to Link’s Pummel, which deals only 2% and has a poor repetition rate.


●Bubbline Attacks●
The Bubbline, also known as the Bubbler, is just what it sounds like--a gun that shoots bubbles. Perhaps more than any other weapon, it embodies the disadvantages of levelling down. The level 3 bubbles can circle around Quote in a pseudo-shield pattern, as well as turn into razor-sharp projectiles, while the level 2 Bubbline fires a basic stream of multi-hit bubbles, and the level 1 Bubbline...can only fire a single pathetic bubble at a time.​


●Up Aerial●
Quote fires the Bubbline upward, causing a tight dome of bubbles to quickly appear over him acting as a sort of shield that deals multiple 1%, flinching hits to anyone who touches it. After a moment, the wall of bubbles will disperse, turning into watery shuriken-shaped projectiles that fire at upward angles (each one may randomly deviate from straight up by a little bit, spreading them out a little more). These razor bubbles deal 3% damage and flinching knockback, but with so many, opponents are likely to take around 12 or 15% damage.

The level 2 version of this attack involved Quote firing upward a stream of bubbles similar to a Fire Flower’s flames in range and damage. On the plus side, he can hold this attack for as long as five seconds, even after touching down on the ground, making it a nifty juggling tool. The level 1 version of this attack fires upward a single tiny bubble that travels approximately half a Battlefield platform’s length upward, dealing no damage and flinching knockback.


●Up Throw●
Quote tosses his opponent upward for a measley 2% damage, then fires the Bubbline at them. At level 3, rather than hit the opponent, the bubbles form a circle all around them. 10 bubbles in all will hover around the opponent for just a moment before one-by-one becoming razor sharp projectiles and ramming into them for 1.5% damage and weak upward knockback. Though each bubble’s effect is weak, they certainly stack up and can get an opponent pretty high off the ground.

The level 2 attack is more straightforward, shooting a stream of bubbles that deal 5 hits of 2% damage and push the opponent upward about a Battlefield platform’s length. The level 1 attack is a single bubble dealing 1% damage and no knockback or hitstun.


●Down Throw●
At level 3, for this attack, Quote begins firing the Bubbline upward while still holding onto the opponent. How strong this throw is depends on how quickly they break his grip. You see, as soon as they break it, all of the bubbles simultaneously go projectile and gang up on the opponent for one big hit. Each second the opponent stays in Quote’s grip equates to another 8% damage and a moderate increase in knockback from the final blow. This move works especially well in conjunction with the Pummel.

The level 2 attack is less impressive. Quote slams his opponent to the ground for 3% damage, then blasts them with a bubble stream for another 4 hits of 2% damage. The level 1 attack is, yet again, a single bubble, this time dealing 1% damage and leaving the opponent in prone.


●Fireball Attacks●
The Fireball is a bulky gun which shoots out fireballs that bounce along the ground. The white-hot level 3 fireballs hang around for a lot longer than the normal-looking level 1 fireballs, and also move a lot faster.​


●Down Tilt●
Quote whips out the Fireball and shoots it downward, toward the ground before him. The gun emits a white-hot fireball that bounces along a path similar to Mario’s fireball, though it will travel about 1.5x as fast and as far, dealing 9% damage and weak knockback to anyone it hits. This cannot be repeated at a very fast rate, having considerable ending lag.

The level 2 version of this attack is a fireball that looks and acts like Mario’s while dealing 6% damage and flinching knockback, while the level 1 version is a tiny fireball that will die out on its second time hitting the ground and only deals 3% damage with flinching knockback.


●Down Aerial●

Quote fires the Fireball directly downward, causing the same bouncing projectiles listed in the Down Tilt to be fired straight down. This Fireball attack is notably faster than the Down Tilt, allowing you to shoot off several fireballs within a reasonable timeframe. For this reason, you can often accumulate quite a bit of damage on an opponent from above, or use this while moving side-to-side to rain down a series of fireballs that will be difficult for your opponents to dodge.


●Snake Attacks●
The Snake is the powerful combination of the Polar Star and the Fireball. It shoots fireballs just the same, but they act as fast straight-moving projectiles now instead of bouncing along the ground. The speed they travel and the distance covered is determined by the level of the gun.​


●Forward Throw●
Quote fires the Snake point-blank at the opponent, causing a blazing fireball to travel right into their face and carry them forward 1.5x a Battlefield platform’s length before stopping. They’ll take continuous damage from this totalling 14%, then okay horizontal knockback after the fireball stops. At level 2, the fireball will deal only 10% damage total and travel a Battlefield platform’s length. At level 1, it deals 5% and travels half a Battlefield platform.


●Backward Throw●
This attack is identical to the Forward Throw, but backward.


●Spur Attacks●
The Spur is the ultimate version of the Polar Star, its creator’s true vision for the gun. The Spur, unlike the other weapons, begins the match at level 1. Why? Because the Spur can only reach level 3 temporarily...through charging. Smash Attacks, ahoy! The Spur’s low-level attack is the same as the Polar Star’s level 3 shot, while at higher levels it fires a piercing laser beam.​


●Forward Smash●
After charging, Quote fires the Spur forward, releasing a laser beam that can be anywhere from as thin as R.O.B.’s to as tall as Quote himself. The laser travels half the length of Final Destination, and deals 14-25% damage to anyone it hits. Unfortunately, this attack has considerable startup and ending lag, so use it prudently.


●Up Smash●
The same as the Forward Smash, but Quote fires the Spur upward instead.


●Final Smash●

●Final Smash● Iron Bond
The Iron Bond is a special item obtained only by dedicated Cave Story players. The item description reads ”Your tie to Curly Brace, the only warrior you would trust your back to. Surely you will meet again one day...” And sure enough, thanks to the Smash Ball, that day is today.


Curly Brace, pictured above, appears, and straps herself to Quote’s back, facing the opposite direction. Both Quote and Curly then equip the Nemesis, an extremely powerful gun that fires searing energy projectiles over far distances. Quote also dons the new-and-improved Booster v2.0 in place of the old 0.8. The effects of each are as follows:

The Booster v2.0 replaces not only your Up Special, but your mid-air jump as well. When you press the Jump button in mid-air, Quote will activate the jetpack in whatever direction you are tilting the control stick, or up by default. He and Curly will start moving at Mario’s dash speed in that direction, and can do so for as long as he likes. Moreover, Quote can do this as much as he likes, having no need to touch down on the ground for the duration of the Final Smash. Note that you can use attacks while doing this; you just have to tilt in the desired direction when starting the boost and then hold the Jump button to keep going while you do whatever else. The Up Special functions as it did before, but with twice the speed and control.

The Nemesis replaces all weaponry attacks in Quote’s arsenal--in other words, everything but the already-covered Booster, the Grab, and the Whimsical Star. Tilting the control stick in the desired cardinal direction and pressing either the Attack or Special button will cause Quote and Curly each to fire the Nemesis. Quote fires in the direction you tilt, Curly fires in the opposite. The only exception to this is when firing upward while standing on the ground, in which case Curly will fire upward alongside Quote. The projectiles from the Nemesis travel in a straight line for about two Battlefield platforms’ length at about Captain Falcon’s dash speed, and deal 15% damage and good knockback upon hitting. Firing the Nemesis has little lag on either end.

The Nemesis and Booster v2.0 stay equipped for 15 seconds, after which Curly will disappear and Quote will re-equip whatever gun was equipped before, as well as the Booster v0.8.


●Extras●

●Alternate Colors●


●Alternate Costume / Clone Moveset● Curly Brace

Indeed, you can also play as Curly if you like. Curly moves much faster than Quote, and can jump considerably higher as well. Her attack speeds also tend to be faster. She weighs slightly less than Quote, but her real weakness comes in her steeper level-down mechanic. While Quote has to take 20% damage while holding a weapon for it to level down, Curly has to take only 10%, meaning she’s much more likely to get knocked down a level by a single attack from an opponent. Oh, and naturally, for Curly's Final Smash, Quote appears to fight alongside her.


●Assist Trophy● Sue Sakamoto


Sue Sakamoto is a human girl who was turned into a Mimiga, the major inhabitants of the floating island the entirety of Cave Story takes place on. Sue was a part of the same crew as the antagonist Doctor that came to the island for research. Somewhere along the line, the Doctor turned on the crew, and Sue became a Mimiga. She fancies herself a fighter (“Even my big brother’s never beat me!”) but in reality, is rather weak.

After popping out of the Assist Trophy, Sue will close in on the nearest opponent, fists up with a battle-ready look on her face. A single hit will knock her on her face, where she’ll lie unconscious for about three seconds before getting back up and repeating. If the opponents neglects her as she closes in, she’ll jump onto their back and start beating on them like a Pikmin, for 3% damage every hit, with about 3 hits a second. In this state, she’s not so easily gotten rid of, and must be shaken off with 4x Pikmin-shaking difficulty. One can either move around a lot or use attacks that will hit her to do this. Shaking her off has the same effect as hitting her normally, knocking her out for three seconds.


●Stage● Outer Wall


The Outer Wall of the floating island serves as the Cave Story cast’s accompanying stage in Brawl. In the game, the wall is the connection point between the Egg Corridor and the Plantation, and only by scaling its treacherous heights can the Quote proceed to reach the Doctor’s Throne Room and save the day. More importantly for Smash implementation, it has the wonkiest gravity this side of the Himalayas.

In Brawl, the Outer Wall stage has a base about the size of Battlefield’s. Rising up from the left side are a series of stage builder blocks and Battlefield platforms arranged somewhat haphazardly. There are also thin vertical walls protruding up from the left side of some of these platforms. Essentially, this forms a wall along the left side of the stage comprised of these various stage parts, and although it’s quite possible to make your way through them, to do so would be folly, as nothing lies beyond but a drop to your doom. If you can knock your opponent past there, kudos to ya, but they’re likely to hit a wall on their way.

Now, let’s get to that absurd gravity. For the characters duking it out, nothing appears to be any different. You fall down at the same speed you always have. However, for reasons unknown to the greatest of scholars, everything else falls left. Yes, everything affected by gravity that is not one of the 2-4 players in the match behaves as though gravity were leftward. That includes items that appear in the match, gravity-affected projectiles your character has, and even non-player characters like Assist Trophy and Pokeball summons. The gravity pulling them left is not as strong as the gravity pulling you down, however. It’s only about half as much so, and what’s more, it’s not particularly good at holding things down. Any item or projectile that hits the left wall and isn’t destroyed upon hitting it (such as a thrown capsule item or a Pokeball that bursts open) will bounce back up (which is to say, to the right) to half the distance it started from, before repeating the process.

Naturally, this affects some characters' gameplay more than others, particularly projectile users. Depending on the side of the stage characters are on, they may suddenly have a higher-speed projectile to fire at opponents or they may barely be able to get one past their own face. Upward flying projectiles won’t come down at all, of course, giving some characters a unique type of juggling game. Here are some examples of affected moves:

- Mario’s fireball
- Diddy Kong’s peanut popgun and banana toss
- Yoshi’s egg toss
- Link’s (and Toon Link’s) arrows and bombs
- Samus’s bombs
- Ice Climbers’ ice shot
- R.O.B.’s gyro
- King Dedede’s minion toss
- Olimar’s Pikmin toss
- Snake’s grenades, remote missile (when abandoned), Up Smash rocket, and C4s dropped in midair
- Sonic’s spring​


Katapultar

Smash Lord
Joined
Nov 24, 2008
Messages
1,257
Location
Australia
[COLLAPSE="Quote"]My, making such a "mechanic" orientated character is rather interesting coming from you. The set is as basic and techno-ish as you'll get for a protagonist of this sorts without deviating from their source materials, and something about those stats do tell me that about the physics of Quote's game given they're all but there - even the Level Down mechanic serves a purpose to showcase something in the games, as I've no familiarity with the series at hand.

Quote seems like a "versatile" character who's not all THAT versatile, and is rather interesting to some degree in that his weapon will weaken if he's attacked by a foe after using it, making him a punishable character in a different way - it's not like you can just put it away either, so you'd have to be careful as to whether you'd just wanna use a certain weapon and then switch it out for another one that's level 1...while this is probably most likely embodying the gameplay of Cave Story, it does seem a little distracting and makes Quote a character who seems like he'd be stuck with being forced to preserve his weapons in a rather awkward way, though that's the player's choice. These moves, while not very long, do make Quote's set longer than it appears to be. And the fact that he doesn't use any punching or kicking moves at all most certainly tells me something about the game.

But onto more relevant matters to which this comment is concerned with regarding the nature of this moveset, it's basically a moveset for a video game rather than a character, which I certainly don't have any problems with - I welcome it in fact, especially with those extras that actually piece together a bit of a story. A nice little set on it's own.[/COLLAPSE]
 

Rychu

Thane of Smashville
Joined
Jul 5, 2010
Messages
810
3DS FC
1908-0105-4965
Link to a YouTube playlist, and pit tags around it. There is an icon a...he [IMG] tags. [size=1][i]:phone:[/i][/size]
 

Hyper_Ridley

Smash Champion
Joined
Dec 21, 2007
Messages
2,291
Location
Hippo Island
Quote has some interesting ideas, and it's nice to actually get a Cave Story set for once. However, I feel the mechanic makes him really underpowered. His weapons are basically normally balanced, mayyyyyyybe slighty "op" at level 3, but then after taking 15% with that weapon it's already on the bad end of the power spectrum. 15% is about 2 hits from anybody, and since all the attacks of a weapon share the level it means taking 2 hits with a weapon has a noticeable cut on his options. I think it would have been better to have his weapons level-UP as he uses them.
 

The Warrior of Many Faces

Smash Apprentice
Joined
Mar 22, 2012
Messages
101
Location
Everywhere and nowhere, as location is meaningless
Azula is a newcomer set, and I won't say what everyone is thinking. It's at times a hearty transition from the series to Smash, incorporating those extras for one thing and in the least, knowing how to emphasize the specials, to give her some kind of base... even if they are at the end (which is seen as unintuitive). Where you need to do some learning is in the rest of the moveset, which doesn't really play off of that end base of the set. The moves work fine, but they should at least work in ways that would aid you using those specials. The logic in Make Your Move is as follows: you can make a basic moveset that fits a character, but an elaborate one (whether the inputs are simple or not) is always better, because it not only makes them feel more unique, but also opens up windows of opportunity for the set's development. By comparison, you could see why Azula seems kinda close-minded in that regard. Glad to have this promised set posted finally, though, Womf.
Since I’m not sure what it is that everyone’s thinking, I can’t comment on that.

So basically, you’re saying that the set’s solid, but needs more emphasis on how to capitalize on the specials? If so, then I can understand your viewpoint. Personally, though, since I don’t actually see that sort of emphasis in the actual Brawl characters, I don’t feel it particularly necessary in my sets. On the other hand, that may just be me being unobservant; it’s not unheard of. Nonetheless, since it is nice when a set comes together like that, consider your words taken under advisement, even if I ultimately choose not to do that with every set.

Now that I’m done with that, on to the reviews! With luck, I might actually catch up soon. XD


SAIX

That mechanic is interesting; normally it wouldn’t be useful considering that not every stage has a moon, but then you whip out the Neutral Special to allow it to be usable anywhere, making it a viable strategy rather than a luck-of-the-draw type thing. Pretty elegant, as mechanics go. Still, it would help if we knew exactly how long Berserk Mode lasts.

Speaking of which, I really like the way you illustrated the Berserk Specials; it really emphasizes the unbalanced nature of his berserker state.

The Side Special builds on that, giving him the ability to quickly put the moon between himself and a foe. Maybe not the most useful Side Special ever, but if it works with other barriers of similar thickness, or if you could go through a character with it, it rapidly becomes an excellent spacing option.

His counter, although generic (as you yourself noted), serve him quite well, especially considering your implication that he can use that for his moon-charge time; even if no one attacks him, he’s still got something to show for it.

I actually quite like the Berserk Neutral Special; we could use more Falcon Punch-y attacks. ‘Course, since I myself have no plans to include any in my sets, that might ring a little hollow. XD

The Berserk Side Special is also quite a good concept; it’d be an absolute terror on Final Destination. Which, of course, is why I will be engaging him on New Pork City instead. XD

Overall, this is quite a good set, with a likeable mechanic and moves that work well with it. As usual, though, I could have gone for a Final Smash.


XALDIN

This set works really well. This really feels like wind, what with the aerial combat and the lances; the lances, like the wind, are omnipresent and potentially deadly.

Plus, this set forces you to think a little for maximum efficiency. Smashing the foes just isn’t Xaldin’s style; he needs to manipulate his lances to create a whirling trap for his foes… and only then will he use an overwhelming strike. The whole thing just fits his heartless personality; it even seems to show a slightly sadistic side to Xaldin. Winning isn’t enough for him; he has to really rub it in that his foe’s been outmaneuvered from the start.

Overall, very well-characterized. Great job!


XIGBAR

I think it’s safe to say that this guy’s a bit overpowered when it comes to recovery. Three jump-a-ports? With floating? And an Up Special that gives him four more jump-a-ports? The low weight helps, but it still doesn’t sit well with me. On the other hand, though, a master of space could theoretically do far more than that, so this is actually probably nerfed as much as is feasible while remaining true to the character.

The Neutral Special, on the other hand, is definitely overpowered. Ignoring reflectors? Fine. Ignoring attacks? Also fine. But ignoring the entire stage is a bit much, especially considering the speed boost granted from being propelled from a portal. At least it’s only 7% damage…

And then there’s the undetectable scramble. Useful, certainly; too much so in conjunction with the speed boost. If there was something a little more tangible than a smile, or maybe a slight change in portal/singularity color, that might alleviate the problems.

And then there’s the Forward Smash of Unlimited Range. Yeah, I don’t think I need to say much about the problems with this one.

The pummel, although it adds to the overpowered problem, is actually a rather cool option. Instead of throwing a foe, one can choose to only pummel and severely disadvantage the foe for a little bit after they escape. Heck, short of the Down Throw, the pummel is the most preferable option unless you really need to go into pseudofloat.

About that Down Throw… it’s overpowered, yadda yadda, but it also doesn’t quite fit the input. It’s not a throw, really; I personally would have pegged it as a Smash or a Special if anything. As a throw, it just doesn’t fit.

However, it all fits together very neatly, I must admit. So this is a great set in that respect. It just strikes me as not having enough weaknesses.

On another note, you have a bit of a discrepancy; specifically, you mention in your Forward Tilt some crystals involved in the Down Special… which is the scramble. Something doesn’t add up here…

Also, about those extras… does Xigbar not have his own theme or something? One would think that if he had one, it’d work better. Even though the tunes do nicely match the desperate tone of someone facing that many projectiles. Well, the first one, anyway. The Space Jam part of the second just detracts from the tune (although it is a good pun, since Xigbar is the master of space).


XEMNAS

So this guy’s the leader of the bunch, huh? That being the case, I think that certain overpowered moves (the Jab, for instance, since it has unlimited range) can be excused, especially with all the lag the guy suffers from.

However, I do find myself wondering why a master of nothingness summons stuff, which obviously isn’t nothing since it can do real damage… it’s just plain confusing. Still, that sounds like it came from the character, so it’s a game plothole rather than a set plothole.

Anyway, back to set commenting.

No doubt all the aforementioned lag results from the usefulness of his Neutral Special. Otherwise, since he’s untouchable when in Nothing, he’d be unstoppable.

Xemnas is actually quite an interesting guy. Sure, he can attack directly, but that’s not where he excels. Nor is he a projectile spammer or a camper. Through some combination of the above and a lot of teleporting, he wears the foe down to nothing… literally.

Overall, the sheer amount of lag plus the necessity of pretty much every input for a successful strategy actually makes this guy more balanced than some of his other underlings in Organization XIII ( I’m looking at you, Demyx.) He’s kind of locked into one strategy, though, even with his many descriptive and versatile inputs.
 

Katapultar

Smash Lord
Joined
Nov 24, 2008
Messages
1,257
Location
Australia
lol


These two girls are secondary characters from YuruYuri, an slice-of-life anime/manga that contains many hints of girl-to-girl relationships as the title suggests. Both girls want to become the next student council vice-president of their middle school, which caused an intense rivalry to break out between them - they constantly argue with each other, yet neither of them seem to be able to get the other off her back. Despite their similarities between their goals, the two girls are just as different from each other - Sakurako has a complex about her flat chest and tends to be the one who starts the arguments with Himawari, who has surprisingly large boobs and is the more composed and rational of the two, while her light-haired rival tends to be childish. The two of them may have feelings for one another, though...

Both girls form a unique tag-team to take on the Brawl Roster, because while they're essentially fighting together they're also fighting against each other! Despite being a tag-team you're only able to select one of the girls like with Zelda or PT at the CSS, and if you don't choose one the game will decide at random for you - both girls have perfectly average stats (and are short), though Sakurako is a bit lighter and faster than usual while Himawari is the same stat-wise but is instead heavier than usual. At first the two girls will appear to get along as well as the Ice Climbers, with the other following the one you selected, but that sure won't last forever between these two...

For you see, unlike normal tag-team characters both girls not only have their own damage percentages, but also have their own stock and score! This means the two of you will actually be competing with each other for the highest score, since only one character is able to win the match! Due to the nature of how they work, both girls respawn separately rather than together, so if one is KO'ed or loses all her stock the other will simply march on and continue the fight alone.​


SpecialS


[Side Special]

Regardless of who you're controlling, Sakurako throws out a snide remark at Himawari, suddenly sparking the rivalry between the two girls as they both jump back a Platform's distance while facing each other - the girl you're in control of at this moment will jump either forward or backwards depending on which direction you inputted the Special, meaning you can deliberately manipulate this move in such a way to make one of the girls recover in the process. Regardless, the AI girl will turn against the Player girl as an incredibly aggressive enemy that knocks other enemies out of her way while trying to chase her rival down - you can choose to damage your rival and knock her away, but KO'ing her is highly discouraged. If you want to bring the two girls back together, simply re-use this input and your girl will attempt to apologize to the other when they're both facing each other within a Platform's distance - this is relatively lagless within the first 5 seconds of breaking up, but as time passes the apology becomes more laggy and the AI girl will be far more likely to beat up on you in that time instead of sitting down and listening to reason. There are ways to reduce or downright reset the lag of the apology, however.

Important to note: this move isn't the only way the two girls can start a fight with each other. If you're playing as Himawari and you land a successful attack on a foe, Sakurako will automatically break away from you and attempt to capitalize on the damage you dealt while you're still suffering from your end lag - if it's the other way round Himawari will instead wait for Sakurako to make a move (move towards the target) before doing anything, and is far more of an opportunist with her attacks whereas her rival will simply attack as aggressively as possible. The opposite is also capable of occurring if your girl is instead grabbed or knocked back, which'll have Himawari attempt to attack the enemy lightly but not go all-out against them or try to take all the glory. While this might make Sakurako the more obvious character to pick of the two, Himawari generally does have better stats (along with some different moves), and if Sakurako does break away from you aggressively to seize the glory her AI will always be more aggressive towards the target enemy and deal more damage than her AI rival ever would in the same situation. The two girls will also fight with each other if they're not KO'ed together within a 3-second interval, which'll usually result in the AI-controlled girl attacking your girl.

Don't think that you can just sit back and let your partner do all the work either, as you're both competing for the most amount of points based on the mode you're playing, except in stock matches where the winner is determined not by who has the most stock in the end but rather who managed to score the most KOs - it's entirely possible for one of the girls who lost all her stock to actually beat out the other who remained last standing by getting a higher score through actually attempting to do some work, so neither girl can afford to slack off! KOs against each other do not change either girls' score nor does it reset their damage percentage, and if both girls have the same score after both having won the match a Sudden Death will occur between the two.

All of the above is providing both girls were fighting against each other, however. If the two of them were working together like they initially do at the start of the match, they'll actually combine their score and stand a much better chance at winning the match compared to just doing things on their own...the only problem with this however is that when you do actually attempt to attack an enemy for this cause in the first place you'll end up fighting against your rival, so unless you end up apologizing this isn't gonna be happening...unless you manage to find an opening to apologize or gain the other girl's trust, that is...​


[Up Special]

On the ground, the girl will look shocked before suddenly running forward at Captain Falcon's dashing speed, knocking anyone out of her path for 14% and horizontal-downwards knockback that KOs at 250% until she's within arms reach of her rival, or she reaches a ledge or boundary, coming to a skid whether she reaches her goal or not. If the girl is in the air however, she'll instead reach out with both hands in the chosen direction and flail forward like a slowed-down Corkscrew that inflicts similar damage but knockback in the opposite direction. If she doesn't manage to reach the ledge or touch ground this way, she'll very slowly reach out with one hand for 1.2 seconds, defying gravity all the while before she's forced to enter helpless state. A helping hand?

This is where the girls' teamwork really needs to shine through, as the rewards are more than worth it. If the girl trying to recover from the air and is failing to do so, the other girl can (or will try to if she's AI-controlled) attempt to save the other by using this move - upon doing so, the girl will have 5% flinch resistance if she needed to dash via the ground version, to which she'll instantly transition into the aerial version (which she'll obviously use if she was in the air) and automatically aim it to where the recovering girl was. Now, both girls will hold each other's hands for a good 1.2 seconds in which they defy gravity and have Super Amour in a heartwarming moment before the rescuing girl tosses her rival with thrice the speed and distance of the initial aerial recovery before both girls get their jumps refreshed. Any foe in the way of the flung girl will take a surprisingly powerful 16% with upwards knockback that KOs at 135%, but that's not the reason why you'd want to save your rival - you see, the two girls will stop fighting with each other during this moment and actually combine their score in such a manner that your AI rival will attempt to capitalize on your attacks but won't go against you. This strengthened bond won't last forever though, as it can be broken once again if of the girls failing to save one another (The AI girl will either blame your girl for not saving her or being able to look after yourself and will go aggressive on you), and also with two uses of the Side Special since a first one will cause your rival girl's AI to behave as it would in the beginning of a match.

The ground version is similarly useful for strengthening the girls' bond, because if the girl was being grabbed or attacked by a foe the attacking girl will damage and knock that foe away with the properties of the attack and the two girls will make up...only if this situation occurs a total of 3 times between the two girls.

Your AI rival will attempt to save you with either version if she generally has nothing better to do or knows that it's actually possible to pull off, so don't worry about having an unreliable partner in terms of recovery. The only thing that'd truly stop the two would be the presence of other foes...hence it's better for the girls to stay close to each other for that reason if foes are on their tail.

If you're playing in a Team Match it's actually possible for your girl to rescue their recovering partner with the same properties and methods as saving your rival - the Student Council needs to help everyone with their problems!


[Neutral Special]

Each one striving to be better than the other, both girls turn to each other and comically death-stare each other down whilst a link of electricity connects their eyes! This sparks the competitive spirit of your rival, who's AI will become more aggressive and downright be motivated to become more skillful - as a note, it generally starts at Lv5 but with 3 seconds of staring it can reach Lv9! It can actually reach Lv10 with 5 seconds, but she gets necessarily aggressive with that. And yes, this AI is basically fighting "with you", but she'll eventually attack you so be sure you can defend yourself! This only occurs if both girls had the same score (stock count is ignored) and their damage percentages had a no bigger difference than 50%. If one girl happens to be winning, she'll act all smug while the other will give her a frustrated death stare - regardless of whether your girl or the AI rival is winning, this'll serve to change the rival's AI, making her dumb down via overconfidence by 2 levels for every difference in score and/or by 1 level for every 100% difference in damage percentage or coin count for Coin Matches - if the player was winning the rival girl will instead be opted to try harder and will have her AI increased up to Level 10 (better than Brawl's best AI but still beatable due to being extremely aggresive). All this occurs regardless of whether the girls are working together or against each other, but it does not change that fact - this move can and will only be used by the player, so you don't have to worry about the AI suddenly using it.

If both girls were fighting against each other when death-staring each other, the link of lightning between their eyes will actually act as a hazard to outside enemies! This otherwise comical anime-staple slowly knocks enemies towards the very middle whilst dealing multiple hits of 1%, upon which it'll inflict 24% with upwards knockback that KOs at 75% - the electric link will reach out no matter how far the two girls are from each other, and will strangely go through any walls in-between the two girls...their rivalry cannot be blocked off by such things! Despite it's range and damaging potential however, the electric link deals progressively more knockback as foes are slowly pushed into the center, and thus is much better used when the two girls are closer to each other rather than far-away - providing your AI girl wasn't doing anything beforehand, the move is very quick to initiate. That'd be great as a KO move did it not have two major downsides: first, the rival girl's AI will increase from the competitive stare-down, and since you two will have been fighting against each other when you initiated this move she'll use that improved AI to take you down and get all the glory for herself, even if it means a lot of trouble for her foe in the process - you can only hold the move up until the rival girl's AI goes to Lv 10, and cannot use it again until her AI drops back down again. Secondly, there will be no clear indication as to who actually scored the KO from the electric link, so that KO will count as a "half-KO" of sorts that doesn't count for either girl until one girl manages to KO that KO'ed foe again and will score two points as a result - it's also possible to have this half-KO be added onto the girls' total if they bond together, but if they break up it'll turn back into a half-KO. Also, if you manage to get two half-KOs in a row it'll actually count as a proper KO between both girls while they're apart, but will become two if one girl takes all the glory or they join back together.

If a match ended with the two girls still fighting each other and there was a at least one half KO to be scored that could potentially put both girls in a tie or have one beat the other, a Sudden Death will occur, and the winner of that SD will obtain all of them half-KOs as actual points. If the results of that SD would cause both girls to have the same amount of points, another final SD will occur.


[Down Special]

Realizing it's lunchtime, your girl takes some out and holds a small container like an item. Press A to get to her to eat something within a 0.85 second interval, and it'll heal her a random amount from 1-3% and buff the damage of her next successful attack by 1-4% due to it not randomly being picked up and eaten off the floor like normal Brawl food items. A small thought bubble will float next to the girl and tell you which food is up next, because there's a 1/4 chance that it'll either be a carrot or a bell pepper, which Sakurako and Himawari respectively hate - your girl will not each this particular food. The solution? Feed it to the other! Re-using the input will have your girl toss the food over to other girl, who will instantly eat the food and be healed without having to take the time to chew or anything for some magical reason. There are 13 food items inside, and your main container acts like a Mr. Saturn throwing item that'll cause all the food to spill out and fall to the floor for healing at the cost of it not buffing the attack of whoever eats it. Whenever a food item is taken from the container, it'll return within 15 seconds. Choose whether you want to take the time to eat the food yourself or use it to help your partner, because she can do the same - you may even want to do this if you want to initiate the Neutral Special.​


StandardS


[Standard]

Your girl reaches out with both hands and...tickles the foe! This cuts their speed down to 3/4s and deals hitstun to them afterwards based on how long they allowed themselves to be tickled, though they still take this hitstun even if the girl is attacked out of the tickling - said hitstun generally lasts for 1/7ths of the time the foe was tickled for, but the girl has a bit of lag coming out of the tickling so you can't just bring it down anytime when the foe tries to attack you, though you can move back and forth a little during the tickling. You'll also very rarely be able to follow the hitstun from the move, but your rival can if they're nearby; they'll attempt to take all the credit and hit the foe you were tickling with an attack that'll hopefully score them a solid KO.

If you don't like that however, you can always tickle your rival. Even more special however is that if Sakurako would attempt to tickle the front of any character with boobs, such as Himawari for example, she'll get angry and squeeze them to deal 8% along with similar pushback to a Bumper! This also works on other females or male characters like Super Macho Man, and deals 1.2X more damage and pushback with every further use of the move in-between stock - great if you're using flatty, but if she's AI-controlled she'll usually attempt to use it on her melony-friend when she's being tickled. If you're clever however, you could possible turn this into a generic spacer, or even as an opportunity to make-up if booby lady is knocked offstage.

Himawari's boobies aren't that big, but if Sakurako gets a bigger, more developed batch (these girls are in middle-school), she'll deal even more damage and pushback! The opposite can occur with smaller ones, however...


[Dash Attack]

And now for the one move that's most practical input-wise for your rival girl to follow up with when you land a blow. Your girl will suddenly attempt to imitate a footballer's kick as they stop in place, which deals 11% and mostly-vertical knockback that KOs at 145%. This is an insanely fast move if it hits at all, but a failure will result in your poor girl suddenly tripping up and falling to the ground! She stays there for a wee moment before getting back up, different from normal Brawl tripping since the other girl can use her as a means to attack - you could either footstool your partner to get high up into the air or walk over them to get that ice sliding effect for your moves...better yet, why not dash over them and have your movement speed doubled until you stop moving? The poor victim of a girl takes 12% and is knocked into prone by this however, but your rival girl will generally attempt to exploit you if they get the chance...this can actually occur even when the two are working together, but mostly happens when you're fighting against each other.​


[F-tilt]

Your girl winds-up for a small moment before throwing a punch out, comparable to Wario's F-tilt but with more realistic range for a little girl. Sakurako's punch deals 11% with knockback in the opposite direction that KOs at around 145%, but is unique in that she briefly performs a flurry of punches that hit diagonally above and below her, as if you angled the move in every realistically possible direction - Himawari's punch, meanwhile, deals 14% that KOs at 128% but has a slight suction effect that'll drag in foes who'd otherwise barely avoid the attack, possibly due to her overwhelming boobs. Oh, and if you use this attack on a foe who's stunned, prone, sleeping, tripped, frozen, grabbed, in the middle of hitstun, taking knockback or anything else like that the girl will pull off a dynamic punch that deals twice as much damage/knockback and sends foes flying with THAT sound! This is more conventional to pull off than it sounds as you have two girls rather than one and you could simply take advantage of a foe's prone situation from being hit by the other girl in an attempt to steal their kill - if she's nearby your rival girl will almost always use this attack when it's power could potentially be doubled, especially when you've just hit an enemy with a move like your Standard and she suddenly takes advantage of that - good for when you two are working together, but bad when you could potentially have your KO stolen.​


[U-tilt]

Your girl suddenly crouches down, and once you release the input she'll do a flying uppercut punch! Simply tapping the input doesn't take her off ground, but the longer the move is held for the higher your girl will go up, with every second spent charging taking her up as high as a Super Jump Punch until you can reach 4X that height. The move itself deals 3-19% that KOs at 300-115%, making it extremely deadly if you manage to charge it for up to 3 seconds, though you can keep it held down for as long as you like. The before-charge is a bit laggy but there's just no telling when the girl will pounce from there, making it extremely deadly to be above her during that time. Also, due to the attack's nature your rival girl will try to prevent enemies from being above you, but will otherwise use more campy tactics if there's no enemy to attack - she'll even go as far as to troll you with the Down Special and heal herself.​

[D-tilt]

Compared to what you'd probably otherwise think, the two girls actually have different crouches. Sakurako will lie down on her stomach with her limbs laid out evenly in a unmotivated manner, able to crawl around like a worm while Himawari simply bends down on one knee like good old Ganon, not having the projectile-ducking ability her rival has. Both girls have different D-tilts too - Sakurako will scarcely reach out with both hands to grab her foe's legs, which does nothing to interrupt the foe unless she stops crouching or crawls away from them, in which case they'll be knocked into their prone state with 3%. You can use Z to release the foe from here, or make Sakurako pinch her foe for a non-flinching 5% that jolts the foe into doubling their speed for 2 seconds - Sakurako can allow herself to be dragged around by her foe if they choose to move around, or can even spotdodge in order to dodge enemy attacks that'd try to knock her away as foes cannot shake her off any other way. Sakurako can even use this D-tilt on her rival for support if you'd like to call it that, or simply pester a foe with it to distract them while Himawari gets the finishing blow; be sure to release yourself at the right time though when this happens, as blondy will be sent flying along with her foe.

Himawari's D-tilt, on the other hand, is somewhat comparable to a crouching version of Zelda's uncharged D-Smash in that she sweeps the floor on both sides with an outstretched foot. This is rather laggy for a D-tilt, but it deals a surprisingly solid 13% with horizontal-downwards knockback that KOs at around 150% but puts enemies into prone if they're knocked along the ground. Not to mention that this move gets Sakurako off your tail if she's using her D-tilt on you to prone and get ahead of you, as not many MYM characters have conventional attacks that hit on both sides of them nowdays that aren't B-airs.​


SmasheS


[F-Smash]

Your girl attempts to throw a fierce punch! It works in a fairly similar way to Wolf's F-Smash but with slightly less range and as much lag before charge as Snake's F-Smash, dealing a fixed 15% that KOs at 160% if it connects. This punch is unique because while it doesn't gain power with charge, it can be stored for as long as you like, and it will automatically lash out at any hitboxes whether they be projectiles or other melee attacks - if your girl's punch wins her next successful attack will be buffed by the damage and knockback of the attack it beat out (this can stack if you re-use this move, as the buff doesn't count in attack clashing), but if it clashes with the attack it'll cause a circular shockwave to fly out from both hitboxes and hit enemies within 2 SBBs for 1.5X the attack's damage, though it won't hit the other character if they used a melee attack to connect with yours. Also, if your girl's hitbox loses it'll only be half as powerful for the next successful attack or clash, but otherwise this move never stales no matter how many times you use it...

Which is good, because when you attempt to charge this move near your enemy rival they'll attempt to use the same move to clash with you, not wanting to be beaten by you - this isn't all that bad in some ways since you'll always get the damaging shockwave that defends you from foes. Your rival will also often attempt this move against attacking foes when she's tagging along with you or as a simply counter against attackers, which is good and bad in that it gives her next attack a buff, but it'll be all but bad in the rare case that she actually clashes with another hitbox, as the shockwave can potentially damage your girl - all this applies to your girl as well, too. This is one of your best offensive and defensive moves.​


[U-Smash]

Your girl takes a turn for the odd, or more like pissed as she puts on a comically angered face and starts complaining about random things! Most certainly odd, but even more odd are the anime-ish soundwaves that begin emanating from around her a similar distance to a Smart Bomb blast's radius (min or max based on charge) and remain while that girl stands in place - Sakurako's soundwaves deal 1% every 0.25 seconds to all foes around her, while Himawari's deals twice that much but as "invisible" damage that only makes itself apparent when she hits an enemy with another move; both variations also have the unique ability to ignore shields and dodging, because you can't possibly expect to ignore the angered sounds of an anime girl. The soundwave will constantly be kept up and operating whenever the girl stands still after you use the move, but at the cost of her other attacks dealing only 3/4s of its total damage and knockback - if you want to remove the effect simply use the move again.

If one girl is on the same plane facing the other, her soundwave will suddenly halve in radius, only to concentrate itself into a "sound beam" that fires forward and envelops the other girl for twice as much damage! Your rival girl will usually attempt this move when she has enough time, but also for one particularly deadly reason: to steal KOs. That's something almost impossible to do in a Brawl FFA, but the sheer size of the soundwave which covers almost the entire screen will inevitably damage knocked enemies as they fly away, and thus will count as your girl's kill rather than that of the foe who originally sent the character flying...sneaky. If both girls have their soundwaves envelop an individual foe when they'd be flying into a KO this way it'll count as a half-KO, and the first girl to land a clean KO on that character gets the stock. If you deliberately try to camp and keep your soundwave in-tact near your rival girl's target just to steal their KO however, they'll always attempt to attack you beforehand or knock you into the air with an U-throw so you can't steal their kill. It's possible to make it work, but sometimes you should just let them get the kill and simply not distract them.

If both girls are working together they won't be harmed by one another's use of this attack.​


[D-Smash]

Student Council work-time! Not feeling up to the heavy load, your girl takes out a huge bunch of unorganized papers, holding them like a crate, and can be thrown for a similar amount of damage (slightly varies with charge however). If you re-use the input however, much like with the Down Special your girl will toss the sheets right towards her, which will either damage or force her to hold them...how lazy! On the other hand the load of sheets will damage anyone in their path and go right through them, and if they're put down they'll act as a platform that's half to twice as tall as a crate; if a character is knocked into or attempts to move through them horizontally however, they'll end up scattering the 50-250 papers across the stage randomly in a Smart Bomb radius. This deals no damage but rather characters "pick up" the papers as they go along like coins, which will also fly out of characters if they're struck head on. These Student Council papers can make one of the two girls special, because if one or both of them manage to collect all the papers lying around the stage they'll be immune to being directly KO'ed by and take half knockback from all attacks until their damage percentage exceeds the amount of papers they collected - while the girls will fight each other for the papers, joining together in apology will combine their papers so they can both survive to greater damage percentages than otherwise perceived. Once all collected, papers cannot be knocked out of the girls until they're KO'ed, and if you try to use this move while papers are scattered of the ability is in effect the papers that'd be scattered from the new bundle will instead turn to dust. You can use the initial paper bundle to possibly distract your rival or even make them hold it as a platform, which they'll do for you when you're joined together, with the bundle having the bonus of being a throwable projectile.​


AerialS


[N-air]

Your girl faces the screen and stretches out in a fun-looking star-shape, dealing 9% with knockback in the opposite direction that KOs at 200% the very moment you use the move. The move lasts for 1 more second afterwards, and from there your girl will turn around, even if she's knocked away by an attack in the process - she also takes 3/4s less knockback from attacks but takes all the hitstun once she turns around (you'll turn to face your foe when you're hit by them as with any move, but being hit during this move will make you turn your back to them). The attack is initially quick, but leaves your girl vulnerable despite it being useful for turning around in mid-air for your other aerials. This move is oddly the same for both girls.​


[F-air]

Your girl furiously hammers down with a hand - Sakurako deals 10% with mostly horizontal knockback and impact stall (Zelda's Lightning Kick), while Himawari is more straightforward and deals 15% with flat-out horizontal knockback - both versions will KO at around 160%. The attack can be used once again in a row however, which has the girl swing her other arm upwards and deal half of her previous attack's damage, but this time the attack knocks the enemy behind them albeit only KO'ing at 215%. A straightforward killing move comparable to Lucario's F-air (but with less range), your rival girl will only use the first attack if it'll kill, but otherwise she'll always use the variation of the move that'll knock the enemy away from you - what, you think she's going to let YOU get all the glory for her KO? You should probably do the same too with your catch rather than concern yourself with whether to use the move for damaging or KO'ing, but the nature of the move does make it very versatile as a gimping or anti-gimping move.​


[B-air]

Your girl turns their upper-half, then suddenly points in front of them while yelling behind them at the same time, speech-marks appearing around them all the while. This appears to have been an insult, as the soundwaves will travel thrice the distance of Charizard's F-air whilst dealing a non-flinching 5% per second to foes in its path with similar properties to the U-Smash, which you can keep out for as long as you like, even on the ground. The girl's finger also deals 1% and acts like a Bumper too, because it's that cool and it encourages peeps to come from behind and take damage if they can't out-prioritize it.​


[U-air]

Your girl triumphantly points towards the sky, causing the anime heavens above to celebrate by shooting comical lightning down to earth that appears to be flashing - yes, I'm completely serious about this. If the girl is winning like she should be, the lightning will appear to strike down on her only to split past her and hit the ground a Platform on either side of her, piercing through any unlucky enemies along the way. Sakurako's lightning is erratic and travels across the screen away from her at Mario's dashing speed, while Himawari's is not only 1.5X larger than her rival's (and Pikachu's) but also flashes twice in a row for the twice as much damaging potential. Either way, the lightning is same in execution, dealing 16% whilst spiking enemies for knockback that can KO at 85% and will generally knock enemies into prone - you've a choice between a variation that's more likely to hit multiple enemies or one that will deal twice as much damage if it hits, ignoring the invincibility from prone or techs. The move is grand, sure, but you can't spam it as it has as much duration as a Warlock Punch and the girl will constantly keep falling during the attack, but it'll continue if you hit the ground early - the attack will continue on even if the girl is interrupted, to which the only way to safely avoid it is to get close to her or be winning before then...

If your girl uses this while losing, two lightning bolts will come down from the sky and intersect at that girl, zapping her for the damage of her move before knocking her down to the ground! It's quite possible to help your rival girl this way by being under her when she hits the ground, to which you'll help her up in an auto-tech and it will count as an apology...but why the hell would your rival ever want use this move if they as a CPU would specifically know if they're winning? Hey, even CPUs make mistakes sometimes, and your rival girl tends to get cocky when you're losing or she's just scored a KO, or especially when the actual opportunity to hit with this move arises. You too, could use this move just to gander pity from your rival as well, but it won't always work if your foe interrupts you.​


[D-air]

Your girl does a stylish flip before suddenly doing your typical stall-then-fall drop kick, with Sakurako's dealing 8% with upwards knockback that KOs at 140% but Himawari's dealing 26% with high hitstun that's certainly her rival's cue to follow-up. Either way, the two girls pierce through enemies they hit, but if you hold A after the move your girl will hold their hands up above them, which has the effect of springing anyone who makes contact with her but keeping them in their action from before albeit refreshing helpless states - this also ignores upwards hitboxes, too, so you can use it to help your rival girl by springing them back up into the air when they attempted to use one of their aerials to follow up, or you can just as easily use it on a foe like Bowser who attempted to bomb you.​


GraB

Both girls reach out and hold their foe by the collar with both hands for their grab. Humorously enough, if one of the girls uses this to grab the other both of them will look mad with each other and hold each other by their collars...unless a foe first saw which girl grabbed the other they won't have any idea who's actually grabbing who. If you use this while both girls are together, the other will move to the other side to hold her foe from there and subsequently make the grab a bit more difficult to escape - if the foe escapes from the grab like this both girls will be pushed back.

By the way, if the two girls are working together it's actually possible to use this grab on your rival by doing a backwards grab input. This won't cause the two girls to fight with each other unless you used a Pummel or Throw that inflicted damage, so be careful.​


[Pummel]

With a comically angry look on her face, your girl yells at her foe to damage them for 2% per hit at a slow rate. If the held foe is the girl's rival, she can yell back to deal damage at the same rate - the only downside to this is that you'll halt your escape for as long as you continue to do this. The damage of this Pummel becomes greater than a normal character's when both girls are together and using it on the one foe at the same time. Also, if you grab your bonded rival and attempt to yell at them they'll retaliate at you with the options of this throw, so be careful.

If you have your U-Smash active while using this Pummel, it'll be able to hit enemies within the radius for its damage and fractional flinching that'll work at over 150%.​


[F-throw]

With a sudden burst of strength, your girl holds the foe by the back of their clothing-article with one hand, hilariously dragging them along the ground at her dashing speed before tossing them forward the moment you release the control stick, dealing 7% with horizontal knockback that KOs at 175%. Being able to drag your enemies towards the edge of the stage before throwing them most certainly gives this move far more KO potential than initially credited, but the foe can escape your grab during that time and will end up in their tripped position while your girl is still moving. You can also dump your foe on the spot if you use Z, which'll prevent your rival girl from getting into a fight with you and allows for you to space them in a hilarious manner. Even more humorous is that you can use this move to steal your rival girl's target for yourself and run away with them, though she'll attempt to chase you or worse-off use her grounded Up Special to easily catch-up with you and damage the foe in the process.

You can also use your thrown target as a projectile to deal damage against your rival girl, or even use your rival girl as a projectile against other enemies if you're feeling gutsy.​


[B-throw]

Your girl places her target behind her and begins conversing with them. On your rival, she'll start to apologize, which takes 1.5 uninterrupted seconds for it to work and have them bond together again - the only time your rival won't ignore this is when you're the one to initiate the grab. If you used this on a foe however, your girl will give them a thumbs-up and will suddenly become their ally, whether they like it or not! Regardless of whether the two of them were bonded or not this'll be an act of betrayal that turns your rival against you, and cannot be undone with a simple apology unless you attack your new ally with the Pummel (your other attacks don't initiate friendly fire) - in the meantime, your rival will find a different foe to team up with if the new combined score of you and your new ally exceed that of your rival's; if there's no other foe she will become extremely aggressive and attempt to attack you rather than your ally. Don't think that your new ally will always be cool with this however, as their attacks are on friendly-fire and they only have to KO you to end the alliance - it really depends on whether they can benefit from the points you're sharing with them, and whether they really want to share their victory with a lightweight female anime character...using this move near the end of a match on the winning foe is quite a sneaky way for cheat your way into a victory, but if you've been treating your rival like garbage you've still essentially lost the match.

Oh, and by the way, this throw doesn't work on Boss Characters, and not just because of the grab immunity most of them have - you literally cannot use it on them at all.​


[U-throw]

Your girl comically flings her target into the air as far as 3 SBBs (all the way up to the top of the screen with both girls), but this deals no damage nor does it have any potential to kill. This is a generic set-up throw used on your rival girl or when she isn't around, but otherwise it actually produces a unique effect - both girls' eyes will twinkle with competition in mind as they look at the flung foe intently, the winner being the one who manages to land the first blow on them! Regardless of whether you two are infighting or not the AI girl will attempt to reach the target at the same time you do, and the both of you are able to attack each other to reach your goal - the winner is healed off 25% while the loser takes that amount as damage, there being no damage difference between the two as a whole in the end due to the scuffle being trivial. If the attack that hit the target managed to KO them the winner will instead be healed off half their health if it exceeded 20% while the loser takes that amount as damage. Note that the competition will be rendered null if the flung foe returned to ground before they could be hit.

The AI girl will sometimes attempt to use this throw when fighting against you, to which she'll demand fair game - if you manage to oblige and at least try to get into the air and attack the flung foe she'll instantly make up with you, regardless of whether you won the bet or not...it's not like they can stay mad at each other forever.

Note that this throw works very well with the D-air.​


[D-throw]

Your girl will take a completely different route and ask the other character for help on her homework! You can use this even if you're being grabbed by your AI rival, and in doing so she will attempt to help you and will take out some homework to do out of hammerspace. With both girls it takes 11 seconds to complete the homework, and when it's done they'll both receive a half-point! Similar to the Neutral Special lightning the first girl to score a KO will receive the bonus, but in Stock Matches the winning girl gets an extra stock while in Coin Matches she's rewarded with 75 coins. Either girl is capable of leaving the throw at anytime, which'll cause it to take 22 seconds to be completed, but any progress made beforehand will be saved for the next attempt, but this only lasts for as long as neither character is KO'ed - your AI girl will generally leave if she's been attacked or if there's a KO opportunity to be had, but otherwise be aware that if you try to leave your girl will end up receiving the bonus and won't have to KO for it. Also, if you use this throw on a foe while either or both girls are holding them, they'll be harassed to help with the homework and it'll get done within 4 seconds - the foe is unable to do anything within the first 2 seconds, but after that they're free to leave anytime they like and even beat up on both the girls at the same time. If the foe chooses to do this, providing neither girl is KO'ed you'll have made progress to gaining a free score, but if the foe chooses to help with the homework the point will be split between the two teams and whoever manages to KO the other first will gain that point...yes, the foe can take credit for doing your homework with you. Trying to use this throw on a foe twice in a row under these same conditions will have it be complete, but the point will be split and if you don't have a percentage advantage over your foe it can easily backfire on you. If you use this on an another ally, you can have them help with the homework much like using this on your rival - all the same the point will be split and whoever manages to score the first KO will get that point as as a stock.

You could effectively stall with your rival girl and use this move multiple times to obtain a free point without having to KO your foe, but the girls have no way to stall for this aside from one of them getting up to attack the foe while the other does the homework, but as a balancing precaution if any girl with a half-point gained this way is KO'ed it'll become null for both characters. It's easy enough for the foe to KO the most vulnerable girl anyway, and you're viable to losing the match instead of winning it if you're not careful. Also, once some homework has been done the next lot will take 1.4X longer to complete, so you can't just win all your matches this way.​


PlaystylE

Compared to other tag-team characters, Sakurako and Himawari aren't just fighting the other Brawlers, but also among themselves! No other fighter has to do such a thing to acquire victory, and while this may seem like self-defeat two heads are better than one, especially when they actually put aside their differences and choose to work together. You have a choice between the mildly bratty Sakurako to be in control of all the wildness and take out your vengeance on those boobies, or the more composed Himawari who generally has better stats and sometimes attacks, but has the downside of having to put up with her rival's eagerness to stir things up between them...

The two of you will get along nicely at the start of the match, but the moment you attack or are attacked things'll change - this is the one moment where it truly matters which girl you picked. If you don't want your rival to just rush at the enemy the moment the game does truly begin, pick Sakurako, but if you want the AI to stand a better chance at scoring KOs, AKA the more campy type, pick Himawari.

You won't really have access to your cool stuff like the Neutral Special and the U-air at the start of the match, only really being left with some generic offensive options and the U-Smash for tickling the opponent's bad fancy. This isn't all bad, as once you get the fire started with a simple move you can get things started with your rival, even if you're the first one to be attacked at the start of the game - it'll be difficult for foes to capitalize on the damage they deal to one character due to being harassed by another, but at the same time they'll be separating the girls from each other.

The Neutral Special is probably the most obvious option you have at the start of the game since you'll have enough comparison in your damage percentage to use it, and easily punishes foes who end up in-between you trying to separate the two of you - the only problem however is that your rival girl, especially prevalent with Sakurako, tends to keep foes to herself and away from between the two of you. That, and if you try to use the Neutral Special during this time you'll only end up hurting them in the process as enemies retaliate against her.

If the foe is being harassed by your rival girl, you'll generally be left with the options of helping them, camping away like a lazy person or working against them to get their kill. Letting your rival get all the glory isn't that bad since they will be scoring the both of you KOs despite the fact that you'll pretty much "lose", but on the other hand if you just ignore them they'll weaken in terms of recovery and just do whatever they like, making them rather prone to being KO'ed. If you really want to help them, you can be selfless and feed them with your Down Special (helps with the Neutral Special's usage), and simply sit back and support them with with your Up Special when they're about to die - you'll get their KOs added to yours, but you'll also receive any losses such as Self-Destructs and what have you. You may also want to just try and get the kills for yourself and capitalize on the punishment they dish out, which'll give you more control of the match since you can use moves like the B-throw to form a partnership with your other foes.

The Neutral Special is a rather interesting move, as it varies in the ways it can be used. You could simply wait for the perfect time and use it right away to get some good damage in on a foe from a distance and score an easy KO which you two can compete for, but your rival's AI will increase as the time passes with the move's use, and once you've used it for 5 seconds she'll become Lv10, thus restricting the move's use to up to 2 seconds at a time. Raising your rival's AI may seem extremely beneficial, but it makes them ridiculously aggressive to the point where their style can have a lot of blind spots to it and be easy to counter. Also, if your rival's AI is weakened it'll be easier to get an advantage over them and score kills, though you do risk leaving them vulnerable to enemy attack at the same time just as much as their highest AI.

Although both girls are essentially competing with each other, at the same time they're also working together - they essentially ARE two characters in one, and if they manage to get back together through an apology it'll mean trouble for their foes. Hence, the basic strategy enemies may likely induce if they can is to keep both girls separated from each other, as they'll lose their recovery ability this way and they'll benefit from being able to leech off one of the girls for points in a Timed or Coin Match, while in a Stock Match the girl in question will begin to lose stock and cause the duo to suffer - if their efforts do end up breaking the bond the two girls have however, do remember you can punish them with your powerful Neutral Special.​


MasterWarlord

Smash Champion
Joined
Aug 24, 2008
Messages
2,902
Location
Not wasting countless hours on a 10 man community
CHARACTER PITY YOUR WAY TO TOP 10

Yutaka is horribly, horribly overpowered (Against her character). Fsmash/side aerial (These moves can deal up to 178% for those who don’t remember, feasibly 60%+ if you’ve tripped already a few times) getting buffs from the nair/Neutral Special is really disgusting to imagine. Yes, she will trip, the very first time she attempts it, that is, and if she deliberately goes into prone (Against her character) with a handful more of attacks she can get around this and be broken as hell to her heart’s content. Her offensive game pales in comparison to her defensive, though, as you give her far too many ways of simply shrugging off damage like it’s nothing (Against her character). In particular, she’s such a tank that her grab gives her superarmor for god knows what reason, and she’s enough of an HMA to do massive uppercuts to the foe with no set-up at all. Most of the moves are just other ones of doing away with her Slowbro-esque poison damage that she slowly takes, because that crazy shield isn’t enough, that make absolutely no sense given the animations for the moves – she can even transfer all damage in her shield into a single attack via magical means. It’s very forced representative characterization that gives her supernatural powers – in particular that Up Special needs to be entirely scrapped, as not only does it literally let her cure her status effects for no charge whatsoever (God knows why you thought this was a good idea), it’s the most obvious random power she’s given in the entire set.

On that doubles mechanic, before you accuse me of hypocrisy with Lunge (Thank you for that link, I haven’t laughed so hard in ages), I rather regret a lot of the tacky stuff in that set now, and screwing with the enemy’s characterization is something low potential sets like this have to avoid. When Silver’s been going out of his way to make sets for these sorts of characters for so long without giving them –anything-, this set comes across as blatant cheating more than anything. As far as the uniqueness of the set, yeah, that’s the one thing it’s got – it’s a pretty bloody unique moveset with some cool concepts in it. Like Lunge, though, the sheer tackiness and forced characterization (In Lunge’s case for the foe more than himself) is too much of a sacrifice. A set like this would make some more sense on a character with actual powers – a similar set to this does exist on a character that actually makes some sense, and it’s called Gardevoir.

WHY IS THIS SET NOT CALLED COLE

Cole feels more like one of those “cage” movesets than a bullet hell moveset, as the space that projectiles can rebound inside of is so small that there’s no way the foe can possibly dodge that many of them. That’s a very number cruncher-ish complaint though, so continuing on Cole is a pretty good read up through the Smashes, particularly with creating one way entrances/exits through his barrier giving him some nice flavor and being believable with all the wacky tech this guy gets in the source material. The aerials are where the set begins to fall apart and teems up with filler, though. The throws are really the worse part, though, as the aerials give Cole some more options to attack the foe with as he rebounds off the barrier, enabling him to add himself to the mix as a living projectile – they’re kind of needed when they’re his few melee moves, and it feels a lot better when all of the melee moves are brought to a single section of inputs, making his Up Special make a lot more sense in the context of this moveset as he is given melee attacks to use as he hovers around. The grab-game’s still pretty bad and the projectile moves could use a bit more to differentiate them, but it’s fairly solid.

TOXINRIAL

The base concept of the set is definitely the best part – the foe has to steal eggs from Iron Tail to cure their poison which gets stronger and stronger over time. The fact Iron Tail himself has so few moves/direct attacking moves makes a lot more sense when you realize that the foe’s going to want to attack Iron Tail himself to cure their poison. Iron Tail’s going to want to flee while his bat and spider do the brunt of the work actually attacking the foe – that one aerial that swaps Iron Tail’s position with the foe is actually pretty clever in hindsight, and pretty much any tackiness here is cleared up by the awkward source material. That doesn’t excuse the random Espeon Future Sight in the moveset, though, which is not only tacky but irrelevant and helps to break him. Of course, that’s just one move, and most of the spider/bat moves (AKA 85% of the moveset) are handled very well throughout.

DISCLAIMER: DO NOT READ THIS SET

Unfortunately, not everybody in MYM skims, so I did not see the disclaimer until –after- I read the whole thing. Maybe you should’ve put it at the front?

I was really, -really- expecting this to end with that experience gaining mechanic I heard so much about in the xat to redeem this set in a Sayaka-esque manner, but instead it just ends with that disclaimer. Was this mechanic really so bad it had to be removed? As is, the weapons deleveling just feels like a way to underpower him, and how much certain weapons weaken while other weapons don’t weaken at all comes across rather tacky. The set really needed something more than random projectiles up the wazoo, and that removed mechanic feels like something the set was obviously designed with the intention of keeping in. In the least you could’ve kept it in collapse tags at the bottom or something. Oh, and I do have an actual positive thing to say – the order the moves are organized in this set is actually good and far better than if they’d been organized normally, far better than in Grey.

*SNARKS BEHIND ALT AND STEAM*

Rool will make up something good to talk about in literally any set if he so desires, you should know better than to preview Azula to somebody outside of MYM like him.

As for the rest, blah blah, it’s a Brawl rushdown moveset, though you’d think it’d be more self-aware than it is. It is trying to pass off as more of one than other Brawl characters who happen to be fast – in which case DK (Who is indeed quite fast, just a glass cannon because of his size) is more of a rushdown character than this moveset.

You go on about it not being a camper, but this set is made for Brawl, not MYM Brawl – any character with so much as a single projectile can camp in such a context, much less multiple. If you have projectiles and the enemy doesn’t (Or yours beat those of the enemies, like D3’s dual purpose projectile/walls Waddle Dees), you’ll use them – this dictates a good chunk of the match-ups in Brawl.

So yes, a set for a Brawl character on a character with loads of potential that doesn’t know what it’s doing. Good show.

And this is more of a complaint about your movesets in general than this one specifically, and it’s also the main thing that let me identify you – stop with your bloody return key fetish.

You will use the return key after so much as two sentences only to do so again after two more in an endless cycle.

It makes the moveset both look and feel longer than it is and constantly disrupts reading flow.

How you managed to abuse the return key even in a moveset intentionally underdetailed to hide behind the guise of an alt is beyond me.

No amount of tacked on "XD"s can cover that up.

Well, that and you sharing the incredibly forced opinion that a character who can't jump is definitively terrible, regardless of not cheating out on inputs and being able to get into the air anyway, just because you're trolling and have to generate hate for Smady's set, DM.
 

Katapultar

Smash Lord
Joined
Nov 24, 2008
Messages
1,257
Location
Australia
CHARACTER PITY YOUR WAY TO TOP 10

Yutaka is horribly, horribly overpowered (Against her character). Fsmash/side aerial (These moves can deal up to 178% for those who don’t remember, feasibly 60%+ if you’ve tripped already a few times) getting buffs from the nair/Neutral Special is really disgusting to imagine. Yes, she will trip, the very first time she attempts it, that is, and if she deliberately goes into prone (Against her character) with a handful more of attacks she can get around this and be broken as hell to her heart’s content. Her offensive game pales in comparison to her defensive, though, as you give her far too many ways of simply shrugging off damage like it’s nothing (Against her character). In particular, she’s such a tank that her grab gives her superarmor for god knows what reason, and she’s enough of an HMA to do massive uppercuts to the foe with no set-up at all. Most of the moves are just other ones of doing away with her Slowbro-esque poison damage that she slowly takes, because that crazy shield isn’t enough, that make absolutely no sense given the animations for the moves – she can even transfer all damage in her shield into a single attack via magical means. It’s very forced representative characterization that gives her supernatural powers – in particular that Up Special needs to be entirely scrapped, as not only does it literally let her cure her status effects for no charge whatsoever (God knows why you thought this was a good idea), it’s the most obvious random power she’s given in the entire set.

On that doubles mechanic, before you accuse me of hypocrisy with Lunge (Thank you for that link, I haven’t laughed so hard in ages), I rather regret a lot of the tacky stuff in that set now, and screwing with the enemy’s characterization is something low potential sets like this have to avoid. When Silver’s been going out of his way to make sets for these sorts of characters for so long without giving them –anything-, this set comes across as blatant cheating more than anything. As far as the uniqueness of the set, yeah, that’s the one thing it’s got – it’s a pretty bloody unique moveset with some cool concepts in it. Like Lunge, though, the sheer tackiness and forced characterization (In Lunge’s case for the foe more than himself) is too much of a sacrifice. A set like this would make some more sense on a character with actual powers – a similar set to this does exist on a character that actually makes some sense, and it’s called Gardevoir.

I never thought you'd ever attempt to read Yutaka like, ever (given that you seem to have character bias against LFPs that aren't well-known or villainous, which is why you haven't read some of my other sets in this contest), but I absolutely knew that if you did you'd hate her (I guess you did this to try and de-bunk all the attention she's getting and make her less liked by the overall community with your word). This is the kind of set that you do need to be coming from a certain angle in order to actually appreciate, and I guess really not everyone's going to agree with what I'd otherwise consider to be good characterizing, especially since low potential characters well...have low potential. It's true that Yutaka can get quite strong, but she's not necessarily at all overpowered - in order to attack at all, she has to rely on her small limbs for both those potentially powerful moves, and they both come in multi-hitting moves that can be out-prioritized by just about any attack; we're also talking about a small character who essentially uses Ness-esque limbs, which in themselves would be quite unconventional to hit with, and since they're apart of the character she'll take damage if they're hit compared to if said attacks were instead used from a weapon or random magic attack.

Speaking of which, I understand that the Up Special is a bit of a big deal in the set, and not just with you, to which I could probably replace it with a generic flail or something despite the fact that it would sort of weaken the entire vision I had for the set. The move was partially designed to mock the fact that we have some rather silly moves in Brawl like Peach's random heart-creating U-tilt and as I said in the move, the Ice Climber's magicy Down Special where they shoot ice from their hands. But of course, I wouldn't just put the move in only for that reason for such an important set of mine - I guess really the move is symbolic more than anything, so it'd be difficult for most people to understand where I was coming from in it's implementation: the move is more or less designed to be well, a special kind of support that showcases how pure Yutaka is, and also make her fairy-tale outlook on life what saves her from falling into despair. With that, it also makes a bit of sense that it'd rid her of her poison damage.

The potential damage she can dish out is kind of like this...you don't really expect someone like her to be able to do that much, and really it's designed to be a bit of a representation in how far she's come, evening out the odds of balance in Brawl despite she not being powerful at all.

I guess also to you the shield and some of those animations come across as being, well, tacky in terms of apparent supernatural ability, but this is Brawl, and every character is able to put up a bubble shield in which they'd otheriwise be unable to do in their own worlds - I don't see anything wrong with letting your shield soak up passive damage you take, as that occurs in other sets like with poison clouds and what have you. I did try to give reasoning as to why some of those animations did what they did, but I guess they aren't enough for you to believe it.

Also, shrugging off damage isn't against her character since she has to deal with illness - actually, I should mention that the damage she takes is meant to be symbolic and akin to an illness, and some of those moves are designed to show us how she copes with it like she's always had to. I think it's easier to understand my design for the set if you put yourself in Yutaka's shoes in playing as her and having to see just what she has to do, and in that she has to do more to stay alive than any other character and actively wants to become involved in everything despite her weaknesses, which is probably one of the most important points in the set and why I gave her an offensive game. She also has to be careful not to let her illnesses overwhelm her when she's trying to be active, which is why I gave her that defensive game - she has to stay at home a good deal of the time, so it would make even more sense for the character if the offensive game pales in comparison to the defensive.

I guess you were simply coming from a perspective where everything has to make sense from the context in which the character fits in, not at all believing that someone like Yutaka should deserve something like Super Amour or potentially powerful attacks just because she's a lightweight female protagonist - I can see where you were coming from with that, given I remember your complaint with Olimar remix and Grinch. With all the symbolism I was trying to implant and what with making Yutaka unique, I guess really this set absolutely isn't designed to appeal to you - it's impossible to please everyone.
 

ForwardArrow

Smash Ace
Joined
Aug 17, 2011
Messages
502
I never thought you'd ever attempt to read Yutaka like, ever (given that you seem to have character bias against LFPs that aren't well-known or villainous, which is why you haven't read some of my other sets in this contest), but I absolutely knew that if you did you'd hate her (I guess you did this to try and de-bunk all the attention she's getting and make her less liked by the overall community with your word).
May as well tell you right now that it was me who asked him to read the set. Largely because I felt it was overrated as hell too, though for different reasons(the very symbolism you describe is something I kind of loathe in sets, and the playstyle is one that while unique feels a bit shallow to me). But yeah, don't think it was just Warlord trying to be mean and debunk your set, if anything I'm the one you should be blaming.

That said, I figured I'd address the whole matter of perspective complaint. I don't think it's so much that Warlord or myself won't "let ourselves" like Yutaka, it's the set does not really have what we look for in a moveset. If it's not there, we aren't gonna suddenly change our mindset to suddenly like the moveset. Different people, different tastes. Though maybe that's what you're trying to say the whole time.
 

MasterWarlord

Smash Champion
Joined
Aug 24, 2008
Messages
2,902
Location
Not wasting countless hours on a 10 man community
May as well tell you right now that it was me who asked him to read the set. Largely because I felt it was overrated as hell too, though for different reasons(the very symbolism you describe is something I kind of loathe in sets, and the playstyle is one that while unique feels a bit shallow to me). But yeah, don't think it was just Warlord trying to be mean and debunk your set, if anything I'm the one you should be blaming.

That said, I figured I'd address the whole matter of perspective complaint. I don't think it's so much that Warlord or myself won't "let ourselves" like Yutaka, it's the set does not really have what we look for in a moveset. If it's not there, we aren't gonna suddenly change our mindset to suddenly like the moveset. Different people, different tastes. Though maybe that's what you're trying to say the whole time.
Let's wrap this up before the next reply session begins:

For all I said in the comment I certainly greatly respect the moveset far more than any other I dislike. In particular, the statement where FA says the moveset "doesn't have what we're looking for" misrepresents me, as I look for playstyle uniqueness and flow into said playstyle the most, and this moveset has that. It just feels like you were really forcing it on this character with really abstract representative characterization you wouldn't think about actually playing the game, along with a lot of balance problems.
 

webcoroma

Smash Rookie
Joined
Feb 28, 2012
Messages
21
Location
San Jose, CA, USA, Earth.
MYMini thingy

Frank West SSE role: What if Snake wasn't the only person to sneak on the Halberd? Going on a hunch, Frank sneaks on board the Halberd and runs into Snake, Metakight and Lucario. Literally. Where upon they are ambushed by Primids. After a brief fight, Frank joins the group.

Music: (I wasn't sure if I could post one at a time so I just list the numbers for the songs that would be added) http://www.youtube.com/playlist?list=PLAE1C076CE7628586 2,3,4,7,28
http://www.youtube.com/playlist?list=PL7353232C0E41D24A 16-30

Is this too much?
 

Davidreamcatcha

Smash Ace
Joined
Feb 9, 2011
Messages
629
IRON TAIL'S LAIR

As the name quite literally explains, this is the lair of Iron Tail from Peter Cottontail -here he plots to take over Easter with Montresor and his spider, and uses it as his base of operations throughout the film.

Obviously, it serves as Iron Tail's homestage in the game. All of the above image is in the picture, the main difference being that it extends off to the left to create a very large walk-off - actually decent considering the token amount of trap/tunnel characters that are in Make Your Move. The whole thing is about as wide as Melee Final Destination. The entire bottom of the stage is solid and extends down to the bottom blast zone - the edge hangs out an entire Battlefield Plateform, and the aerial portion is quite large, meaning aerial battles will be quite prevelant. The entire thing is flat - but it's not like we don't need some giant flat stage for MYM.

MADAME ESMERELDA

Madame Esmerelda is a character from Peter Cottontail, appearing exclusively in the Halloween segments. She is a good friend of Iron Tail's - the first he does when he learns Peter's in Halloweenland is call her and ask her if she can "frighten him away". She attempts to do so, only to become content with Peter. This threatens Iron Tail's operations, so Iron Tail has Montresor fly over there and force Peter away.

As you may've guessed, she appears from the Minion Crate (remember those? I do) to assist Iron Tail. Once she appears, she cackles and hops onto her broomstick, floating just above Iron Tail at all times. She conjures up a fireball every 5 seconds, which homes in on the foe at Ganon's dash speed and deals 8% damage, able to grant Iron Tail another defense option. Adding on to this, if a foe approaches Madame Esmerelda and gets within 1.5 BFPs, she will glance at them and shout "Boo!", causing them to become pratfalled/footstooled, taking 3%.

Whenever Iron Tail is knocked into the air, or jumps, Madame Esmerelda is always one step ahead and constantly stays above him. By holding up on the control stick, Iron Tail will cling on to the bottom of her broom, able to use aerials in this state - he can only be knocked off by her time running out or taking 10%, also able to get off by sinply holding down on the control stick. By airdodging while Iron Tail is clinging, you control Esmerelda in a recovery similar to Montresor's, except lasting for infinite time, meaning you can actually have Montresor out pressurring the foe instead of babysitting him. She lasts for 20 seconds.

As a side note, Iron Tail's FSmash has been changed.

:phone:
 

MasterWarlord

Smash Champion
Joined
Aug 24, 2008
Messages
2,902
Location
Not wasting countless hours on a 10 man community
WYALD​


Wyald from Berserk has spawned from the assist tropy in his gigantic apostle gorilla demon potato form! He remains in the background, or at least as far as he can with his huge frame (He’s a bit taller than even Giga Bowser), actively walking about like an ape at DK’s dash speed. Once he gets behind the nearest enemy and stays behind them consistently for 2 seconds, he will smash them with his fists if they are male/genderless, dealing 25% and knockback that KOs at 80% and instantly shattering shields. If the character is female, however, Wyald will grab them (In a very fast motion, less laggy than simply smashing the foe) and then hold them at 6x grab difficulty, after which he will state his MYM catchphrase from the screencap and take out his tongue before proceeding to use it as a pingas. This deals 10% per second to the grabbed character. Wyald vanishes after a grab attempt/smashing of his fists, whether or not he’s successful.

TOWER OF CONVICTION​


Because we have not passed the border for “family friendly” for Smash Bros a thousand times over already in MYM, this stage is essentially a room the size of Final Destination’s platform (With windows to the outside as blast zones and the ceiling off camera for a top blast zone) where priests are torturing a bunch of naked *****s with insanely elaborate devices. Now you understand why there’s no picture.

Among the many torture devices in the background, there are two coffins filled with spikes in the background that *****s are constantly getting put into and crushed inside of. If you are stupid enough to spot dodge into one of these coffins, it will be closed on you by the priest, causing you to take 50 hits of 1% and flinching before being let out in prone, generating an aesthetic pile of blood on the floor and a full second of stun.

Occasionally Mozgus the high priest, the one used as the “image” for this stage, will come onto the stage, usually being in the background torturing *****s. He will proceed to enter his daily ritual to his lord of slamming his face into the ground a thousand times. If you come into contact with this, you will take 10% and average set knockback away. This lasts for 20 seconds before he’ll leave, but if Mozgus is attacked during this time he will turn around and look around wildly for the player who hit him. If he sees nobody in the direction he’s looking on the ground (It takes a bit of lag for him to turn to look, he’s only slamming his face into the ground), he’ll ignore them, but otherwise he’ll chase after whatever foe he sees regardless of whether or not they hit him. He chases foes as a slower, stronger clone of Ganondorf due to how fat he is, but the pay-off is he has constant superarmor that makes him immune to taking stun from all hits that deal less than 10%. His grab is also replaced with Dedede’s, and if successful he will drag you into the background and into the spiked coffin, it being impossible to escape.

Mozgus can attack other people outside the one who he thinks attacked him, but will only specifically target the “heretic”, lasting until either the victim is KO’d, put in the coffin, or 20 seconds pass. At this point he goes back into the background. He comes out of the background very rarely, but will generally come out once per match, it varying based off stocks/the time limit how often he'll appear, but being able to appear multiple times in longer matches. If he is somehow KO'd during the 20 seconds he's out, he will not respawn. It is somewhat possible to KO him if a match lasts a long time, as if he comes back out for more punishment he'll keep all the damage he took.
 

Katapultar

Smash Lord
Joined
Nov 24, 2008
Messages
1,257
Location
Australia
Can't believe I made THIS in a whole day. Especially character-wise...

Sorry for ripping your Organization Professor...


[FONT="#28c217"]Oogie Boogie


Whereas the folks of Halloween Town just want to give a good scare, Oogie Boogie means to play dirty in just about every way. An avid gambler, he loves nothing less than putting other peoples' lives on the line, going further than most other Disney Villains in actually kidnapping, torturing and killing victims with the help of his bratty henchmen and many casino-themed torture devices. He has a bitter past with Jack, and intends to upstage him as the ruler of Halloween Town, even if it means getting outsiders involved...

Size: 10
Weight: 20
Ground Speed: 1
Traction: 9
Air Speed: 3
Jump Height 1: 2
Jump Height 2: 2
Fall Speed: 9


Oogie has stats you'd expect from a typical heavyweight who can't quite hold himself up, but unlike most his brethren he weighs a shocking amount - that, and you'll quickly find that he only takes half hitstun and has Super Amour against all attacks that deal 5% or less...

He does have a rather fatal weakness, however. Upon being hit by any cutting attack, or just any old one that would send him flying, Oogie's body will tear and reveal itself to be composed of many cartoony-looking bugs that begin spilling out of him like water and scatter across the stage aimlessly upon touching it - you hardly need to worry about the main body falling offstage given how much Oogie weighs. Crying out "My bugs!" during this time, Oogie's main body begins limping and moving significantly more slowly for 2 seconds until it finally collapses, the stage being filled with enough bugs to fill the entirety of Final Destination. These bugs are completely harmless and can be killed with one attack, or even just be stepped on, but just doing that won't do you any good - there's a blue bug that's slightly bigger than the rest and always comes out last that composes Oogie's brain, and once you kill it he loses a stock. Oogie's not completely vulnerable while he's a bug however, as he's able to move around the stage at Ganon's dashing speed and move past certain objects with his size, even crawl on walls or ceilings for as long as he likes (which only his bug will do)...were it not for the fact that he'll also lose a stock if his main body is knocked off the stage at only a quarter of it's weight. KO'ing the body is sometimes the better option for foes, as they suffer hitlag from their attacks from killing the bugs and move at half their speed when stepping over a bunch of them, even suffering the ice sliding effect when attempting to stop. On the other hand, Oogie's body will remain torn with no way to be sown back up, let alone get back all those other bugs you lost as they fell out....at least for now...​


Specials


Oogie starts off every match with a pair of die he casts and throws to the floor in front of him, which enlarge to half a crate's mass before giving off a random result from their combined numbers between 2-12 that shows up above the die. These die can be hit on their sides to tip them over, but their exact positions are determined at random - on the other hand they can in fact be picked up and thrown around the stage, but only deal 2% and pathetic flinching that only works at around 125% before landing on the ground and giving off a completely random result. It's also possible for players to knock the die around to have them emulate the damage and knockback of their attack at quarter capacity if you want to deal more damage...

But wait, then what's the point of the die result if you can just use them as weapons? Well, Oogie IS a gambler, and what he's putting at stake with the die results are the number of traps he can have out onstage at once - that means you can have a total of up to 12 traps out at once, but if you ever get a pair of 1s Oogie will yell "Snakes eyes!?", which is indeed as bad as he makes it sounds since this means you get no traps at all. As a matter of fact, rolling a 1 at all detracts from the other number you rolled, so if you rolled a 2 and a 1 you'll only be able to have one trap onstage. Oogie can still lay traps on the stage even if he'd exceed his limit however, though this trap will be "withdrawn" at the moment (and cannot be destroyed by trap-destroying moves), but the moment you get a high enough die result it'll instantly spring into action. The traps you made first will be the first to spring up this way, but when the die result is low enough it will be forced to withdraw into the stage, with your more recent traps being the first to succumb to this. Because of this Oogie actually has to take care in which order he makes his traps, because if he makes an important one after his other trivial ones he could risk the match from failing to get a high die result...but don't think this makes Oogie completely luck-based, no - he's more than willing to cheat for the sake of his outcome and use underhanded tactics to rig the outcome of his die.

If a character picks up a die it will remain on it's top with it's result still in-tact, but if thrown or knocked around the results from before will no longer be in effect and the that die will be null until it lands again - this can actually be used to your advantage if you ever get a 1, because it will no longer be in commission and you'll gain an additional trap if you had your other die around. Also, if your die are ever knocked offstage they'll fall from the top of the screen onto a random location of the stage. To make you as helpless as possible, your foe could try and get their hands on both die and keep knocking them around, but they still have you to personally deal with.​


Neutral Special - Skeletons in your Closet?

Oogie Boogie causes a skeleton attached to a wire to come down from the top blast zone at double Sonic's dashing speed. When it initially comes down, it deals 16% and upwards knockback that kills at 125%, giving Oogie a much needed KO move. The skeleton sticks around and doesn't seem to do much afterwards beyond waste a trap and be a wall with 35 stamina. Wasting a trap is half the point, though, as if the dice make the skeleton go away, instead of vanishing it will get pulled off the top blast zone at the same speed. If it comes back into play, it will be a hitbox once again as it comes down, making foes have to be incredibly wary whenever the dice are rolled. Simply making the foe be paranoid of that part of the stage can make the luck factor beneficial.

Characters can press "up" to grab the string holding the skeleton like a ladder. This serves minimal purpose, but characters can then hit left and right to swing the skeleton about - the physics are the same as the uair hook that Oogie can swing on. This will cause the skeleton to become a hitbox based off the momentum it achieves, though Oogie will always be immune to the skeleton no matter what.

Inputting Special Dsmash with a skeleton already out will not make a new one. Rather, it will cause the skeleton to come to life and open his rib cage, attempting to grab foes inside and dealing 10-20% and 1% per second while grabbed. Keep in mind that the skeleton can do this while being swung about. . .The fact that this grab escape has 1.4x regular escape difficulty also means you can have the skeleton release the foe when the momentum is at its' strongest to knock the foe off-stage. . .Or, if you want to stall for time, you can just use the dice to destroy the skeleton when the foe is grabbed, causing the skeleton to take the foe up to the top blast zone (They will be released and not killed).

Credit to MasterWarlord for this attack (which he kinda wanted in).


Side Special - HMA Inhale

Oogie Boogie takes a cue from the eagle king and begins inhaling or exhaling based on whether you held the control stick backwards or forward. Objects are sucked towards or away from Oogie based on how much they weigh providing they're within 1/2 of FD, though he cannot swallow entire foes and does not have a very wide radius in which he affects objects, to which you can and have to angle his head to affect anything shorter than your head area.

Oogie can suck up and swallow non-explosive items, and by attempting to exhale he can spit them as smash-thrown projectiles in the angled direction. Transformation items like mushrooms will change Oogie and explosives will harm him from the inside like with Brawl's eaters, but other items will slightly add to Oogie's mass and increase his weight by 0.5, with barrels and crates increasing it by 1. This also makes Oogie a bigger target despite being harder to knock around, mind you. In terms of practical 1v1 uses, Oogie can suck up his own die to make them flip over with every 2 SBBs they travel, or keep them inside of him to use as sneaky projectile attack against enemies - be aware if you do this however, all of Oogie's traps will vanish and he'll actually have to spit out the die to make them re-appear. There is no limit to how many items Oogie can keep inside himself, though he'll start getting less weight for each one to make it possible for enemies to tear him - interestingly enough, any items Oogie had inside him will fall out when he's torn, so you could very well use this as a trigger to activate your traps when enemies think it's safe to suddenly hit you. Oogie can also suck up any stray bugs that didn't make it to him when he got sown back up, and will receive as much as 0.2-2 weight based on how many there were.​


Up Special - Oogie BOOGIE

Oogie steals yet another one of Dedede's moves...except he barely jumps off the ground at all in exchange for his impact being far more powerful. Oogie doesn't jump high enough to be able to flatten the likes of Luigi from the ground, but if he does manage to get someone they'll take a surprisingly fatal 21% with horizontal-downwards knockback that puts them in prone on the ground and sends them sliding across the stage, generally KO'ing at 95%. And if characters aren't flattened by Oogie himself, they risk being pushed back by the invisible shockwaves he creates across the stage on either side of him, the length at which is 0.5-3 SBBs depending on the weight on the object. Dies will be pushed back a SBB, and are also pushed over so you can change their number depending on which way they're standing. Also, if Oogie somehow manages to grab a ledge with this move he'll end up smashing his entire body onto the stage to create that same shockwave which travels across the stage before he transitions into his normal ledge options.​


Down Special - Snakes N Spider Soup

Oogie steps on a proppy switch as a SBB worth of circular ground opens up in a mechanical manner to reveal what resembles lava, which is in fact Oogie's snakes n spiders soup which he uses humans for - tapping the input has the hole appear in front of Oogie, though you can charge the move for up to a second to make it appear at the furtherest area of the stage you're standing on as Oogie's not one to move around himself for that reason. You can only have one of these holes onstage at a time. Bugs will go around the hole to reach their destination, while other characters are stuck with jumping over it lest they want to take damage frighteningly similar to the lava from Brinstar that can potentially KO at around 200% - try not to be knocked into your own soup lest you want all the contents of your body to spill and to lose a stock instantly (unless you can somehow have the hole be closed by a die result). The contents of the hole are dormant for now, but items, summons and portions of victims can be added into the soup to make it overflow at 0.5 SBBs per sample on either side (1.5 when a character is damaged by it), in which the contents acts like the soup hole usually would (it can and will also grow in size), terrain-sensitive and all but moving across flat surfaces at Ganon's walking speed until it flows offstage.

While Oogie massively suffers in the face of (any) goop due to effectively being OHKO'ed by it, he also massively benefits from it if you keep it in place as a trap by exhaling or better yet, inhaling it - whenever Oogie Boogie inhales any type of goop, it'll somehow form into insects inside his body (possibly by feeding them) that slowly enlarge him from the inside by 1.1X his original size per 0.5 SBBs of goop, and not just the contents from the soup either but any goop from another moveset. As this occurs Oogie become a bigger target as his attacks deal more damage proportional to how large he is (2X his size doubles the power of his attacks) but also slows them down by that much, though he also starts to taking significantly less knockback to compensate - foes will have a much more difficult time trying to tear him open, even with slashing attacks, and more bugs will spill on the stage when that happens, allowing him to survive for longer as he starts to shrink. Oogie will also gradually stop being knocked upwards by his own soup until he reaches obscenely high percentages, which means he'll easily be able to stand on it without being killed for a limited time as his damage begins to skyrocket, yet on the other hand his soup will grow due to damaging him and it'll cover enough of the stage to force enemies into the air...you'd think that Oogie could simply inhale his soup to grow bigger instead of allowing himself to be damaged by it, but he'll eventually get so big that he won't be able to bend his head down to inhale it.

On the other hand however, Oogie's suction becomes far more powerful with his size, and he's able to suck in any goop that's a certain distance away from him to increase his size even further. Oogie can also inhale foes when he's reached more than twice his size (and cannot be grabbed when he's at least this big), which causes the outside of his body to become transparent as foes find themselves around his brain area, forced to move around in any direction at their aerial speed while taking passive damage from the bugs at 1% a second but also suffer from a quarter of the inhaled goop's effects every second but without flinching or knockback - that's an additional 2.5% a second from the soup. The foe is also capable of attacking Oogie's bugs from the inside to shrink him, and if their body ends up overlapping that of Oogie's shrunken one it'll burst as if torn and his bugs will scatter - foes can also attack the edges of Oogie's insides to damage him (no hitstun or knockback) or even go down to his bottom area to cause a tear. Oogie's not defenseless with a foe inside him however, as by exhaling he'll attempt to spew up the goop he inhaled with whatever properties it had beforehand along with his foe at Sonic's dashing speed, effectively creating a mid-air variation of his soup contents that'll be fatal to the foe given how close they'll probably be to the blast zone if they fail to dodge the moment they're released from Oogie's mouth. From there they should be able to fall to the ground while the goop spews out of Oogie's mouth as a stream with it's normal properties, travelling across the stage away from Oogie if it was his own soup contents. Used as an actual means of attack to outside enemies, this soup stream isn't nearly as broken as you'd think since Oogie will not be able to angle it against enemies close to him, and puking it out will naturally cause him to shrink, and is the only way you're able to do so if you need to.

Finally, die will float on top of soup contents and any other types of goop, even water, but because of the soup's damaging properties it essentially becomes impossible for anyone to tamper with the die results - spilling soup across the stage isn't a bad idea to keep a certain result in place, though you'll have to deal with the actual soup contents themselves and thus this isn't completely permanent.​


Standards


Standard

Oogie claps his hands together with each tap of A, as if applauding his victim's efforts to survive. Each hits deals about 2.5% with flinching knockback that can be done at a rapid rate for a good amount of damage, with Oogie being able to keep his hands closed as a solid if you hold A - more relevant with him than most characters since weak attacks won't make him budge and if the enemy tries any funny business Oogie can just clap on them. This is also helped by the fact that Oogie can walk backwards and forward while holding his hands together this way like an eager child, but aside from pathetically walling enemies it doesn't do much else. It's more relevant for when Oogie's a giant since his hands and arms will act as a platform if they're big enough, which he can easily manipulate to force enemies on the defensive when they've been forced into the air by the burning soup contents - here, Oogie's hands will deal a significantly large amount of damage and take up a huge amount of space to the point where you'll be racking lots of damage on foes with high percentages.​


Dash Attack

From his laughably pathetic stride, Oogie bends down a little before suddenly pouncing forward with his ragged mass, dealing slightly more damage than Dedede's Dash Attack along with travelling twice the distance, but with twice the start and ending lag. What makes this otherwise powerful attack more punishable though is the fact that Oogie overexerts himself and ends up forcing a Pokeball-sized ball of bugs to roll out from a small opening in his body behind him with the physics of a rolling barrel and deal 3% with slight upwards knockback before eventually coming to a stop - this'll naturally affect dies you have behind you. This ball of bugs acts like an item due to Oogie totally needing something else other than his dies, which he could choose to roll directly into his Down Special soup hole or any goop soup onstage for ingredients to enlarge it as a deadly surprise for enemies. This comes at the rather hefty cost of some of your bugs however, which can easily be killed by a foe but inevitably cut your weight down to 15/10, takes off 2% of your flinch resistance and cuts your movement speed down to an even more sluggish 3/4s of it's original. You can do this up to 3 times in a row with your original size, but actually having been enlarged rids you of this cost since you'll use the bugs you've gained from your goop, which instead only costs you 0.1X the size you've gained, essentially only 0.5 SBBs of goop which the bugs you used for this move will make - enlargening yourself will revert you to your normal statistics, so there's no need to worry. This move becomes more difficult to use the bigger you are, but at around 1.5 of your original size or so you'll be able to use your large mass to crush enemies, though the ball you make afterwards won't change in size no matter how big you get.​


F-tilt

Oogie suddenly opens his mouth and fires off one of his bugs with the same random properties of Olimar's Pikmin Toss but can be angled. This bug will attempt to pursue the nearest foe and latch onto them (if it didn't initially hit them), dealing 0.1% per second and forcing a 0.1 second delay in the foe's controls whenever they transition into a jump, walk/run/dash or attempt to stand or fall, which essentially delays the foe's ability to attack and even move around in the air until they shake the bugs off like Pikmin. That in itself won't be enough to rid the bugs for good though, as they'll keep pursuing that same foe unless they're actually killed. You can have up to 10 bugs out with this move (one more for each 1.1X larger you are from drinking goop), though they actually come from your main body and make you a bit lighter in the process - 0.1 weight is lost for each bug. In groups, the bugs will be downright deadly for their ability to delay the enemy's controls and make them more likely to fall into your traps when they're trying to jump or move past them, though they're still ridiculously easy to kill to the point where enemies only have to walk over them. Hitting with this move initially is generally your only option to make it work.

You can use this move as a bug to make all other bugs behave aggressively and attempt to pursue foes and swarm on them, you being able to deal quite a lot of damage if the foe is unable to fight back against them, say if they didn't attempt to walk over them or anything. Now foes actually have to walk over the bugs and not leave them alone at all, as they'll likely have blind spots from the lag of their attacks, but will there be enough space on the ground for them to move at all?​


U-tilt

Oogie festively throws his hands up into the air like Ronald McDonald does with his Ran Ran Ru (or Wario's U-tilt), dealing 9% that KOs at 200%, because Oogie totally doesn't have enough ways to knock enemies up into the air - you can keep spamming this move over and over from a single use instead of succumbing to the rough end lag early, which also helps that objects touching the upper-half of Oogie on either side during the first hit will also be chucked up, so you can obviously use this to spring both your die into the air rather than just throw one at a time. Due to how spammable it is, you could easily juggle enemies above a giant Oogie up to the top of the screen to their deaths if they were indeed stupid enough to be there, or simply take advantage of Oogie's initially large mass to use this as an anti-air against enemies who try to jump over your traps, such as your Down Special hole.​


D-tilt

Oogie bends to slam the ground with both hands, dealing 4% with slight knockback that only KOs at 315% upon contact with his arms but 9% to anyone underneath his main body with spiking knockback that knocks enemies upwards on the ground and KOs at 130%. The attack also causes a slight shockwave around Oogie that trips anyone right next to him when he slams the ground, and subsequently yet randomly changes the results of any die near him - other attacks that induce stationary shockwaves along the ground will also produce the same effect on die, not just this attack, and will also cause Oogie's soup contents to hop off the ground momentarily at the same time. This attack has a horrible amount of end lag to it as Oogie sluggishly bends back up and thus is very easily punishable, but the attack itself starts up almost instantly, which is excellent for it's die-manipulation that usually rigs the result for a higher number in Oogie's case - activate one of your laid traps and punish any enemy who'd try and take advantage of your end lag.

When you've become giant, you'll naturally cover more space with your main body, though it'll become horribly inconvenient to try and rig your dies. You can also use this move when you've been reduced to the state of a bug, which'll cause any other bugs you have around to move to your stray dies and attempt to turn them over in order to rig the result for you - if you have any dormant traps around the stage to use against enemies while you prepare for your revival you can make yourself out to be more of a threat as a bug than your foe initially thought.​


Smashes

All of Oogie's Smashes are trap-producing moves which he can charge for as long as he likes. A closed mechanical hole will appear in front of Oogie upon use of an U-Smash or D-Smash, the likes of which you can direct the control stick to move around at Ganon's dashing speed to choose where they appear much like with his Down Special.​


F-Smash

An elaborate box of sorts appears in front of Oogie in the background, a SBB tall and wide, which quickly opens up and reveals a human-sized toy soldier that slides onto the attacking plane within a 1.2 seconds interval before pointing it's gun at the nearest enemy and shooting them for a non-flinching 5% before going back into the background. The toy solider will not attempt to fire again afterwards until they're triggered by the die result, which must be done via you getting a lower score than used to initially trigger them then getting high with another roll. Using this move again or holding the charge for more than 0.5 seconds will have another box appear next to the one that first appeared, and if there's not enough space on the stage to fit any more the next box will appear on top of a previous one like a tower. Given the nature of the toy solider's attacks you may not see it fit to matter where they're positioned, but the toy soldiers themselves do in fact act as solids for the brief moment they're out, which can serve to hinder foes but also block off your goop soup. Toy Soldiers will not come out of their boxes if the space they'd occupy is being occupied by another obstacle or character, say if you're giant, but to compensate for this the toy solider will instead come out once that obstacle has been removed, and will fire multiple times if you managed to trigger them multiple times via die rolls while their area was being blocked. Toy soldiers can also be stopped if a foe attacks them before they open fire, as otherwise they'll serve as dangerous damage-racking tools, especially against shields and aerial foes ready for another round against the soupy good and Oogie's other tricks.

You can have as many boxed toy soldiers out as you like providing you have no more than 12 total traps onstage, in which case the firstly made box lying dormant will be replaced.​


U-Smash

Oogie causes a rather jagged-looking black fence to rise from the ground, as tall as 0.5-1.5 SBBs depending on charge which acts as a wall, but a unique one that extremely small characters, objects and goop can move through due to it's physical structure - you're able to move through it while in bug form. The fence cannot be destroyed, though one should take care when trying to jump over it, for it's tips are capable of poking enemies upwards for 2% that KOs at 140% but otherwise characters shouldn't have too much trouble jumping over it given how low it is. Oogie does need to be careful around his own fences however, as their sharp hitboxes will instantly pierce and tear him open, causing his limp body to hang from the top of the fence spikes if all the bugs have been spilled - this is your only way of actually tearing your own body however and quickly if you're giant, though there's little reason for you to want to do so aside from the fact that your hanging body won't be knocked away until it's hit by an attack that'd actually cause it to fly off the screen instantly, which is quite difficult. Luckily for you however, your fences will never surface if Oogie would be in their path as to not accidentally skewer their master.

The fence's tips are also capable of skewering enemies at the area they pop out of, dealing 8-24% depending on how tall they are and keeping the enemy impaled until they DI all the way to the top and take the knockback, they having Super Amour from all other attacks aside from those that cause upwards knockback until they do that. This'll happen more often than you think since the fences will naturally withdraw and spring back up with your die results, and if a character would fall through a fence while having Super Amour (or using a teleporting move) they'll end up being skewered all the same.

You can have as many of these fences out as you like providing you have no more than 12 total traps onstage, in which case the firstly made fence lying dormant will be replaced, just like with the F-Smash. Also, if you re-use this attack when making a Oogie will be able to make another right away, so feel free make all the fences you like in one sitting.​


D-Smash

This time Oogie takes a refined version of his stylish casino roulette board peeps have to run on, slapping himself in the middle of it by default. The roulette is composed of a middle area that's a SBB wide, along with a "circle" that's a SBB thick in which two portions of it end up making contact with the attacking plane, these parts even functioning as drop-through platforms if there really isn't enough space. Once made, the roulette will begin spinning clockwise from where Oogie is facing, rotating at speeds in which causes the individual parts of the board to enter and exit the attacking plane on each side at a rate of every 2-0.1 seconds depending on charge.

Anything that stands on the spinning roulette will be dragged into the background for said amount of time before being brought back into the attacking plane, and during that time the character will find themselves "stuck" to the board in that they cannot jump, their attacks will have no effect on anything happening outside and they will not be able to move off the roulette until they return to the attacking plane- if a character would end up taking knockback due to certain circumstances while in the background this way, they'll remain in a "frozen" state before being launched once they return to the attacking plane - giant characters are not affected by the roulette however. The roulette also acts as a fairly good defense for Oogie since characters who'd try and rush at him will find themselves stalled for a moment and forced to move towards him from the opposite direction once they return, which Oogie could perhaps try and punish. A roulette will also affect traps and what have you, even being able to bring F-Smash toy soldier boxes into the attacking plane if the two overlap each other, and also being able to have U-Smash fences move about from the different planes if you need them off your back for some reason. Projectiles and goop of the sorts that'd move along the ground and end up travelling on a roulette will end up frozen if they'd touch the edge of it until they come back to the attacking plane - your Dash Attack bug ball and Down Special can be affected by this, allowing you to manipulate them in cunning ways.

You can only have one roulette board out at a time due to Oogie swinging that way and will create another if you attempt to re-use this move. Unlike your other traps however, you can in fact "upgrade" this move by using it again while in the middle of the roulette. Doing this will cause the ground in which the spinning roulette itself is occupying to lower to half a Kirby to 1.5 Ganondorfs height based on charge, which in itself actually counts as a trap - in other words, this one aspect of the roulette board could potentially be shut down by a die toss, or even be activated as to keep foes off-guard. And since you're making a hole in the stage and thus imposing on it, you'll be treated to a special use of your Down Special soup goop in that you'll be able to fill the ground with it to the point where you'll have a stationary pool that won't be going anywhere unless foes change the outcome of your die. The pool is still capable of overflowing this way however, and if the upgraded function of this move is shut down the soup contents will end up gushing out across the stage.​


Aerials


N-air

Oogie lies forward in the air before suddenly bulging his stomach downwards as a damaging hitbox that deals 11% with upwards knockback that KOs at 170% - during this time Oogie gets 12% flinch resistance to any attack that'd hit him in the stomach, and he'll bounce off any surfaces he hits as if he had used both his jumps at the cost of actually using them all up if he had any left to use. Yes, the attack hits below you, but that's quite useful for hurling your soup-sailing die into the air if you want to change their results, and acts as yet another anti-air sort of move like with the U-tilt. It also protects Oogie from his own soup at the same time with his flinch resistance, but he'll still take damage from it so don't think going after your die is always worth it.​


F-air

Oogie point forward, cowardly making a stone wall slightly taller than him and as wide as Ganon pop up from the ground or abyss below him that rises to where he used this move whilst dealing 10% that KOs at 160% to anyone hit by the wall's impact before it suddenly goes back into the ground. While it's out the wall does in fact act as a wall that briefly impedes the advance of your goop, simply damaging any enemy who touches the end which is moving at the time. The only real downside is that the move is quite slow despite the wall moving through the stage and at Sonic's dashing speed and also counts as a trap that Oogie can upgrade with another use of this move to make knives swirl around the direction of the wall that Oogie was facing when he used the move, which deal hits of 2% and flinching knockback that keeps enemies a slight distance away from your wall while it's out. You can't use this move at all if you can't make any more traps, but if your die suddenly go out on you when you have a wall out it'll end up going into the background and returning when you get your high number. Overall, a good move, but one that somewhat needs careful using.​


B-air

Oogie looks behind him, this time using his cunning to make a pendulum swing towards the screen and chop through anyone directly behind him for a surprisingly fatal 27% that KOs at 75% as your strongest move by far. The move has the same shortcoming as the F-air due to taking a while to execute however, but unlike said move you can in fact have as many of these axes out at once providing you don't go past your limit or attempt to make any more than 12. These axes will in fact be triggered if you attempt to lay them past your trap limit, and unlike all your other traps if one's been activated it will not stop until it's made a full-swing, it being a one-use weapon. Also useful is that axes will not activate if they'd end up hitting Oogie, which means they're safe to have out even when you're giant. Axes may seem like the best thing in the world since you could potentially have 12 swinging out at the same time, you need not only to consider your other traps but also the fact that they're very easy to avoid, and that they can be used against you in certain situations.​


U-air

Oogie points upwards to make a hook come down from the top of the screen, which he holds onto with one hand until you press A or Z - said hook slightly swings into the background while falling so it won't hit enemies on the way. While he's holding onto the hook, Oogie can make it go up and down at Ganon's walking speed or use his body mass to swing back and forth with a use of the control stick in that direction, dealing as much as 3-15% that KOs at 170% - releasing yourself from the hook this time has Oogie fly in the direction of his apex for a bit of distance, an instant transition into his aerial game. Oogie can use his Smashes to create traps on the ground beneath him while he's hanging from his hook, however, and can also use his F-air and B-air. Also, even if you're giant Oogie can call forth a hook to barely hang onto as defense against his own soup contents, but he won't be able to swing around...that'd be a bit unfair.

Oogie can stay attached to a hook for a surprisingly long 15 seconds before it snaps or simply goes back up when he releases himself, but it does in fact count as a trap, albeit a different one you can't set beforehand and thus is situational. Because of this, enemies are able to get to your die and attempt to change it's results to wreck your recovery, all the easier if you have a higher result and other traps on the stage, but if you've got the die stuck in soup contents it'll be nigh impossible for enemies to do this unless they can somehow knock it upwards without directly touching the soup, such as with a specialized D-air. Once you summon the hook for the first time it'll be numbered in that way for the rest of your stock, so if you summon it before your others but bring it out later on it'll count as your first trap but if you had 9 others onstage it'll count as the 10th and so on - all the more important as to decide when you want to summon it due to the protection and recovery it offers.​


D-air

Oogie faces the screen, concentrating all his mass in one area before plummeting down to earth like a rock whilst dealing actual spiking damage for once for 14% that KOs at 160% offstage - some of the knockback is slightly angled too, meaning enemies will usually be knocked to the ground near Oogie rather than being crushed beneath him. The way in which Oogie briefly structures himself for the attack also has a bit of an effect on the shockwave he creates, which affects 1/4 FD on either side and deals set upwards knockback 1.5 SBBs to not only any foe but also the likes of items which are smash thrown up and even goop which is thrown up before coming back down. Not even traps can resist Oogie's grace, for the likes of walls and such will be pounced into the air, even Oogie's U-Smash fences if he had any onstage. Essentially, your best air-to-ground transition and weapon against anyone who'd try to follow you into the air.​


Grab

Oogie Boogie reaches out with a stubby hand, which is surprisingly strong given he was able to hold a fat man just with that. His grab range is on par with Ganondorf's however - for humanoids or non-fat characters Oogie keeps them wrapped around his arm to his sides, but otherwise he'll juggle them back and forth with his hands, playing around with the lives. Oogie's Pummel lets you move around the stage with your foe without hindrance while you hold Z, though Oogie will be footstooled if his foe is released in the air so cross your soup contents with a hostage at your own risk. Releasing Z lets you hold the foe in place once again for your throws, which is beneficial for positioning via F-throws and B-throws unlike other characters.​


F-throw

Oogie gives his victim a scare of his own with the many snakes that suddenly stretch from his mouth and bite down on them for 8% that KOs at around 225%. Those snakes were poisonous too, and induce the somewhat tacky effect of making the victim take 2% every time they try to perform an action or take a quarter of the damage from their own attack for the next 14 seconds in which re-using this throw on them again will reset the timer - how long they perform said action for afterwards is irrelevant. While foes will generally take less damage from using their weaker attacks, these won't quite suffice against Oogie due to his constant flinch resistance compared to if they tried to use a more powerful attack to hurt themselves even more. It also helps that the foe is usually encouraged or downright forced to dash and jump on many occasions because of your traps and released bugs. That said, the poison from this throw is somewhat good as a counter if you don't kill the enemy with it, which is usually easier said than done when you can use your Pummel beforehand to position the enemy closer to the blast zone.​


B-throw

Oogie holds his foe behind him like some kind of involuntary dance partner before forcefully slapping them across the side of their body, making them comically spin away at Ike's dashing speed for 1.5 seconds before they lose all momentum and enter prone. In this state foes bounce off walls and are a damaging hitbox that deals 3% with slight upwards knockback, so not even Oogie would dare to re-grab them. Foes will automatically stop moving at ledges, but while they're being spun around they have slight control over whether they want to slow down or speed up by respectively holding the control stick away or towards the direction they're moving, but this control weakens with their damage percentage. Perhaps even more deadly is that while this throw deals no damage, foes will continue to spin around even when they take outside damage, suffering 1.2X damage and vertical knockback, with 1.35X more knockback in the horizontal direction they were moving and less in the opposite direction. Worse off, even with all knockback they're suffering foes will still be footstooled after the 1.5 seconds are up from their spinning, so with enough damage on them you could make them suffer a gimp or even have them dunked into the soup's contents twice in a row. Aside from trap-positioning and some stalling, this throw is also useful for manipulating your die results and thus your traps by having the foe's involuntary hitbox knock the die into the air - you may want to shut off your traps temporarily this way, and from there rely on simple luck as to what happens next.​


U-throw

Being the cheater he is, Oogie Boogie tosses his enemy up into the air a small distance before tossing at them...another dice! Overall the victim takes 10% with upwards knockback that KOs at 190%, but more importantly the newly created die will hit the floor in front of Oogie and yield a number that'll most likely earn you some extra traps if you had a bad number beforehand. The die only lasts for 5 seconds however before suddenly exploding and dealing 12% that KOs at 150% unless Oogie or his henchmen were holding it (in which case it'll simply vanish), so don't think you'll have the time to exploit your third die and get more traps in the house...it is actually possible to attempt this, but if you somehow did manage to get more than 12 traps out this way those extra ones will remain dormant until you somehow manage to pull this move off again and get a very high number. Making some F-Smash toy soldiers to take advantage of the foe's disposition for another time would be a good idea if you decided not to follow up with an attack or sorts. Another thing about these "artificial" dies is that they will not float on goop, but can at least be used as ingredients for your soupy goop.​


D-throw

Oogie decides to get despicable, more so than beforehand, and actually force his foe to the floor headfirst as if trying to drown them in a pool. The move's execution deals a token 3% as the victim has their head slammed into the ground while their body strangely acts as a solid of sorts via Oogie's forcefulness, all until the victim can escape from the grab. Said solidness is made quite useful against goop however, as the victim will be kept in place to take 5% per second from Oogie's soup or his soup contents at all, but more so to make the soup travel away from Oogie and keep him from harm due to his victim blocking it off from him - you'll obviously make quite a lot of soup this way which you can use to drown out the other parts of the stage, and once the foe escapes from being exposed to it they'll be damaged by the actual soup itself. If there are other types of goop, you may be able to use this throw to expose your victim to this like the madman you are.​


[FONT="#28c217"]Playstyle[/FONT]

Like a good bunch of his Disney Villain cohorts, Oogie is given a lot of props and traps to play around with to compensate for his lack of cool magic abilities. Oogie likes to go a step further than those other characters however in that, instead of simply littering the stage with traps, actually throw in a little thrill in their activation, messing with his foe in rather horrifying ways fitting for a boogie man who likes to put his victim's lives on the line.

The first thing Oogie will want to do is prioritize his usage of traps, as the one you plant first will almost always be able to come into play. Ignore the die result (unless it's a pair of 1s in which you can use your D-tilt to change it) and decide upon your traps: The Down Special soup and U-Smash gates distance your foe a little and generally force them to jump in order to reach you, giving you much-needed time to set-up your other traps since you'll have a lot to play around with. U-air is safety first, while the F-air and B-air moves are offensive along with the F-Smash for damage-racking, but those are generally good for later on.

Yes, Oogie is a sack-o-traps and cheating, but he ain't completely reliant on them with that surprisingly powerful body of his. Foes will be hard-pressed to pressure him with weak attacks let alone push him back a decent ways, which makes him surprisingly threatening up close when he can easily manipulate you or his trap results with his throws, and has some surprisingly strong standard attacks...we're talking about the guy who's able to lift big fat Santa with a single stubby hand! To re-iterate on his damage resistance, trying to attack Oogie is somewhat similar to attacking a metal character in that he'll shrug off the fast, weak attacks thrown against him, and that only a good Smash or so will knock him away. But while Oogie has mass in the spades, he lacks a tight body and as such with his damage up a little he can be knocked away and his body torn...and all of a sudden, Oogie isn't all that great at surviving when all it takes is a foot to crush the fragmented life out of him.

This is where the player really needs to implement a sense of strategy to keep Oogie alive. The U-Smash suddenly becomes all the more useful when you have a wall only you can pass through as a bug, and you can't just use your henchmen only for grabbing your die and Dash Attack bug balls - keeping them around to fix your body will ensure your survival.

One part I haven't elaborated on yet that was otherwise done so quite a lot in the set is the lava-like soup that pours from the Down Special. You're really playing with fire when you have a trap that does you much more harm compared to your foe when you're a sack of bugs, but used correctly and it can turn the stage into a nightmare for foes. At first it's a generic trap of sorts that's basically a portable Brinstar, but put a foe, their items or your Dash Attack bug balls in their and you'll be making some steaming hot stew. F-tilt helps make the foe's controls less responsive so they're more likely to fall directly into the soup (and the U-Smash gates), but actually grabbing the foe, moving them where you want with the Pummel and exposing their poor little head directly into the soup and using it to block it off your direction is not only an effective way to very quickly spread it around the place but also keep it away from your direction.

Once you actually have some soup flowing it'll no longer be affected by your die result, and actually becomes an ever-lasting hazard your foe must constantly be wary of lest they want to go flying. While the soup is more dangerous to you than it is to the foe, it's also more beneficial to you as you're able to use your beloved Side Special to actually push it around, preferably into your own mouth where it'll make you into a giant. Oogie loves the feel of towering over his enemies, and while it may not seem all that good when you have your soup contents and lingering gates that can damage and potentially backfire on you if they're out, Oogie can eventually get to the point where, with enough of his own soup, he can become so insanely large that he'll hardly need to worry about taking damage for a while, though he'll still be vulnerable and his damage WILL skyrocket...then again this is kind of why you have your U-air, and why it's actually important in the first place. Oogie is slow as a giant, but his attacks become immensely powerful, like that of a boss character's. He already has quite a bit of power to his attacks, but just being able to knock enemies away with but a single blow is truly frightening, especially when they already have to deal with the onslaught of your other carefully-positioned traps on the stage like your U-Smash gates and damage-racking F-Smash toy soldiers.

The die is actually a bit of an afterthought with all things considered. While you do need it to actually make all those wonderful traps of yours activate, the fact that it relies on sheer luck makes things quite chaotic, and really foes themselves will have to take a gamble and toss the die into the air themselves - this disables Oogie's traps for a moment for some fresh air, but there's no telling whether the result yielded will be higher or lower than that of the original result. In short, foes might end up hurting themselves with a toss. Oogie doesn't need to rely on this silly tactic to change his results however; he barely has to worry about his die results since he can use moves like his Side Special, Up Special but mostly D-tilt to change them on demand - his foes can do the same too, but only if they have a trip-inducing shockwave move. Speaking of logistical consistencies, Oogie happens to be very, very happy when it comes to fighting enemies who rely on goop. He can suck it in for himself to become giant, transforming into a monster with their help. This varies from match-up to match-up, especially when Oogie can spit the victim's own goop in their face and potentially damage them. Hope you're not fighting an enemy who automatically makes goop...

Basically, like a lot of his Disney cohorts, Oogie Boogie does require a bit of careful planning to his schemes, but with a bit of thrill to it. And a fairly large and fat body. There's quite a lot about Oogie that's unique in terms of physique, but really he's just the same fellow doing things a little differently. Only magic-users can be unique, unfortunately. Maybe.​


[FONT="#28c217"]Final Smash[/FONT]

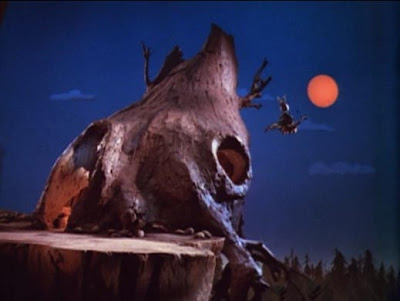
Oogie lets out a skyward scream of anger as many bugs come crawling from different parts of the stage with bits and pieces of scrap metal, ready to make their master into the next Uber Jason...no seriously. The screen then fades into black for a moment, only for a colossal steel terror to suddenly come down on the stage and completely destroy it! This doesn't damage foes, but rather leaves them unconscious in their downed states before suddenly waking up, only to find themselves in a desolate scrapyard that's frighteningly similar to a walk-off boss arena, like Rayquaza's for example. Only twice as wide to compensate for FFA and the big peeps.

Everything seems quiet for a moment, but that's proven wrong as a gigantic Oogie Boogie suddenly tears through walls of scrap metal that hide the hellish fields of the background, a monstrosity made of many bits and pieces of metal that easily keeps at the size of Kraid from SSBM's Brinstar Depths stage. I'd show you what this Final Boss from Oogie's Revenge game looks like, but I don't quite have enough character love for a Disney Character and also I don't want to have "Oogie Boogie" showing up on my Google search everytime, along with having to delete video searches on Youtube.

Oogie peers through from the background, about half his body present, and you get to control his moves for a wee while and kill your enemies. He has some fairly generic giant attacks which aren't really worth mentioning since you can imagine them, but they're really slow but deal obscenely high amounts of damage. Oogie gets this form for 35 seconds or unless you can take down his 500HP by hitting him, which will make him fall to nothingness and be reduced to a bug once he returns onstage. Beware of his arm slaps, boulder-spewing and moves where he makes metal poles rise from the ground which you have to break or he'll do it for you.​
[/FONT]


Edits:
Added Playstyle section
Made the U-Smash gates unable to pop up via die result if Oogie is standing on top of the area so he's not as vulnerable to them, especially when he's giant.
Made U-air be counted as the #th trap depending on when you initially summoned it.
Replaced Neutral Special with Warlord's move.
 

FrozenRoy

Smash Lord
Joined
Apr 26, 2007
Messages
1,261
Location
Las Vegas, Nevada
Switch FC
SW-1325-2408-7513
Extras, Extras, Read All About 'Em!

Night's End Sorcerer - Trophy

A scythe wielding spell knight, Night's End Sorcerer is a card from the famous card game Yu-Gi-Oh!, his removal of spirits and summoning of them is an abstract representation of his effect. Although not the most used card, Night's End Sorcerer is well known for it's combo with Magical Exemplar and it's excellent anti-metagame ability that also lets it be used to summon the excellent finisher, "Tempest Magician".

Night's End - Trophy AKA All-Star Night's End Sorcerer Trophy.

A homage to the card's art, Night's End Sorcerer gathers energy as his batty friends gather around to cover him, an impressive display of teamwork. Infused with lunar power, a vicious slash follows, cleaving through the stage as solid stone. It is a bit deriviative, but the result is majestic, wouldn't you say?

...I wanted to write more, but I could not get it done during the week and, quite frankly, I need to get SOME sleep as I most likely have places to go today. Hope two trophies is enough to qualify an entrance. Maybe I'll edit more in later...
 

Junahu

Smash Ace
Joined
Nov 15, 2005
Messages
899
Location
Shropshire Slasher
new MYmini

MYmini Week #12
Living vicariously through match-ups


[29th Apr-5th May]
A fairly easy task this week; choose (at least) 3 movesets from MYM12, and then write about how they would fare against one another in a fight. I.E. write three matchups.
 

ForwardArrow

Smash Ace
Joined
Aug 17, 2011
Messages
502
A little late (wary)


Homura Extras

Entrance Animation


Homura performs a similar entrance to what you see in the above picture, though admittedly, it doesn't take nearly as long. She also throws out a monotone "That won't be necessary" on entry.

...and yes, I am kind of hitting myself for not mentioning this in the original set.


Taunts
Up Taunt merely has Homura do a standard hair flip, similar to the one in her entrance animation. Unlike the entrance animation, she's entirely silent going about this, and it's actually a bit quicker than your standard taunt.

Side Taunt has Homura take out her Soul Gem briefly to check it's current state. Usually, the soul gem will just be it's normal purple hue. If you're playing a 20 stock match or your Necromancer playing opponent is a jerk and you've been fighting for 30 minutes, Homura's soul gem will have some black cloudiness in it, which she winces slightly at before putting the soul gem away again.

The Down Taunt has Homura turn around, and briefly stares at whoever is behind her. You'll just end up looking kind of silly if nobody is standing behind you, this is probably best used if the opponent just went flying over your shoulder. Show them how little you care.


Event Match
Stocks: 1
Play As: Homura
Play Against: Kyubey, Elsa Maria

This particular mission has you play on New Pork City, though the Chimera will not spawn, instead having the entrance to Elsa's barrier spawn in it's place. In the mean time, Kyubey romps around the map, being completely harmless to you in that he won't attack you... but there is a need to kill him. Why? Because in about a minute, the event match will have Madoka showing up on stage, and if Kyubey happens to be alive, he'll bolt for her. And if he reaches her, it is in fact Game Over, because at that point there's no explaining yourself for trying to kill the stupid cat thing. He also does have a movement speed buff and infinite stocks, though every time you take a stock away from him it takes an additional 3 seconds for him to respawn. Probably best to just murder him as many times over as you can. Anyway, if Madoka shows up you can convince her to leave by walking up to her and grabbing to talk for 2 and a half seconds, after which she'll disappear from the stage.

This would all be absurdly easy if it weren't for Elsa throwing a wrench into your plans. As I said, her barrier will spawn randomly in the same manner as the Ultimate Chimera, but once it does it's around to stay. It will spawn minions once every 5 seconds at first, but the longer the match goes on it will spawn them faster and faster, and the entrance to Elsa's barrier will increase in size, starting at Bowser's but reaching nearly the size of Giga Bowser by the time Madoka shows up. The minions will in fact attack her as well, and she only has 30% stamina, and if she does walk up to the barrier that may as well be game over for reasons I'm about to go into. To win the match, in addition to getting Madoka to leave, you have to go kill Elsa Maria. You enter the barrier yourself by walking up to it, and you can in fact knock Kyubey in there, which is an immediate life loss for him from which he doesn't get a corpse.

Elsa's stage inside the barrier is actually pretty difficult, because Elsa has her tentacle count booster to 16, as well as the entire 8 battlefield platform wide black stage being covered in barrier. She also has a statue in the back of the stage, which upon contact with the top of it deals 20% and knockback that KOs at 90%, and Elsa has no qualms about smashing you into it. And you know, if Madoka shows up and Kyubey is alive while you're fighting this thing, it's game over. If she enters the barrier, Elsa will probably just kill her in like half a second, what with her low stamina and such.

Anyway, the choice here is whether you go after Kyubey or Elsa first. While Kyubey is a more direct threat to you losing the match when Madoka shows up, Elsa's presence is pretty terrifying if she lasts up until the point Madoka arrives, with a constant stream of minions and the ever present possibility she'll end up in the barrier and probably die. If you can't eliminate Elsa quickly, it may be best to go after Kyubey first and get Madoka to leave, and considering Elsa's buffs in the match you're not going to have the easiest time eliminating her. That said, having a large stream of minions as a threat to Madoka isn't much better than Kyubey, really. Once Elsa is dead and Madoka has left, you win the event match.
 

Smady

Smash Master
Joined
Apr 29, 2007
Messages
3,307
Location
K Rool Avenue
MYmini Week #11: Rool’s worst nightmare


Rainbow the Clown

Rainbow the Clown is an alternate costume of Mr. Mime, but necessitates some changes to his moveset. Foremost are some purely aesthetic ones - Rainbow the Clown's animations are all the same as Mr. Mime's, whilst also being markedly different. He still moves like Game & Watch, but without the frame-by-frame animation. Another significant change is shield, which is now rainbow-coloured as opposed to monochrome. There are some other minor changes to his moveset, too, due to it being irreconcilable at times with Rainbow's all-together different persona:

  • All of your props are visible now.
  • Your desaturation now turns into oversaturation. This means everything becomes an irritating, blindingly vibrant rainbow colour instead of black-and-white.
  • The black bars in the up special are, predictably, coloured now. Rainbow no longer magically creates them, but pulls out a brush to comically paint them on himself.
  • Curtains in the down special are now a generic magic trick box - it's a disappearing act!
  • You no longer have any convoluted interaction with puncturing enemy shields and absorbing them - the pin now simply pops them, for a colourful explosion that acts as a good KO move.
  • The same as the above goes for your mime box, which allows for some mindgames when you can also trap the opponent inside of one.
  • You can go invisible still in the same way as with the curtains, but any move brings you out of it with Rainbow the Clown saying "suprise!" or an alteration of it.
  • Down throw becomes an entirely different move that allows Rainbow the Clown to teleport between boxes at will if there are multiple ones. If there aren't it functions as normal.
  • The down tilt becomes a move where you use a popper, that has flinching knockback and multiple hits at its end.
  • Leaf blower is now a move where Rainbow quickly creates a balloon animal, pushing it forward for 1% damage and very generic spacing as it constitutes its own space. This can be burst to create an explosion exactly the same as an enemy shield. Can be spammed.
  • Down smash is now a water balloon. The water causes your paint from the new up special to spill, with a goop effect akin to Bowser Jr.'s that causes foes to tread the paint around, essentially letting you teleport anywhere that they go.
  • Up air is now a comical flip in mid-air as Rainbow the Clown chortles, homing on closeby opponents and causing mild damage and knockback. If performed while invisible or inside of a box, he will explode out of it in a burst of colour, another good KO move.


EVENT MATCH

Event: Turf War
Player: Mr. Mime / Rainbow the clown (1 stock)
Opponent(s): Mr. Mime / Rainbow the clown (1 stock)
Stage: The City of Townsville
Timed?: No
Description: "The City of Townsville is under attack! Who will prevail, clown, or mime?"

The goal here is, predictably, to paint more of the generic Townsville stage oversaturated, or desaturated as possible, with your side and neutral special. Whoever paints over 50% of it first wins. The stage itself is comprised of multiple large buildings and other obstructions that move around like cars and the people of Townsville too. Your neutral special will not have an effect on the latter, meaning you have to use your side special, although this is privy to the regular rules - if objects are linked up, then they are contaminated in the same stroke. This event match is complicated by the people and cars - they freeze in place under Mime's control, but will be sent into a frenzy under Rainbow's. You can indeed override the other player's paint job if you use your saturation move in their area, but this match also has actual blastzones and both players have a percentage. The stage obviously has a big ceiling, but also blastzones on either side of the city, as well as some areas that are similar to the water pits on Delfino Plaza. It's a complex stage, and this event match may go on for a while longer than you'd think it would.
 

TWILTHERO

Smash Lord
Joined
Aug 19, 2007
Messages
1,880
Location
Canada
Week 10: I’m so Jet-lagged I’m using Kholdstare’s suggestion:
1) Planetoids by Kholdstare (6 votes)
2) Stairs by SmashDaddy (3 votes)
2) Slope Physics by MasterWarlord (3 votes)
3) Retruax Physics by Junahu (2 votes)
3) Outer Wall Stage by SirKibble (2 votes)
Ghost Physics by Katapultar (1 vote)

Congrats as always! Will have week 11 poll up soon!
 

Katapultar

Smash Lord
Joined
Nov 24, 2008
Messages
1,257
Location
Australia


Agiri Goshiki VS Doc Scratch


The ultimate showdown between two people who really like to mess with other people's heads - they even both have their Standards as their N-airs! These two have a whole lot they can do to influence a match, but when it comes right down to it Doc Scratch really isn't at all fazed by Agiri's ninjutsu. Why, you ask?

Agiri is able to stay out of a match for 5 seconds to set-up or power up her bomb, her main kill move, sure. She can even send out a clone in her place to attack Scratch, and pull off a whole lot of tricks like the D-Smash or fly into the sky with the Up Special...except Doc Scratch's mindgames affect time and space itself, and he has many ways to counter Agiri's moves. For example, he could easily use his Down Special to completely remove the hole Agiri was hiding in if she was doing so with her stealth at the start of the match, or just as easily remove a D-Smash hole from the stage instead of needlessly walking into her trap. Not to mention that if Scratch does try to approach Agiri at all to warp an area around her he can just use his Up Special to teleport back to the end of the stage and camp.

Perhaps the worst part for Agiri is that Scratch really has no fear of her bombs whatsoever. He can use his Side Special while she's camping away at the start of the match powering up her main kill weapon, easily able to warp space as to wreck the trajectory of the bomb to have it miss Scratch entirely. And while Agiri won't necessarily ever be starved for bombs given the tricks she can use to replicate one, Scratch also has his dreaded U-tilt to make them completely miss him, and he hardly needs to attack the ninja himself when he can just sit there and camp with his Neutral Special.

Most of this would assume that the Agiri player is trying to stall and make a powerful bomb, though it's entirely possible to have her go out and attack Scratch directly and use her second most powerful attack the D-air to approach from the air with the Up Special, even go as far as to use clones to do this while the real Agiri camps. Arming yourself with bombs during this time most certainly isn't a bad idea too. The only downside to this however is that the D-air itself does require Doc Scratch to be at a relatively high percentage to work, and he does have an infinite recovery - Agiri needs to have damaged him with her other moves in the first place, to which the same clone trick with the Standards or even grab game should do some wonders. If you can pull it off.

Overall however, Doc Scratch simply beats out Agiri's setting up and her projectiles and traps, all while starving her for a decent KO move let alone decent way to damage him given how many of the ninja girl's moves are dedicated to fancy tricks instead of straightforward moves, especially in the air. Agiri is more suited as a bit of an anti-item character with what she can do, but Doc Scratch can just ignore all that since he has no need for such things - her only saving grace is perhaps that she has an actual close-ranged game she can use against Doc Scratch and doesn't need to worry about being grabbed out of the blue due to the nature of his grab game, so shielding is quite safe against him more so than most characters. In the end however, it's quite obvious here who's the real mastermind.


Kirika Ueno VS Poison Ivy


There's something frighteningly similar between these two. It's probably because they both wield tether-based moves that are capable of wrapping themselves around the other - THIS, I should elaborate on before we dig deeper, since both follow a different set of rules. Ivy's is somewhat more under-elaborated and generally more inferior to Kirika's to some degree; given the 3 DKs would most likely be less than 3 SBBs and 1/2 of Final Destination is equal to 4 SBBs, Kirika's Side Special is the one with superior range - she can also angle it while Ivy cannot. Ivy's tether is governed by a character's weight and ground speed in which gives her a total of 10, and while I never put Kirika's statistics into numbers her dashing speed would be about 8.5 and her weight a 1, so Ivy will barely be able to move her about...on the other hand, Kirika's tether is governed by the law in which the fastest moving character will move the other around, so in that case it should be Kirika moving Ivy about. To make things simple however, the first tether to hit the other character will have it's laws take place, so if Ivy hits Kirika with her tether first she'll be able to drag her around, but if Kirika hits first she'll be able to drag Ivy around a little better than she'd be able to do to her.

If one character has their tether on another character however, that other character can instantly throw theirs onto the other just by using their Side Special, so once one of the females has their tether on the other they won't be able to avoid what's coming to them. If both characters happen to have their tethers on each other at the same time, they'll end up wrapping themselves around each other, combining their HP. Ivy's has superior HP to Kirika's at the start, but the latter is able to keep powering her own tether, with the whole thing starting off at 40HP in which both characters are able to break with their moves. When the two have their tethers together, Ivy has the benefit of being able to drag Kirika towards her instantly with another use of her Side Special instead of obliging to the equally sadistic rules of Kirika's tether which would give her the option of being able to drag the girl towards her, but Kirika is able to reel herself towards Ivy with her Up Special and move across the stage instantaneously at the same time, using her as a recovery. Ivy does have quite a lot of ways she can manipulate Kirika when she's tethered with her, however, but some of these moves don't really do anything to break the tether.

It was never really elaborated on in Ivy's set, but tethering moves will make the character who knocked the other character be sent flying with them - Kirika has the advantage here due to her revival mechanic if she's at 0%, and she can very easily drag Poison Ivy off the screen with her if the plant woman tries to KO her without bothering about her tether. In this case the high HP of Ivy's tether sort of works against her. Kirika can also knock Ivy away with her moves at the same time, but to be fair she'll be dragged with Ivy for a KO as well if Ivy had her tether on Kirika, which she'll only be able to survive with her mechanic. That means she kinda has to be at 0%, which isn't impossible compared to other sets.

There's obviously a lot more to these two than their tethers, though. Ivy has a very simplistic close-combat game at her disposal along with a plant turret she can summon to pressure Kirika, who unfortunately for her doesn't have too much trouble destroying it given how fast she is and how she has some decent ranged options with her straps. Poison damage doesn't really do all that much to Kirika given she can just regenerate it within 10 seconds of taking it, so really Ivy should consider whether she wants to plant some turrets around the stage to pressure Kirika when time comes to exploit her curse or use her Up Special to restrict her in place to give her more control over the game, though Kirika likely won't be in place for as long as others due to the fact that her damage percentage will be low most of the time unless she's taken damage from her curse. Even when she's bound by these vines and Ivy's distanced herself away so she's out of the Side Special's range, Kirika can still use her F-Smash to hit from afar in order to either KO her from there or simply tether at her, so Ivy isn't safe, even when she can use her body to damage Kirika. There's also Kirika's U-Smash which she can use from afar to damage Ivy from almost any point of the stage or even have Kirika damage herself, which will in fact release her from the grab instantly and allow herself to set-up.

Effectively speaking, both characters are able to pressure each other to no end, but the pace of the game does lie with Kirika a little in her curse which activates within 30 seconds of the match. Kirika could in fact take advantage of this by going all-out on Ivy to pressure her plant set-up, using her many strap moves to keep some distance between herself and the plant mistress - Ivy will have to be careful of this. Some of this mostly depends on whether Ivy can or would choose to fight back at all however, and whether she can outlast Kirika for 30 seconds before she takes enough damage for Ivy to easily be able to exploit and use to score a KO from close-up.

Overall, both characters have a fair amount of ways to pressure on the other, each specializing in tethers. Kirika does have a slight advantage in this area however, even if her main attacks don't deal all that much knockback compared to Ivy, especially since she's able to regenerate her health and pretty much control the rate of suicide with moves like her D-Smash to protect herself from damage, while Ivy has no such thing in her disposal. It helps that Kirika is able to take advantage of just about all her shortcomings in a match, and there aren't many tether-based characters who'd be able to fight with her equally when she has her immortality.​


Kirika Ueno VS Demyx


Demyx has pretty much been established as one of the most broken movesets of all time given how there's absolutely no way to avoid his KO mechanic if you can't kill all his minions in time (which few would be able to do given that they can attack and he can attack you at the same time) and it can affect every other character in the game to the point where he'd be viable as a 3v1...assuming that you were fighting on Final Destination or Battlefield however, Kirika would have no trouble eradicating all the clones in one sitting with a use of her F-Smash to whip Demyx into shape at the same time - piercing moves, whether they be close or long ranged, are generally a boon for Demyx and unless you have one of those moves in your set don't ever think you'll stand a chance at beating him. Not to mention the fact that for once just sitting there and cowering won't be enough for Demyx, because if Kirika somehow insta-dies from the broken move she'll simply come back providing she was a 0%. This match-up does present a problem for Kirika however in that Demyx's KO mechanic ignores the usual KOing methods of Smash and thus suicide against him is somewhat useless...unless you can make Demyx's water clones useless in the first place with the aforementioned tactic.

This is actually one of the very rare match-ups in which Demyx's opposition has a chance of defeating him, which Kirika could do quite easily if she continues to pressure him. Keeping him in the air with aerial approaches and moves such as the D-air is a good way to keep him off the ground so he can't use his kill move, but when things really get down to business, given how easily you can kill the clones, Demyx will likely have to resort to using his viable melee options. Another thing that also makes him fairly overpowered are his ranged melee attacks like the Smashes which let him rival Kirika to a degree, but they're not THAT good as to allow him much of a chance when Kirika can fire her F-Smash from anywhere on the stage. It does sort of become a bit of a ranged battle from here, but it won't last forever given Kirika's curse that'll damage her within 30 seconds or so. Even more advantageous to Demyx is that his KO moves will kill Kirika far earlier than hers will to him, she effectively being doomed once her curse kicks in. Demyx does have a surprisingly difficult time breaking Kirika straps however given his tilts are ranged moves and his F-Smash and D-Smash deal no damage at all, which massively works against him since if he tries to push Kirika off the stage he'll be dooming himself as well. Actually, even his aerials like F-air and what have you only deal watery pushback, and his grab will only work like it normally does when he's tied to the Side Special so he doesn't have the advantage of being able to pull Kirika towards him.

Kirika really does have quite a few advantages over Demyx compared to other characters, generally shutting down his main game and forcing him to use his Smashes and other basic KO moves to get any results. Kirika only has to be careful of these, but Demyx isn't necessarily the best when it comes to running away or stalling so you should be able to get him in your grip quite easily and finish him.


By the way, as for the forced-characterization rock-off, Kirika will attempt to stick true to her own character and not join in with the rock-off, but she's forced in place due to the awkwardness of the situation while Demyx plays his sitar, all while looking around in an embarrassed manner. This doesn't make any difference to the situation compared to other characters, though.


The Warrior of Many Faces

Smash Apprentice
Joined
Mar 22, 2012
Messages
101
Location
Everywhere and nowhere, as location is meaningless
*SNARKS BEHIND ALT AND STEAM*

Rool will make up something good to talk about in literally any set if he so desires, you should know better than to preview Azula to somebody outside of MYM like him.

As for the rest, blah blah, it’s a Brawl rushdown moveset, though you’d think it’d be more self-aware than it is. It is trying to pass off as more of one than other Brawl characters who happen to be fast – in which case DK (Who is indeed quite fast, just a glass cannon because of his size) is more of a rushdown character than this moveset.

You go on about it not being a camper, but this set is made for Brawl, not MYM Brawl – any character with so much as a single projectile can camp in such a context, much less multiple. If you have projectiles and the enemy doesn’t (Or yours beat those of the enemies, like D3’s dual purpose projectile/walls Waddle Dees), you’ll use them – this dictates a good chunk of the match-ups in Brawl.

So yes, a set for a Brawl character on a character with loads of potential that doesn’t know what it’s doing. Good show.

And this is more of a complaint about your movesets in general than this one specifically, and it’s also the main thing that let me identify you – stop with your bloody return key fetish.

You will use the return key after so much as two sentences only to do so again after two more in an endless cycle.

It makes the moveset both look and feel longer than it is and constantly disrupts reading flow.

How you managed to abuse the return key even in a moveset intentionally underdetailed to hide behind the guise of an alt is beyond me.

No amount of tacked on "XD"s can cover that up.

Well, that and you sharing the incredibly forced opinion that a character who can't jump is definitively terrible, regardless of not cheating out on inputs and being able to get into the air anyway, just because you're trolling and have to generate hate for Smady's set, DM.
Okay, so we have Kat really liking the set, Smash Daddy thinking that it’s solid but could be better, and now you really disliking the set. I officially have a varied readership. Yay! (That wasn’t meant sarcastically, by the way. I like having a varied readership, even if I don’t necessarily agree with all of them.)

Since you’re critiquing my critiques, I’m going to continue the chain and critique your critique of my critiques. Specifically, that “bloody return key fetish” you claim I have.

Point #1: New thought = new paragraph. Nothing weird about that, even if my thoughts happen to switch more frequently than yours.

Point #2: Do you see anyone else complaining about it? I’m pretty sure I’ve reviewed at least one set from every active participant and have received no complaints from anyone other than you. In which case, it doesn’t disrupt reading flow, it disrupts your reading flow, and as the sage Kat has said fairly frequently, you can’t please everyone.

So no, I won’t stop this “bloody return key fetish.” It’s my writing style, I’m not abandoning it just because one person finds it irritating. If two or three did, you might have a case. As is, you're outta luck.

On another note, since you titled the review with something that doesn’t even seem to have a tenuous connection with Azula, it took me a bit to find it. As you noted yourself, not everyone reads every post, and I imagine people will find your reviews a lot more easily if they didn’t have to figure out if “Snarks behind Alt and Steam” refers to Azula. Just a thought.

As for the rest… well, some of it just doesn’t make any sense. What does Rool have to do with anything? Intentionally underdetailed to hide behind an alt… um, could you translate from SSB jargon to English, please, since I have no clue what you mean by an alt? And I assure you that I was not intending to pass this off as another Brawl character; any resemblances to other characters are purely coincidental.

As for what I assume is your response to my response to Rhyperior: I’m entitled to my opinion, and in my opinion, without at least a half-decent jump, a character is severely handicapped. I’m not trying to generate hatred, I’m just giving my opinion in a review.

When it comes to what’s left, well, it comes down to the fact that I like the way Azula works. Considering that I have a couple of people who agree, I’m going to have to say that while your opinion is noted, I’m changing nothing.

Now, on to the reviews:

THE PROSPECTOR

I’ll admit that I just don’t like this character at all; he was an all-around annoying villain. However, while I may not like the character, the set is another story entirely. The Prospector has some really good mechanics here, with the box aiding camping and/or gimping and the Up Special + clinging ability allowing him more mobility when it comes to the stage. Foes will obviously want to get rid of the box to increase their own mobility, but with the various pitfalls and oil geysers, that box will become much more difficult to deal with, especially since Stinky Pete can just get a new one every stock. And that’s not even factoring in the Side Special, which can really throw off any attempts to get rid of that box.

That Up Smash, though, is really rather odd, since it’s a counter. I suppose it works for the set, but it’s still fairly odd to have that particular input be a counter.

Another possibly odd thing is the gold healing Stinky Pete. Even considering the medium we’re working in, it seems a little weird. Still, if gold could heal anyone, it’d be Pete.

Aside from those oddities, though, this is a very well-executed set. You know you’re doing something right when someone who hates the character likes the set.


TEMPURA WIZARD

I… am not quite sure what to think of this guy. Deep-frying… okay, simple enough, if fairly overpowered. It wouldn’t be so bad if he didn’t have the opportunity to deep-fry quite so often or if it didn’t stop people from attacking; practically everything except his standards allow for deep frying. The possibility of OHKOing a deep-fried foe is definitely overpowered.

A somewhat odder thing is that aside from deep-frying, the attacks really don’t have much depth. I could understand that for, say, Jabs and whatnot, but even I put more detail into my specials than this and I’m generally underdetailed in MYM.

Not only that, you make reference to mechanics that were never explained, such as Tempura Armor.

All of this makes me wonder if this is supposed to be a joke set or just made in a couple of hours, but without any indication in the post I can’t be sure.


IRON TAIL

Perhaps he’s not the brightest of villains, but he sure knows how to stall the foe to death. The poison effect, of course, ends up being key, but Iron Tail’s ability to fly away on Montresor while the foes languish on the webs allows for the necessary stalling that makes the poison at all workable.

Even better is the possibility of the fake egg. The foe’s going to be chasing after you one way or the other in order to cure their poison, which isn’t good for a stall character… which is why you send them off chasing a different egg that may or may not be fake. A smart opponent would probably just ignore those, though, and just chase after Iron Tail since the eggs derived from hitting him are never fake.

The Up Smash, I think, needs elaboration; what exactly is so bad about blowing a bubble? I mean, unless it replaces the intended attack.

That Pummel is impressively deadly for a number of characters. People like DK would be just fine, but Marth’d be in trouble. It gives Iron Tail a possibility for KO moves, although this definitely varies. Need a KO? Iron Tail stole Fox’s Blaster! …yeah, thanks a lot, spider.

The Neutral Aerial is fairly handy if anyone’s close enough for it, although I find myself wondering what happens if the foe has an item and Iron Tail doesn’t. Do they switch anyway? Could be handy for stealing a Home-Run Bat or something to help with KOs. Even better if it works with Dragoon pieces… unless you have one yourself, of course.

Overall, there’s only one overarching strategy for Iron Tail, but with so many ways to accomplish that, Iron Tail is anything but predictable. Not my style, but a pretty good set nonetheless.

Also, I liked the extras! :D


YU NARUKAMI

Agh. This is so freaking complicated. I don’t know about anyone else, but the personas would take me so long to master that I wouldn’t bother under normal circumstances. This is like, five different sets in one considering those passive stats and separate smashes for each Persona. It’s simply too complex for my taste.

Still, I appreciate that this is both true to the character and that a lot of work went into it. It’s a versatile character that has an answer for every situation; of course, you still have to figure out what the best answer to any given situation would be. This isn’t a set for those who can’t think on their feet, but those who can will have a pretty deadly character at their disposal. It’s an impressive set overall… but I can’t see myself liking it at all. Probably give me a decent fight, though, which I wouldn’t mind; so long as I’m trying to beat his strategy rather than use it, I’m good.


KERORO PLATOON

You know, I went into this expecting to dislike it, considering how complicated it seemed to be… I’m happy to say that I was very very wrong. This set rocks.

There is so much you can do with these guys. Camp a little? Sure, just make sure Keroro is attacking just often enough to avoid rocket attacks from Giroro. Or, if you’re wanting to be offensive, sic the squad on someone. A mixture? They can do that, too; one possible strategy that stands out is to set Giroro and Tanama to attacking while Keroro builds Gundam models and then hands them over to Kululu to animate.

And that’s just off the top of my head. There are probably at least twenty different viable strategies that take advantage of this unique team dynamic, meaning that there’s absolutely no way to even try to counter most of their strategies. Unlike Yu Narukami, though, these options aren’t especially complicated: the team dynamics are pretty easy to remember and the options all flow from there.

Even so, this remains very well balanced due to being composed of little Pikmin-sized creatures, with their strategies suffering if even one is lost.

In actuality, though, you imply that losing one at a strategic time might be useful… but then you never followed up. I personally have difficulty figuring out how losing one might be useful, considering how well these guys synergize (in spite of all the infighting).

That infighting is something that really makes this set shine. These guys don’t cooperate too well a lot of the time, and yet somehow they manage to pull through anyway and win the day. Both a Crowning Moment of Heartwarming and a testament to how well this set was made. Not everyone can make a set where the members will actually attack teammates and still manage to be effective.

Overall, this is probably your best set yet. Well-characterized, balanced, and just really fun to play. Plus it looks good visually. This set has it all!


PLAYER99

Visually, this is really really good. Very video game-y, which no doubt was what you were aiming for.

The set’s also fairly good: we get one central mechanic, the Download, which everything else revolves around. Not too complicated, but this gives us options depending on how you prefer to play. Whether it’s a need for speed, ways to wall, or an order of offense, Player99 can accommodate you. Plus, even though Player99 seems better at range, he can still accommodate you up close.

The /Sentinel is actually my favorite part of the set. It’s a nice way to spread the damage around without using minions or anything like that.

Love the extras here; the Taunts look like they’d be interesting visually, and the second win animation is pretty darn funny. It’s almost metagaming in a way, but since he’s actually from a world in which video game mechanics apply… yeah, I can’t think of a term for it.

Overall, while it’s not the most enthralling set I’ve ever seen, it’s pretty solid. I might actually play him, given a chance.
 

Davidreamcatcha

Smash Ace
Joined
Feb 9, 2011
Messages
629
"Alt" refers to an alternate account - there is a theory going around in the chatroom that you may be another MYMer who shares many of the same traits with you. The name of the comment refers to something he's been accused of doing.

I may as wll mention that I'm not really a huge fan of the "return key fetish" either - it's really quite annoying.

:phone:
 

darth meanie

Smash Journeyman
Joined
Jun 6, 2008
Messages
452
Theory is an awfully strong word for what it is. I'd say unfounded accusation would be more accurate.


Azula's line spacing is the least of the set's problems.
 
Top Bottom