• Welcome to Smashboards, the world's largest Super Smash Brothers community! Over 250,000 Smash Bros. fans from around the world have come to discuss these great games in over 19 million posts!

    You are currently viewing our boards as a visitor. Click here to sign up right now and start on your path in the Smash community!

Make Your Move 13 - Most Recent Movesets: The Advertisement Period Begins

Hyper_Ridley

Smash Champion
Joined
Dec 21, 2007
Messages
2,291
Location
Hippo Island
Hello boys! I'M BAAAAAAAAAAAAAACK!

Glad to see MYM is still having argument over how in-smash or un-smash we "should" be and holding xat-style arguments in the thread and all that good stuff. Meanwhile, I spent my time without internet coming up with some PSABR movesets, as well as some updates for a certain teenage dragon moveset that I've already implemented. Check them out! Or just sit tight and wait for my 2nd moveset of MYM13 to be posted soon!

Assuming my computer doesn't spontaneously combust, I'll be in the chat tonight! :bee:
 

Katapultar

Smash Lord
Joined
Nov 24, 2008
Messages
1,258
Location
Australia
Strange House

Banette's Home Stage


Basic Layout
Two players can spawn on either set of very wide drop-through platforms which we'll call "2F" for convenience of which is situated above 1F where two other players can spawn (in a 1v1, both players always spawn on 1F). For now, the basement beneath 1F is not only inaccessible but is also out of the camera's sight, or at least until a part of the floor that's "stained" is dealt 10% in which case it'll give way and collapse. The entire ceiling and floor of the basement is composed of this kind of flooring, so the only way players will be able to receive vertical KOs is to destroy them, revealing a dusty sky if the ceiling is destroyed and an ominously otherworldly whitish area if the basement floor is destroyed. Only the drop-through platforms and the middle of the stage are indestructible in order to give off a proper playing ground, the opposite ends serving as ledges when the destructible ground next to them gives way. As far as the staircase in the middle of the stage is concerned, it merely sits there for a cosmetic effect.

Gimmicks
Every 10-20 seconds of the match, furniture will float out of one of the 3 open doors in the background. If no part of the stage has been destroyed yet, the furniture will gently scatter outwards and land on different parts of the ground. There can be anywhere from 3-6 pieces of furniture, ranging from lamps to vases to couches to bookshelves.
Lamps are items that can be turned on as a source of light in the rare case where the player is fighting against an enemy who can produce darkness or smoke. They deal light damage when thrown, and shatter upon hitting something or being attacked.
Vases deal some decent damage that can KO at higher percentages when thrown, more often than not containing an item. They're like weaker item capsules, only players can break them open to get hold of the item inside by pressing A.
Couches act as annoying obstacles that can be thrown or destroyed like Wario's bike.
Bookshelves act as genuine walls, but when pushed against or attacked they fall over, crushing enemies for 12% that can KO at 150%.

If part of the stage has been destroyed, the furniture will instead mix together to act as a substitute for that area, restoring up to 1/2 of the total area that can be destroyed. Sometimes however, the furniture won't slot itself into the destroyed area but rather will angle itself 45-90 degrees from that area, creating a destructible slope or wall for those it benefits. The furniture can occasionally block one or both sides of the indestructible ground in order to cage a fighter, or even the area leading to the top blast zone. If the stage feels like being a jerk, it'll sometimes throw its furniture at random players on 1F or 2F, dealing anywhere from 3-15% that can KO as early as 140%. Players can tell that this'll happen when the furniture doesn't move upon exiting doors and rattles, having plenty of defenses against them when they can be outmaneuvered fairly easily, as well as destroyed or shielded. The furniture gimmick can be turned off, in which case the destroyed stage will not return.

If there's a character in the game with no way to destroy the ground/furniture from a certain angle, the stage won't be fixed up to prevent them from being trapped.​


Agi

Smash Lord
Joined
Jul 27, 2008
Messages
1,120
Location
SE Washington
Note: This is the "plaintext" version of my Rose moveset. By which I mean not written in-character, but rather in my overly casual voice. Please give the "stylized" version a try. You can find it by clicking here.
For the record I'd like the stylized version to be the one on the moveset list

There will indeed be a playstyle section coming, I just have not gotten around to it yet due to writing this thing twice.

[collapse="Changelist"]To those of you who actually read the stylized version, you have my thanks. There's quite a few new things that you may not have picked up on/just plain didn't EXIST in it for whatever reason, which I have alleviated here.

• Playlist added whoo
• There is now a grounded version of the DTilt. Apparently I deleted that in the original.
• Up Special has been turned into the Final Smash, previous glide mechanic is now the Up Special. Damage taken while in flight, which heals in-between flight sessions.
• Re-balanced the Seer mechanic.
• Down Smash explored further, reduction of efficiency explained.
• FAir "grim" version buffed significantly.
○ 11/7/12 Edit: Grim FAir requires threading of needles. Can be used on an opponent to tie the thread into them.
• Octo-Parry is now cancelable after blocking a hit.
• FThrow balance retouched.
• USmash nerfed.
• String stamina reduced.
• Various sounds added for thematic purposes.
• 200% more snark.[/collapse]

vvvvvv playlist, yo vvvvvv


Rose Lalonde is one of the four "Beta" kids in Homestuck, and arguably the straight man of the group - she's the only one who consistently has her head on her shoulders instead of gallivanting with salamanders or burying themselves wrist-deep in plush rump. She goes by tentacleTherapist online, a callback to her fascination with the eldritch and her skilled abilities in psychoanalysis. She wields two needles as weapons, which have grown in complexity from a basic pair of knitting needles to quills taken from the back of Echnida. No, not Knuckles, the beast of legend. This particular incarnation of Rose is taken from roughly midway through Act 5, wherein she communicates a bit too openly with the Noble Circle of Horrorterrors and gains access to a highly specialized form of dark magic.

Statistics

• Size - 4
• Speed - 7
___○ Air - 10
• Weight - 3
• Jump - 7​

MYM has seen enough lightweight female protagonists to have a general idea of what their physical stats are. Rose is a 13 year old girl, she's not going to be tipping any scales. She has speed and general mobility on her side, both highly useful (and arguably, interchangeable.)


Forward Tilt @ Needle Poke

That's right, people, this is one of "those" sets, where the attacks are all out of order for one reason or another. I've entirely lost any semblance of "voice," that was all eaten up by the actual moveset. You're left with me, the snarky Agi who's just trying to explain to you as clearly as possible how this all works. It could be worse. I could write this in the style of Buckminster Funnyuncle, and believe me, I have been highly tempted to do so. Anyway, I have successfully padded this move's length for 4 lines or so without going anywhere, solely to make it look like it's more complicated than it is, so let's get this show on the road.

Rose pokes forward with a needle. Exciting. It's got a bit of reach to it, slightly more than Pit's comparable FTilt, and does... oh, let's say 7% on impact, this is all rather arbitrary. If the opponent shields it, Rose is pushed back a certain distance until her needle is barely in contact with the foe. This executes rather quickly, and haha, wow, there's something I forgot to mention already. There's a follow-up hit to this that you can choose to do, tapping A again to have her stab with her second needle, unavoidably with the proper timing. This adds another 4% or so, and turns this into a somewhat reliable finishing move - not that it'll be finishing before 180% or so. Rose has a slight frame disadvantage whether or not the attack hits, amplified if the second hit connects. The spacing effect of the move prevents her from being punished in many cases, however.​

Down Tilt @ Needle Swipe

Hey, see that move right up there? Yeah, this is pretty similar to that. Rose takes a needle, pointed forward, and swipes it across the floor instead of poking. This does damage and knockback, comes out a bit quicker, and does not push her back when shielded. Move on, nothing to see here.​

Neutral A @ Knit

No, this doesn't involve any thread, silly, where on earth did you get that idea? The title? Pfff, titles, mean less than they ever did. Not sure why I bother with 'em, really. Either way, as could be expected by the above "SIMPLE ATTACKS," this is another really simple attack. Going from foreground to background, or... background to foreground? You'd think we'd have come up with a better way to say this by now. Either way, Rose strikes through the Z-plane with a single needle, with notably shorter range but quicker execution than the above. 3-4 damage can be expected, and like any decent pummel, holding the input causes Rose to go berserk, striking repeatedly for slightly less damage per hit. Hey, here's an idea, why don't you go click on the hyperlink up there, under "Simple Attacks?" No, not the one in the move description here, a bit farther up- farther, farthe- there you go. Yeah, that, click that. Now wait a while, it's going to have to loa- okay, good. Go click buttons or something now. Should give a nice preview of the next section or so.​

Dash Attack @ Youth Slide

Sadly, there's really nothing to say about this attack. While it was fun to write in-character, explaining how to get the best momentum out of physically sliding into the opponent, it really just boils down to Rose coasting to the ground, sliding along about a Bowserwidth or so, and dealing 6% in a low-priority hitbox as she crashes into the foe, having a CHANCE to trip them. How big this CHANCE is I have no idea, but MYM hates CHANCE effects anyway despite a CHANCE to trip being one of the most common CHANCE effects within Brawl itself. Anyway uh if the opponent doesn't trip then she's probably going to get hit in the face or something due to frame disadvantage​

Grab @ Restraining Grasp

Yep. Her grab sure is a grab. Short range, quick execution… highly reminiscent of Ike's, come to think of it. When she holds the opponent, she will often stand behind them, maintaining an armlock with a single needle pressed lightly against their neck. Don't get me started on Kirby and the like. For whatever reason, she doesn't use the very well-positioned needle on their neck to pummel – too barbaric? No, that couldn't possibly be it. Whatever the reason, she instead uses the needle in the hand she's holding behind their back, meaning whatever she's doing can’t be seen by the camera. Whatever it is, it only does 1-2% per hit, but comes out pretty fast.​


Forward Aerial @ Brutal Gore

Alright, you made it through one section! Nicely done, champ, we're all proud of you. Welcome to the Advanced Attacks, not named so because they necessarily take any more brain cells to input on a GC controller, but because they were slightly more technical in the original "guide" writing style when it came to physically performing them. Like this:

"...a dual-handed aerial downward swing, utilizing both horizontal and vertical momentum for maximum impact. Feel for when the needles cease their journey through your combatant's meaty body, and make haste to extract them at this very instant. By gaining a foothold on their body, you may use this additional repulsive force to aid in retrieving your instruments of combat."

…which boils down to what you see a few pages into the hyperlink on the Advanced Attacks header. Jump, stab downwards with both needles, use foe as a springboard to jump off. 14% done in all, 8% from the stab, 6% from retrieval, and this has some rather excellent spiking knockback. Really, why are you making me rewrite this? All the above requires is a bit of interpretation/patience. Okay maybe a lot of patience and I'd rather that people actually read it in ANY form than ignore it due to writing style god this is getting pathetic​

Up Tilt @ Octo-Parry

I've probably used the UTilt as a counter at least three times in my movesetting history, but this is the first time that it's actually justified and has a most excellent title that I am appalled Hussie never bothered to use. Rose holds both needles over her head in a manner similar to her guard, though obviously no bubble shield forms. They’re also angled such that they’re pointed forwards, not like it really matters. Anyway, in this stance, Rose will AUTO-PARRY! any attack which comes into contact with the needles, the first hit at least, first pulling the attack so that it follows through slightly away from her, then slashing with a good force, a minimum power of 7% but up to 3/4 the power of the attack which would have hit her. If she is not attacked in .5 seconds, she automatically leaves the stance, with the faintest of frowns.

This can be cancelled early by tapping A at any time, delivering the minimum damage/knockback. You may also cancel the move after blocking the hit by shielding, preventing the counter and quickly following up with something else.​

Up Air @ Vital Pinch

Would you believe that this was one of the first moves I made sure I had? Funny how that works out. Anyway, this is a pretty dang basic attack as well, but one which if you were to actually PERFORM IT you'd end up goring both your wrists. Simultaneously. It would hurt. Rose takes both needles and swings them overhead, not through the Z planes this time, coming to a point of intersection that it would not be pleasant to be in. Comparisons can be drawn to Zero Suit Samus’s UAir in speed and power, dealing 11% and KOing deceptively early.​

Down Air @ Youth Roll

Rose tucks in her arms and legs, entering a somersault in midair in a fairly standard stall-and-fall, trajectory similar to the Ice Climbers. As she spins, her body behaves as a very weak hitbox, delivering 4% on impact with enough hitstun to make sure she's well on her way before they can react. IN ADDITION, damage from any attacks she takes while on her way down is reduced by half, to a minimum of 1%. A sufficiently strong hit will knock her out of this heavy armor.​

Neutral Air @ Severance

Finishing up our more generic inputs is this little dandy, the Neutral Air! As you might expect, Rose takes both her needles, holds them together, and then abandons all sense of form as she enters a frenzy of attacks, covering a wide area around herself. As soon as ANY of these hit, she regains her air of calmness, swiftly relocates the needle in the other hand to the same point of entry, then slashes both outwards to rip a decent chunk of damage into the enemy's meter. 9%, it seems. Watch out, as this has fairly severe landing lag on a whiff.​

INTERMISSION
Seer of Light


Up until now, I haven't had need to mention Rose's passive mechanic – she is a Seer. Fortunately, her method of seeing is somewhat different than other prediction movesets we have seen in the past. Instead of locking the opponent into controlling a duplicate of themselves or what have you, Rose is limited to knowing what the best action to take is in any given situation... that is to say, the one which will lead to the most fortunate outcome. She does not have particular control over this ability, but it does manifest itself reliably.

Every 5-20 seconds, decreasing in time as you behave more aggressively, a coalescence of light will form, indicating a fortuitous action. Maybe a line weaving into the background, hinting at a dodge, a sudden burst suspended in midair between yourself and the foe, foretelling a powerful moment of impact. Really, it's up for interpretation. Moving along the path, which won't be any longer than a Battlefield platform, will cause Rose to absorb the energy into herself as an aura. Act quickly now, it won't last long (less than half a second, though beginning to charge commits the energy), but your next motion will be buffed by roughly an extra .4x. That's damage, knockback, jump height, invincibility frames after a dodge, frame advantage after a shield, grab escape difficulty,
string HP, grace period for reclaiming your body
- you name it, it applies. CHANCE effects are guaranteed as well. The game will make an educated suggestion for you, unique to each input, and it's usually right about what to do... or rather, would be, if your opponent couldn't see it. Curse these single-screen limitations and the mutable nature of the human mind.​


Thread created specifically with this buff requires at least two hits to destroy, and has golden particles intermingled with the normal purple ones.

-0 Knitting for Assholes Dummies 0-


Neutral Special @ Thread

Upon pressing B, Rose's needles take on a purple sheen, brimming with a dark font of energy. These shadow particles, similar to those which appear from Ganondorf's smashes, are an aesthetic effect only, and trail behind Rose as she walks. This move does not really do much of anything until you hold the input, at which point the energy begins to take physical form as a string, coiled around the needles at first, then shifting to the ground. It has semirealistic physics, drifting slowly downwards according to the laws of gravity, and is pulled around by Rose as she walks. String has 6 stamina, and is destroyed in "units" which are roughly a battlefield platform long. It takes severely reduced damage from energy-based attacks (anything that can be absorbed by Ness's Down B), roughly 1/3 of what they would normally do.

Unfortunately, there is no apparent purpose to this move whatsoever, though you probably know better than that. Slack string can be grabbed by opponents, and dangling string can be climbed as swiftly as a ladder.​

Down Special @ Stitch

Ah, here we go. This move allows you to give some much-needed structure to all this thread sitting around. Upon input, Rose takes a single needle and fastens the loop in place - seemingly in midair! Or on the ground. Your choice, really, but why would you want to be boring? Either way, a string pulled taut acts as an impassable wall, floor, ceiling, what have you. We've some primo RPG logic going on, now. Portions of thread not attached to anything will wither away in about three seconds. Again, there's a certain amount of duality to this input - tapping it will simply create an anchor point, whereas holding it will make Rose tie it off.

If string is destroyed by a melee attack while pulled tight, it will deal 3% and flinching to anyone along its length as it snaps. Anchor points are particularly resistant to damage, stomaching 15% before fraying, though if they ARE destroyed then two of the above hitboxes form, assuming they were pulled tight on the other ends. Rose is not vulnerable to this damage.​

Forward Smash @ Eldritch Seam

Ooh, fancy. Seems Rose isn’t limited to dragging thread around to its proper place on the stage! While you charge this move, Rose takes a step forward, folding a single needle over her chest, eyes closed and teeth gritted. Releasing it causes her to snap it forward, releasing an accompanying yell. A jagged purple beam emits from the wand, travelling anywhere from Battlefield's length to 1/2 that distance based on charge. This is a decently powerful projectile, dealing 16% at base with standard damage scaling, and can kill starting at 130%. It even penetrates multiple foes.

But wait, there's more! Press and hold A after releasing this smash, and it gains an entirely new purpose: it behaves as a long-range tether! The foe, your string, the ground, whatever, it grabs right onto it, dealing half the usual damage in the case of a foe. While this doesn’t instantly grab enemies (though can be used to later on,) having a momentary tether on them can be somewhat useful, as you are treated as an anchor point for them until they destroy their leash. Which, well, is most likely to be instantly. Rose can freely drag around anyone of Peach’s weight or lighter while attached.​

Back Aerial @ Expeditious Retreat

Personal mobility should always be a priority, and having an active thread gives you a highly flexible option as a backup. Use your Back Air, and your thread will begin to retract, and it will do so at a stunning pace, absorbing itself back into Rose’s wands. Enemies tethered to Rose in one matter or another will be pulled towards her. If the enemy is particularly massive, or your thread has been anchored, she will be pulled along instead – potentially equally useful. Finally, pesky slack can be safely eliminated in this manner. Should Rose not have any thread out, she will instead do a fairly basic BAir, shoving both needles behind herself under her arm to deal 11%. The travel can be cancelled into this attack simply by tapping A again.​

INTERMISSION
Reexamination of Staples

Neutral A @ Rethread
And here we are, coming full circle to the simplest of inputs. Press A needle pull, blah blah, nothing to see here, right? Of course not. Walk over to that thread over there; try using this on it. See? You grab right on, either looping a thread you already have around or gaining a new start point. As a utility move, this is primarily used to handle slack. This is unique from the Down Special in that it does not create an immovable point, rather, its intersections can freely move around.​

Neutral Air @ Severance
Rather handy, being able to include two similarly simple moves and expound upon their purpose side-by-side. Whereas the above assists in eliminating slack, this move instead creates it, rather effectively. When Rose’s needles come into contact with a thread, she will quickly slice through, causing the two halves to drift downwards, obeying gravity and remaining anchored. In this manner, and ONLY through this move, no thread is destroyed, just separated at a point.​

Forward Tilt @ Son Filé

This move changes rather significantly when facing a thread. Instead of a violent poke, Rose instead slides her needle along the string, as she would to play a violin, though obviously the angle is a bit trickier. You may input this as staccato or legato as your heart desires by how long you hold A, the effect is minimal when it comes to the attack’s mechanics. This causes the string- and all taut portions which are connected- to vibrate, releasing a tone corresponding to their length. These tones are preset so as to harmonize with each other, quite fortunately, and will vibrate for 5 seconds after being strummed, decreasing in volume over time. Striking repeatedly will increase the time they stay active by half, up to 10 seconds – that’s an infinite series, folks, 5, 7.5, 8.75, etc.

While they vibrate, threads become invulnerable to ranged attacks, reflecting them instead. The distance a colliding projectile has traveled is also refreshed, for that matter, potentially allowing you to loop them in infinite patterns.​

-~0 Utilizing the Air 0~-


Up Special @ pch00000

Rose’s early listing of 7 for her jump doesn’t really do justice for her true prowess in the air. By inputting her recovery move, Rose calls upon her bond to the Noble Circle, filling her body with sufficient energy to maintain eight seconds (!) of free flight. This lasts until you float into the ground, input the move again, or smash the crouch. While flying, Rose has complete access to her ground moveset and no access to her aerials - she must specifically be falling to use those. As a balancing factor, there's a limit to how high she can fly - long distances are difficult to measure, particularly vertical ones, but she can fly no higher than 3/4 the distance to Final Destination's top blast zone higher than the highest point in the map. She also lacks any sort of traditional shield/dodge, relying on her moveset for such maneuvers. It may be early to mention, but she has an alternate Down Tilt while in the air.

…aaaaaaand she takes 2% of damage per second she’s in the air which automatically heals as she refrains from flying I probably should have said that earlier but oh well​

Side Special @ Particle Rush

This move borrows from both the literal and connotative interpretations of the Light aspect. During the startup lag, of which there is just enough to be noticeable, Rose fills herself with an internal glow. This glow is quickly expended as she bolts either forward or backward the length of a Battlefield platform and a half, naturally immune to damage. What this boils down to is a ground-style roll that can be performed in the air, up to three times in fact.

If Rose's needles are threaded when she does this, and she passes through an opponent, she will either cause them to trip or be put into helpless, as the dual threads tighten around and knock them off-balance. As this is technically a "grab," it works through shields.​

Up Throw @ Hangman’s Ascent

Hey, remember all that time ago when we learned how to grab people? Have you really just been stabbing the enemy since then, not knowing what else to do? Well, that’s a shame, as being able to grab people in the air leads to a fairly versatile grab game, if somewhat limited in variety of launch directions.

This move really boils down to “Rose throws them up,” but with a fancy-schmancy animation. Rose's wands spark with a surge of purple energy, forming for an instant a particularly sturdy length of thread. Immediately, this is wrapped around the opponent’s neck, forming a crude noose. She then uses their chest as a springboard of sorts, launching into the air, escaping from above – and with a sudden crack, the thread tightens around their neck, hauling them upwards by one of the most vulnerable parts of the human body. As you may guess, this does a significant amount of damage, 16-17%, but does not launch them very high and decays quickly. Rose ends up about three Ganonheights above the ground, which is roughly where the foe will be at about 60% damage. The thread breaks as a result of the force – don’t expect anything tricky.​

Down Throw @ Dersite Drop

This move can be somewhat confusing when used on the ground. Similarly to the Up Throw, Rose loops her thread around the foe's body repeatedly - their legs, this time. She then pushes them over and ties an anchor point where she is standing, just like her Down B. In the end, the foe will be prone on the ground, tethered to an anchor point in thin air on a short string, having suffered 6% because throws do damage.

HOWEVER. When used in the air, the repeated loopings around the foe's legs become obvious in purpose, unraveling as they plummet! They can fall up to three Ganonheights before dangling in midair, taking up to 8% damage based on the length of the drop. Let them hang until they break themselves out.​

Back Throw @ Enforced Retreat

Assume, for the sake of argument, that Rose has a decent trail of thread behind her. With this fun little move, she loops her thread around the opponent as she steps to the other side, spinning them around and dealing 2% as she does so. Pulling taut on the thread, she gives them one last push with her foot… and then they’re yoinked backwards at a high speed, tracing the path of the thread!

For every battlefield platform they are carried, 3% is dealt, moving faster and faster as they try to escape with double grab difficulty. (that is to say, the difficulty of the grab left over plus an additional base difficulty.) If they fail to escape before reaching an endpoint, they will rocket out at about 1.5x the speed they accumulated, taking an extra 5%. Rose, meanwhile, is probably working to extend the length of their emotional rollercoaster.

Just for the record, no string is created or destroyed in this move, not even joints.​

-~-0 A New Vantage Point 0-~-


Up Aerial @ Zipline

Anyone up for some mobility? By using Rose’s Up Air on any taut length of string overhead, she will latch on with her needles and begin accelerating, with a distinctive grinding sound from the shadow particles which launch out, accompanied by the faintest of otherworldly moans. No damage, no hitbox, just a quick way to get around. You can use this to catch up to someone you’ve sent flying with your Back Throw, if you’re THAT desperate to see how this could possibly be useful.​

Down Tilt @ Dark Pulse

From a bird’s-eye view, it becomes very tempting to rain down destruction on your enemies, which is quite possible. For maximum coverage, Rose fires a single slow-moving burst of concentrated energy at a downwards angle, powerful enough to deal 8% on contact. These will travel on their own pace, about the falling speed of a sticker, until they come into contact with either the ground or an enemy, bursting in a small explosion. These may reflect off of vibrating strings.​


Up Smash @ Eldritch Storm

For a move this late in the set, you may be somewhat disappointed to learn that this amounts to a slightly weaker version of the Forward Smash aimed in two angleable directions, with the addition of a fairly powerful hitbox directly above Rose. Yes, this is going somewhere.

While charging this move, Rose holds her needles above her head in an X-shape, power clearly coursing through them. You can move her elbows up and down while charging to the angle of your liking, as when she releases this attack, she snaps her arms straight out and firing a beam from each wand in the direction they were pointing. As clearly stated above, these beams do 12% regardless of charge, and can only travel a maximum of 3/4 Battlefield’s length before dissipating. They are guaranteed to turn into string afterward, and Rose will by allow them to fall to the ground by default, though you can hold onto them by maintaining a grip on the A button. They behave as a continuation of the previous thread, if there was one, with only 4 stamina each. Is there any purpose to spamming string everywhere? Probably not, not yet at least, though it can be fun.​


Forward Air @ Deep's Beckon

Borrowing from an early skill, Rose's FAir has a unique effect if she is currently threaded. As both needles slide easily into the ground, melting away the immediate area, they fire a pulse of eldritch energy into the stage itself, which immediately corrupts in an area the width of a battlefield platform. This anchors the thread as per usual, and serves as a very ineffective trap, dealing 1% with flinch on contact and an additional 1% per two seconds that anyone stands on it. It will remain alive so long as the attaching thread does, the two having a symbiotic relationship.

Now then, what this serves as is a very minor deterrent, an form of stage control that no one's really going to care about anyway. Your thread can benefit from it in particular - by attaching it to an afflicted portion of ground, it gains the ability to heal itself over time, to a maximum of double its usual stamina. It does so at the rate of 2% per second, and grows in girth to about the width of a smoke ball at maximum size. This doesn't change its properties in any other way, though the moaning in a vibrating cord will overpower its harmonious tones when played, forcing your symphony into a minor key.

If used on an opponent, the thread attaches to them instead. This is not a grab hitbox, Rose simply ties the thread off onto their body, maybe tethering them to an anchor point, maybe just giving them a silly-looking scarf.​
Grab @ Therapy

Proximity is no longer a prerequisite to restraining the enemy – arguably, it never was. By holding the grab input, Rose can either create a levitating length of thread from her own position or assume control over the end of a thread on the field. Either way, this tendril of energy can be used to grasp at foes from a distance, moving at roughly her dash speed. Of course, none of the aforementioned “throws” work from a distance, with the exception of Enforced Retreat (perhaps inappropriately named now, as it draws foes inward) but it is still possible to squeeze them from a distance for minor damage, 2-3%. Although this is a more fragile approach, as your thread is still liable to attack, its speed and general utility makes it worth the effort now and again. It takes some time to recover after use, limiting its utility.​

Forward Throw @ Banishment

Unlike her previous throws, Rose does not use her string for this throw. Instead, she strengthens her grip on the foe, bending their head backward and pressing her needle ever more firmly against their neck. A single drop of blood drips from their neck, entering the wand. At once, a Ganon-sized purple portal opens a battlefield platform ahead, Rose releases her quarry, and a writhing thorned tentacle shoots out, grasping the foe for 4% and pulling them in. The portal closes. There is silence for half a second, while the enemy's damage meter takes a rapid fire of 13% hits, crackling with purple lightning. A portal reopens some distance away, firing them diagonally upwards with knockback which kills at 110%.

A glorious throw, doing high amounts of damage and knockback in one convenient package. It doesn't even decay, what's going on here? The thing is, this move becomes incredibly risky the later on in the battle that you use it. That is to say... your and the foe's total damage is factored into how hungry the Noble Circle is to feed. A weaker pair is easier to consume - by the time you and the foe share 140% on your combined damage meter, you are almost guaranteed to be eaten alongside your enemy as the tentacle reaches faster and farther than you can escape. Be extremely careful.​

Down Smash @ Call of Fluthlu

Rose begins mumbling incoherently in the tongue of the ancients, which is said to induce hemorrhaging in he who listens too intently. Fortunately, unless you're blasting the volume on your TV, you should be fine. If you are standing on the ground, you... really should not have been, as this incantation opens a portal straight to the furthest realm directly underneath you, through which Fluthlu's frisky tendrils will begin to fondle every nook and cranny. How embarrassing. His glorious appendages flail back and forth for roughly a second and a half, covering a stunningly wide area and dealing absurd damage - 23-31% per hit. Rose is entirely susceptible to this damage.

Obviously, this is not ideal. Rose is light enough that she's entirely likely to KO herself using this, or if nothing else endure a chunk of damage she cannot afford. Fortunately, she has just the tool for the job. Two, actually. If she's in midair while she uses the smash, the portal opened is far smaller, leading to a smaller amount of thrashing over a shorter period of time, scaling logarithmically so that the portal shrinks rapidly as she initially leaves the stage and tapering off more slowly as she rises. At absurd heights, only the very tip of Fluthlu's tendril pokes through, giving an awkward wiggle which trips before retreating.

While holding onto a thread, she uses it to channel the smash into wherever the thread ends - potentially to multiple areas if the thread splits. The threads need not be taut. This can be used to relocate the smash entirely, and uses the end's height as Rose's effective altitude for the smash. Obviously, this has the same drawbacks as staying in the air - as you open up more portals, they shrink.

In addition, closed circuits of thread can hold summons. They release when destroyed after a certain amount of lag, or when attached to the ground through FSmash or what have you. If there is a line nearby, the slack will instead be attracted to it by an unnatural force, preserving your actual intentions.

In short, this is an incredibly versatile smash - just don't get hit by it.​

Final Smash @ Despair

Running the full gamut of her abilities, Rose calls upon the awesome power of the Noble Circle of Horrorterrors for her ultimate attack - but they aren't particularly invested in keeping her alive. Regardless, instantly after the move's input, a horizontal seam violently rips open some distance above her, forming a gate to the Furthest Ring. A single thorn-ridden tentacle shoots out at a blistering pace, reaching Rose 3/4 seconds after the initial input. When it finds her, it coils around her rapidly, crushing her body in multiple hits of 5% for 45% in total, before retracting back into the realm of the eldritch with her in tow. The gate closes, leaving behind an ominous purple smoke which quickly dissipates.

Her body may be gone, but her soul is alive and... well, alive, at least. Drained entirely of color and partially translucent, the grimdark husk of Rose Lalonde can still be controlled, with free flight as long as she lacks a physical form. She remains invincible for about 10 seconds, gaining a plethora of buffs to her speed, power, damage output, and thread stamina - her Seer mechanic also activates once every two seconds, and you thought I forgot about that, didn't you? As she moves around, swathes of reality are torn, leaving stylistic rips in the shape of black tentacles wherever she goes. Eventually, a portal opens, dropping her battered physical body onto the stage, indicating the end of the final smash, and the ends of the enhancements. By returning to it, Rose reassumes her physical form, worse for the wear but still able to fight. But who says you have to? Your buffs may be gone, but you still have perpetual freeflight. Or... would, rather.

Sadly, after 10 seconds or 25 damage taken by her soul specifically (her body can absorb any amount of damage, only dying by being knocked offstage), she loses the feeble connection to the physical world, vanishing completely and losing a stock. It will take slightly longer for her to respawn if she dies in this manner: an extra second or two. The powers of the Circle are truly awesome, but taking advantage of their perceived generosity is highly dangerous.​
0 Playstyle 0

Yeah, pool's closed. Come back later.

To play as Rose Lalonde is to play a game of balance. She feels comfortable regardless of her distance from the opponent, with setup options and a powerful ranged attack at long distance and no shortage of needle pokes at close range, amplified by a limited amount of spiritual guidance to assist every so often. Amplify this by her ability to corral off sections of the stage and summon the power of the ancients to do her bidding dinner, and you’re looking at instant cries of brokenness. But let’s take a closer look.

Rose begins the brawl like most characters with a charged projectile – a tap of the B button. There is no disadvantage to preparing early, and as long as you don’t set an anchor point or let out string your mobility will not be hampered. Consider your opponent. What are they built for? If you’re going to be dealing with a camper, freeflight and the ability to reflect their attacks right back at them will come in quite handy. Take to the air quickly, and form your first anchor point there – your FSmash will enable you to connect to the ground with a small amount of setup.

Campy characters tend to hate lockdown; by expertly manipulating your thread through a series of smashes and weaving in and out. Anchor frequently, so the whole structure does not collapse upon itself. Engaging in rushdown through your side special and airgame, you can make life a living hell for a character without a proper gtfo attack. Their feeble attempts to break out of this prison, likely created by an overhead Up Smash, disorient them momentarily as the thread snaps – just long enough to be further pestered. She may find it difficult when it comes to the kill, though. Her long-range KO methods kill at very high percentages and aren’t particularly long-range anyhow. Her kills while up close and personal are either too self-sacrificial or too laggy to rely upon. That, or they’re only available for a half-second window the opponent can predict and counteract, though you can take advantage of their “prediction” for fairly mundane mindgames. When dealing with a camper, it might be a good idea to anchor yourself to a point midway into the air, redirecting any knockback into a swinging motion around the point set in space.

Rose's own setup aspects are​


ForwardArrow

Smash Ace
Joined
Aug 17, 2011
Messages
502
Rose
I am probably the first person not to adore this particular moveset, though really I'm a bit surprised it's reception's been this good so far. I mean, the Up Special in the original, as you yourself have admitted too, literally served no purpose at all. The writing in the initial version is pretty hard to comprehend, especially towards the end, to the point I've reserved commenting it until now. Because I want to see a set for what it is, not bloody interpret. I will say though that the presentation of the original is a really nice tribute to the character, at the very least.

The concepts introduced gradually in the set are... decent, with thread based stage construction being the focus. Some of Kat's recent sets and Kammy have shown that generic stage construction is really growing stale... at the very least, Rose provides some twists on it. Namely creating slack thread that doesn't really function as proper stage construction and is far more easily flexible, which certainly has it's advantages. I find it very awkward how you dedicate an entire special to tethering it down, you could argue it's more intuitive but that move does literally nothing without string. Combining it with Neutral Special somehow probably would've been good for the set, as it only frees up another blood SPECIAL. Side Special also feels like it should've just been "oh she can roll in the air during her free flight" or something, given as the side effect of the move right now feels horribly... mediocre and irrelevant, though it also kind of invalidates any reason to actually roll.

No I'm not nearly done complaining about the bad in this set, sorry to say. The Luxkin mechanic really is awful, feeling like an awkward gimmick that tries to represent her future sense... but in all honesty it feels like in actual gameplay it'd get annoying. If the outcome really is ideal or one of the most ideal ones, the stupid light showing up indicates it as an obvious route for you to do, giving a foe an easy route to counter it and providing much frustration to the Rose player. There are times when it'll work out in your favor, but as is it actually hurts her playability. There's a large amount of filler in the set, with moves like UThrow that are relatively fancy animations that are good for the character, but don't contribute much. More importantly, moves like FThrow, Up Tilt, and Dair really just feel gimmicky to me, having some rather tacked on additional effects that make the former two more awkward to use and the Dair is just desperately trying to be creative. I figured I'll also mention Bair, which is really frustrating if you need to defend your back and you just have to retract string to do so.

For what it's worth, I at least appreciate all the set tries to do in regards to expressing the character. You gradually expand on her abilities, making the set twisty and more interesting as it goes along, at the end rewarding us with a shockingly awesome DSmash which singlehandedly saved the set from dislike for me, as well as some cool stuff like using thread as ziplines/projectile reflectors/tethers. I wish the set tried to utilize tethering itself to the foe a bit more, but it's an overdone concept anyway. Honestly I'm not joking when I say DSmash is probably the sole reason I find the set tolerable really, given that the move gives her a ton of versatility and is very fascinating in it's numerous potential functions... I only wish more of the set was like that, really. Aside from that, the set's clearly trying to exhibit the character and does so very well, but from the perspective of her gameplay it often ends up costing you.
 

FrozenRoy

Smash Lord
Joined
Apr 26, 2007
Messages
1,261
Location
Las Vegas, Nevada
Switch FC
SW-1325-2408-7513
Rose
I am probably the first person not to adore this particular moveset, though really I'm a bit surprised it's reception's been this good so far. I mean, the Up Special in the original, as you yourself have admitted too, literally served no purpose at all. The writing in the initial version is pretty hard to comprehend, especially towards the end, to the point I've reserved commenting it until now. Because I want to see a set for what it is, not bloody interpret. I will say though that the presentation of the original is a really nice tribute to the character, at the very least.

The concepts introduced gradually in the set are... decent, with thread based stage construction being the focus. Some of Kat's recent sets and Kammy have shown that generic stage construction is really growing stale... at the very least, Rose provides some twists on it. Namely creating slack thread that doesn't really function as proper stage construction and is far more easily flexible, which certainly has it's advantages. I find it very awkward how you dedicate an entire special to tethering it down, you could argue it's more intuitive but that move does literally nothing without string. Combining it with Neutral Special somehow probably would've been good for the set, as it only frees up another blood SPECIAL. Side Special also feels like it should've just been "oh she can roll in the air during her free flight" or something, given as the side effect of the move right now feels horribly... mediocre and irrelevant, though it also kind of invalidates any reason to actually roll.

No I'm not nearly done complaining about the bad in this set, sorry to say. The Luxkin mechanic really is awful, feeling like an awkward gimmick that tries to represent her future sense... but in all honesty it feels like in actual gameplay it'd get annoying. If the outcome really is ideal or one of the most ideal ones, the stupid light showing up indicates it as an obvious route for you to do, giving a foe an easy route to counter it and providing much frustration to the Rose player. There are times when it'll work out in your favor, but as is it actually hurts her playability. There's a large amount of filler in the set, with moves like UThrow that are relatively fancy animations that are good for the character, but don't contribute much. More importantly, moves like FThrow, Up Tilt, and Dair really just feel gimmicky to me, having some rather tacked on additional effects that make the former two more awkward to use and the Dair is just desperately trying to be creative. I figured I'll also mention Bair, which is really frustrating if you need to defend your back and you just have to retract string to do so.

For what it's worth, I at least appreciate all the set tries to do in regards to expressing the character. You gradually expand on her abilities, making the set twisty and more interesting as it goes along, at the end rewarding us with a shockingly awesome DSmash which singlehandedly saved the set from dislike for me, as well as some cool stuff like using thread as ziplines/projectile reflectors/tethers. I wish the set tried to utilize tethering itself to the foe a bit more, but it's an overdone concept anyway. Honestly I'm not joking when I say DSmash is probably the sole reason I find the set tolerable really, given that the move gives her a ton of versatility and is very fascinating in it's numerous potential functions... I only wish more of the set was like that, really. Aside from that, the set's clearly trying to exhibit the character and does so very well, but from the perspective of her gameplay it often ends up costing you.
Since I presume I am this set's primary "supporter" due to my ranking of it, I felt like I should defend it.

First off, you liked Alice and she had two inputs that didn't work without her dolls in a similiar manner. :p It's a lot cleaner and easier to have multiple moves for it rather than stuffing it into a single ubermove, even if it does take away a move slot. Or so goes my thought on this for Rose, at least.

Secondly, I think you might have missed the part about Luxkin where he mentions that you can use ANY move with the Luxkin, and that the most fortuitous part is merely a suggestion and to a lesser extent, a way to give it a fancy animation. It is even lampshaded that since the enemy sees it too, that part of it isn't a part that matters. It's basically a power boost at a specific place, which offers multitudes of interesting possibilites: Does one follow it, but become more predictable in where they are? Does a foe try to camp Luxkin areas and possibly fall victim to Rose's other attacks or let her construct her stage? What about appearing in a nicely designed thread construction? There seem to be more possibilities here than you give it credit for, I feel.

DAir isn't really gimmicky, given that Rose has a defensive focus with the thread and the fact waiting can be quite beneficial to her with stuff like Luxkin, while the effect seems fine enough: Defensive meneaveur (God I can't spell that word), damage reduction, simple. Also, you don't have to retract string to do so: Pressing A twice causes her to use her standard, non-stringed if generic BAir, allowing you to defend your back fine. U-Tilt/F-Throw depends on the person, though I thought F-Throw was (COOL). U-Throw arguably has some relevance: It gets them in the air, gets Rose high in the air and can position the foe right in front of Rose. Remember how D-Smash's size and thus the danger it represents to Rose gets smaller the higher in the air she is...?
 

Katapultar

Smash Lord
Joined
Nov 24, 2008
Messages
1,258
Location
Australia
[collapse="Rose Lalonde"]Having read through both the stylized and plaintext version, Rose is an atmospherically invigorating set that puts character ahead of conceptual labor that the likes of FA expect from every veteran set. While I found the first parts of the stylized version to be quite astounding what with its MYM1 feel (seriously man, go read Socrates and the like), I actually enjoyed the plaintext version more if for being less claustrophobic and somewhat still keeping some of the original's tone (but with 200% more snark, obviously). I'll just say here that ever since you've become active this contest, I've come to admire you for your sense of writing style and actually envy it.

Given how I've been enticed by sets with great atmosphere in this contest such as Wonka and your Pharaoh Man, most would probably assume that this set would be on SV level for me, but....I have some issues with the presentation itself. It's true that Rose does have the atmosphere, but it feels distorted for whom the target audience is supposed to be, and the need to stay true to the original context does backfire - this manifests itself in the stylized version, as while that does justice to those who know the series from back to front like Froy, those who want to know what the attacks do straight and through can end up being lost on some of the moves such as the F-Smash (I still don't really understand it in the plaintext mostly because the actual object used as the tether is not mentioned, and one has to guess it's either the beam or the string based on the move ordering) and just what the heck the Seer of Light section is. There's also the vague description of the F-throw and how it only seems to damage you as well when all players' combined damage amounts to 140%, if I'm not mistaken.

You had this coming though, and as such promised the plaintext version and eventually delivered it, effectively being a different narration for the same set....but that's wherein another problem arises. Some of the moves just came off as having felt like a chore to write-up on your part, and it's obvious from the snarky tone that makes some of the moves more annoying to read through than they should be, a downside to an otherwise amusing tone - take this line from the Dash Attack, as an example "Sadly, there's really nothing to say about this attack. While it was fun to write in-character, explaining how to get the best momentum out of physically sliding into the opponent, it really just boils down to Rose coasting to the ground". I'm specifically complaining about this context of the set because of how the presentation of the set was handled and how it's not a trend with your previous sets what with Pharaoh Man and Heavy, meaning it's a one-off thing due to having essentially made the same set twice. I don't think the presentation was executed that well on that note, but could very easily have been if only the plaintext version had been released - Homestuck comes off to me as being more fantasy-based over internet-based, or at least this character does, so the plaintext is very fitting, if even more so than the stylish version.

Ignoring the presentation, the actual atmosphere provided by the attacks. I came to realize that placing basic attacks on one input, the thread gimmicks on another and then dark magic and so on was somewhat acceptable, at least from a gameplay point of view, but it feels very difficult for me to relate to due to having little motif and this character being absorbed in the fantasy world that is Homestuck. It does kind of come off as being crazy and irrelevant of me to include in the comment for the most part, but it's a problem I've had with every other Homestuck moveset save for Doc Scratch where it felt like a whole lot of randomness. It's probably helped by how the set and those others come off as being "I'm not going to tell you everything about this character, you come here and research yourself.", which probably can't be helped given the nature of the series but isn't very inviting. It almost even feels unfair to judge the set on that basis, but my enjoyment of the set is at stake here.

For all the ranting on my unnecessarily long and somewhat unjustified comment, I didn't quite enjoy Rose as much as I thought I would if because I thought some of the presentation was a little skewered and a bit too fan-ccentric to adhere to a normal audience, as ambitious as it was in that department. Some of it could have been done a little better, whereas the other half comes from my personal thought as what it means to enjoy a set. [/collapse]
 

Davidreamcatcha

Smash Ace
Joined
Feb 9, 2011
Messages
629
Smady

Smady is one of the characters found within the Smashboards contest, Make Your Move, a movie loaded to the brim with Nintendo Villains. In the contest, Smady is a puppeteer, traveling around the thread in his caravan. He commands an awe-inspiring presence, the chat shaking upon him entering, as he flies into a blinding rages at random. He is incredibly greedy, actively going out of his way to obtain votes - which works well with his stagename of Smash Daddy, as he often plays up to the crowd to obtain more precious gold. He has an encounter with Wizzerd himself when Kupa and Kat, two street cons, bring the wooden boy to him. After Wizzerd becomes convinced it would make his "father" proud, he participates in Smady's puppet show, becoming an instant sensation. However, when he attempts to leave, Smady locks him in a cage, bragging about how much votes he will make from the little puppet. When he leaves, however, Wizzerd quickly escapes with a little help, leaving the fate of Smash Daddy unknown...

Specials

Weight: 9
Size: 9
Falling Speed: 9
Aerial Movement: 7
Traction: 4
Movement: 2
Jumps: 2

Idle Stance

Smady stands with his hands on his hips, rarely glancing from side to side.

Walk
Smady walks without taking his hands off his hips, his belly bouncing as he walks.

Run
Smady runs with gigantic strides of his legs, practically jumping to walk along. He pumps his arms in tandem with this.

Crouch
Smady kneels down to the ground as he strokes his neckbeard, as if inspecting something.

Dizzy
Smady places his hands on either side of his head as he staggers back and forth.

Sleep
Smady sleeps standing in the stereotypical Nintendo fashion - almost inhaling the tip of his neckbeard as he stares the first part of the snore, before exhaling and sending it blowing back away.

Specials

Down Special: Puppet Show

Smady motions to the top of the sky and then points down in a very swift motion, taking about the same time as Ganon's jab. Immediately after he finishes motioning, a puppet like one of the ones shown above (Slightly shorter than Mario) falls down from the top blast zone at Sonic’s dashing speed. It’s connected to it by proposals, and after being summoned will start dancing in place with the infamous Russian kicking dance. It will kick out to each side two times each, dealing 3% and knockback that KOs at 160%, then extend out all its’ limbs at once as it shouts “GAY!”, creating a hitbox all around itself that deals 5% and knockback that KOs at 180%. The puppet will continue to do this in an infinite loop, and Smady can have up to four out at a time. Inputting Down B with one out will replace the oldest one, it getting yanked back up off the top blast zone.

Attacking the puppets themselves doesn’t hurt them in the slightest or even interrupt their dance. They still take the knockback, but their proposals will cause them to swing back towards the foe with realistic physics (And back and forth a bit as they lose momentum), boosting the power of their kicks with momentum they pick up from the attack. The puppets are very light, but can never be killed by this. Smady himself can attack the puppets like this to turn them into more active hitboxes against the foe, with the more sensible option being that a swinging puppet will force another puppet to start swinging if it hits it - two swinging puppets meeting up will cause a large hitbox to take place, dealing 20% damage and high knockback if the foe is traped between them.

To defeat the puppet, you must attack the proposal connecting the puppet to the top blast zone. It has a paltry 15% stamina, so this is rather easy. Once the puppet’s proposal is cut, it will fall down lifelessly and must be tossed off the stage before Smady can throw another. It becomes a generic throwing item for foes if they pick it up, but if Smady picks up this puppet he will hold it by the cut proposals, animating it himself if he stands in idle (And visibly mouthing “Gay!” when the puppet extends out all limbs). Holding a puppet in this manner does not prevent Smady from using attacks like when most characters are holding items – he can use all but his grab, which enables him to drop/throw the puppet away. Several of his attacks in fact change if Smady’s holding a puppet, largely due to the hand that he uses to punch and what-not being the one he holds his puppet in.

If you don’t want to carry a puppet along with you but still want to get mileage out of a puppet when the foe is adamant about cutting them down, your unseen helpers at the top blast zone don’t have to lower the puppets all the way to the ground. If you input Down B when a puppet is already being lowered, it will stop being lowered and stay at the elevation it’s currently at. In addition, if you use the move in the air the puppet will be lowered to your current location rather than the ground. The puppets must be at least 3 Ganons from the ground at bare minimum.


Neutral Special: Appealing To The Crowd
Smady turns to the camera and takes several very deep bows, blowing kisses and yelling happily in british. This causes either votes or tomatoes to be thrown at Smady from the foreground. By default, tomatoes will be thrown at Smady for the next 20 seconds. The off-screen audience will throw tomatoes at Smady even if he moves from where he was originally standing. While these tomatoes can indeed hurt Smady, if a foe is adamantly chasing Smady and he's fleeing it's likely they'll be the ones getting by the tomatoes. The tomatoes deal 5% and flinching on contact, and one is thrown every 2 seconds,

Now, the longer puppets have been dancing since you've last used this move, the more gold votes will be sent your way. A puppet Smady is personally using while in idle counts for this. Having more puppets out dancing multiplies this. After a maximum of one puppet dancing for 45 seconds or 4 puppets for 11.25 seconds, this move will be maxxed, with Smady flashing gold somewhat like how Wario flashes with a maxxed fart. At max, the move produces 35 votes over 5 seconds.

These votes deal a mere 1% and no flinch to the enemy, but each and every vote heals Smady of 1% on contact. Unlike with the tomatoes, this requires Smady to stand still to reap the benefits rather than flee, as votes vanish on contact with the ground. Considering how many votes will be coming so quickly, foes will be quite frantic during this brief period to pressure you, making this an excellent time to capitalize on Smady's defensive melee moves.

Smady cannot use this move again until the audience stops throwing things at him. Also keep in mind that Smady will be able to collect votes even if he loses a stock - the puppets remain onstage even after he dies, allowing him to immediately come back and collect votes if needed, or collect them at a much later time.


Up Special: Smady Ban
Smady reaches behind his head to reach for his banhammer, before he swings it forwards. It's a respectable KO move, dealing 12% and knockback that kills at 95%. It's not the fastest KO move around, but it's not unusable by any stretch of the imagination.

This will destroy proposals if it comes into contact with them, necessary due to proposals being immune to the rest of Smady's attacks, and him likewise being immune to their attacks. If you want the bonuses of a puppet in your hands but the foe isn't knocking the puppets down, this is your go-to-move.

While in the air, Smady swings it upwards in a very Marth-esque motion - though he only recovers half the distance. As should be rather obvious, he keeps the same damage/cutting properties. However, even with his decent aerial movement, his falling speed ensures that he plops down like a rocket. Smady's recovery is hell, meaning that he'll want to stay onstage at all costs.


Side Special: Goldman Sachs
Smady takes out a sack, eyeing it with greed. With no votes (You can obtain them via Neutral Special), he simply attempts to grab foes with it - only grabbing their head if it's literally impossible to grab all of them. After this, he'll tie the opening of the bag shut with some proposal and force foes to escape it with average grab difficulty. Foes can take knockback inside of the bag, but not damage. Foes can still jump while inside of the bag to move about, but cannot attack or move normally.

If there are 10 or more votes in the bag, Smady will attempt to slap the bag of gold downwards for a KO move. With 10 votes, this does a token 8% and knockback that KOs at 150%. With 25, it deals 20% and knockback that KOs at 70%. This can go all the way up to 35, this being the cap, dealing 30% and knockback that kills at 55%.

The best part is this move is largely lagless regardless of how many votes are in the bag, making this a reward well worth the effort put in. Beware that every time you use the move, 4 votes slip out/get knocked out of the bag and there's no way to get those specific votes back.


Grab-Game

Grab - Proposals
Smady attempts to grab the foe with a typically heavyweight grab. If successful, he will automatically tie up the foe, connecting four proposals to their limbs, holding the ends of them in his palm. This occurs before the foe can even attempt to grab escape at all.

Now, if the foe "grab-escapes", Smady will still be holding onto the proposal afterwards. This prevents the foe from moving more than a platform away from Smady. They can destroy the proposal, but this proposal has a bit more HP, 26 to be precise. If Smady or the foe deal knockback to each other, both will end up taking said knockback. If the foe is the one taking said knockback, though, Smady can cut the proposal on demand with his sword.

While Smady's throws deal knockback to the foe by default, they release them from the proposal. Holding the grab input while they're being thrown causes them to not take the knockback, only being moved a slight distance away - to make up for this, they take double the damage from the throw. In addition, inputting grab when you already have a foe tied to you in this way will cause Smady to yank on the foe's proposal, pulling them half a platform towards him and causing them to trip if on the ground. If he has a puppet, he will first throw that at the foe before he can yank on the proposal.

By pressing grab while holding an item, Smady will grab it and attach his proposals to it. While this hardly has any relevance in a 1v1, this can come in useful in a casual FFA setting, allowing Smady to be more of a threat, or be useful in specific match-ups against item-making foes.

Pummel - british Rage
This is not a traditional pummel state, rather being one that can be held out for 3 seconds by holding the button. Smady pulls the victim up to his level and begins yelling at them in british - if the foe attempts to escape during this time, Smady delivers a mighty slap that releases them automatically. This deals 18% damage and high knockback, being one of your best killers in this regard, the proposals will fly off of them regardless of if you hold the grab input or not. The foe has no chance to slip out in the middle of Smady's yelling, but will automatically slip out after the pummel ends. This motion allows you to potentially hold them in place longer - thereby keeping them from destroying your puppets early, allowing you to reap more of the crowd's reward.

Up Throw - Lasso
Smady throws the foe up, still holding the proposals, before spinning them around in circles above his head. This does no damage, hardly doing any damage - in fact, this throw isn't done yet...

The foe can button mash out of this, having to escape at 1.5x grab difficulty - which causes them to go flying in a random direction and take 4% damage, likely getting deattached from their proposals if Smady isn't holding the grab input. Now, Smady can throw them from this state by choosing a direction on the control stick - though he is only able to throw them in upwards or forward-angled directions. Throwing them deals 5% damage by default - with 2% damage for every second you were able to keep them grabbed without them mashing out. While the foe is incredibly likely to mash out and render your hard work useless, you can time this to throw them just before they escape - and their escape may be prolonged if a swinging puppet is around.


Side Throw - Twirl-Around
Smady grabs his opponent by their proposals and twirls them around himself 3 times before he throws them in the direction you picked, with 7% damage and good knockback - this move comes off as more useful when you consider that there may be puppets dancing near you, as this allows you to slam your foe into the puppet a few times for extra damage before releasing them - as well as forcing them to build the puppet's momentum for you.

Down Throw - Slamdown
Smady grabs the proposals and slams them down to the ground in front of himself, taking the foe with them - they smash down on the ground, taking 6% damage and laying down in prone. This is one of Smady's best ways of shoving them into prone easily, with the only prerequisite being that you put them into your grab. Take note that this is the only one of Smady's throws that doesn't boost damage if you're not releasing them from the proposals - as they're not taking knockback anyway, though you can still choose to release them from the proposals regardless.

Standards

Jab: Laughter
Smady throws up his hands in laughter for the initial hit, dealing 5% and weak vertical knockback. The second portion of the jab has raise up his hand high before slapping his knee, dealing 6% and downward knockback to send foes to the ground.

The first hit of the move will cause a puppet you're holding onto to get sent up into the air. If they're in the air to start with, the first hit can still be of some use as it sends the foe even higher up into the air, potentially putting them out of range from hitting you with their aerials. The second hit will send the object tied to the proposals to the ground if it was in the air. If the foe was in the middle of the aerial, they'll now be stuck in the landing lag of said aerial. There's plenty of leeway with when you can use the second part of the jab, so use it in a unpredictable manner to avoid getting hit by aerial enemies. Puppets/foes deal 4% and weak knockback as they are flung about by this move.

Do take note that this is one of Smady's only real anti-aerials, and that the puppet forms a hitbox primarily in front of him - meaning he's still vulnerable if a foe chooses to approach from behind...


Forward Tilt: Knock-a You Silly!
Smady delivers a mighty backhand in front of himself. This deals 8% and has a pretty good reach, potentially halting approaching foes.

With a puppet in-hand, this will cause the puppet to end up behind you, as Smady covers a wide arc with his backhand. The puppet will stay in this position if you enter idle, meaning this can be useful if you predict a foe's going to roll behind you to try and catch you off-guard. The puppet also has a bonus hitbox as it spins backwards for 6% and flinching. This can also be useful while dashing to hit foes chasing you, such as when the audience is throwing tomatoes at you.


Up Tilt: Lariat
Smady does his best Zangief impression as he extends out his arms to either side then starts spinning in place. This deals a nice little 7% damage and covers both sides of Smady, leaving only his head open to attack.

If this hits a puppet, it will cause it to begin spinning in place for the next 3 seconds - becoming a hitbox that deals multiple containing hits of 2% damage, as well as being hard to DI out of. It will also reflect all projectiles that are thrown at it. After the 3 seconds are up, the puppet will attack using the normal "GAY!" hitbox, before the cycle repeats. Smady can use this against a puppet multiple times to increase the time it spins (adding 3 seconds every time he hits it), though as it will swing away from you a bit when you use this, it will be difficult to make it become a constantly-spinning hitbox.

Using this on a puppet with proposals attached will cause them to spin around Smady with this hitbox for the duration of the attack, allowing Smady a way to reflect projectiles as a defense.


Down Tilt: Rolling on the Floor
Smady bursts out into laughter again and falls into prone. Smady has a unique prone stance - he lays on his back, laughing with his hands on his belly. Rather than his get-up rolls giving him invulnerability, these cause Smady to form a hitbox. Likewise, his "get-up attack" doubles as a dodge as Smady gets up. Essentially, Smady's prone is reversed from a normal character's.

Smady's "rolls" cause him to continue laughing as he rolls three quarters of a platform in the direction chosen. This will cause Smady to trip any foes he rolls past (He can still be attacked fine and dandy from behind), dealing 6% and if they were already in prone before he passed them cause them to get dragged with him to the end of where he intends to roll, dealing 10% to them in the process. This does not beat out enemy get-up attacks, but will beat out enemy attempts to roll up from prone.


Dash Attack: Charger
Smady reaches out with a grab hitbox as he runs forward - stopping with some bad end leg if he doesn't grab anybody. Should he succeed in grabbing someone, he will dash forward with them, holding them in front of himself to act as an attack sponge. After a second of this, Smady grabs the foe and takes an item they may be holding, kicking them away for 7% damage.

Smashes

Down Smash: Spinning Punch
Smady cracks his knuckles, before he punches so fast that he spins himself around as he punches. This causes Smady to turn into a hitbox that deals 19-30% and knockback that kills at 155-95%. If Smady is carrying a puppet, he'll spin the puppet around himself for the move's duration, it turning into a hitbox that deals 8-14% and knockback that kills at 160-135%. If Smady is holding a puppet -and- a foe (He must grab the foe first for this to work), he will stop holding out one of his arms towards the end of the move, slamming the object that's being held into the other object. This will cause both objects to take 22-32% and knockback that kills at 105-65%, getting sent flying in opposite directions.

While an obvious killing move, this requires some set up - you'll need to not only grab the foe, but get a puppet as well. Even without the foe, this still has it's uses, as this becomes one of Smady's best ranged melee attack when he has a puppet attached.


Forward Smash: British Rampage
Smady spazzes out in place for the charging animation, making an incredibly loud noise. At the end of this, Smady begins releasing several wild punches in front of himself as he moves 3 Platforms forward at his dash speed, his neckbeard shaking back and forth as he madly screams in british all the while. Contact with a punch from Smady deals 10-19% damage and good knockback, launching foes horizontally away from him. This is one of your best tools for when a foe approaches you from the front, as you're an active hitbox and can't be knocked out by standard melee attacks. You can still be knocked out of this by projectiles, disjointed hitboxes and attacks to the back, however.

A more situational use for this, is using it while tethered to a foe - the foe is forced to move forward, lest they get hit by your rampage, potentially causing them to come into contact with a puppet or whatever you've laid out in their path.

When you use this with a puppet in hand, it becomes far more effective - as Smady's rapid punches keep the puppet in front of himself at all times as it moves up and down. The puppet deals 8-16% if it hits anyone, not only increasing this move's hitbox by a bit, but more importantly - acting as an attack sponge for Smash Daddy, making him less likely to be knocked out of this.


Up Smash: Smady Stomp
Smady begins to look gradually annoyed with the foe, before he jumps into the air, holding his arms behind his back. The distance in which you jump upwards is influenced by how long you charged, ranging from one Kirby upwards to a Ganondorf. During this time, you can move about in the air with Smady's aerial movement to choose where you land, obviously being more effective if you charge longer, for obvious reasons. Once he lands back on the ground, he lets out a booming yell of "QUIET!". There is a bit of end lag here, but not enough to make this in-viable.

Upon landing on the ground, the ground around Smady shakes thanks to his massive weight - a platform on either side of Smady, to be exact. If foes are within this range, they are stunned for half a second - while you don't have much time to capitalize, this is an excellent opportunity to get a grab in on them. No, you can't just spam this to stack stun on the foe, as they cannot be affected by this for 3 seconds after you use it once.

If foes are on the ground in prone when you use this, they take 5-11% damage and are immediately knocked upwards from it - possibly allowing you to capitalize on their newfound state if you can get out of your end lag quick enough, perhaps with a followup fsmash? More importantly, if you land on a foe in prone, they take 16-25% damage and high upwards knockback. This is one of your only attacks that launches them upwards - but it allows you to get them out of your (lack of) hair for a few moments, if you need to gather more votes especially.


Aerials

Neutral Aerial: Stomach Jut
Smady faces the screen, and after some minor startup, swings out his right/left half out, which side swinging out depending on what direction you push the control stick in during the startup (it is chosen randomly otherwise). Getting hit by Smady deals 6% damage and horizantal knockback - attacking him will cause them to take the knockback of the attack they just hit him with, effectively allowing him a counter - which works well in close range.

Forward Aerial: PUSH!
Smady PUSHES the foe in the public's eye! He quickly shoves in front of himself, this is an incredibly fast maneuver that deals 4% damage and pushes the foe away with decent set knockback - allowing you to effectively space them with this move.

This is easily your best aerial to actually deal with midair foes - as it allows you to effectively push them away from proposals they might be attempting to cut, as well as possibly into a stray puppet if you want to boost their momentum a bit.

While you have a puppet in hand, the rough shove from Smady causes it to fly forwards in an actual hitbox - dealing 8% and good knockback, giving you a hitbox that deals knockback more than the typical set knockback. A foe attached to proposals is also forced to fly forwards, dealing the same damage if they meet a puppet or it's proposals - Smady can quickly cut the proposal to set them flying forwards.


Back Aerial: Spin Punch
Smady turns around as he punches. He turns in such a way that the arm he's punching with is the less practical to more immediately hit behind himself, causing his arm to be blocked off from hitting behind himself for a time due to his fat. This bair turns Smady around, and the laggy punch deals 11% and knockback that KOs at 90%.

If you have a puppet, this will cause it to get wrapped around yourself, the proposal spinning around Smady until the puppet is stuck against Smady's fat. This causes the puppet to be a hitbox on either side of you during this time, dealing 8% and knockback that KOs at 150%. Afterwards, during what would normally be ending lag, the puppet will spin back around to unwrap itself. At the end, the puppet will spin around rapidly in a blur, a constant hitbox that deals 10% and knockback that kills at 130% and reflecting projectiles. This lasts 2 seconds. This will cause the puppet to go out to the limits of the proposal of a platform. If you release the puppet via you sword, though, it will go flying forwards Battlefield's length.

Foes who are tied up in proposals cannot dodge this attack, getting grabbed when Smady attempts to wrap them around his fat in a grab hitbox. To stop this attack, foes must knock Smady out of it, which is thankfully for them fairly easy to do due to the laggy nature of it. If they are hit by it, they'll take 10% when they get wrapped around Smady before suffering the other consequences.


Down Aerial: Ground Pound
Smady's neckbeard and limbs flail upwards as he goes into a full free-fall, letting go of a puppet he might be swinging on, before falling downwards at Sonic's dash speed. His arse is a hitbox that deals 18% and spikes foes as powerfully as Dedede's Up Special. Standard HMA stall then fall.

The move is mainly notable for when you're carrying around a foe tied up in proposals, as it lets you effortlessly drag them to the ground or potentially a suicide KO if the stage has bottom blast zones. The foe will be strung up in the air above Smady, acting as a hitbox that deals 7% damage to anyone they hit during this - this can also apply to puppets, giving Smady some small defense above his head as he falls downwards.


Up Aerial: Cling
Smady reaches upwards in a grab hitbox - if he grabs a foe, he will hang on to their legs, combining his fall speed with their's, effectively making the two of you drop like a rock (also helping if you fastfall). Smady can break free at any time by pressing the A Button, while the foe must deal 10% to Smady. The one with the highest fall speed has the most influence over the pair's movement, which likely means Smady will have control unless he is fighting another heavyweight. As soon as you hit the ground, the two break free from each other. You can use this to drag foes away from puppets or back down to the ground, if needed - also serving as a suicide KO, if not one that's easy to break.

By grabbing on to a puppet, you can hold on to it for three seconds. Staying on any longer will cause it to break and fall off, cutting it's proposals. This allows you to stall a bit, if needed.


I've Got No Proposals On Me
When obtaining the Smash Ball, Smady lets out a boisterous laugh as all the puppets onstage go up to the top blast zone, as Smady snaps all proposals connected to himself and steps into the background of the stage, pulling out a conductor's stick as he enters a new idle. You have 8 seconds to strategize your plan of attack - as you gain control of an arrow that has free-flight comparable to Super Sonic - only a bit slower to allow you more control, as everyone is locked into place. Pressing any input while in this state has a small square appear at the location of the arrow - you can plop down 12 squares in the following order - 4 blue, 4 pink and 4 red. None of these can overlap. If you don't place them all after 8 seconds, Smady faceplams and re-enters the foreground, you effectively wasting a final smash.

Once you place them all, Smady steps back into the foreground and begins using his stick as though he were a mad conductor, triggering a new idle. As soon as everyone is unlocked from place - 4 blue Nick puppets appear where the blue squares were placed, having the same stamina/swinging properties of your normal properties, the only difference being that you can't knock these (or any of the other puppets in Smady's final smash) down. The Nick puppets dance in a defined space - moving a platform forward with light kicks of 4%, before scooting backwards the platform backwards with their backside sticking outwards - their backsides are solid and deal dragging hits, dragging the foe to where they want them to go. You can use this to drag them into the attacks of other puppets - effective if you can push them into other farmgirls, as two backsides making contact deals 12% and good knockback to anyone trapped inside.

After 4 seconds, 4 FRoy puppets will appear, the Nick puppets remaining on-stage. These constantly kick on both sides of themselves - dealing 8% and high vertical knockback to anyone who comes in contact with them - possibly star KOing foes if they're high up enough, possibly by swinging them.

After another 4 seconds, your standard down special Bobby puppets appear. The puppets dance for 8 more seconds before being pulled back up to the upper blast zone in a hitbox - allowing Smady a fresh start with a new setup. During all of this, Smady is free to attack the puppets and cut them while the foe cannot. One of your most obvious strategies here should be to get some free healing - as your puppets rack up votes for you and are able to defend you thanks to their large numbers.


Playstyle

Smady's game, of course, revolves around his puppets. He's rather slow and rather laggy without them, so he needs to play dirty a bit in order to get his way. The puppets, of course, are the main part of your gameplan - they're quick to set up, easy to take down, and can be made into a more offensive purpose if needed. Right off the bat, you're going to want to have a puppet or two set up - not only to rack up some damage a bit, but to cover yourself as well. Smady'll most likely be playing defense at this stage in his game, able to bait an approach from foes. If you're not ready for an approach from foes for whatever reason, just get the crowd to throw tomatoes at you and run - the foe should be getting splattered with them while you make a quick getaway, just like an actor getting booed off the stage. Using ftilt during this time works wonders - just use that as you're dashing to make a sudden unexpected blockade at your back.

At some point during all of this, you should try to attach a proposal to the foe - your grab-game is useful for the sheer ways in which you can use it to stall the foe from meddling with your wonderful puppet show. Even not throwing them is the most obvious example of this, forcing them to stay put, making a lot of votes......FOR YOU! This also has the beneficial effect of releasing them at the end of it - leaving them with proposals attached. UThrow is an alternative way of stalling them out, especially if you prefer the idea of throwing them away to keeping them attached to a proposal, as you can aim it in most any direction. DThrow kickstarts your prone abuse game, while you can force foes to build puppet momentum with SThrow.

Let's talk about your tether. Your tether leads into an intricate prone abuse game, and forces the foe to stay subjected to your melees. Among your most obvious things here is your down tilt - by forcing yourself to enter prone, you can trip those who have gotten out of it, starting an offense against them. Your main goal while tethered, is to essentially drag them across the stage with you, then cut the proposals. Your USmash and FSmash are amongst the best tools for moving them with you, and you can seamlessly transition back to your vote/puppet game once again with these moves. Your standards and aerials, of course, help in pushing them about. Once you have them far enough away? Feel free to cut the proposals and DI back to the stage, or use your downwards aerial to push them down with you if you can't possibly make it back to the stage with your pitiful recovery. Back Aerial can also bring foes attempting to retreat closer to you, before they attempt to knock you away - given they're stuck on the proposal with you, this can spell out a demise as they knock themselves towards the blast zone - before you suicide downwards.

If the foe insists on cutting your puppets down, you can grab a puppet to begin a much more offensive game, as a good majority of your moves are made to be better when you have a puppet in hand. While you have to stand in idle with the puppet to build up to your down special, you'll have no problem getting that in thanks to how much defense and offense the puppet provides you. Use your ftilt to protect your backside, use jab to protect against assaults from the front - among your best tactics to use here is to start spinning your puppet around your body, as you can make your self impervious to projectiles before running forward. Hands-down, your best tactic for approaching is your british Rampage, as it allows you to sponge up attacks as you move forward as a giant hitbox - while spinning punch works better as a standalone attack thanks to the incredible range it provides - especially if you have a puppet and a foe at once, turning it into one of your best killers.

However you decide to play Smady, there's always a crescendo you need to build up to - appealing to the crowd. As you play, you should always attempt to keep your puppets alive through any means necessary to make sure you get as many votes as possible. When you finally have enough votes - all you need to do is press it. Foes will be frantic during this time, and you'll be locked in place, meaning you'll have to defend yourself to the best of your ability through clever use of melees and puppets, perhaps having a swinging or a spinning one nearby to keep yourself on the defense and keep the foes from approaching you. If the foe manages to knock you away, you are going to want to build space asap to keep you from losing the votes. You can kill the foe beforehand before healing up with the votes - allowing you to gain votes in peace. As the votes can build up between stocks, suicide even becomes a legitimate strategy, allowing you to collect votes upon your return - showing how greedy Smady is for them. Whatever it is, you gain a reward well worth the wait - your best killing move through the sack, though it will eventually drain over time and it can hurt you if you whiff it, it's the best possible reward, and the biggest addition to Smady's line of excellent killers.

That doesn't mean Smady doesn't have his weaknesses, though. Despite all his strengths, he still has a fatal weakness against aerial foes. His anti-airs are all extremely weak or have some sort of flaw to them, keeping them from being especially useful. It's practically required that the foe go into the air to cut down your puppets, meaning they'll very likely find the time to attack him from up there. Even ignoring all the aerial stuff, he has all the standard heavyweight weaknesses: he's slow, he has a lot of end lag - and let's face it: you get off the side of the stage? You ain't getting back on. But as a master showsman, Smady is equipped to deal with all obstacles. His main helper in Nintendo - the one that allows him to stay on the levels of magical fairy godmothers and snakelike sorcerers, is his sheer unpredictability. Smady can smoothly transition from phase to phase at the drop of the puppet. Smady is the fighter who keeps his foes on his toes, allowing him to keep control of the foe: like a puppet in a cage.


Extras

ENTRANCE - SHOWBOATING
Smady enters the screen bowing and blowing kisses to the ground, a puppet tucked under his arm.

UP TAUNT - CONS-TAN-TIN-OPLE!
Smady announces the above syllables, turning his back to the camera and shaking his arse at it in a taunting fashion.

SIDE TAUNT - FACEPALM
Smady facepalms while muttering british gibberish, just like he does in one of his key scenes.

DOWN TAUNT - VOTEHUNGRY
Smady rummages through his sack, a gold number popping up above his head showing how many votes you have.

If you have less than ten votes, Smady pulls out a worthless metal ring from the sack and bites into it, loudly yelling "What's this!?", tossing it aside.

If you have 10-25, Smady pulls out a single gold vote, kissing it lovingly, before he places it back in the sack.

If you have 25-30, Smady happily grabs a handful of votes and throws it up in the air, catching them all in his sack before they fall back down to the ground. If you're interrupted here, the votes will be placed on the ground - his run animation changes when he runs over votes, kneeling down as he runs to pick them up and place them in his sack. This allows him to place them back in his sack easily - while you can seriously be hurt by this, if you can pull it off, it should be rage-inducing for the foe.


VICTORY POSE 1 - THE ONION
Smady takes a large bite of an onion he's holding - taking out half of it neatly, before tossing it aside, back at the losers.

VICTORY POSE 2 - SINISTER Smady
Smady has his sword - which has multiple food items impaled through it, and makes a throat-cutting motion with it to his foes, before he begins eating the food straight off of it.

VICTORY POSE 3 - CAGED
Smady grabs the last place loser by their neck and throws them into a cage, locking it and yelling in a booming voice - "THERE!"

VICTORY POSE VS. GARBLE - FIREBREATHER
Smady looks straight at Garble and laughs. "You think dat you know how to breath fire? I can show you how to breath fire, boy!" He burps straight at Garble, before laughing.

VICTORY POSE VS. ASHENS - TOYS
"Toys!? Garbage!" Smady denounces Ashens, standing amongst his partners. "You should try one of my-a puppets!"

VICTORY POSE VS. MIKE DAWSON - ETERNAL LINE
Smady lets out a boisterous cry of "Ehh...you missed, pal!" before slapping his knee in laughter.

VICTORY POSE VS. GHETSIS - THE GREAT MAGICIAN
Smady is seen fiddling with Ghetsis' cane, making it fire thunder and energy and other Pokemon moves without Pokemon. "Perhaps Smash Daddy shall become a magician! Whatchu think?" He turns to Ghetsis, who faceplams in response.

VICTORY POSE VS. YOUNG XEHANORT - NO Smady IN DDD
Smady laughs at the young Xehanort: "Go back to your home and play with your dolls, little girl!"

VICTORY POSE VS. ALAKAZAM - SILVER SPOON
Smady has one of Alakazam's spoon-amplifiers in hand, staring at it curiously: "And what do you use dese for, eh?"

VICTORY POSE VS. WILLY WONKA - VIEWING PARADISE
Smady has a bunch of Wonka Bars impaled on to his sword, he asks "You tink you can stop Smash Daddy with food?" before eating the Bars off the sword.

VICTORY POSE VS. CLAYTON - WORKERS
Clayton's Pokemon are seen locked in a cage besides Smady. Smady turns to a gagged and bound (in proposals) Clayton and sneers. "You have given Smash Daddy many great ideas...THESE SHALL BE MY NEW PERFORMERS!"


ForwardArrow

Smash Ace
Joined
Aug 17, 2011
Messages
502
And that, my friends, is why a bunch of thinly veiled insults does not make for a good jokeset.
 

n88

Smash Lord
Joined
Oct 10, 2008
Messages
1,532
0/0 points for the pictured corgi not appearing in the actual moveset.
 

JOE!

Smash Hero
Joined
Oct 5, 2008
Messages
8,075
Location
Dedham, MA
LIZARD

Well, yeah... this isn't Curt Connors at all. (Sad)

Oh wait, it's a magic OC that actually has kind of a cool premise behind him being an expert magic scholar, and using his knowledge of spells to manipulate magic itself. Even better is that he's an OC in a thread in a similar vein towards The Deadliest Brawler :awesome:.

Anywho, to sum up my feelings after so many others have talked about it: I feel as if the set suffers from doing too much. He can move-copying/manipulation, a stealth game combined with rubble creation and transformation, Golem minions he can alter, and the whole flying thing.

Picking like, even just 2 would be good enough fodder to work with without making every damn input a special move. For example, when I heard he mimicked moves and had a golem, I thought he could map inputs to said golem to make a truly custom minion somehow. Or, replaced his Nspec with another o he could do it wherever (Imagine being able to do like, DDD's Ftilt wherever). On top of all this, he then has a few broken traits like his weight being stupidly low (DK Down B could probably one shot him and doesn't give a crap about him hiding) meaning one mistake ever leads to an easy death, making it frustrating to play as him. And then, his weird aerials and side B that can be used while flying, making huge tornados and powerful wind boxes when you have no fear of not getting back to the stage yourself? There's his gameplay right there: get them off the edge and they're done.

All said and done though, I found the set enjoyable for the individual ideas, such as the differing Golems and the Dspec acting as a memory counter, but when it's all together it's just too much crammed into a set and becomes a bit of a mess with each move becoming a special to compete for space.

:/


GARBLE

Not much to add here from what others have said. The characterization is spot-on for a bully character, the Assists are interesting, simple and versatile enough to get a ton of mileage out of them when combined with his moveset, and his rather unique style of continuously pressuring foes into a corner to either brutally take them down off the edge for a suicide or just continue on until they cant recover off-stage (and even then he has Dair) is very fun to think about.

My only complaint is what I talked to you in-chat about (the unintuitive Nair cancel), so it's kind of a meh point. Great job on the extras by the way, it really helped flesh him out aesthetically for me (y).

(also, that grab clash mechanic should be universal lol)


BUBBLEMAN.EXE

While having a great playstyle, this Navi has a couple issues preventing me from -loving- the set. For one, jabs/aerials that can be directed or serve special purpose like the Bair (and although I generally don't enjoy grabby Uairs, his is kind of vital to recover with as he can treat a bubble like snake's cypher) are awkward to imagine, more so the aerials due to you wanting to leave the Control Stick open to move your character while performing an aerial rather than angling an attack you can just DI with. Secondly, the Dspec seems kinda useless when the bubbles can be plowed through by just about anything given the investment it takes on Bubbleman's part just to set it up, which also leads to a bit of a conceptual problem: Bubbleman will have to rely on the Bubble-wall to do much of anything. Even then, most characters should be able to hop over and interrupt him blowing up any amount or decent sized bubbles before he gets the chance to properly utilize them.

Don't get me wrong, I do like the set, it's just the #'s and some input awkwardness kinda works against his whole plan of attack when faced with any sort of aggression, leaving the cool parts kinda put aside in favor of Missile Spam.
 

Hyper_Ridley

Smash Champion
Joined
Dec 21, 2007
Messages
2,291
Location
Hippo Island
Thank you for the kind words sir. I decided to change the NAir dodge input in the end.

Now then, as much as I like updating Garble, I think it's time for...
 

Hyper_Ridley

Smash Champion
Joined
Dec 21, 2007
Messages
2,291
Location
Hippo Island


GRIMLOCK


Grimlock is a Transformer, specifically an Autobot, and even more specifically a Dinobot. This means that rather than have a vehicle-themed alternate form, he turns into a robot dinosaur (in his case, a TRex). He's not the brightest guy around, but he's got tons of fighting ability. His primary weapons are an energy based sword and shield.

Grimlock’s most recent appearance is in the awesome game Transformers: Fall of Cybertron, in which he is playable in the main campaign as well as in multiplayer, as a member of the Titan class. He’s using his design from that game in Brawl…and he’s appearing as a 1v3 boss.

STATS

Movement Speed: Slow walk, average dash
Traction: Great
First jump: Low
Second jump: Grimlock uses jets in his feet to give himself an above-average midair jump.
Air control: Taking a page from the recent Transformers games, Grimlock surprisingly has high air control
Air speed: Unfortunately, he’s slow in the air
Fall Speed: And he falls quickly too
Size: 3x Ganondorf. His sword, similarly, is about 2.5x the size of Ike's.
Weight: 1.5x Bowser

No tricks here. These stats are all relative to standard playable characters. In fact, Grimlock can be harmed normally too. He can be grabbed, dealt set knockback, given status effects, and stunned like any 1v1 moveset.

RAGE METER​

Surrounding Grimlock’s HUD is a white circle that becomes red as it’s filled. Grimlock normally fills this meter by landing hits, filling 4% of the meter per hit. When it’s completely filled, Grimlock goes into standby for his final smash, which you’ve probably already figured out. While Grimlock isn’t as straight-up powerful as other 1v3 characters, his ability to use his final smash in normal gameplay surely makes up for that. On that note, if Grimlock happens to break a smash ball, he is automatically given 100% rage.

Grimlock can also fill the rage meter as a defensive technique. When he is combo’d for 3 individual attacks, every subsequent attack in that combo will give him 15% rage, and one of the perks of his final smash is that he can use it during hit-stun! It’s important that I said “attacks” and not “hits”; Fox using his DAir isn’t going to activate the effect. Grabs actually have their own 3-use counter so the enemy team can combo 3 throws together, but pummels and throws count towards the standard hit counter (lol Lucario). On the other hand, when Grimlock is KO’d he loses up to 30% of his rage meter.

SPECIALS​

Neutral Special: Dinobot Fury
Grimlock spreads his arms and lets out a war cry over .7 seconds, acquiring 15% rage at the end of the animation. This is really only going to be useful on the occasion you manage to get 1 or 2 of your opponents offstage and the third is stunned in some way. Having said that, it’s actually a good thing that this move isn’t more vital to Grimlock’s game-plan, since this is the move you’re losing when your final smash is ready. This allows you to hold on to the final smash for a moment if you’re currently in an advantageous situation, or you simply want to try KOing your opponents to unleash the attack on their next stock.

Side Special: Energon Shield

Grimlock summons a phalanx-style shield of orange energy in his left hand after .4 seconds. Grimlock is free to move about and attack normally after summoning his shield. It covers most of Grimlock’s front except for his feet and his head, and has 60 HP, turning red as it takes damage. While the shield absorbs all forms of attack (including grabs!), Grimlock holds it to his side during his dash and most attack animations.

If Grimlock performs this input with his shield out, he’ll perform a shield bash! This has a hitbox on frame 1 and above average end lag, and deals 12% with set horizontal knockback as far as ½ of Battlefield. The attack also retains the regular defensive properties of the shield, allowing it to out-prioritize literally everything, even transcendent hitboxes and aerial attacks. Grimlock can still perform a shield bash during his dash, though the animation will be modified accordingly.

Up Special: Hover
Grimlock uses his jets to essentially perform his midair jump before *gasp* HOVERING for 3 seconds. While hovering he can move left or right at a moderate speed and perform aerial standard attacks during it. You can’t cancel out of the hover but considering Grimlock has a disgustingly good stall-then-fall DAir you can just use that for emergencies.

Down Special: Whirlwind
The “signature move” of the Titan class! Grimlock’s shield disappears if he has it active, as he turns slightly towards the screen and grabs his sword with both hands. After .5 seconds, his torso starts to rapidly spin for 4 seconds, dealing 13% and KOing at 100% to those struck by him. While the move can hit the same target more than once, opponents are given a .3 second grace period before they can be damaged by it again.

It would be a good time to mention now that Grimlock is free to move about during the entire move, and he in fact moves slightly faster than his normal walking speed! Grimlock also has super-armor during the last .2 seconds of the startup period as well as during the first second of the actual attack, so you can’t just casually strike him out of this. While attacking, it’s also possible to angle the attack like those in-game tilts and stuff, making it even more difficult to evade the whirling death approaching you! The move has moderate end lag, but really, if Grimlock hasn’t either hit everyone away or retreated as it’s about to end to keep himself safe, he’s a bad Autobot. If that's STILL not enough for you, Grimlock after the super-armor wears off, Grimlock can cancel the move into any attack other than his specials or grab. If that's still not enough for you, why the heck are you using this move to begin with?

STANDARDS​

Jab: Omnislash
Grimlock horizontally slices with his sword at a 40 degree downwards angle. This deals 11% and KOs at 170%. While the attack does hit a good ways out from Grimlock’s body, it also can only hit that far out; only the sword itself has a hitbox, making it useless for close-range attacks. Still, the attack has below average startup lag and moderate lag, making it difficult for a ranged character to do much on the ground.

This is actually a 2-part jab, with the second part simply having Grimlock swing his sword the opposite direction for the same damage and knockback. What’s interesting about this is that you can hold backwards while inputting the second part and Grimlock’s torso will turn around as he attacks backwards! Unfortunately, the first hit cannot combo into the second, even if you perform it forwards, but do you really want a JAB to deal 18% at once?

Forward Tilt: Titan Kick
Grimlock performs a straight kick similar in appearance to Ganondorf’s FTilt. This deals 14% and purely horizontal knockback that not only KOs at 90%, but already has a base knockback of 1/3 of Battlefield. It has below average startup lag and above average end lag. Considering the sheer range of the kick, you can basically use this as a poking tool in spite of the end lag, and Grimlock’s height allows this attack to function as an anti-air!

Up Tilt: Orbital Slice
Grimlock swings his sword in a semi-circle above his head. This deals 14% and star KOs at 105% if you connect with his sword; it deals 10% and star KOs at 120% if you connect with his arm. Moderate lag on both ends, but with the amount of space you’re covering with this, do you REALLY think that will matter? The most notable downside of the move is that because it deals vertical knockback, it won’t actually increase the distance your opponent has to travel across the stage to reach you.

Down Tilt: Slash Sweep
Grimlock’s crouch is similar in appearance to Ganon’s, not that it matters since there’s no way he’d ever be capable of crouching under things. On the other hand, while crouching Grimlock is completely covered by his shield.

His DTilt is a sweep with his sword, dealing 12% and tripping anyone it hits. Grimlock holds the sword close to his body, giving it less range than you’d expect, though it’s still impressive. Moderate lag on both ends, but against shields it always pushes back the defender to the end of the sword and leaves them in a frame-neutral state. Use this attack liberally against ground-based characters, forcing them to jump if they ever want to get any closer. Then use your FTilt to launch them even further away!

Dash Attack: Clearing the Path
By default, Grimlock performs a shoulder barge across 1/5 of Battlefield, dealing 13% and KOing at 115%. Only Grimlock’s upper body has a hitbox, but his legs are invincible until the (moderate) end lag kicks in. On that note, the attack has below average startup lag.

If Grimlock has his shield active, he performs a different attack. This time he’ll quickly bring his shield to his front while skidding to a stop, completely stopping after traveling the same distance as the normal version of the move. His shield is the hitbox, dealing 12% and set horizontal knockback for ¼ of Battlefield. This has below average startup lag and no end lag, allowing Grimlock to use this move to transition from his dash to his walk. Grimlock’s legs are completely vulnerable for this variation of the move, a tradeoff for acquiring his powerful frontal defense.

SMASHES​

Forward Smash: Furious Slam
Grimlock swings his sword upwards before slamming it back down into the ground. This attack has moderate startup lag with a single hit of super armor, and it deals 14% while KOing horizontally at 90% during the first phase of the attack. As he swings it back down, the sword deals 14% and KOs horizontally at 80%. Grimlock’s entire arm is a part of the hitbox of this awesome attack, and after both swings are finished it only has moderate end lag.

Up Smash: Crush
With moderate startup lag, Grimlock swipes at the air with his left hand at a 30 degree upwards angle. If he catches someone, he transitions to his grab game, and this move does in fact have a grab hitbox. It also has moderate end lag and will deactivate Grimlock’s shield if he has it active.

The attack can’t be charged, but you do get a special effect for holding the Attack Button as Grimlocks grabs. If you do so and his hand makes contact with a drop-through platform, Grimlock take holds of the platform before quickly pulling his arm downwards, causing the platform to break apart into lots of intangible pieces. The platform will reappear after 15 seconds. Note that if you attempt this variation of the move, he will prioritize platforms over other characters, though he does have super armor and anti-grab armor as he breaks the platform. By using this attack, you can eliminate ways for your enemies to get around your shield and swarm you, and it also allows him to use his ridiculous throws against airborne opponents.

Down Smash: Boost Dash
Use the boost to get through! Grimlock gets into a sprint-ready position before boosting forwards (or backwards if you hold the opposite way!) using his jets. He quickly covers ¼ of Battlefield with no charge, and with a full charge he travels far enough to cover most of Final Destination! The dash itself has no hitbox except for right as it begins, creating a tremor slightly wider than Grimlock himself that deals 11% and trips anyone caught within it on the ground. The main thing the move grants is a quick (though crude and imprecise) movement option. The attack won’t stop at the edge of platforms, so be careful about charging it up too much.

Grimlock can perform his FTilt, Side Special, and Down Special during the dash, retaining its momentum as he does so. FTilt will come out if you press the attack button at all (even working in midair!), whereas Side Special will occur with any non-down special move input. Grimlock has 1 hit of super armor during the move’s moderate startup time, and while it has no end lag, you’d be crazy to spam it when you have limited options during it. Yes, Grimlock does hold his shield at his side during the move so you can’t just push enemies off the stage with it, and if you perform a shield bash during the dash it has a modified animation to reflect this (though with the same properties).

AERIALS​

Neutral Aerial: Sex Sword
I think that may qualify as the most innuendo-filled move name of all time. Grimlock stabs his sword at a 30 degree downwards angle and holds it in place for a moment, acting as a sex-kick attack. It deals 13% and KOs at 95% on the initial hit, then deals 10% and KOs at 150% for the lingering hit. Below average startup lag, moderate end lag.

Forward Aerial: Smashing Slice
Grimlock cleaves his sword downwards, covering a semi-circle in front of himself. It deals 13% with slightly-downwards knockback that KOs horizontally at 100%. However, if he hit a foe at the exact moment his sword his pointed straight ahead, it deals a spike! With this and his NAir, it’s not advised to be right in front of Grimlock when he’s in the air. Moderate lag on both ends, but it can be auto-canceled if Grimlock lands when the swing reaches the bottom half of its arc.

Back Aerial: Thruster Kick
Grimlocks kicks backwards with one foot and ignites the thrusters on it. His leg deals 11% and KOs at 120%, while the fire of the thrusters deals 15% and KOs at 85%. This has below average startup lag and above average end lag, but Grimlock keeps his shield held to his front during the move. There's not much to say about this attack, it lets Grimlock deal with anyone who manages to get behind him while maintaining his frontal defenses, quite the useful attack in a bind.

Up Aerial: Emergency Boost
Grimlock ignites not only his feet thrusters, but a pair of thrusters on his back as well, completely halting his aerial momentum for .4 seconds. This has below average startup lag and above average end lag, though the end lag can be canceled into any other aerial attack. Making contact with any of Grimlock’s jets during the attack deals 12% and spiking knockback, and Grimlock can slowly move left and right during it to mess you up; it deals a lot of shield stun and shield damage if he manages to catch you in it. Yes, this UAir is hitting below Grimlock. Considering his size, enemies aren’t going to be above him too often (if ever) when he’s in the air, so this gives him a way to attack downwards without having to spam his stall-then-fall DAir. The momentum-cancelling nature of the move also provides Grimlock with some extra survivability.

Down Aerial: Slam
Here’s that awesome move I mentioned back in his Up Special. Grimlock curls up and punches downwards with his left hand with enough force that it causes him to plummet to the earth at the same speed as Bowser Bomb. Like with Whirlwind, his shield is deactivated upon starting the move. Anyone who collides with Grimlock as he falls takes 16% and spiking knockback, but luckily for them they’re actually given immunity to the next hitbox that shows up. Upon hitting the ground, a mighty explosion of raw energy occurs around Grimlock, dealing 22% and star KOing at 60%! For the record, the explosion is .4x the size of a smart bomb’s.

If there is a silver lining for Grimlock’s opponents, it’s that he has above average startup lag as he quite literally stalls before falling, and the attack also has above average end lag as Grimlock recovers from the power of his own strike. Then again, it deals so much shield-stun that Grimlock still recovers in time to defend against most counter attacks…

THROWS​

Grab

By default, Grimlock’s grab is a simple one-handed swipe with his left hand, holding the enemy in the air like in the image. It has moderate speed and good range thanks to his size. However, if Grimlock has his shield in-play, his grab changes to a short-ranged stomp. This has the same speed as his normal throw but it even works on prone characters. Landing his normal grab leads to his standard throw-game, but landing the stomp grab has Grimlock pin the enemy under his foot, dealing 12% while being 5x harder to escape than a normal grab. Grimlock is free to perform his jab, tilts, and side-special (will occur with any direction + special move button) during this time, though he is forced to remain stationary.

Pummel: Grimlock headbutts his enemy, dealing 6% at a moderate speed.

Forward Throw: Rag Toss
Now would be a good time to say that Grimlock has super-armor and anti-grab armor while performing a throw. Grimlock’s FThrow is a rather basic hurling of his enemy forwards, dealing 14% and KOing at 90%. What’s notable about the throw is that it has a base knockback of ¼ of Battlefield, making it a great way to get an annoying enemy out of your face.

Back Throw: Titanic Slam
Grimlock jumps into the air with his foe before turning around and slamming them into the ground, dealing 16% and mostly vertical knockback that KOs at 80%. Besides the throw itself being quite good, he pitfalls anyone else he lands on. Still think Dedede’s BThrow is broken?

Up Throw: Execute
Grimlock lifts his enemy above his head and impales them with his sword, dealing 20%, before tossing them to the ground for an untechable knockdown. What makes this throw especially scary is that if his sword happens to strike any other enemies, it deals 20% to them as well along with vertical knockback that KOs at 65%.

Down Throw: Lockdown
Grimlock throws his foe to the ground for 12% before stomping down on them, pinning them down in the same way as when he performs his with-shield grab. This allows Grimlock to utilize this ability even when he doesn’t have his shield active, and since he can perform his side-special in this stance he can use this chance to acquire it! Note that the defensive bonuses he gets during throws go away once he has pinned his opponent.

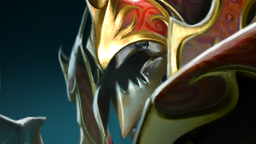
FINAL SMASH - TRANSFORM

Awww yeah, the moment you’ve been waiting for. After inputting the move, Grimlock stabs his sword into the ground and deactivates his shield as his body starts to undergo some rather painful-looking changes. After about 5 seconds of transforming (he's invincible the entire time), he comes out looking like this:


Once in Dino Form, Grimlock has the same basic stats, except for having an above average dash and being thrice the size of Bowser with a longer tail to boot. More importantly, Grimlock now has permanent super-armor, anti-grab armor, and complete immunity to status effects. He also gets a new mini-moveset, naturally. The transformation lasts for 12 seconds, use it wisely!

Dino Special: Flamethrower

Bowser’s neutral special but with twice the range, no diminishing effect, and Grimlock can walk around during it.

Dino Jab: Head Smash
Grimlock recreates Yoshi’s FSmash, dealing 14% and KOing at 90%.

Dino Tilt: Tail Smash
Grimlock whips his tail overheads, making this a good anti-air attack. By good I course mean it makes enemies afraid to jump. It deals 16% and KOs at 80%. Below average startup lag, moderate end lag.

Dino Dash Attack: Rampaging Smash
Grimlock roars as his dash animation becomes more enraged in appearance, dealing 15% and tripping anyone caught near his feet. This also resets any terraforming effects he travels over. There’s no startup time to the rampage, but it lasts for a full second and it doesn’t cancel if Grimlock dashes off the side of the stage, so this actually requires some slight planning to make use of it.

Dino Smash
Grimlock performs a hip-check, moving him forwards slightly while dealing 20% and KOing at 60%. This has moderate lag on both ends, but it deals a ton of shield damage, and will still some shield damage even if power-shielded.

Dino Aerial: Stomp Smash
Grimlock stomps downwards with both feet, dealing 25% and a spike twice as powerful as Ganondorf’s. If he touches the ground during the attack, it creates a DK down-special effect across the entire platform he’s on, dealing 12% and star KOing at 100%. Moderate startup lag, below average end lag.

Dino Grab: Eat, then Smash
Grimlock reaches towards the ground and bites, catching multiple enemies if possible in his jaws. This grab is 3x as strong as a normal one. Grimlock’s pummel is chewing for 5% at a moderate rate, then his throws are...well, take Yoshi's throws, make them actually threatening looking, and they all deal 13% and KO at 80%. Grimlock is the T-Rex Smash Bros deserves!

PLAYSTYLE​

The main thing that separates Grimlock from the other 1v3 sets out there is the fact that he actually has to try in order to win :troll:. In all seriousness though, Grimlock can be a bit tricky to play at first since he’s a melee-oriented boss without automatic defenses against the shenanigans a team can do. While his anti-combo rage will deter infinites, he’ still taking around 30% whenever the team lands a solid hit, and since he’s in mid-close range he will be in danger of being hit quite often. Grimlock’s long-term goal is simply to get to 100% rage so he can annihilate the enemy team in Dino Form, but it’s getting to that point where the meat of gameplay lies.

Summoning your shield should be your first priority whenever you have a free moment. Nearly impenetrable frontal defenses will help to stop a lot of the pressure a 3-man team can deliver, and it allows you to safely approach them too. One sneaky way to make room for this is a backwards DSmash, though you’ll have to ensure you don’t fly right off the stage during the process. Alternatively, you can simply try to land a few hits to ward your enemies away, or jump backwards while calling forth your shield. Once your shield is play, things become a lot smoother for you as you essentially have super-armor for the next 60% you take from the front, and while enemies can always try to get past you, you have your USmash to shut-down overhead platform routes while using your UAir to stop enemies passing beneath you when you jump.

The key to maintaining offensive momentum is, ironically, to hold your ground and shut-down enemy attempts to close-in. All of Grimlock’s tilts, his jab, and his NAir and FAir are safe at their max range, so if your opponents are at mid-range you should always be throwing some type of hitbox in their way. When they’re about to enter close range, stick to DTilt, shield bashes, and grabs/throws to reset the situation. Assuming you’re doing your job properly, you should be building up rage at a steady, if a bit slow, pace.

Against teams that are heavily keepaway-focused, Grimlock’s initial gameplan is a bit trickier, because the constant barrage of projectiles and summons will make it difficult to summon a shield. Stick to high ground whenever possible and look for openings to DSmash across the stage, summon your shield, and/or initiate a Whirlwind to plow through the enemy. “Divide and conquer” is the key here.

Once your rage is about to fill up, you’re final major decision is whether to use it immediately or to try and finish off your opponents’ current stocks then quickly take ‘em out again with the final smash. Grimlock has a naturally easy time finishing off targets thanks to low KO thresholds and stuff like Fair for respectable edge-guarding prowess. When you do transform, there’s no real strategy to scoring KOs with it; it’s a goddamn final smash after all. Heck, you might even try to save on to it in case you find yourself under heavy pressure from the enemy team, then use it to completely reverse the situation!

Capture the Flag
Even for a boss character, Grimlock is godlike in CTF matches simply because of the set-up period, allowing him to spam Dinobot Fury to have 100% rage before the fight even begins. Then it’s a simple matter of leading the offensive charge, transforming at the first sign of trouble, and laughing as he casually strolls in to the enemy base and takes the flag. The primary thing keeping him in check is the fact that CTF matches have team-attack enabled, so he runs the risk of KOing his team just as easily. Of course, this is a 3v1 character we’re talking about, if any stragglers on the enemy team try to grab his flag, he can pick them off without too much hassle. Even when his final smash runs out, there are 4-10 enemies for him to fight and quickly replenish his rage.

MATCHUPS

Vs Meta Knight, Yoshi, Jigglypuff: Even
This is when Grimlock wishes his anti-infinite mechanic counted individual hits rather than whole moves; Mach Tornado and Yoshi DAir inflict disgusting amounts of damage without triggering rage while setting up a Rest from Jiggs. On the bright side, 2/3 of these characters must be in close-range to do anything (with Yoshi’s projectile being largely ineffective at long range), giving Grimlock more breathing room when it comes to acquiring his shield and keeping them at bay. This is further compounded by the light weight of the melee characters. It’s entirely possible that Jigglypuff might lose 2 of her stocks before Grimlock ever transforms. Still, when the enemy team does close-in successfully, Grimlock is in a lot of trouble thanks to MK’s speed and the sheer damage potential this team has. The fight largely depends on how much damage Grimlock manages to do before he’s cornered, with him standing a fair of chance of victory if he can take off a stock from each enemy before being forced to use his transformation just to bail out of a bad situation.

*At least 1 more matchup is on its way!*

EXTRAS​

Side Taunt: Grimlock clenches his left hand while growling.

Up Taunt: Grimlock claps sarcastically. This can be canceled into his USmash for ultimate platform-wrecking power!

Down Taunt: Grimlock makes a chuckling motion while saying “Me think you bad at this.”

Win vs Shotzo: Grimlock picks ups Shotzo and examines it, saying “So, what your robot form look like?”

Lose 1v1 vs Ashens: Ashens’s couch is seen in typical review-style as he holds a Grimlock action figure. Ashens yells, “So, you want to see a real flamethrower?” as he torches Grimlock.

-INCOMING CODEC PRESS SELECT-​

Snake: This robot is enormous. Is this a new type of Metal Gear?

Otacon: It’s not a Metal Gear, but it is quite powerful. This is none other than the legendary Grimlock of the Autobots!

Snake: Huh, I would never have guessed he was an Autobot with the raw anger he’s exuding.

Otacon: He may be one of the good guys, but experiments on him have altered his mind and left him in an almost primal state. That’s probably why he’s attacking you right now.

Snake: Well then it’s a good thing I have backup. Say, these Autobot things can transform into vehicles, right? What does this guy change into, a tank?

Otacon: …Let’s just say that you’ll be reminded of Shadow Moses Island when you see it…

-END TRANSMISSION-​

ver 1.01: Buffed Dino form to have a reliable anti-air option, tweaked rage meter gain, buffed the descriptions of several moves.
ver 1.02: Gave Whirldwind the ability to cancel into standard attacks, and gave DSmash a damaging hitbox, giving these moves more versatility. Also clarified the controls for Grimlock's DThrow/Alternate grab.
ver 1.03: General damage/knockback buff for many of Grimlock's regular form attacks, general speed buff to dino form's attacks
 

Katapultar

Smash Lord
Joined
Nov 24, 2008
Messages
1,258
Location
Australia
[collapse="Grimlock"]Grimlock doesn't feel nearly as passionate as Garble was (there's a noticeable lack of detail in the set among the character bio and attacks themselves), but is still a surprisingly refreshing read given his simplicity and subtle take on 3v1. For one, this is pretty much the first 3v1 1v3 set for a -protagonist- instead of an antagonist, and he's not all "in your face" about his status to the point where much like Larfleeze, he could very much be fought as a 1v1...in fact, the whole 1v3 thing feels more like a formality. Sure, he's got range and some power, but he's pretty laggy and such a huge target, and the Rage Meter won't save him from attacks that...aren't comboed together.

At the very least, Grimlock feels weak until one gets to the U-air or so where he takes a turn for the powerful, trying to revel in his boss status by pinning a foe down and striking with frighteningly powerful throws that make the rest of his moves look frail - it takes from some of the otherwise different take of a boss that I mentioned beforehand. Not to mention Grimlock has Super Amour when grabbing that isn't available on that much of a basis with the rest of his moves, giving him very little reason to use them when he has something so powerful. On that note, I do wonder whether Grimlock's rage meter builds up when foes are attacking him when he's holding a foe when they're essentially helping him get his Final Smash.

The Final Smash is where I feel you dropped the ball on this set, unfortunately. Not only does it behaves too much like the Final Smash of a typical character, but is also feels incredibly uninspired, effectively being Giga Bowser with a bit of Yoshi in his shallow attacking options. The Final Smash should have been the best part of the set what with being hyped at the start. At the very least, in terms of balance, Dino Grimlock's sheer lack of attacking options actually gives him several blind spots...to the point where I feel he's actually weaker than in his original form due to having absolutely no way of attacking above or below him where foes can simply wail on him until his time is up. This is easily fixed with a few tweaks, however.

Grimlock's a decent set, but is severely lacking in the passion that drives one to think outside the box in terms of originality as well as a lot of your usual writing style that can get people excited for simple attacks of which would make him a lot more entertaining, as that's a part of your sets that makes them great. In your defense however, Grimlock very much feels like a simple smash n bash character in a similar vain to his game appearance (or at least I expect it to be that type of game) who's using the 3v1 engine as a playground to give off the same feel one would get from that game (even though we do have SSE in Brawl) what with being so huge. I doubt few wouldn't understand the desire to implement their favorite characters into Brawl and keep them going how they would in their original game, something you praised Perches Poxtrot for in a comment last contest, and given how long you've spoken of this set a lot of stuff behind it seems justified on your behalf. [/collapse]
 

ProfPeanut

Smash Ace
Joined
Oct 1, 2008
Messages
727
Ten targets, marked for death

Demoman


The Demoman is a an explosives expert playable only in CTF mode. His roles include setting up a minefield that'll blow up anyone stupid enough to try and go on the assault, hailing down a barrage of grenades from a safe distance, and slicing/exploding anyone that fights him head-on. There's little chance of anyone taking down this - *backstab* AAUUUIAAAAAAAAUUIiii...


Nyx Assassin


"Deep in the Archive of Ultimyr, shelved between scholarly treatises on dragon cladistics and books of untranslatable spells, there is an ancient tome of entomological curiosities. Compiled by scholars, the book describes the telepathic talents of the zealot scarab, a strange species of social insect with abilities unique to all the seven planes.

Unlike most grubs of his colony, Nyx Assassin did not arise from metamorphosis with the plodding thoughts and blunted appendages common to the worker caste of his kind. For his was a special transformation, guided by the grace of Nyx. He was the chosen one, selected from the many and anointed with an extract of the queen goddess herself. Not all survive the dark blessing of the queen's chamber, but he emerged with a penetrating mind, and dagger-like claws--his razor sharp mandibles raking the air while his thoughts projected directly into the minds of those around him. Of all zealot scarabs, he alone was selected for the highest calling. After his metamorphosis, he was reborn, by grace of Nyx, with abilities which shaped him for one thing and one thing only: to kill in the name of his goddess."

Nyx Assassin is one of the many heroes that populate Valve's rendition of the game Defense of the Ancients. A unique zealot scarab blessed by his goddess Nyx, he carries out his duty of skittering unseen around the battlefield, armed with razor-sharp claws, spiked armor and a piercing psychic mind. His specialty lies in sneaking up behind unwary heroes who stray too far from their teammates, and rewarding them with swift assassination.
In the original DotA, he was actually Anub'arak, the Nerubian Assassin. Since it was both horribly out-of-character and illegal to use unless they owned Blizzard, Valve applied a drop of their creativity to get around the issue of importing this character.

Due to his unique properties, Nyx Assassin is only playable in Smash Bros.' CTF Mode.

Statistics


Entrance: Nyx Assassin emerges from the earth with a short hop, catching the ground as he lands.

Size: 6
Weight: 4
Ground Speed: 6
Air Speed: 6
Traction: 7
Jump Height: 4
Fall Speed: 8


"My purpose is clear, my targets doomed."

Specials

Up Special: Vendetta

Nyx Assassin instantly becomes invisible, unseen by enemies but appearing transparent to his allies and himself. While invisible, his ground and air speed both increase to a value of 9, and he passes through enemies and their minions without interruption, similar to the G-Man. The only way for enemies to see him is if something corporeal latched onto him (whether a prop, a minion, or the flag) or if they hit him with a light-based attack. Too bad for them, there's hardly any light-based attacks in MYM…

Nyx Assassin can't just use this whenever he likes, however. When he uses this move, a timer visible only to those on his team and himself appears next to his portrait and starts clocking down from 20 seconds. While this timer is active, Nyx Assassin can't use this input and become invisible, leaving him in a vulnerable state if he loses his cover beforehand.

The moment Nyx Assassin uses any of his moves bar his shield, dodges (he still takes damage from wayward attacks) or a certain other input to be listed later, he will lose his invisibility at the beginning of the attack's starting lag. But if Nyx Assassin uses an attack with a jointed hitbox (as in, directly attacking with his limbs or body) as he becomes visible, that attack will deal seven times more damage than the norm. If two or more foes stand close enough to be both struck by such a boosted attack, then poor foolish them. Starting with a disjointed hitbox or grab will activate no such damage bonus, even if a jointed hitbox is followed up.

Nyx Assassin will eventually lose his invisibility after 20 seconds. While he can remain invisible indefinitely this way (except for the brief moment between losing invisibility and getting it back), he won't exactly be able to do anything to contribute to the game as well, since he can't relay back any scouting he does. He must also remain wary of any attacks that enemies might throw out as they raid or defend; since he won't want to attack while scuttling about, it shouldn't be difficult to focus on dodging as he skitters deep into the enemy base.


Side Special: Mind Burn

Nyx Assassin lashes out with his claws over half a second, unleashing a blue bolt of energy that immediately strikes the last enemy he attacked, so long as that enemy is visible and no further than 5 Stage Builder units away from him. This bolt (12%) burns away the enemy's shield by half its maximum hit points - even if the enemy wasn't shielding. No matter how much shield they had at the time, they'll only go into shield stun if they're foolish enough to try raise it while they have no shield energy.

The only reason Nyx Assassin can't just spam this move, though, is because he sacrifices part of his own shield when he uses this attack. He'll lose three-fifths worth of full shielding, and so will be unable to cast this again until he regains enough shield energy to spend. If his entire shield is depleted, he won't enter shield stun unless he chooses to shield right after for some reason.

The attack does no hitstun, but can be an important part of Nyx Assassin's assassination attempts. Not only does it come out very quickly, but most enemies won't have enough shield left to cover their whole body after being struck by it - making them easily shield stabbed by the Nyx Assassin.


Neutral Special: Spiked Carapace

Numerous spikes suddenly rise out all over Nyx Assassin's body, remaining there for 3 seconds before retracting. If any sort of damaging hitbox would strike Nyx Assassin while the spikes are out, whoever created that hitbox will find themselves immediately impaled by psychic spikes that will suddenly appear around him or her. It doesn't matter if it's a projectile, trap, pummel or even a stray minion; Nyx Assassin's spikes will surround the foe wherever they are, unless they're killed. Not only does Nyx Assassin not take damage or knockback from that attack, but that opponent will both take damage equal to the amount that Nyx Assassin deflected and be knocked back a little, stunned for half a second (Nyx Assassin has deflected a tick of witch doctor's poison just as equally as a god's thunderbolt back at their owners this way, so everything else is barely a challenge). Nyx Assassin will still suffer any debuffs or status effects the attack may have, though, and anyone fortunate enough to be shielding (for the dodge plane is no safe haven here) will block the reflected damage.

This will only reflect the first instance of damage that a foe might throw at Nyx Assassin, making him vulnerable to the next one - but it WILL reflect damage from multiple characters at once. If the entire enemy team decides to rush out the entrance in a fury, and Nyx Assassin stands there with his spikes at the ready, he can potentially throw their whole opening gambit against them while his own team prepares to sweep them off. On the other hand, allies will also activate these spikes and will be stunned in response as well, though at least Nyx Assassin won't take any damage. He oughtn't stand in the way of their charge regardless.

Nyx Assassin can only pull these out while not grabbed or in hitstun. Using this breaks his invisibility, and a fine line exists between resorting to this in a panic, and knowing that the bonus damage isn't worth death. He also has to wait 9 seconds after using it before he can use it again, meaning he has to time activating this well or suffer the enemy's attacks. This can be a nasty surprise to those opponents who rely on either long-range, powerful attacks or heavy-damage traps, and also rebutts any kind of retaliation from would-be assassination targets.


Down Special: Urna Swarm

Nyx Assassin digs into the earth, releasing a large Green Shell-sized scarab that appears similar to Nyx Asassin. The scarab has 20% hitpoints, doesn't take knockback, is short enough to dodge Falco's lasers, runs as fast as the Nyx Assassin normally does, can't be slowed down, can run up walls, behaves like a trap in that it ignores allies, isn't counted as a trap but rather a minion, and can number up to 8 scarabs in total at any time. Scarabs don't attack by themselves; instead, as long as any enemy is within range, they sacrifice themselves to create a psychic burst (10%) about as large as a Bob-omb explosion.

Enemies struck by this burst will have a strange "pierced" effect upon them for one second, indicated by the icon of a sliced brain above their personas. While afflicted with this effect, enemies are unable to perform any attack in their moveset; this covers smashes, grabs, commands to traps or minions and even punches and kicks, all blocked from use. While they're still able to move, shield or dodge, they essentially become punching bags for this short duration.

Nyx Assassin takes 1 and a half seconds to unearth a scarab, during which three small diagrams appear around him, visible to the player. Tilting to any one of them while Nyx Assassin digs will light them up, and determine the behavior of the scarab created.

Left/Right: This is the default setting, chosen automatically if no behavior is selected. The scarab will burrow into the earth upon creation; the moment an enemy appears on the screen, the scarab will unearth (which will take a third of a second) and start running towards the enemy, following the nearest one's horizontal position until they fall within range. Since scarabs can't jump, enemies are probably going to jump over them to avoid them, or maybe use a ground-sweeping moving to kill them first, forcing them into a predictable position for allies. On the other hand, scarabs can serve the same duty as Waddle Dees in taking a wide-sweeping projectile to the face for the team, so long as that projectile doesn't pass through units.

Down: After burrowing, the scarab will wait until a foe moves at least one SBU within range before appearing, running at them and bursting. As it takes a third of a second for the scarab to unearth, it can serve as a decent complimentary trap to lay amongst the rest. It can be buried at the edge of one screen so that any foes who walk in will immediately be exploded upon, or left near the flag or key traps in order to safeguard them against sabotage. It should be noted that scarabs won't disappear upon Nyx Assassin being killed, so even if the assassination attempt fails, foes can still be disabled long enough for the defenders to strike back.

Up: Instead of burrowing, the scarab will hop onto Nyx Assassin, hiding under his armor and turning invisible when he does. So long as there's a visible enemy trap with stamina or minion onscreen, Nyx Assassin can press Down Special for a single scarab of this type to hop off of him and onto the ground, though to enemies it'll seem like the scarabs appeared out of thin air. The scarab will ignore all player-controlled characters, though - and instead make a beeline for their minions and traps. Scarabs, having regular hurtboxes, can speed ahead to activate the enemies traps for your team, or help take down particularly bulky ones, either by exploding on them en masse or providing enough of a distraction so that your allies can take it down without retaliation. They also make a fine private sabotage device for Nyx Assassin; deploy them then take down whatever enemy is close when they try to stop the scarabs, or backstab someone and throw the scarabs down to wreck their fortress while you make mincemeat of them. This is the only move Nyx Assassin can perform while invisible which will keep him invisible, and can be performed in the middle of attacks as well; no use spreading the swarm with no assassination opportunity to follow up on.

Upon death, scarabs leave behind a corpse that lasts for half a minute. If Nyx Assassin uses this attack with one of these corpses at least 2 SBUs away from him, he will revive that scarab instead - a process that takes only half a second. A revived scarab has a lighter shade of color, and won't leave a corpse behind upon death; this allows Nyx Assassin to quickly reuse the scarabs he prepared at the start of the game, or those that he brought along on his assassination routine, to further booby-trap a part of the map. He'll still get the same diagrams to work with, even if he'll have to be quick about it.


"Nyx, nyx…"

Attacks

Neutral Attack

Nyx Assassin rakes the air in front of him with one of his claws (6%), then immediately follows up with his other claw (6%). Enemies struck will flinch long enough for Nyx Assassin to follow up with something else, but they'll be knocked back far enough that he can't hit them with his jab again. Using this out of invisibility will apply the bonus to both hits, and thus land a deadly 84% on the enemy. Your most lethal starting move, but also your least far-reaching and least useful one.


Dash Attack

Nyx Assassin leaps, then extends out his claws mid-leap, catching anyone in the way (9%) and dragging them along, knocking them into prone as he lands. The leap's speed depends on Nyx Assassin's own ground speed at the moment of execution; in a brawl, it can reset a particularly rowdy area by putting characters into prone while leaving you enough time to dash away before they get up. While invisible, you'll leap far enough to catch almost any running enemy before they escape off to another part of the map, pinning them down at your mercy with a fresh 63% upon them.


Forward Tilt

Nyx Assassin lunges forward with both of his claws in a pincer attack (10%), reaching a SBU in front of him and knocking anyone struck in a dizzied state for three-fourths of a second. If Nyx Assassin's target reacts too quickly for him, this move gives him enough time to follow up without retaliation, even if it doesn't do as much harm as his jab at 70%. Be careful, as there's enough starting lag for anyone who already sees you to quickly strike back or shield, and enough ending lag that you really only have half a second to work with to follow up and finish your assassination attempt.


Down Tilt

Nyx Assassin grows spikes on of his claws, then sweeps the ground in front of him with it (10%). This will flinch anyone standing in front of him, and knock anyone in prone upwards a short distance. It will also pin down the foe with some of Nyx Assassin's spikes, preventing them from jumping for the one second that they last. If they get struck by another attack within that second, the spikes will hold them to the earth (though get loosened off) and they'll get knocked into prone. There's enough starting lag that Nyx Assassin can't use this twice in a row safely, but enough utility for him to quickly follow up after dealing 70%.


Up Tilt

Nyx Assassin turns and rakes the air above him with both of his claws (11%), slamming them down on the ground beneath him afterwards. Anyone above Nyx Assassin struck will be dragged down to the earth, while anyone right below him will be knocked upwards in return, likely to be killed at 135%. Perhaps Nyx Assassin's targets like to stay in the air? This doesn't do anything for those who can stay really far up, but it gives Nyx Assassin a good 77%-dealing tool against those who think staying a short distance above the ground will keep them safe. It's fine for when Nyx Assassin's right on top of his target too, so that he doesn't have to reposition himself to keep the attacks coming. It's also his only grounded non-smash attack with killing power, should he need the quickness.


"Your thoughts betray you!"

Aerials

Forward Aerial

Nyx Assassin rears his claws up over a third of a second, then brings them down in a large swathe (10%), covering the whole area in front of him. The attack is quite similar to Mario's Forward Aerial in that landing it normally deals regular scaling knockback that kills at 120% - but sweetspot it at the tips of his claws mid-swing, and the foe is spiked hard into the ground. Easily telegraphed, this 70% worth of damage isn't the safest opening move, and is instead much better for finishing off a target. while high in the air. Landing that sweetspot also allows Nyx Assassin to continue piling damage onto the target, and he has little landing lag to worry about despite the notable ending lag.


Up Aerial

Nyx Assassin arches his back, allowing his spikes to suddenly rise out a third of a second later. These spikes don't deflect, but instead deal damage (12%) and linger for a fourth of a second before retracting, doing enough knockback to kill at 140%. Of course, given that Nyx Assassin can easily juggle a foe and strike them with this halfway to the top blast zone, the killing potential of this attack is much higher than stated. The slow nature of this move makes it difficult to land on anyone who can retaliate easily, though, and the long landing lag is problematic too. Spikes count as a disjointed hitbox, which is fine - the odds of landing this on a normal-sized grounded target are very slim, and it's difficult to follow up on anyway.


Back Aerial

Nyx Assassin aligns his body such that his whole back faces behind him, arching it similar to Bowser's BAir. He then thickens the armor on his back, it shining for the three-fourths of second he holds this stance. While Nyx Assassin focuses on strengthening his armor, any attack he takes from behind will deal no hitstun and be reduced in damage by 75%. Furthermore, while he still receives knockback, the vertical aspect will be totally converted into horizontal knockback similar to those ground-only characters, and getting struck out of a Camera Zone will only push you into the next one, as long as there is one. Almost purely for escaping, of course, since you can barrel past enemies on your escape and use this for a good getaway - but if Nyx Assassin uses this to escape from a soured assassination attempt, what's to stop him from turning invisible midflight and heading back unseen?


Neutral Aerial

Nyx Assassin spins his body around like a whirling fortress, slicing targets with his outstretched claws and legs over a second (2.2% per fifth of a second, 11% total) and flinching them with each tick of damage. In addition to having transcendent priority, Nyx Assassin retains some of his aerial momentum when using this, allowing him to claw through multiple targets in some cases. It's quick enough to be used at both the start and middle of an assassination attempt, but the final hitbox deals only enough knockback to knock foes away a short distance, and starting with it deprives Nyx Assassin of his ground follow-up attacks as its landing lag is short yet significant. Alternatively, with some helpful allies or use of your Back Aerial, you can activate Vendetta early then saw through the enemy line with 15.4% damage ticks before going invisible once more.


Down Aerial

Nyx Assassin shuffles his legs rapidly (3% per third of a second, 9% total), dealing multiple hits as they imitate running. Targets caught are pushed down with Nyx Assassin as he falls, and; should Nyx Assassin land before the move ends, the target will end up right in front of him, and the negligible landing lag will allow Nyx Assassin to easily follow up with a grab. The trick lies in catching the foe with his shuffling feet, though, which strikes only below him and have a little starting lag. This move is still much better for following up than striking unseen, as Nyx Assassin can do much better than 63%.


"For you, dear Nyx, for you."

Grab Game

Nyx Assassin's grab reaches about as far as Bowser's, although takes merely a third of a second to perform. It's otherwise unremarkable by itself.

The pummel is far more curious. At such a close range, Nyx Assassin sends his razor-sharp thoughts into his target's mind, dealing 3% in just a fourth of a second. These thoughts are Nyx Assassin's own way of replicating the scarabs' psychic burst in that they too interrupt all attack commands that the opposing player may send to the target, disabling him from making any kind of attack once they're released from the Nyx Assassin's grasp. Instead of one second, the duration of the "pierced" effect lasts for a third of a second times the number of pummels Nyx Assassin inflicted on the enemy.

Depending on the situation, Nyx Assassin may have the time to land this enough times to disable his target from retaliating the whole duration of the attack. Consequently, he may want to skip straight to one of his throws in the event that one of the target's allies is close enough to strike Nyx Assassin before he can do anything else. The pierced effect will surely waste the time of anyone reflexively using their GTFO move to escape, although it may instead allow them to focus on evading Nyx Assassin's attacks rather than making the error of striking back and leaving themselves open further.


Forward Throw

Nyx Assassin gores his target on the horn on his head (18%), then regains control of all movement inputs. He is now free to dash, dodge and jump wherever he pleases - bringing his impaled target along with him, who must now escape at twice the grab difficulty. Any attack that hits the foebefore it hits Nyx Assassin will be blocked by that foe (assuming the attack has no ghost-like properties and such), shielding Nyx Assassin from attempts to strike him or allowing him to bring particular targets into the line of fire for his allies. Any attack input will have Nyx Assassin toss the foe off and forward ala DK.


Back Throw

Nyx Assassin throws the foe down, then props his claws on the ground to hold himself in place. He then uses his legs to pierce thefoe (16%) before kicking back, sliding the foe along the ground behind him. The foeshould slide five SBUs at a dash speed of 9 on average, depending on the target's weight, before stopping. While sliding, the target will trip anyone he collides with if smaller, or knock them back a short distance (5%) if the same size or larger. This is far better for throwing away a foe than killing one, temporarily disabling any other enemies from interfering as Nyx Assassin runs off.


Up Throw

Nyx Assassin bends his head down before head-butting the target skyward (15%) with enough force to kill someone at 100%. Powerful, yet telegraphed, and may not work on some stages, this is a surefire way to finish off a target without risk of retaliation. In simplicity lies the surest ways to assassinate.


Down Throw

Nyx Assassin shuffles his claws wildly, grinding the foe between them (12%). After nearly a second of this, Nyx Assassin tosses the target down such that they rebound off the floor weakly on any percentage - right back into Nyx Assassin's clutches. If scarring the target further is what is needed, rely on this to follow up with other attacks or even another grab.


"My purpose draws nigh!"

Smashes

Forward Smash

Nyx Assassin rears both of his claws up, then drives them into the ground in front of him with great force. Immediately, earthen spikes thrust upwards (20%-28%) from the ground in front of him, rising in sequence away from Nyx Assassin until they reach one to five SBUs away, depending on the attack's charge. The spikes have powerful knockback that will throw even a healthy foe four SBUs up into the air, although the force scales at a medium-slow pace and won't kill until 140%-100% or so. Still, Nyx Assassin can send an entire raid skyward given the attack's range - with the aid of his Neutral Special, he's almost ensured of charging it fully.


Down Smash

Nyx Assassin begins digging up the ground below him, needing half a second before he can either leave it as is or charge further. Afterwards, he leaves behind a special pitfall trap that will bury the first foe that steps upon it (15%-21%) for 1-3 seconds, depending on the charge. The moment the trap is triggered, a special downward-pointing arrow will appear above Nyx Assassin to his player and teammates and will last for as long as the foe is buried. Should Nyx Assassin input the Down Smash again during those moments, he will dig into the earth over three-fourths of a second, open to interruption until he disappears into the stage. Immediately, he then unearths himself from the spot that he first placed the pitfall trap, hopefully with an entombed foe at his mercy.

This move is a valuable escape mechanism, although unreliable. As simple as it is to plant in your base and use it to escape after an assassination, its merits as a simple pitfall trap to delay foes or incapacitate them long enough for an ally shouldn't be ignored.


Up Smash

Nyx Assassin brings out a red scepter from beneath his shell - he is not unfamiliar with artifice and its uses in assassination. From the red jewel at the scepter's head, a bloodied bolt of energy strikes the highest-damaged foe on the screen, skipping everything and everyone else. The target is stunned as though struck by the full force of Ness' Neutral Special (15%-35%), and then one of two things occur - if the target is below 175%, he or she is footstooled; if above 175%, he or she takes lethal upwards knockback.

As much of a potent finisher as it is, there are drawbacks worth mentioning. Firstly, as it is a smash attack, Nyx Assassin must be on the ground to use this, and not juggling the foe. Second, Nyx Assassin takes about half a second to draw the scepter out, giving enough time for any foe in critical condition to dodge, if they aren't in hitstun. He must also contend with half a second of ending lag as he hides it back. Third, if no foe is onscreen upon release, the scepter will resort to targeting an ally in its release, even if it won't strike Nyx Assassin himself.


Final Smash
Scarab Swarm

Nyx Assassin calls upon his goddess for aid, causing the earth all around the stage to begin rumbling and spitting dirt. Suddenly, a powerful psychic pulse emanates from Nyx Assassin, extending to reach past the screen borders and even into the adjacent zones, stopping only once the radius reaches two Final Destinations in length. The pulse applies the pierced effect upon every foe that doesn't dodge in time, as well as damaging them. The further they are from Nyx Assassin, the less damage they take (40%-15%) and the shorter the duration of the pierced effect (10 sec. - 4 sec.).

The moment the pulse echoes outwards, dozens upon dozens of scarabs begin erupting out of the stage around Nyx Assassin in a 5 SBU-wide area from where he used the Final Smash. The scarabs, being identical to the ones from the Down Special, will explode upon the first enemy object they touch; they will choose to swarm over the closest enemy upon spawning. If there are no enemies onscreen, the scarabs will move towards the direction of the enemy's flag, repeating their attack behavior. If the enemy's flag is taken, the scarabs will then follow and guard the ally with the flag, resuming their invasion of the enemy base once the point is taken.

Since the scarabs continue to spawn randomly en masse for about six seconds, this overwhelming force will likely take down any fortification and force the enemy to concede their flag point, if they're not too busy getting murdered in the chaos. After all, Nyx Assassin is still free to kill as he pleases in the meantime...


Playstyle


Nyx Assassin isn't playing mindgames here; he's playing run in, kill someone in the blink of an eye, then hide before the enemy team can catch him. Nothing's more painful for a target than to craftily set up a fortress only to watch it disappear as Nyx Assassin unexpectedly slaughters him, after all.

Before the game starts, apply your scarabs and Down Smash pitfall strategically. Decide on how you'll spend the opening moments - will you participate in the first raid, supporting your allies' attacks as you incapacitate enemies? Or, more often than not, will you immediately dash into the enemy base, jumping over the brawl and locating all high-threat targets?

While Nyx Assassin has enough tools to kill almost any character, he only has the tools to kill any one character. The player's problem, then, lies in whoever foes Nyx Assassin must contend with. Who's poorly equipped to fight in melee range? Who's terrible at peeling off opponents, or possesses only one or two long-range attacks that can be quickly reflected? Whose traps and minions will all disappear upon death? Who's the most frustrating defender to the flag? Who's too far out from any kind of help from teammates? Who needs to be absent for the next half-minute?

To help with deciding the next target, it's better for Nyx Assassin to stay just ahead of his teammates so that he can assess which of his allies can capitalize on missing enemies and which of his enemies will be the biggest hurdle for the incoming raid. After all, it's a futile act to kill someone defending deep in the enemy base if not enough team members are inside by the time that target respawns. As useful as it is to destroy a whole half-minute's worth of set-up, such characters should really only be prioritized if the aforementioned set-up affects much of the stage and can't be hastily plopped down again for a respectable defense upon revival. Nyx Assassin needs to predict the right moments when one specific missing character will tip the scales of the game to his team's favor.

While Nyx Assassin is able to put up a fight, his unboosted damage is actually quite lackluster. True, his grab hurts more than the norm, but his dependable attacks make him the weaker of most straight one-on-ones; truly, much of his damage lies in the boost given by Vendetta. Depending on the foe, his Spikes can also do much damage, and his Side Special and Up Smash only guarantee the foe's demise after an ambush.

Nyx Assassin's second dilema is in what he must do right after killing someone. Even after going invisible once more, foes are likely to become suddenly warier, either littering the air with wide-range attacks to slow you down or grouping together at just the right distance, immune to group-backstabs yet still covering each others' backs. Nyx Assassin can choose to move to another area and target whatever foes may be found there, as it's often easier than waiting around now-stalwart targets.

The problem with having quick access to the enemy base is that Nyx Assassin is likely to set off the traps there first, with a chance to simply kill himself if careless. Scarabs can be deployed one at a time to check for hidden ground traps, or en masse if a particularly healthy trap must be destroyed without Nyx Assassin's direct interference. They can also be used to mind-game enemies determined to defend their fortress, luring them into the open or forcing them back.

Even though he may seem to be built for it, Nyx Assassin really shouldn't try make a beeline for the flag. He can't pick it up without making himself visible, and he's really only going to waste his attack boost that way. It's far more useful to take out the defenders along the way, clearing the path for your better-equipped flagbearers.

As for escaping, Nyx Assassin has some decent options with his spiked carapace and various other moves. The question lies in whether you truly need to escape as opposed to hiding for the next assassination attempt instead. Perhaps your cover had to be blown early to survive, perhaps the opportunity was too good to pass, perhaps there's an angry raid group who just turned their attention towards you. Disable the enemy long enough to make your exit, then prepare to sneak behind them again.

Defending is not Nyx Assassin's strongest suit, although a hidden guard is something many teams would appreciate. Nyx Assassin can capitalize on his burrowed scarabs this way, and can also keep an eye on his own base for other potentially hidden enemies. It's easier to commit mistakes when one thinks no one will be coming, after all.

Nyx Assassin has only one true purpose in this mode, and it's not capturing the flag. Regardless, it's a purpose he carries out with pride and impunity, silencing key targets so that his team can march onwards upon the corpses of the enemy.


Changelog
02/04/13 - Edited Final Smash
02/03/13 - Added Final Smash
- Scarabs' psychic burst now also apply the "pierced" effect instead of selectively disabling inputs.
- Up Smash damage rescaled to 15%-35%, from 25%-35%
- Up Smash damage threshold raised to 175% from 150%
- Up Smash now has 0.5 seconds of starting lag and 0.5 seconds of ending lag, up from 0 seconds.
- Removed shield energy requirement from Up Smash.
01/02/13 - Spiked Carapace stuns for 0.5 seconds, down from 1 second.
- Spiked Carapace now doesn't hurt shielding characters (provided no part of them is exposed) and invulnerable characters
11/14/12 - Increased damage multiplier of Vendetta from five to seven, indirectly reducing the number of attacks Nyx Assassin needs to push a foe into KO range.
- Cleaned up some text and formatting
11/10/12 - Added.
 
Last edited:

FrozenRoy

Smash Lord
Joined
Apr 26, 2007
Messages
1,261
Location
Las Vegas, Nevada
Switch FC
SW-1325-2408-7513
MAGGOTS

MAGGOTS MAGGOTS MAGGOTS MAGGOTS MAGGOTS etc

The Soldier is yet another TF2 set, though it's better than the likes of Medic. It has a very inventive use of self-damage and CtF mode by using it primarily as a method of travel, taking advantage of huge stages. This also leads to a pretty good aerial game, which makes sense: Soldiers love the high ground. It also fits in to the Soldier's...unbalanced personality, let's say. This is all pretty slick when put into the context of Capture the Flag, as Soldier is a truly offensive CtF character who works without seeming broken in most aspects. The rockets are fairly well balanced and for the most part, interesting without being dumb. The style is fitting for the Soldier, a real madcap offensive dash with a lot of STUFF BLOWING UP.

On the other hand, it has a good deal of stuff I dislike. I don't like how the Liberty Launcher is handled: The fact that the mini-rockets let your allies get your buffs in them seems incredibly...not quite tacky, but not right, especially when a lot of missiles self-damage and the like. I would have preferred if the Soldier could use them for a smaller rocket jump or something. We'll have to agree to disagree on the Grab Smash as well: I feel like it's pretty broken and kinda dumb, though it does at least slot well into the Soldier's playstyle. Moves can sometimes feel a bit dull, but given the character choice's armaments I feel it is handled well enough that it never truly brings the set down. While not something I'd deduct points for, I'm kind of sad that the D-Throw doesn't have him rocket jump off the foe's face. On the flipside, that Final Smash is amazing. On par with Von Kaiser's. Medic is jealous, I'm sure.

Overall, Soldier is a very good set, and while I wouldn't say I love it, I very much enjoyed it, and I feel it is the best of the CtF by far, unless Sniper turns out really good when I get to it. First MYM13 Smash Daddy set: Successful.

Putata Potata

Putata is a pretty good set, methinks. Paint terraforming is handled carefully, deliberately and oddly uniquely I feel, with a large focus on differing angles and the like. Putata liking the air fits well with this, as he creates a little hip hop playground for himself. It also works well with his sawblade F-Tilt. Impressively, you manage to make a OHKO Super Scope-esque surprisingly balanced, because of the time and resources it takes to make it. The dog is what ties the set together, turning a light fitting playstyle into more cohesive, various creations and conctions combinable into one singular, deadly beastie. It's all looks really fun to play as, I think.

I don't like how the DSmash interaction with the dog went. The dog totem felt awkward and possibly overpowered: Something more awesome would be it causing a solid wall to be mounted/attached to the dog's back, making it harder to jump and get away, or perhaps even the ability to capsulize the dog for Putata or something. I also don't like D-Tilt: Pitfall traps in general are boring additions to sets with balance trickiness and I felt it was both boring and somewhat unbalanced here. I kinda wish Putata could stamp the foe while he grabbed them...

As a side note, I love the way he looks.

But yeah, good set. Whoo.

NO LIKE YOU

ME GRIMLOCK

That'll be funnier when you see my Rankings image.

Anyway, I was excited when I saw another HR set and elated when I saw the mechanic...but it all sorta fell down from there. The energy of the beginning rapidly evaporates to a sort of vapid boredom, moves described starting jubilantly and ending with a whimper of short comparison and nothing else to Brawl moves, a reverbating shrinking echo of waning. The core idea is very cool: Grimlock doesn't have a lot of the advantages normal 3v1 bosses have, but he instead builds up rage that lets him use a Final Smash, with Rage building better if you take advantage of the lack of, say, anti-grab armor to chain him, and the FS usable during hitstun. Cool.

The set then delves largely into a...really boring, no offense, moveset. It's not the lack of innovation or anything, it's the lack of anything else like cool descriptors or even just some added bits to spice it up, which is set alongside some moves that I don't entirely like(USmash being a grab hitbox is bad IMO). Dsmash doesn't feel at all like a DSmash, but instead a directional input. The grab game feels automatic, pinning down the foe and then either going to town or forcing the other foes to wait it out, and better than the rest of the moveset, as it KOs and damage racks all in one handily. Also, why can he not use Smashes when the foe is pinned, but the Jab, Tilts and SSpec? For that matter, why can he not use NSpec?

This leads to the low point of the set, the Final Smash. Normally that's not a low point, but here it's presented as the proverbial carrot on a stick early on, taunted for the reader via the mechanic and then yanked away to the end of the moveset, but that would be fine if it was something wonderful, but instead it is basically Giga Yoshi, without description that makes it enjoyable, each attack being short and mostly Brawl attacks but stronger. It's a boring end that makes the whole thing feel like you don't taste true power for the fruits of getting your rage. It's sad because I really like the concept, but it just...wasn't pulled off in a satisfactory way.

Which Old Witch?

Koric, eh? I feel like you've made something before this...Looking it up, you made Regulus in MYM12, which amused me because I liked Bomberman 64. You also made 4 MYM11 movesets. Cool.

Witch herself is actually more interesting than I expected entering the moveset. Comet and Meteor are interesting projectiles we don't see much of in MYM, providing some camping ability with what I felt was some depth, with mindgames from Comet and with Meteor providing close range camping. The standards are less interesting, but still hold promise: Up Tilt is somewhat cool and I like how the Jab can be followed up well. Up Smash, however, was something I was not expecting, as it essentially allows you tu turn your projectiles into a medley of attacks by stuffing them inside the tornado with proper timing since they are projectiles OR to strike projectiles herself, while functioning as a strong smash attack. The idea of combining this with Meteor is vicious and makes Witch surprisingly competent at close range, even without melee attacks. Down Smash is also interesting, serving as a sort of dangerous finisher or psuedo-counter.

One complaint about this set is it can be hard to read at times, as it feels like commas are missed and sentences sometimes hard to read. It's not TOO distracting, but a bit tough. Forward Throw is cute, but perhaps not the best choice for a move. Still, it did feel character-y at least. The numbers can be somewhat wonky at times as well, such as the SSpec lasting far too long at 12 seconds and the USpec going too far high. There were also a few times I felt that frame info wasn't the best choice or some moves expanded...but I found the frame data surprisingly refreshing for other moves.

Overall, I enjoyed this moveset more than I expected when I would read it. This pleases me. Good moveset, it just needs polish and maybe some writing help.

Clumsy Moveset Writer

You make it a point to call her Clumsy Assassin through the moveset as an interesting organizational test...then call her Sheena in the Jab. Now, you DO call her Sheena later, but it seems to follow a progression: Clumsy Assassin -> Resolute Assassin -> Sheena. So why is this Sheena mention out of place? Was it clumsiness or intentional?

I feel the idea of "Clumsy Assassin does stuff to the foe, takes advantage of opening" is somewhat flawed moveset-wise, because what can Sheena take advantage of with? The throws can somewhat do it, but only F-Throw really does anything worthwhile, because Clumsy Sheena has little use for attack freshness and the foe's staleness isn't that big for the moveset, the attack lag stuff is okay but kinda meh given her moveset...right, D-Throw can stack. So her entire moveset is spamming D-Throw so the foe can't dodge Corrine and the like? There's still so little to take advantage of aside from more curses...the moveset doesn't seem much fun to play, I think. It feels somewhere between a flowchart and focus, a bit too obvious and yet somehow not, and it feels like a lot of it would come down to boring gameplay of abusing Corrine and one or two seals alongside sapping dodging, since you get a WHOPPING 14 seconds to refresh it and it's stackable. She seems very much landslide-y, with matches seeming less to be close and more to landslide either for her if she can get the D-Tilt chain going or against her if not.

Overall, I vaguely appreciate the organizational attempt, but the moveset didn't do anything for me. On the plus side, Google Searching "Clumsy Assassin" for a Rankings pic was fun! And so I close the book on the Junaday sets. Rankings updated and a good deal of older ranked sets switched around, so look carefully.
 

Hyper_Ridley

Smash Champion
Joined
Dec 21, 2007
Messages
2,291
Location
Hippo Island
May as well give some general responses to Grimlock's feedback before the REALLY negative ones show up and the thread devolves into argument central.

First off, I can definitely understand the set coming off as a boring read. I'll fully admit that some of the move descriptions could use some spicing up, but I was also going for a bit of the no-nonsense brawling that Grimlock is about in the writing itself. His character doesn't lend itself well to really distinct animations outside of the occasional I REALLY SMASH YOU move, and I didn't want the set to be nothing but sword impaling and earth-shattering stomps, so meh. Especially on the final smash, I was trying to play it for comedy that his moveset is just various ways of murdering you horribly.

Speaking of the final smash, I DO need to give him more anti-air stuff, thanks for the tip Kat. Other than that though, I'm not quite sure what everyone (or at least you 2 for now) were expecting from "transform into a robot TRex". It's not like he was going to have some insane new game mechanic considering it needs to be capable of dealing a lot of damage without worrying too much about what the situation is when he uses. The point of it being at the end is because, you know, it's a giant robot TRext. That's already kick-*** (d). If the problem is the Yoshi comparisons, well, that again was meant as a joke, seeing as Yoshi is essentially a cuddly Trex and needs Grimlock to whip him into shape.

On the inputs, DSmash and Down-Special were originally on each other's slots, but I swapped them because I wanted DSmash unusable in the air, and Down-Special usable in the air. USmash is a "grab" because it lets him perform his grab moves on airborne opponents, and it fits with him grabbing the platforms to destroy them. Though he totally should say "I'M GONNA WRECK IT!" when he does that.

Thanks to both of you for the feeback. I'll admit that I wasn't quite as into it with this set than I normally am, but hopefully I can give him some revisions to tune him up. :bee:
 

FrozenRoy

Smash Lord
Joined
Apr 26, 2007
Messages
1,261
Location
Las Vegas, Nevada
Switch FC
SW-1325-2408-7513
The problem may come from the unfortunate fact the humor didn't really become obvious enough to not fall flat. Or at least, I didn't notice it until you pointed it out.
 

Junahu

Smash Ace
Joined
Nov 15, 2005
Messages
899
Location
Shropshire Slasher
Clumsy Moveset Writer

You make it a point to call her Clumsy Assassin through the moveset as an interesting organizational test...then call her Sheena in the Jab. Now, you DO call her Sheena later, but it seems to follow a progression: Clumsy Assassin -> Resolute Assassin -> Sheena. So why is this Sheena mention out of place? Was it clumsiness or intentional?
That's an error on my part. :bee:

I feel the idea of "Clumsy Assassin does stuff to the foe, takes advantage of opening" is somewhat flawed moveset-wise, because what can Sheena take advantage of with?
In most circles, you punish by racking damage or KOing. Get an advantage, hit the foe with something. With Sheena, you can take advantage of an opening, by adding more future openings to take advantage of, or more statuses to further open the foe up. Eventually, even Sheena's relatively clumsy pressuring will become a dominating force.
The key, and the whole conflict, is that Sheena is not the best equipped character for either pressuring or punishing. She's a poor assassin, because that's how she feels about herself.
(This is all stuff that probably should have been written in the moveset to begin with :urg:)

Clumsy Sheena has little use for attack freshness and the foe's staleness isn't that big for the moveset
Freshness affects damage, which in turn affects priority. And that only needs to come into play for one or two exchanges before it turns a battle around. Plus it basically makes Sheena less likely to get KO'd, and even a little more resiliant in general.

...right, D-Throw can stack. So her entire moveset is spamming D-Throw so the foe can't dodge Corrine and the like?
A good point, the throw should be a bit more powerful, but unstackable. Thanks.

There's still so little to take advantage of aside from more curses...the moveset doesn't seem much fun to play, I think.
Depends on who plays really. I'm personally not big on building movesets up specifically for the most avid players. And nowadays I'm no longer a fan of building a moveset purely around the reader's interest. That does kind of put me in a bit of a bind, with movesets that have neither infinite tactical depth, nor the capacity to enthrall a reader.

The attacks all have just enough synergy to them that a layman can have fun playing with things, like seeing if they can get a Pyre seal and a Guardian to both hit the foe during a combo, or using a Serpent seal to drop a combo without letting the foe really get away, etc. These kinds of things do impact on how characters feel and matches play out. So ultimately I think I want my movesets to lay firm foundations on how to explore the characters they are about, in ways that the actual player can become easily aware of.

Overall, I vaguely appreciate the organizational attempt, but the moveset didn't do anything for me.
Fair enough.
 

Kholdstare

Nightmare Weaver
Joined
Oct 10, 2008
Messages
1,440
HALLOWEEN MAKE-UP DAY

While the 31st of October has come and gone with a good number of movesets come by, the showing seems far more disappointing than those of previous contests, and for good reason: many of us were unable to contribute whether due to time restrictions or that unfortunate hurricane. Rather than allowing sets that would only work on Halloween to gather dust until next year, I propose an alternative - make the tenth of November Halloween Make-up Day. This gives a way for those of us who had no way to post sets during this time a chance to engage in frightful fun, as well as allowing those who were unable to get one out a week to make up for it. I know I shall be posting a set that day - I implore everyone interested to do so as well.
Apparently nobody had any makeup sets besides ProfPeanut.
 

Junahu

Smash Ace
Joined
Nov 15, 2005
Messages
899
Location
Shropshire Slasher
Ah, yes. There was more backroom shuffling, and the date got pushed back to the 15th. You can go ahead and blame everyone in the leadership (plus me) for the lack of communication on this change.

6_6 sorry
 

Hyper_Ridley

Smash Champion
Joined
Dec 21, 2007
Messages
2,291
Location
Hippo Island
The problem may come from the unfortunate fact the humor didn't really become obvious enough to not fall flat. Or at least, I didn't notice it until you pointed it out.
It was definitely too subtle for its own good, I agree. My next set shouldn't have this problem at least :cool:

Apparently nobody had any makeup sets besides ProfPeanut.
Grimlock was posted for it in my timezone (sad).
 

ForwardArrow

Smash Ace
Joined
Aug 17, 2011
Messages
502
Ah, yes. There was more backroom shuffling, and the date got pushed back to the 15th. You can go ahead and blame everyone in the leadership (plus me) for the lack of communication on this change.

6_6 sorry
Actually, we're pushing it back a tad further to the 18th. There was more work here than I believe we all expected.
 

Agi

Smash Lord
Joined
Jul 27, 2008
Messages
1,120
Location
SE Washington
MYMini Idea
Do You Like Green Eggs and Ham?


For those of you who somehow still don't know, Dr. Seuss was an absolute genius of the written word. Author of more than 40 children's books, chances are you've read one or two of them in your lifetime. The Cat in the Hat, Horton Hears a Who, The Sneeches (and other stories,) - all these books, though told in a way children can understand and appreciate, contain highly advanced thematic elements which you may discover on a reread, incredibly strict meter, and of course that lovable dialogue which made Seuss famous.

Of course, one portion of Seuss's genius stands out in the story of Green Eggs and Ham. When challenged by a colleague to write a story in 50 words or less, Seuss (quite possibly with a visible smirk) did not falter, and took him up on the bet, producing a cohesive story with an identifiable conflict, antagonist, denouement, and resolution, all within the 50 word limit.

[collapse="The 50 Words"]The 50 are: a, am, and, anywhere, are, be, boat, box, car, could, dark, do, eat, eggs, fox, goat, good, green, ham, here, house, I, if, in, let, like, may, me, mouse, not, on, or, rain, Sam, say, see, so, thank, that, the, them, there, they, train, tree, try, will, with, would, you.[/collapse]

Now... what if we apply this to MYM? How few unique words could be used to construct a complete moveset - all 23 or so inputs, playstyle summary, any extras you could care to mention - all the while maintaining the same level of creativity we've come to associate with the contest? I ask because I have no idea. For context, this contest's Koala Kong has 1937 unique words out of a total of 16747, compared to perhaps a simpler set, Mr. Dark, who still uses 495 unique words and 2065 altogether. How far can we shrink this number?

Let's find out. For this mini, write a moveset as you normally would, but try to keep the number of unique words to a BARE minimum. 200 seems attainable, 100 is a challenge, but if you REALLY want to push it, try to match the Doctor himself - 50 unique words. Can you do it? Is anyone going to TRY to do it? Who knows. Far below is the unique word counter I used for the above measurements, but let's establish some ground rules first.

1) Don't dumb down your ideas. Balance your creativity alongside the challenge of condensed language.
2) The idea is to make unique movesets, but resubmissions under the new constraints are also welcome.
3) If you stop having fun for any reason, stop making the set. Really, this should be the rule for making any moveset.
• If you'd like, include a list of the words used, and a word total. As this obviously requires a bit more work, I can't really hold everyone to it.
• Image setters are likely to have a bit more trouble with the final word count. Consider using text instead.
• EVERYTHING counts - move names, stuff like Up Throw, etc. You may have introductions/conclusions which don't count toward the final total, reflections and the like, but everything within must be part of your final total. Be smart about images.

http://rainbow.arch.scriptmania.com/tools/word_counter.html

Yes, I like them, Sam I Am!

999 posts? Next one better be good.
 

Hyper_Ridley

Smash Champion
Joined
Dec 21, 2007
Messages
2,291
Location
Hippo Island
I look forwards to it. I hope everything turns out ok Khold (hug).

EDIT: Don't feel like double-posting, so I'll say now that Grimlock has received his first revision, giving his final smash a way to hit things above him in addition to a few other tweaks.
 

The Warrior of Many Faces

Smash Apprentice
Joined
Mar 22, 2012
Messages
101
Location
Everywhere and nowhere, as location is meaningless
Just a quick 24-hour set to try to get myself back in the groove

DERPY HOOVES

"I just don't know what went wrong!


Derpy Hooves, by far the most popular background pony from MLP:FiM. Making an appearance in the very first episode, she has since made several appearances in the background and managed a good minute of fame in Season 2. In general, Derpy is portrayed as clumsy and unintentionally destructive, but well-meaning and cheerful, as well as very obsessed with muffins. She is widely considered to be Ponyville’s mailmare, and although she may occasionally deliver the letters to the wrong address, she never gives up. She’s also commonly portrayed as the companion to Doctor Whooves for some reason.

STATS AND MECHANICS

WEIGHT: 4 Derpy’s pretty light.
SIZE: 5 Derpy’s pretty average in this regard.
GROUND SPEED: 3 Not particularly fast…
DASH SPEED: 7 …except for when she's late for something.
TRACTION: 1 Oh my goodness, Derpy’s traction is horrible.
JUMPING ABILITY: 9 She makes up for it with five jumps akin to Pit’s, however.
AIR SPEED: 9 Derpy may be clumsy, but she knows her way around the air.
FALL SPEED: 3 Falls fairly slowly.
CROUCH: 4 Not a great crouch, but serviceable.
WALL JUMP: No.
WALL CLING: No.
GLIDE: Yes.
FLOAT: Yes.


BASIC ANIMATIONS

Idle Stance: Derpy stands there with a grin, occasionally flapping her wings or making her eyes derp in a different direction.
On-screen Appearance: Derpy crash-lands from the sky, then shakes herself off with a goofy grin.
Walk: Derpy trots along with a happy smile, eyes closed.
Run: Whoops, the mail’s late! Derpy gallops with a panicked look on her face, wings outspread.
Swim: Derpy doesn’t swim too well, but she doggy-paddles as best she can.
Crouch: Derpy bends downward with a look of interest on her face. I wonder what she’s looking at?
Dizzy: Derpy’s eyes start going around and around in two different directions.
Sleep: Derpy sleeps standing up, head bent downward.
Item Grab: Derpy grabs the item with her hoof… somehow. Who knows how that works.
Dash Item Grab: Derpy grabs the item without even looking at it as she rushes by.
Item Hold: When holding still with an item, Derpy keeps the hoof she holds it with off the ground, occasionally staring at the item with a fascinated look.
Item Throw: Derpy tosses the item overhand in a careless motion.
Item Swing: Derpy swings the item around enthusiastically, swinging herself around with it.
Dash Item Swing: Derpy takes a swing, almost overbalancing but managing to catch herself at the last second.
Item Shoot: Derpy stands on two legs and fires the gun as if she was a soldier. Where’d she learn to shoot like that?

SPECIALS

Neutral Special: Muffin!
Derpy grabs a muffin from nowhere and tosses it in her mouth with a blissful expression, healing 2% damage. Not very much, sure, but there’s only .5 seconds of startlag as she pulls out the muffin, so she can spam that and heal quite a bit if undisturbed. A simple move, but an essential one given that Derpy often damages herself.

Note that there’s a 1% chance that the muffin will accidentally bounce off of Derpy’s nose and fall on the ground, where it can be eaten by anyone just like any other food item.

Side Special: Derpy Delivery!
Derpy throws a letter one SBB forward. If it doesn’t hit anyone, it’ll float to the ground and vanish. If it does hit someone, it’ll stick to them like a Sticky Bomb (probably another application of whatever allows her to hold these things in the first place), and can be passed along in the same manner. It can also be knocked off with sufficient knockback; in general, if they’re traveling more than two SBBs, there’s about a 50% chance that the letter will visibly fall off and vanish.

So what does this letter do? Well, nothing in and of itself. But, if Side Special is used again and the letter is attached to anyone that wasn’t the original recipient, Derpy will assume that she delivered the letter to the wrong person and will corkscrew two SBBs straight towards the letter, dealing 4% damage and knockback KOing at 120% to anyone in her way as she tries to get the letter. If she contacts the person with the letter during her flight, she’ll confiscate the letter, so you can’t spam this back and forth for juggling.

This is a fairly good KO method, as well as a good way to enhance Derpy’s already-good recovery. It also does an effective job of turning foes against each other as they try to get the others to hold the letter.

But what happens if the original recipient has the letter? Well, Derpy throws another letter! She can have up to three letters out at a time, but only one letter to a person; if she tries to give someone more than one letter, it’ll just vanish uselessly.

The main downside to this move comes of the fact that she goes straight towards the letter; if she would run into any scenery during her flight, she’ll crash, halting her flight and dealing 10% damage to herself. Not as much of a problem on flat stages, but definitely not to be used carelessly on more complex stages.

Up Special: Thundercloud!
Derpy begins to bounce up and down on a thundercloud (2 SBBs long) that comes out of nowhere, at a rate of about a bounce every half-second.


The cloud can’t be directed, but will float upwards at about Ganondorf’s dash speed, going in a 30-degree angle in the direction Derpy was facing until it floats off-screen. As if Derpy needed more recovery. Getting off is as easy as moving in any direction; this does allow you to eat muffins while you’re on there, but you can’t use most of Derpy’s moveset without getting off the cloud.

Fairly useful, right? But there’s a big problem with it. First off, the cloud can be hit by attacks. It won’t dissipate, though, so you needn’t worry about that. However, every time the cloud takes a hit or Derpy bounces on it, there is a 1 in 3 chance that it will fire off lightning, dealing 5% damage and flinch to anyone within half an SBB of the cloud, including Derpy.


Obviously, this should be considered more of a last resort recovery-wise, unless you just want to make the cloud and get off it immediately so it can get in the opponent’s way. Note that trying to use this while there’s another cloud out doesn’t do anything, though, so you can’t spam this.

Down Special: Mail’s here!

Derpy takes out a mail bag and swings it in front of her. If it hits, it deals 5% damage and knockback to the tune of KOing at 150%. However, there is a 1 in 3 chance of the bag tearing and scattering about five envelopes on the ground within a 2 SBB diameter, which pretty much act like banana peels. Attempting to use this again while the envelopes are scattered will have Derpy swing the empty bag uselessly. But fortunately for her, she can pick up the letters and put them in the bag laglessly if she contacts them, giving her bag 1% damage for each letter, although the bag causes flinch, not knockback, until she’s collected all five again (or until the rest have been thrown offscreen). The bag won’t rip until it’s full, though, so that’s something.

The bag is an okay method of smacking a foe away, although having letters on the ground to make people vulnerable to Derpy’s attacks is usually better.

AERIAL ATTACKS

Neutral Aerial: Whee, barrel roll! / Boing!
Derpy spins around in midair, dealing 5 hits of 2% damage and knocking foes away about half an SBB. Mostly a “get out of my face” sort of move.

When used on a cloud, however, this moves changes: Derpy’s next bounce will cause two Ganondorf-long lightning bolts to come out underneath the cloud at 240 and 300-degree angles, dealing 2% damage and spiking foes downward. This tends to make the cloud a lot more usable, since foes will have a harder time hitting the cloud and thus have difficulty trying to set it off.

Front Aerial: Clap your hooves!
Fairly self-explanatory: Derpy claps her front hooves excitedly three times in quick succession, dealing 2% with flinch the first two times and 3% with light downward knockback the third time. A quick move with little lag.

Back Aerial: I love breaking clouds!
Derpy kicks both her hind legs backwards in a quick strike, with a sweetspot right at the end of her hooves that deals 10% and KOs at 130% when it first comes out. After that, it only deals 4% and flinch.

Up Aerial: Flap flap flap!
Derpy flaps her wings very quickly, slowing her fall by about 10% and creating an updraft that damagelessly pushes foes directly above her up at Mario’s dash speed. A good way to gimp off the top of the screen.

Down Aerial: I’m Supermare!
In a variant of the old stall-then-fall, Derpy stalls briefly, then flies downward at about the speed of Sonic’s Down Aerial with her front hooves outstretched until she hits the ground (or goes offscreen, or is hit with something). Anyone she hits takes 4% damage and knockback that KOs at 150%. A hard-hitting move, but one only to be used above ground.

STANDARD ATTACKS

Jab: The mail must be delivered!
Derpy lashes out with a letter in her hoof, dealing 1% damage and flinch. A very simple, spammable move, good for damage-racking. Not as good as a fan, though, but then again, what is?

There is a 1% chance that Derpy will accidentally give herself a paper cut, dealing the damage and flinch to herself instead.

Dash Attack: Whoopsie-daisy!
Derpy does a somersault for one SBB, dealing 3% damage and minor knockback. More for knocking people off their feet than anything else.

However, there is a 1 in 5 chance that Derpy will accidentally fall flat on her back when somersaulting, cutting the distance by half an SBB and leaving her open with decent endlag as she picks herself up. However, if someone contacts her as she falls, they’ll take more knockback than usual, such that they’ll be KOed at 150%. A double-edged move, given that if Derpy doesn’t hit during her failed somersaults, she’ll be wide open.

Forward Tilt: Need some space here!
Derpy turns around and bucks her back legs in a strike that deals 7% damage and knockback that KOs at around 180%. This is possessed of slight startlag and endlag as she gets in and out of position.

As with many of her moves (save for her aerials; she must be better in the air), Derpy might mess this attack up. In this case, it’s a 1 in 5 chance of tripping and falling flat on her stomach, limbs outspread. Contacting her during her fall will increase the damage to 11% but keep the knockback the same. This does leave her open, however, as she picks herself up, although the lag here is less than the lag on the Dash Attack.

Up Tilt: Loop-de-loop!
As noted, Derpy does a very quick loop-de-loop, popping foes about an SBB into the air and dealing 4% damage. Not a bad juggling tool, if it weren’t for that omnipresent chance of failure. There’s a 1 in 10 chance Derpy might end up crashing into the ground when she comes down, dealing 5% damage to herself. The damage and knockback to foes remains the same, though. Fortunately, she’s not left quite as open as with her other tilts, taking less time to recover.

Down Tilt: Poke!
Another self-evident move wherein Derpy pokes at the foe’s foot with a hoof, dealing 3% damage and flinch. Notable in that even Derpy can’t mess this one up, although the move is a bit slower than her other tilts.

SMASH ATTACKS

Side Smash: Here, have a muffin!
Derpy decides to give the foe a muffin, throwing it straight forward 1 SBB ahead. Unfortunately, she threw it a little too hard; if it hits, it’ll deal 12-16% damage with knockback KOing at 130-120%. Oops. Once it hits the foe, the muffin will fall to the ground and can be eaten for 2% healing like any other muffin.

There’s about a 1 in 20 chance that Derpy will accidentally throw the muffin so hard that it hits the foe for the usual stuff, and then bounces back and hits Derpy for the same amount. Double oops.

Up Smash: Woo-hoo!
Derpy jumps in the air with forelimbs up while saying the titular phrase. This deals 16-22% damage to anyone contacting her, with knockback KOing at 110-100%. Easily one of Derpy’s best KO moves, but there’s also a 1 in 5 chance of her falling on her back as she comes down, leaving her open for a fair amount of time as she gets up.

Down Smash: I have a “destrussive poterror”!
Derpy sits down suddenly, dealing 15-21% with upward knockback KOing at 120-110%. At half charge, she’ll also cause a shockwave half an SBB to each side, and at full charge, she’ll also somehow create a full-fledged hole in the stage the size of the shockwave, extending all the way to the bottom of the stage. Naturally, Derpy will start falling, but with her aerial capabilities, getting to the ledge should be no problem. The hole will somehow vanish after five seconds. The hole makes a decent zoning tool, or you can try to spike foes into it from your cloud using the Neutral Aerial.

GRABGAME

Grab and Pummel: Hug!
That’s right, Derpy grabs the foe by hugging them. It’d be sweet if this wasn’t a fighting game. It’s a short-range grab, but pretty quick.

Unfortunately for the foe, she tends to hug a little too hard: her pummel involves a squeeze which deals 2% damage a pop. Kind of slow, though.

Forward Throw: Are you okay?
Derpy abruptly releases the foe, at which point they fall to the ground and take 5% damage. Derpy looks briefly concerned as they fall; she hadn’t meant to drop them like that…

Back Throw: Hey, is that a muffin?!
Derpy thinks she sees a muffin ahead of her, launching herself forward 1 SBB and throwing the opponent behind her in her enthusiasm. This deals 7% damage and bounces the foe off the floor a little, although the knockback isn’t KOing anytime soon. A good spacing move.

Derpy looks a little crestfallen when it becomes clear there is no muffin to be had.

Up Throw: Let’s go flying!
Derpy flies up with the foe in her arms… oh wait, the foe just fell out after an SBB’s worth of travel. Oops. Oh well, it’s only 8% damage, not the end of the world.

Down Throw: Ack!
Derpy loses her balance and falls over on top of the foe, dealing 4% damage. Afterwards, she’ll get up and ask worriedly, “Are you okay?”


FINAL SMASH
DERP!

If Derpy is within three SBBs of a foe when she activates the Final Smash, she flies up off the top of the screen; she’s got some items to deliver! Only she seems to be having trouble carrying them, and the closest foe to her is getting the worst of it. First a flowerpot drops on them, dealing 5% damage and flinch. This tends to hold them still long enough for the anvil that immediately follows, which deals 10% and knockback KOing at 150%. After a couple of seconds, a wagon full of hay bales drops on the foe if he’s still onscreen (if not, a random foe becomes the new target), dealing 15% and knocking them into prone. And for the grand finale, a grand piano falls from the sky immediately after the wagon, dealing 20% and KOing at 100%.

Can I just say… ouch!

Afterwards, Derpy descends from the sky, looking sheepish.

PLAYSTYLE

Okay, so I’m going to clear this up first: Derpy is not Pichu. For one thing, her attacks are generally more damaging than Pichu’s. For another, there’s only a chance of Derpy hurting herself. And finally, Derpy has an easy way to heal some of that damage off.

Okay, so with that over with, let’s get to the actual playstyle.

Well, Derpy doesn’t exactly have much of a playstyle. She’s all over the place. She can damage people pretty well with her quick attacks, and she has good KO moves. But a few stumbles here, a few counterattacks there, and she’s in bad shape. Plus she’s fairly light already, which doesn’t help. One of the better ways to play Derpy, then, is to hit, run, eat muffins if you have the time, lather, rinse, repeat.

In fact, no matter how you play Derpy, those muffins are the centerpiece. If you want to camp, the muffins are crucial for keeping yourself at low percentages. If you’re being proactive and attacking, the constant mistakes Derpy makes will necessitate withdrawing to eat muffins every now and then. The main problem is finding time to eat some muffins in the middle of a brawl, but Derpy’s speed and aerial prowess tend to help with that.

Something that’s definitely worth noting is that Derpy almost never messes up in the air. Not as much stuff to crash into up there, I guess. That also leads into another potential strategy: gimping. Derpy’s not the best at it, but her Up Aerial has definite potential for upward gimping, and her Neutral Aerial when on a cloud can really mess people up, especially if you’ve got a hole to spike them into from Down Smash.

In general, Derpy’s range isn’t that good, so a skilled foe with a decent projectile can make life difficult for her. At the same time, though, her aerial prowess makes it difficult to keep hitting her after the first time: hit her into the air and she has several different ways to get back to the stage and retaliate, whether it be flying, gliding, hovering, Side Special, or Up Special. Down Aerial is a good way to approach the ground from midair, and if you’re on a cloud, you can rain lightning down on them with Neutral Aerial (assuming you don’t shock yourself).

And therein lies the bulk of Derpy’s problems: her propensity for hurting herself or leaving herself open. While it makes her hard to predict, it also makes her hard to play. But hey, she’s fun to watch because of those selfsame tendencies, so if you’re looking for a fun character to play, Derpy could well be the pony for the job. And if you’re more competitive… well, mastering a character like Derpy will be all the more proof of your skill.

EXTRAS

Up Taunt: Mmm, muffin!
Derpy briefly balances a muffin on her nose before she expertly lets it fall into her open mouth.

Side Taunt: Blowing Bubbles
Derpy takes out a bubble wand and blows a few small bubbles.

Down Taunt: I love being a Pegasus!
Derpy flaps her wings a couple of times with a grin, then folds them again.

Symbol: Derpy’s Cutie Mark, defaulting at blue.


Upon Selection (Wiimote): Derpy says, “Anything I can do to help?”

Kirby Hat: Kirby gets Derpy’s grey fur, her blond mane, and her Neutral Special. No doubt he’s thrilled.

Victory Pose 1: Oops! My bad!
Somehow Derpy has managed to break the floor of the winner’s screen with several large cracks. She hoves above the floor, looking sheepish and saying the titular phrase.

Victory Pose 2: Muuffffiinnss…
Derpy happily chows on a muffin.

Victory Pose 3: Bubbles
Derpy blows a bunch of bubbles, which reflect the image of her happy smile.

Loss Pose: I just don’t know what went wrong…
Derpy looks downcast as she mutters the titular phrase.

Alternate Costumes: Derpy can change her fur color from its normal grey to red, green, blue, lighter grey, and black.

Snake Codec:
Snake: What’s wrong with her eyes?
Otacon: What, no comment about how weird it is to be fighting a pony?
Snake: How is that any weirder than the pink puffballs?
Otacon: Point.
Otacon: My guess is, she was born with it. Probably genetic.
Snake: I wonder if she can see sneak attacks coming with those eyes…

Trophy:
Derpy Hooves: Derpy is a Pegasus pony from the land of Equestria. Her love of muffins is only surpassed by her clumsiness, although she’s actually an okay flyer, which she uses to her advantage as mailmare of Ponyville.
DERP!: Looks like Derpy has some deliveries to make! Uh-oh… she dropped them. Look out below!

Stage:
Cloudsdale

A medium-sized stage, Cloudsdale is a difficult stage to play on because of a general lack of edges. The only edges on the place are at the base of the building to the upper right and at the tops of both buildings. Characters with poor recovery will have trouble here. People can fight inside the building to the upper right between the pillars, but can only stand on top of the building on the lower left. Pegasi can be seen trotting or flying in the background.

The upper right building has a dark secret, however. If you become dizzy, asleep, or take shieldstun while in the building, a grim-looking Rainbow Dash will whisk you into the background, at which point the character’s voice will begin screaming in agony for a second. (Thankfully, the character can’t be seen once dragged into the background.) After another second passes, a vibrant rainbow can be seen in the sky… and the character loses a life. Good news, though: Rainbow Dash won’t appear while the rainbow remains in the sky, and the rainbow lasts for thirty seconds.

Fun fact: if Rainbow Dash is fighting on this stage, the Pegasus will be Spitfire instead.


MATCHUPS:

Vs Garble: Heavy Disadvantage

All those extra hitboxes are horrible for Derpy, given how much damage she's already doing to herself. She simply doesn't have the room to maneuver into her damaging moves when she's got extra dragons to be worrying about. Not to mention Garble's aerial ability messes up Derpy's non-self-damaging moves. There's not much to say here: Derpy is outclassed in every way.

Vs Rose Lalonde: Moderate Disadvantage

The thread is really what kills Derpy here, severely limiting her mobility and making it hard to land any KO moves. Up Smash does stand a chance of getting in a good hit here, however, or you could use Up Tilt to buy some time to destroy thread. Additionally, Derpy can camp somewhat effectively with her muffins even if surrounded by thread; while Rose can certainly interrupt, that may well leave her open to an attack from Derpy.

Of course, this all assumes that Derpy lets Rose set up. Herein lies Derpy's biggest chance: if she can keep Rose off-balance, she can keep her from creating the webs of thread that would doom our intrepid pegasus. However, Derpy's chances of messing up somehow will almost certainly give Rose an opening, and Derpy can't withdraw to eat muffins without letting Rose set up thread. Of course, without healing, Derpy will get smashed offstage soon enough, allowing for string setup.

Vs Shang Tsung: Heavy Disadvantage

Derpy has two humongous problems when facing Shang. First, he's fairly heavy. Derpy's KOing abilities aren't the best. Still, she could potentially survive this if it weren't for Hot Escape and Shang's many other quick ways to get across the screen. Derpy's chances of withdrawing to eat muffins are pretty low, and the damage that will be building up as a result alleviates Shang's own difficulty in KOing. Really, unless Shang messes up hugely, Derpy stands little chance against this master sorcerer.

Vs Lizard: Moderate Advantage

Lizard has a fairly big disadvantage here in that there's really not much he can copy from Derpy that won't hurt himself. Another problem he has is that countering any given move from Derpy won't really cripple her that badly. Lizard's gonna have to rely on golems if he's going to win this matchup. The major problem with this is that Derpy's pretty fast, so Lizard's going to have a hard time buying enough time to actually make a golem. If he does, though, Derpy's kind of in trouble. If she goes after Lizard, the golem gets her; if she attacks the golem, Lizard has time to begin making another golem. And if Lizard manages to make a golem explosive... well, that's not good for Derpy. But given Lizard's low weight and Derpy's speed, it's a pretty uphill battle for Lizard.

Vs Armantle: 50/50

Assuming Armantle's on his own, this is a fairly even matchup. Derpy has quite a bit of difficulty KOing Armantle, who's pretty darn solid, and Armantle's Overheat can really hurt Derpy in conjunction with her own derps. That being said, Derpy can fly over lava without a problem, and given how slow Armantle is, Derpy will have no problem at all withdrawing to eat muffins, especially if Armantle does something silly like shield himself. So if Derpy's patient enough, she can whittle Armantle down little by little until she's finally got the percentage to KO. On the other hoof, if she messes up or if Armantle lands an Up Smash, Armantle's powerful attacks will make short work of Derpy.

Vs BeastMan.Exe: Slight Disadvantage

Derpy has a fairly easy time keeping Beastman off-guard to start with, given his fall weight and her general speed. Once she messes up, though, Beastman actually has an opportunity to fight back. Detaching an arm or two is definitely good for Beastman here, given that that means Derpy has more stuff to maneuver around. Odds are, Beastman's not getting any vertical KOs with Up Smash given Derpy's aerial prowess, but he can definitely make her want to stay on the ground where she's more likely to stumble. Beastman doesn't have any spectacular advantages here, but I'd still give the nod to him. Still, Derpy might surprise me.

Vs Yukiki: Heavy Advantage

Derpy has the great advantage of being able to soar over pretty much anything Yukiki has. Snow? Whatever. Snowballs? Pfft, easily dodged. And in fact, that is basically Yukiki's game, so Derpy has very little problem avoiding it unless Yukiki can successfully predict when and where she's gonna touch down. In addition, Yukiki is really easy to KO, so Derpy doesn't even need to do that much to score a win. That said, Yukiki hits surprisingly hard for a space froggie, so Derpy still needs to be careful.

Vs Bigfoot: Slight Advantage

One thing's for sure: this will be a long battle.

Bigfoot relies on hitting and running, using his trees for quick retreats. However, the fact that it takes time to set up trees leaves Derpy plenty of opportunity to attack him and prevent him from setting up. The Mailbag is particularly useful here: can't make trees if you're slipping and falling. Not to mention the fact that if Bigfoot lets Derpy charge a Down Smash, his trees will be gone, falling down the hole she's created.

That being said, if Bigfoot does manage to set up (likely, considering that , he has healing, teleportation, and his own strength to help fend off Derpy. On the other hoof, Derpy can wreck Bigfoot's trees with relative ease, so it'd be easy to bait him into a trap of some sort. Overall, Derpy's got the advantage, but she'll still have to play carefully.

Vs Cooking Mama: Utter Domination

What is there to say? Derpy utterly obliterates Cooking Mama with her set's organization, color, and pictures. Cooking Mama has no chance against the most popular pegasus pony ponydom can present.
 

Smady

Smash Master
Joined
Apr 29, 2007
Messages
3,307
Location
K Rool Avenue
Well, guys, this is it, the final delay. 30th it is for the Illbleed and CastleVania movements. I'm not going to chastise the people responsible for this or other delays - it happens, lets just move on and get this thing finally posted. I myself am hardly free of the blame. We've all been very busy [this is not an off-season anymore, most are in school or work] so it's understandable. Saying that, this should be worth the wait.
 

JOE!

Smash Hero
Joined
Oct 5, 2008
Messages
8,075
Location
Dedham, MA
A minor thing I do want to bring up though is that you have an attack that increases the shield damage after countering something... am I the only one who thinks that this would almost never come up?
Late as all hell, but might as well clarify: the mechanic here is that he does shield damage without having your shield up, meaning it will already be damaged by that amount when you do bring it out.
 

Hyper_Ridley

Smash Champion
Joined
Dec 21, 2007
Messages
2,291
Location
Hippo Island
I haven't read whatever set Joe's referring to, but I want to say that a) that is an awesome mechanic, and b)what happens if he brings the shield all the way to "broken" status before they ever actually shield?
 

JOE!

Smash Hero
Joined
Oct 5, 2008
Messages
8,075
Location
Dedham, MA
shields regenerate automatically while you aren't shielding, so doing that would actually stunt regen lol

If it is brought to 0, shielding would bring up a shield with like 1 frame of HP left, IE it'd last 1/60th of a second and pretty much break instantly.

Edit: And it's Bisharp, HR.
 

FrozenRoy

Smash Lord
Joined
Apr 26, 2007
Messages
1,261
Location
Las Vegas, Nevada
Switch FC
SW-1325-2408-7513
shields regenerate automatically while you aren't shielding, so doing that would actually stunt regen lol

If it is brought to 0, shielding would bring up a shield with like 1 frame of HP left, IE it'd last 1/60th of a second and pretty much break instantly.

Edit: And it's Bisharp, HR.
I figured it didn't recharge from the attack since it seems kind of useless otherwise unless it's spammable?
 

JOE!

Smash Hero
Joined
Oct 5, 2008
Messages
8,075
Location
Dedham, MA
It's part of his Fsmash which is like a medium between MK's Ftilt and Link's Fsmash, so it *could* be spammed, but the effect only kicks in if he counters with it.
 

BKupa666

Barnacled Boss
Moderator
Joined
Aug 12, 2008
Messages
7,788
Location
Toxic Tower
Lord Voldemort


Voldemort...the name alone inspires paranoia in the magical world of Harry Potter, and has become synonymous with the term 'villain' in the literary world. A former schoolboy slowly ensnared and corrupted by the Dark Arts, Voldemort's lust for superiority led him to collect a pack of loyal, yet disposable Death Eaters. Voldemort and his followers slaughtered masses of non-magical innocents to preserve only those with 'pure' magic blood, who in turn became terrified of the immense threat the Dark Lord presented, allowing him to maintain a vice-like grip over the population from the shadows. Despite his abilities and control, Voldemort was unable to confront the 'human' inevitability of death, and ended up splicing his soul into seven pieces, securing each inside a hidden magic relic in acts of self-preservation. Only after the eventual destruction of these relics, and therefore his soul, did Voldemort meet his end, but not before making a profound impact on the world he manipulated so heavily.

Statistics

Traction --------{ 10
Size --------{ 8.5
Aerial Movement --------{ 7
Weight --------{ 6
Movement --------{ 4
Fall Speed --------{ 3
Jumps --------{ 2


Though his statistics aren't much different than those of a regular playable character, make no mistake, Voldemort is a fully-fledged boss character, meant to be fought by three opponents. Even without being a hulking beast or towering deity, Voldemort is far more difficult to finish off than his frame would suggest. It's a good thing he possesses the staying power he does, seeing as how he's not immune to being grabbed, pitfalled, and what have you, though attempting to do so against the most powerful Dark wizard of all time is probably not be the smartest idea just yet.

Voldemort possesses the ability to float freely in any direction, the hem of his robe turning to smoke as he traverses the air at 1.25 times Peach's float speed. His float lasts thrice as long as hers, allowing him great opportunities to rain chaos down on foes from above.


What is a Horcrux?
"A Horcrux is a very powerful object in which a Dark wizard or witch has hidden a fragment of his or her soul for the purpose of attaining immortality. Creating a single Horcrux allows one to gain the ability to resurrect themselves if their body is destroyed, but the more Horcruxes one creates, the closer one is to achieving true immortality."

--Harry Potter Wiki


Mechanic - Split Soul
Whenever Voldemort spawns on the stage, he is accompanied by his faithful snake, Nagini, who slithers along a platform behind her master, low to the ground. She is as tall as Olimar and as wide as Dedede, what with her copious coils and all. Although she follows Voldemort wherever he goes, him levitating her up beneath him if he enters the air, she is not knocked back when Voldemort is. She will slither toward him at Luigi's dash speed if separated, allowing him to reunite with her upon contact. If he is KOed while Nagini is onstage, he does not lose a stock, as he respawns instantly with a soft chuckle. This is because Nagini is no mere mindless minion to abuse: she is, in fact, a prized Horcrux.


The portion of Voldemort's soul residing in his reptilian companion keeps him alive…as long as she is, that is. Nagini is KOed if she loses her 30 HP; this is quite the undesirable outcome, as the destruction of Voldemort’s soul piece costs him some of his most prized powers, making him a very vulnerable target. Nagini will only return alongside Voldemort when he is KOed, which is generally quite easy after she (and the soul fragment she contains) is destroyed. To prevent the humiliating mortal fate of being KOed, Voldemort can either focus all his efforts on defending Nagini alone (a very risky maneuver), or play a more dangerous game, splitting his soul further to prolong his time on the battlefield.


Specials

Down Special - Horcrux
Voldemort summons of his Horcruxes from the series at random (the Slytherin locket, Riddle’s diary, Marvolo's ring, etc.) and places it on the stage, turning it invisible with a Disillusionment Charm over half a second. If Voldemort takes out a Horcrux in midair, he'll leave it levitating in place below him. Horcruxes are around the size of a Soccer Ball, with 30 HP each, and remain invisible until they suffer damage, upon which they are revealed. If Voldemort is KOed while one of these Horcruxes is onstage, he’ll respawn, as he does when Nagini is out. The destruction of all Horcruxes and Nagini results in Voldemort losing many of his potent powers, becoming a sitting duck, although he has extensive defensive methods he can use fervently to avoid this. Throughout one match, Voldemort can create as many Horcruxes as he has stocks, no more, no less.

Horcruxes can be created entirely at Voldemort’s discretion; he can use a mere one Horcrux each stock, or create multiple ones. The former will not keep Voldemort alive as long each stock, while the latter prolongs a single stock for quite a long time (although defending all Horcruxes and Nagini can be exceedingly difficult), but leaves Voldemort in trouble later on, as he finds himself with a Horcrux shortage. How Voldemort handles his Horcruxes can single-handedly sway the match in or against his favor. Whatever he decides to do, Nagini entering the match with Voldemort from the start doesn’t give him much time to wait before choosing his course of action.

[COLLAPSE="Without Horcruxes..."]Voldemort may not use this move at all. He's made his bed in terms of Horcrux management, and now must lie in it.[/COLLAPSE]


Neutral Special - Avada Kedavra
Voldemort screams the titular Killing Curse, aiming his wand during the .45 second startup before casting a green beam of light across the stage to the opposite blast zone. The beam is slightly less thick than ROB's laser, about 1.5 platform long and as fast as Sonic's dash speed. It will bounce off of any surfaces, gaining a slight speed boost each time, until it either hits a character or obstacle, or travels offscreen. Though the beam will not automatically KO any character it hits, it will come close to doing so; it deals just 6-7%, but knockback that can KO around 75%. Voldemort's trademark spell is a potent killer in the context of Smash. Should it hit a stationary object, the spell will light it on fire for thirteen seconds so it deals multiple hits of 3%, before it disintegrates, unless doused with a watery attack. Foes may reflect the curse with a well-timed perfect shield, though if they fail to do so, it will deal massive shield damage, bringing them close to a shield break if not outright doing so; Voldemort reflects the curse if it hits his shield at all, allowing it to pass through his smokey body otherwise. Should Voldemort angle his shield up or down, he'll reflect the spell in the opposite direction, opening his scope beyond a simple horizontal projectile.

Voldemort has around half a second of cooldown on the move, during which he can repeat the spell nonverbally, casting it with half as much startup lag. Continuous taps of the input will cause him to fire off a Killing Curse with disturbing frequency. Voldemort is able to angle each individual curse during this time, creating a dangerous web of spells. Foes will have to time their movement and dodges carefully to penetrate this offensive defense. Other moves aside, Voldemort has a built-in method for making this difficult; hovering above the stage and firing Killing Curses down ensures they will bounce back at least once. Should Voldemort choose to adapt a hit-and-run strategy, this is quite lethal indeed.

[COLLAPSE="Without Horcruxes..."]Though Voldemort's spell passes through his smokey body when he has Horcruxes onstage, it will hit him full force once they're destroyed. In addition, the spell is much less threatening to foes: Voldemort can only fire off one at a time. In addition, foes now gain the upper hand in Voldemort's little Ganondorf-style tennis match; they can reflect the curse by hitting it with their shield at all, while Voldemort must perfect shield it to avoid suffering devastating shield damage.[/COLLAPSE]


Side Special - An Army of Creatures Whom All Fear
With a simple 0.45 second slash of his wand, Voldemort summons a single Inferius, a reanimated wizard's corpse. These ghastly creatures are as large as Captain Falcon, though they move at the sluggish walking speed of his clone toward the nearest character. Inferi aren't to be trifled with; they'll slash at any characters near them over .55 second, dealing 9% and knocking them into prone. In addition, if a character enters the air a platform above an Inferius, or even stands on a drop-through platform overtop one, it will lunge aggressively upward to pull the character to the ground, before beginning its assault. Inferi must be knocked offstage to KO them, seeing as they have no health; they weigh approximately as much as Marth at 50%. Up to eight Inferi can remain onstage at a time...


...That is, until a foe comes into contact with one. Voldemort, the sadistic being he is, has placed a Gemino charm on each Inferius, causing each minion to create two duplicates when it is first touched. Needless to say, this can fill the stage with the zombie-esque creatures quite rapidly, as Inferi can be duplicated either when they are physically attacked, or when they attack a foe themselves (though Voldemort cannot duplicate them himself). Each Inferius can only create duplicates once, and duplicates cannot multiply either, allowing Voldemort to have a whopping maximum of twenty-four of them onstage at once. Inferi will not wander into traps or offstage on their own, putting the pressure on foes to finish them off quickly, yet carefully. It is preferable to finish Inferi off with non-physical attacks, or at least to knock off any Inferi that have already duplicated before any that have not to avoid becoming overwhelmed.

Voldemort cannot directly control an Inferius, though he can influence their movement, likely en masse, beyond simply bashing them around with attacks. Should they drag themselves over to a flaming object, or any character using a lingering fiery attack, they will immediately turn around and proceed in the opposite direction. If an Inferius is hit into or by a fiery attack (Avada Kedavra sets them aflame as it would a stationary trap), it will thrash around in place for thirteen seconds before disintegrating (unless hit by a watery attack ahead of time), dealing multiple hits of 3%. Neutral Special is indeed a worthy tactic for directing Inferi on a smaller scale, or for caging them between two burning Inferi, while other...more destructive flaming moves are better for herding entire hordes around.

[COLLAPSE="Without Horcruxes..."]Voldemort does not place the Gemino charm on Inferi, eliminating their ability to duplicate, and can only summon four corpses instead of the usual eight.[/COLLAPSE]


Up Special - Apparition
Contorting into nothingness and gaining slight super armor, Voldemort vanishes from the stage for a brief time. He now has multiple options, all of which involve him bursting back into existence with .45 second end lag; because each choice uses the same startup animation, foes can only guess which one Voldemort will select. If the input is simply tapped again, Voldemort will reappear in place. Should the player lightly maneuver the control stick around before tapping the input, Voldemort will reappear at a location of their choice, selected with an invisible cursor that travels at Mario's dash speed. Finally, with a 'smash' of B and a direction, Voldemort will travel a set half of Final Destination that way before reappearing. Voldemort can remain in nonexistence for up to a second and a half while deciding where to Apparate; if this time passes without him having made his selection, he'll reappear in place with twice the move's regular end lag. He does not enter helpless after Apparating, though he may only do so once in midair and can only hover if he did not do so prior to using the move. Voldemort Apparates alongside Nagini if they are united, and if he's in contact with any Horcruxes or Inferi, he'll take them along as well, depositing them at his destination. He will also take along any foe he is touching while Apparating (this, in combination with his initial super armor, gives him slight defense against gimping), immediately transitioning into the below effect upon reappearing.

If Voldemort Apparates and reappears directly overtop an opponent, he'll possess their body, turning their eyes a darker tint. He gains control over a victim's body for six seconds if they do not mash free, dealing them 1% per half second. Foes can cast Voldemort out with 1.5 times grab difficulty, and will often try to do so rather vigorously; Voldemort doesn't exactly need a long time to put his foe in harm's way. He suffers none of the damage of outside attacks, though if the victim suffers more than 10%, he'll flee their body automatically. He may exit a character by choice by shielding. Though Voldemort lacks obvious follow-up options after exiting a foe, his victim ought to avoid moving predictably immediately afterward; the last thing they want is Voldemort reading them and Apparating overtop them a second time for more possessive hijinks. The last thing they want, at least until they are exposed to the nastiness of Voldemort's Smashes, that is.

[COLLAPSE="Without Horcruxes..."]Voldemort suffers twice as much end lag whenever he Apparates, and directs his path around manually at Luigi's dash speed instead of Mario's. He can only possess a foe for up to three seconds, and can be thrown out twice as easily.[/COLLAPSE]


Shield Special - Killing Command
From behind his shield, Voldemort utters the word 'Kill!' in a hissing tone, causing Nagini to circle around from behind, poke her head out the front of his shield and strike forward half a platform over .55 second. Her bite deals a relatively straightforward 10% and horizontal knockback KOing around 120%, though it has a surprisingly large hitbox due to the expansion of her jaws. Used against attackers, this is a very basic defensive technique that also allows Nagini to recover 10% per bite, up to her maximum of 30 HP.

Should the move be used next to an Inferius, Voldemort will instead gesture toward it, commanding Nagini to hide inside it rather than strike. She slithers into the Inferius' open mouth, and there she will lay in waiting until a foe draws within half a platform on the creature's level. Should they do so, she will lunge from its mouth and coil around them, dealing 1% per half second and forcing them to escape with 1.5 times grab difficulty. Nagini will automatically exit an Inferius that has been attacked or set aflame, not suffering damage, and slither back to her master, who can summon her back simply by using Shield Special a second time anywhere onstage. If Nagini is ever in danger, it may be in Voldemort's best interest to hide her among a swarm of Inferi, using Apparition to scatter her and multiple minions around for devious defense. Her surprise attack's stalling properties also come in handy later on, for uses far less common than mere setup.

[COLLAPSE="Without Horcruxes..."]This move is rendered unusable, due to Nagini's absence.[/COLLAPSE]


Smashes

Forward Smash - Fiendfyre


Rather than simply sweeping his wand, Voldemort conjures a ball of magic fire in his hand, bringing it to his mouth and breathing into it to enlarge it. This causes it to very rapidly grow into a monstrous area of flame; the closest comparable attack in Smash is the Sacred Fire pillar conjured up by Ho-Oh, albeit with great flaming serpents and dragons writhing around inside the blaze. Indeed, this Smash fills the same space as this Pokeball equivalent, capping out at a height of four Ganondorfs. Opponents who come in contact with the flame are pushed upwards, taking multiple rapid hits of 3-4% and building up damage at an absurdly rapid rate should they do nothing. When faced with Fiendfyre, foes do have a few slight saving graces: they are able to DI rather smoothly up and out of the fire, rather than getting held firmly in place. Should they attack the fire at all, they will also disperse it around the immediate area of their hitbox for a half second. This allows characters with attacks surrounding themselves to use said moves repeatedly to escape, though they merely dismiss the fire's stun, not its damage.

Of course, Voldemort isn't about to let his foes escape his inferno that easily. As the Fiendfyre blazes onstage, the fiery creatures within seek extra sustenance, stretching out across the stage in search of prey. Depending on charge time, the Fiendfyre will expand one to three platforms in the direction of the nearest opponent, filling this distance over a seven second period. Once the Fiendfyre has reached its maximum distance, it will burn for fifteen additional seconds before finally dying down. Voldemort can only set his Fiendfyre on one area of stage at a time, erasing it if he attempts to do so a second time. Fiendfyre stops at stage edges, decimates minions, traps and projectiles, and can be strolled through casually by Voldemort (and slithered through by Nagini). He and his actions are visible inside the blaze, though it can cover some of his end lag on attacks, particularly if he Apparates into the fire.

Though the fire's sheer size is quite intimidating, most foes will find it worrisome simply for the options it lends its master. Voldemort may stroll in and out of it to shield himself, or keep it at his back to protect Nagini inside. Camping away for long periods of time is, of course, a terrible idea for multiple reasons, not the least of which include vulnerable Horcruxes elsewhere or multiple foes teaming up to fight through the flames. Voldemort can place Horcruxes within the blaze as well, as they are protected from being burnt by an Impervius Charm; individual foes are hard-pressed to attack through the blaze to reach them inside, especially as the fire progresses toward them, creating more flames to fight through. Fiendfyre also turns Inferi around if they approach it, and can even blockade some foes offstage. The inferno juggles foes up enough to save them from a gimp, though since many opponents lack the aerials needed to effectively penetrate it, they are stuck in no-man's land as Voldemort handles their teammates or the remainder of the stage.

[COLLAPSE="Without Horcruxes..."]Voldemort now summons Fiendfyre with the startup lag of one entire Warlock Punch. The fire retains its damage-dealing and expanding properties, though it stuns foes even less than usual and is dispersed for an entire second when attacked, rather than half that.[/COLLAPSE]


Down Smash - Great Lake
Voldemort casts the Blasting Curse, 'Confringo', at the ground beneath him, creating a massive sloping crater from two to three platforms wide and two to three Ganondorfs deep (leaving a sliver of ground at the bottom of stages this would otherwise blow through, while not functioning on drop-through platforms). Opponents standing on this ground after the half second startup are launched skyward, suffering 23-28% and knockback KOing from 100-85%. However, Voldemort is not simply caging the foe into a pit; immediately after creating a crater, Voldemort casts 'Aguamenti' into the pit, filling it to the brim with water. The entire process of creating the crater and filling it up takes approximately a second; Voldemort has super armor during this time. One crater may remain onstage at a time, lasting until Voldemort is KOed; the stage over which Voldemort creates his original crater will revert back to normal should he blast out a second.

Though Voldemort and Nagini are able to walk over the surface of the water as though it were solid ground, foes fall into the water, descending to its bottom with their fall speed halved. Characters control as usual at the bottom of the water, moving and attacking with half their regular speed, while gaining infinite jumps that boost them up half as high as their land counterparts. Unless a character jumps entirely out of the water, their drowning timer ticks down, lasting about twice as long as it does in Brawl. Escaping from water is, of course, quite simple unless Voldemort intervenes. And if he does intervene, Voldemort will find that placing a Horcrux on the water's surface can secure it away quite conveniently.

Any Inferi herded underwater will remain there for quite some time, lacking the movement needed to climb up the sloped edges quickly. Should a foe touch the water's surface at all, any Inferi underneath them will lunge up to the surface and pull them to the crater's bottom. They will drag characters down any time they attempt to jump up from underwater, unless the victim is able to attack all Inferi far enough away to keep them far enough away, which is difficult in such cramped quarters. In addition, should an underwater Inferius contain Nagini, her strangling coils can also hinder a foe's escape, forcing them to escape an additional obstacle before beginning their ascent (she'll slither up the slope to her master once done). The crater's sloping edges alone can prevent melee attackers from reaching too close to a surface Horcrux lest they slide down into it, while projectiles are generally kept from reaching their target by Voldemort's onstage obstacles. The best approach most foes are left with is that of jumping overtop the lake, attacking down with an aerial, then hoping they can recover to safety before entering the range of any Inferi below. From the surface, Voldemort can cover his crater with Fiendfyre to push foes up past any surface Horcruxes, or D-Tilt to seal them down. His Neutral Special and jab beams are also able to bounce around with increased ease inside a crater, turning it into an even less desirable location for foes to deal with in their quest to destroy Horcruxes.

[COLLAPSE="Without Horcruxes..."]Voldemort simply receives a tad more lag when setting up his pits, suffering mainly from the loss of effective crater-related options due to other weakened moves. [/COLLAPSE]


Up Smash - Atmospheric Smoke
Voldemort lifts his wand skyward and releases a literal cloud of smoke into the air. The charge time determines how high the cloud rises; with minimal charge, the cloud simply erupts around Voldemort, immediately hiding him away, while at full charge, it quickly ascends two and a half Ganondorfs above him. Charge determines the cloud's size as well, ranging from two to three Ganondorfs high and three to four Bowsers wide. Opponents in the smoke's midst suffer a constant 1% per half second, though when attacking midair Horcruxes, they do have the option of jumping up and down repeatedly to attack while avoiding damage. This is considering they know where the aerial Horcrux is within the smoke, since Voldemort is able to shift its position around with utmost ease.

Because Voldemort leaves no silhouette inside his smoke, he is able to utilize its mysterious nature to great effect, rather than for a single mindgame or two. His ability to float allows him to traverse a cloud of smoke, filling it with chaotic elements before scattering them around to best defend a Horcrux that may or may not be present. Voldemort's smoke is also a more versatile stage-coating hazard than Fiendfyre or a crater, as he has no limit on how many clouds he may produce. That said, each one only lasts from ten to fifteen seconds, requiring Voldemort to keep tabs on their contents to avoid exposing them prematurely.

[COLLAPSE="Without Horcruxes..."]Voldemort may only produce a single cloud of smoke.[/COLLAPSE]


Grab-Game

Grab - Cloak Tendrils


A wavy tendril begins stretching out from the bottom of Voldemort's cloak over .4 second, traveling forward a short distance above the ground at Ganondorf's dash speed. If a foe touches any part of the tendril, Voldemort will cause its end to wrap around them, trapping them as close to him as they were when they made contact with it. To break free, the character must pull against Voldemort's cloak for one second to escape, whether by dashing or jumping against it. The Voldemort player can direct the control stick around to influence the tendril's path, creating any number of twisting patterns. Though an individual cloak tendril can reach a maximum of Final Destination's length, Voldemort may input the grab up to four times to create a winding maze of tendrils his foes must pass through to get to him. With each additional grab input, Voldemort loses control of the tendril he was manipulating previously, leaving it to hover in place as he sends out an a new tendril. Though a single tendril is not exceptionally tough to break free from, vanishing afterward, a victim can get doubly caught up if they move into a second tendril while pulling against the first. Being tied up by multiple tendrils forces foes to move in rather predictable directions to free themselves, allowing Voldemort to react with ease. Multiple foes can be grabbed at once, having to work around each other to pull free in some tangled scenarios.

If Voldemort inputs any attack other than an additional grab, his tendrils will remain onstage in whatever formation he created. They'll vanish if he tries running, dodging, rolling or jumping, or if he is attacked, but Voldemort can send out a maze of tendrils before launching an assault, or alternate between attacking and sending out tendrils. He maintains tendril formations after Apparating, letting him reach them into different areas of stage, dragging victims with him in the process. Once Voldemort has grabbed a foe, the 'Z' input changes from sending out tendrils to pummeling them. All in all, the versatility of the tendrils' movement gives them a variety of uses outside of the traditional grab, not the least of which include him reaching down into a crater to hold a foe underwater and coaxing foes into dodging mindlessly within an atmosphere of smoke.

Voldemort throws victims in the same order with which he grabbed them.

[COLLAPSE="Without Horcruxes..."]Voldemort may send out up to two tendrils at once, rather than the regular four.[/COLLAPSE]


Pummel - Cloak Choke
With a single foe in his clutches, Voldemort simply gestures, causing the tendril holding his victim to squeeze around them. This deals 1% and is rather spammable. If he has seized multiple foes, however, he'll twirl their tendrils together over .75 second, retaining the pummel's damage. This essentially reverses the position of two captured foes, and causes three captured foes to all rotate positions in a clockwise manner. Though this pummel is less spammable, doing so multiple times can force foes to change directions suddenly to pull free, keeping them trapped for longer.

Depending on how far out each foe was caught on their tendril, three to five pummels with multiple foes will also shorten each tendril to the point where the victims will end up tied together. If Voldemort ties victims together, his tendrils will vanish as foes remain stuck, roped tightly by a ring of smoke. This, they must mash free from with triple grab difficulty, remaining stuck together if Voldemort attempts attacking them around. Tied foes' weights are combined, though Voldemort generally has no problem knocking them around with Neutral Special, which they can't deflect while bound together. Through doing so, multiple foes can be put in dangerous situations at once, or potentially moved away from a Horcrux at once as punishment for attacking it as a team.

[COLLAPSE="Without Horcruxes..."]No change is made to the pummel, though only two foes can be tied together by two tendrils.[/COLLAPSE]


Forward Throw - Offensive Imperius
Voldemort casts the third of the three Unforgivable Curses, 'Imperio', to place his victim under his complete and utter control for a brief period. Unlike when he possesses a foe with Up Special, this throw (as well as B-Throw) programs his victim with a set AI for seven seconds, before they are able to mash free with grab difficulty. Voldemort cannot harm his mind-controlled victim; they instead join him as a makeshift teammate against their former allies.

Here, the Imperiused character will automatically pursue the nearest opponent, attacking with Level 7 AI. They'll focus on knocking opponents into Voldemort's stage elements, or simply offstage. Aside from allowing the curse's time frame to wear off, opponents can deal their former ally 30% to knock them from their stupor prematurely. Though this will generally not take long, due to the possibility of two characters teaming up to meet that damage quota, the single Imperiused foe can prove bothersome when an opponent is already in a sticky situation. If he's trying to spike them down into a crater while they're desperately trying to surface, for example.

[COLLAPSE="Without Horcruxes..."]Foes can shake off the curse after just three and a half seconds, and can be knocked out of it by receiving 15%.[/COLLAPSE]


Back Throw - Defensive Imperius
Voldemort uses the Imperius Curse again, just like with F-Throw. However, instead of turning his victim into an offensive lapdog, he chooses to program them defensively instead. For the same seven seconds before they can break free, his victim will approach the nearest Horcrux, standing overtop it. If a former teammate gets within a platform of it, the character will try to attack them back with Level 7 AI.

Of note, if a character attempts to camp at a Horcrux, the victim will stand in the face of the projectiles, offering themselves up as a meatshield. In addition, if a foe tries approaching Voldemort from behind to attack Nagini, the victim will begin defending her instead (they'll do the same automatically if Nagini is separated outside an Inferius). Victims can be set free early if a former teammate deals the same 30%. If Voldemort performs the move within an atmosphere of smoke, foes may not understand that their teammate has been corrupted, possibly tricking them into accompanying their teammate to the nearest Horcrux hoping to attack it, only to be deceived themselves.

[COLLAPSE="Without Horcruxes..."]Foes can shake off the curse after just three and a half seconds, and can be knocked out of it by receiving 15%.[/COLLAPSE]


Down Throw - Confundus Charm
Voldemort nonverbally blasts his victim with the Confundus Charm, 'Confundo,' which addles their mind with a great deal of confusion. This manifests itself not through their attacks, but through their shield defense, for the next nine seconds. By either tapping or holding the input, Voldemort can influence the lag with which his foe summons their shield differently, either removing its admittedly minimal startup lag, or adding a half second of lag onto summoning it.

Which option Voldemort selects is not necessarily of significance, considering the ultimate goal is to throw off his opponent's timing. When a Killing Curse is approaching rapidly, either modification to their startup lag can cost them the narrow window required for a reflecting perfect shield. Of course, the opponent player can test out how their shield has been impacted before a Curse is fired, but even in doing so, they render themselves vulnerable to Curses regardless. This throw deals no damage, allowing Voldemort to use it while veiled in smoke to further confuse his foe as to where they are positioned and whether their shield has been tampered with.

[COLLAPSE="Without Horcruxes..."]No change is made to this throw, though since a nerfed Killing Curse can be reflected by any contact with a shield, it is no longer effective for that purpose.[/COLLAPSE]


Up Throw - Cloaked Ascent
Voldemort turns his wand on his victim once again, casting a Disillusionment Charm to turn them invisible, before directing his wand upward to launch his foe into the air. His charm takes nearly a second to cast (he has super armor while doing so); during this time, the player can direct the Control Stick around in intricate patterns, with this invisible cursor traveling at Mario's dash speed. Though this path can simply travel straight up (if not influenced at all) or loop around in a complex manner, it cannot dip below the 10 o'clock or 1 o'clock position on either side of Voldemort.

When Voldemort launches his foe, they'll follow his designated path while invisible, traveling at the same speed as its cursor. Though the foe cannot mash free from this forcible levitation, they stop levitating after a set nine seconds. In addition, they can DI against the path Voldemort is levitating them along, slowing their movement along it or even pushing themselves back against it, depending on how accurate they are in DIing the opposite direction. The catch, of course, is that foes have no idea which direction to DI due to remaining invisible. Thus, the fear over whether to fight against any obstacles that may lurk in their path (unclear, again, due to smoke), is legitimate; by trying to escape one obstacle, a victim may cast themselves right into another by mistake. Inside smoke, levitating foes may not even know they are being subjected to U-Throw before it is too late. Despite none of Voldemort's throws dealing damage, their potency while shrouded in obscurity is undeniable.

[COLLAPSE="Without Horcruxes..."]Voldemort loses his super armor during the move's startup. The victim is also only kept on his levitation trial for 4.5 seconds, rather than the full nine.[/COLLAPSE]


Standards

Jab - Crucio
Hissing the titular Torture Curse, Voldemort casts a beam of red light across the stage. This beam shares its size, movement, aiming and shield reflection properties with that from Neutral Special, though its effect is quite different. Rather than knocking foes back with killing power, this curse knocks foes into prone, dealing four rapid hits of 2%. The hits cause them to bounce up and down slightly in pain, traveling roughly a platform forward onstage as if laser-locked by Falco. Due to a fair bit of end lag, Voldemort cannot permanently lock a foe into prone, though he can chain multiple Torture Curses if they are slow to react. If a foe is hit while airborne, they'll simply freeze, suffering the hits as they fall straight down. Used well, Voldemort may push foes (and Inferi, who are knocked back rather than down) onstage, as well as bring them down to his level, if not lower into his lake.

[COLLAPSE="Without Horcruxes..."]Voldemort's Torture Curse gains the same shield reflection properties as a Horcrux-less Neutral Special, albeit with significantly less shield damage dealt to Voldemort if he does not perfect shield, making it the safer curse for such an endeavor. The curse will also hit, rather than pass through him if reflected [/COLLAPSE]


Dash Attack - Protego


Lunging forward half a platform with great ferocity, Voldemort quickly casts a Shield Charm in front of himself, with it lasting for .75 second before dissipating. The charm covers a Bowser in front of him, serving as a large hitbox that deals 5% and solid horizontal knockback KOing around 130%. The charm also fulfills its purpose as a shield, reflecting all enemy projectiles back for its duration, including Voldemort's own curses. While battering a curse back and forth, Voldemort can slowly close the distance between himself and a foe with this move, making it more challenging for them to pull off a perfect shield.

If Voldemort performs the move while gliding over a lake, he'll create a wave in the lake that travels across its surface at Luigi's dash speed before crashing into its border. The wave grows as it travels, with the maximum size of the wave depending on how much lake is in front of Voldemort when he initiates the charm. If he's halfway across his lake when he does so, he'll produce a wave as tall as Mario and as wide as Kirby, while if he just barely nicks the edge of a lake with his charm, a wave as tall as Ganondorf and as wide as Bowser will progress intimidatingly across the lake. Waves pull in foes and put them in their infinite-jumping swimming state, dealing 9% and spiking them should they be inside it when it crashes. Since an underwater foe can still drown inside a wave, Voldemort can send multiple waves across the lake as their air supply dwindles; send out an initial wave, then Apparate back slightly and repeat the process as needed for best results.

[COLLAPSE="Without Horcruxes..."]Though the move's strength and wave-creating properties are not diminished at all, Voldemort must now hit projectiles during the charm's first few frames to reflect them.[/COLLAPSE]


Forward Tilt - Ring of Fire
Voldemort swipes his wand briefly, causing a flaming ring to be traced around him over .75 second. His pyrotechnic magic deals 8% and horizontal knockback KOing around 140%. The ring's front appears a platform in front of Voldemort, hitting foes in front of him much like a traditional tilt, before stretching around the foreground and background so its back reaches a platform behind him as well. After it is fully created, the ring will travel around with Voldemort for the next ten seconds, levitating around him while maintaining the same distance in front of and behind him. During the startup, the player may tilt the control stick slightly forward or backward, causing the ring to materialize slightly more or less in front of Voldemort, creating more space inside it as a result.

Foes who enter the ring for whatever reason find themselves in close proximity to Voldemort himself. Rather than launching foes, the ring's inside knocks them into prone on the ground; this includes when they attempt to dodge into its foreground and background portions. Voldemort, as a ranged fighter, prefers to toy more shrewdly with foes in his ring, rather than bash them aimlessly against its perimeter. For example, he can Apparate close to a foe, enclosing them as they approach a Horcrux, before walking the flaming interior against them to steer them away from their target, lest they get knocked repeatedly into prone. He may circle a ring around a nearby foe after casting Neutral Special or jab, before alternatively approaching and shielding to require multiple perfect shields from his victim at an increasingly fast rate. Voldemort may also herd around Inferi directly if he has created ring space in front of or behind him, conveniently covering Nagini in the latter scenario, though he'll burn Inferi if he moves too quickly.

[COLLAPSE="Without Horcruxes..."]Voldemort's ring takes a hit all around, having its damage and onstage time halved, while its lag is doubled.[/COLLAPSE]


Down Tilt - Long and Winding Robe
Voldemort stretches a snake-like black tendril of robe forward across the ground with minimal startup lag. The robe is flat, traveling at Dedede's dash speed up to half of Battlefield before vanishing into black smoke. Voldemort can cancel the move early at any time if the input is released. Foes who come into contact with its hem as it travels forward suffer 1% and trip onto it. Voldemort's robe serves as a solid platform for opponents; should he withdraw it with characters standing overtop it, they'll take this minute damage and trip once more, vulnerable in the Dark Lord's shadow.

The robe's solid properties come into play intriguingly when crater lakes are involved. By stretching a robe tendril over the lake as a foe attempts to jump out at its Horcruxes, he'll provide them a not-so-welcome landing. More often than not, if the foe was attacking, they'll enter their landing lag as they hit the robe. Now, the Voldemort player can release the input, dumping the foe unceremoniously into the lake. Against opponents who fall into a lake without his robe's help, Voldemort can still stretch it over the lake's surface as they try to emerge for breath. Its solid properties serve as a roof, forcing foes to swim around it to escape out of an increasingly narrow opening. Though Voldemort cannot hold out his robe to ensure that his victims drown, covering the lake at an opportune moment can ensure any characters inside do just that.

[COLLAPSE="Without Horcruxes..."]The maximum distance Voldemort can extend his robe tendril is halved.[/COLLAPSE]


Up Tilt - Dark Mark


Voldemort points his wand skyward, launching a Bowser-sized Death Eater insignia with .45 second startup. The Mark travels skyward (or slightly diagonally, if angled during the startup period) at Fox's dash speed for as long as the input is held, coming to rest once it is released. Should an opponent touch the Mark, the seemingly-smokey symbol will detonate over them, dealing 10% and vertical knockback KOing around 120%. Voldemort can place up to seven Dark Marks over the stage at a time, each lasting twenty seconds before vanishing harmlessly. Considering their aerial nature, Marks are highly effective tools for blockading off aerial Horcruxes as though they were undersea mines. With smoke blown into the mix, an arrangement of Marks (or, what appears to be an arrangement of them) becomes all the more deadly. A Mark can even be placed directly over an aerial Horcrux if aimed well, forcing one of Voldemort's three opponents to take a hit before the team can continue.

[COLLAPSE="Without Horcruxes..."]Voldemort may only place a total of three Dark Marks over the stage.[/COLLAPSE]


Aerials

Neutral Air - Concentration of Power


Voldemort faces the screen and holds out his hands, siphoning in dark matter from the air around him to create a sphere of energy in his hands. In doing so, he creates an increasingly powerful vacuum effect on the air around him, with it growing in size (from half a Smart Bomb radius to a full one) and pull (from a below average to powerful pull, a fair deal stronger than Dedede's Inhale). His sphere's growth serves as an indicator of this power, as it, too, grows as the move is held out, from half the size of a regular shield to 1.5 times the size of one. Voldemort's suction drags in both characters, including Nagini and Inferi, and items, including Horcruxes. While items are absorbed into the sphere, defended from attacks by its massive priority, foes are spiked powerfully on contact with the energy, suffering 5% in the process. Voldemort may hold out this first phase of the move for up to three seconds, upon which the second phase is automatically triggered; he may cancel it by either air dodging or landing, though the latter is far laggier an option.

Once the input is released, Voldemort lets out a yell, spreading his arms to detonate the dark matter in a blast around him. This creates a crushingly powerful hitbox around the same area that was previously covered by suction, dealing 15-18% and knockback KOing from 100-80%. Any items held in Voldemort's sphere are also released, pushed back in the opposite direction from which they were brought in with varying force. If the Voldemort player so chooses, they can manually select the direction his fodder is launched by tapping the control stick once the contents of choice are in the sphere (this also controls his aerial DI). Voldemort's fluid combination of pulling and pushing gives him a great deal of control over repositioning Horcruxes, both grounded and aerial, as well as moving around Inferi and bringing Nagini back to him (if the blast is canceled). Because his sphere is also comparable to a shield (though not entirely, since it doesn't cover most of his body), it can also reflect spell beams in midair, keeping their chaotic bouncing alive even longer.

[COLLAPSE="Without Horcruxes..."]Voldemort's suction and, as a result, blast power are nerfed slightly. Because of his newfound vulnerability to spell beams, his sphere's reflecting properties are also nullified.[/COLLAPSE]


Forward Air - Wind Funnel
Voldemort aims his wand forward and casts out a swirling funnel of smoke, a platform and a half long and a Ganondorf tall at its outermost point, with .65 second lag on both ends. The funnel can be held out for up to five seconds, and can be angled around freely during this time in front of Voldemort. The move ends automatically if Voldemort lands (it can be discontinued through an air dodge as well), though he can prolong it through his float. Opponents suffer no damage from immediately coming in contact with the vortex (they're merely pushed back lightly), and can actually attack it to cause it to deteriorate back toward its master, who suffers unpleasant lag if it is destroyed. Eliminating it entirely requires foes to deal 60% to it, though this is not exactly without risk.

Should characters not destroy the vortex entirely, it will surge around them wherever they are, spinning rapidly to deal all the damage they dealt it, back to them, in multiple light hits (dividing this damage equally amongst each opponent that attacked it). Against a team of offensive opponents, this move is not of much use, though when used while floating around and defending Horcruxes, it is quite a boon indeed. Voldemort also has access to a few cruel games with his vortex; he can use it out of nowhere in the face of an aggressive attacker as a gradual counter should they refuse to retaliate, or can angle it up and down to prevent foes from destroying it, should they choose to do so. Voldemort may not repeatedly spam the move to push around opponents, due to its end lag, though its pushing effect can serve this purpose initially, should his foe not DI away from it. This lag also prevents him from vanishing the funnel immediately once his foes get close to destroying it, though he can certainly try to do so.

[COLLAPSE="Without Horcruxes..."]Voldemort's funnel can be destroyed by dealing half as much damage to it.[/COLLAPSE]


Back Air - Cloak Trail
Voldemort gestures behind himself, allowing the back of his cloak to extend slightly, creating a horizontal trail of black particles as tall as Mario and a platform long. Opponents caught in this trail suffer roughly 2% per second through multiple hits, and are slowly pushed to the end of the trail, moving along it at Ganondorf's dash speed. Once he's captured a foe (or multiple ones), the player can direct the control stick to move around Voldemort's trail, and, as a result, the characters trapped within. The trail can be directed around at Mario's dash speed, though it can only reach up to half of Battlefield's distance. Still, Voldemort may catch opponents hot on his tail (possibly surprising them if they're after Nagini), or on the brink of attacking a Horcrux, and push them back, possibly into obstacles they tried so hard to avoid. Voldemort DIs slightly while directing his trail, for better or for worse, and cancels it once the input is released, his opponents have exited it, or upon landing.

[COLLAPSE="Without Horcruxes..."]The move's damage is nerfed slightly, though as a whole, the move suffers very little; it remains a defensive tool for Voldemort to try using in his weakened state.[/COLLAPSE]


Up Air - Crackling Static
Voldemort aims his wand skyward and releases a horizontal burst of static electricity skyward over .45 second. His static is as thick as Mario and one platform long, floating up a Marth over a second before levitating in place for the next nine seconds. It's a fairly basic aerial trap, in other words. Once an opponent hits the static and suffers its 9% and moderate opposite knockback, however, they'll come to find out a nasty truth: any time a character hits the static, it will double in size, in both thickness and length (this can be done up to five times). Needless to say, this creates a much larger obstacle for opponents to avoid.

Static can potentially become absolutely massive if Voldemort can bounce a foe off of it multiple times by, say, placing it over a lake crater; multiple traps can also converge into a single one if they come in contact with each other. He has no limit to how many individual static traps he can place onstage, which enables him to create blockades around Horcruxes that potentially become more and more impenetrable as foes continue bumping into them. That said, as powerful as static can become, none of it can last longer than nine seconds. Through N-Air, Voldemort may also manipulate his static, dragging it in and expelling it to further dig a thorn into his foes' sides.

[COLLAPSE="Without Horcruxes..."]Voldemort can only send out up to three static traps, each of which will only double in size twice.[/COLLAPSE]


Down Air - Pyrotechnic Lasso
Voldemort aims his wand downward, out of which emerges three circular lassos of flame, each slightly larger than Kirby. They spread in an arc-shaped pattern as they travel at Mario's dash speed, with one lasso traveling straight down as the other two move diagonally to either side. Should they hit the ground, they'll simply form Bowser-sized flame traps, spaced a short distance apart. These last nine seconds, dealing 10%, moderate vertical knockback, and serving as great obstacles or covers for nearby Horcruxes.

Should a lasso actually hit an opponent, however, the lasso will surround them, circling around them vertically. Because the lasso simply travels around with them, not coming in contact with them (yet), opponents can still move about and attack without a worry or care...again, yet. Should they fail to extinguish the ring after seven seconds, the entire lasso will explode around them, dealing 20% and knockback KOing around 75% to its hapless victim. The flame can be extinguished either by fast-falling for one second so the flowing air douses it, or by landing in water (such as that in a crater). Though Voldemort is still free to attack characters circled in flame, the flame lasso essentially isolates a character from their teammates, as, if a character touches the ring, they'll suffer 7-8% and bounce back. Aside from distracting opponents from their Horcrux-attacking mission, lassos can divide groups of teammates hoping to commit a mass raid as well.

[COLLAPSE="Without Horcruxes..."]Voldemort only sends out one ring (straight down), and its victim has twice as long to douse the flame before it explodes around them.[/COLLAPSE]


Final Smash

Final Smash - Greater Lake
Voldemort waves his hand, causing a curtain of black to fall over the screen, enveloping all characters for a second. After this time, the screen lightens up, though not significantly, revealing the combatants to have been transported to a murky cave, the hiding location of one of Voldemort's Horcruxes within the series. The entire area takes up the space of the Final Destination stage, with two walk-off blast zones at either side of the screen. The entire floor of the cave is nonexistent; instead, a bottomless lake rests at the lower portion of the screen, with a single boat, half of Battlefield wide, floating overtop it. A moderate distance into the air, stalactites gleam menacingly down at characters, dealing 20% and a powerful spike should they leap up into them.

Like his regular crater water, Voldemort may stroll around the surface of his lake at will, though opponents must avoid it at all costs. Should they break the surface in the slightest, the Inferi that reside in the water will lunge up and begin pulling their victim off the bottom blast zone to a KO. While only one Inferius will lunge up at an opponent immediately above them, if an opponent drifts to either side even slightly, additional Inferi will lunge up as they cross overtop them underwater, continually pulling them further down. If the Inferi weren't a hassle enough to deal with, if he's standing at either side of the boat, Voldemort can pilot it across the lake at Mario's dash speed. He may take it away from struggling underwater opponents this way, or simply rest in its middle to place it overtop them and seal them down.

In general, Voldemort's extra stage, which he keeps opponents on for fifteen seconds, gives him nearly an entire stage over which he can hide Horcruxes without fear of them being destroyed. The ones he has placed on the main stage during the fight are transported to this new lake as well, scattered randomly around it so that their master may reposition them while their attackers are busy struggling to remain on the meager boat. If, in some wild scenario, Voldemort lose all Horcruxes in this stage, it also keeps him in the position to score easy KOs in his weakened state, which isn't the case during a regular match. Horcruxes are returned to the main stage alongside their master once the move ends, in the same position they were in prior to the move being used, and scattered randomly if they were brought out during the Final Smash.

[COLLAPSE="Without Horcruxes..."]Nothing changes whatsoever with this Final Smash. If Voldemort has acquired a Smash Ball during his weakened state, he sure the hell has earned it.[/COLLAPSE]


Playstyle

Pitting himself against three opponents in the world of Smash, Voldemort holds back none of his dark mastery. In fact, had he not rendered his soul so fragmented and unstable, due to the existence of his Horcruxes, his foes would stand little chance at all of dethroning him. Even so, playing with his Horcruxes in combination with his intense death traps, Voldemort may dominate any trio he's faced with. The potential prolonging of each stock he has gives Voldemort more than enough time to correctly manage each card he holds up his robe sleeves, though the burden of doing so is on him at all times.

The danger of Nagini getting swarmed by three opponents at a match's beginning is imminent. Though she can be hidden at times, if she is killed off early on, Voldemort is stuck fighting an uphill battle within the match's opening moments. Thus, the creation of at least a single Horcrux is a fantastic safeguard for its master, and effectively provides him with a centerpiece around which he can focus his offensive and defensive magic. Of course, since Voldemort has a limited number of Horcruxes to place, the rate at which he places them is a decision he'll have to make, based on his opposition.

For example, placing multiple Horcruxes at once, as opposed to one at a time, is inherently bad at a cursory glance, due to the difficulty in managing all successfully. However, placing multiple Horcruxes can divide an otherwise-solid team of three, as each member separates off to attack an individual Horcrux. When a united team might otherwise be overwhelming Voldemort or a single Horcrux, this can prove to be quite a valid strategy. Against less offensive opponents, single Horcruxes can suffice, and should Voldemort choose to prolong his present stock, rather than future ones, he can simply lay out additional Horcruxes whenever one is destroyed, granted that he has enough, and the destroyed one is not his last onstage one. Whether Voldemort spends all his Horcruxes on one stock or divides them evenly is up to him, though the existence of his weakened, Horcrux-less state is an unshakeable reality he'll have to face eventually.

Horcruxes, in whatever quantity, can be either a weak point or a piece of bait, depending on Voldemort's gameplay. Voldemort has multiple 'danger zones' he can hide Horcruxes inside, as he works to preserve the security of these areas without rest. These include, but are not limited to, burying a Horcrux amidst an Inferi swarm or inside Fiendfyre, placing one overtop a dangerous lake crater, or shrouding it in mysterious smoke. The beauty of these zones lies in the spontaneity with which Voldemort can draw them out. A foe may think they are rapidly closing in on a Horcrux, when, in all reality, they're a few seconds away from being plunged into the oblivion of raging Inferius limbs, or coated in Fiendfyre they can't possibly throw off on their own. The fact that these brutal snares can be sprung on opponents out of the blue surrounds Voldemort with an air of uncertainty that, if employed, can cripple opponents through fear of what's about to hit them. This manifests itself most cleanly through Voldemort's smoke, the traps he can hide within and manipulate to his heart's content, and the regular actions he can perform inside, with his victim being clueless to react, though it arguably apples to each of his aforementioned hazards.

As potentially overwhelming as Voldemort's stage control is the extent to which he can single out a character (or multiple characters) and slowly, but effectively, suffocate them. Casting multiple spell beams through a combination of Neutral Special and jab singles out an opponent, who can rely only on their own perfect shielding to bat away the beam again and again. Pressuring a foe into a lake, before holding them under the surface with a grab, D-Tilt, or even Nagini's own coils, forces them to prioritize their own survival over their role as a team member. Likewise, Voldemort can draw together opponents to lead them all to the slaughter en masse if he so chooses. He may bind together foes against their will with a pummel, or use an Imperius mind-control throw to draw them together, unaware that they are now, however briefly, opponents. Little team tasks, such as pushing through Fiendfyre as a group or fighting through F-Air smoke, can allow teammates minor 'wins' over Voldemort, but guarantee their eventual loss as they all suffer the damage that otherwise may have affected only one opponent. Regardless of how he manages his opponents, Voldemort is left with no shortage of ways to finish them off once they're good and damaged; hell, his trademark spell has 'Kill' in its very title. And once a single opposing teammate is finished off, the remaining two's chances of a victory plummet immensely.

In any scenario, Voldemort is likely to survive portions of matches for an inordinately long period of time, thanks to his Horcruxes. Though he's no behemoth, Voldemort is every bit as challenging a boss to bring down as the MYM Goliaths, due to the scattered nature of what can serve as his weak points. The chaos he can throw into the mix to ensure his immortality is a spectacle, though demanding of a keen strategic mind to serve as more than just flashing lights. Materializing and soaring around the stage like only the darkest of wizards could, opponents very well may be left referring to the Dark Lord as 'You-Know-Who' once he's finally finished with the torturous game he plays.


Extras

Up Taunt - Sparks Flying
Voldemort bows slightly, holding his wand to his chest as a series of dark sparks emerge from its tip.

Side Taunt - Red Eye
Voldemort's snake-like eyes flash an ominous red color, making his disdain for his victims quite plain.

Down Taunt - Underwhelmed Overlord
Voldemort puts a hand to his chin and comments, "I confess myself...disappointed."

Entrance - Out of Black Smoke
Voldemort Apparates onto the stage, shrouded in darkness. His pale frame seems to glow against his dark smoke as he brandishes his wand for combat.

Victory Pose #1 - Dark Marking
Voldemort chuckles subtly as he casts a Dark Mark into the sky; the screen noticeably darkens as it takes place offscreen above him.

Victory Pose #2 - Pensive Meditation
Voldemort simply faces to the side, both hands to his head as he shuts his eyes in deep thought. Meanwhile, Nagini circles around the losers, occasionally snapping at them ominously.

Victory Pose #3 - Closing Statement
Voldemort faces his opponents and declares, "I have nothing more to say to you. You have irked me too often, for too long." A flash of green light from his Killing Curses overwhelm the screen, fading it from the viewer's vision.

Victory Theme - Impending Darkness
A dark and ominous rendition of the main Potter series theme plays whenever its villain scores a victory.

Loss Pose - Barely Concealed
Voldemort claps softly, though his eyes flash red and his wand occasionally emits sparks, indicating the fury swelling up within over his loss.
 

n88

Smash Lord
Joined
Oct 10, 2008
Messages
1,532
Lord Voldemort
Oh boy, commenting again. . . it's been a while, hasn't it?

Reading through the set, I was at first impressed with how the specials seemed relatively subdued (though I do have to bring up Voldemort's inability to function in modes other than Stock; I understand why the Horcruxes work the way they do, but I feel some concession ought to be made, or some alternate function provided to allow Voldemort to exist in other modes), but this is almost immediately undone by the spectacle of the Smashes. These attacks definitely have some incredible visual appeal, but I remain somewhat skeptical of them. They certainly don't fulfill the normal role of Smashes in a moveset and I generally dislike non-Special attacks that you can't use twice. I'm also forced to question the idea that Voldemort would, in a combat situation, decide that his best move was creating a lake, as interesting as the interactions with his robe, Nagini and the Inferi may be.

In general, the set seems to have a problem with the way it treats inputs; though they're certainly the foundation of the playstyle, the Specials seem at times to be among the least special moves in the whole set. I do forgive that to a degree though, as the character you're working with lends himself well to a flashy moveset without a lot of physical attacks. I do enjoy the way Voldemort ultimately plays out; the baiting and manipulation that comes from the horcruxes, as well as the general zaniness from his long-range game makes him quite fascinating to imagine in action, and for the most part I believe the set stays true to the character; it seems to capture well the feeling of those few duels Voldemort took part in. The extent to which Voldemort manipulates the horcruxes here is a bit of a departure, and the biggest issue I have with the characterization. But they're still used interestingly, and I feel the set does benefit from their inclusion, so I'm not going to get too hung up on that. As one final complaint, I feel like Voldemort would benefit immensely from a non-boss mode (witty links to MYM6 edition need not apply).

Overall, I'd say my feelings are a bit mixed on this one but leaning positive. I think it might be better off with a few changes, but it's definitely an enjoyable read.
 

Katapultar

Smash Lord
Joined
Nov 24, 2008
Messages
1,258
Location
Australia
I'll get to Sniper, Headless Horseman, Nyx Assassin, Derpy Hooves and Trainer JOE! soon enough, but you can have these for now.


[collapse="The Soldier"]Finally having gotten through this set, Soldier is as straightforward as they come, having a large emphasis on selling the purpose of his straight-forward moves in an imaginary game mode. I'll admit I'm not a huge fan of Team Fortress 2 nor Capture the Flag movesets what with the latter sets feeling a bit more lockdown-ish than usual and having more privileges for the game mode than normal characters do, which Soldier capitalizes on a little (there are times where the extremes the set resorts to are a little hard to believe), but for me there's quite a lot to like about this set as others before have brought up. The presentation is marvelous enough to make me wonder why the other CTF sets didn't use Impact font (though I guess it fits Soldier more given he's kinda like a poster-boy for the series), and I don't need to tell you how awesome it'd feel to blow yourself back with a grenade in hand. My only nitpicks on the set would have to be at the somewhat large usage of props in the standards, especially the grabgame, as Solider is a character I feel would be perfectly willing to grab enemies physically and fight with his bare hands. There's also a bit of awkward logic-inconsistency with the pummel-KO and the Final Smash (as strange as it is to comment on that, though it's good for its in-game implications and various likable throwbacks). It's probably not something you care about too much, though.

On a final note, I will say that the playstyle section is amazingly well-written, and is incredibly successful at selling off the set, if for describing what Soldier is all about. [/collapse]


[collapse="Lord Voldermort"]Voldermort is not only a blast from the past what with being a MYM6 villain getting a new set, but also feels like it's taking a similar style from that timeline what with being so trapccentric. He has almost no reason to ever want to approach foes when all but one move provides a trap or projectile of some sort, so I can definitely see Voldermort being a character who absolutely cannot function up-close and is easily pressured by one character. It's balanced out by the trap spam and massive hitboxes, but in a somewhat unsettling way when they can be so powerful being a 3v1. How far you go with the special effects of the moves, especially with the aerials, is one of the things that gives this set a retro-flavor.

The set itself is constructed intriguingly. You take a concept, but instead of playing on it to high-hell like readers would expect, you then take another seemingly unrelated mechanic in what is a large showcase of Voldermort's endless slew of frightening powers, to which the fun never stops. There doesn't -seem- to be a whole lot of obvious flow or interactions as a result, though it makes the set easy to get through and keeps one guessing, very unique. At worst, I'd say that there doesn't seem to be a huge motif in the set unlike a lot of your others nor a crafty, inventive selling point that takes use of the smash engine that did it for me with Wonka, mostly hiding horcruxes inside traps of death which are strong because 3v1, though it'd be unfair to expect things that account to my tastes from all your sets.

Onto the presentation, that part of the set is handled incredibly well with how all the moves are introduced, their gimmicky properties befitting of the mysterious nature of the Harry Potter universe - even the idea of moves like the F-air and U-air changing properties has a nice motif to it. Add laying traps over a horcrux, as simple of a method as that may be, and it comes off as making a -lot- of sense for the previous universal context that was established. Voldermort never comes off as being a genius in the set, but rather destroying those in his way with traps and frightening power. Lastly, the lake had to be one of my favorite parts of the set, not only for adding a piece of scenery pretty much taken from the Harry Potter universe (it feels like something from a film setting), but also giving your minions a playground where they can be at home to wreak havoc. All the smashes feel like they add a new layer of darkness of which foes have to navigate to destroy horcruxes.

This was a set where, at first not everything made itself obvious, and I wasn't too sure about it, but upon thinking into it more was actually quite enjoyable and a solid like for me. The craft behind it it is deceptively clever.[/collapse]
 
Top Bottom