• Welcome to Smashboards, the world's largest Super Smash Brothers community! Over 250,000 Smash Bros. fans from around the world have come to discuss these great games in over 19 million posts!

    You are currently viewing our boards as a visitor. Click here to sign up right now and start on your path in the Smash community!

Make Your Move 3.0: It's over, it's done, moving on.

Status
Not open for further replies.

nakedsnake

Smash Journeyman
Joined
Jul 26, 2008
Messages
362
Location
Shadow Moses Island(Blaine,MN)
Hannah Montana

As of right now I am not going to put to much detail into this character.


Specials

Neutral B- Super girl punch
Damage-2-5

Side B-sing
Hannah sings
Damage 20-25

Up B-Bodyguard boast
Her bodyguard gives her a boast
Damage 10-12

Down B- Temper tantrum
She goes crazy and loses all control
Damage 19-23
Tilts
Neural A- Money attack
she through a bunch of money at you
Damage 5-7

ftilt - groin grab
She grabs you groin and squeezes
Damage 23-27

utilt- Heel stomp
She stomps on your leg
Damage 12-16

Dtilt-Head knock
She knocks you on the head
Damage 10-17

Smashes
Side smash-Gut punch
she goes straight for the gut
Damage 14-15

Up smash- Best of both worlds
She sings this song
Damage 25-30

Down smash- Crying
She crys causing her oppenent to fell sympathy
Damage- Paralyze

Aerials
uair- Mic
She throws the mic up
Damage-5-12

Dair- Money shower
Shower of money
Damage 6-14

Fair-Heel throw
She throws her show
Damage 7-14

Bair- Good girl
She looks behind you and acts like she just a good innocent girl
Damage- paralyzes

Dash attack

Boyfriend tackle
She tackles you the same way she tackles her ex boyfriend
Damage- 12-15

Grab
Side grab
She grabs you and digs her nails into your back then throws you
Damage 10-14

Down grab
she trips you and then starts stomping with on you with her heels
Damage 12-14

Up grab
She pushes you away and then throws up
Damage 12-15

Final Smash
Hannah will sing at a unheard of pitch this will cause unbearable
pain to her enemies.
Damage- Death

Billy ray AT
Billy ray grabs his character and starts hitting your oppenent with it.
 

TWILTHERO

Smash Lord
Joined
Aug 19, 2007
Messages
1,880
Location
Canada
^^^^^^Hannah Motana?!?!?!??!?!?

I thought you were just joking, but now i know you were serious XD
Though the moveset itself is pretty funny though :p
however the grabs are pretty broken though (20%????)
 

Eternal Smasher

Smash Ace
Joined
Jan 24, 2006
Messages
604
Location
Bronx, NY
(I'm so not kidding.)

The Zoop Triangle joins the fray!?


Backstory:
Psych! Zoop ain't got no backstory! This is how you play, though.

Overview:
The Zoop Triangle is the smallest “character” in the game, being roughly the size of a Mite. Except it floats. It mainly attacks by stabbing people, and boy, do its attacks come out quick. Because it's so small and zips all over the place when attacking, it's incredibly evasive. But it's even lighter than Jigglypuff! A Snake U-Tilt on FD can kill this thing at 65%!

Power: 3. Some of this thing's attacks have surprisingly good knockback.
Speed (movement): 3. Doesn't float too fast.
Speed (attack): 5. Zippy.
Size: 0.5. Mite-sized.
Weight: 0.5. So...light...
Jump: 3.5. Its jumps are actually pretty good.
Range: 3.5. Its range isn't too bad either.
Traction: 5. Perfect, since it doesn't touch the ground.
(all values out of a possible 5)

Pros
+ Its incredibly small size and zippy attacks make it a hard target to hit.

+ Stronger than it looks.

Cons
- Extremely light, and therefore very vulnerable.

- Recovery move leaves the Zoop Triangle a sitting duck in the air. Grabbing the ledge or using Color Bomb is practically a requirement.

Miscellaneous Abilities: Crawl. It floats along the ground.

*~~~~~~~~~~~~~~~~~~~~~~~~~~~~~~~~~~~~~~~~~~~~~~~~~ *​

Standard/Tilt Attacks

Basic: Zoop. The triangle darts forward to stab foes. Spammy, with low knockback. Range comparable to Dedede's mallet spin (final A combo). This will go right over some smaller characters' crouches. 3%.

U-Tilt: Rising Zoop. The triangle darts upward to stab foes. Slightly less spammy, with slightly more knockback. Range comparable to DK's U-Tilt. 7%.

F-Tilt: Spinning Zoop. The triangle darts forward to stab foes, then spins to deal multiple hits. The final hit knocks foes away diagonally. 4% initial hit; 2% a hit, 4 hits max.

D-Tilt: Low Zoop. The triangle descends low to the ground and stabs at the foes feet. Same range as Zoop. 7%.

*~~~~~~~~~~~~~~~~~~~~~~~~~~~~~~~~~~~~~~~~~~~~~~~~~ *​

Smash Attacks

U-Smash: Double Rising Zoop. The triangle darts upward twice to stab foes. Quick to execute, but a bit laggy to finish. The second stab is the hard and knockback-filled one, and goes slightly higher. 4%, 12% uncharged; 5%, 15% fully charged.

F-Smash: Super Zoop. The triangle darts forward to stab foes. Quicker to start than Zoop with more range and much more knockback, but very laggy at the end. 11% uncharged, 18% fully charged.

D-Smash: Triple Low Zoop. The triangle quickly descends low to the ground and darts forward, backward, and forward again to stab foes. Its spammiest smash by far. Knockback is similar to Olimar's D-Smash, but less powerful. 10% uncharged, 16% fully charged.

*~~~~~~~~~~~~~~~~~~~~~~~~~~~~~~~~~~~~~~~~~~~~~~~~~ *​

Specials

Standard: Color Bomb. The triangle moves back, shaking, for as long as the button is held (it eventually stops moving back). When the button is released it darts forward into a glowing paint splotch to become it, and keeps going forward a good distance (distance can be as far as Pikachu's Skull Bash). If it collides with an opponent, large item, or wall, it triggers a Bob-omb-sized explosion and does several “backflips” from recoil. This is, hands down, its best KO move when it works. 9% uncharged, 23% fully charged.

Forward: Line Bomb. The triangle darts forward a bit, turning into a glowing gear. If it hits someone, the gear attaches itself to whomever it hit. After an uncertain amount of time, the gear will explode, doing medium knockback. Only one gear from any given triangle can be on-screen at a time.14%.

Up: Spring Piece. The triangle darts upward into a small purple spring and shoots up. The dart hurts, but the shooting up does not. This move takes it a bit higher than Sonic's Spring Jump, and it cannot attack afterwards. 6%.

Down: Proximity Bomb. The triangle darts downward into a small lightning bolt, creating explosions on both sides of it. They are relatively low damaging, but are set to knock opponents pretty high. Not spamable by any means. 7%.

*~~~~~~~~~~~~~~~~~~~~~~~~~~~~~~~~~~~~~~~~~~~~~~~~~ *​

Aerials

U-Air: Upper Zoop. Picture Double Rising Zoop with a spin on the second dart. 5%; 1% a hit, 5 hits max.

F-Air: Forward L Zoop. The triangle darts forward, then down, to form a horizontal L. The second hit looks like it should spike, but wouldn't ya know, it doesn't. Well, it kinda does. Like Sonic's Spring. A bit spammy. 6%, 4%.

D-Air: Falling Zoop. Picture Double Rising Zoop upside-down. The second dart spikes decently. 5%, 6%.

B-Air: Reverse Zoop. The triangle does a fake-out, seemingly darting forward then darting backward. Good for evasion, as the triangle doesn't zip back to its original position when it's finished. 8%.

N-Air: Square Zoop. The triangle darts forward, down, backward, and up to attack. Only hits once. The square's area isn't very large, and knockback is decent. 11%.

*~~~~~~~~~~~~~~~~~~~~~~~~~~~~~~~~~~~~~~~~~~~~~~~~~ *​

Dash Attack: Roundabout. The triangle simply spins out of its “run”. Hits multiple times. Low knockback throughout. 2% a hit, 5 hits max.

Wake Up Attack: Recovery Zoop. The triangle spins once as it rises, then darts forward, waits a bit, and darts backward. It lands the same way each time, so the attack is the same. 6%. (All 3 of my movesets had this trait so far. Go me.)

Ledge Attacks (yes, it has ledge attacks)


<100%: Rising L Zoop. The triangle “flips” onto the stage and darts forward, then up, to form an L. Hits twice. Even rangier than DK's. 3%, 3%.

>100%: 1-2-3 Zoop. After a “1-2-3” swing up to the stage, the triangle darts forward along the ground. 7%.

*~~~~~~~~~~~~~~~~~~~~~~~~~~~~~~~~~~~~~~~~~~~~~~~~~ *​

Grabs and Throws (yes, it can grab)

Grab: It freakin' pierces the enemy's chest/face! That alone does 3% every 1.5 seconds. Again, goes right over some smaller characters' crouches.

U-Throw: Upper Release Zoop. The triangle darts up quickly, releasing the foe into the air. Rather high knockback. 9%.

F-Throw: Release Zoop. The triangle darts forward quickly, releasing the foe diagonally away. Again, above-average knockback. 9%.

D-Throw: Slam Zoop. The triangle rises with foe in tow and darts into the ground three times, releasing him/her on the final slam. Comparatively low knockback, but still decent. 4%, 4%, 5%.

B-Throw: Piercing Zoop. The triangle darts through the enemy and darts into his/her back to knock them away. Hey, what do you know, high knockback! 3%, 8%.

*~~~~~~~~~~~~~~~~~~~~~~~~~~~~~~~~~~~~~~~~~~~~~~~~~ *​

Final Smash: Level 9.​
Time completely stops. There is no zoom-in. A distinct sound effect is heard, and the current level transitions to Level 9.
Wait, what just happened? All the characters were transported to a game of Zoop! The triangle is controlled as it is in Zoop, as everyone else gets barraged by pieces. Different pieces have different damage levels and effects:

-Green pieces deal 6% and knock opponents upward.

-Purple pieces deal 9% and put flowers on opponents' heads. Low knockback.

-Blue pieces deal 13% and freeze opponents. Low knockback.

-Red pieces deal 16% and burn opponents. High, upward knockback.

If a character gets in the way of the triangle's zooping, they are dealt 25%, effects that match the last piece the triangle touched, and suffer knockback equivalent to that of Charizard's sweetspotted Rock Smash. The four corners are the safe havens. After up to 15 seconds (depends on how well you play the game), the center will get invaded and the triangle will spin and explode into a bunch of stars. This explosion deals 45% and knockback equivalent to that of a Falcon Punch. After the explosion, all returns to normal and the triangle falls from the top of the screen.

*~~~~~~~~~~~~~~~~~~~~~~~~~~~~~~~~~~~~~~~~~~~~~~~~~ *​

Taunts

Up Taunt: The triangle performs a slow “backflip” and spins once happily. Yeah. I said happily.

Side Taunt: The triangle “points” forward twice.

Down Taunt: The triangle descends to the floor and spins, pointing upwards.

Win Poses

#1: The triangle darts into the floor, spins around multiple times, and rises, pointing upward, in a slight arc.

#2: The triangle darts left, right, and upward before spinning three times.

#3: The triangle sways back and forth, over and over again, while pointing upward.

Misc. Animations

Dizzy: The triangle sways and struggles to stay afloat, almost hitting the ground several times.

Sleeping: The triangle doesn't sleep. Okay, not really, it just falls to the floor rigid.

Curry: The triangle points forward and diagonally up and down, like its aiming the flames.

Standing: Heh. Gravity. The triangle floats aboveground, at roughly the position of Mario's head. It moves back and forth slightly as it floats. When idle, the triangle will slowly spin in one direction, then another.

Entrance: The triangle simply descends, spinning.

*~~~~~~~~~~~~~~~~~~~~~~~~~~~~~~~~~~~~~~~~~~~~~~~~~ *​

Other

Kirby Hat: When Kirby swallows the triangle, he...uh...hmm. Yeah. Okay. Wait, I got it. Kirby gets...****. Um, okay, he gets a triangle-shaped body. Awesome.

Victory Theme: 00:12-15 of this video. Sexified, of course.

Symbol: The Z in the title. (Triangle was taken by Pizzaman, who is awesome.)

Alternate Colors

Default color is red. Blue, green and purple are the alternates. Yeah, that's not a lot.

*~~~~~~~~~~~~~~~~~~~~~~~~~~~~~~~~~~~~~~~~~~~~~~~~~ *​

Codec Conversation

Snake: Hey Otacon, what's with this tiny triangle?

Otacon: I remember that! It's the center triangle from Zoop!

Snake: And Zoop would be...?

Otacon: It was a fairly popular puzzle game in the mid-to-late 90s. Gets a bad rap nowadays, and lots of people don't even remember it exists. In any case, it attacks by “zooping”.

Snake: ...

Otacon: *sigh* Basically, it stabs.

Snake: Thanks. Much better. Looks pretty light, so if I could just hit it hard...

*~~~~~~~~~~~~~~~~~~~~~~~~~~~~~~~~~~~~~~~~~~~~~~~~~ *​

Things You Must Be Asking By Now

1. How the hell does it use items? Excellent question. It holds up items, all items, by its base, which is adhesive (for the sake of simplicity). In the case of shooting items, well, it fires by magic, dammit. To throw, it just “flips” in the appropriate direction.

2. Okay, well how does it grab ledges? By the point. DUH. (lol)

3. Wait, it grabs people by piercing them? That's pretty badass. Yeah, I know.

4. Display name? I mean, Zoop Triangle is pretty long. Okay, how about Zoop T.? That works.

*~~~~~~~~~~~~~~~~~~~~~~~~~~~~~~~~~~~~~~~~~~~~~~~~~ *​

Heh. Fun. Comments? *peeks back at Toku's set* Yeah, comments?
 

KoJ

Smash Journeyman
Joined
Aug 16, 2008
Messages
317
Hannah Montana: Ridiculously overpowered, and I hate the character. Crotch grab is scary, and not just because it does more than 3 times the amount of % some other tilts do.

Zoop Triangle: :0 The wierdest character so far... Anyway, it's kind of boring, since his attacks all comprise of stabbing, but you did an amazing job with what you got.
 

nakedsnake

Smash Journeyman
Joined
Jul 26, 2008
Messages
362
Location
Shadow Moses Island(Blaine,MN)
Hannah Montana: Ridiculously overpowered, and I hate the character. Crotch grab is scary, and not just because it does more than 3 times the amount of % some other tilts do.

Zoop Triangle: :0 The weirdest character so far... Anyway, it's kind of boring, since his attacks all comprise of stabbing, but you did an amazing job with what you got.
If someone grabbed your area it would hurt alot expecially if they squeezed with their long nails.
 

Darkurai

Smash Master
Joined
Aug 20, 2007
Messages
3,012
This moveset is unfinished. Please do not use it for the contest.

NEWCOMER


Van Grants joins the Brawl!

Commandant of the Order of Lorelei, Van uses his expert skills with the sword to defeat his enemies.

Size: 7/10
Power: 8/10
Weight: 7/10
Attack speed: 6/10
Walking Speed: 5/10
Dash speed: 7/10
Fall Speed: 5/10
Jumping: 5/10
Traction: 6/10
Wall-jump: No
Wall Cling: No
Crawl: No
Glide: No
Tether: No

Standard Combo
A: Van slashes his sword slightly diagonally from right to left.
AA: Van slashes his sword slightly diagonally from left to right.
AAA: Van pulls back his sword, and then thrusts it forward.

Tilts

Aerials


Smashes


Specials
Neutral Special: Radiant Dragon
Van holds his sword pointing forwards with two hands, and pulls it back a bit so that the hilt is near his chest. He then thrusts forward shooting out a beam of energy

Forward Special: Negative Gate
Van holds out his hand in front of him, and a sphere of dark energy appears, doing moderately weak, but continuous hits to whoever is there.

Up Special: Lighting Tiger Blade
Van swings his sword vertically and jumps into the air. A bolt of lightning strikes quickly in front of him, and he falls, slamming his sword on the ground as he does.

Down Special: Guardian Frost
Van spins around, with his sword against the ground, magically drawing a circle. He then thrusts his sword into the cround and icy stalagmites come from the circle.

FINAL SMASH: Ancient Reqiuem
Van calls out "Behold the power of Lorelei!" and pumps his fist. Suddenly, a great amount of energy appears everywhere, completely covering the stage and damaging whoever's close to Van. Van then shouts "Farewell!" and holds out his hand and focuses a great deal more of energy on whoever is unfortunate enough to be directly in front of him, shouting "Ancient Reqiuem!"
Video of Ancient Reqiuem: http://www.youtube.com/watch?v=r34LX8rUVKc

Other
Grab attack: Elbows the person he has grabbed.
Throws: Van never does any throwing in Tales of the Abyss, so all of his throws are really just generic throws like, for example, Marth's.
Ledge attack (under 100%): Van quickly climbs onto the ledge and swings his sword.
Ledge attack (over 100%): Van slams his sword on the ground in front of him, and then slowly climbs up, defensless as he does this.

Taunts
Up: Van holds his sword upright with both hands in front of his face and closes his eyes.
Side: That thing he does at 2:10
Down: Van lowers his sword and says "You've fought strong. But that ends now."

Entrance
Van is waiting on his knees with his sword in the ground next to him. He stands up and pulls his sword from the ground.

Victory Poses
1. Van holds his arm up in front of his face, looks at it, and says "To think you could push me this far..."
2. Van sticks his sword in the ground and says "Don't interfere with my ideals."
3. Van turns away and says "The planet's memory itself will die."

Kirby Hat
Kirby gains Van's hair.

Snake Codec

Alternate Colors
 

Adapt

Smash Lord
Joined
May 7, 2008
Messages
1,489
Location
NS, Canada
After a long wait...

Diddy & Dixie Tag Team


I heavily based their moveset around Diddy's Brawl moveset and DK Country 2 because it was my fav DKC game


Generic Attributes (out of 10)

Both


Weight: 4
Jump: 7
Dodging: 9
Horizontal Airspeed: 6
Fall Speed: 6
Running Speed: 5

Wall Jump: yes
Wall cling: yes
Number of jumps: 2

Diddy

Attack Speed: 8
Attack Power: 4

Dixie

Attack Speed: 6.5
Attack Power: 5.5

Moveset:

Notes:

- Both characters attack at the same time a la Ice Climbers so the individual percentages are separated
- Diddy attacks faster and weaker so his always hit first.
- They have the same basic attacks, but have different specials that add strategic depth.
- Knockback scale (KB): 1 = normal Jab of any character, 10 = ~Ikes charged F-Smash
- Both Diddy and Dixie can have items at the same time.
- Dixie uses her hair any time that Diddy uses his tail.

Both

Tilts:


Neutral: Left Jab, Right Jab, Tail/Hair whip. Tail whip will continue as long as you hold A. (2%, 2%, 1%.....1% KB=1)
Forward: Double punch (5%, 6% KB=3)
Down: Tail/Hair sweeps along the ground, pops the foe up (4%, 5% KB=2)
Up: Handstand Kick (7%, 8% KB=5)
Dash: Diddy does a cartwheel, Dixie spins and whips her hair out (6%, 6% KB=2)

Smashes:

Forward: Two roundhouse punches, one from each, but at the very tip you can escape Dixie's punch(10%, 12% KB=7)
Down: Each monkey sweeps an opposite side with their feet (11%, 13% KB=7.5)
Up: 3 Hit combo from each monkey (fist>foot>tail/hair), giving 6 hits in a short time. (5% each hit, total 30% KB=4.5)

Aerials:
In the air, Diddy and Dixie work together and give single hits with large hitboxes. If the two monkeys are not together, the aerials are much weaker.

Neutral: A double cartwheel in the air, fast startup (8% KB=4)
Forward: Dixie swings Diddy around and he kicks out (14% KB=6.5)
Back: Diddy swings Dixie behind him and she kicks back (12% KB=6)
Down: Both monkeys stomp downwards, only Dixie spikes (11%, 13% KB=5)
Up: Diddy gives Dixie a hand and she does a back-flip while kicking out (12% KB=5)

Throws:

Grab attack: Headbutt (2%)
Forward: Tosses the foe forwards, just out of combo range (11%)
Back: Leap-frogs the foe backwards (9%)
Down: Throws the foe into the ground in front of them which pops them up at a 70 degree angle(7%)
Up: Throws upwards, but not very far (9%)

Get-up Attacks


Ledge Sub-100: Both monkeys come up and do a clap in front of them(4%, 4% KB=3)
Ledge 100+: Both monkeys come up and do a floor sweep kick (6%, 6% KB=3)

Ground Sub-100: Both monkeys kick with one foot in each direction (4%, 4% KB=3)
Ground 100+: Both monkeys do a handstand and kick out on both sides at once (6%, 6% KB=3)


Diddy

Specials:


Neutral: Banana - Diddy throws a banana. Like the down special in brawl. (5% from thrown banana)

Side: Monkey-Ball - Diddy grabs Dixie and throws her forward. Aimable to +/- 30 degrees to the horizontal. His tail catches her hair and pulls her back. This can be used as a recovery move like the Ice Climbers (sweetspot the ledge) (13% KB:7)

Down: Tag Team - Diddy high-fives Dixie, and Dixie becomes the controlled character. This switch takes 5 frames, and can be done in mid-air.

Up: Rocket Barrel Pack - Diddy brings out his rocket pack and Dixie holds on for dear life as they rocket upwards. Aimable and Chargeable and spikes at the exhaust, same as Brawl (10% spiking hit, 9% collision hit KB=4)


Dixie

Specials:


Neutral: Banana - Dixie drops a banana on the ground in front of her. Animation takes longer than Diddy's, but she
doesn't have to jump to grab the banana.

Side: Monkey Ball - Dixie Picks up Diddy in her hair and throws him forward. Aimable from 0 to 45 degrees to the horizontal. Her hair catches his tail and pulls him back. Can be used as a recovery move (sweetspot the ledge). (15% KB:8)

Down: Tag Team - Dixie high-fives Diddy, and Diddy becomes the controlled character. This switch takes 5 frames, and can be done in mid-air.

Up: Heli-Hair - Diddy holds on to Dixie's legs and Dixie spins around with her hair. This move is very good for horizontal recovery but poor for vertical recovery. (12% from Diddy's feet as they spin KB:4, 13% from Dixie's hair KB:4.5)


Taunts:

Side: The monkeys dance around each other and slap hands
Down: Diddy brings out his Boombox and Dixie her guitar and they play for a second
Up: Diddy picks Dixie up and throws her in the air

Final Smash:


Rambi, Expresso, Squitter, Winky, Squawks and Rattler all move accross the stage in their own way, damaging whomever they hit.

Rambi: runs along the ground (30% KB:9)
Expresso: JUmps and flaps down (15% KB:4)
Squitter: shoots webs and hops by (7% per web KB:2, 20% if hit by squitter KB:5)
Winky: Hops along the ground. If he hits an enemy he will bump them forward, possibly hitting them several more times (10% KB:2)
Squawks: Flys in a zigzag pattern across the screen (10% KB:3)
Rattler: hops quite high in the air as he bounces across the screen (25% KB:6.5)

Stage:

N64 Donkey Kong Stage, complete with barrel on the bottom. Updated graphics.

Music:
Bramble Blast (brawl)
King K. Rool battle theme (brawl)
Lockjaw's Saga (link below)
Krook's March (link below)

http://www.youtube.com/watch?v=vmlEv_i2RqA
 

SirKibble

Smash Champion
Joined
May 2, 2008
Messages
2,400
And for my next moveset I reserve:

Kerrigan, The Queen of Blades

http://www.starcraft2.com/art.xml?s=53
Heck.

Freaking.

Yes.

StarCraft FTW!

Someone should do Fenix. He's freaking awesome. His Final Smash could be like Samus/Zamus. He could... Oh, wait... Die... But then he'd get to be a Dragoon!!!

Protoss > All. Fact of life. But Kerrigan is still cool.


EDIT: OMIGOSH! I HAVE YOU TO THANK, GOOD SIR. I DID NOT KNOW STARCRAFT II HAD BEEN ANNOUNCED!!!!!!

Today is a good day.
 

SirKibble

Smash Champion
Joined
May 2, 2008
Messages
2,400
When does this whole thing end their must be a deadline
I believe the deadline is sometime in January. Yes, a long time away...

I vote for Hannah montana in the next game
Then all the hotgirls freaky 12 year old fangirls would play smash
Ew... Fix'd.

I feel weird fixing a spoiler...
 

KoJ

Smash Journeyman
Joined
Aug 16, 2008
Messages
317
Metal Gear RAY

http://www.youtube.com/watch?v=85ra7kS1m8k
http://www.youtube.com/watch?v=IY1PlZ1tIMI
Metal Gear RAY??!! He’s too big to be a… Oh, wait, he’s a boss.

Anyway, Metal Gear RAY uses a variety of KILLER weapons. Watch out for machine guns, missles, and the scary as heck high-pressure water cannon. RAY jumps around a lot, so remember to dodge a lot.

This is the Metal Gear Solid 4 RAY, so it lacks the tail and isn’t controlled by an AI. Instead, it’s piloted by Liquid Ocelot from Metal Gear Solid 4.

SSE Role

Solid Snake follows his old enemy and comrade, Gray Fox, to a tropical island in the middle of the ocean. Confused as to why Fox is leading him here, Snake is suddenly attacked by a Cheep Cheep. Within seconds, the sea becomes alive with the little blights and some bloopers, quickly trying to chomp on him and Fox. As they desperately battle their way through, they spot Bowser. Laughing maniacally, he points a dark cannon… And then hears a rumble. Everyone freezes.

With a screech, Metal Gear RAY leaps from the ocean onto the small island on its belly, landing on Bowser, who is instantly trophified. The trophie is flung a few inches from Snake, who revives it. Bowser at first is about to fight, but then he notices RAY. Snake and Bowser get into their fighting positions, but then he notices Gray Fox is relaxed.

The cockpit of RAY opens, revealing Liquid Ocelot. He shouts at Snake that he’s come all this way for a fight, and then gestures to Gray Fox, who hops in Bowser’s unattended Clown Car and flies off. Angry at being betrayed by his comrade, Snake fires a missle, but it is shot out of midair by the high-pressure water cannon. Snake turns to Bowser, nods, and faces Liquid Ocelot.


Stage

Because Metal Gear RAY is so big, the stage is also very big. It’s about 2 Final Destinations long to accommodate RAY. On either side, instead of empty air, is a bunch of water. If you are in the water, Metal Gear RAY will probably jump in, so watch out for that. There are no platforms here. The stage has a high ceiling, so take advantage of it.

Moveset Before a Quarter of the Health is Gone

Stomp

A simple stomp by Metal Gear RAY. RAY lifts its foot up and slams it down about five feet ahead of him, causing intense knockback. Lots of knockback, but not TOO much. Very predictable.

20% on Intense Mode.

Machine Gun Fire

RAY starts aiming with his arm, and a little target appears on the ground. The target will follow you quickly for the next 4 seconds. When those 4 seconds are up, RAY will stop the target and IMMEDIETLY fire a massive burst of machine gun fire in the target’s direction, dealing lots of damage. The machine guns’ fire continues over time like Tabuu’s bullets (In this case about 5 seconds), but it doesn’t end with a large final hit. Very low knockback, but lots of damage. Getting behind Rex can result in this attack being easily avoided.

Potential Damage: Each bullet does about 3% on intense mode. If you get hit by the full force of the attack, it can do up to 60%.

Slide

Possibly RAY’s most annoying attack. RAY dives off the edge of the stage and into the water so its off the screen… And then jumps back on, sliding like a penguin on ice forward. This attack is very fast when RAY slides, and has major knockback. On intense difficulty, it’s just sick. Don’t shield it, unless you want a smashed shield.

35% on Intense Mode.

Slide Hop

Just like the slide, but when Ray slides, it hops in midair, going about 10 feet in the air. It has the exact same damage and knockback, but you have to respond differently. Instead of jumping over it, stay on the ground in the middle of the stage.

35% on Intense Mode

Leap of Death

RAY jumps high up in the air, and slams down on the other side of the stage with both feet, and then turns around. Pretty easy to avoid, but DON’T shield it. Large knockback.

25% on Intense Mode.


Added Moves at 75% Health

Missiles

RAY charges up for 2 seconds, creating some light from the launcher on his back. It then fires four slow traveling heat seeking missles from there, which home in slowly. They all have medium knockback. Going behind Ray will stop the missles from locking on. Get the missles to hit RAY for extra damage.

20% each on Intense Mode.

Jet Missile

This attack has the same charging up animation as the normal missles. However, instead of firing several slow moving missles, it instead fires a single large missle at high speed that has significantly more power and knockback. Shield it or spot-dodge or roll if you have to. Getting close to or behind RAY will stop this attack from hitting at all, as the missle’s speed insures it doesn’t turn as easily.

40% on Intense Mode.


Moves at 50% and Lower

Missile Tube

This attack is quite easy to avoid, luckily. A target appears on the scene and follows you very quickly for 2 seconds and then freezes for another second. Then, six small missles fire out from Metal Gear RAY’s launcher, hitting the targeted area. Each one has small knockback, luckily.

10% each on Intense Mode.

Water Jet Cutter

RAY’s most powerful move. The Metal Gear dives into the water, underneath the stage and out of site. When it jumps back up, instead of doing the sliding move, RAY bends down and fires a concentrated jet of water from its “mouth” at ground level for 4 seconds. This attack will KO at 0% on Intense Mode, so AVOID IT AT ALL COSTS. Jumping over it is wise, as RAY will not lift up its head until it has finished. Ledge-grabbing will also dodge it.

60% on Intense Mode.

Water Jet Cutter Scan

RAY does the same setup as last time, but instead of merely bending down and firing it, RAY fires its beam straight down right in front of it and then begins moving it slowly across the stage away from RAY until it reaches the other edge, at which point it’ll disappear. Air dodge, roll, spot-dodge, or move to the other edge and jump over the beam when it reaches there.

60% on Intense Mode.


Ending Cutscene

When RAY is defeated, it starts tipping backwards towards the sea. Liquid starts cursing, trying to get the controls to work again, and screams in panic as RAY falls helplessly into the water, sinking down into the depths.

Snake and Bowser then team up to find Gray Fox.


Funny pic...
 

Dark Paladin X

Smash Journeyman
Joined
Feb 22, 2008
Messages
277
Splendid, the oblivious superhero from Happy Tree Friends

Splendid


Splendid, the oblivious superhero flying squirrel from Happy Tree Friends, has joined the fray.

Stats
  • Power: 7.2/10
  • Running Speed: 5.6/10
  • Falling Speed: 2.7/10
  • Attack Speed: 4.7/10
  • Weight: 4.2/10
  • Mid air jumps: 4 (and also a Glide)

Alternate Costumes
  • Blue: Default, see pic above
  • Red: Red fur, black "eye mask," something I like to call "Bizzaro Splendid"
  • Green: Green fur, dark green mask
  • Yellow: Yellow fur, golden mask
  • White: White Fur, dark grey mask
  • Purple: Purple fur, pink mask

Specials

Neutral: Laser Beam: Splendid shoots laser beams from his eyes. Almost similar to R.O.B.'s neutral B (well not really, there isn't a 20 second wait powerful version for Splendid), except he can shoot up to three laser beam shots from his eyes, each dealing 5% damage and minimum knockback.

Side: Ice Breath: Splendid shoots a short ranged Ice Breath from his mouth, it deals around 11% damage and freezes the opponent. Although it is capable of Star KOing someone if one has taken heavy damage.

Down: Heat Vision: Splendid shoots intense radiation from his eyes downward at the floor. This will allow Splendid to easily destroy mines and traps (i.e. Motion-Sensor Bomb or Snake's down smash) without actually activate it. In other words, the mine/trap gets destroyed but doesn't explode. Also, if anyone gets caught on Splendid's rays, they take damage.

Up: Blitz Aerial Assault: Splendid flies vertically upwards in extreme speed with his fist clenched and outwards, dealing damage to foes along his path.

Tilts:
*Neutral: Thrusts his left leg and kicks multiple times before doing an uppercut that has low knockback.
*Dash: Splendid extends his left leg forward.
*Forward: Punches really hard with his left fist. Slow, but powerful, almost equivalent to Ike's side tilt.
*Up: Shoots an arch of his ice breath above him from his mouth. Good for juggling, but does not freeze opponent.
*Down: Sweeps his right leg across the floor.

Smashes:
*Forward: Basically a shorter, but more powerful version of Splendid's neutral special. About the same strength as R.O.B.'s forward special.
*Up: Releases a strong and powerful uppercut that is capable of Star KOing around 80% damage.
*Down: Splendid sweeps his left leg behind him and sweep that leg to the right.

Aerials:
*Neutral: even shorter and weaker version of Splendid's neutral special.
*Up: Shoots fire breath above him.
*Down: Does a powerful stomp with both legs that emits ice. This will freeze the opponent, stops all momentum for Splendid and delivers a painful meteor smash.
*Forward: Punches upward in front of him with both fists.
*Back: Extends his left leg behind him, a sex kick (who came up with that term, but I know what it is).

Throws:
Pummel: Shoots his laser beams. Slowest pummel, but very damaging 4%
Back: Twirls the foe around multiple times before throwing the foe, decent killer. Quite similar to Mario's back throw, but more painful.
Forward: Sparta kicks the foe :p.
Up: Does an uppercut.
Down: Slams the foe to the ground.

Final Smash! Whirlwind

Now, if you get trapped in Splendid's Final Smash, you are **** screwed. Splendid will fly towards the center of stage. The screen will zoom in to him, he will stare upward towards the sky thrusts his arm upward and starts spinning around rapidly, creating a powerful whirlwind that covers the entire stage and brings the foes upward towards the sky within the whirlwind, thus Star-KOing them (even if you are 0% damage, you still will be star KO'ed).
 

Chief Mendez

Smash Master
Joined
Mar 25, 2007
Messages
3,161
Location
Somewhere
KoJ. That. Was...just...itwasjustsobeautiful.

I think I may cry.

I especially like the part about going to find Gray Fox...
 

KoJ

Smash Journeyman
Joined
Aug 16, 2008
Messages
317
KoJ. That. Was...just...itwasjustsobeautiful.

I think I may cry.

I especially like the part about going to find Gray Fox...
Really? It wasn't that amazing...

I'm doing a REX boss-set next. No, Liquid Snake won't be piloting it. Neither will Liquid Ocelot.:chuckle: Who do you like better, REX or RAY?
 

Chief Mendez

Smash Master
Joined
Mar 25, 2007
Messages
3,161
Location
Somewhere
Really? It wasn't that amazing...

I'm doing a REX boss-set next. No, Liquid Snake won't be piloting it. Neither will Liquid Ocelot.:chuckle: Who do you like better, REX or RAY?
Well, I do have a thing for RAY, so maybe that would explain my reaction.

RAY's not only a more enjoyable/challenging boss fight as opposed to REX, but it was just so more...pivotal than REX. Fortune, Solidus, Liquid Ocelot, and Raiden all together at once was, for me, the 2nd best part of that game. Also MGS2 is my favorite MGS, so that helps. :chuckle:
 

dancingfrogman

Smash Ace
Joined
Jan 3, 2008
Messages
862
Location
United Kingdom, Birmingham
Switch FC
3133 8842 3910
DancingFrogman's Link-up Space

This is my post which allows people to see this post and see everything which I've done so far. like my characters, for instance. Also, i'll put reviews which the JUDGES said about my character. I'll do it in Date order! (click on the name of the characters to get to their respective moveset)

Team Rocket


What the judges Rated/commented on Team Rocket?

Commander Blitzkreig: 3*/3*

Sirkibble: Rank B/S

Sirkibble Said:
TEAM ROCKET -- RANK: A*
Another time through this moveset and I see considerable improvement. First things first: The layout is a thousand times better than before. Much easier to navigate. And it looks like you figured out something to let you switch between any of the Pokemon. But... Well, I still think it would get kind of confusing. Even if it shows you the buttons to press for certain Pokemon, that's gonna kill people who are trying to switch on a dime. And also, it assumes you're using either the GC or Classic controller. What about us Wii-mote fans?


HeoandReo said:
Team Rocket: Wow, another 5 movesets in one. Like the previous topic's Vent, this one stayed true to what the Pokemon would do. I also like the variety of each of them, makes you feel that working as a team would be most optimal with them. Only criticism is that the Pokemon might need costume colours.

Chris Lionheart: Rank B/S

Chris Lionheart said:
Team Rocket- Rank B

This moveset may have a lot of detail, and that reflects in its grade, however it is horribly overcomplicated and too many Poke'mon are a part of it. Like SirKibble said... 3 is bad... this many... ouch.


Chief Mendez Said/Ranked:
Team Rocket: This is, by necessity, a staggeringly long moveset. Five characters in one seems like slight overkill, though the number does do a perfect job of displaying Team Rocket’s stuff over the years NEEDS MOAR WOBBUFFET. The actual moves are pretty solid overall, though a few special moves seem out of place on certain Pokemon, such as Rollout as Lickitung’s Neutral Special. The other moves are sort of hit-or-miss. Arbok seems like a really, really fun character to see in motion, but…well, Meowth is about the same size as Cacnea, so I fail to see how he warrants inclusion as “the small one”.

They have a great Final Smash though. And the Extras dancingfrogman included are all very well thought-out (but where’s the “Team Rocket’s blasting off again?”).

Fitting to Character: I’m torn on this. Team Rocket never really fights, and when they do, they really only use one Pokemon each. I’d be much more favorable towards this if they only had Arbok and Koffing…or Koffing at all, for that matter. I mean, the few times they’ve actually been in a videogame, those are the Pokemon they use. 4/10

Balance: I remain unconvinced that giving a player access to five original movesets in one character isn’t a recipe for disaster. Aside from that (rather large) quirk, most everything else about the character seems fairly equal in the grand sceme of things. 5/10
Originality: Good overall. Few of the Specials felt contrived, and the characters are very well described and unique. 7/10

Appearance: This is easily dancingfrogman’s weakest link. I found it difficult to read through the entire thing, as I kept getting lost amidst the avalanche of identical text. And I’m sure there are bigger pictures of these characters out there on the internet. 2/10

FINAL = 18/40


me = :(

Improvements to be made:
1. a different style way to select different pokemon instead of going in an order.
2. Balance issues
3. Organisation with colours and putting words in bold etc.

PLEASE LOOK AT MY TEAM ROCKET MOVESET AGAIN, I'VE ADDED COLOUR AND SIZE TO ORGANIZE AGAIN, ALSO LOOK AT THE NOTES AGAIN, I CHANGED DOWN-B QUITE A BIT.

Chao


What the judges Rated/commented on Chao?

Commander Blitzkreig: 3*/3*

Sirkibble: Rank A/S

Sirkibble Said:
CHAO -- RANK: A
Awesome detail here. Really, I think this is one of the few movesets in the contest that has the perfect amount of detail on every move. Kudos. The strength-increasing mechanism, while interesting and surprisingly not-broken, begs Chao players to camp incessantly until he reaches full strength. Also, he kinda gets screwed in some timed matches... Anyway, aside from that unfortunate weakness, this is a truly phenomenal moveset.

HeoandReo said:
Chao: Interesting concept. I like the idea of it all. It's also quite creative in what the Chao does. Another great moveset.

Chris Lionheart: Rank S/S

Chris Lionheart said:
Chao- Rank S

This moveset is truly great. The amount of detail and personality clearly shows that you have gone above and beyond in this moveset. It is only unfortunate that this character is so camp reliant.


Chief Mendez Said/Ranked:
Chao: So, how does Chao, essentially a Tamagotchi rip-off inserted for no good reason into the Sonic games, measure up in the world of Smash Bros.?

Pretty **** well, as it turns out. The most striking feature of the moveset is how Chao gradually gets more powerful as a match goes on, based on what you do most (jumping, smashing, running, etc.). There are a bunch of design issues with this, but it remains as an exceedingly unique idea. The rest of Chao’s abilities revolve around the few things they do in their games of origin, which are basically 1) act cute 2) play with random toys.

…Surprisingly, it works! As neat his Down Aerial is, Toon Link’s is already annoying enough. The fact that you can bounce off the ground, and not just enemy fighters, pushes it over the edge into “broken territory”.

…Yep, that’s pretty much all I’ve got. This is one of the more original collection of ideas I’ve yet read. It takes balls to make a moveset for a character who primarily busies itself with crawling around on the ground, cooing, and being thrown into walls.

Fitting to Character: I really can’t find any move that sticks out as being out-of-place. Chao does all of these things, and they’re what he’d do if he ever wanted to kick the snot out of someone. 10/10
Balance: Oooh. It’s that power-up trait, man. A smart Chao player would do nothing but run away for four minutes (during a stock match) before fighting, now that they’re super-powered. And what happens in a standard 2-minute Time Match? Chao’s at a big disadvantage in that case, through no fault of the player. The other offensive element is his Pogo-Stick Down Aerial, for obvious reasons, as any Toon Link player can tell you. 4/10
Originality: Using various animals and toys to attack is certainly an inventive toolset, but I feel that some of Chao’s normal attacks are duplicated throughout the moveset, but for the most part, this is a highly original moveset. 7/10
Appearance: Colors are present and accounted for, but I wish some more BBCode was used within each section: the identical text makes it a bit difficult to find something you’re looking for. Also, I’m not sure the pictures were necessary for the Special Moves, but they’re a nice touch nonetheless. 6/10
FINAL = 27/40


Improvements to be made:
1. the stregnth increasing mechanism begs the player to camp. (i want to keep the strength increasing mechanism, and I don't want him to be powerful from the staart, so i don't know how to sort that out)
2. Screwed in time matches (I actually never thought about chao in this situation)
3. to make chao overcome the weaknesses (again, its just has to be like that)

Dry Bowser


What the judges Rated/commented on Dry Bowser?

Commander Blitzkreig: to be ranked

Sirkibble: to be ranked

Sirkibble Said: to be reviewed

HeoandReo said:
Dry Bowser: He's like Bowser, except he's entirely different. There's just so much nice difference here, as to his bone attacks and melee strikes.

Chris Lionheart: To be ranked

Chris Lionheart said: To be reviewed

Chief Mendez Said/Ranked: To Be Ranked/reviewed

Improvements to be made:

Yet to be told!

Nights


What the judges Rated/commented on Nights?

Commander Blitzkreig: to be ranked

Sirkibble: to be ranked

Sirkibble Said: to be reviewed

HeoandReo said: to be reviewed

Chris Lionheart: To be ranked

Chris Lionheart said: To be reviewed

Chief Mendez Said/Ranked: To Be Ranked/Reviewed

Improvements to be made:

Yet to be told!

Death Adder


What the judges Rated/commented on Death Adder?

Commander Blitzkreig: to be ranked

Sirkibble: to be ranked

Sirkibble Said: to be reviewed

HeoandReo said: to be reviewed

Chris Lionheart: To be ranked

Chris Lionheart said: To be reviewed

Chief Mendez Said/Ranked: To be Ranked/Reviewed

Improvements to be made:

Yet to be told!

Bean


What the judges Rated/commented on Bean?

Commander Blitzkreig: to be ranked

Sirkibble: to be ranked

Sirkibble Said: to be reviewed

HeoandReo said: to be reviewed

Chris Lionheart: To be ranked

Chris Lionheart said: To be reviewed

Chief Mendez Said/Ranked: To be Ranked/Reviewed

Improvements to be made:

Yet to be told!

Metal knuckles


What the judges Rated/commented on Metal Knuckles

Commander Blitzkreig: to be ranked

Sirkibble: to be ranked

Sirkibble Said: to be reviewed

HeoandReo said: to be reviewed

Chris Lionheart: To be ranked

Chris Lionheart said: To be reviewed

Chief Mendez Said/Ranked: To be Ranked/Reviewed

Improvements to be made:

Yet to be told!

Captain Syrup


What the judges Rated/commented on Captain Syrup

Commander Blitzkreig: to be ranked

Sirkibble: to be ranked

Sirkibble Said: to be reviewed

HeoandReo said: to be reviewed

Chris Lionheart: To be ranked

Chris Lionheart said: To be reviewed

Chief Mendez Said/Ranked: To be Ranked/Reviewed

Froggy


What the judges Rated/commented on Froggy

Commander Blitzkreig: to be ranked

Sirkibble: to be ranked

Sirkibble Said: to be reviewed

HeoandReo said: to be reviewed

Chris Lionheart: To be ranked

Chris Lionheart said: To be reviewed

Chief Mendez Said/Ranked: To be Ranked/Reviewed

Miles "Tails" Prower


What the judges Rated/commented on Miles "Tails" Prower

Commander Blitzkreig: to be ranked

Sirkibble: to be ranked

Sirkibble Said: to be reviewed

HeoandReo said: to be reviewed

Chris Lionheart: To be ranked

Chris Lionheart said: To be reviewed

Chief Mendez Said/Ranked: To be Ranked/Reviewed
_______________________________________________________________

Dancingfrogmans Moveset Layout


[ COLOR="Cyan"][ B][ SIZE="3"]Name[/SIZE][/B][/COLOR]


[ SIZE="3"][ COLOR="Lime"]Back-story/Description[/COLOR][/SIZE]:


[ SIZE="3"][ COLOR="Yellow"]Notes[/COLOR][/SIZE]:


[ COLOR="Purple"][ SIZE="3"]Playstyle:[/SIZE][/COLOR]

[ SIZE="3"][ COLOR="DarkOrange"]Stats[/COLOR][/SIZE]:
Power: /10
Walking Speed: /10
Dash speed: /10
Range: /10
Projectile distance: /10
Drop speed/weight: /10
Size: /10
1st jump: /10
2nd Jump: /10
Crouch: /10
Traction: /10
Combo: /10
Wall jump:
Wall cling:
Crawling:
Glide:

[ COLOR="Red"][ SIZE="3"]Specials[/SIZE]:[/COLOR]

Neutral B:

Side B:

Up B:

Down B:

[ COLOR="DarkOrange"][ SIZE="3"]Standard[/SIZE]:[/COLOR]

Neutral A:

Hold Down A:

F-tilt:

F-Smash:

U-tilt:

U-Smash:

D-tilt:

D-Smash:

Dash Attack:

[ COLOR="Blue"][ SIZE="3"]Aerials[/SIZE]:[/COLOR]

N-air:

F-air:

B-air:

U-air:

D-air:

[ COLOR="Lime"][ SIZE="3"]Grabs[/SIZE]:[/COLOR]
Grab attack:

F-throw:

B-throw:

U-throw:

D-throw:

[ COLOR="Sienna"][ SIZE="3"]Other Attacks[/SIZE]:[/COLOR]

get up attack:

Edge attack over 100%:

Edge attack under 100%:

[ COLOR="Orange"][ SIZE="3"]Final Smash[/SIZE][/COLOR]


[ COLOR="Blue"][ SIZE="3"]Pros[/SIZE][/COLOR]


[ COLOR="Red"][ SIZE="3"]Cons[/SIZE][/COLOR]


[ COLOR="Magenta"][ SIZE="3"]Animations[/SIZE][/COLOR]

Dizzy:

Sleep:

Idle:

Running:

Crawl:

Drowning:

[ COLOR="Lime"]
[ SIZE="3"]Alternate[/COLOR] [ COLOR="Yellow"]costumes:[/SIZE][/COLOR]

1.
2.
3.
4.
5.
6.
7.
8.

[ COLOR="Orange"][ SIZE="3"]Taunts[/SIZE]:[/COLOR]

Up:

Side:

Down:

[ COLOR="Green"][ SIZE="3"]Victory Taunts[/SIZE]:[/COLOR]

1.

2.

3.

[ COLOR="DeepSkyBlue"][ SIZE="3"]Entrance[/SIZE][/COLOR]


[ COLOR="Silver"][ SIZE="3"]Lost animation[/SIZE][/COLOR]


[ COLOR="Magenta"][ SIZE="3"]Crowd Chant[/SIZE][/COLOR]


[ SIZE="3"]Wii remote Sound[/SIZE]:


[ COLOR="DeepSkyBlue"][ SIZE="3"]Stage[/SIZE]


[ SIZE="2"]Music:[/SIZE]

[ SIZE="3"][ COLOR="RoyalBlue"]Related Items[/COLOR][/SIZE]:

[ COLOR="SandyBrown"][ SIZE="3"]Trophy Descripition[/SIZE][/COLOR]

[ COLOR="Sienna"][ SIZE="3"]Snake Codec:[/SIZE][/COLOR]

Remove the space between [ COLOR to make it work. you can use at will
 

dancingfrogman

Smash Ace
Joined
Jan 3, 2008
Messages
862
Location
United Kingdom, Birmingham
Switch FC
3133 8842 3910
sorry for the double post, but heres my newest moveset

Bean (from Sonic the Fighters)


Back-story/Description: Bean first originated from a game called Dynamite Dux. Which I haven’t heard before. Bean the Dynamite was directly inspired by the 1988 Sega coin-op Dynamite Dux, originally released on System 16B hardware. Dux stars twin birds Bin and Pin as they combat their way through 6 stages of cartoon action to rescue the oh-so-cute Lucy from the clutches of the evil, cockroach-esque Achacha. The ducks' basic attack is a simple punch, though a variety of comical weapons (including bombs) can be obtained to clear the path of slapstick villainy. A Master System port was released in 1989. in sonic the fighters, he used mostly bombs.

Notes:
Most of Beans moves uses bombs in it, Bean was actually high tier in sonic the fighters, as he could throw bombs in all sort of ways.

Stats:

Power: 7.2/10
Walking Speed: 6.4/10
Dash speed: 6.8/10
Range: 6.5/10
Projectile distance: 9.9/10
Drop speed/weight: 5.6/10
Size: 5.4/10
1st jump: 7.6/10
2nd Jump: 5.4/10
Crouch: 7.1/10
Traction: 6.7/10
Combo: 8.5/10
Wall jump: Yes
Wall cling: no
Crawling: no
Glide: no

Specials:

Neutral B: Bomb throw: this is rather basic, Bean crouches a bit, and throws a bomb as far as you want by holding down the b button. The range is massive, and can keep the foes of the stage. This has some ending lag. The range of the throw is great, but not as good as snakes when he throws it his furthest. This does 8% and mid-low knockback. In the air, however, Bean throws 2 bombs downwards in an arc, each bomb still does 8% and mid-low knockback.

Side B: Laser Shot: Bean pulls out a massive laser cannon which rests on Beans shoulder. This has massive start-up lag and ending lag. When this is shot, a big orange ball comes out; this is slightly weaker than Samus’s charge shot. This does 23% and high knockback. The lag of this move makes it unusable.

Up B: Bazooka Blast: ON THE GROUND, Bean picks up a bazooka and shots it like his Side B, but this is weaker and has A LOT less start-up and ending lag. You shot one bullet which travels fast and does 13% when hit. This also does mid knockback.
IN THE AIR, Bean shoots the Bazooka down-wards, and the force of the shot rockets him upward, the recovery distance is like a semi-charged Diddy Kongs up-b. This still does 13% and medium knockback.

Down B: Gunpowder Block: This is a counter move; Bean closes his eyes and sticks his bomb in front of him, if you hit him, the bomb explodes which does 16% and medium knockback. If no-one hits you, this is a very easy punishable move, because of the large ending lag.

Standard:

Neutral A: Jabbing Bird: Bean Jabs with his right hand twice, which both does 3%, and then he ends it with a low kick, which does 5%, this does low knockback.

Hold Down A: bean continually does the first punch.

F-tilt: Peaking Order: Bean moves forward with this move, Bean pecks 5 times, and ends it with a punch to the gut. Each peck does either 1% or 2%, and the punch does 4%. This does. This has almost no start-up lag, but the ending punch has some lag on it. This does mid-low knockback.

F-Smash: Wind-up Bomb: Bean does a wind-up punch, when charging, looks like Sonics F-smash, but then Bean punches upwards, and when you think that’s the end, bean throws 3 bombs in a clump together far up-wards. When uncharged, the punch does 10%, and each bomb does 4%, and the punch does mid-high knockback (the bombs always does low knockback), when charged, the punch does 15%, and the bombs still do 4% each, it also does high knockback.. It’s actually hard to connect the punch with the bomb; it only connects when Mario is hit about 65%. You have to activate by pressing a after the punch. The punch has some ending lag if you don’t use the bombs, and when you use the bombs, there is less ending lag than the punch.

U-tilt: Kick Upper: Bean leans back and kicks upwards, this is used to combo opponents at early percentages. This does 9% and mid-low knockback.

U-Smash: Catch the Bomb: Bean throws his bomb into the air the same distance as a uncharged Snakes up-smash, then catches it, this has little start-up and ending lag. When uncharged, this does 16% and mid-high knockback, when charged, this does 21% and high knockback. This has some ending lag.

D-tilt: Mad Bird Legs: this works similar to Lucas down tilt. Bean sweeps his leg around very quickly, and is almost aloud to do this straight afterwards. This has no start-up or ending lag. Each kick does 2% and very-low knockback, almost touching no knockback at all.

D-Smash: Bomb crack: Bean picks up his bomb, and explodes the bomb on the floor directly in front of him. This has quite a bit of ending lag. When uncharged, this does 17% and mid-high knockback. When charged, this does 22% and high knockback.

Dash Attack: Bird Wheel: Bean does a cartwheel, this does 3 constructive hits, each hit does 4%, and the final hit does mid-low knockback.

Aerials:

N-air: Flying Twist: Bean twirls around similar to Squirtles d-air. This does constructive hits. The final hit does mid knockback. The max damage you can do is 14%. This has some ending lag.

F-air: Leg Sticker: this is similar to Wario’s F-air, Bean sticks his legs out which does 6% and mid-low knockback. This has little ending and start-up lag.

B-air: Back-flipper: Bean Performs a back flip, and when his legs are out-wards is when it does damage, this does 8% and mid-low knockback.

U-air: Head-Peck: this is a quick move; Bean performs a head butt which only hurts when the foe hits his large beak. This does 10% and mid knockback, used to juggle opponents. This has very little start-up and ending lag.

D-air: Green Tornado: Bean sticks his head facing downwards, and he spins around doing constructive hits. The max damage you can do is 15%, and the final hit does mid-low knockback, this has a tiny bit of ending lag.

Grabs:

Grab attack: Peck: Bean does a standard peck with his beak. This does 3%

F-throw: Exploder mouth: This does no knockback, Bean stuffs the foes mouth with a bomb, which does 10% damage, the opponent has less ending lag than you, and he can simply roll away.

B-throw: Twister: Bean quickly spins around, and throws the foe behind him, this does 10% and mid knockback.

U-throw: Bean toss; Bean just throws the foes up-wards like Mario’s up throw, this does 9% and mid knockback.

D-throw: Stomping Bird: bean does a quick stomp. Nothing special, this does 8% and mid-low knockback.

Other Attacks:

Get up attack: Wakey Wakey: Bean Punches in both directions and spins up. This does 9% and mid-low knockback.

Edge attack over 100%: Bird Sweep: Bean crawls on a sweeps the floor with his foot. This does 4% and low knockback.

Edge attack under 100%: Fountain spin: when he gets up, he spins on a spot, this does 8% and mid knockback.

Final Smash: Bean Bomber

When Bean unleashes his final smash, he laughs and then jump into a massive airplane which drops bombs, the bombs explode when they hit the floor. This ends after 10 seconds. Each bomb does 25% and high knockback. This is rubbish on the stages like the temple, as you can shelter yourself.

Pros

Bombs are very effective in many ways.

Decent air game.

Cons

you won’t want to be using most of the specials on the floor

light and quite slow

Animations

Dizzy: Bean rocks back and forward

Sleep: a basic sleep animation, like Marios sleep animation.

Idle: folds his arms and winks at the camera.

Running: just a basic run animation.

Crouch: the crouch animation is similar to wolfs crouch.

Drowning: waves his arms back and forth

Alternatecostumes:

1. The skin of bean is green (default)
2. The skin of bean is blue
3. The skin of bean is dark red
4. The skin of bean is black
5. The skin of bean is purple
6. The skin of bean is light grey

Taunts:

Up: Throws his bomb up into the sky, and then catches it.

Side: Spins a Bomb on the end of his right index finger

Down: does a little dance.

Victory Taunts:

1. Jumps up, and his position is in a shape of a star

2. Holds his bomb in his right hand, and smiles

3. Throws a bomb, and kicks it to his right, and looks at the camera

Entrance

he appears holding a bomb, which explodes, then he wipes his face.

Lost animation

claps just like most of the cast.

Crowd Chant

BEEEAAAAAAAAANN (in the tone of Mario)

Wii remote Sound:

the sound of a bomb exploding.

Stage: Dymanyte Plant


(sorry for the bad painting)

When the door opens at the top, bombs fall of the conveyor belt onto the battlefield, this happens every 30-40 seconds, each bomb does 17% and mid knockback. thats the only hazard. the thin green lines are the floating platforms, and the arrows point where they go.

Snake Codec:

Snake: that bird appears to be holding a bomb, who is he
Otacon: That’s Bean from sonic the fighters.
Snake: a sonic character, with a not-so-obvious name, like tails, for someone who has 2 tails, eggman, for a person head shaped as an egg. Tell me more about him.
Otacon: Bean has an infinity supply of bombs at his disposable; he also carries bazookas and other guns.
Snake: Sounds like a bird version of me; I’ll show him how to properly use those weapons of his.
Otacon: Snake, show that bird what your made off.
 

Mario & Sonic Guy

Old rivalries live on!
Joined
Sep 18, 2007
Messages
22,423
Location
Mushroom Kingdom
NNID
TPitch5
3DS FC
5327-1637-5096
Stallord


Stallord is known as the Twilit Fossil and the fourth boss Link fought in Twilight Princess. It's basically an undead dragon that was revived when Zant placed a cursed sword on its skull.

Not much else is known about Stallord, but it is capable of summoning other undead Stal creatures such as its Staltroops.

Stallord enters the Smash world as a boss.
------------------------
Boss Stamina

Stallord's stamina increases when you raise the difficulty level. This applies even to Boss Battles.

For Stallord, its head detaches from the body when half of its HP is gone.

Easy: 200 HP
Normal: 250 HP
Hard: 300 HP
Very Hard: 350 HP
Intense: 400 HP
------------------------
Attacks

Phase 1

Poison Gas: Stallord breathes poisonous gas on you. The poison breath does up to 13% damage on Easy and Normal, 26% on Hard, 42% on Very Hard, 56% on Intense.

Crush Grip: Stallord tries to grab you. If it succeeds, it'll slam you into the ground. Does up to 16% damage on Easy and Normal, 32% on Hard, 48% on Very Hard, 62% on Intense.

Stalfos Summon: Stallord slams the ground, waking up some Stalfos. They appear in larger numbers on the higher skill levels. However, they all disappear when phase 1 ends.

Phase 2

Fire Bomb: Stallord unleashes a giant fire ball at you. Does up to 18% damage on Easy and Normal, 32% on Hard, 44% on Very Hard, 58% on Intense.

Head Thrust: Stallord rams into you directly. However, it's fairly easy to avoid on the easier skill levels. Does up to 21% damage on Easy and Normal, 36% on Hard, 47% on Very Hard, 65% on Intense.
------------------------
Side Notes

The Stalfos that may appear during the battle are also enemies that appear during Adventure Mode.
------------------------
 

Snowstalker

Smash Ace
Joined
Jan 25, 2008
Messages
813
The Bean moveset is awesome, and I'd love to fight Stallord in the SSE.

Oh, and my Junior moveset is complete. Check it out.
 

Evilgidgit

Smash Apprentice
Joined
Oct 10, 2007
Messages
166
Location
England
Snowstalker, I love your Bowser Jr. moveset. Are you doing an AVGN moveset, based on your comment? :psycho:

Coming Soon...

OLYMPIC MAN!!!
 

TWILTHERO

Smash Lord
Joined
Aug 19, 2007
Messages
1,880
Location
Canada
Considering how bad she is at singing, I see this as an annoying spam move.
Dude, i freaking love Hannah Montana's singing:bee:

I'm joking, i just had to say that. Her singing is pretty awful

The Bean moveset is very well done and i would have love to fight Stallord as a boss.
 

KingK.Rool

Smash Lord
Joined
Nov 26, 2005
Messages
1,810
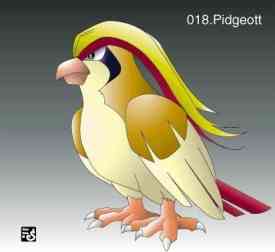
SWOOPING IN ON WINGS OF WIND, PIDGEOT ENTERS THE FRAY! THOSE TOO LIGHT TO STAND THEIR GROUND BEWARE!​


---CHARACTER---

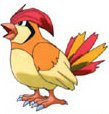
Pidgeot is from the very first generation of Pokemon, and its pre-evolutions, Pidgey and Pidgeotto, could be caught throughout without too much difficulty. It's an interesting Normal/Flying type that can whip up gales with its wings and fly at speeds of Mach 2. That "gales" part there, that's the crucial part; Pidgeot and its line are perhaps the only Pokemon in existence whose Flying-type identity is specifically linked to the wind.

Lots more details can be found here.

---OVERVIEW---

Idle Stance --- Pidgeot stands aloof, its wings ruffled back and its head held high with pride. Every once in a while, it tosses back its head or peck at the ground. When it doesn't find anything, it returns to its silent vigil.

Walk --- Pidgeot walks slowly, like a chicken but with somewhat more grace, one foot in front of the other.

Run --- Pidgeot spreads its wings and swoops forward, although not at its full speed. It's just sort of hovering above the ground, causing a thin stream of dust to whip around behind it as it goes. A fairly quick run, about the speed of Charizard.

Dizzy Stance --- Pidgeot spreads its wings, faces the screen, and stumbles from one side to the other clumsily. Makes it look pretty ridiculous, as many dizzy stances do.

Sleep Stance --- Pidgeot tucks its head into its wing as it dozes, its chest slowly going up and down.

Crouch --- Wings slightly splayed out to either side, Pidgeot lowers itself onto the ground like a bird guarding its eggs.

Glide --- Pidgeot HAS to have a glide. It's the quickest glide in the game, as suiting a Pokemon like Pidgeot. It also has a lot more mobility; Pidgeot can briefly travel perfectly upwards or downwards in a swoop before stalling and falling out of its glide. Pidgeot's advanced glide game, between this and its Up Special, is one of its greatest boons.

~~~-------------------------------------------------------------------------------~~~

Height --- Pidgeot is a large bird; standing at full height, it's a bit smaller than Mario, but once it unfurls its wings, as it does in its falling animation, it's actually a big target.

First Jump --- Pidgeot's first jump is pretty awful; a flap of the wings propelling it up the size of a Bowser and a half.

Extra Jumps --- Pidgeot has two extra jumps, each of them the length of its first jump again. This gives it excellent air mobility, openings to use aerial attacks, and also huge recovery. One of its strengths.

Power --- Pidgeot doesn't have the greatest knockback on most attacks. I'd call its overall power a bit below average. However, to compensate, Pidgeot has its wind attacks, that deal no damage but specialize in this particular department.

Attack Speed --- Despite what you may assume, Pidgeot's attacks can't be chained all too easily. It should rely on keeping its foe quite far away to be able to pull off its laggier attacks. Again, wind attacks are vital.

Traction --- As it flies above the ground in its dash, Pidgeot doesn't have terrific traction. Although it doesn't trip too much, being much too graceful for that, it can't turn on a dime. 3/10, I'd say.

Fall Speed --- Pidgeot is straddling the line to being a fast-faller. This adds to its overall impression of speed, an interesting combination with its multiple jumps. However, in conjunction with its light weight and big size, it makes it a prime candidate to be combo'd.

Weight --- Not the heaviest of characters, Pidgeot, being all feathers and bones. I'd say it's a bit lighter than Pikachu.

---MOVESET---

SPECIALS​

Neutral Special --- Whirlwind --- Pidgeot swings its wing, kicking up a small tornado that travels straight forward, picking up speed as it goes. If it catches anyone, it acts like the old twister on Link's stage in SSB64, scooping the enemy up, spinning him around three or four times, quickly, and then throwing him straight up.

Notes --- This tornado travels in a straight line, but vanishes when it reaches a ledge or an obstacle of some sort. Now, since it travels so quickly, it's very difficult to punish a foe trapped in the tornado or one that has just been launched out. As Pidgeot swings its wing, there is a small opening for punishment. However, the tornado, picking up speed, is hard to predict and even dodge with slower characters. A foe caught is dealt 8% and thrown up, although it can't KO until extremely high percentages.

Forward Special --- Gust --- This is a chargeable attack, but not storable. Hold B for up to five seconds, then release, and Pidgeot will quickly and repeatedly flap its wings, making a gale blow across the stage. Uncharged, it barely even stops a nearby opponent's momentum. At full charge, it's quite potent, greyish wind shooting opponents almost clear across Final Destination.

Notes --- This is a useful edgeguarding tool, as it can be used from the air, but only effects a radius in front of and slightly above Pidgeot. In other words, if a foe is trying to go over you, you can use this attack while they're still in front of you to push them away. Gale can also be used to deflect certain gravity-effectible projectiles, such as ROB's Gyromite and Samus's missiles. This makes it extremely useful in a variety of situations, especially for giving you some space, but beware: the attack can be shielded, does no damage, and, obviously, must be charged to have any significant effect.

Up Special --- Fly --- Unlike Charizard's Fly, this essentially sends Pidgeot into a kind of super-glide. For three seconds, Pidgeot has the freedom to do whatever aerial stunts it wants without stopping.

Notes --- The dynamics are the same as a regular glide, as are the controls, but you can pretty much do anything. Loop-di-loop, fly upside down, straight up, straight down, glide attack(s) over and over again - the only difference is that it only lasts about three seconds. It's a solid recovery, though, and you can still use ordinary glide after it. All this adds up to making Pidgeot very hard to get rid of, and a true master of the glide and, by extension, of the skies.

Down Special --- Roost --- Looking around warily, Pidgeot lowers itself onto its rump and sits there, oblivious to the commotion around it. Every two seconds or so, Pidgeot lets out a cry, and heals 2%. Releasing B ends the attack. This can go on for a maximum of 14 seconds, healing 14%. However, after the attack ends, Pidgeot rises to its feet slowly, tossing its head and preening its feathers, giving it an exceptional amount of lag, about three seconds. What's more, having let down its guard, Pidgeot takes extra knockback if hit out of the attack or its lag.

Notes --- This attack should be used whenever the foe has been knocked away but can't be pursued, and whenever the foe is KO'd. Healing 2% or 4%, then fighting through the lag, is quite possible, leaving Pidgeot slightly refreshed and ready for combat. This has yet another level in 2 on 2; get your partner to guard you while you Roost, and you might even get the full 14% off, and that might even be a game-changing swing.

Overall, this move should be used at regular intervals, but very cautiously.

~~~-------------------------------------------------------------------------------~~~

STANDARD ATTACKS

A --- Wing Attack --- Pidgeot pulls its wing back, extending them, and then brings them both forward in a kind of clap with very nice range. The wings remain out for just under a second before Pidgeot pulls them back, if it doesn't follow up with its A combo.

Notes --- Strong for a jab attack, Wing Thwack has its uses. It may have very small knockback, but it does about 4%, which, combined with its range and long duration, makes it very useful for reaching out and touching an irritating foe. The knockback may be small, but it actually pulls the foe towards Pidgeot, setting you up for Featherdance.

Tap A --- Featherdance --- Pidgeot flaps its wings very quickly, raining feathers down on the foe. These little puffs of down pelt the foe in a disjointed hitbox, but the occasional feather flutters a bit farther away, giving the move a capacity to sometimes poke foes who are farther away.

Notes --- The hits have no knockback, and each do 1%, but since they fall in such a random, unpredictable way, you never know when the foe is going to have an opening to break out and retaliate. Use conservatively.

Dash Attack --- Quick Attack --- Pidgeot leans back and lashes out with a talon at the foe. This talon strikes low and has a 30% chance of tripping. As it does so, it extends its wings up high in the air, making its body a bigger target.

Notes --- A quickly executed (obviously) attack with decent range, it shoots foes on a horizontal trajectory when it doesn't trip the foe. This knockback is still quite small, though. Doesn't do much damage, only about 6%.

~~~-------------------------------------------------------------------------------~~~

GLIDE ATTACKS​

Neutral Glide Attack --- Drill Peck --- Pidgeot breaks into a sudden spin. Wind whirls around it, giving this a sizable hitbox and quick priority. Pidgeot spins two or three times, in very quick succession, but the attack still deals out a single hit.

Note --- Drill Peck does about 9% and can KO at higher percentages. Any foe coming into contact with Pidgeot's swirling body is bounced away at a random trajectory. Now, this is probably the most spammable of Pidgeot's glide attacks, and comes out quickly to boot. Very handy.

Forward Glide Attack --- Air Slash --- As tilting forward causes Pidgeot to pitch downwards, when you use this attack, Pidgeot will be swooping already. Here, it jerks its head in a downward arc angrily. As it does so, an invisible blade of air appears before it, and cuts from high up to down low. The air slash remains out for a long time and has maximal priority, and you can safely use it before reaching the foe.

Notes --- Now, the slash travels in a sudden downward arc, and if it connects at any point, it deals 7%. However, it deals next to no knockback, merely knocking the foe slightly upwards to allow Pidgeot to glide past where they originally were. Another sudden attack, and an unpredictable one. Use for racking damage when Drill Peck is overly predictable.

Back Glide Attack --- Tailwind --- In this sudden move, Pidgeot bends its wings until their tips almost touch behind it, then pulls them forward in front of it, and finally returns them to their original position. Now, there is not actual hitbox per se here; the wings deal no damage. However, as Pidgeot brings its wings forward, a sudden gust of wind the length of a Battlefield platform materializes behind it, pulling foes along with it as it glides.

Notes --- Your foe dodge your glide attack? Use Back Glide to pull them along with you as you flap your way off the stage, making this attack's primary use as a suicidal attack. As Pidgeot actually pulls them for quite a long distance, this seems like it's handy, but you'll have to be creative in making up applications for such a move.

Up Glide Attack --- Endure --- Without a moment's hesitation, a bubble of dust-like particles cover the top half of Pidgeot's body, leaving only its talons and tail vulnerable. This bubble knocks away foes that bump into it with set knockback, but more relevantly, the duration of the attack gives Pidgeot super armor. Now, the bubble winks out of existence fairly randomly, so beware.

Notes --- Foes that are bumped away by the dust bubble are dealt a weak 3%, and could never be KO'd by this attack. No, this move's true use is in giving Pidgeot a quasi-shield while gliding. Be careful, though, as its feet and tail can still be hit. Also, the bubble can fade after anywhere from half a second to two seconds, so it's an unpredictable way to shield.

That aside, I mostly suggest using this attack to barrel through a foe, then following up with a Tailwind. The disorientation of being tossed around the stage by Pidgeot should be more than enough to make you an opening.

Down Glide Attack --- Faint Attack --- Since tilting down makes Pidgeot go into a swoop, this attack is mostly only used as an approach, and it's handy in that sense. Faint Attack has Pidgeot going almost entirely transparent, visible only as through a Cloaking Device, for about a second before reappearing. During that one second, if Pidgeot collides with a foe, it will let out a screech, reappearing, and dishing out great knockback against the foe.

Notes --- This move's drawback? Pidgeot must swoop during its duration; after pressing down A, you lose all control over its trajectory during its invisibility. Since the hitbox is more or less invisible, this is a most unpredictable attack, and I strongly suggest swooping towards a foe and then suddenly disappearing to throw them off. Pidgeot can be hit out of its transparency, but since its glide is so quick, this is hard to time.

Damage output isn't great - 5% - but there's some very decent knockback when Pidgeot collides with you. Use as a handy approach and to strike fear into the hearts of foes.

~~~-------------------------------------------------------------------------------~~~

TILTS​

Forward Tilt --- Wing Attack --- Pidgeot turnsso that we see it head-on, or facing the screen, and extends both wings to either side. Directly in front of it, it buffets foes first with a sideways swing, and then with a second, similar swing going back towards the background.

Notes --- This attack actually doesn't have the greatest range, as Pidgeot is hesitant to stick its wings too far away. The first hit deals 5%, but it does have enough knockback that it's not too easy to hit with the second one, which does 4% when it hits. Now, this attack is laggy, as Pidgeot has to get into position. Okay for racking up the points early on, when you can land both hits, and maybe for trying to get that vital space between you and your foe if they're too close, but in general, not the best attack.

Up Tilt --- Steel Wing --- Pidgeot does a Charizard-esque two-wing strike directly above it with glowing wings. To elaborate, Pidgeot hits them with the joint of both wings by suddenly bringing them together above it.

Notes --- This is actually quite a strong attack that does about 11% and can KO over 100%. Its knockback has a slicing sound effect, rather like that of a sword attack, and is quite useful. What's more, there is a brief frame of super armor as Pidgeot prepares to bring its glowing wings together. To offset these perks, this is a very slow attack, with little range.

Down Tilt --- Pluck --- Pidgeot strikes foes in front of it with a sudden, sharp jab of its beak. In speed, this move is hard to trump; the execution takes about a split second. The knockback here is quite unpredictable.

Notes --- Pluck does about 4% - not the greatest amount - with unpredictable knockback that depends on the exact trajectory of the hit. It has a 20% chance of tripping the foe, which is ideal, as it sets you up for a big Forward Smash blowing them way out. Otherwise, it can make them go up, make the bounce along the ground, make them fly diagonally - although, obviously, not very far in any of these directions.

Another interesting property of this move is that it steals any item the foe may have been holding. Just get up close to them before they chuck that Pokeball or whatnot, and suddenly it's clenched in Pidgeot's beak. Makes it quite handy, in certain situations.

~~~-------------------------------------------------------------------------------~~~

SMASHES​

Forward Smash --- Ominous Wind --- Pidgeot strikes foes directly in front of it with a powerful dual-wing strike, bringing them together in a clap-like motion. The outstretched wings stay out for a bit over a second, and are a hitbox that has the power to KO. However, as a cherry on the cake, a small wind is kicked up, that pulls foes within one Battlefield platform away towards Pidgeot at a decent speed.

Notes --- This one does about 16% with decent chances for a KO. However, the wind that it makes gives it deceptively long range, with the power to drag in a foe who's just out of reach. Quite handy, but the wings aren't the most powerful of hitboxes. This attack's main role will be to knock them off of the stage where you can edgeguard them with Gust or... something else.

Up Smash --- Aeroblast--- In this quickly executed attack, Pidgeot swings a single wings overhead, in an arc from front to back. The wing itself is hardly potent, and in fact quite weak. However, this attack is yet another that causes a powerful wind to be created. This one carries the foe upwards, and can in fact KO off the top of the screen.

Notes --- As with all wind attacks, the wind itself does no damage. This doesn't stop you from juggling the foe just to annoy them. Anyway, the wing does a sad 8% if it hits, with little knockback. However, this attack alone should make the foe wary of approaching from above, and most especially on stages with low ceilings; they just might not make it.

Down Smash --- U-Turn --- Pidgeot speedily spreads its wings, shoots a tiny distance forward (like the Range of Ivysaur's Forward Smash), and then whirls and moves back to its original position. It basically looks like Pidgeot's starting to dash forward, but with its body a hitbox, and with a very sudden turn around as it starts in the other direction.

Notes --- This makes for a quick way to turn around. It's an excellent mindgame, as it looks quite a bit like a sudden dash. Pidgeot's body makes a hitbox in this tackle, but the sweetspot is on the tip of its wings as it whirls. Sweetspotted, it does 18% and can KO by 90%. Not sweetspotted, it's a fairly weak smash, doing about 10%. No wind effects in this one, sadly, but it has a different application than a long-range KO.

~~~-------------------------------------------------------------------------------~~~

AERIALS

Neutral Aerial --- Aerial Ace --- Pidgeot essentially spreads its wings wide and bares its talons for about a second's period. During this time, the whole of its body is a big hitbox, although it does the most damage on the talons. This be sort of a quasi-sex kick, and comes out nice and quick without lots of strength.

Notes --- Unless you hit with the small talons - which deal 12% - this attack does a mere 7%. It has very little knockback, and stays out far too long to follow up effectively. With a big hitbox, use only when you need a bit of breathing space.

Forward Aerial --- Twister --- Pidgeot flaps both its wings in front of it, in a motion reminiscent of a less sudden Forward Smash. This attack can be called a Charizard impression; the wings themselves do little damage, but the invisible gust kicked up in front of them has very nice horizontal knockback.

Notes --- Since Pidgeot doesn't even have to touch them, this move's priority comes first. The wings themselves do an absolutely pathetic 2% and have just enough knockback to push the foe behind you where the wind can't touch them, so make sure you hit them with the gust. If you do, this is a fine edgeguarding option, as it can knock away a recovering foe without having to get too close to them. The only flaw with hitting your foe with wind in all these attacks is that it deals no damage; damage output is Pidgeot's greatest flaw.

Back Aerial --- Brave Bird --- For about a second, Pidgeot curls up in midair, putting its feet directly beneath it. Then it unleashes its pent-up power, suddenly extending both talons directly behind it at a terrific speed. These talons come out quickly, but get pulled back in just as quickly if they don't hit someone. If they do, they seem to bounce off of them and push Pidgeot a certain distance forward, dealing 5% to itself. However, the effect on the foe is much greater, making this quite a good KO move.

Notes --- Aside from the obvious start-up lag, and the negative effects on Pidgeot itself, this attack is quite mighty. It dishes out 13% to any foe who gets smashed by those talons, and has the horizontal knockback that can potentially KO.

Up Aerial --- Double Team --- Rarely do you find an A attack that can double as recovery. In this move, a second, third, and fourth Pidgeot appear above it, in a Fox Illusion-style trick. Of course, the lower ones disappear, and the top one extends it neck, hitting foes with its beak. Essentially a very short, vertical Fox Illusion that only does decent damage at the top.

Notes --- The disappearing trick has knockback but no damage. The real trick here is hitting the foe with the outstretched beak, which does 9% and has upwards knockback, although not too much of it. Now, this can't be spammed as an infinite recovery, as there is the ending lag, that keeps you from actually gaining any height in the long run. Use if you need that final bit of air time to touch the ledge.

Down Aerial --- Air Cutter --- Pidgeot bares its talons, getting into position, and drops like a stone down onto the foe. In the vein of Toon Link, Game and Watch, or Sheik, this attack makes Pidgeot drop, on a slightly tilted angle like Zamus's. However, this one stops after about a second, and Pidgeot pulls out with a flourish, making it slightly possible to recover if you missed. There is a slight wind around Pidgeot as it uses the move, pulling foes down with it as it drops.

Notes --- This attack has negligible knockback and does 7%, so, aside from the slightly redeeming wind feature, this is definitely an aerial better skipped. Still, an interesting one, if nothing else.

~~~-------------------------------------------------------------------------------~~~

THROWS

Grab --- Pidgeot pulls its wings in, catching foes in a wind and pulling them in. Range is about equal to Lucas's or Ivysaur's grabs.

Grab A --- Peck --- Pidgeot jabs at the foe viciously. Simple. Only does 1%.

Forward Throw --- Sand Attack --- Pidgeot flaps its wings together, catching the foe in a wind and shooting them horizontally. This wind is a bit different, though, and is quite sandy.

Notes --- This throw only does 6%, but can KO near the edge at higher percentages. More relevantly, the sand caused by the throw slightly obscures the screen for a few seconds before fading away. Usually a useless tidbit, but might come in handy in a chaotic free-for-all. As a visual effect, this sand can be blown further along the stage with any wind attack.

Back Throw --- Frustration --- Pidgeot swings the foe around to be behind it, jabs them in the face twice, and then knocks them away with a third jab.

Notes --- This looks painful indeed. Bad knockback, but this one at least has decent damage, 11%. Use when Pidgeot's lack of damage output is kinda getting you down.

Up Throw --- Tornado --- Yeah, alright, this one isn't an actual attack from Pokemon, but hey, there's only so many wind-based Pokemon attacks. Here, Pidgeot whips up a sudden tornado that ensnares the foe before it. They spin around inside a bit, then are launched straight up.

Notes --- Now, this one can KO at high percentages and does about 9%. However, it's a very slow throw, making it pretty useless in free-for-alls and team situations; if Pidgeot or the trapped foe are hit in any stage of the move, it's stopped.

Down Throw --- Clogged Tornado --- Similar to the previous attack, except this time, rather than standing by, Pidgeot rises to the top of the tornado and, perching there, blocks the foe from being sent out, instead shooting them careening into the ground.

Notes --- This one deals almost no knockback, but is one of Pidgeot's few attacks with respectable damage - about 13% - making it a high-power throw. It's impossible to chain-throw, as they more or less fall right beneath you, and, with teching, can punich you before Pidgeot has recovered from its ending lag.

~~~-------------------------------------------------------------------------------~~~

FINAL SMASH

Final Smash --- Hurricane --- Oh no, Pidgeot has the Smash Ball! Upon pressing B, Pidgeot rises to the top of the screen, where it becomes your job to tap B as quickly as humanly possible. Wind starts blowing everywhere, in arbitrary directions, tossing foes about. This lasts for about fifteen seconds, and is particularly devastating in free-for-alls, where everyone's bumping into one another. However, if you failed to KO them, you get nothing; the only way this attack can cause damage is by blowing them into hazards.

Notes --- If they're lucky, they get caught in a downdraft and grounded. If unlucky, an updraft will blow them straight into a current that takes them off the screen. However, if your tapping lets up, so will the winds, and the opponents will be able to resist them. This is a Final Smash that really takes great reflexes and tapping skills to work properly; if you have this, you should be able to, with a little bit of luck, send foes off the stage or into hazards. Oh, and don't even consider hiding on a ledge during this; the winds will rip you right off of it and into thin air.

---EXTRAS---

TAUNTS AND POSES

Up Taunt --- Pidgeot tosses its head back and strikes a pose. We see its profile, "hair" blowing in a breeze. Majestic and serious.

Side Taunt --- Pidgeot inspects the ground, then jabs, and comes up gobbling a small worm. Not very majestic or serious.

Down Taunt --- Pidgeot makes its cry from the game - the rest of the time, it's mostly silent - and unfurls its large wings. This taunt is impressive because it's one of the few times that Pidgeot opens its wings facing the camera; usually, one wing is in the background and one is in the foreground.


Victory Pose 1 --- Pidgeot swoops past the camera suddenly, then comes back around, lands, and unfurls both wings, holding one in front of it like a cape.

Victory Pose 2 --- Pidgeot picks at a few feathers, stamps its foot once or twice, then rears back and lets out its cry majestically.

Victory Pose 3 --- A small, dark tornado pops up from the bottom of the screen. It starts to slow, and, as it disappears, Pidgeot, who was within, stop spinning and looks over its shoulder at the screen.

Losing Pose --- Pidgeot simply glares at the winning player, unmoving.

~~~-------------------------------------------------------------------------------~~~

ALTERNATE COSTUMES

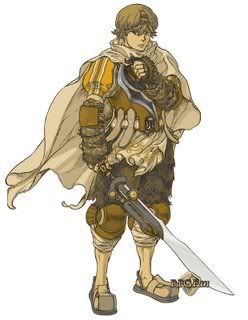
Well, first of all, there's the shiny costume:


Pretty much a golden variant on regular Pidgeot.

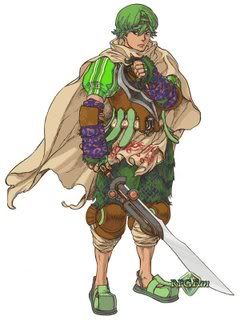
Red Team --- Pidgeot's hair becomes totally red, with no streak of yellow at all. Its body also changes in hue.


Blue Team --- Pidgeot's hair gains a blue streak instead of a yellow one. Hue changes.


Green Team --- Blah blah, hair gets green streak, hue changes.


Dark Pidgeot --- Since everyone needs a dark costume, here, Pidgeot becomes black. Its hair becomes pure white as a contrast, and its eyes are white and piercing. Its talons, though, are blood red.


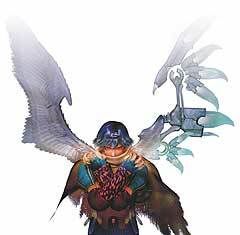
Alt. Costume --- Pidgeotto! Why not? With a tap of a button, Pidgeot's hair gets shorter, its dark eyemarks vanish, and its tail becomes two colours again! See here:


~~~-------------------------------------------------------------------------------~~~

SNAKE'S CODEC​

Otacon - Snake, watch out! It's a Pokemon!
Snake - Another one? Where do these things come from?
Otacon - They hatch from eggs after you take a certain amount of steps.
Snake - So they know how many steps you've taken? Doesn't sound like any egg I ever ate.
Otacon - Geez, Snake... you need to pay attention here! Pidgeot can move at a speed of Mach 2 and produce gale-force winds with a flutter of its wings!
Snake - ...Tastes like chicken?
Otacon - ...I give up.

~~~-------------------------------------------------------------------------------~~~

MISC

Entrance --- A small tornado comes in from the background and fades to reveal Pidgeot, wings spread, waiting inside.

Kirby Hat --- Kirby gains Pidgeot's long hair, making him look pretty hilarious. He gains the power to spit whirlwinds out of his mouth, since he obviously doesn't have any wings.

Symbol --- Is it necessary to mention that it gets the Pokeball?

Victory Theme --- Pidgeot gets the couple of seconds of this theme directly after the opening riff.
 

TWILTHERO

Smash Lord
Joined
Aug 19, 2007
Messages
1,880
Location
Canada
@Pidgeot: I did a Pidgeotto moveset and it fails compared to your Pidgeot :urg:

Anyway, thats a very well done moveset. I really liked it.
 

SirKibble

Smash Champion
Joined
May 2, 2008
Messages
2,400
More movesets have been evaluated.

That section was easy... I'll probably try to do another today.

Oh, and after reviewing that section, I have decided on my next moveset, to truly do him justice...


I may follow up with more of the Chrono Trigger cast as well.
Frog
 

Iron Thorn

Smash Lord
Joined
Jun 26, 2008
Messages
1,097
Location
Going to Gamelon. I'm taking the Triforce of Spag
Frog? YES. My bro had Crono Trigger. He named Marle after my "big" (she's my twin but there's an emotional maturity difference) sister, and said he was going to name Frog after me X3 He named the queen after me, but Liz the Frog woulda been cooler.

And that's a sweet Pidgeot moveset. Good use of color. Only quibble is the lack of extras (taunts, Snake codec, victory poses, etc.) and that it's not Pidgeotto ;P And TWILTHERO, you did a respectable Pidgeotto moveset.
 

Delta_BP26

Smash Ace
Joined
Aug 23, 2008
Messages
606
Location
NYC
Pidgeot: My favorite Pokemon. I love you.
/gay

Seriously though, the moveset was very well done.
 

KoJ

Smash Journeyman
Joined
Aug 16, 2008
Messages
317
Pidgeot: Very nice. However, you need taunts, snake codec, etc, to really put it over the top.
 

Chris Lionheart

Smash Champion
Joined
Apr 6, 2008
Messages
2,076
Location
Make Your Move
Hey everyone. Sorry I've been gone. My computer finally broke completely (so now I'm using a very slow one until I can get a new one.)

I've made some major changes to my General Chris Lionheart entry (page 19.)

I've edited his stats, changed his forward smash, added a new person to his Final Smash list (and trophy list), added a name pronunciation, and stuff like that. I think its a lot better now.

Well time to begin work on my next moveset. Pelleas, "King" of Daein.
 

Stroupes

Smash Lord
Joined
Jun 2, 2008
Messages
1,810
Location
Tennessee


Kalas, the winged warrior from the world in the sky joins the fray. Think of him as a heavyweight Pit. He has one natural wing, and one mechanical wing, but both provide him with a flight ability. His primary weapon is his sword, but Kalas also carries a hand dagger. He debuted in the game "Baten Kaitos."


Costumes:

Red Team


Green Team


Sepia Kalas


STATS

Size: 3
Range: 4
Power: 3.5
Speed: 2.5
Weight: 3
Defense: 4.5
Jump: 3

Other: Crawling, no; Wall Cling, no; Wall Jump, no; 3 jumps. Glide, yes.


MOVESET
Knockback legend-
1. None- it's a DI lock.
2. Very little- easily followed-up.
3. Little- Barely within reach for a second attack.
4. Below Moderate- Out of reach.
5. Moderate- A moderate distance away.
6. High- about 5 body spcaes away from the character. (excluding aerials)

Standard Moves-

A: Kalas swipes with his dagger. One hit: 2% dmg.
Knockback: None

AA: Kalas stabs with his dagger, and twists it. Two hits: 4, 2% dmg.
Knockback: None

AAA: Kalas swings his sword horizontally. One hit: 8% dmg.
Kncokback: Below Moderate

Side Tilt: Kalas kicks outward. If activated again, Kalas will swing his sword in the opposite direction that he kicked. Two hits: 4, 12% dmg.
Knockback: Below Moderate

Up Tilt: Kalas swings his mechanical wing upward. One hit: 4% dmg.
Knockback: None

Down tilt: Kalas thrusts his foot outward and kicks upward. Two hits: 7, 6% dmg.
Knockback: Below Moderate

Dash: Kalas rushes with his sword pointed outward, stabbing the enemy with great knockback. One hit: 15% dmg.
Knockback: High


Smash Moves-

Side smash: Kalas swings his sword horizontally. It comes with a wind-knockback effect. (such as TLink's Dair and GAW's Uair) One hit: 19% dmg.
Knockback: Moderate

Up Smash: Kalas stabs his dagger upward. The dagger produces small forces of energy, with a separate hitbox as the dagger. One hit(dagger): 12% dmg. Multiple hits(energy): 1-1-4-5-3% dmg.
Knockback(dagger): Below Moderate
Knockback(energy): None
Reference to the Blue Storm ability.

Down Smash: Kalas slams his sword on the ground, creating a small ring of fire around him. Separate hitboxes. One hit(sword): 16% dmg. One hit(fire): 5% dmg.
Knockback(sword): Moderate
Kncokback(fire): Little
Reference to the Hellfire ability.


Aerials-

Nair: Kalas spins around with his sword and dagger. One hit(sword): 7% dmg. One hit(dagger): 6% dmg.
Kncokback: Very little

Fair: Kalas spins his dagger in front of him. Multiple hits: 1-1-2-4% dmg.
Knockback- Very Little.

Bair: Kalas points his wings outward. One hit: 17% dmg.
Knockback: Moderate

Uair: Kalas knocks the enemy upward with the hilt of his sword. Kills at the lowest aerial dmg percentage. One hit: 14% dmg.
Knockback: High

Dair: Kalas slices downward with his sword. Has high priority, but no spike. One hit: 18% dmg.
Knockback: Moderate

Special Moves-

Neutral B: Lingering Time- Kalas stabs the enemy, afflicting them with a chrono seal, which lasts a few seconds. This seal inflicts a small amount of damage every second, and inflicts heavy gravity to its victim. The seal only lasts a few seconds, and can be passed onto another character by touching them. One hit: 7% dmg. Seal damage: 2% dmg every second.
Knockback: None.

Side B: Shadow Wings- Kalas cuts open a portal with his sword, releasing a number of shadow birds, which fly out horizontally. Multiple hits: about 3% each.
Kncokback: Very Little.

Down B: Energy Wave- Kalas slams his sword down on the ground, creating a surrounding wave of energy. The energy does little damage, but stuns the enemy. It is also chargeable. The longer charged, the larger the wave radius, and stun time. One hit: 3% dmg.
Knockback: Very Little.

Up B: Shining Seraph- Kalas flies upward with his sword(similar to Marth), stunning the enemy. One hit: 13% dmg.
Knockback: Little

FINAL SMASH- Demons of Darkness
Kalas casts a shadow on the whole stage(ground, not air or platforms), creating a Pitfall effect. Shadow demons then rise out of the ground, hitting enemies above the stage.(don't worry, I wouldn't make this FS too easily dodgeable ;D) The demons last for about 4 seconds, doing about 7% dmg each. Then, after all the demons have been released, they all return to the shadow on the stage, doing massive damage to enemies. Kalas cannot move or attack during the move.


Grabs-

Grabjab- Kalas stabs the enemy with his dagger. 2% dmg each.
Forward Throw- Kalas kicks the enemy outward. 10% dmg.
Back throw- Kalas steps in front of the enemy and swings his sword behind him. 12% dmg.
Up throw- Kalas throws the enemy upward and flaps his wings upward. 6% dmg.
Down Throw- Kalas throws the enemy down on the ground, and thrusts his sword down. Lowest-% killer. 12% dmg.


Taunts-

Side Taunt- Kalas spins his dagger and says "Is that you got?"
Down Taunt- Kalas examines his swords, and flips it in his hand.
Up Taunt- Kalas flaps his wings a couple of times.


Miscellaneous Info:

Logo: A sword with wings.
Ledge Recovery 1: Kalas slides onto the stage, kicking outward. 7% dmg.
Ledge Recovery 2: Kalas crawls onto the stage, and swipes his sword across the ground. 13 % dmg.
Ground recovery: Kalas spins his dagger on either side of him.
Stunned: Kalas doubles-over with his wings drooped.
Idle: Kalas looks to the sides, then behind him.
Entrance: A Magnus appears, which summons Kalas in a flood of light.
Victory Poses: 1) Kalas says "Say cheeseburger!" and takes a picture with a camera. 2) Kalas descends from the top of the screen, and swipes his sword. 3) Kalas laughs while spinning his dagger.

Snake Codec:
Snake: Otacon, there's a bird guy here.
Otacon: Snake, that's Kalas. He lives in the sky. They say his planet was overcome by a massive flood, so his people migrated to the sky.
Snake: He looks like a pushover...
Otacon: Don't be so sure, Snake.
Kalas has defeated a god, with the help of his companions.
Snake: Otacon, I think you're telling me a fairy tale.
Otacon: It's completely true, Snake. Not only do you have to worry about his powerful weapons, but also the elemental effects they leave behind!
Snake: Sure, Otacon. Don't let me forget MY magic weapons on the next mission.
Otacon: Snake...


Assist Trophy-

The Great Mizuti


Mizuti will float around the stage, using one of three attacks.

Sorcerer's Seal: Mizuti will suck the player into it, making the character disappear completely for a split second, then Mizuti spits them out, slightly stunned. 17% dmg.
Sorcerer's Chakram: Mizuti spins it's ring blade, causing multiple hits that are very difficult to escape. 7 hits, 3% dmg each.
Sorcerer's Breath: Mizuti blows a large stream of smoke, which will remain on the character for a certain amount of time. It creates a flower effect and a smoke effect( Smoke ball.)


Stage: Pherkad: the Ancient Capital.
Music: http://www.youtube.com/watch?v=U3Tx3DWeQcU&feature=related
and
http://www.youtube.com/watch?v=5Cw2EitDQTE&feature=related


Except that alleyway will be horizontal. Like Bridge of Eldin. And yes, it is a walk-off stage.


That's all :)
And to clarify for those who don't know, Kalas does have wings, just not in the default pictures.


KingK.Rool

Smash Lord
Joined
Nov 26, 2005
Messages
1,810
Ooooh, Chrono, that should be a good one.

And yeah, I do need to add the taunts, victory poses, losing poses, music, codec, kirby hats, and all that other fancy stuff. I think I'll get on that now.
 
Status
Not open for further replies.
Top Bottom