• Welcome to Smashboards, the world's largest Super Smash Brothers community! Over 250,000 Smash Bros. fans from around the world have come to discuss these great games in over 19 million posts!

    You are currently viewing our boards as a visitor. Click here to sign up right now and start on your path in the Smash community!

Make Your Move 3.0: It's over, it's done, moving on.

Status
Not open for further replies.

The Fail Tracer

The Universal Cosmic Tracer
Joined
Dec 28, 2006
Messages
4,181
Location
Beside myself
3DS FC
2337-5641-4371
'oly Crap, I can't believe I haven't subscribed to this thread yet.

I guess I'll be working on my movesets.
 

KingK.Rool

Smash Lord
Joined
Nov 26, 2005
Messages
1,810
The Squeak Squad


WHO ARE THE SQUEAK SQUAD?

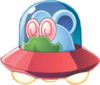
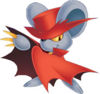
In the picture above, Daroach, the leader of the Squeaks, is the fellow in the red cape and hat. The large, rotund pirate-like fellow beside him goes by the pirate-y name of Storo. The shrimpy mouse with swirly eyes on the treasure chest is Doc, who is often seen in his trademark UFO. Lastly, the snickering yellow mouse in the lower corner is Spinni, the ninja and speed demon of the bunch.

Together, these are the Squeaks. In this moveset, Spinni, Storo, and Doc work in tandem - with a twist that I'll get to in a moment.


THE TWIST

This IS three movesets in one, but these three are quite different from the Ice Climbers working together and even from the Pokemon Trainer's Pokemon Switch style.

Essentially, you use one at a time. On the select screen, you pick the character "The Squeak Squad," which shows all three of them selected. Which one you start out with is quite random, and can't be affected or changed.

As to switching, they CANNOT switch at will. The three of them switch out only when certain conditions are met - don't worry, they're simple conditions, as I learned an important lesson from my Grim Reaper moveset. As it's more or less impossible to control which one you want, switching here is more of a drawback than an advantage. As you'll see, it's practically impossible to just main one, and equally impossible to switch whenever you want to. Bear this in mind if you feel any one character is slightly overpowered.

The three of these are meant to exhude the feeling of a tag-team boss fight. With that, let's get going, with oh, let's say, Spinni.


SPINNI


>>>OVERVIEW


Idle Stance --- Spinni is slightly hunched over, crouching down low to the ground, ready to make a move in an instant. Every once in a while, he cackles nefariously and quietly to himself, obviously plotting his next dastardly deed.

Walk --- Spinni remains crouching low to the ground and softly pitter-patters forward. Looks like he's sneaking, which is probably a good guess, him being a ninja and all. It has a special property - doesn't activate Motion-Sensor Bombs. Yes, that means Snake's, too.

Run --- Spinni goes down on all fours and dashes forward, scurrying up and down like any other mouse. This is a quick dash, about the speed of Sheik's, and starts up almost instantly. Spinni is nothing if not speedy.

Dizzy Stance --- Spinni spins around on the tip of his toe, having lost his balance, teetering this way and that, but somehow keeping his balance.

Sleeping Stance --- Spinni curls himself up in his little red cape and dozes on the ground, breathing quickly in and out. In his curled-up state, he's actually very small, even smaller than Pichu did while he was ducking, making him a bit below the range of some attacks.

Crouch --- This crouch is very low indeed. Spinni falls down, flat on the ground, rather like Snake in his crouch. Being so diminuitive, this shrinks Spinni's already small body, making him tricky to hit. Most projectiles will soar right over him.

Crawl --- Spinni's crawl is a sneaky one. Pulling himself forward with his paws, he gets pretty good speed going, in fact, almost as good as his dash. Certainly better than his walk, though, as I mentioned, that has its own uses.

Wall Cling --- Ah yes, another area in which Spinni excels. Not only can he wall-cling, he can use his Neutral Special while sticking to a wall. We'll be getting to that quite quickly. His wall-cling appears to be him facing the wall and gripping it with both feet and one hand. With his free hand, though, he can perform his attack.


Height --- Spinni is the shortest and stubbiest of the Squeak Squad. His height is just a tad higher than Pichu in the previous game, but unlike Pichu, who's resembles a vertically propped log in shape, Spinni is quite lithe, making him small and difficult to hit, at times. In this sense, he can be compared to Olimar.

Weight --- Tsk, tsk. Spinni hits hard but dies hard also. He's a mouse, and reaps both the benefits and the unfortunate consequences. He is VERY light. By that I mean, almost as light as Jigglypuff. The closest he can be compared to is Game and Watch's weight. Combine this with his speed and his erratic playstyle, and you have a character who is very satisfying to smash off the top of the screen.

First Jump --- He may be a mouse, but Spinni is also a ninja. His first jump sees him leaning back slightly and swinging his arms forward to give his jump additional momentum. He kicks off of the ground powerfully. Spinni's first jump is almost as high as Mario's, so, all in all, quite decent, leaning towards good.

Second Jump --- Once in the air, Spinni's mobility is not so great; Doc is much better in this regard. His second jump sees him pulling a kind of backflip in an effort to get some extra height, but it isn't too great, not as much as his first one. A bit below average, 4/10, let's say.

Power --- Spinni's power depends greatly on the attack in question. He's not weak like some lightweights, but history tells us that fast, powerful characters quickly become broken. On that note, let us compare his power to a slightly watered down Jigglypuff - Melee Jigglypuff. Quite average, and not at all bad for his weight class.

Traction --- Like all ninjas, Spinni sticks to the ground. His turns are quick affairs, as he spins around, his cape whipping around behind him, and resumes his run in the other direction. Skidding, sliding; none of that. When you hear the steady pitter-patter of Spinni's gait, you know.

Fall Speed --- Spinni is, sadly, something of a fast-faller. Obviously, he's not quite as quick a faller as Fox, but nonetheless, he spends fairly little time in the air, which suits him. With Spinni, a frantic, non-stop movement style is probably the best choice.

Range --- Mmmm, not one of Spinni's strong points. Although he uses weapons for some attacks, none of them can outrange, say, Link's sword or DK's arm. And of course, his puny arms and legs aren't going to be beating anybody. No, approaching is definately one of Spinni's weaknesses.


>>>SPECIALS


Neutral Special --- Shuriken --- Ah, the obligatory ninja star toss. Spinni's is quite large, about half of his own size, in fact. Throwing it takes a bit of time as Spinni rears back to draw it and hops ever so slightly forward to throw it with additional strength. This keeps it from being a spammable projectile. Now, the shuriken flies straight forward, not slumping in its trajectory, and goes right off the side of the screen. Its speed is nnothing to write home about, going a tiny bit quicker than Link's Boomerang. This attack can be used while Spinni is clinging to wall, and is in fact executed a bit quicker then. Interesting visual point - these ninja stars stick in the wall for a few seconds after hitting them. Upon impact, the ninja stars do about 3% and flinching knockback. Their main use is for spacing, mindgames, keeping the foe on their toes, and to counter projectile spammers.

Forward Special --- Claw Gauntlet --- Spinni rears back, pulling out of his cape a large metallic gauntlet that he quickly slips on, and, leaping forward, he swipes at foes with clawed digits. This is a chargeable attack in the vein of Luigi's Green Missile, but not quite. You can hold B for a maximum period of two seconds, no more, and simply tapping side B makes it a quick and sudden swipe with decent range for one of Spinni's attacks. The longer you charge, the quicker and longer his sudden leap. Learning to aim properly with this speedy attack is key; unlike Luigi's, its primary purpose is not recovery, but rather suddenly attacking foes who seem out of range.

Maximum range is only about the length of two Bowsers, making it not so good at recovering. The attack always does about 9% and has decent knockback that seems to knock the foes into the air and away horizontally; the perfect opening to chase. A good approach technique.

Up Special --- Supermouse --- In this sudden attack, Spinni leaps up slightly in a short, completely vertical jump that is about as short as Bowser's. However, in this, he then launches himself into his best impression of a glide, extending both arms forward like Superman, his cape billowing behind him. Unlike a real glide, he slowly wavers up and down as he glides. This has all the capabilities of a real glide, but with the limitation of lasting a mere four seconds or so, and of being relatively slow. Obviously, this recovery grants Spinni decent horizontal recovery, but weak vertical recovery, not to mention that it's easy to gimp.

Down Special --- Squeak Squad Standby --- Spinni mutters something into a small speaker on his wrist. Suddenly, a small, sparkling explosion pops up right in front of him, and there stands a small yellow back-up mouse. Each member of the Squeaks has the power to call up one of these minions, which can be seen in the image above. Spinni's isn't the cleverest, and tends to hop around aimlessly until it bumps into a foe. It has basic AI - enough to not jump off the side of the stage. If it jumps into a foe - or you knock a foe into it - it pops in a gout of fire, dealing multiple hits and trapping the foe long enogh for you to run up and hit 'im. Obviously, you can only have one at a time, and it lingers if any member of the Squad switches, until it dies. Don't think of it as a living entity, like Pikmin or my aforementioned Reaplings - think of it as a mini-Bob-omb.


>>>MOVESET


A --- Cape Crack --- Spinni whirls around, buffeting foes from the side with his cape. This attack is useful in that not only does it turn you around, which serves for mindgames, but it looks innocuous, almost as if he was just turning casually. What's more, the hitbox is fairly large, across the fluttering cape, although the range isn't anything special. Although the attack causes the foe to flinch long enough to lead into the tapping combo, it only does 1%.

Tap A --- Flapping Cape --- As Spinni stands, one foot slightly raised, looking important, his cape flutters behind him in a nonexistent wind, wavering quickly enough to deliver multiple hits with very little knockback. Each hit of the cape does 1%, and the hits are fairly unpredictable as to when they will occur. However, it's quite easy to DI out and away from Spinni as he does this, and there is some lag when he concludes it, as he tosses his cape back behind him. You could compare this attack to Diddy's Tap A.

Dash Attack --- Rowdy Rodent --- In this strange but useful attack, Spinni drops right into a crouching stance out of his dash. He then proceeds to scurry forward at a speed faster than his dash, for a short distance, arms flailing akimbo, squeaking like a devil. This attack is as unpredictable as they come, and the majority of attacks will miss him if this is used properly. The attack has handy upward knockback but does a meager 5%. Still, this is probably Spinni's best approach technique, even if it is predictable.

>>>TILTS

Forward Tilt --- Nettling Ninja Star --- This can be best described as half taunt, half attack. Spinni draws, as the title suggests, a ninja star, and proceeds to wave it mockingly up and down before him. There are three hits; first stroke up, one stroke down, third stroke up, each equally powerful - equally weak - but easy to string together, especially at low percents. The first hit has very tiny upward knockback, which is usually cancelled out by the downward hit, which pulls them back down. The final hit is quite weak and sends them ever so slightly into the air. Each hit does about 2%, no more. However, priority is quite good, and the attack is mostly lagless, if nothing else.

Up Tilt --- Ninja Flip --- This attack is self-explanatory. Spinni suddenly and abruptly pushes himself off of the ground with his powerful legs, pulling a complete flip before landing on his feet again. Notably, there is a millisecond of lag as Spinni ducks down slightly to prepare for this jump. This second can be used to dodge quite a few projectiles, though mindgames are the only reason to use it rather than his nice crouch. This attack is a decent juggle, and Spinni's feet are long enough to surprise foes thinking to attack from above. It only does approx. 6%.

Down Tilt --- Whirlwind Cape --- Spinni ducks and whirls around in a circle, scurrying frantically. Throughout, his cape spins around just above him, forming a propellor hitbox that launches foes at random angles if they come into contact with it. Probably his best tilt, there is very litle lag and the attack does around 8%, his cape is quite a large hitbox and has decent priority. It doesn't have any KO potential, and the random knockback makes it hard to chase the foe consistently.

>>>SMASHES

Forward Smash --- Ninja Boot --- In this handy, quick attack, Spinni lashes out at fools with a rapidly rising boot that comes almost to his forehead as a decently sized hitbox. This is a quick smash with surprising range, as Spinni jumps forward slightly as he kicks. Sadly, without a solid, close-range hit from the tip of his foot as he brings it up, this attack is pretty weak with lame knockback and about 9%. Sweetspotted, though, which, bear in mind, is not that hard to do, it does 16% and shoots the forward almost straight up, leaving Spinni to chase with his nice Aerials. Another attack that need practice to work right.

Up Smash --- Ninja Butt --- Another acrobatic, strange attack with surprising range. This attack has two clear-cut parts: the short leap, where Spinni rises slightly into the air and tilts his head back ever so slightly; and the headbutt, where Spinni suddenly and speedily brings his head forward. There is a small hitbox, admittedly, and priority is nothing fantastic. However, there is a short period of super armor as he prepares to bring his head forward, which brings this attack into the realm of the useful. Thanks to the lag as he jumps, this attack must be used liberally, but with good upwards knockback and about 15% damage, this is one of Spinni's best KO options.

Down Smash --- Sai Swipe --- A quickly executed attack in which Spinni produces two sai (here for those who don't know the name) and suddenly spins around, essentially turning around while holding two sharp daggers out on either side. Obviously, this attack hits to both sides, with the kind of priority that can only be gotten with a bladed weapon, and comes out quiiiick. Don't celebrate yet, though. The damage and knockback of the attack are pathetic. After doing a meager 9% - less than many tilts - the foe goes out on a horizontal angle that is very difficult to chase and follow up. This move's main purpose is to put some space between you and your foe - but why, oh why would Spinni WANT to do that? Better to pass on this one, although it has some applications.

>>>AERIALS

Neutral Aerial --- Rat's Pirouette --- As the name implies, Spinni pulls a pirouette in mid-air. This move is quick to start up and last a full second, but winds down a bit more slowly, and is easy to punish. Spinni himself deals about 9% and above average knockback, but it's far more likely that you connect with your cape, which does only about 4% and minimal flinching knockback.

Forward Aerial --- Shuriken Snipe --- Spinni draws a ninja star in a split second and flings it down at the ground on an angle. Compare it to how Sheik throws her needles while in the air, if you must, even though this is just one strike, but somewhat more powerful. The Shuriken loses its momentum after about the size of one full Bowser, and drops feebly, making it more or less impossible to snipe off recovering foes. The attack comes out quick, and does a decent 9%, but doesn't have any notable knockback.

Back Aerial --- Creeping Claw --- In another speedy aerial, good for chasing, Spinni draws his clawed gauntlet and extends it under his other arm, holding it behind him for a second or so. The claw hits for 10% and does nice slightly tilted upwards knockback, which is easy to follow up on. The rest of Spinni remains exposed, though, and there IS wind-down lag.

Up Aerial --- Supermouse Rising --- Flapping his arms once, powerfully, Spinni temportarily stops any momentum he had and pushes himself ever so slightly up. Again, his cape billows behind him as he tries to look heroic. This attack hits with the tip of Spinni's nose for about 6% and little upwards knockback. What with the tiny hitbox, bad range, start-up lag, and little reward, this is quite the awful attack.

Down Aerial --- Shuriken Deluge --- Spinni lets loose a fistful of ninja stars - three, to be exact, that fall at about the same speed and usually hit the foe together. They have only flinch knockback, obviously, but all three together can do up to 10%. The attack is pretty fast with some wind-down. Really, mastering these Shuriken attacks is an essential part of Spinni's game.

>>>THROWS

Grab --- Spinni's grab is a more or less typical one-handed swipe. However, when doing it, he hops ever so slightly forward, giving it range a bit beyond his stubby arms, though it's still a short grab.

Forward Throw --- Claw Clack --- In this simple but effective toss, Spinni pulls out his claw and swipes from above, knocking the foe forward almost along the ground. At higher percents and near the edge of the stage, this is great way to knock away foes with bad vertical recovery. It only does 7% or so, but the knockback isn't bad.

Back Throw --- Gut Star --- Spinni spins them around behind him, and then throws a shuriken unerringly into their gut. This attack is fun in that the ninja star stays in them for a few seconds before disappearing, though this is nothing more than a visual fun fact. Besides the coolness, this is a weak toss with little knockback and 5%.

Up Throw --- Flame Prayer --- In a unique attack based off of Kirby's Ninja power (which he can get from swallowing Spinni's ninja stars in the game), Spinni raises one hand, two finger sticking up, and a gout of flame sprouts out of the ground, knocking foes straight up. This attack is unfortunately weak like Spinni's other throws, doing about 7% and only a little bit of knockback.

Down Throw --- Furry Frenzy --- Spinni drops the foe to the ground and starts clawing him furiously. Again, playing up the mouse side of this ninja mouse. This attack lasts about a second, eventually shoving the foe a bit farther along, bouncing him along the ground. Does 10% - the most of Spinni's throws - but has lag that makes it impossible to chase and lets low-damage foes with good teching roll back and punish him.

>>>TAUNTS AND POSES

Up Taunt --- Spinni makes his trademark cackles, putting his hand over his mouth as he does so.

Side Taunt --- Spinni takes a large treasure chest out of nowhere, looks at itgreedily, rubbing his hands together, then stows it away.

Down Taunt --- A small mini-Squeak scurries out from under Spinni, but, wanting to keep the spotlight on him, Spinni boots him away, and he falls into the foreground and away.


Victory Pose #1 --- Spinni opens up a great, bejeweled treasure chest that is pointed away from the screen. A great golden glow comes up out of it, illuminating him. He looks very pleased indeed.

Victory Pose #2 --- A smoke bomb rolls onto the screen, making the background temporarily a screen of fog. When it clears, Spinni is crouching there, looking stealthy, a ninja star in his hand, ready to be tossed.

Victory Pose #3 --- Two ninja stars embed themselves, one after another, coming somewhere from the background, into the foreground. Suddenly, Spinni pops out of nowhere and cackles, his ninja stars surrounding him.

Losing Pose --- Spinni applauds begrudgingly, looking inattentive.

>>>MISC

Entrance --- Spinni appears in a puff of black smoke, holding a ninja star that he hastily puts away.

Kirby Hat --- When Kirby sucks up Spinni, he gains the sharp shades and a small hat with the two large, oversized yellow ears. He gains the power to throw Shuriken, and to cling to walls while doing it as an extra perk.

>>>PLAYSTYLE

Spinni is a bit of a glass cannon. He's a fast hitter who has to keep the pressure going to have a chance. Approaching is one of his flaws, but his unpredictable Dash Attack and sudden Forward B help him with that weakness. Most of his moveset is unpredictable, with many attacks appearing frenzied and sudden. His recovery, however, is somewhat weak, which means that Spinni must remain on the offense to have a chance against any decent character.

Another important aspect of Spinni's game are his ninja stars. These can be mixed and used at many opportunities, and travel quickly enough to keep your foe on his toes. Throwing a few is a great way to lead into a tilt or Smash that sends them into the air.

Once there, Spinni has an advantage. With solid aerial attacks that come out very quickly, Spinni can do a decent Wall of Pain imitation. In the air, his inferior grabs don't really matter; all that matters are his aerials. On that note, Spinni is great at wall camping on the few stage that HAVE walls; he can sit there and fling ninja stars until he's ready to leap off and start an assault.

Another important technique to master is the Squeak back-up. Positioning him, sending foes into him, and punishing foes who are ablaze are all critical. In fact, every one of those opportunities to start a combo should be taken frantically. The opponent MUST be given no time to think.

Lastly, consider that Spinni is a very small character. Since he won't be weathering very many hits, your size is your best defense. Shield? Nah. Dodge? If you must. But mostly, a Spinni player should just keep pressing his powerful offense, mixing it up with ninja stars, and relying on your opponent's attempts to counter missing as your defense.

>>>SWITCH TIME?

And now we get to it. When does Spinni switch to the next in line, the sneaky, clever Doc? For Spinni, the conditions are simple, almost painfully so; he just has to KO the foe. As soon as he does, the next time he touches solid ground (in case he was in the air when they were KOed), a sudden beam comes down out of nowhere, and he's abducted off the top of the screen, looking exasperated. Next second, the beam is gone, and Storo descends in his very own UFO. This whole process is very quick; you can usually complete the switch before the foe has fully respawned.

So, as Doc comes down, the foe is at 0%, and he is very likely somewhat damaged. This means that his work is most definately cut out for him. As you will see quite soon, Doc's main function on this team is to rack up the damage for Storo to come down and end it. And this is a function that he fulfills well.

...

Let me take this moment to suggest a break. It's hard to digest more than one full moveset at once, so, for the full effect, give Spinni a bit of time to sink in. Of course, you can do it however you want; this is just my suggestion to increase your enjoyment of the moveset(s).

...

DOC


>>>OVERVIEW


Idle Stance --- Doc is constantly in his trademark UFO, which hovers about the height of a crouching Pikachu off of the ground. This makes many down tilts quite useless against him even when he's just standing there. While there, his UFO is stationary, rocking a tiny bit, and he occasionally glances behind him from within.

Walk --- NOTE! Doc does not have a dash. He cannot run, only walk, and his walk starts up almost instantly. He moves at a constant steady speed, his UFO moving forward unrelentingly. The speed is quite impressive for a walk, a bit faster than the Ice Climber's dash. This constant pace is interesting AND relevant to gameplay, as he has certain attacks that he can execute without stopping his walk.

Dizzy Stance --- Doc opens up the top of his UFO and slumps out the side, heaving uncontrollably, his eyes swirling around and around. Miserable but funny dizzy stance.

Asleep Stance --- Still in his UFO, Doc stows his glasses, revealing tiny little eyes, and dozes right there, his head falling onto the controls (which can't be seen from our angle).

Crouch --- How could a UFO crouch? Nope, Doc can't crouch. Combined with his nonexistent dash, that gives him Doc a very stiff, mechanical feel that's quite unique..

Wall Cling --- None, of course.


Height --- The UFO itself isn't all that tall, only about the overall size of Mario, but considering that he floats quite a bit off of the ground, the tip of the UFO is more or less on the same level as Bowser's head. This makes him a wide target for smashes and aerials and just about everything that doesn't strike at the foe's feet.

Weight --- Doc is heavier than Spinni, for one. The UFO is full of gear and mechanical bits, weighing him down more than you'd think. You could probably safely compare his weight to Link's; not quite a heavyweight, but getting there.

First Jump --- You can't really call this a jump; a small white flame suddenly projects out of the bottom of Doc's UFO, propelling him upwards a decent distance, about the distance of Mario's first jump. This is a sudden jump that's hard to predict, as Doc doesn't have to prepare in order to use it.

Second Jump --- Small white flames pop out of the sidal jets that ring the bottom edge of his UFO, pushing him just a bit further up. This second jump is pretty short, about as long as Link's, perhaps, but again, unpredictable and hard to meet properly.

Power --- This is not Doc's forte. Although he can rack up the damage with a high level of efficiency, he has issues sealing the deal, and that's okay, as that's more the job of Storo and Spinni. He does have the rare attack with KO potential, but on the whole, he's pretty close to Mewtwo's level of power - that is to say, weak.

Traction --- UFOs definately can't grip the ground, or spin around instantly. What's more, as Doc doesn't dash, he can't turn on a dime; he has to actually stop and turn to walk the other way. This isn't as bad as it sounds; his walk starts up quickly enough to cancel out the lack of a swerve. On another note, a plus to being in a UFO is that Doc does not slide. He can stop in a split second without sliding anywhere.

Fall Speed --- What with the propulsors ringing the UFO, Doc falls INCREDIBLY slowly. Seriously, he falls slowly enough to pull off six Forward Aerials from the peak of his jump to the ground. This is Doc's greatest asset, in truth, though there are certain ways to punish it, and the slow fall time can get annoying to impatient players. Still, it gives him incredible air mobility, as a character in a UFO ought have, and makes him very dangerous in the air, although it also makes him easy to attack.

Range --- This is something that depends entirely from attack to attack for Doc, although his average range is pretty good. He has many attack that use mechanical arms, beams, and other such handy things with good priority and range.

>>>SPECIALS

Neutral Special --- L.A.S.E.R. --- Ah yes, Doc's Laser, his quintessential attack, as important to him as Spinni's ninja stars. In this useful attack, a small device comes out of the bottom of the UFO, looking a bit like some kind of dental device or drill. Then out comes the laser, quick and sudden. This laser is perhaps best compared to R.O.B's; however, it's very thin and has a bluish white tinge, and travels quite a bit faster. It bounces off surface also, though is even bouncier, and stops when it collides with a foe rather than continuing through them. The knockback is smaller, though, with no more effect than a flinch, and only does about 3%. This is definately NOT spammable, as it takes some lag as Doc sends out and retracts his laser.

Learning to properly aim this attack is absolutely vital. Tilting the control stick up and down in the start-up as Doc draws the laser can be used to snipe off foes from just about any angle, even while Doc is in the air. Bouncing it off the ground is a vital skill. In any case, the L.A.S.E.R. is dangerous to use in close quarters - too easily punished - and in fact should be wielded primarily to slow down an approaching opponent.

Forward Special --- Alien Abduction --- This move takes about a second to wind up in which it is easily gimped. Doc rises slightly into the air for about one second, then suddenly, a beam of light shoots down from the bottom of his UFO, and he swoops forward for about the distance of a slightly charged Luigi Missile. This attack can be easily jumped over, and Doc has to catch them in the beam proper for the attack to work; he himself knocks the foe back but does absolutely no damage. He moves quickly, but not quickly enough to stop most foes from jumping out of the way. Dodging and shielding DOES NOT help, however.

So, you've caught your foe in your tractor beam, and now they're bobbing around helplessly beneath you. What do you do with them? Well, pretty much anything. They come with you if you jump, run (walk), or even fall off the edge, making Docicide a general threat, as they come directly beneath you. However, beware! They more the foe taps buttons, the quicker he'll break out, and it's easier at lower %s. Quick tapping at 0% will break them out after two seconds. No amount of tapping at 100% will get them out before you have a chance to leap to your death. This is also useful before then as a way of depositing people at stage hazards.

Up Special --- Close Encounter of the Second Kind --- Whether Doc is in the air or on the ground, he freezes, his UFO spinning with more and more speed. After a second, he rockets away in the general direction of the control stick. Colliding with foes gives set knockback and no damage. The trajectory curves slightly down before coming back down, in a mini-arc. This recovery is extremely difficult to aim correctly, made more difficult by the fact that Doc cannot grab the ledge. At all. This attack MUST go straight onto the stage, which is possible, as it goes farther than Fox's Up B. Cons: No ledge-grab, hard to control, no damage, has wind-up, get be out-prioritized by waiting foes. Pros: Long range, equally good vertically and horizontally, moves very quickly, hits foes with poor priority out of the way. All in all, recovery is one of Doc's poor points.

Down Special --- Squeak Squad Standby --- Doc cackles as he pulls back the roof of his UFO and flings a small back-up mouse at the ground below him. This one hops around slowly, tossing small bombs short distances. These bombs sit there for a few seconds, flash for a second, and then blow up, with decent knockback and about 8% damage. These harm Doc as well as foes, so beware. There is lag at the start of the attack, and this mouse is unpredictable and not as lethal, so it's not the most powerful of attacks. Not to mention that after about 10%, the mouse blows up (leaving you free to make another one).

>>>MOVESET

A --- Drill Poke --- A small drill-shaped apparatus emerges from the front of the UFO, going out a tiny distance and poking foes at its tip. This does strictly horizontal knockback, but that's so small that they'll have to be at very high %s for it to have any impact. It does about 3%, though. Although it comes out fairly quickly, this is a bad attack, and having no way to follow it up makes it a dismal option.

Note that Doc has no Dash Attack.

>>>TILTS

Forward Tilt --- Cyborg Wall --- A small, mechanical, two-digited claw suddenly extends out of the side of the UFO. It sticks out for a second or two, being a hitbox all the while. This is a nice attack, as it has long range and decent knockback. It does about 6%, though, and no more. This attack is interesting in that Doc can move while using it. This means that he can move anywhere. He can stop, then move. He can move forward a ways before moving back (without turning around, still facing forwards). That makes this a quasi-dash attack that's quite useful for mindgames and approaching carefully. Shame about its poor other qualities and wind-down lag.

Up Tilt --- Phone Home --- A small antenna sprouts out of the top of the dome, taking a second to do so. Once there, it suddenly and abruptly blinks, radiating a small green light. This is a sweetspot - or rather, a tiny hitbox - that shoots foes to the sky and does about 11%. Not bad, eh? Ah, but don't forget about its start-up and wind-down lag, its tiny hitbox, and its puny range. A fun dream, but all too hard to put into effect.

Down Tilt --- Extend-o-Matic --- In an attack with start-up lag, two robotic arms extend out of both sides of the UFO, and, in a second stroke, are lowered to the ground. The arms are all hitbox, though they do the best knockback as they graze the ground. This attack takes a long time to be put down and pulled back up, though the pay-off is decent; about 10% with high priority and big hitboxes.

>>>SMASHES

Forward Smash --- Power Beam --- Two small metal sticks emerge side by side from the hull of the UFO. Between them, a power beam is formed. For this who haven't played any Kiby games, this is essentially a whip made of sparking energy that starts way up high and swings deliberately down, disappearing at the ground. This attack has multiple hits and can rack up quite a bit of damage, up to 19%, while also having good range and great priority. It does have some start-up, though, and does almost no knockback. And, of course, the icing on the cake - just as with the Forward Tilt, Doc remains completely mobile while using it. Since it's another attack that stays out for a while, you can actually start it while at a distance and then scurry up to the foe to hit him. Another good approaching trick.

Up Smash --- Shuttle Swirl --- In this sudden and powerful move, the UFO tilts backwards until it's almost vertical, then spins viciously, scoring multiple hits that suck the foe in and a final hit with good knockback. This move can be compared to a vertical Bowser Down Smash. The attack is executed very quickly but doesn't really have range and has bad wind-down as Doc is somewhat dizzy and can't control his shuttle right away. The final hit does 12%. All the hits together, which is hard to land, does a fantastic 22%.

Down Smash --- Bombs Away --- In one of the rare moves where Doc emerges, the dome is pulled back, Doc sticks his head up, and, cackling, he drops a big, round, black bomb. This bomb blows up on contact with another player or with the ground, doing some niiice damage that doesn't harm Doc, although he too takes the knockback. In that, this is a somewhat risky attack, and it doesn't really have KO potential, either. It does 16%, though, and has a long hitbox, making the foe think twice about approaching blindly. A decent smash but a risky one.

>>>AERIALS

Neutral Aerial --- UFO Sighting --- As a strange sci-fi motif plays in the background, Doc's shuttle suddenly swirls around twice in midair, if you know what I mean. Since it moves so much so quickly, in a pattern rather like a falling fly, there's a nice big hitbox with knockback that can go pretty much anywhere. The damage is low, though, a mere 7%. Still, with the speed at which this attack is executed, you can pull it off up to four times before hitting the ground, making it pretty useful. Still, it's easily outprioritized, if hard to predict.

Forward Aerial --- Cowprod Taser --- A long, thin piece of metal protrudes suddenly from the side of the UFO, sparking at the tip and shocking foes it pokes at for minimal knockback and 5%. This attack is underwhelming, yes, but it's one of the fastest Doc has, and that's saying something. This is another way to approach, to space, and to stop enemy approaches; in fact, those are Doc's three main strengths. The damage sends the foe back sparking, keeping them from immediately retaliating.

Back Aerial --- Flame Thrusters --- With a second's lag, Doc tilts hif UFO forward, pointing the bottom of the UFO at an angle and back. A small white jet of flame shoots out, frying the foe a bit with multiple tiny hits each doing 1%, up to seven of them. This has a decent-sized hitbox, although the flame isn't too long, and the move takes some time to start up and end itself, with no knockback even if all your hits connect.

Up Aerial --- Doc's Mad Inventions --- Doc lowers the roof to execute this attack, in which he raises one of those comical cartoon extending boxing gloves and squeezes to send the glove whizzing upwards. After connecting - or not - it stays up there for a while, bouncing around, in a smaller, weaker hitbox. The initial hit, though, does 10% and has ok knockback; setting it up is hard, though, as the wind-up is long and obvious. Still, with his long air time, there are ways to put this into use; stopping annoying edgeguarders, for one.

Down Aerial --- Noxious Concoction --- In yet another attack where Doc retracts the UFO dome, he leans out slightly and drops a beaker full almost to the brim with bubbling green liquid. This goes down for a short length before vanishing in a green explosion of fumes. It also explodes on the ground or on contact with a foe. The initial damage is negligable - about 4% - although this attack does knock the foe far enough to be a good spacing technique. However, after the explosion, the hittee suffers from poison damage for a few seconds, racking up up to 8%, if you're truly lucky. Once in a long while - like 1/500 - the potion is a vivid purple, and, though it has the same qualities, the poison lasts for a LONG time and racks up up to 30%. Not bad for an Aerial, hmm?

>>>THROWS

Grab --- In an interesting grab, Doc tilts the UFO slightly so that it is facing half forward and half down. He then send out his tractor beam. If it catches one's foot, that's enough to pull them into a grab. Still, even with that, his grab range is only as good as Ivysaur's.

Forward Throw --- Laser Deliverance --- The L.A.S.E.R. extends out of the bottom of the UFO, catching the drifing foe on itself, then points forward, pulling the foe with it, and fire rapidly. Very short knockback, as should be expected from the laser, and damage of 6%. Not a terrific throw.

Back Throw --- Saucers Attack! --- Dropping his traction beam, Doc suddenly swerves forward, then spins back to smash the foe who has barely had time to drop behind him. Quickly executed and surprising, with OK knockback for a throw but only 5% damage. Hard to follow up on, as the foe flies faster than Doc can drift.

Up Throw --- Tractor Dunk --- The tractor beam flashes suddenly, then shrinks and focuses into a single, concentrated beam that bounces foes off of the ground. Unlike the back throw, this attack does let Doc follow up, probably with a Cowpoke Taser, against floatier foes. Damage is sad, though - 4%, tying it with Marth's as the weakest tosses. Apparently Doc's tractor beam can't fry buildings yet.

Down Throw --- In For a Landing --- With the foe still caught in the beam, Doc descends almost to the ground, and fires up the UFO's thrusters, burning the poor sap stuck between the ground and the UFO. It ends with strangely vertical knockback that keeps it from becoming a chain-throw. Though it can't KO, it's the most powerful of Doc's throws, doing about 8%, which still isn't all that great. Doc doesn't specialize in grabbing.

>>>TAUNTS AND POSES

Up Taunt --- Doc presses a hidden button, and his laser extends from the bottom of his flying saucer. It turns one way, then the other, and, finding no foe, retracts.

Side Taunt --- Doc retracts the shuttle's dome, raises himself slightly out, and cackles maniacally. A pretty long taunt, but a truly annoying one, even though Doc's evil laugh is a very quiet, almost undetectable, snicker.

Down Taunt --- Doc presses his face against the glass and waves mockingly to us, the viewers.


Victory Pose #1 --- Outside of his UFO at last, Doc carefully pours one beaker into another. A green potion begins to fizz uncontrollably, then explodes, frying Doc to a crisp and causing him to fall flat on his face.

Victory Pose #2 --- Doc slowly descends from a stairway that has descended from his UFO, which is in the background. "I come in peace," he squeaks, then smirks.

Victory Pose #3 --- Doc flies onto the screen, his UFO gripping a great big treasure chest beneath it. He looks quite pleased with himself. Draws a parallel with Spinni's gloating over a treasure chest.

Losing Pose --- The UFO hovers in the background, two mechanical arms clapping noisily against one another. Doc is nowhere to be seen, the little cheater.

>>>MISC

Entrance --- A beam of light radiates from above, and Doc descends from the mothership. Even though there is none.

Kirby Hat --- Kirby looks pretty much like this, only with Doc's big green moustache and a hat with his two big ears. He obviously gains the power to use the L.A.S.E.R.

>>>PLAYSTYLE

Doc is a difficult character to use, or even to define. He's slow. He has little to no KO power. Some attacks have priority while others don't. His recovery is awful. Despite all these flaws, he still manages to succeed. How?

It's really all about the quirks. Approaching should be made as difficult as possible for the opponent by using Forward Tilt and Forward Smash freely. Those are Doc's two primary ground attacks. The idea is to force the foe to attack from the air, where Doc is king.

In the air, the foe must adopt a totally different approaching style, as Doc stays there for quite a while. From below? Boom, you're poisoned. From the front? Ah, that's where Doc starts racking up the damage. With huge air mobility, it's easy to combo the foe with repeated Forward Aerials, making a sort of wall that's quite tough to penetrate. For Doc, this kind of aerial combat is a specialty.

L.A.S.E.R. must also be mastered. It's another terrific way of stopping a charging foe, which is truly vital to Doc, as he can be easily annihilated or edgeguarded.

For that matter, one of Doc's most important attacks is his Abduction move. This attack just has so many applications, it's worth it to constantly seek an opening to shoot forward and catch the foe. The most important of these is the Docicide, which, as I'm about to mention, is useful for another reason.

All in all, Doc is the ultimate floaty character. Rather like Spinni, he's quite unpredictable, and specializes in racking up damage, spacing the foe, and playing a nice slow defensive game.

>>>SWITCH TIME?

Ah, yes. When does Doc move on to the heavyweight bruiser of the trio, Storo? If you think on it a bit, considering Spinni's conditions, it's pretty obvious; Doc switches out when he's KOed. As soon as he loses a life, the respawn platform sees a completely different figure lurching into battle.

What does this mean for strategy? Well, as we mentioned, Spinni leaves Doc to fight a foe at 0% when he is very likely damage himself. This is the purpose of Doc's slow, defensive game; racking up enough damage on the foe before falling that all Storo has to do is come over and clean up the mess, with one of his many KO attacks. I just love this weird kind of symmetry.

So, hear we are at Storo, the last of the three, who's facing down an enemy who's probably (if you're unlucky, you'll start with Storo) very damaged. Note that Storo is at 0% as he does so. This is relevant both for his own switch condition and for making things very hard for your opponent. It's important to use Doc wisely, though; Storo is absolutely abysmal at damaging the foe to KO-able %s.

...

Blah, blah, blah, take a break, then come back to read the rest. Or do whatever you like. If you're even reading this moveset word for word, I'm sure you can manage one more character.

...

STORO


>>>OVERVIEW


Idle Stance --- Storo stands tall, looking down on his puny foes. Once in a while, he flexes his muscles and thrusts his chest out, stretching to break the monotony.

Walk --- Storo stomps as he walk, one foot thudding down, followed by the other. It's actually quite noisy, but a typical heavyweight walk, deliberate and not too slow.

Run --- Storo runs in a bit of a strange way; sideways, or at least, partially sideways. He faces us and holds his elbows high, his fists clenched and pointing down. He'd look almost funny if his stomping wasn't so loud and threatening. This isn't a fast run, at all. Maybe a tiny bit quicker than Ganondorf.

Dizzy Stance --- In his dizzy stance, Storo stands as tall as ever, but grips his head on both sides, his head lolling from side to side. Looks like he wishes he could fall, but his legs and body are stronger than his mind.

Sleeping Stance --- The same holds true when Storo takes a nap. His head falls onto his chest, and his nose twitches occasionally, and he dozes right there, staying as big a target as can be. Seriously.

Crouch --- It's not easy for a goliath like Storo to crouch. He actually just sort of falls down backwards, and his belly protrudes so far that just about every projectile will hit him anyway. Not to mention that falling down takes him a bit of time. This begs the question, why crouch? Just wait till we get to his Down Tilt.

Wall Cling --- Is that some kind of joke?


Height --- Storo is huuge. Really huge. He stands a head taller than Bowser - his head, bear in mind, which is pretty small in proportion to his body. Combine this with his massive girth, and you have a combo-user's dream; a slow, fat target.

Weight --- The first respect in which Storo is unique, and actually has an advantage; Storo is the game's very first super heavyweight! After all, bear in mind, he's pretty much all fat, as compared to Bowser or Ganondorf. What this means is that Storo has fantastic hit resistance; most smash attacks will hardly knock him the distance of three Bowsers even at high damages. The flip side to this fantastic resistance is that, thanks to that very same tiny knockback, Storo is immensely easy to combo. Which brings us right back to the preceding point.

First Jump --- Storo pulls his legs up to his body in this short jump. It goes about the distance of the first jumps of Ganondorf, maybe a bit farther. Storo is a slow jumper, and prefers to remain on the ground.

Second Jump --- His second jump is absolutely abysmal, barely outranging Zelda's pathetic second jump. Not good stuff. Again, Storo's air mobility is quite limited. That's okay, though.

Power --- Well, Storo wouldn't be much of a super heavyweight if he couldn't KO foes left, right and center, would he? With all of his abysmal lag, range, speed, evasion, and recovery, Storo is a tank and a beast, if nothing else. He's not quite as powerful as Ganondorf, with KO potential on EVERY attack, but he's at least equal to Ike, and has a few truly vicious moves.

Traction --- Storo doesn't slide as much as some characters, but he DOES slide. When he stops running, he skids a tiny bit forward before digging in his heels and stopping his momentum. His turning is not instantaneous, no, he has to take time to whirl and start running the other way.

Fall Speed --- Storo falls like a heavyweight. That is to say, quickly without quite being a fastfaller. This doesn't do any favours to his already fringe air power, and makes him a character who's best when he's firmly planted on the ground.

Range --- Now, for range, there IS such a thing as ok without being terrific. Storo's limbs aren't all that long, but I suppose his size can be considered to add to his range. On the whole, Storo is average in this department, but can' t really hang with the best of them. Yar?

>>>SPECIALS

Neutral Special --- Roly Poly --- Storo begins to revolve on the spot, apparently defying the laws of gravity as he start spinning while facing the camera, his arms and legs stuck out. He quickly begins to revolve so quickly that he resembles an uninterrupted blue sphere with small, blue round things constantly revolving around him (those are his limbs and head). When you release B, he slowly rolls forward, like a boulder, a sharp contrast to Jigglypuff's frantic attack. In this state, Storo is nigh invulnerable, and goes right through foes, pushing them up into the air and dishing out 14%. How long he stays in this state depends on how long you held the button.

Now bear in mind that Storo can still be damaged by most any attacks and especially projectiles while in this state. Also note that the very longest you can roll around for - with full turning capabilities, obviously - is about ten seconds. All this adds up to a handy attack when the foe is trying to press an attack and a beastly move in multiplayer.

Forward Special --- Poundmaker --- This attack has very different properties depending on where it was used. If used on the ground, Storo - in a move with little wind-up - hops forward, his legs in the air, causing Dedede-style stars to erupt on the ground on either side of him. That's not the end, though, not by a long shot. Pressing B again at the exact moment when his...bottom touches ground makes him bounce right off of it and do it again. And so on and on ad nauseum. There is no limit to the number of bounces you can make but your own reflexes, the limits of the stage, and your foe, who can strike you higher up to avoid the stars - which deal 4% and flinch - and the hitbox on the lower half of his body, which does about 10% and weird horizontal knockback. This attack is handy as the stars can trap foes who think to outrun the incredible bouncing Storo, lagging them long enough for him to sit on them. This can KO at higher %s, but not so much as some of his other attacks.

Used in the air, Storo raises his legs also, but picks up momentum as he starts falling. When he hits ground, B can be pressed to bounce, and so on and so on. Sadly, this can't spike if Storo hits a foe in the air, making it a dangerous and potentially suicidal attack. It still has powerful horizontal knockback, though, letting you potentially hit a recovering foe, bounce them off the side of the stage, and kill him along with you.

Up Special --- Avast! --- Arrrr! Storo be drawin' a long rope with a hook at its end. The hook be whizzin' its way to yer ledge, grabbin' him a tether recovery, me hearties! Arr, it be true that tethers be weak recoveries, but Storo the Scurvy has the best throwing arm yer bilge eyes ever saw, knockin' lubbers clear off of the ledge with the hook! Aye, the hook be doin' about 7%, but don't be doin' enough knockback t'be mentioned. Oh, yarr, 'tis handy, but be short-ranged, for a tether! ...

Bottom line, it's a short-ranged tether that knocks the foe off the ledge and then grabs it, making it very hard to gimp, but only useful for a specific range. Storo should rely on his weight to keep him on the stage, as his recovery doesn't do him any favours.

Down Special --- Squeak Squad Standby --- The obligatory Squeak. In Storo's case, he seems to pull a blue one out from behind him, made easier by his massive bulk, and drops it on the ground before him. This one is somewhat sluggish, and slowly eases along the ground, never going too far one way or the other before turning back. If a foe comes into contact with it, it blows up, doing about 9% and OK knockback. This one is the closest, out of the three, to a typical motion sensor bomb. However, it's quite slow and blows itself up after 10% has been dealt to it, making it easy to detonate remotely with a projectile. Still, Storo should be happy with the few tricks that he gets.

>>>MOVESET

A --- Palm Pop --- Storo extends his long arm and sticks his palm directly into the foe. Minimal knockback sets this up for AA, but it does a decent 3%. It is somewhat comparable to Ike's initial hit in his A combo, executed at a decent speed and setting up for a power hit.

AA --- Fist Stopper --- Storo clenches his extended hand, hitting foe within a decent range for 4% damage and some knockback, enough to KO at higher percentages. This attack is somewhat unpredictable but easy to DI out of after the first hit. Still, it's one of Storo's precious few combos that are relatively quick, and is useful for mixing up your approaches.

Dash Attack --- Trampled Underfoot --- Remember Storo's strange sideways run? Well, in his dash attack, he just keeps on running, raising his arms a tiny bit higher to indicate that he's attacking, and can essentially trample right over most foes. Since he's so big, and his legs are all hitbox, this is a difficult attack to shield; however, it's quite slow, only as fast as his run, and easy to jump right over. Even if he tramples them, he only does 7% and very little backwards knockback, so this attack has its main purpose in intimidation; the foe must be wary when this huge hulk scuttles towards them.

>>>TILTS

Forward Tilt --- Flatten --- In this long-range, big-lag attack, Storo pushes himself off of the ground, dropping directly in front of where he was previously standing. Looks almost like a tiny short-hop. The lower half of his body is a hitbox, but does very little knockback unless he actually lands on top of them. Unlike Poundmaker, this attack drives the opponent into the ground DK-style, albeit for a short period of time - so short, in fact, that with wind-down lag, Storo can't really capitalize on their plight with any big attack. I suppose you could sneak in a free jab. Anyway, this attack does 8%, but has lots of lag as Storo jumps slightly up and comes slightly down.

Up Tilt --- Dying Dunk --- As Storo leans back onto one foot, the other one held in the air in front of him to get maximum height, he punches out into the air above him with both meaty hands. Surprisingly small range, and easily punished, but lots of power if it hits, up to 11% and good vertical knockback. His fists themselves come down almost instantly after going up, so the hitbox is very short.

Down Tilt --- Toe Tackle --- Remember how Storo's crouch is him lying on his back? And it takes a while to do as he has to fall? Well, to make up for his crouch's lag, his down tilt is perhaps his fastest attack, as he suddenly lashes out at the feet of foes in front of him with his own tiny foot. This causes them to trip and does 4%; however, unless they react with a tech or a jump, you CAN follow it by rising and smashing them. A handy, fast attack, though it's kind of predictable when they see Storo lying there.

>>>SMASHES

Forward Smash --- Toe Punt --- When you first use this Smash, Storo runs in place for a second, then he dashes forward a short way and kicks out with all the power in his foot. Now, the second of running is vital here; it makes this move slow to start out, canceling out its quick hit and big range. When you see Storo running in place - when you charge it to make him run farther, he runs in place longer - that's a good indication to get up in the air and well out of his way. The kick has terrific knockback - comparable to Ganondorf's Forward Smash - and does a titanic 23% uncharged - fully charged, it does 30% and has longer range. Watch out for this attack ; stay on your toes, or you'll find yourself on Storo's toe.

Up Smash --- Belly Trampoline --- In this strange move, Storo leans farther back then you'd think possible, pulls in his stomach, and then thrusts it out at full power. This attack only hits foes who are actually coming from above. It only does 7%. It obviously has huge lag at the beginning and the end of the attack. It has low priority and little range, as actually bends over when doing it, making the top of the hitbox shorter than he'd actually be. With all these flaws, why use it? Well, simply, if executed properly, if it hits a foe falling on you from above, it can KO at ridiculously low %s. On stages with low ceilings, it can kill Mario around 25%. That's a big reward; still, this attack is just too hard to pull off anywhere but maybe in team battles.

Down Smash --- Sudden Collapse --- In an unpredictable attack that looks somewhat like his crouch, Storo jumps up into the air and drops flat on his back. This is a big hitbox that sends foes skipping along the ground in perfectly horizontal knockback. Since it takes time for Storo to jump up and fall down, and also to clamber back to his feet, this is yet another brutally slow Smash, not quite as useful as Forward Smash or as potentially powerful as Up Smash. It does 20%, though, and has good knockback. The large hitbox, again, can get foes who are trying to roll around Storo's feet.

>>>AERIALS

Neutral Aerial --- Inner Strength --- In a slowly executed move, Storo curls up, pulling in his arms and legs, then suddenly stretches, thrusting out and flexing his arms, suddenly extending his legs, and puffing out his chest. His whole body is a hitbox here, but each part has different properties. His fists do a nice 15% but not too much knockback; the soles of his feet are a nice spike that does 10%; his chest has awesome knockback and KO potential while only doing 4%. This attack has wind-up, yes, but it's still a very important part of Storo's game, with its many applications. It's definately the best of his meager aerials.

Forward Aerial --- Hulk Mouse --- Storo leans forward in midair, pulls his arm back, and then extends it with a grunt. His fist does 9% and OK knockback, but what with the windup and overall mediocre power of this move, combined, of course, with Storo's aerial weakness, I suggest passing on this one.

Back Aerial --- Crash Clap --- Storo leans so that he's parallel to the ground, then claps powerfully above his head. The clap itself does high damage - 15% - and has KO potential, but a small star shoots out from between his clenched palms, doing a mere 3% and flinching damage to foes who just barely escaped the clap itself. Though it may not sound like it, this attack has massive lag. An interesting point of note, though, is that if Storo hits the ground while using it, you can shift the control stick down to go instantly into an almost lagless crouch. This, of course, paves the way for a quick Down Tilt into a Smash attack. This is the move's best application, as it's too easy to beat Storo in the air.

Up Aerial --- Bicycle Kick --- Storo clumsily does a backflip, hitting foes with a stuck-out foot. This attack is slow and bulky, and rarely will you be able to complete before Storo hits the ground, ending in more lag for you. The pay-off is decent - 16% with the potential to KO with backwards knockback - but it's just so EASY for almost every character to dodge and then start comboing poor old Storo.

Down Aerial --- Corkscrew Headbutt --- Rather like Wario, Storo turns upside down and butts foes with his head. This has a small hitbox, does only 11%, has only liberal uses as it doesn't even spike, and, if he hits the ground before the move is complete, he will be buried a la Headbutt, letting the foe start an attack of his own. Even worse than his other Aerials. I warned you to stay on the ground, Storo - who do you think you are, Doc?

>>>THROWS

Grab --- In this nice-range grab, Storo leans down and grasps at the foe's ankles. If he catches someone in his long arms, he picks them up by the foot and holds them upside-down in the air in front of him. Pressing A makes him pummel them while they're just hanging there. Storo has a nice grab game to compensate for his weak Aerials and slow Smashes.

Forward Throw --- Lasso --- In this quite comical attack, Storo lifts them over his shoulder, spins them around so that they are no more than a blur, then tosses them forwards. This does a terrific 14%, but can't KO except at higher %s.

Back Throw --- Bum-p --- Storo drops the foe behind him and bumps them away. Pretty simple and straightforward. Has pretty good knockback, but not as much damage as his other throws, doing only 9%. It's pretty easy to chase the foe tossed like this.

Up Throw --- Faceplant Uppercut --- A brutal toss, as Storo slams the foe into the ground face-first, then throws them upwards. Has straight vertical knockback, but not enough to KO. Still, the damage is impreissive - 13% - and it may have a demoralizing effect on weaker foes to see their precious characters being brutalized so badly. Note that on foolish, inexperienced foes, this is the perfect set-up for an Up Smash - against light characters on small stages, these two moves may be all you need to make the world's fastest KO.

Down Throw --- Squash --- Storo drops the foe beneath him and essentially sits on them. Although it sounds simple, this is in fact Storo's most tantalizing toss, as, after sitting on them (to good damage but literally no knockback), he falls backwards into a crouch. Since the foe is right beside you, 10% more damaged, you can follow it up with a Down Tilt, tripping to them to set up a big hit.

>>>TAUNTS AND POSES

Up Taunt --- Storo pulls a large hammer out of nowhere, and chuckles a bit to himself as he holds it.

Side Taunt --- Storo draws a swashbuckler's sword, and swings it around once or twice before accidentally poking himself in the foot with it. He hastily puts it away.

Down Taunt --- In a strange taunt that actually has a practical use, Storo falls down onto his back and takes a quick snooze, "...ZZZ..." floating up from him. By holding down at the end of the taunt, this links - you guessed it - to his crouch and his Down Tilt. Nice way of tricking a foe into coming close, assuming that you're vulnerable.


Victory Pose #1 --- Storo poses in the foreground, flexing his muscles and grunting, then laughs heartily, slapping his belly.

Victory Pose #2 --- Storo walks in, carrying a hefty treasure chest on his shoulder. He chuckles a bit, then accidentally drops the chest on his toe, causing himself to fall over in a heap.

Victory Pose #3 --- Storo is sitting in the middle of the screen, then shuffles forward a bit so that you can't see the other characters for his massive bulk. He laughs a bit, pleased with himself.

Losing Pose --- Storo claps loudly, bringing his hands far apart before bringing them together.

>>>MISC

Entrance --- Storo tramples in from the distant background, whipping up a cloud of dust behind him.

Kirby Hat --- Kirby gains the eyepatch and the bandana with mouse ears sticking out the top. He gains the power to use Roly Poly, though his is obviously less potent, him being so much smaller.

>>>PLAYSTYLE

Storo is quite literally a tank. He can take a LOT of punishment without being KO'ed, as long as it doesn't come to aerial combat. Storo must keep both feet firmly planted if he's to stand a chance at winning: with his quick fall time, huge body, and minimal knockback, he's truly a combo-player's paradise.

Down Tilt is a very potent weapon. It's one of Storo's only ways of setting up a smash, which is important, as a Smash or two from Storo will end your game real quick. Speaking of Smashes, Forward Smash is a very potent weapon, and should be used quite often to keep your foes on their toes and fearful to approach from the ground. When a foe approaches from the air, you have the Up Tilt, or, if you're feeling really daring, the Up Smash.

An important trick to wield is the Squeak Squad Standby. This is Storo's only real way of controlling the stage, of forcing foes into close quarters combat, and of keeping pressure on the foe even from a distance. On small stages, Storo's Standby and Storo in general is obviously more dangerous.

Now, as Storo always comes out at 0%, it's crucial to take advantage of that beginning portion when you're at such low damage that most attacks will hardly faze you. Use that to try out bold and risky attack patterns, high-power attacks, and tilt combos. Keep your foe fearful of what you're up to, and they will, eventually, slip up, letting Storo mop up their remains.

>>>SWITCH TIME?

Storo has the strangest switch condition; he must be at 150% to go into Spinni; even if he's in the air, Spinni's ninja smoke bomb engulfs Storo and replaces him with the ninja in an instant. This isn't really that hard, when you consider just how heavy and easy to combo he is, but it makes things difficult for everyone. Ought you kill yourself before hitting that critical mass? Is the foe at high enough percents that it would be good for Spinni to come and land a quick finisher? Should you actually LET your foe combo you? Hmm, good questions all.

And for your foe, too, there is pressure. Do they want Spinni to come out? If they're a heavyweight who can't properly edgeguard Storo, perhaps they do, and will try their best to dish out as much damage as possible. Maybe they're a lightweight character who prefers edgeguarding and dodging Storo's clumsy attacks to chasing Spinni and being chased by Spinni. It really adds layers to strategy.

In any case, Spinni comes out at 150%; a high percentage indeed. This is when you must use all the aggression you have left; attack the foe relentlessly; hopefully he, too, is at a high damage after tussling with Storo. Hopefully he'll be too focused on trying to stop your attack to launch his own. The Squeak Squad is not an easy character to master, not at all.

...

Now for the extras that all the Squeaks have in common, starting with their Final Smash.

...

FINAL SMASH

Uh oh! The Squeaks have a Smash Ball! Suddenly, whoever it is raises a hand skywards, calling out to someone (Doc's "hand" being a mechanical arm). An explosion shatters the sky, and Daroach appears, floating in the center of the stage!


For fifteen seconds, you control Daroach while your character remains in the background. Daroach can fly, rather like Yoshi's Final Smash, is invulnerable, and has a simple but devastating moveset:

Neutral Special --- Triple Star --- Daroach draws a star rod (not THE star rod) and swings it, causing three stars to bounce along the stage for a few seconds. They have pretty good knockback and each do 8% if they hit someone. They bounce aroudn near the ground and vanish after a few seconds.

Forward Special --- Freezing Beam --- Swinging his wand, Daroach makes a thin beam shoot straight forward, across the whole stage. Compare to Dialga or Palkia, but thinner. If it hits someone, it dishes out 14% and freezes them for long enough for Daroach to come over there and follow up.

Down Special --- Bomb Attack --- Daroach flings a bomb directly at a foe who's not too far away. This bomb blows up abruptly, doing nice knockback and 12%.

Any A attack --- Wand Wham --- Daroach simply swings his wand like a bat. This, being his most basic and quickest move, does 10% and has OK knockback that can KO a foe after a few Stars and a Freezing Beam.

Bear in mind, though, that you don't control Daroach for long, and the foe CAN potentially run the whole time, so use your time wisely and rack up the damage if you're using Storo, go for a KO with Doc, and do both if you're Spinni.

ALTERNATE COSTUMES

Red Team --- Doc's moustache become bright red, Spinni become red, his cape yellow, and Storo, too, has his two colours reversed, his shirt and bandana suddenly blue. Strictly a functional change.

Blue Team --- Doc's moustache changes to blue, as does his UFO. This combined with his blue skin makes him look somewhat frozen. This bodes true for Storo as well, whose shirt and bandana become blue. Spinni, though, just changes the colour of his cape for a dramatic effect of blue on yellow.

Green Team --- Doc's UFO and skin becomes green, while his stache goes blue. Looks cool. Storo's shirt and bandana change, as does Spinni's cape.

Awesomeness change --- In their final, awesome costume, Spinni's cape become black, and his glasses are replaced by a ninja-style mask. He looks very much like an actual ninja, only rat-like. Doc, meanwhile, become green, and his swirly glasses are replaced with big, black, bug-like eyes. He look pretty much like an alien, although his blue moustache doesn't help the impression. Storo, meanwhile, gets a black-and-white style shirt to go with his red bandana and eyepatch, making him look like a true pirate. Ninja, alien, and pirate all in one, how could you go wrong?

SNAKE'S CODEC

Snake - Otacon, who are these guys?
Otacon - That's the Squeak Squad, Snake. There's Spinni, who's very acrobatic. He throws Shuriken.
Snake - Ninja stars?
Otacon - ...Yeah, ninja stars. Then there's Doc, who floats around in an Unidentified Flying Object!
Snake - You mean... a flying saucer?
Otacon - Yes, that's what an Unidentified Flying Object is, Snake! Of course, there's also Storo, who's a bit of a buccaneer.
Snake - ...
Otacon - Sigh... a pirate, Snake.
Snake - Otacon, you really need to learn to talk like a normal person.

MORE MISC

Symbol --- The Kirby Pop Star.

Victory Theme --- The Squad gets the recognizable riff of their own theme, linked here in its original, non-Brawl version.
 

SirKibble

Smash Champion
Joined
May 2, 2008
Messages
2,400
Wow... I'm impressed! That's a VERY well-done multiple-character... Um... Character. Go Sqeak Squad!

And I thought everyone should know, or rather, I want to tell them whether they want to know or not, that I've stopped just talking about it and actually started work on my Crono moveset. Might be a few days before I post him, though. Darn Aerials...
 

KingK.Rool

Smash Lord
Joined
Nov 26, 2005
Messages
1,810
Wow, that's a pretty big post, isn't it?

Anyway, now that's finally out of the way, I can make some comments on the most recent 'sets.

@Bass - A very nice moveset in general. Life Aurora is a very interesting concept, though my personal favourite part of the set is the "Get Ability", it really adds another level to his gameplay. Plenty of detail makes it easy to tell what he'd look like, and you even have a section for strategy! Very good job, although it doesn't hurt that it's a good character. ;)

@Rand - Looks exciting, I'm looking forward to the rest.

@Leonardo - I agree with MasterWarlord that your movesets are getting better and better, TWILTHERO. The pictures definately help Leonardo to live and breath like a real character. I think you did a good job of adapting a Teenage Mutant Ninja Turtle with interesting, dynamic attacks that stay true to his origins, so far.
 

MasterWarlord

Smash Champion
Joined
Aug 24, 2008
Messages
2,902
Location
Not wasting countless hours on a 10 man community
The squeaks moveset is very good, K. Rool, I only wish I had time to read the whole thing, but I'm very busy updating my web site. Looks great from what I've read so far though. I noticed you're no in the user group. Don't know it exists? Take this link.

http://smashboards.com/group.php?groupid=276&gmid=18571#gmessage18571

Edit: Sorry, I had something I copied and pasted to quote up. It's removed now.
 

TWILTHERO

Smash Lord
Joined
Aug 19, 2007
Messages
1,880
Location
Canada
Glad to see everyone likes my Leonardo moveset so far ^_^. I'll hopefully have it finished tomorrow (too lazy right now :p).
 

The Fail Tracer

The Universal Cosmic Tracer
Joined
Dec 28, 2006
Messages
4,181
Location
Beside myself
3DS FC
2337-5641-4371
Vyvyan Basterd


Vyvian Basterd, the freeze-dried punker from the hit sitcom "The Young Ones," has joined the Brawl!

Vyvyan is the most violent character in The Young Ones, occasionally displaying accomplishments of inhuman strength. He drives a yellow Ford Anglia with flames at the sides, and has a Glaswegian pet hamster named Special Patrol Group.

Stats (Out of 10)

Power: 7.9/10
Walking Speed: 4.1/10
Dash speed: 5.6/10
Range: 5.5/10
Projectile distance: Random(see neutral-B)/10
Drop speed/weight: 6.7/10
Size: 8/10
1st jump: 6/10
2nd Jump: 8/10
Crouch: 5.9/10
Traction: 6/10
Combo: 7.2/10
Wall jump: yes
Wall cling: no
Crawling: yes
Glide: no
Tether: no

A Moves

Neutral-A: Hammer - A regular hammer. This was used to pound Rik on the head in the episode "Nasty." [4%]
Forward-A: His side-A is his hammer again, but with more range and power added. [7%]
Up-A: Shovel - A shovel sweeps the air above Vyvyan as you use this attack. This shovel was used in "Summer Holiday" to smash out a window. [7%]
Down-A: Vyvyan throws a match below him and lights a fire around him. [5%]

Aerial A Moves

Neutral-A: Cricket Bat Spin - Vyvyan spins a cricket bat around in the air. [6%]
Up-A: Aerial head-bonk. He sure does have a hard head! [9%]
Back-A: A strong aerial kick. [9%]
Forward-A: Using his trusty hammer, he bashes the opponent on the head, spiking the opponent downwards. [10%]
Down-A: A very strong downward kick. In the episode "Bambi," this kick was used to destroy the floor in front of him, then a second time to knock the person below unconscious. [14%]

Smash Moves

Forward-A: Cricket Bat Swing - Watch out. Vyvyan is very strong with this bat. He has used it to knock people unconscious. [13%]
Up-A: Head Throw - Yes, he actually throws his own head into the air. In the episode "Bambi," he lost his own head on a train, but somehow got it back on his shoulders. [8%]
Down-A: Body-Slam [10%]

Attacks When Getting Back Up

To get back up when knocked down, Vyvyan uses the claw end of his hammer to pull himself back up. Watch out; it could hurt if you're in the way.

Specials

Neutral-B: Dynamite Throw - Used like Snake's grenades, but with more power. [17%]
Forward-B: Window Smash - Vyvyan takes a window out of nowhere and smashes it over the opponent's head. In the episode "Nasty," he actually pulled the window out of the wall and smashed it over Neil's head. [15%]
Down-B: Vyvyan straps a stick of dynamite to his head the first time you use this button combination. Now you can walk to wherever you want and do it a second time to explode the stick of dynamite. It does 5% to yourself, but is powerful and useful in many ways. In "Time," He did this to himself to try and cure his hangover. [19%]
Up-B: Vyvyan spins through the air with his chainsaw. [3%xeach time it hits]

Throws

Throws are normal, nothing special here.

Taunts

Up-Taunt: Faces the TV screen, giving the two-fingered salute.
Side-Taunt: Gives the two-fingered salute in the direction you pressed the D-pad and says, "Missed me, virgin!"
Down-Taunt: Drops his head, picks it back up, then puts it back on.

Final Smash

Vyvyan gets inside his yellow Ford Anglia with flames at the sides and drives around. You can drive around by pressing the control stick to either side, and the B button throws sticks of dynamite as you drive!

Other

Logo: A silhouette of Vyvyan's head.

Stage Entrance: Drives by in his yellow Ford Anglia.

Assist Trophies

Special Patrol Group

Vyvyan's pet hamster, SPG, bursts out of the assist trophy. He can fly to opponents and bite/headbutt them.

Vacuum Cleaner

A vacuum cleaner that Vyvyan "pepped up a bit" in the episode "Interesting." It is so modified and powerful that it can go places on its own. Roaming the stage, it sucks up whoever it runs into and the player must mash the buttons to free him/herself.


... I may work on this more tomorrow.​
 

pure_awesome

Smash Lord
Joined
Sep 17, 2007
Messages
1,229
Location
Montreal, Canada
KRool, I just finished reading the Squeak Squad post. It's amazing. The change mechanic is, to me, the most unique idea so far in the contest.

Very, very well done. Storo is definitely my favourite.
 

Chief Mendez

Smash Master
Joined
Mar 25, 2007
Messages
3,161
Location
Somewhere
SQUEAK SQUAD

Spinni switches to Doc when he scores a KO...

...Doc switches to Storo when he is KO'd...

...and Storo switches to Spinni when he reaches 150%.

It's a neat idea, but there are a bunch of issues with it's mechanical workings. Like you mentioned, you couldn't main any of them. I don't know about anyone else, but it sucks liking Squirtle so much, while having to deal with fatigue and auto-changing upon respawn. So for that reason alone, I probably would play as the Squeak Squad about as often as I play Yoshi.

Which is to say: never.

And what happens in a 1-stock match? The switching mechanic is (almost) pointless in that case. If you can't pick who you're going to start as...

Also, on a related note, does Spinni start out at 150% when he's switched to from Storo?

Plus the game they're from was boring amirite?

The actual movesets are killer/boss/totallyradical/waypastcool/etc., but it feels to me like maybe you're trying to innovate for the sake of innovation? The way you have it set up is definitely reminiscent of "a tag-team boss fight", but ask yourself: are most players really going to care about that if the character is so irritatingly difficult to get the hang of?
 

SirKibble

Smash Champion
Joined
May 2, 2008
Messages
2,400
Plus the game they're from was boring amirite?
:eek:

Was it really? Seriously? Like, no jokes. Was it really boring? Would it be boring if someone was an over-the-top fan of Kirby games?

I don't want to believe it...
:crying:
 

MasterWarlord

Smash Champion
Joined
Aug 24, 2008
Messages
2,902
Location
Not wasting countless hours on a 10 man community
Still haven't had time to read the massive squeak squad moveset, but I did read some on Storo, which seemed pretty well done. The entire moveset seems extremely detailed. Really though, with the switching mechanic all you're going to do is make people angry. Nobody likes stamina on pokemon trainer. You're robbing these characters from being used in the metagame. It's a shame. It's also a shame that storo can't use his weight to his advantage since he switches to spinni at 150%.

I've reworked my site to be more positive and have no rankings, and added my newest review of Koj's Gecko Moria. I highly recommend you read that set, and I'm going to blatantly advertise it here as it seemed to get ignored as all these other movesets were posted today along with the little competetive scuffle happening. Go give it a read. Use the link on my site in it's rating if you've lost place of where it is. It's on page 180.
 

Chief Mendez

Smash Master
Joined
Mar 25, 2007
Messages
3,161
Location
Somewhere
:eek:

Was it really? Seriously? Like, no jokes. Was it really boring? Would it be boring if someone was an over-the-top fan of Kirby games?

I don't want to believe it...
:crying:
I think it was. But then, I'm not a huge Kirby fan. I liked 64, Superstar, and loved Canvas Curse, but the others I just find derivative and uninteresting.

They're like the Dynasty Warriors of Nintendo. Squeak Squad was just too much of the same for me. :ohwell:
 

MasterWarlord

Smash Champion
Joined
Aug 24, 2008
Messages
2,902
Location
Not wasting countless hours on a 10 man community
Squeak Squad was too short and too easy, even for a kirby game, and that's saying something. I've completed it 100% twice, and I find it to be one of the worst in the series due to lack of content. While amazing mirror may be frustrating, it gives some challenge and originality to the franchise. Still, super star is by far the best game in the series, and soon it will be the remade and improved super star on DS.
 

SirKibble

Smash Champion
Joined
May 2, 2008
Messages
2,400
I think it was. But then, I'm not a huge Kirby fan. I liked 64, Superstar, and loved Canvas Curse, but the others I just find derivative and uninteresting.

They're like the Dynasty Warriors of Nintendo. Squeak Squad was just too much of the same for me. :ohwell:
Squeak Squad was too short and too easy, even for a kirby game, and that's saying something. I've completed it 100% twice, and I find it to be one of the worst in the series due to lack of content. While amazing mirror may be frustrating, it gives some challenge and originality to the franchise. Still, super star is by far the best game in the series, and soon it will be the remade and improved super star on DS.
:cry:

Oh, well, I'll probably try it out anyway, diehard Kirby fan that I am. I haven't played a Kirby game yet that I didn't like.

Super Star is the best, though, at least until KIRBY WII comes out! Whenever the heck that ends up being...
 

ducky285

Smash Journeyman
Joined
Mar 2, 2008
Messages
222
Location
Cicero, IL
Squeak Squad is disappointing. Actually, every Kirby game since KSS has been disappointing seeing as they had a great gameplay system and decided not to expand or build on it.

KDL3 was pretty cool, though, because of the helpers... but it was still too easy and kinda shallow. :/
 

SirKibble

Smash Champion
Joined
May 2, 2008
Messages
2,400
Squeak Squad is disappointing. Actually, every Kirby game since KSS has been disappointing seeing as they had a great gameplay system and decided not to expand or build on it not as good as KSS, but still awesome.

KDL3 was pretty cool, though, freaking awesome, because of the helpers... but it was still too easy and kinda shallow. :/
Fix'd.

Don't diss. ;)
 

KoJ

Smash Journeyman
Joined
Aug 16, 2008
Messages
317
Moria isn't too underpowered. Doppelman is like a gigantic extended hitbox, and his u-B, while easily punishable for recovery, has infinite range and can be used as a "counter." Also, his shadow bats make him pretty much immune to projectile spam.
View my moveset on page 180
Thanks for the review, though. Yeah, the stage's description was a little rushed. :chuckle: Also, thanks for the not-so-subliminal advertising.
View my moveset on page 180
Hamm is awesome. By favorite attack is the side-B, which reminds me of Meouth's pay day. His B-up, although taken from the movie, is a bit generic in appearance, but its ability to spike at the beginning was making me drool too much to care. His cork gun is great, but his army soldiers confuses me... Are there more army soldiers when he finishes
View my moveset on page 180
Ridley's recolorings are good. It's too bad I'm not good at that stuff.:urg:
View my moveset on page 180
Now, it's off to Kuma! The bear does not like it when I'm late.
View my moveset on page 180
 

ducky285

Smash Journeyman
Joined
Mar 2, 2008
Messages
222
Location
Cicero, IL
Fix'd.

Don't diss. ;)
My opinion, thanks.

Given how much KSS was a leap ahead from the previous games, it's pretty obvious why someone like me would be a bit perturbed by DL3, which took a HUUUUUUGE jump backward in terms of gameplay.

Kirby 64 was the same deal, lots of power combos but no real variety in the way you could attack. Amazing Mirror was ok and was an interesting concept but the gameplay was still shallow as all hell. Squeak Squad is somewhat of a return to the KSS style but still fell short IMO.

All I'm saying is, I was expecting a lot more out of Kirby after KSS essentially redefined the combat system. They could have done a LOT more with it and they decided to scrap it for no good reason, only to reintroduce a gimped version of it. Looking at it from that perspective, can you understand my disappointment?

Keep in mind that I'm just as much a Kirby fanatic as you. :p
 

SirKibble

Smash Champion
Joined
May 2, 2008
Messages
2,400
My opinion, thanks.

Given how much KSS was a leap ahead from the previous games, it's pretty obvious why someone like me would be a bit perturbed by DL3, which took a HUUUUUUGE jump backward in terms of gameplay.

Kirby 64 was the same deal, lots of power combos but no real variety in the way you could attack. Amazing Mirror was ok and was an interesting concept but the gameplay was still shallow as all hell. Squeak Squad is somewhat of a return to the KSS style but still fell short IMO.

All I'm saying is, I was expecting a lot more out of Kirby after KSS essentially redefined the combat system. They could have done a LOT more with it and they decided to scrap it for no good reason, only to reintroduce a gimped version of it. Looking at it from that perspective, can you understand my disappointment?

Keep in mind that I'm just as much a Kirby fanatic as you. :p
The fixing thing was a joke anyway.

I completely understand what you're saying, and I feel the same in a lot of ways. I wish the variety (not to mention the variety of copy abilities that haven't seen much action since... Ninja, anyone?) of Kirby Super Star had been kept in other games, but it wasn't. Thing is, I still loved the games, despite.

The trailers have made Kirby Wii seem like it will have the varied attack methods again, though, so I have really high expectations for that. Plus, they brought back the helper system, now expanded to four players. So I fully expect to see Super Star finally beaten out, and I couldn't be more excited about it. :)
 

ducky285

Smash Journeyman
Joined
Mar 2, 2008
Messages
222
Location
Cicero, IL
Yoyo, Plasma, Wing, Mirror and Paint get no love. :/

I'm still holding hope that there will be a 25 hour epic adventure game starring Kirby in the near future with an expanded KSS style of combat. I doubt that'll be Kirby Wii but I'm hoping it'll be reasonably close.

I should totally draw up a design plan and send it to Sakurai. I have SO many ideas. :D

EDIT: Before you even say it, I didn't mention Jet because Jet sucked donkey phallus hehe.
 

kitsuneko345

Smash Ace
Joined
Dec 20, 2007
Messages
562
Location
*sending Sundance lots of apple pies on Pi Day, as
If I could read the squeak squad's moveset in one go, i'd die of thrist. Seriously though, i can't really read it as of know, as i am on a wii typing this sad attempt of a post.

Anyway, don't expect my next character Ouendan anytime soon. It'll probably be judge-able in about 2 weeks, and even then, it'll probably not be complete. I will let you in on some secrets, though:

Like Wario, he is "special", but unlike Wario, his "special" is way better. If you don't know what I mean, read the next sentence.

There will be 24, 30, or 36 costumes, but you will start off with 4, 5 or 6, respectively.

There are two final smashes, with one done under certain circumstances.

There is an assist trophy, about 52 trophies, more stickers, and a stage.

The Stage will have a feeling like lylat cruise and will probably have many songs (about 45 is the maximum at this point, but this will probably lessen down to about 15-30.)

This is my most committed work ever since my first character in MYM 2.0
Hariyama.

I'm expecting a lot of praise for this, but I'm not expecting "Dracula" status, although i could hope.
 

KoJ

Smash Journeyman
Joined
Aug 16, 2008
Messages
317
The sheer amount of effort put into it will give it Dracula status. 52 trophies? Don't you have a life?:laugh:

Kidding, kidding.:p

Where is Quendan from?
 

KoJ

Smash Journeyman
Joined
Aug 16, 2008
Messages
317
Thanks Mendez.

How did you manage to get 52 trophies from one game?
 

kitsuneko345

Smash Ace
Joined
Dec 20, 2007
Messages
562
Location
*sending Sundance lots of apple pies on Pi Day, as
"Ouendan"

They're a troop of cheerleaders that go about Japan, cheering people on to do their best in times of need. The Japanese predecessors of the Elite Beat Agents.
What he said.

D amn Wii, you being so slow.

Angry at the mistake of using the Japanese word Ouendan with a Q, even though I'm taking Spanish!!!

Actually, there is a sequel to Ouendan. Both games are very hard though. Imagine tapping, dragging, and spinning to a specific beat of the full metal alchemist opening. Yes, READY STEADY GO is in the first ouendan.

Anyways, Even though I said 52, it was an estimate. I will say that three trophies will be an ability of the ouendan, 31 will be of the characters saved by the ouendan, one will be of the assist trophy, two will be of the final smashes, one will be of a cat, and six of them are a secret unless you've attention to the last post i made.

I'm not going through descriptions though (unless I have the time at the end of my next moveset
Delibird.
).
 

SirKibble

Smash Champion
Joined
May 2, 2008
Messages
2,400
Ninja was in Kirby 64.

O SNAP--You've just been shown up by some guy who's only played four Kirby games.
Fire, Needle, Cutter, Bomb, Ice, Spark, and Stone. No Ninja.

I'm hoping you meant Squeak Squad, since it actually appeared there. In case you are referring to Cutter + Bomb in Kirby 64... That is NOT Ninja! :ohwell:


That's Ninja. It's appeared in Super Star and Squeak Squad, but I haven't played Squeak Squad, and either way, it's still an underappreciated copy ability. As are Yo-Yo and Mirror, and as Ducky mentioned, Plasma and Wing (even though those did appear in Air Ride, and don't anybody tell me that game sucked, or I'll castrate you with a rusty spoon). Air Ride shoulda had Jet, too... Because it didn't suck anything's anything. I love Jet... :)

I have a whole idea for how a Kirby game should be, having multiple ways to use every power, the shielding mechanic from Super Star, the Helper System from Super Star, and taking it into 3-D. Too bad we can't submit these kind of things, I'd love to, and I'm sure fanatics like us have ideas that would really move things in a positive direction. :cool:

[/WayOffTopicRant] :ohwell:
 

LUVTOY77-ROGUE WIREFRAME

Smash Champion
Joined
Jul 26, 2006
Messages
2,372
I think it was. But then, I'm not a huge Kirby fan. I liked 64, Superstar, and loved Canvas Curse, but the others I just find derivative and uninteresting.

They're like the Dynasty Warriors of Nintendo. Squeak Squad was just too much of the same for me. :ohwell:
I'm butting into a conversatioon, I know! Sorr but I wanna voice my opinion as well :laugh:

Squeak Squad seemed to EASY for me.... am I right?
So did New Super Mario Bros. :/
 

Chief Mendez

Smash Master
Joined
Mar 25, 2007
Messages
3,161
Location
Somewhere
Kirby throws a Ninja Star forward, faster than the eye can see (much as a Ninja might do). Regardless of the fact that it explodes, that's basically Ninja. Whatever it's called, I think we can all agree that the next Kirby game really needs to pull from Kirby 64 more. Refrigerator and "giant-rock-attached-to-lightning" are very under-appreciated copy abilities. :bee:

LUVTOY77-ROGUE WIREFRAME said:
So did New Super Mario Bros. :/
Start, LRLRXXYY, baby. :bee:
 

KingK.Rool

Smash Lord
Joined
Nov 26, 2005
Messages
1,810
SQUEAK SQUAD

Spinni switches to Doc when he scores a KO...

...Doc switches to Storo when he is KO'd...

...and Storo switches to Spinni when he reaches 150%.

It's a neat idea, but there are a bunch of issues with it's mechanical workings. Like you mentioned, you couldn't main any of them. I don't know about anyone else, but it sucks liking Squirtle so much, while having to deal with fatigue and auto-changing upon respawn. So for that reason alone, I probably would play as the Squeak Squad about as often as I play Yoshi.

Which is to say: never.
Ah, see, that's a difference in philosophy. Personally, I like all three of the Pokemon and play with them equally without getting annoyed. I conceived of Squeak Squad as exactly that; a character who's forced to be three in one in exchange for slightly upped stats to each individual character.

And what happens in a 1-stock match? The switching mechanic is (almost) pointless in that case. If you can't pick who you're going to start as...

Also, on a related note, does Spinni start out at 150% when he's switched to from Storo?

Plus the game they're from was boring amirite?
1-Stock Match? Pfft, who plays 1-Stock Matches?

...Just kidding. Yeah, the switching mechanic is useless there, but since you start with a random character, and I assume you're going to play multiple times, you're probably still going to get to experience all three characters.

Yep, Spinni starts at 150%.

And yep, Squeak Squad was (IMO) one of the weakest of the series so far, sadly, for all the reasons already mentioned.

The actual movesets are killer/boss/totallyradical/waypastcool/etc., but it feels to me like maybe you're trying to innovate for the sake of innovation? The way you have it set up is definitely reminiscent of "a tag-team boss fight", but ask yourself: are most players really going to care about that if the character is so irritatingly difficult to get the hang of?
Well, I sat down and thought to myself; how could I make switching different while also making sense with the characters? It wouldn't psychologically make sense to me if they could switch at will: they're not Pokemon, after all. I considered making each of them shift after being dealt a certain amount of damage, and then wound up with my current concept. I don't really think it's so much more difficult than mastering Pokemon Trainer.

Anyway, I just couldn't resist making a triple character that was a pirate, a ninja, and a UFO all in one.

My next moveset is a return to basics, anyway, after how complicated Grim Reaper and Squeak Squad were. I haven't actually started, but I'm thinking.

Kirby64isthebestKirbygameFireworksFridgeandMeltingIcecubeFTW
 

Meadow

Smash Apprentice
Joined
May 4, 2008
Messages
197
Location
Herndon, VA


The Bard has entered the fray.

Note : The Bard has no name. It's up to you to give her a name. If you don't enter a 5 letter nickname into the slot, then the name of the Bard under her character icon will read, Bard. If you DO enter or use one however, that replaces the Bard. You can switch names as well.

Background Information :

The Bard is from Caballa Island in a popular online MMORPG, Trickster Online. She's a 2nd job character, her prior job being a Librarian. She wears a Sheep costume, as it is designated to do so for you to enter Caballa Island / A.K.A. the world of Trickster. She can use a large variety of elemental spells, and can choose 2 of 5 elements to master. (Fire/Lightning, Lightning/Water, Water/Wind, Wind/Earth, Earth/Fire) As you can see, the elements can be combined in 5 different ways. Once you choose an element, the elements that are not adjacent to the element you chose will be blocked to you forever. The Bard can then advance to a Soul Master or a Witch at Level 130 and TM Level 120.

How to Unlock : Use Zelda, Pit, Pikachu, Ivysaur, and Squirtle 10 times.

Unlocking Notice : A spell user from Caballa Island, the Bard has joined the Brawl!

Wiimote Sound : A musical chord on a Harp can be heard.

Contents :

I. Pros & Cons [PRCNS]
II. Playstyle [PLYST]
III. Statistics [STATS]
IV. Standard Attacks [STDAT]
V. Smash Attacks [SMSHA]
VI. Aerial Attacks [AIRAT]
VII. Grabs & Throws [GRBTH]
VIII. Specials [SPCLS]
IX. Final Smash [FNLSM]
X. Extras [EXTRS]
XI. Appearance [APRCE]
XII. Stage & Music [STGMS]
XIII. Taunts [TANTS]
XIV. Victory & Losing Poses [VICLS]
XV. Costumes [CSTME]
XVI. Trophies [TRPHY]
XVII. Assist Trophy [ASTPH]
XVIII. Snake Codec [SNKCD]
XIX. Other Information [OTRIN]


Pros & Cons :

[PRCNS]

Pros :

-Has projectiles
-Can freeze opponents
-Has 2 spikes
-Quick attacks
-5 different elements
-Can reflect projectiles (Nair)

Cons :

-Lightweight
-Attacks feel a bit awkward
-Low Edgeguarding abilities
-Bad jumps

Any more Pros or Cons? Please tell me. :]

Playstyle :

[PLYST]

The Bard has a very fluent playstyle. Her attacks feel a bit off, but you can connect them easily once you get the hang of her. The Bard may have projectiles, but she is more of an aggressive type rather than a camper. The Bard is perfect for those who like Zelda, as their characters are remarkably similar. Her rolls and dodges are a bit slow, but her aerials and tilts come out very quick. It's best to do an Fair (Water blast, has the same effect as F.L.U.D.D. and Squirtle's Water Gun, however with damage) on an opponent and quickly follow up with a down tilt, followed by an up tilt.

So it'd be : (Fair) - Down Sweep (Can Spike/Causes a set amount of knockback), Up Tilt.

Another great attack that can catch opponents off guard is : Bair (Earth Vine) followed by a Dair (Fire Spike).

Statistics :

[STATS]

Power: 6/10 (Average)
Weight: 4/10 (A bit heavier than Peach)
Walking Speed: 6/10 (Average)
Dash Speed : 7/10
Fall Speed: 5/10 (A bit floaty...)
Size: Roughly the same height as Peach/Zelda
Jumping: 5/10 (Average; her first jump is the same as Zelda's; her second is a bit higher than Peach's. And trust me, Peach has the WORST second jump in the game.)
Crouch: 7/10 (Can dodge some small projectiles, such as Fox's Lasers)
Traction: 7/10 (Normal)
Projectiles : 8/10
Number of Jumps : 2
Wall-jump: No
Wall Cling: No
Crawl: No
Glide: No
Tether: No

Standard Attacks :

[STDAT]

A : Harp Swing – The Bard swings her harp to the right, having the same range as Zelda's standard A attack. It's a good 'Get away!' move, but it can't be spammed. (Average Range, Little Knockback) [3%] It lags a bit at the end.

When to Use : Anytime when your opponent is vulnerable. Her jabs may not be the fastest, but it does some pretty good damage/knockback.

A – A : Double Harp Swing – The Bard swings her harp to the right, then back to the left again. Same range, knockback, etc. (Average Range, Little Knockback) [First Hit : 3%, Second Hit : 3%] The only difference is that this doesn't have as much lag at the end as Harp Swing. It's better to do both hits rather than one, obviously.

When to Use : Anytime when your opponent is vulnerable. You can jab cancel after this for even more mindgames.

A – A – A : Triple Harp Swing – The Bard swings her harp to the right, then to her left, then finally jabbing the opponent with her harp. (Above Average Range, Little Knockback) [First Hit : 3%, Second Hit : 3%, Third Hit : 4%] The opponent can DI out of the Bard's A-A-A combo, so you won't be guaranteed to get the last hit. This is just another generic A-A-A combo, nothing special/interesting.

When to Use : Anytime when your opponent is vulnerable. The damage is great, simply because you can do 10% damage in the space of 1 second, maybe a bit more.

Forward Tilt : Ditz – The Bard turns around, her handbag swinging and hitting the opponent as she does so. This is a pretty fast attack, and isn't really punishable. Has great range. (High Range, Average Knockback) [9%] It's very predictable though, despite how fast it comes out. Usually people will powershield the attack.

When to Use : Whenever your opponent keeps using dash attacks (I'm looking at you, Sonic.), if you predict when they're going to dash into you, you can whack them before they hit you. This goes through most dash attacks, though some will still get through, such as Snake's, Sonic's, Ness's, and the other characters that have a large hitbox for their dash attack.

Other Comments : Like some of the other Forward Tilts, you can aim the bag downwards/upwards a bit while tilting it. Use this to your advantage, it might catch the opponent by surprise.

Down Tilt : Sweep - The Bard sweeps the floor with her harp, using both hands. Same range as Zelda's down tilt. It's pretty fast, but most of Bard's attacks are like that. It can hit someone on a ledge/spike them from a ledge, so whenever you see someone edgehogging, this attack is the best option. (Average Range, Average Knockback) [8%] Despite it's weak look, it can actually spike someone pretty far. You'll be able to net a free KO if the person's damage is 89% or higher when you spike them from the ledge. (This is based on the edges and boundaries on Final Destination; it'll vary from every stage/ledge)

When to Use : Like most Dtilts, they're underused. Sweep is very good for surprising the opponents, and it spikes as well. The spike hitbox will be in the direct center of the harp. You can knock off edgehoggers easily with this move, and you can use this to lead into a Utilt at low percentages. This is not a very good KO move, but hey, at least it sends the opponent into the air, where most of your KO moves are used in.

Other Comments : People tend to watch out for this move; they know that it's a viable spike when they're on the ledge and always scrabble around to avoid it. Use this as an advantage and use a Down Smash or some other fast attack that cannot be punished easily. The harp has longer range than most would expect, but it cannot trip, which is bad. The distance they're shot from is erm...inescapable? You can't DI out of the attack when you're getting hit UP into the air, but one you start dropping, you can DI or attack. So, a good way to use this is to immediately use an Up Tilt or Up Smash once you use this on them at low percents; at high percents, this is not a very good KO move and there are much better ways to KO an opponent using one of your other moves.

Up Tilt : Angel Wings – The Bard raises her harp upwards, standing on her toes, damaging anyone who touches it. You can sweetspot this attack, strangely enough. If the opponent touches the very tip of the harp, or the Angel Wings, then you do 2% more damage than usual. (High Range, Average Knockback) [9%] This comes out much faster than her other tilts, and it's not that predictable, due to the fact that it comes out so quick.

When to Use : Has great priority, comes out quick, can be sweetspotted, has a bit of a disjointed hitbox...sound like any other tilt? [Snake's Utilt comes to mind.] Though this move may seem broken, it's not really that useful compared to her other attacks. It's great for when you want to give some quick damage, but other than that, the only other time you'll use this is when you Dtilt them. Most people tend to go for the Usmash whenever someone is above them rather than the Utilt, out of habit.

Other Comments : The hitbox stays out longer than expected, but the damage is less when you hit them at the end as she retrieves the harp. If you want to KO someone, use the Up Smash instead of this. It's not very powerful.

Dash Attack : Jab – The Bard jabs the opponent with her harp. Self explanatory. (Average Range, Average Knockback) [8%] Has a bit of lag at the end. It has lovely knockback though, but you can't spam this efficiently.

When to Use : Use it cautiously, for it will leave you very vulnerable if you miss. I'd rather do a hyphen smash, but that's just me.

Smash Attacks :

[SMSHA]

Forward Smash : Critical Hit – The Bard spins in a circle and jumps, clutching her Harp as she does so. She hits the opponent on top of the head, hard. It has a bit of start-up lag, but it's one of her most powerful attacks. She slowly turns while she's charging it. This smash can also spike an opponent, has a long hitstun when used on the ground, but not much knockback. Great for when the opponent is stunned. (Average Range, Little Knockback) [Uncharged : 12%, Fully Charged 19%]

When to Use : The only time you'll EVER use this is when the opponent is stunned or frozen or some other thing. This is her most powerful spike, but that's the only thing it can do; spikes. And like most spikes, it comes out relatively slow, leaving you vulnerable/predictable. This attack has one of the longest hitstuns in the game though, so that's a plus.

Other Comments : Chances are that most inexperienced players will spam this move, causing them to be vulnerable for at least half of their gameplay (Okay, maybe that's a bit of an exaggeration, but it's semi-true.). You should be using this smash the least out of your other ones, and only when you are almost 100% sure that you can land this should you use it. If you miss, then...have fun being frustrated. The Smash's spike is the 10th strongest in the game,

Down Smash : Treble Cleft – The Bard plays her Harp for a third of a second and two treble clefts the size of a Warp Star shoot out from both sides. Has low range, but great knockback. Great for pushing people away. (Average Range, Very High Knockback) [Uncharged : 10%, Fully Charged, 17%]

When to Use : This'll be your primary smash. It comes out quick, has great knockback, covers both sides, and has very good range. Use this whenever your opponent sidesteps/anticipates an attack, for this will throw them off.

Other Comments : Not only does this attack look good, the Down Smash has exciting range (That doesn't make any sense, does it?), but low damage. If you run and stop, and then use the Down Smash, you will slide a bit on the ground, as if you were glide-tossing an item.

Up Smash : Mana Arrow – The Bard shoots a small arrow off of her harp. The arrow is about the size of a Star Rod, and appears on top of the Bard's head. It doesn't really move though, so that limits it a bit (If it DID move however, then it'd be horribly broken). The Mana Arrow will slowly increase in length as you charge it up however, so it doesn't have the length of a Star Rod immediately...once you charge it up completely, it'll have the length of a Star Rod. If you just use the C-Stick to do this Smash, then the range of the Arrow be so small that the opponent has to make direct contact with the Bard in order for them to get hit/damaged. It is Average in everything except for it's very high damage. It's one of the Bard's primary kill moves. (Very High Range, Average Knockback) [Uncharged : 14%, Fully Charged : 21%]

When to Use : This attack is also very predictable, but it has some nice range and damage. You can kill characters off the top pretty easily with this, but use it sparingly, because it'll leave you a bit vulnerable at the end.

Other Comments : It is recommended that you charge up the arrow when using this Smash attack. If you don't, the range is drastically reduced, but the KO potential and knockback is not diminished. Try not to use this so often.

Aerial Attacks :

[AIRAT]

Neutral Air : Seal of Wind – The Bard raises her knee a bit, her fingers playing on her harp. A faint gust of wind immediately appears around the sides of the Bard, protecting her from harm while slicing her opponents as well. This can reflect projectiles. It has a bit of start-up lag (It takes .3 seconds to use), as the Bard chants the spell, which makes it hard to use as a reflector. The distance it reflects the projectiles isn't much, it's similar to how far Nayru's Love reflects a projectile.(Low Range, Low Knockback) [7%]

When to Use : Predict an oncoming projectile and shorthop; then use Seal of Wind. There, reflected and nice damage as well. You can short hop and use this attack, and it'll come out right before you land.

Up Air : Seal of Thunder – The Bard raises her hand, her palm facing upwards. Her lips move soundlessly and a small lightning bolt appears in the palm of her hand, stunning anyone that touches it. This comes out quick and is one of the Bard's kill moves. Has the same power as Zelda's Up Air. The opponent has to be moderately close though, in order to get hit by the full effect of the thunderbolt. This is the Bard's only aerial that has a disjointed hitbox. If the opponent is hit by the...disjointed hitbox, then they will just flinch in mid-air and take 4% damage instead of 9%. (Low Range, Average Knockback) [9%]

When to Use : Mix this up with your Up Tilt and Up Smash. All three of these have great priority and can KO an opponent easily.

Other Comments : This attack is so similar to Zelda's Up Air that it's a bit disturbing...same KO power, same range, and most of all, same element! (Fire and Thunder!)

Down Air : Seal of Fire – The Bard kicks her foot out, stomping her foot on top of them. However, a her foot has a faint fiery aura around it, burning the opponent as well. This can spike, but like most other spikes, it comes out pretty slow. (A bit slower than Ness's Dair) It's a bit tricky to air dodge this move...and even if you don't get spiked, you still get some pretty nice knockback and damage. (Average Range, Very High Knockback) [11%]

When to Use : A nice alternative for the FSmash. This one doesn't leave you as vulnerable and much more easier to land. Don't you just LOVE the feeling of successfully spiking an opponent?

Back Air : Seal of Earth – The Bard swings her harp behind her, and a small vine entwines itself around the harp instantaneously. If the attack is sweetspotted correctly, then the opponent will not only get more damage than usual, but will get a flower on his/her head too. The flower lasts for 4 seconds, unless you successfully sweetspot the harp again on the opponent, causing the flower to grow even more. You can get the flower to the maximum size (It'll be devastating...) but it's very hard to do it. This is the Bard's only multi-hitting aerial. It will hit 3% per hit, 2 ~ 5 hits total depending on how you hit the opponent. Sweetspot : Very tip of the harp (Average Range, Average Knockback) [3% Per Hit] This aerial comes out fairly quickly, but not as quick as some of the Bard's other moves. This is a great damage-racker, though not a good KO move at all.

When to Use : It comes out quick, has great damage, and is her only multi-hitting aerial. Think of it as a debuffed form of Mr. Game & Watch's Turtle, except with the chance of getting a flower on the head.

Forward Air : Seal of Water – The Bard puts her harp between her arm, then shoots a small jet of water through her palms. The range is the same as her Up Smash, or Mana Arrow, fully charged. Pretty much an average attack, though this aerial is a bit slower than the others. (Very High Range, Average Knockback) [10%] This has a 5% chance of freezing her opponent as well. This is probably the Bard's most broken aerial, seeing as the range is ridiculous and has a chance of freezing the opponent, but it's her slowest aerial.

When to Use : Leads into some other attacks very nicely, the low knockback and the ease of the use.

Grabs/Throws :

[GRBTH]

Grab : The Bard grabs the opponent with her left hand. (Average Range)

Dash Grab : The Bard runs and tries to grab the opponent with her left hand...pretty much the same thing as her normal grab, except that her dash grab has a little more range than her normal one. If the Bard misses, then she'll stop immediately, clutching her harp in both hands, a shocked look on her face, as if she was just about to trip. (Above Average Range)

Grab Attack : The Bard puts her harp between her arms while she's holding the person, and then slaps the person's face. [2%] (Low Speed)

Forward Throw : Disappointed - The Bard shoves the opponent away. Has a 10% chance of tripping the opponent. (Average Knockback) [9%] This has no noticeable lag and is not easily punishable.

When to Use : This should be your main throw, and if you're facing the other side of the edge, then use this throw and dash grab again. Chances are that they'll get grabbed again/trip, so you can get some easy damage.

Back Throw : Tennis Harp - The Bard puts the opponent behind her and whacks them in the face with a harp. (High Knockback) [10%] It comes out as fast as Peach's back throw.

When to Use : Great knockback. It has about the same knockback as Peach's Tennis Racket (Unsweetspotted, of course. If it had the same knockback as a sweetspotted Tennis Racket...it'd be almost as broken as Ness' Bthrow.) It's best to use this when near the edge.

Up Throw : Three Cheers for the Victim – The Bard throws her opponent up into the air, with 3 notes coming out of her harp and zooming straight into her opponent. The opponent gets knocked to the northwest of the Bard, assuming that she faces the right while holding the opponent. (High Knockback) [13%]

When to Use : This is good for any situation, really. Most of the Bard's gameplay focuses in the air, and you can use a quick Bair when they get shot back by the notes. Great way to rack up damage, but don't use it in a Free For All (3 or 4 players). The duration of the throw takes a while, and opponents can intercept it easily.

Down Throw : Trash – The Bard places the opponent on the ground, then kicks them in the stomach. The opponent slides close to the ground, almost touching it. (Average Knockback) [11%]

When to Use : The throw is average in all aspects, but there is one hidden use that makes it very useful; at the very edge of the edge, if you use this throw, they'll rocket downwards, as if they were hit by a spike. It isn't nearly as powerful as a real spike, but it'll surprise opponents and demolish those with horrible vertical recoveries (Donkey Kong, Bowser, Peach).

Specials :

[SPCLS]

Neutral B : Cleaving Terra – The Bard swings her harp forward, a small vine wrapping itself around the harp. The vine then shoots out of the tip of the harp, and goes back into the ground. It has the same range as a Beam Sword, and anyone that touches the vine will get damaged. The same goes for the harp. However, if the vine hits an opponent while it's going into the ground, the opponent will be stuck in the ground as well, as if they landed in a pitfall. The entire attack lasts for 3 seconds. The opponent will be stuck in the ground until the attack ends, which is when they can mash the jump button, trying to escape. This is the Bard's slowest special, but it has some very nice effects to it. (High Range, Low Knockback) [11%]

When to Use : Cleaving Terra is a slow attack, but that's how it is. It's part of the Earth. Instead of ripping apart the land like what the spell really does in Trickster Online, this one is a much more gentler and weaker version. Cleaving Terra would best be used when your opponent is busy fighting someone else in a free for all, or if they're just not paying attention/vulnerable. Cleaving Terra has the same effect as the Bucculus/Metroid (You know, Bucculus/Bucculi/Whatever are those enemies that suck on you in the SSE, hidden under the ground). Cleaving Terra also traps the person in a pitfall, which is nice, but that's really all the attack does. It leaves you very open.

Other Comments : Cleaving Terra is basically a buffed up version of her Back Air, though some might say that it's worse than her Bair...Cleaving Terra does less damage than Back Air (If the Bair hits the opponent 4 ~ 5 times), but the pitfall effect is useful, because you get an opportunity to use another attack, or use Cleaving Terra again. It's hard to master this attack, but once you do, it'll make your opponents grind their teeth in frustration.

Side B : Shard of the Glacier – The Bard plays her harp for a third of a second and an icicle shoots out of her harp. This damages anyone hit by the harp or the icicle, and is considered a projectile (The icicle). It goes as far as Wolf's Laser/Kirby's Final Cutter, and can whittle away an opponent's shield easily. The projectile is about the same length as Toon Link/Link's arrows, and has a 8% chance of freezing the opponent. It has virtually no start-up lag, but has some ending lag as she sets her harp down. If the opponent touches the Bard while she's chanting the spell, then they receive 3% damage and the chance of being hit by the icicle as well. (Very High Range, Average Knockback) [11%]

When to Use : Approaching, camping, etc. Just use it like you would with a normal projectile. The icicle will slightly tilt in a direction in the direction you fire it, but it'll just shoot past horizontally in the air. The shard may be a bit slow, but it's much more useful than it looks. The shard comes out during the first few frames of the attack, so if you use it in mid-air, you can cancel the animation. The Shard is good for any situation. It may not be the best, but it's good.

Other Comments : It's so shiny. I wonder what'll happen when Kirby swallows it? Kirby CAN swallow this projectile, and it'll have the same effect as Kirby eating a Bob-Omb/other explosive item. It'll do 4 ~ 5% damage to him. If Ness absorbs this projectile, he'll heal himself by 11%. If Lucas absorbs this projectile, he'll heal himself by 15%.

Up B : Wind Blade – The Bard conjures up two wind...blades...and jumps on top of them, giving her a high vertical boost. The blades are the size of a warp star and damage anyone that touches it. The blades last for 2 seconds if they are used on the ground, but if used in the air, then the blades shoot out in opposite directions and are considered a projectile. This doesn't give the Bard any horizontal distance at all, so you'd better use DI. The distance the blades shoot out is roughly half of the distance of Shard of the Glacier. If this attack is reflected, it will not hurt the Bard, so that's a definite plus. The opponent can use their double jump/Up B special if they get hit by the attack if they're in the air, and if the opponent lands on the wind blade, they receive a very high boost, about the same as Sonic's Spring Jump. This only applies to the opponent(s), not the Bard. The Bard herself only gets about half of the distance of the Spring Jump. [Average Range (On the ground), High Range (In the air), Average Knockback] [8%]

When to Use : Wind Blade is your primary 'Escape' attack. You can escape the midst of the battle, along with damaging others in the process. The Blades will never hit you if they're reflected, so use them whenever you want. Just be careful/cautious when using this move; it'll leave you vulnerable in mid-air against the more aerial opponents (Meta Knight, Luigi, etc.).

Other Comments : One white/gray stages, the blade blends in with the background, making it almost invisible. Oh, and try not to let the opponent get a free ride on the wind blade. Even if the chances of them landing on it is very small.

Down B : Phoenix Shockwave – The Bard sends out a small shockwave with some fire on the trail, laying on her knees. The fire trail looks similar to how the remains of the fire look after Mario's Final Smash. Depending on which side of the shockwave the opponent is hit, they can either be burned or electrified. This is considered a projectile, and has the same range as a charged up Star Rod attack. The shockwave has a 5% chance of stunning the opponent. If used in the air, a small spark appears on the Bard's shoes, does the same amount of damage, has very low range (Must have direct contact), comes out much slower and has a 10% chance of stunning the opponent. So it's much better to use this on the ground, because it IS a shockwave, but you have a higher chance of stunning the opponent if you use it in the air. The shockwave is easily predictable, because the Bard spends three-fourths of a second sending the shockwave out. (15% chance in the air)(Very High Range, Average Knockback) [12%]

When to Use : For using this on the ground, it's much better to just use Shard of the Glacier. It's faster, less predictable, and harder to shield. In the air however, it's a good alternative for the Dair, seeing as they have remarkably similar effects, minus the spike effect of course. The shockwave is more damaging than it looks; the knockback it sends back is higher than her other attacks. Use this move wisely.

Other Comments : This is the worst looking attack that is in the Bard's moveset, in my opinion. I'm just not a fan of red flames and yellow sparks. If Ness absorbs this projectile, then he'll heal himself by 12%. If Lucas absorbs this projectile, then he'll heal himself by 14%.

Final Smash : Bolster Ballad

[FNLSM]


The Bard's Final Smash is one of her more useful spells, Bolster Ballad. In the game, Bolster Ballad decreases the MP usage of party members if the caster (The Bard) does not move. If the Bard moves, then the Ballad will only effect her. Of course, because there is no Mana in Brawl, the spell has been modified a bit.

Bolster Ballad is fairly small however, despite how it looks in the screenshot; the Ballad will cover two character lengths away from the Bard on either side of her. The Ballad will take a full 2 seconds to use, and the Bard will play her harp for the next 40 seconds, unable to move. She is invincible during this time, so there's no use hitting her. If it is used in the air, the Bard will gently float to the ground as she does her Final Smash. So if you use this off of the stage, you're dead. The Ballad will then confuse anyone on the ground, and a flower will appear on top of their heads. The flower does not fade away until the Final Smash ends. If you jump above it, it's fine, but if you even put one foot into the range, whether it'd be as if you were thrown or on an accident, there's no escaping it once you step inside it. After half of the Final Smash is over, musical notes and classic literature books will shoot out in three directions from the Bard (North, Northeast, and Northwest). The notes will differ in damage and effects, but the books will always do 5% damage per hit. The books will fly toward an opponent, trying to bite them once before disappearing. The notes damages and effects are as followed :

- Red Note : The opponent receives 9% damage and is burned, getting shot back. This note appears the most often. This note comes out 40% of the time.

-Blue Note : The opponent receives 7% damage, and has a 10% chance of being frozen. This note comes out 20% of the time.

-Yellow Note : The opponent receives 8% damage, and has a 8% chance of being stunned. This note comes out 20% of the time.

-Green Note : The opponent receives 10% damage, and air trips. The opponent can DI, or use their recovery move if they haven't done so yet. This note comes out 10% of the time.

-White Note : The opponent receives 7% damage, and gets shot in a random direction. This note has the highest knockback, having the same launch power as a spike/meteor smash. This note comes out 10% of the time.

The Final Smash is best used in the center of the stage, similar to DK's Final Smash. The flowers on the opponent's head does 1% per second.

Extras :

[EXTRS]

Tripping : The Bard will fall face first onto the floor, her arms waving frantically and her harp clattering to the floor in front of her.

Ledge : The Bard will cling onto the edge of the stage, one of her hands holding onto the harp on the stage.

Get Up Attack : The Bard will grab her harp, swinging it and kicking her foot backwards as she gets up. It does 3% damage and will cause some considerable knockback. (Average Range, Average Knockback)

Ledge Attack (Under 100%) : The Bard will slide her harp up onto the stage, before climbing on carefully on her knees. The opponent will be hit off of the stage. (Average Range, Average Knockback) [5%]

Ledge Attack (Over 100%) : The Bard will climb onto the stage, panting, and she kicks her foot out a bit, looking as if she's trying to trip the opponent. The opponent is knocked back to the center of the stage. (Average Range, Average Knockback) [4%]

Appearance :

[APRCE]

Entrance : The Bard slides off a rainbow slide, made out of notes.

Icon : A harp.

Kirby Hat : Kirby receives the Bard's Sheep decorations (Horns and Tail) and her Harp. Cleaving Terra lasts for 1.5 seconds and does exactly half of the damage/knockback/whatever of the Bard's version of Cleaving Terra.

Dizzy : The Bard puts her palm onto her forehead, her head spinning.

Sleep : The Bard sits down and clutches her harp to her chest, her head down. You can't see her face, it's covered by her bangs.

Forward Roll : The Bard spins around as she dodges. (Picture Peach's roll dodge)

Backward Roll : The Bard spins around as she dodges. (Picture Peach's roll dodge)


Sidestep Dodge : The Bard spins around once on the spot.


Air Dodge : The Bard spins around once in midair. Nothing special.

Swim : The Bard flails her arms dangerously, her eyes tightly shut and a strange expression on her face (Joy, Fear? Or maybe Foy/Jear.)

Homerun : The Bard swings it back horizontally, then hits the opponent/sandbag. It looks like she's going to hit a golf ball.


Standing : The Bard will stand still, both of her hands on her harp. Occasionally she'll play a note or two on her harp.


Walk : The Bard walks daintily, her hands on her harp (How many times have I typed this phrase?)

Run : The Bard runs the same way as she walks, except that her head is tilted downwards and she has a 'Panicking' expression on her face. A sweat drop coming out of a small speech bubble near her can be seen, though you need to zoom in a bit to actually see it.

Stage & Music :

[STGMS]

Stage : Rooms of Ordeal - Past the Door of Tribulation


A basic map, with a center stage composing of a thin platform. The platform may look like you can jump through it, but in reality, it's not. There are no other platforms here, so it looks quite similar to the Smashville stage, as well as Battlefield/Fountain of Dreams without the platforms. It has even boundaries, so it could be considered as neutral...that is, if the hazards weren't here.

The only hazard in this stage is albeit of a powerful one; the Guardian occasionally whacks the opponents with his/her/its scythe, sweeping the entire bottom of the stage. It deals 20% damage and as much knockback as one of Cresselia's Psycho Cuts. Other than slicing the opponents, the Guardian can summon Tribunal enemies, each one doing different damage and effects. Each one has an equal chance of appearing.

He can summon :

x3 Tribunal Moths - These moths have wings of fire; they flutter about randomly, dealing 7% per hit and fire knockback. The moths disappear in 15 seconds.

x1 Tribunal Siremaid - Attacks players that come close to it; it shoots a devastating melody towards them, which may stun them. Her melodies deal 12% damage, and has a 5% chance of stun. If stunned, the stun lasts for 2.5 seconds. She disappears in 10 seconds.

x1 Tribunal Crow - The Tribunal Crow attacks with dark magic. He can also use daggers to slice the opponents, and has the speed of Gray Fox. He deals 15% damage for one hit, but he's the fastest to disappear after he's summoned. The Tribunal Crow lasts for 7 seconds, whereas most of the other summons last for at least 10. The Tribunal Crow stays on the platform, attacking the players that are nearest.

x1 Tribunal Seth - The Tribunal Seth attacks with quick slashes from his/her paws. She can kick the opponent as well, dealing 5% damage for each slash and 7% damage for a kick. She targets the player closest to him/her, and doesn't stop trying to attack them. The Tribunal Seth will stay for 11 seconds.

x1 Tribunal Shadow - As you can see, the Tribunal Shadow is just that; a shadow. Out of all of the summons, he's probably the strangest. The Shadow will either stay still and watch the match, ignoring the opponents, or he'll just cling to the nearest opponent, hindering their jump and speed dramatically (Both will be dropped by 30%). The Shadow stays for 13 seconds.

x1 Tribunal Tooth Flower - The Tooth Flower cannot move; it'll stay in the spot it was summoned in and will just bite nearby opponents, dealing 12% damage for each bite. The Tooth Flower disappears in 12 seconds.

x1 Tribunal Hell Knight - The Hell Knight will target the nearest opponent, locking onto them. The Hell Knight attacks with a large sword, about as long as a Star Rod, but his attacks are fairly weak, as well as slow. For each slash of his sword, it does 10% damage. However, there is a 1/8 chance the sword will be imbibed with a fiery substance similar to its head, dealing 18% damage of fire damage instead. The Hell Knight disappears in 10 seconds.

x2 Tribunal Yeti - These Yetis will run around the platform, smashing the ground at random. They do not search for an opponent; they just whack at the ground randomly. If the Yeti hits you with his fists, then you have a 10% chance of being frozen. For each hit, they do 13% damage. They are erratic and it is hard to predict where they will attack next, so be careful. The Yetis appear for 9 seconds.

x1 Tribunal Koom - The Tribunal Koom does not attack the opponents directly on the stage. The Tribunal Koom stands and walks around for 5 seconds, before he tries to light up his lantern, which has gone out. He'll try to light it once each second for the next 3 seconds, before a great big flash appears and blinds everyone on the screen. The light will deal 20% damage at maximum the closer you are to him, and 15% for farther away, and etc. You can shield the light of the attack, but beware; it'll take a heavy toll on your shield. It's much better to sidestep/roll. The Tribunal Koom lasts for 10 seconds.

x1 Tribunal Merman Aku - Merman Aku will appear, and dashes [Glides?] to the nearest enemy and stabs them with his pitchfork. He'll only attack once before disappearing, so the time he says will vary. Aku's speed is not that great though, it's about as fast as Mario's speed. Aku's pitchfork will do 15% damage, along with some considerable knockback. The Merman will lock onto one opponent only. He'll disappear once he attacks or if you outrun him for 10 seconds.

x1 Tribunal Addax - The Tribunal Addax will walk to any nearby opponents and whacks them twice with the horns in his hand. He'll attack anybody near him, and his horn attacks are easily predicted. He's not much of a threat. His horns deal 7% damage for each hit, and he'll disappear after 12 seconds.

x1 Tribunal Stoor Worm - The Stoor Worm will bite any nearby opponents, rushing to them while he's running (Same speed as Bowser's run). The bite will deal 12% damage. He'll stick around for 10 seconds.

x3 Tribunal Madame Chiffon - The 3 Madame Chiffons take up so much space that there is barely any elbow room on the stage when they're summoned. The Madame Chiffons will dance in place, blowing their fans at themselves. If you make direct contact with the Chiffons, you'll take 3% touch damage. You can get hit multiple times very easily here, as they take up most of the space on the stage. It's ridiculous. Be happy though, for they will only stay for 9 seconds, as they cannot stand the heat.

x1 Tribunal Freyja - The Tribunal Freyja will appear, shivering. She'll shoot ice projectiles at any opponents within her vision, and her icicles are exactly the same as the Bard's version of the move. They even have the same freezing rate. Anyways, she'll last for 11 seconds.

x1 Tribunal Fish Guardian Tink - Fish Guardian Tink will appear and body slam the nearest opponent he sees. He'll attack once before vanishing. His body slam does 14% damage. If he sees no one, then he'll leave after 10 seconds.

x1 Tribunal Leviathan - One of the most dangerous summons, the Leviathan will tail whip the nearest opponents, dealing 12% damage for each hit. The tail has the same range as Yoshi's down smash, but he/she/it has a very slow movement speed. The Leviathan will disappear after 10 seconds.

Music :

Blooming Cora (Night)

Megalopolis Square (Night)

Trickster Online (Title Screen)

Trickster Online (Boss Room)

Taunts :

[TANTS]

Up Taunt : The Bard jumps up and down, clutching her harp with a happy expression on her face.

Side Taunt : The Bard puts her harp and arms behind her back and sings, bouncing on the balls of her feet. A small colorful note comes out.

Down Taunt : This vv


Victory/Losing Poses :

[VICLS]

Victory Pose 1 : The Bard strums her harp with her eyes closed.

Victory Pose 2 : The Bard displays all 5 elements that she controls. A small green vine entwines her feet at the bottom, in her right palm she's holding a small ember; in her left hand holding the harp her harp is covered with a watery material, similar to dry ice. The wind is blowing the fire is producing, and a small cloud in a jar is shooting thunderbolts.

Victory Pose 3 : The Bard blushes and puts her hand to her mouth, swaying a little.

Costumes :

[CSTME]


Starting at the black hair, the Bard's clothes are the same color(s) as the next costume's hair color, so it'd be Black Hair with White Clothes, White Hair with Purple Clothes, and so on.

So, here are all of the costumes :

Pink Hair with Green Clothes (Default)
Black Hair with White Clothes
White Hair with Purple Clothes
Purple Hair with Green Clothes
Green Hair with Blue Clothes (Green Costume)
Blue Hair with Red Clothes (Blue Costume)
Red Hair with Yellow Clothes (Red Costume)
Blonde Hair with Brown Clothes
Brown Hair with Gray Clothes
Gray Hair with Teal Clothes
Teal Hair with Pink Clothes

Trophies :

[TRPHY]

Bard : The Bard from Trickster Online makes an appearance in Brawl as a playable character. She's a master of the elements and has a wide variety of attacks to her disposal, being able to launch projectiles and close range attacks as well. The Bard's Final Smash, Bolster Ballad, makes use of her abilities as a Bard and can cause some strange affects to the people caught inside it.

Librarian/Sheep : The knowledgable librarian with twin bells has a quiet personality. She can use a variety of spells from the spell books she has read in her career as a librarian. She's the first job of the Sheep class in the game, and her spells are the same as the Dragon/Shaman. She uses her book when casting a spell, and of course, spells usually take a while to cast, ranging from 0.5 seconds to 3 or more.

Dragon/Shaman : The intelligent magician with dragon wing decorations has an honest personality. He can use a variety of spells from the spell books he has read in his rich library. He's the first job of the Dragon class in the game, and his spells are the same as the Sheep/Librarian. He uses his staff when casting a spell, and of course, spells usually take a while to cast, ranging from 0.5 seconds to 3 or more.

Magician Sephira : The childish master of magic appears as an Assist Trophy as well as a trophy and sticker. Sephira may not look like the part to be a 'master' of magic, but she's very talented and has an excellent mind. She greets and helps newcomers to Caballa Island and also sells the valuable skill cards needed to use skills in the game. She keeps her black cat on her shoulder at all times, and it seems to be able to talk.

Bard La Fimmel : The quirky bard appears as a Trophy in Brawl. Bard La Fimmel helps let the Sheep advance to a Bard, with the fee of a one-million galder check, a Pure Sheep Badge, and a couple of tests. He also sells the Bard skill cards, one of them including Bolster Ballad.

Don Cavalier : The billionaire that created the 'Trickster Revolution', he was the one that brought all of the competitors to Caballa Island in search of his inheritance. He has left a series of riddles that only the true Trickster could figure out and claim the prize as their own. He is dead, but his game is surely not.

Assist Trophy :

[ASTPH]

Magician Sephira

Don't let her appearance fool you; Sephira is a talented magician and is one of the masters of magic on Caballa Island. She help out new players in a tutorial and teaches them how to use skills, and also sells Skill Cards for the Magic Type.

Once Sephira comes out of the Trophy, her cat deftly avoids any attacks and jumps of off Sephira's shoulders, sticking close to her legs. Sephira takes out her star wand and casts a spell. The spell she casts is random however, but some have a higher chance of appearing than others.

Mana Arrow (30%) - Sephira casts one Mana Arrow at the nearby opponent and does 8% damage to them if it hits.

Cure (5%) - Sephira cures the person that opened the Assist Trophy, healing them by 15% damage.

Mana Ring (15%) - Sephira casts a Mana Ring at the nearest opponent, doing 15% damage to them as well as trapping them in the ring for 3 seconds, letting anyone attack that person while they're trapped.

Rust (10%) - Sephira casts Rust, which as you may have guessed, slows down the opponent closest to Sephira. They will be slowed for 5 seconds.

Mana Web (10%) - Sephira casts Mana Web, which you may have guessed, slows down any opponents that are within a 2 character range of Sephira. They will be slowed for 5 seconds.

Mist of Mana (10%) - Sephira casts a Mist of Mana around the character. The character will do 2% more damage (And in damage only, the knockback and range is the same, though vision will get a bit worse) for the next 8 seconds.

Mana Storm (10%) - Sephira casts a small tornado around the opponent closest to her (The opponent has to be within 2 character spaces) and deals 20% damage to them, along with stunning them for 2 seconds.

Mana Shield (5%) - Sephira casts a small shield in front of her, protecting anyone behind her from energy based projectiles and reflecting them back at half the maximum distance but with double the power.

Invincible Casting (1%) - The rarest of all spells, once Sephira casts this spell, you'll have invincibility for the next 25 seconds, similar to a Starman.

Arrow Rush (4%) - One of the rarest spells Sephira will cast, 2 ~ 7 arrows will launch themselves towards the nearest opponent, dealing 6% for each arrow. This is a lethal attack; the arrows pierce shields quickly and effectively, and the whole attack can do a maxiumum of 42% damage.

Snake Codec :

[SNKCD]

To be done (I have no idea what to put in here...any tips/help?)

Other Info :

[OTRIN]

Random Fact : The Bard has lower swim time than most characters.

SSE Role : In Skyworld, after you rescue your desired princess as Kirby, once you're on the sea of clouds, Kirby and Peach/Zelda hears an enchanting melody. They walk towards the source, and find themselves blocked by a cloud. Kirby inhales it, but finds one more in the way. If you chose Zelda, then she'll use Din's Fire to destroy the cloud; if you chose Peach, she'll use Peach Bomber to knock away the cloud. You then find a bewildered looking Bard, shocked at seeing intruders in her private quarters. The Dark Matter can be seen dropping down around the Bard afterwards, and Kirby, Peach/Zelda, and the Bard wil face off 50 Primids/Sword Primids/Boomerang Primids. After you kill all of the Primids, complete the stage as normal and the Bard will join your team.

To be continued...(90% done)
 
Status
Not open for further replies.
Top Bottom