Chapter 2: Sailors of the Storming Seas
Level 7: Great Sea
Play as: Gibari or Big the Cat
Big the Cat is shown fishing on the beach of Isle Delfino. He's sitting down with his rod casted out at sea, waiting for a fish to bite. . .And waiting. . .And waiting. . .He looks at his wrist where a watch would normally be, curious how much time has passed, then waits some more. Eventually, the fat cat falls asleep due to boredom. Big doesn't get much sleep though, as Froggy comes out and licks him in the face to awaken him. Big pets Froggy with affection, then gets up off his buttocks and reels his line in. Big ducks his head in to the water to wonder why the fish aren't biting to not see a single fish whatsoever. He looks around with his still in the water to see the fish all gathering in an area in the distance, then brings his head up out of the water to see that they've all gathered around Gibari's fishing spot. Big angrily goes over to him and goes to body slam him, Gibari barely getting out of the way in time. Gibari, rather shocked, gets in a defensive position, and a battle starts between the two fishermen, you getting to choose your character.
After the battle, a cutscene shows a different group of characters. All four of Andy's toys are seen on a beach together, relaxing and having fun. Slinky is using his dog-digging skills to bury Rex in the sand, while Hamm leans back and catches some rays from the sun. Mr. Potatoe Head is trying to construct a sand castle, but the tide washes in and destroys it. Potatoe Head angrily stamps his feet upon seeing this while the other toys just laugh at him. Slinky decides to go for a swim in the water and starts dog paddling, Hamm and Rex joining him. Potatoe Head refuses to do so, backing away from the water and flailing his arms about, while the other toys motion for him to come in and join the fun. Potatoe Head reluctantly comes into the water and swims, it seemingly not being as bad as he thought, but the water causes his shoes to become unattached and fall into the water. Potatoe head flails his arms about due to having loft his means of transportation, no longer being able to swim, Rex having to bring him back to land. Slinky and Hamm go down to get Potatoe Head's sunken shoes, but a Magikarp devours them and swims off with them. Slinky and Hamm chase after the Magikarp, Rex hastily going up to join them by using his tail as a propellor. Mr. Potatoe Head just shrugs as they go off and pulls out a spare set of shoes from his containment section in his rear, putting them on. He chuckles at their stupidity slightly, and then walks away casually.
Mr. Potatoe Head looks out to the great sea to see three massive battleships approaching, each of them having very distinct designs. One of them is the ship of King K. Rool and the Kremlings, one is the pirate raider owned by Cervantes, while the last is only known as Thriller Bark, being headed by Gecko Moria. Potatoe Head panics at this and runs away to find help, finding Gibari and Big the Cat fighting each other. He hastily goes up inbetween them and motions out to the battle ships, Big fainting in terror stupidly. Gibari motions to his nearby small boat, and the characters head into it to flee from the ships, Gibari dragging the unconcious Big the Cat along.
Gibari's boat is significantly enlarged to make the level playable, it being the platform you'll use for the entire level. You play as Big, Gibari and Potatoe Head, the three ships being seen in the background firing at each other. The ships are too busy firing at each other to be concerned with such a small threat as your three characters, and thus don't effect gameplay for the level. The actual threats in the level are water Pokemon which come up out of the water to attack, attempting to knock you off your boat while it still travels it's course without it's riders. If you stay in the water for long, Tentacool will come to zap you with their poison stingers, causing you to sink into the water to your doom, meaning you must stay on the boat at all times.
Level 8: Water Temple
Play as: Zora Soldier
The cutscene picks up where we last saw the other three of Andy's Toys, them chasing the Magikarp deep into the sea away from the beach, not needing to breath due to being mechanical. They go deep down into an abandoned underwater Zelda-like temple. By the time they get into it, the Magikarp is long gone, much to the dismay of the toys. Slinky and Hamm pulls themselves up onto the shore inside this mysterious sunken temple, but Rex is unable to do so thanks to his tiny arms, flailing them about. Hamm and Slinky barely manage to pull the giant dinosaur up out of the water, and they then look about the ancient temple to find their friend's lost shoes. Before they can do much exploring, they bump into a Zora assigned to guard the sacred place, and he pokes their spear at them. Rex screams and jumps back while Hamm smacks his hand on his face, and a battle follows. You play as the Zora, and must defeat all three of the toys, thankfully only one at a time.
After the battle, Rex puts his hands up frantically and flails them around, showing him that they don't want to fight. Hamm motions to the Zora's armored boots and then shrugs to communicate that they can't find their friend's shoes, and the Zora stops being so hostile. The Zora motions for the toys to follow him, and they then go to explore the Water Temple. The level is based off the Water Temples from Twilight Princess and Ocarina of Time, featuring few enemies and being heavy on puzzeles. Most of the puzzeles revolve around changing the water level, and you'll be doing a lot of backtracking throughout the level as you figure out the exact level of water you need. If you want to find all the hidden stickers and trophies, you'll spend even more time in the level, although you may find some on accident when you put the water level at the wrong one needed to proceed. Enemies are standard Zelda fare, being enemies that inhabited the water temples in Ocarina of Time and Twilight Princess.
After completing the level, the next cutscene shows a treasure room at the end of the water temple. Massive amount of rupees and gold abound here, as well as a beautiful maiden awaiting any brave man who would find the treasure. Krystal is encased in crystal here in addition to all the gold, although there are two deadly guardians to prevent anyone from actually taking the treasure home after having found it. Astaroth, the guardian golem, and Voldo, the merciless mummy, stand on top of the pile of riches, stopping anybody who would be lucky enough to find the treasure trove. Voldo, bored, is doing a lot of strectches with his insane flexibility, while Astaroth cracks his neck about lazily. They don't notice that Krystal has finally gained enough power to melt her prison, though, and she comes out of it, causing her prison to shatter and getting in a battle ready position with her staff. The two guardians turn around and are shocked to see that they actually have some work to do, but are happy to do the task. Astaroth laughs evily and goes in to crush Krystal's soul into dust, Voldo leaping into battle alongside him. Krystal looks somewhat intimidated though doesn't back down and gets ready to fight, and you play as her in a battle against the two, them both fighting you at the same time.
After the battle, Krystal is shown barely being able to defend herself against the heartless guardians, having severe trouble with them. Andy's three toys and the Zora soldier arrive into the treasure room at this time though, the Zora coming up in front of Krystal to take a hit for her. The two guardians go in to take some more hits at them, but Rex and Slinky come in front of them. Slinky starts looking feral and Rex rears his head back to let out a roar, but they simply say the words "bark" and "roar" respectively, causing Astaroth and Voldo to laugh heartily. You play as the two guardians against the other characters, having five enemies to defeat with your two characters.
After you defeat the foolish intruders as the two Soul Calibur characters, they go in to finish them, but the Magikarp who caused Andy's Toys to get involved in all of this flails about into the area. Everybody stares at it, raising their eyebrows, while Astaroth just laughs. The guardian golem goes up and stomps on Magikarp, seemingly knocking it out, but this angers the Magikarp and causes it to evolve into a massive Gyarados. Voldo smacks Astaroth accross the head in anger and puts his hands on his hips while Astaroth just shrugs, and Gyarados lets out a massive roar, causing the characters to cringe back in fear. Hamm's Cork pops out in sheer shock, and a boss battle follows.
BOSS: Gyarados
Play as: Astaroth, Voldo, Zora soldier, Krystal, Andy's Toys (Slinky, Rex, Hamm Only)
The characters forget their differences to defend their very lives from the gargantuan Pokemon, making it hard to believe this deadly beast was once a pathetic Magikarp. Gyarados is in a pool of water on the left side of the stage, while you play on top of the treasures of the Water Temple on the right side of the stage. Gyarados has no less health then you needed to "win" the battle against True Dracula in the end of the previous chapter, making the fact you only have five characters rather scary. Thankfully though, you get to use each of Andy's Toys for the boss battle, buffing the character total up to seven.
Attacks:
Whirlpool: If you ever jump down into the pool of water where Gyarados is, he'll use this to pull you down into the water and to your doom, killing you instantly. You must jump out to Gyarados and use an aerial attack, then jump back to your platform of money shortly afterwards. Due to how hard it is to hit Gyarados, he has 25% less health then True Dracula to make it easier on you.
Headbutt: Gyarados slams his head down at your position, doing low damage and average knockback. This is his fastest attack, coming out with little lag, and he uses it a lot throughout the battle. There is slight ending lag if he misses with the attack, him slamming his head down on the hard gold, being very slightly dazed and giving you a chance to attack.
Twister: Gyarados summons two small tornadoes at either side of the platform you're standing on, which deal no damage but push you along with them like the water from Mario's FLUDD/Squirtle's neutral B. The tornadoes go back and forth for a good while, being pretty annoying, lasting until the massive Pokemon completes two more attacks.
Dragon Rage: Gyarados breathes fire accross the part of the arena you can actually stand on, you having to dodge it then jump up to avoid burning your feet on the piping hot treasure after the attack. The breathing of the actual fire does decent damage and decent horizontal knockback, though stepping on the burning hot money does low damage but does massive vertical knockback, shooting you skywards as your feet feel the burn.
Ice Beam: Like Dragon Rage, but doesn't do as much damage and knockback, having less lag. Gyarados fires the ice beam accross the entire platform, causing it to become slippery. The icy effect on the battlefield will last until Gyarados burns up the ice with Dragon Rage.
Attacks gained at 75% health:
Surf: The massive beast brings up a tidal wave which you must sidestep/roll away from, or else it will pull you off the stage. Works somewhat like Tabuu's red rings of death in that you mess up the timing, death is guaranteed.
Roar: Gyarados lets out a defeaning roar which will cause you to go into a dizzy state if you don't dodge it. The roar also eats through shields though, and if you just shield the entire duration of the attack you'll break the shield. To successfully avoid the attack, you must first do a dodge then shield to last the entire time the roar is in effect.
Attacks gained at 50% health:
Thrash: Gyarados leaps out of his pool of water onto the stage, thrashing about violentely to do massive damage and knockback, the whole stage being a gigantic hitbox. This is certain death if you're hit by it, but due to Gyarados no longer being in the pool of water you won't fall victim to whirlpool if you go in, and you must go into said pool of water to avoid the attack. After the attack's finished, hastily go back up to the platform while Gyarados leaps back into the water, or else you'll be sucked down to your doom by a whirlpool.
Hyper Beam: Works like Dragon Rage, but the beam is bigger and does much more damage and knockback. Gyarados will fire the beam back and forth accross the stage, and there will be no after burn. After this deadly attack is complete, Gyarados will have to recover for a long period of time, leaving him vulnerable to be attacked.
After the boss battle, Gyarados is seen letting out a massive hydro pump at the characters, and Andy's Toys are hit by it, sending them up and out of the temple. The other four characters take the chance to attack Gyarados while he's focused on the toys, all stabbing into him with their weapons, going in pretty deep, causing the beast to fall over, dead. Krystal and the Zora look relieved, but the screen then cuts to the hydro pump forcing the toys up out of the water temple and sending them sky rocketing out of the great sea. They land in the small boat with Gibari, Big the Cat, and Mr. Potatoe Head. The shoes Gyarados devoured while still Magikarp happen to wash by, Potatoe Head picking them up out of the water casually and adding them to his spare part containment in his back. The other three toys angrily glare at Potatoe Head who didn't need their help, having had a spare all along, while Potatoe Head just shrugs and laughs.
Before you can move on to the next level, the scene cuts back down to the four characters still stuck in the water temple. The two guardians, Astaroth and Voldo, show no signs of being weary from the battle or wanting a truce due to their brief partnership, and go up to attack Krystal and the Zora soldier. Krystal looks rather intimidated, being very tired by now, but the Zora soldier steps up in front of her to defend her with a look of courage. You get to choose one character, and you get to participate in a two vs two battle of Voldo and Astaroth vs Krystal and the Zora soldier. All characters will be on the screen at the same time, your partner being AI controlled.
Level 9: Gankplank Galleon
Play as: Jack Sparrow or Captain Syrup
Jack Sparrow is seen in a tiny rowboat, having just been screwed over by Barbosa in the end of the third Pirates of the Caribbean movie, having no ship or crew. He sees the three ships and hastily starts rowing up to one of them, hoping he might be able to get some loot or take it over, the ship happening to be K. Rool's. He manages to find an area of the ship to climb up onto only to find another pirate, Captain Syrup, doing so from the opposite side. Jack, despite not having had good luck with pirate women, goes up and puts his arm around her, but the female captain just throws a bomb which explodes in his face, chuckling. Jack takes out his pirate sword while Syrup gets another bomb ready, and a battle between them starts, you getting to choose your character. A storm brews over the area during this battle, lasting for the rest of the chapter.
After the battle, both of the crewless captains will be seen continuing to fight each other, but a bunch of pirate Kremlings on the ship will come to interrupt the small skirmish. They encircle them, leaving them no choice but to ignore their little dispute, syrup going back to back with Sparrow.
You play through a level with both pirates through K. Rool's ship, there being a battle against the Kremlings at the start. The Kremlings are of course the pirate themed ones from Donkey Kong Country 2, many having peglegs, eye patches, and what not. The main threat of the level is combat, as there is little room for puzzeles or platforming challenges on a ship. Cannonballs will come onto the ship, bein fired from the ships of Cervantes and Gecko Moria, and when it comes you must be careful to avoid it or take massive damage and knockback. Upon getting to the other side, you'll see K. Rool steering the ship, and the level will end and another cutscene starts up.
K. Rool is in his "Kaptain" costume to match his fellow pirates, and both pirates come up to stab him in the back while he's occupied steering the ship. The Krool Kremling Kaptain however turns around at the last second, doing a tail whip to knock them off their feet, then roars down at them, doing a good job of intimidating Jack, who hastily scoots back. Jack goes to flee cowardly, but is stopped by the Kremlings, who block him off from fleeing any farther. They eagerly push him back to their captain and get ready to watch the fight, while K. Rool just laughs. A battle starts, and you play as K. Rool against the two amateur pirate captains. You face them both at the same time, although on one side of the stage there are the spectating kremlings who will attack your enemies if they get too close.
After the gameplay, K. Rool is seen battling Captain Syrup in a duel. Syrup looks behind her to ask Jack for help, but he's fleeing the battle. While she's looking away, the cruel captain knocks her out, then tosses her to one of his mates who proceeds to tie her up. They turn their attention to the self proclaimed "captain" Jack Sparrow, who runs off the plank and into the sea, letting out a frantic yell. K. Rool and his Kremlings laugh heartily at Jack's cowardly antics, Jack heading for his tiny rowboat and frantically heading for Cervantes' ship, hoping he'll have better luck.
Level 10: Thriller Bark
Play as: Squeak Squad
The squeaks are seen in a small ship of their own, being a tiny little thing. It's amaturely built in the design of a large ship despite it's small size, being around the size of Toon Link's ship in Brawl. Storo is up in the Crow's, looking through his telescope, then puts it down and points ahead at the large ships they're coming up on. Spinni, who is at the wheel, turns towards the nearest one, which happens to be Gecko Moria's. Doc hovers up onto the ship ahead of the others in his little spaceship while Storo pulls himself up with his hook, Spinni on his back coming up with him. The Squeak Squad all strike a pose, and the level starts. You have three lives, one for each squeak, the normal switching mechanics for them being tossed aside in favor of just switching on being KOd. Storo though still counts as losing a life once he has 150% damage, so you can't take advantage of his massive weight, otherwise you'd never lose a life.
After you go through Moria's ship which I quite frankly know nothing about due to not being a fan of One Piece (Cannon fire coming at it like on K. Rool's ship), Moria will be seen catching some rays in the sun while his servant Doppelman shades him from it, his crouching pose. Doppelman gets out of this position much to the anger of Moria, but he excuses this when he realizes he did it to defend him, the Squeak Squad arriving to his end of the ship. Moria quickly gets up and steals their shadows, then animates the shadow as zombie versions of them which go up to attack the squeaks. The zombie squeak squad attack the normal squeak squad, and you play as the squeak squad once again in a battle. The zombies are as powerful as the real squeaks in this battle, them not being pathetically weak like the ones from Moria's personal arsenal for use in battle.Moria is seen back in his lazy pose afterwards, thinking that the zombies would've done the job. He gets up annoyed at his rest being interrupted once again, motioning Doppelman to go up in front of him, the servant hastily obeying his master's orders. Another battle starts, and this time you play as Moria against all three members of the Squeak Squad, thankfully not at once. They switch upon being KOd, although Storo still is considered defeated when he gets 150% damage.
After the battle, Moria snaps his fingers and doppelman drags the squeaks into another part of the ship. He throws the three of them into a tiny cage, Spinni and Doc being pushed against the bars by Storo's huge fat painfully. Storo just shrugs and chuckles slightly while Spinni is crying out in pain while Doc, thankfully protected by his ship, just groans and smacks his paw on his face.
Level 11: Pirate Raid
Play as: Chao, Plusle & Minun
Chao as well as the two electric rodents will be seen in a dank cell within Cervantes' ship, a zombie pirate patrolling back and forth as the guard. The cute creatures have been starved, and are gnawing on the bars, hoping they might get our or at least get some nourishment. After they just hurt their teeth, they sadly lay back in exhaustion. The zombie pirate's stomach growls, and he eyes the two cute creatues and licks his lips. He opens their cage to devour them, but Plusle and Minun simply zap him in the face, knocking him out. The undersized characters come out of their cage and hastily go to look for an exit, a level starting. The level is through the dungeon section of Cervantes' ship, his ship being somewhat larger then the other two ships. You can open up the other cages to get trophies/stickers/healing items, but sometimes just more zombie pirates will come out to attack you.
At the end of the level, the two cuddly characters will bump into the captain's quarters of the ship. Cervantes takes out his sword and shoots out a barrage of bullets at the two tiny characters, successfully intimidating them, and a battle starts, you playing as Cervantes against the two creatures at once. After defeating them, Cervantes picks them both up casually and tosses them into one of his cannons, using them as ammo to be fired at K. Rool's ship. The dread pirate lets out a evil laugh, then goes to the steering wheel of the ship, setting the ship's course towards Noki Bay, away from Delfino Plaza where it was previously going.
The camera next shows the three massive pirate ships coming close together, still firing their cannons at each other. The screen becomes a split one, and it shows K. Rool and Moria barking out orders to their crew to lay the planks down to Cervantes' ship, which is inbetween both of their ships. Both of the pirate captains run onto the ship to board it accross the planks their crew layed down, going on personally. When you need a job done right, you need it done yourself, do you not? The screen gets out of the split mode to show Moria and K. Rool seeing each other getting up on opposit sides of Cervantes' ship, and they charge each other, letting out battle cries. A battle follows between the two pirate captains, you getting to choose your character.
Afterwards, a bunch of zombie pirates sorround the two raiding pirate captains, destroying the planks that are linking the ships together. The cannons of Cervantes's ship are shooting up the other two pretty badly, causing them to have to retreat and head for Delfino Plaza while Cervantes' ship heads on for Noki Bay. The two pirate raiders have no choice but to settle their disputes, going back to back and beginning to fight off the zombie pirates together. You don't actually go through a level this time around, it's simply a long battle against the large amount of zombie pirates, playing as both captains.
Seeing that the zombie pirates are being killed off like flies, Cervantes fires a flurry of bullets at the other two captains, leaping into battle. Doppelman takes the hit for Moria while K. Rool dodges the shots, returning fire with his blunderbuss. The dread pirate Cervantes leaps down to personally take care of the two captains, hoping to get them to join his crew before the day's end. You play as Cervantes against K. Rool and Moria, you once again having to take down two characters at the same time.
Having defeated the other two captains, Cervantes come up to take out their souls and get them to join his crew, but Jack Sparrow has finally caught up to the ship in his little rowboat, tiredly pulling himself up onto the ship. Cervantes turns his gaze to the self proclaimed captain and gets in a fighting position, Jack doing so also, but the ship crashes into the shore, causing them to fall over. The four pirate captains look to see where they are to find that they've landed at Noki Bay, and the level ends.
Level 12: Delfino Plaza
Play as: Plusle & Minun, Squeak Squad, Captain Syrup, Chao
A massive portal is seen opening in the middle of Delfino Plaza, and Dracula comes out of it, having reverted back to his normal form. His undead army comes out of the portal behind him, as well as vampiric versions of Sandslash, Simon Belmont, Isaac, Knuckles and Shadow. Dracula immitates Ganondorf's up taunt, bracing himself and spinning around, then extends out his limbs and lets out a massive screech like the one that turned the characters with him into vampires. It goes all throughout Delfino Plaza, turning all the inhabiting Pinatas into vampires. Dracula and the vampiric characters laugh evily at this, then the camera shifts to the beach of Isle Delfino.Due to their captains not manning their ships, both the ships of K. Rool and Moria crash into the shore of Delfino Plaza. The minions of K. Rool and Moria go out of the ship to raid Delfino Plaza, but they are no match for the vampires of Dracula, being converted into vampires themselves.
The camera shows inside of Thriller Bark for Storo to of finally broken the cage due to his massive girth. The Squeak Squad proceeds to head out onto the shore, unaware of the vampires. Next, Captain Syrup is seen inside of K. Rool's ship, still tied up. A Kremling comes up to her eagerly for a kiss, puckering his lips, Syrup looking grossed out. Just when he's about to kiss her, he gets electrocuted by Plusle & Minun, Chao going up to untie her. Syrup kicks the Kremling's crotch for him to kneel over in pain, and they then head out onto the shore of Delfino Plaza together, meeting up with the Squeak Squad. The vampires start approaching them and they all get in fighting positions, and the level starts.
The level features vampires back from Dracula's Chaos Citadel, as well as vampiric pinatas that were converted by Dracula's screech. There are also vampiric Kremlings and members of Moria's crew they were converted upon attempting to raid the city, making for quite the variety of vampires. The main threat is once again from combat, the vampires able to restore their health by leeching on you.
Getting to the end of the level, the four characters will find themselves in the center of Delfino Plaza, outside the giant shine tower. Dracula laughs at the foolish efforts of the characters, and motions his five playable character vampires to go down to dispose of them and get them to join his cause. The five vampires bow before Dracula, Dracula petting Simon's head and chuckling slightly, then head off to do as they were commanded. You play as the four normal characters against the vampiric Knuckles, Shadow, Simon Belmont, Sandslash and Isaac, them having two characters out at a time while you only have one.
Level 13: Delfino Coast
Play as: Gibari, Andy's Toys, Big the Cat
The cutscene picks up where the last one left off. The vampiric playable characters are seen constantly trying to bite into the four normal ones to convert them to Dracula's side, but they continue to resist. Dracula, annoyed at the failure of his vampires, goes to join them, but his attention is diverted as he hears a nearby ship sinking. He turns his head to see the small boat Gibari's on sinking due to the weight of Andy's extra toys, them having to weakly swim onto the beach. Dracula rubs his hands together and chuckles, then heads after them. The four characters you played as in the previous level run off toward Noki Bay away from the hordes of vampires, then the screen cuts back to Dracula closing in on Gibari's group. Dracula turns into his true form and lets out a roar, severely intimidating the characters, Hamm's cork popping out once again. Instead of fighting True Dracula, the characters simply flee from him in terror instead.
The level is a chase level, somewhat like the level with the Pig King Statue in the real SSE in Brawl. However, if you let True Dracula catch up to you, he'll devour you whole, resulting in an instant death, meaning you can NEVER let him catch up to you. You run along the coast of Delfino Plaza, the city being seen in the background while you run along the beach. A few vampires will sometimes get in the way, but the main threat is of course True Dracula. At one point in the level there will be a bunch of useless Goldeen flailing about on the beach uselessly, only to be trampeled by Dracula.
At the end of the level, the characters will have ran the whole course of the beach, having to go up into the city to join the other characters. True Dracula chases them along with the playable vampiric characters, them having no choice but to dive into the sea to flee from them, heading towards Noki Bay. The vampires follow them even throughout the water, having no intentions of letting them escape.
Level 14: Noki Bay
Play as: Cervantes, K. Rool, Gecko Moria, Jack Sparrow
We rejoin the four pirate captains where we last left them, them just seeing that they've landed on Noki Bay. Cervantes goes up to finish off Jack Sparrow, but the self proclaimed captain points up to the top of the cliffside on Noki Bay, showing a massive pile of treasure. All the characters look shocked at this and all stop what they're doing to head for the treasure, pushing the elder Noki who guards the bay into the water along the way. They all push and shove as they hastily run up for the treasure, racing each other, but still all ultimately going for the same goal.
This level has virtually no enemies at all, there being several feats of challenging platforming as you climb up the cliffside. The level slowly scrolls upwards, forcing you to make treacherous jumps with little time to decide how you're going to go about it. The platforms are very slippery due to their being goop all over them, just like in Super Mario Sunshine. The few enemies that they are in the level are goop monsters that come out of the goop covering the cliffside, being rather annoying as they leech onto you, damaging you and limiting your jumping ability. You must shake them off as quickly as possible, or simply avoid them entirely if you wish to have any hope of clearing the level.
At the end of the level, the four pirate lords will pull themselves up onto the platform at the top with the pile of treasure. Cervantes first comes up with no problem, but then Moria and K. Rool come up at the same time, getting stuck in the small section to get up due to their massive girth. They flail their legs behind them as trying to get up, unintentionally kicking the unlucky Jack Sparrow down the cliffside, then manage to pull themselves up. The three true pirate lords stare at the treasure greedily, then turn to look at each other, realizing that they'd have to share the treasure. Having no intention of doing so, the pirate lords make distance between themselves and get into fighting positions, a free for all between them following with you getting to select your character.
After the gameplay, the pirates will be seen locked in a furious combat against each other. The duel is quite epic, them all being evenly matched. The battle rages on for a while, but K. Rool suddenly notices that the treasure they were fighting over is mysteriously missing. The Kremling Kaptain points this out to the other two characters and they turn to look at the treasure, then look in the opposite direction to see Jack Sparrow making off with the treasure, sneaking away. Realizing that he's been found out, Jack turns around and grins, then runs in terror from the three pirate lords. You play as Jack in a three on one battle against them, them all being out at once to fight you. The other three pirate lords still aren't fond of each other though, thus team attack is on, keeping the battle from being too hard.
After the battle, the other characters who are being chased by the vampires arrive at Noki Bay. The three true pirate lords are knocking Jack down the cliffside and following him downwards while the others are going up the cliffside to flee, and they meet up in the middle on a large platform sticking out of the cliffside. The vampires are about to catch up to the characters, spelling certain doom for the group, causing them to panic. Captain Syrup, desperate, takes out her genie lamp and rubs it, causing Nat the Genie to come out of it. He goes over to the vampires and uses his magic to do deadly attacks on them, knocking them off the cliffside and into the water. Nat is far from loyal to his master, though, and then turns to the playable characters, letting out a battle cry, causing a boss battle to start.
BOSS: Nat the Genie
Play as: Gibari, Big the Cat, Andy's Toys, Squeak Squad, Captain Syrup, Plusle & Minun, Chao, Jack Sparrow, Cervantes, K. Rool, Gecko Moria
Nat floats back and forth accross the platform, having a ridiculously large bar of health, making True Dracula's look pitiful. You also have a ridiculously large amount of characters to compensate for his insane health, though, having sixteen total characters when you're counting the transformations, you getting an extra stock to use all the transformations of Squeak Squad and Andy's Toys.
Attacks:
Fireball: Two fireballs are dropped from the genie's hands on either side of him, one after the other. After hitting the ground, the fireballs go along the ground until falling off the edge. Do small damage and knockback, but are very fast, a common attack for Nat to use.
Genie Minion: Nat summons a minature version of himself that goes back and forth accross the stage like he does, firing one of the fireballs just as powerful as Nat's fireball at a time, behaving just like them. While the minion can be defeated like a normal enemy, it can be killed in one hit with a jump like a Mario enemy. You can bounce off the minion to attack Nat's head, where he will recieve extra damage from attacks. Considering how much health Nat has, you'll want to take advantage of this whenever you can.
Thunderbolt: The genie claps his hands together and lightning strikes down at his sides instantly, doing insane damage and knockback if they hit. There is fair warning to the attack due to the clap at the start, giving you time to go under Nat or away from him to avoid the lightning strikes.
Pillar of Flame: The genie swishes his hands back and forth to warn you that the attack is coming out, then a larger version of Ness/Lucas' PK fire is summoned at your position, doing no knockback but dealin gheavy damage. To dodge it, you have to either be already running at top speed and keep doing so, or perfectly time a roll to get away from the attack.
Attacks added at 75% health:
Charge: Nat lands on the right or left side of the screen on his feet, then charges to the opposite side of the arena and back again, afterwards going back into his normal levitating stance. The only ways to avoid this attack are to hang on the ledge or to jump over the genie if your character has exceptional jumping ability. Does pretty good damage and knockback, but it's not insanely over whelming.
Attacks added at 50% health:
Butt Slam: Nat floats to the center of the stage and falls down on his buttocks, covering up two thirds of the stage with his girth. If you are actually hit by his buttocks, you are dealt insane damage and knockback, resulting in a likely death. If you're on the ground to the side of Nat you'll recieve upwards knockback and decent damage from the minature earthquake as he falls on his buttocks. To fully avoid the attack, go to the sides of the platform and jump.
Earthquake: Nat causes an earthquake like with his Butt Slam attack, but through magic. The earthquakes lasts for a long period of time, having the same effect as the minature earthquake caused by the Butt Slam, though slightly more powerful. Nat snaps his fingers before doing the attack, giving you fair warning, you having to use all your jumps if you wish to successfully avoid the attack for it's entire duration.
The characters look relieved to see the genie being sucked back into the lamp after he's defeated, but their troubles are far from over, as the vampires have gotten back to them in the time they spent fighting Nat. Due to the characters already being so weakend from the tough boss battle, the vampires easily defeat them and begin converting them into vampires. Isle Delfino has been added to Lord Dracula's kingdom, and many new powerful soldiers have joined his cause. . .What could possibly stop him?

 ) She fast falls this, cant cancel it, and this bring opponents down with her..its basically a really nerfed version of Dedede`s Up B. makes a small explosion when she lands....its a really small explosion with nearly no extra hitbox. (5%,5% landing explosion. brings opponents down with her...so its a meteor smash that cant be escaped...she dies too.)


 )
)
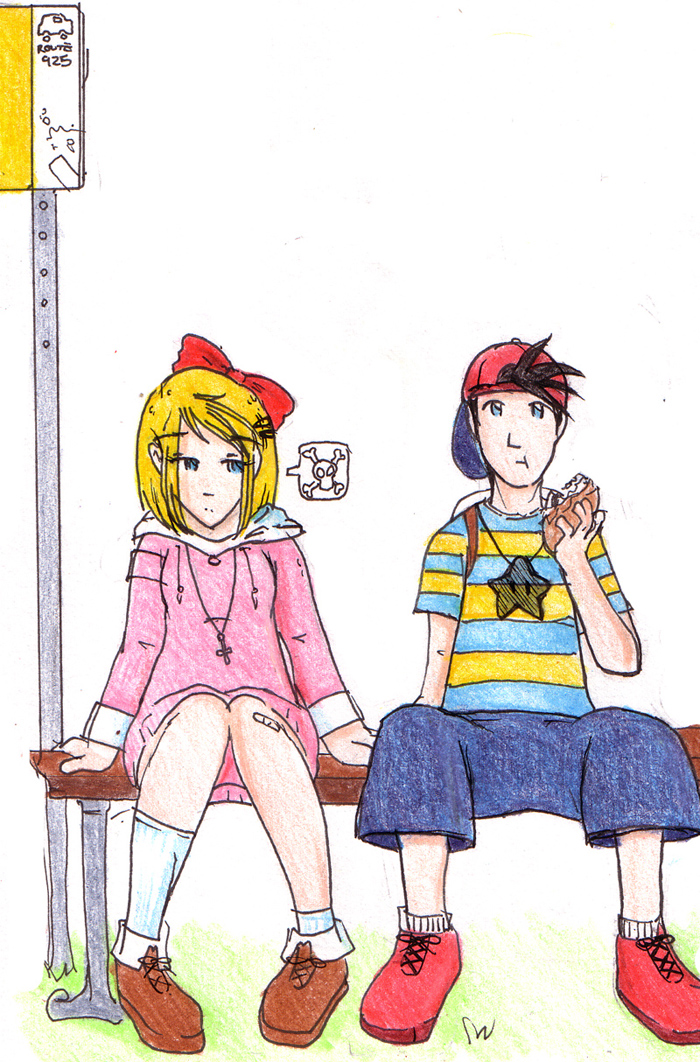
 But that's understandable. Nice picture - who drew it?
