Welcome to Smashboards, the world's largest Super Smash Brothers community! Over 250,000 Smash Bros. fans from around the world have come to discuss these great games in over 19 million posts!
You are currently viewing our boards as a visitor. Click here to sign up right now and start on your path in the Smash community!
It appears that you are using ad block :'(
Hey, we get it. However this website is run by and for the community... and it needs ads in order to keep running.
Please disable your adblock on Smashboards, or go premium to hide all advertisements and this notice. Alternatively, this ad may have just failed to load. Woops!
Cactus Cooler is a west coast drink i believe, and its kinda liek haiwaan punch only with different flavors...I was drinking one right now so thats why i said it.
??? I dunno teas.
i have a shiney (male) Mightyena! heh heh well make sure thats one of the costumes. Also Final smash should be uhhh.... sucker punch? lol mightyena doesnt have many good attacks really.
Shiny Mightyena with blue "dog jacket" for blue team alt. Sucker Punch sounds like a good Final Smash...randomly inflict high damage and knockback on an enemy.
Shiny Mightyena with blue "dog jacket" for blue team alt. Sucker Punch sounds like a good Final Smash...randomly inflict high damage and knockback on an enemy.
At first i was like "Shiny mightyena is golden, you fool!" but now i understand your changing the black fur to blue. Cool choice.
Chomp is the second strongest dark type attack mightyena learns...so that should be a good move....also an idea mightyena can learn Facade which increases with power if they have a status effect, maybe its a move that increases power with percentage?(like lucario, but just one move?).....also projectile could be Toxic.....xD..... just throwing it out there, i would think it would be hard to have a mightyena moveset.
Chapter 2 of SSE = epic! You used all of the characters well, and it didn't seem like you gave an unfair amount of screen time to any one character. I lol'd at Voldo's reaction to Gyarados.
Whoa. Okay, Dracula's vampire-tizing pretty much everybody. By the way, I noticed you used Zora Soldier (although you called it Zora Guard or something) Is that someone else's moveset, or did you decide ZS would fit better than Sain?
EDIT: Captain Syrup ftw. Jack Sparrow is comic gold in this thing. And the misspelling of Piantas was great. "Vampiric pinatas!" Do they have halloween candy inside?
First, the latest and greatest in the SSE world was truly wonderful.
Now to business.
I'm thinking when this is all over and done, we should give out special awards to certain movesets and certain makers. You know, things for movesets like "Most Plausible for Actual Inclusion in Smash" and "Most Detailed." And we'd probably limit the number of awards one entry or person can win. That way, Fierce Deity Link doesn't get them all.
Yeah, that was your Zora in there. It'd been a while since I read the moveset, so I didn't remember the exact subtitlte. Probably should've just called it Zora. I'll go edit it to change the name. Yes, Sain is still going to be included.
I was wondering if anybody would notice the lack of Metal Knuckles, Grim Reaper and Doopliss. There was also Sin Paw Dip, but you can't be perfect, aye? The characters from previous chapters will only show up as vampires in future chapters, with the exception of the final chapter. What happened to those not shown here as vampires? You'll have to wait to find out.
As for the characters still in the water temple, they're unknown by Dracula and thus aren't turned into vampires. That's the main reason I gave them a boss, so that they wouldn't be left with minimal play, and it actually ended up working quite well. What will they do with their status of being under Dracula's radar? Only time will tell.
@SirKibble: Individual awards is a good idea, but limiting how many awards a moveset can get is just cheating most of the winners. So long as there are rankings for the individual categories, I don't think one moveset massing awards should be a problem, as that way every moveset would have a mass of "awards".
Guess what? I've decided to hop on the bandwagon as well and make my own SSE.
Unlike the others I plan to make mine have a bit more dialogue (so if I go out of character, please correct me and advise me of how to make a change. As this is supposed to be a contest for "Alternate Brawls" I may (and probably will) also included existing characters in order to help with the plot line.
SSE: The Evil Council
If you want your character added then just ask. I will currently put a limit of one character per person (if you already have characters up there they don't count)
I will start off unlike anyone else.... with a Prologue. The purpose of the prologue will to be explain how my OC, who I have clearly stated will live on Earth somehow ends up in Trophy Land.
Prologue- Defend Fort Walker:
Location: Earth
Year: Approx. AD 3000
(Before the current story-) Cutscene- Ashencroft and Tabuu:
Ashencroft sits atop the throne in the old Valian capital. Suddenly, a mysterious being appears in the throne room. It is none other than Tabuu. The guards immediately surround Tabuu, only to be blown away by Tabuu's off waves. Ashencroft is un-impressed, for he arrogantly believes his powers are far greater than the intruders. He draws his sword, but Tabuu makes the halt gesture with his hand and starts to speak.
"I am not here to be your opponent," said Tabuu.
"Then tell me why you are here, or you shall find yourself at the point of my sword," replied Ashencroft.
"I am here to make a proposition. I need a general strong enough to lead my army against some rather annoying resistors."
Ashencroft laughs at this. "You think you're the only one with that problem? I would have had complete control of this country 15 years ago, if it weren't for some noble Valian resistance army."
"Then I offer a deal. Help me crush the resistance in my world, and I shall lend my massive army to aid you in return. Do we have a deal?" asked Tabuu.
With that, the two villains shake hands and a deadly alliance gains its first two members.
Cutscene 2- The Nobel General
Night is drawing nigh. A young man looks into the distance. Chris Lionheart. He is dressed in the uniform of a Valian soldier (mostly white cloth clothes, but armor is worn to protect the vital points of the body.) He looks melancholy (gloomy). The camera then zooms out to show you why. A large army marches on Fort Walker, atleast 10,000 brutal soldiers.
"Why would the enemy send just enough forces to match our own?" Said Chris, still an inexperienced general.
"They are trying to test us. With you at the lead we shall not let them down."
The speaker was Chris's younger cousin, Arden.
"Well," Arden continued, "you'ld best inspire your troops. Give them a speech to raise their spirits."
"I will, cousin."
And with that, the Lionheart gathers his men in the citadel (the main area) and gives them some words of inspiration.
"Hear me, brave men and women, warriors of Valious!" Chris said. "Tonight our oppressors have saw fit to send us entertainment for the night. We shall make them regret their arrogance! They think themselves better than us, simply because they have the ability to handpick their soldiers. We have something that they will never have. A powerful desire burns in each of our hearts, giving each of us the strength to fight like 10... nay 20 soldiers. Some of you may die tonight, but your loss shall not be in vain. We will win this fight, for we have the upper hand! This is our territory and our base. Defend it well. I will be fighting alongside you and supporting as well as I can. Make your prince proud! Tonight we fight!"
The soldiers reply with a loud cheer.
Before the enemy troops could arrive, the defenses had already been set and the base had been fortified. Chris gathered the primary force of knights to protect the citadel. His friend, Ryann Trueshot, was given command over the archers stationed on the upper walls. Arden was placed second in command over the main knight forces, should Chris be needed elsewhere.
And this is where the battle begins.
Part 1- Breaching of the Gate:
Play as- Chris Lionheart
Song- Valian Theme
The enemy has broken through the gate, their forces somewhat thinned by several volleys of arrows. Chris Lionheart takes some of the citadel knights, trusting the rest to his cousin and charges to meet the invaders.
*Obj- Defeat 50 enemies.
A fairly simple objective. Defeat 50 enemy soldiers, all of which are garden variety knights armed with swords.
Hints-
Use the superior length of your sword to keep attackers at bay.
Each individual soldier is weak (rougly the strength of a primid). Just stay alive and this should be quick.
At the end of this fight a cutscene plays, the screams of the archers are heard from above.
"Dang! They've breached the upper levels. I've got to go help Ryann!" said Chris.
Part 2- Reach the Upper Levels:
Play as- Chris Lionheart
Song- Valian Theme
This plays out much like any SSE level. Just reach the top floor (you aren't rushed by any means.) There will be soldiers to attack you, but unlike other SSE levels, soldiers will also be present to help ward off some of the attackers. This is meant to be an easy chapter.
When you reach the top, another cutscene will play. Fortunately most of the soldiers stationed here are still in good condition, as a considerable number of knights were stationed up here as well to protect the crucial archers. Despite this, Ryann is indeed in trouble. A fully armored enemy soldier single-handedly crushes the soldiers fighting him. He turns his sights to Chris and the two warriors clash.
Part 3- Enemy Veiled In Black:
Play as- Chris Lionheart
Song- Against the Black Knight
This is a one on one fight against a computer controlled opponent. His difficulty scales with level, but this fight is unique in that you don't have to win. The outcome will be the same regardless of the results. The enemy uses the same moveset as my Ashencroft entry (minus the final smash). Generally, you should be able to win, due to your superior speed (and hopefully superior intelligence). If you do however fail, the story will continue normally.
After the fight another cutscene is played. When Chris attempts to slay his opponent, He merely slashes the helmet. The enemy is stunned, for this entire fight his armor has yet to be scratched. He was apparently holding back, as he strikes Chris to the ground, knocking his sword out of reach. Chris braces for the impact of cold steel, when suddenly an arrow strikes his attacker in the shoulder, bouncing off but getting the enemy's attention. The archer who fired the arrow was Ryann.
"You shall not kill him," says Ryann. "I won't let you"
This gives Chris enough time to grab his sword.
The knight is unintimidated by this. He merely laughs and speaks to his foe..
"So, young Lionheart... yes I know your name. This girl is important to you isn't she. Well, let's have a contest...."
"What are you talking about?" Said Chris.
Before either Chris or Ryann could react, his foe grabs Ryann.
"I want to find out just how noble the Valian prince truly is. I'm going to give you the chance to save your little girlfriend... follow me if you want to rescue her. But be warned, follow me and your life will be in constant peril."
And with that, the knight slashes a dimensional rift with his sword and walks through it.
"Woah... what is going on?..." Chris says to himself. "It matters little... I'm coming, Ry!"
Chris jumps through the rift and it closes behind him. When he opens his eyes, he finds himself in another world, the world of Trophy Land. Ryann's captor is nowhere is sight, and Chris knows that he must obtain the help of others if he is to find her.
Chapter 1- The Blades of War
Level 1- Finding Ike
Songs- Ike's Theme
At the end of Radiant Dawn, Ike leaves to explore a new land, never to be seen again. By some odd coincidence this land just happened to be Trophy Land. Mia considers Ike to be her greatest rival (and favorite person in the whole world). When Ike leaves, Mia is left with an empty feeling and decides to leave Tellius her self in hopes of finding Ike.
Mia arrives in Trophy Land and soon after arrival finds herself being attacked by supspace army.
Part 1-
Playable characters- Mia
Objective-
Make your way through trophy land (side scrolling) until you find Ike. You will be forced to fight subspace army creatures along the way.
At the end of part 1, a cutscene is shown where Mia is completely surrounded by Supspace Army units. It appears to be the end for Mia until a familiar sound is heard...
"AETHER!!!"
Ike appears and reduces many of Mia's attackers to corspses. Those are replaced with more primids which surround them both. Now Ike and Mia must fight the Subspace Army attackers together.
Part 2-
Playable characters- Ike, Mia
Objective-
Defeat all of the Primids (there are about 100 total)
Notes-
You are not alone. While you may only choose one character, you will either a) Be given the other character as a computer controlled ally (single player) or b) Have the other player play as the other character (co-op.)
After all the Primids have been eliminated Mia embraces Ike. He is surprised to see her even with her challenge seeking personality.
"What are you doing here Mia?" asked Ike.
"What do you think I'm doing here? I never had my duel at dawn." she replied.
Ike laughs. "Same old Mia... are you sure you don't just miss me?"
"Sure I did boss. You're my favorite person in the world remember? Do you know what those things were that assaulted me?"
Ike shrugs. "I had a run in with those things a while ago. To be honest I'm not entirely sure what they are. I thought I had defeated their leader but if they're back then my allies must have failed."
"Allies?" Mia asked.
"Yeah," replies Ike. "I met a rather odd group of warriors and helped them save this country. If these creatures are back, then the others must be informed. Come with me, Mia."
A big grin appears on Mia's face as she says "It'll be just like old times, eh boss? You, me, and a small group saving the world.
Level 2- The Prince and the Casanova:
Songs: Tales of Symphonia Theme, Fire Emblem Theme
Marth journeys back to Altea. Unfortunately he will not arrive home before his sword is once again needed.
Part 1-
Marth takes shelter for the night in a rather guady looking mansion he finds along the way, thinking that the mansion is empty. He is soon ambushed by sword primids.
Playable characters- Marth
Objectives- Survive for 2 minutes (3 stock).
Hints-
Use your counter properly to avoid taking damage from the energy sword wielding primids. They are fairly predictable so it shouldn't be hard.
It seems like the Primids have come in endless supply. Marth grows more exhausted by the minute. It seems like everything is over until several fireballs strike his attackers. Marth's savior is none other than the great Zelos Wilder!
Part 2-
Playable characters- Marth, Zelos Wilder
Objectives- Defeat all of the sword primids.
Notes-
Regardless of the character you choose, both characters will be present on the field, the other one being controlled by either a computer (single player) or the other human player (co-op).
After defeating all of the sword primids, Zelos immediately hits on Marth.
"Hey, beautiful. Whats a girl like you doing in my mansion?" asks Zelos.
As you can imagine, Marth is a bit angry.
"Who are you calling a girl!" Marth replies angrily.
"What!? You're not a girl? I am sorry dude," Zelos says. "I hope you'll accept my apoligy."
"I guess I'll let you keep your head, considering you just saved my life," said Marth.
"What were those things doing in my home anyway? Did you let them in?"
"I have no idea where those... things came from. I just know they are bad news," Marth replies.
"Do you think there will be more?" Zelos asks?
"Unfortunately, that is almost a certainty. Fortunately I know a group that can help me get rid of them."
"Are there any ladies in that group?" asks Zelos.
"Umm.. sure why?" asks Marth.
"Then I'm coming with you. Have no fear hunnies! Zelos is here!"
Zelos proudly storms out of the house, not even asking which way to go.
"Wow," says Marth. "What an odd person.... how did he mistake me for a girl anyway?"
Level 3- Hero Of Hyrule
Songs- Legend of Zelda Theme
After defeating Tabuu, Link returns to the forest, once again returning the Master Sword.
Before he can place the sword back in the stone, however, Link is attacked by the Subspace Army.
Part 1-
Playable characters- Link
Objective- Destroy the Subspace Army (they come in an assortment of different enemies, totalling 30 in all).
After this Link talks to himself, saying that he needs to find the rest of the group, or he would if he could say anything other than "SKRAHHH!!!"
Level 4- The Masked Swordsman
Songs- Metaknight's Revenge
Metaknight vanishes from view shortly after the fight with Tabuu, choosing to remain mysterious. He returns to the Halberd, but aircraft carrying Subspace Army attacks the Halberd.
Part 1-
Playable characters- Metaknight
Objective- Defeat the Subspace Army sieging the Halberd in a side-scrolling level through the Halberd.
After the battle Metaknight realizes that all of Trophy Land must be plagued with the creatures, so he decides to find a group, saying nothing because it would be stupid if Metaknight talked to himself.
Level 5- Ike's Group Forms
Songs- Ike's Theme
Each section heads the same way, joining at the same point by some strange coincidence.
Chris arrives in a field, stopping briefly to take a breather after the long battle he had back on Earth. Little does he know, Ike and Mia are heading his way.
When the 3 meet, Chris and Ike confront each other. Ike is dressed in his black Lord outfit, which fools Chris into believing that Ike is an enemy soldier. This causes the 2 swordsman to have a one on one standoff.
Part 1-
Playable characters- Chris or Ike
Objectives- Defeat the other person in a stamina match.
Notes-
Chris has a speed and range advantage but Ike has a power advantage as well as a counter.
After the fight, a cutscene shows them tied. Chris has even greater fighting skill than Ike, but Ike wields the legendary Ragnell, putting them on equal footing.
Ike, exhausted from fighting, says "You can't beat me... I fight for my friends..."
Chris realizes that this line is far to nobel (and corny) to be said by a villain, so he offers a truce.
"Hey. I don't know who you are, but noone with your fighting honor could possibly be evil. What is your name and what brings you here?"
"My name is Ike. Me and my companion were beset by strange creatures, and we have come seeking aid. And you?"
"My close friend was abducted by a knight in black. I could use some help rescuing her."
"The Black Knight lives!?" Ike says, horrified and excited at the same time.
"Do you know of him?" Chris asks?
"If we are talking about the same person, then yes. He murdered my father."
"Ouch... sounds like we should be on the same side," said Chris.
As they agreed to join forces, Link, Metaknight, Marth and Zelos show up and join the team as well.
Zelos immediately hits on Mia.
"Hello, beautiful! Is there anything I can do for you."
"Yeah... you can fight me!" replies Mia.
Zelos is caught off guard by this unusual beauty. Ike attempts to break up the fight but Marth stops him.
"Wait," said Marth, "I want to watch this. Zelos has it coming."
Part 2-
Playable characters- Mia or Zelos Wilder
Objective- Defeat the other person in a stamina match.
Regardless of what character you use, the outcome of the match shown in a cutscene is always the same. Mia kicks Zelos's ***.
"Ouch! Why do you have to be so rough, beautiful?"
Mia is about to reply, but Ike interrupts and replies for her.
"I apologize for my friend. She gets excited really easily. And when she does, she always ends up hurting someone."
"Such a beauty is easy to forgive," says Zelos. "I kind of like a strong woman."
Another voice is heard from an unknown person.
"I swear... you'ld hit on a tree if I dressed it up in a skirt."
The speaker steps out from behind the trees. Shinon
"Woah where'ld you come from Shinon?" says Ike.
"Heh... I've been here the whole time. You sure aren't perceptive. Do you even ponder why I tell you that you will never be as good as your father."
"Same old Shinon..." says Ike. "Well, if noone else is going to show up, then I guess everyone is here. Lets share information."
And so each person in the group takes turns sharing his/her story. Chris is the last to tell his story. Zelos immediately responds to Chris's story.
"So... you've come all this way for a girl. Sounds like I'm not the only Casanova in this group."
"What do you mean by that, Zelos?" Chris replies.
"What? You mean your not interested in this Ryann girl?"
Chris gets frustrated, partly annoyed by Zelos's attitude, and partly annoyed that Zelos was pretty much right on the mark. Its this frustration that causes him to punch Zelos in the face.
Everyone else in the group laughed, both because they felt Zelos deserved it and because they could see right through Chris's tough act.
The chapter ends when the entire group is surrounded by Subspace Army.
Part 3-
Playable characters- Ike, Mia, Chris, Marth, Zelos Wilder, Link, Metaknight, Shinon (pick 4)
Objectives- Defeat all 100 Subspace Army units (of various types).
After this fight, the entire group understood the gravity of the situation. They would need to find others to join them in their quest to stop the Subspace Army and defeat its leader once and for all.
Chapter 2: Rising Darkness
Tabuu and Ashencroft wanted to ensure their victory in this war. To do this, they would need the help of other powerful villains. In order to prevent a revolt, Tabuu knew he would have to hide how much power he had lost when he was defeated by the heroes of Trophy Land. Ashencroft was sent out to recruit. To assist in this, Tabuu granted his sword additional powers. It was in fact Tabuu who granted Ashencroft's blade the ability to slice through dimensions. Now Ashencroft has the power to warp using his sword.
Part 1- Mewtwo
Songs: Team Galatic Battle
Mewtwo and Mew were equals in the new Poke'mon kingdom they started (at the end of the first Poke'mon movie). There was unrest, however, for Mewtwo didn't like being equal in power with another. Mewtwo's desire to rule over all Poke'mon made him easy to tempt.
When Mewtwo was alone, Ashencroft warped in to begin "negotiations."
Mewtwo is suprised by the intruder but not frightened. Mewtwo charges a powerful shadow ball and launches it at his opponent. The shadow ball doesn't even scratch Ashencroft.
"So... I guess I'm going to have to do this the hard way.." Ashencroft says.
"Its impressive that you've survived that," said Mewtwo, "but I was just getting warmed up."
Mewtwo then fires a hyper beam, one of the most powerful attacks in Poke'mon. It doesn't even leave a scorch mark on his foe's armor.
"Now... you'll have to witness true power," says Ashencroft.
FIGHT!
*Useable characters- Ashencroft
*Opponent- Mewtwo
*Obj- 1 stock match
After defeating Mewtwo, Ashencroft stays his hand, and tempts Mewtwo by offering him power.
"I can see inside your black heart, Mewtwo.... and I can see your desires. I can see that you want to rule over all Poke'mon and eliminate the humans of your world. If you will offer me your allegiance, then you will obtain true power. Resist and I will kill you here."
"I will accept your offer..."
And thus the alliance got its 3rd member.
Part 2- The Black Knight (Note that none of this is actually related to the true plot of FE.)
Songs- Against The Black Knight
It appears as though the Black Knight has once again survived his fight with Ike. He was ressurected by Sephiran before the 2nd to last fight in Radiant Dawn. The Black Knight's one desire is to surpass Ike and defeat him. This made him easy to tempt.
Ashencroft warps to the Black Knights location. The Black Knight draws his sword, Alondite, in reaction to this. A fight between the 2 knights ensues.
Useable Characters- Ashencroft
Opponent- The Black Knight
Obj- 1 stock match
After the end of this match, the cutscene resumes.
"Why can't my blade hurt you..." said The Black Knight.
"I know you're story.... (Spoilers) Zelgius, your equipment was blessed by a "god." I am more powerful than your Ashera, for my power comes from the abyss."
Ashencroft, holding back much of his strength, slashes at the Black Knight. His sword takes a chunk out of the Black Knight's armor. The Black Knight is surprised at this.
"... What do you want from me?" asked the Black Knight.
"I want nothing but your allegiance" replied Ashencroft. "In return you will have the opportunity to fight your nemesis again.... the one you call Ike."
"I'm listening..." said the Black Knight.
"Ike resides in another realm. He is allied with a rather annoying group. Among them is a prince who's people I intend to vanquish. With your help, we will all see our desires met."
"We?" asked the Black Knight.
"Come with me... everything will become clear to you."
Part 3- Dracula
Songs- Castlevania Theme
Simon Belmont once again hunts down Dracula. This time, in his castle in Trophy Land.
Useable Characters- Simon Belmont
Opponent- Lord Dracula
Obj.- 1 stock match
After Simon defeats Dracula, Dracula becomes a bat and flies away. When Dracula finds his new destination, a creepy, desolate part of the forest, Ashencroft is there to greet him.
"I see we are of the same kind," said Ashencroft.
"You are a vampire as well?" said Dracula.
"Nay... atleast... not quite, for I am a different kind of demon."
"Well then, lets find out which of us is the superior." replied Dracula.
Playable Characters- Ashencroft
Opponent- Lord Dracula
Objective- 1 Stock Match
Ashencroft defeats Lord Dracula. Dracula decides to deny his opponent victory by telling about his recent battle with Simon Belmont. Before he could say a word, however, Ashencroft interrupts him.
"I already know your story, dark one, for I can read the evil of your heart. I have come here to make you an offer. Pledge your loyalty to me and you shall gain the power to defeat the one you call Simon."
"I accept your offer..."
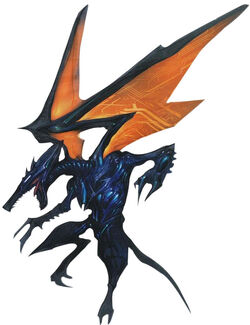
Part 4- Nightmare
Songs- Against Ashencroft
Nightmare, a merciless killer who gains pleasure from the suffering and fear of others, was perfect for Tabuu's alliance. Gaining his allegiance would be simple.
Ashencroft warps to Nightmare. Nightmare had just finished turning an innocent victim into a trophy. When he saw the knight, Nightmare's only thought was to kill.
Playable Characters- Ashencroft
Opponent- Nightmare
Objective- 1 stock match
After being defeated, Nightmare begins to speak.
"You.... how can you resist a nightmare."
Ashencroft laughs. "I fear nothing... But I have not come here to fight. I have come here seeking your service."
"You expect me to... serve you? I care not for loyalty or power. I only want fear."
"Thats what makes you perfect for the job I'm offering you. Your payment will be the fear and misery of my enemies."
"I will be their worst Nightmare!"
Part 5 Ganondorf And Bowser
Ganon and Bowser were quick to leave the group after Tabuu had been defeated. They now joined forces and plotted to destroy Link, Zelda, and Mario once and for all. When Ashencroft made his offer they were quick to accept.
This is unique among most chapters in that it may be updated as more villains are added to the roster.
Chapter 3: Gotta Catch Them All
Part 1- "I'M NOT ASH!!!"
When we last left off on The Poke'mon Trainer's journey, he was being chased by a bunch of screaming fans. They didn't even give him the time to explain that he wasn't Ash Ketchum. Fortunately for him, his Charizard could fly.
Ash Poke'mon Trainer went to sleep during flight and when he woke up he found himself near a cave. He enters, knowing that his Poke'mon will defend him from any danger.
Little did he know that an intelligence greater than his own was in that cave.
Part 2- The Big Shots
Songs: Poke'mon Battle Diamond and Pearl
Team Big Shots were on their newest mission, to find the famous Mew. When Mewtwo joined Tabuu's alliance, he received his payment soon after. Mewtwo and Ashencroft stormed the Poke'mon Kingdom and forced Mew to retreat, leaving only Mewtwo to rule. His rain of terror would come soon. His next goal was to wipe the slate of humanity clean.
Mew managed to get away with his life and took shelter in a cave in the forest region. Fortunately, Stalin, the world's most intelligent Poke'mon discovered this quickly, and took his teammates, Anguirus and the Undertaker on their most important mission ever. If they fail, then all humans and Poke'mon will be at the mercy of Mewtwo.
When the Poke'mon Trainer and Team Big Shots meet, the trainer's only intention is to catch these impressive Poke'mon. Team Big Shots has no intention of allowing themselves to be treated like pets.
Useable Characters- Team Big Shots
Opponents-Ash Ketchum The Poke'mon Trainer.
Objective- 3 stock (Poke'mon Elimination) match
When Team Big Shots wins the match, The Poke'mon Trainer cowers in fear. To his astonishment, Stalin starts speaking.
"Hey, you...."
"What? Are you talking to me?" The PT asked.
"No... I'm talking to the other geek that was trying to turn us into common household pets."
"How can you speak?" PT asked. "Poke'mon can't talk."
"We're Team Big Shots. Our IQ is much higher than yours. We don't wish to waste time quarreling with you, we've got more important matters to attend to," said Stalin.
"Allow me to help," replied the PT.
Part 3- Mew
Songs: Poke'mon Battle: Diamond Pearl
Team Big Shots and the PT find Mew in the center of the dungeon. When Mew sees the human trainer, he acts on instinct and attacks the PT's poke'mon.
Useable Characters- Mew
Opponent- The Poke'mon Trainer
Objective- 1 stock match
After the match the cutscene resumes, showing Mew's great power. He knocks all of The PT's Poke'mon away with a single physcic blast.
Team Big Shots then speaks with Mew in Poke'mon language. When Mew is told what happened after he was driven out, he loses all fear and decides to join the team and pay Mewtwo a little visit.
Part 4- Pikachu and Jigglypuff
Songs: Any Poke'mon Song
When the group leaves the cave, they journey through the forest and find a Pikachu fighting with a Jigglypuff.
Useable Characters- Pikachu/Jigglypuff
Opponent- Jigglypuff/Pikachu
Objectives- Stamina Match
When the fight is over, The PT attempts to capture both Poke'mon but Stalin stops them.
"Don't even think about it, human," Stalin said, "We will talk with them instead."
After another conversation in Poke'mon language, Pikachu and Jigglypuff join the Poke'mon Trainers group.
Through his intelligence, it was only natural that Stalin would be appointed the leader of this group. They all knew that if they were to defeat Mew, they would need the help of another legendary Poke'mon. Mew and Mewtwo have equal power, so one can never overthrow the other alone. Mew would need the help of another ancient poke'mon, Lucario.
The dialogue wasn't really great for this chapter but its to be expected of a Poke'mon Chapter.
Chapter 4: Sain Loves the Ladies
Part 1- Why don't the ladies love him?
Songs: Fire Emblem Theme
Bored of his duties, Sain leaves Lyn's court in search of a woman who can actually tolerate his womanizing ways. His journeys take him to Trophy Land. Sain travels from town to town, being turned down by most of the ladies in the known Nintendo universe.
One day he was particularly unwelcome in a village near the Mushroom Kingdom and is chased off by a mob of women.
Playable Characters- Sain
Objective- Escape the mob
This works kind of like the racetrack level of Melee's adventure mode, except that you are constantly being chased by a crowd of angry women. Don't count on getting lucky.
Before he is chased off by the mob, he hears about a ball being held at Princess Peach's castle. The guest list was huge and contained people from several countries, including Hyrule and Sain's home, Lycia. Many beautiful women were sure to attend, and even someone as dim-witted as Sain knew this. Sain, of course, does not hesitate to go.
Part 2- Princess Peach
Songs- Barbie Girl
It turns out that organizing a party is more stressful than BarbyPeach thought. The palace had to be decorated, the food had to be prepared, and the toads knew nothing about being waiters. Apparently Peach didn't think ahead, as the only thing that had been finished was the guest list. She couldn't count on Mario being there to help, as he was nowhere to be found. Peach decides to take a stroll through the garden to relieve her nerves. She is attacked by Subspace Army.
Playable Characters- Peach
Objectives- Defeat the Subspace Army units (30 in all).
After these Subspace Army units are defeated more appear. Fortunately for her, the previous fight made a lot of noise, alerting the guards (now why can't they ever stop Bowser). When the fighting is done, even Peach was smart enough to (somewhat) realize the gravity of the situation. She has her servants post messages around the villages of the Mushroom Kingdom requesting the help of any able-bodied tropps to serve as guards. The party must go on!
Part 3- The Noble Sir Sain
Songs- Crimean Army Sortie
Sain sees this message and decides to take advantage of this opportunity. Being out of work for so long was starting to take its toll on Sain's wallet. He had also heard that the Princess was quite a beauty.
So Sain hops on his trusty steed and sets off for Princess Peach's Castle. He wasn't the first to arrive unforunately, as many other knights, human and mushroom alike, also had their eyes set on the job. The toads had advised peach to hold a tournament to decide who should become a member of Peach's personal guard.
Playable Characters- Sain
Objective- Win the tournament (64 entries)
Notes- Each match is a one on one 1 stock match.
The opponents are common knights except for the final round, each opponent uses the same moveset as Link.
In the last round, you fight a stronger knight, who uses your moveset. He is heavier and slightly stronger than you are.
After he wins the tournament, Sain is appointed to be Peach's personal guard. True to his nature, Sain hits on the Princess using his Shakespearean style language. This goes right over the Princess's head (she doesn't understand that he is trying to hit on her.)
"I'm sorry my good knight... I have no idea what you're saying," said Peach.
Sain, frustrated, replies "I'm sorry, my Princess, I just said that you are truly beautiful."
"Thank you. May I ask your name?"
"I am Sain, of Lycia."
"Well, Sir Sain. Would you mind escorting me to the party?"
Sain, as you might expect, was overjoyed by this. Usually, girls walk off or slap him by now. His sweet-talking may not have been effective, but he had a date nonetheless (or atleast thats the way he saw it.)
Part 4- The Party
Songs- Power Hungry Fool
Thanks to the diligent toads, the preparations for Peach's ball had been finished in time. The guests were already starting to pour in. Among the more well-known guests were Princess Zelda of Hyrule, who had befriended Peach before the fight with Tabuu.
As the party commenced, the castle soon went undersiege by subspace army, led by none other than Bowser.
Playable Characters- Sain, Peach, Zelda
Objectives- Destroy all enemies.
Notes-
There are about 30 Subspace Army enemies. After those are all defeated, you will face Bowser.
Bowser has no intention of being defeated so easily. His own Koopas immediately storm the palace and he runs off with Peach.
Part 5- Sain to the Rescue
Songs- Fire Emblem Theme
Before Sain could rescue the Princess, he would have to take care of the Koopas first.
Playable Characters- Sain, Zelda
Objective-
Defeat all Koopas (30 total).
Notes-
These come in an assortment of Koopa Troopas and Koopa Paratroopas.
Use their shells to help score additional kills.
Sain wastes no time pursuing Bowser. In his rashness, he leaves without taking Zelda with him, making this a solo mission.
Playable Characters- Sain
Objective-
Find the Princess
Notes-
This works like pretty much any SSE side-scrolling level.
Bowser almosts escapes with the Princess. He flees to his Koopa Clown Car located near a volcano. Fortunately for Peach, she was lucky to have Sain as a guard. Sain arrives just in time to fight the dragon... turtle... thing.
Playable Characters- Sain
Opponent- Bowser
Objective- 1 stock match
When Sain defeats Bowser, Bowser is knocked into the lava. It looks like the end of Mario's arch-rival. The Princess is grateful to be rescued and completely ignores the fact that she was kidnapped in the first place.
"I'm sorry, Princess. There were to many enemies to stop him."
"You've saved my life and thats what matters," replies Peach.
"Hey... the ball doesn't have to end yet. I'm sure everyone will be thrilled to see you safe," says Sain, "Let me take you back to the palace."
"Thank you, Sir Knight."
End Of Chapter... Or is it...
Cutscene- Night of the Living Bowser
Bowser isn't yet dead. After Sain and Peach leave the area, a skeletal hand bursts from the lava. Bowser is now.... Dry Bowser!
Chapter 5: The War Begins
Level 1- The Fortress
Part1- Moving Out
Soonafter their conversation, the knight group decided that it was time to move out. They would need a way to the Subspace Realm. They decide to head for the fortress first.
On the way to the fortress, the group is assaulted by knights. Chris recognizes them immediately as members of Ashencroft's human army.
Useable Characters- Chris Lionheart, Ike, Mia, Zelos Wilder, Shinon, Link, Metaknight, Marth (Pick 4)
Objectives- Destroy the Barbarous Legion Knights (100 in all)
Notes-
These enemies are divided into sword, spear, and axe specialists, with some bow enemies scattered throughout. Individually they aren't hard defeat. You definitely want to take advantage of the FE character's counters.
After that fight it become evident that the group was close to their destination. Chris Lionheart was the first to realize this, as his thoughts have been only on finding Ashencroft and Ryann this whole time. He charges ahead, leaving the rest of the group to catch up.
Chris was interrupted by a horrifying sight. A subspace bomb blew up the fortress and took much of the surrounding area with it. It would have taken Chris as well, had MK not flown in and taken him from harm's way.
"Woah... what just happened?" asked Chris.
Link was the first to answer.... "SKRAHHH!!!!"
The entire group was impressed at Link's amazing fluency and could only reply with "......"
"Maybe I should explain," said Marth, "That explosion was the result of a Subspace Bomb. When one of those things goes off, everything in the explosion's path is pulled into the realm of Subspace, another realm ruled by Tabuu, the leader of the Subspace Army."
"I see... and what happens to those caught in the blast?" asked Chris.
"We don't really know... we assume that they are unharmed and are pulled into Subspace just like everything else."
"So, thats where I'll find my friend?" Chris inquired.
Zelos laughs at this. "Come on everybody. Lets head for the Subspace Realm with haste for loverboy here."
Chris is once again angered by his new friends impudence. Once again, his fist finds it way to Zelos's face.
The group then heads towards the deserts, hoping to find an entrance to subspace there.
Level 2- The Mines of Moria
Part 1- Western Moria
A Gondorian knight known as Berethor leads his odd group, The Third Agers, to fight Sauron, who has also joined Tabuu's alliance. They head through the Mines of Moria, located deep in the mountains.
Useable Characters- The Third Agers
The first part of the level will be a maze, just like any other side-scrolling SSE level. This level features pits, Dwarven Traps (such as fire spouts), and other hazards. The enemies featured here are all goblins or wargs, which come in several types:
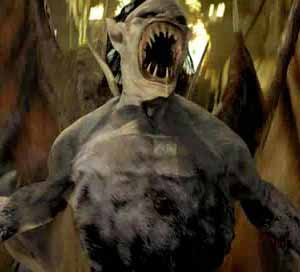
Goblin Chieftan- A staff wielding Goblin that can use fire magic and heal other Goblins. They have the lowest health.
Goblin Archer- A bow wielding Goblin that fires arrows.
Goblin Warrior- A sword wielding Goblin that is fast and weak.
Goblin Veteran- A more stout Goblin warrior with dual swords. Its attacks are stronger than its weaker cousin.
Warg- A large and fierce wolf-life creature.
At the end of this level, the group opens a hidden door, enchanted with dwarven magic and enters the more perillous eastern half of Moria.
Part 2- Indiana Jones
When the group enters Eastern Moria, they are surrounded by Goblins, but are "rescued" when the Balrog of Morgoth burns many of the Goblins. They immediately find shelter and wait for the demon to pass.
After the demon leaves the room, another person is seen running towards it. Indiana Jones
Berethor's group catches up to Indy and starts talking to him.
"You, what is your name and what is your business here?" asked Berethor.
"My name is Indiana Jones. I was here hunting down an ancient artifact when that ****ed creature came out of nowhere and nearly roasted me!"
"I wish that thing had burned you!" said Hadhod. "How dare you go treasure hunting in the tomb of my kin! I should have your head for that!"
Berethor stops the Dwarf's attack.
"We need all the help we can get if we're up against a Balrog. Come with us, and we might all make it through these mountains."
Indy agrees and joins the group.
Part 3- Eastern Moria
With their new ally, the Third Agers head through Eastern Moria, hoping not to fight the Balrog. Eastern Moria is much like Western Moria but it is larger and more dangerous. Fire Traps are even more common and a new trap, spike pits have been added. The Goblins in these parts are much stouter than their Western cousins and have higher hp.
Useable Characters- The Third Agers, Indiana Jones
This level can be divided into several sections.
Section 1- Really straitforward. This takes up most of the level. You just head forward, head down a pit occassionally and fight lots of Goblins.
Section 2- You head into a drum room where many Goblins are. This is where the most intense fighting against common enemies will happen.
Section 3- Head across narrow wooden bridges and down the huge stairs near the exit of Moria.
After getting through the dungeon, the Balrog shows up behind your group. Everyone agrees that it is time to get the hell out of there and they manage to escape the Balrog's grasp.
Part 4- Demons of Fire
Little did they know, another demon stalked the halls, seeking the Balrog. It was none other than Ashencroft, the fire demon from Earth. Tabuu sent the Blade Demon in with a mission to recruit the Balrog. Ashencroft saw the stupidity in this.... the Balrog would never fight for him. Tabuu knew this to, so he had Sauron accompany him.
Seeing Sauron, the Balrog attacks him and a battle begins.
Useable Characters- Sauron
Ally- Ashencroft
Enemy- The Balrog of Morgoth
The Balrog uses the following attacks:
Whip of Fire- A very far reach whip. He swings it over his head before lashing out. Low->High knockback. 10->25%
Flaming Sword- The Flames of Udun form a sword. This is powerful but doesn't have great range or speed in comparison to Whip of Fire. He slams the sword into the ground.
Medium->Very High Knockback. 15-30%
Roaring Inferno- The Balrog unleashes a torrent of flaming breath. Long range in front of him. Deals 5->10% per second that you are in it. No flinching. No knockback.
Pillar of Wrath- The Balrog flies into the air and slams into the ground in the center of the stage, releasing fire everywhere. This must be side-stepped or aerial dodged to be properly avoided. Can OHKO in intense. 20->50%
(The number after the arrow is the intense percentage)
Size- Same as Galleom
Mobile- Somewhat
Health- Same as Galleom
Difficulty- 3-4/5 (If you can dodge Pillar of Wrath, if not its OVER 9000!!!!!)
After defeating the Balrog, Sauron speaks to it.
"Fight for me..." Sauron commanded it.
The creature couldn't speak, but it obeyed its conqueror, becoming Sauron's powerful pet.
Cutscene-
Berethor's group has headed some distance from Moria, but they are still surprised at what happens next.
A subspace bomb strikes the Mountains of Moria, pulling it into the Subspace Realm. Berethor and friends are safely out of its range.
Chapter 6- Where's Mario?
Level 1- Vacation Crashers
When Bowser once again attempted to kidnap Peach during her ball, Mario was nowhere to be found. Instead, a new hero, Sain, had to step up to rescue the Princess. Mario had gotten bored of his tedious life of rescuing a ungrateful Princess from Bowser on a regular basis for no pay. He decided to vacation in Delfino Plaza.
Mario's vacation would be short-lived, however, for the city soon came under attack by the Subspace Army.
Part 1- Surrounded
Useable Characters- Mario
Objectives- Destroy the Subspace Army (30 total) or survive for 2 minutes.
It seems that Mario is in a bit more trouble than he can handle. He becomes completely surrounded. A Greap moves in, its scythes looming menacingly over Mario. Suddenly, a green fire ball strikes the Greap, knocking it down.
Mario turns to see his savior, Luigi.
Part 2- Don't Forget Weegee!
Useable Characters- Mario, Luigi
Objectives- Destroy the remaining Subspace Army (50 total).
Notes- Enemy number 50 is the Greap.
Mario wants to talk to his brother, but their job isn't done yet. They know that they must rout every enemy in the city.
Part 3- Routing Delfino
Useable Characters- Mario, Luigi
Objectives- Go throughout the entire Delfino Plaza, destroying every Subspace enemy along the way.
Details-
This is a pretty straight-forward side-scrolling level. The Subspace Army will appear not only on the roads, but they will also sneak out of alleys and jump from the roofs of buildings. The last part of the level will be the central area of the plaza.
Once the plaza has been cleared, they are attacked again, this time not by Primids, but by something much worse.
Dry Bowser leaps down from the roof of a building, being immediately followed by a large group of flying Koopa Paratroopas. This fight is clearly not in favor of the Mario Bros.... that is until a boomerang soars through the air.
All of the paratroopas are grounded by the boomerang. The rang returns to its owner, Ty the Tasmanian Tiger.
Part 4- Bowser the Undead
Useable Characters- Mario, Luigi, Ty The Tazmanian Tiger
Objectives- Defeat Dry Bowser and the Koopa Troopas.
Notes-
No matter who you choose, you will be aided by 2 computer controlled allies, who control the other 2 characters.
Don't waste time. Destroy the enemy while you still have help.
Ty's boomerang is great for destroying clumped Koopas.
Use the Koopa shells to your advantage, but beware the dangerous red shells.
When the koopas are defeated, Dry Bowser retreats, hopping into his new gothic ride, which matches his new undead look.
Level 2- Back To Business
Mario and Luigi know the imminent danger of their current situation. They know that if they are to defeat this new evil, or even survive for that matter, they would need an army. One "person" immediately came into their mind. That person was none other than Pit, commander of Palutena's Army. Ty decided to come along as well.
And so Mario, Luigi, and Ty head for Sky World. The quickest way there would be to take a plane from Delfino.
Part 1-Leaving Already?
Useable Characters- Mario, Luigi, Ty The Tazmanian Tiger
Objectives- Find a plane.
Details-
This is a side-scrolling level. Just journey through Delfino until you find a plane. Unlike most levels, it is not straightforward, and is instead a maze of sorts. This is unique in that there are no fights along the way. Once you find a plane, this part ends.
The group has found their ride, but the owner isn't willing to give it up without a fight.
Miles "Tails" Prower
Part 2- Sorry But We Need That Plane
Useable Characters- Mario, Luigi, Ty the Tazmanian Tiger (choose one)
Opponent- Miles "Tails" Prower
Objectives- Defeat Tails in a stamina match
After Tails is defeated, he calls for help. A blue blur flashes across the screen and a hedgehog appears beside Tails. Sonic The Hedgehog.
Seeing Mario, Sonic decides to have a battle for old times sake.
Part 3- Red Vs. Blue
Useable Characters- Mario or Sonic
Opponent- Mario or Sonic
Objective- Win Or Lose. (Stamina)
Notes-
This is a unique fight. Win or lose, the story continues almost exactly the same. The character who wins will effect the next conversation somewhat.
If Mario Wins:
Sonic is knocked to floor and Mario mocks him with a "Hah! Hah!"
If Sonic Wins:
Sonic runs circles around a tired Mario.
"Come on... keep up... your to slow!"
After that little dialogue (if it can even be called that), Sonic and Tails join your group and allow you to use their plane.
Level 3- Next Stop, SKYWORLD!
It would appear as though the group's job won't be easy, for their plane isn't the only thing roaming the night sky. They are immediately attacked by Vampires, lead by none other than Dracula.
The group reacts in shock, but the quick mind of Tails quickly formulates the best possible plan.
Part 1- Battle In The Skies
Useable Characters- Tails
Ally- Ty The Tazmanian Tiger
Objectives- Survive for 2 minutes.
Details-
You play as Tails. During this fight, you possess the ability to fly around for an unlimited duration. Pretty much the only way to die is to suicide, or to be knocked out of the stage when your damage gets high enough.
Ty the Tazmanian Tiger will be riding on the roof of the ship, throwing his boomerang at the Vampires. Ty is invinceable during this fight. His main purpose is to rack up projectile damage against the attacking vampires so that you can score the KO's.
Dracula will not appear during this fight.
At the end of this fight, the group is overwhelmed by the vampires. But hope is not lost, for white wings are seen flying through the sky.
Pit
Pit didn't come alone. He brought a squadron of angels with him. The angels attack the vampires, and an epic battle commences.
One vampire remains uncontested.... Dracula.
Part 2- Angel Vs. Demon
Playable Characters- Pit
Opponent- Dracula
Objective- Win Or Lose (Stamina Match 300%)
Details-
Whether you win or lose, this fight ends the same.
You will have constant flight during this fight, as will Dracula, so the only way for one of you to win/lose is to SD or to have your health brought all the way down to 0%.
After this fight ends, whether you win or lose, the vampires are defeated by Pit's army of angels, and Dracula, despite having the upper hand in the fight vs. Pit, is forced to retreat.
Pit, now to tired to maintain flight, falls from the sky. Tails re-assumes command of the plane and dips down just in time to save the white-winged boy.
The group now has an army, but the situation has grown even more grave. Its not just Tabuu and Bowser... but also vampires! As far as they knew, that might not even be the entire enemy force!
Chapter 7- The Girls.... And Sain
Level 1- Leaving The Castle
After Sain defeated Bowser, he escorts Peach back to the ball. While there, the two share a dance.
A young woman then offers to take a photograph of them. Donna Letman
As soon as the young photographer sets up her camera, however, the castle once again comes under attack by Primids.
A new girl joins the fight, bringing her doll to life. Anise
Part 1- Under Attack
Playable Characters- Sain, Peach, Zelda, Donna Letman, Anise
Objectives- Defeat All of the Sword Primids (50 in all)
Details-
This is a pretty straightforward battle. Just kill all 50 sword primids to advance.
After this fight, Donna Letman becomes surrounded. With nothing but her camera to defend herself, it looked like it was all over for her.
"Here goes nothing....." said Donna, "Say CHEESE!!!"
Donna snaps a photo of the primids and, to her great astonishment, it causes all the primids in the picture to vanish.
"Wow..." said Donna, kissing her camera, "Thats what I'ld call a Kodak moment."
From this point it became obvious to everyone in the room, even Peach, that something must be done. Someone would have to take the fight to Tabuu, or else all of the Mushroom Kingdom would be destroyed by his infinite army.
Sain volunteers for the job. To his dismay, Peach decides to join him.
"No, Princess, you mustn't come. It is far to dangerous," said Sain.
"Then I will come as well," replied Zelda.
"Oh, great. Now I have to worry about the safety of two princesses," griped Sain.
"Two Princesses and a Photographer," stated Donna, "I may not look like much, but apparently my camera packs a punch."
"Count me in as well," said Anise, "my magic will protect me."
"I don't have any say in this do I?" asked Sain.
"None at all," replied Peach, "You are my knight. You must do as I say."
"As you wish, my Princess," said Sain.
So with that, the group left Princess Peach's castle and journeyed towards the Research Facility. Zelda, the brains of the group (considering that the only other person in the party that has been to the Subspace Realm before was Peach), stated that if Tabuu was a threat again, then the Subspace Bomb factory must have been rebuilt. They were likely to find a Subspace Portal there.
Level 2- Setting Off
Zelda pulls out a map of Trophy Land. The group had just reached their first checkpoint, The Lake, which resides near Peach's Castle. To get to the Research Facility, they would have to find transportation first. They would head from the Lake, through the Swamp, and through the desert, eventually reaching a Foxhound Army base located in the desert.
Part 1- The Swamp
Playable Characters- Sain, Peach, Zelda, Donna Letman, Anise
Objectives- Make it through the swamp.
Details-
This is a side-scrolling level. You will have to fight many Crocs, and other enemies from Donkey Kong, to make it through. There aren't to many traps in the swamp. This swamp contrasts heavily to the one in the current SSE.
The major trap of this level is muddy marshes and bayous (pretty much like a very muddy swampy lake in Louisiana). These areas slow your characters movement and decrease your ability to jump. The bayous act like water and can make you drown if you stay inactive in them for to long.
Crocodiles can be seen swimming through the water and will attack you if you get to close.
This part is lengthy and would probably take about 15 minutes minimum to go through.
"Eww... this place is making my dress all muddy!" complained Peach.
"I think thats not our biggest problem right now," said Sain. "There are enemies ahead."
Sure enough, there were crocs ahead, lead by none other than King K. Rool. Unfortunately, K. Rool spotted the intruders and sent his goons to attack.
Part 2- Crocodile Hunters
Playable Characters- Sain, Peach, Zelda, Donna Letman, Anise
Objectives- Defeat the Kremlings (50 total)
Details-
This is a pretty simple beat em up mission. Just defeat all the enemies to continue.
Kremlings are weak and come in several forms:
Normal Kremling- Weak and easy to defeat. Nothing special. Kind of like a regular primid, except with more focus on biting.
Big Kremling- Larger than their normal cousins... actually a lot larger. These guys are slower, stronger, and can take more of a beating.
TNT Kremling- This Kremling likes to commit suicide. Hiding in a barrel of explosives, these Kremlings will run up to the nearest person and blow up. The safest way to deal with them is to use projectiles to take them out from a distance. The explosions are easily powerful enough to kill surrounding Kremlings.
After the fight, the cutscene resumes and King K. Rool prepares to shoot Peach with a cannonball. His plan is unsuccessful, however, because a cocunut comes out of nowhere, landing directly in the barrel of his gun and causing it to backfire.
Two apes jump from the background. Donkey Kong and Diddy Kong
King K. Rool attacks in his anger and is joined by more Kremlings.
Part 3- Welcome To The Jungle
Useable Characters- Sain, Peach, Zelda, Donna Letman, Anise, Donkey Kong, and Diddy Kong
Opponents- King K Rool and Kremlings
Objectives- Defeat all of the foes.
Notes-
The easiest way to win this mission is to take out the Kremlings first. This can be accomplished easily through the use of Din's Fire or explosions from a TNT Kremling.
Once this has been accomplished, this fight becomes cake, as K. Rool is slow and predictable.
After being defeated, K. Rool flees. Donkey Kong and Diddy Kong pursue him, leaving the group. They will not be seen again for a while.
"Well that was odd..." said Sain, "It's not everyday that you see monkeys fighting crocodiles with guns."
The whole group gets a good laugh out of this.
The party continues on their way, exiting the swamp soon afterwards.
Level 3- The Desert
Sain's party soon finds themself in the arid wastelands of the desert.
"Eww... I thought the swamp was bad..." complained Peach, "I've got sand in my dress."
Everyone laughed at this. Even Sain couldn't hold back a chuckle.
"Well, excuse me, Princess," replied Sain, "You almost got killed by viscious reptiles and your complaining about sand in your skirt?"
Peach, annoyed by her knight's attitude, pulls out her frying pan and whacks him in the head. "How dare you speak to royalty that way, Sain. I could relieve of your duty for this!"
"I'm sorry Princess," replied a hurt Sain, rubbing the back of his bruised head, "I've forgotten my place. This desert must be getting to me. Forgive me, my muse."
The Princess thought a bit and replied with what she would probably consider to be a big word... "OKAY!"
After a water-break, the party resumes their journey through the desert.
Part 1- Land of White Dunes
Playable Characters- Sain, Peach, Zelda, Donna Letman, Anise
Objectives- Make it through the desert.
Details-
This part covers a lot of ground, and is, of course, a long level, taking about half an hour to complete.
The enemies of this mission are mostly from the Legend of Zelda series, consisting of Goblins, Octoroks, Re-deads, and many desert enemies from the series.
The only traps are quicksand pits, which slowly pull you under if you don't jump out of them, but occassionally the wind will pick up, creating short sandstorms that do 1% per second.
When this part is finished, the group has nearly arrived at the FoxHound base.
This chapter ends here, as it will not continue until the other groups have met up at this point.
Chapter 8- Nightmare In Dreamland
Level 1- Kirby!
At the start of Kirby's Adventure, someone steals Kirby's cake. (Powers) Kirby, pissed off, devours many innocent Waddle Dees as he journeys to slap King Dedede in the face for no particular reason. (You get a cookie if you get the reference. )
Kirby is joined by his friends, The Kirby Friends, ChuChu, Coo, Kine, Nago, Pitch, and Rick, as well as (the non-playable) Gooey.
Part 1-Kirby's Revenge
Playable Characters- Powers Kirby, Kirby Friends
Objectives- Make your way to King Dedede's castle.
Details-
This is a side-scrolling level. It looks just like a Kirby game (though its much shorter, making it more of a "mini" Kirby game).
Your enemies will be a mixture of Waddle Dees, Waddle Doos, and many other Kirby enemies.
You will come across several sub-bosses as you progress through the game, including Whispy Woods. These bosses all have rougly twice the HP of a Greap and aren't to hard to beat.
The length of this level is considerable (it would probably take about 20 minutes or more to beat), but it is really fun and a lot like the actual Kirby games so you may really enjoy it (especially if your name happens to be SirKibble.)
After this level, Kirby and Friends arrive at Dedede's castle. They are attacked by Waddle Dees, but Kirby is allowed to move on by his friends as they hold off the Waddle Dees.
Part 2- Dedede's Castle
Playable Characters- Powers Kirby
Objectives- Get to Dedede
Details-
This works just like a Kirby game. Go through the castle. You will occassionally have to fight Waddle Dees, but overall this is really easy.
This should only take about 5 minutes tops.
After this part, Kirby finds Dedede.
Kirby slaps Dedede across the face.
Dedede: What was that for?!? I didn't even do nothin'!
Kirby: Hiiiii!
Dedede: You're so annoyin' when you're all cute like that. . .
Kirby: Hiiiiii! Hiiiii! Hiiiii!
Dedede: Guh, enough already! I'm gonna clobbah dat dere Kirbeh!
When either Kirby or DeDeDe wins, the other is turned into a trophy.
If Kirby Wins-
He does the annoying Kirby Taunt
If Dedede Wins-
He does the big gay dance.
The victory does not last long, however, because soon the castle comes under attack.
The leader of the assault is none other than.... Nightmare! The Azure Knight steps forward and points his sword at the character. As he does this, Shadow Bugs seep up through the floor. This time, it doesn't form primids. Instead it creates an army of miniature Nightmares (each one about the size of a primid.)
The winner of the last match (Kirby or Dedede), becomes desperate and immediately brings the loser out of trophy form.
Part 4- Nightmares
Playable Characters- Powers Kirby, Dedede
Objectives- Defeat the Nightmares (50 total)
Details-
There are plenty of enemies to defeat, but they aren't to hard. They all use weak sword slashes and fight similarly to Sword Primids, with a few toned down versions of Nightmare's attacks.
Each one has about as much health as a Primid so beating this part shouldn't be to hard.
The following two parts are flashback chapters for Kirby's Friends:
Kirby's Friends allow Kirby to enter the castle and hold off the Waddle Dees.
Part 5- Kirby's Friends
Playable Characters- Kirby Friends
Objectives- Destroy the Waddle Dees (50 total)
Notes-
This is really easy. Just defeat all the little Waddle Dees.
The Waddle Dees just keep coming, and it becomes obvious that Kirby's friends will not be able to hold them all off. "Fortunately" for them, the Nightmares then appear.
The Waddle Dees ignore Kirby's Friends and start fighting the new intruders, but they are outnumbered and outmatched. Kirby's Friends then decide to help fight the Nightmares.
Part 6- Nightmares Part 2
Playable Characters- Kirby Friends
Objectives- Defeat 30 Nightmares
Notes-
Again pretty straight forward. This shouldn't be to hard.
After defeating the Nightmares, the Kirby friends prepare to fight the Waddle Dees again, but instead find that the Waddles are storming the castle.
The Kirby Friends follow the Waddle Dees into the castle.
After winning that match, things appear to be hopeless when Nightmare summons even more of the Nightmares to surround Kirby and Dedede.
But hope was no lost, as a boomerang flies forth and strikes down the Nightmares.
The boomerang returns to its source and a small knight steps out. Sir Kibble
Kirby's Friends then appear and rejoin the group. They are accompanied by the Waddle Dees, lead by a Waddle Doo who teamed up with them after the Nightmares appeared.
The characters then team up to face Nightmare.
Nightmare says "I will feast on your souls!"
The battle commences.
Part 7- The Nightmare
Playable Characters- Powers Kirby, Dedede, Sir Kibble, Kirby Friends, Waddle Doos
Opponent- Nightmare
Objectives- Defeat Nightmare.
Details-
He has 3 stocks.
You have computer controlled versions of the two characters that you don't pick (they have their AI level raised as the difficulty goes up).
You and your allies each have 1 stock (though if you die you can press start and take control of one of the 2 computer allies if you wish.)
If you have a human ally, then he will be able to choose one of the 3 characters as well and the character stealing feature is locked.
After Nightmare is defeated, he plants his sword and the ground and teleports away (it would seem as though Ashencroft wasn't the only one given this power by Tabuu.)
"Such pathetic pray isn't worth my time."
Kirby, Dedede, and SirKibble then realize that Tabuu has come back and that they must stop him (well atleast Dedede and Sir Kibble do... they have to explain things to Kirby.)
Dedede then summons his large army of Waddle Dees (and Waddle Doos) to join them.
The captain of the Waddle force was a particularly skilled Waddle Doo (the same one who helps the group fight Nightmare.)
Dedede: "Cap'n! Get the troops togetha! I'm gonna clobbah dat dere Tabuu!"
Chapter 9- The Legendary Lucario
Level One- Taking to the Skies
When we last left off on the Poke'mon Trainer's journey, he had just met an odd bunch of talking Poke'mon known as Team Big Shots. Team Big Shots was on a journey to find Mew and help him defeat Mewtwo. Mew is found in a dungeon. Now, with 2 more Poke'mon on the team, Pikachu and Jigglypuff, they head for the ice mountains where Lucario was last seen.
The quickest way there would be, of course, to use The PT's Charizard.
Unfortunately, a great power lurks in the skies.
The Legendary Dragon, Rayquaza zooms in at amazing speed and fires a blast of lightning, which Charizard barely evades.
Everyone riding on the Charizard is woken up by the loud noise. Unfortunately only Mew, the Undertaker, and Charizard are able to fight in the air.
This would be the case, anyway, if it weren't for a winged warrior of the skies. Pidgeotto
Pidgeotto flies in and uses wing attack to put the hurt on Rayquaza.
A battle insues.
Part 1- Boss Battle Rayquaza
Useable Characters- Charizard, Mew, The Undertaker, Pigeotto
Objective- Defeat Rayquaza
Notes-
Rayquaza fights exactly like in the Brawl SSE.
You have constant flight in this fight.
All attacks performed by your character are either specials or aerials.
Rayquaza uses Iron Tail, which is a sweeping tail attack. It actually hits twice, so it can break your shield quite easily at higher difficulties.
Rayquaza ducks down and rushes to the other side of the stage.
[edit] Second Move
Rayquaza shoots an energy ball at front of it diagonally, or lowers its head and uses Energy Ball in front of it, which travels across the stage unless it hits the ground, when it will explode. (This can be reflected by various reflecting attacks but not absorbed by PSI Magnet or Oil Panic)
Rayquaza burrows underground, then bursts out of the ground where the player was standing. At lower HP, Rayquaza does this three times. When its HP is low enough that it can be captured, it will perform this attack four times.
[edit] Third move
Rayquaza's eyes glow, and then it creates an explosion at the location where your character was at that time (possibly Focus Blast). While Rayquaza's eyes glow, fighters in contact with its head will be spiked to the ground, often a perfect setup for the explosion.
Rayquaza flies up in a tight circle and uses Shock Wave (or possibly Thunder, though this is extremely different from Pikachu's Thunder) which hits you with a multi-hit lightning bolt (it does not have knockback, however). It breaks shields down quickly. During the time Rayquaza rises touching it will deal Electric damage. It's one of the few attacks that are easier to dodge on higher difficulties due to its much shorter duration. Rayquaza only uses at lower HP.
Rayquaza flies up slowly, then crashes into the character while burrowing into the ground, then appears on the other side. Thunder is the substitute for this at lower HP.
Rayquaza flies up, and then uses Extremespeed to dash near the ground back and forth. At lower HP, Rayquaza does this two or three times. Small characters can evade this attack by ducking, but Rayquaza's rotating head may catch ducking characters off-guard for a clean hit.
[edit] Random
Rayquaza uses Roar. During the first part of the roar, you are pushed away from Rayquaza if you are close to it. This attack deals no damage. (This does not affect Rayquaza's attack cycle.)
After being defeated, Rayquaza falls from the sky. Charizard starts to grow tired, but he still has the strength to atleast make it the edge of the mountain region.
Level 2- The Mountains
Part 1- The Base
Useable characters- Poke'mon Trainer, Pidgeotto, Mew, Team Big Shots, Pikachu, Jigglypuff
Objectives- Journey through the mountains.
Details-
This is a side-scrolling level. The entire time, you are basicly going uphill.
Beware of traps such as geysers, ice spikes, and freezing lakes (can make you drown and deal 1% damage per second).
The enemies of this level consist of Ice Climber's enemies, as well as an assortment of Poke'mon types:
Polar Bear- Ice Climbers
Topi- Ice Climbers
Zubat- Flies around and deals weak damage. The real threat is a long range supersonic wave that can temporarily make you dizzy.
Glalie- An Ice Skull like Poke'mon. It attacks primarily by biting and through freezing breath.
Spheal- A cute weak little ice seal. It attacks by playfully tossing a ball of ice at you after bouncing it several times on its nose.
Sneasle- A really awesome little ice and dark type Poke'mon that attacks with fast claw attacks.
Snorlax- This lazy bear is really slow and really powerful. Takes a lot to bring down. Thankfully they are predictable (a lot like fighting a Greap.) Attacks with snores and claws and can go to sleep, healing its health over time.
As the group goes further up the mountain they are attacked by a large group of Zubat's, which immediately supersonic everyone. The group appears to be done for until a strong poke'mon comes to the rescue.
A floating poke'mon of ice and snow flies in. FROSLASS
Froslass creates a shield of ice over the PT's group and then whips up a mighty hailstorm, knocking all of the Zubat's right out of the sky.
Froslass then guides the other Poke'mon up the mountain.
Part 2- The Summit
The team is near their destination now. Between them and Lucario, however, lies a stretch of frozen ground. This is a hunting territory for Mightyena.
Useable characters- The Poke'mon Trainer, Team Big Shots, Mew, Pidgeotto, Pikachu, Jigglypuff, Froslass
Objective- make your way through the Mightyena hunting grounds.
Details-
This is a straightforward side-scrolling level, with few traps other than a blizzard that occassionally kicks up, doing 1% per second.
The enemies you will face will consist of all of the enemies in the previous part, plus packs of hungry Mightyenas, as well as viscious little Poochyenas that attack with sharp fangs and claws.
One Mightyena backs down at the end of this part and joins your group in return for sparing its life.
Part 3- Lucario
The team has finally found Lucario, who was once again meditating at the tip of a mountain. Hearing the footsteps, Lucario's eyes open, and he challenges Mew to a battle of Legendaries. Before the battle can happen, two little midgits finally climb up to the summit. The Ice Climbers
Two adorable little creatures also run in and start cheering, each taking a different side. Plusle and Minon
The Ice Climbers watch in astonishment and confusion as the epic battle happens.
Useable Character- Mew
Opponent- Lucario
Objective- Defeat the opponent in a one-stock match.
At the end of the battle Mew and Lucario communicate by reading each other's minds, and they agree to join forces against Mewtwo.
Now with the power of two legendary physcic Poke'mon, the entire team can be warped near Mewtwo's castle.
Level 3- Infiltration
Part 1- Wes Vs. Team Rocket
Mew's group weren't the only ones to enter Mewtwo's Poke'mon Kingdom. Another Poke'mon Trainer sneaks around, seeking to face Mewtwo with the help of his trusty Poke'mon, Espeon and Umbreon. Wes
Unbeknownst to both groups, there was also a 3rd party entering the fortress. This group on the other hand, didn't have such good motives. Team Rocket (and Meowth)
When Wes and Team Rocket meet, Jesse sees Wes's adorable little Poke'mon and immediately comes up with one of her infamous schemes.
*Insert the Team Rocket Speech here* (What I forgot it XD.)
Wes: Who the hell are you people?
Jessie: We are Team Rocket. And you're our next victim. Hand over the Poke'mon you little brat.
Wes: I don't think so.
Useable Characters- Wes
Opponent- Team Rocket
Objective- Poke'mon Elimination match
Details-
Cause every one of Team Rocket's Poke'mon to faint.
Espeon and Umbreon have 300% total Stamina (this can be used in any combination and is shared between the two.)
Each of Team Rocket's Poke'mon have 50% stamina.
After Wes wins the match, Umbreon charges up a Shadow Ball and Espeon charges up a Psybeam. Team Rocket is struck by both at once, resulting in the famous "Team Rocket's blasting off again!!!!", as they are launched right through the roof, causing the roof to break. They are sent thousands of feet in the air (somehow miraculously surviving).
Part 2- Groups Collide
Mew's group soon hears the sounds of battle happening in the corridors of Mewtwo's Fortress and rushes towards the source, only to arrive immediately after Team Rocket is shot up into the heavens.
Poke'mon Trainer: What did you just do to those people?
Wes: They're gone now..... good riddance.
PT: You're a bully and I hate bullies!
Wes: .... You want to fight.... alright, have it your way.
Useable Characters- Wes, The Poke'mon Trainer
Opponent- The Poke'mon Trainer, Wes
Objectives- Defeat the other character in a Poke'mon elimination match (stamina)
Details-
Wes's 2 Poke'mon each have 150% stamina.
The PT's 3 Poke'mon each have 100% stamina.
Cutscene- Subspace Bomb Goes Boom!
PT: Alright, you had better start talking.
Wes: The name is Wes. I came here hoping to capture Mewtwo and free the Poke'mon here.
PT: Who were those people you hurt, and why did you do that?
Wes: They were some idiots from Team Rocket. They wanted to steal my Poke'mon, so I kicked their ***. Everything that happened after that is history.
After this was said, Wes joins the group.
They head off to face Mewtwo.
Well, atleast they would have if a Subspace Bomb didn't blow up the area, dragging everyone and everything in the fortress to Subspace.
The Poke'mon group's journey will continue in a future chapter, the endgame chapter to be exact.
Chapter 10- Two Groups Arrive
The name pretty much explains it. Two more groups arrive at the Foxhound Base.
Level 1- The Mario Group Arrives
After the battle with Dracula, Pit was injured pretty badly, and it took several days for him to recover. Fortunately, his angelic powers allowed him to make a full recovery. Once the team was sure that Pit would be okay, they wasted no time in moving out.
Either by instinct, or by some other force, they head to the desert.
To their dismay, a terrible sandstorm kicked up, making flight impossible. They would have to travel by foot.
Mario: Up we go!
Tails: Sorry, Mario. My plane won't be able to fly through this storm. The sand would mess up the engines.
Sonic: So we'll be going on foot? Good. I want to work my feet.
Tails: Sonic... you know we can't keep up. You'll have to walk.
Sonic: .... Dam.... you're to slow.
Part 1- Navigate the Desert
Playable Characters- Mario, Luigi, Ty The Tazmanian Tiger, Sonic, Tails, Pit
Objective- Journey Through The Desert
Details-
This is a straight-forward side scrolling level.
You will occassionally come across Cactus traps (works just like spike traps.) Sometimes these traps will be hidden under sand dunes so think things out.
Sand Dunes may also block doors, paths and other areas. Simply hit them with melee attacks to scatter the sand.
Most of the enemies will be desert enemies from the Zelda series, though desert enemies from Mario games and Sonic games are among them.
Some enemies will surprise you by jumping out of sand dunes.
After this level, the cutscene continues:
Sonic: Come on.... step it up.
Tails: ... I thought I told you to walk.
Sonic: I am walking.... I can't go slower than this.
Luigi: Momma meya.... my aching feet... no fair.... Pit and Tails can fly.
Tails: Quit the complaining.... we're almost there.
It was true, the group had almost arrived at the Foxhound base, but their way was blocked by none other than Dry Bowser.
Pit: Ha! Theres only one enemy. This'll be easy.
After Pit said this, there was a huge rumbling sound under the sand. A giant skeletal dragon rose from the dirt.
Tails: Looks like you spoke to soon.
Sonic: Alright... I was getting bored.
Part 2- Boss Battle- Stallord
Origin: The Legend Of Zelda: The Twilight Princess- Desert Boss
Useable Characters- Mario, Luigi, Ty The Tazmanian Tiger, Sonic, Tails, Pit
Attacks Part 1:
Decayed Breath- Stallord rears his head back and breathes fire at you, dealing 3....10% per second. Lasts 5 seconds. No knockback but does cause flinching. Easy to DI out of.
Skeletal Army- Skeleton soldiers with swords rise from the ground. They don't take much to defeat, though their health rises with difficulty.
Spinng Blades- Spinning Tops complete with spikes rise from the sand and go back and forth across the stage, like a red shell but slower. They do 10.....25% if they hit. The knockback from these is low in Very Easy but rises to High in Intense.
After Stallord is seeming defeated, the group cheers. Suddenly, his head comes back to "life" and attacks.
Tails: Looks like we cheered to soon.
Attacks Part 2:
Decayed Fire- Stallord spits a large fireball at you. Comparable to Metal Ridley's similar attack. Not to hard to avoid. Deals 15....30% damage and Medium.....Very High knockback.
Spinning Blades- Spinning Tops complete with spikes rise from the sand and go back and forth across the stage, like a red shell but slower. They do 10.....25% if they hit. The knockback from these is low in Very Easy but rises to High in Intense.
Health- Each stage of Stallord has about 1000 hp.
Size- Rougly the size of Galleom or Duon in part 1. Rougly the size of Porky in part 2.
Mobile- Part 1, no. Part 2, Flies.
Difficulty- 3/5, Not to hard. Not to easy.... just meh.
After defeating Stallord, the group turns to face Bowser, however the Koopa King had already fled.
So, the group heads towards the Foxhound base.
They're story will continue in a future chapter.
Level 2- Berethor's Group Arrives
After leaving Moria, the 3rd Ager's and Indiana Jones head through the desert.
Along the way, the come across a Desert Temple, and Indy can't help but rush off to explore it. Berethor's group can't catch up, but they are forced to go after him.
Part 1- The Temple of Sand
Playable Characters- Indiana Jones
Objective- Make it through the Desert Temple
Details-
This temple works a lot like the desert stage in Mario's part, with spike traps of both the standard and cactus form.
There are also Sand Dunes that cover doors, enemies, traps, and paths. Hit them to scatter the sand and get through.
The enemies of this temple are primarily scorpions, snakes, and other desert creatures, but desert enemies from the Zelda series are also scattered among them.
The new traps of this dungeon include the falling roof, which can flatten you if you aren't careful.
There are also dart and arrow traps that fire at set intervals.
As Indy goes through the last falling door, his hat is almost crushed, but he pulls it off just in time. He then finds himself in a room full of cobras.
Indiana Jones: Snakes! Why did it have to be snakes?!
Indy lights a torch and uses it to keep the snakes away. All the snakes then become frightened and retreat.
Indy: Well, thats a relief.
After saying this, a giant cobra rises up and hisses at the explorer.
Indy: Great..... why does **** like this always have to happen.
Part 2- Boss Battle: Giant Arbok
Origin: Its an Arbok from Pokemon.... only its really ****ing big.
Attacks:
Bite- Arbok bites at you. Avoid by side-stepping, aerial dodging, or jumping. 10....25% damage and Low....High knockback.
Glare- Arbok stares into your soul, freezing you in place. The animation for this attack involves Arbok's eyes glowing bright red. Turn around, shield, or side-step to avoid. This attack is unaffected by difficulty.
Tail Whip- Same as Rayquaza's Iron Tail attack in the Brawl SSE.
Wrap- Arbok extends its tail and tries to wrap you in it. This move is fairly slow and predictable. Jump or roll away at the right time to avoid. If you are wrapped in it, you take 3...5% per second for 5 seconds. No knockback.
Slither- Arbok slides across the ground, just like one of Rayquaza's attacks. This is used to switch sides of the stage. 10....25% damage and Medium....Very High knockback.
Health- Giant Arbok has 500 hp.
Size- Giant Arbok is rougly the size of Galleom.
Mobile- Yes
Difficulty- 3/5 (Shouldn't be very hard at all).
After Indy defeats the Giant Arbok, a new door opens, leading up into a treasure room. Indy follows it, especially since the door behind him shut.
The treasure room had a deadly guard. Voldo
Part 3- The Guardian of The Treasure
Useable Characters- Indiana Jones
Opponent- Voldo
Objective- Defeat Voldo in a one stock match
After being defeated, Voldo allows his opponent to take from the treasure. Indiana, however, was not interested in treasure, but merely the thrill of the adventure.
The previous doors open up, and the Third Agers enter the room.
Hadhod: Why the hell did you do that.... you almost got us killed!
Indy: Well I never asked for you to follow.... And this is my job...
Morwen: Whoa, there is so much treasure here.
Indy: Don't take it. The treasure is guarded. I think things will get a lot worse if we don't leave.
The group agrees and exits the Temple from the way they came.
The Temple wasn't to far from the Foxhound base. Berethor's group decides to go there.
Their journey doesn't continue until a future chapter.
Chapter 11- Enter The Fist
Level 1- The Chosen One
Orphaned as an infant, he was raised by various rodents. Many years later, he began wandering the country side under constant attack by the Evil Council. After finding Crane School, he began training there to prepare for his long-awaited showdown with the evil Master Betty. During this final battle he found out that he was against, of all things, French aliens. With the help of his talking tongue, he eradicated the aliens and killed Betty, finally avenging his family's death.
After Betty's defeat, The Chosen One, wandered around, completely lost, and somehow winded up in the trophy land desert.
One day, his life drastically changed when he discovered that his greatest enemy was alive.
Part 1- Alone In The Desert
Playable Characters- The Chosen One
Objective- Walk through the desert. Get to an oasis.
Details-
This is a side-scrolling mission.
There aren't any traps, but there is a time limit to get to the Oasis, before The Chosen One passes out in thirst. Fortunately this limit provides plenty of time.
Enemy ninjas will pop up. They are easy to defeat and really.... really.... stupid.
After reaching the Oasis, Master Betty appears to The Chosen One.
Chosen: "You, I know you... why are you still alive?"
Betty: "I'm bionic... neeer neeer!"
Chosen: "I only like the women, but what does that have to do with anything."
Betty: "ENOUGH! I'll shake your bouncy booty. Hit it."
*Betty's radio is turned on by his assistant, it starts playing I Like Big Butts.*
At this moment, The Chosen One remembers something that his Master had once told him.
Crane Master: "Beware Betty's song about big butts... He beats you up while he plays it! *groans*"
The Chosen One had no choice but to fight.
Chosen: I need gopher chucks!
The Chosen One pulls out a rope and reaches into the ground, taking two gophers from the earth. They bite the rope and he starts swinging them around.
Part 2- The Chosen Versus Master Betty
Playable Character- The Chosen One
Opponent- Master Betty
Objective- 1 Stock Match
After being defeated by The Chosen One's powerful new technique (a kick to the crotch), an Evil Council Ship, disguised as a pyramid, rises under Betty's feet and flies away.
The Evil Council had been eradicated by The Chosen One in Kung Pow 2, but one of the ships is now under the possession of the evil Master Betty and his servants.
After drinking from the Oasis, The Chosen One decides to head for the Foxhound Base, which he can see in the distance, and seek shelter for the night.
End Chapter Cutscene- The Evil Council
As Betty's ship flies away from The Chosen One, it is suddenly taken to subspace when a bomb is fired at it.
Betty is shocked by his current predicament, but everything is cleared up to him by Tabuu's Evil Alliance.
Ashencroft walks up to Betty's ship.
Ashencroft: Who are you?
Betty: I'm Betty.... neeer neeer!!!"
Ashencroft: ..... Betty? Isn't that a woman's name?
Betty: (angrily) Is that supposed to be an insult? I should kill you.... kill you dead!"
Ashencroft: *laughing* Good... you've got anger. Now give me a reason not to kill you right now.
Betty: I'm evil.... really evil. So evil.... THAT I'M BAD! Neeer neeer!!!
Ashencroft: I can see the evil in your heart.... but everyone else here is also evil... what makes you so special? What is your greatest desire?
Betty: There is one called The Chosen One. He is good..... And he is supposed to be dead! I am responsible!
Ashencroft: Then join us. You shall meet your goal if you help us to meet ours.
Betty: This place is great..... So everyone here is one big mean evil family? I've got an idea... Let's change our name. From now on, we shall be known as The Evil Council.... neeer neeer neeer!!!
Chapter 12- The Long Road Ahead
Level 1- Day One
The Knight Group had the farthest to go in order to reach the Foxhound Base. They would have to completely cross the desert from one side to the other. Predictably, this long stretch would not be un-eventful.
Part 1- The Baking Sun
Playable Characters- Chris Lionheart, Ike, Mia, Marth, Link, Zelos Wilder, Metaknight, Shinon
Objective- Cross the desert.
Details-
This is pretty much just like any of the other desert levels.
This level is lengthy, but not to long, probably about 10-15 minutes in length.
The enemies of this level consists of monsters from the Legend of Zelda, Snakes, birds, and scorpions from Tales of Symphonia, and some Kirby enemies.
The traps of this level include sand dunes, cacti, and quicksand.
At the end of this level, the group sets up camp for the night, exhausted after a long day's journey.
While the rest of the group slept, Chris walks off to be alone and watch the stars.
Ike wakes up, and decides to join him. A conversation (which I will give a seperate color for organization purposes) results.
Ike: Hi.
Chris: What do you want? You do realize I came here to be alone right?
Ike: Sorry about that.... I just wanted to speak with you. Your swordsmanship is unlike anything I've ever seen... who taught you?
Chris: I was taught by my uncle... he's been dead for a few months now.
Ike: Ouch.... I apoligize if I brought up anything painful.
Chris: *sighs* I'm used to loss. My kingdom isn't exactly peaceful.
Ike: So you really are a prince? I was a noble once.... I hated it.
Chris: I don't exactly enjoy it either, but I do care for my country. My people may be few in number now, but I would gladly give my life to defend them.
Ike notices Chris's unique blade.
Ike: That sure in an interesting weapon you have. Is that edged by diamond?
Chris: Yeah. Before we were invaded, it was custom to make special weapons for our great generals and our royal family. A quarter inch of diamond makes for an incredibly sharp edge. This sword will cut through just about anything.
Ike: So... I know you probably don't like it when this subject is brought up, but who is this girl that you want to save?
Chris: She's a good friend of mine. We've been close since we were children.... ever since the invasion. Her family died that day as well.
Ike: Man.... you've got one sad story. If it's any consolation, I know how it feels. My mother died when I was young, and my father was killed before my eyes.
Chris: War is a cruel thing.... how many people have to suffer because of it?
Ike: There is always some hope right? You can still save your girl right?
*Chris laughs*
Chris: I guess there is no point in denying it.... I had plans to wed her after the violence had ended.... when it would finally be enjoyable to settle down. Obviously, fate has other plans for me. If I don't succeed here, then that dream will be shattered.
Ike: Well atleast you've got a girl. I've been to busy with war to ever settle down.
Chris: Isn't there anyone close to you?
Ike: Well... there is Mia. She's insane, but atleast she's crazy about me. To be honest, I care for her to. I don't know what it is... Maybe its the way she fights me every day, or her admirable persistance. Perhaps its just that she's really beautiful..... but I can't help but like her.
Mia enters the area.
Mia: You know you're my favorite person in the whole world, boss. I'ld like to be with you, but first we have to have our duel at dawn. Don't count on settling down yet though.... my spirit can't be tamed.
Ike: Looks like the sun is starting to rise. You ready?
Part 2- Duel At Dawn
Playable Characters- Ike, Mia
Opponent- Mia, Ike
Objective- Defeat the opponent in a stamina match.
Details-
This a really basic battle. Pick whoever you want, but you have to win the match.
I recommend using Mia due to her superior speed.
If Ike Wins:
Ike: *Panting* You've much improved, Mia. You were so close.
Mia: *Panting* I'll surpass you sometimes, boss.
If Mia Wins:
Mia: *Catching her breath* I've finally defeated you, boss.
Ike: Looks like I've finally been surpassed. I'm glad, really. Good job, Mia.
The three swordsmen head back to camp, only to find that Metaknight has vanished.
As the rest of the team wakes up, they all take some time to ponder Metaknights motives, but to no avail. The masked knight of Dreamland is shrouded in mystery.
Cutscene- Creature of the Night
Ashencroft knows that his opponent is growing closer. He decides to send a little greeting present.
Ashencroft: Dracula, I have a mission for you.
Dracula: What would you ask of me?
Ashencroft: A young prince, by the name of Lionheart, is traveling through the desert to challenge me. I want you to test his strength. If I know anything about him, he will try to be alone whenever he gets the chance. Wait until he does so, and then strike.
Dracula: And defeating this Lionheart will help us?
Ashencroft: Indeed. Do as I say, and I will grant you the power to kill Simon Belmont.
Level 2- Day Two
The Knight Group didn't have long to sit around, the sun was rising and they knew that they would have to cover more ground.
Part 1- The White Dunes
Playable Characters- Chris Lionheart, Ike, Mia, Marth, Link, Zelos Wilder, Shinon
Objective- Cross the desert
Details-
This again, is pretty straight-forward.
The main difference between this and part 1, level 1 is that Metaknight is no longer available. The length of this level is shorter, about 7-10 minutes in length.
Watch out for Pirahna Plants and Goombas that pop out of the sand.
After a long day of travel, the group once again calls it a night and sets up camp.
The Lionheart waits for the rest of the team to fall asleep before going to be alone. This time, he is not interrupted by another team member.
As he watches the stars, the young prince thinks of the days soon to come. Will he walk out of this land alive?
He did not have time to ponder his questions, however, because he is soon attacked by a powerful foe.
Dracula flies in and strikes at Chris, who parries the blow.
Part 2- Wings of Darkness
Playable Characters- Chris Lionheart
Opponent- Dracula
Objective- 1 Stock Match
After this fight, the match has not yet ended. Dracula's fangs seek the Lionheart's neck.
Chris moves his arm in the way to block, but his arm is bitten. Dracula's fangs sink in deep as the prince winces in pain, trying not to scream.
With his free arm, Chris manages to knock the vampire lord away.
Dracula: You're blood.... its not normal. Why are you immune to the curse of the vampire?
Chris: What are you talking about? ...... You'll regret biting me.
Dracula: Prepare to die.
Dracula is no longer holding back anything. The wounded Lionheart is no longer able to hold his opponent off on his own. Fortunately help comes in the form of a vampire hunter.
Simon Belmont
Simon leaps in and strikes Dracula with his whip. Now the real fight begins.
Part 3- Boss Battle- Dracula
Playable Characters- Simon Belmont, Chris Lionheart
Objectives- Defeat Dracula
Origin: Its ****ing Dracula.... one of the most well-respected legends of all time.
*Notes- If the moveset here is not satisfactory to you, Mendez, then please make a new one.
Attacks-
Swarm of Bats-
Dracula casts his hand forward and a huge swarm of bats fly forward in an upwards crescent moon arc. These strike for low knockback but annoying damage and flinching. There are 10 total bats. Moving to a safer area and jumping is the safest way to avoid. 2.....5% per bat
"Wine Glass-
Dracula takes out his trademark glass of "wine" and drinks from it, healing him for 3....7% per second. Hit him during this to stop the healing.
Vampire-
A vampire flies onto the stage and starts fighting you, attacking with fangs and punches. It is not to hard to kill, though its damage output increases with difficulty.
Transformation
Dracula becomes a swarm of bats, which fly back and forth, striking for some damage. Little....Medium Knockback. 5....15%
When Dracula's health gets under 20%, he gains one more attack.
The Curse Of The Vampire-
Dracula lunges forward and bites at his foe. If it strikes, the foe is takes powerful damage. This is slow and very predictable, as Dracula will open his mouth and his fangs will protrude outwards before he lunges. Good....OHKO Knockback. 20....50% damage.
Size- Rougly that of Marth
Health- Average boss health
Difficulty- 4/5 (Pretty tough)
After being defeated by the combined strength of Simon Belmont and Chris Lionheart, Dracula becomes a bat and flies away.
Simon: Dam.... he got away again...
Chris: Who are you?
Simon: My name is Simon Belmont. I am a legendary Transylvanian vampire hunter. Dracula has been my prey for years. You held out for longer than most against him. I'm impressed.
With Simon added to the group's roster, the team heads towards a distant building, visible right now only as a mirage. They are within a day's walk of the Foxhound Base.
Cutscene- Dracula's Return
Dracula returns to the Evil Council.
Ashencroft: Did you face the Lionheart?
Dracula: Yes. He was as strong as you said, but I almost defeated him.
Ashencroft: Almost?
Dracula: He was rescued by Simon Belmont. The two of them proved to be a powerful combination. But I did learn something interesting about your little rival.
Ashencroft: And that is?
Dracula: His blood... it isn't normal. It resists my curse.
Ashencroft: Interesting.... Maybe that is the source of his strength.... Nay his whole family's strength.
Chapter 13- The Subspace Bomb Factory
As all of the groups meet at the Foxhound Base, they discover that Snake is nowhere to be found. Where could he be?
*Note that this chapter has multiple things happening during it. They are all happening at roughly the same time.
Level 1- Stealth Mission
Snake took a helicopter up to the Subspace Bomb Factory. After a Subspace Army attack on Foxhound a while back, Snake was ordered by Colonel to shut the factory down.
He would need to find a way in first.
Part 1- Entering the Factory
Playable Characters- Snake
Objective- Find a way inside the factory.
Details-
This is a side-scrolling mission.
Unlike most side-scrolling levels, you will have to avoid getting into many fights, making it effectively the stealth level.
If you do happen to be spotted, you can always take care of the enemies who see you.
All of your explosive specials and moves will be locked for this part.
The enemies of this level will be primarily R.O.B.s of the regular, missile, and sniper type.
This part ends when you find an airshaft that Snake can enter.
Snake enters the factory through an airshaft. His next objective, of course is to find the Subspace Bombs and de-activate them.
To do so, he will have to make his way through many long corridors, silencing any enemies who spot him.
Part 2- Finding the Bombs
Playable Characters- Snake
Objective- Find the Subspace Bombs
Details-
This is a surprisingly straight-forward mission. Just follow the path, entering the proper doors along the way.
You don't have to avoid being spotted, but be sure to defeat every enemy you come across, otherwise this part will fail after 3 minutes of an enemy surviving outside of your view screen.
The enemies of this level consists of sniper, regular, and missile R.O.B.s.
Your explosive moves are locked in this part.
As Snake enters the bomb room, the game shifts focus to another team.
Level 2- Team Space Animals
Fox, Falco and Krystal team up with Wolf O'Donell to deactivate the entire factory. Their method of entry is a bit less.... stealthy than that of Snake.
With their Arwings and Wolvens, the team blows a hole in the roof. This draws the attention of..... Star Wars Fighters?!
A team of Storm Trooper Pilots attacks the group.
Falco: I've got this Fox. Move on ahead and I'll catch up!
Fox: Good luck Falco.
Part 1- Fox's Mission
Playable Characters- Fox, Krystal, Wolf
Objective- Get To The Control Room
Details-
This unlike Snake's parts isn't a stealth mission. Many enemies will be drawn to the invading furries (which would make Snake's stealth mission a lot easier.)
The enemies consists of R.O.B.s, Storm Troopers with various weapons, and robot enemies from the Star Fox series.
After this part, the Fox team arrives at the control room. As Fox reaches out for the switch, his hand is shot by a lazer gun.
Wolf: I can't let you do that Star Fox.
Fox: Wolf?! What are you doing?!
Wolf: Getting rid of a lifelong nuisance.
Fox: Alright... have it your way. Here I come!
Krystal: I've got your back Fox.
Part 2- Rivals Clash
Playable Characters- Fox, Krystal
Opponent- Wolf
Objectives- Defeat the opponent. 1 Stock Match
Details-
The character that you don't pick will help you as a computer controlled (or player controlled in co-op) character.
This fight, despite the results, isn't exactly "won" by your team, but rather the fight goes on as the game shifts to another perspective.
Level 3- Assassination Mission
Another person also infiltrated the Subspace Bomb factory. His goal, unlike the other characters was a bit more aggressive..... Sagi was to assassinate the one running the factory.
With his wings, Sagi flies in through the hole in the roof created by the space animals shortly after the Fox Team leaves that area.
Part 1- Finding the Boss
Playable Characters- Sagi
Objective- Find the factory boss.
Details-
This is another straight-forward side-scrolling level.
The enemies include R.O.B.s, storm troopers, robots from the Star Fox series, and enemies from Baten Kaitos.
After this part, Sagi enters the command room (not the control room that Fox entered.)
After he enters, the boss appears and pulls out a lightsaber. It is none other than Darth Vader!
Sagi prepares to fight his opponent, but before the battle begins a red reploid enters the arena, pulling out a blue sword of energy. Zero
With his free hand, Zero shoots some bullets at Darth Vader, signalling his side to Sagi.
The two warriors charge at Darth Vader and an epic clash begins.
The perspective then shifts back to Snake.
Cutscene- "Rapture"
(Sorry if this is offensive, but it is an awesome name for what happens here.)
Snake enters the bomb storage room. He then calls Colonel on his Codec.
Snake: Colonel.... there must be billions of bombs here.
Colonel: This is bad.
Snake: Tabuu has unlimited resources and endless workers... this is to be expected.
Colonel: You'll have to find a way to deactivate the bombs.
Mysterious Voice: I'm sorry Snake..... I can't allow that.
A man enters the room and draws his red lightsaber. Darth Vader's Secret Apprentice
Snake: Sorry Colonel.... I'll have to call back later.
Snake and the Apprentice get into an epic fight.
Snake's hand to hand combat proves to be a match for the Apprentice's lightsaber skills. His fist finds its way to The Apprentice's face, knocking him away.
Snake: So much for stealth....
Snake pulls out his Nikita Missile launcher and shoots an explosive at the Apprentice.
Unfortunately, the Apprentice jumps high into the air, causing the missile to strike a Subspace Bomb.
Snake: OH SHI-
Before Snake can finish that word, every subspace bomb blows up in a chain reaction, eveloping EVERYTHING.... not just Trophy Land, but literally every world..... and bringing it into Subspace.
Endgame- Moments of Fate
The entire universe has been dragged into Subspace. Even though everyone was caught in the explosion, noone was harmed. It would appear as though the climax has arrived.
Chris Lionheart: What just happened?
Zelda: We've arrived in Subspace.
Zelos Wilder: I don't know many of you, but lets take care of this Tabuu person... oh I almost forgot. I'm going to give you all codenames.
Zelos points to each person and gives them a codename:
Mia- "Beautiful"
Peach- "Blondy"
Zelda- "Princess"
Ike- "Blue"
Marth- "Mr. Manly "
Link- "Silent one"
Sonic- "Speedy"
Tails- "The Fox"
Mario- "Red"
Luigi- "Green"
Pit- "Angel"
Ty- "Tiger"
Indy- "The Explorer"
The Third Agers- "The knight" (Berethor), "Cutey" (Idrial), "The Archer" (Elegost), "Shortstuff" (Hadhod), "The other chick" (Morwen), "The other knight" (Eaoden)
Sain- "The annoying one" (Zelos doesn't like competition)
Shinon- "The rude one"
Donna Letman- "Camera girl"
Anise- "Little one"
Lastly, Zelos points to Chris.
Zelos Wilder: And you are "Loverboy"
Chris: ...... These nicknames suck. Well if thats it, then lets get this over with.
A mysterious female voice: Hey can I have a codename.
A young girl walks in. Erutashi
Zelos: Ugh.... you can be the ugly one.
This makes Erutashi really mad. She starts chasing Zelos.
Erutashi: I'm going to rip your nuts off!!!
Zelos: Oh ****! I need those!
Zelos and Erutashi run ahead of the rest of the group, leaving everyone else to follow.
Level 1- The Subspace
Part 1- The Subspace Throne
Playable Characters- Everyone who met at the Foxhound Base (do I seriously have to type them all) except for Zelos (Erutashi is not yet playable either)
Objective- Arrive at the Subspace Throne
Details-
This is a side-scrolling mission, effectively just the first part of Subspace from the brawl SSE (no I'm not going to make you go through that Great Maze crap.)
The enemies are all from the Subspace Army.
At the end of this level, this new super group arrives at the Subspace, and find Tabuu sitting in his throne. Once they've arrived, many Subspace Army enemies appear, but Pit's angels start fighting them off.
Tabuu: Good.... you've all arrived. Now.... meet your fates!
As Tabuu says this he opens up many rifts, each one containing a different destination. Each of these rifts pulled a group of characters to a different destination:
Old Valios- Chris Lionheart, Ike, Mia, Zelos Wilder, Marth, Shinon
The Water Temple- Link, Zelda
Castle Dracula- Simon Belmont
Bowser's Lair- Mario, Luigi, Sain, Peach
Master Betty's Ship- The Chosen One
These Characters remain at the Subspace Throne to fight Tabuu:
Pit, Indiana Jones, The Third Agers, Sonic, Tails, Ty The Tazmanian Tiger, Donna Letman, Anise, Erutashi
This results in a bunch of boss fights that (chronologically) happen at roughly the same time.
Level 2- Tabuu
Indiana Jones: So you're the one who's caused all this.
Tabuu: Yes.
Tails: But why do you desire our destruction.
Tabuu: Its simple... I want to be king... of everything! After you meddling heroes stopped me last time, I plotted my revenge. I recruited all of your greatest enemies, as well as some of the most powerful champions of evil in the universe to crush you. They all think they are getting such a great deal. But after you are all vanquished, I will betray them and rule their kingdoms. Now... prepare to die.
Tabuu flies up and uses his off waves, which have regained the power to trophy-ize everyone.
But he is interrupted as a giant PK thunder (really 3 combined into one) strikes him, weakening him considerably.
Three more characters join the frey.
Ness, Lucas, and Paula
Part 1- Boss Battle- Tabuu
Origin- Smash Bros. Brawl SSE
Playable Characters- Pit, Sonic, Tails, Indiana Jones, The Third Agers, Erutashi, Donna Letman, Anise, Ness, Lucas, Paula, Ty The Tazmanian Tiger
This battle with Tabuu is different from the Brawl SSE battle. Tabuu will ride in his throne, a giant floating chair that matches his color.
His attacks are:
Off-Wave (Mini)- Tabuu fires a small sonic wave that travels in the direction fired (can be horizontal, vertical, or diagonal). This wave bounces off of floors. This move has Low....Medium knockback and does 5......15 damage.
Off- Wave (Mega)- This is effectively the same as Tabuu's Off-Wave in Brawl. He and his throne teleport to the background. He lifts up his hand. Each time he waves it (3 times) he fires a wave. Dodging this requires the exact same timing as in Brawl. The damage and knockback are the same as in Brawl.
Chain of Light- In Brawl, this could probably be considered Tabuu's most broken attack, but I've weakened it. Tabuu pulls out the giant golden whip, spinning it over his head three times before lashing out at the stage (this makes it more predictable). The damage and knockback are the same as in Brawl.
Shuriken Boomerang- Same as in Brawl.
Dragon Cannon- Same as in Brawl
Electrical Shield- Same as in Brawl
Chair Spin- Tabuu's throne flies across the stage (with him in it), spinning around. This is effectively the same as Golden Brackets.
Size- Including the Throne, he is rougly 1.2-1.5x his Brawl size
Mobile- Yes (Flies)
Difficulty- 4/5
Level 3- Bowser's Lair
Mario, Luigi, Sain, and Peach are warped to Bowser's Lair.
Part 1- Seeking Bowser
Playable Characters- Mario, Luigi, Sain, Peach
Objective- Find Bowser
Details-
This is like a Mario game, which takes place in a cavern like level, complete with lava pits.
The enemies all come from the Mario games.
After making their way through the dungeon, Mario's team comes across Dry Bowser, who transforms into his Giga form.
Boss Battle- Dry Giga Bowser
Origin: Dry Bowser... but really big
Playable Characters- Mario, Luigi, Sain, and Peach
Attacks-
Dry Breath- Bowser breathes out black fire. The range is about 1 of his bodylengths. DI out of this if you get hit. 3...5% per second. No knockback, but does cause flinching.
Dry Fireball- Bowser spits out a huge black fireball. Can be double jumped over fairly easily. Low....Medium knockback and 7.....15% damage
Claw Swipe- Bowser swipes his claw forwards. Decent knockback. Exactly the same in hitbox and appearance as the claw swipes used by Bowser's Final Smash version of Giga Bowser. Bowser brings his arm back before slashing, so it isn't hard to predict. 10.....25% damage and Medium....Very High knockback.
Stomp- Bowser attempts to flatten you with his foot. No knockback, but it does have the same effect as Donkey Kong's Side B. 10....25% damage
Shell Slider- Like a large-scale version of Bowser's Up B. Triple Jump to avoid. 10....25% damage and Medium....High Knockback
Size- As big as Galleom if not bigger.
Mobile- Yes, but slow.
Difficulty- 3/5
Even though you technically win this boss battle, Bowser is to mighty for the four people to defeat.
Bowser roars menacingly.
Suddenly barking is heard. A horde of dogs run and start tearing bones off of Dry Giga Bowser.
Nintendogs
Bowser roars in desperation several times while the many many Nintendogs turn him into a chew toy.
Level 4- The Water Temple
Link and Zelda are warped to the water temple. Zelda, bearer of the Triforce of Wisdom, knew that the only way to leave would be to defeat the boss.
Part 1- The Temple
Playable Characters- Link, Zelda
Objective- Make it through the water temple.
Details-
This is loosely based off of the water temple from The Twilight Princess.
The enemies are all from the Twilight Princess water temple.
To get through, you will have to flip switches manipulating the water levels.
Higher water levels allow you to reach new heights, while lower water levels are necessary to reach low paths.
You can drown in this level, but only if you don't put in any controller input.
After that part, a cutscene shows Ganondorf finding the temple's treasure, a great Trident. Trident Ganondorf
Link and Zelda enter the room.
Ganondorf: Finally.... my revenge is nigh.
Link charges Ganondorf.
Zelda: I'll help as much as I can.
Zelda creates a sword of light with her magic. Zelda With Sword
Part 2- Versus Ganondorf
Playable Characters- Link, Zelda (with sword)
Objective- Defeat Ganondorf (1 stock match)
After being defeated Ganon becomes his stronger form.
Boss Battle- Ganon Part 1
Origin- The Ocarina of Time
Playable Characters- Link Zelda
Ganon doesn't have a particularly special moveset. He attacks with extremely powerful but slow slashes horizontally or vertically.
This part of the boss battle is really unique in that you don't have to win. Either way the result is the same.
Size- I'm no Zelda expert.
Mobile- Yes
Difficulty- 0/5 (since you don't really have to win)
After winning (or losing) a cutscene shows that Ganon is to powerful for the duo to handle.
Zelda: We only have one option..... I'm going to have to give you power.
Zelda uses magic to empower Link, transforming him into..... FIERCE DIETY LINK
Boss Battle- Ganon (Part 2)
Playable Characters- Fierce Diety Link
His attacks remain the same.
The only thing that changes is that you are now only able to use Fierce Diety Link, who has no A moves.
specials:
up B = great spin
just like links
B = fierce diety swings his sword and a dark wave is sent
Side B = he jumps sideways and stabs
down B = fierce diety strikes his sword on the ground and a dark wave circles him
All of your moves are incredibly powerful and broken, dealing 100% damage each.
Ganon's stats-
Size- (I don't really know)
Health- about 2000
Difficulty- 2/5 With Fierce Diety's extremely vague and broken moves, this will be easy.
Ganondorf starts to disappear after you defeat him.
Ganondorf: We will meet again. I will have my revenge!
Level 5- Dreamland
Nightmare has once again attacked Dreamland.
The Kirby Team had long since left to attack Tabuu, but fortunately Metaknight comes with his Halberd to bring them to Nightmare.
Nightmare: Tremble in my darkness!
Boss Battle- Nightmare
Origin- Soul Calibur
Playable Characters- Powers Kirby, Waddle Doo, Sir Kibble, King Dedede, Kirby Friends Metaknight
Attacks-
*I'll need MW to make a boss moveset for him*
Currently it will just be Nightmare but with a constantly active Soul Charge.
Size- Towers a foot or two above Ganondorf and is about 2 feet wider than Ganondorf.
Health- Average Boss Health
Difficulty- 4/5
If you lose the boss battle, Nightmare will say "Your pathetic souls are worthless!"
If you win the boss battle, Nightmare will be vanquished.
Dedede picks up the Soul Edge, seeing it as a way to "Clobbah dat dere Kirbeh."
A second boss battle results.
Boss Battle- Possessed Dedede
Origin: The Soul Edge has become a giant red hammer for Dedede.
Playable Characters- Metaknight, Kirby, Waddle Doo, Sir Kibble, Kirby Friends
Attacks-
Dedede uses his Brawl moveset but powered up considerably thanks to the Soul Edge.
Hp- Average Boss Hp (maybe higher)
Size- Same as his regular size.
Difficulty- 2/5 (This shouldn't really be a problem considering the sheer number of characters you have.)
Level 6- The Chosen Battle
The Chosen One has been warped to Betty's Lair.
After Betty's DJ turns on the radio, which plays the song "Black Betty", a boss battle happens between the two.
Boss Battle- Master Betty
Origin- Kung Pow- Enter The Fist
Playable Character- The Chosen One
Attacks-
Betty attacks using an almost character-like moveset (though much more predictable) fighting with punches and kicks. His attacks are all slow but powerful.
When his health gets under 33%, Betty will take out a pair of Iron Claws (they hurt like crap man), which he swings around on a chain to attack with. These are much more painful and far reaching than his punches and kicks (though even more predictable).
Occassionally Betty's fist will glow and he will use a punch called the Paralyzer, causing you to temporarily become unable to do anything but flop your arms and legs around. This ends after several second or if he hits you. Betty will say "Take that floppy." after using this.
Health- About 300
Size- Human size
Mobile- Yes
Difficulty- 3/5 (Not really a hard fight if your a decent Chosen One user.)
After being defeated, Master Betty falls on to the ground saying "Ouch.... I fell and hurt my tummy.... Neeerrr!!!!" before dying.
Level 7- Space Battle
Even millions of light years away in space, Samus was not safe from the blast of the Subspace Bombs.
She flies towards trophy land at incredible speed.
But as she enters the atmosphere, Ridley strikes her ship, causing it to violently spiral down.
Samus must now fight Ridley alone.
Boss Battle Ridley
Origin- Metroid
Playable Characters- Samus or Zero Suit Samus (you get to pick before entering the battle).
Attacks-
Ridley plays just like in the Brawl SSE.
Health- Average boss health.
Size- Pretty big (same as in Brawl)
Mobile- Yes (flies across the screen to get around.)
Difficulty- 3-4/5
Ridley flies away after being defeated.
Samus: Woah... that was close.
Level 8- Castle Dracula
Simon Belmont appears in Dracula's castle.
Dracula: Welcome to my home, Simon. Would you like a glass of "wine"?
Simon: The only blood I came for is yours.
Dracula: Such big words, for one so powerless. I almost hate to fight one such as you.
Part 1- Simon Vs. Dracula
Playable Characters- Simon Belmont
Opponent- Dracula
Objective- Defeat the opponent, Stamina match
Dracula: ... Looks like I must resort to using the power that Ashencroft hath bestowed on me.
Dracula becomes True Dracula, a fierce demon bat with a thirst for blood.
Dracula: Time to die, Simon.
Boss Battle- True Dracula
Origin- Van Helsing
Playable Character- Simon Belmont
Attacks-
Blood Frenzy- Dracula leaps forward, madly clawing and biting. Several hits in appearance, but in reality only one is given in affect. This is predictable and slow. Medium....Very High Knockback and 10....25% damage
Flight- Dracula flies across the screen. Same in effect as Ridley's similar dashing move.
Claws- A basic claw swipe. 5...15% damage and low....medium knockback
When Dracula's health drops below 20% he gains a new attack.
Curse of the Vampire- Dracula rears his head back and attempts to bite you. Slow and predictable. Move or dodge to avoid. High.....OHKO knockback and 20....50% damage
Health- About 300
Size- Human size (roughly that of Marth), with a large wingspan.
Mobile- Yes
Difficulty- 4/5 (Probably one of the hardest boss battles in the SSE.)
Level 9- The Poke'mon Kingdom
When we last left off on the Poke'mon group's journey, they were in Mewtwo's castle when the great explosion occured.
The force of the explosion somehow caused Pidgeotto to evolve into Pidgeot.
Part 1- Get to the Throne Room
Playable Characters- PT, Wes, Team Big Shots, Mew, Lucario, Pikachu, Jigglypuff, Pidgeot Frosslass, Mightyena, The Ice Climbers
Objective- Get to Mewtwo
Details-
A really straight-forward side-scrolling level. You will have to defeat an occassional poke'mon enemy, but really its simple.
After this part, the Poke'mon group arrives at the throne room to find Mewtwo sitting on the throne.
Mewtwo: Why do I have company? I suppose you're here to challenge me.... DIE!
Mewtwo casts his hands forward releasing an amazing burst of power, which trophizes everyone in the team except for Mew and Lucario.
An epic fight starts between the three legendary pokemon.
Boss Battle- Mewtwo
Origin- Pokemon Red + Blue
Playable Characters- Mew, Lucario
Attacks-
Shadow Ball-
Mewtwo raises his hand in the air, forming a powerful ball of physcic energy. He then throws it either horizontally or vertically (aimed at you). Jump over to avoid. 10....25% damage and Medium....Very High knockback.
Hyper Beam-
Mewtwo casts his hand forward and fires a powerful ray of energy.Jump over or dodge to avoid. It can be fired in all directions. Much faster than Shadow Ball but it leaves him vulnerable afterwards for several seconds. 10...25% damage and Medium.....Very High knockback
Shadow Claw-
Basicly a ground version of Mewtwo's Fair in Melee.
Physcic-
The same as Mewtwo's down B in Melee.
Confusion-
The same as Mewtwo's side B in Melee.
Teleport-
Mewtwo vanishes and teleports to a random location on the screen. He will occassionally spam this just like Tabuu.
Health- Average Boss Health
Size- Barely taller than a human and somewhat skinnier.
Mobile- Yes
Difficulty- 4/5
Contrary to the battle's results, Mew and Lucario could not handle Mewtwo's newfound power. It looked like the end of the line for the Poke'mon Group.
That is until a racecar bursts through the wall, travelling at several thousand miles per hour. A man leaps out of the cap in midair. Captain Falcon
Captain Falcon: Falcon PAWWWWNNNCCHHH!!!!
Mewtwo, taken off guard, was struck for heavy damage by Falcon's flaming fist.
Mewtwo: Hah.... I still have enough power to take on all of you.
Captain Falcon removes his helmet, revealing himself to be none other than.... CHUCK NORRIS!
Mewtwo: Oh ****! I give up.
Level 10- The Factory
Several major fights happen here at rougly the same time.
Section 1- Wolf
Wolf: I've been waiting a long time for this moment, Fox.
Fox: Why would you betray us.
Wolf: Its simple really. I help Tabuu, and I am bestowed with incredible power. Now its time to use that power against you.
Wolf transforms into a frightening monster.
Boss Battle- Werewolf
Origin: A long time legend, but this particular werewolf is from Van Helsing.
Playable Characters- Fox, Krystal
Attacks-
Wolf has become to stupid to wield a gun in this form. He know strikes with viscious fangs and claws. He has a fast movement and attack speed, but most of his attacks (the only exception being the slow fang attacks) are not very powerful.
Claws- 5...15% Low...Medium Knockback
Fangs- 10....25% Medium....Very High Knockback
Health- Average boss health
Size- Taller than Ganondorf and about as wide.
Mobile- Yes (and quite fast to)
Difficulty- 3/5
Section 2- The Apprentice
Boss Battle- The Apprentice
Origin- Star Wars: The Force Unleashed
Playable Character- Snake
Attacks-
Lightsaber Swing- A basic lightsaber attack with average speed. 5....15% and Low...Medium Knockback.
Lightsaber Throw- Throws the lightsaber like a boomerang. It travels the length of Final Destination. 5...15% and Very Low....Low knockback.
Force Push- Pushes the foe forward if they are enough. No damage. Medium...Very high knockback.
Force Pull- If the opponent is in range (about 1/4th of FD), The Apprentice pulls them closer to him. No damage.
Force Choke- Casts his hand forward. If the foe is close enough, they are choked, dealing 3 hits of 3....5% damage. No knockback.
Force Lightning- Casts his hand forward and fires bolts of lightning about 1 body length in front of him. Low beginning lag but high ending lag. 10...25% damage and Medium.....Very High knockback.
Force Jump- Jumps all the way to the top of the screen and then rapidly falls downwards, smashing anyone below him. To avoid, simply move out of his trajectory. 20.....40% damage and High....OHKO knockback
Health- 300
Size- Average human size.
Mobile- Yes
Difficulty- 4/5
After winning Snake calls Colonel with his Codec.
Snake: Colonel.... mission accomplished.
Section 3- Darth Vader
Sagi and Zero have gotten in a fight with Darth Vader.
Boss Battle- Darth Vader
Origin: Star Wars
Playable Characters- Sagi, Zero
Attacks-
Lightsaber Swing- A basic lightsaber attack with somewhat slow speed. 10....25% and Low...Medium Knockback.
Lightsaber Throw- Throws the lightsaber like a boomerang. It travels the length of Final Destination. 10...20% and Low....Medium knockback.
Force Push- Pushes the foe forward if they are enough. No damage. Medium...Very high knockback.
Force Pull- If the opponent is in range (about 1/4th of FD), Darth Vader pulls them closer to him. No damage.
Force Choke- Casts his hand forward. If the foe is close enough, they are choked, dealing 3 hits of 5....7% damage. No knockback.
Force Lightning- Casts his hand forward and fires bolts of lightning about 1 body length in front of him. Low beginning lag but high ending lag. 15...30% damage and Medium.....Very High knockback.
Hp- 600
Size- Human Size
Mobile- Yes, but slow
Difficulty- 4/5 (effectively just a slower, more powerful version of The Apprentice).
Level 11- The Epic Battle
Chris Lionheart, Ike, Mia, Zelos Wilder, and Marth are warped to Earth.
They appear near the former Valian Capital (the capital before the invasion).
The timing couldn't have been better, as Chris's rebel army was marching on the castle at that very moment. Needless to say, they were suprised to see their Prince again.
Arden: My cousin! Where have you been? Who are these people?
Chris: I... was away. I'm afraid I don't have time to explain much more than that for the time being. These people are powerful friends. You can trust them. Now answer me this... what are you doing here?
Arden: After you had disappeared, we presumed that you had been killed. We came here to get our revenge, even if it means losing our lives.
Chris: So loyal... and so foolish... WHY WOULD YOU DO THAT!? *sighs* I apoligize. I should be glad that you are here. I will need your blades one last time.
Arden: We will be happy to serve.
Things looked hopeless for the valian knights. The city was guarded not only by Ashencroft's barbarous legion, but also by Sauron's orcs.
There was, however, a ray of hope, as Sauron and Ashencroft weren't on the best of terms.
Ashencroft: Here come those foolish rebels.... let them feel the wrath of our combined armies.
Sauron: You are no longer my boss.... Our alliance ends here. I will rule your planet and Middle Earth. Attack him my pet...
While Ashencroft fights the Balrog, the orcs turn on the Barborous Legion, creating absolute chaos in the evil ranks.
Chris: Heres the plan. Our only hope of proving victorous is to take advantage of this chaos and striking both armies head on. We need to break through the enemy ranks. From there, I will go on alone and find the leader. Once he is taken out, the enemy formation should completely crumble. Alright valians.... CHARGE!
Boss Clash: Ashencroft Vs. The Balrog
This is hands down, the most epic thing to ever be in an SSE. You will control Ashencroft using his boss moveset against the Balrog.
Both your power, and the Balrog's power, scale with difficulty.
Ashencroft's Moveset-
Flaming Sword- Ashencroft's sword is ignited for the entire fight, causing a lingering effect after all slashes.
Demon Slashes- Basic sword attacks used randomly during the fight. The knockback is small. 5>20%
Press A to use.
Apocalypse Slash- Ashencroft lifts his sword high above his head and slams it into the ground, creating a huge eruption of fire (like a fully charged Roy Neutral B in Melee except bigger.) Slow attack. 20>50%
Press B to use.
Demonic Assault- A basic horizontal slash made while flying to the opponent (like Quickdraw). 10>30%
Press Side B to use.
Hellfire Aura- An aura of flame temporarily surrounds him, hurting foes in melee range (lasts 5 seconds). 1%>5% per second
*Constantly active during this fight only*
Inferno Edge- Sends a wave of fire out of his sword that travels straight across the stage. 10>20%
Press Down B to Use.
Rising Volcano- Points forwards with his sword. A burst of molten fire erupts under his opponent's location. 20>50%
Press Up B to use.
Parry- (Intense Only)- Block a blow, completely nullifying damage (works like a side-step).
Press L or R to use.
The Balrogs moveset is:
Whip of Fire- A very far reach whip. He swings it over his head before lashing out. 10->25%
Flaming Sword- The Flames of Udun form a sword. This is powerful but doesn't have great range or speed in comparison to Whip of Fire. He slams the sword into the ground. 15-30%
Roaring Inferno- The Balrog unleashes a torrent of flaming breath. Long range in front of him. Deals 5->10% per second that you are in it. Causes flinching. No knockback.
Pillar of Wrath- The Balrog flies into the air and slams into the ground in the center of the stage, releasing fire everywhere. This must be side-stepped or aerial dodged to be properly avoided. 20->50% Intense
Notes-
Both characters are immune to knockback and flinching.
Each boss has a total of 1000 hp.
Ashencroft is just a bit larger than Ganondorf.
The Balrog is as big as Galleom.
Difficulty- 3/5 (Shouldn't be to hard.)
Ashencroft slays the Balrog, proving that he is the greater demon.
By the time the fight ended, Sauron had already left the area and headed to the battlefield, where there was an epic three-way battle between the Orcs, the Barbarous Legion, and Chris's rebels.
Ashencroft: I must be going... I have other matters to attend to... I trust that you will be able to handle this, Zelgius. Ike is on the field of battle afterall.
The Black Knight: Leave this to me.
True to his plan, Chris Lionheart breaks through the enemy lines and heads for Castle Lionheart, the former royal house. He suspected that Ryann would be held there.
While Chris heads for the throne, The Black Knight and Sauron clash it out, each unable to even scratch the other's armor.
Ike and Mia show up to challenge The Black Knight and Sauron, respectively.
Boss Battle- The Black Knight
Origin: Fire Emblem: Path of Radiance And Fire Emblem: Radiant Dawn
Playable Characters- Ike
Attacks-
Alondite Slash (H)- A basic horizontal slash made with the Alondite. Great range. Slow. 10....25% damage and Medium.....High knockback
Alondite Slash (V)- An uppercut slash made with the Alondite. Great range. Slow. 10....25% damage and Medium....High Vertical Knockback.
Sword Wave- The Black Knight slams his sword at the ground, releasing a large wave from his sword that travels across the stage. Jump over it to avoid. Fairly fast. 5....15% damage and Low.....Medium knockback.
Luna- The moon appears in the background. The Black Knight then performs a very slow and predictable but devastating slash. Very High....OHKO knockback and 20....50% damage
Eclipse- An lunar eclipse occurs in the background. The black knight then performs a super charged version of the sword wave. Medium....Very High knockback and 15....30% damage
Size- A bit larger and considerably wider than Ganondorf
Hp- Average boss hp.
Mobile- Yes, but slow.
Difficulty- 3/5 (He's not very great, but then again, neither is Ike).
The Black Knight: It looks like I just can't beat you.... good job Ike.
Ike: Zelgius... you were my most powerful enemy, and my last teacher. Good bye.
Boss Battle- Sauron
Origin: The Lord of the Rings
Playable Characters- Mia
Attacks-
Great Sword- Sauron swings his sword. It is farther reaching and less powerful than his mace. Very Slow. 15....30% damage and Medium.....Very High knockback
Great Mace- Sauron swings his mace. It is shorter but more powerful than his sword. Very slow. 20....40% damage and High.....Extremely High Knockback
Hp- Average Boss Hp
Size- Towers a foot or more over Ganondorf and isn't about as wide as Ganondorf.
Mobile- Yes but slow.
Difficulty- 2/5 (This really shouldn't be hard due to the very predictable nature of his attacks coupled with Mia's speed.)
Sauron: I possess the power of the Nazgul..... no man may kill me.
Mia: I am no man! *Thrusts her sword into Sauron's helmet*
Sauron: What!? No!
Sauron dies much like the Lord of the Nazgul.
Level 12- 15 Years Of Fate
Chris Lionheart arrives at Castle Lionheart. He kicks down the door and enters. He was correct in assuming that his foe would be here. The destined battle has begun.
Chris: You.... let Ryann go now!
Ashencroft: Who art thou to make demands of me? You are not but a miserable boy. Let me tell you a little story.
Chris: ....
Ashencroft: It was 15 years ago. I believe you remember it well. Your kingdom was invaded. So many innocent lives were claimed that day, including your family. You were nothing but a child then. I remember the look of fear in your eyes as I cut each of your loved ones down, one by one. As I went to kill you, your foolish mother stood in my way, taking the force of the blade for you. I remember how you ran. You were nothing but a pathetic little child, who was fortunate enough to be saved by his mother's sacrifice and rescued by his uncle.
Chris: ENOUGH!
Ashencroft: *Laughing* Yes... you're angry good.... anger makes you strong.
Part 1- Chris's Anger
Playable Character- Chris Lionheart
Opponent- Ashencroft
Objectives- Win (Or Lose) Stamina Match
Details-
This is an interesting match in that you don't have to win. The results will be the same.
Chris: My sword..... it doesn't even scratch you!
Ashencroft: You fight well, it is only a pity that your hatred isn't strong enough. Nevertheless, you have earned the honor of seeing my face.
Ashencroft removes his helmet, revealing himself to be one of Chris's most powerful knights.
Chris: Curt? How could it be you?
Curt: Think for a moment....
Chris: *facepalms* It should have been so obvious! You're attitude.... you're beliefs.... none of it matched a true valian hero. How could I have been so trusting of one such as you?!
Curt: You are to trusting, Lionheart. But there is more to me than this. First.... let me tell you the prequel to that story. It was years before the invasion. Your father was on his first assignment as Prince, trying to prove himself worthly of the throne. News had reached the capital that a village had been completely destroyed. Young Christopher took a battalion of troups to investigate. The cause of the catastrophe was an eruption, as he soon found out. I was the only living thing in the entire village, and he was to quick to trust me. I soon proved myself to be his most powerful knight... more powerful than he could ever be. What he didn't know was that I was born of that eruption.
Chris: Born?
Curt: Let me show you my true self.
As Chris and Ryann watched in horror, the pupil's of Curt's eyes became blood red. Even more frightening, however were the huge black feathered wings that bursted through his armor.
Chris: .... What are you?!
Ashencroft: I am the one who has risen from the ashes... I am fire.... I AM ASHENCROFT!
Ryann: He's a demon! Run Chris! Escape while you can!
Chris: I can't.... I won't leave you.... Ok Ashencroft... I bet you're more powerful than I... but I can't afford to lose!
Ashencroft: You should have listened to the girl.... You are a fool.
Boss Battle- Ashencroft
I'm not going to include a picture, seeing as how I don't have a real one.
Origin: My own mind.
Playable Character- Chris Lionheart
Attacks-
Flaming Sword- Ashencroft's sword is ignited for the entire fight, causing a lingering effect after all slashes.
Demon Slashes- Basic sword attacks used randomly during the fight. The knockback is small. 5>20%
Apocalypse Slash- Ashencroft lifts his sword high above his head and slams it into the ground, creating a huge eruption of fire (like a fully charged Roy Neutral B in Melee except bigger.) Very high knockback, can OHKO in Intense. Slow attack.
20>50%
Demonic Assault- A basic horizontal slash made while flying to the opponent (like Quickdraw). Decent knockback. 10>30%
Hellfire Aura- An aura of flame temporarily surrounds him, hurting foes in melee range (lasts 5 seconds). 1%>5% per second
Inferno Edge- Sends a wave of fire out of his sword that travels straight across the stage. Good knockback. 10>20%
Rising Volcano- Points forwards with his sword. A burst of molten fire erupts under his opponent's location. Very high knockback. 20>50%
Parry- (Intense Only)- Same effects as the Parry in this moveset. Doesn't overuse.
Hp- Average Boss Health
Size- Rougly that of Ganondorf. Wingspan is between 10-20 feet.
Mobile- Yes
Difficulty- 5/5 (A real pain in the ***.)
Despite the results of the battle, the true results are shown in the cutscene.
Chris Lionheart is knocked to the ground, his sword is out of reach.
Ashencroft: Prepare to meet your God.
An arrow flies through the air and strikes Ashencroft in the shoulder, enfuriating him.
Ashencroft: Perhaps I can entertain you before you die.... Now, watch as I kill the one you love.
Chris had to make a decision at this point. He could either run and grab his sword, allowing Ryann to die, but giving himself a chance for survival, or he could attempt to save Ryann's life, likely condemning himself to a swift death.
Chris: I choose..... her.
Ashencroft and Ryann fought, but it was a short fight. Soon, he had her on the ground, just like Chris. He pulls back his sword. Ryann closes her eyes and braces herself for the impact of the cold steel.
When she opens her eyes, she sees Chris standing between her and death. For a moment she was overcome with relief, but this was short lived.
Her gaze shifted to Chris's back. Ashencroft's sword was impaled through his stomache. (If this game showed blood then there would be a considerable blood loss.)
Ryann: No! Chris!
Chris turns his head so he can see her.
Ryann: Why? Why did you do that?
Chris: I'ld do anything..... for you.
Ashencroft: You're a fool. Once your life has left your body, I will kill the girl to.
Chris: Can't you see? You've lost?
Ashencroft: What?!
Chris's concealed dagger leaves its sheathe in his gauntlet. With his remaining strength, the Lionheart thrusts his dagger into the foe, while holding on to the sword impaled in his stomache with his other hand. Ashencroft has no way to flee. The dagger strikes Ashencroft's heart, killing the demon instantly, and sending him back to hell.
As Ashencroft falls lifelessly to the floor, Chris also falls to the ground, barely alive. The blade had missed his vital organs, but he was rapidly losing blood.
Ryann: Chris... don't go! Hang on!
Chris: Here, Ryann take this. A little something to remember me by if I don't live to see another day.
Chris removes one of his gauntlets. A gold ring was on his ring finger.
Chris: This belonged to my mother. She gave it to me before she died. I want you to have it.
After saying this, Chris's eyes closed and everything faded to black. He was not yet dead, but his breath was slow.
Epilogue- Farewells
Part 1- A Miracle
Chris opened his eyes.
Chris: Uh..... Where am I?
Everything was hazy, but he could see several of his friends alongside him, including Ryann, Ike, Mia, Zelos Wilder, and all of his loyal knights.
Zelos: Don't move to much pal..... You might tear your wound open.
Chris: I can't believe I survived that. What happened?
Ryann: Maybe I should elaborate.
Flashback- Uncertainty
Ryann: Chris.... wake up!
At that moment, Ryann realizes that she has to stop the bleeding if he is to have any chance.
She removes his cape and ties it around his wound tightly. It became soaked in blood, but it was helping.
Zelos Wilder runs into the room.
Zelos: What happened here.... Is loverboy dead!?
Ryann: Loverboy?
Zelos runs up to Chris and starts casting First Aid spell.
Ryann: What are you doing?
Zelos: Just trying to heal your friend's wounds....... Alright looks like I've done everything I can right now... Now we'll have to get him a doctor.
Ryann: Thank you.
Zelos: Btw... you're kind of cute.
Ryann: And thats how it happened..... We got you here as soon as possible, and you've been sleeping for days.
Chris: Thank you Ryann... and thank you Zelos. I owe my life to the two of you.
Zelos: Oh yeah, btw, I scanned some of your blood with my Magitechnology to check for infection, and the results I got were rather odd to say the least. According this scanner, your blood contains a very unique steroid.
Chris: Thats not possible. I've never used those. (In his mind he was thinking.... "So thats what Dracula meant."
Zelos: Relax, buddy, I'm not accusing you of anything. On the contrary, this steroid was probably taken by one of your ancestors. It has some weird properties. Instead of making your muscles increase in mass, it literally increases their power. From what the scanner told me, there are no negative side-effects. In fact, technically speaking, you are one of the strongest humans on this planet. There is one.... concern... however.
Chris: And that is?
Zelos: It has become a permanent part of your genetics. Theoretically, every one of your descendants would also have the gene.
Chris: That is really unbelievable.
Zelos: Trust me, I am a lot smarter than I act.
Part 2- Returning to Trophy Land
Zelos: Well.... We'll have to be heading back to Trophy Land. We don't belong here. Goodbye.
Chris: Wait... I think I have the strength to join you. I'ld like to thank everyone for all their help.
Chris gets up, barely able to stand.
Ryann: You're so stubborn.... I'll have to help you.
The only way back to trophy land was to use Ashencroft's sword, which was still imbued with the power to warp. The heroes used this sword to return.
Part 3- Peach's Party
Upon arrival, the group appears at Princess Peach's castle. It looks as though Blondie would get her party afterall. This time, everyone was invited.
While there, everyone just had a good time. The ordeal they all went through had already become a memory. It was a truly awesome party, complete with dancing, music, and great food.
The musician was a really talented young woman with a harp. Bard
Over at the buffet, Falco was telling his tale.
Falco: And there I was, piloting my arwing bravely against the fleet of battleships. There were atleast 100 of them, but they were all no match for my flying skills. I shot every one of them down.
Fox: Give it a rest, Falco.
Krystal: You're such a braggart.
Fox: Hey, Wolf, how are you holding up.
Wolf: Curse you.... Fox McCloud.
Fox reaches for the bread.
Falco: Hands off my bread!
Peach and Zelda were on the dance floor with their escorts, Sain and Link, respectively. Daisy joined them as well, but later left to go play sports.
Mario and Luigi were at the buffet, enjoying the italian food, though Mario was having much less fun.
Mario: What does Sain have that I don't?
Luigi: Hmm.... He isn't 2 feet tall.
Mario: Shut up Luigi. *smacks Luigi in the head*
Luigi: Ouch, whats that for?
Mario: Thats for being an idiot.
Luigi: Why is everyone so mean to Weegee....
Snake had refused his invitation saying he had a secret mission to attend to. However, some of the guests observed a rather oddly placed cardboard box in the corner.
The Poke'mon turned out to be great dancers, to everyone's surprise. Everyone will remember Squirtle's awesome break dance. Mewtwo was quickly forgiven for his part in Tabuu's plan. He was just as welcome on the dance floor as everyone else. Wes was popular with the ladies, but The PT wasn't so lucky. Stalin tried to pick up chicks, but lets just say he didn't get lucky.
Samus was the life of the party. She was asked to dance by many guys, and to this day she still wonders why.
Ness and Paula danced, though it was really much more awkward than you think. Ness turned out to be horrible at dancing. Even Lucas managed to find a date, if his cousin counts.
The Chosen One was at the buffet, eating food with his tongue. He caused many to lose their appetites.
Ike and Mia also danced, but it wasn't as romantic as you'ld think. Mia's spirit was far to wild for a slow dance, so it was more comical than anything.
Zelos Wilder hit on every girl at the party (even those with dates), except of course for Erutashi.
If Erutashi wasn't occupied, dancing with her date, a dude named Sora, she would have ripped Zelos's nuts off.
Kirby was at the party, but he wasn't allowed anywhere near the food. Noone wanted him to eat it all, afterall. Instead Kirby partied with his friends (the Kirby Friends) Metaknight had also showed up, but he was really kind of a wet blanket, not really doing or saying much at all. Sir Kibble was being chased by the Nintendogs... apparently when they heard his name, they thought he was dogfood. The Waddle Doo and his Waddle Dees were a welcome addition to the festivities. King Dedede was forgiven for picking up the Soul Edge and attempting to clobbah Kirbeh. Everyone loved his big gay dance.
Pit decided not to come, instead he watched everything (and I do mean everything) through his crystal ball/seeing stone/whatever it is.
Marth danced at the party as well. His wife, Sheeda, made her first appearance in this SSE to be his date. Many thought they were lesbians.
Simon Belmont showed up to tell his vampire hunting tales. Many were intrigued (and horrified) by them.
Donna Letman once again worked as the party photographer. She was glad to capture so many memories in pictures.
Anise tried to hook up with Zelos after hearing of his money, but she was soon turned off by his horrible attitude towards women.
The Third Agers, unfortunately didn't have time to waste. They had to return to Middle Earth immediately. Aragorn would need to be informed of Sauron's final defeat.
Indiana Jones (spoilers)
got married here (this is the wedding at the end of the Crystal Skull).
Ty The Tazmanian Tiger played fetch with the nintendogs using his boomerang (that is after they were done chasing Kibble.)
Donkey Kong played drums and Diddy Kong played guitar alongside The Bard.
Sonic danced with Amy Rose. Apparently, a girl with a mallet can be really convincing. Tails made a really awesome light show for the party.
Shinon prefered not to go to the party. Nobody missed his arrogant and snide remarks.
Captain Falcon showed up to the party in his racecar. He picked up several women.
Chris and Ryann stayed for the festivities, though at first they were only standing at the side.
Chris: Would you like to dance, Ry?
Ryann: You're in no shape to dance....
Chris: I'll manage. We could slow dance.
Ryann: I'ld like that... Please don't overdo it.
And so they danced for the duration of the party.
Part 4- Goodbye
After the party, Chris and Ryann returned home to Earth using Ashencroft's sword.
Zelos: Are you sure you don't want to stay? We'ld be glad to let you live here.
Chris: Thats tempting, but our people need us. If I don't return soon, the legion will learn of my absense and may turn on our people. Goodbye everybody.
Everyone said their goodbyes and went their seperate ways.
Part 5- Their Lives
Ike "The Hero" and Mia "The Graceful Whirlwind"
Ike and Mia were married months after the events of this SSE. True to her word, Mia never quite settled down. They never had children, but nevertheless they were happy. By day they sparred
and you could pretty much guess what they did at night
.
Zelos Wilder "The Casanova"
Zelos Wilder never changed his womanizing ways. He always had a woman around him, but never found true love.
Marth "The Manly One"
Marth returned home to Althea with his wife, Sheeda. There he lived as happily as a king possibly could for the remainder of his days.
Shinon "The Snide Sniper"
Shinon mastered many things over his life, but never specialized in any one thing. The only thing he could never master was manners.
Link "The Silent Swordsman"
After this adventure, Link tried to learn how to speak from many English teachers. He never learned how to say anything but "Skrahhhh!" It is rumored throughout Hyrule that he and Zelda fell in love.
Zelda "The Bearer of Wisdom"
Zelda continued her life as ruler of Hyrule. It is rumored throughout Hyrule that she and Link have a love interest.
Peach "The Pampered Princess" and Sain "The Ladies Man"
With Bowser gone for good, Peach had much more time to fufill her interests. She finally married Sain years later, causing some political turmoil. Her selfishness managed to win over her people.
Mario and Luigi "The Red and Green Plumbers"
Appear in many many more video games, maintaining world wide fame.
Pit "The Angel"
Pit continued on as commander of Palutena's Army. Just like Peter Pan, he never grew up.
Ness and Paula "The Psy Powered Youths"
Ness and Paula remained close for the remainder of their days, eventually getting married.
Lucas "The Cowardly Boy"
As time went by, he gained a bit more courage. He was never truly brave however.
The Pokemon Trainer "Not Ash Ketchum"
Whenever he wasn't having Poke'mon Battles, he was explaining to people that he wasn't Ash Ketchum.
Wes "The Badass Trainer"
Wes became a legendary Poke'mon trainer, and an eventual member of the Elite Four.
Team Big Shots
The Big Shots would remain a valuable rescue group, eventually becoming legendary for their intelligence and ability to talk.
Mewtwo and Mew "The Legendary Poke'mon"
Mewtwo and Mew once again worked together as king's of the Poke'mon Kingdom.
Lucario "The Ancient Poke'mon"
Lucario returned to the mountains, where he meditated daily.
Pikachu "The Electric Mouse Poke'mon"
Pikachu was one day caught by Proffesor Oak and given to a trainer named Ash, who would become his best friend.
Jigglypuff "The Balloon Poke'mon"
Jigglypuff went around the world singing to people. When they were put to sleep, Jigglypuff would become very angry and marker all over their faces.
Pidgeot "King of the Skies"
Pidgeot continued to fly free for the remainder of its lifetime.
Frosslass "The Ice Pokemon"
Frosslass returned to the mountains, living its life naturally.
Mightyena "The Pack Hunter"
Mightyena returned to its pack, eventually becoming pack leader.
Donna Letman "The Photographer"
Donna remained a photographer for the rest of her life, and eventually got married. She was happy with her job and her life.
Anise "The Doll Master"
Anise gave up on her dream of marrying into money. She eventually married for love.
Indiana Jones "The Explorer"
Indy may be old now, but he could never resist a good adventure.
The Chosen One "The Chosen One"
The Chosen One returned to the Crane School, kung fu fighting for the rest of his days.
Fox and Krystal "The Foxes"
Fox and Krystal returned to Team Star Fox. They are rumored to have a secret love life.
Falco "The Pilot"
Falco would join, then leave, then rejoin Team Star Fox many times.
Wolf "Fox's Eternal Rival"
Wolf would never stop fighting with Fox. Their rivalry eventually become almost friendly.
Ty The Tazmanian Tiger "Boomerang Master"
Ty returned to his home. He hopes that someday they may make a sequel to his game.
Simon Belmont "The Vampire Hunter"
Simon Belmont hunted Dracula for a long time, but never managed to slay him. His fame grew and grew as he vanquished many other monsters.
Dracula "Count Vladislaus Dracula"
He may have escaped from Simon Belmont but he would be slain by Van Helsing centuries later.
Snake "The Secret Agent"
Whenever the Metal Gears threatened humanity, Snake would be there to stop them.
Sagi "The Spiriter"
Sagi became the hero of Baten Kaitos. He would gain a permanent fanboy by the name of TWILTHERO, who denies his position as a fanboy.
Zero "The Red Reploid"
Several millenia in the future, Zero would be unfrozen and become a great hero. (This is a reference to the Megaman: Zero Mission games.)
Kirby "The Super Tough Pink Puff"
Kirby would remain one of Nintendo's greatest series, causing Kirby to be a star for many years to come.
Kirby Friends "The Kirby Friends"
Kirby's friends would appear in more games. Whenever the series needed a revival, they would appear to keep the series popular.
Metaknight "The Masked Mystery"
Metaknight would remain an important character in the kirby series. He would always be a mystery.
King Dedede "The Big Gay Dancer"
King Dedede would continue to be the self-proclaimed king of Dream Land. He never could clobbah dat dere Kirbeh.
Sir Kibble "Not Dog Food"
Sir Kibble became a prominent member of the MYM contests and a respected member of Smash Boards.
Donkey Kong and Diddy Kong
Donkey Kong and Diddy Kong return to Kongo Island to discover all of their monkey friends kidnapped by King K. Rool. This spawns a remake of DK64, the best Donkey Kong game ever.
Nintendogs "The Playful Puppies"
They lived their lives... well.... like dogs.
Captain Falcon "Chuck Norris"
Captain Falcon used some of the vast fortune he earned racing and bounty hunting to buy the Hawaiin Punch company. He has now renamed it Falcon Pawwwnch! Its trademark flavor, Flamin Fisty Red, has become the most popular soda ever.
Erutashi "The Self-Conscious Girl"
Erutashi eventually found a guy to accept her. She no longer tries to rip people's nuts off.
Samus Aran "The Buxom Bounty Hunter"
While Samus's ship was being fixed, Playboy attempted to get a contract. To this day, they haven't offered her enough.
Daisy "The Tomboyish Princess"
Daisy and Peach remained close friends. Daisy could never resist making an appearance in a Mario sports game.
Sora "The Squeenix Spawn" (lol Iron Thorn)
Popular demand created many new Kingdom Hearts games, but Sora would eventually be replaced with a more badass hero.
The Bard "The Magical Musician"
The Bard made a living playing at weddings, parties, barmitsphas (sp?), and just about every kind of social event you could imagine.
Nightmare "The Azure Knight"
Nightmare died to Meta Knight and went to hell for his considerable sins. Being living armor, he was immune to the flame, and consumed many souls, having a hell of a time. Due to him having taken over hell, the devil (Who shortly after went down to Georgia) was really pissed off.
Ganondorf "The Wielder of Power"
Though Link killed him once again, he would return time and time again to create havoc.
Bowser/Dry Bowser "King Koopa"
Killed in the Endgame.
Darth Vader "Anakin Skywalker"
Killed in the Endgame.
Darth Vader's Secret Apprentice "Starkiller"
Killed in the Endgame.
Voldo "Servant of Vercii"
Voldo would forever guard Vercii's treasure.
Sauron "The Dark Lord"
Killed in the Endgame.
The Black Knight "Zelgius"
Zelgius was finally slain by Ike. Zelgius felt no hatred, anger, or fear in his death, but rather was overjoyed that he got to fight his Master's son again.
Tabuu "The Subspace King"
Killed in the Endgame.
King K. Rool "The Gator"
King K. Rool escapes from Donkey Kong and Diddy Kong and later captures their friends once again. This spawns a remake of DK64 for the Wii.
Ridley "The Brilliant Beast"
Ridley escapes Samus once again. He will continue to be the main villain of the Metroid Series for as long as it lasts.
Ashencroft "The Blade Demon"
Killed in the Endgame.
Chris Lionheart "The Noble Prince" and Ryann Trueshot "The Beautiful Archer"
Chris Lionheart became king of the new Valious (a unity between the rebels and the legion). He soon asked Ryann to marry him, and she accepted. Their son, Sam Lionheart, would become a great warrior.
FIN
Hope you all enjoyed my SSE.
This last chapter focused more on comedy and romance to contrast to the overall serious tone of the rest of the SSE.
All of the characters who only appear in the epilogue are not just here for cameo value. Everyone is playable in any level after the game is beaten.
And yes that is a Fire Emblem style Epilogue.... what of it?
Awesome, I've got two movesets in MW's SSE. Except I didn't make six or more movesets. Ah, well. Anyway, I figured GR and Doopliss were going to be bosses over some other places since they were the guys who let Drac free.
NOW I MAKES MAI OWN SSE NOW oh wait no everyone's doing it. So nvm.
Atleast all the people who have made SSE's so far are good at it.
Lets see... I think I'll pick Team Big Shot's (Commander Blitzkrieg), Nightmare (MW), and Crono (SirKibble). Crono would make an awesome team up with Snake wouldn't you agree?
Sain is the only one of TVT's movesets that I am familiar with so I'll pick that one. And I'll probably pick Indiana Jones from BKupa's selection.
@ Chris: Either Teigen or Zelda with sword (Eru would be fine too but I've already pimped her out to 2 SSEs)
And vampiric pinatas sound simply marvy, as do individual awards. I'd love to do an SSE, but my Achilles heel in writing is coherent, non-contrived storylines. Plus I'm lazy.
Seeing the setting of your story, Nightmare would probably be the best fit of my movesets, and he isn't being used in other SSEs, so go ahead. That SSE is very well written, looking ridiculously professional with the dialouge. I'm against the use of Tabuu, though. Why do you want a generic final boss when you can pull one from an actual game? Besides, when it comes to the final boss battle, all you do is say *Insert Brawl Tabuu fight here*. I could easily fit in the Brawl characters over some of the characters in my SSE, you really need to choose to do all or none of them though.
At first I was trying to follow the rules with inclusions in my SSE, but then I just decided to screw it over and include as many characters as I could so long as they fit. The grand total is somewhere around 45.
For the most plausible to actually be in smash award, how would you judge that? Then just actually likely characters would win, which would mean the K. Rool/Ridley stampede would flatten everything else.
@ Chris: Either Teigen or Zelda with sword (Eru would be fine too but I've already pimped her out to 2 SSEs)
And vampiric pinatas sound simply marvy, as do individual awards. I'd love to do an SSE, but my Achilles heel in writing is coherent, non-contrived storylines. Plus I'm lazy.
Guess what? I've decided to hop on the bandwagon as well and make my own SSE.
Unlike the others I plan to make mine have a bit more dialogue (so if I go out of character, please correct me and advise me of how to make a change. As this is supposed to be a contest for "Alternate Brawls" I may (and probably will) also included existing characters in order to help with the plot line.
SSE: The Evil Pact
Currently I plan on including these characters: Existing:
Good:
Ike
Link
Marth
Sonic
Mario (and don't forget Weegee)
Metaknight (really kind of a neutral but he plays a hero role in the current SSE so why not)
Kirby
King Dedede
Evil:
Ganondorf
Bowser
*Okay so I'm pretty much going to add any character (already in the game) that I can manage to include.
Movesets: Good:
Chris Lionheart
Zelos Wilder (I plan to give him a comical role. He will really get on Chris's nerves and you'll have to wait to find out how. )
Mia (finish her soon please)
Crono
Team Big Shots
Sain
Indiana Jones
Neutral:
Shadow (he just doesn't seem like a villain to me)
Knuckles
Teigan (What is she good/evil/neutral)
New (No moveset that I am aware of in this contest):
Bosses:
The Black Knight (this is mainly for the epic Ike vs. BK clash)
If you want your character added then just ask. I will currently put a limit of one character per person (if you already have characters up there they don't count)
I will start off unlike anyone else.... with a Prologue. The purpose of the prologue will to be explain how my OC, who I have clearly stated will live on Earth somehow ends up in Trophy Land.
Prologue- Defend Fort Walker:
Location: Earth
Year: Approx. AD 3000
(Before the current story-) Cutscene- Ashencroft and Tabuu:
Ashencroft sits atop the throne in the old Valian capital. Suddenly, a mysterious being appears in the throne room. It is none other than Tabuu. The guards immediately surround Tabuu, only to be blown away by Tabuu's off waves. Ashencroft is un-impressed, for he arrogantly believes his powers are far greater than the intruders. He draws his sword, but Tabuu makes the halt gesture with his hand and starts to speak.
"I am not here to be your opponent," said Tabuu.
"Then tell me why you are here, or you shall find yourself at the point of my sword," replied Ashencroft.
"I am here to make a proposition. I need a general strong enough to lead my army against some rather annoying resistors."
Ashencroft laughs at this. "You think you're the only one with that problem? I would have had complete control of this country 15 years ago, if it weren't for some noble Valian resistance army."
"Then I offer a deal. Help me crush the resistance in my world, and I shall lend my massive army to aid you in return. Do we have a deal?" asked Tabuu.
With that, the two villains shake hands and a deadly alliance gains its first two members.
Cutscene 2- The Nobel General
Night is drawing nigh. A young man looks into the distance. Chris Lionheart. He is dressed in the uniform of a Valian soldier (mostly white cloth clothes, but armor is worn to protect the vital points of the body.) He looks melancholy (gloomy). The camera then zooms out to show you why. A large army marches on Fort Walker, atleast 10,000 brutal soldiers.
"Why would the enemy send just enough forces to match our own?" Said Chris, still an inexperienced general.
"They are trying to test us. With you at the lead we shall not let them down."
The speaker was Chris's younger cousin, Arden.
"Well," Arden continued, "you'ld best inspire your troops. Give them a speech to raise their spirits."
"I will, cousin."
And with that, the Lionheart gathers his men in the citadel (the main area) and gives them some words of inspiration.
"Hear me, brave men and women, warriors of Valious!" Chris said. "Tonight our oppressors have saw fit to send us entertainment for the night. We shall make them regret their arrogance! They think themselves better than us, simply because they have the ability to handpick their soldiers. We have something that they will never have. A powerful desire burns in each of our hearts, giving each of us the strength to fight like 10... nay 20 soldiers. Some of you may die tonight, but your loss shall not be in vain. We will win this fight, for we have the upper hand! This is our territory and our base. Defend it well. I will be fighting alongside you and supporting as well as I can. Make your prince proud! Tonight we fight!"
The soldiers reply with a loud cheer.
Before the enemy troops could arrive, the defenses had already been set and the base had been fortified. Chris gathered the primary force of knights to protect the citadel. His friend, Ryann Trueshot, was given command over the archers stationed on the upper walls. Arden was placed second in command over the main knight forces, should Chris be needed elsewhere.
And this is where the battle begins.
Part 1- Breaching of the Gate:
Play as- Chris Lionheart
The enemy has broken through the gate, their forces somewhat thinned by several volleys of arrows. Chris Lionheart takes some of the citadel knights, trusting the rest to his cousin and charges to meet the invaders.
*Obj- Defeat 50 enemies.
A fairly simple objective. Defeat 50 enemy soldiers, all of which are garden variety knights armed with swords.
Hints-
Use the superior length of your sword to keep attackers at bay.
Each individual soldier is weak (rougly the strength of a primid). Just stay alive and this should be quick.
At the end of this fight a cutscene plays, the screams of the archers are heard from above.
"Dang! They've breached the upper levels. I've got to go help Ryann!" said Chris.
Part 2- Reach the Upper Levels:
Play as- Chris Lionheart
This plays out much like any SSE level. Just reach the top floor (you aren't rushed by any means.) There will be soldiers to attack you, but unlike other SSE levels, soldiers will also be present to help ward off some of the attackers. This is meant to be an easy chapter.
When you reach the top, another cutscene will play. Fortunately most of the soldiers stationed here are still in good condition, as a considerable number of knights were stationed up here as well to protect the crucial archers. Despite this, Ryann is indeed in trouble. A fully armored enemy soldier single-handedly crushes the soldiers fighting him. He turns his sights to Chris and the two warriors clash.
Part 3- Enemy Veiled In Black:
Play as- Chris Lionheart
This is a one on one fight against a computer controlled opponent. His difficulty scales with level, but this fight is unique in that you don't have to win. The outcome will be the same regardless of the results. The enemy uses the same moveset as my Ashencroft entry (minus the final smash). Generally, you should be able to win, due to your superior speed (and hopefully superior intelligence). If you do however fail, the story will continue normally.
After the fight another cutscene is played. When Chris attempts to slay his opponent, He merely slashes the helmet. The enemy is stunned, for this entire fight his armor has yet to be scratched. He was apparently holding back, as he strikes Chris to the ground, knocking his sword out of reach. Chris braces for the impact of cold steel, when suddenly an arrow strikes his attacker in the shoulder, bouncing off but getting the enemy's attention. The archer who fired the arrow was Ryann.
"You shall not kill him," says Ryann. "I won't let you"
This gives Chris enough time to grab his sword.
The knight is unintimidated by this. He merely laughs and speaks to his foe..
"So, young Lionheart... yes I know your name. This girl is important to you isn't she. Well, let's have a contest...."
"What are you talking about?" Said Chris.
Before either Chris or Ryann could react, his foe grabs Ryann.
"I want to find out just how noble the Valian prince truly is. I'm going to give you the chance to save your little girlfriend... follow me if you want to rescue her. But be warned, follow me and your life will be in constant peril."
And with that, the knight slashes a dimensional rift with his sword and walks through it.
"Woah... what is going on?..." Chris says to himself. "It matters little... I'm coming, Ry!"
Chris jumps through the rift and it closes behind him. When he opens his eyes, he finds himself in another world, the world of Trophy Land. Ryann's captor is nowhere is sight, and Chris knows that he must obtain the help of others if he is to find her.
Chapter 1 coming soon to a forum near you.
I plan to make the group that starts in this chapter the "knight" group. Featuring Ike, Marth, Zelos, Link, MK, Chris, and others.
And for those of you who will accuse me of bias... this is one of the only parts to exclusively feature Chris. And I only made this part to assist in the story as a whole.
A robed man, Dracula, sits down upon his chair, in front of this round table of villains, as the camera circles around, revealing some old, and new, members of the group, revealing Gecko Moria, Cervantes, Reaper, & Gecko Moria, as well as a smiling man in a suit, an armored knight, and a giant monster.
CEO.
ASHENCROFT.
GIGAN.
Dracula sits down to discuss what has happened, when a very excited CEO gets up and bows before revealing two of his latest cronies, who have been brainwashed through inhumane ways, one a roguish looking dude and a strange green man.
JEFF HARDY.
MAMA LUIGI.
CEO cackles as Dracula nods his head, as he turns to Shadow, who is about to present something in a gray chest that he found in the plains, shown through a flashback, and out pops out...
A Pure Shadow Core! It dissipates into many forms, taking a Primid-like form, but staying a gray color. Take by surprise and by its sheer numbers, some of the villains flee, leaving only two remaining; Ashencroft and Dracula. As either one, fight through the creature-infested halls of the Villain's Den to the Chambers, where you find a... interesting... cat.
LOLcat.
Apparently, it was an experimentation of cats and the internets combined into one form. This LOLcat, as it is called, escaped from its cage and is making its escape- these villains won't let them do that. As LOLcat, fight off the evil Ashencroft to successfully escape as LOLcat. Dracula, angered, is about to kill Ashencroft before a strange being in a white sheet comes back with a trophytized LOLcat in hand.
DOOPLISS.
The man, apparently the aspiring member of the villains, comes with the duo, making it three.
Keep going through the circling corridors and halls of the Villain's Den until you reach the Golden Door...
Where you're not quite free yet. You see four cybernetic warriors who appear to control some sort of mechanism that allowed the Pure Core to get in.
B&B UNIT.
These four ferocious females won't go down without a fight. As your selected characters, fight off ALL the members of the B&B separately with three stocks to win.
They are trophytized, as another threat is quelled by Drac's own hand. While Ashencroft makes the overexcited Doopliss a member of the Round Table, Dracula grins as he remembers CEO's indoctrination...
Dangit, Prof Oak got ignored lol. I figured it would happen... he wasn't that great anyway. I liked the SSE tho. Even though it stole Oaks limelight.
Cheers have a good 1.
L8a
Following Tabuu's crushing defeat at the hands of the Brawlers, the World of Trophies is returned to normal. The Brawlers return to their normal lifestyle of fighting and relaxing; their new bonds now stronger than ever...
Subspace is now obliterated, and its remains sealed away in an unknown dimension. This dimension is lifeless, desolate, and completely sealed off from the other universes and dimensions. The dead bodies of Primids and the rest of the Subspace Army lie, scattered about this lonely world. Mutilated bodies of Towtows, detonated pieces of Armanks, and some decapitated Auroros lie among the wreckage. In the center of the fallen army, the mangled remains of their leader, Tabuu, lies, the brackets in his chest twisted and bent, his neck and arms bent at odd angles. The ball at the center of his chest feebly leaks inactive Shadow Bugs around the area. This is one place that no one wants to be in.
Suddenly, a sinister red eye pops up in the midst of this foreign dimension. It squints and swivels around, surveying the casualties. Finally, it rests on Tabuu. After staring intently for a long time, something else pops up, and the eye turns to see what it is, ready to annihilate the disturbance. However, it stops when it sees what the commotion was. A portal has appeared behind the eye. Peering through it is a dark unknown figure, who the eye recognizes as a loyal servant. The figure notices Tabuu and, after a slight pause, starts laughing, ruthlessly and evilly, realizing its master has been successful in locating its prey. The eye follows, despite having no mouth. The figure clenches its fist, to signify that it will now leave to serve its true purpose, now that its master has shown it what it needed to know. The portal vanishes.
The eye turns his sights back to Tabuu's corpse. It stares with increasing intensity, until suddenly, the Shadow Bugs turn pitch black and begin swarming over the Subspace Army. The eye lets out another sinister laugh, then pops away. Tabuu begins to stir, but then reels back in pain, falling to the ground. The laughter continues as Tabuu begins shaking. He grows in size, about three times larger than normal. The eye then appears where Tabuu's brackets would normally be in his chest. Tabuu shudders lifelessly, then turns pitch black to match the new Shadow Bugs. The Subspace Army is seen going through the same transformation, many species mutating into more grotesque and fearsome creatures. Finally finished with its intent, the eye teleports himself, inside Tabuu's body away, as the screen darkens to blackness, showing the new army beginning a slow, deadly march...
Chapter 1 will be up as soon as I get some more characters...


")
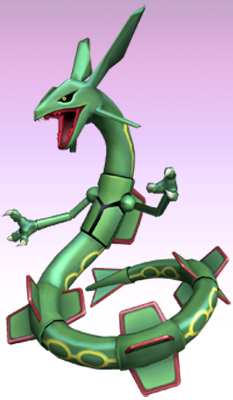
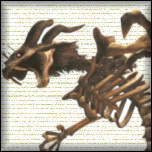


__THISRES__147062.jpg)