Edit: Sorry, submitted this before I was done tweaking the format. Be forewarned, it's a long read, because it's a double moveset. If you're having trouble visualising a particular move, please tell me so I can mock up a picture of it
original character \/\/
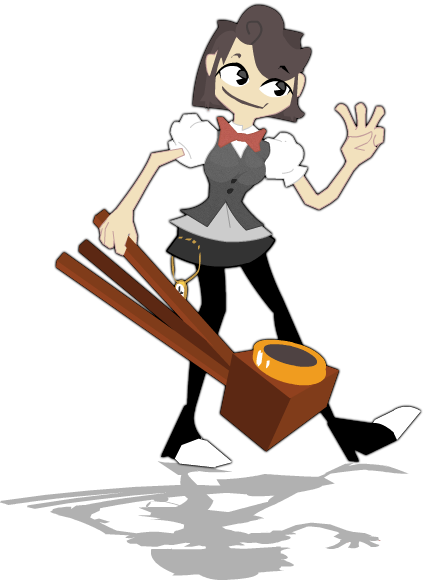
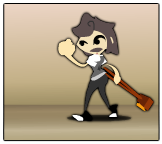
Donna (Levman)
The legendary Photographer, Donna, is ready to brawl!
(See trophy description for info on her backstory)
Unlock: Take 50 total in game snapshots
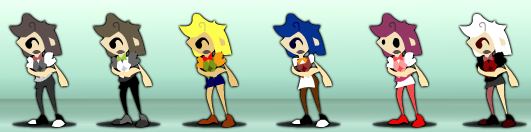
Alt. colours:
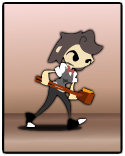
__Play style__
About Donna's Camera: Donna behaves fundamentally different, depending on whether or not she has her 'ye olde' Camera in her hands. The camera itself appears with her as a battering item, and behaves as such if any other character picks it up. When the camera is on the ground, it lies on its back with the camera lens pointing up.
About Losing/Claiming Donna's Camera: If she loses the camera off stage, or it is destroyed by enemy attacks, she can spawn another in a way similar to Wario's bikes (Her up B tether, spawns a new camera if needed, as does her AAA combo). Just like Wario's bikes, Donna can only have one of her cameras out at a time, and Donna's Camera can be used by other Donna players. When Donna picks up another Donna's camera, it becomes
her camera (ie. Donna claims that camera for herself). If, at that time, she had her own camera somewhere on the stage, it becomes the opponent's camera instead.
About snapshots: Some of Donna's special attacks allow her to take snapshots with her camera but they are not saved automatically. Donna must stand still for a while with the camera so that she can develop the photo. This takes 3 second of idling. Only the most recent photo taken can be developed (i.e. if you take a second photo without developing the first, then the first is deleted automatically)
Switching Styles: To rid Donna of the camera, either throw it (exactly like a battering item is thrown) or use Donna's down B . If the camera is still around, she can pick the camera up again. Certain attacks like her dash attack will part her briefly from her camera, automatically retrieving it at the end. If the attack is interrupted midway, she will have to pick it up again manually.
With camera: She is stronger, slower and a faster faller with the camera in her hands. Most attacks utilise her camera's extended reach and knockback to clobber and launch enemies, sacrificing speed and % damage in exchange. The priority of her attacks is increased with her camera, but is still below average. She cannot Wall Jump with the camera, but she can Wall Cling and use a tether recovery (up B). Trying to grab while holding a camera results in Donna dropping or throwing the camera. Donna must drop the camera to pick up other items.
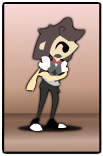
Without camera: She is faster, weaker and a slower faller when bereft of her Camera. Her attacks have the advantage of speed and damage, but the majority of the moves use the same fundamental motions as "With camera", abeit with a shorter range. She has almost no priority when attacking, but very little startup and wind-down lag. She can wall jump without a camera, but cannot Wall Cling and has few recovery options.
Pros
- Good horizontal recovery
- An evil, evil edgeguard (thanks to the many many spikes, gimps and camera techniques she has at her disposal)
- Certain aerials keep Donna in the air longer. Her ability to switch from fast fall to slow fall in particular gives Donna a better than most aerial game.
- Can switch between two wildly varying styles almost instantaneously by dropping/picking up the camera. Since throwing the camera changes Donna's play style, She has a plethora of possible combos that involve quickly switching back and forth.
- Her ability to activate the camera's flash, even if she doesn't have the camera, can stop approaches dead in their tracks, edgeguard from two different points at once, or even set up combos for her
- The camera can take snapshots in the heat of battle. The snapshot will be from the Camera's POV. The Camera's POV is also added to the pause screen views you can cycle through. Bonza snapshots and crazy replay views ahoy!
Cons
- Poor Priority. Donna relies on combo opportunities more than anyone.
- No projectiles (Other than throwing the camera)
- Terrible vertical recovery. Donna won't be able to recover from spikes at even the lowest percentages
- Tether recovery can be out-prioritised by strong attacks, canceling it entirely
- Few vertical and horizontal KO options
- Various moves not possible depending on whether Donna has a camera or not. If your opponent gets that camera away from you and holds on to it, he'll be the one controlling the flow of battle. Hope you like being gimped.
How to use Donna well: Donna relies on her astounding edgeguarding techniques for KOs, although she can get some KOs through excessive comboing in "Without Camera" stance and a single strong launch With the camera. Advanced players will switch back and forth between the styles to pull off long attack chains, mostly aerial in nature. Donna's overwhelmingly low priority means than getting that first attack in can be almost impossible, but almost every one of Donna's attacks has a situational use that makes Donna a worthwhile character to learn. Donna takes a LOT of skill to use at the highest levels of play because of the sheer volume of different attacks and techniques at her disposal. Her play style makes a good counter to projectile users, heavyweights and anyone with poor recovery but she falls apart against characters with high aerial priority. She is Higher-Mid Tier, due to how easily she is gimped and outprioritised (Especially since she relies on gimps for KOs so much)
__Statistics__
Size: Slightly shorter than most "Human" characters. About 7/8 the height of Zelda
5/10 (With Camera)
5.5/10 (Without Camera)
Crouch Size: Donna can crouch quite low without a camera.
4/10 (With camera)
2/10 (Without camera)
Weight: Donna is around the middle in terms of weight class, though she weighs more with a camera.
6/10 (With camera)
5/10 (Without camera)
Launch Power: Donna has some high launching attacks but only with a camera
5/10 (With camera)
3/10 (without camera)
Range: Donna's range with the camera is still short of many sword users'
6/10 (With Camera)
4/10 (Without camera)
Damage: Attack damage is far greater without a camera.
3/10 (With Camera)
6/10 (Without Camera)
Attack Speed: Most camera attacks have some stifling lag behind them
3/10 (With Camera)
7/10 (Without Camera)
Walking Speed: Donna is quite slow with a camera and much faster without
3/10 (With Camera)
5/10 (Without camera)
Running Speed: The difference is even greater while dashing
5/10 (With Camera)
7/10 (Without camera)
Mid Air Manouverability: Donna is quite stubborn in the air, handling much better without her camera
3/10 (With Camera)
6/10 (Without camera)
Fall Speed: Donna is not a fast faller, even with the camera. Her floatiness lends herself well to horizontal recoveries
6/10 (With Camera)
4/10 (Without camera)
1st Jump: Donna has an abysmal first jump
2/10 (With Camera)
3/10 (Without camera)
2nd Jump: ...And a roughly equal second jump. Vertical recovery is not her friend
3/10 (With Camera)
2/10 (Without camera)
3rd Jump: N/A
Wall Jump: 'Without camera' only
Wall Cling: 'With camera' only
Crawl: N/A
Glide: N/A
Tether Recovery: 'With camera' only. Activated as an 'up B' move
__Ground attacks: (With Camera)__
A: Shunt (3%):
holding the camera upright (tripod legs pointing to the ground) with both hands, Donna rams it foreward. Short range, but the attack is as tall as the camera and it also pulls the foe in.
AA: Lamp (1%):
After the Shunt, she pulls the camera back and uppercuts the foe with her left fist. Even shorter range than Shunt, Lamp knocks the foe up. She steps backward during the attack
AAA: Clang (5%):
She holds the bottom of the tripod firmly in her right hand and slams the camera down onto the opponent in a quick 190 degree arc. The range is half the length of the camera. This attack bounces the opponent off the ground away from Donna.
Comments: Donna's AAA combo is surprisingly slow, particularly the first hit. The foe also has to be pretty close for all three attacks to connect. If the foe doesn't tech after Clang however, they'll be in the perfect position for a Huey Whip, magic Carpet or even a KERANG or Camera-Stand at low percentages. Satisfying, but let's not delude outrselves. Noone's going to just stand there and wait for Donna's AAA to come out.
Foreward Tilt: Huey Whip (3%x3):
Grabbing the camera by its head, Donna spins on the spot, using the momentum at the end of the spin to thrust the camera foreward. the 3 legs of the Tripod gives the attack 3 hits, the last launching the foe. The range of this attack is the full length of the camera, the closer the opponent to Donna, the greater the knockback of the attack.
Comments: Donna's only Camera move that can realistically result in a horizontal KO. Quicker than a smash attack, but slower than tilts usually are. Huey Whip launches the foe quite far when you sweetspot it so, despite the ranged qualities of the attack, it should only be used in close quarters. It stays out long enough to punish spotdodges and some rolls, but anyone hit near the tip of the attack can DI out of the following hits with ease.
Upward Tilt: Flag Down (4%-8%):
While, holding the middle of the camera, Donna Swings it above and behind her in an 160 degree arc, rising to the balls of her feet at the peak of the attack. The range of the attack is greater at the top than at the sides. The launch power of this move is better than that of Donna's Up smash. If the opponent is hit at the start of the attack, they are thrown upward toward the peak of the swing whereupon they are struck again. If hit at the end of the attack, the foe is not launched.
Comments: Like Huey Whip, this move is better than its smash equivelent for KOs. Because of its ability to sweep up foes in front of Donna into a second more powerful strike above her, Flag Down's use against aerial foes is depreciated. If you connect with this, don't forget to throw your camera straight up for some cheap extra damage
Downward Tilt: Magic carpet (7%): Holding both the bottom and middle of the tripod, Donna makes a spinning, sweeping motion at the foes legs, tripping them up. Donna ends the attack facing backward and the move itself has a large startup lag. The range of the attack is just over half the length of the camera.
Comments: Despite the move reversing your orientation, Donna has no reasonable moves to take advantage. Any foes who tech through Donna, however are likely to be greeted by an AAA combo or Huey Whip. Use against a panicy or roll prone foe.
Foreward Smash: KERANG! (15%-19%): Donna takes a step foreward, raises the camera above her head then... KERANG! Although it is a foward smash, this attack slams the foe down to the ground in addition to launching them away from Donna. KERANG can be used as a spike, but the attack does not make contact with the ground, limiting its use.
Comments:The step foreward gives KERANG a deceptive range. If used on the edge, she will step off, attack then immediately fall, canceling the wind-down lag. The tip of the attack has spike properties, but only on foes that were airborne to begin with.
Upward Smash: smash-a-pult (12%-16%):
Donna leaps into the air, drawing a thin arc with the camera, that has a far greater range at the top. No matter when or where the opponent is hit, they will be flung backward into the air at a strangly weak trajectory for a smash. The leap into the air counts as a real jump and the player can jump again immediately after the attack finishes and follow the opponent into the air.
Comment: smash-a-pult is rather odd, in that it's a setup rather than KO move. The height that Donna jumps increases with how long you charge it. At most the jump will be twice the height of Donna. If not timed correctly, Donna could jump right through her target and attack thin air. During the jump up part of the smash, Donna has airdodge properties.
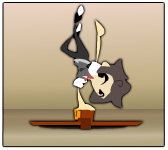
Downward Smash: Camera-Stand (10%-11%): Donna places the camera upright on the ground then does a handstand on it, causing the camera to collapse and the tripod legs to jut outwards to hit the foe. The strong downward trajectory and long range offered by the move makes it a potential edgeguard, though there is a long winddown period before and after the move.
Comments: Despite being Donna's laggiest move, you can actually use Camera-stand to counter after an opponent's attack. This is because as you charge the move, Donna handstands on top of the camera, meaning her hitbox is no longer on the ground but rather above it. This height is sufficient to dodge most ground attacks and grab attempts, other than up tilts and up smashes for obvious reasons. When you release the attack, this obsurdly strong attack will hit before Donna's hitbox reaches the ground, negating most attempts to interrupt it. Catch your foe offguard by incorperating this into your rolls and spotdodge game.
Dash Attack: Vaulting Kick (13%): Donna plunges the head of the camera into the ground and uses it to vault foreward, delivering a flying kick to the opponent. There's an abnormally long wind down to the move as Donna retrieves the camera. For obvious reasons, if there's no ground under where she'll plant her camera, Donna will simply fall off the edge. The move launches the foe at a strong horizontal trajectory that can KO at high percentages.
Comments: in spite of having obvious lag at the start and even more obvious lag at the end, the actual attack portion of Vaulting Kick comes out lightning fast and almost rivals Daisy chain for range. You can cancel the ending lag by sheilding, in case you'd rather pick up the camera yourself or carry on the assualt without it (in which case this attack is Donna's very best approach)
__Ground attacks: (Without Camera)__
A: Push (5%):
Same range as Shunt but obviously pushes the foe back slightely. Donna thrusts her palms into the foes stomach. Does more damage than Shunt
AA: White glove (1%):
Greater range than Lamp. With her right hand Donna performs a swift sharp punch to the face, with the left she reaches into her back pocket. There is no step backward unlike Lamp
(If Donna can't spawn a camera yet, she can't perform a neutral A combo)
AAA: Daisy Chain (12%):
A camera spawns in Donna's left hand. While holding only one of the legs, she thrusts the camera toward the enemy. The other legs snap outwards to double the attack's range. This attack launches the foe slightely less than a Huey Whip and can only be used every so often, but Daisy Chain has the greatest range of all Donna's attacks and is difficult to avoid since it's part of the neutral A combo.
Comments: This AAA combo lives and dies by Donna's ability to spawn a new camera for the third hit. But even without it, the first two hits of the combo outclass their 'With Camera' equivilents almost every way. If she can't spawn a new camera, she'll be a sitting duck after White Glove as there'll be lag before she can do another attack. Donna can't Jab Cancel because of this hidden lag, but then again, who whould want to? The all powerful range, speed and power of daisy chain means that Donna players may consider starting this combo early in anticipation of a foe entering Daisy Chain's range. It's also a lethal way to end combos.
Foreward Tilt: Axehandle (14%):
Donna clubs the foe over the head with both hands. The range is half that of Huey Whip but does more damage and has far less startup lag. Axehandle weakly launches the foe upwards and away from Donna
Comments: Axehandle can only realistically combo into Axehandler. So it's a bad move to open a combo with. A possible ground to aerial combo bridge though.
Upward Tilt: Swat (13%):
Donna simply punches the air above her. There is very little launch power with this move which makes hitting the opponent with multiple up tilts easy. There is exceedingly little range to this attack and it cannot hit enemys at the side of Donna.
Comments: The meat of any Without Camera combo. It racks up damage surprisingly quick, but since it doesn't hit the sides, you should never start off a combo with Swat
Downward Tilt: Card Control (5%):
A simple lightning quick jab foreward while crouching. Little damage, range or launch power. Knocks the foe upwards slightely.
Comments: Anyone with sense will DI away the instant they sense a card control spam is coming. But once trapped, they won't be getting out until mid 40%. Once the foe is knocked high enough, Donna can walk under them and start spamming Swat, for even more damage. An alternative, if the foe DI's away is to use a Donna Hook immediately after Card Control to catch them on the retreat.
Foreward Smash: Donna Hook (15%-28%):
Donna leaps into the air to deliver a powerful Left Hook to the enemy. The short range of the move is somewhat negated by the fact that Donna jumps foreward during the attack. However, it can be easy to miss an enemy that is too close to Donna. Just like Smash-a-pult, Donna can perform a midair jump after a Donna Hook to chase the foe into the air. The move is deceptively fast since Donna punches shortly after leaving the ground, but has little KO potential.
Comments: If you pay attention to Donna's spacing, this attack pays dividends despite not being particularly special in any way. It's best used on foes trying to DI away from a ground combo, but you have to predict exactly when they'll make a break for it, if you want any chance of connecting. The fact that it doesn't hit targets directly in front of Donna makes it an invaluable rescue tool in 2v2. Using this on the edge of stages is the ultimate horizontal recovery gimp since she'll jump off, attack and grab the edge all in one motion.
Upward Smash: Glee (17%-24%):
Donna leaps into the air, drawing a thin arc with her fists. The hitbox for this attack is fatter but shorter than the one for Smash-a-pult. Glee can easily KO opponents but has a longer-than-most startup lag. The leap into the air counts as a real jump and the player can jump again immediately after the attack finishes and follow the opponent into the air. The leap Donna makes with Glee is shorter than that made with Smash-a-pult.
Comment: Despite the similarities between this and smash-a-pult, Glee is a different beast altogether, for all the wrong reasons. It is a typical smash in that it's easy to see coming but devastating if it hits. Only spammy noobs use Glee. Don't be a spammy noob.
Downward Smash: Peg Leg Pete (20%-24%):
Donna performs a strong football kick to the ground. Any opponents the attack hits are sent flying in a standard 'downward and away' trajectory. However, if Peg-Leg-Pete hits any light objects, they are sent flying in slightely upward trajectory, as if thrown. Kicking explosives does not cause them to explode on Donna, explosive items will explode once they land. Kicking a Barrel or rolling crate causes it to roll away from Donna quickly. Unfortunately, kicking a smashball causes it to give its smashy goodness to whomever it collides with next
Comments: Peg-Leg-Pete has terrible range, barely even hitting anything in front of her, and is not even worth the hassle in most cases. But without a camera, it's the only way Donna will be hitting a foe downwards. So, deal. The point of this attack, however is that it launches items as if they had been thrown. Simply kick a pile of items and watch your opponent run screaming from the improvised chaos. If you kick an a thrown item, the item will be thrown right back as if you had caught it.
Dash Attack: Trip:
Donna has no dash attack without her camera. Trying a dash attack will cause her to trip up.
Comment: A trip on command? What madness!?
__Grab __
Donna can only grab when she doesn't have her camera
Grab motion:
Donna crouches and attempts to grab with both hands. If successful, she stands up slightly
Comments: Donna leans backwards during this, so the range is pitiable. This is, however, a crouching grab, which has its uses. It also stays out longer than normal grabs which, considering its poor range, mega handy
Running Grab motion:
Donna dives towards the foe with arms outstretched. If the grab is successful, both Donna and the foe slide foreward a short distance (if they slide off an edge, they both enter freefall). If the grab is not successful, She falls hard on the floor and there is a large lag before Donna can act again.
Comments: This has an abnormally large range (given that Donna dives foreward) and has obvious suicide KO potential, but it is also rather laggy at both the beginning and the end. Certainly the laggiest grab in the game
Pivot Grab motion:
Donna pivots on the spot and performs a sweep kick directly in front of her. The kick does no damage, but knocks foes directly into her grab
Comments: The grab itself is the same as her regular grab, but the sweep kick effectively doubles its range. Since the kick is an attack, it can even grab foes that have been knocked down. Foes can DI away from the grab at especially low or high percentages, and if the kick is shielded, the foe is pushed away from the grab. That's right, shielding can block this grab!
Grab attack (4%):
Donna knees the opponent in the gut
Comments: The grab attack is quite strong, and reasonably fast too (at 0% Donna can get in at least 2 hits and a throw)
Upward throw: Pushsies (12%):
Donna rolls onto her back, balancing the foe on soles of her feet. She then kicks the foe upward, causing little knockback
Comments: This throw is rather easy to DI away from, so it is difficult to chain this into a series of Swats. Effectively useless at high level play
Downward throw: Maui Mallard (10%):
Donna rolls foreward, on top of the enemy. Then jumps, rigidly extending her legs upon landing and sending the foe bouncing hard off the ground. Donna can move again the instant the move finishes.
Comments: The foe bounces high off the floor after the attack, so you won't be able use it as a chaingrab. But it is relatively easy to hit the foe with a Swat or two afterwards. Donna's best throw for racking up damage
Forward throw: Starter's grid (2%):
Starts off similar to Downward throw but, with her hands still on the enemy, she performs a powerful kick to the foe that launches them foreward. Immediately after the kick Donna can dash after the launched foe, otherwise there's a long wind down period while She stands up again
Comment: Starter's grid is a move you'll be spamming to start your combos because of how easy it is to chase after the foe to follow up. This is also a chaingrab to the heavier characters at low percentages, again because of Donna's ability to chase afterwards. Deals next to zero damage to compensate.
Backward throw: Vault over (11%):
Similar to an upward throw. Donna merely kicks the foe at a backwards trajectory instead of an upward one.
Comments: This throw has the most KO potential, making it an OK option if you can't get Donna's camera back for a better KO attack. Otherwise, don't bother with this
__Aerial attacks: (With Camera)__
Neutral Air: Falling Burr (3%):
While facing the screen, Donna's outstretched limbs and the camera's oustretched legs form 7 spines, which cause damage and repel the foe on contact. If Donna lands in the middle of this move, she will bounce off the ground without the attack ending. Falling Burr causes Donna to fall at a slower rate. This move has a good all-around range and damage, but is out-prioritized by literally anything.
Comments: Like a puffer fish, Donna should wait til the last moment before whipping this out. She should cancel the attack immediately after, since it will almost certainly be countered if you go for more hits. Good for clearing air space.
Forward Air: KERSWOOSH! (8%):
Donna attempts to swing the camera in a fashion similar to but quicker than KERANG. If it hits the foe, they are launched a decent distance away, KO-able at higher percentages. However, if it misses, Donna's momentum causes her to spin in midair, which causes a significant recovery time for the move
Comments: Because of the obvious similarities between this and KERANG, this move can be used as a meteor smash. Never ever use KERSWOOSH unless you know it will hit something, because the lag afterwards is the most painful thing you're likely to experience in the air.
Backward Air: Air Swim (12%):
Without turning, Donna kicks behind her with both feet. This attack pushes herself slightely upwards and forewards (like ROB's B-air), making it a useful recovery. There's almost no start-up lag to the attack and very little lag after the attack. Air Swim knocks the enemy up and away from Donna, taking them out of range of more B-airs.
Comments: Air Swim can get Donna some extra distance when recovering and is a good way of repelling the foe since the attack moves you too. If you hit with Air Swim, you are pushed up and forewards 3 times as much as if you missed, thus ruling this B-air completely unsuitable for comboing. It's hilarious to use if both you and your opponent are falling off the stage
Up Air: Dark-Wing (7%):
Donna makes a short swing with the camera above her head. The range of the attack is half the length of the camera. This is Donna's most KO-able aerial attack, especially since it's so quick to execute. Dark-Wing has a particularly low priority however.
Comments: you really have to surprise your opponent to avoid having this being out-prioritised. But the knockback is certainly worth the hassle since it's her best vertical KO option.
Down Air: Flag Under (15%):
Donna makes a short swing with the camera below her feet. The range of the attack is less than half the length of the camera. To compensate, Flag Under deals more damage than the rest of Donna's Aerials, has reasonable priority and launches the foe downwards, without being a spike. The attack stays out for around as long as Toon Link's U-air. The lag after the move is only marginally better than that of KERSWOOSH since Donna has to lift the camera back up
Comments: Flag Under has some major lag, even if you hit, thus ruling it out until the mid percentages. It should be used at the end of an aerial combo to knock the foe down off the stage and set them up for her various spikes.
__Aerial attacks: (Without Camera)__
Neutral Air: Falling figure (6%):
While facing the screen, Donna's outstretched limbs form 4 spines, which cause damage and repel the foe on contact. If Donna lands in the middle of this move, she will land, unlike Falling Burr. This move has a less range and more damage than Falling Burr, and doesn't slow Donna's fall.
Comments: This should be incorperated into Donna's game if she likes to switch styles in the air often. The similaities between this and Falling Burr mask its various differences. Thanks to the way Donna moves without a camera, Falling figure moves faster than Falling Burr horizontally as well as falling faster. Some foes will walk right into a falling figure, expecting it to move like Falling burr
Forward Air: Axewhiff (15%):
Donna attempts to swing her fists in a fashion similar to axehandle. If it hits the foe, they are launched a decent distance away, and dealt significant damage. However, if it misses, Donna's momentum causes her to spin in midair, which causes a significant recovery time for the move.
Comment: Axewhiff is stronger and faster than axehandle and doesn't launch the foe downward like KERSWOOSH. But you have to make the move count, or the lag will only invite punishment. Donna's best horizontal KO option in the air.
Backward Air: Gale Swim (10%):
Without turning, Donna kicks behind her with both feet. This attack pushes herself slightely upwards and forewards, moreso than with Air Swim. There's almost no start-up lag to the attack and very little lag after the attack. Air Swim knocks the enemy up and away from Donna but leaves them in range of more B-airs at lower percentages.
Comments: Watching multiple Gale Swims hit an opponent is akin to watching a man juggle upside down, mesmerising and baffling in equal measure. There is no extra push to the player if Gale Swim connects, which making it a nice spammable aerial. Only the very beginning of the kick counts as the attack, so a well timed airdodge will open Donna up to a severe counterattack.
Up Air: Aerial Swat (13%):
Donna makes a short swing with her fist above her head. The range of the attack is almost none existant, but the attack knocks the foe downward and deals slightly less damage than Axewhiff
Comments: There is no lag after the attack, making Aerial Swat a beautiful setup for Gale Swim spamming. Or you could fast fall another Aerial Swat to drag them closer and closer to the ground. If you get hit by Aerial swat, it's guaranteed that another 5 or 6 attacks are coming your way.
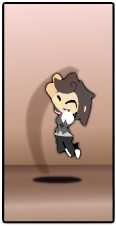
Down Air: Mickey Bounce (17%):
Donna Lifts her legs and decends slightly faster than normal. If her seat comes into contact with an enemy, she will bounce off of them, dealing a high amount of damage but no knockback. She can do this up to three times in the same Mickey Bounce. The move has adequate priority, but takes time to cancel out of and does not knock the foe far back. Landing on the ground during a Mickey Bounce causes a long recovery period
Comments: Mickey Bounce has deceptively high priority, but the animation itself is unmissable. If it hits a foe modair, all of their momentum is cancelled. This property of the attack makes Mickey Bounce invaluable in 2v2 matches to save team mates
__Special attacks: (With Camera)__
Neutral B: Shutterbug (2%):
Donna raises the camera above her head then plants it upright on the ground causing negligable damage and knockback to anyone directly hit by the camera. The camera then emits a bright flash which spreads out in a cone in front of the camera's lens. Donna can charge the attack, thereby increasing the size of the flash, by holding B. Anyone caught in the flash area is repelled away from it, without causing any actual damage or knockback (i.e. like squirtle's water gun). The attack is slow enough that the only ones likely to be caught in the flash are those that were hit by the camera being set up.
A notable quality of this attack, however is that it takes a Brawl snapshot of the match, from the point of view of the camera. If the attack is used midair, Donna levitates the camera in front of her to take the photo and there is no initial 'attack'. Donna can angle the camera in midair by holding the B button and using the Control stick to change the angle. While angling, camera rotates around Donna. For instance, if she angles the camera to take a photo above her, both she and the camera would be facing upwards. For the entire duration of the move, Donna remains suspended in place, letting her stall briefly in midair.
Comments: If you use Shutterbug once in the air, you must touch ground before you can do it again. However, you can drop the camera then use Remote Shutter in the air, catch the Camera and use Shutterbug again. If you're that desperate to stall though, you could use Falling Burr, or Wall Cling.
Side B: Screw Thread (12%x4):
Holding the feet of the tripod firmly in both hands, Donna swings the camera around herself rapidly. The move comes out almost instantly. The effects of Screw Thread are similar to DK's Up B, but with only half the duration. The range of the attack is just over the length of the camera with the attack hitting both sides of her The attack can hit up to four times (The camera is swung around twice) but the hitbox is only the camera's head. With such a little hitbox moving at speed, the attacks are difficult to land. However, each attack deals a great deal of damage and knocks the foe toward Donna, increasing the chances of additional hits. There's a long wind-down period after the move, regardless of whether it hit or not.
Comments: Only the ends of the attack do damage and only on preset frames of the attack. But each attack is individually strong and can knock the foe in some awkward directions. Has marginal use as an edgeguard if you time it right.
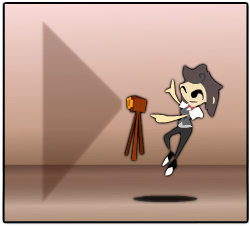
Down B: Watch the birdie (5%):
In a manner similar to Shutterbug, Donna plants the camera on the ground. If used in the air, Donna plunges down with the camera until she reaches the ground, causing a small shockwave. The greater the fall, the greater the knockback caused by the shockwave. At most the knockback is equivelent to that of a sweetspotted Huey Whip. After planting the camera in the ground, Donna leaves the camera standing where it is, effectively parting Donna from her camera until she picks in back up or it is destroyed. Whilst standing the camera acts as a wall to projectiles and a physical obstacle to other players. The camera can be destroyed when it is standing (Durability equivilant to that of the Wario Bike)
Comments: The fall itself does no damage on contact, only the shockwave on the ground. The fall is quicker than any other in the game, even without fastfalling, so there's little disadvantage to using this from up high. No matter how many specials you've used in midair, you can always use Watch the Birdie.
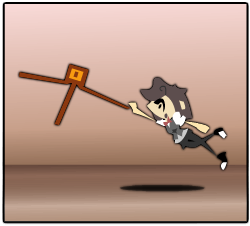
Up B: Triple Monopod (2%-20%):
By one of its legs, Donna whips her camera out in front of her at 30 degree angle. If she's on the ground doing this, she dives forewards first. The second leg of the tripod extends at the same angle, creating a long tether with which she can grab edges and damage foes. The third leg extends at an angle perpedicular to the other legs and is the attacks' Sweetspot. This sweetspot is a strong spike, making it invaluable for foiling recovery attempts.
Comments: Triple Monopod it not technically a tether recovery. It does not automatically home in on the edge, but it does stay out until it reaches it. The spike on the third leg stays out for a while before staleing so there are advantages to not sweetspotting the ledge. Triple Monopod can be interrupted by an attack at any stage other than the very beginning. There is tremendous lag if she lands while using this.
__Special attacks: (Without Camera)__
Neutral B: Remote shutter:
Donna presses a button concealed in her right hand. If the camera is somewhere on the stage or in the hands of an opponent, it takes a photo, causing a flash which pushes foes away, or forces them to drop the camera if they are holding it (even a player on your own team will drop your camera if they're holding it). Holding B has no effect.
Comments: There is a tiny delay, based on distance, between pressing the button and the camera flashing. There's also a delay before you can use the move again. A powerful technique exists where you throw or drop the camera and immediately use Remote Shutter. The spinning camera means the range of the flash is far more dramatic, and can sometimes slingshot foes at wierd trajectories. Another involves throwing the camera so it hits a foe then immediately using Remote Shutter to push them away. Be careful though, the camera's flash can push Donna away too if it hits her.
Side B:
Has no effect without the camera, but Donna will still make a similar motion with just her hands, therefore making it worse than useless.
Comments: You can use it as your 7th taunt if you really want to
Up B:
If the camera is not elsewhere on the stage, Donna spawns a new Camera and uses Triple Monopod (See Up B With Camera for details of the move)
Down B: Axehandler (13%):
Without the camera, Donna jumps into the air, making a quite Axewhiff motion that has less range and damage than the real axewhiff, but half the recovery lag if it misses. If it hits, the attack weakly knocks the foe upwards, away from Donna. Donna will not jump if she is already airborne.
Comments: a useful "6th" aerial that is good for aerial to ground combos.
__Other attacks__
Wake up attack:
(With Camera)
Steamboat Squall (3%x3):
Donna rises while spinning both her leg and camera around herself. Unlike other wake ups, this attack sucks foes in and deals multiple hits. And unlike other tornado attacks, this move doesn't spit them back out again with the final hit. If this move is shielded, then you won't be able to escape the inevitable grab coming your way. Period.
(Without camera)
Comical refrain (5% or 1%):
Donna stands up quickly with one foot thrust foreward and one fist thrust backward, with little range and wind-down. The foot knocks foes away and the fist knock foes up. The orientation of your grounded character is vital in determining what you should do next. The fist sets the foe up well for an up-tilt
Ledge Recovery:
(With Camera)
Cammer (14%):
Donna swings the camera as if it were a hammer while climbing up, hits targets above and in front of Donna, but leaves a large gap towards her feet where any D-tilt or smash is guaranteed to hit. Very light knockback but surprising damage, a total reversal of the norm for Camera attacks.
(Without camera)
Postal swing (7%):
Donna flips up onto the stage, her feet drawing a 270 degree arc in the air. If anyone is hit in the first frame of the attack, they are spiked directly downwards. The rest of the attack can rival some F-tilts in terms of launch distance and the range is dramatic. good priority too. Some Donna players may consider playing as close to the edge as possible to take advantage of this powerful recovery. Entirely gimped by D-tilts and smashes during most of the attack however, as invincible frames are virtually none-existant.
Battering Items:
Donna is rather clumsy while wielding a battering item that is not her camera. In fact, the length of the beam sword actually decreases during tilts and smashes.
nuetral A:
The same as everyone elses 'A with battering item attack'. Donna's average stature doesn't give the attack any notable differences in range either.
Foreward Tilt:
Donna makes an underarm swing with the item, knocking the foe into the air. She bends at the elbow slightely, reducing the attack's range. Works best with the Fan.
Foreward Smash:
Donna raises the item above her head, then makes a clumsy overarm swing with the item, pointing it straight forewards for the entire duration of the atttack. Foes hit by this attack are typically launched down as well as forewards. Works best with Star Rod or Lip's Stick as both the swing and projectile will connect
Foreward Bat Smash:
Donna holds the bat behind her, twirling it around and slowely leaning backwards. Once the wind up is complete, Donna lunges the bat forewards as if it were a lance. The attack has superior range, compared to her stature.
__Final Smash: "Vital Proof"__
"Donna's Final smash sees her take control of the Smash-cam, and use to it track and punish her foes with panoramic and closeup snapshots alike. Will she zoom out to get everyone in the same picture, or zoom in to obliterate a single foe? Or perhaps even something in between. With only 15 seconds to get that vital picture, or three, only the nimblest of fingers can take full advantage of this Final Smash"
Donna jumps foreward into the screen and takes the film out of her camera. During this 2 second animation, most of the screen is obscured by Donna. Once she is done preparing, she leaps behind the screen and takes control of it. She can move it with the control stick and zoom in/out with x/y buttons. The further she zooms in, the slower she can move the screen. If she presses A, a snapshot is taken of the screen, any players caught on screen suffer damage and are knocked away from the centre of the screen. The severity of the damage and knockback increases with how far the screen is zoomed in. Zoomed all the way in (to the point players fill the screen) the attack is near instant-KO and 75% damage. Zoomed all the way out (So the whole stage is visible) doesn't knock the foes back at all and deals 10% damage. Vital Proof ends when Donna has taken 3 photos or 15 seconds has passed. Donna leaps back to where she originally triggered the smash.
Wii-Mote only controls: Predictably enough pointing the Wii-mote at the screen allows you to move the Smash cam around. B and A (or 1 and 2) zoom in and out. Both B and A (or 1 and 2) together takes a picture. Players can choose to use the D-pad to move the camera instead
Comments: In the hands of a skilled brawler in 1v1 situations, Vital Proof is a free KO. Tracking targets in a free for all or 2v2 is a trifle more taxing. The phrase "every man for himself" holds true here as your foes will be scrambling away from the screen, trying to knock the others into it, occasionally even falling off the stage in panic. The Photos can be spotdodged and the move loses power on smaller stages
__Extras__
Taunts (With Camera)
Up taunt:
Donna spins then holds the camera aloft like a sword saying "We're unstoppable. He-heh!". This taunt is even more annoying than it sounds. Imagine Rikku crossed with Kirby. That annoying.
Down taunt:
Donna crouches, opens up the back of the camera and tinkers with the mechanics inside. A cog pops out into her face making and audible boing sound
Side taunt:
Donna turns the camera to herself and makes a random pose, then takes a picture. The picture is actually taken and counts as a snapshot. The poses she does are
1)Thumbs up and a little smile
2)Peace sign and a grin
3)Pegs her nose and sticks her tongue out
4)Falls backward out of the shot
5)Pouts while pointing at the camera
Taunts (Without Camera)
Up Taunt:
Donna puts her hands on her hips and stands defiantly saying "I'm not so weak!". This taunt does not fight for its friends.
Down taunt:
Donna brandishes her fists for fisticuffs, 20's bruiser style.
Side taunt:
Donna grabs an opponent behind her and faces foreward holding the opponent next to her tightly. She makes one of the five poses she would have done with the camera. If she falls, so does the opponent, taking light damage in the prosess. After the taunt she still has the foe in a grab and can proceed to attack or throw them. She can use Remote Shutter during this taunt/grab (It is assumed Donna is doing this taunt in front of a camera she planted on the ground, so she can take a picture)
Comments: Ironically enough, this "grab" has a greater range than her real one, and it even comes out faster. The taunt itself is lengthy, so there's no reason to us this in a free-for-all
Trophies:
Donna Levmen:
A young photographer with an impeccable sense of timing and placement. Her fellow students tend to rely on her photos to shed light on mysteries and incidents aplenty. Despite being a key source of vital evidence, she never abuses this power, taking every step she can to maintain the fragile balance at Forde Macoughan Law School. As such, she makes no alliances, only confiding in her ye olde camera.
Kamen Velik:
A boy possessing what seems to be an impossible level of control over the affairs of the Forde Macoughan law school. He his gifted with an astonishing capacity to manipulate people, sometimes people simply don't realise they're doing exactly what he wants. His kingship over the other students is uncontested. Though Kamen is vaguely aware of his intimidating demeanor, his only attempt to make himself seem more approachable, is to wear a cowboy hat.
Amilia Marsk:
By a large margin, Amilia is the oldest student attending the Forde Macoughan law school. Despite being every bit of Kamen's rival intellectually, she shows more prudence in her actions, oftentimes choosing to do nothing at all. She is always on top of the current situation, though her foreward thinking nature occasionally makes her forget about the problem at hand in favour of trying to fix a problem which has yet to occur.
Seth Fortune:
A young man who became the newest student of the Forde Macoughan law school through a clerical error. Along with Amilia, to whom he is contractually bound to stray no farther than 10 metres from, Seth freelances as an detective for the other students, mainly dealing with those who have been falsely accused. His attitude is somewhat volatile, leading to actions which neither Amilia nor Kamen could predict. Outside of these outbursts, however, he is an easily manipulated hot head who never really understands the situation.
Pocket Camera:
The latest electronic transmissions technology has given birth to this computer/camera hybrid, a device given to each and every student of the Forde Macoughan law school. The camera is untamperable and the photos incorruptable, because it never actually stores the pictures it takes, it doesn't even technically take the picture. The genius behind the technology allows the central database to take the picture on behalf of the camera via a large network of high frequency sensors placed throughout the school. Only one camera has ever been successfully tampered with, the one Donna carries with her. In brawl, these disposable cameras give any budding artist the chance to capture the perfect moment in a snapshot. Make sure you develop the photo before you throw the camera away!
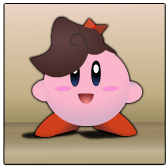
Kirby Hat & move:
The Kirby hat is Donna's brown quiff with a pink bowtie on top. When kirby uses B, he spawns a pocket camera item for him to use and says "Camera!" in that really annoying voice.
Item: Pocket Camera: Only Donna can use the ye Olde camera for photo taking, but anyone can get in on the action with this item. It's a pick up and shoot item (Like raygun with only one use), pressing A causes a flash and takes a snapshot. Player with the camera has to idle for 3 seconds to develop the photo. Once the camera has been used, throwing/dropping it causes it to dissapear. As a thrown item, Pocket Camera is roughly the same as a thrown smoke ball.
Assist Trophy: Kamen Velik (Helping Knell):
The undisputed king of the p1A-ground, Kamen, joins as an assist trophy. He appears high above the stage (camera zooms out to accomodate) dangling a tiny cage on a long chain. The cage rocks slowly back and forth like a pendulum, knocking everyone but the person who used the trophy, away. There is no KO power to being hit by the cage, but a lot of damage which can build up quickly. Inside the cage there is a trapped smash ball. This will be the case even if smash balls are turned off. This smash ball will only shatter if the person(s) in last place hits the cage with an attack. This is usually bad for the person in last place as everyone will gang up on them to stop them getting to the pendulum. After 20 seconds, Kamen flies off the top of the screen and leaves. Attacking Kamen directly three times will cause him to leave early, but he is so far above the stage that few could even reach him When he appears he says "Well let's try to even the playing field!". Every so often he chimes in, "Take it if you can!" or "Well, aren't we a sorry sight.". When he leaves he says "Enjoy the pain!" or "That was an adaquate judgement" depending on whether or not the smash ball was taken. He'll say "Valor is the better part of retreat... or something of the like." if he is made to leave early.
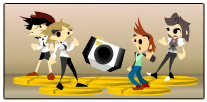
Stage: The P1A-ground: A large, mostly flat floating platform with a small school building to the right hand side. The building has a roof that slants left. In the background of the main platform are 2 groups of 7 students cheering the fight on. 1 Group cheers the Winner on, while the other group cheers on the Loser. If a player does something that causes an audience chant to start, then both groups start cheering for that player. The groups will also move around, following the fight or getting a better view. If a student of one group meets a student of another group then they will fight one another breifly before parting. Some students have cameras (they don't take snapshots like Donna's camera, but you can switch to their POV on the pause screen). The important thing to note about these students is that if a player they aren't cheering for is within range, they will occasionally try to attack that player (roughly 5 second intervals). These attacks do 1% damage but interrupt whatever it was the player was doing at the time. Students fighting eachother will attack any character that steps in range (2 second intervals). The Kamen Velik Assist trophy is more likely to appear on this stage, and if he does, all the students stop cheering until he leaves. Footballs, Bumpers and the Gardevoir Pokemon are also more likely to appear.
Entry:
A huge B&W polaroid of Donna and her camera, side by side, rises out of the ground. Donna and the camera both tumble out out of the polaroid as it blows away.
Victory:
(With Camera)
#1: With the camera upright, Donna fiddles around with the slot on the front of it. From it she removes a picture of her and the camera together, and shows it to the screen.
#2: Facing away from the screen, Donna takes a picture of the losers (Again, real snapshot. Can be saved at the beginning of the next match by idling as Donna for 3 seconds) then giggles to herself.
#3: Facing towards the screen and entirely behind her camera, Donna takes a picture (real snapshot as usual). The picture taken shows a random selection of Mii's loaded from the Wii console, cheering and celebrating.
(Without Camera)
#1: Donna jumps up and down with glee but then looks at her left hand as if expecting to see her camera there. She then looks forelornly toward the screen.
#2: Donna dances from side to side, suddenly falling backwards
#3: Donna looks from hand to hand, disappointed she has no camera, then raises her hand above her head and spawns a new one
Loss:
(With Camera)
While crouching and tinkering with her camera with one hand, she claps despondantly with the other.
(Without Camera)
Donna claps very very slowely whilst looking at the winner.
Logo:
Codec:
Snake: ...
Mei Ling: What's wrong snake?
Snake: ...
Mei Ling: Snake?
Snake: I don't know if this girl wants to fight me or take my picture. It's... creepy.
Mei Ling: You must mean Donna right? Donna Levmen used to be a powerful freelance photographer at the Forde Macoughan Law school.
Snake: Really? Photos don't sound all that powerful to me.
Mei Ling: Don't get so cocky snake. Things were tough at Forde Macoughan, so she knows how go toe to toe with just about anyone.
Snake: But that was a school. It's nothing like fighting on the battlefield
Mei Leing: You wouldn't be saying that if you'd been there.
Snake: ... right.
Classic Mode clear Picture:
(Pirate Ship Stage) Donna taking a picture of a Kyogre that is in the water in front of the Ship. Luigi is cowering behind her. The Picture's angle is from behind the Kyogre, near the surface of the water.
All Star Mode clear Picture:
(Spear Pillar Stage) Donna is posing without her camera, while a Kirby and a MetaKnight (one either side of her) take her picture with Pocket Camera's. The Picture is at no special angle, but there is some party ball confetti around Donna.
Event:
Title:"You're too slow!"
Description:"You heard me! Betcha can't get us all in the same picture!"
Character: Donna
Items: Smash Balls, Bunny Hood, Poison Mushroom, Bumper
This event is Donna Vs three Lv4 Sonics on the Temple stage. Infinite stock each but 3 minute limit. Smash Balls are more frequent in this event. The aim of the event is to KO all 3 Sonics in a single Final Smash. The Sonics will just keep coming back until you KO them all with a Final Smash.
Title:"The Slumber Party"
Description:"They can't stay up all night. Make sure everyone goes to bed soon, ok?"
Character: Peach
Items: Smash Balls, Pokeball (Belossums only), Smoke Balls, Sandbag, Food, Gooey Bomb, Bob-omb, Ray Gun
This event is a Free-For-All involving Peach, Lv9 Donna, Lv9 Jigglypuff and Lv9 Zero-Suit-Samus. Infinite stock but 5 minute limit. The aim of this event is to have everyone asleep (including you) at the same time.
SSE Role:
Donna is on the roof of the stadium where Kirby and Mario fight, watching the battle closely through her camera. Incidentally, the view she has to the fight is identical to the view Pit has when he watches through his mystical water TV. When the Stadium is absorbed into Subspace, she is taken in with it.
It's not until
much later that she is revived and becomes a playable character. Just before DeDeDe encounters Bowser in the Subspace, Luigi finds the trophified Donna and revives her. Good 'ol Luigi gets a hug and Donna decides to tag along with DeDeDe's group. After DeDeDe beats bowser and revives him again, Bowser knocks DeDeDe flying, into Luigi and Ness. This leads to...
Fight!: Donna Vs Bowser: Functionally identical to the bowser fight you just beat, the only difference is the character you have to beat him as.
After the fight, DeDeDe revives Bowser, a third time, and the story continues on as normal, only with Donna appearing in the background of cutscenes involving DeDeDe's group.
Techs:
Camera Sharing: An important point of note about Donna is that the last Camera she picked up will respond to "Remote Shutter". This has an interesting side effect with 2 Donnas. If one Donna takes the other Donna's Camera then throws/drops it or uses "Watch the Birdie", then both Donna's will be able to use "Remote Shutter" on it. You can, in fact do this with as many Donna's as you like
Mickey figuring: Immediately after bouncing off an enemy with Mickey Bounce, tap C Down to cancel it into a Falling figure. In addition to causing extra damage, this Tech let's Donna use another Mickey Bounce almost instantly after the previous one. Unsuspecting opponents can be chained like this to high percentages, though only if each subsequent Mickey Bounce and Falling figure is fast falled. Foiled with perfect shielding a Mickey Bounce.
Hook Hyphen: With C-stick set to smashes, immediately after releasing donna hook, before she leaves the ground, smash the control stick and C-stick down and tap R. She will perform the Donna Hook on the ground, then slide foreward a short distance. Use against enemies too close for a regular Donna Hook.
Hook Jump: If you perfect shield an attack the instant Donna leaves the ground during a Donna Hook, the attack is canceled but the jump is not. Until gravity brings her back to the ground, Donna behaves as if she were already on the ground. She can run, crouch, shield, perform ground attacks, grabs and throws. Jumping will obviously end the tech and if you smash down on the control stick she'll perform the fallthrough platform animation and end the tech. Situational, but few opponents will dare interrupt a Donna Hook knowing she has this tech up her sleeve. The best way to use the tech is near the edge so you can grab the foe as you leap off the edge and then throw them downwards for a cheap KO, or hold them for a suicide kill. You could also use this for advanced edgeguarding if you can get an enemy projectile to trigger the tech.
Smash-a-Jump: Immediately before releasing Smash-a-Pult, tap Z to cancel the attack but not the jump. Unlike Hook Jump, this tech does not fool the game into thinking Donna is still on the ground. Fully charged, a Smash-a-Jump is much higher than a regular jump. A good psyche-out since Donna can attack immediately after leaving the ground.
Hyphen Smash: Smash-a-pult gains significant advantages when you hyphen smash it. Because the attack leaves the ground, Donna gains more horizontal distance than most characters. Quite a terrifying approach.
Donamera (Banned tech): Immediately after inputting the command for camera-stand, tap Z followed quickly by a jump and then Up-B. The timing is incredibly difficult as all four commands have to be done near-symultaneously. If done right you will see Donna use another Donna (In a T-freeze) as her Up-B tether. From then on until she is lost or destroyed, the second Donna will replace the camera in all 'With Camera' attacks. Because she is much bigger than her camera and her arms are splayed out, most of her attacks have a much greater range. Attacks that rely on the tripod legs spreading out or extending have
greatly reduced range (Including the Tether recovery). This tech gives Donna a horrific range advantage and is banned from serious play.


")