• Welcome to Smashboards, the world's largest Super Smash Brothers community! Over 250,000 Smash Bros. fans from around the world have come to discuss these great games in over 19 million posts!

    You are currently viewing our boards as a visitor. Click here to sign up right now and start on your path in the Smash community!

Make Your Move 4

Status
Not open for further replies.

pensfan728

Smash Apprentice
Joined
Jun 5, 2008
Messages
163
Location
Da Burgh
Well, Junahu, i like it. Also, you have been here(smashboards) for three years, yet i have more posts than you. How does that happen?
 

MasterWarlord

Smash Champion
Joined
Aug 24, 2008
Messages
2,902
Location
Not wasting countless hours on a 10 man community
This clown will make you go down laughing. . .The Joker has joined the fray!


Stats:

Size: 8/10 The Joker is tall for a human, but not ridiculously so, being in-between the height of Marth and Ganondorf.
Weight: 7.5/10 The Joker has a MASSIVE amount of explosives and other means of disposing of his enemies hidden within the deep realms of his coat and is human, meaning he’s certainly above average in weight. He’s not on the level of Snake (Despite the Joker carrying far more then him – Snake should weigh less), but he still weighs enough to be considered a heavy weight.
Walking Speed: 5/10 The Joker could walk a good deal faster, but he walks quite awkwardly.
Running Speed: 6.5/10 The Joker is somewhat fast for a heavyweight in how he runs, moving about the battlefield at an average speed. He’d be faster if not for all he was carrying. . .When he takes off his coat, his running speed goes up to 8.
Traction: 2.5/10 The Joker has bad traction, rivaling that of King Dedede, walking about very clumsily.
Power: 7.5/10 The Joker has no shortage of KO moves, virtually all of them being viable for taking enemies down to their doom. The Joker’s KO options are more viable then Ganondorf’s, but they aren’t as powerful as his. The Joker overall has less KO potential then Ganondorf, and doesn’t deal out as ridiculous percentages of damage as he does.
Attack Speed: 4/10 The Joker is notably faster then the heavy hitters such as Ganondorf and Bowser, but he’s still below average.
Range: 8/10 The Joker has a good traditional projectile, and many of his moves involve various weapons that give him good range. Even the Joker’s knife swipes have long range in comparison to the rest of the cast, and even his fsmash is a projectile. The Joker has no problems damaging his opponents, when they’re just slightly away from him, easily beating out the other heavy hitters here, even King Dedede.
Priority: 7/10 The Joker virtually never attacks without a weapon of some kind, meaning virtually all of his attacks are disjointed hitboxes. If you get around the disjointed hitboxes though, oftentimes with their placing leaving the Joker rather open, you can easily knock him out of the attack.
First Jump: 7/10 Laggy for a jump, but pretty good.
Second Jump: 5/10 Nothing special.
Fall Speed: 7.5/10 The Joker falls at a speed typical for a heavyweight.
Crouch: -1/10 This crouch causes the Joker to take more knockback and damage! See dtilt for details.
Crawl: 1/10 Horrendously slow.
Wall Jump: No.
Wall Cling: No.
Gliding: No.
Hover: No.

Basic actions:

Basic pose: The Joker stands up with his arms at his side, carrying his knife in one of his hands. The Joker isn’t standing up perfectly straight, being very slightly hunched over.
Idle pose: The Joker combs his hair with his knife and grimaces.
Walking: The Joker slyly gaits forward, looking almost as if he’s trying to be stealthy.
Running: The Joker stops trying to look stealthy, progressing forward more casually at an average speed.
Dashing: The Joker bolts forward, pumping his arms in long strokes, his coattails flying in the wind. This run looks much less pathetic then Ganondorf’s.
Jump 1: The Joker puts his arms to his sides and crouches very slightly, then springs up with both feet. Laggier then the average jump, but goes up a above average distance.
Jump 2: The Joker stomps his feet downwards in midair and puts his arms up above his head, then quickly slamming them downwards to gain some more air.
Shield: The Joker puts up his arms to block as the bubble shield appears, holding his hand with the knife in front, it pointing towards any foes.
Sidestep: The Joker leans into the background and nearly falls over backwards, rapidly flailing his arms to avoid doing so and resume standing.
Forwards Roll: The Joker leaps forward and does a roll that mirrors Snake’s dashing attack.
Backwards Roll: The Joker does a backflip, but unlike Captain Falcon’s/Ganondorf’s he does two backflips. Has bad ending lag for a roll as the Joker strikes a little pose at the end, balancing himself on one hand, although the range is twice that of the regular roll.
Air Dodge: The Joker leans into the background and does a quick spin.
Sleeping: The Joker cuddles up against his knife, using it as a pillow.
Dizzy: The Joker stumbles about a good bit, standing on one foot as the other one dizzily flails about.
Laughing (From the Joker’s up special): The Joker literally rolls on the floor laughing, banging his hand against the ground.

Special Attacks:

B Down – Gentleman’s Coat: The Joker takes off the coat of his suit and lays it onto the ground in front of him (Saying “ladies first” if any female characters hostile to the Joker are in the match), gesturing his hands out for anyone nearby to go over it, as if he were a gentleman putting it in mud for a woman to walk over (As it sounds, this has a good bit of lag). The Joker then leaves the coat in place, nothing happening after the initial set up. If anyone walks over the coat (Even the Joker himself), it’ll explode, there being a massive amount of explosives in it he takes out of it to do moves such as his neutral special. The explosion does a very impressive 22-23% damage and high upward knockback, the explosion having a large hitbox the size of Bowser, making this a very nice KO move.

The catch is that due to all those explosives being contained in the coat among other stuff such as his cards, the Joker can’t perform any of his other specials or smash attacks when his coat is lain out as all his ammo is contained in the coat. The Joker can pull out a new coat by pressing this button input 10 seconds after his last one blows up (During which he’ll say “Oh, and by the way, the suit? It wasn't cheap. You oughta know, you bought it.”). The Joker can explode it early by doing this button input when the coat is already lain out, him taking a remote control out of his pocket and pressing a button to detonate it. The coat will never explode on it’s own, unlike Snake’s mines, although it’ll still vanish if the Joker loses a stock, him getting a new coat.


B – Ballistic Bomber: When you first press this button input, the Joker will take off his coat and constantly shake it around to get the bombs out of it he needs. The Joker will keep shaking out bombs for as long as you hold this button input, one bomb coming out of the coat per second. The Joker’s cards will also come out of the coat as the Joker shakes it about, dealing 1% damage and a flinch as they give him some very slight protection at his sides, two coming out at each side per second as he gets out the bombs. The Joker will put back on his coat once he’s done emptying out bombs, this part of the attack having slight starting and ending lag, but nothing too bad.

When you do this button input when you’ve already gotten any bombs out of your coat, the Joker will take out a remote control from his coat pocket and press it once for it to do nothing, causing the Joker to say “Eh?” and have a questioning expression on his face, this taking around a quarter of a second. After this, you can rapidly mash B for the Joker to rapidly mash the detonation button on his remote control, him going ballistic, trying to get his bombs to blow up. Every 10 presses of B (Or of the Joker’s remote control as seen on screen, the speed of his presses matching your button presses, although he does it more blatantly with his pointer finger fully extended and looking very aggravated.) will cause one of your bombs to blow up, which doesn’t take nearly as long as it sounds. You can cancel the button mashing sequence by pressing any button input other then B at any time, him going out of it automatically once there are no more bombs to detonate.

The actual explosions of the bombs have a hitbox the size of Bowser, doing 16-17% damage and good knockback away from the center of the explosion. This is much harder to use effectively then Snake’s simple mines, but this has much more KO potential as well, having higher payoff. The multiple bombs can be made more use of in FFAs, as the Joker can keep a constant barrage of bombs going off to ensure someone gets hit.

If the Joker is hit while he’s empty his coat of bombs, all the bombs he currently has out will explode, and his coat will get blown into ashes by the bombs, him not able to get another coat using his down B for 10 seconds. Be very careful to use this move only when it’s safe and to not get too greedy with laying out too many bombs, as it’s not worth the risk, as the Joker will be hit out of the attack if damaged by a non energy projectile and any bombs not already layed down successfully will vanish.

The bombs last 30 seconds before exploding automatically, projectiles/basic attacks unable to destroy them. Unlike with Snake’s down B, you can’t make the bomb explode instantly when your enemy passes the bombs, so you have to predict when they’ll go past the bombs and time when you’re going to blow it up. Also unlike Snake’s down B, the enemy can see your bombs out on the battlefield, so they’re never going to forget where they are, so you have to force them to go past this point, as they’re unlikely to just waltz into their doom.


B Side – Joker Card:

The Joker takes out a razor sharp playing card that matches his name from his coat pocket, then hurls it forward. The card goes the length of the Battlefield stage slightly slower then one of Shiek’s needles. The card does no knockback, just a flinch, and 7-8% damage. The Joker has moderate starting and slight ending lag on the projectile, but it comes out quite fast.

What makes this projectile interesting is that if you do this button input as you would a smash attack, the Joker will throw a fake card that deals no damage or knockback. The Joker still does the start-up animation normally, so this can be used for mindgames. The Joker has no ending lag on the attack when his card is fake, allowing him to take advantage of his enemies shielding the harmless card by going up and grabbing them.

There’s a 1% chance when you do this move that the Joker will say “Here’s my card”.


B Up – Laughing Gas: The Joker takes a small cannon like device out of his coat and points it at an angle in front of him and slightly downwards, then fires a stream of laughing gas out of it, propelling him backwards and upwards at a diagonal angle, laughing wildly as he does so. This recovery takes the Joker around 1.5X the length of Fox/Falco’s up special. This recovery takes some getting used to, as it’s awkwardly slow, and you have to be facing away from where you want to recover as otherwise the laughing gas will simply propel you away from the platform.

If anyone’s hit by the laughing gas, they’ll take no damage, but they’ll start laughing uncontrollably in a state that works identically to the sleeping one, but having a different animation, you hearing the character laughing. You can’t make this work on people in the air, which is probably where you’ll use this most of the time due to recovery, so it’s hard to make that much use of it. Thankfully the laughing lasts a decent bit (Twice as long as Jigglypuff’s sing, though the Joker must complete the move before he can take advantage of this.) so you have a shot of at least throwing a card at the laughing victim before they recover from it.


Basic Attacks:

A/AA/AAA – Krazy Knife: The Joker does a simple stab forward when A is first pressed, fully extending his arm, doing 4-5% damage and mediocre knockback. Upon the next press of A, the Joker will swing the knife in an upward arc from it’s current position, up above his head, doing 5-6% damage and slightly less mediocre upward knockback. Upon the final press of A, the Joker will swipe the knife back down in the same arc, simply in reverse, doing another 5-6% damage and more mediocre knockback. At very low percentages it’s possible to hit with all three parts of the combo, but at 30% or more the knockback will knock them out of the combo. They can get out of it at 20% if they DI properly.

Ftilt – Warm Welcome: The Joker extends out his hand without his knife in front of him, putting the arm with his knife to his said and smiling, as if to shake his enemy’s hand. If an enemy come within range of his arm while he holds it out for a second, they’ll get grabbed by the extended arm. The Joker will then proceed to shake the victim’s hand and mockingly say “ Shocking!”. While you have the enemy’s hand grabbed, you can mash A to electrocute them with a high voltage hand-buzzer, each press of A doing 1%. This is strictly for damage dealing, there being no knockback once the enemy button mashes out of this minature grab. If your enemy has no damage on them, you should be able to get 7-8% damage on them, while at 50%+ you could get as high as 12-13% on them, assuming you can mash it quickly. This counts as a grab, going through shields.

The move will only connect while the Joker is holding out his hand to “shake”. This has average start up lag and slight ending lag if you miss. The Joker has super armor while his arm is extended. This is a good move, but is generally outclassed by the Joker’s excellent grab game. This move will at least prove useful for it’s super armor frames, if nothing else.


Utilt – Preferred Weapon: The Joker stabs his knife upwards with no starting lag whatsoever, dealing 7-8% damage and average upward knockback. The Joker proceeds to bring the knife in front of his face and blow it off as if it were a gun he just shot, mocking those who would use such a simple weapon, then spins it about and puts it into his pocket, all just like a cowboy. This would be an excellent move if the Joker didn’t take the time to mock those who use guns, it having bad ending lag for a tilt. If your enemies have very high damage, this can be used as an excellent KO move due to the low starting lag, just make sure you actually hit them with it or you’ll suffer the ending lag.

Dtilt – Pleased By Pain: The Joker’s crouching pose has an electric chair appear underneath him, and him sitting down in it and getting strapped into it. The Joker has a VERY slow crawl in this crouch by slowly wiggling about to move the chair forward and backward, but it’s so slow it may as well be stationary. When the Joker is crouched, he takes 1.5X as much knockback and damage from attacks (Excluding non energy based projectiles), him getting zapped by the electric chair.

What use is crouching then? Well, the dtilt has the Joker laugh maniacally (Lasting a half a second), which does nothing to harm enemies, but while the Joker is laughing he has super armor, and the Joker will be healed by 5% damage from any attacks (2% for projectiles) that hit him due to enjoying the pain. The Joker has a quarter of a second of ending lag, meaning he can’t use this continuously, and it does nothing to harm enemies, so more often then not they’ll hit the Joker after he’s done laughing to actually deal damage to him. This is best used to absorb projectiles or to heal damage in a FFA when enemies aren’t paying you much attention.


Dashing Attack – Mouthful of Mutilation: The Joker puts the hilt of his knife in his mouth, and puts his arms straight out behind him as he dashes forward, thrusting his head forwards to do a slice with the blade of the knife. The Joker continues dashing as he does the start up animation briefly, and has slight ending lag as he puts the knife back in his hand. Quite laggy for a dashing attack, but it’s hitbox stays out for a long time as the Joker dashes forward, doing 6-7% damage and average knockback. It’s possible to KO with this, but not very practical. The entire length the Joker travels during this attack is half of the Battlefield stage.

Rising Attack (Either side) – Klown Kick: The Joker gets up into a crouching position and extends one of his legs, then does a quick spin, his leg doing 4-5% damage and mediocre knockback as it goes around him. The Joker quickly gets up to a standing position after the attack is complete, it being rather quick.

Ledge Attack (Under 100%) – Seducer’s Spring: The Joker slowly gets up onto the edge of the ledge, not fully on it, this part having the invulnerability frames of the ledge attack, getting in a position ready to spring forward, putting the hilt of his knife in his mouth. The Joker then springs forward onto the platform the length of half a battlefield platform, thrusting his head forwards to slash with his knife. This deals 4-5% damage and mediocre knockback, then the Joker will roll forward like Snake’s dashing attack when he hits the ground a very short distance, around a third of a battlefield platform. The roll does no damage, being ending lag of the attack. This would be among the best ledge attacks in the game if not for the roll.

Ledge Attack (Over 100%) – Clumsy Clown: The Joker throws his knife in front of the ledge he’s about to climb up, it going up the length of a battlefield platform then coming back down quickly. If you’re hit by the knife while it’s going up, it deals 3-4% damage and mediocre upward knockback. If hit while it’s going down, it deals 5-6% damage and spikes you down onto the ground next to the ledge. The Joker is clumsily climbing up while the knife defends him, getting his legs up in a awkward fashion before his arms. The Joker picks up his knife which is impaled in the ground after he finishes climbing up, giving the move slight ending lag. Excellent for crowd control as far as ledge attacks go.

Smash Attacks:

Fsmash – Berserker’s Bazooka: The Joker takes out a bazooka from the deep realms of his coat and aims it forward, unlike Snake’s fsmash, having it mounted over his shoulder as he clumsily prepares to aim it. Upon releasing it, the Joker will fire the bazooka, propelling him backwards half the length of a battlefield platform from the force of it and releasing the rocket from said bazooka. The rocket is around 3X as large Snake’s from his side B, going at the speed of Mario’s fireballs (Quite low). If the rocket hits someone or reaches the end of it’s course, it’ll explode, creating an explosion the size of Bowser.

The explosion deals 18-19% damage uncharged, and 21-22% damage fully charged, the great knockback on the level of Snake’s fsmash increasing slightly with the full charge. The power in this fsmash doesn’t increase as much as most through charging, but it also increases how far and fast the rocket will go. Fully charged the rocket will go half of the Battlefield stage instead of a single Battlefield platform, and will increase from the speed of Jigglypuff’s run to that of Wario’s.

This is an excellent chance to punish the Joker if he misses with this powerful KO move, as the player doesn’t regain control over the Joker until the rocket explodes, and it’s also rather laggy to fire the rocket in the first place. If the Joker fires the rocket at someone right in front of him, the explosion will hit him too, him not being immune to it.


Usmash: Belated Bang

The Joker takes out a gun and points it upwards as he charges the smash attack with his free hand, directly above himself. The Joker detests guns, as he doesn't get to savor his foe’s emotions that way, but when you release the charge, it is revealed this is no ordinary gun, a harmless flag saying “Bang!” popping out of it. While you may find this humorous at first, there’s a deadly spike at the end of the flag (It letting out a shine to emphasis it’s presence) that’s the sweetspot of this move, and it’s main use.

The spike deals 12-13% damage and above average upward knockback uncharged, and 15-16% damage and good upward knockback fully charged. If you hit with the flag or the gun, you’ll do horrendously mediocre knockback and 2-3% damage. The Joker fires the gun the instant you release the smack attack, but it takes a short bit for the flag to come out and the spike on the end of the flag as well. It’s nothing terrible, still being quite fast, and easily one of the Joker’s best KO moves.


Dsmash – Pilgrimage to Hell: The Joker opens his coat up fully to show everyone the massive amount of explosives hidden within it as he charges, holding a string connected to all the grenades in it is his free hand not wielding the knife. The Joker says “Ah, ah...let's not blow this out of proportion.” as the move charges, it getting interrupted if he releases it before then.

When you release the charge. . .Absolutely nothing happens. The Joker obviously doesn’t want to blow himself up, and he just gets an annoyed look on his face, saying “You lot are no fun at all!”, giving the move bad ending lag that can be punished.

What use is this move then? If the Joker is hit while he’s “charging” the move, the Joker will pull the string and all the explosives in his coat will detonate, him not taking any knockback from the enemy’s attack. This causes a MASSIVE, explosion to occur, twice the size of Bowser. Anyone hit by this massive explosion will be dealt an insane 26-27% damage and unholy knockback. The catch is that this move obviously also blows up the Joker himself (Him taking the same damage and knockback as the victim). Joker players will want to try to use this move when they’re at high percents and their enemy is at lower ones to take them down with them, and opposing players will have to pick when they attack the Joker very carefully, as he could whip open his coat and blow everyone sky high if they’re not careful. The Joker won’t pull the trigger if he’s hit by a projectile.


Aerial Attacks:

Nair – Applauding Annihilation: The Joker takes out a second knife from his pocket quickly, then turns to face the camera and claps his two knives above his head, doing a big swinging art to his sides. While he’s swinging upwards, the move won’t do any damage or stun, it’ll just push them like Mario’s FLUDD to just barely above the Joker. The actual clap of the knives does 13-14% damage and good upward knockback, being a fine KO move. It’s not a good idea to try to lift them up with the upward swing of the knives, as they can use an fair on their way up to knock you out of it. There’s a good bit of starting lag before the knives clap if you ignore the upward swing though, so you’ll have a difficult time KOing your enemy if you don’t use the upward swing. If you don’t want your enemy to hit you, try to lift them up on the edge of the knives so they’re out of range to hit you, but still get hit by the clap, albeit barely.

Fair – Jackal in the Box: The Joker takes out a jack in the box from one of his many pants pockets, and begins winding it up, facing the end where “jack” will come out in front of him. The “Pop goes the Weasel” music plays quietly as he winds it up, and if you don’t press anything, he’ll wind it very slowly, it taking a ridiculous 5 seconds to complete the move before “Jack” pops out.

However, you can speed the wind up by rapidly pressing A. If you do all the taps in under a second, it’ll take around 20 taps to wind it up enough to launch it. You can stop tapping at any time though, making your enemy think you’re just going to mash A, and instead only winding it half way to cause them to air dodge, then finish mashing A to land the hit. This is good for mindgames, you having the ability to pop it open whenever you please. You have to be careful though, as the Joker slowly automatically winds it himself, so he may end up popping it open too early for the situation if you do too many taps, meaning this move requires a lot of getting used to. Due to the long wind up of the move, the move won't be interrupted if you land on the ground while performing it.

The actual attack that’s launched from this has the range of half a battlefield platform, a spring noise being heard as “Jack” (Who has a spike on his head instead of a jester’s cap, it shining for emphasis) pops out with his full spring. The sweetspot is the spike on the end of “Jack’s” head, doing 11-12% damage and above average forward knockback. If you’re hit by the spring of “Jack” himself, you’ll merely flinch and take 2-3% damage, being in a good position to punish the Joker. The move has bad ending lag as the Joker reels back in “Jack” and puts away the jack in the box, so while this is deadly if you hit with it, you’ll more likely then not get a face-full of the enemy’s fair if you miss.


Bair – Seducer’s Spin: The Joker raises puts his arms above his head perfectly straight, grabbing his knife with both hands, then lets himself fall backwards out of this positions to do a full body spin, somewhat like a backflip. The animation of the move is like Ganondorf’s uair, but he spins around in a full rotation, and has his arms above his head, and does a back flip instead of a front flip. If you’re hit by the Joker’s legs, you take 7-8% damage and average knockback away from the legs. If you’re hit by the knife though, you take 12-13% damage and above average knockback away from the knife. This has some start-up lag, but the Joker is able to spin around impressively quickly, there being very little ending lag. This had bad ending lag if you hit the ground while performing the move.

Uair – Juggling Joker: The Joker tosses his knife upwards and to the right, then takes out two spare knives from both of the pockets in his trousers and tosses them in the same way he tossed the first knife. The Joker catches the first knife shortly after throwing up the first two knives and throws it up again, and the Joker starts juggling the three knives. This does multiple hits if you’re in the ring of knives above the joker, you not directly needing to be hit by the knives but just be in the general area of the knives. You’ll take 5-6% damage per second while in the knives, taking 3 hits of 1-2% per second, each hit doing a tiny stun. The attacks lasts 3 seconds. If you’re hit by any of the knives before the juggling truly begins, you’ll take 2% damage. This does no knockback, just flinches, though it has a suction effect like Pikachu’s dsmash that very slightly pulls you towards the Joker. If the Joker lands on the ground while doing this move, he’ll continue juggling as if nothing happened, finishing the attack perfectly normally.

Unlike most multi hit aerials, this has no finisher final hit for knockback, leaving the Joker vulnerable at the end as he puts away the two extra knives with slight ending lag. Strictly for damage dealing. You either want to be away from your enemy when you finish it, or hit them with the whole duration of the move to make it so you’ll get more damage on them then they do on you. The Joker can’t use DI much while using this move and the attack’s duration is quite long, so this attack is meant to be used over ground, especially considering the fact the move goes on if you hit the ground.


Dair – Bouncy Ball: A large bouncing ball around 1.5X the size of Kirby appears under the Joker’s feet, it being far too large to contain within his coat. The Joker will proceed to stand on the ball and fall downwards like a typical stall then fall dair, much like Toon Link’s. Unlike Toon Link’s, this is a much slower stall and fall, him going down even slower then his regular fall speed. If you bounce on somebody with it, they’ll take 5-6% damage and mediocre downward knockback. If you don’t do anything else, the ball will vanish.

Where the move gets interesting though is if you press A when you land on something, whether it be solid ground or a foe, you’ll bounce off of them, gaining jumping momentum. You can keep gaining more and more momentum for as long as you please, and the Joker has good control over his DI while on the ball. Each consecutive jump you make will make you go higher and higher, and each consecutive time you pound down on the ground/foe will do more damage and knockback. You can get out of this move by not pressing A when you land, or pressing any button other then A.

Each jump increases all the stats, following a formula. It repeats itself as it goes up in a pattern, this being an example of the first three bounces.


Initial Fall Speed: Very Slow
Initial Stomp: 5-6% damage, mediocre knockback
Initial Jump: 1.5 Ganondorfs in height, low speed going up
Second Fall Speed: Slow
Second Stomp: 9-10% damage, below average knockback
Second Jump: 2.15 Ganondorfs in height, below average speed going up
Third Fall Speed: Below Average
Third Stomp: 11-14% damage, average knockback
Third Jump: 3 Ganondorfs in height, average speed going up

You’ll rarely be able to make use of the stats gained from the extra bounces, as it takes some time to build it up, but you can build it up considerably, the stats keeping going up all the way to six bounces. A good strategy is to build up bounces while your enemy is off stage, then when they get close unleash your powered up bounce on them. Most good foes will see this coming so you’ll have to be careful, but unlike most dairs you don’t have as much to risk, as you can get out of it at any time by casually pressing B, X, R, or any other button that suits your fancy. If you think your enemy will dodge the attack, you can prepare the bouncy ball to use on them as a regular attack once they get on land. The enemy must hit the Joker and not the ball if they want to knock him out of the attack, meaning it can be quite tricky once he’s got a few bounces under his belt. However, as the Joker gains more momentum with the consecutive bounces, he becomes more difficult to control and has a smaller minimum of amount of space he can leap with each bounce, meaning you might accidentally leap off the edge and find it hard to hit the enemy with this move. Only charge bounces for this move if you’ve already lain all your bombs and your coat/don’t want to sacrifice your specials and smashes to lay out your coat.

This move isn’t useless in it’s uncharged form either despite it’s mediocre knockback, as sometimes that’s all you’ll need to make the difference between the enemy recovering or not, and the ball below the Joker will block any enemy below him from being able to hit him, acting as a wall. The Joker is excellent at gimping people with outright horrendous recoveries such as Link, but if it’s half decent at all, they’ll be able to get past the Joker’s edge guarding game.


Grabs and Throws:

Grab: The joker reaches out his lanky left arm to grab the enemy, holding his knife in his right. The Joker will trip slightly if he does a dashing grab, extending his reach, but causing him to have bad ending lag if he misses, sliding forward slightly.

Grab Attack – WHY SO SERIOUS?:

When you press this button input, the grabs the foe by the hack of the head with his left hand while he puts his knife at his victim’s neck. Joker will proceed to tell his “life story” to his victim, the background music dying off and turning dramatic like in the movie as he gets closer to the end of his speech. He’ll do one of two speeches at random, one that he told to Rachel and the other to a black body builder, the later of which he killed.

This does nothing whatsoever. . .Unless the Joker manages to finish his long speech, in which case he’ll slice the knife through the victim’s mouth, dealing a massive 19-20% damage and very high knockback that can kill Bowser at 65% from the center of Final Destination. The Joker’s grab is three times as hard to escape as a regular one, not that he’ll be able to have any chance whatsoever of finishing the speech in one grab. However, if you grab the same foe again, the Joker will pick up his life story where he left off. If used in a FFA, he’ll have to individually tell the speech to each of his victims individually. The Joker has to start the speech over if he’s KOd or his victim is KOd.

This is one of the joker’s main ways of KOing. You can either ignore this attack and use your throws to build up damage, or you can work on bringing the speech to the climax while building up just enough damage to KO your enemies with it as an alternative. You should intend to use this to KO your enemies if you use it, as otherwise it’s far from worth all the effort.


The speeches consist of:

1: (Used on the majority of the cast) Wanna know how I got these scars? My father was...a drinker. And a fiend. And one night he goes off crazier than usual. Mommy gets the kitchen knife to defend herself; he doesn't like that. Not…one…bit. So, me watching, he takes the knife to her, laughing while he does it. He turns to me, and says…"Why so serious?" He comes at me with the knife, "Why so serious?!" He sticks the blade in my mouth, "Let's put a smile on that face!" And…(Turns back to look at other people watching if it’s a free for all who will be stunned in terror if the Joker gets this far, this little part skipping if it’s not a FFA)…why so serious? (Finally does the attack for the damage/knockback)

2: (Used on humanoid attractive females) Well, hello, beautiful. (sloppily slicks his hair back with a knife) You must be Harvey's squeeze. (begins to circle her) And you are beautiful. (stops circling and pretends to be concerned) Oh, you look nervous. (holds the knife up) Is it the scars? Wanna know how I got 'em? (grabs her chin as she continuously tries to look away) C'mere, look at me. So, I had a wife, she was beautiful...like you, who tells me I worry too much, who tells me I oughta smile more, who gambles and gets in deep with the sharks…(she squirms, and he pulls her back) Hey. One day they carve her face. And we have no money for surgeries. She can't take it. I just want to see her smile again. Hmmm? I just wanted to let her know that I don't care about the scars. So, I stick a razor in my mouth and do this...to myself. (mimes moving a razor around his mouth) And you know what? She can't stand the sight of me! She leaves! Now I see the funny side. Now, I'm always smiling! (Finally does the attack for the damage/knockback)

The speech used on females is longer then the regular one, but it does an extra 15% damage and 1.5X as much knockback.


Fthrow – Begging for Pain: The Joker lets out a sinister smile and says “You see, in their…last moments, people show you who they really are. So in a way…I knew your friends better than you ever did. Would you like to know which of them were cowards?”, loosening his grip on the foe as he says this. The Joker’s target will get infuriated at this and smack the Joker, but the Joker player must time a press of A correctly to parry the hit with his knife and deal a whopping 15-16% damage, knocking them down. The timing is very hard, and due to the length of the baiting statement this is too laggy to use in free for alls, and if the Joker fails the timing HE get knocked down and takes 15-16% damage. If you can get the timing down, this is the Joker’s best damage dealing throw, although if you’re still picking up the Joker you’d be best sticking with his simpler dthrow.

Bthrow – No Fear Of Death: The Joker grabs his victim with both arms around their neck, then falls backward, allowing gravity to do the work for him, as if he was going to suicide. If you fall backward on the ground, it deals a mediocre 1% damage to the enemy and this has bad ending lag, in which case the opponent can punish you badly. However, you can use this to fall backwards off the stage, and your foe will be unable to get out of it, although obviously you’ll be KOd as well as you both plummet to your doom.

Uthrow – Hellish Handstand: The Joker tosses his opponent upwards for 3-4% damage, then does a handstand. The victim falls back down, the throw not having sent them that high, and the Joker has spikes emerge from his shoes, the victim getting shot up by them for good upward knockback for a throw and another 3-4% damage. This has decent knockback for the throw, and while it does low damage is the best of his throws for KOing, none of his Dthrow and Fthrow doing no knockback and his Bthrow unable to KO in the traditional manner.

Dthrow – Pencil Trick: The Joker puts the hilt of his knife in his mouth and grabs his enemy in a head lock with his right arm, then takes a pencil out of his coat with his free right arm normally carrying the knife. The Joker carefully makes the pencil balance and stand upright, saying “I’m gonna make this pencil disappear. . .”. The Joker then smacks his foes down with his right arm to impale their face on the pencil, it going through their eye socket, not that that’s shown. The pencil vanishes from view as the victim covers it, the Joker saying “Ta-dah! Its. . .It’s gone!”. This is Laggier then the average dthrow, but does a respectable 10-11% damage.

Final Smash – Golden Coat:

The Joker throws his old coat away casually for there to be a golden coat underneath it. Why didn’t he use that thing earlier?!? This powers up all of the Joker’s specials and smash attacks significantly, below are the effects of the final smash to each move:

B – Ballistic Bomber: The Joker pulls out bombs twice as fast and can have a maximum of 10 of them out at a time.

B Side – Joker Card: The Joker throws three cards at a time instead of one, making the attack a superior version of Shiek’s Needles.

B Up – Laughing Gas: This isn’t improved directly, but you won’t go into your helpless state after using this, meaning you have infinite recovery.

B Down – Gentleman’s Coat: When you lay out your coat, there’ll be another coat underneath it, so you can use this as much as you want with no penalty and have as many coats out as you want. You also are immune to your own golden coats.

Fsmash – Berserker’s Bazooka: The rocket goes twice the length it normally does in half in the time, going the full length of the battlefield fully charged at an astonishing speed.

Usmash – Belated Bang: The spike (Now golden) on the end of the flag shoots out as a projectile, going off the top of the screen at an insane speed, still being just as powerful as it normally is in the Usmash.

Dsmash – Pilgrimage to Hell: The Joker has no ending lag whatsoever for when he releases the “charge” of the attack, meaning your enemy has no opening to attack you without getting blown to hell.

The Joker is still vulnerable during this final smash, meaning your KO isn’t as guaranteed as if you’d gotten, say, Wario’s final smash. The Final Smash lasts 20 seconds. You’ll be wanting to lay as many bombs and coats down as you can, as they’ll still last after your final smash is done. If anyone tries to stop you while you’re laying out all your explosives, you can casually either flee with your infinite recovery, whip out your Dsmash to scare them away if you have high damage and don’t mind being KOd, or whip out your rocket launcher. Either way, your enemy will be afraid to approach you/unable to do so, so you can lay out your mass explosives in relative peace. On smaller stages, such as the ones that are actually tourney legal, you’d be better off just hunting them down with your Fsmash or Usmash, as they have nowhere to run.

Overall Play Style – The Joke’s On You:

The Joker has trouble racking up damage in the traditional manner with normal fast attacks, as those attacks are few and far between. Still, the Joker’s attacks aren’t exactly all horrendously slow either, they’re somewhere in between. The Joker has no shortage of KO moves, rivaling Ganondorf for the amount of moves that can potentially KO. The Joker is excellent at KOing due to his KO moves not being as slow as the other power characters, but unlike those power characters he doesn’t have a lot of simple fast attacks to rack up damage enough to KO, such as Bowser’s ftilt or Ganondorf’s dashing attack, for example.

How does the Joker rack up damage then? He can still do it, but he can’t just waltz up to somebody and use his somewhat on the slow side attacks, expecting to be able to KO with them. The Joker has to play smart. He can use his card projectile for some damage, forcing the enemy to approach, then after throwing several cards, throw a fake and take advantage of their power shield and go up to grab them. Speaking of the Joker’s grab game, that’s another excellent way to rack up damage. The Joker has an excellent grab that rivals Dedede’s, and his dthrow and fthrow are very damaging, albeit his fthrow requires practice to use correctly. If you use your grabs to damage though, you won’t have the safe and easy option of KOing with “Why So Serious?”, so make your choice of how you want to use your grabs early on.

The Joker, as stated, has many options to KO his enemies. He can use his large amount of moves intended for KOing to slowly rack up damage while also working on “Why so serious”, his grab attack, to get it’s speech towards the end, intending to use that for the KO to take some of the stress off his many KO moves. He can also lay bombs when he gets the chance as his enemy’s damage racks up, intending to use those for the KO. Of course, the Joker can also simply use one of his actual traditional KO moves, his Usmash being an excellent option. If the Joker is confident in his enemy’s damage percentage and his ability to use his aerials and tilts, then he can lay down his coat to intend to KO his enemies with. This pretty much forces you to use the coat to KO as it takes away your other specials and smashes, so be sure to try to lure your foe into it by using your cards, possibly taking advantage of the fake cards to find an opening and smack them with a weak attack into the coat.

When the Joker’s own damage racks up and gets sent flying, he has a good recovery to get back, but a predictable one that he can’t attack out of, not being too hard to gimp by skilled players. The Joker will want to avoid being knocked off stage due to his predictable recovery. Once the Joker’s damage racks up, his goal will be to take you down with him. His dsmash and bthrow are excellent suicide moves, so you’ll have to be careful in taking the Joker down. Just wait for the Joker to open up his coat ready to set off his explosives and punish the ending lag. Don’t attack recklessly, or else you’ll be going to hell with the Joker. Keep away from the Joker at all costs if he’s at the edge and facing away from it, as he’ll just grab you and do a casual bthrow to take you down to your doom. This can be very scary at first, but once you get used to facing the Joker, you’ll see this coming and not have that much trouble avoiding it. If you’re playing the Joker and the enemy has gotten used to your tricks, you can try faking them out with your cards, then quickly run up to them and do a Dsmash, sliding into them slightly by using the c-stick, to give them a nasty surprise.

The Joker is generally bad at gimping, so don’t think about trying it too often. You’re better suited to laying bombs while your enemy is recovering, and you should be laying them at pretty much every chance you get. If you insist on gimping your enemy, your best bet is to stay at the platform safe and sound, slowly getting your jack in the box fair ready to spring out at them. The bouncy ball dair shouldn’t be used unless you’ve already lain out all your bombs, or using the simple uncharged version to gimp mediocre enemy recoveries.

Overall, the Joker relies heavily on mind-games. His options for KOing are among the best in the game, but his options for damaging you enough to do so are on the opposite side of the spectrum. He’ll have to trick you to damage you and lure you into his attacks, and he has the arsenal to do so just so long as he plays smart. The Joker takes a lot of getting used to, but once you master him your opponent won’t see what’s coming. Besides, what fun would it be if you simply disposed of your rival? Your rival completes you. What would you without him? There’s no harm in playing with your food before you bring it to the slaughter.


Taunts:

Up Taunt – Nut-Job: The Joker uses his knife to comb his hair and says “I like this job. I like it.”.

Side Taunt – Cold Caller: The Joker shrugs and says “I just want my phone call!”.

Down Taunt – Chaotic Chance: The Joker takes out a coin and flips it casually, saying “You know the thing about chaos? It's fair.“.

Entrance – Bad Joke: The Joker says the words “Ha ha ha ha, hahaha, ha, ha, ha, oh, a-hee-hee, ha ha, oh, hee hee, hee ha, ahaha” in monotone. If you leave him to sit after the entrance, he’ll go on with this to say “And I thought my jokes were bad. . .”.

Results Screen Poses:

Win 1 – Perfect Plan: The Joker rubs his chin and says “You know what I noticed? Nobody panics when things go "according to plan"…even if the plan is horrifying. If tomorrow I told the press that, like, a gang-banger will get shot, or a truck load of soldiers will be blown up, nobody panics...because it's all part of the plan. But when I say that one little old mayor will die…(voice rises hysterically) well, then everyone loses their minds!”.

Win 2 – Simple Tastes: A pile of money is in front of the joker, who says “You see, I'm a guy of simple taste. I enjoy dynamite, and gunpowder, and gasoline! And do you know what they all have in common? They're cheap.”, then lights a match and tosses it into the money for it to start burning up as the Joker laughs.

Win 3 – Belated Bus: The Joker is wearing a clown mask over his head and doesn’t have his signature tie, and there’ll be another mobster there with a clown mask next to him, having a gun pointed at him. The Joker says “No no... I kill the bus driver!” for the mobster to say “What bus driver?!?”. A bus drives in from the background, squashing the losing players and the mobster, for the joker to take off his mask and laugh, take the mobster’s gun and shoot into the bus for a death cry to be heard (The bus driver's), then go into the bus and drive off the screen.

Win against Batman – Creepily Completed Clown: The Joker turns around to face Batman, who is lying on the ground, barely conscious, mumbling “Just finish it. . .”. The Joker then says “I don't wanna kill you! What would I do without you? Go back to ripping off mob dealers? No. No…no. You…you complete me.”. If there are multiple Batmans, the Joker will do this to the highest ranking one, any others doing their normal loss animation.

Loss – Applauding the Act: The Joker applauds his enemy’s act, looking as if he enjoyed the pain, smiling creepily. He’ll sometimes take a break from clapping to throw a rose from his suit at his enemy’s feet mockingly, chuckling slightly, then resume clapping.

Loss against Batman – Plan Two Face: The Joker says “Did you really think that I would risk the battle for Gotham's soul in a fist fight with you?! When dealing with this city, you need an ace in the hole. Mine's Harvey.”, then laughs maniacally instead of clapping.

Wiimote Noise – Always Smiling: The Joker can be heard saying “Let's put a smile on that face!”.

Kirby Hat – Klown Kirby: Kirby gets horrific scars like the Joker that extend his mouth to look like a gigantic smile, as well as the Joker’s sea green messy hair. Kirby imitates the Joker’s facial expressions as he does the various parts of the move, although instead of shaking a coat to get out bombs, he pukes them out. No effects to represent the cards coming out of the coat are given to Kirby. Kirby looks quite angry when he takes out the remote control to detonate the bombs, pounding on it in frustration.

Alternate Colors:
-Default (Purple suit)
-Red Suit
-Blue Suit
-Green Suit
-Split Suit (Two different colors on either side of it to look like Two-Face’s suit, half of the Joker’s face being painted black as well, his mouth on that side being painted blue)
-Black Suit
-Ronald McJoker


Snake Codec Conversation:

PUSH SELECT

The Joker: See, this is how crazy Snake has made Gotham. You want order in Gotham? Solid Snake must take off his bandana and turn himself in. Oh, and every day that he doesn't, people will die. Starting tonight. I'm a man of my word. AH-HEE-HAH-HAH-HAH-WOO-HOO-HOO! *Screaming of innocents*
*Joker’s portrait vanishes, Otacon’s appears*
Snake: People are dying, Otacon. What would you have me do?
Otacon: Endure, Snake. Take it. They'll hate you for it, but that's the point of this. You can be the outcast. You can make the choice that no one else can make – the right choice.
Snake: Well, today I found out what I can't do. I can't endure this. Today, you get to say, "I told you so."
Otacon: Today I... I don't want to. . . But I did bloody tell you. *Snake laughs* I suppose they'll want to lock me up, too, as your accomplice.
Snake: Accomplice? I'm gonna tell them the whole thing was your idea.

-End Transmission-

Assist Trophy: Two Face


Two Face emerges from the assist trophy and lifts up his lucky coin to the camera, heads side up, saying “The world is cruel, and the only morality in a cruel word is chance...unbiased…unprejudiced...fair. ”. He then puts points to it with his other hand and says “You live”, then turns it tails side up, saying “You die”. Two Face will then flip his coin and catch it, taking a look at it. There’s a 50/50 chance it’ll be heads or tails, but he won’t show the results to the camera. If it’s tails, he’ll look at the battle with disgust and say “You’re a lucky man”, vanishing. If it’s heads, he’ll say “I don't leave anything up to chance, I make my own luck.” and take out a gun. He’ll proceed to take a single shot at everyone besides the owner of the assist trophy, one at a time. The shot will always hit the target unless they time a dodge properly, and it’ll do 25-26% damage and heavy knockback. Once Two Face fires a shot at everyone, he vanishes.

Item: Squirting Flower

When you pick up this item, your character will equip it over their heart, it being meant as a complement to a suit. It lasts for 20 seconds. The Squirting flower replaces your character’s ftilt and fair with a move where your character squeezes the flower to cause water to come shooting out of it, being as potent as Mario’s FLUDD, and working like it in the sense that it does knockback but no damage. Unlike Mario’s FLUDD, you can spam this due to not having to charge it, so if anybody’s off the edge at all you can abuse this to easily gimp their recovery.
 

MarthTrinity

Smash Lord
Joined
Aug 9, 2007
Messages
1,954
Location
The Cosmos Beneath Rosalina's Skirt
Excellent moveset as always Warlord, I especially like the Two Face assist...for some reason the idea of The Joker doing his grab attack to Ness or someone small and innocent like that makes me sad...but it's a very good play mechanic : )
 

Chris Lionheart

Smash Champion
Joined
Apr 6, 2008
Messages
2,076
Location
Make Your Move
The joker is an awesome moveset, Warlord (and I'm sorry I borrowed the speech idea for Bastian).

I've got a moveset in the works. It should be up within an hour.
 

Hyper_Ridley

Smash Champion
Joined
Dec 21, 2007
Messages
2,291
Location
Hippo Island
Joker is just as epic as ever Warlord. I liked how my idea for the side special was implemented, and the other moves were great as well. The DSmash in particular looked fun to use.
 

pensfan728

Smash Apprentice
Joined
Jun 5, 2008
Messages
163
Location
Da Burgh
Nice Joker moveset Warlord. Not that it wasn't expected. So i noticed that Junahu's megaman IS on the stadium... so congratulations to him.
 

IvoryFlame

Smash Journeyman
Joined
Jun 2, 2008
Messages
234
Location
Salem
Y'know what? Heck with it. This thread is quickly becoming completely unfair for lazy schmucks like me who can never even possibly compete with the likes of either Megaman, Maria, or The Joker. So infuriating.


I'm just sportin' y'all. Fantastic job on Joker, MasterWaterboard! Would you be willing to let him in Time Crash?
 

Shadow5567

Smash Journeyman
Joined
Apr 11, 2008
Messages
223
Location
In your mom
wow.... i look away for a few days and were already 89 pages in.... well, guess i gotta stop makin excuses for my movesets now....
 

Tanookie

Smash Journeyman
Joined
Nov 17, 2008
Messages
436
Location
*sends Sundance a leather harness on Dragon Apprec
Y'know what? Heck with it. This thread is quickly becoming completely unfair for lazy schmucks like me who can never even possibly compete with the likes of either Megaman, Maria, or The Joker. So infuriating.
...Am I really up there with them?!

That makes me so happy, you have no idea. Thank you so much. :)

Is Maria gonna be in Time Crash?
 

Chief Mendez

Smash Master
Joined
Mar 25, 2007
Messages
3,161
Location
Somewhere
I won't be upset in the slightest if the moveset ends up disqualified. I knew this might happen before I even started making it, and I did it anyway.

Seeing people liking my moveset is the only reward I need or want.
I'll get the rest of the Sandbags talking about this. Personally I'm torn, as I think you did a much better job rep'ing the character than I did...but at the same time it seems more like a hypothetical idea more suited to the SSB4 Discussion thread or something. :ohwell:


@Warlord: I like how you tried like, 3 times to get the first post, and still missed it. :chuckle:

EDIT -

@IvoryFlame: Hence the "10chars" thing you'll see at the end of short posts like that.

10internets
 

Smasherk808

Smash Journeyman
Joined
Jul 12, 2008
Messages
231
Whoa jeez i've missed a lot! I've been looking at some of the movesets... they are really good. A big step up from MYM3. I'm working on my Eeveelution moveset right now, I'm pretty much done with the specials and stats!
 

KingK.Rool

Smash Lord
Joined
Nov 26, 2005
Messages
1,810
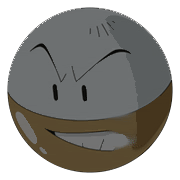
BRZZZZZZT! THE SHOCKINGLY ROUND ELECTRODE HAS ROLLED INTO THE BRAWL! WATCH OUT FOR HIS SHORT FUSE!


--CHARACTER--

Electrode's main claim to fame is his astonishing speed and his capacity to store huge amounts of electricity in his body. Oh, and, of course, the fact that he can explode at the drop of a pin. Pokedex entries:

It stores electric energy under very high pressure. It often explodes with little or no provocation.

Electrode eats electricity in the atmosphere. On days when lightning strikes, you can see this Pokémon exploding all over the place from eating too much electricity.

They appear in great numbers at electric power plants. Because they feed on electricity, they cause massive and chaotic blackouts in nearby cities.


Electrode was among the first Pokemon to use the move Charge, which doubles the strength of its next electric attack. It's also famous for its use of Selfdestruct and Explosion, both devastating attacks that take it out as part of the bargain.

--THE TWIST--

Electrode has three states - Regular, Charged, and Fizzled. At the start of a battle, he's in Regular form. His Down B - which will be explained in depth - eventually sends him into Charged form. After using an explosive attack, he goes into Fizzled. Both of these change a large portion of his moveset, alternatingly making it stronger or weaker.

After being KO'd, he restarts at Regular form. Simple enough, right?

--OVERVIEW--

ANIMATIONS

Idle Stance --- Electrode looks a bit shifty, but keeps his broad grin on his face. Once in a while, he pulls a little spin.

Walk --- Slowly rolls forward, as any ball would do in his position. A fairly slow walk. If you've seen Electrode in Pokemon Snap, you'll know what this looks like.

Run --- Electrode rushes forward, rolling again, at high speeds. His is a fast run, comparable to Marth's, as befitting his stats in the game.

Crouch --- Uh oh! Electrode has no crouch! How does a stiff sphere crouch?

Roll --- Ummm... take a guess. Electrode literally rolls past foes. It's actually pretty short, since he only turns one vertical spin before it ends.

Spot Dodge --- Electrode rolls ever so slightly into the foreground, then way back into the background, and then back. Decently long and confusing dodge.

Air Dodge --- Electrode flips so that we only see his red underside, as he spins into the background. Short dodge.

Dizzy Stance --- Electrode is off balance, rolling and spinning as his eyes flit around in his sockets uncontrollably. His movement is erratic, so it's actually tricky to hit him.

Sleep Stance --- Electrode is tilted slightly down, his eyes shut, still grinning in his sleep. Kinda basic.

---~~~~~~~~~~~~~~~~~~~~~~~~~~~~~~~~~~~~~~~~~~~~~---​

STATS

Height --- Well, vertical and horizontal size is obviously equal here, and either way, about as tall as Mario, if a bit shorter.

Weight --- Electrode may be heavy in actuality, but you wouldn't know it, because he has all the hit resistance of a lightweight. Must be something to do with his compact ball shape. In any case, he's below average here, although not ridiculously so.

First Jump --- A very basic hop. Not too great in range. Not too horrible, either.

Second Jump --- Electrode pulls a twirls as he gains more height. Again, a slightly below average jump. For recovery, you'll have to rely on his exemplary Up B.

Power --- Electrode is good at racking damage, but when it comes to KO, you're going to be relying, 75% of the time, on an explosive attack. And, of course, this just gets worse when you've fizzled. Although, in Charge form, he has a couple more options up his sleeve.

Attack Speed --- This is good here. Many of Electrode's attacks come out almost instantly, to counteract their poor range. Those with better range are a bit slower.

Traction --- Electrode is quite a slippery customer. It takes him a bit of time to turn, and, even worse, at the end of a dash, he slides a ways before stopping. Not as bad as Luigi, but still... you're usually gonna wanna be approaching from the air.

Fall Speed --- Another good department. Electrode doesn't take FOREVER in the air, but he still leans towards floaty. Lets him pull off more aerials!

Range --- This is bad here. Many of Electrode's attacks have poor range, to counteract how quickly they come out. Those that are slower have better range.

--MOVESET--

SPECIALS

Neutral Special --- Selfdestruct --- Electrode closes his eyes tightly, facing the screen, for a second, and then... KABOOM! He blows up, with a hit radius a bit bigger than that he has in Brawl. After the smoke clears (which happens quickly) Electrode will be in Fizzled form.


Notes --- This comes out in a second, much quicker than it does in Brawl. It deals a very nice 20% and has knockback that is a bit less than that of a Bob-omb.

Uses --- Many. The explosion has an excellent radius, making it one of his most ranged attacks, and don't forget, this can be used in mid-air as a fancy way of edgeguarding. The attack in itself is practically broken. HOWEVER, after its use, Electrode is fizzled, and he's much weaker in many ways. Therefore, timing is essential here.

Fizzled --- Electrode hunkers down and tries to explode, but only a puff of steam escapes him. He frowns, looking sad, as he does in Brawl when he fails to explode.

Forward Special --- Gyro Ball --- Electrode begins to spin like a top, frantically. A small crosshairs emerges from him. For about two seconds, you control the crosshairs. After the two seconds are up, a small greyish ball of light shoots out of Electrode, zooms speedily to the spot where the crosshairs where, and explodes in a fireworks-like blast, about the size of a PK Flash.

Notes --- Obviously, this attack has a duration of two seconds. Those two seconds are utilized to lock onto a foe. Once the time is up, the ball gets there as quickly as possible, although it can't go through solid surfaces. It doesn't hurt anyone along the way. Its final explosion, though, deals a great 13% and has very, very nice knockback.

Uses --- This takes a while to activate, and if Electrode is hit, it's cancelled, so using it when the foe is near is a bad idea. On the other hand, the crosshairs moves quickly, so it's an ideal way to pester a foe way on the other side of the stage. It's ideal for edgeguarding, since it has KO potential in its own right. Just make sure you properly predict where they're gonna be by the time the Gyro Ball gets there.

Charged! --- Instead of a mere Gyro Ball, Electrode launches a Zap Cannon! This one moves a bit more slowly, and is a larger ball of lightning, but its explosion is about twice as large and deals 16%! This one doesn't do any knockback, but rather suspends the foe in the air, paralyzed, rather like ZSamus's B, for two seconds, just enough time to get in there and PUNISH.

Fizzled --- Instead of a Gyro Ball, Electrode launches a puff of smoke!... Wait. Yeah, this is just a large puff of smoke. The explosion is about the same size, but it's... just smoke. It deals about 5%, but with not even flinching knockback.. and kinda obscures the screen for a few seconds. Yeeeeah... no. Not worth the long start-up.

Up Special --- Magnet Rise --- Electrode glows and sparks for a second as he rises into the air. Suddenly, he hurtles towards the nearest solid surface. This can be bumpy, flat, upside down, or curved. Upon contact with it, he'll stick to it as if attracted by a magnetic force. He's essentially in a wall cling here. He can then jump off and repeat the process.

Notes --- The magnetic attraction only goes a certain distance; if he's more than a Fire Fox away from the surface, he won't be able to move. In any case, this usually homes on to walls, but it can also take him straight to a ledge if that's within reach. He can only use two Magnet Rises before landing on solid ground.

Uses --- This is a very handy recovery. However, it's tricky on some stages; since he locks onto the NEAREST surface, he could end up under the stage, where, even after jumping out of his wall cling, he can't reach the ledge with his second Magnet Rise.

Fizzled --- Electrode pulls out the very last bit of magnetism left in his body. When in this state, he can only use Magnet Rise once before touching the ground, and its range is slightly shorter. Makes it quite difficult to recover at the best of times.

Down Special --- Charge --- Upon pressing Down B, Electrode goes into a charging animation; he shuts his eyes tight, scrunches himself up a bit, and motes of energy start appearing around him and going into him. You need to charge for a total of seven seconds to reach charged form. This is pretty easy to pull off; he charges as long as you hold Down B, and the amount he's already charged carries over to the next time he uses it.

Notes --- Electrode goes into his charging animation and comes out of it almost instantly, making this more than just an attack you can use when the foe is far away.

Uses --- It's so easy to pull off that you should be charging during every instant when you're not trying to combo or in imminent danger of being hit. Charged form is very good, but you need a whole seven seconds to reach it, so start adding it up as soon as the fight starts.

Charged! --- Electrode simply grins for as long as you hold Down B.

Fizzled --- Electrode scrunches up and pulls a concentrating face. Small puffs of smoke emit from him as he tries to restock his electricity. This works just like regular Charge, with him Charging for as long as you hold the button, and the charge you have carrying over to the next time you do it. After about eight seconds total, he'll spin sharply, all the dust and grime flying off of him. Congrats - you're no longer Fizzled.

---~~~~~~~~~~~~~~~~~~~~~~~~~~~~~~~~~~~~~~~~~~~~~---​

STANDARDS

Neutral A --- Tackle --- Electrode hops slightly forward, ramming foes with his body.

Notes --- This hardly give him any horiozontal distance at all, but he spends quite a while in the air. The hit actually does 3% with almost no knockback. Very low range, obviously, with puny priority. It comes out quick enough.

Uses --- Almost nothing. This can really only be used to chain into AA, which is somewhat decent.

AA --- Rapid Spin --- If you tap A while Electrode's still in the air from Tackle, he'll repeatedly spin like a top as he goes.

Notes --- This causes the Tackle to do multiple hits of 1%. You'll often get five or six in, if you properly caught the foe.

Uses --- Excellent way of racking up damage with an attack that isn't too conspicuous. The major selling point for this is that it remains unchanged even when you're fizzled. In that state, it's probably your best damage output mechanism.

Dash Attack --- Rollout --- Electrode simply speeds up his rolling dash for a brief distance, hurtling forward at a sudden breakneck speed.

Notes --- Unlike Sonic's, this has very horizontal knockback. It comes out almost as quickly, but only does 5%, and can't KO. This combined with the usual poor priority/range...

Uses --- ...Makes this an attack well worth skipping. It's decent against inexperienced foes who don't know how to predict it, but otherwise, pass.

Charged! --- This time around, small sparks materialize around Electrode as he rolls. As in Pikachu's Down Smash, foes are pulled in by the sparks and therefore pulled along as Electrode moves. Multiple hits here, each dealing 2%, for a maximum of 14%. Much more decent, although still predictable.

---~~~~~~~~~~~~~~~~~~~~~~~~~~~~~~~~~~~~~~~~~~~~~---​

Forward Tilt --- Thundershock --- Electrode pulls a grimace and a small spark emerges from his forehead, crackling like a whip for a second before fading.

Notes --- This takes about 0.5 seconds to come out, so it's pretty quick. The spark hands out multiple hits, each doing 2%, for a maximum of 10%. Like many lightning attacks, the foe is sucked in, which kinda makes up for the surprisingly short range of the spark. There is no knockback at the end, but some wind-down lag, making it impossible to chain multiple Thundershocks.

Uses --- Damage racking, foremost. One of Electrode's higher priority attacks, without losing too much speed. Small hitbox, though, and, unless you catch the foe in the whole thing, they hardly take any damage.

Charged! --- The lightning bolt that emerges from Electrode is now a whip about as large as Sheik's. This pretty much just makes it more ranged and disjointed. However, the start-up is now 0.8 seconds, so it's quite a bit slower.

Fizzled --- A tiny wire pops out of Electrode's smoldering forehead and lets out a tiny spark as it waves about. As a contrast to the Charged form, this is pretty much waaaay smaller. You literally have to be on top of Electrode to be hit by this. However, it comes out stunningly quick. Even with the speed, though, you're rarely going to be hitting with it.

Up Tilt --- Flash --- Electrode hops slightly into the air, then scrunches himself up, and suddenly flashes pure yellow. This counts as a first jump; he can use his second jump immediately.

Notes --- This comes out about as quickly as you'd expect it to, but it's pretty predictable. On the other hand, they might just think you're going for a real jump. If they're literally right on top of you for the very short duration of this attack, they take 14% and are knocked away on an angle depending on the angle they were hit at. This doesn't have KO potential, disappointingly, and a very small hitbox. Low priority.

Uses --- Like many of Electrode's attacks, this suffers from lack of range and priority. Worse still, it only has a split second of hitbox open. On the other hand, this does plenty of damage and is perfect for getting the opponent off your back. At lower %s, you can follow this up with a second jump and an Aerial.

Charged! --- Electrode glows for the whole duration of the hop! This means that contact with him for the whole attack will give you 14% and the knockback. The hitbox comes out much more quickly, therefore. Much more handy, and a great way of spacing a foe who's in too close, although it still has low priority.

Fizzled --- Electrode simply hops up without flashing at all. He uses his body to hit foes instead, but that does a mere 4% and tiny upwards knockback. Still, look on the bright side; it's easier to follow up on with an aerial.

Down Tilt --- Sonicboom --- Electrode turns upside down and spins like a top, causing small shockwaves that look kind of like wind to shoot out to either side of him.

Notes --- This takes 0.6 seconds to come out, relatively quick. The shockwaves don't go out very far, though... about half of Electrode's size to either side. It only hits foes who are on the ground proper, and does a set 5%. It sends them flying outwards and away, but not all too far. Decent priority.

Uses --- When you need breathing room and want a bit more range, this is your attack. You're going to be using this a lot when you're fizzled, as it remains unchanged, and therefore one of his only ranged attacks. Otherwise, you have better, electrical options.

---~~~~~~~~~~~~~~~~~~~~~~~~~~~~~~~~~~~~~~~~~~~~~---​

SMASHES

Forward Smash --- Spark --- Sparking with electricity, Electrode suddenly zooms a short distance - half a Battlefield platform - forward, ramming foes with his body.

Notes --- This comes out astonishingly quickly for a smash. It does a decent 13%, but with kind of below average knockback, unfortunately. It has decent range, since Electrode moves forward, but the same old bad priority.

Uses --- This is a great move for surprising foes who think that they're comfortably out of range. It's not going to be KO'ing until very high percentages, though. It's a decent option until you're Charged, but since it doesn't get bolstered then, Electrode'll have better attacks.

Fizzled --- A simple one - the exact same thing happens, minus the sparks. Instead, a small puff of steam shoots out of Electrode at the start of the attack. Without the power boost, it does only 9%, with slightly less knockback.

Up Smash --- Swift --- Electrode turns onto his side and spins, small stars materializing around his middle to make a bigger hitbox.

Notes --- This takes about 0.8 seconds to come out, so it's not Electrode's speediest attacks. However, the hitbox is at his middle and is pretty big thanks to the stars that circle him like a planet's rings. This one does multiple hits as he spins, each of 3%, for a total potential 18%. It has little knockback, though, even on the last hit.

Uses --- This is a fantastic damage racker. It's got a decently sized hitbox that can really catch aerially approaching foes by surprise, and the stars are pretty useful in that they suck foes in slightly. Use liberally.

Fizzled --- Very obvious, isn't it? No stars appear, meaning Electrode just turns and spins. It's a bit quicker, but loses the range, priority, and useful properties, and does a mere 11% with a single hit.

Down Smash --- Static --- Electrode suddenly moves back and forth very quickly, like a mini version of Sonic's Down Smash, but several times more. He then jumps slightly off of the ground as a series of lightning bolts crackle beneath him, hitting multiple times over a fairly large area (almost as much as battlefield platform).

Notes --- This takes just a bit over a second to come out, as Electrode rubs the ground with his body. This process does NO damage, even though it seems as if it should. He hops off the ground fairly quickly, and then the lightning bolts begin to shuffle around beneath him, forming almost a cage. This has a nice surface area, and sucks foes in to multiple powerful hits, each dealing 4%, for a potential total of 24%! The final hit shoots foes slightly away on a horizontal trajectory. The whole attack takes up a bit over two seconds.

Uses --- This is a powerful but sadly slow attack. It's decent at edgeguarding, as it has the perfect timing to capture a foe in its bolts just as they reach the ledge. It's also yet another fantastic damage racking mechanism. Not to mention that the early part of it - the shuffling - is great for mindgames, as it looks almost like a foxtrot where Electrode doesn't turn.

Charged! --- Since Electrode is so full of static already, it takes only one or two rubs against the ground to transfer the charge. Essentially, this means that the attack's start-up is cut in half. This makes it much more useable as a whole, and a great tool for building up damage.

Fizzled --- Oooh. Electrode has to rub against the ground for TWICE as long to see any effect, and even then, the effect is minimal, making only a tiny little sphere of lightning on the ground directly beneath him. Each hit here does a mere 2%, for a maximum of 12%. In other words, once you're fizzled, avoid this one.

---~~~~~~~~~~~~~~~~~~~~~~~~~~~~~~~~~~~~~~~~~~~~~---​

AERIALS

Neutral Aerial --- Discharge--- Electrode, facing the screen, releases an small, translucent circular wave of electric energy from his core.

Notes --- This wave hardly leaves Electrode's body before fading, so its range is mostly overlapping Electrode himself. Therefore, blah blah, lousy priority. This attack does a mere 4%, with no knockback. Its important properties are twofold: it comes out FAST; it paralyzes foes right in midair a la ZSamus Down Smash/B. It holds them there, unmoving, for a second or so.

Uses --- Now, this paralyzes the foe for just enough time to follow up with another, more effective aerial, or even a Selfdestruct in a pinch. It doesn't help Electrode's lack of KO moves, but it CAN chain into one.

Fizzled --- Umm... nothing happens. Electrode kinda pulls a face, trying to concentrate, but only a small puff of smoke emerges from him. That's it. Umm... fourth taunt, anyone?

Forward Aerial --- Thunder Wave --- Electrode focuses and a ring of crackling lightning appears directly before him, at eye level with him. The ring is about half the size of Electrode himself.

Notes --- The ring created by this attack doesn't come out too quickly; this is a slower aerial. It crackles there for about a full second, dealing multiple hits the while. A foe caught right in the ring will take about 12% from the whole attack.

Uses --- This is probably Electrode's most useful aerial, as it has truly excellent range. It's also a good damage-dealing machine. However, to truly capture the foe in the ring is a real challenge; you're more likely to use this as a spacing tool.

Charged! --- The ring almost doubles in size! Now, it's just as big as a second Electrode, hanging in the air before him! This obviously makes it waaaay easier to actually catch the foe in the middle for all of those juicy multiple hits. Nothing else really changes.

Fizzled --- Instead of a ring of lightning, a ring of smoke emerges from Electrode's forehead. It kinda hangs there for a little while, obscuring vision quite nicely. If a foe passes right through it for the three or so seconds it remains, they'll take 1% without even the slightest knockback. The use of this attack is primarily to frighten the foe and cover up your own movements; this is vital for Fizzled Electrode to be able to get in close.

Back Aerial --- Light Screen --- True to its name, a thin wall of light - about as high as Electrode's body itself - materializes behind him, hanging there for three seconds where it was summoned. Can only be used once every ten seconds.

Notes --- This has a mere second's lag as Electrode releases his charge. The light screen lingers where it was placed, suspended in the air. It can be walked through or jumped through or attacked through or pretty much anything else-through. However, if it captures a projectile - an energy projectile - that projectile will be absorbed by the screen. It doesn't end there. At the end of its three second lifespan, if Electrode is near - one body length away - its charge will be transferred to him, leaping into him in the form of a lightning bolt. This, as you may have guessed, increases how much he's charged himself. A blaster bolt from Fox cuts down how much you need to charge by 0.5 seconds. A Samus blast cuts it down by three seconds.

Uses --- This is primarily for the stoppage of projectiles, and it serves that purpose wonderfully, as, against campers, this is a fantastic way to get up to full charge. Since it cuts down how long you'll have to charge, it means that you can charge yourself without living in fear of the projectiles constantly cutting you off. It's also good as a surprise tactic against an aggressive foe who won't give you breathing space, but, at the same time, likes to mix it up every once in a while.

Charged! --- Everything happens almost the same way. However, since Electrode is now so magnetic, the light screen will follow him around, staying a constant distance away from him, for the duration of the attack. To dodge projectiles, now, all you have to do is turn your back on them. Obviously, it doesn't add to your charge at the end. However, now, the projectiles will be reflected instead of just absorbed! Very handy.

Fizzled --- Happens similarly, except it doesn't add to your charge and the light screen can only swallow one projectile hit before shattering.

Up Aerial --- Charge Beam --- True to its name. This attack takes about one second to start up, one second in which Electrode is deadly still. After that, a pillar of lightning reminiscent of Pikachu's Thunder shoots down onto Electrode. After being hit, Electrode's Charge increases.

Notes --- As I say, start up lag abides. It only does minimal knockback and about 3% in a single hit, keeping it from being as annoying as Thunder. It does, however, reduce your remaining charge time by the one second it took to start up. It only does this if it isn't interrupted by an overhanging platform. Obviously, it no longer does this once you're charged.

Uses --- If you want to charge without being vulnerable, this is your attack. It's a really ncie way to poke out at foes who are approaching from above; you won't inflict any real harm, but you will screw up their approach. Once you've Charged, though, this is a subpar option, since it isn't improved in any way.

Fizzled --- Kinda obvious by now? A pillar of smoke emerges from Electrode and zooms straight up. This looks very wide and intimidating, but does absolutely nothing. A strictly visual effect. Of course, as aforementioned, this visual effect is crucial to fizzled Electrode's game.

Down Aerial --- Magnet Bomb --- A stall-then-fall. Electrode rises a bit, glowing silver, then turns and drops head-first at a high speed. This is your typical attack if he hits solid ground, or if he jumps off the ledge with it, but if he makes contact with a foe, he goes KABOOM, as seen in Selfdestruct. He'll be in Fizzled form afterwards.

Notes --- This takes a bit under a second for the stall part. Electrode drops fast, looking like a silver bullet/oval thing. If he hits ground, he'll bounce off, losing his glow, and that's that. If he makes direct contact with a foe, KABOOM. For details of the explosion's properties, see Selfdestruct above. It's the same thing.

Uses --- This is way harder to land than a simple Selfdestruct, since you have to make contact. It's easy enough to just airdodge or spotdodge it. However, it'll really keep any foe on their toes, as Electrode descends really quickly. Be careful not to suicide with this one.

Fizzled --- Electrode still pulls the attack off; however, he can't explode and doesn't glow. Instead, he goes right through foes he smashes, giving very low knockback and about 5%. he trails smoke like a shooting star. A bad option.

---~~~~~~~~~~~~~~~~~~~~~~~~~~~~~~~~~~~~~~~~~~~~~---​

THROWS

Grab --- Electrode releases a small line of lightning. It reaches out a frustratingly short distance, then reels the foe in, whereupon Electrode hops slightly off of the ground and they slowly rotate in orbit around him. Not too quick a grab, but with okay range. Tapping A will cause him to release a bit of electricity into them, dealing 2%.

Fizzled --- No line of lightning, no way to grab. Fizzled Electrode has no grabs.

Forward Throw --- Flash Cannon --- Electrode launches the foe forward with a large ball of light in their gut. After a certain distance, that ball explodes in a flash, temporarily making all ground-bound foes dizzy.

Notes --- You won't have time to get off the ground before it explodes, which means that this throw will always make Electrode dizzy. It won't work on the foe, since he's in the air. On the other hand, he'll take 14%. Low knockback, but 14%. And, in multiplayer, this'll also hit everyone else who's not in the air.

Uses --- This has titanic damage for a throw, but at the cost of them landing a shot on you. The dizziness is pretty short, so if you tap frantically and they have a bit of damage already, you should get un-dizzy before they can punish you. Handy for racking damage, not that Electrode needs much more in that department.

Back Throw --- Mirror Shot --- Remember how a grabbed foe rotates slowly around Electrode? Well, this throw causes him to unleash his magnetic hold over them, sending them flying at whatever angle they were at that moment in relation to Electrode's body.

Notes --- Get it? If they were currently right above him, they'd fly straight up. If they were beneath, they'd be bounced off the ground. And so on. The actual knockback isn't too good, but it IS versatile. Only 5% is dealt by this weak throw.

Uses --- This is a weeeird throw. It may be back, but it'll usually end up going in some other direction. In fact, at lower percents, you're unlikely to be able to hold them long enough for them to complete one full orbit around him. However, its versatility more than makes up for this; any angle is fair game.

Up Throw --- Vital Throw --- The foe grabs Electrode by surprise and tosses him straight above!

Notes --- WHAT??? A throw where Electrode is the one who gets thrown??? Yes, that's right. Electrode here takes 5%, and fairly small upwards knockback. What? Why? It makes no sense? Hey, he's the ball. People throw balls.

Uses --- At first glance, this is the stupidest attack ever. However... wait for it... at the right %, this is the ideal set-up for a Magnet Bomb down aerial, and to blow them up! This is going to be one of your major set-ups for a KO once they reach higher %s. Pretty neat, eh?

Down Throw --- Thundershock --- Electrode releases the foe on the ground beneath him, and lets loose with a flurry of lightning bolts on them. They are therefore paralyzed.

Notes --- This looks painful, but only deals 6%. It also has no knockback, only leaving the foe stunned as in ZSamus's B or Down Smash.

Uses --- The foe will be paralyzed for about one second, so follow up with something! This can't really be used to chain into Selfdestruct, as the foe will have a nice window in which to escape before you blow up, and that's really not something you want to be using frivolously. Still, chain it into a damage racker!

---~~~~~~~~~~~~~~~~~~~~~~~~~~~~~~~~~~~~~~~~~~~~~---​

FINAL SMASH

Final Smash --- Explosion --- Electrode begins to glow a violent yellow, drowning half the screen in it, and then explodes, a great tempest of fire and smoke that covers a radius as big as TWO smart bombs! However... Electrode is KO'd.

Notes --- Once you press B, foes can't do much; the explosion is on its way! In that last split second, they can scurry to get out of its reach, but the blinding light makes it hard to see how far away you really are. The explosion itself sends anyone it hits FLYING, with godly knockback, and a full 60%! How unfair! But... Electrode is KO'd, and vanishes in the explosion, respawning along with his victims. What a ridiculous attack.

Uses --- This Final Smash is pretty much game over if they're at all damaged; just get in close and KABOOM, off they go. The effect is very intimidating, what with the column of smoke and fire and all. However, you're not gonna want to use this if you're not already damaged. You're going to want to hold on to the Final Smash until you've taken some substantial damage already... or until you're Charged.

Charged! --- Electrode is fully charged, oh no! And he used his Final Smash! Now he's super-charged! He's invulnerable in this state, still taking damage, but with constant super armor. All of his attacks do 1.5 times the damage. Best of all, foes are now attracted to him by the immense magnetic charge stocked in his body. In the ground or in the air, they're pulled to him as if by a wind, at a decent speed. This makes it so, SO easy to rack up tons and tons of damage and the unsuspecting foe; and, as soon as they reach a sufficient amount, just hit 'em with a Selfdestruct. His super-charged form lasts for about twenty seconds.

Fizzled --- Awww, poor fizzled Electrode, can't do anything about it... or can he? Using his Final Smash here causes a thunderstorm to brew way up above. Three bolts of lightning will descend. The first is right in front of Electrode, wherever he is. The second, right behind him. The third will come down, ripping through foes, and hit Electrode directly! He proceeds to devour the electricity all around him, and - yes - become fully charged! The lightning bolts deal 20% and pretty good knockback to any foe they smash in to. You're going to have to chase them down if you want the bolts to make contact, since they always fall in the same pattern.

--PLAYSTYLE--

THE ENERGY CYCLE​

Playing Electrode is all about timing, technique, and pressure. At the start of the match, our primary objective will be to Charge yourself and to rack up damage. Electrode has many options for that. However, you’ll also want to be spacing and sneaking in Charges, and why?

Electrode by default needs to be right next to a foe to do any damage to them. His speed and mobility help him a bit with this, but his pathetic priority doesn’t really do him any favours. Until you’re charged, you’re at a disadvantage, and any head-on clash will end up in the opponent’s favour. Sneak in Charges at every available moment. Pace yourself, and focus on your more ranged attacks – Forward Aerial being chief among them, as well as Gyro Ball – to buy yourself time.

Once Electrode is charged, things change. Many of his attacks have excellent range, now, or at least improved properties. He still suffers from lack of a KO move, but he can now dish out the damage like there’s no tomorrow, racking up well over 150% with a single chain of close-combat attacks.

So, the foe is sufficiently electrified. You want to bide your time until there’s a real opening. Once you see an opportunity, a real chance, go ahead and launch your Selfdestruct. If you fail, you’re kinda in trouble, as fizzled Electrode has no KO options whatsoever. In that case, you’ll have to rely on gimping. This is part of the reason why you want to ensure the foe is at huuuge %s before going for the kill. As fizzled Electrode, now, you have only one advantage; the smokescreens summoned up by many of his attacks. It’s not too hard to keep the screen shrouded in greyish steam, where you might just be able to get in close enough to the foe to make up for his lousy priority. Still, it’s a tough battle; you want to spend as little time Fizzled as possible. Take risks to get in those vital Charges, and go back to your regular state.

Whatever his form, a large part of using Electrode is making wise stage choices, due to his unique recovery. A stage like Pokemon Stadium is very bad; you’re going to end up homing in on the underside, or even on the tall support in the center, where you won’t be able to return. A stage like Yoshi’s Island, with steep, flat edges, is vastly superior as a pick.

In general, Electrode’s all about compiling electricity, releasing it with a bang, and then repeating the cycle. He makes up for low range and priority on most attacks by keeping up a steady assault, staying right in the foe’s face, or by playing a spacing game, staying at a distance and stocking your lightning capacity. Energy is the key word here. Generate it, use it, spend it.

--EXTRAS--

TAUNTS AND POSES

Up Taunt --- Electrode turns upside down and flips so we see his back. Without his face visible, he looks exactly like a Pokeball. He stays like this for about a second, then flips back.

Forward Taunt --- In a taunt reminiscent of one of Meta Knight's, Electrode rises slightly into the air and spins rapidly, like a top, dazzling us with his speed.

Down Taunt --- Electrode starts vibrating like crazy. It looks as though he's been placed into a washing machine.


Victory Pose #1 --- Electrode is right next to a Pokeball. He casts it a few shifty looks, then appears to have an idea, and flips upside down, looking exactly like the Pokeball next to him, but bigger.

Victory Pose #2 --- Electrode smiles broadly in the foreground as several large lightning bolts crash down onto him, electrifying him and causing him to spark with energy.

Victory Pose #3 --- Electrode focuses for a second, then causes a huge web of crackling lightning to jolt all around him, filling the screen. He sits in the centre of this chaos, grinning and looking behind him.

Losing Pose --- Electrode attempts to explode in the background, but fizzles out instead. He frowns, miserable:


---~~~~~~~~~~~~~~~~~~~~~~~~~~~~~~~~~~~~~~~~~~~~~---​

ALT COLOURS


---~~~~~~~~~~~~~~~~~~~~~~~~~~~~~~~~~~~~~~~~~~~~~---​

SNAKE'S CODEC

Snake - Colonel, what is this ball and why is it fighting me?
Colonel - Snake, stay away from that. Electrode is packed full of electricity, and it can unleash it at any moment.
Snake - So you're saying I should stay at range?
Colonel - It may be quick, but it's just a ball, after all. Take advantage of how close it needs to be to harm you.
Snake - Right.
Colonel - And don't get blown up.
Snake - WHAT?
Colonel - *end transmission*

---~~~~~~~~~~~~~~~~~~~~~~~~~~~~~~~~~~~~~~~~~~~~~---​

MISC EXTRAS

Entrance --- Electrode pops out of the obligatory pokeball. His is a fast ball:


Wiimote Sound --- The sound of crackling electricity, followed by a large and booming explosion.

Kirby Hat --- Kirby becomes more or less an Electrode with limbs:


He gains the ability to use Selfdestruct, but he has so little electricity that his explosion is little more than a pop, and does only 5% with minor knockback. But hey, it's reuseable.

Victory Theme --- Electrode's theme is the chilling but mechanical Power Plant theme.

---~~~~~~~~~~~~~~~~~~~~~~~~~~~~~~~~~~~~~~~~~~~~~---​

---------------#101​
 

SkylerOcon

Tiny Dancer
Joined
Mar 21, 2008
Messages
5,216
Location
ATX
Electrode makes me a happy Pokemon fan.

Joker was very well done. Though, perhaps, having quotes on every attack was a little bit overboard. That goes from cool to just kind of annoying of having to sit through those every time you attack.

I promise you guys Toon Link is like three seconds from being posted. Just get this thing to the next page.
 

TWILTHERO

Smash Lord
Joined
Aug 19, 2007
Messages
1,880
Location
Canada
EEEEEWWWWW...Electrode. Worst electric Pokemon ever :urg:

Anyway, it's still a great moveset, that's well detailed, though it kind of makes my movesets look small XP.
 

Hyper_Ridley

Smash Champion
Joined
Dec 21, 2007
Messages
2,291
Location
Hippo Island
Electrode was very creative, K.Rool. You'll be happy to know that I am in the rough draft phase of Wheelie, and will start him as soon as my "self-portrait" move set is finished.

My third move set, the Raptors, might be up to tommorow.


edit: @Cruxis: You're supposed to post the SSE in a blog, not in this thread. But I'll forgive you just becuase of who the shadow in the banner is.
 

~Cruxis~

Smash Ace
Joined
Nov 27, 2008
Messages
768
Location
In a timeless world
Electrode was very creative, K.Rool. You'll be happy to know that I am in the rough draft phase of Wheelie, and will start him as soon as my "self-portrait" move set is finished.

My third move set, the Raptors, might be up to tommorow.


edit: @Cruxis: You're supposed to post the SSE in a blog, not in this thread. But I'll forgive you just becuase of who the shadow in the banner is.
I didnt post it, exactly. I used a previous post so that I can get away with it. I cant make blogs with this new account right now. The whole point of NOT posting it here is for spam reasons, but technically, it isnt the same thing since I have it as a link.
 

Chief Mendez

Smash Master
Joined
Mar 25, 2007
Messages
3,161
Location
Somewhere
Great job on Electrode, Warlord
O SNAP

Alucard will be up tomorrow...hopefully.
Sure you don't wanna' pace yourself? I've got two more movesets waiting in the wings, as well as two more planned...but I don't intend on posting any of them for a while still.

You've only got like...three or four movesets, right? In a couple hundred pages from now, you'll be spent at this rate. :psycho:

@Cru: Why can't you make a User Blog? You really should get on that as soon as you can...loopholes are still loopholes, man. :urg:
 

~Cruxis~

Smash Ace
Joined
Nov 27, 2008
Messages
768
Location
In a timeless world
O SNAP

Sure you don't wanna' pace yourself? I've got two more movesets waiting in the wings, as well as two more planned...but I don't intend on posting any of them for a while still.

You've only got like...three or four movesets, right? In a couple hundred pages from now, you'll be spent at this rate. :psycho:

@Cru: Why can't you make a User Blog? You really should get on that as soon as you can...loopholes are still loopholes, man. :urg:
What the heck are you talking about? I cant see the big deal. So I am handicapped for now. Fine, if it makes you happy, I will see what I can do to fix a small deal.
 

Tanookie

Smash Journeyman
Joined
Nov 17, 2008
Messages
436
Location
*sends Sundance a leather harness on Dragon Apprec
O SNAP

Sure you don't wanna' pace yourself? I've got two more movesets waiting in the wings, as well as two more planned...but I don't intend on posting any of them for a while still.

You've only got like...three or four movesets, right? In a couple hundred pages from now, you'll be spent at this rate. :psycho:
This is true. *Smacks self*

I completely forgot the fact that threads like these carry on for hundreds of pages. I've got about three more moevesets planned (including Alucard), but I keep getting more ideas.

...Does anyone know which Golden Sun characters have been done in MYM before?
 

SkylerOcon

Tiny Dancer
Joined
Mar 21, 2008
Messages
5,216
Location
ATX
- - - Toon Link Remix - - -


Nobody wanted another Link clone. Toon Link had so much potential, and Sakurai failed to recognize it. This is what our favorite cel-shaded hero should have been. Clothed in the green of fields, he has the sword to repel evil.

Keep in mind, this is not your standard fare Link. This is a completely and totally redone version of everybody's favorite Kokiri and it's much less sword based that we're used too. Even if you're a sword Link fan, this moveset has something for you.

Taking advantage of the various items that Link has come across through his many adventures, you're sure to find a great deal of variety. Everything from a giant hammer to a rod that shoots fire, this moveset is highly versatile.


General Stats

Weight: 4/10. About the same as his current incarnation

Walking Speed: 6/10. Average walking speed.

Running Speed: 6.5/10. Slightly above average.

Air Speed (upwards): 4/10. Pretty slow moving upwards. All that equipment has to drag him down somehow.

Air Speed (downwards): 7/10. Try to avoid the meteor smashes.

Power: 6.5/10. Pretty heavy hitter right here.

Wall Jump: No

Wall Cling: No

Crawl: Yes

First Jump: 4/10. Link jumps up, bringing his arms above his head.

Second Jump: 6/10. Link takes out the Deku Leaf and flaps it downwards, levitating him further.

Glide: Yes. While some of you may be confused as to how a character without wings can glide, Toon Link has a very useful item that his realistic counterpart did not – The Deku Leaf. Check the ‘special abilities’ section after the moveset description for more info.

Attack after recovery: Yes


Range Key

Teal means the attack has horrible range.
Yellow Green means the attack has bad range.
Dark Blue means the attack has decent range.
Dark Olive means the attack has good range.
Turqoise means the attack has godly range.
Navy denotes a projectile.


Knockback Levels

Little- Extremely low knockback (Doesn’t kill but knocks opponent away)
Low- Very little knockback. (Kills 150%)
Mediocre- Little knockback (Kills about 130%)
Decent- Moderate knockback (kills around 120%).
Good- Above average knockback (kills around 100%).
Great- Kill move at 70% (assuming this moveset were to be used in Brawl’s physics)


Lag Levels

Little- Hardly any lag
Low- A little bit of lag
Decent- A moderate amount of lag
High- A lot of lag
Insane- Ike forward smash


Ground Attacks

Telescope Jab: AAA Combo (3%, 3%, 4%)- Link pulls out his Sister’s Telescope and releases a succession of three hits. He swings it first to his left, then to the right, and then to the front. He holds it in his right hand, and keeps his sword held a bit behind him for the brunt of the attack. For the last hit, the telescope is fully extended, giving it extra range. The final hit has low knockback.

Shield Slide: Dash Attack (8%)- Link pulls the Hylian Shield from his back, he slides, and puts the shield in front of his legs. The legs are brought back slightly as to not get in front of the shield. During the opening frames, the attack will bring opponents in front of Link, but if the opponent is hit during the closing frames, the shield will knock the opponents upward. Opening and closing frames have mediocre knockback.

Hero’s Thrust: Up Smash
(15% regular, 20% charged)- Link brings his sword directly above his head. Link’s arms are first brought to his side and then pulled upwards. Imagine Link making an invisible triangle with his arms at the beginning, with his fists (and the base of the sword) forming the midpoint of the baseline. The attack has a slightly disjointed hitbox all around the sword. The sweetspot is the sword which causes the opponent to be sent flying upwards, but the opponent can be hit with Link’s elbows while he’s bringing them down to the sides causing sideways knockback. Elbow knockback is decent, upwards knockback is good. Low startup lag, but with decent ending lag.

Skull Hammer: Forward Smash (18% regular, 23% charged)- Link brings out the gigantic Skull Hammer! Its sweetspot is at the head of the hammer, but the iron pole that holds it can slam opponents too. Both have forward knockback. He heaves it back to his left side and then swings it with all of his might. Excellent range. Great knockback on the head of the hammer and good knockback on the pole. Insane startup and landing lag.

Boot Stomp: Down Smash (17% regular, 21% charged)- Link brings out the famous metal grieves, the Iron Boots! I don’t know how he managed to change into them so fast, but be warned! These really pack a punch! Link slowly brings up his leg, and slams it down on the ground, causing gravel to fly out to the sides of Toon Link. The Boot’s hitbox is directly in front of Toon Link, and the gravel’s hitbox goes as far as an extra one and a half Toon Links on both sides of the boot. Gravel has decent knockback and the boot has good knockback. High startup lag and decent landing lag.

Lantern Wave: Up Tilt (4% Multihit, four hits total)- Link pulls out his trusty lantern for this attack. While most people see it just as a useless lighting utensil, its’ power is much, much more. If you’re caught in the flaming menace, you’re in for a world of hurt. Decent range and low knockback, but it also has little lag.

Multi-Slash: Forward Tilt (8%, 8%)- Link first swings the sword from the ground going upwards, eventually reaching above his head. Then, he deals a powerful stab. The upward thrust has a slightly disjointed hit box, and the stab has a very nice disjointed hitbox. Unlike Link’s current forward smash, the second hit will happen no matter what, so be careful! Decent knockback and low startup and landing lag.

Cane of Pacci: Downward Tilt (3%)- This stick has to have some use, right? Link pokes at his opponent’s feet with it, and it comes out very fast. It has a chance of causing tripping. He pokes at his opponent using the thin end of the cane, and holds the thicker part. No knockback or lag.


Aerials

Sword Spin: Neutral Air (12%)- First swiping the sword in front of him, and then behind him, this is an attack to be reckoned with. First Link swipes in front of him, bringing the sword from left to right. His right arm moves behind his body. He then spins his head around and swipes behind his body. This is a fast attack with low knockback and little lag.

Back Stab: Back Air (10% spike, 9% beginning after spike frames, 6% lingering hitbox)- Link stabs behind him, hoping to hit his opponents. Acting like a sex kick and a spike combined, this is a unique attack. At first, Link brings his sword quickly downward and in front of him, causing a very weak spike. He then continues to pull the sword behind him, which is the beginning of the sex kick part. The beginning frames of this part causes decent knockback. The sword will then remain behind him for about as long as Mario’s current Neutral Air does. This part will cause little knockback. Decent startup lag and low ending lag.

Broadside Blast: Up Air (10%)- Link heaves his sword up above his head and slams the opponent with the broadside of his sword. Creating a deep ‘thunk’ sound, this move starts out with link holding the sword in front of him and arcing the sword up above his head to his opponent. The arcing movement starts slowly, but gradually gains speed. High startup and landing lag. Kills at about 85%

Sword Spin: Forward Air (5%, 6%)- Link does a single spin with his sword, giving him a bit of extra forward momentum. Catches the opponent in two hits, the last one sending the opponent in the direction that Link was facing before using the attack. Link holds the Master Sword out as far as he can in front of him. Low startup lag and decent landing lag. Medicore knockback.

Rupee Toss: Down Air (8%)- Link tosses three rupees directly below him! Man, he must have an adult’s wallet to be able to afford that! Link brings down his right hand and makes a tossing motion below him, having three small rupees go down very little under his hands. One goes downwards directly below him, one goes angled slightly to the left, and one goes angled slightly to the right. No startup up lag and low ending lag. No knockback


Specials

Grappling Hook: Neutral Special (10% thrown, 5% twirling, 5% air)- Link brings out the grappling hook for his neutral special. On-stage, you can hold down B for as long as you like and Link will continue twirling it above his head. If you hit either up, left, or right on the control stick, Link will throw the grapple in that direction! It travels about one half of Final Destination’s current length. Link brings one arm upwards above his head, and uses that to twirl the rope, and he keeps the other at his stomach, anchoring the grapple. You can be hit by it while it’s twirling, which will cause 5% damage. Off-stage, Link will swing it around his head one time and will throw it in the direction that he is facing. This can be used as a grapple recovery, and can act as a pseudo-Zair. Causes 5% damage in the air, and travels about as far as Link’s current Zair does. Thrown knockback is decent and the start-up lag is decent. The ending lag is high because he has pull the grapple back in. Twirling has the same amount of start-up lag, but low knockback and ending lag. In the air, it has no startup lag, high landing lag and no knockback.


Fire Rod: Downward Special (15% (-1% per half second) Fireball, 2% Flamethrower)- Link pulls out the mystical Fire Rod for this attack! It can either shoot an extremely slow moving, large, and powerful fireball, or it will shoot a continuous stream of fire. To shoot a fireball quickly press the B button and let go. The fireball will never disappear, but it does continuously decrease in power and knockback. To use the flamethrower, just hold down the B button. For the fireball, Link extends his arm out fully and released the flame, knocking him back a bit because of the powerful force. For the flamethrower, Link will extend his hand and keep it out. You can shoot the fireball and flamethrower from anywhere in front of Link, to anywhere on top or below Link. Fireball has good knockback when starting and low knockback when ending. High lag. The flamethrower has no knockback and low startup and landing lag.

Four Sword: Side Special (10% ground, 2% air)- It’s… four Links?! That’s right, using the magic abilities of the Four Sword, Link makes three copies of himself! Using this attack on the ground will result in a greatly ranged attack in which two Links go left and two Links go right. They hold their swords directly in front of them, using both hands. The sword’s hilt is placed in front of the stomach area. Slightly disjointed hitbox. In the air, the Links form a spinning circle! Moving like Kirby’s hammer did in Melee, this attack is a multi-hit that can go up eight hits. If you connect the attack, a different Link will stay out allowing a slight alteration to Link's stats. More in the 'Special Abilities' section. Mediocre knockback and low amounts of lag.

Roc’s Feather: Upwards Special (11%)- Link can now jump higher than ever before! The Roc’s feather gives him a spiraling third jump! It acts much like Samus’ Screw Attack, but it does no damage unless you press Up-B a second time during the attack, in which case Link will be sent flying down in a sword plant that will spike. If you connect the sword attack you regain your recovery. The attack starts as it shows Link pulling the feather from his pocket. He will continue holding the feather until the attack ends or he cancels it with a sword plant. The sword plants hit box is disjointed under the tip of the sword. Sword plant’s knockback and lag are identical to its’ current version.


Grabs

Link’s grab is worked by the Gust Jar. By pressing down the grab button, Link will take out the Jar and it will start vacuuming in your opponent, assuming they’re close enough. It can grab your opponent when they’re about 1/8th of FD’s length away. Quite a bit of ending lag, if you don’t grab your opponent. If your opponent is grabbed, Link will put the Jar away and hold them in his hands.

Hilt Jab: Pummel (2%)- Link hits his opponent with the Hilt of his sword. It’s fairly fast and you can hit your opponent with it about two to three times before they escape the grab.

Foot Slam: Forward Throw (7%)- Link slams his foot into his opponents back as hard as he can. Bringing his foot up to his chest and then kicking with all of his might, that’s gotta hurt! While his foot is up at his chest, his torso is slanted slightly backwards and his arms are behind his head. When he brings his foot down, on his opponent, he rebounds slightly and then regains balance. Mediocre knockback.

Sword Slap: Back Throw (10%)- Link brings his opponent upwards and slams the opponent with the broadside of his sword. Hunching over slightly and bringing his fist to the side of his head, he strikes the opponent in the face. Mediocre knockback.

Gust Thrust: Down Throw (12%)- Link pushes his opponent downwards and then locks them on the ground with Gust Jar. He holds the opponent on the ground for about as long as Charizard does with his down throw and then aims the gust at the opponents feet, launching them off. Decent knockback.

Northern Winds: Up Throw (9%)- The Wind Waker is a taunt no more! Calling upon the mystical powers of the Wind Waker, Link summons a northern wind to throw his opponent upwards. Moving like a conductor, Link first moves his hands to the side and then he moves them upwards. With the wind summoned, his opponent goes flying! Forming a funnel of wind about five Toon Links high, any other opponent caught in it will also be thrown. Decent knockback.


Situational Attacks

Shield Slam: Ledge Attack (Under 100%) [8%]- Crawling up from the ledge, Link slams the Hylian Shield right onto the opponent! Pushing himself up and holding his sword in his left hand, he keeps his right hand ready to lash out and smack the foe. Little, sideways knockback.

Sword Swipe: Get-up Attack (Under 100%) [8%]- To prevent himself from getting knocked straight back down, Link spins the sword around him. Starting with his right hand pushing him up from the ground, he quickly does a three-hundred-sixty degree circle around his body with his sword. Little, sideways knockback.

Map Slap: Ledge Attack (Over 100%) [6%]- Batting away any opponents who attempt to keep Link off-stage, this rolled up map of the Great Sea can actually come in handy! Climbing back up and holding his sword with his left hand, Link swipes with the Map while he’s getting up with his right hand. Little, sideways knockback.

Windmill: Get-up Attack (Over 100%) [8%]- Making it’s second appearance, the Grappling Hook is the item for this attack! Pushing himself up with his left hand, Link’s right hand spins around once with the Grappling Hook in its’ grip! Only going about the length of one Toon Link (standing) to either side of him, this attack serves its purpose as a distancing attack.


Special Abilities

Deku Leaf


By holding down the Jump button after you use your second jump, Link will move the Deku Leaf above his head and grab it with both hands. This gives him increased aerial mobility and speed, but be warned, Link only has a limited amount of time and can't fly like the other characters can. He is restricted to left and right movement and cannot go upwards or increases his falling angle. His Neutral air doubles as his glide attack.

Also be warned that this glide cannot be used very often. Link has a magic meter just below his stock count. You can keep the Deku Leaf out for five seconds at max, and then it will disappear. The magic meter will very slowly recharge, gaining one second of usage time every fifteen seconds you do not use it. This means that it requires one minutes and fifteen seconds to fully recharge.

Four Swords Links


Every time you use the Four Sword attack and it connects with the opponent, a different Link remains after the attack. Each Link has a slight alteration to certain qualities and this will greatly help your game to know. Each of these Link's can be changed to be the starter by choosing their color on the character selection screen.

Green- Green Link has the normal status for every attack and stats given. He is the standard, starting Link.

Red- Red Link's attacks have knockback increased by 10%, but the damage goes down 5 points for each attack. He also takes a slight hit to his speed. This Link is meant for killing.

Blue- Blue Link's attacks have the amount of damage increased by 5 points each, but his knockback is decreased by 10% of the normal rate. This Link should be used to increase the damage on your opponent.

Purple- Purple Link gets a boost where the other Link's do not. All of his General Stats get increased by 1 point, with the exception of power. This makes him faster, heavier, and allows him to jump higher. At the same time, knockback is decreased by 10% and you damage 5 points less per hit.


Final Smash

Moon Pearl

Whats this? Link has a.... pearl?! That's right, the mystical Moon Pearl is being used! Flee! Throwing it on the ground, a gateway between the Light and Dark worlds is open! This Final Smash is very unique in the sense that it requires much more than a bit of timing and a press of the b-button, but you have to work to make use of it after you actually use the pearl.

How does this work? Once the portal is opened, you have to knock your enemy inside! If you manage to knock your opponent onto the center of the pad, which is very small, your opponent will be sent to the Dark World. This can have one of five effects.

  • Effect One (25% and below)- Your opponents damage counter is immediately increased to 75%. After this happens, your opponent is spit back outside of the Moon Gate.
  • Effect Two (26% to 50%)- Your opponents damage counter is immediately increased to 100%. After this happens, your opponent is spit back outside of the Moon Gate.
  • Effect Three (51% to 75%)- Your opponents damage counter is immediately increased to 125%. After this happens, your opponent is spit back outside of the Moon Gate.
  • Effect Four (76% 100%)- Your opponents damage counter is immediately increased to 150%. After this happens, your opponent is spit back outside of the Moon Gate.
  • Effect Five (101% +)- Your opponent is sent inside the Dark World, and never to return again... on that stock, anyway. Instant K.O.

If you're in an FFA, everybody can be knocked into this by anybody else, so be careful! The only person that will never have to worry about facing the Dark World is the user of the technique. The Portal covers about 1/8 of Final Destination's length.

Miscellaneous

Animations

Standing- With a weary look on his face, he stands with his shoulders back.

Walk- Link brings his shield up to his chest, wary of any attacks. His sword his held at his side, ready to be brought up for an attack.

Running- Arms are swaying back and forth, and his short legs carry him across the battlefield. His torso remains fairly still, making him look a bit goofy.

Idle- Link reaches up to adjust his cap. He wears the goofy expression that he does in the picture of his 'casual clothes' in the costume section.
Crouch- Unchanged from his current crouch.

Dizzy- Toon Link clutches his head with his right hand. His eyes are closed shut and he has a sick expression on his face.

Sleep- Toon Link slouches over, his chest heaving slightly. His shoulders move up and down quite a deal, to match his breathing.

Shield- Unchanged from his current shield.

Taunts

Up Taunt: Map- Link reaches into his pocket and pulls out a dusty old sea chart! First he rolls it out, studies it, and then folds it back up and puts it in his pocket. The picture on the map (only visible by turning the camera behind Link) is a miniaturized version of the map from the original Legend of Zelda.

Side Taunt: Sightsee- Link pulls out Aryll's Telescope and looks around through the telescope. First to his left, then to his right, and then he retracts it and puts it away (probably keeping it hidden until he attacks with it again!)

Down Taunt: Phantom Hourglass- Link pulls out the Phantom Hourglass and turns it once, holding it out for a while to show the sand falling.

Snake Codec

Snake: "Mei Ling, who is this kid with the cat eyes...?"

Mei Ling: "Oh, they call him Toon Link. Doesn't he look familiar?"

Snake: "Yeah, he looks just like Link."

Mei Ling: "But you know there've been several people who've gone by that name, right?. They all have certain things in common--green clothes, a sword, a shield... But they all came from different lands and lived in different eras. And yet the spirit of the hero of the Triforce is timeless. It's an essence that transcends history."

Snake: "I think I can relate to that."

Mei Ling: "Huh? What do you mean?"

Snake: "There's been more than one 'Snake,' too, you know..."

God I'm so lazy

Music


Four Swords Adventures: Hyrule Overworld
Four Swords Adventures: Frozen Hyrule
Four Swords Adventures: Realm of the Heavens
Wind Waker: Ganon Battle
Wind Waker: Phantom Ganon Battle

Costumes

Green Link (Default)
Red Link
Blue Link
Purple Link

Alternate Costume (Casual Clothes):


Comes in Green, Red, Blue, and Purple.

Wiimote Sound

You hear the distinct clanking of clashing swords and then four voices shouting "Hiyaaaaaaa!" in unison.

Kirby Hat

Kirby gains the current Toon Link's hat (as in, if Red Toon Link was out, Kirby would get a Red hat) and a grappling hook with decreased range. It does 8% damage thrown and has mediocre knockback. It does 3% while twirling.
 

SkylerOcon

Tiny Dancer
Joined
Mar 21, 2008
Messages
5,216
Location
ATX
Things are still coming soon because I am a lazy ******* and I wanted to post this now.

MarthTrinity is awesome.
 

Junahu

Smash Ace
Joined
Nov 15, 2005
Messages
899
Location
Shropshire Slasher
The Joker is fantastic. I'm grateful that this great character was done justice.
Below is some nitpicking;

a bunch of laughing gas
A cloud of laughing gas maybe?

Running Speed: 6.5/10 The Joker is somewhat fast for a heavyweight in how he runs, moving about the battlefield at an average speed. He’d be faster if not for all he was carrying. .
So.. when he takes off his coat.. he should be faster. Right?

If the Joker is hit while he’s empty his coat of bombs, all the bombs he currently has out will explode, and his coat will get blown into ashes by the bombs, him not able to get another coat using his down B for 10 seconds. Be very careful to use this move only when it’s safe and to not get too greedy with laying out too many bombs, as it’s not worth the risk.
Does The joker take damage, or knockback? If not then it IS worth the risk, because there's no real downside (other than lack of coat) to getting attacked and having all the bombs detonate symultaneously.

The catch is that this move obviously also blows up the Joker himself.
Is this an instant KO to the Joker?


Moving on to...

Electrode! Wow. I always liked electrode, even though he was a rather pathetic pokemon. Vital Throw is brilliantly twisted.

I really wished you included some kind of benefit to being in the fizzled state. I also didn't like the fact that, sans getting KO'd or using a Final Smash, there's no real way to unfizzle yourself. Perhaps if you use Charge uninterupted for long enough, he could return to normal?

Plus.. how does he hold items?


edit: SkylerOcon: Teal and Turquiose are really similar colours, and yet you use them to denote the two range extremes. Bad idea. bad bad bad! A simple blue-green-orange-red scale would work so much better.
 

Chief Mendez

Smash Master
Joined
Mar 25, 2007
Messages
3,161
Location
Somewhere
You really need to bold those attack names. Also I don't think your method of color-coding damage/knockback has gotten any easier on the senses since Trident Ganondorf. X_X

OTHER THAN THAT

I like it. It's...eh, probably yeah my favorite character "remix." Very nice job there, man. Quick suggestion though: 5% less for each move is kind of ridiculous (for the different colored Links, that is). Maybe 1 or 2...but 5 really stacks up.
 

SkylerOcon

Tiny Dancer
Joined
Mar 21, 2008
Messages
5,216
Location
ATX
Final Smash? Wut.

I don't think I've given him that yet.

EDIT:

@Mendez

The five percent change is added in to make it more significant. 10% increase on knockback isn't to shabby either. Each Link needs to feel very distinct or it will just feel like 'oh okay I changed colors' not 'oops I needed to be Red Link now I have to hit with the Four Swords attack another three times'.

But yeah, I'll do the bolding part.
 

SkylerOcon

Tiny Dancer
Joined
Mar 21, 2008
Messages
5,216
Location
ATX
Moves bolded so they're easier to see.

I really should hurry up with that Final Smash, though <_<
 
Status
Not open for further replies.
Top Bottom