((Please ignore the difference between their final moveset and the above, I haven't changed it yet.))
The bear-and-bird duo have arrived to fight! Here's a brief history of the duo (spoiler alert for B-K: Nuts & Bolts):
History
Banjo and Kazooie reside in the Spiral Mountain area on the Isle o' Hags. The pair have gone on many adventures over the years, almost all of them having to do with the evil witch Gruntilda and her schemes to either restore her own life (having become less than human) or become beautiful.
The rescue of Tootie (Banjo-Kazooie)
One one faithful day, Banjo and Kazooie sleep. Banjo's sister, Tootie, walks in, asking to go on an adventure; she is shooed in favor for more sleep. Tootie then walks out to see her friend, Bottles the Mole.
Meanwhile, at her lair, Gruntilda Winkybunion and her assistant Klungo finalize a plan to take Grunty's body and restore it to a sexy form. All the components for the plan (the machine to do it, the bumbling assistant, and the need to be sexy) are in place, except for one...the beauty to transfer the beauty from. There is a perfect candidate, though. Tootie. So, off on her broom does Grunty go to kidnap her.
Afterwards, when Banjo and Kazooie awaken, Bottles informs them of the incident, and then teaches them a set of moves that gets them started on their journey. Once the team is prepped, they set off for Grunty's Lair, a series of interconnected worlds within a large castle-like cavern. Throughout the their adventures in Grunty's Lair, the pair collect Musical Notes and Jigsaw Pieces to advance through the wonderous worlds of the lair, from the scenic (and shark-infested) waters of Treasure Trove Cove, to the snowy landscapes of Freezeezy Peak, to the time-broken forest of Click Clock Wood.
Along they way, they are assisted by a colorful cast of characters: Bottles teaches them new techniques for more rigurous terains, Brentilda, Grunty's sister, gives seemingly useless advice and background info on her harded sister, Mumbo Jumbo, Gruntilda's teacher, helps the pair by providing magical transformations, and the Jinjos, a group of colorful creatures, help out the pair if enough of them are found. Once they collect enough things to advance to Gruntilda's final challenge, they participate in a quizshow, Grunty's Furnace Fun, to win the freedom of Tootie. Though there is much to celebrate, Tootie suggests that Gurntilda must be finished once and for all.
The pair return to the lair, and confront her at the top of her tower. The battle is hard, but with a little help from Bottles and the Jinjos (and their God, the Jinjonator), they manage to vanquish the witch, launching her off the top of the tower. Gruntilda lands in a large hole, and is trapped by a boulder. Banjo and the gang celebrate while Gruntilda starts plotting her revenge (in "Banjo-Tooie").
The One With the Time-Traveling (Banjo-Kazooie: Grunty's Revenge)
Time passes, and the duo lives on. However, Gruntilda had managed to survive two months under a boulder. Her assistant Klungo, seeing the futility in hefting the boulder off his misssssstressssss, decides to take a different course of action - he builds a Grunty-Shaped robot, the Mecha Grunty, to house the witch's spirit while her new plot is in action.
It's a relatively simple plan: go back in time and stop the bear-and-bird duo from ever meeting. This would erase her previous defeat and put things right for the witch. She attempts to do so, but through the combined efforts of both a young and older Mumbo-Jumbo, Bozzeye (a relative of Bottles), and the pair from the future, Grunty is thwarted. Soon afterwards, Grunty calls for help, specifically from her own kin.
The One With The Sisters (Banjo-Tooie)
Several years later, Banjo, Kazooie, Bottles, and Mumbo are playing a friendly game of cards. Meanwhile, the other 2 Winkybunion Sisters, Mingella and Blobbelda, arrive in the Drill Mecha Hag 1. They free their sister, and Bottles is killed in the impeding assault. Afterwards, Banjo and Kazooie leave on yet another adventure to stop the evil witch. This adventure is a lot tougher, though, but they have friends like Bottle's brother Jamjars, Chuffy the train, Humba Wumba the shaman, and Master Jiggywiggy to help them along with their quest to reach the witch, who intends to use the Big-o-Blaster (B.O.B.) to take energy from the surrounding Isle o' Hags and create a new body for herself.
Once Banjo and Kazooie arive at the Winkybunion stronghold, Cauldron Keep, they attempt to stop Grunty, who has devised yet another quizshow (The Tower of Tragedy) to distract the duo. They win that one, too, and fight Grunty (who uses the Hag 1 to fight back. Once the 2 defeat Grunty, all that is left is her head (a skull), which is kicked around as the gang celebrates. Grunty, once again, swears her revenge in a later game (calling it "Banjo-Threeie").
For the Deed to Spiral Mountain (Banjo-Kazooie: Nuts & Bolts)
Seeing as the witch had thoroughly been defeated, Banjo and Kazooie retire from the adventuring life for 8 years, taking up a life of video-game playing and pizza eating that takes their weight up several
uncomformtable notches, in the process forgetting all of their moves from the previous 3 games (one could argue that Banjo had forgotten how to drive a kart). Grunty, however, has been confined to a pile of rocks in her body-less form. Once she escapes, she again tries to confront the duo, who has become so chunky it's difficult to move.
Once they try to get it on, an unknown outside makes an appearance, pausing the action so carelessly he could have been playing a video game. The outsider introduces himself as the Lord of Games, the creater of all videogames, ever. He says that there are more diplomatic ways of competing (this time for the deed to Spiral Mountain), and sets up a challenge for the arguing parties. With that, he transports them all to Showdown Town, the new central hub for their competitions. This time, Banjo will walk around worlds, completing new tasks along the way. If he succeeds, the deed is his; likewise, if he is to fail, then Grunty wins the deed.
Things are a little different this time around; the LOG refuses to restore the bear/bird duo's moves (opting to restore their physiqes instead), but tells them that Mumbo Jumbo has opened a new business in Showdown Town,
Mumbo's Motors, to aid the duo by creating all sorts of vehicles to complete their tasks. Humba Wumba sells the duo blueprints for pre-made vehicles, Bottles helps the duo by showing challenges, and the Jinjos (and their evil rival clan, the Minjos) make appearances.
Grunty (in her new mechanical body) impedes the two as much as she can. She has the Showdown Town Police Department (STPD) at her disposal, an army of Gruntybots to do her bidding, and a new feline assistant, Piddles, as her old assistant decided to give up his hencheman lifestyle in favor of making "ssstupid gamesss" like "Hero Klungo Sssavesss Teh World".
Eventually, after collecting tons of
useless objects, the duo square off against their favorite witch in a vehicle triathalon on Spiral Mountain, which the duo win. The duo win the deed, get their old moves back, get a new Banjo-Shaped vehicle, and Grunty is sent to work at the LOG's game factory, where she swears revenge (yet
again, again) and vows to make her own game to terrorize the world with one day.
Character Stats/Info
All statistics on a 5 point scale, with 5 being the best/highest.
For Banjo only:
Overall Strength: 4
Physical Strenght: 4
Projectile/Special Strength: n/a
Initial Jump: 3
Air Jump: 3
Overal Recovery: 3
Glide: n/a
Traction: 3
Weight: 4
Fall Speed: 4
Walk Speed: 3
Run Speed: 3
Roll Speed: 3
Dodge Speed: 3
Ledge Recovery: 3
100+% Ledge Recovery: 2
Yes/Nos
Glide: No
2+ Jumps: No (2 standard, 1 special)
Wall Cling: Yes (infinite)
Wall Jump: Yes
Crawl: Yes
For Kazooie Only:
Overall Strength: 3
Physical Strenght: 2
Projectile/Special Strength: 4
Initial Jump: 5
Air Jump: 3
Overal Recovery: 4
Glide: 5
Traction: 5
Weight: 2
Fall Speed: 2
Walk Speed: 5
Run Speed: 5
Roll Speed: 5
Dodge Speed: 3
Ledge Recovery: 4
100+% Ledge Recovery: 3
Yes/Nos
Glide: Yes
2+ Jumps: Yes (4 standard, 1 special)
Wall Cling: No
Wall Jump: No
Crawl: No
For BanjoKazooie only:
Overall Strength: 4
Physical Strenght: 4
Projectile/Special Strength: 3
Initial Jump: 3
Air Jump: 4
Overal Recovery: 5
Glide: 4
Traction: 3
Weight: 4
Fall Speed: 4
Walk Speed: 3
Run Speed: 3
Roll Speed: 3
Dodge Speed: 3
Ledge Recovery: 3
100+% Ledge Recovery: 4
Yes/Nos
Glide: Yes
2+ Jumps: Yes (3 standard, 1 special)
Wall Cling: Yes
Wall Jump: Yes
Crawl: No
Advantages/Disadvantages
Banjo
Advantages: Because Banjo is an average-sized bear, he has some power behind him. His overall land speed is a bit above the average bear, he runs decently. Fallspeed and jumps allow him to fall out of the way of some fast attacks, and he has great overal resiliance, and an excellent horizontal recovery in the form of his Latch Pack special move.
Disadvantages: He can't jump as well as some others can, though, and he's pretty slow when it comes down to it. Because he no longer has Kazooie to help him out, he has a slightly poor vertical recovery (apart from his Jump Pack special move) thanks to his bluky and slightly heavy build.
Kazooie
Advantages: Kazooie's focus is speed and altitude, so it's no wonder that she's the speedier of the 2. Thanks to her extra jumps, glide, her excellent Leg Spring special move, and fast aerials, she should rarely be on the ground attacking, but she can also hold her own on the ground. For the same reasons is her recovery a force to be reckoned with.
Disadvantages: Ol' Chicken Legs has one major weakness: she's light as a feather (the pun was intended, and I don't care...), so she launches more easily than her honey-loving partner. Another weakness is that of her attacks; while some have crazy power (like her Egg Shot special move if a Grenade Egg is launched), a lot of her moves aren't as powerful as she would hope.
Banjo-Kazooie
Advantages: A union of forces is simply the sum of its parts, right? This is the case when the duo comes together. The great recovery and fast attacks of Kazooie and the power and resilence of Banjo are both shown in full force, creating a duo that could trump even the sneakiest of witches (and they have, thanks very much).
Disadvantages: A union of forces is simply the sum of its parts, right? Unfortunately, this is not the case for the duo. It seems that most of Banjo's disadvantages, apart from recovery, are present, but not as much as before. This really is the most balanced of the 3 forms.
Moveset
All directional input asume a player facing right (default 1P position). All ATTACK DATA measured on a 5 point scale, with 5 being the highest in the case of most statistics (for lag, 5 is the least possible lag). "Desperation" refers to when a character is above 100% damage.
Legend
Banjo Move/Input/Description
Kazooie Move/Input/Description
Banjo-Kazooie Move/Input/Description
Any Character Move/Input/Description
Entrance Animation:
Whichever character starts, the two come together. A portrait of golden Jigsaw Pieces appears, then breaks, revealing the duo dancing and getting ready for action. If starting as the duo, the animation ends there. If Banjo, Kazooie exits his backpack and makes for the stage BG (where PKMN Trainer would be) as he thumbs-up and says "Yuh-huh!". If Kazzoie, she jumps out of his backpack as he makes for the stage BG, and ruffles her feathers and sqwaks, prepared for battle.
Standard Moves
While Standing A, A, A - Bear Claw
ATTACK DATA
Damage: 3%, 3%, 3%
Knockback: 1, 1, 2
Initial Lag: 4
Ending Lag: 2
Range: 2, 2, 2
Banjo punches one with his right paw while he steps forward, punches with his left while stepping forward, and punches right again.
While Standing A, A - Wing Attack Combo
ATTACK DATA
Damage: 4%, 4%
Knockback: 2, 2
Initial Lag: 5
Ending Lag: 3
Range: 3, 3
Kazooie swings her right wing forward, whacking the opponent, while she steps foward and whacks again, this time with her left wing.
While Standing A, A, A - Breegull Bash Combo
ATTACK DATA
Damage: 3%, 4%, 7%
Knockback: 1, 2, 5
Initial Lag: 3
Ending Lag: 2
Range: 1, 2, 3
Banjo punches once, then steps forward and kicks. Not wanting to leave Kazooie out of the action, while he's kicking, he reaches behind him, grabs her by the neck, then swings her forward, slamming her on the enemy. He then puts her back. Don't worry; she doesn't mind.
While Dashing A - Forward Roll
ATTACK DATA
Damage: 5%, 3% during roll
Knockback: 3, 2 during roll
Initial Lag: 3
Ending Lag: 2
Range: 5
Banjo tucks himself into a ball and rolls forward. The initial hit is the second he rolls, and the roll itself is a different, damaging move.
While Dashing A - Spinning Wing Whack
ATTACK DATA
Damage: 6%
Knockback: 3
Initial Lag: 4
Ending Lag: 2
Range: 3
Kazooie runs forward, spinning on one foot as she spins around with her wings out, slashing everyone around her.
While Dashing A - Forward Roll
ATTACK DATA
Damage: 6%, 4% during roll
Knockback: 4, 2 during roll
Initial Lag: 4
Ending Lag: 3
Range: 5, 5 during roll
Banjo dives forward (the initial impact), then in mid air, curls up with Kazooie wrapping her wings around the bear. After he lands, he rolls a fair distance.
While Standing > A - Honey Kick
ATTACK DATA
Damage: 8%
Knockback: 3
Initial Lag: 3
Ending Lag: 4
Range: 3
Banjo executes a basic spinning foward kick.
While Standing > A - Breegull Cutter
ATTACK DATA
Damage: 6%
Knockback: 4
Initial Lag: 4
Ending Lag: 3
Range: 4
Kazooie extends her wing upward so that she can slash downward.
While Standing > A - Bear/Bird Union
ATTACK DATA
Damage: 5%, 8% (at the same time)
Knockback: 3, 4
Initial Lag: 4
Ending Lag: 3
Range: 4, 3
Banjo kicks foward (much like Ganondorf's Brawl WS > A) while Kazooie swings a wing foward, covering the kick. Both hits are individual of each other and have their own hitboxes and damage (the above data refers to Kazooie's attack first, then Banjo's).
While Standing ^ A - Bear Swipe
ATTACK DATA
Damage: 6%, 6%
Knockback: 3, 3
Initial Lag: 4
Ending Lag: 4
Range: 2, 2
Banjo swipes upwards twice in rapid succession.
While Standing ^ A - Beak Tower
ATTACK DATA
Damage: 7%
Knockback: 4
Initial Lag: 4
Ending Lag: 4
Range: 3
Kazooie shoots her head upward.
While Standing ^ A - Scissor Wing
ATTACK DATA
Damage: 7%
Knockback: 4
Initial Lag: 4
Ending Lag: 3
Range: 5
Banjo moves before Kazooie slashes her wings in a scissor motion.
While Standing v A/ While Crouching A - Sweep Swipe
ATTACK DATA
Damage: 8%, 6%
Knockback: 4, 4
Initial Lag: 2
Ending Lag: 3
Range: 3, 3
Banjo swipes twice, low to the ground. Second hit is a Meteor Smash.
While Standing v A/ While Crouching A - Using Your Head
ATTACK DATA
Damage: 7% (10% at beak)
Knockback: 4 (5 at beak)
Initial Lag: 3
Ending Lag: 4
Range: 4
Kazooie swipes her head in a sweeping motion, much like a sword slash. Beak causes extra damage.
While Standing v A/ While Crouching A - Wing Umbrella Kick
ATTACK DATA
Damage: 8%
Knockback: 4
Initial Lag: 3
Ending Lag: 2
Range: 3
As Banjo sweepkicks (like Snake's WS v A/WC A), Kazooie covers his body with a wing. Limited reflective properties versus projectiles.
Smash Attack
While Standing Smash > A - Pack Whack
ATTACK DATA
Damage: 17-24%
Knockback: 5
Initial Lag: 2
Ending Lag: 3
Range: 4
Charge State: Banjo grabs his backpack straps, pulls his backpack slowly off, then prepares to swing by tensing up.
Banjo swings his packpack in a wide arc.
While Standing Smash > A - Turbo Talon Trot
ATTACK DATA
Damage: 13-19% (multi impact)
Knockback: 3 (initial impact, 1 to every other hit)
Initial Lag: 5
Ending Lag: 5
Range: 4
Charge State: Kazooie slips on her Turbo Trainers as she trots in place.
Kazooie bends her neck forward slightly and rushes forward.
While Standing Smash > A - Beak Barge
ATTACK DATA
Damage: 17-26%
Knockback: 5
Initial Lag: 2
Ending Lag: 3
Range: 4
Charge State: Banjo trots in place as he preps his shoulder, and Kazooie sticks her head out and tenses her head up and speards her wings slightly.
Banjo tackles forward while Kazooie sticks her head out, stick as a board, that damages hard.
While Standing Smash ^ A - Failed Flip Jump
ATTACK DATA
Damage: 15-21%
Knockback: 4
Initial Lag: 3
Ending Lag: 2
Range: 4
Charge State: Banjo bends down and tenses up, one sholder down and one shoulder up.
Banjo jumps upward in a failed attempt to jump upward hard. Banjo himself is the hitbox.
While Standing Smash ^ A - Breegull Slash
ATTACK DATA
Damage: 14-20%
Knockback: 4
Initial Lag: 4
Ending Lag: 3
Range: 3
Charge State: Kazooie bends down, tensing up.
Kazooie flips backwards, kicking as she does. Her claw has the highest damage.
While Standing Smash ^ A - Honyuken
ATTACK DATA
Damage: 16-23%
Knockback: 4
Initial Lag: 3
Ending Lag: 2
Range: 2
Charge State: Banjo bends down and tenses up, preparing a fist for an uppercut, while Kazooie places her wing on Banjo's arm.
Banjo jumps upward, uppercutting as he does so, while Kazooie slashes upward with the correspoinding wing.
While Standing Smash v A - Slam Pack
ATTACK DATA
Damage: 18-27%
Knockback: 5
Initial Lag: 2
Ending Lag: 3
Range: 3
Charge State: Banjo jumps into his backpack, pulling up the straps while he tenses up.
Banjo jumps upward slightly, then slams down hard on the ground.
While Standing Smash v A - Wind Beneath Wings
ATTACK DATA
Damage: 14-20%
Knockback: 2 (5 for wind)
Initial Lag: 5
Ending Lag: 3
Range: 5
Charge State: Kazooie raises her wings upward while facing outward.
Kazooie flaps her wings down hard. This creates a small wind that deals no damage but great knockback.
While Standing Smash v A - Egg Lay
ATTACK DATA
Damage: 14-20% (if standard egg), 16-22% (if fire/ice egg), 18-25% (if grenade egg)
Knockback: 2 (if regular egg), 3 (if fire/ice egg), 5 (if grenade egg)
Initial Lag: 3, 2 if grenade eg
Ending Lag: 3
Range: 4
Charge State: Banjo tenses up, while Kazooie sticks her head out of the backpack from the bottom.
Kazooie shoots an egg downwards. The egg is random - regular eggs, fire eggs, ice eggs, and Grenade eggs are the possible types.
Aerial Attacks
While in Air A - Midair Roll
ATTACK DATA
Damage: 13%
Knockback: 3
Initial Lag: 3
Ending Lag: 3
Range: 3
Banjo curls up and rolls in mid-air.
While in Air A - Wing Whack
ATTACK DATA
Damage: 12%
Knockback: 4
Initial Lag: 3
Ending Lag: 2
Range: 4
Kazooie spins around, spreading her wings to slash at the opponent.
While in Air A - Midair Roll
ATTACK DATA
Damage: 16%
Knockback: 4
Initial Lag: 3
Ending Lag: 3
Range: 3
Banjo curls up into a ball and rolls in midair, with Kazooie wrapping her wings around him for added damage.
While in Air > A - Honey Heel
ATTACK DATA
Damage: 16%
Knockback: 5 (Meteor Smash)
Initial Lag: 1
Ending Lag: 4
Range: 3
Banjo frontflips, keeping his leg close to his body, then kicks downward. Impact with the heel causes a Meteor Smash.
While in Air > A - Breegull Drill
ATTACK DATA
Damage: 4%, 4%, 4%, 4%, 5%
Knockback: 1, 1, 1, 1, 4
Initial Lag: 5
Ending Lag: 3
Range: 3
Kazooie spins vertically while positioned horizontally, causing several drill-like impacts.
While in Air > A - Rat-a-tat Tap
ATTACK DATA
Damage: 6%, 6%, 7%
Knockback: 2, 2, 4
Initial Lag: 4
Ending Lag: 3
Range: 4
Banjo curls up, bends his head down and lets Kazooie peck forward 3 times.
While in Air < A - Jiggy Kick
ATTACK DATA
Damage: 14%
Knockback: 4
Initial Lag: 3
Ending Lag: 3
Range: 3
Banjo dropkicks backward.
While in Air < A - Spring Step Shoes
ATTACK DATA
Damage: 5%
Knockback: 4
Initial Lag: 2
Ending Lag: 2
Range: 3
Kazooie slips on her Spring Step Shoes and dropkicks. If she contacts, she causes large knockback depending on their percentage and Kazooie is bounced in the opposite direction. The same happens for Kazooie if she hits a wall.
While in Air < A - Bear-Bird Cocktail
ATTACK DATA
Damage: 6, 4, 8%
Knockback: 3, 2, 4
Initial Lag: 4
Ending Lag: 2
Range: 3
Banjo backhands backwards, Kazooie swings her wing backwards, and Banjo kicks hard backward.
While in Air ^ A - Roysten Swim
ATTACK DATA
Damage: 3%, 3%, 3%, 3%, 4%
Knockback: 1, 1, 1, 1, 3
Initial Lag: 3
Ending Lag: 3
Range: 3
Banjo swipes upward 5 times, as if he were trying to swim upwards.
While in Air ^ A - Stilt Flip
ATTACK DATA
Damage: 14%
Knockback: 3
Initial Lag: 5
Ending Lag: 4
Range: 5
Kazooie slips on her Wading Boots and backflip kicks backward. Her legs extend as a result of the Wading Boots, which is why the range is extended.
While in Air ^ A - Flap Flip Slash
ATTACK DATA
Damage: 17%
Knockback: 4
Initial Lag: 2
Ending Lag: 4
Range: 3
Banjo backflips and kicks while Kazooie wraps her wings around his body for extra slashing power.
While in Air v A - Honey Down Kick
ATTACK DATA
Damage: 15%
Knockback: 4
Initial Lag: 2
Ending Lag: 3
Range: 3
Banjo kicks downward in a similar manner to Luigi’s WiA v A.
While in Air v A - Bill Drill
ATTACK DATA
Damage: 2%, 2%, 2%, 2%, 2%, 2%, 2%, 4%
Knockback: 1, 1, 1, 1, 1, 1, 1, 3
Initial Lag: 3
Ending Lag: 2
Range: 4
Kazooie puts herself in a diving position and spins in a drill-like fashion, creating multiple impacts.
While in Air v A - Beak Buster
ATTACK DATA
Damage: 16% (10% afterwards, up to 2 additional hits)
Knockback: 5 (3 afterwards, up to 2 additional hits)
Initial Lag: 2
Ending Lag: 2
Range: 5
Banjo curls up in a ball with his head towards the ground, Kazooie sticks her head out, and the two fall downward fast. Stall-then-fall. Secondary impact only occurs if first hit impacts. First hit is a Bounce Impact attack.
Prone Attacks
While Down (Face Up) A - Nip Up
ATTACK DATA
Damage: 9%
Knockback: 3
Initial Lag: 2
Ending Lag: 3
Range: 3
Banjo nips up, kicking forward while he does so.
While Down (Face Up) A - Breegul Sweep
ATTACK DATA
Damage: 8%, 8%
Knockback: 2, 2
Initial Lag: 3
Ending Lag: 3
Range: 4
Kazooie spins around, getting up.
While Down (Face Up) A - Honey Punch
ATTACK DATA
Damage: 8%, 8%
Knockback: 3, 3
Initial Lag: 3
Ending Lag: 3
Range: 4
Banjo gets up and punches twice, once left, once right.
While Down (Face Down) A - Flip Up
ATTACK DATA
Damage: 9%
Knockback: 3
Initial Lag: 2
Ending Lag: 3
Range: 3
Banjo frontflips up, kicking in an arc as he does.
While Down (Face Down) A - Breegul Sweep
ATTACK DATA
Damage: 8%, 8%
Knockback: 2, 2
Initial Lag: 3
Ending Lag: 3
Range: 4
Kazooie spins around, getting up.
While Down (Face Down) A - Honey Punch
ATTACK DATA
Damage: 8%, 8%
Knockback: 3, 3
Initial Lag: 3
Ending Lag: 3
Range: 4
Banjo gets up and punches twice, once left, once right.
While Hanging A - Ledge Kick
ATTACK DATA
Damage: 11%
Knockback: 3
Initial Lag: 3
Ending Lag: 3
Range: 3
Banjo swings himself up, kicking as he does so.
While Hanging A - Peck Comeback
ATTACK DATA
Damage: 8%, 8%
Knockback: 3, 3
Initial Lag: 2
Ending Lag: 3
Range: 4
Kazooie pecks twice as she gets back up.
While Hanging A - Wing Whack Attack
ATTACK DATA
Damage: 10%
Knockback: 3
Initial Lag: 3
Ending Lag: 3
Range: 3
Banjo punches while Kazooie swings her arm.
Desperation While Hanging A - Honey Punch
ATTACK DATA
Damage: 10%
Knockback: 3
Initial Lag: 2
Ending Lag: 3
Range: 3
Banjo struggles to get back up, but punches afterwards.
Desperation While Hanging A - Breegul Slash
ATTACK DATA
Damage: 6%, 4%
Knockback: 3, 3
Initial Lag: 2
Ending Lag: 3
Range: 3
Kazooie struggles to get back up, but slashes with her wings afterwards.
Desperation While Hanging A - Bear/Bird Attack
ATTACK DATA
Damage: 12%
Knockback: 4
Initial Lag: 1
Ending Lag: 3
Range: 4
Banjo struggles to get back up, but attacks alongside Kazooie afterwards.
Throw Attacks
While Standing A+G (Z) -
Grab
ATTACK DATA
Damage: n/a
Knockback: n/a
Initial Lag: n/a
Ending Lag: n/a
Range: n/a
The character grabs the opponent.
Banjo will simply grab his opponent with his left paw. The same goes for the duo. Kazooie, however, grabs the opponent with one of her feet, while wearing her Claw Clamber Boots. Enter Grab State.
During Grab State A - Bear Whack
ATTACK DATA
Damage: 1%
Knockback: n/a
Initial Lag: n/a
Ending Lag: n/a
Range: n/a
Banjo whacks the opponent with his right paw. Maintain Grab State.
During Grab State A - Bird Kickslash
ATTACK DATA
Damage: 1%
Knockback: n/a
Initial Lag: n/a
Ending Lag: n/a
Range: n/a
Kazooie kicks the opponent with the other foot. Maintain Grab State
During Grab State A - Pack Peck
ATTACK DATA
Damage: 2%
Knockback: n/a
Initial Lag: n/a
Ending Lag: n/a
Range: n/a
Kazooie pecks at the opponent. Maintain Grab State
During Grab State > - Honey Punt
ATTACK DATA
Damage: 12%
Knockback: 3
Initial Lag: n/a
Ending Lag: 2
Range: n/a
Banjo pushes the opponent down, then punt kicks them.
During Grab State > - Breegul Throw
ATTACK DATA
Damage: 10%
Knockback: 4
Initial Lag: n/a
Ending Lag: 3
Range: n/a
Kazooie flips, while maintaining her grip on the opponent, and when she reaches the apex of her flip, she kicks and throws the opponent forward.
During Grab State > - Bear Bird Spike
ATTACK DATA
Damage: 12%
Knockback: 4
Initial Lag: n/a
Ending Lag: 3
Range: n/a
Banjo kicks the opponent upward, then Kazooie whacks them with one of her wings, similar to a volleyball spike.
During Grab State < - Bear Overhead Throw
ATTACK DATA
Damage: 12%
Knockback: 4
Initial Lag: n/a
Ending Lag: 4
Range: n/a
Banjo throws the opponent behind him.
During Grab State < - Bird Spinning Kick
ATTACK DATA
Damage: 2%, 2%, 8%
Knockback: 4
Initial Lag: n/a
Ending Lag: 3
Range: n/a
Kazooie spins the opponent behind her, lets go, then kicks her opponent 3 times in a spinning wheelkick fashion.
During Grab State < - Grenade Throw
ATTACK DATA
Damage: 14%
Knockback: 5
Initial Lag: n/a
Ending Lag: 4
Range: n/a
Banjo throws the opponent backward, then Kazooie shoots a Grenade Egg at them.
During Grab State ^ - Taxi Pack
ATTACK DATA
Damage: 12%
Knockback: 3
Initial Lag: n/a
Ending Lag: 3
Range: n/a
Banjo scoops the opponent up with his backpack and swings them upward.
During Grab State ^ - Peck Throw
ATTACK DATA
Damage: 3%, 3%, 7%
Knockback: 3
Initial Lag: n/a
Ending Lag: 3
Range: n/a
Kazooie throws the opponent up, lets them go, then pecks them 3 times.
During Grab State ^ - Bird Sword Slash
ATTACK DATA
Damage: 13%
Knockback: 4
Initial Lag: n/a
Ending Lag: 3
Range: n/a
Banjo tosses the opponent up, then grabs Kazooie by the legs and slashes her in an arc upwards, slashing the opponent.
During Grab State v - Smack Pack
ATTACK DATA
Damage: 13%
Knockback: 2
Initial Lag: n/a
Ending Lag: 3
Range: n/a
Banjo pushes the opponent down and then jumps into his backpack and slams himself onto the opponent.
During Grab State v - Talon Trot
ATTACK DATA
Damage: 3%, 3%, 3%, 3%, 3%
Knockback: 3
Initial Lag: n/a
Ending Lag: 3
Range: n/a
Kazooie throws the opponent down and runs in place on top of them.
During Grab State v - Close-range Beak Buster
ATTACK DATA
Damage: 16
Knockback: 3
Initial Lag: n/a
Ending Lag: 2
Range: n/a
Banjo throws the opponent down and then performs a Beak Buster on the opponent. See above for Beak Buster description.
Special Attacks
While Standing/While In Air v B -
Split Up
ATTACK DATA
Damage: n/a
Knockback: n/a
Initial Lag: n/a
Ending Lag: n/a
Range: n/a
This is the transition move for changing between Banjo, Kazooie, and the duo. When activated, the current configuration will disappear in a blue/gold/red cloud of sparks (and will fall slower if While in Air), while in the background the configuration will change and return in the same cloud. Tapping the button once will change the configuration to the next configuration, while 2 taps will result in changing the configuration after that one. The order is Banjo, Kazooie, then Banjo-Kazooie. Much like Zelda's WS/WIA v B or Pokemon Trainer's WS/WIA v B, the character gains immunity for the time that they are transforming.
While Standing/While In Air B - Shack Pack
ATTACK DATA
Damage: n/a
Knockback: Depends on the attack (minimum 2)
Initial Lag: 3
Ending Lag: 3
Range: 2
Banjo jumps into his backpack, and stays while you hold down B. While inside the backpack, if Banjo is above 50%, he will gain 1% damage every second. While inside the backpack, if Banjo will jump out of his backpack and cause a wave of energy to pulse out, which causes knockback for the attacking opponent equal to the knockback that Banjo would have taken. If maintained While In Air, Banjo's horizontal movement will decrease and Directional Influence is disabled.
While Standing/While In Air B - Egg Shot
ATTACK DATA
Damage: Regular Egg: 7%, Fire Eggs: 10%, Ice Eggs: 10%, Grenade Eggs: 17%, Clockwork Kazooie Eggs: 17%
Knockback: Regular Egg: 2, Fire/Ice Eggs: 3, Grenade Eggs: 4, Clockwork Kazooie Eggs: 4
Initial Lag: 3
Ending Lag: 3
Range: Regular/Fire/Ice: 5, Grenade: 4, Clockwork Kazooie: Varies (5 Maximum)
Kazooie shoots an egg forward. The order in which the eggs are shot is determined randomly before the match begins, but it remains the same during the duration of the match (for example, the order in one match might be Ice, Clockwork Kazooie, Regular, Grenade, Fire, while in another match it might be Grenade, Fire, Ice, Clockwork Kazzoie, Regular). All eggs fly directly forward, except Clockwork Kazooie Eggs. If Kazooie launches a Clockwork Kazooie Egg, it will fall almost immediately, and when it lands on the ground, a tiny mechanical version of Kazooie will walk out of the cracked egg and it walks forward indefinately until it reaches an edge, where it turns around until it hits someone with knockback equal to a Grenade Egg.
While Standing/While In Air B - Egg Shot
ATTACK DATA
Damage: Regular Egg: 7%, Fire Eggs: 10%, Ice Eggs: 10%, Grenade Eggs: 17%, Clockwork Kazooie Eggs: 17%
Knockback: Regular Egg: 2, Fire/Ice Eggs: 3, Grenade Eggs: 4, Clockwork Kazooie Eggs: 4
Initial Lag: 3
Ending Lag: 3
Range: Regular/Fire/Ice: 5, Grenade: 4, Clockwork Kazooie: Varies (5 Maximum)
Kazooie shoots an egg forward. The order in which the eggs are shot is determined randomly before the match begins, but it remains the same during the duration of the match (for example, the order in one match might be Ice, Clockwork Kazooie, Regular, Grenade, Fire, while in another match it might be Grenade, Fire, Ice, Clockwork Kazzoie, Regular). All eggs fly directly forward, except Clockwork Kazooie Eggs. If Kazooie launches a Clockwork Kazooie Egg, it will fall almost immediately, and when it lands on the ground, a tiny mechanical version of Kazooie will walk out of the cracked egg and it walks forward indefinately until it reaches an edge, where it turns around until it hits someone with knockback equal to a Grenade Egg. The only change that occurs between Kazooie's version and this version is that Kazooie can now angle her shot diagonaly-upwards or diagonaly-downwards.
While Standing/While In Air > B - Latch Pack
ATTACK DATA
Damage: 8% if hit by the straps, 14% if attack throw hits
Knockback: 2 if hit by the straps, 4 if attack throw hits
Initial Lag: 2
Ending Lag: 1
Range: 5
Banjo swings his his backpack forward. If the opponent contacts with the pack part of the backpack, they are sucked in, pulled back to Banjo, who punts them out of the pack. Teather Recover properties versus ledges.
While Standing/While In Air > B - Talon Torpedo
ATTACK DATA
Damage: 5-12%
Knockback: 2-5
Initial Lag: 4-1
Ending Lag: 2
Range: 3-5
Kazooie tightens herself up and launches herself forward, hitting with her beak. Possible to hold. Hold increases range, damage, knockback, and lag. Enter Helpless State afterwards.
While Standing/While In Air > B - Beak Bomb
ATTACK DATA
Damage: 17%
Knockback: 4
Initial Lag: 2
Ending Lag: 3
Range: 5
Banjo curls up while Kazooie screeches. When he stops, he shoots forward at high speed. If he hits the ground/wall, he'll bounce back and take decent knockback and about 5% damage. Possible to curve upward or downward slightly during movement. Movement lasts for 3 seconds if there is no impact.
While Standing/While In Air ^ B - Jump Pack
ATTACK DATA
Damage: 9% if hit by Banjo, 3% if hit by backpack
Knockback: 2 if hit by Banjo, 1 if hit by backpack
Initial Lag: 5
Ending Lag: 2
Range: 5
Banjo jumps into his backpack and jumps straight out of it with increased altitude. The backpack drops with the force of the jump. The backpack is pulled back at the apex of the jump. Enter Helpless State afterwards.
While Standing/While In Air ^ B - Shock Spring Jump
ATTACK DATA
Damage: n/a
Knockback: n/a
Initial Lag: 5-3
Ending Lag: 3
Range: 3-5
Kazooie curls up a bit, and then springs upward in a jump. Possible to hold. Holding increases jump distance and lag.
While Standing/While In Air ^ B - Flap Flip Jump
ATTACK DATA
Damage: 15%
Knockback: 4
Initial Lag: 2
Ending Lag: 3
Range: 4
Banjo backflips, jumping upwards, while Kazooie slashes the opponent. Enter Glide State afterwards.
FINAL SMASH
<Nuts & Bolts>
If the pair isn't together, they unite instantly and appear next to other. As the pair pose, they disappear in the same cloud they disappear in when they Split Up. The screen zooms out as Banjo and Kazooie reappear...driving a car-like vehicle. Well, they're flying across the screen. When they land, they drive across the stage, falling off whatever platforms they may encounter, then fall off the stage...then they appear again. On the other side of the screen. In a different vechicle. Same deal, only this one's a helicopter that moves forward constantly and can rise (activated by pressing the Jump button repeatedly). Once it moves off screen, they reappear again. Only, again, it's another vehicle. In the far background, the two reappear in a bi-plane-like vehicle, going through the stage and the foreground (much like one of Master Hand's attacks), crashing into whoever is unfortunate to be in its way. Then, with all the finality of the end of a Final Smash, the plane comes back in from the forground and has its parts explode all over the stage, and the original configuration returns to the field.
Properties:
Part 1 - The Car: This attack does regular damage and somewhat moderate knockback. Pressing A causes the vehicle to speed up (and increase damage and knocback slightly). Pressing B causes the vehicle to shoot missiles in a random direction that causes higher-than-average damage and knockback.
Part 2 - The Hind Helicopter: Same base damage/knocback. Same effects caused by button presses. Pressing the Jump button repeatedly increases height.
Part 3 - The Plane: High Damage and Knockback from the single impact. No button effects.
Part 4 - The Explosion: Every piece that explodes from the center deals 1% damage and deals moderate knockback. While it may seem harmful, imagine several little Fox's shining you flying at you. Yeah. Don't like it, huh? Deal.
<Other Information>
Taunts
Banjo
- Up Taunt - Banjo poses for the crowd and thumbs up as he says "Yuh-huh!"
- Side Taunt - Banjo jumps into his backpack and takes a quick snooze.
- Down Taunt - Banjo dumps the contents of his backpack, examines it, and scoops it up again.
Kazooie
- Up Taunt - Kazooie lays an egg and hatches it...and there's nothing. She sighs
- Side Taunt - Kazooie trots in place a lot and squaks.
- Down Taunt - Kazooie flaps up and does a backflip before landing.
Banjo-Kazooie
- Up Taunt - Banjo plays around with a Jiggy and gives it to Kazooie, who swallows it.
- Side Taunt - The pair plays their eponymous instruments before posing.
- Down Taunt - The two dance around before bowing twice.
Victory Animations
Music:
Get Jiggy! (3:08 in)
Banjo:
- Banjo dances around before bowing 2 times.
- Banjo plays the banjo a little bit before posing.
- Banjo roots through his backpack and finds a Jiggy.
Kazooie:
- Kazooie jumps and squaks happily.
- Kazooie glides through and then spins in midair then falls and poses happily.
- Kazooie stands there while squaking inquizitively as 3 Clockwork Kazooies walk around her in a circle.
Banjo-Kazooie:
- Banjo dances around before bowing 2 times while Kazooie flaps in the same manner.
- Kazooie runs in with Banjo on her back; when she reaches the middle of the animation, she drops him and keeps running, then she comes back to check on Banjo, who is dazed.
- Banjo plays around with a Jiggy before handing it off to Kazooie, who gobbles it up.
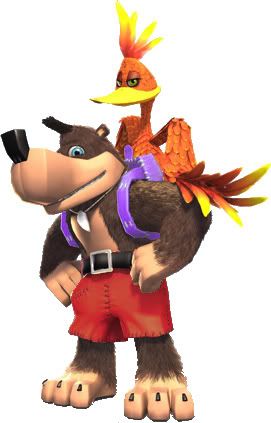
Costumes
Original Costume/Red Team Costume
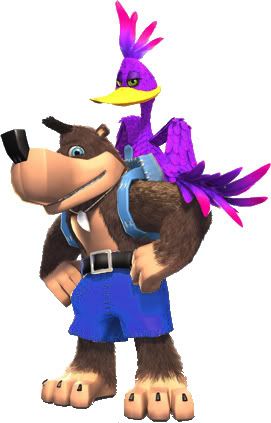
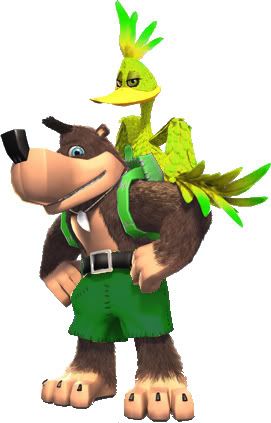
Blue Team Costume/Green Team Costume
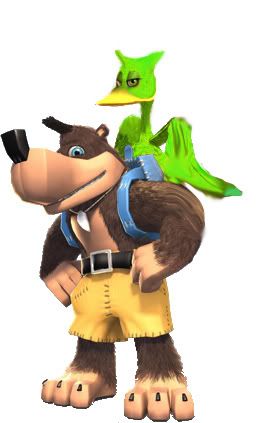
Special Costume 1/Special Costume 2 (Dragon Kazooie)
Stages
Isle o' Hags
Another one of Cena's famous transitional stages. I know, it's a bit cliche by now, but that's ok. This time, it's the home of the bear and bird, the Isle o' Hags.
This is a flying transition stage, much like Delfino Plaza in Brawl. Only this one flies around an entire island. The base platform is a flat, decrepit looking platform with no upper platforms, so it's a bit reminiscent of Final Destination or Port Town Aero Drive. When it is flying, it flies around the island at a high speed and magically fly through walls, mountains, and areas, but this has no effect on gameplay. The platform makes several stops in random order. Occasionally, the damage meters will disappear and be replaced by a text box with Gruntilda’s face, who will spout some absurd rhyme about the combatants, the battle, the game in general, or herself.
Spiral Mountain - The platform will fall through the eponymous mountain, which has 2 rising/falling platforms on either side of the mountain. No surprises here, apart from the small-ish platform that is Spiral Mountain.
Treasure Trove Cove - This place is no day-at-the-beach! *rimshot* The platform glides across the waters under the central structure before making a left and circling around the island. Because its so close to the water, don't be surprised if Snacker the shark jumps from the background through the stage and takes a bite out of players.
Freezeezy Peak - Such a fun stage! The platform lands on the snowman's scarf, just in front of the face, so that the log-smile above can be considered a platform. The ground is slippery, so watch out!
Isle o' Hags - Clifftop - The platform flies slowly on the Clifftop area. There's a 20% chance that the Chuffy's train will come crashing in as you near the train tracks.
Mayahem Temple - The platform lands on a platform in front of a tiki statue that shoots darts once in a while.
Witchyworld - The platform lands on top of the Big Top in the middle of the world. Once in a while, the flying saucer from this level will fly across the screen and shoot golden eggs every which way.
Music
Isle o' Hags
Spiral Mountain
Treasure Trove Cove
Freezeezy Peak
Click Clock Wood Medley
Jinjo Village
Mayahem Temple
Witchyworld
Spiral Mountain - Decimation
BanjoLand
Grunty’s Furnace Fun
Based off the
super special awesome final quiz show from
Banjo-Kazooie, this stage is a stone platform, Battlefield-esque in appearance, with 2 floating platforms above it that circle an invisible center point, with the background being the Grunty’s Furnace Fun Stage with Grunty hosting at her podium and the prizes (including Tootie) on a pedestal. There’s one fun feature of this stage - every once in a while, a colored square will appear on the stage. Stepping on it will activate a trivia challenge – the immediate background of the stage will turn black (though see-through), and Grunty will ask the character who landed on the square a trivia question based off their universe (in rhyme, of course); the color of the square will determine the question’s category. 4 possible answers will show up on screen represented by for colored balls - the player (and only the player) that hit the square first must break their answer's corresponding ball to answer it within 10 seconds, and will fail the question if they do not answer. Here are the categories...
Blue – General Knowledge (The game/franchise’s history, story events, etc.)
Green – Music (A small sample of music will play, then the player determines where it comes from/which stage it plays on)
Purple – Characters (A character from the character’s series will be show, and you will have to name them/say which game they debuted in/which game they weren’t in, etc.)
Yellow – Challenge (Complete a task such as jump 5 times in 7 seconds, KO an opponent, taunt 6 times, etc.)
Orange – Screenshots (A screenshot from the character’s franchise is show, and you have to guess the place)
Winning one of these challenges rewards you with a 15% life gain. Losing yields a 7% life loss.
Music
Grunty’s Furnace Fun
Bubblegloop Swamp
Mad Monster Mansion
Vs. Wizpig (Diddy Kong Racing)
Vs. Gruntilda (Banjo-Kazooie)
Banjo-Kazooie Power-Up Medley
Treasure Caves (Diddy Kong Racing)
Darkmoon Caverns (Diddy Kong Racing)
<Codec Conversations>
Banjo-Kazooie – Snake and Roy Campbell
Snake: Colonel, there’s a bear with trunks standing here. And it looks like he has a bird stuffed in his backpack.
Campbell: The bear is named Banjo, and his bird companion is Kazooie.
Snake: It’s ironic that these animals don’t have intimidating names, yet military units like FOXHOUND have animal names and are formidable opponents.
Campbell: Don’t let that fool you. Though they may not have terror-inducing names, they make up for it with techniques that rival Sniper Wolf, Vulcan Raven, and even Liquid. Their biggest advantage is their ability to Split Up and fight on their own. They’ve honed their arsenal of techniques over years of fighting the witch Gruntilda, so watch out.
Snake: I’ll be sure to. What’s in a name, anyway?
Campbell: That’s the spirit, Snake.
Banjo – Snake and Otacon
Snake: Otacon! That bear and bird Split Up!
Otacon: Yeah, and it looks like you’ll be fighting Banjo one-on-one.
Snake: Aren’t honey-bears supposed to be peaceful?
Otacon: Normaly, yes, and Banjo is moreso. He’s really laid back. He’d rather chill out and play his banjo than fight, but he packs a mean punch when he has to. He seems to favor that backpack of his, so watch out.
Snake: Fighting with your equipment holder. The battlefield is as diverse as always.
Otacon: You of all people should know that, Snake.
Kazooie – Snake and Mei Ling
Mei Ling: Snake, you must know the old adage “United we stand, divided we fall.”
Snake: Of course. On the battlefield, help is always welcome.
Mei Ling: Kazooie was a loner for most of her life. It wasn’t until Banjo saved her from a baddie one day that she started to see the value in others. Even so, she does get a thrill out of fighting alone, and takes it very seriously.
Snake: But she’ll still fight with Banjo until the end.
Mei Ling: Right. Though they may be divided, their minds and hearts are one. That’s what gives her the will to fight on.
Snake: To fight for someone else…that’s a beautiful thing.
Mei Ling: I never figured you for the sentimental type, Snake.
Snake: I wonder how a breegull would taste.
Mei Ling: *sigh* I stand corrected.
<Operation: Snake Eater Codec Conversations>
Because I love me some Metal Gear Solid 3.
Banjo-Kazooie – Big Boss and Major Zero
BB: Major, I’ve encountered some sort of bear. It’s strange, it’s wearing shorts and has a backpack with a red bird in it.
Zero: Our intelligence says that its name is Banjo. He hails from Spiral Mountain. The bird is called Kazooie.
BB: What’s a bird doing in a bear’s backpack, anyway?
Zero: They seem to be close friends. It makes sense, too, as they happen to be experts at fighting. I doubt even CQC will be able to hold them down for long.
BB: Hard to wrestle a bear with CQC, after all.
Zero: Intel also suggests that they Split Up for more tactical approaches. Be very cautious, Snake.
BB: Understood.
Banjo –Big Boss and EVA
EVA: Snake, that bear is named Banjo. He knows his way around a fight.
BB: I figured that he would.
EVA: Even so, maybe if you approach him peacefully, he’ll be less prone to smack you around with that backpack.
BB: He actually uses he backpack? Are you kidding me?
EVA: Afraid not. Years of fighting against that ugly wart Gruntilda have taught him that when the going gets tough, use whatever asset you can.
BB: That’s something you should know about, EVA.
EVA: *chuckling* I suppose I do, don’t I? It’s worked on you, I see.
BB: What’s that supposed to mean?
EVA: I’ll leave that to you.
Kazooie – Big Boss and Para-Medic
BB: Para-Medic, I’ve spotted that Kazoo bird.
PM: You must be talking about Kazooie. Kazooie is a Red-crested Breegull, a rare bird exclusive to the Isle o’Hags. They have feathers that can become razor-sharp at will, so watch out for her winged attacks.
BB: …so?
PM: What?
BB: So how do they taste?
PM: Snake! Do you ever not think about that? You can’t eat your opponent! That would be entirely unethical.
BB: But supposing I had to…
PM: *exasperated sigh* The guide says they taste like chicken, ok?
BB: That’s all the intel I need.
AND NOW I’M FINISHED. FEEL FREE TO CRITISIZE IN ANY WAY POSSIBLE, I MIGHT NEED HELP. LINKS FOR REFERENCE COMING SOON.


")