• Welcome to Smashboards, the world's largest Super Smash Brothers community! Over 250,000 Smash Bros. fans from around the world have come to discuss these great games in over 19 million posts!

    You are currently viewing our boards as a visitor. Click here to sign up right now and start on your path in the Smash community!

Make Your Move 4

Status
Not open for further replies.

MasterWarlord

Smash Champion
Joined
Aug 24, 2008
Messages
2,902
Location
Not wasting countless hours on a 10 man community
Guess this means no Angry German Kid (Or Sir Aaron for that matter) either. . .And it was coming along so nicely from the previews he gave us.

In any case, what K. Rool said was all true. He was a great guy to have around and a fine moveset maker. I'm honored to have reviewed one of his 'sets. This "death" easily hits me the hardest out of any of the MYMers we've lost so far. Khold will be dearly missed, but not forgotten. Perhaps when times are better for him he will be able to afford to come back to us.

#14
 

BKupa666

Barnacled Boss
Moderator
Joined
Aug 12, 2008
Messages
7,788
Location
Toxic Tower
Iago and Zazu


The new managers of the Enchanted Tiki Room; Iago, the wisecracking parrot sidekick to Aladdin (and previously Jafar) and Zazu, the proper hornbill majordomo of the Pride Lands, have joined the Brawl!

Iago


STATS

Power: 5/10: Iago has average power in most of his attacks.

Walking Speed: 3.5/10: Iago has below average walking speed.

Dashing Speed: 6.5/10: Above average, Iago is a decent runner.

Weight: 4/10: Below average, Iago can't stand up to much damage, but he can last longer than some other lightweights.

Range: 4/10: Iago's attacks are mainly closer ranged.

Projectile Distance: 6/10: Because he doesn't want to hold onto his projectile, Iago can throw it an above average distance.

Attack Speed: 7/10: Iago generally attacks with decent, above average speed.

Priority: 4.5/10: Barely below average, Iago doesn't have the best priority, but it is still enough to use well.

Size: 4/10: Around the size of Diddy Kong, but slightly shorter, Iago is a small target, and is still resized from his canon appearance.

First Jump: 3/10: A small, below average jump, Iago has little control horizontally, but can use this jump to get airborne quickly.

Second, Third, and Fourth Jump: 2.5/10: Iago has three jumps in the air. For each one, he gets a low distance, but good control horizontally and vertically.

Fall Speed: 3.5/10: Iago is a moderately floaty character.

Recovery: 7/10: With great jumping, but a somewhat gimpable recovery, Iago's recovery as a whole is above average.

Crouch: 4/10: Iago's crouching pose moves him lower to the ground, but doesn't give him much protection to attacks.

Traction: 5/10: Average, Iago's footing while dashing is somewhat lacking, but is bearable.

Comboability: 7/10: Overall, Iago has a great mix of combo and kill moves.

Wall Jump: No

Wall Cling: No

Crawl: Yes

Glide: Yes

Tether: Yes

ANIMATIONS

Entrance: Iago simply soars down from the sky, landing on the stage ungracefully, landing on his behind. With a squawk, he hops to his feet and puts up his fists.

Walking: Iago simply strolls forward at a quick pace, a slightly uncertain look on his face.

Running: Iago pumps his wings as he jogs forward even faster.

Dashing: Like the other winged characters, Iago flies when he dashes, flapping his wings rapidly, while staying close to the ground.

Jump #1: Iago squawks and pushes off the ground with both talons.

Jumps #2, #3, and #4: Iago flaps heavily, a few red feathers falling out. When he uses his fourth jump, he pants heavily as he flaps up.

Crouching: Iago lies backwards and reclines on a gem-encrusted palace pillow, eating a bunch of grapes. The pillow and grapes vanish if he is attacked out of this pose. Consider it another taunt, as it isn't very good for dodging attacks.

Crawling: Iago bends his back low to the ground and tiptoes forward quietly, looking around sneakily.

Gliding: Iago flaps his wings normally, losing a few red feathers in the process. This glide is fast, but lacks vertical control.

Idle Animation: Iago stands defiantly, peering around the stage uninterestedly. If left alone for too long, he folds his wings impatiently, taps his foot at the screen, and yells out, "What are you waitin' for? Get on with it!"

Forward Roll: Iago darts forward in a cowardly manner, and turns around after reaching maximum roll range.

Backward Roll: Iago gets down on his butt and crawls rapidly backwards, pushing himself along with his feet and wings, hopping to his feet after reaching maximum range.

Spot Dodge: Iago jumps into the background with both feet, flapping slightly and losing a few feathers, before hopping back.

Air Dodge: Iago pulls his limbs closer to his body and spins around comically.

Shield: Iago rests in a simple bird cage. The cage vanishes when Iago rolls, dodges, or when it is broken. When it is attacked, the cage bars bend ominously.

Tripped: Iago flips and collapses comically on his arse, his facial expression contorting in shock.

Dizzy: Iago stumbles around dizzily, losing a few red feathers in the process, moaning.

Sleeping: Iago leans backwards on the same jeweled pillow from his crouching pose and dozes off, snoring.

SPECIALS

Neutral Special: Loony Lamp: Out of nowhere, Iago takes Jafar's black genie lamp and places it on the ground at his feet. The lamp lies on the stage like a regular item. Characters can pick it up and throw it at each other for 5-6% and low knockback. Iago, however, can also use the B Button to make the lamp perform various effects, from anywhere on the stage. The lamp lasts for 15 seconds, unless it is thrown away, and after one use, Iago must wait 15 more seconds before using it again. The lamp can perform one of three attacks. It is best to see which effect will benefit Iago the most in his current situation, and use it if possible.

The first effect is not an attack, as much, as it is a distraction. Like in the regular Jafar moveset, the lamp spews out a cloud of purple smoke, obscuring the area of half of Battlefield in front of you for 10 seconds. This is triggered by tapping the B Button to release the cloud. This can be helpful for obscuring characters or yourself, to plan tricky attacks, although you can still see the basic outline of obscured characters.

The second effect is a projectile attack. By tapping B + Side B, Iago makes the lamp shoot a small stream of fire (the size of Falco's lasers), dealing 8% and low knockback. The stream travels about as far as Wolf's laser. Iago can fire one every five seconds out of the lamp. These are effective projectiles, but are not spammable. Use them to build damage on foes; this is their best use, as they aren't a good kill move. The stream is slightly slower than any laser, so foes can dodge them without much hassle, although in a FFA, using this on multiple foes will be almost sure to land you a hit.

The final effect of the lamp is triggered by pressing B + Down B. The lamp will shapeshift into a miniature Snake Staff, like the one Jafar uses. It stays there for the remainder of the lamp's fifteen seconds. If a foe is caught directly in front of it, closer than one character, they will be stunned there, hypnotized by the serpent head of the staff. Characters stay stunned longer if they have higher damage. The staff inflicts no damage, however. The staff can be picked up and thrown away, or at enemies for the same damage and knockback as the normal lamp. However, only Iago can pick it up from the front without being hypnotized. Other characters must pick it up from the air or the back. Overall, this can be the most effective if you want to build a lot of damage while the foe is stunned, but you'll have to trick them into falling into its range. A competent opponent will rarely fall victim to this.


Side Special: Cracker Craze: In the original Aladdin, Iago hated nothing more than the Sultan cramming cracker after cracker down his gullet. Here, he takes one of the crackers he so despises and hurls them at foes in a rage. Throwing one cracker takes about .5 second as Iago reaches back and hurls it with a squawk. There is a pattern to knockback as to the crackers he throws. The first cracker that hits a foe will stun them slightly in place and deal 7%. This cracker has a 33% chance of tripping the foe as well. The next cracker that hits a foe will deal 5% and below average knockback. Because of this, Iago should always aim to hit a foe with two consecutive crackers, so as to avoid being punished after throwing the first cracker. The crackers fly a distance slightly shorter than King Dedede's Waddle Dees, but they disappear if they hit the ground, rather than sliding. Overall, this is a good projectile if you don't spam it and pay the price for the slight startup and ending lag it has.

Up Special: Planted Pot Plot: A wooden sea saw appears below Iago, with the raised end under the parrot, while a palm tree in a pot rests on the lower end. Iago stops falling in midair when he uses this move, but it can have slight horizontal momentum if Iago uses it after running and jumping. Iago gets an angry look on his face, says, "Mess with this bird, huh?", and slams his butt down on the raised end. This causes the potted plant to fly up a very slight bit, dealing 14-15% and good knockback to close range foes who hit it. When the pot comes back down, it launches Iago (who is seated on the other end) into the air for a recovery. The seesaw and plant vanish after launching Iago. Iago flies up slightly less than Sonic does with his Up Special, but Iago has much better control of this move, as he can control himself much more easily while soaring, due to not spinning around. If used on the ground, the pot can be used to launch foes vertically. However, the best use is simply for recovery. Iago uses this move in Return of Jafar to launch some murderous street thieves away from Aladdin and co.

Down Special: Bye Bye Birdie: Out of nowhere, a wooden Tiki idol appears on the stage, with a platform extending from two sides of the idol. One side is behind Iago, the other is unseen on the other side of the idol. Iago hops into a bird cage, which materializes on the platform behind him. As soon as he's in, the idol starts chanting, "Uh-Oa!", and spins around to show the other side of the idol, with the other previously unseen platform. On this platform, perched on a log, is Zazu, who hops off with a proud pose, as the idol vanishes in a flash of red light. You are now playing as Zazu. This switch takes a bit longer than switching between Zelda and Shiek did in Melee. You must switch while grounded, otherwise nothing happens. You can swap to remain invincible to bosses for a brief period, although if you spam the swap more than 10 times in 25 seconds, the idol will be angered, and will deal 10% of knockbackless damage to your character. The only way to stop this is to not swap for 30 more seconds after the curse starts. This does not apply to when your bird is KOed. When this happens, you automatically switch to the other bird.

BASIC ATTACKS

Basic Combo, Hit #1: Parrot Punch: Iago leans forward slightly and swings his wing at foes, balled into a fist, yelling out, “BAM!” This has virtually no startup lag and okay priority. Although it does no knockback, it is not supposed to, as it is only the first hit of Iago’s basic combo. This deals 3% to foes.

Basic Combo, Hit #2: Parrot Peck: After punching, Iago leans back slightly and jams his large beak down to the ground, yelling out, “WHACK!” This has a small bit of startup lag, as Iago leans back before pecking. There is also slight ending lag, as Iago holds his beak to the ground for a brief period. However, the priority is pretty good for a basic hit. The knockback is slightly below average. This deals 2% to foes alone and 5% with the first hit.

Dash Attack: False Flamingo: Iago hops up onto a small pair of stilts, while donning a fake flamingo beak. He used this disguise to sneak into the Palace and steal the lamp in the original Aladdin. Here, he simply dashes forward using the stilts, chuckling sneakily to himself. Although he steps forward multiple times before hopping off the stilts (which vanish), this move only deals two hits; one light one to trap foes, then one stronger one to knock them away. Although this is a good dash attack to use trickily, its priority is rather low. The range is fairly close as well, with a hitbox on the stilts. Iago has little lag, starting and ending this move. The second hit deals decent knockback. The first hit deals 2% while the second hit deals 5%, for a total of 7%.

TILTS

Forward Tilt: Talon Dance: Just like he does in this song he sings, Iago spreads his wings and starts doing a simple line dance, kicking his feet out with a grin on his face. There are two hitboxes on this move. The first is on his wings as he first spreads them. This deals 6% and low knockback to foes. The second hitbox are on his feet as he dances. These deal 4% and better knockback than the wings with each kick. Iago dances fairly quickly, and has little startup or ending lag. The only downfalls to the move are its shorter range (although not too short) and its negligible priority. Holding the button allows Iago to keep on dancing, although the knockback from the kicking decreases slightly over time. Used correctly, this can easily build damage on foes.

Down Tilt: Pillow Bash: Iago’s crouching pose is lazing on a jeweled pillow, eating grapes. Here, he immediately hops off, while pulling the pillow out from under himself, then swings it forward angrily. The pillow has below average range, but good priority due to the hard jewels on it. This move is slightly similar to Peach’s down tilt when it comes to startup and ending lag. If you hold the crouching pose after using the move, Iago will casually hop right back on after using the move. This does average vertical knockback, and deals 6-7% to foes.

Up Tilt: Feather Tickle: Iago takes a single red feather and holds it above his head, tickling it back and forth. This does three rapid hits to foes. The first two hits trap the foe, while the last one does low knockback. This is great for building damage, especially if there is a platform above Iago, but it can't juggle that well. The range is decent, but the priority is not great, because of the flimsy feather. Iago has slight ending lag as he stows the feather, but takes it out very rapidly. This is a good combo move to build damage with, especially on larger foes who will get hit with all three hits. The hits deal 2%, 2%, and 3%, for a maximum of 7%.

SMASHES

Forward Smash: Watermelon Mash: Out of nowhere, Iago takes a standard marketplace watermelon and holds it above his head while charging. When he releases, he slams it down in front of him with a grunt, shattering the watermelon in a juicy explosion. This is Iago's main killing move, as his other Smashes have other various effects in place of knockback. There is little startup lag, and a good amount ending (about the same as Marth's F-Smash). The priority of the melon is above average, as is the knockback. The range is similar to that of Mario's F-Smash, except you can't angle the hitbox. This Smash deals 9-18% to foes.

Down Smash: Hypnotic Ruby: From behind his back, Iago takes a giant red ruby and holds it in front of him, eying it greedily. Anyone who hits the ruby takes 10% and below average knockback, no matter the charge. However, grounded foes on either side of Iago are stunned, as if by Zamus' Plasma Beam, due to the precious gem. The ruby shines red light where foes are stunned. The range is shorter than Zamus' D-Smash, but this stuns foes on either side of Iago. Iago takes the ruby out fairly quickly, but has a fair bit of lag as he puts it away. The priority is low, but foes are stunned longer the more damage they have. Foes who are stunned take a minute 5-9%. This Smash deals no knockback unless you hit the red ruby, but Iago can punish foes after they are stunned, making this a useful Smash to have.

Up Smash: Mystic Staff: Iago takes the staff of the Oracle from King of Thieves and holds it above his head, saying, "Who would want this thing?" Upon release, the oracle comes out, shrunken down to the size of Luigi, and says, "One question...one answer.", before vanishing. The oracle deals from below average to above average knockback depending on the charge. It also has decent range and priority. The catch? It merely shocks the foe, dealing no damage at all. The foe is hit as if they had a Cloaking Device in Melee; they take the knockback they have with their damage level, but receive no additional damage. Iago has a decent bit of startup lag with this move, but little ending lag. This is not a bad move, and is a decent killer for Iago, but it just doesn't deal damage, so you'll have to follow your foes up with some aerials after hitting them with this if you want to damage them.

AERIALS

Neutral Aerial: Hammerhead: Iago takes his construction hammer from the Tiki Room picture at the top of this post and holds it above his head in a comic pose before stowing it. This hits similarly to a sex kick, in one solid vertical hit. The priority is below average, as is the range, though. He takes the hammer out quickly, and has little lag stowing it. This is a good aerial to hit foes out of a combo with, and can be used to KO foes with high damage levels. This move deals 7-8% to foes.

Forward Aerial: Scimitar Slash: In his talons, Iago takes a simple scimitar, the kind Aladdin used in his battle against Jafar, and slashes it forward. He first holds the sword down, then swings it up, dealing average vertical knockback. Like Marth's moves, there is a sweetspot for knockback on the tip of the sword. The priority and range is average. This move is great for using in combos, but its killing power can be SDed from fairly easily. The sword has a tiny bit of lag starting and ending. It deals 9% to foes.

Back Air: Branch Batter: Iago takes a simple wooden branch in his wings, holds it like a baseball bat, and swings it backwards twice. He used this to try and free Genie from his prison in Return of Jafar. The first hit deals no knockback, while the second hits foes away lightly. The priority is low, but the range is average. The speed for the move to be used is about the same as Sonic's B-Air. Because of the low knockback, this cannot be used to KO well, but can be effective in Wall of Pains. The first hit deals 3%, while the second hit deals 4%, for a maximum of 7%.

Up Air: Raining Gold: Iago takes a handful of golden coins and throws them above his head comically. This move deals up to seven multiple hits, due to the many raining coins, which stay out for a second before vanishing, although they only hit as they appear. This move does below average vertical knockback on the last hit, as the other six hits just trap foes. Iago throws the coins rather quickly, and has a tiny bit of ending lag. The priority here is low, but the range is above average. Overall, this is a good move for comboing, but little else. This move can deal from 1-11% to foes.

Down Air: Crystal Crash: Iago cries out, "Look out below!" and drops a crystal ball beneath him. The crystal ball falls for the length of one Stage Builder block downwards before vanishing, shattering if it hits the ground or a character. Iago can only have one ball out at a time. He drops it fairly quickly, with a bit of starting lag, but almost none ending. Characters who hit the bottom of the ball get spiked with average power; otherwise they get below average horizontal knockback. The priority for this move is good, but the range is fairly close. This is a good way to finish combos off the edge with a spike. Iago can also fly over offstage foes with multiple jumps and drop a ball on them to spike them as they try to recover. Overall, this may be his most useful Aerial. The ball deals 8% to foes.

OTHER ATTACKS

Downed Attack: Cracker Chomp: Iago angrily faces the screen, extending his neck slightly, and chomps down hard. The attack has minor starting and ending lag. This is quite close range, but deals decent knockback for a minor attack. The priority is slightly below average. This deals 5% to foes.

Flipped Attack: Kick of Doom: Iago thrusts a leg forward as he hops to his feet. This has low range and knockback, and deals 4% to foes. The priority is fairly low, but this has very low overall lag. This is similar to when Iago kicked Jafar's jamp into lava to destroy him.

Tripped Attack: Talon Splits: From his tripped position, Iago squawks and extends both legs in a splits pose, kicking foes away on either side of him before hopping to his feet. This has low range and priority, but does decent knockback and 3-6% to foes. Iago starts this move quickly, and has a bit of ending lag as he holds the splits pose before hopping to his feet.

Glide Attack: Angry Lurch: Iago squawks angrily and leans his entire body forward, pecking and snatching with his talons at the same time. This is a close ranged attack, but deals average knockback. This is a quick move to cancel a glide with. The priority is surprisingly above average. There is low startup and ending lag with this move. It deals 6-7% to foes.

Ledge Attack: Fish Slap: Iago takes a standard marketplace fish and swings it in front of him as he jumps onto the stage. The priority is rather flimsy. This has below average range and knockback. It deals 5% to foes. Iago tosses the fish lazily over his shoulder after swinging it, where it vanishes. There is very little startup lag, but a slight bit ending as Iago tosses away the fish.

Ledge Attack (over 100%): Brow Wipe: Iago struggles onto the stage, waving his legs, then wipes his brow when he recovers with a "Phew!" This is close range and does quite low knockback and has low priority. There is a good deal of startup and ending lag, as well. It also only deals 3% to foes.

GRAB AND THROWS

Grab: Necklace Nab: Iago pulls out a golden necklace and tosses it forward, chuckling, then yanks it quickly back in. This is a tether recovery for Iago. This grab is a lot quicker than several of the other tether recovery grabs, only having the ending lag of a normal grab. However, due to the necklace being rather fragile, this grab is slightly easier to escape from than other grabs. If Iago connects with a foe, the necklace loops around their neck and he reels them in. Otherwise, he pulls it in and stows it.

Grab Attack: Scimitar Slash: Iago takes the same scimitar from his F-Air and slashes it cleanly against the victim's neck. This is a fairly quick Grab Attack, and can be used multiple times in a row rapidly. It deals 2% to the victim.

Forward Throw: Candle Crash: Just like he did when defending his treasure in King of Thieves, Iago takes a golden candle and swings it like a baseball bat, the golden plate that serves as the candle's base flying off like a frisbee and shattering on the foe. This deals the most knockback of Iago's throws, but has slight ending lag as Iago recovers from the swing, leaving the foe able to retaliate with a quick Aerial. This throw deals 7% to foes.

Back Throw: Cracker Cram: Iago yells to the foe, "Here, have lots of crackers!", as he takes a handful (wingful?) of them and crams them into the foe's protesting mouth. This deals a rather damaging 10% to the victim, but it only trips them in place. This can be good or bad; a quick victim can hit Iago with a quick Tripped Attack, but a quick Iago can combo the victim out of the trip.

Down Throw: Questioning Squawk: Iago grabs the foe by the face, pulls the foe close to his own face, and squawks out, "Ya got a problem with that?!" before tossing them away. This knocks the victim lightly horizontally, dealing rather low knockback, but enough to keep Iago safe from retaliation. This throw deals 5% to foes.

Up Throw: Talon Drop: Iago squawks, grabs the victim in his talons and lifts them up a bit, then drops them to the ground. This is essentially a weaker version of the Up Throws of R.O.B., Kirby, and Meta Knight. Iago is also vulnerable for a split second prior to the attack, so this is not the best of his throws by any means. It deals 6% to foes.

FINAL SMASH


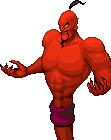
The Revenge of Jafar: Iago takes out Jafar's black genie lamp, rubbing it greedily. Genie Jafar emerges with an evil echoing, "At last...I am all-powerful!", while Iago taunts his foes by saying, "Ladies and gentlemen...a warm Agrabah welcome for Genie Jafar!", before flying out of sight. You are now in control of Jafar in his monstrous red form. He has several powerful attacks at his disposal. He is about the size of Giga Bowser, yet slightly thinner and slightly taller. One catch to this Final Smash is the fact that Genie Jafar's lamp can be attacked. The lamp has 50 HP. If the HP is drained, Genie Jafar is pulled back into the lamp, screaming, "NOOOOOO!", pulling Iago out of the sky, where he lands alongside the lamp and kicks it away angrily, you playing as him again. Be sure to defend your lamp!

By pressing the B Button alone, Genie Jafar raises his arms to the sky, causing a single pirate ship, loaded with treasure, to fall from the middle of the screen, landing on the stage with a crash before vanishing in a spark of gold. The ship is approximately the size of three-fifths of Final Destination, and the height of two Ganondorfs. Any foe who is crushed by the falling ship takes 25% and heavy knockback. Genie Jafar can only use this attack three times while he is out.

By pressing the A Button, an angleable beam of hypnotizing yellow light is fired from Genie Jafar's eyes, going all the way to the ground. Foes who hit the beam of light take 10% and are stunned in place for 2 seconds, leaving them open to other attacks. This attack is quite spammable, so use it often to leave foes open to some more powerful attacks.

By pressing Down and B, two serpents erupt out of Jafar's lamp, and proceed to follow foes around with the same AI of normal Jafar's Orphidians. However, these snakes are buffed to having 30 HP. These snakes attack by striking foes for 15% and good knockback, or by coiling around them and squeezing for continuous damage, about 3-4% per second, until the foe escapes by button mashing. These snakes last 10 seconds. Only two snakes can be out at once.

Finally, by pressing the B Button and smashing the Control Stick down (like a Smash Attack), Jafar slams his massive fists to the ground, causing an earthquake to occur on either side of him. This is Jafar's most damaging attack by far, dealing 20% and high knockback to foes who hit his fists, and 12-18% to the foes who hit the earthquake. The ground affected rises about three-fourths of Ganondorf's height up, and travels about half of Final Destination at the speed of Meta Knight's dashing speed. Foes unfortunate enough to get hit by this take high vertical knockback, so be sure to use this as your finisher after damaging foes with other attacks.

Genie Jafar stays out for twenty seconds, Iago flies back in, with a bored expression on his face. He lands alongside the lamp and rubs it, saying obnoxiously, "Ya know what? You're nothing without me!" Genie Jafar is pulled back in, yelling out, "TREACHEROUS PARROT!" Iago carelessly tosses the lamp away, saying, "Jerk!" to himself, and you commence controlling him again.


TAUNTS AND VICTORY / LOSS POSES

Up Taunt: Iago takes a watermelon and holds it in one wing threateningly, and yells out, "I got more where that came from!"

Side Taunt: Iago pimps himself out in stolen marketplace bling, wearing a miniature version of the Sultan's feathered hat, as well as a golden necklace and several multicolored jeweled rings. He then turns to face the screen, grinning a wide grin and posing.

Down Taunt: Iago sits, floating in the air, and waves in front of him, calling out tauntingly, "Good-bye! See ya!"

Air Taunt: This taunt is performed by using any taunt input while airborne. Iago leans forward, his beak enlarging slightly, and yells out, "Hey you! SHUT UUUUUUUUP!!" Truly hilarious to use after KOing a foe.

Victory Pose #1: Iago is seen fluttering over a brick well, holding Jafar's black genie lamp in his talons. He drops the lamp into the well, abandoning it along with his previous troubles, then sings out, "From here on in, I'm looking out for me." He then flies offscreen.

Victory Pose #2: Iago sits, grinning in a mountain of gold and jewels, casually saying to himself, "Live a life of leisure, counting all your treasure!"

Victory Pose #3: Iago sits on the jeweled pillow from his crouching pose, eating various fruits from a jeweled bowl, and saying in a relaxed voice, "Being one of the good guys has its advantages."

Victory Theme: A clip from the main Aladdin theme, Arabian Nights.

Loss Pose: Iago claps angrily, losing several red and blue feathers in the process, and commenting to himself, "Look at this! I'm so ticked off, I'm molting!"

OTHER

Icon: The main Aladdin icon, the lamp of the Genie.


Wiimote Sound: Iago yells out, "Look at all these presents!"

Kirby Hat: Kirby gets Iago's big beak and some red feathers on his head. Kirby can send out Jafar's Lamp like Iago does with his Neutral Special.

Colors:

Standard
Blue
Green
Purple
Yellow
Black

CODEC CONVERSATION

Snake: Otacon! There's a loud-mouthed red parrot on the battlefield!

Otacon: You must be fighting Iago.

Snake: Is this some kind of joke?

Otacon: He may not look like much, but he loves trickery and treachery. He uses these traits to take on many different situations.

Snake: He's not the only one with trickery. Good birdie...polly want a little...

Iago: Say cracker and I LET YOU HAVE IT ON PRINCIPLE!

Otacon: *sigh*

ASSIST TROPHY


Cassim: Aladdin's long-lost father, and ex-King of the Forty Thieves. At the end of King of Thieves, Iago decides to run off with Cassim (who is wanted dead or alive), due to not wanting to stay for the mushy stuff after Aladdin's wedding.

Here, Cassim appears on top of his dark horse. He then proceeds to ride around the stage, trampling foes in his path for about 15% each hit. After 10 seconds of this, he will jump off the horse (which vanishes), and pull out the mythical Hand of Midas, carefully holding it by the handle, not the hand itself, which turns anything it touches to gold. He then throws it forward at whatever is in front of him. The Hand flies like a standard item, vanishing when it hits the ground. If any foes hit it, however, they turn into a golden statue. Foes who are statues need to take 30% before they can be broken out, although they can button mash to lessen this time slightly. Foes take no knockback from the Hand, but it is an easy way to build damage, and if it hits a foe who is offstage, it is all but certain death for them. Cassim appears rarely as an Assist Trophy.


STAGE


Palace of Agrabah: This is the palace of the Sultan and the Princess in all three Aladdin movies. Here, you fight on a balcony of the vast palace, looking out upon the vast town of Agrabah below. The balcony is about the size of the Melee Final Destination (which is larger than the Brawl reincarnation), but with slightly raised edges, where the railing is. This means that characters can slide up the edge without fear of getting caught under a ledge. However, this stage is not without a few hazards in the hectic palace.


Occasionally, a generic thief will run across the stage, carrying an armful of treasure, which drops in small quantities. This increases the likelihood of tripping in that area for five seconds, before the treasure vanishes. A few seconds later, several Palace Guards, led by the Captain, run across the stage after the thief, yelling, "STOP, THIEF!" The guards attack as they pass by at your intruding characters with several sword slashes, dealing about 10-15% each. However, they run rather quickly away, and can be attacked to make them flinch and not attack as they pass, like King Bulbin on Bridge of Eldin.


Also, occasionally, Rajah, the pet tiger of the Princess, will curiously investigate the characters, by grabbing a single character with a pounce and sniffing/licking them. While this deals no damage, the grabbed character is vulnerable to attacks for several seconds until Rajah releases him/her, or they button mash away. Take advantage of grabbed foes during this time period. Rajah cannot be attacked, and stays out for several seconds before prowling away.


MUSIC

Arabian Nights
One Jump Ahead
Friend Like Me
Prince Ali
A Whole New World

PLAY-STYLE

The first thing a player may notice while picking up Iago is a fairly average balance of power and speed. Most of Iago's attacks are centered around trickery through comedic props. Iago likes 'tricky', and has mastered the art of deception. By using all aspects of his moves, he can be a feathered mastermind in the hands of skilled players.

It's best to keep out Jafar's lamp with his Neutral Special at all times possible. The ability to stun and zap foes, as well as obscure Iago's movements, can really benefit him in different situations. Using crackers to build damage and keep foes at bay is also helpful in many situations. Iago can use his Up Special for recovery if necessary, but it can be gimped fairly easily, and Iago can usually recover without it. Very rarely, if ever, should it be used to attack foes.

Iago's basic attacks and tilts are excellent for damage building, but lack KO potential. Use them frequently to combo and manipulate your opponent. Because of their low KO potential, Iago must rely mainly on Smashes to KO foes. However, his F-Smash is the only main damage dealer. His F-Smash and U-Smash do decent knockback, while his D-Smash stuns foes, but U-Smash deals no damage, while D-Smash deals damage, but only stuns foes. Iago must combo foes out of most Smashes to KO them, unless they have high damage. Iago's aerials can be helpful here. They are also helpful for dealing damage. Grabbing is another fair option to mess around with foes, but be sure to plan your throws and attacks carefully, as foes can escape from Iago's necklace with relative ease. Overall, Iago is a great character in the hands of a smart player, but without a brain behind the bird, players may be at a slight loss when playing Iago.


Zazu


STATS

Power: 3.5/10: One of the weaker characters in the game, Zazu doesn't have much killing power at all in a good deal of his attacks.

Walking Speed: 5/10: Zazu has an average pace when walking.

Dashing Speed: 8.5/10: Zazu is definitely a speedy character, with a great dashing speed.

Weight: 2.5/10: Zazu is down there with Jigglypuff and Mr. Game & Watch in terms of weight. In other words, he's light as a feather.

Range: 4/10: Although his hitboxes are extended slightly from his small frame, Zazu still hits mainly at close range.

Projectile Distance: 8/10: Zazu has little initial distance on his projectile, but the projectile itself will 'wander' around if not attacked, so it can cover great distances.

Attack Speed: 9/10: Zazu is one of the faster characters in the game to make up for his low weight and power.

Priority: 3.5/10: Although his priority is rather low, Zazu can keep up a barrage of attacks to cut through those of opponents.

Size: 2.5/10: One of the smaller characters in the game, Zazu is a rather small target to hit, being around the size of Squirtle, and still resized from his canon appearance.

First Jump: 2.5/10: Zazu's first jump boosts him a small distance off the ground very quickly.

Second, Third, Fourth, and Fifth Jump: 2/10: Zazu can jump multiple times in a very regal and controlled manner, having less distance, but one jump more overall than Iago, a less majestic bird.

Fall Speed: 1.5/10: Zazu is an extremely floaty character, enough so that players may experience the feeling of lower gravity when playing Zazu.

Recovery: 8.5/10: Although Zazu has somewhat penetrable defense when airborne, he has four aerial jumps, an excellent glide, and a decent recovery move, making it difficult to block him from the stage. Although being a light character gives him all the more reason to need this recovery.

Crouch: 8/10: Zazu bends forward to the ground, spreading his wings slightly. This brings him very low to the ground.

Traction: 7/10: Although he is very stable when dashing, his nervousness can trip him up sometimes.

Comboability: 8.5/10: Zazu can easily follow opponents around and spray them with a flurry of attacks.

Wall Jump: No

Wall Cling: No

Crawl: Yes

Glide: Yes

Tether: No

ANIMATIONS

Entrance: Rather than crashing in like Iago, Zazu peacefully and gracefully soars in, looping around in an airborne circle before landing with a flutter.

Walking: Zazu struts forward proudly, going at an average speed.

Running: Zazu spreads his wings and begins gliding forward quickly.

Dashing: Zazu strains slightly as he glides faster.

Jump #1: Zazu flaps his wings lightly to gain a small, rapid boost into the air.

Jumps #2, #3, #4, and #5: Zazu flutters in place again, but with a royal style, gaining a bit more aerial distance.

Crouching: Zazu spreads his wings slightly and bends forward, getting low to the ground.

Crawling: Zazu crawls forward nervously on his hands and knees (or wings and talons).

Gliding: Zazu spreads his wings majestically and glides forward, rather than flapping casually like Iago.

Idle Animation: Zazu looks around the stage in a bored manner. If left alone too long, Zazu will occasionally flap his wings and pose proudly in place.

Forward Roll: Zazu darts forward, turning around nervously after reaching maximum range.

Backward Roll: Zazu gets an irritated look on his face and jumps backwards, flapping his wings for distance.

Spot Dodge: Zazu jumps into the background, fearfully, on one foot, then hops back.

Air Dodge: Zazu performs a royal flip, curling into a cannonball as he does so, then uncurls after dodging.

Shield: Zazu hides under an empty turtle shell, presumably one that belongs to Rafiki. The shell cracks as it takes damage, and vanishes when broken or dropped.

Tripped: Zazu falls on his behind, with a humiliated look on his face, losing a few feathers.

Dizzy: Zazu stumbles about, a disoriented look in his eyes.

Sleeping: Zazu perches on a log (with a smaller branch extending from the top, serving as a perch) and dozes off. He snores softly and makes a snot bubble as he does so.

SPECIALS

Neutral Special: Circle of Life: Zazu summons one of the animal subjects of the Pride Lands to attack, by pointing at his foes and saying a pun or fact about the animal summoned. The animals serve as his projectile attack. There are three animals that can appear here, the animal appearing chosen randomly. Each has a different amount of stamina that foes can lower knock them back, and to make them vanish if they lower it entirely. If their stamina is not reduced, the animals stay out for 10 seconds each. Zazu must wait 5 seconds in between each animal. Only one animal can be out at a time. The animals are like weaker Assist Trophies, damaging foes, but not Zazu. Learning to include the animals in combos can take some time, but can really assist Zazu in the long run. Animals can run offstage occasionally with less than competent AI, but on most stages, this is not a problem, as the animals will not approach the edge unless they are summoned near one.

Antelope: Zazu proclaims that, "The herd is on the move!", as a single brown antelope with a black and white stripe prances forward. It is slightly shorter than Diddy, but a bit longer. The antelope simply bounds around the stage, knocking foes away with its sharp antlers. The antelope deals average knockback to foes, with average priority, and has 25 HP. Antelopes are the most common animal to appear, and are the most likely to bound off the stage. They are also easier to attack than the other two animals. However, they are still useful to Zazu as a whole. Their antlers deal 9-13% to foes.

Monkey: Zazu says, "The chimps are going ape!", as a small chimp (about the size of Jigglypuff) appears in front of him, sitting in place, and begins tossing stones at foes in a circular arc, screeching all the while. The rocks go at a rather rapid pace, and the arc extends about one and a half Stage Builder blocks forward. The monkey has only 15 HP, but is hard to approach without projectiles, due to the rocks (which have decent priority). Because it is sitting in place, the chimp can't possibly fall off the stage unless it is knocked off. This is a good animal to summon, as it serves as a projectile for Zazu. However, some foes can easily take it out with one attack, so do your part to defend the chimp. Each stone deals 2-3%, and traps the foe in the stream of stones, although the foe can DI out. Chimps appear the most rarely of the three animals.

Cheetah: Zazu declares, "Cheetahs (cheaters) never prosper!", as a cheetah (the size of Ivysaur) begins dashing around the stage at the speed of Fox's dashing speed, stalking foes, pouncing on them occasionally for below average knockback. The cheetah will rarely run offstage, even if is released near an edge. Cheetahs have a decent 30 HP, but don't attack nearly as frequently as the above two animals, although if attacked, will begin attacking more regularly. The pouncing deals 11-12% to foes. Cheetahs appear less commonly than antelopes, but more frequently than chimps.

Side Special: Morning Report: Zazu begins giving the Morning Report to foes, dancing, marching around in place, saluting, spreading his wings, chuckling, and singing so his adam's apple vibrates slightly. Holding down the move's input allows for Zazu to hold out the report for as long as necessary. The dance moves themselves deal slight damage and low knockback to foes, about 2-5% each. This protects Zazu from attackers for the most part, but is not the main part of the move. If foes approach Zazu, they fall asleep from boredom. To make this more useful than Jigglypuff's Sleep, the range is increased to that of Donkey Kong's Hand Slap, though it is not as noticeably shown. The range is shown by small music notes around Zazu as he dances. Zazu has more of a potency to put foes to sleep the longer he has been dancing. He has a slight bit of ending lag after dancing, but he can still stop dancing and attack the sleeping foes with more frequency than Jigglypuff. However, just because his dancing deals damage, foes can easily approach from the air and cut through the low priority dance attacks. Overall, this is a good move if used without spamming, and cautiously.

Up Special: Leaf Glider: Zazu takes a large tree leaf and holds it above his head like a parachute, as several winds, swirling with small flowers, leaves, and particles, blow the leaf and Zazu upwards. This acts slightly similarly to Snake's Cypher. However, there are many notable differences. First of all, Zazu goes up only about half as high as Snake does, but as Zazu's jumping and gliding allows for an excellent recovery anyways, this is not a downfall. Second, because Zazu is so much lighter than Snake, the leaf doesn't sink downwards as he first brings it out, making it safe to use near the abyssal blast line. Finally, the leaf can actually deal slight damage as it rises, dealing a light 4-6%, but no knockback. Zazu lands with very little lag, making this punishable only by gimping foes. The leaf naturally has low priority, though. Like Snake, Zazu can cancel the rise by pressing the shield or attack buttons. If he has any leftover jumps after using the move, he can still use these. However, only one leaf can be used per recovery. These leaves were used by Rafiki in Lion King 2 to travel around and tell Simba's daughter about the meaning of love.

As an easter egg, if you pause the game at exactly the right frame, at the right angle, you may just see some alleged subliminal messaging in the swirling winds that blow the parachute upwards...


Down Special: Bye Bye Birdie: Out of nowhere, a wooden Tiki idol appears on the stage, with a platform extending from two sides of the idol. One side is behind Zazu, the other is unseen on the other side of the idol. Zazu hops onto a log, which materializes on the platform behind him. As soon as he's in, the idol starts chanting, "Uh-Oa!", and spins around to show the other side of the idol, with the other previously unseen platform. On this platform, resting in a cage, is Iago, who jumps out with a squawk, as the idol vanishes in a flash of red light. You are now playing as Iago. This switch takes a bit longer than switching between Zelda and Shiek did in Melee. You must switch while grounded, otherwise nothing happens. You can swap to remain invincible to bosses for a brief period, although if you spam the swap more than 10 times in 25 seconds, the idol will be angered, and will deal 10% of knockbackless damage to your character. The only way to stop this is to not swap for 30 more seconds after the curse starts. This does not apply to when your bird is KOed. When this happens, you automatically switch to the other bird.

BASIC ATTACKS

Basic Combo, Hit #1: Wing Slap: Zazu spreads the feathers out on his left wing and swings it forward briskly to slap the foe. This deals no knockback, being a simple combo starter, and is fairly close range. There is virtually no startup or ending lag to this move. It deals 2% to foes.

Basic Combo, Hit #2: Double Slap: Spreading out the feathers on his right wing as he pulls back his left wing from the above hit, Zazu slaps with his right wing this time. This slap is slightly harder than the first, dealing very low knockback, and having a very minute bit more range than the first hit. This move has virtually no startup lag, but a tiny bit ending if it is not continued. This hit deals 2% to foes alone and 4% with the above hit.

Basic Combo, Hit #3 -: Royal Laughter: After his wing slaps, Zazu sits down lightly on his back and begins laughing royally to himself, kicking both feet in and out in front of him rapidly. By holding down the A Button, you can continue the kicking indefinitely. This is a close range combo, similarly to Kirby's Basic Combo. Zazu can score multiple hits if he gets a foe against a wall with this, although it is obviously not an infinite. Zazu has little ending lag when releasing the combo. However, all three of the hits have low priority. Each of the rapid kicks deals 1% to foes, but builds up damage rapidly if held.

Dash Attack: Paintbrush Plow: Zazu takes his paintbrush from the Tiki Room picture at the top of this post, and, as he is soaring forward dashing, breaks suddenly by digging his feet into the ground while holding the paintbrush in front of him. This has little startup lag, but the ending lag of Mario's Dash Attack, as Zazu stows the paintbrush and rights himself. This has below average range, and deals below average knockback. One out of three times, there will be a slight bit of pink paint on the brush, and if a foe is hit while there is paint out, they will slow down and trip more often for 5 seconds. This move deals 6-8% to foes.

TILTS

Forward Tilt: Parental Point: Zazu extends his wing, a smug grin on his face, then points forward once, extending a single wing feather out into the foe, like he did to young Simba. This has a small hitbox and low priority, but has almost no lag starting or ending, making it an effective jabbing attack. The range extends a very slight bit forward from the feather, but the most knockback is given from foes who are closer to Zazu as he points. The knockback dealt is below average. This move deals 5% to foes.

Down Tilt: Sweep of Respect: From his crouching position, Zazu bends up slightly, then sweeps his wings out as he bows low to the ground, like he does when showing respect to the kings of the Pride Lands. Unlike his other Tilts, this move has slight startup lag as Zazu prepares to bow. There is also slight ending lag as he straightens up. However, the knockback is slightly better than Zazu's other Tilts, being just barely below average. The priority is average here as well. Zazu's spread wings increase the range to about average range as well. This move deals 6-7% to foes.

Up Tilt: Walnut Launch: Zazu briefly tucks his beak under his wing, then spits a single small brown walnut into the air a small distance above him. The walnut is a disjointed hitbox with below average priority. Zazu must stay in place until the walnut falls behind him, giving him a bit of ending lag; the hitbox ends as the walnut falls. This is effective for juggling foes, seeing as the knockback is below average and the walnut flies up quickly. The range is fairly decent though, as the walnut is launched about the distance of Kirby into the air above Zazu. There is slight startup lag as Zazu takes out the walnut, but unless you whiff entirely, this is not dangerously punishable. The walnut deals 6% to foes. This Tilt is a nod to the walnut attacks of the Necky enemies in Donkey Kong Country.

SMASHES

Forward Smash: Majordomo Dart: Zazu pulls his head back as he charges, then swoops forward like a dart, stabbing foes in his path with his large beak. This Smash is unique in the way that it actually moves Zazu forward across the stage, like Pikachu or Luigi's Side Specials. Zazu has little startup lag as he soars, but a fair bit when landing, although still less than Luigi or Pikachu. This Smash does one solid hit to foes, dealing average knockback as Zazu's main killing move. The range of the soar depends on the charge. The range can change from almost nowhere, to about one third of Final Destination at maximum charge. The priority is decent here, making this a fairly safe move to attack with. It also serves as a quick way to get offstage to edgeguard a foe. Zazu is slightly vulnerable if he whiffs the Smash, however. This Smash can deal 9-18% to foes.

Down Smash: Tunneling Rodent: While charging, Zazu looks at the ground uncertainly. When he releases, a small brown gopher pops out of the ground in front of him, calling out, "Zazu!", who jumps in shock slightly. The gopher then rapidly tunnels around to Zazu's other side, where the rodent salutes and says, "News from the underground!" before popping back down. When the gopher first pops up, foes who are hit take below average knockback. If they are close enough to Zazu as the gopher first appears, however, they get buried in a Pitfall effect, staying buried for longer if they have more damage. The second pop of the gopher deals below average vertical knockback. Zazu lags very little starting up, and a fairly small bit ending. The gopher can be attacked to make it pop back underground like a Whack-a-Mole, ending the Smash early, leaving Zazu vulnerable to a counterattack. However, it is speedy enough to deal quick damage (not a great KO move) without fear of punishment. This has about the range of Diddy's D-Smash. Burying the foe with the first hit is a sure way to hit them with the second pop. This has the potential to deal the easiest damage of Zazu's Smashes, but not the best knockback by any means. It can deal 6-17% to foes.

Up Smash: Coconut Craze: Zazu takes a lovely bunch of coconuts, three to be precise, and juggles them above his head. This Smash deals three hits to foes. The first two hits trap foes, while the last hit deals average vertical knockback. The priority is fairly low, but the range is slightly higher than Olimar's U-Smash, so it can be used to catch foes above Zazu. Zazu juggles the coconuts fairly quickly due to his nervousness, having barely any startup lag, but a fair bit at the end as he stows the coconuts with a brief showman's bow. This Smash can deal 4-20% if a foe is caught in all three hits.

Depending on how many times Zazu uses this Smash, he sings a different clip from the song as he juggles the coconuts, the cycle starting over again after the fifth use of the Smash. If you are just playing around in Training Mode, it is amusing to spam the Smash to hear the different lyrics that Zazu can sing.


1st Time: I've got a lovely bunch of coconuts...
2nd Time: De de de de, there they are...
3rd Time: All standing in a row!
4th Time: Big ones, small ones...
5th Time: Some as big as your head!

AERIALS

Neutral Air: Goard Bash: Zazu takes a colorful red goard in his talons, similar to the ones owned by Rafiki, and spins around in a circle, extending the goard out to the side slightly to hit foes. The spin takes about half as long as R.O.B.'s N-Air, and is about half as powerful as well. However, the goard has surprising range, being barely below average. The priority of the goard is average, so it can be used from a shorthop to negate several Tilts, due to Zazu's floatiness. This can be used to start or end aerial battles rather well, so use it to your advantage. It deals 6-7% to foes.

Forward Air: Swift Surveillance: Zazu gets a concentrated look on his face, whips a wing to his forehead to see a further distance, then swiftly peers left to right and back to observe his surroundings. This is a quick, two-hit Aerial; the first hit occurring as Zazu brings his wing to his face and stunning the foe, while the second hit occurs as he peers around, dealing below average knockback. The priority is below average, and the range is fairly close. An opponent can hit Zazu rather easily if he misses landing this move, so only really use it if you know you can land both hits. The speed is relatively fast, so Zazu has little startup or ending lag, unless he lands on the stage before the move is finished. This makes him collapse flat for a brief period before righting himself. This move deals 4-8% damage to foes.

Back Air: Tail Twitch: Zazu turns his head backwards, thrusting backwards with his body to twitch his long blue tail feathers at foes. This move has low priority and knockback. The range is better than Zazu's other Aerials, however; actually having average range. This is a fairly speedy attack, too. However, because of the low knockback and priority (they're just feathers), the main use of this is quick backwards Wall of Pains to stun the foe and repeatedly build damage, slowly pushing them off the edge, where an Aerial with more knockback can be used. This move deals 5-6% to foes.

Up Air: Hornbill Squawk: Zazu rears his head upwards and lets out a loud distressed squawk, sending out a small, short-ranged shockwave above him. The priority of the shockwave is about that of Olimar's U-Air. The knockback is probably the best of Zazu's aerials, being barely below average. The ending lag as Zazu lowers his head is fairly low as well, so this is a great move for juggling a foe, then KOing them off the top when they get enough damage. This Aerial deals 7% to foes.

Down Air: Triple Beaker: Zazu gets an irritated look on his face as he bends his neck downwards, extending his beak slightly, and rapidly pecks down three times rapidly. The first two pecks trap foes and deal no knockback, while the last peck is done with a good deal more force, spiking the foe with average power if they are in midair. The priority is below average, but this move can actually diminish shields rather quickly. This is slightly faster than Snake or Lucas' D-Air, but spikes with less power. Used skillully, this can be used after knocking the foe a good deal offstage to make sure they don't recover. This move deals 3% with each of the first two hits, and 4% with the last hit, for a total of 10%. Zazu pecks young Simba like this to free himself after being grabbed in a pouncing lesson.

OTHER ATTACKS

Downed Attack: Brazen Brush: Zazu hops to his feet huffily and brushes himself off with both wings. There are two hits during this move; the first is as Zazu hops up, dealing low knockback. This has low priority and range as well. The second hit occurs as Zazu brushes himself off, dealing lower knockback, and sharing the low priority and range from the first hit. Unless you're trying to clear the area directly around Zazu, you should consider rolling instead. One plus to this move is the rapid speed and lack of lag. Both hits deal 3%, for a maximum of 6%.

Flipped Attack: Wingspan Spin: Zazu spreads out his wings like feathery blades and spins around rapidly on one foot to throw off nearby attackers. This has slightly less speed than Zazu's downed attack (although it is still speedy), but improves on knockback, range, and priority, these traits all being below average, still, though. This has a tiny vacuum effect, but this is not that noticeable or useful. This move deals 4-5% to foes.

Tripped Attack: Dizzy Dodo: Zazu gets a comical wide-eyed expression, as he stumbles around his place, spinning his neck around in a circle, dragging along his body behind him, until he does a 360, upon which he rights himself. This is a fast tripped attack, but has low knockback and priority. The range is better than the above two attacks, though. The hitbox here is on Zazu's head, which he is swinging around. This move can deal 4-6% to foes.

Glide Attack: Cuckoo Clap: In the middle of his majestic flight, Zazu swiftly brings both wings forward, clapping in front of him to halt his aerial momentum. This deals below average knockback, but has decent priority and range that is just barely below average to make up for it. While this doesn't sound like much, this is still quite handy for a glide attack. The speed of the clap is virtually lagless starting up, but has a tiny bit of ending lag. This move deals 5% to foes.

Ledge Attack: Regal Restriction: Zazu pulls himself up, swinging one wing forward in a scolding motion, and yells out, "No more, I say!" This has fair priority, range, and knockback (although it is just a ledge attack, so nothing much). The speed is rather average, as well. This is fairly hard to punish without using an Aerial, which Zazu can knock you out of with a flurry of his own Aerials, so a foe must time a retaliation attack well to beat this. This deals 6% to foes.

Ledge Attack (over 100%): Pleading Push: Zazu gets a pleading look on his face as he struggles onto the stage, and sticks both wings gently in front of him, weakly trying to push away any foes that are nearby. This has very low priority and below average range. Instead of doing knockback, this move trips foes. Although Zazu can usually follow up tripped foes with an Aerial, Zazu lags a bit after this move as he steadies himself, leaving himself open to a tripped attack. Simply jumping onto the stage is a better, less punishable option for Zazu when he has over 100%. This move deals a puny 3%.

GRAB AND THROWS

Grab: Lavish Landing: Zazu has a fairly unique grab. He can grab normally on the ground, by hopping forward slightly, then hopping back if he misses. This is a quick grab, but is not really spammable. If he connects, Zazu lands on the foe's shoulder, holding them in place temporarily to attack. In the air, however, Zazu can use the grab input to rapidly hop forward in midair, not hopping back if whiffing, about half the distance of Diddy's Monkey Flip. If he hits a foe in midair, however, they receive 3% and a Footstool Jump effect. This is useful for finishing foes that have poor recovery, or are far offstage. Zazu can't grab foes as long as other heavier characters, due to his light weight, but his Throws are generally fast to make up for this.

Grab Attack: Talon Pinch: Zazu gets an irritated look on his face and pinches the foe with his talons as he is standing on their shoulder (or head for characters like Kirby or Jigglypuff). This only deals 1%, but can be done extremely rapidly to build damage on foes.

Forward Throw: Long-Winded Lecture: Zazu hops off the victim's shoulder and begins giving a random generic lecture to the foe, including the history of the Pride Land's majordomos, or the reproductive habits of lizards. Foes take no knockback, but are stunned in place as if in a shield-break stun. They stay this way for longer if they have higher damage levels. Zazu lags slightly after this throw, but if the foe lags for longer due to having more damage, Zazu can get in an extra hit to knock them away. This throw deals 2% to foes in addition to the stun.

Back Throw: Throw-Rug: Zazu hops off the foe's shoulder, turns backwards, and in an uncharacteristic burst of strength, lifts the foe off their feet, waves them up and down in front of him like a rug, then drops them. Foes bounce off the ground before taking below average knockback. Foes can Floor Tech out of this to punish Zazu, who has slight ending lag, but the timing is difficult to master. This throw deals 7% to foes, which is the most of Zazu's throws. Zazu fantazised about beating Scar like this when alone with Mufasa.

Down Throw: Hair Pluck: Zazu jumps up onto the foe's head (unless he is already on there on characters with no shoulders), gets a skeptical look on his face, and plucks a single hair from their head, even if the character has no hair. He does this to taunt young Simba's lack of a bushy mane. This deals 5% and low horizontal knockback to foes. Zazu can follow up with another grab because of the virtually nonexistant ending lag, although it is not a chaingrab by any means; just a way to build damage.

Up Throw: Majordomo Salute: Zazu hops off the foe's shoulder and gives a swift royal salute, knocking the foe upwards with below average power. A foe with a quick D-Air can punish Zazu, as he holds the pose for a brief period. The knockback almost doubles if Zazu has over 75%, however, so it is not that punishable if you are patient about using it. This grab can deal 4-6% to foes.

FINAL SMASH

Birdie Boiler: While Iago gets a new controllable entity as his Final Smash, Zazu gets a cool cinematic cutscene. Zazu must land a hit on foes to activate the cutscene and the attack. In a panic, he darts forward, about the distance of Diddy's Monkey Flip. Foes hit by this take 10% and are knocked offstage to the main attack. If Zazu misses, he lags for a second on the ground before getting to his feet, having lost the Final Smash.

Foes hit by the initial attack are subject to the following cutscene. A dark Elephant Graveyard cave is shown. The foe(s) who got hit are falling down a cliff (at the top of which Zazu is sitting on a dead tree, watching), and landing with a splat in...a geyser filled with boiling liquid, the Birdie Boiler. Each foe lands in an individual geyser; there can be one to three geysers depending on how many foes got hit with the Final Smash. The foe(s) look relieved at first, then comically look down, eyes widening to see the Birdie Boiler. Upon the foe(s) seeing where they landing, the geyser(s) erupt, sending the foes flying in a blast of fiery red steam, dealing the foes 50% of fire damage each. Hyena laughter is heard in the background, although the hyenas themselves are unseen. The screen then cuts back to the main stage, where the hit foes are launched off vertically with great force. If a foe has above 60%, this is almost a certified KO. Although foes can dodge the initial attack to render it useless, Zazu can set them up with some fast moves, before tricking them into dodging, only to get hit with the initial attack. Zazu can only release this Final Smash on the ground. The inspiration for this Final Smash can be seen here, from 2:54 - 3:05, where Zazu himself falls victim to the Birdie Boiler.


TAUNTS AND VICTORY / LOSS POSES

Up Taunt: Zazu folds his wings and declares in an indignant manner, "You're wildly out of wing!"

Side Taunt: Zazu puts his wings on his hips and says slightly angrily, "That's Mr. Banana Beak to you!"

Down Taunt: Zazu chuckles nervously, drumming his wing feathers together, and mutters, "Ix-nay, on the upid-stay!"

Air Taunt: Zazu facepalms (facewings?) and groans to himself, "I'd never have to do this under Mufasa..."

Victory Pose #1: Zazu soars around onstage in a graceful aerial loop, then lands in center stage and puffs out his chest proudly.

Victory Pose #2: Zazu sits uninterestedly in the middle of the screen. He looks backwards at the loser(s), and sniffs to himself, "Riffraff!" and flies away offscreen.

Victory Pose #3: Zazu swoops onscreen, landing with a salute and says, "Good morning, sire! Checking in with the morning report!"

Victory Theme: A clip from the main Lion King theme, Circle of Life.

Loss Pose: Zazu claps with a sigh, saying to himself, "This is so humiliating..."

OTHER

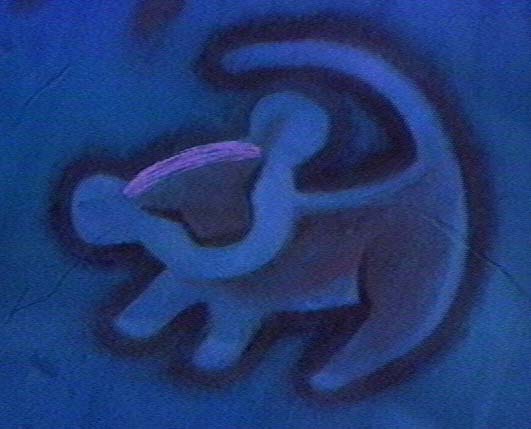
Icon: The main Lion King icon, Rafiki's painting of Simba.


Wiimote Sound: Zazu declares proudly, "It's a tradition going back generations!"

Kirby Hat: Kirby gets Zazu's long beak and colorful blue tail. Kirby can summon animals just like Zazu does with his Neutral Special.

Colors:

Standard
Red
Green
Purple
Yellow
Black

CODEC CONVERSATION

Snake: Something's not right here...hornbills aren't native to North America.

Otacon: That's Zazu, Snake. He's the esteemed royal adviser of the Pride Lands.

Snake: What's he doing here?

Otacon: I have no idea. However, he has many responsibilities because of his position. He can perform surprising tasks, so be sure not to underestimate him.

Snake: You know, I never got to taste hornbill during my "stay" in South Africa. I wonder...

Zazu: Oh, you wouldn't want me! I'd be so tough and gamey!

Otacon: Eww, gross!

ASSIST TROPHY


Rafiki: The wise and mystical baboon, who is a vital adviser and friend of the kings of the Pride Lands. He wields a goard-dangling stick and often speaks in third person when speaking of himself. Here, Rafiki hops out of the Assist Trophy with a pose, then runs and flips around wildly, swinging his stick in a surprisingly brutal manner, dealing only 9-12%, but surprisingly high knockback, having good killing potential. After about 10 seconds of this, Rafiki stops and says wisely, "Ah yes, the past can hurt. But, the way I see it, you can either run from it or learn from it!" He then attacks for another 10 seconds before ceasing his attacks and saying, "My work here...is done." He then vanishes. Rafiki is a great Assist Trophy to receive (especially on smaller stages), but appears fairly rarely.

STAGE


Pride Rock: The majestic home to the lions and lionesses, named 'pride' after the term for a group of lions. Here, you fight on the standard sloped point of rock that is shown regularly in the movies. This area is about the size of Bridge of Eldin. However, it is slanted downwards, the cliff point of the rock being on the left side, while the rest of the rock slants down to the right. The cliff point to the left serves as an edge, where characters can be KOed off the bottom boundary. As a small feature here, characters can hang on the edge for double the normal time before losing their invincibility frames (Lion King edge-hogging jokes FTW). On the right edge of the screen, where the rock slants down, there is a walk-off edge. However, the side boundary is thankfully not too close, to prevent easy, cheap KOs. The only other stage elements here are a weather change. Occasionally (about every minute and a half), a heavy rain will commence. However, unlike on Distant Planet, it will not wash away characters, but merely increase the likelihood of slipping for its duration (10 seconds). Other times, instead of rain, the African sun will rise high overhead, dealing 1% of knockbackless damage to grounded characters every 3 seconds, lasting for 20 seconds. In the background, there are all sorts of African wildlife and foliage, adding to the wild effect of the stage.

MUSIC

Circle of Life
I Just Can't Wait to be King
Be Prepared
Hakuna Matata
Can You Feel the Love Tonight

PLAY-STYLE

While Iago is all about trickery, Zazu has a very different style. As the majordomo of the Pride Lands, Zazu has lots of responsibilities, many of which rely on his orderly and proper character. In Smash, winning with Zazu is a matter of using his Smash character traits, which include speed, floatiness, and survival. Without these, Zazu is a light, weak character that will turn off many players. However, Zazu can be used enjoyably and skillfully if you learn to responsibly implement these styles into your attacks.

Using Zazu's Neutral Special is usually advantageous, especially if you are near a foe or in a FFA crowd. Although you can't control what animal appears, the animal will more likely than not assist you as long as it won't fall off a nearby edge. Morning Report should be used to put foes to sleep and leave them vulnerable, although not weakly attacking directly. Just don't get too predictable with it, or Zazu will end up as the punished one. Leaf Glider should never be used to attack, as it is extremely punishable due to low priority. However, its decent range allows Zazu to be able to recover even more easily. Foes will often have to hit Zazu clear off the side to keep him offscreen.

Zazu can use his basic attacks to quickly build damage. If you get the chance to trap a foe against a wall with his basic combo, be sure to hold the foe to build decent damage. Tilts are a speedy option for comboing and damage building, but can't be used to KO until high damage levels, so don't bother trying. Zazu has quick Smashes that can catch foes off-guard, although his F-Smash can move him into an enemy attack if you aren't careful with it. Being a bird, Zazu has excellent aerials. However, they average a low priority, so use them for quick, damage racking combos to get the foe off the edge. Zazu has many jumps, so this is quite advantageous. Zazu can grab and throw to add to these combos, although he can be shaken off rather easily. Overall, Zazu is a great character for a consistent player. Speedy attacks may make him appeal to newer players as well, but it takes a fair bit of skill to bring him up to competitive status.


Unlocked By: Play 125 Brawls, get Iago and Zazu to join your team in the SSE, clear Boss Battles with Pit, Meta Knight, and Charizard.

TROPHIES

Aladdin Series

Iago (Aladdin)
The Revenge of Jafar (Final Smash) ( Super Smash Bros. Brawl)
Aladdin (Aladdin)
Three Wishes (Final Smash) (Super Smash Bros. Brawl)
Jafar (Aladdin)
His Three Wishes (Final Smash) (Super Smash Bros Brawl.)
Sa'Luk (Aladdin and the King of Thieves)
Rally the Troops (Final Smash) (Super Smash Bros. Brawl)
Genie (Aladdin)
Princess Jasmine (Aladdin)
Abu (Aladdin)
Magic Carpet (Aladdin)
Sultan (Aladdin)
Rajah (Aladdin)
Captain and Guards (Aladdin)
Cassim (Aladdin and the King of Thieves)
Thieves (Aladdin and the King of Thieves)
Abis Mal (Aladdin and the Return of Jafar)
Vendor (Aladdin)
Palace of Agrabah (Aladdin
)


Lion King Series

Zazu (The Lion King)
Birdie Boiler (Final Smash) (Super Smash Bros. Brawl)
Simba (The Lion King)
King of Pride Rock (Final Smash) (Super Smash Bros. Brawl)
Timon & Pumbaa (The Lion King)
Hakuna Matata (Final Smash) (Super Smash Bros. Brawl)
Rafiki (The Lion King)
Scar (The Lion King)
Nala (The Lion King)
Mufasa (The Lion King)
Shenzi, Bonzai, and Ed (The Lion King)
Kiara (The Lion King 2: Simba's Pride)
Kovu (The Lion King 2: Simba's Pride)
Zira (The Lion King 2: Simba's Pride)
Nuka (The Lion King 2: Simba's Pride)
Vitani (The Lion King 2: Simba's Pride)
Ma (The Lion King 1 1/2)
Uncle Max (The Lion King 1 1/2)
Animals (The Lion King)
Pride Rock (The Lion King
)


EVENT MATCH

Event Match 28: Hot, Hot, HOT!
Play as: Iago and Zazu (one stock for each)
Enemies: Mario, Luigi, Bowser, Captain Falcon, Charizard, Ike
Stage: Hyrule Temple
Description: A cornucopia of fiery opponents have invaded the new Tiki Room temple! Banish them before they anger the Tiki Gods!
Unlocks: Tiki God trophy
Summary: You play on Hyrule Temple against the above six opponents. Three are out at a time, a new foe spawning after you KO one. You have two stocks, one for Iago and Zazu separately (the two of them being the new guardians of the bird-run Tiki Room). The opponents have a very slight handicap in terms of knockback. The catch to this battle is that if you don't KO all six opponents (who all have a prominent fire attack) within one minute and thirty seconds, an image of a Tiki God will flash across the screen (like Palutena in Pit's Final Smash), and your bird will be KOed off the top of the screen instantly in a fiery explosion. It cannot be dodged by any means at all, being a definite instant KO. Be sure to defeat your opponents before then. If you swap birds mid-match, the stocks will switch as well to ensure you aren't playing as the same bird twice. For those who have not visited the Enchanted Tiki Room at Disney World, "Hot, Hot, Hot!" is one of the many songs sung by the Tiki Room birds.

SSE ROLE

After the first Marth/Meta Knight/Ike level, a cutscene is shown of several generic thieves riding across a sandy nighttime desert on horses. They seem pissed due to not having obtained any loot from their raid, but upon seeing a dark cave, they rush inside, all having thought bubbles of mountains of treasure. The thieves enter a large cavernous room to find, to their delight, piles and piles of gold and jewels. The thieves jump up and down comically in celebration, then proceed to run about, stealing whatever they can find. However, a golden candlestick bottom flies at them like a frisbee, the thieves barely being able to duck and avoid it. The camera zooms over to its source: Iago stands, pissed at the invasion, holding the rest of the golden candlestick like a baseball bat. He throws his as well, which they dodge, getting angered as well. Iago pulls out a scimitar from a pile of gold. He was left there by Cassim to guard the place while he went out and searched for treasure, Iago having run off with Cassim at the end of King of Thieves. The thieves scream comically, but then gain control of themselves as they remember that they all have swords! They pull said swords out of their belts for Iago to back up, as the thieves laugh evilly and approach. You now play as Iago in a multiman battle against the thieves. Thieves attack with generic sword slashes, as well as planting pottery jars with bombs hidden inside, and throwing lit torches at you. Defeat them to trigger another cutscene.

The thieves are all on their hands and knees, disarmed and with several bad scratches and bruises, as Iago approaches them with his sword. The thieves all scream and dash out of the cave at top speed. Iago laughs, and goes to relax in a pile of gold, but then sees what the thieves truly fled from. Two ROBs are activating a Subspace Bomb in the treasure cave! Iago's jaw drops as he begins to flee, albeit taking a good deal of the treasure with him, stuffing it into a sack held in his talons. You now play a fleeing level in which you must escape the cave in three minutes or less. However, along the way, Iago wants to save his and Cassim's hard-earned treasure, so you must collect the equivilent of 1,000 Coin Battle coins in golden coins (no dollar bills) in this level. There are several generic Primids as foes here, them having accompanied the ROBs. Boxes and enemies don't drop stickers or trophies here; gems are found, which give you anywhere from 10-100 coin equivilents, while a golden coin only gives you one coin equivilent. You must collect 1,000 and escape before the time limit, or you will have to redo the level. Clear it to clear the level and trigger a final cutscene.

Iago escapes the cave, hauling his treasure-filling sack in his talons, which weighs him down slightly, but not too much in his eagerness to flee. From a safe distance away, perched in a tree, Iago watches angrily as the cave is engulfed in Subspace. He then gets a thought bubble of Cassim, and proceeds to look around for him. Of course, he is nowhere in sight, so Iago picks up his treasure sack again and sets off in search of his new master.


Before the second Fox/Diddy level, another new level appears. Zazu is seen sleeping in his nesting tree in the middle of the African Serengheti. He wakes up with a yawm and hops out of his tree to stretch. However, he looks down to see shaking rocks. A question mark appears over his head, then Zazu dramatically looks back to see a wildebeest stampede gaining on him rapidly. Zazu squawks in fear and takes off soaring away, as the wildebeests trample the area he was stretching just seconds before.

You now play a chase level as Zazu. The stampede of wildebeests are constantly at the back of the screen. They move slowly enough for you to stay ahead, but fast enough to keep you on the move. Touching them means 50% and high vertical knockback. Because Zazu is so light and you only have one stock, you must avoid them at all costs. Occasionally, a hyena or vulture will come out of the pack/from above to attack you, the predators wanting a meal from the stampede. Vultures swoop and peck, while hyenas scratch and chomp. Defeat these basic enemies as soon as possible to concentrate on fleeing the wildebeests. Reach the level end to trigger a cutscene.

Zazu reaches Rafiki's Great Tree and flies up into its branches, as the panicking wildebeests run around it. As the last of the stampede clears, Zazu turns to see the source of their fear. It is a Subspace Explosion (a different one than the one in Iago's treasure cave). Zazu sees some Primids approaching the tree, and looks around fearfully. Suddenly, a blur of flur cuts through several of the Primids, as Rafiki begins using kung-fu and his stick to attack them. Zazu nervously swoops down and joins the fight. You now play as Zazu in a multiman fight against the Primids. A Rafiki Assist Trophy helps you out here, but there are large numbers of Primids to take down, so you'll need him to help you. Defeat them all to clear the level and trigger a cutscene.

Zazu and Rafiki appear tired from the battle, but proceed to Pride Rock to inform their king Simba of the invasion. When they get the the rock's base, Timon and Pumbaa (Timon riding on Pumbaa) fearfully run up to them. Timon points to a thought bubble of a swarm of Primids overtaking Simba and taking him away. Zazu almost faints from shock, while Rafiki appears to be mourning. Zazu sighs, realizing his duty as majordomo, and flies off to see if he can find Simba. Rafiki and Timon & Pumbaa leave as well, although not accompanying Zazu in his mission.


After the second Marth/Meta Knight/Ike level, Zazu is shown, flyng through the wilderness, alone and tired, not having found Simba. A rumble behind him causes him to leap out of the way as Galleom (in tank form) zooms by, carrying something. Zazu sees an older man wearing blue robes, and hesitantly flies after Galleom to help the man (Cassim, for those who didn't realize it yet). He pecks Tank Galleom in the eyes for the metallic beast to roar and turn to Zazu, dropping Cassim. However, a sword-like noise is heard behind Galleom, who turns to see Marth, Meta Knight, and Ike, ready for battle. Galleom roars, as Ike motions for Zazu and Cassim to get out of there. Although the Galleom fight was originally in the second level for the sword-users, it is combined with the level where you fight him as Lucas and Pokemon Trainer (which is right after the second sword-user level), Galleom being a great deal harder the second time here. Anyways, back to Zazu and Cassim. The duo run off through the desert. Cassim stops and shakes Zazu's wing, expressing his gratitude. Zazu looks slightly nervous, having lost time, and points to a thought bubble of Simba. Cassim shrugs, not having seen the lion king, but follows Zazu (much to his pleasure) as he continues searching, wanting to repay him for rescuing him from Galleom. No level is played here, however.

A new level appears, now before the Olimar/Falcon level. Iago is still searching for Cassim, dragging his treasure sack along tiredly, being too tired to fly anymore. He is so tired that he doesn't realize he's about to walk into a great big lion! Iago finally sees this and screams. Simba is chained (although not a trophy, like DK), but he is still barely able to grab Iago in one paw and give him a "Sshh!" to calm him down. Iago slowly realizes that he's not going to be eaten, and uses his sword to slice through the chains and free Simba. Simba roars in gratitude, then follows Iago as he continues his search for Cassim, which Iago leaves for immediately after being thanked, not wanting to hang around with a lion, still being nervous. The screen zooms in and out to show Iago far ahead of the tired Simba. The camera switches to Zazu being far ahead of the older Cassim, who isn't as able as he used to be. Iago and Zazu collide in midair, falling to the ground. Iago angrily brushes himself off and approaches Zazu menacingly. Zazu tries to restore calmness by backing away slowly and holding his wings in front of himself, not wanting unnecessary violence when there's a job to do. However, seeing how he has no choice, Zazu puts his wings up in fists. You now choose between Iago and Zazu in a 1 vs. 1 battle. However, you cannot defeat your opponent. The opposing bird has constant superarmor and is slightly buffed, while you are at normal status. Your goal here is to survive until Simba and Cassim appear, settling the conflict by reuniting with their birds. This takes about a minute, so be sure to play smart here.

This cutscene starts after the minute has passed. Simba roars to get their attention, while Cassim claps his hands and says, "Enough!" Iago and Zazu stop their dispute to reunite with their masters. Iago gives Cassim a high-five, while Zazu perches on Simba's shoulder and laughs along with him. Simba and Cassim realize that they were looking for each other. Cassim pets Simba, who allows it, not shaking him off. Iago and Zazu eye each other warily, then realize they have nothing to fight about anymore and shake wings. Simba then gets a thought bubble of Pride Rock, needing to return to help the pride. Cassim gets a thought bubble of his hidden cave artifacts that may not have been destroyed by the Subspace Bomb, due to being buried underground. Iago is still angry about losing the cave to Subspace, and pounds a fist in his wing, pointing at the Halberd, which is flying over the group now, dropping Shadow Bugs. Iago motions for Cassim to go get the treasure while he exacts his revenge on the Subspace Army. Zazu looks at Simba with a weak smile, and realizes that taking back the Pride Lands will take more brawn and less brain. He then hops off Simba's shoulder to land alongside Zazu, where the two strike a pose. Simba nods, smiling back, then runs off to help his pride, giving Cassim a ride back to the cave along the way. The two birds wave goodbye, then set off on their own. You play a desert level as the two birds, getting one stock for Iago and Zazu individually. Iago and Zazu join your team this time, having met for the first time and combined their character.

Iago and Zazu are next seen as Meta Knight and the Ice Climbers are bounding up the mountain. The two birds look at each other, nod, then follow the characters, Iago wanting to board the Halberd and get his revenge, with Zazu following along. Meta Knight accepts the two birds, not seeing them as threatening, and the winged characters bound on up the mountain, the Ice Climbers ahead of them. Iago and Zazu are selectable here now along with Meta Knight and the Ice Climbers. In the Meta Knight vs. Lucario cutscene, Iago and Zazu stand back and watch, letting Meta Knight fight his own battle. The birds board the Halberd as it crashes, along with Lucario and Meta Knight, while the Ice Climbers fall off the mountain.

These characters are next seen on the Halberd. Instead of hiding in his box, Snake sees Iago and Zazu, and licks his lips, wondering what exotic tastes these birds might have. He jumps out at the characters, taking a swipe at the birds, who dart away in terror. Meta Knight and Lucario strike fighting poses in front of the birds, who come around and join them. You play in a 4 vs. 1 as Snake now, with two foes out at a time, and you having to take out both Iago and Zazu.


Snake is barely able to handle all four opponents at once. He is trying to be sneaky, but Meta Knight uses his brokenness to use his cape-glitch with his Down Special to appear behind Snake and knock him back at Lucario and the birds. However, Lucario stops attacking as he sees a horde of Primid approaching. You now play the standard Halberd level, with Iago and Zazu selectable in addition to the other characters.

After the group frees the princesses, Iago and Zazu stay behind with the princesses in their prison room, Iago on Peach's shoulder, while Zazu is on Zelda's. When the princesses leave the room, Zazu tries to stop them, but Iago says, "Relax!", putting a wing around Zazu, then leaving after the princesses, Zazu having no choice but to follow. You play as the birds and princesses in this normal level, and the next one as well, where the group fights Duon.

After the Halberd lands, Iago and Zazu go through the standard cutscenes of the Great Invasion and are turned into trophies with everyone else. Notably, in the Invasion cutscene, Iago is staring angrily at Bowser and Ganondorf on the Ganon Cannon, thinking that they were responsible for blowing up his cave. However, nothing else happens here. Iago and Zazu have separate trophies in the Dedede/Ness/Luigi level, so you must save them both if you want to use them both. If you collect both of their trophies, as well as the trophies of Link and Zelda (and therefore Ganondorf), an entirely new level appears.

Bowser is seen approaching the Great Maze stairs from one direction. Ganondorf is approaching it from the other. The two villains run into each other. Bowser roars, pissed off at Ganondorf's betrayal. Ganondorf pounds his knuckles like in his Side Taunt, and you choose one character in a one vs. one battle against the other.

The winner of the battle taunts the loser (Bowser using an F-Smash to knock the trophy away, Ganondorf spinning in place like his Up Taunt, then Sparta Kicking the trophy), then continues on. However, he hears flapping, and turns around to see Iago soaring at his face, screaming, "SHUT UUUUUUPPP!" The winner barely dodges, as Iago soars over his head, losing control and crashing into the loser's trophy, reviving them. Zazu flies up and lands next to Iago, wondering what he's got himself into this time, to see the two villains approaching the birds angrily. You now choose a side to play as: you can choose to play as one of the two villains against the other three characters, or as either Iago and Zazu to play against both villains on a team with team attack on, with the other bird as your ally.

After the battle, Iago is content with his revenge, and is backing away from the villains nervously, saying, "Lay off, buddy!" Zazu backs away next to him. Bowser reaches them first, plowing through the birds and scattering them, but only doing this to frighten them, and continues on towards the stairs, wanting more to exact revenge on Tabuu than on the birds. Ganondorf follows angrily, after glancing around at the vastness of Subspace, motioning the birds to come along, seeing as they might just make worthy slaves, despite their small sizes. You now play as these four characters in a brief Subspace level. Because this level was optional, there are only a few enemies (albeit powerful enemies) and a lot of stickers and trophies. This is a good hoarding level for trophies and stickers. Iago and Zazu get no further cutscenes after this. The treasure cave and wildebeest stampede play minor parts in the Great Maze now, due to having been engulfed in Subspace. Shadow Iago fights you in a door in the treasure cave, while Shadow Zazu fights you in a door at the end of the wildebeest stampede. Against Tabuu, you can't choose to play as both birds, so hold R while selecting to switch to either Iago or Zazu before the final battle.


In memory of Kholdstare...

2008-2009
 

Baloo

Smash Ace
Joined
Nov 14, 2008
Messages
781
Ah, it looks good at a skim, Bkupa666.

I think the whole thing is a joke about Khold, but if not...


I'll still finish all 20 helpers, even without help if need be!
 

Junahu

Smash Ace
Joined
Nov 15, 2005
Messages
899
Location
Shropshire Slasher
That moveset(s) was incredibly detailed. Some of the attack descriptions were a bit plain-faced, which was a tremendous shame because the attacks themselves were creative.

I enjoyed reading Iago and Zazu , in spite of my extreme predjudice against anything that mentions the dreaded, Enchanted Tiki Room.


And what's with all the people leaving? At this rate, noone will be left to see Viola, when she's eventually, eventually finished.


Also, a from scratch Team Rocket Sprite. I think I did pretty well
 

KingK.Rool

Smash Lord
Joined
Nov 26, 2005
Messages
1,810
Ah, it looks good at a skim, Bkupa666.

I think the whole thing is a joke about Khold, but if not...


I'll still finish all 20 helpers, even without help if need be!
Khold... admittedly, he IS that type, but I doubt that's the case this time around.

Iago and Zazu look great. I'm sorry, Kupa, I can't give more detailed feedback just now.
 

Baloo

Smash Ace
Joined
Nov 14, 2008
Messages
781
Why? With absolutely no warning? And isn't it convenient we have pictures of it, does Warlord go around taking pictures of every post on the XAT? Warlord, really, do you know anything about this?

But whatever.

*mourns*:(:(
 

Baloo

Smash Ace
Joined
Nov 14, 2008
Messages
781
I dunno, but a Latias/Latios set would be awesome. Really. I say do that, they're somewhat popular Pokemon, will be recognized because of their appearance in Brawl if nothing else, and are just awesome for being telepathic flying dragons.

And nice avatar, what is it?
 

Red Arremer

Smash Legend
Joined
Nov 27, 2005
Messages
11,437
Location
Vienna
KHOLDSTARE'S FUNERAL
-_-

Awesome. Yet another great MYMer leaves due to unfortunate circumstances...

Iago and Zazu
This looks great. Unfortunately it's (almost) 4 AM here, and I'm too tired to read anything, yet alone that gargantuan wall. Sorry.

Okay, I will wait until the next contest to post something because I won't have enough time. Has anyone done the following characters:

Sora - Kingdom Hearts
Latias & Latios - Pokemon
Zangoose & Seviper - Pokemon
Aelita, Ulrich, Odd, or Yumi - Code: LYOKO
William - Code: LYOKO
Scyphozoa - Code: LYOKO
Yes, more than enough
Not that I know of - I'm not 100% positive on that one
No, No
No, No, No, No
No
No

I would suggest you to check movesets from regulars (like Iago and Zazu right there), and try to meet the standards of 'em. Welcome to MYM.
 

Scyphozoa

Smash Cadet
Joined
Feb 11, 2009
Messages
65
Location
Back from the grave.
I dunno, but a Latias/Latios set would be awesome. Really. I say do that, they're somewhat popular Pokemon, will be recognized because of their appearance in Brawl if nothing else, and are just awesome for being telepathic flying dragons.

And nice avatar, what is it?
Okay, thanks! I'll do Latias & Latios first. I'll make them work like Ice Climbers (my favorite character in Brawl, if you haven't noticed).

My avatar is the Scyphozoa, an enemy from the anime Code: LYOKO, an awesome anime. It comes on Cartoon Network.

http://editthis.info/Code_WIKI/Scyphozoa

-_-

Awesome. Yet another great MYMer leaves due to unfortunate circumstances...


This looks great. Unfortunately it's (almost) 4 AM here, and I'm too tired to read anything, yet alone that gargantuan wall. Sorry.


Yes, more than enough
Not that I know of - I'm not 100% positive on that one
No, No
No, No, No, No
No
No

I would suggest you to check movesets from regulars (like Iago and Zazu right there), and try to meet the standards of 'em. Welcome to MYM.
Thank you. I'll try to do my best!
 

TWILTHERO

Smash Lord
Joined
Aug 19, 2007
Messages
1,880
Location
Canada
I'm adding Mello to my to-do list, unless someone would prefer I do Near or something...
Nope, can't let you do Near man. I'm making him in MYM 5 :bee:

You're free to do Mello though.

@Bkupa's moveset: Whoa, that looks really great at a glance. That is one sweet moveset you got there. Awesome job man.

And, yeah...i'll miss Khold as well. He was always one of my favourite MYMers.
I one time gambled one of my super votes, and he won one of them. Now that he's gone, i wonder if he'll mine if i don't super vote Wiz =P

Sorry for me being missing in action lately. I'm really busy atm. I also like you guys to know i pretty much cancelled my SSE. I'm probably going to try and make one again in MYM 5....but no more MYM 4 SSE :(

Oh well.
 

SkylerOcon

Tiny Dancer
Joined
Mar 21, 2008
Messages
5,216
Location
ATX
Because I'm bored. Top 10 movesets so far (in my opinion):

1) Chef Kawasaki - KingK.Rool
2) Electroplankton - Akaik
3) Super Star Helpers - SirKibble
4) Deoxys - Chief Mendez
5) Kefka - Spadefox
6) Megaman 9 - Junahu
7) Pokey - The Trophy Master
8) The Sandbags - Chris Lionheart
9) Wheelie - Hyper_Ridley
10) Wiz - Kholdstare

These are excluding my two sets... which would pretty much mean that if I had included mine, everybody behind Super Star Helpers would be bumped down one spot. Sorry, Khold :(
 

KingK.Rool

Smash Lord
Joined
Nov 26, 2005
Messages
1,810
Okay, I will wait until the next contest to post something because I won't have enough time. Has anyone done the following characters:

Sora - Kingdom Hearts
Latias & Latios - Pokemon
Zangoose & Seviper - Pokemon
Aelita, Ulrich, Odd, or Yumi - Code: LYOKO
William - Code: LYOKO
Scyphozoa - Code: LYOKO
Sounds great. Welcome to MYM, by the way!

@ Skyler: :bee: It still stuns (and pleases) me how much everyone enjoyed Kawasaki. Thanks!
 

MasterWarlord

Smash Champion
Joined
Aug 24, 2008
Messages
2,902
Location
Not wasting countless hours on a 10 man community
Why? With absolutely no warning? And isn't it convenient we have pictures of it, does Warlord go around taking pictures of every post on the XAT? Warlord, really, do you know anything about this?

But whatever.

*mourns*:(:(
Let me assure you that this is not a joke. I wouldn't joke about something as serious as this. As for the pictures, I thought Khold deserved for his final words to be made public rather then a lousy description from me. It wouldn't of gotten nearly as much attention with just a brief description anyway.

Nobody else was in the chat save Ocon who was afk, so I could freely go back and take screenshots, the old stuff being in no danger of being washed off screen.

BKupa666 said:
Iago and Zazu
Another amazing moveset. Things keep getting better and better from you, don't they? Their SSE Role was the best one you've done yet, you fully integrated them in and added NPCs. The mass extras of the moveset make me filled with glee, and the main movesets are highly detailed and filled with quality.

SkylerOcon said:
Top 10 list
*Vomits*
 

SirKibble

Smash Champion
Joined
May 2, 2008
Messages
2,400
Yeah, I popped into the chat a little after the announcement was made, and it was moving rather slowly. There was definitely time to screenshot everything with plenty of forethought.

@Skyler's Top Ten List: Yay! SSH! I still feel like S&B are my best, though, but whatever.

All in all, a very respectable collection of movesets, right there!
 

Twilight-Emblem

Smash Apprentice
Joined
Nov 28, 2008
Messages
114
Location
Alabama
Man, first StB, now Kholdstare...

Finally remembered my password, so the pics for Crono will be up soon, so that's good news.

@Iago and Zazu: BKupa used Wall of Text! It's super effective! And by super effective, I mean that I never would have thought those two would make a good set. Unfortunately, I've never been to Disney Land so I've never been to the Tiki Room.

Anyway, I'm thinking about writing an SM in MYM5, but I'm still trying to think of ideas for a story for now. It'll probably include explosions (most likely Nook's Cranny) and FMA.
 

Jimnymebob

Smash Champion
Joined
Sep 26, 2008
Messages
2,020
NNID
Jimnymebob
Iago and Zazu were great, and I'm really sorry to hear about Kholdstare.
 

Evilgidgit

Smash Apprentice
Joined
Oct 10, 2007
Messages
166
Location
England
Wow, I've been absent for quite a while. There are some awesome movesets. Well done to the Ditto movesets.

Pity about Kholdstare. :(
 
D

Deleted member

Guest
KHOLDSTARE'S FUNERAL


A moment of silence, if you please. . .
:(

And he was always, always fun to have around.
Were you around during the "incident"?

http://makeyourmove.wikia.com/wiki/Fallen_MYMers

From the awesome people that I knowthat left, there's The Commander, The Thorn, The Baron, and now the...*weeps* The Stare.
Hey, it's not like I'm gone forever. ;)

Iago and Zazu
Awesome, especially this:

Iago: Say cracker and I LET YOU HAVE IT ON PRINCIPLE!
lolol
 

Hyper_Ridley

Smash Champion
Joined
Dec 21, 2007
Messages
2,291
Location
Hippo Island
Because I'm bored. Top 10 movesets so far (in my opinion):

1) Chef Kawasaki - KingK.Rool
2) Electroplankton - Akaik
3) Super Star Helpers - SirKibble
4) Deoxys - Chief Mendez
5) Kefka - Spadefox
6) Megaman 9 - Junahu
7) Pokey - The Trophy Master
8) The Sandbags - Chris Lionheart
9) Wheelie - Hyper_Ridley
10) Wiz - Kholdstare

These are excluding my two sets... which would pretty much mean that if I had included mine, everybody behind Super Star Helpers would be bumped down one spot. Sorry, Khold :(
I'm happy to see one of mine on there, but the lack of Joker (MasterWarlord) and Jonathan and Charlotte (Spadefox) angers me.


@Iago and Zasu: Awesome! I loved Iago's dash attack. :bee:
 

flyinfilipino

Smash Master
Joined
Sep 11, 2007
Messages
4,319
Location
North Carolina
FARFETCH'D JOINS THE FRAY!


------------------------------------------------------
Basic Attacks [BASIC]
------------------------------------------------------

Neutral A: Infinite Slash
Damage: 1%-2% (each slash)
-This move may look cool, but it really doesn't serve much purpose. Sure
you can hold down A and rack up a little damage, but after about a second your
opponent should break free and you'll be left flailing your stick at the air
like a lunatic while he proceeds to punish you. If you do find yourself using
it though, it's good for leading into a tilt attack of your choice or even a
down smash if you're quick about it, but you should try and avoid using it too
much since it detracts from your combos and overall pressure game.


Forward Tilt A: Triple Strike
Damage: 4% (first slash), 3% (second slash), 5% (third slash)
-This attack should see a lot of use. Press A three times while tilting
left or right to execute three very speedy stick strikes. It has a pretty
decent range to it and the last hit knocks your opponent away and upwards.
Perfect for setting up a Forward Aerial or Up B attack. Great no matter how
you look at it.


Up Tilt A: Spin Strike
Damage: 6-7%
-I don't much care for this move. It's a bit slow by Farfetch'd's standards.
You're better off with an Up Smash (which isn't particularly great either).


Down Tilt A: Low Thrust
Damage: 4%
-Another really great tilt attack here. This one comes out VERY fast so
you can usually hit a few times in a row with it if you're lucky. It has a
great range and can sometimes poke underneath an opponent's shield. Great
for breaking up enemy attacks and pushing them away slightly. NOTE: Farfetch'd inches
forward ever so slightly after he uses this move, making it a little easier to
hit multiple times.


Dash A: Rushing Kick
Damage: 6%
-As with a lot of other dash attacks, this one isn't anything special. It
pops your opponent in the air for an easy follow-up aerial, but it's just too
predictable to rely on. This move should be used in strict moderation and only
if you feel that you have a good chance at hitting with it.


------------------------------------------------------
Aerials [AIR]
------------------------------------------------------

Neutral A Air: Spinning Strike
Damage: 12% (first hit), 7% (second hit), 5% (third hit)
-Probably the least useful aerial move in Farfetch'd's arsenal. Farfetch'd basically spins around wildly hitting in all directions around him. It
does decent damage and knockback, but it's not as viable for combos as the
other aerials are for a couple reasons: 1) it's kinda slow to complete itself
2) it's more difficult to control the direction of the knockback than other
aerials. However, it makes for a decent safety move since it hits all around
you and sends the opponent away without much thought. Note: the first hit of
this move 'usually' knocks the opponent away before the other hits can land.


Forward A Air: Triple Slash
Damage: 3% (first hit), 3% (second hit), 4% (third hit) 10% total
-This move, along with his Down Aerial is what makes Farfetch'd stand out
as a truly great character. This attack consists of three hits. The first two
are designed to trap the opponent in hitstun, while the third hit knocks them
back a ways. Landing a few of these is an excellent way to rack up damage and
get KOs after you've chased your opponents off the edge. A great way to get
this move out is to dash towards your foe, do a short-hop, tag 'em with the
Forward Air and then repeat. You can also try setting up for a Forward Air by
hitting your opponent with a Forward Tilt or by using a Forward or Down Throw.
Really any time that you find yourself on the same level as your opponent
(while both in the air) would be a viable time to use this.


Back A Air: Reverse Triple Slash
Damage: 3% (first hit), 3% (second hit), 4% (third hit)
-This is basically the same thing as Forward Air. Just use this when the
enemy happens to be behind you in the air. Easy, huh?


Up A Air: Overhead Slash
Damage: 6%
-Farfetch'd does a quick stick slash above his head in a wide arc. For me,
this move really only has one use; juggling. Basically you just hit 'em with
an Up Aerial while they're above you (obviously) then jump and repeat... and
repeat... and repeat... until you run out of jumps. Then, you can either
finish them off with an Up B or even Neutral B. Fun combo, and not too hard to
do either.


Down A Air: Downward Slash
Damage: 7%
-This is another move that should be abused heavily. It's much like the Up
Aerial but Farfetch'd swings his stick underneath him instead of above him.
He does so in a nice wide arc covering a big area so it's pretty easy to hit
anyone underneath you or in front of you. It's important to learn to do this
out of a running short-hop for your approaches but it's even more important to
learn to gimp people with it as it's FArfetch'd's main tool for chasing
people off the stage and keeping them there. If you hit your opponent
correctly (meaning that they are in front of you and also slightly below you)
the knockback sends them away from you and downward, which can obviously be
very detrimental to their efforts to get back to the stage. Depending on the
character (it helps if they have a poor recovery) usually two or three of these
hits while you're pursuing them off the stage means they won't be returning.
NOTE: you might notice that this move can often be used interchangeably with
Forward Air but keep in mind that the Down Air is quicker and can be done in
much more rapid succession. It also has a shallow downward knockback instead of
shallow upwards as seen in the Forward Air, making it better in most cases for
gimping.


------------------------------------------------------
Smashes [SMASH]
------------------------------------------------------

Forward Smash: Power Slash
Uncharged Damage: 14%
Charged Damage: 19%
-This is Farfetch'd's strongest hitting move (excluding Final Smash) and
one of his few viable means at getting a KO. It is, however, very slow for
Farfetch'd's standards and since it lacks good range, it can be very hard to hit with.
I personally try and stay away from this move since it's easily punishable.
You're better off with a Down Smash instead.


Up Smash: Overhead Triple Slash
Uncharged Damage: 3% (first slash), 2% (second slash), 4% (third slash)
Charged Damage: 4% (first slash), 3% (second slash), 5% (third slash)
-Another sub-par smash attack. It's nice when you can connect with all
three hits, but when you don't you usually end up being punished since only the
last of the three has any real knockback to it. The best use for this move is
while rushing your opponent. If you execute this attack while running towards
your opponent, you will actually keep your momentum and continue forward while
doing the attack (usually helps if you charge it up a bit too). This is risky
and a bit situational, but no more so than a standard dash attack.


Down Smash: Double Slash
Uncharged Damage: 11% (front), 13% (back)
Charged Damage: 15% (front), 18% (back)
-Ahhh... now here's a real smash attack. This attack is FAST. I mean...
seriously... it's nearly instant. I highly recommend using using the C-stick
to ensure that it comes out at fast as possible (or if you're using the
Wiimote+nunchuck you can set your down d-pad input to do a Down Smash... which
is what I do and it works great). Aside from the being insanely quick, this
move hits both in front of you and then behind which helps control those
opponents who like to roll around you too much. And with its great knockback
it's arguably Farfetch'd's best KO move aside from his Up B. Use it liberally.


------------------------------------------------------
Grabs [GRAB]
------------------------------------------------------

Grab Attack: Wing Stab
Damage: 3%
-Just your standard grab attack. Your opponent will likely be struggling to
break free of your grab so you obviously shouldn't do too many of these or else
you won't get your throw off. You can do more attacks when the opponent is at
higher %'s.


Forward Throw: Flipping Kick
Damage: 9%
-This is Farfetch'd's best throw in terms of where is leaves the opponent after
throwing them. They'll usually be (depending on percentage) in good range for
you to follow up with a Forward Air or perhaps Up B.


Back Throw: Ninja Strike
Damage: 10%
-To be honest... there really isn't much point to using this throw as
opposed to the any of the others.


Up Throw: Suplex Slam
Damage: 12%
-Basically the same as Kirby's famous Up Throw (you know the one). This is
Farfetch'd's most damaging throw, but I would still opt for a Forward or Down Throw
since they're easier to follow up with Aerials.


Down Throw: Kicking Slam
Damage: 1% (each hit) (11% max)
-Looks cool and leaves your opponent in a decent place for an aerial. Just
don't use this in a free-for-all match or your likely to get hit before you get
the throw off.


------------------------------------------------------
Special Attacks [SPEC]
------------------------------------------------------

Neutral B: Whirlwind
Damage: 1% (each hit) ~23% (max)
-Ahh... the good old Neutral B Whirlwind...Farfetch'd spins around
creating a bright blue tornado. This can hit multiple times, each hit doing
1%, up to a maximum of about 23% damage. You can move yourself left and right
with the control stick and repeatedly tap B to increase the duration of the
attack. Tapping the B button fast enough will lift the tornado off the ground
a bit. This attack is a spammer's best friend, and with good reason too. Using
this allows you to completely absorb most projectiles and it is pretty hard for
opponents to dodge or punish if used with some rhyme and reason rather than
just spamming the hell out of it. I would advise using this move sparingly as
it can get rather predictable. It can be used as a recovery (along with all
other of Farfetch'd's specials) but be advised that you will enter fallspecial (meaning
you can't attack or jump) if you end this move while in the air. The main use
for this move is to cancel out projectile attacks and allow you to sweep in and
damage your opponent while he/she is busy spamming their lasers, arrows, etc...
It can also be rather deadly if you catch your opponent in the tornado while
near the top of the stage; the Whirlwind has a decent upwards knockback on
the last hit, so you can expect to get a few "Star KO's" if you use it high
enough. In free-for-all battles with 3 or 4 people, this move becomes much
more viable since you can easily activate it and sweep across the stage
damaging everyone who gets in your path.


Forward B: Fury Attack
Damage: 1% (each hit), 3% (final hit) ~13% (max)
-Another multi-hit special that involves Farfetch'd spinning around like a
madman? That's right! There really isn't anything special about this one
though. You'll rarely be able to connect with every hit and even so, the
damage is pretty sad (around 10% average) considering how easy it is for
enemies to dodge it and punish you. It can be useful if you are in need of
vertical recovery however, as you can 'aim' the direction of the attack with
the control stick.


Up B: Aerial Ace
Damage: 9% (rising strike) 12% (gliding attack)
-Farfetch'd does a rising upper slash, then flips around into a glide.
This is Farfetch'd's best recovery move, but can leave him vulnerable to edge
guarders unless you time your glide attack well (press A while gliding). Both
the hit from the initial rising slash as well as the glide attack have great KO
potential and will likely be responsible for a large portion of your kills.
It's also important to note that you can choose the direction in which you do
your Aerial Ace. Let's say you chase an enemy to the right edge of a level
and have used all your jumps. Even though your momentum is taking you to the
right and even though you are also facing to the right, you can hit left on the
control stick immediately after pressing Up+B to then Aerial Ace to the left
and glide safely back to the stage. Also, when gliding, you can lean the
control stick forward to descend and back to ascend. You CANNOT start an ascend
without first gaining speed by descending or else you will enter fallspecial.


Down B: False Swipe
Damage: 14%
-Farfetch'd covers himself with his free wing and teleports a short distance in
whichever direction you choose by using the control stick. You can also hold
either attack button to execute an attack when you reappear, but the attack is
fairly weak, and in most cases, absolutely worthless. The only use this move
has is in regard to edgehogging. Let's say your opponent is about to attempt to
grab the right edge on Final Destination. You're in the middle of the stage
and run to the right about halfway to the edge, do a shorthop, then while in
the air you do your Down B and aim for the ledge. If done correctly, you'll
reappear, nick the edge of the level and then grab on to the ledge just before
you opponent does, thus KO'ing him because he can't grab the ledge if you're on
it. Now this is, of course, very risky. If you overshoot the False Swipe,
you end up falling right off the stage. The timing is pretty tricky but once
you get it down it can be very rewarding.


------------------------------------------------------
Final Smash: Night Slash [FINAL]
------------------------------------------------------

Farfetch'd executes his Final Smash by throwing a flurry of feathers out in front of him a
fair distance. Whether or not your opponent takes any effect from this Final
Smash depends on how close they are in proximity to the feathers as he throws
them in front of him. Simply put, you have to make sure you foes are very close
by in order for "Night Slash" to take effect. Assuming that you did in
fact "catch" one or more persons in your feathers, the entire stage goes black for
a moment and then Farfetch'd slashes through the darkness delivering 40% damage to
those in which he "caught" as well as 18% damage to others nearby. The
knockback is significant, but it does not guarantee a KO. That being said, it
is obviously very unwise to waste this move on an opponent that is sitting at
0-20% especially if they are a heavyweight character. Just remember that for
lighter characters (like Mr. Game and Watch or Jigglypuff) make sure they're
at 20% or higher before hitting them with this. Heavyweight characters (like
DK or Bowser) should be around 40% when using this move.

When compared to other final smashes, Farfetch'd's seems a bit lackluster.
It's not like Olimar's or Dedede's where they just press the B button and
everyone gets affected. And it's not like Marth's where it's an instant KO if
you connect with it. Farfetch'd players have a bit more work to do to get
KO's out of their final smashes, but that's okay because Farfetch'd's players should
have a distinct advantage when it comes to actually "breaking" the smash ball
in the first place. Here are a couple strategies I employ when the mad dash
for the Smash Ball ensues:

1) Stand back a bit as the other character(s) get the first hit or two on the
ball, then run in close and use Up B to break the ball and damage anyone in
the way.

2) Position your self underneath the ball (not too close... leave a little room
in between you and it) and proceed to mash B. Your Whirlwind should take care of
anyone nearby and should do more than enough damage to destroy the smash ball
if you get a good, clean connection. Remember that the faster you mash B, the
higher you go. So do you best to time your B mashing and stay in contact with
the ball.


Credit for moveset goes to Lord Sakurai
^ ^​
 

Smady

Smash Master
Joined
Apr 29, 2007
Messages
3,307
Location
K Rool Avenue
Farfetch'd is good, although some of his moves are bizarre (up-tilt; grab attack) and need definition. I love the character though, and this is the quintessential Farfetch'd moveset - there is hardly any material for it. I particularly like the Up-B, which resembles MetaKnight's in a non-broken way, and 'Fury Attack', although it sounds useless. Lotsa slashes and kicks too... it isn't your best moveset, but Farfetch'd is in itself epic.

PMing you now about you-know-what. :)
 

Jimnymebob

Smash Champion
Joined
Sep 26, 2008
Messages
2,020
NNID
Jimnymebob
Farfetch'd is okay, but apart from the specials it lacks detail on how the attack actually works. For example, his

Back Throw: Ninja Strike
Damage: 10%
-To be honest... there really isn't much point to using this throw as
opposed to the any of the others.

Sounds cool, but what does it look like? If I could visualize what Farfetch'd's actions were like then maybe it would be better.

Also, his specials seem too much like Metaknight's, and apart from them, none of his attacks are based from the Pokemon games, which is a shame, as there is a whole load of attacks and TMs that he learns in the games.
 

dancingfrogman

Smash Ace
Joined
Jan 3, 2008
Messages
862
Location
United Kingdom, Birmingham
Switch FC
3133 8842 3910
Dancingfrogmans tribute to


KHOLDSTARE

The person who brought us the MYM WIKI:


Kholdstare had a personality to love, a great guy who made movesets with bursting of creativity, and was a very recognised member of the MYM community. Kholdstare had a great sense of humour. Kholdstares leaving on MYM will have an impact on everyone, seeing how emotional this actually is, even on the internetz.
 
Status
Not open for further replies.
Top Bottom