Lord Meta Knight, what is your command?
=== Halberd Crew ===
A joint moveset by KingK.Rool, SirKibble, and MasterWarlord.
=== Description ===
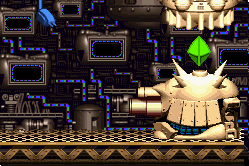
The crew of the Halberd, mostly made up of Meta Knight's loyal band of rogues and warriors, featured primarily in the Kirby Super Star subgame "Revenge of Meta Knight." The four primary crew members who discuss Kirby's progress (and how to foil him) throughout the game are Ax Knight, Mace Knight, the surprisingly loyal Sailor Dee, and Captain Vul himself. Of course, despite their throwing multiple obstacle at Kirby, he successfully trashes the ship. Vul, in his desperation, actively speeds up the destruction of his beloved ship. When his greatest weapon, Heavy Lobster, is destroyed, he abandons ship.
Ax Knight and Mace Knight remain, as does Sailor Dee. The two Knights - with the rest of the Meta Knights - make a final stand against Kirby, but they're defeated, and also make their escape. Sailor Dee stays to watch Meta Knight himself taking on Kirby, and is on the ship with his lord as it crashes into the Orange Ocean.
After the wreck of the Halberd, the crew apparently disbanded. The Meta Knights still serve their lord loyally, but Vul and Sailor Dee have not been seen since. Here, though, the crew reunites, joining the Brawl to back up Meta Knight!
---
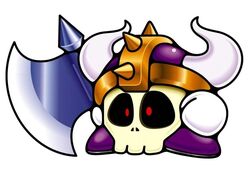
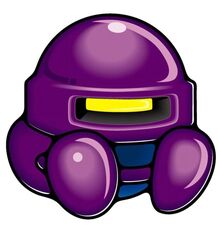
\-- Ax Knight --/
"I will stay until the bitter end."
This is Ax Knight. A rather simple fellow, he wields his axes, of which he seems to have an unlimited supply. He's not too clever, but very loyal to his master, and was constantly updating the others on Kirby's progress throughout the Halberd.
What does he do in Brawl? Please, read on...
Ax Knight has three axes in his arsenal. Every time he uses an attack that causes him to throw away one, he pulls out the next - these always go in a specific order. The first one is the lightest, and very fast; second is a slightly slower one that excells at racking damage with multiple hits; and third is the big, heavy one that should have no trouble getting you a KO. After you chuck the third, Ax Knight loses pretty much all of his moveset, all the axe-based attacks. They disappear when Ax Knight is KO'd, and he can start fresh.
Ax Knight can't pick up an axe after he's tossed it. Neither can the foe. HOWEVER, Captain Vul and Mace Knight can, although in their hands, it's just a battering item (strength and speed depending on which axe). That's right, it doesn't disappear when Ax Knight switches out, and sticks around until one of the crew is KO'd.
...What this means is that Ax Knight has a built-in chain of succession to help him pull of KOs. It also means that you're going to have to be cautious and clever with when you toss away an axe; you had better be totally sure you won't have any more need for damage racking before tossing the second axe, for instance. It also means that you're encouraged to switch after you've used up all three axes; you'll be leaving some juicy trinkets behind for the rest of the crew to play with.
\-- Stats --/
Traction /> 8
Power /> 2 / 3 / 7
Attack Speed /> 9 / 5 / 3
Fall Speed /> 7
Range /> 7
Run /> 5
Jump /> 5
Weight /> 4
Height /> 4
Ax Knight doesn't trip often, you gotta hand the little guy that; he tries hard. His first axe is very weak, but blazingly fast; his second is barely stronger and not all that fast, but forget not that it does lots of damage; and the third is actually really strong, but slooow. Axe Knight is a fastfaller with average jumps, so he won't spend that much time in the air; he's also pretty slow and light, but at least his axes all lend him some good reach. He'll need it to contend.
\-- The Moveset --/
=S=P=E=C=I=A=L=S=
Neutral Special /> Axemerang
This attack can be used out of jump or on the ground. It comes out pretty fast, and has Ax Knight lob his axe, spinning like any boomerang, a short ways before him. The trajectory of it can be aimed just a tad after it comes out; it goes about a Battlefield platform in front of you before turning and coming back. If it hits anyone while it's out there, it obviously won't come back, as it simply falls onto the ground. It travels as fast as it does in the Kirby games, so a bit faster than Link's, and it's, of course, much larger and doesn't go nearly as far.
Now, where it gets interesting is as it comes back. You can either catch it - allowing you to keep it for future use - or dodge it, letting it continue on behind you, rather like in Down Smash. This allows for great mindgames - you can airdodge it at the last second to avoid catching it and allow it to hit a foe behind you.
Now, the first axe does 9% on contact; the second does 13%; and the third has some better knockback but does 8%. This is a vital tool in Ax Knight's arsenal, fast, versatile and tricky, but remember - he only has three uses of it before you switch out, and you can't use any other attack while your axe is being thrown.
Forward Special /> Trick Attack
This attack can be used out of jump or on the ground. It comes out pretty fast, and has Ax Knight lob his axe, spinning like any boomerang, a short ways before him. The trajectory of it can be aimed just a tad after it comes out; it goes about a Battlefield platform in front of you before turning and coming back. It travels as fast as it does in the Kirby games, so a bit faster than Link's, and it's, of course, much larger and doesn't go nearly as far.
Sound familiar? It is. It LOOKS exactly the same as his Neutral Special. The difference here is that YOU know that the axe you toss is, in fact, a fake. Upon contact with a foe, it simply explodes in a puff of steam, dealing no damage whatsoever. Vitally, though, you can still pull off OTHER attacks while this one is out. Mindgames is the name of the game with this one; see Playstyle section. Ax Knight may not be intelligent, but he sure is clever.
Up Special /> Axe Ledges
Now Ax Knight's strange undead powers come into play again. As he uses this, he simply stops moving through the air, and places the axe in his hand beneath his feet; it serves in this way as an impromptu ledge, which is suspended there for five seconds, glowing slightly, before plunging. However, since it's a ledge, you pretty much get your other jumps back - and remember, Ax Knight has three axes, and therefore three uses of this attack, which allows him to get back from ridiculous distances. After those three, though, he pretty much has no recovery, so use them wisely. It does come out rather quickly, on the bright side, and is practically impossible to gimp.
Down Special /> Changing Shifts
Ax Knight rushes into the background frantically, then the next crew member appears, walking in from the background. This is a fairly standard transformation Down Special, but you have super armor as the switch occurs to prevent foes from punishing the switch like they can Pokemon Trainer's. This can’t be used to stall though, as you must wait 20 seconds before changing your shift again with another of the Halberd Crew.
As Ax Knight switches in or out, there's a 20% chance of him saying one of the following lines of dialogue:
- Switching in: “I've got an axe to grind. . ."
- Switching in against Kirby: ”GAH! What'd you call ME out for?!?"
- Switching out: “I just got unlucky!”
- Switching out against Kirby: "Quick! Find his cake or we're all doomed!"
=S=T=A=N=D=A=R=D=S=
Standard /> Simple Axe Extension
Gripping his axe by the center of the pole, Ax Knight simply extends it before him, hitting with its head.
First ax comes up at practically Meta Knight speed, but only does 2%.
Second ax has no knockback at all, and does 4%, but is slower.
Third ax is quite slow, but does a full 6% and has good knockback in and of itself.
Small range compared to most of his attack. Use primarily to chain into...
Standard, AA /> Simple Axe Extension into Uppercut
From its extended position, Ax Knight suddenly brings the axe up, right over his head, dealing out upwards knockback. This can be used to scoop up aerially approaching foes.
First axe is, again, Meta Knight speed, making the whole combo something like his Forward Tilt. It deals 3% and has little upwards knockback.
Second axe has Ax Knight twirl it like Pit as he brings it up, dealing many little hits, for a maximum of 8% - but it has almost no knockback.
And third axe? Again, slow but powerful hit, although it's pretty fast for third axe standards. It deals 6% with KO potential at really high %s, but the first hit has too much power for these two to chain together.
A handy attack in all three scenarios, it'll be one of your quickest kill shots when you break out the third axe.
Dash Attack /> Helmet Roll Forward
Ax Knight slows almost to a stop, skidding along the ground, and his helmet accidentally pops off and rolls away before him. Frantically, he chases after it. The helmet moves about as fast as Pikachu, and Ax Knight slightly faster. Contact with helmet causes 6% and tripping, the better to be trampled by Ax Knight the very next second, who deals 4% and some decent forwards knockback. He has super armor until he finally catches his helmet, which happens after a distance of a platform and a half.
Beware, though: if the helmet flies off the ledge, Ax Knight will hopelessly leap after it, still a hitbox; a useful manuever for high-% edgeguarding, but a risky suicide move.
=T=I=L=T=S=
Forward Tilt /> Cut Earth
Ax Knight, in two moves, raises his axe above his head and then brings it down in front of him. As its head embeds itself into the ground, he pulls it towards him, cutting a gash into the ground that does different things depending on your current axe:
First axe, this comes out in about 0.3 seconds, so it's very quick. It only does 4% if you hit with the axe head, and the gash only kicks up a small plume of sand for ten second, obscuring the screen effectively.
Second axe, it comes out in 0.6 seconds and deals 7% on contact with tiny knockback again. This time, Ax Knight angrily whacks the ground twice more, frantically, resulting in a longer attack and a big hole in the ground that causes foe who pass over it in the next ten seconds to be buried a la Pitfall.
Third axe, it's a heavy blow, slow but strong, dealing 12% with surprisingly small knockback. As Ax Knight pulls his axe towards him, he cuts a deep gash in the ground/platform, which has high chances of trippage if you pass over it in the fifteen seconds it lasts.
On the whole, this odd attack is one of Ax Knight's few ways of rigging the stage in his favor, so take full advantage. A cloud of sand is perfect cover to switch out, if need be, or to throw out an axe.
Up Tilt /> Disembodied Skull Soaring
Axe Knight suddenly leaves his body behind him! Wait, what? His face is a skull, obviously, and it leaves his limbs, his weapons, his helmet, all that sitting on the ground like an invisible man while the skull goes up about a jump's length and then turns and swoops back down. This comes out almost instantly to make up for its long length. His body has super armor throughout, but that just makes it easy to beat on it. The skull, however, glows blue and fiery, and upon contact deals 8% and has a strange effect.
After touching the skull, the foe, too, becomes disembodied. A pale and ghostly version emerges from the main body, and they have to control THAT for ten seconds. That form, however, is very weak, dealing half damage and no knockback. Meanwhile, their regular body, which is immobile, has super armor, giving you ample time to rack up the damage while their ghostly incarnations feebly try to return the favor. An oddball attack that isn't that difficult to land with; it'll definitely warn them against aerial approaches.
Down Tilt /> Dig me a hole!
Ax Knight whirls comically like a top, rapidly digging himself a hole. The speed of this depends on his axe; in an unusual reversal, the third axe is quickest to dig, while the first is slowest. Once the hole is done, he crouches in it sneakily while you hold down. Pressing B while in the hole will result in him taking a moment to cover it up, hiding him effectively. Now, when you release down, he pops out, swinging wildly with high priority and range. Pressing A while in this state results in a false "pop-out", just him slightly raising himself before ducking back in. You can stay hidden for ten seconds before being forced out; it's possible, with a low attack, to hit Ax Knight out of this.
This is awesome mindgames right here. Fake them out a few times, you're bound to land the powerful hit eventually. It's amazing in multiplayer where it's easy to love track of everyone. That Ax Knight - he always come prepared, even for trench warfare!
=S=M=A=S=H=E=S=
Forward Smash /> Dash with Upraised Axe
As he charges, Ax Knight raises his axe overhead. After releasing, he rushes forward just as he does in the Kirby games, the distance varying depending on how long you charged from a minimum of half a platform to a maximum of two. He actually moves quicker than his dash, too. Like Ike and his Forward B, upon any contact, he'll stop running and strike.
First axe, he actually takes a small hop back before swinging three times, each for 3% but each as fast as a Meta Knight attack. Great priority, with a bit of knockback on the final, upward, strike.
This is the classic one, just like in the Kirby games. Upon reaching the foe, he slashes repeatedly and frantically, for about six hits. This happens fairly quickly, and deals up to a total of 18%, but can be easily shielded or dodged.
The third axe also has three hits, but these are fairly bulky, each with tiny flinching, but each one moving Ax Knight slightly forward, bringing him into range for the next strike. The third has some good knockback, and each does 5%. Risky, but if you land the first, you're likely to land everything.
A handy attack for covering some ground and attacking unexpectedly.
Up Smash /> Pogo Axe
Ax Knight slams his axe into the ground before him, then hops onto it, catapulting himself up above; how far up depends entirely on how long he charged and on what axe it is; first will obviously catapult him less high than the heavy third. This attack at the least takes you higher than a regular jump and at the most higher than Falco's double jump, making it a great way to get higher up in the air where you can pelt them with your aerials. NOTE THAT this attack costs you an axe, causing Ax Knight to pull out the next in line if it wasn't already the third one. Leave it sticking there for Vul or Mace Knight, if you wish.
Down Smash /> Boomerang Axe, Forward then Back
Ax Knight tosses his axe directly before himself, about a platform's distance - but then it comes right on back, and Ax Knight hops up slightly and lets it keep moving behind him. How far it goes behind him depends on charge time. Whenever it hits, the result is the same; a set amount of damage and average knockback, and Ax Knight loses another one of his three weapons. The first axe deals 10%, the second deals 16%, and the third deals 11% but has some more knockback. This attack comes out fairly quick, but isn't really versatile - although its resemblance to his B is always handy for mindgame purposes.
=A=E=R=I=A=L=S=
Neutral Air /> Full Axe Windmill
Ax Knight draws ALL the axes he currently has with him - this attack is unique in that it's best before you start tossing 'em. It's sort of like Pit's or Ike's, but covers his whole body, and comes out relatively quickly...
With all three axes, it's a whirling, hard-to-penetrate circle of death that deals multiple hits OR a single big hit depending on which of the three axes you hit with - not that it's easy to time something like this. With every hit and the final good one, you've got 15% right there.
With two axes, it's suddenly quite a bit slower. You're much more likely to land only one of the two spinning axes; the big one does 8% on contact and will likely knock them out of the hit, while the smaller one sort of pulls the foe in, dealing 6%. At lower %s - if you chucked your first axe early - this can lead to a push-and-pull, and a few hits, with luck.
So now you've got just one axe, and it spins pretty slowly. It's easy for a foe to slip through it and interrupt him. Best to avoid at this point, despite the 12% payoff.
This is a fantastic shorthopping option, especially in the first two scenarios. It's a neat little attack that'll keep you constantly conscious of just how much you lose when you give up an axe.
Forward Air /> Disembodied Grab
Ax Knight extends one large gloved hand... which suddenly extends way longer than you'd expect. In fact, it completely detaches from his body, glowing an eerie blue. You can control how it moves almost instantly after using the attack, although it's constantly losing height. While it's separated from him, he falls much more slowly, letting the glove go below, even though it doesn't move quickly. As soon as it makes contact with someone else, it pulls the into a grab, and Ax Knight falls suddenly and abruptly with them to the ground, from where he can throw them.
You can try dodging the hand and going for Ax Knight himself while this attack is happening, as he doesn't have super armor, and hitting him will cause the hand to fly back to him and the attack to end. When it hits the ground, if you didn't catch anyone, the attack ends and Ax Knight goes into free-fall. Lastly, this can be used to Axicide if there's no ground below you at the time you catch 'em, even though this is hard to pull off with his fall time.
Back Air /> The Amazing Vanishing Axe
Ax Knight lobs the axe he's currently using forward, as he does in his special. It stays on the same horizontal level as him, following him as he drops. If you press nothing else, it simply finishes its boomerang trajectory, goes out about a platform's distance, and comes back. If, however, you press A while it's out there... Ax Knight's eyes glow yellow and evil, and the axe disappears in a puff of smoke, only to reappear behind him and return to him from there.
With your first axe, this is a speedy, spammable move, but weak no matter where the axe hits. Still, it's pretty impressive to toss an axe forward and have it return from behind as a short-hop.
The second axe pulls foes along with it as it goes, dealing multiple hits of 2%. This gets interesting if you hit them with the second part, as it tends to pull them back to Ax Knight and chains into Up Air.
The third axe is slooow, so there's a decent chance that the attack is still going on when you land. This beefy one deals a good 10%, but doesn't have much knockback compared to many of his big-axe-attacks.
A very decent attack that can really bend the foe's mind with guessing where and when the axe whirling towards them is going to vanish.
Up Air /> Impale on Helmet
Ax Knight's spiked helmet briefly becomes a hitbox, for only a few frames. The foe needs to be overlapping for this to work. After the small hitbox, he spins around once, facing the screen and rotating like Mario taunting. This just adds some obvious lag during which he's suspended in the air. HOWEVER, if you hit someone in that opening hitbox, they'll be impaled on your spiky helmet and therefore will move with you as you rotate. If there is indeed someone gored on your helmet, pressing A will cause Ax Knight to make a convulsive motion and for them to go flying in the direction they were pointed at that moment. In other words, you choose which direction they get tossed in. It isn't heavy knockback, but it's still very potent as a spike. When the foe is first gored, they take 11%; remember, this has a tiny hitbox, and if you miss, you'll DEFINITELY be punished. Use only when you have an assured hit.
Down Air /> Abandon Ship!
This is a split-second counter; who'd a thunk it? As he uses it, Ax Knight gets a frightened expression, his eyes darting; if he's hit in the exact split second he uses it, he'll scream loudly, stalling, then plunges suddenly, straight down, trying to escape before all hell breaks loose. Along the way, he tosses away all three of his axes, if he still has them, and they can hurt foes on impact as items, waiting to be picked up by the next member of the crew. If used above solid ground, Ax Knight ends up faceplanting helplessly. If this happens, Captain Vul will come rushing in from the background, pull Ax Knight out, and toss him away into the background; you've just switched characters. If he uses above empty air, he won't KO himself; no, he'll simply escape the field of battle, while Mace Knight rushes in, exasperated, on the nearest ledge. This is essentially a handy last-minute precaution, a good way to switch while also leaving axes for the other Crew members to play around with. Tough to pull off, but hey, like I say, it's like an emergency self-destruct button or something.
=T=H=R=O=W=S=
Grab /> Disembodied Hands Grasping
A simple grab; Ax Knight drops his axe briefly and extends both hands farther than they should be able to go, as they both glow bluish. This is a mid-ranged grab, not quite tether-style, but still handy for snatching up foes who think they're out of range. Problem thing here is that it comes out slower than you'd think; on the whole, Ax Knight's grab game isn't anything special.
Pummel /> Switch Spirits
The weirdest pummel you've ever seen, as Ax Knight's supernatural powers show up again. This takes long for a pummel, but not as long as you'd think; there's a blue flash and Ax Knight and the foe he's holding switch places - characters, essentially. They're Ax Knight and you're them. This lasts for a mere seven seconds before you both switch back. Of course, they can press A themselves to switch back, so it's like a button-mashing contest between the two of you.
Obviously, like Manaphy, you don't switch damage %s or stock or anything like that; if they KO themselves, they're the ones who lose the stock, after you switch back. Watch out, though; they CAN chuck your axes away freely. They CAN'T switch characters. It's a weirdo pummel, but great for confusion, and more useful than most of his throws.
Forward Throw /> Sweep into Uppercut
This one only works if Ax Knight still has at least two axes on him. With the first, he sweeps along the ground, cutting the foe's footing off, and causing them to begin tumbling. Now, if and ONLY IF you press A with perfect timing, while they're in the air, he draws suddenly and hits the foe, who's loose in midair, a good distance ahead.
With all three axes, the first hit is weak and does 5%, but the second comes out decently quickly and does 6%, making a decent total score.
With only two, however, the first hit does 9% and the second does 5% with better knockback. This is the beefier, handier version.
One of Ax Knight's better throws.
Back Throw /> Backwards Toe Kick
Ax Knight drops the foe off behind him, and bends forward, kicking back at the foe's face with the tip of his toe. This does 5%, and doesn't really sound exciting; the knockback is puny and takes them a tiny bit into the air, although it has some long hitstun. The interesting thing here is that you can potentially roll backwards and repeat the grab, making a hard-to-execute chaingrab, if only at lower %s.
Up Throw /> Triple Axemerang Combo
Ax Knight turns his back on the foe, and tosses all the axes he has - however many that is, straight forward, one slightly above the other. He then hops up slightly and automatically, allowing all three axes to crash into the foe who was behind him. Now, this attack is pretty brutal, but unless you fastfall right away, you'll lose all three at once, and that ain't good. Fastfall to catch at least a few of them. This has minimal knockback, but each axe you hit with does 6%, for a potential early-game total of 18%! Is that worth the risks? Not usually, to be frank...
Down Throw /> Trampoline Time
Ax Knight hops up onto the foe. It's yours now to repeatedly footstool them with your timing. You can do this more times than with a regular footstool, a maximum of fifteen, and each does 1 or 2%. This can be pretty brutal, actually, but it's VERY hard to get the timing after the first few times, as the height he jumps after each bounce is completely random. There's no pattern. Sometimes you'll go so high that the foe will recover from the hitstun and gets out entirely. And, of course, no knockback. This is strictly a damage-racking throw. Handy, if unreliable.
=F=I=N=A=L===S=M=A=S=H=
Final Smash /> The Axe of the Gods
A heavenly chorus rings out, as Ax Knight scratches his head, looking confused. Suddenly, a massive, golden axe drops from the heavens, embedding itself into a random place on the stage; if it hits a foe on the way, they take 15% and good knockback. It'll remain glistening where it landed for five seconds before vanishing, so rush in there, quick, and pick it up! Only Ax Knight can wield this one.
This is a very special axe, and one that he can use as much as he wants for the next twenty seconds. This one ALWAYS comes back to him after completing attacks; use B and dodge it, it'll go back a ways then magically rush, as if magnetized, back to Ax Knight's hands. It's also as strong as they get; it's much faster than your usual third axe, but has the same power in it. With a weapon like this, Ax Knight should be able to dish out the damage, and, indeed, the KOs. Have fun, because after twenty seconds, it vanishes suddenly, vaporizing right out of his hands, and a muttering Ax Knight pulls out the axe he was using before the Final Smash. Sorry, little guy; you can't have it all.
\-- Playstyle --/
Ax Knight is unique among his buddies in that maining him alone is an uphill battle. Since he loses axes so regularly, switching is sometimes a needed precaution; it's either that or allowing yourself to be knocked out, so as to get your precious weapons back, as an axeless Ax Knight has about seven true attacks, and is an easy target for the most novice of players.
In truth, every stock should unfold more or less the same way. The first axe is for poking at the foe over and over again with irritating little attacks, unnerving them and wrecking their confidence. You're not bound to get too much damage done per se, that first one is all about the mindgames and the moral side of playing Brawl.
Then you toss the first axe - maybe to recover, maybe to stop a projectile spammer, maybe completely by accident - and the second one comes out. This one is supposed to go to town on an unnerved foe, racking up damage after damage, always staying in close with attacks with barely any knockback, and generally being as aggressive as possible. Then that one, too, makes way for the third and final onslaught.
The third axe has one and only one purpose - finishing them off. It's slow as they come, so you better be sure they're at a high enough % before tossing the second one - you want to be able to finish with a single well-aimed axe stroke, like an executioner.
And then they're KOed, and Ax Knight has a problem. This axe can't rack up damage, at all. So unless you switch, it's very likely that you'll be knocked out in turn, which, of course, will refresh your three axes and let you start from scratch. At times like this, your throws will be potent damage-racking weapons.
Ax Knight is deceptively all about the mindgames. Many of his attacks - in particular his Side B, but also his Down Tilt, Back Aerial, and many more - are meant to keep the foe guessing as to what this insane little axeman is going to do. It's all about timing, and tact; it's all about knowing yourself better than they do, and all about making moves that completely break down any preconceptions.
Ax Knight's stats aren't great. Any of his three individual axes leave him decidedly underpowered. It's when all three of them serve their individual purposes that he comes together as a character, and to do something like that, you have to keep remaking yourself and how you approach the obstacles in your path.
There's no better way to remake yourself than switching characters entirely, and hey, when you do so, you'll be leaving a full set of powerhouse battering items for Vul and Mace Knight to play around with, keeping them amused just long enough to let twenty seconds elapse and bring the little axeman back out. THAT is how you main Ax Knight.
\-- Extras --/
=T=A=U=N=T=S===A=N=D===P=O=S=E=S=
Forward Taunt /> Master Woodsman
Ax Knight heaves his axe over his head and slams it down before him, showing off. Except, of course, he gets it jammed in the ground before him, and pulls on it frantically for a second before getting it out again.
Up Taunt /> Bouncing
An excited Ax Knight bounces up and joyfully, a wicked grin on his face. How exciting.
Down Taunt /> Bragging Rights
Ax Knight lifts his axe over his shoulder and boasts, "This one's in the bag." Thankfully, this is a long taunt, and therefore not spammable.
Win Pose #1 /> Rain of Blades
Ax Knight, ecstatic at his victory, tosses all three of his axes up into the air... then cowers as they rains down around him, barely missing him.
Win Pose #2 /> Assemble
Ax Knight starts off scattered across the screen. A glove here, an axe there, his helmet in the foreground, and a hollow skull off near the back. As a blue glow suffuses the screen, all these pieces come together to form him. He cackles nefariously as he fingers his axe.
Win Pose #3 /> Manic Axeman
Ax Knight rushes in from the side of the screen, his eyes rolling around and crazy, swinging his axe repeatedly all over the place. He runs back and forth a bit like this before tripping and collapsing in a sad heap. Poor little guy.
Loss Pose /> Disassemble
In the opposite of his win pose, Ax Knight claps only once before simply falling apart, a mess of garments with an axe and a skull. Looks like he doesn't take losing too well.
=S=N=A=K=E='S===C=O=D=E=C=
Snake: So this is the guy with the axe, huh?
Mei Ling: That's right, Snake. Ax Knight may not be too clever, but he always, always tries his hardest. That's what a warrior should be like.
Snake: Warriors like that end up dead and buried.
Mei Ling: Snake!
Captain Vul: Hehe... good luck burying Ax Knight.
Mace Knight: He'll always manage to dig himself back up. Believe me, I've tried it.
Snake: So what exactly are you saying?
Captain Vul: You fool! The only way to stop Ax Knight is to make him throw away all three of his axes! KAHAHAHAHAHAHAHAH!
Mace Knight: AHAHAHAHAHAAHAHAH!
Sailor Dee: HEEHEEHEE!
Captain Vul: HEHEHEHEH! Ahem... hmm.
Snake: How do these idiots keep getting our frequency, anyway?
=M=I=S=C.===E=X=T=R=A=S=
Entrance
Ax Knight rushes in from waaay back in the background, swinging his first axe wildly all the while and kicking up a cloud of sand as he goes.
Kirby Hat
Kirby gains the spiked, primitive helmet of Ax Knight. He gains the power to toss axes forward boomerang-style, but they're much smaller and weaker, and will occasionally be phonies, not doing any damage and simply disappearing in a cloud of smoke on contact. Even Kirby doesn't know when the fake's coming out, detracting from its usefulness.
Alternate Colors
- Bloody Barbarian - The red costume, his whole get-up becomes rusty and spookily blood-spattered.
- Ghost Skull - A haunting blue costume, he glows perpetually with a wispy light.
- Woodsman - The helmet is apparently made of wood, and his main color becomes green.
- Axeman of the Gods - A full-body gold costume. Looks very regal and royal.
- Evil Spirits - His skull becomes black with glowing red eyes, very sinister-looking.
---
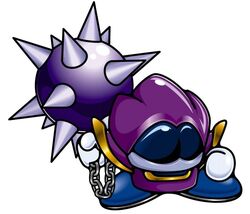
[[[ Mace Knight ]]]
"Hmph. I know we'll regret this."
Mace Knight brings his rather unique weapon to the Crew! Note that the weapon Mace Knight uses is actually a flail, which is different from an actual mace. However, for ease of reference, it will still be referred to as a mace throughout this moveset. I will also refer to it as a ball and chain, though this is, yet again, another thing entirely.
Mace Knight’s weapon of choice is far from lightweight, and it shows when he attacks. By default, most attacks are slow and don’t reach far at all. However, by swinging his ball and chain beforehand, he can give the ball some momentum, speeding up attacks, lengthening his range, and generally having a positive effect on his moves.
Mace Knight’s Neutral Special is used to whirl the ball over his head. As he gets it going faster, it has a more significant impact on the rest of his moveset. Once it’s spinning at top speed, it will whirl around his head as a gray blur, such that you can’t see the actual ball anymore. In addition to attack bonuses, such as automatically taking his Smash Attacks to full charge and greatly strengthening his recovery, a fully charged ball and chain will cause Mace Knight to jump higher and fall slower, thanks to a little helicopter-like effect he gets from spinning it so rapidly.
When being attacked, Mace Knight can usually keep spinning the chain at the same rate. The chance of him stopping is roughly the same as for a hit character to drop an item they’re holding, only it’s divided into two possibilities for Mace Knight. If the hit is indeed powerful enough to hinder his ability, there is an 80% chance that it will cut the spinning to half of what its previous rate was, with a 20% chance that it will stop it completely.
[[[ Stats ]]]
Size: Mid-Small
Weight: Mid-Heavy
Power: Varies
Jumps: 2
Jump (1): Mid
Jump (2): Mid-Low
Speed (Walk): Slow
Speed (Run): Mid-Slow
Traction: Mid
Speed (Attack): Varies
Speed (Falling): Mid-Fast
Range: Varies
Crouch: High
Crawl: No
Wall-Kick: No
Wall-Cling: No
Glide: No
[[[ Moveset ]]]
∂----- Specials -----∂
Neutral Special φ Wind Up
Pressing the B button will cause Mace Knight to start swinging his ball and chain over his head. You can speed up the time it takes to get to full speed by pressing the B button multiple times. This works like a charging move, where you’ll be stuck in place while you get up to speed. However, Mace Knight will finish the charge for you if you can’t stay in place long enough to get up to full charge. For example, if you only have time to press the B button once, and then cancel out of this move (which you can do by shielding, or by starting to move), he’ll keep swinging the ball and chain over his head, reaching full charge on his own about 5 seconds later. The more you mash the B button while you’re in place, the faster you’ll get yourself to full charge. A quick player can get it in about a second. If you’re mashing the button to get to full charge, and you reach it, Mace Knight will simply stop responding to the button input, since he can no longer spin the ball faster.
[0%]
Side Special φ Massive Swing
Mace Knight swings his mace forward, dealing a strong blow to opponents. He swings it in an arc that begins over his head and ends as it returns to him and he catches it lower in his other hand. Every aspect of this move is affected by the momentum you’ve built up before using it. The range is initially comparable to the Ice Climbers Forward Smash, but can extend up to one-third the length of Final Destination. The damage starts at 10%, and can build up to 18% at full momentum. Knockback goes from flinching to heavy diagonal knockback. Priority also increases with momentum. The only thing about this move that is affected negatively by the momentum is the lag times. With no momentum, you can perform your simple attack with moderate lag, but with all that momentum, such a powerful attack takes a lot of energy from Mace Knight, and he swings the ball rather slowly.
[10-18%]
Up Special φ Chain Reach
Mace Knight tosses his spiked ball upward and forward as both an attack and a tether recovery. As an attack (when used on the ground or where there is no ledge to latch onto), the ball travels similarly to Olimar’s Pikmin Chain, with only the spiked ball dealing damage. It’s slower than Olimar’s chain, but deals a solid amount of damage, 10-18% depending on your charge. The reach of the ball is also affected by the charge, ranging from about what Olimar gets with 2 Pikmin to about what he’d get with 8. Again, the ball travels more slowly than the Pikmin extend, and there’s a little more startup lag, as well as considerable ending lag.
When used as a recovery, this functions like a tether, latching onto a nearby ledge. However, this tether does not have all the same qualities as most others. Regardless of whether or not a ledge is occupied, the spikes will stick into it with a deafening thud. If an opponent was guarding the edge, but out of their invincibility frames, they’ll take 8-10% damage and be knocked away from it. If they are still in their invincibility frames, they’ll simply let go of the ledge, affected by the tremendous shaking that undoubtedly follows the ball’s impact. Like with the attacking variation, the range is affected by your charge. This may seem like a simple buff on the standard tether recovery, but it has its downsides. For one, it’s significantly slower. Mace Knight takes a second to fling the ball, which travels somewhat slowly toward the ledge. In addition to that, he doesn’t climb his tether as fast as most characters. He clambers up the chain to the ball, collecting it as he goes, but takes a second or two. During this time, the ball, sitting on the corner of the ledge, can be hit by other players. If the ball takes 25% damage before Mace Knight reaches the ledge, it will fall, and Mace Knight along with it. Mace Knight regains his recovery if this happens, but he’ll have no charge, so you had better hope you’re within about two Pikmin’s distance of the ledge.
[10-18%]
Down Special φ Changing Shifts
Mace Knight walks into the background as the next crew member appears, walking in from the background. This is a fairly standard transformation Down Special, but you’ll have superarmor as the switch occurs to prevent foes from punishing the switch like they can Pokemon Trainer’s. This can’t be used to stall though, as you must wait 20 seconds before you can switch again..
There is a 20% chance that Mace Knight will say some dialogue as he changes shifts with one of the other crewmembers. Depending on the situation, Mace Knight can say one of a few various lines as he makes his way into the background or enters the field of battle from it. The dialogue is as follows:
- Switching in, under 100%: “My turn already? Idiots. . .”
- Switching in, over 100%: “Sure, make me do all the hard work. . .”
- Switching out, under 100%: “Get out there! I’m not doing everything for you!”
- Switching out, over 100%: “I hate this job. . .”
∂----- Standards -----∂
Standard Combo φ Swift Spin
Mace Knight holds his hand out and whirls his ball and chain vertically in front of him. The distance covered is similar to that of Mr. Game & Watch with his Standard Combo, only about three times the vertical component. Without momentum, he rotates the ball very slowly, taking a second to get it there, and it will deal 1% damage to anyone who touches it. It has very low priority like this, and is easily canceled out. With momentum, the spinning ball can reach up to 5% damage per hit, with a set knockback knocking opponents upward about two Stage Builder blocks (it has this even when dealing only 1% damage). There is a moderate amount of ending lag either way, as Mace Knight reaches out his other hand and grabs the chain, stopping the spinning.
At full momentum, this attack gains an additional property. Acting as a fast-moving fan, the spinning ball will push air forward for about two Stage Builder blocks. While all characters can run against this (though characters like Jigglypuff and Ganondorf really struggle to), it can negatively affect their approach. Also, the whirling ball acts as a weak reflector, able to reflect projectiles as long as they’re not moving too fast. Examples of reflectable projectiles include Mario and Luigi’s fireballs, Pikachu’s Thunder Jolt, and all items that aren’t Smash Thrown. Fast-moving projectiles, however, such as Pit’s Arrows or Fox’s Blaster shot, will not be reflected.
[1-5%]
Dash Attack φ Vault
Mace Knight slams his mace to the ground in front of him and jumps up, making a sweeping arc over it to the opposite side. Anyone hit by the ball will take 8% damage and weak knockback. Anyone that Mace Knight or his chain strikes during the jump takes 6% damage with fairly weak knockback, but it’s got surprisingly high priority and it can be pretty easy to hit with. Momentum affects how far away from Mace Knight the ball will be slammed down, and consequently affects how large his arc is. With no momentum, it’ll be a pathetically small arc, looking like Mace Knight simple hopped over the ball after dropping it. However, with full momentum, Mace Knight can almost make it from one end of Final Destination to the other! Unfortunately, despite little startup lag, he suffers a lot of ending lag after this move, making it punishable in many cases.
[8% or 6%]
∂----- Tilts -----∂
Forward Tilt φ Shockwave
Mace Knight smacks the ground in front of him with his mace, shaking the ground and shooting a small shockwave forward, which moves about as fast as a PK Thunder. Lag times are moderate for this regardless of your charge, but having built-up momentum will affect the size of the shockwave. At no momentum, the shockwave will travel directly along the ground, only affecting opponents who are touching the ground, and will be as long as half a Stage Builder block. At full momentum, the shockwave will be as tall as Link, and one-third the length of Final Destination. A full-momentum Shockwave is easy to hit with, but unfortunately, this move lacks in power, dealing multi-hit damage that, depending on your momentum beforehand, usually accumulates to about 5-8% damage. Luckily, one redeeming quality is that the shockwave will pass through opponents, and won’t stop until it strikes a wall or a ledge.
[Variable Damage]
Up Tilt φ Chain Stretch
Mace Knight’s chain stretches out, pushing the ball high above his head. If it’s not spinning, this will just create a tall hitbox directly over him, which deals 5% damage and pretty weak knockback. With the ball spinning, however, the horizontal range increases to about the width of a Battlefield platform, and the spinning ball deals 8% damage with much better knockback. Lag times are moderate, and aren’t affected by the momentum.
[5% or 8%]
Down Tilt φ Quick Bounce
Mace Knight pounds the ground in front of him with his mace, bouncing the spiked ball off the ground with a thunderous sound. It reaches a similar distance to Kirby’s Hammer when used on the ground. This attack has relatively little startup and ending lag, and is fairly quick to execute. As Mace Knight swings the ball down and bounces it, it deals 4% damage with pretty weak knockback to anyone it hits.
Unlike most of his other moves, the momentum of Mace Knight’s ball does not affect this attack at all. In fact, this move is one of your best options before the ball is swinging at its fastest, because aside from being unaffected by the momentum of the ball, Mace Knight will pick up his momentum exactly where he left off as the ball bounces back up over his head. In other words, you don’t lose momentum by using this move. Due to its weak damage and knockback, this move should be used primarily to ward off your opponents while getting the ball to full charge.
[4%]
∂----- Smashes -----∂
Remember, for all Smash Attacks, momentum automatically translates to charge. However, this does not apply the other way. Charging will not give you the same effects as built-up momentum will.
Forward Smash φ Hyper Spin
Mace Knight whirls around with his mace outstretched, damaging opponents both to the front and the back. The lag on this move is moderate, and the spinning ball deals 10-15% damage with good knockback to those it hits, while the chain deals 4-5% damage with knockback directly away from Mace Knight. Adding momentum to this move will affect the number of times that Mace Knight spins around, and the ball reaches further from him every time. You can get up to four spins. The first spin has the ball very close to Mace Knight, and the last spin has it about half of Battlefield’s length away. Priority is also increased by having momentum. Lag times are shorter than average for this move, and the actual move executes relatively quickly as well, each spin taking a little under half a second.
[10-15% or 4-5%]
Up Smash φ Aftershock
Mace Knight brings his mace to the ground hard, shaking the floor beneath him. He faces the screen and slams it down directly in front of him, so the hitbox for this is relatively difficult to hit with. This part of the attack does 4-6% damage, depending on charge, and knocks opponents upward with moderate knockback. Lag times are moderate, though the startup lag is severely reduced if Mace Knight builds up momentum beforehand.
The real power of this move comes about two seconds after Mace Knight hits the ground, as the shaking ground erupts in a massive energy burst. The burst is about as wide as Bowser and as tall as the height of the tallest Battlefield platform, and lasts for a second or so before dissipating. The energy aftershock deals 12-20% damage, with good upward knockback.
[4-6% + 12-20%]
Down Smash φ Spike Slam
Mace Knight slams his spiky ball down in front of him hard, shaking the ground and damaging those who he hits. This has lag worse than Ike’s Forward Smash if you’re not charged up, but if you’re charged, it’s about as fast as Mario’s Forward Smash. It’s range is similar to Lucas’ with his Down Smash, a little further if you’re charged up. As he slams it down in front of him, the ball deals 12-20% damage, depending on charge, and above average knockback. However, it has another effect. Opponents directly behind Mace Knight, who are touching the ground, will be stunned by the impact, as if hit by Zero Suit Samus’ Paralyzer, which brings us to the next point about this move.
Like Link’s Forward Smash, Mace Knight can press the Attack button again to perform a second part of this move. After slamming the ball down in front, he can swing it over his head and slam it down behind him, hitting those enemies he stunned with the first hit. Damage, range, and speed are all affected by charge, just like the initial hit, damage for this hit being more, at 14-22%, but with a little less knockback than the frontal strike. This should be used wisely, though, as the inclusion of the second hit significantly increases the ending lag of this move, from something rather moderate, to something that will all but ensure a nearby opponent a punishing opportunity.
[12-20% or 14-22%]
∂----- Aerials -----∂
Neutral Air φ Guard Whirl
Mace Knight lowers his (hopefully spinning) ball and chain to chest height. If the ball isn’t spinning, this means only that his body is turned into a hitbox, though one without much priority. If it’s spinning, then as he brings it down it will spin tightly around him, with great priority that protects him from most incoming attacks. It doesn’t go far beyond his frame either way, but the priority is greatly affected by the momentum of the ball. He holds the ball and chain down there for about a second before raising it above his head again. Note that this move will not stop the momentum of the ball. Enemies hit by the attack, regardless of momentum, take 5% damage and fairly weak knockback. Startup lag is moderate, while ending lag is a little bit more.
[5%]
Forward Air φ Heavy Flip \Mace Knight performs a front flip, with his mace outstretched, swinging around him. This is similar to Meta Knight’s Neutral Air, excepting that Mace Knight only rotates around once, doing so much more slowly, and his range can be a good deal longer. There’s a fair amount of startup and ending lag to this move, but it makes up for it with a solid 12% damage and pretty good knockback. The range of this move is affected by the momentum you have when you use it. At no momentum, the range is roughly the same as Meta Knight’s with his Neutral Air, not much of anything. At full momentum, it reaches about half the radius of a Smart Bomb explosion, making a large 360 degree sweep of devastation.
[12%]
Backward Air φ Force Boost
Mace Knight flings his mace forward, propelling himself backward. Anyone the ball strikes gets 7% damage with relatively little knockback, and anyone Mace Knight hits while moving backward takes the same amount, but with somewhat better knockback. If the ball isn’t spinning, this will give him a tiny boost backward, as he thrusts the ball forward. With a spinning ball, however, it will act as a sort of fan, pushing the air away and driving Mace Knight back hard, ideally about half the length of Final Destination. Moderate startup lag and rather long ending lag make this only somewhat useful for recovery purposes.
[7%]
Up Air φ Loose Ball
Mace Knight throws his ball high into the air, then catches it when it comes back down. He is unable to move from the time he throws the ball to the time he catches it, so you’ll be falling freely during this time, with no control. The ball travels up about the distance of three Stage Builder blocks from where you throw it, then falls, making the full trip in about two seconds. This can be a dangerous move, because it leaves you falling and kills your momentum, but it has one huge redeeming point. The flying ball does knockback directly downward, most often spiking opponents. The more momentum you have beforehand, the stronger the spike will be, accompanied by 10-15% damage. This is a powerful tool in the hands of a good player. The startup lag is also affected by the momentum, ranging from something Ike-like to something rather moderate. Ending lag is always moderate.
[10-15%]
Down Air φ Megaton Dive
Mace Knight swings his mace downward, in an arc that affects gameplay only as a vertical line downward (so no sweeping to either side). He takes about a second to perform the swing, with above average lag on both ends. The reach of it is affected by the momentum. Without any momentum, it’s range is similar to Link’s Down Air, meaning it doesn’t reach all that far at all. With full momentum, it reaches approximately the height of three Stage Builder blocks. The ball deals 8% damage and decent knockback to anyone hit, but that’s not its real strong point.
If the ball strikes the ground when Mace Knight swings it down, it will stick into the ground, and Mace Knight will pull on the chain to drag himself down with it. He’s pretty quick to do this, too. As he strikes the ground, a huge burst of energy erupts from the ground, dislodging the ball and very quickly spreading to an area a little bigger than Bowser. This energy burst deals 10% damage and good knockback, but Mace Knight suffers significantly longer lag if this version of the move is employed.
[8% + 10%]
∂----- Throws -----∂
Grab φ Extended
Mace Knight grips his chain near the spiked ball at one end of it, and hurls the other end forward, which wraps opponents up in it and pulls them in close. It reaches about as far as Zero Suit Samus’ Grab. Unlike the majority of his attacks, Mace Knight’s grab is actually hindered by having his mace spinning at full charge. With a spinning ball, he’ll have to slow it down briefly and stop it before he can throw the chain forward. Conversely, this makes Grabbing an ideal course of action when you don’t have time to spin the mace around. There’s a fair amount of ending lag either way, but without charge there is almost no startup lag, while there is quite a lot with a charged ball and chain.
Pummel φ Spike Bash
Mace Knight hits his victim with the spiky ball he grips in his other hand. This is a powerful Pummel, dealing 5% damage per hit, but it’s also very slow. If you want to be able to pull a Throw off after even one hit from the Pummel, you’d best make sure your opponent has a fair amount of damage on them before Grabbing them.
[5%]
Forward Throw φ Top Yank
Mace Knight yanks on the chain holding his opponent, sending them forward as they spin like a top. They’ll shoot forward about half the length of Final Destination (though they’ll stop at ledges), and this only deals 5% damage to the victim. However, as they’re shooting forward, they’ll also deal 5% damage to anyone they come in contact with, allowing you to hit multiple opponents with this Throw. This is a relatively fast Throw.
[5%]
Backward Throw φ Carrier Swing
Mace Knight wings up and swings his mace forward, hitting his opponent with it. Then comes the fun part. As he strikes his opponent, he won’t hit them away from him. He’ll hit them and continue to spin with them, leaving them pressed up against the spiky ball as he does. The opponent must break free with controller input, though they’ll get free on their own eventually. The initial hit deals 4% damage, and opponents will take 1% more every half-second they remain pressed up against the ball. When they break free, they’ll escape as if they’d simple broken free from a normal Grab.
[4% + 1% per hit]
Up Throw φ Rocket Quake
Mace Knight slams his mace down behind him, causing the ground to shake and shooting his victim high into the air. This has good upward knockback, and deals 8% damage, but it’s a very slow Throw on both ends. As a neat little bonus, opponents behind Mace Knight as he slams the mace down will take 5% damage and weak knockback.
[8% or 5%]
Down Throw φ Burial Pound
Mace Knight takes his mace and smacks his victim hard over the head with it, dealing 8% damage and burying them in the ground. Unfortunately, he also buries his chain by doing this. Both Mace Knight and his victim can mash buttons to try to free themselves from the burial. If Mace Knight breaks free, he can follow up with another attack. If his victim breaks free, the chain will come up with them, freeing Mace Knight at the same time. This Throw is rather slow, but can pay off in the right conditions.
[8%]
∂----- Final Smash -----∂
Final Smash φ Warrior’s Frenzy
Mace Knight glows a vibrant red, becoming invincible for the next 15 seconds. During this time, his spinning mace remains at full momentum always, recovering instantly after any attack. Enemies who touch him in this state will be caught in the spinning ball, which deals multi-hit damage that’s difficult to DI out of. As one final note, Mace Knight gains a new Neutral Special in this state, due to the fact that his old one is currently useless. His Neutral Special now makes him spin the ball at an even faster rate, which creates a powerful tornado around Mace Knight. This is highly akin to Meta Knight’s Mach Tornado, with two notable exceptions. First, it is more powerful and catches enemies very well, making it difficult to escape the attack once you’re hit. Second, though, it is immobile. Unlike Meta Knight, Mace Knight cannot move around with his tornado, and cannot rise into the air with it. It lasts for almost as long as Meta Knight’s does if you are mashing the B button at the fastest rate possible.
[Variable Damage]
[[[ Playstyle ]]]
Obviously, your first priority with Mace Knight is to keep spinning that ball and chain. Mash the B button every spare moment you have. If opponents are rushing in, it’s best to use the D-Tilt to hold them off until you’ve got some good momentum. Once you’ve got that, it’s all about reading your opponent. Some will be best struck but a powerful F-Smash, while others will fall for the U-Smash. For aerial assaults, use the N-Air to protect you while you get in close, then proceed to strike your opponents down with a D-Air or a well-placed F-Air. Ideally, you’ll want to try to set up a swing of the Side Special to hit, as this is his move potent KO option.
Gimping is risky with Mace Knight, as his primary tool for it (the U-Air) also leaves him at a disadvantage, so it should only be used in carefully evaluated situations. For the most part, just let your opponent keep coming back for more. Mace Knight has his fair share of moves to keep hammering your opponents with. If you can’t get in close, options like the F-Tilt and Dash Attack can help you score glancing blows that may allow you opportunities to get in closer and deal some real damage.
As far as defensive play goes, you’ll want to try to avoid it. If your opponent can start hammering you, you’re all but finished. Mace Knight needs to be on the offensive, as his recovery, while potentially very good, is entirely dependent on momentum, which you’re unlikely to have if you’re taking a serious beating. To stay on top, you’ve got to be the one dealing all the blows.
If you’re against an opponent who just keeps coming in for repeated hits, try Grabbing, as it’s one of the only things Mace Knight can do quickly without building up momentum. His F-Throw works well for clearing you some space to build momentum, as does the D-Throw if you can mash the B button fast enough to escape and then build momentum as well. As long as you focus on keeping that momentum, a lot of the rest of your game will fall into place!
[[[ Extras ]]]
∂----- Taunts and Poses -----∂
Up Taunt
Mace Knight spins his mace rapidly, but accidentally smacks himself in the head with it! Luckily, it does no damage to him, though he rubs his head afterward for a second. Note that this Taunt will get rid of any momentum you previously had.
Side Taunt
Mace Knight holds his mace above his head, then makes the act of c
ocking it, lowering it slightly, then lifting it again. Like the other, this Taunt kills momentum.
Down Taunt
Mace Knight stomps his foot twice on the ground, kicking up dust and grunting, “Hmph!” This can be done without killing your momentum.
Victory Pose #1
Mace Knight spins his mace around over his head, creating a sort of helicopter effect and lifting himself up off the ground, close to the top of the screen, where he remains indefinitely.
Victory Pose #2
Mace Knight swings his mace rapidly above his head, then slams it to the ground in front of him, creating a massive crack in the ground that travels across the entire length of the screen. He then stares at the screen intently, appearing very menacing.
Victory Pose #3
Mace Knight is seen spinning his mace, then stops, as if confused, looking back at the losers and muttering, “Well, what do you know…”
Loss Pose
Mace Knight, like an honorable soldier, stands and claps, just like his lord Meta Knight.
∂----- Snake's Codec -----∂
Snake: Otacon, who are these guys?
Otacon: That’s the Halberd Crew, Snake. They’re Meta Knight’s henchmen, and they operate his battleship. They’ll come at you one at a time, so keep in mind that there are always two more of them in reserve when you’re fighting one.
Snake: So who’s this guy with the ball-and-chain?
Otacon: That’s Mace Knight, and actually, Snake, that’s a flail, not a ball-and-chain. Funny they should call him “Mace Knight,” since his weapon’s not even really a mace.
Snake: Sure, Otacon. So tell me what you know about him. I mean his fighting style.
Ax Knight: You’re as good as toast, buddy! Mace Knight’s ball-and-chain is gonna rip you to shreds!
Captain Vul: How many times have we told you, Ax Knight, it’s not called a—
Ax Knight: Right, whatever. This guy’s still going down!
Snake: You sure about that?
Captain Vul: Mace Knight is among our best warriors. You’ll be hard-pressed to defeat him, and if you do, we’re right behind him.
Snake: I’ve got a couple tricks up my sleeve myself…
∂----- Misc. Extras -----∂
Entrance
The background opens up like a mechanical door, and Mace Knight steps out, muttering to himself, “I have a bad feeling about this…”
Kirby Hat
Kirby gains Mace Knight’s helmet-like thing, and a combination of his Neutral Special and Side Special. Holding the B button will charge the attack like the Neutral Special, and it will then automatically release as Mace Knight’s Side Special.
Alternate Colors
- Normal
- Blue – Mace Knight’s purple armor becomes blue, so almost everything but the gold rims on his armor is now blue.
- Green – Mace Knight’s purple armor becomes green, and his dark blue visor becomes a shade of silver.
- Red – Mace Knight’s purple armor becomes red, and his dark blue visor becomes a deep black.
- Grayscale – Mace Knight’s armor becomes an off-white color, while his visor turns pitch black.
- Old – Mace Knight’s armor becomes a dusty brown, and his visor turns gray.
---
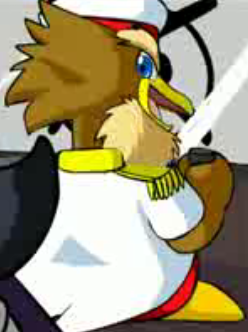
~~~ Captain Vul ~~~
"My flying fortress, the Halberd, will now rule over all of Dreamland!"
This is Vul. The very image of professionalism, he leads the crew into a new era of prosperity. In particular one loyal fellow...
"Oh no! Oh no! What do we do?!"
See that cute little guy right there? That’s the captain’s cabin boy, a Waddle Dee with a sailor cap. Fans of the series have dubbed him “Sailor Dee”, which is how I’ll refer to the puffball throughout the moveset. He’s the captain’s loyal partner and will always follow him around in a similar fashion to how Olimar’s Pikmin do. Also like Olimar’s Pikmin, Sailor Dee cannot be hit unless he’s separated from the captain by one of his moves.
When Sailor Dee is separated from the captain, he won’t take knockback, but has a health bar of 50 stamina that’s not shown to the camera. The captain has few ways of regenerating Sailor Dee’s health on his own, but when he switches to another member of the crew via his down special, Sailor Dee will regenerate one hit point per second. This encourages you to not exclusively use the captain out of the halberd crew, but the captain’s game doesn’t revolve around Sailor Dee to the point you should always switch out once Sailor Dee croaks over.
In any case, if you master the captain, you should be able to keep Sailor Dee alive for a good long time, especially considering he only becomes vulnerable upon you making him so and there being the occasional way to heal him without switching to another member of the crew. Captain Vul doesn’t need to rely on switching out nearly as much as Pokemon Trainer’s Pokemon due to their stamina, and can quite easily be mained on his own.
~~~ Stats ~~~
Size ~ 8/10
Captain Vul is as tall as Marth and his width is just around the middle of a standard human character like Marth and a giant one like Bowser. Sailor Dee is the size of one of the Waddle Dees from Dedede’s side special.
Weight ~ 7/10
Captain Vul is borderline heavyweight.
Walking Speed ~ 3/10
Vul likes to take his time moving about when not in a rush, going at a leisurely pace.
Running Speed ~ 3/10
The captain actually tries somewhat when running, but he’s still an old man so he moves about rather slowly.
Traction ~ 8/10
Vul has good traction due to not picking up enough momentum to trip.
Power ~ 6.5/10
The captain isn’t a standard heavyweight, being somewhat balanced in stats. While Vul does lean more towards the heavy hitter side, he’s not as extreme enough to be considered a standard heavyweight. While Vul has decent punch in several of his moves, he still doesn’t have a standout one that’s good for KOing.
Attack Speed ~ 5/10
Vul has a good amount of moves with little starting lag, making them easy to hit with, but they have bad ending lag making it hell if you miss.
Range ~ 7/10
Vul has a couple projectiles, but they’re placed at very awkward button inputs in his moveset. There are several moves throughout the moveset that involve various props that give Vul above average range in general. This is one of Vul’s advantages, but it’s not massive.
Priority ~ 9/10
Vul’s moveset is filled with disjointed hitboxes from all the various props he uses, and those that don’t still have decent priority for the most part. This is another of Vul’s advantages, though it’s not hard to take advantage of something like this.
First Jump ~ 2/10
He’s an old man, remember?
Extra Jumps ~ 5/10
Vul gets two extra jumps with flaps of his wings, but they’re small ones like Charizard’s.
Recovery ~ 7/10
Vul’s up special allows him to transverse a good distance.
Fall Speed ~ 6/10
Vul is far from floaty, but he doesn’t drop like a rock like other heavyweights, allowing him to actually have a halfway decent air game.
~~~ Animations ~~~
Basic pose
Vul stands with his wings furled up and folded behind his back like the only time we actually see anything besides a shot of his head in the games. Sailor Dee is the same as one of Dedede’s Waddle Dees.
Idle pose
Vul takes out an old fashioned pipe and puffs it while Sailor Dee repositions his hat to be firmly in the center of his head.
Walking
The captain walks with his eyes closed and his wings furled up and folded behind his back as if pacing.
Running
Vul opens his eyes and moves a bit faster.
Dashing
Vul actually pumps his wings and tries to run.
Crouching
The captain gets on the ground like a bird in it’s nest, his wings at his sides and sitting on his legs. If the captain is left idle in this pose, a worm will appear in front of him which he’ll hastily go to devour.
First Jump
The captain doesn’t try particularly hard at all to jump, not crouching down or anything, just leaping up to make this jump as insanely low as it is. At least it’s the fastest in the game, not that that matters.
Extra Jumps
The captain flaps his wings a simple time like Charizard’s two extra jumps.
Shield
The captain puts his wings in front of himself as the standard bubble shield forms. If Sailor Dee is present, he uses him as a meat shield for the pose.
Spot Dodge
Vul leans into the background standing on one foot, nearly falling over backwards, taking a while to regain his stance on both feet to make this spot dodge awkwardly long and punishable. If Sailor Dee is present he’ll join the captain in sidestepping, but will help him up more quickly.
Forward Roll
Vul runs into the background and runs forward the standard roll distance, then runs back into the playing field.
Backward Roll
The captain flaps his wings forwards to push himself backwards from the force of it, it being similar to Dedede’s roll.
Air Dodge
Vul flaps his wings to push himself into the background, then turns around and does the same thing to push himself back into the playing field. Longer then the average air dodge but has slightly longer ending lag then most.
Sleeping
Vul gets down in the same position as his crouch pose and sleeps like an actual bird. If Sailor Dee is present, he’s jumping on the bird’s backside, trying to wake him up.
Dizzy
Yellow chicks spin around Vul’s head as he sways back and forth. . .Perhaps his life is flashing before his eyes and he’s thinking of his children?
Tripping
The captain trips over Sailor Dee is he's present, otherwise tripping over his own feet like everyone else. There's a 10% chance upon tripping that the captain will yell "CURSE YOU SAKURAI!".
~~~ Moveset ~~~
Specials
Neutral Special ~ Meat Shield
Captain Vul steps into the background, picking up Sailor Dee and holding him in front of himself to use as a meat shield. This may at first seem like a fairly standard counter, but considering Sailor Dee will actually take damage to his stamina when being hit, it’s not worth it, right? Wrong. This counter is considerably stronger then the others. While it does no damage whatsoever, when foes hit Sailor Dee the part hit will jiggle a little as a “bounce” sound is heard, and the foes will take triple the knockback of their attack in the opposite direction from how it went to Sailor Dee. This makes an excellent KO move, but is completely useless in damage racking, so only use this when a foe has enough damage to be KOd and they’re going to use a powerful move on you. If Sailor Dee gets KOd from this attack, Captain Vul will have bad ending lag where you can punish him. Sailor Dee will also reflect projectiles back in the direction they came at twice as fast and as powerful of a rate, though this isn’t worth tossing around Sailor Dee’s stamina unless you’re able to hit with a reflected Gordo or something. This has below average starting lag and average ending lag that can be punished. The captain cannot be grabbed out of this counter due to being in the background.
Without Sailor Dee, the captain will pull out a Javelin Knight to defend himself. Instead of foes who hit the Javelin Knight bouncing off, the Javelin Knight will stab it’s javelin out at the foe who hit it to deal the knockback. Most properties are the same, but this version actually deals 10% damage! This is way better, right? Not so much, as the Javelin Knight only has 15 stamina and thus won’t withstand most attacks which could be countered to KO an enemy with Sailor Dee. This is a good tool to throw in for damage racking and potentially KOing once your foe reaches very high percentages against foes with weak KO moves.
Forward Special ~ Waddle Bowler
Captain Vul picks up Sailor Dee and holds him in a pose as if he were a bowling ball then he runs forwards the length of a stage builder block and hurls him like one, taking half a second. Captain Vul has to wait another half a second after releasing Sailor Dee to move, watching to see how his shot went, holding his pose after he threw him like his “bowling ball” like a pro bowler. Sailor Dee is invulnerable and disjointed as he rolls along at the speed of Wario’s run, moving until he hits something or until he goes two thirds the length of Final Destination, slowing to a stop quickly once he’s gone his maximum range. Contact with Sailor Dee before he starts losing speed (Which occurs when he’s gone 90% of his max distance) deals 13-14% with average knockback. After he hits something or goes his full course, Sailor Dee will be dizzy from spinning around for two seconds, and you are unable to reunite with him until this period is over. After recovering, Sailor Dee will salute the captain, able to come back to him. If Sailor Dee is hit any point after he starts losing speed, it will damage his precious stamina. This is best used as an approach, just make sure you take advantage of it once you hit with the approach to do further damage to them to cover Sailor Dee as he recovers. This is the closest thing to a projectile the captain’s got and it eats up all projectiles while Sailor Dee has his momentum, so this gives the move some uses defensively.
Without Sailor Dee, the move is completely changed. The captain takes out a whistle and blows it for half a second of lag, causing Sailor Dee to come dashing towards the captain if he’s just standing doing nothing and not busy/performing a move/dizzy/etc. Sailor Dee does zero harm to foes as he comes to report to his captain and runs at the speed of Kirby’s run. Sailor Dee takes the most direct path to the captain, and will run straight into a pit if there’s one in front of him. Should Sailor Dee run into a wall, he’ll stop his mad dash and just stay put. If your foe isn’t right next to you, this is a better option then picking Sailor Dee up yourself, but otherwise you’ll want to get him personally so you don’t get punished for blowing the whistle.
Up Special ~ Flight of the Falcon
The captain makes use of his wings and flaps them for a standard controllable recovery like Pit’s. Without Sailor Dee, this is essentially identical to Pit’s up special, albeit the captain flies slower but can keep going a bit longer then the angel.
With Sailor Dee, the move is a good bit more interesting. Sailor Dee hops onto Captain Vul’s back to hitch a ride as the captain flies along. This slows the captain’s movement speed during the recovery even more so, making him extremely easy to gimp and halfing the distance he can travel on his way to recover. Yes, as a twist, Sailor Dee actually is a negative to the captain when he’s recovering.
However, if you press B while recovering with Sailor Dee on your back, he’ll hop off and take out a parasol, the favorite weapon of Waddle Dees. This frees up the captain from Sailor Dee’s weight, allowing him to proceed with his normal recovery. Sailor Dee slowly floats with the parasol in the direction you were facing when you ordered him to hop off at the same speed and with the same fall speed of floating with the parasol item in Melee (One of the few items taken out in Brawl for w/e reason). This attack makes Sailor Dee vulnerable to damage, but this is a good recovery for him and it’s more then likely he’ll be able to make it back to the stage. You don’t have to wait for Sailor Dee to touch the ground before reuniting with him, but the game won’t let you do so until your recovery is finished.
Down Special ~ Changing Shifts
Captain Vul walks into the background muttering to himself, Sailor Dee appearing next to him instantly and walking back into the background with him if he’s alive, then the next crew member appears, walking in from the background. This is a fairly standard transformation down special, but you have superarmor as the switch occurs to prevent foes from punishing the switch like they can Pokemon Trainer’s. This can’t be used to stall though, as you must wait 20 seconds in-between changing your shift with another of the Halberd Crew.
There is a 20% chance that Captain Vul will say some dialogue as he changes shifts with the other crew member. Depending on the situation, Captain Vul will say one of a couple lines as he makes his way into the background. He’ll also say some different dialogue upon coming out from the background if another of the Halberd Crew switches shifts with him. The dialogue is as follows:
- Switching in, under 100%: “Do I have to do everything?!? What do you think I pay you for?”
- Switching in, over 100%: “Looks like it’s all up to me as usual. You lot can’t do anything right!”
- Switching out, Sailor Dee KOd: “I really need to get a new cabin boy. . .”
- Switching out, Sailor Dee Conscious: “Get your rear end out there and do something useful, you lubbers!”
Standards
Standard Combo ~ Paper Work
Upon first pressing the A button, Captain Vul takes out a piece of paper in front of him, swinging out his wing as he does so to whack foes with the wing for 3% damage and tiny set knockback. Upon the second press of A, Captain Vul takes out his reading glasses and put them on to read the fine print of the paper with his other wing for the same damage and knockback. Both of these parts of the combo have nearly non existent lag with the exception of there being very slight ending lag on the second hit, and both have average (Perhaps slightly below) range.
Upon pressing A for the third time, the captain mumbles something under his breath and crumples up the piece of paper into a ball and hurls it forward. The paper ball is the size of a smart bomb (Not the explosion it causes!) and travels the length of half of Battlefield doing 3% and a flinch. The paper ball is disjointed and travels at the speed of Captain Falcon’s run, making it easy to hit with the projectile. If you hold down/mash A, the captain will perform the first hit of the move over again to take out another piece of paper, but if you still keep holding down/mashing Vul will skip to the third hit of the move, crumpling up the new piece of paper. This all happens rather quickly so you can launch about one paper ball every half a second. This is Vul’s only true projectile so you’ll probably find some use of this against campers, although it’s far from spammable due to how weak it is and the fact that upon stopping the combo there’s some more brief ending lag as Vul takes off his reading glasses. Should Vul be hit before ending the neutral A combo himself, Vul’s reading glasses will fall off, shatter, then vanish.
If Sailor Dee is present for the move, he’ll hand the paper work to the captain for the first hit and provide any more paper Vul will require should you hold A down/mash A, reducing the lag of that part to be even more tiny albeit keeping Vul from hitting his foes with a swing of his arm. This reduced lag might not be much, but it helps this go up to the level of being a possible projectile to actually spam against those left without one and have bad approaches such as Ganondorf (Though everything kills that guy).
Dash Attack ~ Spyglass Polevault
Vul takes out his spyglass as he runs and starts extending it as running forward. Vul moves around 20% slower then his normal dash speed during this time, and is capable of running off edges, unlike most dashing attacks which prevent you from doing so. Holding down A causes Vul to extend the spyglass more, and upon releasing A he’ll stab the spyglass into the ground and use it to leap forward. The longer the spyglass was, the higher Vul will go up and the less ending lag the move will have. Vul moves forward at the speed of his run while going through the air, his body being a hitbox with above average priority until he hits the ground, it dealing 11-12% with above average knockback on contact. With no charge, Vul will barely jump off the ground at all. With a second’s charge, he’ll jump up double Ganondorf’s height. You can charge the move up to 3 seconds. If Sailor Dee is present, he’ll make a second hitbox overlapping the captain with the same properties, doubling the amount of damage the move does. This is crazy powerful, right? True, but it’s insanely hard to pull off. You need a massive amount of room to run to extend the spyglass, and after that you need even more room if you don’t want to jump off the edge to your doom during the attack. If you don’t get a running start (Or much of one) to extend the spyglass, the move has terrible ending lag that begs to be punished, and even if you get a running start the arc of the move is incredibly predictable and possible to punish regardless. This is mainly only useful on Bridge of Eldin and other stages with insanely long platforms, being extremely situational.
Tilts
Forward Tilt ~ Captain’s Spyglass
The captain takes out his spyglass (Essentially a handheld telescope) and puts it up in front of his eye, closing his other eye to get a better view, holding the spyglass with both hands, giving the most average starting lag. Captain Vul then extends the spyglass out to be around half the length of a Battlefield platform for the attack as it suddenly jerks out, dealing 6-7% damage with small knockback, the spyglass being disjointed. The range of this move is good, but short characters can walk right under it with ease, making it a totally useless move against them, right? If Sailor Dee is at your side, he’ll take out a spyglass as well and look out of it, standing at the captain’s feet and making a second hitbox that’s just as large with the second spyglass (Actually it’s slightly bigger, but only barely). This makes an excellent wall of high priority in front of you.
If you don’t press anything after this move, it has nearly no end lag for Vul (And Sailor Dee) to put away his spyglass, but if Sailor Dee is with you and you press A before it ends the captain will look down at Sailor Dee and grunt in anger, extending out his spyglass a bit more (A quarter length of a Battlefield platform) to outdo his cabin boy. Pressing A again causes Sailor Dee to extend out his spyglass half a battlefield platform more (A quarter length of a Battlefield platform more then the captain). Pressing A will cause the captain once again to extend his Spyglass out to beat Sailor Dee’s by a quarter platform length. You can repeat this infinitely until the spyglasses get to the length of two thirds of Battlefield, in which case the spyglasses will break and give the move HORRIBLE ending lag. You can use this to combo at early percentages when foes won’t get knocked out of the range of the spyglass’ extension as you keep knocking them forward to be hit by the next extension. Still, the further you extend out the spyglasses the worse ending lag the move has due to them having to actually retract the spyglasses before they put them away (Thankfully they do this rather quickly, but if you extend them too far it can still be laggy), so unless you know you’ll hit them with the next strike don’t use it. Use sparingly at early percentages for damage racking only.
Up Tilt ~ Crow’s Nest
A pirate style crow’s nest shoots up out of the ground underneath Sailor Dee. The wooden pole holding up the crow’s nest goes high enough to get the part holding Sailor Dee up to double Ganondorf’s height. If anyone’s hit by the top of the crow’s nest as it goes up (It shooting up over the course of half a second), they take 10% with average upward knockback. The move is disjointed and Sailor Dee is invulnerable as the crow’s nest shoots up, but after it reaches it’s peak Sailor Dee can be damaged as the crow’s nest doesn’t vanish and the cabin boy takes out a spyglass (A short one with no hitbox, unlike the ftilt), checking out the view from his new high position to report to the captain. During this time, the part of the crow’s nest Sailor Dee is in is a non fall through platform with the width of Bowser. Vul can go up to the crow’s nest to retrieve Sailor Dee, and he’ll probably want to do so ASAP before the foe comes down and hits him unless they were high enough damage to be KOd, albeit you can’t reunite with your cabin boy until he stops looking around with the spyglass after 2 seconds and salutes the captain, meaning you may have to defend him. The crow’s nest sticks around for 15 seconds or until you form a new one, adding an extra platform to the stage.
Without Sailor Dee, the crow’s nest shoots up underneath Captain Vul. The properties of the move are the same, but instead Vul is the one made vulnerable from the attack. Vul’s idle animation for the two seconds isn’t using the crow’s nest like a pirate, however. . .He uses the crow’s nest like a crow. He puts his wings to his sides and sits down in the nest like a real bird would, sitting on his legs. If Captain Vul is hit during this time, he’ll let out an angry “Caw!” and eggs will be seen splattering underneath where he was (Males can lay eggs?). Seeing you can’t defend Vul like you can Sailor Dee, that makes this version of the move useless, right? Not entirely, as while Vul is in this state you can tilt the control stick to make Vul’s head look around in various directions. Upon pressing A, Vul will pick up one of the eggs he apparantely layed and throw it upwards, it having the same arc as a thrown item and dealing 5% with a long stun as they wipe off the egg yolk, making the time you’re stuck like this be much safer. The egg travels quickly, but Vul can’t throw another egg until the current one hits something. Should the egg hit the ground, it’ll splatter and make an area with poor traction for both Vul and his enemy, lasting 20 seconds.
Down Tilt ~ Swab the Deck
Captain Vul takes out a mop and a bucket of water, handing them to Sailor Dee as he barks out the name of the move to order his cabin boy to do so. Sailor Dee salutes the captain, then starts mopping the floor. This has about half a second of starting lag, but as soon as Sailor Dee starts mopping the floor Captain Vul is free to move. This separates Sailor Dee from Vul, allowing him to be damaged.
Sailor Dee will swab the deck for a full second before putting away his mopping tools and turning to face the captain and saluting to tell him that the deck has been successfully swabbed, after which you can make contact with the little guy for him to be reunited with Vul.
The mopped part of the floor sparkles, being squeaky clean. If a foe walks over it, they trip. The mopped terrain stays squeaky clean for 10 seconds before no longer causing tripping, and you can only have one squeaky clean spot on the battlefield at a time.
If Captain Vul uses this attack without Sailor Dee next to him, he’ll swab the deck himself, mumbling under his breath in annoyance because his cabin boy hasn’t done it for him yet. This doesn’t have the start up lag of the version with Sailor Dee, but leaves Captain Vul very vulnerable as he swabs for 1.5 seconds. Vul isn’t used to doing such simple manual labor, thus he takes longer then his cabin boy to swab the deck.
Smashes
Forward Smash ~ Shake your Tail-Feathers!
Sailor Dee plucks out a feather from the captain’s tail-feathers and winds up for the charging animation, then hurls it forward upon releasing the charge. The feather goes a fifth the length of Final Destination uncharged and a third of it fully charged. The feather itself does nothing whatsoever, but the captain will become alarmed and hastily run after the feather upon seeing it flying by, charging after it. The captain goes double his normal running speed to pick up the feather, and coming into contact with him during this deals 16-17% with above average knockback, bordering on high knockback. The captain has super armor as he charges forward, making this move a force to be reckoned with, though there are a couple are several downsides. Firstly, while the move has below average start lag, the ending lag is terrible (On the level of the starting lag of Dedede’s fsmash) as the captain picks up the feather and jams it back alongside his other tail-feathers, turning around to look at them and shaking them to ensure it’s firmly in place before you regain control of him. Secondly, Sailor Dee will stay behind and laugh at the captain as he goes through the entire move, separating him from the captain and making him vulnerable to damage. As with most moves of the captain, this is easy to hit with, but punishable should you miss.
Without Sailor Dee, the move is much more standard, just being a standard elbow charge like Wario’s in the Wario Land games. The captain still has super armor as he charges forward, but the power is reduced to 10-11% with average knockback and the captain’s running speed is reduced to his normal speed. On the plus side, the move no longer has horrible end lag, but the move is harder to hit with in the first place as it has some added starting lag.
Up Smash ~ Coffee Break
Captain Vul takes out a coffee cup filled with the stuff, sniffing it in admiration as steam comes out of it for the charging animation. Upon releasing the charge, the captain will jerk the cup upwards to cause the coffee to splash up out of the cup above the captain. The splattered coffee is a disjointed hitbox that has around the size of Kirby, going up around Ganondorf’s height at the speed of Mario’s run before coming back down. The coffee does 9-10% fire damage (It’s hot! How else would it hurt them?) with average knockback, it able to go up to 14-15% damage with above average knockback fully charged. After the attack is complete, the captain catches the coffee in his cup and takes a sip before stashing it away, healing him for 1% damage, 2% fully charged. This sip is more of a negative then a positive, though, as it gives the move average ending lag that can be punished. The move also has slight start up, but it’s nothing terrible, still being very slightly below average, though still possible to be interrupted.
If Sailor Dee is with the captain, he’ll cause the move to have more .25 seconds more ending lag as he jumps up to catch the coffee in his mouth (He turns away from the camera so he doesn’t reveal his non existent mouth to it), causing the captain to briefly shake his fist in anger at Sailor Dee, giving him a stern look. This heals Sailor Dee for 3 of his stamina, 6 fully charged. This is one of the few ways you can heal your cabin boy without switching to one of the other members of the crew, so you’ll want to use this attack despite there being better offensive options available to you.
Down Smash ~ Bird Feed
Sailor Dee throws some bird feed down at the captain’s feet for the charging animation. Upon releasing the charge, the captain sees the bird feed and licks his lips (Beak?), what with him being a bird, then smacks his beak down to the ground three times, once slightly to the left of himself, once in front of him, and once to the right. There is brief lag inbetween each beak smack as the captain devours the bird feed on the ground. On the whole, the move takes about as long as Bowser’s dsmash, and has little ending lag. Getting hit by the captain’s beak as he smacks it down any of the three times deals 11-12% and average knockback. The size of the captain’s beak as he smashes it down is exaggerated to give the move more range, it becoming around the size of Kirby and the hitbox expanding further still to the size of Wario, the move having good priority but not being disjointed. Charging the smash attack decreases the lag slightly due to the captain being more eager to chomp down on the more numerous bird feed, it reducing the lag by 20% fully charged. As an extra bonus, the fully charged smash will heal the captain by 1% each of the three times he chomps down on the bird feed.
Without Sailor Dee, the captain just smacks down in front of himself a single time, hard. This does the standard 11-12% damage of one of the smacks in the dsmash with Sailor Dee, but has above average end lag as the captain pulls up his beak from the ground, it having gotten stuck, and rubbing it slightly in pain. Charging the smash attack increases the damage to 15-16% and the knockback to above average. This is a fine smash attack assuming you can hit your foe with it seeing it doesn’t have much start up and average power, but this isn’t something you can afford to whiff.
As an easter egg, if you use this move against another bird character such as King Dedede or Falco, they’ll fight over the bird feed with Captain Vul. How does it work? If a foe is within a stage builder’s block of the bird feed, the tongue of the bird character will drop out of their mouth and their eyes will go wide as they charge the captain. This causes a typical cartoon dust cloud to emerge, and a button mashing contest occurs lasting for two seconds to see who wins and gets the bird feed. If anbody else makes contact with the dust cloud, they get knocked away and take 10% damage with average knockback. Sailor Dee is safely in the background during this. After 2 seconds in the dust cloud, the loser will fly out with 12% and slightly above average knockback while the winner will chomp down the bird feed and heal 5% damage. Hopefully this altered dsmash will help teach those chain grabbing jerks a thing or two. . .
Aerials
Neutral Aerial ~ Waddle Swing
Without Sailor Dee, this move is a fairly standard generic spin in the air typical of this button input. It lasts a full second doing multiple hits, the whole captain being a hitbox with below average priority. The captain does 5 hits for 2%, the last doing below average knockback. Not a particularly good damage racker considering there’s slight lag (Though below average) on both ends. The move has bad landing lag though, so avoid short hopping it to use as a quick damager as it’s likely either the priority or the land lag will be punished.
With Sailor Dee, the captain grabs the tiny captain boy’s arms and swings him around as he spins, making Sailor Dee an additional hitbox that’s disjointed doing the same damage. While Vul is a much bigger hitbox then Sailor Dee, the cabin boy will be the hitbox more likely to connect due to the captain spinning him around very quickly to the point he’s just a brown blur which makes his priority protect the captain’s low priority.
Forward Aerial ~ The Captain Sinks with his Ship
Captain Vul does a salute, then slowly turns around in midair while in the position so that his head faces diagonally downwards and forwards. The captain then puts his wings to his sides and charges downwards like a fighter plane. This move has above average starting lag making it quite predictable as the captain gets into position. The captain goes down at the speed of Wario’s run, meaning it’s not that fast. Contact with Vul’s beak (It’s size being exaggerated to make the hitbox for the move bigger) spikes you down with 12-13% damage. However, the captain isn’t trying to hit anyone with this attack. . .His eyes are closed. He’ll go straight through anyone should he hit them to his doom as he “sinks with his ship”. If Sailor Dee is present though, he’ll slap the captain in the face to snap him out of it to cause him to regain his senses if he hits someone, still having any leftover jumps and up special usage from before he used the move. This moves is generally utterly useless without Sailor Dee due to how it kills the captain, and even then it’s very laggy and hard to hit with, as well as being predictable. It can’t be used for anything but spiking due to it’s bad starting lag and horrible landing lag, so good luck finding a use for this one. This is by far Vul’s most situational aerial, but due to Vul’s good recovery in his up special he can actually make it back up the platform from this so skilled players may manage to make use of the move.
Back Aerial – Bottle of Rum
Captain Vul takes out a glass of some unidentified beverage (There’s no alcohol in Smash, over protective parents!) and bellows “Yo ho ho ho!” as he swings the glass behind him. If any foe is hit by the glass, which is not disjointed (Though the hitbox extends a bit out from the beer glass to make the move have decent range) and sticks out an average range with the captain’s wing, they’ll drink some of the liquid and take 6-7% damage, going into their helpless state. There is little starting lag, making this an easy move to hit with. This makes an excellent way to gimp foes with how fast it comes out, but there’s a big catch. If you miss with the move, Captain Vul will drink the beverage himself and take the 6-7% damage, going into HIS helpless state! If Sailor Dee is present, he’ll drink the liquid, scurrying up in front of the captain to do so eagerly. Sailor Dee will then drop like a rock to his doom, but at least you’ve still got Vul. The liquid heals Sailor Dee for 5 damage, meaning you may intentionally want to use this move over the land not wanting to hit anyone. Still, Sailor Dee will be in a “dizzy” like pose after he hits the ground for two seconds from the nasty liquid (Don’t do drugs, kids!), not being able to reunite with the captain until he salutes after it’s complete, meaning you’ll have to defend your cabin boy while he recovers, him not being able to take a good drink. This is a great tool for gimping, but it’s high risk high reward, as per usual with Vul.
Up Aerial ~ Shuttle Loop
Captain Vul does a shuttle loop that covers a nearly identical amount of distance to Meta Knight’s up special of the same name (Without the gliding afterwards), but flaps his wings to do so instead of gliding. Captain Vul will continue you to fall downwards as he does the move (Albeit not as quickly, so this stalls his fall somewhat), and he ends up in the same position on the X axis as he was when he finishes the move. This takes twice as long as Meta Knight’s up special to complete, but considering Meta Knight’s up special has no lag, this isn’t a huge problem.
The hitbox of the move is the captain’s beak throughout the entire duration of the move, it glistening to show it’s sharpness. Getting hit does 12% damage and above average knockback in the opposite direction the beak is facing. If Sailor Dee is with the captain, he’ll fall off the captain’s back when he goes upside down at the start of the move, briefly separating him from the captain before he lands onto the captain as he finishes the loop. This move has a hard to hit hitbox, but is very versatile, as depending on when you hit with the beak you could potentially even spike your enemy. Still, the rest of the body of Captain Vul does no damage, leaving foes open to punish you or the briefly separated Sailor Dee should you whiff the attack.
Down Aerial ~ Parasol Bomber

Captain Vul tosses Sailor Dee downwards for him to take out a parasol that his kind so love and stab it downwards as he plummets to the ground. Sailor Dee moves downwards at the speed of Mario’s run and forwards in the direction Captain Vul was facing when he initiated the attack at the speed of Ganondorf’s walk. Two small stars rotate around Sailor Dee’s parasol as he goes down which just do 5-6% damage and minor set knockback, but getting hit by the actual parasol does 14-15% damage and spikes you downwards. Throwing Sailor Dee downwards has little lag, and the captain is free to do other things as he does so. Having a projectile spike is useful, but it’s very hard to hit with the tiny parasol, you being just as likely to hit with the weak stars which will give your foe back their extra jumps and up special. If you use this off the stage Sailor Dee will plummet to his doom, KOing him, so exercise extreme caution when using this to spike. This obviously separates Sailor Dee from the captain and you can’t reunite with him until he lands on solid ground.
If you use this move without Sailor Dee, Captain Vul takes out the parasol himself and performs the move in an identical fashion, turning the move into a standard stall then fall. An excellent way to use this move is to throw Sailor Dee down with a dair first to a foe on the stage, then quickly follow up with your own dair to hit with both dairs for good damage. Just make sure you do indeed hit with it though, as the move continues whether or not you hit your foe, not ending until you hit the ground, where you have bad ending lag. This makes this combo and using the move without Sailor Dee in general highly punishable, as well as making this a guaranteed suicide off stage unless the forwards momentum of the move manages to take you back to the platform, which is highly unlikely as it’s very small.
Throws
Grab ~ Barrel Stuffer
Captain Vul takes out a barrel and holds it above his head, then smacks it down in front of him to try to capture foes in it, putting a lid on the barrel to trap the foe should he succeed. The grab is slower then the average one, but reaches a good deal in front of Vul and the size of the barrel is large enough to realistically contain Bowser, so it’s easy to hit with, especially considering it’s disjointed nature. The beginning lag isn’t horrendous, just worse then the average grab, but should you miss it’ll take the captain a good while to stash the barrel away. This follows the usual principle of Captain Vul – not too hard to hit with moves, but bad to whiff with. The only effect Sailor Dee has on the move is helping the captain stash the barrel away slighter faster (20%), helping to eliminate the grab’s main weakness.
Should you use this grab in the air, Captain Vul will hold the barrel out in front of him as his fall speed increases dramatically to the level of Fox using DI downwards. Should a foe be caught in the barrel, they’ll plummet with the captain in his crazy fall to his doom kamikaze style, allowing you to Captaincide, although due to the sheer speed of the rate you’re falling it’s rather difficult. Should you hit the ground upon catching a foe in the air with the barrel, the game will treat it as if you grabbed them normally, you able to perform your pummel and throws. This overall gives the captain a very good grab game, this grab being easy to catch foes in, though as on the ground has punishable ending lag.
Pummel ~ Barrel Clash
The captain claps his wings together to smack the barrel, causing it to vibrate loudly and laggily for an entire second, dealing an excellent 6% damage to the victim inside. It’s nearly impossible to squeeze two pummels in before you do a throw due to the lag of this, and it’s possible if your foe is a good button masher to let you do a grand total of zero throws after this due to it’s lag. If Sailor Dee is present, he jumps on top of the barrel as the captain claps his wings together, doing an additional 2% damage.
Forward Throw ~ Barrel Kick
Captain Vul puts the barrel down on it’s side, then gives it a good kick forwards. The barrel will roll forward half the length of Final Destination over 1.5 seconds, and should it get kicked off the edge it’ll fall slightly faster then the speed of the victim’s normal fall speed. Foes can button mash out of this quite easily at low percentages, meaning you can only kick foes off the edge before they bust out at very high percentages, 150% bare minimum unless you’re close to the ledge at the start of the move. This does no damage whatsoever and is strictly a potential KO move. Should the foe not button mash enough to escape (Extremely unlikely unless your foe is as high as 200%), they’ll be dizzy when they bust out of the barrel, allowing you to use a KO move to finally finish them off.
If Sailor Dee is present, he’ll also kick the barrel alongside the captain, increasing the speed of the rolling barrel to go it’s entire distance from 1.5 seconds to 1.2 seconds, thus giving foes less time to button mash out. Should another foe besides the main victim be hit by the rolling barrel, they’ll take 10% and average knockback, making this good for FFAs. Should the barrel run into a wall, the foe will become dizzy and be a prime target for punishing.
Back Throw ~ Do a Barrel Roll!
Captain Vul hops on top of the barrel and runs rapidly on top of it to cause it to roll backwards as if he were in a log rolling competition. Mashing A causes Vul to run faster, and you can potentially get the barrel moving as fast as Sonic’s running speed should you button mash enough and should your foe not resist, but you’ll more likely then not never be given the chance to go fast enough due to the foe still being able to escape out of this slightly easier then DK’s fthrow just like the Barrel Kick throw. Unlike the Barrel Kickl, you’ll be accompanying with your foe to their doom should you use this to take your enemy off the edge, effectively making this another Captaincide move.
If the foe still manages to recover after they burst out of the barrel once they’ve button mashed, you’ll be screwed, due to the fact that if you’re in the air while performing this throw and the foe busts out you’ll go into your helpless state. This once again does no damage to the main victim, but just like the fthrow you can damage other foes besides the main victim for 10% and average knockback should you hit them, and you can ram the barrel into a wall to make your foe dizzy. If Sailor Dee is present, he’ll also hop onto the barrel and run alongside the captain, making you gain speed faster. Sailor Dee will drop straight to his doom alongside the captain should the move end in the air.
Up Throw ~ Cage Match
If Sailor Dee is present, the captain takes the lid off the barrel then throws his cabin boy into it to teach the victim some manners, putting the lid back on the barrel to trap both foes inside it. For a brief moment you can control which direction Vul has the barrel lid face, then you lose control of Vul and gain control of Sailor Dee. Mass cries of pain from both characters and smack sounds are heard inside the barrel as the victim and Waddle Dee fight each other inside the barrel. . .Who wins? It’s determined by a brief button mashing contest that lasts a solid 2 seconds (Meaning the throw is useful in FFAs, but you already have the excellent fthrow for that). Should Sailor Dee win, the victim of the throw will be shot out of the lid with average knockback (Great for a throw) and 15% damage. Otherwise, Sailor Dee will be shot out of the barrel the same distance, potentially falling off a ledge you may of intended for a foe to his doom, with 15 damage taken out of his stamina. Upon landing, Sailor Dee will be dizzy for a single second, then will salute the captain, finally being able to reunite with the captain and for all the earlier parts of the throw being able to be damaged. Only use this throw if you’re confident in your button mashing skills, as this can backfire very badly and cost you a match. This is the only of Vul’s throws that actually damage the main victim and is the only one not intended for KOing (Not that the other throws KO in normal manners), so this is the throw you’ll probably end up using the most, assuming you’re decent at button mashing and willing to take a chance.
Without Sailor Dee, Vul places the barrel on the ground face up, throws off the lid, then hops into the barrel to teach the victim a lesson personally. Vul will instead take the 15% damage and average knockback should he lose. Due to the barrel facing straight up, the knockback is always straight upwards, giving this throw little KO potential.
Down Throw ~ Taking out the Trash
Vul picks up the barrel and holds it under his wing. You can now move around with the foe trapped inside the barrel, albeit you have your movement restricted as if you were holding a Cracker Launcher (Slightly slower movement speed then your run, one small jump only). It’s slightly easier for a foe to break out of this then DK’s fthrow through button mashing, but if Sailor Dee is present he’ll help hold the lid shut to make it just as hard as DK’s fthrow. Unlike DK’s fthrow, you don’t have to suicide to KO your foes, as pressing A again will cause the captain to take off the lid and hold the barrel upside down as he shakes it upside down, sending foes downwards the height of 1.5 Ganondorfs. This is good to use next to a ledge against foes with bad vertical recoveries and could potentially get you an early kill, but this throw on the whole is very situational. Just like the fthrow and bthrow, this does no damage.
Final Smash
Final Smash ~ Legendary Bandana
If Sailor Dee is KOd when the final smash is started, a bright light beams down in front of Captain Vul off the top of the screen and Sailor Dee will appear, revived. In any case, Sailor Dee will then throws his sailor cap off to reveal a bandana underneath it, proving that he is in fact the same Waddle Dee who was at King Dedede’s side in the Revenge of the King game in Kirby Super Star Ultra, Bandana Dee as dubbed by fans.
So how is this cute little bandana gonna help you in battle? Bandana Dee functions just like Sailor Dee, but he has unlimited stamina and should he be KOd via the dair or down special, he’ll instantly be revived, appearing next to the captain in a beam of light like the one that appears to revive Sailor Dee at the start of the final smash. Bandana Dee’s knockback in Captain Vul’s counter neutral special is boosted to 5X the amount of the attack, giving Captain Vul a very capable KO move. Due to Bandana Dee’s unlimited health, you can abuse attacks that leave him vulnerable to the fullest such as the side special, dtilt, uthrow, and fsmash with little thought, the fsmash being a particularly useful tool to just throw in anywhere due to it’s super armor, albeit still leaving the captain vulnerable. One final extra note is that the usmash functions as it does with Vul alone, allowing the captain to heal himself rather then Bandana Dee who no longer has any need for stamina.
This final smash lasts until you get KOd or switch to another of the Halberd Crew. This final smash still leaves Vul perfectly vulnerable, but should you know which moves to use what with not having to protect your cabin boy this can be deadly. If you get this when you’re at a low percentage, it’ll be a real force to be reckoned with due to the sheer length of how long the final smash lasts, although this won’t save you at higher percentages due to the effects simply not being that phenomenal.
~~~ Playstyle ~~~
Vul doesn’t have any huge advantages over his foes, being somewhat balanced. Vul doesn’t have the easiest time either racking up damage or KOing, but he can out-range his foes, easily out-prioritize them and will take a while to KO as he always manages to come back to the stage. Vul can also get early KOs with his many gimp aerials, but this alone is not what saves the good captain.
Vul’s entire playstyle screams high risk high reward. His moves are rarely slow to start, but are regularly slow to end. That means it’s easy to hit your foe, but if you miss you’re screwed. Players who try to use Vul wildly seizing every moment won’t have the best results, as the captain requires patience. Vul can very easily be punished, but the thing is that Vul himself is also great at punishing his foe’s mistakes. This means that you’ll want to play very patiently as the captain, getting in strikes when it’s all but guaranteed for the best results.
You’ll want to expose Sailor Dee with care, only when necessary. Seeing many of your moves make use of the cabin boy without making him vulnerable, you still have plenty of options to use while keeping him safe. You’ll want to regularly try to heal your cabin boy with your usmash/bair when at all possible and you’ve got a spare moment to keep him with you as long as possible. Even without him, though, you’ve still got a competent moveset. Your best option without Sailor Dee would probably be to captaincide with one of Vul’s many throws (Or his aerial grab) or aerials which result in this to start off with a clean slate. Vul is very adept at taking his foes down with him and if you’re competent as the captain at all you’ll leap at the chance to try to do so once you’ve KOed your enemy and you’re still around with a high damage percentage.
Vul has many options for KOing, but none of them really leap out as a stand out above the others. None of his moves have above average knockback (Albeit plenty have that much), leaving you in an awkward position to try to finish off your foes. The most surefire way to do so would be to catch your foe using a big attack with your counter or to grab them at the edge of the stage and roll them off the edge in the barrel. Vul still does lean more towards the power side, though, and if anything has more problems with damage racking. You have to hit foes with single powerful strikes for the most part to rack up their damage, making each individual hit quite important. Good options for this include the uthrow assuming you’re a competent button masher as well as the ftilt, which is one of the few ways Vul can actually combo.
Vul takes some getting used to, but he’s not as utterly awkward to learn as some of the other more complicated entries into MYM, playing somewhat like Dedede except not broken. Vul is a heavyweight with a good grab and aerial game, but suffers from not being able to damage rack or KO with as much ease as a speedy character or a true heavyweight. Despite this, Vul is a force to be reckoned with if you capitalize on your foe’s mistakes.
~~~ Extras ~~~
Taunts and Poses
[COLOR="99000"]Up Taunt ~ Bandana Captain[/COLOR]
The captain reaches up to his hat and re-centers it on his head, but then if Sailor Dee is around he’ll hop off and knock the hat off the captain to reveal that he too secretly wears a bandana! The captain hastily puts his hat back on to avoid revealing his secret. . .
Side Taunt ~ Pipe Puffer
Captain Vul takes out his pipe and puffs it like in his idle pose. If Sailor Dee is present, he’ll try to follow the captain’s example by taking out a pipe and puffing it also, but he’ll fail miserably, choking on it.
Down Taunt ~ Sleeping On The Job
Vul gets down into his crouching pose and sleeps, like his sleeping animation. If Sailor Dee is present, he’ll reach under the captain to take out a egg from underneath him and throw it at him to awaken him. The egg will land in the captain’s eye and it’ll crack slightly for some yolk to come out to position itself perfectly to make the egg look like an eye glass for the captain. Annoyed, Vul angrily shakes it off, then resumes fighting.
Win Pose #1 ~ Heavy Lobster
The captain is seated at a table with a fork and knife in each of his two wings, along with a handkerchief tied around his neck. The captain beats his fork and knife against the table impatiently. Sailor Dee comes in staggering back and forth, carrying a massive platter with a huge lobster on top of it. He carries it in to the captain for him to start devouring it, what with how birds love sea food. A meal well deserved.
Win Pose #2 ~ Sailor Doo
Sailor Dee has his back to the camera, and all the losers aren’t clapping but instead stare at him with freaked out expressions. Vul goes over to him and puts a wing on him, trying to see what’s wrong, but Sailor Dee then turns around to him and the camera to reveal he has only one giant eye, being a Waddle Doo.
Win Pose #3 ~ Cheers!
The captain takes out two bottles of unidentified liquid and gives one to his cabin boy, proclaiming “Cheers!”. Sailor Dee happily takes the bottle and clanks it against the captain’s, but this causes the cabin boy’s bottle to shatter. Sailor Dee starts trying to put together the pieces while the captain drinks out of his bottle (Which typically doesn’t have scratch). Upon finishing his drink, the captain wipes off his beak then tosses walks off-screen and tosses the bottle behind him carelessly. During this time Sailor Dee has completed piecing together his bottle, but Vul’s bottle lands on top of it and shatters them both, making an ever bigger mess. Sailor Dee lets out a sigh as he looks over the mess, taking out his mop and starting to clean it up.
Loss Pose ~ Cabin Boy’s Respect
Vul is nowhere to be seen, and only Sailor Dee is present to applaud the winner’s victory.
Loss Pose Against Meta Knight ~ Captain’s Respect
Captain Vul is actually alongside Sailor Dee, applauding his master. All hail Sir Meta Knight!
Snake's Codec
Snake: There’s some bird in uniform past his prime along with one of those minions of the penguin king. . .Is this really who I’m supposed to take out? You need somebody as trained as me to take out amateurs like these guys?
Colonel: That’s Captain Vul, Snake. Don’t underestimate him. He may not be physically fit, but he’s a military genius.
Snake: Fine. . .What about the little puffball?
Colonel: Vul uses that “puffball” in most of his plans. He’s highly vulnerable to your explosives, but Vul will be very protective of him. Do your best to get past his defenses.
Snake: Copy that. Over and ou-
Ax Knight: Don’t think you can take out our captain so easily!
Mace Knight: Yes. . .And once he’s down, you’re dealing with the both of us, fool.
Snake: . . .Who are you, and how did you get on our frequency?!?
Colonel: Ignore them, Snake. Focus. What they say is true, Vul has the power to call the both of them into battle at will. Be prepared for either of them to appear.
Snake: Are they threats?
Ax Knight: You bet we are! You’ll never get past all my throwing axes! First I’ll soften you up with my first couple axes, then I'll finish you off with my last one! Hahahahahahhahahahah!
Mace Knight: . . .You just saved the guy’s CO some research. . .
Ax Knight: What does that matter? He’ll be in bite size pieces when I’m done with him. . .
Snake: You keep thinking that, little guy. . .
Colonel: Should Mace Knight come out, Snake, you musn’t let him get momentum as he spins his mace around above his head. Avoid that at all costs, as if he can keep spinning it full speed, he’s a power house.
Snake: Alright, that sounds like enough info for all of them. . .May I begin the attack?
Colonel: Feel free, Snake. Good luck.
Misc. Extras
Entrance ~ Harsh Landing
Captain Vul gracefully flies down onto the battlefield. . .But then Sailor Dee drops from the top of the screen and lands on his back, causing him to hit the ground hard. Vul gets up and glares at his cabin boy in annoyance for him to just shrug, then they both go into their standard stance.
Kirby Hat ~ Kaptain Kirby
Kirby gets Vul’s sailor hat, as well as his beak and the beard attached to said beak, making this Kirby copy more distinguishable from the Falco Kirby copy. Kirby spits out a Javelin Knight instead of taking one out for Vul’s version of his neutral B without Sailor Dee, but otherwise all the properties are identical.
Alternate Colors
- Standard
- Navy Captain - The captain’s clothing and Sailor Dee’s hat turn navy blue like a navy soldier’s uniform.
- Army Captain - The captain’s clothing and Sailor Dee’s hat turn into military colors, looking like a army soldier’s uniform.
- King Vulvulvul - The captain gains Dedede’s red clothes and his feathers turn blue while Sailor Dee loses his hat. In the Final Smash, Sailor Dee pulls a bandana out of nowhere and puts it on.
- Dark Sailors - The captain’s feathers turn black with some slight white while Sailor Dee turns into Sailor Doo. In the second win pose, Sailor Dee is the imposter while Sailor Doo is the real cabin boy.
- Nazi Captain - The captain’s clothing and Sailor Dee’s hat turn gray, them both gaining red stars on their hats. If you zoom in on the stars, you can see that the word “detail” is written on them.
---
=== Extras ===
...............SHARED FINAL SMASH................
In addition to each member of the crew having their own individual final smash, they have an alternative final smash that they can use by using their down special when they have the energy of a smash ball flowing through their veins.
Upon using the final smash, the Halberd appears in the background of the stage for 30 seconds, and it will constantly fire all of it's guns at the stage which function just as they do on the Halberd stage. While it can still hit the crew member who summoned it, it won't aim for them and instead all the guns will rapidly fire at the target. After the 30 seconds are up, the Halberd will swoop across the screen, requiring a timed dodge to avoid due to it's size covering the entire screen as it passes. This does 30% and huge knockback and thankfully won't hurt the crew member.
If you use this final smash on the Halberd stage, then if you're currently fighting on the platform rather then the actual Halberd the platform will zoom over to the Halberd instantly. The final smash then functions as normal, although rather then the Halberd swooping across the screen at the end Heavy Lobster will instead come out from the background and charge the screen for the final hit, it functioning in the same way.
...............STAGE................
This is the usual stage in Brawl, no changes are made here, but whether or not more Kirby stages are added this remains the home stage of the Halberd Crew along with Meta Knight, albeit it not nearly as important to the masked warrior as it is the crew who allows it to operate. The Halberd Crew and Meta Knight have a mash taunt on this stage in the same fashion as Snake’s codec on Shadow Moses and the taunt the space animals share on Lylat Cruise and Corneria (Save Wolf on the later). There are 8 possible conversations, 2 for each character. One will occur if the character is under 100% while the other is if they’re over 100%. The character (Or characters in Vul and Sailor Dee’s cases) who issued the taunt will not appear in the conversation due to being on the battlefield, just like the mash taunt of the space animals. These conversations are linked here:
...............ASSIST TROPHY................
So let’s see, all the Meta Knights are in this moveset. . .Mace Knight and Ax Knight are playable obviously, Javelin Knight is Captain Vul’s neutral B without Sailor Dee, and Trident Knight is an assist trophy. Nifty!
Upon coming out of the assist trophy, Trident Knight holds his trident above his head with both hands in a victorious pose, facing the camera, then lets his side face the camera as he goes to attack his master’s enemies. He’ll run back and forth across the stage at the speed of Kirby’s run and being around the pink puffball’s size, doing an about face should he come to an edge. Obstacles won’t stop Trident Knight either, as he’ll use his jets to rocket up to the top of the object then plant his feet firmly on the ground once more. Should Trident Knight get within a Battlefield platform’s distance of anyone, he’ll dash up to them and do a bunch of lightning quick slashes with his trident over a second, doing 10 hits for 2% each, then do a final stab forwards for 10 and above average knockback. Should someone be half a Battlefield platform’s distance away but in the air, he’ll jet up to be in their Y axis then throw his trident at them for 30% and great knockback, it going at the speed of Sonic’s run and homing in on the enemy. Trident Knight lasts either 20 seconds or until he throws his trident at someone. If you can learn to time the dodge of the trident throw, you may want to go into the air so he’ll disappear faster, but it takes a lot of practice, the timing to dodge it being very hard.
...............SSE ROLE................
DISCLAIMER: Neither Kibble nor I suggest poring over this wall of text. Flee this moveset while you still can.
- Your friend and faithful narrator, K.Rool
Note: Remember that dojo update that explained (Or at least attempted to) all the various plot holes in the SSE? In that update, Sakurai claimed that there was a cutscene he regretfully had to cut that would’ve been at the opening of the game to explain the stealing of the Halberd. Essentially Dedede would have come to steal it from Meta Knight, but then while Dedede fought Meta Knight the Shadow Bugs would come and take over the ship, Dedede indirectly leaving the ship defenseless by distracting Meta Knight. This SSE Role incorporates this scene that should have been in the SSE in the first place, albeit obviously not in the way it would’ve been incorporated.
Ah, you’ve just started the SSE for the first time. . .Here’s the opening cutscene! And no, it’s not Mario vs Kirby in the stadium. Instead, we see the
Halberd Crew at the controls of the ship. Vul is manning a steering wheel while Mace Knight and Ax Knight are pushing away at buttons. Sailor Dee comes in and gives the captain some coffee for him to take it from his cabin boy and start drinking it, Vul patting his cabin boy on the end. As Captain Vul slacks off,
Meta Knight comes in. Upon seeing his boss come in, Vul spits out his coffee in shock at the fact that he’s been caught off the job, and the coffee lands over Meta Knight’s mask. Meta Knight angrily wipes it off and goes past Vul to look out of the helm of his ship. Dreamland’s lazy lifestyle will end! He will rule!
We cut to
King Dedede boarding the ship, landing onto it as if he were using his up special, crashing down on top of some Javelin and Trident Knights, destroying them. For a twist, the first level you play in the SSE is as a villain as you invade the Halberd for god knows what reason. The level features actual Kirby enemies found in the Revenge of Meta Knight rather then the generic SSE ones, and it takes place on the exterior of the ship.
Upon completing the first level of the game, we cut back to the Halberd control room where Meta Knight and the Halberd Crew are looking at Dedede’s progression through the Halberd on a screen. Ax Knight and Mace Knight ready their weapons and squint their eyes at the screen, ready to go after him, but Meta Knight shakes his head to his two minions, pointing down to the ground to motion them to stay put. Meta Knight more then knows what Dedede is capable of and flies off to take care of the king himself. Mace Knight and Ax Knight go to follow him, but Captain Vul blocks them, coming up in front of them and eyeing them sternly. The camera cuts to Dedede continuing his invasion of the Halberd and attempting to go within the interrior of the Halberd, but Meta Knight springs out of the entrance he’s going to go into and slashes him, causing him to land on his buttocks. Dedede gives Meta Knight an angry glare and readies his battle hammer, and a battle starts, you getting to choose your character out of the two top tier Kirby villains.
The loser of the battle falls down, having been turned into a trophy. The winner just a triumphant pose, then goes to shove the loser’s trophy off the ship. . .But suddenly a hoard of Shadow Bugs start falling onto the Halberd which then proceed to materialize into Primids. The winner revives the loser (Dedede hastily in a cowardly fashion, Meta Knight more reluctantly) due to being outnumbered by these strange creatures, and they go back to back as they’re surrounded by the monsters. You play as both characters in a battle against the various SSE enemies.
After the battle, both characters are seen having trouble defending themselves against the enemy hordes. Some Barbaroses (Those weird creatures with horns for heads that do no damage and blow you into traps) come in front of the Primids and proceed to blow both characters off the stage. The camera cuts to the Halberd Crew who watch in horror as their master is taken off ship. Vul hastily extends out his wing to motion Mace Knight and Ax Knight to dispose of these creatures, now being the highest ranking officer, for both knights to salute the captain and run out. You play a level as you go through the interior of the ship disposing of various SSE enemies as the two knights.
After the level is complete, we see Mace Knight and Ax Knight successfully emptying a room of enemies. Ax Knight wipes off his axe while Mace Knight recovers as he stops spinning around his mace. . .But then a massive hoard break down the doors and come in after the two. Both knights hastily flee, blatantly outnumbered. We cut to Captain Vul, who’s watching the knights flee on a screen. He pounds the fist against the ship in anger. . .Suddenly, the door starts shaking. Sailor Dee motions to it, but when Captain Vul looks back it’s no longer shaking in a comic fashion, him turning back to the screen. The door then breaks down as a bunch
of Mr. Game & Watches invade the control room. Sailor Dee hastily runs behind the captain to hide while Vul makes his hands into fists. . .You play as Vul against 10 Mr. Game & Watches, who are weakened as most enemies are when they have a team larger then 3.
Upon defeating the Game & Watches, Mace Knight and Ax Knight come into the room with all the more subspace enemies behind them, along with some more Game & Watches. Vul sees this and his eyes go wide, nearly popping out of his head. He hastily flees the control room along with the two knights. The subspace enemies continue the chase while the Mr. Game & Watches stay at the Halberd control room and begin manning the ship as they are seen when being found later on before they merge into Duon. The Halberd Crew run into a small room and lock themselves in it, setting a ridiculous amount of locks into place. The enemies beat on the door, but are ultimately unable to get through. The Halberd Crew slump against the door as Vul wipes some sweat off his brow. . .
After this lengthy section added to the SSE at the beginning, everything proceeds as normal for the most part. In the cutscene where Snake’s box is briefly shown for a couple seconds on the Halberd, the camera zooms out to reveal that the box is in the same room the Halberd Crew have locked themselves into. Sailor Dee looks at the box curiously as it moves and motions for the captain to look at it, but Vul just facepalms (Facewings?) at this.
The cutscene where
Snake reveals his cover and says “It’s show time!” is drastically different. The box is shown once again and it once again moves slightly. Sailor Dee points at it once more for the captain to just roll his eyes at his cabin boy. The camera zooms in to the box to show Snake curled up in an uncomfortable position, waiting in annoyance for the Halberd Crew to leave so he can bust his cover, figuring that they’re with the subspace forces. He takes out his watch and looks at it in annoyance, then reluctantly decides to blow his cover and say his signature line. Vul, Mace Knight, and Ax Knight all get into battle positions while Sailor Dee simply glares at the captain angrily. You play as Snake in a battle against the Halberd Crew, having to take all three at once. This isn’t too hard considering how the SSE always gives you 4 stock for no reason whatsoever.
After defeating the Halberd Crew, Snake proceeds through his brief solo section of his first level as normal, but the cutscene where he normally meets up with Meta Knight and Lucario is different. At the start of the cutscene, Meta Knight and Lucario come up into the room where Snake and the Halberd Crew were hiding, Meta Knight hastily going over and reviving their trophies. The crew salutes their captain, then they join Meta Knight in his reclaiming of the ship. They all go by Snake’s box, oblivious of it, but Lucario as normal sees Snake within it by making use of his aura vision. The Halberd Crew turn around to see Snake and they all get pissed and ready to fight him, but a hoard of subspace enemies arrive forcing them to divert their attention. Snake sees that these characters are against the subspace army as he is and decides to join them, albeit keeping his cover and fighting from afar via his missiles. You play through the standard Halberd Interior level you do with Snake, Meta Knight and Lucario as before, only now the Halberd Crew occupies your fourth stock.
Before the boss battle with Duon, a second Halberd Interior level takes place once again featuring Meta Knight’s party, which now includes the Halberd Crew. In this level, you can see Wheelies powering various machinery in the background. Roaders are a common enemy in this level, and at one point in the level you can see them being made on a conveyor belt which reveals that the bottom wheel which powers them is in reality a Wheelie. Upon reaching the end of the level, the group sees the Halberd Reactor pulsing violently. The reactor’s various defenses start firing in mass to attack the group. Lucario and Snake go to attack the reactor, but Mace Knight and Ax Knight go in front of them to block them while Vul, Sailor Dee, and Meta Knight point to the caged Wheelies powering the Reactor. Lucario and Snake nod at the former owners of the ship. . .
Boss: Halberd Reactor
Play as: Meta Knight, Lucario, Snake, Halberd Crew
This boss battle requires a few specific actions before the real fight begins. Initially there’s a shield that’s blocking you from the reactor that reflects projectiles and electrocutes you on contact for 10% damage that’s impossible to destroy, as the captain implied in the last Halberd conversation. However; the picture above isn’t entirely accurate, as the arena is about 1.5X bigger with a bunch of Wheelie cages stacked on top of each other at the opposite side of the arena. The cages are electrified just like the shield so you can’t free them. . .Or can you? The only way to get KOd here is by Star KO due to the walls on either side of the battlefield.
Laser: A small cannon comes out of the ceiling to shoot at you. Unlike in the games, it doesn’t take time to aim, making this battle far harder in that you constantly have to stick around where you want the laser to shoot rather then easily being able to guide the laser to where you want it to shoot in Kirby Super Star. The cannon shoots out a laser at you then goes back into the ceiling which goes at the speed of Mario’s run and is long and skinny. It can ricochet up to 3 times, doubling it’s power and speed each time. It initially has only 10% damage and average knockback, but at it’s top power it can do 80% and unholy knockback moving at insane speeds, so watch out!
The first use of the laser you must make is to have it shoot open the Wheelies cages on the side. After this, the Wheelies will happily flee into the background. The lack of the Wheelies on the left will open up a new way for you to be KOd. After this, the shield will be vulnerable to laser fire. However; it must of bounced at least twice to be strong enough to destroy the reactor, so you’ll have to get creative with how you aim the laser in order to ricochet twice then hit the shield. After the shield is gone, you can finally damage the reactor by guiding the lasers into it like in the game. Lasers won’t do additional damage if they ricochet on their way to the reactor, so don’t bother. It takes 10 hits to destroy the reactor. The reactor will only use this attack after it uses three other ones at random.
Flamethrowers: Four panels come under the arena rather then the usual three in Kirby Super Star due to the increased size of the arena, then they all shoot up cones of flame off the top of the screen almost as thick as Bowser. This can be dodged by standing inbetween the cones, while if you get hit you’ll be caught for multiple hits that can do up to 40% damage. This has zero KO potential and is just a damage dealer. You can destroy the panels with an attack directed at their location under the battlefield such as a spike or dtilt.
Energy Shots: Like the previous attack, but each panel shoots three tiny energy shots upward that only do 5-6% and minimal set knockback the size of an uncharged 0% Aura Sphere, then launch a much more deadly one the size of a fully charged Aura Sphere that does 20% and good knockback. The panels can be of course still be destroyed.
Charge Shot: The reactor’s two cannons start pulsing, then a gigantic shot goes out of across the battlefield at a high speed, around that of Captain Falcon’s run. This does 25% damage and very high knockback. This has very high starting and ending lag, though that doesn’t matter seeing you’re not rushing to attack anything. The larger of the two cannons coming out of the reactor has it’s own health bar and can be destroyed to stop attacks from it, though it’s health bar is insanely huge. This may trick noobs into thinking this is what must be attacked to win the battle, just like in Kirby Super Star.
Arm Crush: Two mechanical arms come out from the ceiling, long and skinny like the laser cannon that comes out from the ceiling. One of them reaches after you to try to grab you while the other swings about wildly back and forth, doing 8% and below average knockback upon contact. The arm trying to grab you will chase you for 3 seconds, being only the speed of Ganondorf’s run, but the other arm being there to make dodging both rather troublesome. If the arm grabs you, the other arm will smack you for 15% and above average knockback. If you button mash like a monkey on crack you can get out before this occurs, though you have to have lightning fingers if you want to have any chance.
Flame Bomb: The two mechanical arms come out from the ceiling once again, and this time drop a large red bomb in the center of the arena the size of Bowser. It explodes in a hitbox of it’s size for 20% damage and large knockback, then two fireballs will go out from either side of it doing 5-6% and light knockback, then making upon getting to the edges of the screen making large pillar of flames twice the width of Bowser that do multiple hits for a total of 40% like the cones of fire. This entire attack is very laggy. To dodge it just stay away from the bomb, then go to the center of the screen where the bomb was to dodge the pillars of flame.
Attacks added at 50% health:
Treadmill: The floor turns into a treadmill rapidly going to the left, trying to push you off screen. You’ll be wiped off as fast as you would be on the track of Big Blue if you stay on it, so you’ll constantly have to jump during this attack using DI to the right. This lasts a lengthy 10 seconds, and the Reactor will use it’s Charge Shot attack during this time as well to make things all the more complicated.
Plasma Fire: A single panel comes under the ground and stays under you no matter what, charging up energy, sparkling with plasma. If left alone, it will charge for a full 10 seconds and do 100% damage with insanely godly knockback. You must destroy the panel ASAP when this attack starts occurring. When you destroy it it’ll still launch off it’s current charge at you, there not being enough time to dodge after you attacked it as it goes up very quickly. If you attack quickly enough you’ll just be shrugging off 10% and low knockback, but otherwise you’ll have to deal with something far more deadly.
Attacks added at 30% health:
Reactor Rampage: The Reactor comes out from it’s position to charge at you! It glows and pulses violently as it pursues you. After it does it’s first shot at you, it ricochets about randomly at the speed of Sonic’s run. Moving at insane speeds in an erratic pattern, it’s easy to get hit by it, and contact with it at any time does 35% and unholy knockback. After the attack is complete, the reactor goes back into place to continue powering the ship.
Attacks added at 10% health:
Mirror Shield: Two mechanical arms place a new mirror shield like was present at the start of the battle in front of the reactor to reprotect it from laser fire. You must have the laser ricochet twice then hit the shield again just like at the start of the battle. This is very annoying, as without the shield it would take only one more hit to destroy the Reactor at this point. This isn’t a one time use attack, and the Reactor will use this every time once it gains this attack in it’s 3 attack interval between using the laser, so once the shield is gone you MUST hit the reactor with the laser of have to destroy yet another shield.
(As an extra note, to keep Boss Battles rounded off at a pretty looking 10 bosses, Master Hand and Crazy Hand are mashed together into one battle, since they were pathetically easy anyway.)
We next get a shot of the Halberd Control Room with the various Mr. Game & Watches inside, but instead of a group breaking in to the control room we see
Wolf entering it casually. The main Mr. Game & Watch comes up to Wolf and salutes for Wolf to chuckle subtly. Wolf takes out a canister of some sort and releases a bunch of shadow bugs at Game & Watch. . .Mr. Game & Watch beeps in horror as the shadow bugs come to overtake him and uses his down special bucket to gather the shadow bugs into it, then throws the bucket out the window. Wolf growls at Game & Watch in outrage for Game & Watch to simply taunt with one of his bells. You play as Game & Watch against Wolf in a standard brawl, the other Game & Watches in the background.
Upon defeating Wolf, he falls down as a trophy. Game & Watch rings his bell in triumph, but then Meta Knight’s party arrives in the room. Captain Vul recognizes the Game & Watch crew and motions the other forward to attack, extending out his arm. The Game & Watches reluctantly go into battle against the group. Sailor Dee runs around the room trying to save himself, then looks out the window to see Fox on the deck fighting some subspace enemies alongside Sheik and Peach. Sailor Dee turns to Wolf’s fallen trophy, then back to Fox, then back to Wolf once more. They look so similar, and Fox is helping destroy those who took their ship. . .Wolf must be on their side! Sailor Dee goes over to Wolf and revives him for him to chuckle and claw Sailor Dee away. He takes out another canister of Shadow Bugs and releases it for them to start going into the Game & Watches, forcing them to transform and them unable to defend against them due to being busy with Meta Knight’s party. As Game & Watch starts transforming, Wolf takes out his trophy gun and fires it at Meta Knight, successfully turning him into a trophy. Wolf turns to aim it at Ax Knight and Mace Knight, but they hurl their weapons at him to knock him out the window. Ax Knight and Mace Knight go to look out the window to see Wolf landing in the cockpit of his Wolfen and flying off. The two knights go to revive Meta Knight, but the Game & Watches finish their transformation into Duon, who slashes the characters out onto the exterior of the Halberd alongside Fox, Peach, and Sheik, Duon leaping down onto the deck after them. Falco sees this from up in his Arwing and shoots down at Duon to help the characters, but Wolf flies by and knocks Falco down out of his arwing, forcing Falco down alongside the other characters with a thud rather then a graceful landing as opposed to normal. The group you fight Duon with is the same as always, save the addition of the Halberd Crew.
Upon defeating Duon, differences in the cutscene where Peach gets Game & Watch to join the side of the heroes include Wolf pounding his fist in anger in his Wolfen where he viewed the fight from up above then flying off into the distance. Meta Knight’s party (Which no longer includes Meta Knight who is a trophy) are also more reluctant to have Game & Watch join them, but Peach once again uses the plot device of sharing them tea to get them to calm down, just like how she calmed down Fox and Sheik. The Halberd Crew hastily go back up to the control room to revive Meta Knight, who takes the wheel of the Halberd as he did before. . .The Halberd Crew join the rest of the meaty playable group and get no further personal screen time, just generically being present like everyone else. The only remaining changes are for Wolf, who appears alongside Bowser and Ganondorf in the Great Invasion cutscene, is also betrayed by Ganondorf alongside Bowser when Ganondorf goes before Master Hand. Wolf is also beating up Ganondorf’s trophy in revenge at the end of Dedede’s subspace level alongside Bowser and you’ll have to take him down as well as Bowser to make the battle actually hard, seeing you still have the usual 4 stock for it.
In the Great Maze, the Halberd section is extended to include more segments of the many levels that take place there, and within this area you must take down shadow versions of the Halberd Crew, Wolf, and the Halberd Reactor.
...............VICTORY THEME................
The Halberd Crew's victory theme is the
Revenge of Meta Knight Credits theme, a melancholy remix of the main RoMK theme. Very moving and powerful. Poor little guys... they never had a chance against that evil, evil pink puffball.
---
"Lord Meta Knight, please take care!"
"We'll go on ahead then!"