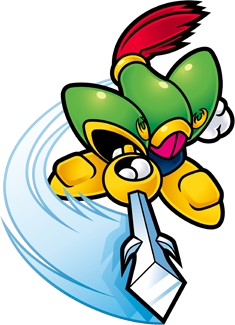
Envy is pretty sweet, especially the Final Smash. I love how there are user-specific characters there. The Ken one made me LOL, while the Scar one was awesome, nice shout-out to the Lion King ending (although he is playable alone as well).

-
Welcome to Smashboards, the world's largest Super Smash Brothers community! Over 250,000 Smash Bros. fans from around the world have come to discuss these great games in over 19 million posts!
You are currently viewing our boards as a visitor. Click here to sign up right now and start on your path in the Smash community!
It appears that you are using ad block :'(
Hey, we get it. However this website is run by and for the community... and it needs ads in order to keep running.
Please disable your adblock on Smashboards, or go premium to hide all advertisements and this notice.
Alternatively, this ad may have just failed to load. Woops!
Please disable your adblock on Smashboards, or go premium to hide all advertisements and this notice.
Alternatively, this ad may have just failed to load. Woops!
Make Your Move 5
- Thread starter MasterWarlord
- Start date
- Status
- Not open for further replies.
Tanookie
Smash Journeyman
Let me once again voice my amazement at how quickly you guys finish movesets...MW has posted, what, four now? 0_o Sheesh. Anyway, I loved Envy's set, MW, especially all the Final Smash options. Peter Pan's made me cringe...why be so cruel? =O I might think of some for Mia, Alucard, and Maria, though. It could be fun.
It looks like all the other Sins are gonna be represented: I see Sloth and Greed, which is exciting. That means we've all gotten in! Hooray!
I'll admit, I didn't work on Mia or Hypno at all yesterday or today (so far) I was in the car for eight hours yesterday, but I've got some time to work on them now. Expect Mia to be up tomorrow (possibly today) and Hypno soon after.
Zant was really pretty good, great for a newcomer (you are a newcomer, right?) But yeah, good moveset.
Envy was great. I loved the final smash, besides the fact that none of my movesets are featured in it. But I won't complain about that. The fact that each one was completely different, as opposed to Falcon's cinematic, was pretty cool. Hinawa would have been better for Lucas though.
Envy was great. I loved the final smash, besides the fact that none of my movesets are featured in it. But I won't complain about that. The fact that each one was completely different, as opposed to Falcon's cinematic, was pretty cool. Hinawa would have been better for Lucas though.
Yea, you meanie. I've been waiting for Mia for too long now.Expect Mia to be up tomorrow (possibly today).

KRiMz0N
Smash Journeyman
thisArgh, the special mechanic of my next moveset makes it long and difficult to make. I'll post it as soon as I can, but no guarantees.
stupid hector of ostia
Darkslash
Smash Master
Reading hughes discription to make it make more sense, why don't you make the picture transform into hughes tradmark throwing knives?
That would seriously scare a guy.
That would seriously scare a guy.
Tornadith
Smash Journeyman
I can't wait for Mia to come out. In fact, I have been played Golden Sun 2 recently since I never actually beat it and now I'm on Doom Dragon and I'm getting pissed.
Haven't really been able to work on Allegretto 'cause of spring break.
Haven't really been able to work on Allegretto 'cause of spring break.
Tanookie
Smash Journeyman
Yea, you meanie. I've been waiting for Mia for too long now.
Excitement makes me happy. Then again, if it doesn't live up to your expectations, then you'll be mad. But she's got seven Final Smashes...she can't be that bad. ^_^I can't wait for Mia to come out. In fact, I have been played Golden Sun 2 recently since I never actually beat it and now I'm on Doom Dragon and I'm getting pissed.
I'm just taking my time...Mia's got her playstyle and extras, but then you shall see all of it in glory and maginificence! Hoorah!
What? You can give toons more than one Final Smash? What the heck?Excitement makes me happy. Then again, if it doesn't live up to your expectations, then you'll be mad. But she's got seven Final Smashes...she can't be that bad. ^_^
I'm just taking my time...Mia's got her playstyle and extras, but then you shall see all of it in glory and maginificence! Hoorah!
Tanookie
Smash Journeyman
If it's part of their special mechanic, yes...there's no limit as to what you can do with your character. Or, there are, but...they're really vague and dealt with on a case-by-case basis. It's really hard to make a character un-Smash like, but...yeah. She has seven Final Smashes.What? You can give toons more than one Final Smash? What the heck?
Darkslash
Smash Master
Its like how some characters like Samus have more than 1 Final smash. From what he says its due to her mechanics. So you can have lighting cast randomly the top level spells if you want.What? You can give toons more than one Final Smash? What the heck?
SirKibble
Smash Champion
- Joined
- May 2, 2008
- Messages
- 2,400
Warning!! 4-character Moveset Ahead!!

Four of the Helper characters from Kirby Super Star: Ultra team up and join the Brawl! Now, you may be asking, “SirKibble, didn’t you already do this?” The answer, my friends, is a resounding no! This time, the four Helpers are completely different ones from the Super Star Helpers of Make Your Move 4. Now, Blade Knight, Plasma Wisp, Rocky, and Gim comprise the Super Star Helpers: Ultra! They’re copy abilities are:
So what’s the trick with these four, huh? The last set of Helpers was divided by strengths and weaknesses in the categories of Speed, Power, Range, and Weight. Not so this time. These Helpers aren’t even divided into categories. They all sport their various quirky moves, but the key special piece of this moveset lies in their switching mechanic.
SWITCHING MECHANIC: TAG STAR
The “Tag Star” is a special type of Warp Star used by the Ultra team. The tag star functions on an energy supply that recharges automatically over time. While one of the Helpers is in the field of battle, the Tag Star is far away in the background with the other three, storing energy. To fly in and switch in one of the other Helpers, it requires some energy. The Tag Star can gain this amount of energy in about 20 seconds. This is the vital energy that the Star needs to fly in with one Helper and fly back to the background with the other.
However, if you let it charge longer, the Tag Star will gain additional energy. This energy goes toward a special ability called the Tag Blast, which any set of two Helpers can perform. As one is switching in and the other is switching out, if enough energy is built up, they will perform their unique Tag Blast attack. Tag Blasts become useable after about 40 seconds of charging.
Down Special | Tag Star
This switch can only be used on the ground. The Helper you’re currently using quickly stands and braces themselves, still taking damage from hits but unable to receive knockback, as the Tag Star rushes in from the background, carrying the next Helper to the field of battle. A small icon next to your damage meter will show you which Helper is slated to fight next, but you can change this through taunting (explained further in the Taunts and Victory Poses section for each character). The Star reaches the playing plane in about half a second, at which point the Helper aboard the star will hop off, onto the ground, and the one previously in play will take to the Star and return to the background. There is no punishable lag like Pokemon Trainer and Zelda / Sheik experience when switching, as the Helper becomes immediately controllable upon hitting the ground. If a Tag Blast is in order, it will take place when both Helpers are in the field of battle, before the one leaving takes to the Star.
Enough of that, though! On to the individual movesets!
Size: Mid-Small
Weight: Mid
Power: Mid
Jumps: 2
Jump (1): Mid
Jump (2): Mid
Speed (Walk): Mid
Speed (Run): Mid-Fast
Traction: Mid-Good
Speed (Attack): Mid-Fast
Speed (Falling): Mid
Range: Mid-Short
Crouch: Mid-High
Crawl: No
Wall-Kick: No
Wall-Cling: No
Glide: No
Standard Combo | Set Slash
Blade Knight drops his sword hand behind him, ready to slash, when you press the A button. This is somewhat slow, but as long as you hold the button, he won’t release the slash. The actual slash is lightning fast, and can be released at your discretion. In addition, Blade Knight can inch forward and backward, and even perform low jumps, similar to Kirby’s movement when he’s got someone in his mouth. The slash, when released, has range similar to Meta Knight’s Forward Smash, and deals 8% damage with okay knockback. The lag after the hit is small, but not insignificant.
[ 8% ]
Forward Tilt | Parry
Blade Knight puts his sword forward, in a defensive stance. He does it quickly, and holds the stance for about half a second, then returns his sword to his side, with some ending lag. If an attack strikes his front (he’s still vulnerable from the back), he’ll block the hit, stunning his opponent, and a well-timed second press of the button will cause him to roll around back of his opponent, delivering an upward slice as he gets to his feet again, dealing 10% damage and decent upward knockback. Unfortunately, this button press has a very small window during which you can perform the roll/attack. The opponent will always be stunned long enough for you to deliver this blow if you manage to score the button input. Otherwise, you’ll just have to follow up with another attack. There is very little ending lag if the attack is performs, making it well worth your while.
[ 10% ]
Up Tilt | Intimidate
Blade Knight holds his sword up, spinning it around rapidly for about a second before gripping it firmly again. As he spins it, enemies that face him and are within about half a Smart Bomb’s explosion radius will turn and run the opposite direction, intimidated by his sword skills. If the player taps the control stick the direction their character was originally moving (toward Blade Knight), they can manage to remain still for the duration of the move, but they will be unable to advance toward Blade Knight. This move has little startup lag, but a fair amount of ending lag. Best used to throw enemies a curveball during their approach.
[ 0% ]
Down Tilt | Block
Blade Knight ducks down, holding his sword diagonally in front of him, becoming impervious to all attacks made on him. He strikes this pose quickly, and will hold it indefinitely, until he receives the button input again, which signals him to stop, at which point he’ll twirl his sword briefly and then grip it again, making for some significant ending lag. This may seem to be an ultimate defensive pose, as it’s only vulnerable to grabs, but there is a downside. Every blow Blade Knight blocks will weaken his ability to defend, by the percentage that the hit would’ve dealt him, decreasing his probability of blocking the next hit. For example, if the first hit to strike him after he uses this move deals 15% damage, then he’ll only have an 85% chance of blocking the next (100 – 15 = 85). If Blade Knight fails to block a hit, in addition to taking it, as he’s knocked into the air, he’ll automatically enter a Helpless state, so be careful about when you use this move.
[ 0% ]
Dash Attack | Fury Rush
Blade Knight halts in his tracks, quickly slashing his sword forward at short range. This slash comes out about as fast as Meta Knight’s Down Tilt, sweeping in a vertical arc and dealing 4% damage to anyone it hits. If the button is pressed again right after the first slash, Blade Knight will step forward and slash again! This can be repeated as many times as desired. At low percentages, this is a great way to rack up some damage on your opponents, and can also be used as a method of approaching, due to the repeated hitbox as you move forward.
[ 4% ]
Forward Smash | Power Wave
Blade Knight lifts his sword high above him, then brings it down in a powerful slash. The slash covers an area similar to Meta Knight’s Forward Tilt (third/final hit), dealing 10 – 20% damage, but with weak knockback. The slash shoots forward a silver crest of energy, however, that travels forward about one-third the length of Final Destination, moving about as fast as a PK Thunder, and deals 5 – 8% damage, also with weak knockback. There is a fair amount of lag on both ends of this attack.
[ 10 – 20% + 5 – 8% ]
Up Smash | Blade Toss
Blade Knight throws his sword high into the air, it spinning rapidly as it flies, then catches it as it falls back down to him. The sword travels the distance in about the time it takes King Dedede to complete his Super Dedede Jump, although it travels up only about half the vertical distance. The sword spins very rapidly, though, enough to create a wave of energy around it. This energy wave makes the spinning sword about 1.5X the size of Ike’s sword during Aether, and the energy wave deals 8 - 12% damage and decent knockback to anyone it hits. On the way up, the spinning blade gives directly downward knockback, and on the way back down, the knockback is directly upward, so you can often chain this together with itself to score two hits. There is moderate lag at the beginning and end of this.
[ 8 – 12% ]
Down Smash | Power Pulse
Blade Knight stabs his sword into the ground, pulsing energy into it. The energy pulses into an area about a Battlefield platform wide around Blade Knight (just one platform’s width total, not one to each side), which can be seen by it glowing faintly. This energy remains in the ground for about five seconds, and will erupt if an opponent steps onto it, dealing 14 – 20% damage and decent upward knockback. If Blade Knight is in the eruption when it happens, he’ll also take the knockback, although he’ll be safe from damage. There is above average lag on both ends of this move.
[ 14 – 20% ]
Neutral Aerial | Spin Slash
Blade Knight performs a full circle spin with his blade outstretched, not unlike Meta Knight’s Neutral Aerial. However, he only spins around once, and doesn’t spin quite as quickly as Meta Knight. His reach is short, and the blade deals only 7% damage and weak knockback, but as soon as he finishes the spin, an energy wave shoots out, circling around him the same way his blade did, only at a slightly further radius. This energy wave deals only 1% damage, but actually does rather well in the knockback department. This does make the attack somewhat long, as Blade Knight can’t perform another attack until the energy wave is done, but there’s little lag on the ends of the move, so it’s not quite so bad.
[ 7% + 1% ]
Forward Aerial | Arc Burst
Blade Knight slashes his sword in a forward arc similar to Toon Link’s Forward Aerial. After the initial slash, he follows by slashing back over the same path, this time shooting forward a burst of energy that travels about one Battlefield platform’s length forward, damaging opponents. The sword slashes execute in about a second total, each dealing 8% damage. The energy burst deals 4% damage. There is minimal startup lag on this move, but some ending lag.
[ 8% + 8% + 4% ]
Backward Aerial | Feint
Blade Knight pulls his sword back, as if about to slash like in his Forward Aerial, but doesn’t. Aside from happening very obviously and quickly, you can cancel out of this at any time into another attack, making it a very powerful tool for mindgames.
[ 0% ]
Up Aerial | Cover Crest
Blade Knight lowers his sword, then slashes in an arc over his head. This is a slow move, but the slash leaves an energy crest over Blade Knight’s head, which remains there for the next three seconds. The actual slashes has a hitbox similar to Meta Knight’s Up Aerial, though it executes slower. The energy crest rests at the high edge of that hitbox. The slash deals 8% damage, and the crest that remains deals 3%, both with upward knockback, though the slash’s is much stronger.
[ 8% + 3% ]
Down Aerial | Thrust Drop
Blade Knight stalls in the air, then thrusts his sword downward, shooting him downward about the height of the highest Battlefield platform over the main platform. After this, he stalls again as he pulls his sword back up. While his sword is extended downward, it deals 10% damage and good diagonal knockback to anyone hit. The stalls on either end make this move somewhat laggy, but they do prevent you from being too reckless with this attack.
[ 10% ]
Neutral Special | Power Slash
This is a chargeable, storable move. Blade Knight charges up energy in his sword, that he can release in a powerful slash. The move he charges it up, the bigger and stronger the energy burst is. When he slashes, he’s somewhat slow, but before the slash, you can angle it, controlling the direction the energy burst shoots in. The energy burst looks a lot like the one that happens during Lucario’s Force Palm, though it’s silver and potentially bigger or smaller. At weakest charge, the energy burst is so small it won’t even reach beyond the sword slash. At strongest charge, it’s about twice the size of Lucario’s Force Palm, and deals 15% damage, with weak knockback. The actual sword slash deals 10% damage, always, but it’s slow and laggy, so this should mainly be used for the extension of the energy wave.
[ 10% + 15% ]
Side Special | Valor Charge
Blade Knight lifts his sword into the air, then begins glowing a bright golden color. This takes about half a second. In this state, he charges forward, running at a normal speed, slashing at anything he comes across. While he’s glowing, he has super-armor, and he’ll charge for about half the length of Final Destination, slashing for 10% damage and good knockback at anything he strikes. He will stop if he hits a wall, but will continue running after he slashes at anything in his path. At the move’s end, Blade Knight nearly collapses from the charge, returning to a normal state with significant ending lag.
[ 10% ]
Up Special | Burst Propulsion
Blade Knight holds his sword beneath him, and it begins emitting silver energy that serves as a sort of rocket, pushing him upward. This lasts for about a second, and can get him about as high as Mario’s Super Jump Punch goes, with some horizontal control as well. After this second, the blade will erupt in a final burst of energy, pushing Blade Knight once again the same distance upward, as well as dealing damage and putting him in a Helpless state. The burst deals 10% damage, though only within a small area, as well as decent diagonal knockback.
[ 10% ]
Grab | Normal
Blade Knight reaches his free hand forward to grab, very similar to Meta Knight.
Pummel | Shake
Blade Knight shakes his victim about, dealing three small hits of 1% damage each. This is a somewhat slow Pummel.
[ 1% Per Hit ]
Forward Throw | Rush Release
Blade Knight runs forward, still holding his victim (who can still try to break his grip) until you press a button, at which point he’ll toss his victim forward, dealing 5% damage and weak knockback. This can potentially be used to suicide KO, but that usually won’t be a practical option.
[ 5% ]
Backward Throw | Dismiss
Blade Knight casually tosses his victim over his shoulder. This deals only 2% damage, but has surprisingly long hitstun, meaning that you can often score another hit on your victim.
[ 2% ]
Up Throw | Skewer
Blade Knight holds his victim up high, then drives his sword up through them! Don’t worry, it’s not graphic, the unlucky victim goes shooting upward, taking a good amount of upward knockback from the stab, though the 5% damage is nothing to boast about.
[ 5% ]
Down Throw | Finisher
Blade Knight tosses his opponent to the ground, then jumps over them and drives his sword into their gut (assuming they have a gut). This is his most damaging Throw, strapping on 8% damage to the victim, but is rather slow, and deals very little knockback, often leaving Blade Knight vulnerable. In 1-vs.-1 matches, though, this is usually your best option.
[ 8% ]
Up Taunt | Holy Light
Blade Knight grips his sword with both hands, as it begins to glow. He then holds it skyward for a second, then sweeps it back to his side, as it returns to normal.
Sets Next Helper: Plasma Wisp
Side Taunt | Fumble
Blade Knight accidentally drops his sword, then scrambles to pick it up again, appearing very relieved once he does.
Sets Next Helper: Gim
Down Taunt | A Short Break
Blade Knight stabs his sword into the ground, then wipes off his brow with a handkerchief he pulls out of nowhere. He then puts it back and pulls his sword from the earth, ready to fight again.
Sets Next Helper: Rocky
Up Victory Pose | Exhausted Warrior
Blade Knight appears tired, breathing heavily, then drops his sword and collapses down to his knees. Must’ve been a tough fight!
Side Victory Pose | Finish Them!
Blade Knight is nowhere to be seen, then rushes in from the side of the screen, and off the other side. He continues rushing back and forth, as if chasing someone, for the duration of this Victory Pose.
Down Victory Pose | Finished Work
Blade Knight sticks his sword into the ground and turns, facing toward the background and tilting his face upward, toward the sky.
Loss Pose | A Worthy Adversary
Blade Knight lays his sword on the ground and kneels facing his opponent, his head bowed with respect.
Many of Plasma Wisp’s attacks in Brawl function on a charge mechanic, based upon a charge that he builds up through moving around. Every time the control stick is tilted in a direction, one “unit” of charge will be gained. “Tapping” the control stick will profit you three units. There are five levels of charge, and each is gained at a 10 unit increment, so:
Charge cannot exceed the maximum 40 units, and after every use of an attack that relies on charge, Plasma Wisp’s charge will drop back to 0. Attacks that do not rely on charge will not affect it, unless stated otherwise in the moveset. Charge is visually shown by Plasma Wisp glowing and flashing more vibrantly and more quickly as he reaches higher levels of charge. At Level 5 charge, a light-turquoise sphere will surround him, like shown in the above picture. This sphere is approximately the size of a Party Ball, and will spark once every five seconds while it remains over Plasma Wisp, dealing 1% damage and flinching knockback to anyone touching it. This isn’t a very predictably useful tool, but it may release you from a grabbing opponent’s grasp at a lucky time, or serve some other unforeseen function.
Plasma Wisp’s relative immunity to gravity is manifest in Brawl through his jumps (or rather, his single “jump”). When Plasma Wisp is ground-bound, a few thin lightning bolts will stream down from his frame to the ground below, essentially holding him down, and allowing him to use attacks like his Tilts and Smash Attacks. Upon choosing to leave the ground, however, Plasma Wisp will not “jump” like most characters. Rather, he will simply disconnect from the bolts (they will vanish into thin air as he does), and hover into the sky. This essentially forms one long jump that makes him rise up whenever the Jump button is pressed, very similar to R.O.B.’s Up Special. This jump allows him to hover upward about three times the distance and time of R.O.B., lending to a very advantageous aerial game.
Size: Mid
Weight: Very Light
Power: Mid
Jumps: Special [See above paragraph]
Speed (Walk): Mid-Slow
Speed (Run): Mid-Slow
Traction: Mid [Despite how mediocre his turning is, due to the fact that he floats, Plasma Wisp can’t trip!]
Speed (Attack): Mid-Fast
Speed (Falling): Slow
Range: Long
Crouch: High
Crawl: No
Wall-Kick: No
Wall-Cling: No
Glide: No
Standard Combo | Spark
Plasma Wisp clenches his fists, sparking with electrical energy briefly. In a lot of ways, this is comparable to Mewtwo’s Neutral Aerial in Melee. He sparks for about a second, with minimal startup and ending lag, dealing multi-hit damage to those who touch him. The damage can reach up to about 6% if all the hits connect. As an added bonus, if you’re at Level 5 charge when you use this move, a final hit will be dealt by the electrical aura surrounding Plasma Wisp, dealing an additional 4% damage with decent knockback at the move’s end. What’s more, this bonus occurs at no cost to your charge!
[ Up to 6% + 4% ]
Charge Retained
Forward Tilt | Stun Grip
Plasma Wisp reaches his hands forward, holding them straight out in front of him. This has moderate lag, for a Tilt. He will grab any opponent within a fairly normal Grab range, but will not hold onto them for a follow-up Throw. Instead, he’ll pulse all his accumulated charge into them, stunning them for a period of time, during which he can use other attacks. The stun strength is proportional to the amount of charge Plasma Wisp has built up. At weakest, it will hold for an average of about a quarter-second, but at strongest, it will hold for roughly two seconds! It does no damage, but sets up other attacks well.
[ 0% ]
Charge Exhausted
Up Tilt | Lightning Rod
Plasma Wisp holds his hands skyward, and a lightning bolt crashes down into his fingertips. The bolt comes from about two Stage Builder blocks’ height above him, and shoots down quickly, giving his move minimal startup lag. The bolt deals 2% damage with directly downward knockback, which becomes useful for the second part of this move. When the lightning strikes Plasma Wisp’s hands, he keeps them above his head/body/self as they crackle with electricity. He can remain like this for as long as you want, and will stop when any other button input is given. His hands are a small hitbox, but they catch well and are hard to DI out of, dealing multi-hit damage to those who touch them. There is some ending lag when you quit this.
[ 2% + Variable Damage ]
Charge Retained
Down Tilt | Energize
Plasma Wisp stretches his hands out to either side, and the lightning bolts connecting him to the ground glow brightly and flow up into him, giving him additional energy. Unfortunately, this is a slow move, as it’s not exactly easy to just pull energy out of nowhere like that, and the lightning bolts have to reform, totaling the move’s usage time to a little more than two seconds, but it does two things that can be extremely worthwhile. First, it locks Plasma Wisp at his current Level of charge, disallowing him from dropping below it. Second, it boosts his charge by 10 units, which will always take him up one Level. For example, if he’s at Level 3 charge when he uses this move, he’ll be boosted to Level 4, and become unable to drop below Level 3 for the next 5 seconds, after which the move cannot be used for another 30 seconds. Use this wisely.
[ 0% ]
Charge Gained: 10 Units
Dash Attack | Magnet Slingshot
Plasma Wisp stops dead in his tracks, but the lightning bolts connecting him to the ground rush forward a little farther, still connected to him at a backward angle. Since they’re pulling him forward at this point, he then succumbs to the pull and catapults himself forward in an attempt to slam into foes. He stops for about half a second, then launches forward about half the distance a Fox Illusion travels, although at a slower (but still pretty fast) speed. If he collides with anyone, they’ll take 10% damage and pretty good knockback. There is moderate ending lag as he stops.
[ 10% ]
Charge Retained
Forward Smash | Plasma Sphere
Plasma Wisp holds his hands out in front of him, and a sphere of electricity begins to grow. When the attack is released, he will let go of the sphere, at its current size, and it will hover for about five seconds, dealing multi-hit damage that’s difficult to DI out of to anyone who touches it. The amount you can charge the attack depends on how much plasma charge you have, and the Smash’s charge will determine how much of your plasma charge is exhausted. For example, with a Level 3 charge accumulated, you can charge the Smash attack for about half of its full charging duration. Charging beyond that point will not affect the attack. However, you could release it at weakest charge to only exhaust 10 units (or 1 Level) of charge. At weakest, the ball is about the size of Samus’ smallest Charge Shot. At largest, it’s a little bigger than a Party Ball, and catches/holds opponents who touch it much better.
[ Variable Damage ]
Variable Charge Exhausted
Up Smash | Triad Bolt
For this attack, Plasma Wisp’s current Level of charge determines exactly what he’ll do. If he’s at Level 3 or lower, he’ll stretch his hands out to his sides, and two thin lightning bolts will shoot into them from about two Stage Builder blocks’ length away on either side. These lightning bolts are full of powerful energy, which Plasma Wisp uses to charge himself up, gaining 5-10 units of charge from this, depending on how much he charges the Smash Attack. However, opponents who touch the bolts as they enter Plasma Wisp’s body will also be charged up, and will deal 1.2X normal damage and knockback on all attacks for the next 5-10 seconds (again, depending on the charge of the Smash Attack). This variation of this attack is somewhat slow, but not unbearable.
If Plasma Wisp is at Level 4 charge or higher, he’ll instead fire lightning bolts out of his hands, which he stretches out just the same. After the bolts travel out about two blocks’ distance, they’ll stop and turn sharply, angling upward and backward to meet at a point about two blocks’ height above Plasma Wisp, from which point they’ll proceed to dart downward, back into Plasma Wisp. This variation of this attack is extremely slow, but protects Plasma Wisp well, as the lightning bolts deal 10-20% damage, and also weakly stun opponents hit by them, helping the considerable ending lag a bit.
[ 10 – 20% ]
Charge Gained: 5 – 10 Units (if Level 3 or lower)
Charge Retained (if Level 4 or higher)
Down Smash | Shockwave
Plasma Wisp slowly concentrates himself into a round ball while charging this move, then slams into the ground, seeping into it and launching an electric green shockwave out from the point he hits. The startup lag on this move is moderate. The shockwave travels out quickly from Plasma Wisp through the ground, both to the front and the back, about one-fourth the length of Final Destination, stunning and dealing 5-10% damage to anyone it hits. After this, the shockwave emits a green gas into the air, which floats back to the location Plasma Wisp used the attack from and reforms as him. This causes this move to have quite a bit of ending lag. Luckily, if you hit your opponents, they’ll be stunned and probably won’t be able to punish it.
If Plasma Wisp has at least Level 4 Charge, this attack gains an extra property. A shockwave will also shoot through the air, making a full semi-circle over the area the shockwave travels along the ground. This shockwave deals no damage, but does stun opponents it hits very well, and adds to the stun that ground-bound opponents take from the attack.
[ 5 – 10% ]
Charge Exhausted for Level 4+
Neutral Aerial | Discharge
Plasma Wisp quickly releases all his built-up energy, reverting back to zero charge. While this may seem counterproductive, the energy release creates a quick, powerful concentration not unlike Jigglypuff’s Rest, which deals strong damage to anyone within the very small (and brief) hitbox as it appears. Depending on the Level of charge you have, this attack will deal 2%, 4%, 8%, 16%, or 32% damage, with proportional knockback to the damage. Obviously, it’s best to reach Level 4 or 5 charge before unleashing this attack, especially considering that despite its minimal startup lag, this move has about 2 seconds of ending lag, as the energy release takes a lot out of Plasma Wisp.
[ 2% or 4% or 8% or 16% or 32% ]
Charge Exhausted
Forward Aerial | Aurora Sweep
Plasma Wisp stops falling, hovering in the air, and rushes forward at about his running speed, for about one-fourth the length of Final Destination. After that, he returns to his original location and resumes falling. As he’s moving forward, he’ll let off a green gas that stuns opponents, trapping them inside it. When he sweeps back around, he’ll slam into all trapped opponents, dealing 8% damage with decent upward knockback. This costs him 10 units of charge and has moderate lag on both ends.
[ 8% ]
10 Units of Charge Exhausted
Backward Aerial | Fume
Plasma Wisp begins “coughing,” entering a sort of convulsive state for a time, creating a fair amount of startup lag for this move, before a final “cough” causes a flurry of green flames to start shooting out behind him. These reach almost as far as a Fire Flower’s flames, and about as high. The flames persist in shooting out for about 2 seconds, dealing damage similarly to a Fire Flower, only the flames pull opponents in more than they push them out, and have a shock effect instead of a flaming one. Plasma Wisp cannot use any other moves until the effect of this ends.
[ Variable Damage ]
Charge Retained
Up Aerial | Bad Fusion
Plasma Wisp pauses, falling even more slowly than normal for a second, then erupts in a violent explosion, damaging all opponents within a short distance of him. This is a powerful, but laggy attack, dealing 15% damage with strong upward knockback to anyone hit in the explosion, but having Ike-like lag at the beginning and end. Additionally, this exhausts all of Plasma Wisp’s built-up charge.
[ 15% ]
Charge Exhausted
Down Aerial | Grounder
Plasma Wisp extends his hands downward, attempting to form an electric current. This will fail if there is no ground directly below him, within at least 5 Stage Builder blocks’ height. If there is ground, he’ll form a stream of lightning bolts between his hands and the ground below, then be pulled quickly down it, slamming into the ground. This all happens very quickly, with little startup lag (and Plasma Wisp drops at about the speed a Falcon Kick moves), and Plasma Wisp has great priority while dropping. He’ll also deal 10% damage with weak knockback to anyone he hits while dropping. There is a fair amount of ending lag as he hits the ground, as it seems to catch him off guard slamming to the ground at such high speed. Whether the move is successful or not, it will cost him his charge.
[ 10% ]
Charge Exhausted
Neutral Special | Plasma Shot
Plasma Wisp holds his hands forward and fires a plasma-based projectile, but the projectile fired depends entirely on your current Level of charge. Lag times are always moderate, something like Mario’s Fireball. The actual shots correspond to the Levels of charge as follows:
Side Special | Will-o’-the-Wisp
Plasma Wisp pauses in place and glows eerily, becoming somewhat transparent. He glows like this for about as long as Lucario’s counter lasts, having some lag time at the end if he isn’t hit. However, if Plasma Wisp is hit while he’s glowing, he’ll erupt in a burst of green flames, slightly larger than himself, immediately setting plasmatic fire to nearby opponents, who will be very briefly stunned (which also deals 1% damage) at two to three random times during the next five seconds, interrupting any actions they may be performing. After erupting, Plasma Wisp reappears some distance in the direction you used this move, about the distance a Fox Illusion travels. This does not put him in a Helpless state.
The plasma fire gets stronger if Plasma Wisp is at a charge of at least Level 3. If this is the case, the fire will also ignite anyone along the path he travels before reappearing, as a faint green glow moves along the path. He travels this distance in about one second, and reappearing is a slightly laggy action, but he can’t be hit when he’s just a glow, only as he’s reforming.
[ 1% per hit ]
Charge Exhausted for Level 3+
Up Special | Static Field
Plasma Wisp quickly raises his hands and creates a circular field of static energy above him. The field is proportional to his current level of charge, a Level 1 field being about the size of a Party Ball and a Level 5 one being about the size of Luigi’s Negative Zone. The bottom of the circle will always just barely cover Plasma Wisp at his current location. The static field remains for five seconds, and Plasma Wisp can move freely inside it—up, down, left, and right—unrestrained by gravity, at a speed similar to Pit’s when he’s using the Wings of Icarus. Using this move will only take away your Up Special, so Plasma Wisp can still use all his other moves without striking solid ground again, and is not put in a Helpless state. This deals no damage to opponents. In fact, opponents will enjoy the same freedom within the static field as Plasma Wisp does, so use this carefully. However, opponents will not have their state changed when they enter the field. If they are in a Helpless state when they enter it, they will still be when they exit it or when it disappears.
[ 0% ]
Charge Exhausted
Grab | Normal
Plasma Wisp simply reaches forward and grabs with both hands. Similar in lag and range to Mario’s Grab.
Pummel | Drain
Plasma Wisp draws energy from his victim through his hands into himself. This deals 1% damage to your opponent, and profits you a single unit of charge. Unfortunately, it’s a rather slow Pummel, and usually can’t be repeated too many times before your opponent will break your grip.
[ 1% ]
Charge Gained: 1 Unit
Forward Throw | Supercharge
Electrical energy surges around Plasma Wisp for a second, and he then pulses all of it into his victim. This attack has both a huge advantage and a huge disadvantage, and so should be used carefully, both of which are proportional to the amount of charge Plasma Wisp currently has. On the plus side, the knockback from the energy pulse is directly proportional to Plasma Wisp’s charge, meaning that at Level 4 or 5, this is a very powerful attack, and can often score KOs on foes before they reach extreme damage percentages. However, the energy, while powerful, is not hostile, and will not deal damage to Plasma Wisp’s victim. In fact, the energy will actually heal your opponent! The number of units of charge put into the blast will actually be recovered by your opponent, so while a 40 unit Throw deals incredible knockback, you’d better be sure you’ll score that KO with it before using it, as it will also restore 40% damage to your opponent!
[ Heals Opponent 0 – 40% ]
Charge Exhausted
Backward Throw | Envelopment
Plasma Wisp pulls his arms into his burning green body, pulling his victim with him. The victim will be stuck inside him for 2-3 seconds afterward, and will take damage and knockback with Plasma Wisp as long as he’s enveloping them. Plasma Wisp is free to move around with his victim during this time, until they’re released, at which point they will topple out of him, as if footstooled. This attack deals no damage, and actually, the victim can attack Plasma Wisp from within while they’re trapped, though he’ll take minimal knockback from these hits, even the most powerful. Most attacks will only deal him damage, and the most powerful of attacks will only deal flinching knockback to him. This should mainly be used to carry characters with poor recoveries over the edge, dropping them to their doom, as Plasma Wisp’s recovery outclasses much of the roster.
[ 0% ]
Charge Retained
Up Throw | Ionizer
Plasma Wisp quickly pulses some energy into his victim (exactly 10 units of charge), ionizing them such that they’ll be magnetically attracted to the top of the screen. He then releases them, and the unlucky victim goes fluttering upward, unable to control their vertical movement for the next 3 seconds. However, this cannot score KOs, as they will not float past the top edge of the screen. Additionally, this Throw does no damage, so it’s more of a stalling tactic than anything, although it can be used to force opponents with weak aerial games into a bad position. This Throw cannot be used unless Plasma Wisp is at Level 2 charge or higher, for obvious reasons.
[ 0% ]
10 Units of Charge Exhausted
Down Throw | Bond Breaker
Plasma Wisp jumps up above his victim, then throws his hands downward, toward them. The unlucky victim then shatters into a million or so microscopic pieces (okay, not really, you can see them), which revolve around the spot they were thrown at. They will remain in this broken state for the next 2 seconds, and are unable to attack, grab items, etc. while in this state. They can “walk” left and right, at Jigglypuff’s walking speed, to affect the spot where they’ll reform (diminishing chain-grab potential), but are incapable of any other actions. They also can’t be hurt in this state, though, so it’s mainly a stalling tactic, or a way of trying to set up another attack, for when they reappear.
[ 0% ]
Charge Retained
Up Taunt | Short Circuit
Plasma Wisp begins sparking in random places across his body, shaking about violently before regaining control of himself.
Sets Next Helper: Rocky
Side Taunt | Rainbow Flame
Plasma Wisp cycles through the entire spectrum of visible colors quickly, beaming brightly all the while.
Sets Next Helper: Gim
Down Taunt | Beckon
Plasma Wisp points a finger forward, then turns his hand over and does a “come here” signal with his finger.
Sets Next Helper: Blade Knight
Up Victory Pose | Power Overwhelming
Plasma Wisp shakes about violently, as an electrical charge builds up around him. After a couple of seconds, he stops, looking menacingly at the screen, with lightning bolts surrounding him as far as the screen can see.
Side Victory Pose | Frenzy Fire
Plasma Wisp turns around and around, shooting off various plasma projectiles in every direction, then finally gets dizzy and falls to the ground.
Down Victory Pose | Electric Eruption
Plasma Wisp is nowhere to be seen, as green sparks begin to cover the ground, which begins to glow faintly. Suddenly, the sparks explode violently, like a firework, and Plasma Wisp appears, holding his hands up as if accepting applause.
Loss Pose | Dissipate
Plasma Wisp hangs his head sadly, and begins to disappear, growing smaller and smaller, fainter and fainter as time goes on.
Size: Mid-Small
Weight: Heavy
Power: Mid-Strong
Jumps: 2
Jump (1): Mid-High
Jump (2): Low
Speed (Walk): Slow
Speed (Run): Mid
Traction: Good
Speed (Attack): Slow
Speed (Falling): Fast
Range: Mid-Short
Crouch: High
Crawl: No
Wall-Kick: No
Wall-Cling: No
Glide: No
Standard Combo | Hop
Rocky hops a short distance into the air, then crashes back to the ground. This takes about half a second to do, with little startup lag and some ending lag. Anyone near Rocky as he strikes the ground will be buried, but take no damage. This is great for setting up another move, but your opponent has to be close by for it to work.
[ 0% ]
Forward Tilt | Dust Slap
Rocky leans forward and faceplants into the ground, kicking up dust in front of him. The dust reaches about as far as a Fire Flower’s flames, and will slow down any opponent it touches, making them move at slightly slower than normal speed for the next five seconds. This attack has a fair amount of both startup and ending lag (Rocky’s got to lean back hard enough to get back on his feet), and deals no damage. The effect can be compounded if the attack is used multiple times.
[ 0% ]
Up Tilt | Pebble Spray
Rocky closes his eyes as if concentrating, and a few pieces break off of his top, flying into the air, covering a similar area as the spores that Toad spits in Peach’s Neutral Special. After they spray up, they hover for a second, then rush back down and fuse into Rocky’s body again. The rocks deal multi-hit damage up to about 12% to anyone hit, dealing damage the entire time they’re out, even during the brief time they simply float. There is moderate startup and ending lag on this move.
[ Up to 12% ]
Down Tilt | Crumble
Rocky bursts into pieces, crumbling all over the ground. While in pieces, Rocky can’t be hurt, and he remains like this for about a second, after which he reforms slowly. This essentially functions as a longer-than-normal sidestep dodge, but it’s got significantly longer ending lag. The startup lag is minimal, so you can quickly avoid things as needed, but the ending lag makes this highly punishable if used incorrectly.
[ 0% ]
Dash Attack | Heavy Slam
Rocky jumps into the air, still moving forward, then stops for a second before rushing downward, slamming into the ground hard. He goes forward about the distance Bowser does if he uses the Bowser Bomb from the ground, and stalls for a slightly longer time than that before dropping. As he drops, he deals 12% damage with good knockback. Unlike most Dash Attacks, though, this one is not sensitive to the edges of platforms, so you can potentially KO yourself with this. Use it wisely. Startup lag is minimal, but there’s quite a bit of ending lag.
[ 12% ]
Forward Smash | Rumble Roll
Rocky charges this attack by vibrating violently in place. When released, he’ll rush forward on his side, causing him to roll and even sometimes bounce short distances into the air. The full distance he’ll travel is affected by the amount of charge built up before the attack is released. At weakest charge, he’ll travel only about as far as one Battlefield platform, but at full charge, he can cover about two-thirds of Final Destination’s length. He travels about as fast as characters like Mario run. If he strikes anyone while rolling and tumbling, he’ll deal 10% damage and decent knockback to them. Startup lag is moderate, and there’s quite a bit of ending lag.
[ 10% ]
Up Smash | Spire
Rocky “transforms,” becoming a large, sharp stalagmite. As he does so, he’ll damage anyone he touches, with a vertical range similar to Marth’s Up Smash, though somewhat wider to the sides. The bulk of Rocky’s frame deals 8 – 14% damage, but the very tip deals double that damage, also with dramatically increased upward knockback. Rocky remains in this form for about half a second, though he only deals damage as he transforms and shoots upward. There is some startup lag and considerable ending lag to this move.
[ 8 – 28% ]
Down Smash | Earthquake
Rocky vibrates while “charging” this move, which is the actual damaging part. Afterward, he simply stops, tired. While he’s shaking, he’ll deal multi-hit damage to all ground-bound enemies within about one Battlefield platform’s length to either side, reaching a possible total damage of about 20%. This move has quite a bit of lag on either end, but it can really be worth it if you land the early hits, racking up lots of damage. When the quake stops, the opponent will be shot up a short distance, just enough to hopefully get Rocky a little breathing room during his ending lag.
[ Up to 20% ]
Neutral Aerial | Dropper
Rocky faces the screen and clenches his eyes tightly shut, doubling his falling speed and becoming a hitbox until he strikes the ground again. Anyone he touches like this is dealt 8% damage and pretty good knockback. There’s not much startup lag, but you can’t use another Aerial afterward, and the ending lag upon striking the ground is moderate.
[ 8% ]
Forward Aerial | Spin Drop
Rocky begins spinning around, dealing multi-hit damage to those he touches. He’ll do this until he strikes the ground, at which point he’ll hit and bounce forward, about half the distance a Falcon Kick travels along the ground. During the bounce, he deals 10% damage and good knockback to anyone he hits. There is some startup lag to this move, and a fair amount of ending lag as well.
[ Variable Damage + 10% ]
Backward Aerial | Freefall
Rocky immediately enters a Helpless state, but this is no ordinary Helpless state. In this state, he’s still ready for an attack. This will have no effect until he strikes the ground, at which point he’ll pound it hard, brutally damaging opponents near the point of impact. This deals 20% damage and good knockback, but due to the nature of its setup, as well as its relatively low range, it can be difficult to pull off.
[ 20% ]
Up Aerial | Volcano
Rocky quickly transforms a bit, opening up a volcano-like hole above him, which quickly starts spewing rocks and smog, damaging opponents above him as well as propelling him downward. The rocks and smog deal multi-hit damage that will generally accumulate to about 10%, with a range similar to that of Ivysaur’s Up Aerial, though the hitbox is a bit longer-lasting. This move has relatively long startup lag, but the ending lag is minimal.
[ 10% ]
Down Aerial | Rockslide
Rocky bursts into pieces, falling to the ground. This gives him a greater range than most of his attacks, as the falling rocks will spread out, each dealing 1-2% damage. Sadly, you’re only likely to score about 4-5% damage from all of them. After they strike the ground, Rocky will reform, but no earlier, so make sure to use this above solid ground. There’s little startup lag, but the ending lag is substantial, as Rocky’s not too quick about putting himself back together.
[ Variable Damage ]
Neutral Special | Round Off
Rocky quickly forms himself into a more round shape, so he can roll around. In this state, he can roll back and forth along platforms by simply tilting the control stick. He can move about half the speed of Yoshi’s Egg Roll, dealing 10% damage with weak knockback upon striking any (assuming he’s moving at any sort of reasonable speed). Unlike Yoshi, Rocky can actually stop rolling, staying in place, but a hard enough hit can still knock him out of it, just like Yoshi. He can exit this state manually though a second press of the button. There’s moderate startup and ending lag for this move.
[ 10% ]
Side Special | Wallraiser
Rocky stomps the ground underneath him, causing a small quake that shoots up a rock wall out of the ground! The wall is about as tall as Link, and comes up a short distance in front of Rocky. This deals no damage, but serves as a potential defense, as the wall can take 50% damage before breaking! This, however, can be utilized by other players as well, since the wall functions like normal terrain, blocking anyone and everyone’s hits that strike it until it’s destroyed. The creation of the wall has moderate startup and ending lag.
[ 0% ]
Up Special | Seismic Recoil
Rocky closes his eyes tightly and shoots a wave of energy downward. This wave will travel (about the speed of a PK Thunder) until it hits something, whether that be solid ground or the blast zone, at which point it will bounce back. When it comes back and strikes Rocky, it will launch him high into the air. How high depends on how long the wave has been traveling. It builds power as it goes, so a further distance from the ground/blast zone will give you a greater height. If used from the height of Final Destination down to the bottom blast zone, it will launch Rocky upward about the distance of five Stage Builder blocks. The traveling energy wave will deal multi-hit damage to opponents struck, usually only totaling up to about 5%. Rocky can move while the wave (which is about as wide as Bowser) travels, so he can potentially get out of its way before it strikes him, in which case it will simply keep traveling up until it goes off the screen or strikes another surface.
[ Variable Damage ]
Grab | Special
Rocky teeters backward, then slams down to the ground, creating a small shockwave in front of him that stuns opponents such that he has effectively “grabbed” them. This is a slow Grab, but it’s got good holding power. This also has somewhat short range, but can grab multiple opponents.
Pummel | Kick
Rocky simply reaches one foot forward and kicks his victim. A slow Pummel, and it only does 2% damage. Straight pummeling isn’t really a good option for Rocky.
[ 2% ]
Forward Throw | Quake Shove
Rocky slams down hard again, creating a shockwave that pushes his victim forward. This deals only 3% damage, but has good forward knockback, and can be useful as a finisher at times. This is a relatively slow Throw, but well worth it in many situations.
[ 3% ]
Backward Throw | Tectonic Shift
Rocky jumps into the air, as the ground begins shaking. The area his victim is standing on is suddenly shoved underneath him, but Rocky falls just in time to land on his opponent, stopping them from shooting backward! What a guy! Of course, he deals 10% damage and buries them in the process, so don’t lament too much about him effectively saving them from peril. This is a very slow Throw, but also a rather good one.
[ 10% ]
Up Throw | Jumper Quake
Rocky hops a short distance to the ground, then goes careening toward the ground, slamming into it hard and causing a quake that shoots his victim(s) upward! This also deals 7% damage, but the real key point is the great vertical knockback! This is also among Rocky’s faster Throws.
[ 7% ]
Down Throw | Dynamite Blast
Rocky closes his eyes and begins vibrating, turning a bright red color, then explodes violently! This takes a bit of time, but the ensuing explosion is powerful, dealing 14% damage and good knockback. Unfortunately, it’s extremely slow. Rocky takes a while to explode, and putting himself back together afterward is also a very slow process. Use this wisely.
[ 14% ]
Up Taunt | Near Fissure
Rocky cracks down the middle, almost all the way through! With a distressed look on his face, he forces his two halves back together! Close call!
Sets Next Helper: Blade Knight
Side Taunt | Muscle Man
Rocky transforms into a statue of a flexing man! He looks so strong! He changes back after a short time.
Sets Next Helper: Plasma Wisp
Down Taunt | Rage
Rocky stomps the ground angrily, fuming as he does.
Sets Next Helper: Gim
Up Victory Pose | Trophy Time
Rocky stands, looking around as if confused, then beams brightly as he forms himself into a stone trophy. His little eyes can still be seen on the trophy, blinking happily at his victory!
Side Victory Pose | Standing Tall
Rocky stands, looking disappointed, then perks up as he slams the ground, causing a wall to shoot up. He then leaps atop the wall and strikes a pose, winking.
Down Victory Pose | Crater Slam
From off the screen, Rocky comes crashing to the ground, forming a massive crater! What a hard hit!
Loss Pose | Broken
Rocky lies in a sad heap, a jumble of tiny rocks being seen with a loose bandana and a pair of sad eyes over them.
Size: Mid-Small
Weight: Mid-Light
Power: Mid-Weak
Jumps: 2
Jump (1): High
Jump (2): Mid-High
Speed (Walk): Mid
Speed (Run): Mid
Traction: Mid
Speed (Attack): Mid-Fast
Speed (Falling): Mid
Range: Long
Crouch: Mid-High
Crawl: No
Wall-Kick: No
Wall-Cling: No
Glide: No
Standard Combo | Break Spin
Gim performs a spin highly akin to Kirby’s Dash Attack in Brawl, though he stays in place while doing it. Gim will spin as long as the button is held down, dealing multi-hit damage to anyone who touches him. He’s fairly tough to DI out of, too, and with little startup and ending lag, this move may seem very good. If you hold this attack for more than three seconds, though, Gim will become dizzy, giving him a LOT more ending lag than you would’ve had before, whenever you decide to end the move.
[ Variable Damage ]
Forward Tilt | Pitch
A fairly basic attack, Gim tosses his yo-yo forward and then catches it as it flies back. This move has no quirky attributes, and should mainly be used for quick spacing, as it comes out fast, has little ending lag, and goes pretty far, extending fully about three Stage Builder blocks’ length forward. The spinning yo-yo deals only 3% damage and flinching knockback, but this attack definitely isn’t without its uses.
[ 3% ]
Up Tilt | Lasso Swing
Gim throws his yo-yo forward, then arcs it over his head. It reaches only about a block’s length forward before going upward, stretching to about the same distance, only above his head. At any point before Gim catches the yo-yo behind him on the way back, you can press the button again to make him swing the yo-yo forward, making it retrace its overhead path again. It loses strength every time this is done, however, so it’s best to make sure you can just hit with the first time, rather than count on a redemptive loop. The first overhead swing deals 6% damage with weak knockback, and the damage goes down 1% every swing after that, stopping at 1%. There is little startup or ending lag to this attack.
[ 6% or Lower ]
Down Tilt | Sleeper
Gim throws his yo-yo toward the ground below him, stalling it there. This is one of his few short-ranged moves, but the spinning yo-yo deals multi-hit damage and it difficult to DI out of, lasting for three seconds before jumping back up to Gim’s hand. The spinning can accumulate a total of about 10% damage, and the jump back up at the end deals 5% with weak upward knockback. The yo-yo is a small hitbox, though, so you’ll have to get up close. Luckily, this move has relatively little lag on either end, so you should be able to find some use for it.
[ Up to 10% + 5% ]
Dash Attack | Walk the Dog
Gim quickly tosses his yo-yo toward the ground, stalling it there and letting it rush forward along the ground. He continues running at the same speed he was for another one-third the length of Final Destination, with the yo-yo leading. The yo-yo deals 6% damage and weak upward knockback to anyone it hits, though this move should mainly be used for protecting yourself as you approach, as you can shield to cancel out of the run at any time, causing Gim to quickly retract the yo-yo and put up his defense. If you run the full distance, however, Gim will end with an overhead swing similar to that of his Up Tilt, effectively hitting opponents over your head (which is where the initial hit will likely set them) with another 6% damage.
[ 6% + 6% ]
Forward Smash | Hammer Drop
Gim tosses his yo-yo out in front of him, stalling it about a Battlefield platform’s length away from him. Charging only makes this move wait longer, as the timing of the release is key. There is virtually no time between releasing the Smash Attack and the attack happening, so you simply have to wait for the right moment. When Gim releases this Smash Attack, he snaps the yo-yo back toward him sharply. If no one’s there, this will end the move. If someone is between him and the yo-yo as he does this, they’ll get tangled up in it, and Gim will proceed to swing the yo-yo over his head and then slam it to the ground, releasing the poor victim with an added 18% damage to their damage meter. There is moderate startup and ending lag for this move.
[ 18% ]
Up Smash | Gazer Spiral
Gim charges this Smash by stalling his yo-yo near the ground. Upon executing the move, he drops it to the ground so it lays on its side, and jumps on top of it. This causes him to spin rapidly, leaving the ground and shooting into the air. He reaches a vertical distance about the height of the tallest Battlefield platform up before shooting back downward, grabbing the yo-yo on his way down and ending the move. This is a somewhat laggy move, especially on the front end, but Gim deals 20 – 26% damage and good knockback as he shoots up and down, making this move more than a little useful. He traverses the entire distance in a little over half a second, making the middle part of this attack far from laggy.
[ 20 – 26% ]
Down Smash | Tripper
Gim swings his yo-yo around him full circle, first to the front and then the back, reaching about one-fourth the length of Final Destination to either side. If the yo-yo string strikes anyone, it will deal 1% damage and automatically trip them. However, if you don’t fully charge this attack, Gim will also trip over the string as it comes back around. If you fully charge it, Gim will jump over the string at the right time to avoid it, giving him time to attack his tripped opponent. Luckily, this is a fast attack in all regards, including charge time. It charges about twice as fast as most Smash Attacks, and coupled with low startup lag and ending lag, as well as a fast execution, this move can become somewhat spammable.
[ 1% ]
Neutral Aerial | Around the World
Gim spins his yo-yo full circle around him, starting out in front and spinning it down around the back, then up over his head to return it. The hitbox is disjointed, at a distance about Bowser’s height away from Gim except when he’s throwing the yo-yo and catching it. Lag times on both ends, as well as the execution time for this move, can be very fast. On the other hand, they can also be relatively slow. The speed at which the yo-yo is thrown and spins around Gim is directly related to how fast Gim is moving through the air when this move is used. At low speeds, such as a simple jump, there is a fair amount of lag, and the yo-yo spins slowly, dealing only 5% damage and weak knockback. When moving faster, however, such as during a fastfall (or maybe after taking a hard hit), the speed can reach insane levels, the entire move executing sometimes in less than half a second, with the yo-yo’s speed giving it the power to deal 15% damage with good knockback. Of course, that’s only at best, so expect speeds somewhere in the middle, usually.
[ 5 – 15% ]
Forward Aerial | Blender Kick
Gim tilts his legs up, to point them slightly forward, then spins rapidly, performing a multitude of kicks toward his front. These kicks have short range, but between the 10 of them, each dealing 2% damage, this move can really rack up the damage. The kicks all execute in a time of about one second, and the startup lag is minimal to boot. Unfortunately, this move doesn’t give you a lot of breathing room afterward if you do connect, and the ending lag will often leave you punished. Use this carefully.
[ Up to 20% ]
Backward Aerial | Freeze
Gim throws his hand downward, as if putting it to the ground, throwing his legs behind him. Incredibly, this works the same as this break-dancing technique would on the ground, stopping him in mid-air! It also functions as a weak “sex kick” move, dealing 5% damage to those who touch him. On top of all that, he’s got super-armor for the one second he stays frozen in the air, after which he’ll simply drop out of the pose. This move, unfortunately, takes some psyching up from Gim, and if used too frequently, it will suffer in all properties except the “sex kick,” even sometimes reaching a point where he doesn’t stall at all, and gains no super-armor, if spammed too much.
[ 5% ]
Up Aerial | Windmill
Remember Sonic’s “C’mon, step it up!” Taunt? Well, Gim basically does that in mid-air, minus the oft-annoying vocal. Minimal startup and ending lag are a plus for this move, and his spinning legs deal multi-hit damage up to about 12%, with a final hit at the end pushing opponents upward to give Gim some breathing room. As an added bonus, this move will cause Gim to fall a little more slowly, sometimes serving as a slight boost to recovery and also making it easier to score all those hits.
[ Up to 12% ]
Down Aerial | Tangle Drill
Gim quickly wraps himself up in his yo-yo, stalling in mid-air as he does. After this slightly long stall, he pulls the yo-yo string, spinning himself around rapidly, and also propelling himself downward. He rockets downward at a regular stall-then-fall pace, catching opponents he hits and dragging them down with him, dealing multi-hit damage to them all the way. If he strikes the ground before the fall ends, his opponent(s) will be shoved a fair distance away from him, which is good, because Gim gets dizzy and suffers quite a bit of ending lag from this.
[ Variable Damage ]
Neutral Special | Dreamer
Gim tosses his yo-yo downward in effectively the same way he performs the Sleeper. As he does this, however, the yo-yo begins to sparkle and twinkle. It’s now controllable! Yes, you can steer the yo-yo all around, moving it at a speed about three-fourths that of a PK Thunder. It can move anywhere within two Negative Zones’ distance of Gim, but the string isn’t long enough to reach farther. Anyone the yo-yo touches will be dealt 8% damage, with decent knockback. Unfortunately, Gim is entirely vulnerable during this move, even falling at a normal speed. On top of that, the ending lag is horrendous, as Gim regathers the string and pulls the yo-yo back in.
[ 8% ]
Side Special | Blindside
Gim throws his hand forward, and a holographic-looking yo-yo shoots out, about the distance of a Battlefield platform. If no one is there, the yo-yo will simply vanish at the end of its path, but if it strikes someone, it will disperse in a cloud of florescent color, covering the victim. The next time Gim uses this move, a yo-yo will come out of thin air and slam into the back of the aforementioned victim’s head, dealing 8% damage and flinching knockback! If Gim can, he’ll snap his fingers to make this happen, but the button input can be received at any time, whether Gim is able to snap or not. For example, you could use this while an opponent had grabbed Gim and was holding him, to effectively release you from their grip. There is moderate lag during the yo-yo toss, but next to none when the hit comes.
[ 8% ]
Up Special | Reel In
Gim tosses his yo-yo upward as a tether recovery. If he’s near a ledge, the yo-yo will land on the tip of the ledge, spinning to automatically pull Gim toward the ledge. He’ll reel in pretty fast, but be careful, as the yo-yo can be grabbed and thrown off the ledge if your opponent is quick, ruining the recovery. As an offensive attack, this attack involves Gim tossing the yo-yo upward at a 45 degree angle, slightly slower than the Pikmin Chain, although it reaches about the same distance as one with six Pikmin. If it connects with anyone, though, it will wrap around them, and Gim will proceed to yank the string down hard, pulling the unlucky victim straight toward the ground. If there is ground for them to hit, they’ll slam into it, taking 12% damage. If there’s no ground, they’ll go rocketing downward to their doom. Unfortunately for Gim, the yo-yo’s attached to his hand as well, so he’ll be dragged down with them.
[ 12% ]
Grab | Extended
Gim throws his yo-yo forward in an attempt to ensnare opponents. This is a long-ranged grab, extending about one-third the length of Final Destination, but it’s got a lot of ending lag if you miss, so be careful about using it.
Pummel | Dizzy Spin
Gim pulls his yo-yo string to spin the opponent around. This deals no damage, but seems to make the victim dizzy, adding to the hitstun of any Throw that follows.
[ 0% ]
Forward Throw | Rapid Kick
Gim hops a short distance into the air, then starts spinning to pelt the victim with kicks, at the same time spinning them around to unravel them. Six kicks deal 2% damage each, executing in about a second. After the final kick, the victim is shot forward a short distance, low to the ground.
[ Up to 12% ]
Backward Throw | Twister Punt
Gim pulls his yo-yo string hard to spin his victim forward, then dashes forward and punts them backward over his head, dealing 10% damage with not-so-great knockback. This is kind of a slow throw.
[ 10% ]
Up Throw | Tornado Shot
Gim lifts his yo-yo as he pulls the string to spin his victim, who shoots into the sky above him, spinning rapidly. After a short time, they’ll stop spinning and be able to control themselves again, but until then, you’re free to follow up with another attack. This does no damage on its own, but is an excellent setup move.
[ 0% ]
Down Throw | Break It Down
Gim releases his opponent, then does one of his Taunts at random. The victim will watch as he does, and start one of their own Taunts shortly after. Assuming you’ve got someone with long Taunts against you, this can easily set up another attack, but beware of opponents with short Taunts, as they may finish before you do.
[ 0% ]
Up Taunt | Sliiide
Gim slides smoothly to the right, then back to the left, returning to his original position. This takes about as long as Sonic’s “You’re too slow!” Taunt.
Sets Next Helper: Rocky
Side Taunt | Disco Party
Gim’s colored lens begins vibrantly flashing bright colors, as he jumps up and down, dancing in a circle and pointing the lens downward to throw some colored light on the floor. This is a somewhat long Taunt, taking about as long Mario’s super mushroom Taunt.
Sets Next Helper: Plasma Wisp
Down Taunt | Sputter
Gim’s exhaust pipes sputter briefly, spitting smoke out the back. This is a quick taunt, taking about as long as Ness’ “Okay!” Taunt.
Sets Next Helper: Blade Knight
Up Victory Pose | Lights Out
Gim holds his hands up, as the screen fades darker. Suddenly, a lone spotlight appears over Gim, who performs a few quick break-dance moves.
Side Victory Pose | Stall
Gim spins around, slipping in a few quirky break-dance moves, then stalls on his hand to end, holding that position indefinitely.
Down Victory Pose | The Atomic
Gim holds his yo-yo up high, and it begins glowing vibrantly. He then throws it down, and it begins spiraling around him in an atomic shape.
Loss Pose | All Tangled Up
Gim appears in the background, tangled up in his yo-yo string. Looks like a trick went wrong, eh, Gim?
Blade Knight + Plasma Wisp | Blazing Blade
Plasma Wisp fires a wealth of energy into Blade Knight’s sword. For the next five seconds, anyone who comes within about two Stage Builder blocks’ length of Blade Knight will be slashed at viciously with lightning speed, taking 10% damage and good knockback. After the time has passed, the attack ends, with Blade Knight’s sword returning to normal.
[ 10% ]
Blade Knight + Rocky | Sword In the Stone
Rocky sits on the ground as a holographic-looking sword appears sticking out of the top of him. Blade Knight grips the hilt and pulls it out, as it emits a searing light. The area within about half a Smart Bomb’s blast radius will be affected, and opponents within that area take 20% damage and good knockback. After this, the attack ends. This attack executes in about a second.
[ 20% ]
Blade Knight + Gim | Wayward Yo-Yo
Gim attempts to do a basic Sleeper, but Blade Knight cuts the yo-yo’s string, and the yo-yo begins jumping around randomly, hopping about at insane speeds. The yo-yo deals 5% damage if it hits anyone, and who knows if it will; it’s movements are so random! After about three seconds of this, the attack ends as the yo-yo vanishes and the Helper leaving hops on the Tag Star and jets for the background.
[ 5% ]
Plasma Wisp + Rocky | Molten Inferno
Plasma Wisp begins pulsing energy into Rocky, who heats up to incredible heats and eventually melts, becoming a pool of lava that spans the entire platform this attack is used on. This takes about two seconds to happen, and Rocky remains like this for another two seconds, dealing 10% damage to anyone who touches him, before he quickly resumes his normal form, ending the attack.
[ 10% ]
Plasma Wisp + Gim | Atom Bomb
Gim begins spinning his yo-yo in the atomic symbol pattern, as Plasma Wisp charges energy. After about a second, a massive explosion occurs out of nowhere! It reaches about twice the distance of a Smart Bomb explosion, dealing multi-hit damage up to about 20%, after which the attack ends. The explosion, however, is rather brief, and can be spot-dodged entirely with precise timing.
[ Up to 20% ]
Rocky + Gim | Stone Slinger
Gim wraps his yo-yo around Rocky and starts swinging him around, in an arc that reaches about the distance of a Battlefield platform away. He swings him back and forth about half a dozen times, with knockback toward Gim (making multiple hits often a reality). Every time Rocky connects with an opponent, they’ll take 10% damage. After a few swings, Gim pulls Rocky back in, undoes the string, and the attack ends. This is among the longer Tag Blasts.
[ 10% ]
Final Smash | Super Star Party
Before this Final Smash actually happens, the Tag Star, fueled by the Smash Ball, brings the remaining three Helpers to the field of battle. From this point, the Helpers work together to ensure total chaos. The attack begins with Gim jumping on top of Rocky, using him as a sort of pedestal, and holding a hand toward the screen, effectively slowing the motion of all other players(“Stop! Hammer time!”), and also darkening the sky. After this, he points toward Plasma Wisp, who begins firing small energy orbs toward the sky, which explode as fireworks! This affects a rather large area overhead, with each firework dealing multi-hit damage up to about 10%. As this is happening, Blade Knight will rush along the ground, controlled by AI, striking at anyone who he comes close enough to. (Blade Knight doesn’t know how to party; he just fights.) After about five seconds and a couple dozen fireworks, Rocky gets tired of being Gim’s stage (Gim is dancing all the while the fireworks are going off), and jumps up, throwing him off. Gim tumbles into Plasma Wisp, who then accidentally fires a huge firework into the center of the sky, which explodes in a large burst that deals more multi-hit damage, this time up to about 25%. As this happens, Blade Knight rushes back to the other Helpers, pointing toward the Tag Star, which is losing its energy. The three Helpers you weren’t using hop back onto the Tag Star, and rush into the background, and gameplay returns to normal.
[ 10% per hit + 25% ]
Four of the Helper characters from Kirby Super Star: Ultra team up and join the Brawl! Now, you may be asking, “SirKibble, didn’t you already do this?” The answer, my friends, is a resounding no! This time, the four Helpers are completely different ones from the Super Star Helpers of Make Your Move 4. Now, Blade Knight, Plasma Wisp, Rocky, and Gim comprise the Super Star Helpers: Ultra! They’re copy abilities are:
- Blade Knight – Sword
- Plasma Wisp – Plasma
- Rocky – Stone
- Gim – Yo-Yo
So what’s the trick with these four, huh? The last set of Helpers was divided by strengths and weaknesses in the categories of Speed, Power, Range, and Weight. Not so this time. These Helpers aren’t even divided into categories. They all sport their various quirky moves, but the key special piece of this moveset lies in their switching mechanic.
SWITCHING MECHANIC: TAG STAR
The “Tag Star” is a special type of Warp Star used by the Ultra team. The tag star functions on an energy supply that recharges automatically over time. While one of the Helpers is in the field of battle, the Tag Star is far away in the background with the other three, storing energy. To fly in and switch in one of the other Helpers, it requires some energy. The Tag Star can gain this amount of energy in about 20 seconds. This is the vital energy that the Star needs to fly in with one Helper and fly back to the background with the other.
However, if you let it charge longer, the Tag Star will gain additional energy. This energy goes toward a special ability called the Tag Blast, which any set of two Helpers can perform. As one is switching in and the other is switching out, if enough energy is built up, they will perform their unique Tag Blast attack. Tag Blasts become useable after about 40 seconds of charging.
Down Special | Tag Star
This switch can only be used on the ground. The Helper you’re currently using quickly stands and braces themselves, still taking damage from hits but unable to receive knockback, as the Tag Star rushes in from the background, carrying the next Helper to the field of battle. A small icon next to your damage meter will show you which Helper is slated to fight next, but you can change this through taunting (explained further in the Taunts and Victory Poses section for each character). The Star reaches the playing plane in about half a second, at which point the Helper aboard the star will hop off, onto the ground, and the one previously in play will take to the Star and return to the background. There is no punishable lag like Pokemon Trainer and Zelda / Sheik experience when switching, as the Helper becomes immediately controllable upon hitting the ground. If a Tag Blast is in order, it will take place when both Helpers are in the field of battle, before the one leaving takes to the Star.
Enough of that, though! On to the individual movesets!
~ BLADE KNIGHT ~
Blade Knight is a knight-like character possessing the Sword ability. A thick plate of armor covers most of his body, with only his arms exposed, one of which is always found gripping his trusty sword. He attacks through various sword techniques, both offensive and defensive, and his sword is also capable of firing off energy bursts in some instances.
~ STATISTICS ~
Size: Mid-Small
Weight: Mid
Power: Mid
Jumps: 2
Jump (1): Mid
Jump (2): Mid
Speed (Walk): Mid
Speed (Run): Mid-Fast
Traction: Mid-Good
Speed (Attack): Mid-Fast
Speed (Falling): Mid
Range: Mid-Short
Crouch: Mid-High
Crawl: No
Wall-Kick: No
Wall-Cling: No
Glide: No
~ STANDARD ATTACKS ~
Standard Combo | Set Slash
Blade Knight drops his sword hand behind him, ready to slash, when you press the A button. This is somewhat slow, but as long as you hold the button, he won’t release the slash. The actual slash is lightning fast, and can be released at your discretion. In addition, Blade Knight can inch forward and backward, and even perform low jumps, similar to Kirby’s movement when he’s got someone in his mouth. The slash, when released, has range similar to Meta Knight’s Forward Smash, and deals 8% damage with okay knockback. The lag after the hit is small, but not insignificant.
[ 8% ]
Forward Tilt | Parry
Blade Knight puts his sword forward, in a defensive stance. He does it quickly, and holds the stance for about half a second, then returns his sword to his side, with some ending lag. If an attack strikes his front (he’s still vulnerable from the back), he’ll block the hit, stunning his opponent, and a well-timed second press of the button will cause him to roll around back of his opponent, delivering an upward slice as he gets to his feet again, dealing 10% damage and decent upward knockback. Unfortunately, this button press has a very small window during which you can perform the roll/attack. The opponent will always be stunned long enough for you to deliver this blow if you manage to score the button input. Otherwise, you’ll just have to follow up with another attack. There is very little ending lag if the attack is performs, making it well worth your while.
[ 10% ]
Up Tilt | Intimidate
Blade Knight holds his sword up, spinning it around rapidly for about a second before gripping it firmly again. As he spins it, enemies that face him and are within about half a Smart Bomb’s explosion radius will turn and run the opposite direction, intimidated by his sword skills. If the player taps the control stick the direction their character was originally moving (toward Blade Knight), they can manage to remain still for the duration of the move, but they will be unable to advance toward Blade Knight. This move has little startup lag, but a fair amount of ending lag. Best used to throw enemies a curveball during their approach.
[ 0% ]
Down Tilt | Block
Blade Knight ducks down, holding his sword diagonally in front of him, becoming impervious to all attacks made on him. He strikes this pose quickly, and will hold it indefinitely, until he receives the button input again, which signals him to stop, at which point he’ll twirl his sword briefly and then grip it again, making for some significant ending lag. This may seem to be an ultimate defensive pose, as it’s only vulnerable to grabs, but there is a downside. Every blow Blade Knight blocks will weaken his ability to defend, by the percentage that the hit would’ve dealt him, decreasing his probability of blocking the next hit. For example, if the first hit to strike him after he uses this move deals 15% damage, then he’ll only have an 85% chance of blocking the next (100 – 15 = 85). If Blade Knight fails to block a hit, in addition to taking it, as he’s knocked into the air, he’ll automatically enter a Helpless state, so be careful about when you use this move.
[ 0% ]
Dash Attack | Fury Rush
Blade Knight halts in his tracks, quickly slashing his sword forward at short range. This slash comes out about as fast as Meta Knight’s Down Tilt, sweeping in a vertical arc and dealing 4% damage to anyone it hits. If the button is pressed again right after the first slash, Blade Knight will step forward and slash again! This can be repeated as many times as desired. At low percentages, this is a great way to rack up some damage on your opponents, and can also be used as a method of approaching, due to the repeated hitbox as you move forward.
[ 4% ]
~ SMASH ATTACKS ~
Forward Smash | Power Wave
Blade Knight lifts his sword high above him, then brings it down in a powerful slash. The slash covers an area similar to Meta Knight’s Forward Tilt (third/final hit), dealing 10 – 20% damage, but with weak knockback. The slash shoots forward a silver crest of energy, however, that travels forward about one-third the length of Final Destination, moving about as fast as a PK Thunder, and deals 5 – 8% damage, also with weak knockback. There is a fair amount of lag on both ends of this attack.
[ 10 – 20% + 5 – 8% ]
Up Smash | Blade Toss
Blade Knight throws his sword high into the air, it spinning rapidly as it flies, then catches it as it falls back down to him. The sword travels the distance in about the time it takes King Dedede to complete his Super Dedede Jump, although it travels up only about half the vertical distance. The sword spins very rapidly, though, enough to create a wave of energy around it. This energy wave makes the spinning sword about 1.5X the size of Ike’s sword during Aether, and the energy wave deals 8 - 12% damage and decent knockback to anyone it hits. On the way up, the spinning blade gives directly downward knockback, and on the way back down, the knockback is directly upward, so you can often chain this together with itself to score two hits. There is moderate lag at the beginning and end of this.
[ 8 – 12% ]
Down Smash | Power Pulse
Blade Knight stabs his sword into the ground, pulsing energy into it. The energy pulses into an area about a Battlefield platform wide around Blade Knight (just one platform’s width total, not one to each side), which can be seen by it glowing faintly. This energy remains in the ground for about five seconds, and will erupt if an opponent steps onto it, dealing 14 – 20% damage and decent upward knockback. If Blade Knight is in the eruption when it happens, he’ll also take the knockback, although he’ll be safe from damage. There is above average lag on both ends of this move.
[ 14 – 20% ]
~ AERIAL ATTACKS ~
Neutral Aerial | Spin Slash
Blade Knight performs a full circle spin with his blade outstretched, not unlike Meta Knight’s Neutral Aerial. However, he only spins around once, and doesn’t spin quite as quickly as Meta Knight. His reach is short, and the blade deals only 7% damage and weak knockback, but as soon as he finishes the spin, an energy wave shoots out, circling around him the same way his blade did, only at a slightly further radius. This energy wave deals only 1% damage, but actually does rather well in the knockback department. This does make the attack somewhat long, as Blade Knight can’t perform another attack until the energy wave is done, but there’s little lag on the ends of the move, so it’s not quite so bad.
[ 7% + 1% ]
Forward Aerial | Arc Burst
Blade Knight slashes his sword in a forward arc similar to Toon Link’s Forward Aerial. After the initial slash, he follows by slashing back over the same path, this time shooting forward a burst of energy that travels about one Battlefield platform’s length forward, damaging opponents. The sword slashes execute in about a second total, each dealing 8% damage. The energy burst deals 4% damage. There is minimal startup lag on this move, but some ending lag.
[ 8% + 8% + 4% ]
Backward Aerial | Feint
Blade Knight pulls his sword back, as if about to slash like in his Forward Aerial, but doesn’t. Aside from happening very obviously and quickly, you can cancel out of this at any time into another attack, making it a very powerful tool for mindgames.
[ 0% ]
Up Aerial | Cover Crest
Blade Knight lowers his sword, then slashes in an arc over his head. This is a slow move, but the slash leaves an energy crest over Blade Knight’s head, which remains there for the next three seconds. The actual slashes has a hitbox similar to Meta Knight’s Up Aerial, though it executes slower. The energy crest rests at the high edge of that hitbox. The slash deals 8% damage, and the crest that remains deals 3%, both with upward knockback, though the slash’s is much stronger.
[ 8% + 3% ]
Down Aerial | Thrust Drop
Blade Knight stalls in the air, then thrusts his sword downward, shooting him downward about the height of the highest Battlefield platform over the main platform. After this, he stalls again as he pulls his sword back up. While his sword is extended downward, it deals 10% damage and good diagonal knockback to anyone hit. The stalls on either end make this move somewhat laggy, but they do prevent you from being too reckless with this attack.
[ 10% ]
~ SPECIAL ATTACKS ~
Neutral Special | Power Slash
This is a chargeable, storable move. Blade Knight charges up energy in his sword, that he can release in a powerful slash. The move he charges it up, the bigger and stronger the energy burst is. When he slashes, he’s somewhat slow, but before the slash, you can angle it, controlling the direction the energy burst shoots in. The energy burst looks a lot like the one that happens during Lucario’s Force Palm, though it’s silver and potentially bigger or smaller. At weakest charge, the energy burst is so small it won’t even reach beyond the sword slash. At strongest charge, it’s about twice the size of Lucario’s Force Palm, and deals 15% damage, with weak knockback. The actual sword slash deals 10% damage, always, but it’s slow and laggy, so this should mainly be used for the extension of the energy wave.
[ 10% + 15% ]
Side Special | Valor Charge
Blade Knight lifts his sword into the air, then begins glowing a bright golden color. This takes about half a second. In this state, he charges forward, running at a normal speed, slashing at anything he comes across. While he’s glowing, he has super-armor, and he’ll charge for about half the length of Final Destination, slashing for 10% damage and good knockback at anything he strikes. He will stop if he hits a wall, but will continue running after he slashes at anything in his path. At the move’s end, Blade Knight nearly collapses from the charge, returning to a normal state with significant ending lag.
[ 10% ]
Up Special | Burst Propulsion
Blade Knight holds his sword beneath him, and it begins emitting silver energy that serves as a sort of rocket, pushing him upward. This lasts for about a second, and can get him about as high as Mario’s Super Jump Punch goes, with some horizontal control as well. After this second, the blade will erupt in a final burst of energy, pushing Blade Knight once again the same distance upward, as well as dealing damage and putting him in a Helpless state. The burst deals 10% damage, though only within a small area, as well as decent diagonal knockback.
[ 10% ]
~ GRAB / THROWS ~
Grab | Normal
Blade Knight reaches his free hand forward to grab, very similar to Meta Knight.
Pummel | Shake
Blade Knight shakes his victim about, dealing three small hits of 1% damage each. This is a somewhat slow Pummel.
[ 1% Per Hit ]
Forward Throw | Rush Release
Blade Knight runs forward, still holding his victim (who can still try to break his grip) until you press a button, at which point he’ll toss his victim forward, dealing 5% damage and weak knockback. This can potentially be used to suicide KO, but that usually won’t be a practical option.
[ 5% ]
Backward Throw | Dismiss
Blade Knight casually tosses his victim over his shoulder. This deals only 2% damage, but has surprisingly long hitstun, meaning that you can often score another hit on your victim.
[ 2% ]
Up Throw | Skewer
Blade Knight holds his victim up high, then drives his sword up through them! Don’t worry, it’s not graphic, the unlucky victim goes shooting upward, taking a good amount of upward knockback from the stab, though the 5% damage is nothing to boast about.
[ 5% ]
Down Throw | Finisher
Blade Knight tosses his opponent to the ground, then jumps over them and drives his sword into their gut (assuming they have a gut). This is his most damaging Throw, strapping on 8% damage to the victim, but is rather slow, and deals very little knockback, often leaving Blade Knight vulnerable. In 1-vs.-1 matches, though, this is usually your best option.
[ 8% ]
~ TAUNTS / VICTORY POSES ~
Up Taunt | Holy Light
Blade Knight grips his sword with both hands, as it begins to glow. He then holds it skyward for a second, then sweeps it back to his side, as it returns to normal.
Sets Next Helper: Plasma Wisp
Side Taunt | Fumble
Blade Knight accidentally drops his sword, then scrambles to pick it up again, appearing very relieved once he does.
Sets Next Helper: Gim
Down Taunt | A Short Break
Blade Knight stabs his sword into the ground, then wipes off his brow with a handkerchief he pulls out of nowhere. He then puts it back and pulls his sword from the earth, ready to fight again.
Sets Next Helper: Rocky
Up Victory Pose | Exhausted Warrior
Blade Knight appears tired, breathing heavily, then drops his sword and collapses down to his knees. Must’ve been a tough fight!
Side Victory Pose | Finish Them!
Blade Knight is nowhere to be seen, then rushes in from the side of the screen, and off the other side. He continues rushing back and forth, as if chasing someone, for the duration of this Victory Pose.
Down Victory Pose | Finished Work
Blade Knight sticks his sword into the ground and turns, facing toward the background and tilting his face upward, toward the sky.
Loss Pose | A Worthy Adversary
Blade Knight lays his sword on the ground and kneels facing his opponent, his head bowed with respect.
~ PLASMA WISP ~
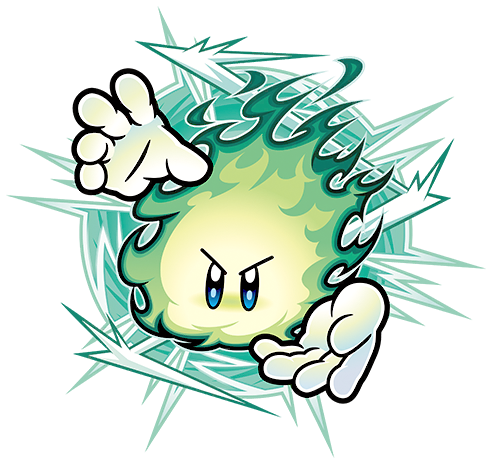
Plasma Wisp is the Plasma-based Helper, a mass of flaming green electricity. The Plasma ability, which he possesses, can be charged by building up energy through movement, making its attacks more powerful. Being relatively unaffected by gravity, he moves more freely through the air than other Helpers.
Plasma Wisp is the Plasma-based Helper, a mass of flaming green electricity. The Plasma ability, which he possesses, can be charged by building up energy through movement, making its attacks more powerful. Being relatively unaffected by gravity, he moves more freely through the air than other Helpers.
Many of Plasma Wisp’s attacks in Brawl function on a charge mechanic, based upon a charge that he builds up through moving around. Every time the control stick is tilted in a direction, one “unit” of charge will be gained. “Tapping” the control stick will profit you three units. There are five levels of charge, and each is gained at a 10 unit increment, so:
- 0 – 9 Units: Level 1 Charge
- 10 – 19 Units: Level 2 Charge
- 20 – 29 Units: Level 3 Charge
- 30 – 39 Units: Level 4 Charge
- 40 Units: Level 5 Charge
Charge cannot exceed the maximum 40 units, and after every use of an attack that relies on charge, Plasma Wisp’s charge will drop back to 0. Attacks that do not rely on charge will not affect it, unless stated otherwise in the moveset. Charge is visually shown by Plasma Wisp glowing and flashing more vibrantly and more quickly as he reaches higher levels of charge. At Level 5 charge, a light-turquoise sphere will surround him, like shown in the above picture. This sphere is approximately the size of a Party Ball, and will spark once every five seconds while it remains over Plasma Wisp, dealing 1% damage and flinching knockback to anyone touching it. This isn’t a very predictably useful tool, but it may release you from a grabbing opponent’s grasp at a lucky time, or serve some other unforeseen function.
Plasma Wisp’s relative immunity to gravity is manifest in Brawl through his jumps (or rather, his single “jump”). When Plasma Wisp is ground-bound, a few thin lightning bolts will stream down from his frame to the ground below, essentially holding him down, and allowing him to use attacks like his Tilts and Smash Attacks. Upon choosing to leave the ground, however, Plasma Wisp will not “jump” like most characters. Rather, he will simply disconnect from the bolts (they will vanish into thin air as he does), and hover into the sky. This essentially forms one long jump that makes him rise up whenever the Jump button is pressed, very similar to R.O.B.’s Up Special. This jump allows him to hover upward about three times the distance and time of R.O.B., lending to a very advantageous aerial game.
~ STATISTICS ~
Size: Mid
Weight: Very Light
Power: Mid
Jumps: Special [See above paragraph]
Speed (Walk): Mid-Slow
Speed (Run): Mid-Slow
Traction: Mid [Despite how mediocre his turning is, due to the fact that he floats, Plasma Wisp can’t trip!]
Speed (Attack): Mid-Fast
Speed (Falling): Slow
Range: Long
Crouch: High
Crawl: No
Wall-Kick: No
Wall-Cling: No
Glide: No
~ STANDARD ATTACKS ~
Standard Combo | Spark
Plasma Wisp clenches his fists, sparking with electrical energy briefly. In a lot of ways, this is comparable to Mewtwo’s Neutral Aerial in Melee. He sparks for about a second, with minimal startup and ending lag, dealing multi-hit damage to those who touch him. The damage can reach up to about 6% if all the hits connect. As an added bonus, if you’re at Level 5 charge when you use this move, a final hit will be dealt by the electrical aura surrounding Plasma Wisp, dealing an additional 4% damage with decent knockback at the move’s end. What’s more, this bonus occurs at no cost to your charge!
[ Up to 6% + 4% ]
Charge Retained
Forward Tilt | Stun Grip
Plasma Wisp reaches his hands forward, holding them straight out in front of him. This has moderate lag, for a Tilt. He will grab any opponent within a fairly normal Grab range, but will not hold onto them for a follow-up Throw. Instead, he’ll pulse all his accumulated charge into them, stunning them for a period of time, during which he can use other attacks. The stun strength is proportional to the amount of charge Plasma Wisp has built up. At weakest, it will hold for an average of about a quarter-second, but at strongest, it will hold for roughly two seconds! It does no damage, but sets up other attacks well.
[ 0% ]
Charge Exhausted
Up Tilt | Lightning Rod
Plasma Wisp holds his hands skyward, and a lightning bolt crashes down into his fingertips. The bolt comes from about two Stage Builder blocks’ height above him, and shoots down quickly, giving his move minimal startup lag. The bolt deals 2% damage with directly downward knockback, which becomes useful for the second part of this move. When the lightning strikes Plasma Wisp’s hands, he keeps them above his head/body/self as they crackle with electricity. He can remain like this for as long as you want, and will stop when any other button input is given. His hands are a small hitbox, but they catch well and are hard to DI out of, dealing multi-hit damage to those who touch them. There is some ending lag when you quit this.
[ 2% + Variable Damage ]
Charge Retained
Down Tilt | Energize
Plasma Wisp stretches his hands out to either side, and the lightning bolts connecting him to the ground glow brightly and flow up into him, giving him additional energy. Unfortunately, this is a slow move, as it’s not exactly easy to just pull energy out of nowhere like that, and the lightning bolts have to reform, totaling the move’s usage time to a little more than two seconds, but it does two things that can be extremely worthwhile. First, it locks Plasma Wisp at his current Level of charge, disallowing him from dropping below it. Second, it boosts his charge by 10 units, which will always take him up one Level. For example, if he’s at Level 3 charge when he uses this move, he’ll be boosted to Level 4, and become unable to drop below Level 3 for the next 5 seconds, after which the move cannot be used for another 30 seconds. Use this wisely.
[ 0% ]
Charge Gained: 10 Units
Dash Attack | Magnet Slingshot
Plasma Wisp stops dead in his tracks, but the lightning bolts connecting him to the ground rush forward a little farther, still connected to him at a backward angle. Since they’re pulling him forward at this point, he then succumbs to the pull and catapults himself forward in an attempt to slam into foes. He stops for about half a second, then launches forward about half the distance a Fox Illusion travels, although at a slower (but still pretty fast) speed. If he collides with anyone, they’ll take 10% damage and pretty good knockback. There is moderate ending lag as he stops.
[ 10% ]
Charge Retained
~ SMASH ATTACKS ~
Forward Smash | Plasma Sphere
Plasma Wisp holds his hands out in front of him, and a sphere of electricity begins to grow. When the attack is released, he will let go of the sphere, at its current size, and it will hover for about five seconds, dealing multi-hit damage that’s difficult to DI out of to anyone who touches it. The amount you can charge the attack depends on how much plasma charge you have, and the Smash’s charge will determine how much of your plasma charge is exhausted. For example, with a Level 3 charge accumulated, you can charge the Smash attack for about half of its full charging duration. Charging beyond that point will not affect the attack. However, you could release it at weakest charge to only exhaust 10 units (or 1 Level) of charge. At weakest, the ball is about the size of Samus’ smallest Charge Shot. At largest, it’s a little bigger than a Party Ball, and catches/holds opponents who touch it much better.
[ Variable Damage ]
Variable Charge Exhausted
Up Smash | Triad Bolt
For this attack, Plasma Wisp’s current Level of charge determines exactly what he’ll do. If he’s at Level 3 or lower, he’ll stretch his hands out to his sides, and two thin lightning bolts will shoot into them from about two Stage Builder blocks’ length away on either side. These lightning bolts are full of powerful energy, which Plasma Wisp uses to charge himself up, gaining 5-10 units of charge from this, depending on how much he charges the Smash Attack. However, opponents who touch the bolts as they enter Plasma Wisp’s body will also be charged up, and will deal 1.2X normal damage and knockback on all attacks for the next 5-10 seconds (again, depending on the charge of the Smash Attack). This variation of this attack is somewhat slow, but not unbearable.
If Plasma Wisp is at Level 4 charge or higher, he’ll instead fire lightning bolts out of his hands, which he stretches out just the same. After the bolts travel out about two blocks’ distance, they’ll stop and turn sharply, angling upward and backward to meet at a point about two blocks’ height above Plasma Wisp, from which point they’ll proceed to dart downward, back into Plasma Wisp. This variation of this attack is extremely slow, but protects Plasma Wisp well, as the lightning bolts deal 10-20% damage, and also weakly stun opponents hit by them, helping the considerable ending lag a bit.
[ 10 – 20% ]
Charge Gained: 5 – 10 Units (if Level 3 or lower)
Charge Retained (if Level 4 or higher)
Down Smash | Shockwave
Plasma Wisp slowly concentrates himself into a round ball while charging this move, then slams into the ground, seeping into it and launching an electric green shockwave out from the point he hits. The startup lag on this move is moderate. The shockwave travels out quickly from Plasma Wisp through the ground, both to the front and the back, about one-fourth the length of Final Destination, stunning and dealing 5-10% damage to anyone it hits. After this, the shockwave emits a green gas into the air, which floats back to the location Plasma Wisp used the attack from and reforms as him. This causes this move to have quite a bit of ending lag. Luckily, if you hit your opponents, they’ll be stunned and probably won’t be able to punish it.
If Plasma Wisp has at least Level 4 Charge, this attack gains an extra property. A shockwave will also shoot through the air, making a full semi-circle over the area the shockwave travels along the ground. This shockwave deals no damage, but does stun opponents it hits very well, and adds to the stun that ground-bound opponents take from the attack.
[ 5 – 10% ]
Charge Exhausted for Level 4+
~ AERIAL ATTACKS ~
Neutral Aerial | Discharge
Plasma Wisp quickly releases all his built-up energy, reverting back to zero charge. While this may seem counterproductive, the energy release creates a quick, powerful concentration not unlike Jigglypuff’s Rest, which deals strong damage to anyone within the very small (and brief) hitbox as it appears. Depending on the Level of charge you have, this attack will deal 2%, 4%, 8%, 16%, or 32% damage, with proportional knockback to the damage. Obviously, it’s best to reach Level 4 or 5 charge before unleashing this attack, especially considering that despite its minimal startup lag, this move has about 2 seconds of ending lag, as the energy release takes a lot out of Plasma Wisp.
[ 2% or 4% or 8% or 16% or 32% ]
Charge Exhausted
Forward Aerial | Aurora Sweep
Plasma Wisp stops falling, hovering in the air, and rushes forward at about his running speed, for about one-fourth the length of Final Destination. After that, he returns to his original location and resumes falling. As he’s moving forward, he’ll let off a green gas that stuns opponents, trapping them inside it. When he sweeps back around, he’ll slam into all trapped opponents, dealing 8% damage with decent upward knockback. This costs him 10 units of charge and has moderate lag on both ends.
[ 8% ]
10 Units of Charge Exhausted
Backward Aerial | Fume
Plasma Wisp begins “coughing,” entering a sort of convulsive state for a time, creating a fair amount of startup lag for this move, before a final “cough” causes a flurry of green flames to start shooting out behind him. These reach almost as far as a Fire Flower’s flames, and about as high. The flames persist in shooting out for about 2 seconds, dealing damage similarly to a Fire Flower, only the flames pull opponents in more than they push them out, and have a shock effect instead of a flaming one. Plasma Wisp cannot use any other moves until the effect of this ends.
[ Variable Damage ]
Charge Retained
Up Aerial | Bad Fusion
Plasma Wisp pauses, falling even more slowly than normal for a second, then erupts in a violent explosion, damaging all opponents within a short distance of him. This is a powerful, but laggy attack, dealing 15% damage with strong upward knockback to anyone hit in the explosion, but having Ike-like lag at the beginning and end. Additionally, this exhausts all of Plasma Wisp’s built-up charge.
[ 15% ]
Charge Exhausted
Down Aerial | Grounder
Plasma Wisp extends his hands downward, attempting to form an electric current. This will fail if there is no ground directly below him, within at least 5 Stage Builder blocks’ height. If there is ground, he’ll form a stream of lightning bolts between his hands and the ground below, then be pulled quickly down it, slamming into the ground. This all happens very quickly, with little startup lag (and Plasma Wisp drops at about the speed a Falcon Kick moves), and Plasma Wisp has great priority while dropping. He’ll also deal 10% damage with weak knockback to anyone he hits while dropping. There is a fair amount of ending lag as he hits the ground, as it seems to catch him off guard slamming to the ground at such high speed. Whether the move is successful or not, it will cost him his charge.
[ 10% ]
Charge Exhausted
~ SPECIAL ATTACKS ~
Neutral Special | Plasma Shot
Plasma Wisp holds his hands forward and fires a plasma-based projectile, but the projectile fired depends entirely on your current Level of charge. Lag times are always moderate, something like Mario’s Fireball. The actual shots correspond to the Levels of charge as follows:
- Level 1 – Plasma Needle
Plasma Wisp fires forward a fast, thin needle of plasma energy, like one of Sheik’s needles. It travels a short distance (like, a Stage Builder block’s length) forward, then disappears. If it hits anyone, it’ll deal 2% damage and minimal knockback.
[ 2% ] - Level 2 – Plasma Arrow
Plasma Wisp now fires an arrow made of sparkling plasma. This fires farther forward, about one-third the length of Final Destination, traveling about the speed of Toon Link’s arrows at full charge. Anyone hit will receive 5% damage and fairly weak knockback.
[ 5% ] - Level 3 – Plasma Spark
If Plasma Wisp is at Level 3 charge, he’ll fire the “Plasma Spark,” a flurry of plasma sparks in a spherical formation that travel only slightly farther than the Plasma Needle, and a little slower. They also deal very little knockback, but due to their multi-hit damaging style, this attack can deal up to 15% damage, though 10-12% is more likely.
[ Up to 15% ] - Level 4 – Plasma Laser
The Plasma Laser is a long, thin laser of plasma, surrounded by multiple rings of green plasma. It fires forward at about the speed of Link’s arrows at full charge, dealing 10% damage and okay knockback to anyone hit. It also travels indefinitely, traveling through opponents it damages until it strikes a wall or goes off the screen.
[ 10% ] - Level 5 – Plasma Wave
The Plasma Wave is the most powerful projectile in Plasma Wisp’s arsenal, but can only be used at Level 5 charge. He fires forward a ball of plasma about the size of Samus’ fully-charged Charge Shot, and it travels about as fast, too, dealing 20% damage and good knockback to anyone it hits. What’s more, it’ll plow right through them, so you can potentially hit multiple foes with this attack!
[ 20% ]
Side Special | Will-o’-the-Wisp
Plasma Wisp pauses in place and glows eerily, becoming somewhat transparent. He glows like this for about as long as Lucario’s counter lasts, having some lag time at the end if he isn’t hit. However, if Plasma Wisp is hit while he’s glowing, he’ll erupt in a burst of green flames, slightly larger than himself, immediately setting plasmatic fire to nearby opponents, who will be very briefly stunned (which also deals 1% damage) at two to three random times during the next five seconds, interrupting any actions they may be performing. After erupting, Plasma Wisp reappears some distance in the direction you used this move, about the distance a Fox Illusion travels. This does not put him in a Helpless state.
The plasma fire gets stronger if Plasma Wisp is at a charge of at least Level 3. If this is the case, the fire will also ignite anyone along the path he travels before reappearing, as a faint green glow moves along the path. He travels this distance in about one second, and reappearing is a slightly laggy action, but he can’t be hit when he’s just a glow, only as he’s reforming.
[ 1% per hit ]
Charge Exhausted for Level 3+
Up Special | Static Field
Plasma Wisp quickly raises his hands and creates a circular field of static energy above him. The field is proportional to his current level of charge, a Level 1 field being about the size of a Party Ball and a Level 5 one being about the size of Luigi’s Negative Zone. The bottom of the circle will always just barely cover Plasma Wisp at his current location. The static field remains for five seconds, and Plasma Wisp can move freely inside it—up, down, left, and right—unrestrained by gravity, at a speed similar to Pit’s when he’s using the Wings of Icarus. Using this move will only take away your Up Special, so Plasma Wisp can still use all his other moves without striking solid ground again, and is not put in a Helpless state. This deals no damage to opponents. In fact, opponents will enjoy the same freedom within the static field as Plasma Wisp does, so use this carefully. However, opponents will not have their state changed when they enter the field. If they are in a Helpless state when they enter it, they will still be when they exit it or when it disappears.
[ 0% ]
Charge Exhausted
~ GRAB / THROWS ~
Grab | Normal
Plasma Wisp simply reaches forward and grabs with both hands. Similar in lag and range to Mario’s Grab.
Pummel | Drain
Plasma Wisp draws energy from his victim through his hands into himself. This deals 1% damage to your opponent, and profits you a single unit of charge. Unfortunately, it’s a rather slow Pummel, and usually can’t be repeated too many times before your opponent will break your grip.
[ 1% ]
Charge Gained: 1 Unit
Forward Throw | Supercharge
Electrical energy surges around Plasma Wisp for a second, and he then pulses all of it into his victim. This attack has both a huge advantage and a huge disadvantage, and so should be used carefully, both of which are proportional to the amount of charge Plasma Wisp currently has. On the plus side, the knockback from the energy pulse is directly proportional to Plasma Wisp’s charge, meaning that at Level 4 or 5, this is a very powerful attack, and can often score KOs on foes before they reach extreme damage percentages. However, the energy, while powerful, is not hostile, and will not deal damage to Plasma Wisp’s victim. In fact, the energy will actually heal your opponent! The number of units of charge put into the blast will actually be recovered by your opponent, so while a 40 unit Throw deals incredible knockback, you’d better be sure you’ll score that KO with it before using it, as it will also restore 40% damage to your opponent!
[ Heals Opponent 0 – 40% ]
Charge Exhausted
Backward Throw | Envelopment
Plasma Wisp pulls his arms into his burning green body, pulling his victim with him. The victim will be stuck inside him for 2-3 seconds afterward, and will take damage and knockback with Plasma Wisp as long as he’s enveloping them. Plasma Wisp is free to move around with his victim during this time, until they’re released, at which point they will topple out of him, as if footstooled. This attack deals no damage, and actually, the victim can attack Plasma Wisp from within while they’re trapped, though he’ll take minimal knockback from these hits, even the most powerful. Most attacks will only deal him damage, and the most powerful of attacks will only deal flinching knockback to him. This should mainly be used to carry characters with poor recoveries over the edge, dropping them to their doom, as Plasma Wisp’s recovery outclasses much of the roster.
[ 0% ]
Charge Retained
Up Throw | Ionizer
Plasma Wisp quickly pulses some energy into his victim (exactly 10 units of charge), ionizing them such that they’ll be magnetically attracted to the top of the screen. He then releases them, and the unlucky victim goes fluttering upward, unable to control their vertical movement for the next 3 seconds. However, this cannot score KOs, as they will not float past the top edge of the screen. Additionally, this Throw does no damage, so it’s more of a stalling tactic than anything, although it can be used to force opponents with weak aerial games into a bad position. This Throw cannot be used unless Plasma Wisp is at Level 2 charge or higher, for obvious reasons.
[ 0% ]
10 Units of Charge Exhausted
Down Throw | Bond Breaker
Plasma Wisp jumps up above his victim, then throws his hands downward, toward them. The unlucky victim then shatters into a million or so microscopic pieces (okay, not really, you can see them), which revolve around the spot they were thrown at. They will remain in this broken state for the next 2 seconds, and are unable to attack, grab items, etc. while in this state. They can “walk” left and right, at Jigglypuff’s walking speed, to affect the spot where they’ll reform (diminishing chain-grab potential), but are incapable of any other actions. They also can’t be hurt in this state, though, so it’s mainly a stalling tactic, or a way of trying to set up another attack, for when they reappear.
[ 0% ]
Charge Retained
~ TAUNTS / VICTORY POSES ~
Up Taunt | Short Circuit
Plasma Wisp begins sparking in random places across his body, shaking about violently before regaining control of himself.
Sets Next Helper: Rocky
Side Taunt | Rainbow Flame
Plasma Wisp cycles through the entire spectrum of visible colors quickly, beaming brightly all the while.
Sets Next Helper: Gim
Down Taunt | Beckon
Plasma Wisp points a finger forward, then turns his hand over and does a “come here” signal with his finger.
Sets Next Helper: Blade Knight
Up Victory Pose | Power Overwhelming
Plasma Wisp shakes about violently, as an electrical charge builds up around him. After a couple of seconds, he stops, looking menacingly at the screen, with lightning bolts surrounding him as far as the screen can see.
Side Victory Pose | Frenzy Fire
Plasma Wisp turns around and around, shooting off various plasma projectiles in every direction, then finally gets dizzy and falls to the ground.
Down Victory Pose | Electric Eruption
Plasma Wisp is nowhere to be seen, as green sparks begin to cover the ground, which begins to glow faintly. Suddenly, the sparks explode violently, like a firework, and Plasma Wisp appears, holding his hands up as if accepting applause.
Loss Pose | Dissipate
Plasma Wisp hangs his head sadly, and begins to disappear, growing smaller and smaller, fainter and fainter as time goes on.
~ ROCKY ~
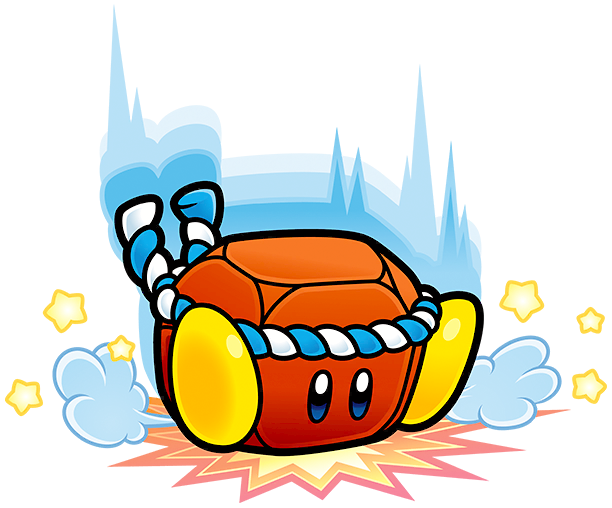
Rocky is the Helper for the Stone ability. A simple block-shaped stone with eyes, feet, and a sort of bandana, his primary means of attacking is by falling on and crushing opponents. He can also harden himself into various forms and structures like Stone Kirby.
~ STATISTICS ~
Rocky is the Helper for the Stone ability. A simple block-shaped stone with eyes, feet, and a sort of bandana, his primary means of attacking is by falling on and crushing opponents. He can also harden himself into various forms and structures like Stone Kirby.
~ STATISTICS ~
Size: Mid-Small
Weight: Heavy
Power: Mid-Strong
Jumps: 2
Jump (1): Mid-High
Jump (2): Low
Speed (Walk): Slow
Speed (Run): Mid
Traction: Good
Speed (Attack): Slow
Speed (Falling): Fast
Range: Mid-Short
Crouch: High
Crawl: No
Wall-Kick: No
Wall-Cling: No
Glide: No
~ STANDARD ATTACKS ~
Standard Combo | Hop
Rocky hops a short distance into the air, then crashes back to the ground. This takes about half a second to do, with little startup lag and some ending lag. Anyone near Rocky as he strikes the ground will be buried, but take no damage. This is great for setting up another move, but your opponent has to be close by for it to work.
[ 0% ]
Forward Tilt | Dust Slap
Rocky leans forward and faceplants into the ground, kicking up dust in front of him. The dust reaches about as far as a Fire Flower’s flames, and will slow down any opponent it touches, making them move at slightly slower than normal speed for the next five seconds. This attack has a fair amount of both startup and ending lag (Rocky’s got to lean back hard enough to get back on his feet), and deals no damage. The effect can be compounded if the attack is used multiple times.
[ 0% ]
Up Tilt | Pebble Spray
Rocky closes his eyes as if concentrating, and a few pieces break off of his top, flying into the air, covering a similar area as the spores that Toad spits in Peach’s Neutral Special. After they spray up, they hover for a second, then rush back down and fuse into Rocky’s body again. The rocks deal multi-hit damage up to about 12% to anyone hit, dealing damage the entire time they’re out, even during the brief time they simply float. There is moderate startup and ending lag on this move.
[ Up to 12% ]
Down Tilt | Crumble
Rocky bursts into pieces, crumbling all over the ground. While in pieces, Rocky can’t be hurt, and he remains like this for about a second, after which he reforms slowly. This essentially functions as a longer-than-normal sidestep dodge, but it’s got significantly longer ending lag. The startup lag is minimal, so you can quickly avoid things as needed, but the ending lag makes this highly punishable if used incorrectly.
[ 0% ]
Dash Attack | Heavy Slam
Rocky jumps into the air, still moving forward, then stops for a second before rushing downward, slamming into the ground hard. He goes forward about the distance Bowser does if he uses the Bowser Bomb from the ground, and stalls for a slightly longer time than that before dropping. As he drops, he deals 12% damage with good knockback. Unlike most Dash Attacks, though, this one is not sensitive to the edges of platforms, so you can potentially KO yourself with this. Use it wisely. Startup lag is minimal, but there’s quite a bit of ending lag.
[ 12% ]
~ SMASH ATTACKS ~
Forward Smash | Rumble Roll
Rocky charges this attack by vibrating violently in place. When released, he’ll rush forward on his side, causing him to roll and even sometimes bounce short distances into the air. The full distance he’ll travel is affected by the amount of charge built up before the attack is released. At weakest charge, he’ll travel only about as far as one Battlefield platform, but at full charge, he can cover about two-thirds of Final Destination’s length. He travels about as fast as characters like Mario run. If he strikes anyone while rolling and tumbling, he’ll deal 10% damage and decent knockback to them. Startup lag is moderate, and there’s quite a bit of ending lag.
[ 10% ]
Up Smash | Spire
Rocky “transforms,” becoming a large, sharp stalagmite. As he does so, he’ll damage anyone he touches, with a vertical range similar to Marth’s Up Smash, though somewhat wider to the sides. The bulk of Rocky’s frame deals 8 – 14% damage, but the very tip deals double that damage, also with dramatically increased upward knockback. Rocky remains in this form for about half a second, though he only deals damage as he transforms and shoots upward. There is some startup lag and considerable ending lag to this move.
[ 8 – 28% ]
Down Smash | Earthquake
Rocky vibrates while “charging” this move, which is the actual damaging part. Afterward, he simply stops, tired. While he’s shaking, he’ll deal multi-hit damage to all ground-bound enemies within about one Battlefield platform’s length to either side, reaching a possible total damage of about 20%. This move has quite a bit of lag on either end, but it can really be worth it if you land the early hits, racking up lots of damage. When the quake stops, the opponent will be shot up a short distance, just enough to hopefully get Rocky a little breathing room during his ending lag.
[ Up to 20% ]
~ AERIAL ATTACKS ~
Neutral Aerial | Dropper
Rocky faces the screen and clenches his eyes tightly shut, doubling his falling speed and becoming a hitbox until he strikes the ground again. Anyone he touches like this is dealt 8% damage and pretty good knockback. There’s not much startup lag, but you can’t use another Aerial afterward, and the ending lag upon striking the ground is moderate.
[ 8% ]
Forward Aerial | Spin Drop
Rocky begins spinning around, dealing multi-hit damage to those he touches. He’ll do this until he strikes the ground, at which point he’ll hit and bounce forward, about half the distance a Falcon Kick travels along the ground. During the bounce, he deals 10% damage and good knockback to anyone he hits. There is some startup lag to this move, and a fair amount of ending lag as well.
[ Variable Damage + 10% ]
Backward Aerial | Freefall
Rocky immediately enters a Helpless state, but this is no ordinary Helpless state. In this state, he’s still ready for an attack. This will have no effect until he strikes the ground, at which point he’ll pound it hard, brutally damaging opponents near the point of impact. This deals 20% damage and good knockback, but due to the nature of its setup, as well as its relatively low range, it can be difficult to pull off.
[ 20% ]
Up Aerial | Volcano
Rocky quickly transforms a bit, opening up a volcano-like hole above him, which quickly starts spewing rocks and smog, damaging opponents above him as well as propelling him downward. The rocks and smog deal multi-hit damage that will generally accumulate to about 10%, with a range similar to that of Ivysaur’s Up Aerial, though the hitbox is a bit longer-lasting. This move has relatively long startup lag, but the ending lag is minimal.
[ 10% ]
Down Aerial | Rockslide
Rocky bursts into pieces, falling to the ground. This gives him a greater range than most of his attacks, as the falling rocks will spread out, each dealing 1-2% damage. Sadly, you’re only likely to score about 4-5% damage from all of them. After they strike the ground, Rocky will reform, but no earlier, so make sure to use this above solid ground. There’s little startup lag, but the ending lag is substantial, as Rocky’s not too quick about putting himself back together.
[ Variable Damage ]
~ SPECIAL ATTACKS ~
Neutral Special | Round Off
Rocky quickly forms himself into a more round shape, so he can roll around. In this state, he can roll back and forth along platforms by simply tilting the control stick. He can move about half the speed of Yoshi’s Egg Roll, dealing 10% damage with weak knockback upon striking any (assuming he’s moving at any sort of reasonable speed). Unlike Yoshi, Rocky can actually stop rolling, staying in place, but a hard enough hit can still knock him out of it, just like Yoshi. He can exit this state manually though a second press of the button. There’s moderate startup and ending lag for this move.
[ 10% ]
Side Special | Wallraiser
Rocky stomps the ground underneath him, causing a small quake that shoots up a rock wall out of the ground! The wall is about as tall as Link, and comes up a short distance in front of Rocky. This deals no damage, but serves as a potential defense, as the wall can take 50% damage before breaking! This, however, can be utilized by other players as well, since the wall functions like normal terrain, blocking anyone and everyone’s hits that strike it until it’s destroyed. The creation of the wall has moderate startup and ending lag.
[ 0% ]
Up Special | Seismic Recoil
Rocky closes his eyes tightly and shoots a wave of energy downward. This wave will travel (about the speed of a PK Thunder) until it hits something, whether that be solid ground or the blast zone, at which point it will bounce back. When it comes back and strikes Rocky, it will launch him high into the air. How high depends on how long the wave has been traveling. It builds power as it goes, so a further distance from the ground/blast zone will give you a greater height. If used from the height of Final Destination down to the bottom blast zone, it will launch Rocky upward about the distance of five Stage Builder blocks. The traveling energy wave will deal multi-hit damage to opponents struck, usually only totaling up to about 5%. Rocky can move while the wave (which is about as wide as Bowser) travels, so he can potentially get out of its way before it strikes him, in which case it will simply keep traveling up until it goes off the screen or strikes another surface.
[ Variable Damage ]
~ GRAB / THROWS ~
Grab | Special
Rocky teeters backward, then slams down to the ground, creating a small shockwave in front of him that stuns opponents such that he has effectively “grabbed” them. This is a slow Grab, but it’s got good holding power. This also has somewhat short range, but can grab multiple opponents.
Pummel | Kick
Rocky simply reaches one foot forward and kicks his victim. A slow Pummel, and it only does 2% damage. Straight pummeling isn’t really a good option for Rocky.
[ 2% ]
Forward Throw | Quake Shove
Rocky slams down hard again, creating a shockwave that pushes his victim forward. This deals only 3% damage, but has good forward knockback, and can be useful as a finisher at times. This is a relatively slow Throw, but well worth it in many situations.
[ 3% ]
Backward Throw | Tectonic Shift
Rocky jumps into the air, as the ground begins shaking. The area his victim is standing on is suddenly shoved underneath him, but Rocky falls just in time to land on his opponent, stopping them from shooting backward! What a guy! Of course, he deals 10% damage and buries them in the process, so don’t lament too much about him effectively saving them from peril. This is a very slow Throw, but also a rather good one.
[ 10% ]
Up Throw | Jumper Quake
Rocky hops a short distance to the ground, then goes careening toward the ground, slamming into it hard and causing a quake that shoots his victim(s) upward! This also deals 7% damage, but the real key point is the great vertical knockback! This is also among Rocky’s faster Throws.
[ 7% ]
Down Throw | Dynamite Blast
Rocky closes his eyes and begins vibrating, turning a bright red color, then explodes violently! This takes a bit of time, but the ensuing explosion is powerful, dealing 14% damage and good knockback. Unfortunately, it’s extremely slow. Rocky takes a while to explode, and putting himself back together afterward is also a very slow process. Use this wisely.
[ 14% ]
~ TAUNTS / VICTORY POSES ~
Up Taunt | Near Fissure
Rocky cracks down the middle, almost all the way through! With a distressed look on his face, he forces his two halves back together! Close call!
Sets Next Helper: Blade Knight
Side Taunt | Muscle Man
Rocky transforms into a statue of a flexing man! He looks so strong! He changes back after a short time.
Sets Next Helper: Plasma Wisp
Down Taunt | Rage
Rocky stomps the ground angrily, fuming as he does.
Sets Next Helper: Gim
Up Victory Pose | Trophy Time
Rocky stands, looking around as if confused, then beams brightly as he forms himself into a stone trophy. His little eyes can still be seen on the trophy, blinking happily at his victory!
Side Victory Pose | Standing Tall
Rocky stands, looking disappointed, then perks up as he slams the ground, causing a wall to shoot up. He then leaps atop the wall and strikes a pose, winking.
Down Victory Pose | Crater Slam
From off the screen, Rocky comes crashing to the ground, forming a massive crater! What a hard hit!
Loss Pose | Broken
Rocky lies in a sad heap, a jumble of tiny rocks being seen with a loose bandana and a pair of sad eyes over them.
~ GIM ~
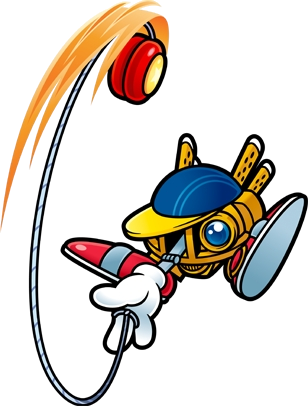
Gim is the Helper for the Yo-Yo ability, a robotic character with a single animate hand extending from his frame. His mechanical build also has him sporting a tinted lens for an “eye” and exhaust pipes protruding from his back. Gim attacks mainly through swings of a yo-yo and various break-dance-like moves.
~ STATISTICS ~
Size: Mid-Small
Weight: Mid-Light
Power: Mid-Weak
Jumps: 2
Jump (1): High
Jump (2): Mid-High
Speed (Walk): Mid
Speed (Run): Mid
Traction: Mid
Speed (Attack): Mid-Fast
Speed (Falling): Mid
Range: Long
Crouch: Mid-High
Crawl: No
Wall-Kick: No
Wall-Cling: No
Glide: No
~ STANDARD ATTACKS ~
Standard Combo | Break Spin
Gim performs a spin highly akin to Kirby’s Dash Attack in Brawl, though he stays in place while doing it. Gim will spin as long as the button is held down, dealing multi-hit damage to anyone who touches him. He’s fairly tough to DI out of, too, and with little startup and ending lag, this move may seem very good. If you hold this attack for more than three seconds, though, Gim will become dizzy, giving him a LOT more ending lag than you would’ve had before, whenever you decide to end the move.
[ Variable Damage ]
Forward Tilt | Pitch
A fairly basic attack, Gim tosses his yo-yo forward and then catches it as it flies back. This move has no quirky attributes, and should mainly be used for quick spacing, as it comes out fast, has little ending lag, and goes pretty far, extending fully about three Stage Builder blocks’ length forward. The spinning yo-yo deals only 3% damage and flinching knockback, but this attack definitely isn’t without its uses.
[ 3% ]
Up Tilt | Lasso Swing
Gim throws his yo-yo forward, then arcs it over his head. It reaches only about a block’s length forward before going upward, stretching to about the same distance, only above his head. At any point before Gim catches the yo-yo behind him on the way back, you can press the button again to make him swing the yo-yo forward, making it retrace its overhead path again. It loses strength every time this is done, however, so it’s best to make sure you can just hit with the first time, rather than count on a redemptive loop. The first overhead swing deals 6% damage with weak knockback, and the damage goes down 1% every swing after that, stopping at 1%. There is little startup or ending lag to this attack.
[ 6% or Lower ]
Down Tilt | Sleeper
Gim throws his yo-yo toward the ground below him, stalling it there. This is one of his few short-ranged moves, but the spinning yo-yo deals multi-hit damage and it difficult to DI out of, lasting for three seconds before jumping back up to Gim’s hand. The spinning can accumulate a total of about 10% damage, and the jump back up at the end deals 5% with weak upward knockback. The yo-yo is a small hitbox, though, so you’ll have to get up close. Luckily, this move has relatively little lag on either end, so you should be able to find some use for it.
[ Up to 10% + 5% ]
Dash Attack | Walk the Dog
Gim quickly tosses his yo-yo toward the ground, stalling it there and letting it rush forward along the ground. He continues running at the same speed he was for another one-third the length of Final Destination, with the yo-yo leading. The yo-yo deals 6% damage and weak upward knockback to anyone it hits, though this move should mainly be used for protecting yourself as you approach, as you can shield to cancel out of the run at any time, causing Gim to quickly retract the yo-yo and put up his defense. If you run the full distance, however, Gim will end with an overhead swing similar to that of his Up Tilt, effectively hitting opponents over your head (which is where the initial hit will likely set them) with another 6% damage.
[ 6% + 6% ]
~ SMASH ATTACKS ~
Forward Smash | Hammer Drop
Gim tosses his yo-yo out in front of him, stalling it about a Battlefield platform’s length away from him. Charging only makes this move wait longer, as the timing of the release is key. There is virtually no time between releasing the Smash Attack and the attack happening, so you simply have to wait for the right moment. When Gim releases this Smash Attack, he snaps the yo-yo back toward him sharply. If no one’s there, this will end the move. If someone is between him and the yo-yo as he does this, they’ll get tangled up in it, and Gim will proceed to swing the yo-yo over his head and then slam it to the ground, releasing the poor victim with an added 18% damage to their damage meter. There is moderate startup and ending lag for this move.
[ 18% ]
Up Smash | Gazer Spiral
Gim charges this Smash by stalling his yo-yo near the ground. Upon executing the move, he drops it to the ground so it lays on its side, and jumps on top of it. This causes him to spin rapidly, leaving the ground and shooting into the air. He reaches a vertical distance about the height of the tallest Battlefield platform up before shooting back downward, grabbing the yo-yo on his way down and ending the move. This is a somewhat laggy move, especially on the front end, but Gim deals 20 – 26% damage and good knockback as he shoots up and down, making this move more than a little useful. He traverses the entire distance in a little over half a second, making the middle part of this attack far from laggy.
[ 20 – 26% ]
Down Smash | Tripper
Gim swings his yo-yo around him full circle, first to the front and then the back, reaching about one-fourth the length of Final Destination to either side. If the yo-yo string strikes anyone, it will deal 1% damage and automatically trip them. However, if you don’t fully charge this attack, Gim will also trip over the string as it comes back around. If you fully charge it, Gim will jump over the string at the right time to avoid it, giving him time to attack his tripped opponent. Luckily, this is a fast attack in all regards, including charge time. It charges about twice as fast as most Smash Attacks, and coupled with low startup lag and ending lag, as well as a fast execution, this move can become somewhat spammable.
[ 1% ]
~ AERIAL ATTACKS ~
Neutral Aerial | Around the World
Gim spins his yo-yo full circle around him, starting out in front and spinning it down around the back, then up over his head to return it. The hitbox is disjointed, at a distance about Bowser’s height away from Gim except when he’s throwing the yo-yo and catching it. Lag times on both ends, as well as the execution time for this move, can be very fast. On the other hand, they can also be relatively slow. The speed at which the yo-yo is thrown and spins around Gim is directly related to how fast Gim is moving through the air when this move is used. At low speeds, such as a simple jump, there is a fair amount of lag, and the yo-yo spins slowly, dealing only 5% damage and weak knockback. When moving faster, however, such as during a fastfall (or maybe after taking a hard hit), the speed can reach insane levels, the entire move executing sometimes in less than half a second, with the yo-yo’s speed giving it the power to deal 15% damage with good knockback. Of course, that’s only at best, so expect speeds somewhere in the middle, usually.
[ 5 – 15% ]
Forward Aerial | Blender Kick
Gim tilts his legs up, to point them slightly forward, then spins rapidly, performing a multitude of kicks toward his front. These kicks have short range, but between the 10 of them, each dealing 2% damage, this move can really rack up the damage. The kicks all execute in a time of about one second, and the startup lag is minimal to boot. Unfortunately, this move doesn’t give you a lot of breathing room afterward if you do connect, and the ending lag will often leave you punished. Use this carefully.
[ Up to 20% ]
Backward Aerial | Freeze
Gim throws his hand downward, as if putting it to the ground, throwing his legs behind him. Incredibly, this works the same as this break-dancing technique would on the ground, stopping him in mid-air! It also functions as a weak “sex kick” move, dealing 5% damage to those who touch him. On top of all that, he’s got super-armor for the one second he stays frozen in the air, after which he’ll simply drop out of the pose. This move, unfortunately, takes some psyching up from Gim, and if used too frequently, it will suffer in all properties except the “sex kick,” even sometimes reaching a point where he doesn’t stall at all, and gains no super-armor, if spammed too much.
[ 5% ]
Up Aerial | Windmill
Remember Sonic’s “C’mon, step it up!” Taunt? Well, Gim basically does that in mid-air, minus the oft-annoying vocal. Minimal startup and ending lag are a plus for this move, and his spinning legs deal multi-hit damage up to about 12%, with a final hit at the end pushing opponents upward to give Gim some breathing room. As an added bonus, this move will cause Gim to fall a little more slowly, sometimes serving as a slight boost to recovery and also making it easier to score all those hits.
[ Up to 12% ]
Down Aerial | Tangle Drill
Gim quickly wraps himself up in his yo-yo, stalling in mid-air as he does. After this slightly long stall, he pulls the yo-yo string, spinning himself around rapidly, and also propelling himself downward. He rockets downward at a regular stall-then-fall pace, catching opponents he hits and dragging them down with him, dealing multi-hit damage to them all the way. If he strikes the ground before the fall ends, his opponent(s) will be shoved a fair distance away from him, which is good, because Gim gets dizzy and suffers quite a bit of ending lag from this.
[ Variable Damage ]
~ SPECIAL ATTACKS ~
Neutral Special | Dreamer
Gim tosses his yo-yo downward in effectively the same way he performs the Sleeper. As he does this, however, the yo-yo begins to sparkle and twinkle. It’s now controllable! Yes, you can steer the yo-yo all around, moving it at a speed about three-fourths that of a PK Thunder. It can move anywhere within two Negative Zones’ distance of Gim, but the string isn’t long enough to reach farther. Anyone the yo-yo touches will be dealt 8% damage, with decent knockback. Unfortunately, Gim is entirely vulnerable during this move, even falling at a normal speed. On top of that, the ending lag is horrendous, as Gim regathers the string and pulls the yo-yo back in.
[ 8% ]
Side Special | Blindside
Gim throws his hand forward, and a holographic-looking yo-yo shoots out, about the distance of a Battlefield platform. If no one is there, the yo-yo will simply vanish at the end of its path, but if it strikes someone, it will disperse in a cloud of florescent color, covering the victim. The next time Gim uses this move, a yo-yo will come out of thin air and slam into the back of the aforementioned victim’s head, dealing 8% damage and flinching knockback! If Gim can, he’ll snap his fingers to make this happen, but the button input can be received at any time, whether Gim is able to snap or not. For example, you could use this while an opponent had grabbed Gim and was holding him, to effectively release you from their grip. There is moderate lag during the yo-yo toss, but next to none when the hit comes.
[ 8% ]
Up Special | Reel In
Gim tosses his yo-yo upward as a tether recovery. If he’s near a ledge, the yo-yo will land on the tip of the ledge, spinning to automatically pull Gim toward the ledge. He’ll reel in pretty fast, but be careful, as the yo-yo can be grabbed and thrown off the ledge if your opponent is quick, ruining the recovery. As an offensive attack, this attack involves Gim tossing the yo-yo upward at a 45 degree angle, slightly slower than the Pikmin Chain, although it reaches about the same distance as one with six Pikmin. If it connects with anyone, though, it will wrap around them, and Gim will proceed to yank the string down hard, pulling the unlucky victim straight toward the ground. If there is ground for them to hit, they’ll slam into it, taking 12% damage. If there’s no ground, they’ll go rocketing downward to their doom. Unfortunately for Gim, the yo-yo’s attached to his hand as well, so he’ll be dragged down with them.
[ 12% ]
~ GRAB / THROWS ~
Grab | Extended
Gim throws his yo-yo forward in an attempt to ensnare opponents. This is a long-ranged grab, extending about one-third the length of Final Destination, but it’s got a lot of ending lag if you miss, so be careful about using it.
Pummel | Dizzy Spin
Gim pulls his yo-yo string to spin the opponent around. This deals no damage, but seems to make the victim dizzy, adding to the hitstun of any Throw that follows.
[ 0% ]
Forward Throw | Rapid Kick
Gim hops a short distance into the air, then starts spinning to pelt the victim with kicks, at the same time spinning them around to unravel them. Six kicks deal 2% damage each, executing in about a second. After the final kick, the victim is shot forward a short distance, low to the ground.
[ Up to 12% ]
Backward Throw | Twister Punt
Gim pulls his yo-yo string hard to spin his victim forward, then dashes forward and punts them backward over his head, dealing 10% damage with not-so-great knockback. This is kind of a slow throw.
[ 10% ]
Up Throw | Tornado Shot
Gim lifts his yo-yo as he pulls the string to spin his victim, who shoots into the sky above him, spinning rapidly. After a short time, they’ll stop spinning and be able to control themselves again, but until then, you’re free to follow up with another attack. This does no damage on its own, but is an excellent setup move.
[ 0% ]
Down Throw | Break It Down
Gim releases his opponent, then does one of his Taunts at random. The victim will watch as he does, and start one of their own Taunts shortly after. Assuming you’ve got someone with long Taunts against you, this can easily set up another attack, but beware of opponents with short Taunts, as they may finish before you do.
[ 0% ]
~ TAUNTS / VICTORY POSES ~
Up Taunt | Sliiide
Gim slides smoothly to the right, then back to the left, returning to his original position. This takes about as long as Sonic’s “You’re too slow!” Taunt.
Sets Next Helper: Rocky
Side Taunt | Disco Party
Gim’s colored lens begins vibrantly flashing bright colors, as he jumps up and down, dancing in a circle and pointing the lens downward to throw some colored light on the floor. This is a somewhat long Taunt, taking about as long Mario’s super mushroom Taunt.
Sets Next Helper: Plasma Wisp
Down Taunt | Sputter
Gim’s exhaust pipes sputter briefly, spitting smoke out the back. This is a quick taunt, taking about as long as Ness’ “Okay!” Taunt.
Sets Next Helper: Blade Knight
Up Victory Pose | Lights Out
Gim holds his hands up, as the screen fades darker. Suddenly, a lone spotlight appears over Gim, who performs a few quick break-dance moves.
Side Victory Pose | Stall
Gim spins around, slipping in a few quirky break-dance moves, then stalls on his hand to end, holding that position indefinitely.
Down Victory Pose | The Atomic
Gim holds his yo-yo up high, and it begins glowing vibrantly. He then throws it down, and it begins spiraling around him in an atomic shape.
Loss Pose | All Tangled Up
Gim appears in the background, tangled up in his yo-yo string. Looks like a trick went wrong, eh, Gim?
~ FULL GROUP ~

~ TAG BLASTS ~
REMEMBER, HELPERS HAVE SUPER-ARMOR DURING TAG BLASTS
~ TAG BLASTS ~
REMEMBER, HELPERS HAVE SUPER-ARMOR DURING TAG BLASTS
Blade Knight + Plasma Wisp | Blazing Blade
Plasma Wisp fires a wealth of energy into Blade Knight’s sword. For the next five seconds, anyone who comes within about two Stage Builder blocks’ length of Blade Knight will be slashed at viciously with lightning speed, taking 10% damage and good knockback. After the time has passed, the attack ends, with Blade Knight’s sword returning to normal.
[ 10% ]
Blade Knight + Rocky | Sword In the Stone
Rocky sits on the ground as a holographic-looking sword appears sticking out of the top of him. Blade Knight grips the hilt and pulls it out, as it emits a searing light. The area within about half a Smart Bomb’s blast radius will be affected, and opponents within that area take 20% damage and good knockback. After this, the attack ends. This attack executes in about a second.
[ 20% ]
Blade Knight + Gim | Wayward Yo-Yo
Gim attempts to do a basic Sleeper, but Blade Knight cuts the yo-yo’s string, and the yo-yo begins jumping around randomly, hopping about at insane speeds. The yo-yo deals 5% damage if it hits anyone, and who knows if it will; it’s movements are so random! After about three seconds of this, the attack ends as the yo-yo vanishes and the Helper leaving hops on the Tag Star and jets for the background.
[ 5% ]
Plasma Wisp + Rocky | Molten Inferno
Plasma Wisp begins pulsing energy into Rocky, who heats up to incredible heats and eventually melts, becoming a pool of lava that spans the entire platform this attack is used on. This takes about two seconds to happen, and Rocky remains like this for another two seconds, dealing 10% damage to anyone who touches him, before he quickly resumes his normal form, ending the attack.
[ 10% ]
Plasma Wisp + Gim | Atom Bomb
Gim begins spinning his yo-yo in the atomic symbol pattern, as Plasma Wisp charges energy. After about a second, a massive explosion occurs out of nowhere! It reaches about twice the distance of a Smart Bomb explosion, dealing multi-hit damage up to about 20%, after which the attack ends. The explosion, however, is rather brief, and can be spot-dodged entirely with precise timing.
[ Up to 20% ]
Rocky + Gim | Stone Slinger
Gim wraps his yo-yo around Rocky and starts swinging him around, in an arc that reaches about the distance of a Battlefield platform away. He swings him back and forth about half a dozen times, with knockback toward Gim (making multiple hits often a reality). Every time Rocky connects with an opponent, they’ll take 10% damage. After a few swings, Gim pulls Rocky back in, undoes the string, and the attack ends. This is among the longer Tag Blasts.
[ 10% ]
~ FINAL SMASH ~
Final Smash | Super Star Party
Before this Final Smash actually happens, the Tag Star, fueled by the Smash Ball, brings the remaining three Helpers to the field of battle. From this point, the Helpers work together to ensure total chaos. The attack begins with Gim jumping on top of Rocky, using him as a sort of pedestal, and holding a hand toward the screen, effectively slowing the motion of all other players
[ 10% per hit + 25% ]
The Trophy Master
Smash Journeyman
Wow Kibble that's incredible! Each move is like, overdetailed and for one of the first times ever, I read all of this freaking moveset, which is longer than most of those posted, because it contains 4 Helpers, each being awesome and unique. What I like with most of your movesets is that most characters you do will have one or many non-offensive moves, moves that will do things like burying people ( Rocky ) or blocking some attacks ( Blade Knight ) . The Tag Blasts and Final Smash are pure awesomeness! One of your best yet, but IMO, it's your best. Great job up there! A big contestant of this moveset, it'll get into the Top 10 for sure!
A big contestant of this moveset, it'll get into the Top 10 for sure!KingK.Rool
Smash Lord
- Joined
- Nov 26, 2005
- Messages
- 1,810
Love the moveset from what I've read, which, admittedly, has not been all that much. I'm totally in awe of how much you did with Rocky, who is basically... a rock. More shameless flattery critique to come when I review the whole thing.
As awesome as the moveset is, it's simply too, too early. I remember how many people were convinced Maria and Grievous and others would make Top 50, but didn't; a lot can change, and saying something will make Top 10 is totally premature.
tl;dr: BAD TROPHY!
Like Spade, I hate when people say that.A big contestant of this moveset, it'll get into the Top 10 for sure!
As awesome as the moveset is, it's simply too, too early. I remember how many people were convinced Maria and Grievous and others would make Top 50, but didn't; a lot can change, and saying something will make Top 10 is totally premature.tl;dr: BAD TROPHY!
The Trophy Master
Smash Journeyman
Sorry K. Rool, I won't do it again... *sniff* .....
But I read the whole moveset! Hahaha! And you didn't ! *Trophy Master feels proud*
I must agree with Rocky cause as his name says it, he's a rock, with a "y". -_-' He didn't have much potential in games, but that's what makes a great moveaet. A character that almost isn't anything, can become a whole detailed moveset in MYM!
Fast Question : On which day of which month of which year was the First MYM launched? ( Like One year and a half ago? )
Birdon should be ready this weekend!
.....But I read the whole moveset! Hahaha! And you didn't ! *Trophy Master feels proud*
I must agree with Rocky cause as his name says it, he's a rock, with a "y". -_-' He didn't have much potential in games, but that's what makes a great moveaet. A character that almost isn't anything, can become a whole detailed moveset in MYM!
Fast Question : On which day of which month of which year was the First MYM launched? ( Like One year and a half ago? )
Birdon should be ready this weekend!
flyinfilipino
Smash Master
I pretty much made a really long commentary in the chat, but SSHU is cool. There are some quirky attacks in there that seem a little out of place to me in the middle of combat, but they're still interesting and overall it's a good (long) set. I like Plasma Wisp a lot, and Rocky is essentially a rock. You made a good moveset for a ROCK.
'Nuff said.
'Nuff said.
PK-ow!
Smash Lord
WAAAH! Will + Freedan is slowing down for me.
How much longer do I have about before we reach the "yeah don't post anything at this point" bar?
It should be way off but I was surprised to be told that the first time...
And also I can't vote unless I get 50 posts in this thread before the end? Is that why people have so much spams? lol
EDIT: Also, question (this will look funny, but it will make you all lethally curious, mwahahah): Is there a name for the kind of hair setup that Samus has in her Zero Suit? Also the same as Zuko from Avatar: TLA?
MarthTrinity
Smash Lord
You have quite a while, the contest just started last week.How much longer do I have about before we reach the "yeah don't post anything at this point" bar?
We're cutting down on spam this time around, people that repeatedly post spam will be reported for it.And also I can't vote unless I get 50 posts in this thread before the end? Is that why people have so much spams? lol
Smady
Smash Master
Okay, funk, I've fallen behind. I need to read Lust, Envy, Zant and SSHU, as well as MT's SM. And then I need to complete Naked Raiden. I'm cool with it, actually.
C~Dog
Smash Champion
Thanks for the comments everyone!
And about the FS, it's not just super mushroom big, its like jigglypuff FS big. And then he stomps around like in TP. The anarchic nature of it seems to fit with his overall character imo.
Okay thanks, i'll add some more detail in.princesspeachluver13 said:Zant Review: Short and Sweet Version
Great set overall, but SOME moves, not all of them, need to be a little more detailed.
Also, the Final Smash is a little bit boring. A giant form just seems a little redundant. *pulls out Super Mushroom*
Other than that? No REAL problems.
And about the FS, it's not just super mushroom big, its like jigglypuff FS big. And then he stomps around like in TP. The anarchic nature of it seems to fit with his overall character imo.
Do you mean short as in the description, or short as in the duration of the actual attack?Jimnymebob said:Zant is also a very good set, although the tilts are a bit short. The moveset itself is quality, and it seems to fit the character very well, so good job.
Yeah, this is my first moveset. And thanks. :DBaloo said:Zant was really pretty good, great for a newcomer (you are a newcomer, right?) But yeah, good moveset.
Hyper_Ridley
Smash Champion
Super Star Helpers are win!
There weren't many basic moves, and the the ones that were omre generic had special little effects added to make them fore interesting, such as Blade Knight's Nair having the energy wave effect. Rocky reminds me of my Wheelie move set in that you took a character who does nothing and made him into a working character (creative liberties FTW!) My favorite one one Gim, simply because he's freaking GIM!
I'm definitley vot-*is violenty murdered by Spadefox and K.Rool*
drag0nscythe
Smash Master
- Joined
- Sep 2, 2007
- Messages
- 3,268
Midna w/ Wolf Link

~~~Opening Note:~~~
Midna with Wolf Link is a transformation of normal Link, instead of being a completely single character. Like Zero Suit Samus, when Link performs his FS, instead of just drawing on the power of the triforce, Midna will appear and infuse it with dark energy also. After the original FS for Link, the energy that was used will force him to change into Wolf Link. ~~~History:~~~
Midna is the sexy queen of dark realm who was turned into a sassy little imp girl in the game Twilight Princess. She ran into trouble with an old vassal, Zant, and had to run to Link to get his help. Link helped her defeat Zant, only for them to run into a larger problem. Once all was said and done, and she was returned to normal, Midna broke the Mirror of Twilight, closing the Twilight realm for ever. ~~~Possible Story scenarios.~~~
-If she was playable in Brawl If Midna and Wolf Link were in Brawl, when the five were making there way to the Meta-Knights ship, Link would get separated from the group and end up fighting a shadow bug version of Jigglypuff. Link would defeat her, but the dark energy released from the shadow bugs would latch onto Link and turn him into Wolf Link. Midna, who was with Link the whole time, will fly out from under his shadow and land on top of him to help find a way to turn him back to normal. Both Midna and Wolf Link push jigglypuff to get her to wake up and the group then ventures onward towards the Halbard and to find a way to turn Wolf Link back into Link. Both Midna w/ Wolf Link and Jigglypuff will run through a dense forest together, with Jigglypuff and Midna slowly annoying each other to an outright fight. When they make it to the deepest part of the forest, Wolf Link Midna, and jigglypuff run into a large light source that appeared to from on of the Star fox ships. Touching the massive amount of light turns Link back to normal and they take it off with them. They eventually meet up back with the original group.
-My own Story
After Link is captured by Bowser and put away in the dungeon, Midna appears to free him, commenting on how this was familiar. Before she can save him, Bowser Jr. appears, forcing her to hide. Bowser jr. turns to orders he was given and starts testing his paint brush on Link. The mess and dark energy in the brush turns Link into Wolf Link. Wolf Link breaks free, Midna joins him to help him escape, and the two go off to find Mario, who has the FLUDD, which should be able to turn Link back to normal.
~~~Stats and Misc.~~~
Strengths
-Midna w/ Wolf Link is rather fast with his A moves, but his B moves are slow .
-They have medium to light weight.
-Midna has the ability to set up combos well.
-Wolf Link can wall jump and stick to the wall with his claws.
Weakness
-Their Ariel moves are rather ineffective. They are better with ground combat.
-They should be slightly easy to send flying. About 120% for them gaining large distances
-Large Hit boxes for the characters and Hit boxes change with each attack and action drastically in some cases.
-Does not have a good ability to send opponents flying.
Alternate costumes / Model swap / Mesh swap / Etc.
None
Select image
The image I have listed in the B moves section is what their Brawl image should look like.
Life Icon
A 2D sprite image of Midna’s head, facing forward with a lot of detail in the mask.
Colors
Normal Wolf Link – Black Midna
The White in wolf links Maine and the green on Midna is blue– Team Blue
The White in wolf links Maine and the green on Midna is Red– Team Red
The White in wolf links Maine and the green on Midna is green– Team Green
The White in wolf links Maine and the green on Midna is yellow – Team Yellow
White wolf link (looks like Okami) – White Midna (when she is weak look)
Alternate Colors
None
Stage
Bridge of Eldin from Brawl.
Theme song
Midna’s Lament
Trophies
Midna w/ wolf Link
Midna
Wolf Link
Midna’s Transformation (Final Smash)
The Gold Wolf that waits to teach Link moves
Normal Form Midna
The Mirror of Twilight
Character's Size compared to other characters
Check the image lower in the moveset for a basic idea. With Midna on top of Wolf Link, the hit box will be about the same size as Luigi, vertically, but longer. Think a wide base and a small top. Midna will move around on wolf Link causing the hit box area to change alot.
~~~Basic Animations~~~
Entrance animation:
Link will fall to the ground with dark energy around him and morph into Wolf Link just like he does in Twilight princess when Midna has the ability to change Link into Wolf Link at will. Midna will then appear out of know where and fall down onto Wolf Links back, making him turn to look at her. They will then enter their “Idle Animation”.
Idle animation:
Wolf Link will stand there breathing, moving his back slowly up and down with Midna riding on top. She will sit there looking forward ready for the next action by the oncoming opponent. Wolf Link will Stand mostly like he does in Legend of Zelda: Twilight Princess.
Getting bored Idle animation
When Midna and Wolf Link stand there to long, Wolf Link will yawn and stand there for a few seconds. Midna will yawn also and push Wolf Link in the head causing him to look back at her. When Midna yawns, she will stretch out with both arms in the air and then put one arm behind her head and stretch like that. After the yawn, she will lean forward and push Wolf Links head, getting Wolf Link to turn and look behind him at her. She will smile and Wolf Link will go back to his normal Idle animation.
Tiptoe animation:
Wolf Link will walk slowly moving one foot slowly in front of the other like he does in Twilight princess when you are performing a very slow walk. Midna will lean closer to his body, almost laying flat on top of him causing the characters Hit boxes to shrink slightly. Midna will look forward while holding onto Wolf Link’s mane.
Walking animation:
Wolf Link will walk just like he does in Twilight Princess.
jogging animation
Wolf Link will start of the jogging animation by jumping slightly in the air, causing Midna to bounce slightly into the air and lose her balance. She will grab onto him and gold tightly before regaining her posture. Wolf Link will jog just like he does in Twilight Princess.
Running animation:
Wolf Link will cause Midna to lose her balance with this animation also, but instead of jogging, Wolf Link will be in full run. He will have one of the fastest runs in the game because of him using all fours. He runs just like he does in Twilight princess when Wolf Link is in Full run.
Turning while walking animation:
Wolf Link will look around him and turn almost on the spot. It will look almost like he is about to chase his tail. Midna will turn her head in the opposite direction Wolf Link turns, giving it a very odd dynamic look. After the turn she will push him with her feet in a "Giddy up" fashion.
Turning while running animation:
Wolf Link, while in full stride, will do an almost on the spot turn. He will dash to an almost halt, turn around very quickly and lunge forward into a full run again. This move has its origins in Twilight Princess as Wolf Link does something similar to it. Midna will fall forward when Wolf Link comes to the halt, hitting her head on the top of his head. When Wolf Link goes into the run again, Midna will fall backwards losing her balance again. When she regains her placement, she will occasionally hit Wolf Link on the head with her hair fist.
Ducking animation:
Wolf Link will fall down to the ground entering a pounce like position with his rear slightly higher than his head. Midna will anticipate the fall and fall with him, getting closer to his body. Because she is closer to his body, their overall hit boxes are smaller.
Sustained ducking animation:
Wolf Link will be in the pouncing position with his rear slightly higher than his head. Midna will be close to his body and ready for action. While in this position, Wolf Link will move his tail slowly right to left. Midna will sit there holding onto him for a short time and if the player stays in this animation too long, Midna will hit Wolf Link on top of the head.
Crawl animation:
Wolf Link will slowly crawl forward. He will exit the pounce position by lowering his rear to the ground and Wolf Link will slowly shift his body forward the same way most dogs crawl on the ground. Midna will just quickly turn around and lay on Wolf Link like he is a lounge chair.
Dodge
Wolf Link will prepare for a hit, but Midna will use her hair and make them fade slightly in twilight. The twilight particle effect is what will be seen on the front of Wolf Link with Midna having her hair hand being in front of Wolf Links head.
Air Dodge
Wolf Link will curl up into a ball and Midna will cover him up with her hair, causing the twilight particle effect to occur. The reverse is what happens when they exit the animation.
Roll Turn
Wolf Link will do a death roll animation on the ground going on his side around on his back and standing back up facing in the opposite direction. Midna will be unprepared for the animation and will fall with him. When Wolf Link hits the ground, she will disappear into his shadow. When Wolf Link is moving back to his idle stance, Midna will quickly reappear looking very mad. Afterwards, they will enter their idle stance again.
Roll Forward
Wolf Link will Dash forward quickly with Midna grabbing onto his mane.
Roll Backward
Wolf Link will jump backwards quickly with Midna grabbing onto his mane. This move will look just like his jump back dodge in Twilight Princess.
Jumping animation:
Wolf Link will lean down slightly and lunge into the air. Midna will move closer to his body also. This move will look like Wolf Link's jump in Twilight princess, but it will have more vertical lift than just being poorly horizontal.
Double Jump animation forward:
Wolf Link try to perform another jump, but cannot. while he is trying this, Midna will use her power and thrust him higher in the air. Wolf Link should look slightly surprised by this.
Double Jump animation backward:
Wolf Link try to perform another jump, but cannot. while he is trying this, Midna will use her power and thrust him higher in the air, making Wolf Link do an almost back flip. Wolf Link should look slightly surprised by this.
Falling animation:
Midna will slowly fly higher in the air (increasing their hit box) and grasp Wolf Link as they fall. Wolf Link will stretch his legs out waiting for impact.
Wall cling animation:
Wolf Link will latch onto the wall with his claws and hold on tightly. He will then turn his head and look behind him over his shoulder. Midna will hold onto Wolf Link's back with one hand and stare behind them with her front facing away from Wolf Link. One leg will be digging into Wolf Link's side while the other one will be free hanging.
Standing on Ledge:
Wolf Link will have all four legs together trying to not fall off the ledge. Midna will just sit there laughing at how silly Wolf Link looks while he is trying to not fall off.
Ledge Cling:
Wolf Link will cling to the ledge with his front two paws planted onto the ledge and his back two legs swaying in the breeze. Midna will look over his head with her hand placed firmly on his brow.
Pull self up off Ledge - No attack:
Midna will lean back as Wolf Link just pulls himself up and shacks off the experience. This will look similar to how Wolf Link performs this action in Twilight Princess.
Tripping:
Midna will fall off of Wolf Link's back, causing Wolf Link to stop instantly and sit down. Midna will pick herself up off the ground and just fly quickly back onto Wolf Links back.
Foot Stool animation:
Wolf Link will pounce on the opponents head, but Midna will put her hair hand under wolf Link as he does it and swap the opponent downward.
Being weak Hit animation:
Wolf Link will rear back slightly with Midna moving forward. She will have a pained look on her face while Wolf Link will have his ears down and his face clinched. The look of the two should resemble a backwards C.
Being strong Hit animation:
Both will be, with Wolf Link moving back slightly and falling close to the ground and Midna being sent backwards, doing a somersault and disappearing. She will then reappear back in her normal position, looking mad. Wolf Link and Midna will both then recover and re-enter the "idle position".
Being sent flying:
Wolf Link will be sent flying, with his body almost vertical and curved. Midna will be knocked off and will disappear. Almost instantly, Midna will reappear back onto Wolf Link's back ready for any of the other actions the player may choose.
Being down attacked:
Midna will look up as she is being hit from above. She will get smashed into Wolf Link as they hit the ground, with Wolf Links legs fall to one side. Wolf Link will hit the ground with allot of force and Midna will clutch to Wolf Links back rearing in pain.
Being grabbed:
Wolf Link will be grabbed by the thought and lifted slightly off the ground (or similar to that animation.) Midna will be swatted away and just disappear.
Star animation:
Wolf Link will be seen spinning off into the background with Midna flying in another direction.
Hitting the screen animation:
Wolf Link will not be seen when the "Hitting the screen animation occurs." Midna's face will be seen upside down and in a pained manner.
Being electrocuted:
Wolf Link will enter a pouncing like position while midna will throw her head back as you electricity flying through their body.
Being set on fire:
Fire will flow around Wolf Link and Midna, but it should look really cool as if he was meant to be a fire wolf. Midna will have the flames flying around her in a way and reaching to her hair, which will look like fire slightly.
Shield Animation:
Midna will take her hair and it will make a shield like shape in front of Wolf Link. The twilight particle effect will also occur.
Broken Shield Animation / death animation:
Midna will disappear, fade away and Wolf Link will fall to the ground hitting it on his side. He will then just lift his head slightly before letting it drop down to the ground one last time.
Being stuck in the ground – via Pitfall or a special move:
Wolf Links head will be stuck out of the ground and he will have a shocked expression on his face. Midna's head will be sticking out next to his also. Wolf Link's rear should also be seen, making it appear that Wolf Link has a very large cure going through his body.
~~~Item animations / Looks~~~
Holding an item
Midna will hold all items with her hair and will always hold it over Wolf Link’s body near hers. The item is usually behind her stuck in her hair hand.
Throwing an item forward
Midna will toss the Item forward by swinging it around her body and sending it flying.
Throwing an item up
Midna will fly slightly up into the air as she thrusts the item up into the air with her hair hand. She will then just sit on Wolf Link again.
Throwing an item Down
Midna will grab hold of Wolf Link’s fur and use him and her power to throw the item downward using her hair hand.
Throw away an item
Midna will just drop the item and Wolf Link will kick it away with his back paws.
Swinging an item
Midna will user her hair as the strong arm to swing any item. Her hair will just bat around her body on her side (which will be the far away side when they are facing left) and swing the item.
Power Swinging the Baseball Bat
Midna will fly in the air and spin very quickly. Then, she will finish off the spin by swinging the baseball bat in front of her.
Swing an Item in the air
While Wolf Link curls up his body slightly, Midna will swing the bat over her head and downward.
Wearing the bunny hood
Wolf Link will wear the bunny hood on his head right in front of his ears. It will be leaning forward at an angle. Every so often, when a player gets the bunny hood, instead of Wolf Link wearing it, Midna will take it off of Wolf Links head and put in on hers inside the mask part. You will see the bunny hood sticking out of her helmet slightly.
Wearing any badge
The Badge will always be placed on Midna's chest, right above her heart.
Carrying a crate
Midna will extend her hand slightly and hold the create from one side with the fingers holding one part of the side and the thumb holding the bottom. The crate will be help right above Wolf Links head.
Throwing a crate
Midna will just toss the create. It will lower slightly, causing Wolf Link to lower his head to avoid being hit and Midna will just chuck it.
Using the Fire Flower
Midna will hold the Fire flower with her hair hand in front of Wolf Link’s mouth. Wolf Link will have his mouth open like he is breathing fire.
Holding the Hammer/Golden Hammer
Wolf Link will walk stiff-like and Midna's hair hand will move in the typical Hammer motion. It will have an odd feeling of being similar to Pits of Game and Watch's.
Riding the dragoon parts
Wolf Link will dig his claws into the dragoon parts and Midna will grab the tip of it with her hair hand. She will then end up laying on Wolf Links back.
Being frozen by a freeze
This look looks like Wolf Link was bucking Midna off his back and both were frozen when Midna had just been sent off his back.
Riding the Warpstar
Wolf Link will dig his claws into the warpstar and Midna will grab the tip of it with her hair hand. She will then end up laying on Wolf Links back.
Eating the super spicy curry
Wolf Link will sniff it and not be interested, but Midna will shove it down his gullet. Wolf Link will then start bucking like a bronco while fire is flying out of his mouth. Midna will be holding on for dear life and will be laughing at Wolf Link the whole time.
Using the RayGun
Midna will hold the gun with her hair right above Wolf Links head. She will fire the gun, spin it and then prepare it again.
Using the super Scope
Midna will hold the Super Scope with her hair right above Wolf Links head. She will fire the gun, spin it and then prepare it again. It has all properties and similar looks the way all the others use it.
Using the cracker Launcher
Midna will hold the Super Scope with her hair right above Wolf Links head by having the hair hand wrapped completely around it. It fires similar to how everyone else fires it.
Moving while Shooting
Because Wolf Link is not holding the gun, he moves normally. Midna will still be in one of the gun firing stances.
Throw Trophy Base
Midna will hold the Trophy base in her hair. She will then fly slightly over Wolf Link (increasing their hit boxes) and she will spin in a circle. She will then send the thing flying and raise her hand to her brow to watch it go. She will then turn around and land back on Wolf Link with a great thud, making him lower slightly. They will then enter their "idle animation".
~~~Attack animations – A Button~~~
Normal A
Wolf Link will raise his front paws off the ground lifting his body slightly into the air. He will then force his head downwards, biting at his foe. Midna will just hold onto him tighter. This move will look just like it does in Twilight Princess and his position when it is done will have his head in the lower corner of the body.
- Knockback – This move has low knockback capabilities.
- Lag – This move is rather quick, but is slightly slow on the beginning.
- Damage – 4%-5%
- Priority – This move has high priority, usually being able to go through most attacks.
Combo A
Wolf Link will continue from the last attack with another bite coming from the lower corner, raising up to the air as he bites. Midna will still be clenching onto him for dear life. The Final attack of the three hit Combo is where Wolf Link will turn his rear and hit his opponent with his tail. This combo should look exactly like it does in Twilight Princess.
- Knockback – The second hit has low knockback while the third hit has a high knockback percentage.
- Lag – Given the first move is slow, the second and third hits are very quick and easy to pull off.
- Damage - 4%-5% for second hit, 6%-8% for third hit.
- Priority – These moves have medium priority. The first move of the combo has better priority.
Running A
Wolf link will perform a lunge bite that causes Midna to bounce in the air and lose her balance for a short time. This move does not stop wolf link, so he can continue running after this move is performed.
- Knockback – This move will not send people flying, but has a good stun capability.
- Lag – This move has relatively no lag at all. It is slightly slow on the uptake though.
- Damage – 5%-7%
- Priority – This move has high priority because of the design and range of the attack.
Tilt Forward A
Wolf Link will lower himself slightly moving Midna closer to the front. While he is doing this, Midna will Swing her Hair Hand at the opponent in front of Wolf Link.
- Knockback – This move will stun an opponent, but not for long.
- Lag – This move has medium speed considering the cast.
- Damage – 6%-8%
- Priority – This move has 50/50 Priority.
Tilt Up A
Midna will swing her hair hand in the air above her head while Wolf Link stretches out his body slightly to give her more lift and reach.
- Knockback - This move will stun an opponent, but not for long.
- Lag – This move is quick.
- Damage - 6%-8%
- Priority - This move has 50/50 Priority.
Tilt Down A
Wolf Link will bite at the opponent with his mouth really close to the ground and his butt high in the air. Midna will slightly sink downward towards Wolf Links head. She will adjust her position when Wolf Link raises his head after the attack.
- Knockback - This move will stun an opponent, but not for long.
- Lag - This move has medium speed considering the cast.
- Damage - 6%-8%
- Priority - This move has 50/50 Priority.
Smash Forward A
Wolf link will lower his feet at first and wait as the move charges. When it is released, he will thrust his head into the air and perform a strong Head butt in the area in front of him.
- Knockback – This move will not send people flying, but will knock them off there feet.
- Lag - This move has medium speed considering the cast.
- Damage – 9%-11%
- Priority – This move has higher priority than others.
Smash Up A
Midna will Force her hair hand into the air with great force with the hand being in a palm like position. The change is her lowering her hair down into her helmet before thrusting it upwards for the attack.
- Knockback - This move will not send people flying, but will knock them off there feet.
- Lag - This move has medium speed considering the cast.
- Damage - 9%-11%
- Priority - This move has higher priority than others.
Smash Down A
Wolf Link will put his legs out to the side slightly and hold the position to charge the attack. Once it is complete, he will spin in a circle quickly hitting anything with his tail. Midna will also have her hair flow around as the spin happens, making her hair wrap around her slightly before moving back to the normal position.
- Knockback - This move will send people flying in a more horizontal direction instead of vertical.
- Lag - This move has medium speed considering the cast when it begins, but is very fast during the execution of the move.
- Damage - 9%-11%
- Priority - This move has higher priority than others.
Duck A
Wolf Link will snap at the opponent’s feet as Midna points forward, like she is giving Wolf Link an order to snap.
- Knockback - This move will not send people flying, but will knock them off there feet. This move has a unique ability to cause someone to trip about 1/100 times.
- Lag – This move is rather quick.
- Damage – 5%-7%
- Priority - This move has higher priority than others.
Air Neutral A
Midna will grab hold of Wolf Links back and hold on for dear life as Wolf Link does a somersault in the air.
- Knockback - This move will stun an opponent, but not for long.
- Lag - This move has medium speed considering the cast.
- Damage – 3%-5%
- Priority – This move has low priority.
Air Forward A
Midna will use her hair and clench it into a fist. Wolf Link will perform the somersault again, but this time, Midna will use her fist for a massive punch attack that has little range.
- Knockback – This move has slightly better knockback than most others. This move will stun an opponent longer than their other moves, but still not for long.
- Lag - This move has medium speed considering the cast.
- Damage - 3%-5%
- Priority - This move has low priority.
Air Down A
Wolf Link will do a Vertical 360 like motion. Midna grab hold of Wolf Link as he goes upside down and she will use this move to thrust her Hair hand downward. This is a spike move where her hair look like a clenched palm.
- Knockback – This move has powerful knockback capabilities and will send people flying.
- Lag – This move is slower than their other moves.
- Damage - 5%-7%
- Priority - This move has low priority.
Air Back A
Midna will swat her hair behind Wolf Link as he falls. She will look back over her shoulder as she does it, but she will have a very uncaring look on her face.
- Knockback - This move will stun an opponent, but not for long.
- Lag - This move has medium speed considering the cast.
- Damage - 3%-5%
- Priority - This move has low priority.
Air Up A
Midna will use her hair hand to punch the air right above her. Wolf Link will perform a somersault, and instead of her punching when she is upside down, she will hold the punch and use it when they are right side up again.
- Knockback – This move has slightly powerful knockback capabilities. It will send people flying.
- Lag – This move is slower than their other moves.
- Damage - 6%-8%
- Priority - This move has low priority.
Ledge Attack
Wolf Link will pull himself up off the ledge very quickly, lunge at the opponent very fast and try to bite their head off. Midna will hold on and be ready for the attack.
- Knockback - This move will not send people flying, but will knock them off there feet.
- Lag – This move is very quick with very little problems with speed after the attack. Wolf Link can actually go into full run after this attack.
- Damage – 4%-6%
- Priority – This move has high priority compared to others.
~~~Attack animations – B Button / FS~~~
Neutral B
Energy field - Midna will raise her hair hand into the air and cause the energy field to appear around Wolf Link. It can be charged. One can charge up the shadow field while holding the B button down. If an opponent or many opponents fall within the field, release for wolf link to lunge at them and attack. If no one falls within the field, Wolf Link will perform a basic spin attack like a normal A move. Hold the button to long, and the field will shrink back down to nothing and Wolf Link will perform the spin move also. When someone is in the energy field, all hope is not lost because they can attempt to dodge or roll out of Wolf Links lunge attack, it is just difficult to do. This move looks exactly like it does in Twilight Princess.
- Knockback – This move has medium knockback when people are caught in the energy field and are hit by Wolf Link. When it is just the spin attack, it has little knockback.
- Lag – Wolf Link will walk slower while the attack is being used, once it is used, Wolf Link is very fast.
- Damage – Spin attack – 5% - 7%, Energy field attack – 8% - 14% per person in the field.
- Priority – High priority to attack anyone who enters the energy ring.
Forward B
Jugular Bite - Wolf Link will lunge at your opponent and grab hold of them. Wolf link will then bite their juggler for a short while. The player also has the option of having Midna throwing the enemy and if they press A, Midna will hit the foe on the head with her Hair Hand. This move is like an extended reach grab. This move is done exactly like it is performed in Twilight Princess.
- Knockback – This move has little knockback, even when Midna hits them with her hair.
- Lag – This move is as quick as a grab move.
- Damage – The initial grab – 2%, The bite attack – 4% each bite, The Hair hand hit – 9%
- Priority – This move has the priority of all grab moves in the game.
Down B
Dig - Wolf Link will lean down to the ground and start throwing dirt behind him. If Down B is held for a short while, Wolf link will dig under the ground and Appear out a hole a few feet away in any direction the player chooses. If this move is done on a platform, Wolf Link will just fall through the platform.
- Knockback – This attack has little knockback, but is good for stunning people or stopping their oncoming attacks.
- Lag – This move is very fast, but it takes a while for Wolf Link to get dirt coming up and for him to stop digging.
- Damage – 3% for each piece of dirt (can be stacked like Charizard’s rock smash on a boss)
- Priority – This move has medium to high priority because Wolf Link is slightly away from where the damage is being obtained.
Up B
Midna Jump - Take control of Midna for a short time and maneuver her in any direction by holding down the B button. Just pressing Up B will have no real effect and will most likely get you killed because Wolf Link will have entered the "fall and you can do nothing about it animation." The player can move her to any position on the screen and release the B button to have Wolf Link lunge straight to her position. This move is great for recovery because it gives him a wicked long 3rd jump. Wolf Link can still be hurt while Midna is flying around. Midna cannot be hurt in this animation. To balance out this move slightly, Wolf Link will have a period of invincibility when he first performs the move, just to give the user a fighting chance. If Wolf Link is hit by an attack, the move is canceled and he will fall. Use this move with Caution.
- Knockback – This move has good knockback only when Wolf Link hits someone while flying to Midna.
- Lag – Midna moves quickly as well as wolf Link when he makes the leap. Wolf Link falls slightly slower than normal when this move is being used, but not that much slower.
- Damage - 15% (if Wolf Link hits someone while he is lunging towards Midna)
- Priority – This move has medium priority when Midna is flying around with a lot of the specifics covered in the description. When Wolf Link is flying to Midna, it has high priority.
Final Smash
Fused Shadows - Midna uses the three fused shadows to turn into the giant monster and attack from the background. While She is doing this, Wolf Link can still run around and attack people. The only problem is that while Midna is attacking in the background. Wolf Link only has his A moves (and only use the ones effectively that do not require Midna.) Midna will also attack any place automatically when wolf Link is holding a person. After the final Smash, Midna will have lost alot of energy and will take the dark energy in Link, causing him to turn back into Normal Link.
- Knockback – Wolf Link has normal knockback for his moves. Midna has a high kill percentage chance.
- Lag – Wolf Link has normal Lag, Midna is fast, but can be predicated easily. (Wolf Link will need to set up her hits most of the time.)
- Damage – Wolf Link does normal damage except for the moves he needs Midna to attack. Midna in the background does 20% damage each hit.
- Priority – This move has priority normal to all of Wolf Links attacks he can use (with no priority put on moves requiring Midna) Midna attacking has high priority.
Visual representation of B moves / FS

~~~Attack animations – Grabs~~~
Grab Animation
Wolf will lunge at the opponent, but instead of him biting of grabbing opponent, Midna will use her hair and grab hold of the person by thrusting it forward with the palm open and grabbing at the head. If the person is grabbed, the arm will then arch upward..
Running Grab animation
This animation looks exactly like the normal Grab Animation, but adapted for the running motion.
Running Grab Missing animation
Midna will fall forward and spin upside down. Wolf Link will throw his head back to get her right side up.
Pivot Grab
Midna will turn around faster than Wolf Link and Grab with her Hair. She will fly in the air slightly and Wolf Link will turn to get back under her. She will then land back on top of Wolf Link.
Hold Animation
Midna's Hair hand is grasped on top of their persons head, arching over grabbed opponent.
Attack Animation
Wolf Link will bite their person that Midna is holding.
- Lag - This move has medium speed, with Wolf Link being able to bite someone up to three times before Midna lets go.
- Damage - 5%-7%
Throw Forward
Midna Will throw her hand back, pulling the captured opponent over both Wolf Link's and her body. She will then throw her hair hand back over her body again, tossing the opponent forward.
- Damage - 7%-9%
Throw Up
Midna will spin the opponent around her head and then throw them up into the air. This move does not really send anyone flying very well.
- Damage - 5%-7%
Throw Backward
Midna Will throw her hand back, pulling the captured opponent over both Wolf Link's and her body. She will then release them sending them flying backward.
- Damage - 5%-7%
Throw Down
Midna will smash the opponent into the ground by lifting her hair hand up into the air and then smashing them into the ground. Wolf Link will then proceed to stamp on them.
- Damage - 8%-10%
~~~Taunts / Win poses~~~
Up Taunt
Wolf Link will bob his head left and right as he remembers the tune to call Epona. Midna will yawn and stretch her arms as she waits.
Right Taunt
Wolf Link will throw back his head and let off a very large howl. Midna will just scratch her back with her hair hand.
Down Taunt
Wolf Link will spin in a circle and lay down for a nap. Midna will jab him to get him back up and ready for the fight.
Left Taunt
Midna will kick Wolf Link in the back causing him to look at her. She will look away and then point in another direction saying the attack came from over there.
Win pose 1
Wolf Link will lay down in the background and sigh while Midna will fly off his back, somersault in the air and pose for the camera.
Win pose 2
Wolf Link will throw his head backwards and release a huge howl. Midna will hold on Wolf links back trying not to fall off.
Win pose 3
Midna will teleport Wolf Link into view and both will strike a pose. Wolf link will look like he is growling at the camera and Midna will look like she is yawning.
Lose
Wolf Link will be sitting with his back towards the camera and his head down. Midna will be laying on the top of his back in a very depressed like slough. Her hair will be performing a very pitiful one hand clap animation.
---------------
Other posted movesets
Ridley: http://www.smashboards.com/showpost.php?p=6983518&postcount=218
half_silver28
Smash Ace
midna & wolf link again... hm...
but in all seriousness, I found the set kind of bland attack wise, although I admit, the specials are EXTREMELY true to the character. I would spend more time thinking out more exciting non-specials if I were you. You seem to have no problems figuring out how every possible stance would look for them and doing the fake dojo update
. All that aside, you did pretty well detailing your moves, so I'm gonna look forward to your next set. Just remember, that this contest is about how interesting your interpretation of whichever character you decide to do is (attack wise and play style wise), not about how they would look holding a cracker launcher/footstool jumping/wearing a badge etc.
tl; dr version: this isn't ssb4, its Make Your Move.
Well, Quite
my solo Midna set is better
but in all seriousness, I found the set kind of bland attack wise, although I admit, the specials are EXTREMELY true to the character. I would spend more time thinking out more exciting non-specials if I were you. You seem to have no problems figuring out how every possible stance would look for them and doing the fake dojo update
even though they are pretty cool
tl; dr version: this isn't ssb4, its Make Your Move.
dancingfrogman
Smash Ace
Wow Kibble, that's an amazing set! The Tag change mechanic is original, and each character has something intresting in them (Blade Knights mindgamez for example), and since the moves are detailed enough to understand without dragged out like my previous work and Chaos 0 (Side-b is 800 words big, as the move has 2 parts, and have there own effect by the mechanic I made).
I see no/little amount of extras though.
I see no/little amount of extras though
.Jimnymebob
Smash Champion
- Joined
- Sep 26, 2008
- Messages
- 2,020
- NNID
- Jimnymebob
Kibble's billionth Kirby set is really cool from what I've read, which admittedly isn't that much. However, I have read Blade Knight and Rocky fully, and they are very good. Good job Kibble.
Midna with Wolf Link seems OK, but the attacks apart from specials are a bit bland and generic, and the layout needs some work.
However, it is clear you've put lots of effort into it, even making a fake dojo update, and showing how she holds all the different items. The item thing is a bit awkward though, because it should be before the moveset, but it takes 10 minutes to scroll down to actually get to the actual set. Either cut it all together, or place it after the set.
.
is really cool from what I've read, which admittedly isn't that much. However, I have read Blade Knight and Rocky fully, and they are very good. Good job Kibble.Midna with Wolf Link seems OK, but the attacks apart from specials are a bit bland and generic, and the layout needs some work.
However, it is clear you've put lots of effort into it, even making a fake dojo update, and showing how she holds all the different items. The item thing is a bit awkward though, because it should be before the moveset, but it takes 10 minutes to scroll down to actually get to the actual set. Either cut it all together, or place it after the set.
The descriptions on some moves are quite short. The set is very good thoughDo you mean short as in the description, or short as in the duration of the actual attack?
.SirKibble
Smash Champion
- Joined
- May 2, 2008
- Messages
- 2,400
Mass response time!
Anyway, thanks!
 Any attacks in particular feel too out of place? I may as well try to make this the best I can, so if you feel like something would be better left out, I'd be more than willing to hear it.
And I must agree, creative liberties ftw indeed! 
In conclusion:
Thank you much! The Tag Blasts and combined Final Smash were done to (hopefully) make the Helpers feel more like a single character this time than the last set were, so I'm glad you liked them! And yeah, I seem to have that tendency to put in a few non-offensive moves.Wow Kibble that's incredible! Each move is like, overdetailed and for one of the first times ever, I read all of this freaking moveset, which is longer than most of those posted, because it contains 4 Helpers, each being awesome and unique. What I like with most of your movesets is that most characters you do will have one or many non-offensive moves, moves that will do things like burying people ( Rocky ) or blocking some attacks ( Blade Knight ) . The Tag Blasts and Final Smash are pure awesomeness! One of your best yet, but IMO, it's your best. Great job up there!
Anyway, thanks!Heh, thanks. Glad you liked it, Wizzerd. (Gonna think of a shorter name for you if you're planning to stick around. Wiz, maybe?)Wow, Helpers were epic. I can't really say anything else. It was just too good.
Lol, yes, the commentary/questions/discussion in the chat was a bit more thorought, but regardless, I appreciate your comments here in the thread as well.I pretty much made a really long commentary in the chat, but SSHU is cool. There are some quirky attacks in there that seem a little out of place to me in the middle of combat, but they're still interesting and overall it's a good (long) set. I like Plasma Wisp a lot, and Rocky is essentially a rock. You made a good moveset for a ROCK.
'Nuff said.
Any attacks in particular feel too out of place? I may as well try to make this the best I can, so if you feel like something would be better left out, I'd be more than willing to hear it.Yay! Thanks, HR!Super Star Helpers are win!
There weren't many basic moves, and the the ones that were omre generic had special little effects added to make them fore interesting, such as Blade Knight's Nair having the energy wave effect. Rocky reminds me of my Wheelie move set in that you took a character who does nothing and made him into a working character (creative liberties FTW!) My favorite one one Gim, simply because he's freaking GIM!
I'm definitley vot-*is violenty murdered by Spadefox and K.Rool*
And I must agree, creative liberties ftw indeed! Thanks, Frogman! And yes, you see no extras.Wow Kibble, that's an amazing set! The Tag change mechanic is original, and each character has something intresting in them (Blade Knights mindgamez for example), and since the moves are detailed enough to understand without dragged out like my previous work and Chaos 0 (Side-b is 800 words big, as the move has 2 parts, and have there own effect by the mechanic I made).
I see no/little amount of extras though
Hehe, I may have one or two more up my sleeve. Glad you liked what you read, though!Kibble's billionth Kirby set
In conclusion:
Wizzerd
Smash Ace
- Joined
- Feb 24, 2009
- Messages
- 929
Sounds fine. And I'll be sticking around, but my next moveset is hard to write because of the special mechanic, so it could take a while. Also, I'm making a moveset for Biospark. Yay, Kirby. I was thinking about doing one for Plasma Wisp, but then I saw that you were making him in Helpers Ultra.Heh, thanks. Glad you liked it, Wizzerd. (Gonna think of a shorter name for you if you're planning to stick around. Wiz, maybe?)
MasterWarlord
Smash Champion

MISSINGNO
"What? Don't you know how to catch Pokemon? I'll show you how then."
&$#@*)(&*@#($ENDSNSLDKal4lkawejl24343$#
$#*&(A$W*OA BACKGROUND *$#NL$SAENLJK
Missingno is a glitch, not meant to be in the game. While it has been in all the Pokemon titles in some form, it was by far most famous and the easiest to access without cheating devices in the original Pokemon Red/Blue versions. Missingno seems to be a dummy left in the game and fills up the various slots over 151. Due to Gold/Silver having numbers higher than 151, when being transferred to these games Missingno would turn into a Johto Pokemon, most commonly Stanler or Remoraid. In any case, most players chose to encounter Missingno for its item duplication powers, making massive quantities of Master balls and Rare Candies.
$#@&*($#@&)(* STATS $#@*&@()@#
Type: Bird/Normal
slmnyrf75%n^m&7kjyj6jmmdsahowmcbnb
Size: 7/10
Missingno is rather tall, being inbetween Ganondorf's and Marth's height. Its base is slightly wider then Marth, but its upper portion is very small in width.
Attack: 137
MSDKLFNu5h32jjklfn32qo5890ujnk*A(&%32894#@mn,.alkjjlkdhsyiuqwbebcvx xcb,mz
Weight: 1/10
Despite its size, Missingno is incredibly light, slightly lighter than even Jigglypuff, making Missingno vulneable to being KOd at absurdly low percentages, especially when coupled with its mediocre recovery.
Defense: 1
NLSKNlkweh5iuSNLKrh7rY*&Rh4kj3n57NKLJnjlkaj
Walking Speed: 3/10
Due to its lack of limbs, Missingno has to sort of hobble around.
Speed: 6
nlksjadnlkjnui27n8098SDYS*(DNJKL$NKWJLH&D*SOFHDS.aals
Running Speed: 5/10
Missingno has some sort of unexplained power for running much like Bowser's.
Special: 29
mlklamlkmklfdjpqokrnjknklkn4328930hNKL543$mm$l,hnupos
Traction: 2/10
Missingno has horrible traction despite being slow due to its lack of limbs. How can you keep your footing without feet?
HP: 33
aghablmasflm23ml324ljk&*(#@lma
Power: 7.5/10
Missingno is absurdly strong, it matching up with its amazing attack stat, it being the highest base attack stat of any Pokemon, even outclassing legends. Missingno is on the same level as even the toughest of the heavy hitters such as Bowser and Ganondorf. . .On his attacks that actually do damage/knockback. Sadly, several of Missingno's attacks do no damage/knockback, being disablers, preventing him from sweeping this category.
Level: 128
ajfdklalkjfn4wkjhakhkjand&U*($&#@*ANndsalknkla43824u9872389naskdfnlKSJDNJKLAMansdfsdafdasdjkl4u3894798378anjlkfsnH$LKJnjlkewnakjrnsljknkjdfbaflkdjfjayheq8748937euarewdfbkjsbhk
Attack Speed: 2/10
Many of Missingno's attacks are laggy, and you'll be hard pressed to find a fast one in here, them being as rare in the moveset as Ganondorf's. Unlike Ganondorf, though, Missingno can actually throw a lot of these slow attacks out due to having little fear of being punished.
Range: 7/10
Missingno reaches out a considerable deal on many of it's attacks. It's nothing outstanding for a heavyweight. While Missingno does have a projectile, it does zero damage or knockback, making it rather trivial in this regard.
Priority: 8/10
Missingno has a sizable amount of disjointed hitboxes and many of it's moves which aren't disjointed are of nearly 100% priority. This is one of Missingno's advantages.
First Jump: 2/10
Horrendous. Worst in the game.
Second Jump: 2/10
Another terrible jump.
Recovery: 3.5/10
Missingno's nair and up special offers average recovery distance, but its terrible regular jumps cause Missingno to be rather in this category overall.
Falling Speed: 4/10
Missingno is rather floaty in comparison to the average heavyweights. Guess its weight would be an indicator of this, eh?
Crouch: 4/10
Below average, as Missingno doesn't reduce his height that much with this.
Crawl: No
Hover: No
Wall jump: No
Wall cling: No
Glide: No
$&*#@$#&@(*! AN IM:embarrassATIONS&)$*(#&)*!(#@
NIM:embarrassATIONS&)$*(#&)*!(#@Standard Pose
Missingno stands upright, his upper half bobbing into itself slightly as it stands in place.
Idle Pose
Missingno starts glitching up, its pixels going static in random formations. Sometimes it may briefly turn into a random human sprite from Pokemon Red/Blue.
Walking
Missingno tilts itself one way, then the other to move. This looks rather awkward and makes its upper half constantly in different positions, giving it a constantly shifting hitbox.
Running
No difference, Missingno just does its walk faster.
Dashing
Missingno leans forward, only a small part of his base on the ground, it going forward at a decent speed.
Crouching
Missingno withdraws its upper half into itself.
First Jump
Missingno crouches down then bounds up, getting a slight boost from some blurry pixels under itself.
Second Jump
Missingno turns into a mess of pixels as it gains a bit more ground.
Shield
Missingno bends it's upper half downwards and outwards to defend it's main portion, looking like a letter P as the standard bubble shield forms.
Spot Dodge
Missingno's lower half becomes it's upper half and visa versa, then it returns to normal.
Roll
Missingno turns into a blur of pixels as it moves in the indicated direction.
Air Dodge
Missingo becomes a blur of pxiels briefly.
Frozen
DFSMN:lnal88723047289dsnjknslkjbskshDFJSDfabfdksanbs,mdn,maswopiyuy8504374093298789JLKAWBELKl4kj2q4389uundmwalnk84289udlkndkjlasfblkja478393724awehlbalkfdblkjja
Asleep
Missingno stands in place perfectly normal, but the text "Missingno is sleeping. . ." is seen in front of it.
Burned
&%*)(@$*&(#NMK:LSRSEOJEn;ldsamn;l,ads;l,r489237894w78940n.312nljkj8(SDlknl43lkjnu23lkj4nWL$Lkn4wajlknlkjn23l4kkn4%L(*^%*()*()#!@Nnlakjnr
Dizzy
Same as sleeping, but the text is "Missingno is confused!". If left in this state for long periods of time, Missingno will take 1% per every 5 seconds in this state, the text changing to "It hurt itself in it's confusion!".
Confused
fHSDKLhdfsa48739326q987698eA(*E(*$#^BklbdshHBkg4gu324behkq4327mlk;dfmbrhewriuwaoeqwyv fkhdsalkr8e798342wen2q8@:L#@!NL8wsue8932n32jn5lkj5nk45lkjn43aj4ljk43lkjlkj4LKJ$KJL#$KJL$KJLKLJ#LKMDSBDASBHDSHBDAJHB
#@&*()$&(*)
#@$&*(@!&(*#@ MOVESET $#&)*(#$&$#@*
&$#*()@#&*($#@ SPE
CIALS &*#@!)#@!&*(%^
Side Special - Item Duplication
A spot a Battlefield's distance away from Missingno the size of Kirby goes all staticy. If an item is there, a second one of it is instantly created. Due to the glitchy nature of Missingno, this allows you to create more of items that developers intended there to be a certain amount of on screen at a time, such as Assist Trophies and Smash Balls. If a foe is in this location, they simply take 5-6% damage and a flinch. Average starting lag is on both ends, keeping this from being too spammable.
If there is nobody in the set location away from Missingno, a random item appears where Missingno's hitbox for the move is. However; these random items aren't the normal ones, and instead are a couple of items only able to be produced by this move. Every part of this move is obviously entirely disjointed. The producable items are the following:
Rare Candy - 30%

This item simply functions like a standard food item, healing you for 3%. However, Missingno's exclusive items can be duplicated just like standard items, meaning when you're left alone you can press this button input, hope for one of these, then keep duplicating them in mass to heal yourself. Don't get too greedy though, as the move is rather laggy, so you'll rarely have a chance to heal yourself for more than 10%.
Helix Fossil - 25%:

This initially does nothing whatsoever on it's own, but after sitting around on the stage for 10 seconds, it will resurrect into an Omanyte. Before it turns into an Omanyte, the fossil can be used as a weak throwing item, having the same properties as the bigger of the two wheels from Wario's broken bike. A smart foe will try to pick up the fossil and throw it off stage before it revives, so you're best advised to hold onto the fossil yourself to protect it until it revives. While you can duplicate fossils to try to swarm your foes in them, the lag of the move will prevent more than 3 from being on screen at once, and even then it's VERY hard to find an opening to duplicate it that many times.
Once Omanyte revives, it will roll across the stage straight forward for 10 seconds, going at the speed of Ganondorf's walk initially. The attack it's using is Rollout as it builds up more and more speed and power as it goes faster. It takes a sizable amount of ground to give Omanyte any momentum for a decent effect. Omanyte's default damage is 5% with tiny knockback, and his damage increases by 2% and his knockback by 5% for every half a Battlefield Platform it transverses, as well as 10% movement speed. This caps off at Captain Falcon's running speed with 25% damage and above average knockback.
The best use of Omanyte is to use him as a wall as he goes forward, as he will absorb enemy attacks and projectiles, but your own attack will still go through him. Rarely will he ever be a threat on his own unless put on the far end of a huge flat stage like Bridge of Eldin.
Dome Fossil - 20%:

This works just like the Helix Fossil, but produces a Kabuto instead of an Omanyte. Upon being revived, Kabuto digs into the ground, then two seconds later pops up under a random enemy, it's body being a hitbox, which is around Kirby's size, doing 10% with average vertical knockback. Kabuto will then dig into the ground and repeat this four more times. Kabuto stays out for a good while as a hitbox before he digs back down, meaning this can't be spot dodged due to the spot dodge not dodging the duration of Kabuto's hitbox. However, getting to higher ground will prevent Kabuto from getting to you, as it is only able to pop out at the ground level it was summoned at.
On small stages such as Battlefield Kabuto is extremely useful, you able to potentially force enemies down to the ground level to be hit by him. If there's too much space on the stage, you have no real way of forcing enemies to approach your Kabuto, making it near useless.
Old Amber - 15%:

This is also just like the other two fossils, but produces an Aerodactyl. However, due to Aerodactyl's fossil, being considerably bigger, characters have to heft up the fossil like Wario's bike, it having the same properties as it. This means this fossil can be destroyed by being attacked, but this also means it's very hard to throw off stage casually, unlike the other two fossils.
When revived, Aerodactyl will swoop across the stage at random foes. You're unable to avoid Aerodactyl eventually overlapping with your character and must time a dodge of some sort to avoid him. When he overlaps with you, Aerodactyl will grab you, it counting as a standard grab and going through shields. He'll simply hold on to you and chomp at you from this point, doing 10 hits of 1% per second. This is only as hard to escape as a normal grab and Aerodactyl does no knockback. If you attack the foe Aerodactyl is holding, they'll still take damage, but won't fly anywhere. This only holds foes decently at higher percents for you to damage rack them, but still, boosting a foe up from 60% up to enough to easily KO them is more than welcome.
Master Ball - 10%:
This is the most useful of Missingno's exclusive items, hence why it's the rarest to appear. You throw this just like a pokeball, but there's no Pokemon inside to come out. Instead, it captures the enemy! If you don't hit the foe with this, this does nothing whatsoever, but if you do hit them they'll be sucked into the ball and have to button mash to get out of it, it being just as hard to get out as it is a grab. While they can't take damage during this time, you can come up and throw the ball off the stage to send them to their doom. This won't work until the foe is at high enough percents for it to be hard to escape the ball, and if you miss with your intial throw the foe can pick up the Master Ball to throw back at you instead. Unlike in the games, you won't want to be duplicating this item, as you can only carry one at a time and your foe will be likely to pick up any others you make.
As a whole, if you don't use this move carefully your foe can just wait for the item to spawn and use it if it's candy or a master ball, or destroy it if it's a fossil. Only use this when foes are far away.
Diagonal Special - ann529980fsdkjnjkl234enla
NSLKJDN%423njk3nlk4njknl4kn4bghjavtr3f3spois4p$&W*NLK#WN$NKsN&)*(%$4nlnlk3nlsjnblkBER784. hKN#54nankrjbkjdnfasndjk543? JNRKn5kla89sd&(R4njknkljdjsalkjyroiadsfsad. kSNau9eruiwhudifsoahgknkerw! NDlkjnf438q9r798SDF&*Jnjklndfsd78af76*FDBHKQTYUTASUBHBBC<MNZ89348. FSLKJbaoiewuaoi7*S!
Down Special - Substitute
Missingo suddenly turns into a substitute doll, its form when put into Pokemon Stadium and of the few TMs he can learn. The substitute doll looks like a baby Rhydon or Kangaskhan, both Pokemon Missingno and his cousin 'M can potentially turn into, strangely.
This has starting lag that could be compared to Dedede's fsmash. There is no real "ending lag" for the move to speak of, and there are no hitboxes anywhere no the move. You'll remain the substitute doll visually if you stand still, but will appear as Missingno the moment you move or press a button.
What does this do exactly? You take 25% damage the moment you use it, but whenever you get hit you'll turn into the substitute doll, it taking the hit for you, and not take damage or knockback and be immune to essentially everything, there being no hitbox to hit you with. The substitute doll shatters after taking the 25% health Missingno gave it. If the substitute has only 1 HP left, it doesn't matter how powerful the attack is. No attack will damage Missingno, which is where you actually get some profit off the 25% you sacrificed.
If you essentially had constant super armor for the move, it'd be broken, would it not? Thankfully you can still get around the substitute when against Missingno, grabs and throws going through it straight to Missingno so you have a way of interrupting his attacks. Still, there are very few throws out there that can KO until high percents, so this move does it's job of keeping Missingno from being easily KOed.
Neutral Special - Water Gun
Upon first pressing this button input, Missingno will bend its upper half to face forward, going into the stance for this move. You can make it face other ways by tilting the control stick, and you can mash B to make a stream of disjointed water come out as fast as Fox's blaster that travels as far just as fast. This does no damage however, and each individual blast does nearly non existant FLUDD style knockback that pushes the foe back, say, a tenth of a battlefield platform. You have to spam this to push a foe any notable distance, but the fact you can aim where it goes means it's easy to hit with if nothing else. This allows Missingno to gimp foes from the safety of the stage. To come out of this stance, press any button besides B.
Up Special - Sky Attack
Missingno charges up energy like Diddy's up special, glowing, then upon reaching full charge rockets up a distance the distance of Diddy's up special (Although not gaining nearly as much horizontal distance as Diddy, unable to tilt the move as it charges like Diddy's), its body becoming a hitbox with average, but it also glitchily stretching out from his main body to form an extra disjointed hitbox. This disjointed hitbox appears in a random location around Missingno and is the size of Kirby. Contact with Missingno or this glitchy hitbox does 10% with average knockback away from the hitbox.
This move functions entirely differently on the ground. You can press B once for Missingo to charge forward with the same hitbox as his up special, not having to wait for it to charge, but Missingno will only go forward a character distance at the speed of Captain Falcon's run. If you hold B, though, you can chareg for up to 3 seconds to go up to half the length of Final Destination, Missingno glowing as it charges. More notably, if a foe is in front of Missingno as it starts charging, it will focus on the target as it charges, and charge in the most direct path to them, potentially coming off the ground. This can be used as a decent counter measure against approaches, particularly if you get lucky and the awkward disjointed hitbox hits the enemy.
$&(*#)@#&*(NA SITU
ATIONALS &#@$)(*@!&()*#^%()#@
Ledge Attack Over 100% - Rejected by the Gods
Missingno warps to the position where players respawn when killed. This does no damage, has above average start up lag, and Missingno is helpless when it appears in the air. This is too slow to be useful in getting away, and should only be used to transverse large stages when you're safe.
Tripped Attack - Tripping foes up
Missingno glows briefly, then all foes on the ground trip if they don't dodge/shield. This has average starting lag but zero ending lag, Missingno getting up after the attack is complete.
Rising Attack (On Stomach) - The Worm
Missingno does the worm to get up, doing a simple wavy dancing motion as it gets to its feet. Nothing complicated. This lasts half a second during which Missingno is a low priority hitbox that does 7% and below average knockback away from itself.
Rising Attack (On Face) - FNALKJNASD#*$(&#&@(!*
FKJLDJASUEU(*#&$(!@&#(*JKDnkljdafkjrhkj483297489dsjSJDsnlkASDHK$*8942893u98u*(#$&*(#@&$3hjknklfankdjfsku83274987($#&EWnjklrwahljaehwnkjdslhawaeuiyriu7285e984&#*(W#HKJDNASKDnkjRYIUOEuioweuiwhhiuweyhAWUIUEWAIUE28747389$&(*#$&#(
Ledge Attack - Glitching Through
Missingno slithers along like a snake under the ledge, then goes up through the edge splitting into mass particles, doing eight hits for 1% over a second in a area the size of Bowser, materializing into itself up on top of the ledge. This has high priority, but average start lag and above average starting lag.
Rising Attack (On Back) - Missing Arch
Missingno turns into an arch formation briefly, then collapses down back into it's position on the ground, doing 10% damage with average knockback. This has below average starting lag and below average end lag, but doesn't actually make Missingno rise from the ground.
$#&@*)($&#@*() STANDARD
S $$@#*($#@&()*@#
Up Tilt - Transform

When Missingno is stored into Pokemon Stadium 2, it turns into a Ditto. For this move Missingno transforms into a ditto, and then in the form of Ditto transforms into the nearest enemy. He then performs the taret's utilt, then transforms back to its normal state. This has slight start up lag added to both ends of the target's version of the utilt to transform into the target and back to normal, meaning you won't want to use this unless the target's utilt is particularly exceptional or fast enough that a bit of extra lag wouldn't hurt it too bad.
Down Tilt - Music Box
In Missingno's crouched pose, its upper half tucks into itself. When you initiate this button input, the upper half comes out the side of Missingo's lower half and and starts spinning around as long as you hold/rapidly press A, like a record player. During this time, the music will change to a random tune from the original Pokemon Red/Blue games, not being updated at all, sounding VERY retro. There is little lag to go into or come out of this position. This does not harm foes directly, but reverses their controls while in effect. This is best used when a foe is recovering, having large mindgame potential as for which direction the enemy should push in to come back to the stage due to you being able to come in and out of the move quickly.
Forward Tilt - Dizzy Punch

While Missingno can't evolve into Kangaskhan, its cousin, 'M, is fully capable of doing so. In this move Missingno borrows the ability from 'M, transforming into Kangaskhan to give the move average start up lag. As Kangaskhan, Missingno does a wind up (Increasing the starting lag to above average), then smacks forward for above average range and priority. This does an amazing 15-16%, but no knockback whatsoever, but makes them dizzy as if they broke their sield.
After coming out of the dizzy state, for the next 5 seconds, whenever the victim does any attack there's a 50% chance they'll hurt themselves in confusion and hit themselves with their own attack, taking the damage/knockback of it. During these 5 seconds, three cartoony chicks will fly around the victim's head to represent confusion, chirping about. This is a great disabler move what with it's after effect and the amazing damage, but it's very high risk high reward due to the starting lag.
$&#@)*($#&@*)( TILTS $#@*()$#@&*(
Standard Attack - Water Gun
Upon first pressing this button input, Missingno will bend its upper half to face forward, going into the stance for this move. You can make it face other ways by tilting the control stick, and you can mash A to make a stream of water come out as fast as Fox's blaster that travels as far just as fast. This does no damage however, and each individual blast does nearly non existant FLUDD style knockback that pushes the foe back, say, a tenth of a battlefield platform. You have to spam this to push a foe any notable distance, but the fact you can aim where it goes means it's easy to hit with if nothing else. This allows Missingno to gimp foes from the safety of the stage. To come out of this stance, press any button besides A.
Dash Attack - Tripping Illusion
Missingno does it's tripping animation as it runs. . .This does nothing whatsoever. You can attack Missingno during this time to punish the trip. . .But it doesn't do anything? During this time, Missingno is invisible and makes no sound effects, there being an illusion left behind it that did the trip. You cannot do another dashing attack during this period. As soon as Missingno does another attack or a second passes, the real Missingno will appear. This can be used very well for mindgames, especially when you DO actually trip - your foe will think you used this attack. Take advantage of when your trip a good deal for mind games. This has the start up lag of Missingno's tripping animation and zero end lag.
$&*($#@&*(@) SMASHES $#@&*(#@$&)(@
Down Smash - Backstab

Missingno turns into one of its alternate forms - the Kabutops fossil from the Pewter City Museum. This happens as it charges up. Upon releasing the charge, Missingno will run into the background and chase after the victim automatically at the speed of Mario's run, being invulnerable, having average starting lag to enter the stance. Missingno has a single jump the height of Falco's (The best jump in the game) while doing this to get higher, but can't land on platforms. When getting directly behind a foe, Missingno will then INSTANTLY do a slice at their back that's unblockable, doing 27-28% with high knockback.
Missingno has to be directly behind the foe for this to work, and it'll only chase after foes for 2 seconds (3 seconds charged), it having terrible ending lag if he doesn't hit anyone. You can press A to get out of the automatic chasing at any time, but you'll still have the horrible lag.
This move would essentially be impossible to hit with, but you can press B while running in the background to become tiny pixels which aren't visible unless you zoom the camera in, thus making the enemy uncertain of when to dodge. You can stay like this for a total of 1 second, you able to spread it out as you see fit throughout the chasing. This move has a lot of mindgame potential and means a massive shift in the flow of battle when used. Either the victim will be hit with a massive attack or you'll be punished horribly. It's best not to gamble with this move unless you have a substitute up to minimize the punishing potential.
Forward Smash - Surf
Missingno bends over as it charges the smash, then brings in a minature tidal wave 1.5X his height that crashes down in front of him. On top of the wave is what seems at first to be a random Pokemon, which is the only hitbox for the move as the tidal wave crashes down a battlefield platform in front of missingno The pokemon does varying damage/knockback based on their size as they crash down. Charging the move makes the wave travel farther before it crashes, up to twice the distance. The wave pushes foes away like FLUDD and acts as a wall, protecting Missingno from the front very well, but leaving him EXTREMELY vulneable to an attack from behind. The water will fall straight down if it goes over a platform, so this can't be used to gimp. This has no ending lag, but it takes a while for the move to complete.
What makes this move more interesting is there's a specific formula for what Pokemon appears on top of the tidal wave. In Pokemon Red Blue, when you did the trick to find Missingno surfing alongside Cinnabar/Seafoam Island, other various Pokemon could show up defending on your name in the water alongside Missingno. The characters of your name that affected this were the 3rd, 5th, and 7th ones.
In this move, the Pokemon that appears on top of the wave will be randomly chosen from one of three, based off your character's name (Or your name tag if you have one.). There's a specific Pokemon that will show up for every letter, capital or lower case, it being the same as what Pokemon appeared based off your name in Red/Blue. If the victim (It's the one closest to Missingno if multiple) has less than seven characters in their name or the characters of their names aren't letters, the pokemon picked by that character slot are completely random each time. Smart players will make name tags to fight Missingno with that have the 3rd and 5th characters of their name as characters that spawn tiny Pokemon that are of little threat, doing 3-5% with tiny knockback, though this is a very advanced technique. Still, due to the 5 character limit on name tags, the third choice for a Pokemon will be random, leaving a open a potential vulneability.
Below is an overly long list of which Pokemon appears based on your name and their damage/knockback, not being a necessary read.
Code:
A: [b]Golduck[/b] (15%, above average knockback)
B: [b]Hypno[/b] (16%, above average knockback)
C: [b]Golbat[/b] (11%, average knockback)
D: [b]Mewtwo[/b] (24%, huge knockback)
E: [b]Snorlax[/b] (28%, unholy knockback)
F: [b]Magikarp[/b] (1%, flinch)
G: [b]Missingno.[/b] (10%, average knockback)
H: [b]Missingno.[/b] (10%, average knockback)
I: [b]Muk[/b] (12%, average knockback)
J: [b]Missingno.[/b] (10%, average knockback)
K: [b]Kingler[/b] (18%, above average knockback, bordering on huge)
L: [b]Cloyster[/b] (19%, above average knockback, bordering on huge)
M: [b]'M (Missingno.)[/b] (10%, average knockback)
N: [b]Electrode[/b] (9%, average knockback)
O: [b]Clefable[/b] (9%, average knockback)
P: [b]Weezing[/b] (12%, average knockback)
Q: [b]Persian[/b] (13%, average knockback)
R: [b]Marowak[/b] (8%, below average knockback)
S: [b]Missingno.[/b] (10%, average knockback)
T: [b]Haunter[/b] (5%, stuns like ZSS' Dsmash)
U: [b]Abra[/b] (5%, tiny knockback)
V: [b]Alakazam[/b] (10%, average knockback)
W: [b]Pidgeotto[/b] (7%, below average knockback)
X: [b]Pidgeot[/b] (11%, average knockback)
Y: [b]Starmie[/b] (9%, average knockback)
Z: [b]Bulbasaur[/b] (6%, tiny knockback)
a: [b]Missingno.[/b] (10%, average knockback)
b: [b]Missingno.[/b] (10%, average knockback)
c: [b]Missingno.[/b] (10%, average knockback)
d: [b]Ponyta[/b] (11%, average knockback)
e: [b]Rapidash[/b] (14%, average knockback, bordering on above average)
f: [b]Rattata[/b] (4%, tiny knockback)
g: [b]Raticate[/b] (13%, average knockback)
h: [b]Nidorino[/b] (12%, average knockback)
i: [b]Nidorina[/b] (11%, average knockback)
j: [b]Geodude[/b] (8%, below average knockback)
k: [b]Porygon[/b] (9%, below average knockback, bordering on average)
l: [b]Aerodactyl[/b] (20%, huge knockback)
m: [b]Missingno.[/b] (10%, average knockback)
n: [b]Magnemite[/b] (6%, tiny knockback)
o: [b]Missingno.[/b] (10%, average knockback)
p: [b]Missingno.[/b] (10%, average knockback)
q: [b]Charmander[/b] (5%, tiny knockback)
r: [b]Squirtle[/b] (7%, below average knockback)
s: [b]Charmeleon[/b] (10%, average knockback)
t: [b]Wartortle[/b] (13%, average knockback)
u: [b]Charizard[/b] (18%, above average knockback, bordering on huge)
v: [b]Missingno.[/b] (10%, average knockback)
w: [b]Missingno. (KABUTOPS FOSSIL)[/b] (15%, above average knockback)
x: [b]Missingno. (AERODACTYL FOSSIL)[/b] (20%, huge knockback)
y: [b]Missingno. (GHOST)[/b] (5%, stuns like ZSS' dsmash)
z: [b]Oddish[/b] (3%, set tiny knockback)

[b][size="2"]Examples:[/b][/size]

Ki[b]n[/b]g [b]D[/b]e[b]d[/b]ede:
[b]3rd character:[/b] n = Magnemite
[b]5th character:[/b] D = Mewtwo
[b]7th character:[/b] d = Ponyta

Di[b]d[/b]d[b]y[/b] [b]K[/b]ong:
[b]3rd character:[/b] d = Ponyta
[b]5th character:[/b] y = Missingno (GHOST)
[b]7th character:[/b] K = Kingler

DF[b]M[/b]:
[b]3rd character:[/b] M = 'M (Missingno)
[b]5th character:[/b] None = Random
[b]7th character:[/b] None = RandomSMNLKfnlsauiorw8907098423590uioe*A(&A*SDNJKNLJKRS*DFLKjrildsa89jjdSSDNRKLNLNrsiu*(SNSMKrdSJ(*SDmlSRS*D9sdmSDRDSJ)(*SDSD&S#$@KJ#ADSLKDG())89*)(FDS()DSFKJLKL$$#@@#NLJ#@()DSF)()*!$@!*()#@(*)NBnSNjkre423889adf89asdjl243jqkl4j3lE*P%NLW
Up Smash - Seismic Toss
Missingno turns into the skeletal form of Aerodactyl from the Pewter City Museum, it being the same as one of the fossils able to be generated from his side special. Upon releasing the charge, Aerodactyl Missingno flies straight up at immense speeds, as fast as Sonic's run. Missingno will go off the top of the screen, KOing itself. WTF?
This can be used for a Missingcide, as if you pass by any enemies on your way straight up off the top of the screen they will be grabbed and taken with you, Missingno holding them against its body. This is completely unblockable, but easily dodgable. This has below average start up lag due to the fact that it KOs Missingno making this an easy move to hit with. However; foes at low percentages can still button mash out before Missingno takes them off screen, it being twice easy to escape as a standard grab due to how fast Missingno shoots up. This makes a decent KO move if you don't care about your own stock due to having a high percentage, but is defenitely a move that will rarely be used.
If Missingno flies up to hit his head on a cieling, anybody he was carrying will take 10% damage and be spiked downwards, and Missingno will fall to the ground, having bad ending lag as he lands. Should you Missingcide with the normal move, the game will shift into a cinematic like Captain Falcon's final smash as Missingno is shown spinning around the globe with the victim in its clutches before registering both combatants as KOd.
%*&(#$&* AERIALS )!*(@#&%%
Back Aerial - Reverse Extension
Missingo extends out it's top half the distance of a battlefield platform forward, then retracts it back to normal. This is one of Missingno's fastest moves, having tiny starting lag and below average ending lag. However. . .This does nothing whatsoever in front of Missingno where it's extending. WTF?
The hitbox is instead located behind Missingno, it extending as far out from Missingno as Missingno has extended it's top half in front of itself. This is very disorienting, as the hitbox behind Missingno is invisible and the animation very much implies it's in front of it. The hitbox is disjointed and does 9-10% with average knockback.
Up Aerial - Moon Wish


While Missingno can only evolve into Rhydon, its cousin, 'M, is capable of evolving into Clefairy and Clefable. Missingo borrows this trait here, transforming into a Clefairy. Missingno raises its arms up above it's head and wiggles them about as a star flies over it's head like the move "wish". This star covers a rainbow arc above Missingno's head, doing 7% damage and below average upward knockback, the star being disjointed. This has below average start up. After the star is gone, Missingno is still unable to do any moves for another half a second, staying as Clefairy, but then a moon stone appears the distance of Ganondorf's height above Missingno and falls down onto Missingno, evolving it into Clefable. The moon stone is disjointed and does 10% damage with average knockback. As Clefable, Missingno heals 5% damage very quickly from the successful wish, then returns to it's normal form.
This move can be interrupted by landing on the ground, or hitting anyone with the star or moon stone, giving it above average lag. This should NEVER be used to actually attack, and instead should be used when you have a moment to yourself. Keep in mind you have to get up as high as possible before using this to get the healing, though, as otherwise you'll land on the ground, interrupting the move before it finishes its lengthy duration.
Neutral Aerial - Lavendar Spirit
Missingno turns into his ghostly form from the various spirits of Lavendar Town, his most well known alternate form besides his main one. Missingno will stay in this form for a single second and be able to go through anything he pleases, having the movement speed of, say, Ivysaur's run, and able to go the distance of Wolf's side special if he holds a direction the entire time he's a ghost. This can be used to recover if you get stuck under the stage or caught under the lip of Final Destination due to your ability to go through stuff.
Despite being able to go through anything, foes can still attack you and you have no way of fighting back or even dodging their attacks, so this begs to be gimped if you use it as your recovery. Misssingno goes into his helpless state after the move is complete.
This doesn't harm enemies. . .Unless you're overlapping with them in the same fashion as Jigglypuff must overlap with enemies to perform her down special when your second as a ghost is up. If you are indeed overlapping with your foe, you'll posses them, controlling them instead of themselves, Missingno vanishing. This lasts a second, less if the foe button mashes, but it being harder to reduce the amount of time if they have high percents. You'll rarely have enough time to make the foe suicide unless they've already over the air or have a stall then fall dair, and it's very easy to see this coming. Even if you do manage to gimp the foe, Missingno will appear where the foe is in his helpless state when he's finished possessing them, so if he sends them to suicide he's going down with them.
Ledge Attack over 255% - nflkdsjanf4u2389q4u897W(*)E&A(
NMJLKFDj8uq9489344070897h24lk3qhnk lkq4h8w.4 jnlfdsnau48934u98wnjkleah 8au8s9 789 98a 789 0 0p0L;KJ OF9028340W8 9)bd (&#*$#@*$JNKLWAJRELKN SNKLJDNFJSDANLknjlsnnlkjnfdsalkjf 89s7fsa9d0uNFSD* (nkD*(Fsf43lk4njlk23njk32nlkj4389*((*jknkjllknjnlkj2348998(*DSjlkjnjkn23hwnblkn3wlkLJK5nbk4kljwjlk4wjN$LJkUL*#EAGYUWGEQU$#$B^OPIQPOVBNBNZX &*V^&878asdsfdsl!(
Down Aerial - Earthquake

In Red/Blue, Missingno would turn into Rhydon if left in a PC for too long, it being Rhydon due to it being the first one listed in the code, quite possibly the first Pokemon ever created.
In this move, Missingno transforms into Rhydon, then falls like a rock downwards. Missingno's body is a high priority hitbox as it falls, doing 26% with huge knockback and spiking foes downwards. This move has above average start up as Missingno turns into Rhydon, and unlike most stall then falls Missingno will keep going downwards even if he hits an enemy, meaning this is certain doom if you don't use it over the ground.
Should Missingno land on solid ground, he'll have above average end lag as it turns back into its regular form. This will also cause an earthquake on the level of ground Missingno is at, stunning foes who have their feet on the ground. At low percents this will only stun foes long enough to prevent you from being punished, but at high percents it stuns them long enough for you to potentially be able to punish them instead. In any case, this move is still easy to punish by jumping when Missingno lands and hitting it with an aerial. This earthquake is more useful in FFAs when a foe isn't constantly looming over you, you able to control the stage very well with this.
This move is best used sparingly, even more so than Bowser's down special. Only use it away from the main stage if you're going to die soon anyway for a Missingcide attempt, and only use it on the stage to punish foes with the fall/set them up for another attack with the earthquake.
Forward Aerial - Egg Plague

Missingno first turns into a plain Pokemon egg the size of Kirby, but then suddenly gains eyes and a mouth, chomping forward with average range, the move having average start up. After the chomp, the move has little ending lag as Missingno turns back into its normal form. The chomp does zero damage or knockback. . .But turns foes into a bad egg, it out prioritizing all other moves due to turning them into the egg before the other move hits. The bad egg functions just like the egg Yoshi puts enemies into with his neutral B. This move can be used to gimp foes, to stun them so you can damage them at high percents when it takes a moment to escape, as well as defensively due to it's amazing priority. This move has it's uses, but is slightly situational, particularly with the starting lag.
#$&(*@#$@ THROWS @#$*#)(@
Grab - Deposit
A computer the size of Bowser suddenly appears out of nowhere behind Missingno, facing the screen, having a suction effect from either side (Not above it) as strong as Dedede's neutral B. This catch is this also sucks up Missingno over a second, and if nobody else is sucked in over the course of this second Missingno is spat out of the computer with HORRIBLE ending lag. The computer can also suck up items in addition to characters, destroying them, not interrupting the move. The computer will vanish after performing any throws.
Down Throw - Eggbound
The computer spits out two "bad" eggs, which are in reality Missingno and the victim, them having been turned into the eggs. This is just like when Yoshi turns you into an egg with his neutral B, having all the same properties and it being the same difficulty to get out. Button mashing helps you in escaping, but if you're at a high percent your foe will likely get out before you. Only use this throw when your percentage is a good bit lower than your enemy's to ensure you get out first to punish them, unless you're very confident in your button mashing skills. Missingno's egg is always spat out to the left from the cpu while the victim's is to the right, so if you use this up against an edge to the right, you can sentence a foe down to their doom as they fall, should their perecentage be high enough.
Forward Throw - Check Stats

The stats of Missingo as in the Pokemon Red/Blue show up on the screen, then a poorly drawn sprite in the style of Red/Blue shows up for the other character. The characters have various made up stats (Save the actual Pokemon) and their movesets are listed as their four special moves.
Being processed into an ugly gameboy sprite is apparantely painful, as it deals an insane 16% to the victim - as much as Dedede's unholy bthrow. However, Missingno also takes damage from the attack, but due to it changing little in the view of the computer it takes only 8%. Pokemon from the 1st generation also take only 8% due to having been in this sprite form before, and Pokemon from the 2nd gen and on take 12% due to being Pokemon but not having been in the form before. This self damage ignores any substitute you have, going through it to you, so that's the main time you'll want to actually use this.
Up Throw - Withdraw
This is a relatively standard throw. Missingno is spat up with average knockback upwards with 9% damage, and the victim is spat out after the victim with the same damage and knockback. Due to Missingno taking the hitstun first, it recovers from it earlier, and thus can do a dair down onto the enemy before they can move (Assuming you both had close damage percentages so you were launched a similiar distance.), giving a point to using this throw.
Back Throw - Withdraw Error
The computer starts the animation for the uthrow, but has an error withdrawing Missingno, letting out mass beeps and bloops. The computer spits both characters out on either side of itself and explodes (Doing no damage/knockback), and the game freezes due to the error. . .For everyone and everything except Missingno. Foes are stunned as if they were hit by ZSS' dsmash, them being stunned for less time at lower percents. A single second is the maximum stun time, and no matter how fast players get out of the freeze the rest of the world will be frozen for a full second. This is a decent set up at high percents, it being nothing more than a potential damage racker at lower ones, that being all the time you have to hit them with.
Pummel - Withdraw Item
This causes an item to be spat out of the computer at random, doing no damage to the foe. If items are turned off, one of the items from Missingno's side special will pop out of the computer, them having the same properties and the same likelihood of showing up. This is rather laggy, and it's rare you'll be able to get 2 items from this unless the foe has high damage. This in no way harms the foe.
$#@&*)(#@$&*)(#@)!@)# FINAL SMASH $&#*()#@&$*()#@
Final Smash - Rare Candy Cheat
In Red/Blue, it was possible to catch Pokemon over level 100 using the trick to find it, Missingno itself included. If Pokemon over level 100 gain any experience, they revert to level 100, but they could still be used in link battles with their uber stats without gaining experience, and could be leveled even higher by using rare candies. However, level 255 is the max, and using rare candies beyond this point reverts the Pokemon to level 0.
In this Final Smash, a cinematic occurs as Missingno is seen against a glitchy background and mass Rare Candies fall from the sky. Missingno will rapidly eats the rare candies, advancing from its base of level 5 up to level 255. Missingno eats one rare candy per milisecond, meaning it eats 100 rare candies per second. A number is displayed in front of Missingno indiciating what level it is/how many rare candies it's eaten. You can press A at any time to end the eating of the rare candies, and Missingno's stats will be buffed times its new level. So if you were, say, level 182, you'd become 182% stronger in all stats. However, if Missingno eats enough rare candies to reach level 255 in the cinematic, the next one it will eat will revert it to level 0, the cinematic ending and Missingno not getting any buff at all. You have to be very careful with when you press A, as if you're too greedy you won't get anything at all.
This lasts until Missingno KOs someone which means it "gain experience", reverting it to it's default level.
$#@&*)(#@$&*)(#@)!@)# OVERALL PLAY STYLE $&#*()#@&$*()#@
Overall Play Style - Not Meant to Exist
Missingno is extremely powerful, on the level of Ganondorf and Bowser with ease. Missingno also has decent skills in gimping with its neutral B/A and nair. Missingno also has a move that could very well make a typical heavyweight very broken - substitute. This allows Missingno to prevent foes from punishing its whiffed moves with nothing more then a throw. However; without substitute Missingno dies much faster then most foes with it's horrendous weight and bad recovery, so it balances out somewhat.
Missingno will want to have a substitute up at all times, whenever possible. Nearly all of Missingno's moves are very laggy and the faster ones are few and far between. However, with substitute, you can use high risk high reward moves with little fear of the risk, as all you're risking is being grabbed and thrown. Foes with powerful throws with KO potential do very well against Missingno, such as Dedede, Mewtwo, Ness, and Wario, while foes with horrible throws like Marth and Ganondorf do quite badly.
Missingno can nearly always be doing something useful and has little excuse to taunt. Obviously the first thing Missingno should do when it has a free moment is put up a substitute if it hasn't one already, and then it can start producing items with its side special or heal itself with its uair. While the foe is off stage giving Missingno time to do this, Missingno could also choose to instead make their recovery slightly more difficult by spamming water gun, or perhaps its nair or even potentially dair if Missingno gets more daring.
Missingno has little problem approaching in comparison to the average heavy hitter due to it lacking fear of being punished. Whenever Missingno's substitute goes down, one must seize the opportunity and attack Missingno relentlessly, not giving it a chance to raise another one. Quick foes are better at this while slow ones have a much harder time keeping the pressure on Missingno. If Missingno is left alone for even the briefest period of time, you'll have to do 25% more damage before you can KO it. Thankfully though, after Missingno gets to 50% damage or so, pretty much any half decent KO move will finish it. Good Missingno players will be able to last to very high percents against foes with bad throws by constantly finding time to put up new substitutes. Missingno can go down very quickly or very slowly. Just make sure you keep your match up with Missingno from being something that shouldn't exist.
$#@*&($#@&()*@
@#&$*(#@
EX
TRAS $#&*@()@$#
#$&#@*()$@#&*( EXTR
A
ANIMA
TIONS @#$&#*@)
Down Taunt - Missing Limbs
Missingno lets out a random noise from Red/Blue, then a random limb from a random enemy turns invisible for 10 seconds. You must wait 10 seconds before making another limb vanish, this taunt only letting out the noise until then.
Up Taunt - Black and White
Missingno lets out a random noise from Red/Blue, and the screen loses all color, going into black and white for 5 seconds.
Side Taunt - I need Scissors! 61!
Missingno transforms into a scissors shape and the number 61 appears in front of it, then Missingno turns back to normal, the 61 vanishing.
Entrance -Wildfire
Missigno slides in from the left side of the screen into it's current position, and the text "Wild Missingno appeared!" shows up below it briefly
Win Pose 3 - Bad Egg Curse
All the losers are seen as bad eggs. Missingno then comes in as the monstrous bad egg from its fair with a mouth and eyes and roars at the screen menacingly.
Win Pose 2 - Evolution
Missingno flashes between itself and one of five random Pokemon, doing the original evolution animation from Red/Blue. Missingno will evolve into either Rhydon, Kangaskhan, Clefairy, Clefable, or Ditto, then let out a cry and strike a pose.
Win Pose 4 - DANSLK$#@U*(#
amlskdj4823987498JNlkawn4kew7e89&$(*@#NKLSAnka398$&(#W*lkaw43487wn43&$I#$n3lk$##KL$34LK$#(*@)#*)(@Y$#&*#@&*(#Y*nnbajlkbnklfalkadsnlvbzlkrdn472386*$#HKL.
Win Pose 1 - Music Change
Missingno performs it's dtilt, it's victory theme changing to one of the themes able to be played from it's dtilt at random.
Loss Pose - Pong
Due to being physically unable to clap, Missingno's loss pose is rather random. Missingno separate it's top half from it's bottom half, splitting itself in two, then has both halves face the the screen from the side. A bad egg appears and heads towards one of the two halves, and the two halves play a game of pong with each other using the bad egg.
Draw Pose - Nfldsnalku4389unkad
MDFSLkaj48932u89NKlh34wajelnalkjnduisafh8i3w84997nalkdfnalksruoewiurioh43w43890432879q43279nfklndsakljnfdnreu8eu284937*#&*OW&IENjnsjfklanlk8w4&#LO@#N@K~LKMlfpommsfhfdsewjSJKLNSAENSALLKD:rweriosadfmlkmkl;MDS:kdDKL:dml:DMlKAmdskldsjAHWEU&*(Q#*()
Victory Theme - Random Sounds
Completely and utterly random sounds are played at random speeds and volumes in mass, all from the original Red/Blue games.
$&*()@#$
Kirby
Hat @$*(#@
Kirby Hat - Missing Hat
Random numbers randomly appear on Kirby, and he will ocasionally turn into another Kirby enemy briefly with the same body structure, such as Waddle Dee or Waddle Doo. Kirby gets Missingno's neutral B upon copying Missingno, Water Gun. It functions normally, but Kirby's standard combo is also replaced by Water Gun. Can't copy Missingno without using Water Gun twice, right?
&*()$@#) Snak
e
Co
dec Conversation *)(@#$!@*()#
Snake: Otacon, come in!
Colonel: I'm not here right now. Please leave a message after the beep. BEEP!
Snake: Errr. . .I was calling for Otacon, not you, Colonel. . .
Colonel: I was a North American fall webworm in my past life. What were you in your past life?
Snake: What the heck are you talking about now? Get Otacon!
Revolver Ocelot: I am a cute little school girl! I love sugar, spice, and everything nice! La dee la dee la!
Snake: . . .Creepy. . .
Missingno: FKJLDSNAKJLNEWAKLEI$#*&#@)(478()$&(*)EW&$*(WAJKLENAJKLNDSKLJAHKJDNSAJDLHDFKLFDSHUREWUIOEUQWIEUWQOPEWUOIPEWUOIPEWQIUOQPIONFJDNLDSKFDNSLKVM><CXMZCX!
Snake: . . .
-End Transmission-
$#@&*($#@ Stage - Glitch Express @#&$*(#@
This is a scrolling stage with two possible start up locations. The first starts at Viridian City, while the other starts at the Safari Zone. Once you've gone through a loop of one of these courses, you'll go through the other course. We'll first start with the course starting at Viridian City.
The two courses are based off paths needed to perform two infamous glitches. The first is the the easiest way to encounter Missingno, while the second is the one needed to get to Glitch City.
Course A: Hunting Missingno
Part 1: Old Man's Demonstration

You fight on the roof of the Virdian City gym, which is owned by Giovanni, leader of Team Rocket. The size of the gym is that of Battlefield, but there are no platforms on top of this building. The gym is currently under construction and being expanded, some construction workers on either side of the gym making large pits that prevent you from simply getting off the gym to fight normally and making this function as a normal stage. You fight here for around 60 seconds.
Occasionally a Team Rocket member will come up and climb onto the roof, throwing a pokeball that releases a random Pokemon that is hostile to everyone. Sometimes he will instead throw an ultra ball which functions like a master ball from Missingno's side special, causing foes to be trapped inside the throwable item until they button mash out, it being as hard to escape as a grab, but this is easy to dodge. The Team Rocket member will keep throwing balls until he's KOed after which he'll fall off the building, having 25 stamina.

After a while of fighting on the top of the gym, an old man will come across the bottom of the screen in front of the gym, down on the ground. He'll sip some coffee and said "Ah, now I've had my coffee and I'm feeling great! What? Don't you know how to catch Pokemon? I'll show you how then.". A Weedle will then come onto the screen and the Old Man will throw a pokeball at it. This has no effect on the battle, although it does change the name tag of player 1 to "Old Man" (Bypassing the 5 character limit) while the demonstration is in effect, or if they have no name tag, that of their character. If you kill somebody while your character is labled as "Old Man", the announcer will actually realize this and refer to them as such on the results screen. After this occurs, a Dragonite flies overhead, and the camera starts following after it.
Part 2: The flight to Cinnabar

Pidgeot is a single average sized platform (1.5X the size of a battlefield platform) in the air with ungrabbable ledges, being sized up slightly to make a reasonable arena. Other generation 1 flying Pokemon will join the flight as Pidgeot flies to Cinnabar, mainly Pidgeots and Fearows, coming in and acting as other platform when they appear. This phase of the stage lasts 30 seconds.
Part 3: Missing Numbers
Dragonite will land on Cinnabar Island, then be off on it's way. You fight on top of the abandoned Cinnabar lab, it having the same size as the Viridian City Gym. The water here functions like the water in Melee to keep this stage as a standard one, or at least a counterpick. However, this is far from without hazards. . .Why do you think we talked to the old man and flew to Cinnabar?
Various glitched Pokemon not meant to appear here will come up out of the water and climb up the lab to attack, being hostile to everyone. Upon getting on top of the building they'll perform their pokeball Pokemon effect (Pokeball Pokemon positions are made for all the Pokemon that appear here.). They thankfully come up fairly rarely, only one per 30 seconds. The Pokemon that come up out of the water depend on the names of the combatants, the name of the person to be looked at being chosen randomly each time. The system is then the same for Missingno's fsmash as for which Pokemon appears. If Missingno itself is to appear, he'll act as an extra combatant hostile to everyone, but as weak as an alloy. For the Kabutops Fossil/Aerodactyl Fossil/Lavendar Ghost, the same thing happens, but Missingno will exclusively use his dsmash/usmash/nair when spawned, respectively. If a Missingno touches an item (It being unable to pick them up as a stage hazard), six more of it will appear, causing this stage to much more chaotic with items turned on.
This phase of the battle lasts 2 minutes, then Dragonite will appear and you'll redo part 2 of course A before starting up course B.
Course B: Finding the Lost City
Part 1: Safari Hunt
You fight at the entrance to the Safari Zone on top of the building that allows you to enter, it being the size of Battlefield. On the sides of the building are some people working on expanding the entrance building in the same manner as the workers expanding the Viridian Gym in Course A, making pits on either side. Towards the camera (The opposite of the background, the camera being zoomed slightly more out more than usual from the fighters) you can see the actual Safari Zone and all the various Safari Zone Pokemon that reside there. The common ones are regularly seen as extras not affecting the battle, but the three rarest ones actually do affect it, one showing up every 30 seconds.
Chansey: Comes up to the entrance building and uses softboiled, throwing an egg up on top of the building. If items are on, this functions as a containe with another item inside, otherwise it simply heals 5%.
Kangaskhan: A baby Kangaskhan (The ones seen in the main kind of Kangaskhan's pouch) wanders up onto the building, climbing up. It functions as a weak throwing item during this time. However, after 15 seconds of this, an adult Kangaskhan will climb up on top of the building in search of her baby. If anyone was holding the baby when she came up, she'll rapidly uses Missingno's ftilt, Dizzy Punch, on them, until hitting them or the stage changes to the next part. After hitting them once or getting on top of the building to find the baby not in anyone's possession, she'll put the baby in her pouch and hop off. If you throw the baby off the stage (You kill babies! You're so cruel!), the adult will not appear.
Tauros: Tauros hops on top of the fence border of the Safari Zone, then bounds up on top of the roof. If no character wearing red appears, Tauros will simply hop off the building back into the Safari Zone, having no effect, but if there is one Tauros will charge at them, being a hitbox that does 15% with above average knockback. Tauros will run off the stage to it's doom, moving at the speed of Captain Falcon's run.
After a minute and 30 seconds of this, Dragonite will swoop by and the camera will follow him, and you'll have another flight to Cinnabar phase.
Part 2: The flight to Cinnabar
Identical to the flight to Cinnabar found in course A.
Part 3: 500 Paces
Identical to the Cinnabar Island phase of the first course, except no Missingno/glitchy Pokemon will appear to attack you. This part of the battle lasts until the characters walk a combined distance of "500 steps", a "step" being the distance of a quarter of a Battlefield platform. This means this phase lasts around a little over a minute in a one on one, while it's very brief in a FFA, lasting only 30 seconds or so.
After walking your 500 steps, you'll hear a "Ding-dong!" sound and a voice saying "Time's up! Your Safari game is over.". A cinematic will occur as the screen blacks out and the characters are seen walking out the entrance of the Safari Zone building as the clerk says "Did you get a good haul? Come again!". When you walk out of the Safari Zone, the cinematic will end, and you'll find yourself in glitch city.
Part 4: Glitch City

In the center of the stage is a bunch of water that function as a normal platform, and on the sides of the stage is ground (Albeit really glitched up ground with random pieces of terrain making it up) that functions like the water in Brawl. This will regularly switch around back and forth, and if you're sinking in the terrain that is functioning as water you'll be shifted up above the ground. While there's nothing to prevent you from walking off the sides of this stage, you'll appear on the other side of the stage after doing so. The only way to KO anyone here is off the top of the screen vertically. The background is made up of random spliced graphics and numbers which are constantly changing.
After 2 minutes of this, Dragonite will fly in to take you out of glitch city, the only way out of Glitch City always having been to fly out. You'll do the usual 30 second "Flight to Cinnabar" phase, then Dragonit will land on top of Giovanni's gym and you'll go through course A.
CREDITS
-ANJDSKNDSJQUEWOQPUEOIQWUOJIASCNLKANLM<DMSALKD$#()@*)($#@
-NLKJDAH*(@#&(*)@!#&(*)@#&(#*@HFDKJfdskjahfdkjsahf832749
-nskJ$#IUK4ewji$#U*)($#kmnl4j43k$U)(#(UE*AMNLKnjk434j$#()$@mkl90098ar
---WAMY--
-NJKDSH$K389432870937eN34j32kl4uwo384(890w$43wklm43jlkU*$#43uw8943w
-nJLKSNlrkjaesur589347898794(*37489u983wajnlZKHew4aykEUY8w4y3wa7878wo7WKY34a8y4
-NDRJSLh4wa89437987wwaeimlkdnslvkjdashrYU*&%*(W4uwOnekjlandsjklfhadskr7a8w4783278
-Smashbrosmike
-MFDkosjrua438578328979832789&#*(4a7048w74893w4nkjlasmdfkasldnkr328472890421798dsa
-fmsdakjlfsdKJRHwauiyruiewayriouweuiYOI$&*#($&(*#@&8HjahjfkdnsKJNldshfdUER*(E&98ws
-SDFJKLsDHufiwa789r79849873789jkfnjkalfdsnkjfdsafdhfdas78asfashdsakjasdrhkjary8SE&*ahrkjshufdusfysioasduibdnsakjcnjklvcxjkzyfueryauyiwaeorunfjkssandlkjfdjkas
-HyperHopper
-FNjlkdsahriuewur8970947023498748932u482390u429343u4389kjndskjalfmklds,mv;lczx,;lkrisdar7853q7we09&*)(EW&$89w78wa9498704w89wa
-GenericTacoKid
-FNlkjfaslkjdhflkadsur73289047209384789237407498390jkfnsdjalkfnlkjdsajfdkdhfkdas789794230984327894njknkljasnkjdlvkljmvcxzklvxcmlvkzxvxzclkvxzclkvxczlkzvxclk
Missingno was win. The design was awesome and fitting. Well done again, MW.
half_silver28
Smash Ace
YES. this set is just as epic as when I previewed it. I can quite plainly say that the randomness of missingno's attacks are awesome & make for a very fitting set. also, ^&$#@#$(*&^%^$!&^%^*!
@$#%$%^: Ah, I've been waiting for you to post this. I saw it back in MYM4, it was awesome. You took it down though, so I never got to finish reading it.
Still as good as it was last time.
@Super Star Guys:
And there is my competition. I'm scared, that is a great set.
MiNda and Wolf were pretty good.
Still as good as it was last time.
@Super Star Guys:
And there is my competition. I'm scared, that is a great set.
MiNda and Wolf were pretty good.
Smady
Smash Master
Reading Missingno, I am really enjoying it with all the references and such. The scrambled text is genius and the entire moveset is full of similar quirks. The craziness and random power is spot-on with how I'd imagine Missingno in Smash form. Good, very good, although this obviously isn't one of your best.
Highlights: up smash and SBM in the credits.
Highlights: up smash and SBM in the credits.
Hello. This is an utterly irrelevant post.
Do not report it, because it will become very useful at some point. Do not ask when, I do not know. It could be tomorrow, it probably will be. This will be the home place of a certain extra for Mr. Saturn.
The extra? Who knows, I'm not telling. It's probably useless, but it's a gift for people with slow computers. I'll tell no more than that.
You will forget you saw this post on the count of three.
1...
2...
3!
OMG MISSINGNO IS SO AWESOME IT WILL WIN MYM5 IM GONNA SUPER VOTE IT IT PWNZ LOLOLOLOLOL!
Kris121
Smash Journeyman
Ahh my eyes!!! I just logged in and look what I see. MASSIVE AMOUNTS of win! Kibble i love the new super star helpers. Maybe you'll combine the sets and then call it one set. Idk. And hskdf23r8#$%W9u0ha8235#$ Masterwarlord. Excellent representation of Missingno.
Diagonal special is win. Midna and link... i might've seen it before but pretty good. Win.
Win Win Win Win Win Win Win Win Win Win Win Win Win Win Win Win Win Win Win Win Win
Win.
Diagonal special is win. Midna and link... i might've seen it before but pretty good. Win.
Win Win Win Win Win Win Win Win Win Win Win Win Win Win Win Win Win Win Win Win Win
Win.
SonicBoom2
Smash Journeyman
Just read Missingno.
All I have to say is that was pure awesome. Loved the fd2erwef43543tergdfsdf*$#(%&$%4 parts.
All I have to say is that was pure awesome. Loved the fd2erwef43543tergdfsdf*$#(%&$%4 parts.
- Status
- Not open for further replies.