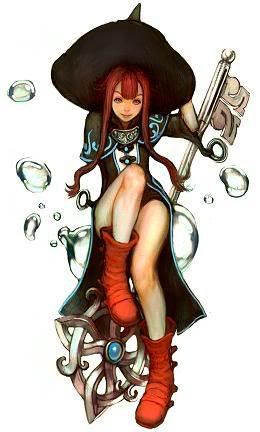
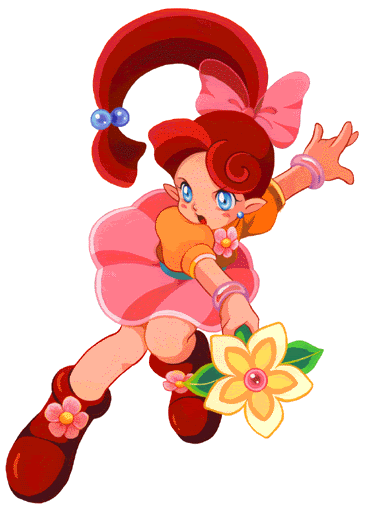
• Welcome to Smashboards, the world's largest Super Smash Brothers community! Over 250,000 Smash Bros. fans from around the world have come to discuss these great games in over 19 million posts!

    You are currently viewing our boards as a visitor. Click here to sign up right now and start on your path in the Smash community!

Make Your Move 5

Status
Not open for further replies.
D

Deleted member

Guest
DownB: Poo concentrates for a few seconds, then shouts and becomes a copy of his enemy, with all their attacks. He stays in that form for five seconds or so, then transforms back into his regular form. He can only transform into someone he's fighting. If there are multiple enemies, he becomes one of them at random.
If I do say so myself, that isn't really a bad idea. It could be interesting, although the randomizer could be fixed.

The rest is sh*t, though it's to be expected. :p
 

Red Arremer

Smash Legend
Joined
Nov 27, 2005
Messages
11,437
Location
Vienna
Lip


Originally appearing as major character in the first installment of the Panel de Pon-series (outside of Japan Tetris Attack), Lip is the fairy of flowers. Her magic resolves around nature and flowers. But don't underestimate this young girl, as she is fairly strong. Only few people can compete with her when it comes to magical power, so keep an eye out!

Stats
Size: She is about the same height like Olimar (without Antenna), maybe a bit taller
Weight: Only Jigglypuff and G&W are lighter than Lip
Speed: She walks and runs pretty much as fast as Peach
Power: She has little knockback in most of her attacks like Metaknight, but those being fairly strong will be told in the moves-section
First Jump: Her first jump is comparable to Lucas'
Second Jump: Her second jump is comparable to Link's
Fall Speed: Wario-ish kind of floaty
Crouch: She can get even smaller by crouching and so dodge most projectiles, but she cannot crawl

Standard Attacks
A, A - Lip slaps, first normally, then backhanded. It comes out fast, but does not much damage or knockback
Ftilt - A bit stronger backhand slap, the knockback is, for a tilt, fairly decent, but the damage is low and she needs a little recover from being so vicious!
Utilt - She raises her hand upwards and throws some kind of fairy dust, which takes a triangle form, in the air. The range of this attack is good, but knockback and damage are not that high.
Dtilt - Finally, Lip's Stick makes an entrance. Like Wario's fingersticking, Lip points her stick in the direction she is looking it. The attack comes out extremely fast and flowers the enemy, however, it does not much damage but nice knockback. The range is decently good.

Fsmash - She plainly bats with her own rod and hits the enemy like other characters do if using her stick as an item, however, it has better knockback than the item. If she carries a Lip's Stick-item, she will use her own, however, the flower takes the size of two hits.
Usmash - Once again a hit with her staff. It's straight upwards. If she stabbed her rod upwards, a small cloud of magic will come out to make a second blow. The first hit does more damage but has low knockback, the second hit does the knockback, but only low damage.
Dsmash - Lip's worst smash attack, she tilts her hips to both sides. It has extremely low range, only mediocre damage and knockback, but is useful for clearing space if getting attacked by more than one person.

Aerials
Nair - Much like Zelda, Lip turns around in the air, using magic coming out from her hands. It's a bit slower than Zelda's attack and has less range, but more damage and knock-back
Fair - Lip does an elegant sweep with her right hand and the coming out magic. Fast with good knockback, but bad range.
Bair - Lip kicks behind her. This move has a sweetspot, which would be her toetip. If she connects with it, the move is comparable to Falcon's Knee of Judgement. If she doesn't, the move is utter crap.
Uair - Lip sweeps her magiced hand above her head. It's much like Fair, just upwards.
Dair - First Lip "drills" her legs down, and then does a split with them. This attack has incredible range (well, for Lip's small body, anyway) and comes out incredibly fast, but, with most of her attacks, the knockback and damage are mediocre.

Situational Attacks
Dash Attack - Lip bats her stick in front of her like some beginner a sword. Compared to most of her other attacks, it's pretty good, but it comes out slow and needs much recovery - the knockback and damage are fairly good, though
Ledge Sweep (under 100%) - Lip backflips onto the ledge, kicking whoever stands too close
Ledge Sweep (over 100%) - She pulls herself up and bellyslides over the ground, clawing around with her hand
Get up Attack (under 100%) - Lip hops onto her feet, punching in both directions and then turning sidewards again.
Get up Attack (over 100%) - Sweeping with a magiced hand, she struggles herself back up to her feet.

Specials
B - Panel -- Lip sweeps her stick, summoning a Panel flying in a ballistic curve into the direction. The effect of the block depends on what colour it has, and some are more seen than others:
Yellow (Star, 40%) - No element, does low damage
Green (Circle, 20%) - No element, does low damage, however, flowers
Purple (Diamond, 20%) - Dark element, poisons, medium damage
Red (Heart, 10%) - Fire element, explodes on contact, high knockback when exploding, however, low damage
Cyan (Triangle, 10%) - Ice element, freezes enemy on contact, high damage
Like Peach's veggies, the Panels can be grabbed by an opponent in the air, and thrown back. Other than that, the Panels work the same like said vegetables.

B side - Fairy Dust -- Lip blows a cloud of fairy dust. It flies slowly and slightly above the ground. It has the aprroximate range of one of Luigi's fireballs, and pretty much works kinda the same.

B up - Flower Glide -- Lip pulls out her stick, turning it into a giant blowball while jumping into the air, and slowly glides umbrella-esque down. This move does no damage.

B down - Garbage Block -- Lip calls down a small garbage block from the air. This move is simalar to Pikachu's thunder mixed with Kirby's stone. It lands and breaks on the first obstacle it hits, doing nearly the same damage as Kirby's stone. Only Lip herself can't be damaged by it. It needs some time to come down and is for this a bit weak, but if used right Lip is able to knock out her enemy.

Grabs, Throws
Grab and Pummel - Lip grabs her opponent at their collar and slaps them.
F throw - Lip pulls her enemy close and bats them with her stick.
B throw - Same as F Throw, just with Lip turning herself around while batting.
U throw - Lip simply grabs the enemy, pulls them closer and throws them up.
D throw - Lip pulls her opponent closer, throws them down and jumps onto them, hopping off of them like off a trampoline.

Misc. Animations
Sleeping - She curls up like an infant and dozes cutely. Awww...
Dizzy - She stands, shaky, while moaning painfully

Final Smash - Tetris Attack - Yes, I know the name is oh-so-witty, but come on, Super Dragon isn't that good either! Anyway. Lips makes a cute little battlecry and jumps in the air. It starts raining Garbage Blocks and Panels in random colours, however, these cannot be grabbed. Due to the high amount of Panels falling, of course there are more rare Panels there, as well! The Final Smash is finished with Cordelia, the final boss of Panel de Pon, appearing in the background, and blowing a comet onto the stage, which explodes. After this, Lip appears again where she was standing.

Taunts
Up - Lip does a little victory dance.
Side - Lip turns around to look at the back of her skirt, wiping some dust off.
Down - She puts up her thumb and says "Yay!"

Entrance
A big yellow flower appears and Lip jumps out of it, the flower then disappearing.

Alt costumes
Yellow Shirt, pink skirt and bow in her hair, brown boots, reddish brown hair (default)
Red shirt and hairbow, light pink skirt and boots, blonde hair ("Barbie Lip", set for Red Team)
Green shirt and skirt, orange-green bow in her hair, brown boots, mud brown hair (resembling Forest Fairy Thiana from Panel de Pon, set for Green Team)
White shirt, skirt, and boots, deep blue hair, purple hairbow (resembling Water Fairy Elias from Panel de Pon, set for Blue Team)
Purple skirt and shirt, white hairbow, green hair, purple boots (resembling Ocean Fairy Neris from Panel de Pon)
Black shirt, boots and hair, red hairbow and gray skirt. ("Emo Lip")

Victory Poses
Up - Lips spins around several times, then hops, saying "Yatta!". The hopping is looped.
Down - Lip sits on her big yellow flower (as in the menu in Panel de Pon), winking at the viewer and giggling.
Side - Lip smiles, holding up her stick, which is blooming and glowing slightly

Codec Converation
Snake: Mei Ling. There's a small girl wielding a giant flower.
Mei Ling: That's Lip, Snake. She's the fairy of flowers, and what she uses is her magical wand.
Snake: A fairy? This place sure gets odder every second I'm here.
Mei Ling: Watch out for her attacks. Her magic contains parasitic flowers which will drain your lifeforce.
Snake: So you mean she uses vampire plants?
Mei Ling: Yes. Be careful, Snake. She also will shoot blocks at you, which can on occasion explode.
Snake: Cute little girls having such vicious flowers as pets and throwing bombs in block form. I should get myself used to seeing a lot of strange and surprising things here.

SSE
Slight changes are made to the existing SSE.
When Olimar gets attacked by the giant R.O.B., Lip first wants to help the small guy, but Captain Falcon is too fast. Lip stands next to Olimar and the one single Pikmin when they look at the half genocide Falcon did with his move. She joins these two, then.

Items
Lip's Stick, duh

Assist Trophies
Windy (the Fairy of Air)
Windy will come out and fly into the air, starting to blow strong gusts over the battlefield (like Whispy Woods). She will occasionally change the directions of the wind. The user of the AT is not affected by the gusts.

Stages
Lip's Flower Garden

Basically, this stage is set up on a platform like Final Destination. There already are blocks randomly set on the ground of the stage, and others will descend from above. If the battle field is pretty high, the rows start to slide into the ground. This stage is like a Panel de Pon screen, just without walls caging the players. However, someone is "playing" on this stage, as well, a cursor (which is no obstacle) slides around and swaps out the panels, changing the stage constantly as much as the descending blocks do.

Logo
Simply a Panel with a heart shape in it.

Music
Panel de Pon - Lip's Theme
Panel de Pon - Forest Stage
Panel de Pon - Water Stage
Dr. Mario - Chill
Planet Puzzle League - Stage 3
Planet Puzzle League - Stage 4
Tetris - Type A
Super Mario Land - Muda Kingdom

That's my first moveset ever... So yea. ^_^
 

Red Arremer

Smash Legend
Joined
Nov 27, 2005
Messages
11,437
Location
Vienna
I always thought Lip would be a great character, Spade...perhaps you should expand on this moveset and post it again?
I already spiced her up a little in MYM3, and I'm honestly a little tired of working on her... Expect a remade MYM3 set from me, though.
 

C~Dog

Smash Champion
Joined
Feb 6, 2009
Messages
2,908
Location
Land of Ooo
# Zant by Condog
Fits the character well with the magic and crazy arm motions like from DragonBall or something, but it needs moar detail and less generosity with moves to really be up there. I mean, a few of the attacks seem generic. It's very good for a relatively, completely new guy.
What do you mean by less generosity? As in, making some of them slower, less damaging, etc? And yeah, i'm sloowly going back and addingdetail to his moves lol

Thanks for the review!

BKupa666 said:
We discussed it...as a K.Rool fan, he said he would do it, even though it would get ignored. I sent it through a different source to arouse more attention. I E-Mailed K.Rool in particular cause he is a shoe-in for SSB4 and needs to be portrayed as original.
Oh, well that's all cool then! :)
 

Tanookie

Smash Journeyman
Joined
Nov 17, 2008
Messages
436
Location
*sends Sundance a leather harness on Dragon Apprec
I don't care how many heads it has...nothing's going to stop us now!


The master Mercury Adept
MIA
has joined the Brawl!


OVERVIEW

[Character Biography]

Mia is a kind young woman (age 17 by the start of Golden Sun) who was presumably born and raised in the wintry town of Imil in the continent Angara’s northernmost region, along with fellow Mercury Adept, Alex. The two of them are, at least by the present age when the events of Golden Sun begins, the last known living descendants of the ancient Mercury Clan who once lived in the region to guard the nearby Elemental Lighthouse of Water, Mercury Lighthouse.

As Mercury Clan members, Alex and Mia are Mercury Adepts and share the abilities of healing and the conjuring of watery and chilling Psynergy-driven magic, and they are the only two individuals on Angara able to enter and exit the normally sealed-off Lighthouse at will. As the upholders of their bloodline's decree to ensure the Mercury Lighthouse is never activated, Alex and Mia lived in Imil together to support Imil’s populace year-in and year-out, taking care of the ill and battling the regular cold and flu epidemics that Imil experiences annually. In addition, Mia lives with and is deeply close to two child apprentices.

Mia's ability to use the Ply healing Psynergy has ended up earning her a degree of fame across portions of Angara (who of course have no idea about the art of Psynergy in general), with people calling her an “angel” both as an endearing nickname and, in some cases, as acknowledgment that Mia must be some sort of angelic entity in human form because of her powers.


[S.P.E.C.I.A.L. Mechanic: Mercury Djinn]

Golden Sun and its sequel were widely acclaimed titles—not so much for their storyline or characters (as both were rather shallow), but for its unique battle system. This system utilized little critters known as Djinn, which are spirits that embody a particular element: Venus (Earth), Mars (Fire), Jupiter (Wind), or Mercury (Water). By mixing and matching Djinn in the game, you could alter your character’s class and available Psynergy. This gave the game a huge variety of class combinations, leading to innovative battles that were never the same twice. In Smash, Mia brings in her own Water Djinn, which in-game would bolster her stats and allow her to summon powerful creatures specific to each element.

When you use a Mercury Djinni—her Neutral Special—you use an effect randomly associated with that Djinni (Mia will call the Djinni’s name out to let you know which one you are using) and the Djinni in question goes into “Standby” mode. You can look at the number of Standby Djinn you have by looking at beneath your own stocks; a series of Djinni-face icons will be down there, the number indicating how many you have used. The maximum number of Djinn you can have on Standby is seven. When you have Djinn on Standby, your stats will suffer according to the chart below:

Therefore, if you want to play conservatively, be sure to use Djinni sparingly. If you want to “Set” a Djinni (take it off Standby), press B while shielding. This randomly Sets one Djinni, increasing your stats if applicable. This effect takes about one second, and gives Mia super armor while doing so. The number of Djinn on Standby determines the variety of creatures you can summon when using Mia’s Final Smash; after the Final Smash, the number of Djinn you use go into “Recovery” mode, meaning that they will not return to Set mode until a certain amount of time: 5 seconds per Djinni—a Djinni in Recovery mode is indicated by a grayish icon on Mia’s damage meter. Each time a Djinni leaves Recovery, a quick blue light flashes in front of Mia and the Djinni’s icon disappears from Mia’s damage meter.

Just in case you missed (or didn’t want to read) that whole monologue, here’s a quick rundown on the different Djinn Stages:

  • Set: No icon on Mia’s damage meter. All Set Djinn have an equal chance of appearing when Mia’s Neutral B is activated.
  • Standby: One icon on Mia’s damage meter for each Standby Djinni. Standby Djinni decrease your stats depending on the number, and they are directly related to your Final Smash; the more Standby Djinn you have, the more options you have when summoning (see Final Smash for more information).
  • Recovery: Indicated by a grayed-out Djinni icon on Mia’s damage meter. After being used for a summon, Standby Djinn switch to Recovery Mode, during which time they cannot be Set or used at all. Each Recovery Djinn takes five seconds to automatically set itself to Mia. When a Djinni is set, Mia will flash blue momentarily and the icon will disappear.


STATS

Power: 6 - Mia’s strength alone is not very high, but her Psynergy helps compensate for that. However, even that isn’t too strong, as Mercury Psynergy has a reputation for being the weakest offensive element.
Size: 5 - Mia is an average human with average human height. Nothing much to say here…
Weight: 3 - As a young woman without much girth behind her, Mia is understandably light. This also gives her a mid-slow falling speed.
Speed: 4 - She’s definitely not made for speed. Mia’s dash is only slightly faster than Link, showing her lack of athleticism.
Range: 8 - Many of Mia’s moves reach clear across the stage, and her smash attacks have large hitboxes as well.
First Jump: 4 - Mia jumps into the air. Nothing special, really…
Second Jump: 4 - Once again, nothing too fancy. Mia spins upward into the air, gaining some extra height. She’s a below-average jumper.
Recovery: 5 - Since Mia’s recovery gives her both jumps back, it’s quite useful. However, it doesn’t help her recovery any distance on its own.
Traction: 8 - Her warm boots are used for travel in the snow and on ice, and as such she has excellent traction.


SPECIALS

[Neutral Special - DJINNI UNLEASH]

Ah, here we are…the cornerstone of Mia’s play style. When you use this move, the outline of a blue Mercury Djinni appears in front of Mia and she raises her ankh to the sky; one of the following effects will then randomly occur after half a second, during which time Mia shouts the Djinni’s name. Once an effect has occurred, that Djinni goes to Standby Mode and the effect cannot occur again until the Djinni in question is Set. All of these attacks have low ending lag. Since Mia calls out the Djinni’s name before using it, you can hit the shield button during this time to cancel the attack. The Djinni in question will then be moved to a random place in the lineup.
  • Hail: Large, spherical ice crystals rain down in a diagonal trajectory, starting from one character length above Mia and falling a distance equal to half of Battlefield. Each crystal does around 15% damage, and there are ten crystals total. However, once a player is hit by one crystal, they are dealt backwards knockback, making it hard to connect with more than one hit. Mia is immobile while the attack is performing, and is given super armor.
  • Sleet: A small, thin line of water droplets and snow shoots out straight in front of Mia, going forward an indefinite distance for three seconds. Like in Hail, this attack gives Mia super armor. The water jet has a very small hitbox and deals only 8% damage, but if it strikes an opponent, all of their attacks do 3% less damage for thirty seconds afterward.
  • Mist: When this Djinni’s power is unleashed, a thick white fog spreads outward from Mia’s body, extending a distance equal to one Battlefield platform along the ground. The fog will disappear if it falls off the edge of a stage. This white fog is very thick, so that you can see nothing in it; however, this property is redundant, since the mist causes sleep upon contact (this effect, obviously, does not apply to Mia and her teammates). The amount of time spent asleep is proportional to damage taken (higher damage equals higher time asleep). The fog fades away after ten seconds.
  • Fizz: This was Mia’s first Djinni, so she shares a special bond with it…of course, that has nothing to do with gameplay. Fizz heals in game, and this effect carries over into Smash. When summoned, Fizz appears over Mia’s head and quickly releases a small amount of blue sparkles that fly into Mia’s body, restoring her for 10% damage. This attack obviously, cannot be spammed, since it is completely random and puts the Djinni on Standby. While the Djinni is healing Mia, she can move around—if she is hit while being healed, the move is cancelled but Fizz still goes into Standby.
  • Rime: When summoned, a purple, triangular seal briefly appears in front of Mia before coming into being above the nearest opponent—the opponent must be no more than three stage builder blocks away. The purple seal appears above the player’s head, spinning in place for ten seconds. While that seal is active, the person affected by it cannot use any special moves.
  • Shade: This is a defensively focused move. Shade solidifies above Mia and is absorbed into her body, surrounding the Adept with a light blue glow that follows the outline of her body. This aura appears instantaneously, and lasts for five seconds. During that time, Mia can move around freely, and is given super armor. Enjoy!
  • Serac: The final Mercury Djinni found in-game, it is also the most powerful. This Djinni summons a large icicle beneath the closest opponent less than three Stage Builder Blocks away, giving it a good range. The icicle is about the size of Mia herself, and shoots out of the ground instantaneously. The opponent is caught in the ice, taking 12% in the process, and the icicle then radiates with blue light before exploding, giving great knockback and dealing 10% more damage. It’s one of Mia’s better KO moves, as it deals good knockback and damage. Unfortunately, its randomness makes it hard to rely on.
[Up Special - ICE PILLAR]

A water geyser shoots up from the nearest solid ground (over a gap, it will come up from the body of the screen). The water deals 12% to anyone who touches it. Once it touches Mia’s feet, it catches her and quickly freezes in place, so when the move is complete, you are left with a frozen pillar of ice that acts as a normal solid surface. From this ice platform, Mia can use her two jumps again, although she cannot use her recovery again. Once the geyser freezes, the pillar lasts for ten seconds before melting down into the ground. It can be used by anybody during that time as a platform or wall (for wall jumping/clinging), although it has no ledges. The water moves very quickly as it shoots up, but you stand the chance of losing some distance before it catches you. Be sure to time this move right, and you will succeed! If you use this move while standing on the ground, the pillar will be two Stage Builder Blocks high, making it a handy move for dodging and blocking certain projectiles.

[Side Special - DELUGE]

Once you input the command, Mia begins to hold her staff in a charging position, blue sparkles of light swirling around her. You must charge this attack for a minimum of 2 seconds; particles of blue light will shine from Mia’s ankh when the charge is complete. Like DK’s giant punch, the charge is carried around with you once you’ve finished charging. If you input the command again, Mia will hold her staff up and a wave of water slightly taller than Bowser appears in front of her, rushing forward the entire distance of whatever platform you’re on. This attack doesn’t do any damage, but it serves the same purpose as a Piplup Pokéball, pushing opponents back with incredible aquatic force. When it reaches the edge of the stage, it forces opponents off with a large amount of knockback as the wave crashes.

If you have more than four Djinn on Standby when this move is used, it does not suffer from lower damage and knockback, since it deals none of the former and a fixed amount of the latter. Instead, the wave’s size is cut in half, putting it at about Mario’s height. This makes the wave slower and easier to dodge.

[Down Special - PLY]

Part of the most well-known healing Psynergy moves in Golden Sun, Mia brings in her signature spell: Ply! This attack takes a moment to use; like Deluge, Mia takes on a casting pose, but this attack needs to be charged for a bit longer at 2.5 seconds—you can carry the charge around with you. When you finish casting, a small fairy flies out of Mia’s body, hovering above her head and sprinkling glittering blue dust onto her over a span of five seconds. During this time, Mia is healed for an amount equal to the last attack she took prior to activating the spell (not charging). Meaning, if she just took 10% from an attack before activating the spell, the attack will heal her that amount over the same time. If you take any damage during this time, the healing effect will stop and you will not be healed the full amount. This can help you restore a lot of damage and effectively cancel out whatever kind of attack just hit you, but you need to be sure to stay away while being healed! Healing Varies.


STANDARDS

[Neutral Combo - FLURRY]

This is an infinite combo. As long as you hold down the A button, Mia holds her ankh out, releasing a small gust of sky-blue wind full of snow and ice crystals. The total hitbox is around half Mia’s size, as she holds the staff out at waist height. This wind can trap opponents for rapid hits of 1%, but unfortunately it’s also quite simple to DI out of. The attack’s main advantage is the fact that with every hit, your chance of freezing goes up until it automatically freezes your opponent once it causes 10% in one attack.

[Dash Attack - LEECH LIFE]

No, this isn’t a Pokémon attack. Mia pauses momentarily as she runs, her ankh gathering energy as she swings it downward for an extra-powerful physical strike that deals 9% but low knockback. In addition, there is a 20% chance that Mia’s ankh will release its special ability, in which it steals life from the opponent, sapping away 5% more damage and restoring Mia for the same amount. Both Mia and the opponent are immobile while this effect takes place; it resembles a large mass of white orbs flying from the opponent’s body into Mia’s. The startup lag of this attack makes it very situational.

[Forward Tilt - BUBBLE]

Mia releases a small water bubble about the size of a Smash Ball that floats around the stage, slowly increasing in size until it reaches the size of Bowser, taking approximately fifteen seconds to do so. The bubble bounces off solid surfaces and cannot be broken. During this time, the bubble will trap anything if it comes into contact with it, immediately appearing around them and preventing them from moving—the amount of time in the bubble depends on the damage the opponent has as well as the size of the bubble. While the opponent is trapped, you have a perfect opportunity to run in and strike then with a smash attack. Once the bubble reaches its maximum size, it pops, dealing 5% damage and low knockback. The move has almost no starting lag, making it a viable trapping option; you should always have one of these on the stage.

[Up Tilt - WISH]

This is another of Mia’s famous healing maneuvers. When activated, Mia sweeps her ankh 180° above her, releasing a wave of sky blue sparkles that slowly float to the ground. The sparkles fly to the closest Brawler (which is almost always Mia) and fly into their bodies, briefly surrounding Mia in a brief glow. The next time Mia is hit with an attack that deals knockback—with the exception of Final Smashes—she is healed for half the original damage of that attack. She is still dealt the normal amount of knockback, however, so you can’t rely on it to save you from death. Be forewarned that, like in the games, Mia will not have access to this move if she has more than three Djinn on Standby; also, the move can affect an opponent if they knock you out of the way and touch the sparkles instead. Mia cannot use this attack while she is under the influence of a previous Wish.

[Down Tilt - TUNDRA]

Two horizontal waves of blue energy quickly shoot outwards from Mia’s body, expanding to the length of one stage builder block in both directions. If an opponent is hit by this energy, they take 6% damage and a bit of hitstun. The energy then is absorbed in the ground, coating it in ice (the ground Mia stands on is also covered as well). When an opponent steps on this ice, they have a 70% chance to trip and slide forward, and a 30% chance to freeze upon contact, dealing 10% damage. Mia and characters like the Ice Climbers are not affected by this terrain change. The ice lasts for twenty seconds before it melts, allowing you to use the move once more. The entire move takes about 1.5 seconds from start to finish, but Mia can move after the snow begins to fall.


SMASHES ≈​

[Forward Smash - ICE MISSILE]

Mia quickly thrusts her ankh forward, summoning a large icicle that is half her height, floating in midair. Its length is about half of a Battlefield platform. For two seconds afterwards, this icicle just floats in midair, always facing the same direction no matter where Mia moves. After two seconds is up, the icicle shoots forward, its speed proportional to the amount of time spent charging—the longer you charge, the faster it moves (its maximum speed is roughly that of ZSS). When the icicle hits an opponent, they are sent flying back with great horizontal knockback and take 25%. This would be a great killing move because of its insane amounts of knockback, if it weren't for the two second wait time. You must time it carefully if you want it to connect.

[Up Smash - FROTH SPIRAL]

Mia lifts her staff up, and an inverted cone of bubbles begin to swirl above her for 1-2 seconds, depending on how long the move is charged. If an opponent comes into contact with these bubbles, they are caught for the full duration of the move, sucked into the center of the vortex and held there while they take countless hits from the spiraling bubbles; in total, the opponent takes 28% damage. At the end of the move, opponents are sucked downwards, actually moving them towards the ground instead of away from it. Therefore, although this attack deals good damage, it has absolutely no killing potential. Use it wisely. This move has high ending and starting lag, so you can’t combo out of it.

[Down Smash - MEGACOOL]

This is undoubtedly Mia’s best Smash Attack. When the smash attack is released, Mia throws her arms out to the sides, facing forward, and a wave of icicles one character length in size pop out of the ground one Stage Builder Block on both sides. The icicles’ sizes vary, although this is a purely aesthetic property; the entire attack has one large hitbox (excluding Mia’s body). The icicles have high priority while coming out, and appear at a reasonable speed. The icicles deal about 26% damage and upwards knockback when coming out; for two seconds after the attack is over, the icicles remain in place, dealing half the amount of damage but the same knockback; it’s as if the opponent walked into a bed of spikes. This property makes it an all-around solid attack, save the beginning and ending lag that comes with it.


AERIALS

[Neutral Air - SNOWFLAKE]

Ice crystals swirl into being around Mia, creating eight spikes that extend in the eight cardinal directions over a span of .5 seconds. These spikes are about the length of Marth’s sword, and touching any part of them will send the opponent flying back with medium knockback in the direction the spike is pointing, as well as 11% damage. These spikes stay out for one second and then shrink in size, disappearing back into Mia’s body. Once you’ve used it once, you cannot use this move again until you get back in the air again. Although this move looks like it covers Mia completely, some of the smaller fighters might be able to get in between the spikes…it’s highly unlikely, but it’s also possible.

If you have more than four Djinn on Standby when you use this move, these icicles have their length cut in half.

[Forward Air - BOREAL BREATH]

Mia inhales and blows out, releasing blue winds. It takes a moment for Mia to inhale and exhale, but this move’s range is quite large—it extends one and a half stage builder blocks in front of her, pushing back any and all opponents much like her Deluge attack. However, once this wind pushes an opponent back (the maximum distance possible is that of Battlefield and your opponents can break free), it swirls around them quickly, dealing 8% damage and then disappearing. The fact that it damages opponents after knocking them away makes it a great boon to Mia, who can concern herself with other matters knowing that her opponent is taken care of.

[Back Air - DEEP FREEZE]

Mia reaches backward and summons a small glittering snowflake that’s half the size of a Pokéball. The snowflake appears almost instantly but only remains out for about half a second. When the snowflake appears, it quickly shines with a blue light one time; if an opponent touches this snowflake during this period, they are automatically frozen and sent flying high into the air in their encasement, taking 19% damage in the process. If an opponent touches the snowflake at any other time, they take a split second of hitstun and only 2% damage. This is one of Mia’s few killing moves, but one that requires timing to use properly. But when it connects…ah, there’s no better feeling.

[Up Air - ICE TORNADO]

A circle of blue wind appears around Mia, quickly flying upward in a tight spiral, extending outward much like a funnel. If an opponent touches this wind, they are trapped and take several rapid hits of 2%, making a total of 12% if the entire attack connects. This move acts very similar to Mia’s down aerial in that she freezes in place (or rather, moves downward very slowly) while this attack is going on, and it makes for a good damage-racking technique. This attack does not send enemies flying up—rather they fly off to the side a surprisingly good distance. The ice tornado is out for about one second, but comes out and has noticeable ending lag as the wind slowly goes away.

[Down Air - DOWNPOUR]

Mia makes no special animation for this move, so it actually comes out rather quickly. Mia freezes in midair, rising slightly as a stream of high-pressure water shoots downward from her body, going down in a straight line and not stopping until it hits the ground. The water column is as wide as Mia is, and if it connects with the opponent, it forces them to the ground for the duration of the attack, which is about one second. It causes rapid hits of 2%, causing 14% in total if the entire attack connects. This move could, in theory, be used as a stall tactic, but since you can only use it once while in the air, its usefulness in that regard is limited. It’s mostly used as an edgeguarding move.


THROWS ≈​

[Grab Attack - NIP]

Mia blows a puff of white, snowy air into the opponent’s face, coating their face in ice and dealing 2%. This ice remains on opponent’s face for thirty seconds or until they are attacked (including throws). During that time, the opponent has a 50% higher chance of tripping, and their attacks gain 50% more start-up lag. You can only use this pummel once per grab—pressing A again will simply release the opponent.

[Forward Throw - NORTH WINDS]

This move is an interesting one, mostly because you can control the trajectory of the throw! When you press forward while holding an opponent, a light blue wind quickly blows in from the side of the stage, flying past Mia and wrapping around an opponent. The wind carries the opponent out of Mia’s arms and into the air, hanging there until the player moves the control stick around. Doing so moves the wind around, effectively controlling where the opponent goes at about the speed of Jigglypuff. Unfortunately, you cannot maneuver your opponent under the stage since the opponent is merely hovering off the ground,. If the wind goes off of the ledge of the stage then it disappears and the opponent regains control. After two seconds, the wind dies down and your opponent falls where s/he is. When the opponent is finally thrown, they take about 10% damage.

[Back Throw - DROWN]

Mia surrounds the opponent with water, tossing them back and covering them in a globe of water. The opponent floats slightly behind and above Mia, taking constant damage as the water suffocates them, dealing in total 14% damage before the water falls down on top of Mia. Now, you may be thinking this throw is broken, but there is a drawback: as the water falls down from the globe, Mia takes 5% damage from the pressure and then spends 1.5 seconds wiping herself off; in addition, this throw does no knockback, as the opponent merely falls to the ground with complete access to all their aerials and jumps. This makes it very easy for an opponent to gimp Mia after she uses this, so be careful. Please note that while the opponent is in the water globe, Mia cannot move, leaving her vulnerable to assault—not only after the attack, but during as well.

[Up Throw - PLUME EDGE]

This attack has two outcomes, depending on what you do after the initial control input. A short water geyser erupts from beneath the opponent; the total height covered is about equal to Mia’s first jump. The geyser remains in place for two seconds; during that time, you can do one of two things: hit the B button or the A button. If you hit B, then the geyser shoots upward once more, launching the opponent up and dealing 8% damage. If you hit A, on the other hand, Mia will leap into the air and strike the opponent with her ankh, sending them flying at a downwards trajectory and dealing them 9% damage instead (if they land on the ground due to the throw, they take an additional 2% from the force). If you do nothing after two seconds, the geyser simply falls back down and the opponent regains control.

[Down Throw - GLACIER]

Mia throws her opponent down on the ground, and ice suddenly materializes all over them, freezing them in a block of ice. As the many ice particles cover the opponent, they take a total of 11% damage. This throw does not actually throw the opponent, but instead freezes them in place; the main intention for this move is to let Mia attack the opponent while they’re encased in the ice, as whichever attack shatters the ice will have its knockback increased by 25% (the total damage needed to break the ice is about 20%). This makes it a very handy KO move, but it is also a great move if Mia needs to get away from her opponents. Please note that while the opponent is in the glacier, they will NOT take damage from other attacks.


FINAL SMASH ≈​

[Final Smash - SUMMON]

This is where your Djinn come into play: when you active Mia’s final smash, the battle action pauses and the camera focuses on Mia, who is surrounded by a bright blue glow. She says, “Hmm, how many?” That’s your cue to press the B button up to seven times—for each tap of the B button, Mia uses one more of her Standby Djinni—their icon will disappear from the screen to indicate this. You have three seconds to tap out how many Djinn you want to use for your summon; the number of Djinn, obviously, changes the function of your summon. After three seconds have passed, Mia rises into the air, her arms outstretched and face serene. The screen then flashes bright blue as the summon takes place. The summons are as follows:

|1 Mercury Djinni - MERCURY|
This is the most basic summon. The blue faded silhouette of a Mercury Djinni appears behind Mia, facing the same direction as her. The spirit flies forward, moving erratically up and down and releasing three large orbs of blue energy that fly straight forward at high speeds. These orbs deal 10% damage each, and if you get hit by one, expect to get hit by at least two more. The orbs do not deal any knockback and home in slightly on opponents. Note that while this attack is going on, the battle can resume as normal.

|2 Mercury Djinn - NEREID|
Mia disappears, and in her place is a young woman perched on the back of a turtle. In total, this figure takes up about half of Battlefield in width and is a little taller than the lower platforms on it. This summon is completely stationary, but you can control its attacks. By pressing A, the girl slaps forward with her large fan, dealing 2% per strike; you can quickly perform a number of these strikes, very similar to using the fan item. If you press B, Nereid releases a large water geyser that is as wide as a Battlefield platform from any solid part of the stage that is no more than two Stage Builder Blocks away from her. These geysers do about 20% damage and great vertical knockback—however, this attack cannot be spammed. This Summon’s main advantage is its raw power, although it cannot move. The Summon lasts fifteen seconds. This Summon’s effectiveness is, obviously, dependent on the size of the stage.

|3 Mercury Djinn - NEPTUNE|
When activated, a large whale suddenly appears from the background, releasing a blue beam that causes water to fall on the screen until it fills up halfway; any player touching the water as it falls in a line down the middle of the screen takes 20% and is given great side knockback. Each player can swim infinitely in the water, although they move slowly and cannot dive down. They can jump as well, though at a rather low height. Mia is in the background, floating in the air with her eyes closed. The whale then begins to swim about in the water below the players, rising upward at random intervals, striking players upwards and dealing 15% damage. However, the chance to KO is high, killing middleweights at about 80-90%. The other effect is more rare—approximately 1 out of 5 times, Neptune will instead swim up and grab an opponent in its jaws, pulling him or her underwater and instantly KO’ing them. This summon lasts ten seconds; once it is over, the whale and the water slowly sink back down off the screen, and Mia returns to the fray.

|4 Mercury Djinn - BOREAS|
This is one of the more powerful options for Mia’s Final Smash, since it causes a great deal of damage over a wide area. This Final Smash is also more cinematic than the others. When this creature is summoned, we get a glimpse of a large iceberg encasing some sort of machine. The ice chips away, revealing what appears to be some sort of alien snow-cone machine. A large block of ice falls into the machine, and Mia appears to turn the lever, which sends billions of ice crystals flying at the opponent. The action then returns to the stage, where a ferocious blizzard begins to blow from the right side of the screen. The blizzard pushes opponents back with great force (Mia is once again in the background), and deals constant damage to them, for a total of 30% damage over ten seconds. The opponents are forced to combat the mighty winds, unable to prevent damage done to them; of course, it’s still rather difficult for them to die, since the wind doesn’t move THAT fast. As the blizzard dies away (a.k.a. the last three seconds of the move), all the opponents are frozen solid.

|5 Mercury Djinn - MOLOCH|
Ooh, this Final Smash is highly interactive. When activated Mia floats into the air, and an enormous horned, white creature appears beneath her. The creature roars and stands expectantly; Mia then descends onto the creature’s back, riding it as her own personal steed. For fifteen seconds, you control Moloch, who is half the size of Giga Bowser and moves at a slightly faster speed. Since Moloch is a powerful magical being, he is unable to be damaged or KO’ed unless he falls off the stage—his jumps are not exactly stellar. Moloch has several powerful commands at his disposal:
  • Neutral A - Bites with a short range, dealing 15% and good knockback. This attack comes out somewhat quickly, making it a solid attack option.
  • Forward Smash - Moloch stabs forward with his horn, dealing 25% damage and high knockback. It’s a wonderful killing move, although its slow speed and small hitbox makes its usefulness limited against smaller and/or quicker opponents.
  • Neutral Special - Breathes an icy wind with a height slightly shorter than Moloch itself, that traps opponents in it for 20% damage and has a 75% chance to freeze the opponent with good upwards knockback. This wind can last up to five seconds and will need three more seconds to recharge.
|6 Mercury Djinn - COATLICUE|
Contrary to the other Final Smashes, this summon is restorative in nature, which makes sense because Mercury Psynergy and Djinn are most revered for their healing powers. When summoned, the fight freezes and the stage background switches to underwater. Numerous bubbles float around and a trio of magical seals appear, merging together before turning into a woman wearing elegant clothing adorned with bells. Coatlicue then creates a large spiral of bubbles around her body, which spins around and flies up the screen to Mia. The bubbles fly around the screen for a moment and are then absorbed into Mia’s body. This heals Mia’s damage meter completely.

|7 Mercury Djinn - AZUL|
The ultimate water summon in TLA, although that isn’t always the case in Smash. When this summon is activated, the stage switches to an underwater background, like in Coatlicue. A large, blue serpentine dragon appears, its body moving around in waves. It then heads towards the fighter closest to Mia, swimming around him and any other opponents close to him (roughly two stage builder blocks away). Opponents can swim away while the dragon speeds toward them, although this is a mostly futile effort. Azul will swim rapidly around the fighters, creating a whirlpool that traps them in place and deals 10% damage. Azul then summons a large orb of blue energy, firing it at the disoriented and dizzy fighters. The orb explodes with immense pressure, dealing no knockback but 50% damage. Azul then swims off the bottom of the screen and the water disappears. This Final Smash, obviously needs timing since it only hits those trapped inside the whirlpool.


PLAYSTLE
“Leaving Opponents Out in the Cold”

Although Mia is a healer in Golden Sun, that obviously wouldn’t translate very well to the world of Smash. However, since healing and restoration is such an integral part of her character, she still has a wide variety of healing techniques—moreso than almost any other character. This gives Mia a distinctly defensive fee, although her prowess over the element of water allows her to perform a wide variety of maneuvers that can restore and destroy. Rather than defensive, her style could be described as mercurial: ever-changing and ultra-adaptable—hehe, aren’t puns fun?

Being able to adapt is especially important with Mia’s highly volatile and random Djinni Unleash attack. Since it is constantly affecting your already low damage and KO output, you have to be sure that you are in a position where you can afford to lose 2% damage on all attacks. Even though Mia has to deal with her own randomness, it’s even harder for her opponents, which is in itself one of her greatest strengths. A good Mia player can unleash a random Djinni and know exactly what to follow up with. Like the element she wields, Mia can cover a wide variety of combat areas.

Unfortunately, while Mia can hold her own in many categories, she doesn’t shine in many of them, except for defense. Ply, Wish, Fizz, and Leech Life all help keep Mia in tiptop shape, and Shade and Ice Pillar help keep her protected. And even though most of her moves cause damage (like most other Smash characters), most of them are just made for racking damage or inflicting status effects—several of her Djinn like Mist and Sleet come to mind. She’s got a big bag of tricks, and it’s up to you, the player, to choose how to use them.

She’s only got two moves with real potential as KO moves: Deluge and Megacool. Deluge is one of those attacks you should always have charged, as its large size makes it a perfect choice for spacing and getting rid of opponents. Plus, using it gives Mia prime opportunity to take advantage of her main gimping move, Downpour. A simple, yet effective combo to try is to charge up a Deluge, use Froth Spiral to bring the opponent right to your side, and then force them off the stage with your Deluge. To make sure they don’t come back, use Downpour to block their ascent.

Another thing you need to learn as a Mia player is balancing your Djinn: none of their various effects are harmful to you, but you should still be careful when using them, as you don’t want to realize you’ve already decreased your damage output further than it needs to go. Although you can always re-Set your Djinn, the fact that it takes a long time means you need a significant opening (luckily, you can’t be KO’ed while Setting a Djinni, though you can take damage). If you’re playing with Smash Balls turned on, it makes Mia’s choices even harder—should you risk the lack of offense for the chances of an Azul Final Smash? However, since all of Mia’s Final Smashes are unique and powerful, it’s really up to you how many Djinn you should have on Standby. I’d suggest having two or three on Standby and then work on using more when the Smash Ball shows up: it keeps your opponents away and gives you more options.

Mia’s throw game is pretty good as well, although many of the more potent throws (Drown and North Winds) often leave her vulnerable for assault. This is a characteristic for many of Mia’s moves, but it does not that the Water Adept is much more at home in a 1-on-1 as opposed to a chaotic free-for-all. Even though most of her moves are slow and powerful, she has various moves with a wide area of effect that mess with opponent’s gameplay and makes their efforts more difficult—a good Mia player always has a Bubble out on the field and makes sure a part of the stage is covered in ice. As long as you follow those general guidelines (keep a quick mind and a quicker finger), you’ll be fine and victory will be yours.


TAUNTS & VICTORY POSES

Up Taunt: Mia waves her ankh in an arc above her head, releasing a small shower of snowflakes that flutter to the ground.
Side Taunt: Clutching her ankh to her chest, Mia gives her opponents a concerned look, warning them to “Please be careful!”
Down Taunt: Mia spins in a circle, holding her ankh out and leaving a trail of water behind that stays in a spiral for a second before falling to the ground.

Victory Act 1: A small blue Mercury Djinni skips around Mia happily, who is on her knees on the ground. She smiles and picks it up, nuzzling it playfully and cooing.
Victory Act 2: Mia floats into the air, arms outstretched as water and ice spins around her. Suddenly she flashes with a blue light and disappears.
Victory Act 3: Mia casts a spell, she holds her ankh out as a series of ice pillars appear behind her, forming an intricate ice sculpture behind her that blocks out the losers. She smiles and blushes at her own handiwork.

Losing Act: Mia claps politely for her opponent, occasionally healing a small wound on herself with some blue sparkles.

Victory Theme: Golden Sun Series - Victory!


EXTRAS

Kirby Hat: Kirby gains Mia’s outlandish blue hair, and the ability to use Deluge as his Neutral Special—since he can’t steal all of Mia’s Djinn.

Symbol: A multi-pointed sun (minus the spiral).


Entrance Animation: A series of large raindrops fall at Mia’s opening position, forming her shape; her color changes from a single shade of blue to her normal colors. She then performs a flourish with her ankh as seven small blue stars sparkle around her momentarily.

Wiimote Selection Sound: Mia’s voice crying “Water!” followed by the crashing sound of a wave.

Credits Song for Single Player: The Lost Age - Aqua Rock

Snake CODEC Conversation:

SNAKE // *Sigh* Mei Ling…I’m tired of fighting all these pretty girls.
MEI LING // Well, I don’t think Mia will have any qualms about fighting YOU, Snake. She’s a Mercury Adept, meaning she can effortlessly control water in all its phases.
SNAKE // Is that so? I hope she realizes that getting me all wet won’t do much other than make me angry.
MEI LING // She also fights with magical beings known as Djinn, which apparently serve as guardians of their element. Not only that, but it says that she can use these Djinn to summon powerful creatures like dragons and whales.
SNAKE // Well, that’s not good…but something that powerful has to have some sort of drawback, right?
MEI LING // Right: according to our intel, using these Djinn decrease Mia’s attack power. It shouldn’t be hard to take advantage of that weakness…

Unlocking Mia:
  • Swim without drowning for 10 seconds during a regular Brawl.
  • Play 415 Brawls.
  • Get Mia to join your party in the Subspace Emissary.


SSE BOSSES

SATUROS AND MENARDI

SATUROS HP: 550
MENARDI HP: 500
MUSIC: Battle! Saturos and Menardi

Saturos (right) and Menardi (left) fight as a duo, each with their own attacks. You fight them at once, and they each have their own HP meter: Saturos’ is blue, and Menardi’s is red. Fortunately, their individual meters are slightly lower in number to make up for this fact. Saturos has a bit more HP than Menardi does, so keep that in mind when choosing your first victim. Your battle platform is about the height of Final Destination, with the light of the lighthouse shining in the background. There are two floating platforms at both ends of the stage. Saturos and Menardi announce all of their attacks, but since they speak as the spells are being cast, it doesn’t help you much in terms of avoiding the attacks.

~ SATUROS ATTACKS ~

1) Physical Attack - Saturos leaps into the air and swings down with his sword, dealing 17% damage and low horizontal knockback. Saturos comes down rather quickly, but the starting leap is easy to see, so it’s also easy to dodge.

2) Heat Flash - After charging for a brief moment, Saturos rushes forward half the distance of the stage, engulfed in fire. If he connects, he swings his sword up, dealing 22% fire damage and sending you flying upwards with a lot of diagonal knockback. This attack is a lot faster and much more formidable. When you see him glowing with red energy, be sure to jump out of the way! This attack also has a 45% chance of giving your character delusion, reversing your controls for five seconds.

3) Eruption - Raising his hand, Saturos summons a pillar of lava beneath your character, knocking them up into the air and dealing 25% damage. The startup time for this is negligible: there is only a brief flash of light around Saturos’ hand to warn you. If you move out of the way fast enough, it can miss, but you have to move quick.

4) Fireball - This has the same starting animation as Eruption, making it difficult to tell which spell he’s using. When Saturos unleashes this spell, a trio of large fireballs (about the size of Party Balls and formed into a close triangle) come out of Saturos’ body and fly towards you at about the speed of a gliding Meta Knight. Each fireball deals 8%, so if you get hit by all three at once (which is highly likely), you’ll take 24% damage.

5) Protect - This has a quick, instantaneous cast time, much like the rest of Saturos’ spells. An ethereal barrier flashes around Saturos and Menardi briefly, and then they are both protected for approximately 30 seconds. During that time, all of your attacks do 3% less damage.

Added at 50% Health

6) Inferno - This replaces Fireball. It has the same startup time and animation, but instead of three fireballs, Saturos releases six fireballs, all of which are slightly increased in size. Each fireball deals 10% damage this time around, and Saturos releases them in two rounds of three; unfortunately, the hitstun between the trios is just enough so that you can easily get hit by all six if you’re not careful. Their air speed is also increased by 50%, making them harder to dodge.

7) Cure - This has a much longer startup time than Saturos’ other spells, so you can tell it’s coming. Be sure you attack before Saturos finishes casting, though, as it will heal either him or Menardi for 50 HP. The cast time is roughly 2.5 seconds, though, so you’ll have more than enough time.

Added at 25% Health

8) Heat Wave - Leaping into the air and screaming “Take this!”, Saturos plunges down with his sword, stabbing it into the ground and releasing a rolling wave of fire that spreads from both sides all across the stage. The fire is only about as high as Mario but it travels quickly; if you get hit by it you take 30% damage and be pushed along with the rest of the fire. Just jump out of the way and be sure to get to Saturos quickly, since he takes a moment to pull his sword out of the ground.

Added at 5% Health

9) Pyroclasm - This replaces Eruption and has the same cast time and animation. Saturos releases a series of four volcanic eruptions beneath you, each one dealing 10% damage, totaling 40% damage. Since they’re all beneath you, if you get hit by one, you get hit by all. This is Saturos’ most powerful technique and a sign that he’s getting desperate.

~ MENARDI ATTACKS ~​

1) Physical Attack - Menardi darts forward, swinging her scythe up and dealing 13% damage with low upwards knockback. It’s slightly weaker than Saturos’ attack, but it’s much faster. Menardi uses this attack often, so you should always be on your toes.

2) Death Size - Menardi uses this attack rarely at first, but begins to use it more as she loses more health. After a moment of charging, Menardi rushes forward and slashes with her scythe; if it connects, you see the faded outline of the Grim Reaper, and then you take 28% damage and horizontal knockback. In addition, there’s a 45% chance that your character will be instantly KO’ed. This is an extremely powerful attack and one you should take care to avoid.

3) Flare Wall - Menardi raises her hand and quickly releases a line of fire that shoots forward and quickly covers half of the stage. If you get hit by it, you take no knockback but are charred for a rough 26% damage.

4) Blast - Like every other spell Menardi has, this has the same quick cast animation. This creates a small explosion of fire at your character’s feet, sending you flying diagonally upwards and taking 24% damage.

5) Impact - Raising her hand, an ethereal sword surrounds Menardi and Saturos briefly, boosting the power of their physical attacks (and Death Size/Heat Flash) by 3% for thirty seconds. Like Saturos with Protect, Menardi uses this attack often.

Added at 50% Health

6) Flare Storm - This replaces Flare Wall. This releases a line of fire like the last one, but when it touches, you, the fire spins around you and explodes from within, giving you 31% damage but no knockback. Like before, just jump to avoid it.

7) Wish - Wait…a Mars Adept using a Mercury technique? Apparently Menardi doesn’t care, as after a slower cast time than the rest of her spells, she creates a spiral of blue sparkles, healing both her and Saturos for 30 HP. Like Saturos and Cure, this will make Menardi extra vulnerable if you attack her while she’s casting this.

Added at 25% Health

8) Flaming Valkyrie - Menardi flies into the air and screams “You’re finished!”, surrounding her body in fire and effectively turning herself into a miniature comet. She then begins flying around the screen at wild speeds (equal to those of Volt Tackle) for approximately five seconds. If you get hit by Menardi during this time, you take 28% and knockback in whatever direction Menardi was flying.

Added at 5% Health

9) Supernova - This is Menardi’s most powerful attack and has the same cast time as the rest of her spells. A small flash of light appears above you for a split second, before turning into an enormous explosion that takes up half of the stage. If you are hit by this (which is highly likely), you will take 40% damage and high knockback.

* * * * * * * * * *​

...After the battle is over, Saturos and Menardi lie on the lighthouse aerie, battered and bruised. However, as your characters revel in their victory, the light from the lighthouse begins to shine, casting its glow over the two Mars Adepts. They suddenly rise into the air, totally and completely restored! As your characters marvel at this amazing turn of events, Saturos and Menardi glance at each other, exchanging evil smirks. The time has come to reveal their most powerful technique! The two Adepts float towards each other, fusing together into a terrifying monstrosity: the Fusion Dragon!

FUSION DRAGON

DRAGON HP: 1300
MUSIC: Battle! Fusion Dragon

This battle is extremely difficult, and it’s not made any easier by the fact that you have to fight with whatever characters you have left from the last battle—there’s no rest in between! Fortunately, the Fusion Dragon does not move a lot, but it does take up roughly half of the Lighthouse Aerie. The background sky has turned an ominous red and the surface of the lighthouse has cracked all over with the immense power.

Starting Attacks

1) Physical Attack - Fusion Dragon’s two heads lunge forward, each biting once, one after the other. Each bite deals a hefty 20% damage, so try to dodge both if you can; you can do this by staying out of reach and attacking from far away. Of course, the dragon doesn’t do this attack much, as it has many more powerful moves at its disposal.

2) Evil Blessing - Without moving at all, the Fusion Dragon glows brightly before releasing a mass of screeching spirits, which fly towards your character and swirl around them, absorbing into their body and dealing 22% damage. In addition, your overall speed (movement, attack, and jump) will be cut by half for fifteen seconds.

3) Deadly Gas - The Fusion Dragon breathes a mass of green gas, which reaches across a quarter of the stage and is about half of the dragon’s height. This gas only causes around 18% damage, but for the rest of match, you will take 5% damage every five seconds. This effect does not carry over to your other characters.

4) Dual Pyre - The Fusion Dragon opens both of its mouths, and both release a purple fireball that takes up its respective half of the screen and moves at a relatively fast speed. The lower head fires first, and then the upper head. Each fireball deals 32% damage and upwards knockback.

Added at 75% Health

5) Drain Fang - The maw of the Dragon’s lower head grows a menacing red, and lunges forward slightly. The Dragon chomps three times in quick succession, dealing 10% for each bite. Your character freezes once they are attacked, red orbs flying from their body to the Dragon’s as the attack takes place. The Dragon is healed ten times amount you take—meaning it can be healed up to 300%! Fortunately, this attack has low range, so keep back when you see it glowing.

6) Severe Blow - The Dragon spends approximately 1.5 seconds charging, and then its entire body is surrounded in a purple aura: it rushes forward across the stage, dealing 40% damage and very high side knockback. This is almost always a KO, so when you see the dragon charging, jump into the air and stay in the air!

Added at 50% Health

7) Dragon Driver - The dragon releases a wave of small purple fireballs, each dealing 8% (there are about ten of them) before spewing a wave of purple fire that spreads into a large cone across the screen, dealing 38% damage but no knockback. This is a quick attack and one that is very hard to dodge; luckily it can’t kill you.

8) Outer Space - Fusion Dragon leaps into the sky, which suddenly turns dark. Purple meteors shoot around in the background, and you can see the dragon covered in purple fire, slowly growing in size as it approaches the stage. The dragon then flies down onto the stage, slowly crushing you into the ground, dealing 55% damage, but no knockback. Instead, once the attack is done and the dragon steps back to its usual position, you will be completely embedded in the ground (like being hit by DK’s Side B). The Dragon uses this attack infrequently at first, but begins to use it more as it loses health.

Added at 25% Health

9) Ferocious Roar - Signifying its loss of health, the dragon releases a deafening roar, manifested in the form of a series of circular shockwaves that radiate all the way throughout the stage. You cannot dodge these, and it stuns your character for the entire duration of the attack. You stay stunned for five seconds after the attack, during which time the Dragon unleashes a Severe Blow attack. This will occur once more when the Dragon reaches 5% health.

Added at 0% Health

10) Wrath of Mars - Once the dragon dies, it roars in agony for several seconds before gathering the last of its energy reserves in the form of a glowing ball of red energy. After 1.5 seconds, the orb explodes, covering the entire stage in fire, instantly KO’ing whatever character you have out at the moment. I hope you have at least one other stock left, otherwise…well, you’re screwed.
 

Hyper_Ridley

Smash Champion
Joined
Dec 21, 2007
Messages
2,291
Location
Hippo Island
That was a great move set Tanookie!

A lot of the moves were simple but clever. I liked up special and ftilt. The FSmash also looked like a move I would have a lot fun messing around with. :bee:
 

Heartz♥

Smash Legend
Joined
May 18, 2008
Messages
10,443
Location
Virginia
Tanookie....

Very, very great moveset. That went beyond from what I expected. The use of her Psynergy attacks in most or all of her attacks was pure genius. And that is exactly what I assumed you would do with her Final Smashes. It could only have been the Mercury summons.

And Saturos and Menardi was like a moveset itself. Omgosh this totally encourages me alot more.
 

half_silver28

Smash Ace
Joined
Apr 25, 2008
Messages
862
Location
MYM, Ohio
wow mia is awesome tanookie! I've never played golden sun, but this set really makes me want to ~ the Djinn-centric playstyle seems really cool (not to mention very fitting for the character) :bee:

like HR said, her attacks are relatively simple but you make them sound really fun. The healing moves were quite awesome, and I loved all the effects of the neutral special and the FS. The other specials and the throws were very creative and kind of summed up this set for me.

This is definitely one of the best sets posted so far, & I really enjoyed reading it. xd
 

Tornadith

Smash Journeyman
Joined
Aug 12, 2008
Messages
374
Location
*Sends Sundance _______________ on __________ Day,
Wow Tanookie! Great job on Mia, I was really excited for Mia and this is way better than I expected. Since I played all of the Golden Sun games, I loved reading the Neutral B and Final Smash to see how you incorporated all of the aspects of the game, and in every way you did it! Also the subtle things, like Sleet decreasing attack power was awesome. I really enjoyed it as a moveset. It really inspires me to make a GS moveset. Isn't Jenna taken already? Cause if she isn't, I would wanna make a moveset for her.

Also: To tide you guys over for Allegretto, I'll release one of my Org. XIII Boss movesets tommorow

EDIT: First person of my Organization XIII moveset will be tommorow, not tonight.
 

Chris Lionheart

Smash Champion
Joined
Apr 6, 2008
Messages
2,076
Location
Make Your Move
Mia was a great moveset. The Djinni mechanic was brillaint and yet totally true to game. Rime was my favorite of the Djinni. Overall, it seems pretty well-balanced.
 

Heartz♥

Smash Legend
Joined
May 18, 2008
Messages
10,443
Location
Virginia
Wow Tanookie! Great job on Mia, I was really excited for Mia and this is way better than I expected. Since I played all of the Golden Sun games, I loved reading the Neutral B and Final Smash to see how you incorporated all of the aspects of the game, and in every way you did it! Also the subtle things, like Sleet decreasing attack power was awesome. I really enjoyed it as a moveset. It really inspires me to make a GS moveset. Isn't Jenna taken already? Cause if she isn't, I would wanna make a moveset for her.

Also: To tide you guys over for Allegretto, I'll release one of my Org. XIII Boss movesets tommorow

EDIT: First person of my Organization XIII moveset will be tommorow, not tonight.
You're doing Yuna? Oh awesome sauce. I cant wait to see what you do with her.
 

Smady

Smash Master
Joined
Apr 29, 2007
Messages
3,307
Location
K Rool Avenue
What do you mean by less generosity? As in, making some of them slower, less damaging, etc? And yeah, i'm sloowly going back and addingdetail to his moves lol

Thanks for the review!
I mean that you need more of the moves to be related to the character, rather than off-shoots... although I realise the hypocrisy when most characters in Smash have generic moves. :(

Good one nonetheless.

Edit: Whoops, sorry to have missed Mia - was quoting from the last page. At a glance, I love the presentation and it looks interesting, time to tuck in, as it were.
 

C~Dog

Smash Champion
Joined
Feb 6, 2009
Messages
2,908
Location
Land of Ooo
I mean that you need more of the moves to be related to the character, rather than off-shoots... although I realise the hypocrisy when most characters in Smash have generic moves. :(
Ah okay. Which most specifically do you think need redoing?
 

Smady

Smash Master
Joined
Apr 29, 2007
Messages
3,307
Location
K Rool Avenue
Ah okay. Which most specifically do you think need redoing?
Generally, I think the specials fit the character the best, while the rest of the moves are fitting, but do not yield enough Zelda references. Symbolism or straight-and-stated plagiarism would make it more effective.
 

Kris121

Smash Journeyman
Joined
Nov 26, 2008
Messages
263
Location
THE INTERWEB
Tanookie that there was super special awesome. Although I think POO P might just give Mia A run for your money. I'm doing a magic set as well and this has got me back after a little hiatus. (I think thats right context. Grammar NAZI is that right) JK JK JK Poo was no where near as good as Mia. Win.
 

Baloo

Smash Ace
Joined
Nov 14, 2008
Messages
781
Finally, Mia is posted! It was worth the wait.

Megacool is the best name for an attack in all MYM history.

And K Rool, you have disgraced Poo. BAD.
 

KingK.Rool

Smash Lord
Joined
Nov 26, 2005
Messages
1,810
And LMFAO @ K.Rool and Poo. The moveset certainly lives up to its name, I'll give it that. :laugh:
Well, quite. :bee:

Oh sorry, didn't read the paragraph below... disregard that. D:

I maybe should get out Lip...
Awww, man, now I'm curious to see what you had to say before you realized it was a repost of an ancient moveset of mine.

What was the point of that, K.Rool?

That's horrible.
Indeed it is. To be fair, though, that before Brawl came out was well above the norm. After posting that, I got quite a few congratulatory comments saying how good my moveset was. XD

And K Rool, you have disgraced Poo. BAD.
I disgraced him two years ago or so, so I think I could maybe be forgiven. :bee:

MIA! Finally! *reads*
 

Skyshroud

Smash Ace
Joined
Aug 7, 2006
Messages
794
Location
PA
@Tanookie: Great moveset, and very true to the character. Just a couple of nit-picking from my part. First off, the side special should probably be named Deluge (after the actual psynergy, since Tidal Wave is not an actual move). Second, the throws are also kind of broken. You said that one of the draw backs of the back throw is that is doesn't cause knockback. Have you heard of tech chasing? This is actually considered an advantage by most players, as you could rack of some serious damage chaining this throw into more throws or just another attack by reading the opponent. It's not guaranteed, but still very, very powerful. If you want to see it in action, watch the first match of this vid: http://www.youtube.com/watch?v=YOZGCmBUAZg&feature=related . Second, the down throw does 11% AND gives you a free high-knockback move? If Mia grabs anyone at around 85%, they are dead (pummel - > throw -> attack). I think you should cut the percents back on both moves to make them a little bit more balanced.

P.S.: Looking back, you said it the back throw leaves here vulnerable? I think you should clarify exactly how this move works a bit more, because I'm confused about several things. Does the opponent just dropping leave them standing up, or in knockdown? What's the ending lag like? During which part of the move is she vulnerable (if it's only during the attack duration, that's only relevant in teams)?

P.P.S.: I have a Down Special on a character I'm working on that is very similar to Mia's ply. Mind if I still use it?
 

Tanookie

Smash Journeyman
Joined
Nov 17, 2008
Messages
436
Location
*sends Sundance a leather harness on Dragon Apprec
Yay for comments! I think it's a good thing we don't spam anymore...makes it easier to find comments and critique.

@Tanookie: Great moveset, and very true to the character. Just a couple of nit-picking from my part. First off, the side special should probably be named Deluge (after the actual psynergy, since Tidal Wave is not an actual move). Second, the throws are also kind of broken. You said that one of the draw backs of the back throw is that is doesn't cause knockback. Have you heard of tech chasing? This is actually considered an advantage by most players, as you could rack of some serious damage chaining this throw into more throws or just another attack by reading the opponent. It's not guaranteed, but still very, very powerful. If you want to see it in action, watch the first match of this vid: http://www.youtube.com/watch?v=YOZGCmBUAZg&feature=related . Second, the down throw does 11% AND gives you a free high-knockback move? If Mia grabs anyone at around 85%, they are dead (pummel - > throw -> attack). I think you should cut the percents back on both moves to make them a little bit more balanced.

P.S.: Looking back, you said it the back throw leaves here vulnerable? I think you should clarify exactly how this move works a bit more, because I'm confused about several things. Does the opponent just dropping leave them standing up, or in knockdown? What's the ending lag like? During which part of the move is she vulnerable (if it's only during the attack duration, that's only relevant in teams)?

P.P.S.: I have a Down Special on a character I'm working on that is very similar to Mia's ply. Mind if I still use it?
Especially Skyshroud...I've never heard of tech chasing. :p With Mia's back throw, the opponent begins falling, but they have access to all of their aerials and jumps. Since Mia takes a second or two stunned from the damage she takes, it's really easy for opponents to simply fall on top of her and attack her with an aerial. And with the Dthrow, I'll tone back the damage and knockback. Deluge sounds much better, actually, I'll change it. And yes, of course you can. ^_^

And Saturos and Menardi was like a moveset itself. Omgosh this totally encourages me alot more.
I'm glad you like the bosses. I always thought making bosses was a ton of fun.
 

Wizzerd

Smash Ace
Joined
Feb 24, 2009
Messages
929
Hm, Mia was a very good moveset! I found all of the attacks original. I didn't fully understand the Djinni (sp?) mechanic, but sounds awesome. Great job.
 

Jimnymebob

Smash Champion
Joined
Sep 26, 2008
Messages
2,020
NNID
Jimnymebob
Mia was a very good set, and well worth the wait.
It had lots of interesting features that don't get too complex, and could work well in the actual games.
Well done Tanookie.

I should have something ready for tonight :bee:.
 

BKupa666

Barnacled Boss
Moderator
Joined
Aug 12, 2008
Messages
7,788
Location
Toxic Tower
Excellent moveset, Tanookie. It has lots of those little features that are so interesting to read about.

Scar and the Hyenas are getting work done on there extras. It won't be long till I'm ready to post the monster.
 

Chris Lionheart

Smash Champion
Joined
Apr 6, 2008
Messages
2,076
Location
Make Your Move
My 2nd MYM5 moveset. It may not be as good as Arthas, but it should be interesting, nonetheless.

Klarrann


"If this is your will, I will serve." ~ Klarrann

Note- Watch this video to get some idea of what the character is capable of. The video isn't high quality, but it does show the character in action. Maybe you'll be able to spot some of the comboes.

Tale of Redemption: Story

Klarrann was formerly a criminal. Thievery... murder... such was Klarrann's past. One fateful day, he commited one final crime. He attacked a church. A priest of the church, thinking only to help him, stood in his way and preached to him. Klarrann killed the priest, and guilt tore at his soul. He joined that very same church, becoming a reverand. Klarrann is the witness to the story of the game N3 (Ninety Nine Nights). Humans (owners of the orb of light) and goblins (owners of the orb of darkness) wage war, each hoping to destroy each other and claim the other races's half of the orb. Should the orbs be united, it would mean the end of both races. The King of Ninety Nine Nights, a demon named as such because he reigned supreme for ninety nine nights before being destroyed by the ancestors of the humans and goblins, would return to gain revenge and throw the world under his dominion. Despite not being the main character and never meeting the final boss, Klarrann, more than either other character, witnesses the story unfold and the moment of truth occur.

Klarrann's personality can be described as deeply reflective and repentive. He now lives to serve his church and the light. In battle, Klarrann wields a great totem with the symbol of his church on it. "Speak softly and carry a big stick" definitely applies.

Pros

Heavyweight.
Great reach.
Powerful comboes.
Large variety of useful moves.
Can directly punish foes for attacking him with Retribution.
Powerful grab game (cannot chain).
No lack of killing moves and powerful attacks.
High priority.
Can Klarrannside.
Great Final Smash.
Orb system is useful (though generally, you will never get enough orbs for the Orb Attack).

Cons

Large target.
Slow character.
Lacks a first jump, making his air game absolutely horrible.
Fast faller, further hurting his air game and recovery.
Most moves are slow and predictable.
Only projectile can't be used often.
Horrible approach game, yet he is reliant on melee for most of his abilities.
Over reliant on punishable moves such as Side Tilt for damage racking.

Mehs

Recovery can be effective, but it isn't difficult to gimp or predict.

Bringing Salvation- Playing As

Klarrann is a difficult character to master and an easy one to predict. Much like Ike, inexperienced players will see him as overpowered. Advanced players will often laugh at him in tournaments, but this does not mean that he lacks the ability to win in high-level competition.

Damage Racking-
Activate Bashing Stance and use Side Tilt (when you are sure you won't be punished).
Use the X combo, not the Y combo while Bashing Stance is active.
Throw in Up Smash for extra damage (this damage is not increased by bashing stance).

Damage Punishing-
Use Retribution to discourage enemy projectile spamming (does nothing against Fox). Activate Bashing Stance if you are not afraid to double your own damage in return for doubling the damage dealt.
Use Zealot's Fire to punish enemy special spammers, such as Pit and Metaknight.

Finishing Foes-
Neutral A, Sublimation, Side Tilt, and Forward Throw are great finishing options.

Defense-
Try to properly space from the foe. Back Roll helps you accomplish this. Retribution can make the foe think twice before hurting you. Use Down Smash and Up Smash to discourage enemies from getting close.

Characters That Klarrann Counters-
Arthas-
Klarrann can easily destroy undead summoned creatures, destroying Acolytes from the very beginning with Side Smash.

Dedede-
Klarrann can destroy Waddle Dees, Waddle Doos, and even Gordos with the Side Smash. Dedede is pretty much forced into up close combat... but look out for the chain grab, which reaks havoc on you up to 50%. Use Retribution and Bashing Stance (hey, you're going to be taking 50% from the chain anyway) to discourage Dedede from using it and to punish him if he does.

Metaknight-
Stop Whorenado with your Side Special, Zealot's Fire.

Extinguishing the Light- Playing Against

Offensively-
Klarrann is weak to fast moves. Noobish Klarrann's will use Bashing Stance foolishly, often without even using Retribution, so punish this with a quick combo. Be wary of Retribution and his Down and Up Smashes. Camping and projectile spam are often effective against Klarrann, as his approach is just awful. Attacks from the air usually work well, as his only anti-air options are Up Tilt and Down Smash. Be sure to gimp his recovery when possible, but watch out for the spike it can produce. Klarrann is exceptionally vulnerable to Chain Grabs.

Defensively-
Watch out for the combo starters, X and Y. They are slow, but if they hit, you are going to take a lot of damage, especially if the Klarrann player was intelligent enough to use Up Smash and Bashing Stance. Keeping a distance from Klarrann and spamming projectiles often works wonders. Take advantage of his lack of air game and bad approach game. If he uses Zealot's Fire... please don't spam specials.

Klarrann Counters-

King Dedede + Falco-
Klarrann can be chain grabbed up to 50% by Dedede and up to 40% by Falco.

Pit, Fox, Falco-
The weak but fast neutral B projectiles of these characters works wonders against Klarrann.

Snake-
Snake can easily out-camp Klarrann and possesses projectiles. In addition, he wins at hand to hand combat. Klarrann has very few options against Snake.

Ways of the Church: Mechanics

Locked Jump-
True to his game, Klarrann possesses no first jump. He is completely bound to the ground due to the sheer weight of his weapon. The only way for him to be airbound is if he is knocked into the air. He does, however have a second jump and aerial attacks.

Orbs and Orb Attack-
Ninety Nine Nights implores an orb system. In N3, every time you kill a foe it releases a red orb. It fills your orb attack guage and allows you to perform a powerful attack.

This is also present in Smash, but in a different form. Every time you land a successful attack, an orb will be released by the hit foe and be collectable by Klarrann alone (or any other Klarrann's can also pick them up.)

When Klarrann gains ninety nine (99) orbs, his red guage will be completely full. Press the Taunt button during this to release your incredible power! During the ten seconds the orb attack is active, a beam of light comes out of Klarrann's totem, tripling his attack reach!

It is also noting that some comboes drain a portion of your Orb Attack guage.

X/Y Comboes-
While on the ground, Klarrann's lost jump buttons are replaced with special combo buttons. By pressing them in the right order, Klarrann gains access to unique comboes. These moves have high hitstun, allowing you to hit with the next hit in the combo. During the combo, Klarrann gains Super Armor frames. Should you choose to stop the combo early by not taking advantage of the last attack's hitstun (some comboes require you do this, or else you will get a different combo), or hit with the last possible hit that cannot possibly chain into a different combo, the combo will end, and the foe will take the knockback of the combo. Klarrann has a set list of comboes, which I have listed last in the moveset for convenience.

Constant Speed + R Dash
Klarrann is a slow character on his own. While he is incapable of "walking" he doesn't dash, rather moving at a slow running speed (slow due to the weight of his weapon).

You must double tap the control stick, or on a gamecube controller setting, press R (or whatever button you set it to) to make Klarrann due a short dash, approximately 3 stage builder blocks in length. He will duck down, dragging his totem across the ground. His left shoulder is ahead of him, causing him to ram into any enemies in his way, knocking them to the ground.

Strength of the Reverand: Stats

Height- Tall
Klarrann is a true giant, easily standing equal with Ganondorf or Abraham Lincoln with his hat on (lol).

Width- Average Human
In contrast to his height, Klarrann isn't a particularly large target width-wise. More like Ike in this area.

Weight- Very Heavy
Klarrann has incredible weight. He is about equal to, or perhaps even heavier than Bowser thanks to his mighty pole (twss).

Movement Speed- Slow
Klarrann isn't fast by any means. Though he doesn't walk, he doesn't "dash" on his own either. He runs forward lugging his heavy totem, slowed down greatly by it. Though not the slowest character, he is horrible at approaching.

Attack Speed- Variable
Klarrann has a lot of speed variety in his attacks.

Attack Reach- Great
Klarrann's totem is huge. On estimate, it reaches 20-30% farther than Ike's sword. During Orb Attack, this great reach is tripled.

Attack Power- Variable
Though generally on the powerful side, Klarrann's moves have a lot of power variety.

Attack Priority- High
Just try out-prioritizing something with that kind of reach... go ahead. Okay.. it's no Whorenado, but it's still pretty high.

Hitstun (Normal)- Low
Klarrann's normal attacks pack little hitstun.

Hitstun (X/Y)- High
Klarrann's combo buttons pack a lot of hitstun, enough to follow into the next attack.

First Jump- N/A
Klarrann has no first jump.

Second Jump- Medium
Klarrann's second jump is very average.

Falling Speed- Fast
Though not the fastest faller in the game, Klarrann's falling speed hurts his recovery and makes his already pathetic air game that much worse.

Recovery- ?
While Klarrann's recovery is potentially effective, it is also gimpable.

Final Smash- Great
There are ways to counter Klarrann's Final Smash and he is vulnerable (with Super Armor) while performing it, but it is still one of the better FSs in Smash.

Traction- Great
With Klarrann's weight and slow speed, he is bound to have great traction, turning easily and not tripping very often... but beware... he has double the normal trip duration!

Dodges- Poor
With the air dodge rarely being an option and his other dodges being average at best, Klarrann mostly relies on his great reach, comboes, and the super armor for defense. He does have a great roll dodge though.

Crouch- Great
Klarrann kneels down, moving his hand across the ground, apparently looking for ancient prophecies. This drastically reduces his height.

Crawl- None

Glide- None

Wall Kick- None

Wall Cling- None

Inspiring Grace: Animations

Idle Pose-
Klarrann stands up tall, his left arm at his side. His right arm holds his totem, which rests on his shoulder, much like a baseball position.

Movement-
Klarrann puts holds the rim of his hat with his left hand, increasing his already western appearance. Slightly leaning forward, he runs forward while holding the totem behind his back, the head of it pointing downwards, with his right hand.

Dash-
Klarrann moves his left hand behind his back and moves his right hand, with the totem in front of his body as he leans forward farther and charges like a bull for 3 stage builder blocks. At the end of it, he slides, kneeling down for ending lag before getting back up.

Shield-
Klarrann leans back slightly, both hands hold his totem. The bottom of the totem is on the ground, the top going about a stage builder block above his head (thats right, it is taller than he is). A shining shield of holy light forms around him.

Forward Roll-
Klarrann performs a slide, much like his dash. In fact, it shares all of the properties of his dash but has less ending lag and deal damage + knockdown to foes (and ofc can't be used to dash attack). Possible mindgame potential.

Back Roll-
Klarrann, jumps back, sliding and kicking up dust as he goes. One of the best roll dodges in the entire game, as it can cover about 3-4 stage builder blocks in distance.

Sidestep-
Klarrann barely steps to the side, his left hand holding the rim of his hat down similarly to his moving stance. A generic pose, but badass nonetheless.

Airdodge-
Klarrann turns 360 degrees as he moves sideways in the air, his left hand holding the rim of his hat. The totem is always in the direction in front of his body.
*Note that this dodge can't be used often, as Klarrann has no first jump. You must be knocked into the air to use this.

Powers of the Light: Specials

Neutral Special- Bashing Stance

Klarrann's idle/standing pose changes. In this new stance, he holds the totem in front of his body with both hands, pointing it diagonally, much like Ike's Up Taunt. His right leg is behind him, diagonally, as his left leg is ahead of him, slightly bent at the knee. While this is the only visual clue that this special is active, it applies to Klarrann regardless of whether he is in the pose or not. This special is a double bladed sword. It gives Klarrann a 50% chance to do an additional 50% attack damage and hitstun with totem (and Spirit Weapon) attacks, but it also causes Klarrann to take double damage. This move has no lag at any point, as it is a stance, not an action. Press Neutral B again to end the special, returning Klarrann to normal.
*This move is very useful when used wisely. It can really increase the power of Klarrann's attacks, especially his comboes. Be ready to end it to prevent large amounts of damage from enemy comboes.
*Does not apply to Klarrann's grabs.
*Another feature of this move that is possibly overlooked is its potential to power up Retribution. The double damage taken due to Bashing Stance is applied before the damage return of Retribution, doubling the effectiveness of Retribution in most cases (with the exception being moves that do damage that is rounded down even when doubled).


Side Special- Zealot's Fire

Klarrann's hand glows with very intense white flames. He reaches out and grabs the foe. Oddly, no damage is dealt to the foe. This move has high beginning and fairly low ending lag. Medium to good reach. Grab priority. No hitstun. Why would you use such a seemingly pointless move? When you grab the foe, Klarrann transfers the divine flame into their body. For 10 seconds, everytime that foe uses a special, that foe takes 10% damage.
*Aside from its obvious use of discouraging foes from spamming specials and punishing them if they do, the grab of this move is fairly good for interrupting the foe.

Up Special- Angelic Wings

Shining gold wings of light burst from Klarrann's back... I know you are thinking this is a clone of Pit's Up Special, but it is not. Hold the B button to make Klarrann fly upwards, he flies slowly, about the speed of the projectile created by Wolf's blaster. Release B and Klarrann will swoop downwards quickly and dramatically. At minimum "charge", this only gives Klarrann about 5 stage builder blocks downwards and less than one stage stage builder block horizontally in the direction he was facing. As he goes farther downwards, he also gains more of a horizontal arc in the direction he was facing, so the higher he flew, the better his horizontal recovery. The Swoop is actually very fast, as he flies nearly as fast as Fox's laser travels. Opponents who come into contact with Klarrann during the swoop take no damage, but are spiked downwards, much like if they come into contact with Falco's Side B in midair. This move has low beginning lag and a variable duration depending on how long you hold B. There is very little lag between the release of B and the swoop. There is, however some ending lag after the swoop is performed. Leaves Klarrann helpless.
*While this appears to be a potentially good recovery, Klarrann is highly vulnerable during the portion where you fly upwards. To get any effectiveness out of this at all, you must gain considerable vertical height before swooping.
Klarrann can grab the edge while flying upwards.


Down Special- Retribution

While similar to a counter in nature, this special doesn't try to defend Klarrann from attack, rather it outright punishes the enemy for using it. Press and release Down B and Klarrann's feet will be surrounded in a blue aura that reaches up about half a stage builder block. This is similar to Immolation in MasterWarlord's Illidan set in that it is a maintainable aura with a cost. Unlike Immolation, this does not deal direct damage. Instead, every time Klarrann is struck by an attack, 1/3 of the damage from that attack (rounded downwards, so a move that deals less than 3% damage will return 0 to the foe) is dealt back to the foe who attacked you. Every time damage is returned to the foe, 1 orb is taken off of Klarrann's orb guage (and the damage dealt by this move does not fill Klarrann's guage). In addition, this move can be charged. After 5 seconds, a gold light aura appears around the blue one. At this point, 1/2 of damage dealt (rounded down) is returned to the foe at a cost of 3 orbs per return. At 10 seconds charge, this move reaches its most powerful form. A ring of green light surrounds the gold and blue rings. Now this move has become a "shield of judgement." Foes who strike Klarrann at this point will take 2/3 of the damage (rounded down) that they deal to him and trip. This costs Klarrann a whopping 5 orbs per return. Press Down B at any point to dispell the auras. This move, in addition to its optional charge duration, has a 1 second cast time (beginning lag) but low ending lag.
*While only the fully charged form of the move actually provides Klarrann with some protection, the move does cause opponents to rethink their strategies a bit, often causing them to think twice before using moves that deal massive damage.
*Moves such as Fox's blaster will return no damage to the foe. These moves will not burn through Klarrann's orb guage.
*Chances are that you will never have enough time to charge this move up to its final form.


Assaulting Darkness: Normal Attacks

Neutral A- Mighty Swing

Klarrann smashes downwards with his totem or spirit weapon, the animation going from the standing pose where the bat is on his shoulder to swinging the totem down to the ground, creating a loud thudding noise. This attack has high beginning lag and medium ending lag. Great reach. High priority. Low hitstun. Deals 14% and high horizontal knockback.
*While the stats of this move are largely comparable to Ike's F-Smash, there are more subtle uses for this. Because it uses your standing/idle pose, it tends to be more of a surprise than most slow attacks. Another use of this move is mindgaming the foe into thinking that you have ended Bashing Stance, as even when you have Bashing Stance active, Klarrann goes into the normal idle pose as part of this move, though the effects of Bashing Stance still apply.

Dash- Bull's Charge
Press R (or whatever you set the input to) or double tap the control stick to perform this move. Klarrann moves his left arm behind his back and the right arm (which carries the totem or spirit weapon) in front of his body as he leans forward and runs faster than normal. The dash travels 3 stage builder blocks. At the end of the dash, Klarrann slides to a kneel. Foes struck by Klarrann while dashing take 5% damage and knocked to the ground (similar to a trip). Low beginning lag. Fairly high ending lag created by the need to stand back up after the sliding kneel. High priority. Low hitstun. Super Armor frames during the dash that end while sliding.
*This has obvious uses, such as helping Klarrann to approach, an area that he is bad at even with this move. It also makes struck foes trip.

Dash + A- Smack
While performing the Dash, press A and Klarrann will use a dash attack. He will swing his totem (or spirit weapon) horizontally from right to left, creating a thudding noise and impact marks when it strikes the foe. Fairly high lag on both ends for a dash attack. Great reach. High priority. Low hitstun. Deals 10% and great horizontal knockback in the direction Klarrann is facing.
*While the more powerful dash attack on its own, this move is largely less useful than the other dash options.

Dash + X/Y- Seize
While performing the Dash, press X or Y and Klarrann's hand will glow with a green aura as he grabs the foe. This deals no damage to the grabbed foe, but it allows him an alternate means to start comboes. This counts as the first move in a combo chain, the button you use affecting which comboes you can chain into. Medium beginning lag. Very high ending lag if you miss. Low ending lag if you successfully grab a foe. Medium reach. Grab priority.
*Klarrann's most useful dashing option by far, as it allows him a faster means to start a combo, though it comes at the downside of being a predictable and easily punishable dash attack.

Reach of the Light: Tilts

Side Tilt- Protector's Strike

Klarrann swings his totem (or spirit weapon) horizontally from left to right with his right hand very quickly. The totem and his right arm are behind his back at the end of this. This move has little beginning lag, coming out very quickly. The effort of swinging such a heavy weapon so quickly and with only one hand is very exhausting however (evidenced by Klarrann panting a bit), causing Klarrann to suffer nearly a second of ending lag! Great reach. High priority. No hitstun. Deals 10% and great horizontal knockback in the direction Klarrann is facing.
*Klarrann tends to become very reliant on this attack. It is one of his few quick means of damaging his opponents. This move is a double-sided sword. Should you miss, you will be punished.

Up Tilt- Mystic Sweep

Klarrann swings his totem (or spirit weapon) horizontally above his head, while turning towards the players, from the direction he was facing to the opposite direction with both hands rather quickly. He then rests it on his shoulder before turning back to his original position. This move comes out fairly quickly, having some, but low beginning lag. There is about 3/4 of a second of ending lag. Great reach. High priority. No hitstun. Deals 7% and good diagonal knockback in the direction opposite of the direction Klarrann was facing.
*There is a hidden feature to this attack. It deals an additional 7% damage while you wield a spirit weapon (so the spirit axe will deal 7+7+3%, or 20%).
*Klarrann's primary method of anti-air. Beware... miss and you will be punished.


Down Tilt- Thunder Clap

Klarrann quickly slams his totem (or spirit weapon) on the ground, creating a shockwave of green light that reaches out 5 stage builder blocks on both sides of Klarrann. Foes in this area of affect who are standing on the ground or platform that it affects trip and take 7% damage. This move has high beginning lag and medium ending lag. Foes struck by the totem (or spirit weapon), which has the usual great reach, will take 12% instead of the normal 7%. High priority. No hitstun. If the foe was shielding, they suffer from daze, a condition similar than shield break that lasts 1 second, instead of tripping.
*This move is only useful for the tripping or daze it causes. It is much to laggy and doesn't deal enough damage to be used as an offensive staple, despite hitting on both sides.

Might of the Light: Smashes

Side Smash- Banish

Klarrann casts his left hand forward. A bright white light forms around his hand and spreads, covering about a stage builder block in front of him. This has very high beginning lag and no ending lag. High priority. Medium hitstun. Deals 20...25% damage. Foes struck by this move are teleported to a new location on the field (that must be on the ground). In addition, if one of the struck foes was a summoned unit, especially one of Arthas's undead, it will destroy that unit and create a nova that reaches 3 stage builder blocks on both sides of the summoned unit's former location and deals 20...25% damage to foes struck by it, but not banishing any summoned units or teleporting any foes struck by it. The nova only occurs once, so it will not continue to decimate an entire undead group through repeated novas.
*This move makes Klarrann an excellent counter for Arthas, as he can utterly destroy Acolytes and other undead units.
*Against characters, this move is a double-bladed sword. It deals a lot of damage to the foe and warps them away from Klarrann, but the warp isn't necessarily a good thing... remember... Klarrann doesn't approach well.


Up Smash- Heart of Holy Flame

Klarrann sticks his totem (or spirit weapon) on the ground in front of him and clasps his hands together to pray (this is the charging position). Fairly high beginning lag and medium ending lag. After 1+1x seconds (1 seconds + 1 second for each second of charging), a bright white flame will burst from Klarrann's body, causing 10% damage and very high knockback with high hitstun and priority. The reach is about 1 stage builder block in all directions from Klarrann.
*While weird, this move does have potential uses. It has mindgame potential, as you set how long it takes to come into effect. Its most prominent use, however is comboing. The damage can trigger during your combo, or if you time it properly, at the end of your combo, adding an additional 10% to your combo. If you time it for the last hit, you have an awesome combo finisher.
*The counter to this move is to simply avoid Klarrann.


Down Smash- Symbol of Wrath

Klarrann kneels down and moves his hand over the dirt, like his crouching pose. He writes on the ground with his finger, creating a symbol. This part of the move sports medium lag on both ends and a duration based on charging, with a minimum of a half-second duration.
At no charge, he will create this symbol.

If given more time (charging), he will add more detail to the symbol, with the most detailed version of the symbol being this.

Now, Klarrann is free to move. When he returns to the location the signet is drawn on, he can activate it by pressing Down Smash again, causing him to press his totem or spirit weapon onto the symbol. A bright, almost nuke-like, blue light will burst from the symbol. Any foe within 3 stage builder blocks radius (in any direction) of the circle will take 10% damage, be spiked down (if they were in the air), and knocked to the ground for 1...3 seconds. This part of the move sports medium lag on both ends. High priority. No hitstun (not that it matters).
Klarrann may have more than one symbol at one time, but only one may be in the same location and they fade away after one minute.
*One of Klarrann's more interesting and potentially useful moves, this doubles as both a defensive mechanism and a set-up for an offensive move.
*Opponents must keep an eye out for the glowing symbols and be wary of Klarrann's current position when dealing with a Klarrann player who loves to use this move, which is just about any advanced Klarrann player.


Holy Skies- Aerials

Klarrann has no first jump, so he can only use his aerials when knocked into the air.

Neutral Aerial- Cyclone Attack
A really basic move, Klarrann spins around 360 degrees with his totem (or spirit weapon), hitting on both sides. High beginning lag and no ending lag. Great reach on both sides. High priority. Low hitstun. Deals 12% damage and high horizontal knockback. If Klarrann hits the ground, he will use the move while on the ground.
*This is mainly used as a ground move, rather than an aerial, as it is a more damaging alternative to Thunder Clap. Klarrann's fast falling speed tends to make it less effective as an aerial.

Directional Aerial- Spear of Light

A spear of light forms in Klarrann's left hand. Klarrann throws the spear in the direction you pressed, which could be any of the cardinal directions, or even a diagonal. The spear travels at a fast initial speed, like that of Fox's laser, but gets progressively slower so that after travelling half of Final Destination it slows to Falco laser speed, and after travelling the distance of Final Destination it slows to Wolf's laser speed. The spear will keep flying until it leaves the stage. It deals 7% and good knockback in the direction the spear was flying.
*The only projectile in Klarrann's entire set. Unfortunately for him, he can't use it reliably. It is a powerful projectile when you can use it, however. Definitely don't waste your aerial opportunity on Klarrann's Nair.
*This takes the place of all the directional aerials.


Hand of the Divine- Grabs/Throws

Grab- Hand of the Reverand
Klarrann reaches out and places his hand on his foe's shoulder. They fall to their knees, awaiting the reverand's message. This has a medium grab speed and reach.

Grab Attack- Word of Censure

Klarrann starts preaching in an angelic language, that somehow the foe can understand (the other language is to prevent religious preaching to the players). The foe takes 7% due to disagreeing with Klarrann's message of deliverance. The foe attempts to attack Klarrann, dealing 7% and great knockback to him if they hit.
*This grab attack can only be used once per grab.
*You must use this grab attack before using your throws.
*To avoid getting hurt, you must throw the foe.


Forward Throw- REV'RAND PAWNCH
Klarrann closes his left hand into a fist and unleashes a mighty punch. High beginning lag and low ending lag. Deals 17% and high horizontal knockback to the foe. Klarrann cannot use this fast enough to avoid taking damage from the foe's attack, but he has Super Armor.
*A truly mighty throw and a great finishing move. It's downside, is ofc, the fact that Klarrann takes damage.

Back Throw- Pole Slap
Klarrann swings his totem (or spirit weapon) from behind the foe's back as they leap at him. They take 10% damage and good horizontal knockback in the direction behind Klarrann.
*This is probably your best throw if you are afraid to take the damage from your forward throw.

Up Throw- Crescent Kick
Klarrann kicks from the ground up, forming a crescent shape. This has low beginning lag and high ending lag. Deals 7% and great upwards knockback.
*Despite its quick initial speed, this throw might be one to avoid, seeing as it puts your foe into the air, something that Klarrann tends to hate.

Down Throw- SMASH
Klarrann smashes his totem (or spirit weapon) down on the foe. Medium lag on both ends. The foe takes 7% damage and is slammed into the ground, much like a Pitfall. Unlike the ordinary pitfall, this cannot be used to guarantee hits, as the foe has invinceability over the entire duration. Its a good chance to take the time and space from the foe a bit, though.

Chances for Redemption- Situationals

Ledge Attack- Headbutt
Klarrann headbutts the foe. This contrasts to most of Klarranns attacks in that it has low lag on both ends, below average reach, medium priority, and low hitstun. Deals 10% and good horizontal knockback in the direction Klarrann is facing.

Rising Attack- Leaping Assault
Klarrann leaps to his feet and, facing the players, swings his arms upwards to each of his sides. The right arm, which carries the totem (r spirit weapon), is more powerful, so this attack will be more powerful on the left side. It deals 10% and high upwards knockback. The right side (or left arm), deals 5% and good upwards knockback. This attack has fairly low beginning lag and fairly high ending lag. Great reach on the left side and medium reach on the right side. High priority. Low hitstun.

Final Smash- Divine Judgement
Klarrann places his totem (or spirit weapon) on the ground and pulls out what appears to be a bible of whatever his religion is. He reads from its prophecies section (effectively its book of Revelations) and a blinding light radiates in the center of the stage. Foes are blinded over the entire course of the Final Smash, unable to see the random lightning bolts that strike. Blue and white lightning strikes from the heavens in random locations, dealing 20% damage and high upwards knockback to those unlucky to be struck by it. It also creates a thunder sound and releases a light wave (that does nothing) and isn't visible until getting within 3 stage builder blocks of a character... Klarrann can be attacked, but has Super Armor during the Final Smash. This ends after 10 seconds.
*The best way to counter this Final Smash is to keep moving. If you figure out where lightning has already struck, move to that location. Remember, lightning never strikes the same location twice. The only way to locate the place the lightning struck is to figure out how long it took the light wave to reach your character. You could also take advantage of the opportunity to lay down the hurt on Klarrann, but remember, Lightning can strike you even when you are by him and it won't hurt him.

Chains of Light: Comboes

Comboes are a unique, yet simple system. Klarrann's comboes only work on the ground, as they take the place of his jump buttons. Comboes are Klarrann's main source of damage and sometimes finishing moves. Some of them are really not straight-forward. Klarrann has Super Armor frames while performing the X and Y attacks. The end knockback of the combo is the knockback of the last hit used in the combo.

X Attack-
Klarrann swings his totem from right to left horizontally. Fairly high beginning lag and low ending lag. Great reach. High priority. High hitstun. Deals 3% and decent knockback. Used to start many comboes.

X, X Attack-
X, X-
Klarrann swings his weapon in reverse. Same stats as X attack.

Y Attack
Klarrann swings his totem upwards in the direction in front of him from the ground. High beginning lag and low ending lag. Great reach. High priority. High hitstun. Deals 4% and good knockback. Used to start many comboes.

Y, Y Attack
Y, Y-
Klarrann swings the totem horizontally from left to right, much like the X attack. Same stats as the Y attack.

Be As Dust- X, X, X, X
X-
See X attack.
X, X-
Klarrann swings his weapon in reverse. Same stats as X attack.
X, X, X-
Klarrann kicks just in front of him. Yellow "shockwave" impact marks occur around his foot. Low lag on both ends. Medium reach. High hitstun. Deals 3% and good knockback.
X, X, X, X-
Klarrann swings around 3 times with his totem, hitting both sides. Low beginning lag and high ending lag. Great reach on both sides. High hitstun. Deals 2% per hit (3 hits against target foe) and decent knockback.

Return to the Soil- X repeatedly, then X
X-
See X attack.
X, X-
Klarrann swings his weapon in reverse. Same stats as X attack.
X, X, X-
Klarrann kicks just in front of him. Yellow "shockwave" impact marks occur around his foot. Low lag on both ends. Medium reach. High hitstun. Deals 3% and good knockback.
X, X, X, X-
Klarrann swings around 3 times with his totem, hitting both sides. Low beginning lag and high ending lag. Great reach on both sides. High hitstun. Deals 2% per hit (3 hits against target foe) and decent knockback.
Continuation-
Klarrann maintains the X, X, X, X attacking, spinning around with his totem. Your opponent is no longer locked, as each of these hits has abysmal hitstun. Deals 2% per hit. Hits on both sides. Great reach on both sides. No beginning lag (seeing as it is just a continuation), but high ending lag. Decent knockback. Low priority and no super armor frames.
*This combo is not recommended, as it is just a continuation of the X, X, X, X combo that leaves you vulnerable.

Die Without Straying- X, X, X, X + Y
X-
See X attack.
X, X-
Klarrann swings his weapon in reverse. Same stats as X attack.
X, X, X-
Klarrann kicks just in front of him. Yellow "shockwave" impact marks occur around his foot. Low lag on both ends. Medium reach. High hitstun. Deals 3% and good knockback.
X, X, X, X-
Klarrann swings around 3 times with his totem, hitting both sides. Low beginning lag and high ending lag. Great reach on both sides. High hitstun. Deals 2% per hit (3 hits against target foe) and decent knockback.
X, X, X, X, Y- Klarrann brings his totem to his left side, pointed behind him (a position similar to that used by a Baseball batter.) After about 1/2 of a second, he unleashes the mighty attack, swinging horizontally to the right. The struck foe(s) take 7% and high horizontal knockback in the direction Klarrann is facing. High ending lag. Great reach. Low hitstun. GThe foe gets a short time to react, possibly allowing them to shield or sidestep the move and punish you for using it.
*This move is a good way to both bring foes into the finishing range and finish them off, but it is risky as they can actually punish you for it.

Repent Before Spirits- X, X, X, X, X, Y (Drains 10% of Orb Guage
X-
See X attack.
X, X-
Klarrann swings his weapon in reverse. Same stats as X attack.
X, X, X-
Klarrann kicks just in front of him. Yellow "shockwave" impact marks occur around his foot. Low lag on both ends. Medium reach. High hitstun. Deals 3% and good knockback.
X, X, X, X-
Klarrann swings around 3 times with his totem, hitting both sides. Low beginning lag and high ending lag. Great reach on both sides. High hitstun. Deals 2% per hit (3 hits against target foe) and decent knockback.
X, X, X, X, X-
A 4th hit slightly continuing the combo. Same stats.
X, X, X, X, X, Y-
Klarrann jumps at the foe and slams his staff into the ground. A green bolt shoots up, reaching 3 stage builder blocks upwards. Low beginning lag. High ending lag. Low hitstun. Deals 7% and great upwards diagonal knockback in the direction Klarrann is facing.
*A much more viable alternative to extend the X, X, X, X than the previous 2 comboes, but it does drain 10% of the Orb Guage's maximum. If you don't have that much, then this combo is unusable.

To Thy Rest- X, X, X, Y
X-
See X attack.
X, X-
See X, X attack.
X, X, X-
Klarrann goes into the first swing of his X, X, X combo.
X, X, X, Y-
Interrupt the X, X, X combo to use this. Klarrann will grab the foe and start slamming them on the ground, dealing 2% per hit, for 3 seconds (Total of 6 hits). He will then throw them.

Trial From Spirits- X, X, X, Y, X
X-
See X attack.
X, X-
See X, X attack.
X, X, X-
Klarrann goes into the first swing of his X, X, X combo.
X, X, X, Y-
Interrupt the X, X, X combo to use this. Klarrann will grab the foe and start slamming them on the ground, dealing 2% per hit, for 3 seconds (Total of 6 hits). He will then throw them.
X, X, X, Y, X
Interrupt the X, X, X, Y combo to use this. Klarrann will throw the foe one stage builder block forward and them jump on them. He then slams the totem into the ground, releasing 4 great pillars of light (one in front of Klarrann, one behind Klarrann, one to the right side of Klarrann in the foreground, and one to the left side of Klarrann in the background. The pillars reach up all the way to the top of the stage and deal 7% and good knockback to any who come into contact with them. The grabbed foe takes 7% and good knockback. Low beginning lag and very high ending lag. Low hitstun.
This is truly one of Klarrann's most amazing comboes, especially in a free for all, where it can hurt other foes.


Fall to Hell- X, X, X, Y, Y
X-
See X attack.
X, X-
See X, X attack.
X, X, X-
Klarrann goes into the first swing of his X, X, X combo.
X, X, X, Y-
Interrupt the X, X, X combo to use this. Klarrann will grab the foe and start slamming them on the ground, dealing 2% per hit, for 3 seconds (Total of 6 hits). He will then throw them.
X, X, X, Y, Y-
Klarrann will leap into the air 5 stage builder blocks upwards while still holding the foe. He will then throw them to the ground and after they hit the ground, he will fall down and smash his totem into them, releasing a pillar of light that travels upwards 3 stage builder blocks. Deals 8% and good knockback to the target foe and 6% and good knockback to other foes struck by the pillar.

Sublimation- X, X, X, Y, Y, X (Drains 10% of Orb Attack Guage)
X-
See X attack.
X, X-
See X, X attack.
X, X, X-
Klarrann goes into the first swing of his X, X, X combo.
X, X, X, Y-
Interrupt the X, X, X combo to use this. Klarrann will grab the foe and start slamming them on the ground, dealing 2% per hit, for 3 seconds (Total of 6 hits). He will then throw them.
X, X, X, Y, Y, X-
Klarrann will leap into the air 5 stage builder blocks upwards while still holding the foe. He will then throw them to the ground and after they hit the ground, his totem becomes the giant golden hammer from his Y, X and Y, X (Hold) comboes. He will then fall downwards and slam the hammer into them. A huge holy nuke of light about the size of a smart bomb explosion will occur at the point of impact, damaging that foe and any other struck foes for 20% and high knockback.
*Truly, this is Klarrann's ultimate combo as far as damage and knockback is concerned, but it does drain your orb attack guage.

Have No Thirst- Y, Y, Y
Y-
See Y attack.
Y, Y-
Klarrann swings the totem horizontally from left to right, much like the X attack. Same stats as the Y attack.
Y, Y, Y-
Klarrann lifts the totem over his head (quickly) and slams it downwards, smashing the ground. The reach is great and is further extended by a green shockwave measuring approximately 1 stage builder block. High hitstun. Deals 5% and high horizontal knockback. Has high ending lag if you do not use another part of the combo.

Have No Hunger- Y, Y, Y, Y
Y-
See Y attack.
Y, Y-
Klarrann swings the totem horizontally from left to right, much like the X attack. Same stats as the Y attack.
Y, Y, Y-
Klarrann lifts the totem over his head (quickly) and slams it downwards, smashing the ground. The reach is great and is further extended by a green shockwave measuring approximately 1 stage builder block. High hitstun. Deals 5% and great horizontal knockback. Has high ending lag if you do not use another part of the combo.
Y, Y, Y, Y-
Klarrann leaps forward about a stage builder block and kicks the foe with great force, producing a golden light circle upon impact that is roughly the size of a stage builder block. Low beginning lag and high ending lag. Deals 7% and great horizontal knockback.
*This move is a great alternative to Y, Y, Y. While Y, Y, Y grants you a better killing move, this does 7% more damage, for a total combo damage of 20%.

Repent- X, Y
X-
See X attack.
X, Y-
Klarrann uppercuts slightly as his hand glows with a green aura. This grabs foes. Klarrann will then leap about a stage builder block upwards with the foe in hand. The green aura in his hands glows extra brightly. He slams them into the ground. Deals 5% and leaves the foe in a "tripped" state. If used improperly, can lead to Klarrannside. Low beginning lag and high ending lag. Low ending lag. High hitstun. High ending lag if you do not follow into a new combo.
*Great if you need to leave the foe vulnerable for a normal attack or possibly even a new combo.

Thou Art Forgiven- X, Y, Y
X-
See X attack.
X, Y-
Klarrann uppercuts slightly as his hand glows with a green aura. This grabs foes. Klarrann will then leap about a stage builder block upwards with the foe in hand. The green aura in his hands glows extra brightly. He slams them into the ground. Deals 5% and leaves the foe in a "tripped" state. If used improperly, can lead to Klarrannside. Low beginning lag and high ending lag. Low ending lag. High hitstun. High ending lag if you do not follow into a new combo.
X, Y, Y-
Klarrann runs about 3 stage builder blocks forwards, still holding onto the foe and then throws them a to the ground (the fly about a stage builder block forward before hitting the ground.) This deals no extra damage to the foe, but it effectively throws Klarrann's dash into the mix, as it damages other foes struck by Klarrann's body for 5% and good knockback. Low lag on both ends.
*An alternative to X, Y. In a 1v1, it essentially trades leaving the foe vulnerable for leaving Klarrann less vulnerable. Rather than the combo ending with high ending lag, it ends with low.

Thou Shalt Perish- X, X, Y
X-
See X attack.
X, X-
See X, X attack.
X, X, Y-
Similar to X, Y. Klarrann grabs the foe, this has very low beginning lag and has a smaller yellow aura around his hand. Klarrann will now start swinging the foe around for 5 seconds. Each time the foe hits an obstacle, object, or another player, the foe will take 6%. You can walk around during this move. At the end of the duration, Klarrann will toss the foe forwards one stage builder block.
*Klarrann has super armor while the foe is grabbed, but if he takes any damage, he will drop the foe.
*You can use your dash during this, oddly. Klarrann will not swing the foe and the time spent dashing will not count towards the 5 seconds of the X, X, Y.


Pray- X, X, Y, X
X-
See X attack.
X, X-
See X, X attack.
X, X, Y-
Similar to X, Y. Klarrann grabs the foe, this has very low beginning lag and has a smaller yellow aura around his hand. Klarrann will now start swinging the foe around for 5 seconds. Each time the foe hits an obstacle, object, or another player, the foe will take 6%. You can walk around during this move. At the end of the duration, Klarrann will toss the foe forwards one stage builder block.
*Klarrann has super armor while the foe is grabbed, but if he takes any damage, he will drop the foe.
X, X, Y, X-
Klarrann will lift the foe upwards and a brilliant green explosion happens around them. Deals 5% to the foe. Any other foes struck by the nova will take 10% and great knockback. Fairly high beginning lag and no ending lag. After this, you resume going into the X, X, Y for however much of the 5 seconds is left.

Salvation- X, X, Y, X, X
X-
See X attack.
X, X-
See X, X attack.
X, X, Y-
Similar to X, Y. Klarrann grabs the foe, this has very low beginning lag and has a smaller yellow aura around his hand. Klarrann will now start swinging the foe around for 5 seconds. Each time the foe hits an obstacle, object, or another player, the foe will take 6%. You can walk around during this move. At the end of the duration, Klarrann will toss the foe forwards one stage builder block.
*Klarrann has super armor while the foe is grabbed, but if he takes any damage, he will drop the foe.
X, X, Y, X-
Klarrann will lift the foe upwards and a brilliant green explosion happens around them. Deals 5% to the foe. Any other foes struck by the nova will take 10% and great knockback. Fairly high beginning lag and no ending lag. After this, you resume going into the X, X, Y for however much of the 5 seconds is left.
X, X, Y, X, X-
As the green nova continues to be around the grabbed foe, Klarrann swings the foe in front of him. The grabbed foe takes no damage, but this helps to hit other foes with the X, X, Y, X effect. No lag on either end. After this, you resume going into the X, X, Y for however much of the 5 seconds is left.
To perform X, X, Y, X, X, you must press X very quickly after X, X, Y, X, or else Klarrann will use X, X, Y, X again.

Fall From Grace- X, X, Y, (Dash + X) or (Y)
X-
See X attack.
X, X-
See X, X attack.
X, X, Y-
Similar to X, Y. Klarrann grabs the foe, this has very low beginning lag and has a smaller yellow aura around his hand. Klarrann will now start swinging the foe around for 5 seconds. Each time the foe hits an obstacle, object, or another player, the foe will take 6%. You can walk around during this move. At the end of the duration, Klarrann will toss the foe forwards one stage builder block.
*Klarrann has super armor while the foe is grabbed, but if he takes any damage, he will drop the foe.
X, X, Y, (Dash + X) or (Y)-
Klarrann will leap forward 5 stage builder blocks saying "May Heaven protect me." His hand will glow a bright green. He will then slam the foe into the ground and a green and gold glow of heaven's light will be created in the area. Deals 6% and good knockback to the grabbed foe. The green glow stays there for 3 seconds. Foes who run into it are judged, taking 7% damage and high knockback. Non-Klarrann allies who run into it are blessed, healing them for 7% damage. The heavenly trap will disappear after being triggered by an ally or enemy. Low beginning lag and high ending lag. Low hitstun. May result in Klarrannside.

You worthless....! Y, X (Drains 10% of Orb Attack Guage)
Y-
See Y attack.
Y, X-
Klarrann does an animation similar to Ganondorf's Up Taunt, except both of his feet remain on the ground, Klarrann screams "YAH!" and his totem becomes a giant spirit hammer with a glowing gold and black color scheme. For 10 seconds, it remains in this form. The hammer powers up Klarrann's attacks by increasing his already great reach by an additional 15% and increases knockback by an additional 20%.
*This move locks the use of Y attacks while you possess the hammer and drains 10% of the Orb Attack Guage's maximum. If you do not have that much orb power, you cannot use this combo.
Klarrann's X combo is now only 2 hit but has buffed damage and knockback. His grab is also replaced.


Shout- Y, X, Then X, X
While he possesses the golden hammer, Klarrann's X combo is transformed into a 2 hit combo.
X-
Klarrann slams the hammer into the ground. Deals 6% and great knockback. High hitstun. High beginning lag. Has high ending lag if you do not use a second hit of the X button. High priority. Great reach (+15%).
X, X-
Klarrann lifts the hammer up and slams it a second time. Same stats as the first hit, but with lower beginning lag.

Despair- Y, X, Z
Klarrann's grab is replaced while he has the hammer.
Z-
Klarrann slams the hammer down. Foes struck by the hammer are crushed into the ground, just like Donkey Kong's Side Special or a pitfall. Deals 7%. Great reach (+15%). High lag on both ends. High priority.

Moan- Y, X (Hold)
Y-
See Y attack.
Y, X (Hold)-
Klarrann does an animation similar to Ganondorf's Up Taunt, except both of his feet remain on the ground, Klarrann screams "YAH!" and his totem becomes a giant spirit hammer with a glowing gold and black color scheme. Klarrann is now unable to move normally until you swing the weapon 3 times. With each additional press of any attack button, Klarrann will swing the hammer, dealing 12% and high knockback per hit. Each attack has high lag on both ends, high priority and low hitstun. The hammer has 15% more reach than Klarrann's totem. Each attack causes Klarrann to move a step in the direction he attacked.
*A viable alternative to Y, X, this move does not drain your Orb attack guage. But it leaves you with blaring weaknesses, namely the inability to attack above you and to move normally.
You still maintain your super armor while using this move, as it is still a combo, but if you are attacked at any moment during this, the move ends and you take the attack's damage.
Note that this isn't like other comboes in that your foe won't just stand there and get hurt.


You Wish To Die?!- Y, Y, X (Drains 10% of Orb Attack Guage)
Y-
See Y attack.
Y, Y-
See Y, Y attack.
Y, Y, X-
Klarrann does an animation similar to Ganondorf's Up Taunt, except both of his feet remain on the ground, Klarrann screams "YAH!" and his totem becomes a giant spirit axe with a glowing electrical blue + white + black color scheme. For 10 seconds, it remains in this form. The axe powers up Klarrann's attacks by increasing his already great reach by an additional 15% and increasing the damage dealt by his attacks by 3%.
*This move locks the use of Y attacks while you possess the axe and drains 10% of the Orb Attack Guage's maximum. If you do not have that much orb power, you cannot use this combo.
Klarrann's X combo is now only 2 hit but has buffed damage. His grab is also replaced.


Struggle- Y, Y, X, X, X
Klarrann's X combo is replaced while he holds the axe.
X-
Klarrann slams down his axe. Great reach (+15%). High beginning lag. Has high ending lag if you don't press X a second time. High priority. High hitstun. Deals 9% and great knockback.
X, X-
Klarrann lifts up his axe and slams it a second time. Same stats as the first attack, but it has low hitstun and ends the combo.

Quake With Fear- Y, Y, X, Z
Klarrann's grab is replaced while he holds the axe.
Z-
Klarrann scoops the foe upwards with his axe. Fairly high beginning lag and high ending lag. Great reach (+15%). High priority. Low hitstun. Deals 10% and great upwards knockback to the foe.

Writhe In Agony- Y, Y, X (hold)
Y-
See Y attack.
Y, Y-
See Y, Y attack.
Y, Y, X (Hold)-
Klarrann does an animation similar to Ganondorf's Up Taunt, except both of his feet remain on the ground, Klarrann screams "YAH!" and his totem becomes a giant spirit axe with a glowing blue, white, and black color scheme. Klarrann is now unable to move normally until you swing the weapon 3 times. With each additional press of any attack button, Klarrann will swing the hammer, dealing 15% and great knockback per hit. Each attack has high lag on both ends, high priority and low hitstun. The axe has 15% more reach than Klarrann's totem. Each attack causes Klarrann to move a step in the direction he attacked.
*A viable alternative to Y, Y, X this move does not drain your Orb attack guage. But it leaves you with blaring weaknesses, namely the inability to attack above you and to move normally.
You still maintain your super armor while using this move, as it is still a combo, but if you are attacked at any moment during this, the move ends and you take the attack's damage.
Note that this isn't like other comboes in that your foe won't just stand there and get hurt.


Don't Anger Me- Y, Y, Y, X (Drains 10% of Orb Attack Guage)
Y-
See Y attack.
Y, Y-
Klarrann swings the totem horizontally from left to right, much like the X attack. Same stats as the Y attack.
Y, Y, Y-
Klarrann lifts the totem over his head (quickly) and slams it downwards, smashing the ground. The reach is great and is further extended by a green shockwave measuring approximately 1 stage builder block. High hitstun. Deals 5% and great horizontal knockback.
Y, Y, Y, X-
Klarrann does an animation similar to Ganondorf's Up Taunt, except both of his feet remain on the ground, Klarrann screams "YAH!" and his totem becomes a giant spirit scythe with a glowing electrical blue + purple color scheme. For 10 seconds, it remains in this form. The scythe powers up Klarrann's attacks by increasing his already great reach by an additional 30%.
*This move locks the use of Y attacks while you possess the scythe and drains 10% of the Orb Attack Guage's maximum. If you do not have that much orb power, you cannot use this combo.
Klarrann's X combo is now only 2 hit but has buffed damage. His grab is also replaced.


No Mercy- Y, Y, Y X (and afterwards X, X)
This is merely the new X, X attack you get while using the scythe.
X-
The same animation as Klarrann's normal X attack. Same stats, except it deals an additional 3% damage.
X, X-
The same animation as Klarrann's normal X, X attack. Same stats, except it deals an additional 3% damage.

Die That Way- Y, Y, Y, X (and afterwards Z)
This replaces Klarrann's grab while he uses the scythe.
Z-
Klarrann sticks his scythe out in front of him at max reach, catches the foe, and pulls in, dealing 7% and leaving the foe in a "tripped" state. Looks similar to an attack by Zasalamel for those who have played Soul Calibur. Fairly high beginning lag and medium ending lag. Great reach (+30%). High priority. Low hitstun.

No Escape- Y, Y, Y, X (Hold)
Y-
See Y attack.
Y, Y-
Klarrann swings the totem horizontally from left to right, much like the X attack. Same stats as the Y attack.
Y, Y, Y-
Klarrann lifts the totem over his head (quickly) and slams it downwards, smashing the ground. The reach is great and is further extended by a green shockwave measuring approximately 1 stage builder block. High hitstun. Deals 5% and great horizontal knockback.
Y, Y, Y, X (Hold)-
Klarrann does an animation similar to Ganondorf's Up Taunt, except both of his feet remain on the ground, Klarrann screams "YAH!" and his totem becomes a giant spirit scythe with a glowing electrical blue + purple color scheme. Klarrann is now unable to move normally until you swing the weapon 3 times. With each additional press of any attack button, Klarrann will swing the Scythe, dealing 12% and great knockback per hit. Each attack has high lag on both ends, high priority and low hitstun. The scythe has 30% more reach than Klarrann's totem. Each attack causes Klarrann to move a step in the direction he attacked.
*A viable alternative to Y, Y, Y, X, this move does not drain your Orb attack guage. But it leaves you with blaring weaknesses, namely the inability to attack above you and to move normally.
You still maintain your super armor while using this move, as it is still a combo, but if you are attacked at any moment during this, the move ends and you take the attack's damage.
Note that this doesn't really work like other comboes.. your foe won't just stand there and take it.


Lots of comboes, right?

Taunts

Up Taunt- I Cannot Allow That
Klarrann points his totem (or spirit weapon) in the direction he is facing and says "I cannot allow that."

Side Taunt- I Bring Salvation
Klarrann plants hit totem (or spirit weapon) on the ground and holds out the book from his Final Smash, saying "I bring salvation."

Down Taunt- Meet Your Grave!
Klarrann says "Meet your grave!" as he slams his totem (or spirit weapon) down.

Loss Pose
Klarrann claps for the foe, while bowing his head, his face concealed by his hat.

Victory Poses:

Up Pose- Peace Be With Ye
Klarrann holds out a dove that carries an olive branch in its talons. He releases it and it flies up into the air.

Side Pose- Salvation Hath Been Brought
Klarrann rests his weapon on the ground and says "Salvation hath been brought."

Down Pose- Rest In Peace
Klarrann bows in respect for the characters he just presumedly killed and says "May thou have enternal rest."

Extras

To Unlock

Unlock him in the Subspace Emissary.

or

He is auto-matically unlocked ninety nine nights after you first play the game.

Game Insignia


The symbol is the N3 lettering on the box.

Character Portrait


Assist Trophy- Tyurru


Tyurru is a young girl adept in water magic. When summoned from the assist trophy, she will fly up into the air, riding on her key staff. From the air, she will fire water moves at the foes below. Tyurru is invinceable and leaves after 10 seconds.

Spurtz
Tyurru fires a quick spray of water, much like Squirtle's water gun diagonally downwards. It travels very quickly. If it hits a foe, that foe takes 3% damage and flinches. Tyurru spams this move frequently.

Bubble
Tyurru drops a giant bubble onto the stage. It stays there for 5 seconds before popping. Enemies who run into it are trapped inside for the remainder of the bubble's duration and take 5% damage per second.

Hydro
Tyurru performs a single powerful version of Squirtle's water gun, firing it at a random foe. If it hits, that foe takes high horizontal knockback and no damage.

Tidal Wave
Tyurru's "Final Smash". Just before leaving, she will get off her key and levitate in place, summoning a giant tidal wave from the background. It deals 20% and OHKO knockback to any foes struck by it. To avoid, you must sidestep or airdodge properly, much like Tabuu's Red Rings.

Boss- The King of Nights

*No Picture Available... instead use this video.

Quite possibly one of the most broken bosses in video game history, the last boss of Ninety Nine Nights, a mighty demon who once ruled the world.

Play As:
Klarrann

Computer Controlled Ally:

Dwingvatt (invinceable, but does take knockback, never enough to kill him, though)

Difficulty:
Very Hard (True to game, The King of 99 nights is one of the most broken bosses ever).

Health:
Same as Tabuu

Size:
Roughly that of one of the Luminoths from Metroid Prime 2 (a bit smaller than Tabuu).

Mobile:
Yes

Fought On:
Another World (Basically a red recolred Final Destination)

Music:
The same music in the video.

Moves:

Warp
The King of Ninety Nine Nights warps to a random location that must be on the stage, not in the air. Very fast.

Dark Claws
A dark aura appears around the King of Ninety Nine Nights claws and he swings them 3 times, dealing 15...30% damage. Low knockback and high hitstun with the first two hits. Medium... Great knockback and low hitstun with the 3rd hit. Great reach.

Split Beam
The King of Ninety Nine Nights fires a very fast beam that splits, much like one of Master Hands moves. It covers 3 stage builder blocks distance in front of the demon. Deals 10...25% damage and good...high knockback. Comes out in about 1/4 of a second!

NUKE!
The King of N3 lifts up his right hand and a large sphere of energy forms around it. This is his ultimate attack. He throws the sphere at your character. While it would seem as though this could be dodged like a projectile, if it hits you, Dwingvatt, the ground... anything... it blows up, releasing an explosion the size of a Smart Bomb explosion! The sphere and the explosion both deal 30...50% damage and high...OHKO knockback! If you want to live, you had better get the hell away from that sphere or be ready to sidestep the explosion!


*These moves sound painful, don't they. Well, they are very, very painful. This boss is an optional boss, not appearing in Boss Battles, rather being a challenge that will give you a trophy of the boss for beating him. He is very difficult to defeat, even with Dwingvatts help. Dwingvatt attacks very quickly and is a great distraction, but deals rather miniscule damage, that of Fox's laser fire at best. If you want to win this fight, you must be able to dodge on a moment's notice and perform hit and run attacks. Comboes do make the King of N3 flinch, so you can use them to some effect.
 

Mythic02

Smash Journeyman
Joined
Jan 22, 2009
Messages
210
Wow, Klaraan is very interseting with all the combos but, without his first jump, how can he move around Norfair? It seems he has to be perfect with his Up-B.

Also, you do know that Dedede's chain grab never stops right? It does pretty much the same knockback whether you are at 0% or 999%. So he couldn't break out at 50%.
 

Hyper_Ridley

Smash Champion
Joined
Dec 21, 2007
Messages
2,291
Location
Hippo Island
That was a cool move set Chris.

However, I feel concerned about all his special mechanics. It makes me feel like he's just the gameplay from his own game with Smash Bros stuff slapped onto them. I've never played his game, so maybe I'm missing something, but it's something I felt I should point out. Even Arthas at least stuck to Smash Bros inputs for creating acolytes and whatnot.
 

Chris Lionheart

Smash Champion
Joined
Apr 6, 2008
Messages
2,076
Location
Make Your Move
That was a cool move set Chris.

However, I feel concerned about all his special mechanics. It makes me feel like he's just the gameplay from his own game with Smash Bros stuff slapped onto them. I've never played his game, so maybe I'm missing something, but it's something I felt I should point out. Even Arthas at least stuck to Smash Bros inputs for creating acolytes and whatnot.
I wouldn't worry about that, seeing as he comes from a Hack and Slash game. The game works with a full explorable map. Even without that difference he isn't exactly the same. All of his A moves, B moves and grabs are creative influence. Ninety Nine Nights characters can only single jump, so if that were canon, Klarrann would have no jumps at all. It took a lot of time to translate the X + Y attacks into a Smash form.

As for the Norfair comment, stages like that are obviously counterpicks against Klarrann. Up B is his only real means of getting around in these stages.
 

The Trophy Master

Smash Journeyman
Joined
Dec 27, 2008
Messages
272
Location
*Sends Sundance an orange elephant on Chirstmas, a
Directly from the depths of the sea, a moveset appears ....

The Water Type Pokémon

The Roster :

The Roster is revealed below, but you might want to keep the surprise till the actual moveset arrives. ( Roster = Author + Pokémon )
Akiak - Chinchou, the Angler Pokémon
Scyphozoa - Sharpedo, the Brutal Pokémon
Baloo - Remoraid, the Jet Pokémon
The Trophy Master - Kingler, the Pincer Pokémon

This moveset will work like The Halberd Crew, so expect different styles from each Pokémon. But, they'll all share a same layout, designed by Scyphozoa, and Akiak! Prepare to be amazed! The moveset is done by Akiak, Baloo, Scyphozoa and The Trophy Master


I know that looks really big for an announcement, but I wanted it to be great, cause I hope our moveset will be great. This will be posted during MYM5, no fears to have.

Nice moveset Chris! Awesome job as always! As you said, it's not as great as Arthas, but atleast it fits Smash better. I love the mini Aerial mechanic. The Warcraft Nerd is happy to see you used some WC moves!

Tanookie, Mia is pure greatness! I was expecting something like that from you and I was hyped up for this, but it's even better than what I thinked. The multiple FS are really good. Can't wait to see Hypno! ( 5th favorite Pokémon )
 

SirKibble

Smash Champion
Joined
May 2, 2008
Messages
2,400
Klarrann was definitely an interesting read, though I have to echo HR a bit. I feel like he's a little forced. His moves are all fun and creative and everything, but the lack of a ground jump and combos (kind of specific to a GameCube controller, too) feel a bit un-Smash-like. Aside from that, though, I really love the moveset. It's definitely fun, interesting, and creative, just seems a bit forced into the Smash setting.
 

Red Arremer

Smash Legend
Joined
Nov 27, 2005
Messages
11,437
Location
Vienna
Someone post two more posts, I have a massive set for the next page.
I can't believe, you, out of all people as an AUTHORITY OF THIS CONTEST are asking for spam in this very thread although you EXACTLY KNOW that we are trying to cut down the spam and ESPECIALLY want the "countdowns" to stop. I'm VERY disappointed in you, Kupa. And I reported you. Expect me to talk to MasterWarlord about this matter... I can not and will not tolerate this.
 

dancingfrogman

Smash Ace
Joined
Jan 3, 2008
Messages
862
Location
United Kingdom, Birmingham
Switch FC
3133 8842 3910
It looks like a good set Chris, while the mechanics are intresting, I think his game would be cramped, IDK, anyone whose played me on Brawl would probably say I <3 the air, and that's how I move towards the opponent and approach the enemy. Not having that option would make me loathe to play as him, just for the fact he can't jump. Everything else is pretty much what De3Minion and HR has said. Everything else is great though!

@Kupa: *waggles finger* Tut tut tut tut tut tut
 

BKupa666

Barnacled Boss
Moderator
Joined
Aug 12, 2008
Messages
7,788
Location
Toxic Tower
You'd better be prepared for Scar & the Hyenas! The wicked lion king and his ravenous henchmen have joined the fray!


Scar is the younger brother of Mufasa, the uncle of Simba, and second in line to the throne after Simba was born. Scar is jealous of Simba's position as the next king of the Pride Lands, so he plots to assassinate his brother and nephew, in order to seize the throne. Because of his cruel sense of indifference, combined with highly sophisticated intellect and him being one of the few (possibly the only) Disney villains to kill off a main character onscreen, Scar has a solid place as one of the most evil and memorable Disney villains of all time.

Scar is depicted as an emaciated melanistic lion with dusty brown fur, a long black mane and distinctive almond shaped green eyes. He has large, white paws with black claws that are always bared and never retracted, unlike those of the other lions in the film. Scar also possesses a white goatee beard and a thin pink gash over his left eye, earning him his name.


In Smash, Scar works as a unique combination character. You can choose to play as Scar alone, or by using his Down Special, you can call out...


Shenzi, Banzai, or Ed to fight alongside their king! One hyena can be out at a time, following behind Scar wherever he goes after being summoned. However, several of Scar's attacks separate him from his underling hyena. These attacks are different sometimes when no hyena is present, or lacks a special effect that the hyena provides. Hyenas also have hit points that can be lowered to KO them, lessening Scar's power a good deal, although not making him extremely weak and unusable. In fact, you'll want to play as Scar alone in some circumstances. More detail can be found under his Down Special.

STATS

Power: 6.5 - 8/10: Scar has above average power when alone, while having a hyena out buffs him up to the power of an average heavyweight.

Walking Speed: 2.5/10: A slow walking speed, Scar is clearly in no hurry here.

Dashing Speed: 5.5/10: A fairly bumpy dash comparable to DK's, Scar has average speed, being a lion, although not a very speedy one. Hyenas walk and run right behind Scar, matching his speed.

Weight: 7.5/10: Scar is rather thin for a lion, but this cruel cat still has a good deal of weight. Hyenas don't add weight to Scar, just like Pikmin don't add weight to Olimar.

Range: 6/10: Most of Scar's physical attacks hit at slightly above average range. Hyenas can increase this range slightly for some attacks.

Projectile Distance: 0/10: Scar has no true projectile.

Size: 8.5/10: Scar is a character of unique proportions; he's a bit longer than Ivysaur, being a lengthy character standing on all fours, and standing about as tall as Marth at the very top of his mane. Hyenas are slightly shorter than Ivysaur, length-wise, and are about as tall as Mario at the top of their heads. Scar is a large target for combo food, although having a hyena out doesn't really matter, as they can't be hit when following Scar (only when separated).

Attack Speed: 5.5/10: Scar has average attack speed, being one of the faster heavyweights due to only leaning slightly towards power in a manner like DK. Hyenas don't generally increase the speed of Scar's attacks.

Priority: 6/10: For the most part, Scar's sharp teeth and ambitions give him decent priority, although most characters can still overcome it with relative ease. Hyenas have varying priority when attacking, ranging from weak to fairly strong. Hyenas are disjointed hitboxes when they are with Scar or alone, although they still have HP when separated.

First Jump: 3/10: A poor, mainly vertical jump, as Scar's claws prevent him from pushing too hard off of the ground. Hyenas follow Scar into the air when he jumps, jumping up right behind him at the same height.

Second Jump: 6/10: A more agile, mainly horizontal bound. Scar stretches his body vertically here, making him a slightly bigger target, so be careful when jumping. Hyenas stay behind Scar, but tuck in slightly when jumping, decreasing their size slightly.

Fall Speed: 7/10: Scar falls with the average fast fall speed of normal heavyweights, hyenas falling right behind him in the air.

Recovery: 4.5/10: When he is followed by a hyena, Scar has a decently long-ranged, although gimpeable, recovery. When alone, his recovery is kind of iffy, but not awful, making the overall recovery decent, but not great.

Crouch: 6.5/10: Being a sneaky lion, Scar can get low to the ground in a decent crouch, although hyenas barely get down at all, so they can't really dodge attacks by crouching, which they do whenever they are following Scar and he crouches.

Traction: 4/10: Having awkward claws and a bumpy gait, Scar has some problems with his traction, hyenas skidding and tripping alongside him whenever he does so.

Comboability: 5.5/10: Scar has a decent mix of comboing moves and one-hit power moves. Having a hyena out can contribute to either the comboability or power of attacks, depending on the move.

Wall Jump: No

Wall Cling: No

Crawling: Yes

Gliding: No

Tether: Yes; only when a hyena is out and following Scar (not separated).

ANIMATIONS

Entrance: A cloud of ominous green steam appears on the stage, out of which Scar prowls, grinning evilly, as the steam evaporates. Scar starts the battle without a hyena out.

Walking: Scar prowls forward slowly, taking slow, intimidating steps. Hyenas march in an orderly manner behind Scar, matching his slow pace.

Running: Scar leans forward slightly and begins an awkward trot of sorts forward. Hyenas trot comically behind him, still matching his pace.

Dashing: Scar begins bounding forward like a real lion. Hyenas run forward, teeth bared, like real dogs, still matching Scar's pace.

Jump #1: Pushing off the ground on all fours, Scar bounds into the air. Hyenas jump up in a similar manner, directly behind Scar, in a Pikmin-like manner.

Jump #2: Scar stretches his front limbs up slightly as he stretches his lower body downwards, getting into a vertical bound of sorts. This jump carries him horizontally. Hyenas bounds up with their back legs, tucking their lower body into a cannonball position as they do so, remaining behind Scar.

Crouching: Scar gets an evil grin on his face as he lowers his entire body to the ground, as if stalking prey. Hyenas bend their legs down slightly, not lowering their body down to Scar's level, but still crouching.

Crawling: Scar prowls forward sneakily and fairly quickly, hyenas doing an odd little belly crawl behind him.

Idle Animation: Scar stands regally and darkly, occasionally shaking out his black mane. Hyenas peer around the stage behind Scar with a hungry expression. If left alone too long, Shenzi and Banzai will start scratching their ear with a hind leg like a dog. Ed has a unique idle animation where he gets bored and begins chewing comically on his own arm out of hunger.

Forward Roll: Scar slips quickly into the background, pulling any hyena out with him by the cheek, then turning back into the foreground after reaching maximum roll range, releasing the hyena as he does so.

Backward Roll: Scar does a quick little bound backwards, causing any hyena behind him to yelp and leap back as well to avoid getting squished.

Spot Dodge: Scar leans low to the ground and bends back into the background, pulling back any hyena behind him with one paw. He leans back and releases the hyena behind him after dodging.

Air Dodge: Scar stretches out his body horizontally as he dodges, while any hyena out behind him ducks under Scar's body to hide, while Scar gets an annoyed expression on his face. He releases this pose, kicking the hyena back behind him to normal after dodging.

Shield: Scar leans backwards behind his shield, getting down to the ground slightly. If any hyena is out, Scar grabs it around the neck with one paw and brings it behind the shield with him, although it is extremely difficult to shield Scar and the hyena's entire body.

Swimming: Scar gets a pissed expression, due to being a cat and hating swimming, as he paddles forward. Any hyena out will get a silly grin as they doggy paddle forward behind Scar.

Ledge Hanging: Scar hangs from ledges with both paws. If a hyena is out, it will grab Scar's tail in its mouth to hang on for dear life, while Scar gets an exasperated expression.

Tripped: Scar's hindquarters fall to the ground as if he were sitting, while Scar gets a pissed expression. Hyenas fall flat on their stomachs, all four limbs spread out, tripping whenever Scar trips.

Dizzy: Scar puts one paw to his forehead and roars quietly as he stumbles around. Shenzi or Banzai sit on their hindquarters, spinning their heads around dizzily. Ed does nothing different at all, but still can't be controlled until Scar regains control. Hyenas get dizzy whenever Scar does.

Sleeping: Scar lies down on his stomach regally, sleeping quietly. Hyenas simply curl up in a dog-like ball, snoring. Ed's tongue hangs out of his mouth while he sleeps, as usual. Hyenas sleep whenever Scar does.

SPECIALS

Down Special: Heinous Hyenas: Scar lets out a wicked cackle of laughter, as a cloud of red smoke appears behind him (this move can only be performed on the ground, and only when the hyena is following Scar and is not separated). Maniacal laughter is heard from inside the cloud as a single hyena (either Shenzi, Banzai, or Ed) walks out of the vanishing cloud and takes his or her place behind their king (meaning Scar can stand backwards to use the hyena as a shield from projectiles, although this is not spammable). Summoning a hyena takes about .5 second, although Scar and the hyena cannot be attacked during this move (they can still be punished when the move ends, though). To select the hyena you call out first, you can choose one of the three hyenas on the character select screen in a similar manner to Zelda and Sheik, although the hyenas always rotate in the order they are listed below. This is the preferred order that Scar uses each hyena. Switching mid-match is fairly easy, unlike Pokemon Trainer, and even so, the differences between hyenas are rather subtle; having any hyena out at all is sufficient help for Scar. Each of the three hyenas have different properties. Some hyenas have stronger attack power than others, dealing a few more damage points, while others attack faster, having a few less lag frames for attacks.


Shenzi:
Shenzi is the de facto leader of the hyena trio, and is the smartest as well. Being the only female hyena (which by nature are smartest and strongest), Shenzi has the strongest attack power of the hyenas, but has the slowest attack speed.


Banzai: Banzai is the most ravenous (even moreso than Ed) hyena, and the most unfortunate in the film. He has a medium of attack power between Shenzi and Ed, and has the fastest attack speed.


Ed: Ed the hyena is considered mentally ill; he never speaks, only laughs maniacally. His tongue is also always hanging out. Although he can be perceived as stupid, he is usually more alert that the other two hyenas. Ed has attack speed in between that of his more vocal hyena companions, and has the weakest attack power of the three. However, he also has a special effect that for every other attack he hits a foe with, drool from his constantly hanging tongue will stay on the foe and increase their likelihood of tripping a slight bit for 3 seconds. This can prove to be quite handy in some cases.

Hyenas follow behind Scar at all times, matching his pace when walking or dashing, jumping behind him whenever Scar jumps, flying alongside him whenever Scar gets knocked around, copying whatever actions Scar is doing (e.g. sleeping, tripped), and contributing to several of Scar's attacks. Hyenas cannot be attacked unless they are separated from Scar. Scar has several attacks that separate hyenas from him. Hyenas don't take increasing knockback (they fly the distance that the attack they were hit with would normally send a character, meaning they can be hit off edges for a clean KO) have 75 HP; if it is lowered, the hyena flies off the screen, spinning like a KOed Subspace enemy. There are a few ways that Scar can heal hyenas, but they are generally difficult to pull off in an intense battle. Scar must now wait 15 seconds before summoning another hyena to join him in the brawl. Scar can touch a separated hyena to reunite with it. Reuniting can be done on the ground or in the air, although it is harder to do while airborne.

By using this move when a hyena is already out, a red cloud will appear over the hyena that is currently out, and a new hyena will appear. The order of hyenas is Shenzi, then Banzai, then Ed. You can choose which hyena to play as at the start, but you can't go in a specific order when selecting a hyena, although this is not a huge deal, due to the subtlety of their differences. If a hyena is KOed, you must wait 30 seconds before you can switch back to that specific hyena, the KOed hyena being skipped over in the red cloud rotation until it is usable again. If all three hyenas are KOed in a 30 second time period, Scar must wait a full minute before summoning another hyena (although the chances of this are highly unlikely unless you are brain-dead). In this case, Scar simply laughs evilly while a red cloud briefly forms around him. Scar users should always use this at the start of a match to summon a hyena. If Scar is KOed while separated from a hyena, the hyena will sit in place comically until Scar respawns and can reunite with it by touching. However, if the hyena is knocked alongside Scar to a KO, Scar respawns alone and has to use this move again to call out another hyena, the previous hyena having been KOed. Most players will end up separating from their hyena eventually, so be careful to defend them; Scar can still play competently on his own, but hyenas are a luxury you'll want to take advantage of.


Side Special with Hyena: Dogged Defense: Scar motions in front of him with one paw, smiling evilly, for the hyena following him to trot up from behind him to his front. Scar pats the hyena on the head and says, "Now, you wait here!", for the hyena to nod comically and sit in place in front of Scar, separating Scar from the hyena. Scar is now able to sneak off on his own and perform the attacks that only Scar alone can do. Any foe who gets within two Stage Builder blocks to the front of the hyena will cause the hyena to stand up and start growling ominously at the foe. If the foe gets closer, the hyena will growl louder.

If the foe gets directly in front of the hyena, it will give the foe a close ranged, fairly high priority chomp. This chomp is generally fairly quick, and deals average horizontal knockback and 8-9% to foes. If a foe jumps over the hyena, it will turn around to face the other direction, still watching the foe. If there are foes on either side of the hyena, it will face the direction of the closest foe. Scar can reunite with the hyena any time by touching it, or by using the new Side Special that he gets when alone. This move can only be used on the ground, and cautiously so as not to damage your hyena too much.


Side Special Alone: Murderous Roar: This is a chargeable move, similar to DK's Giant Punch/Banana Slamma. When the input is first pressed, Scar bends his frontside low to the ground, baring his teeth menacingly, charging. He can charge like this for up to 3 seconds (the charge stopping afterwards), and cancel the charge by moving or L/R. Upon release, Scar lets out a loud lion's roar, creating a shockwave in front of him. The roar damages foes at below average range, and has average priority. The roar starts up quickly, but has a good deal of ending lag as Scar holds out the roaring pose a bit. However, damage is not the main use for this attack; it's main use is for calling back separated hyenas.

If a hyena is within range of the roar (explained below) and not being attacked (or airborne), it will begin trotting loyally back to Scar at the speed of Mario's dash, reuniting with him upon touch. Hyenas can jump up platforms, but not high ones that require more than a double jump. If this is attempted, the hyena will get a confused expression and not attempt to reunite. This will also happen if there is a wall or obstacle in place in between the hyena and Scar, making this a move that can be almost impossible to use on large stages. Scar can use this move while airborne, but it will not call back hyenas unless used while grounded, hyenas looking around stupidly if used in midair, but not atttempting to return to their king. In these cases, Scar will have to touch the hyena himself to reunite. Hyenas can be attacked while attempting to return, so be careful when there are foes between you and your henchmen. This is best used on flatter stages to call back hyenas more quickly. The effects of the roar are as follows:


Under 1 second charge: 3-4%, trips the foe, calls back hyenas within a range of 3 Stage Builder blocks on either side of Scar, infinitely high up or down.

1 second charge: 7-10%, below average horizontal knockback, calls back hyenas within a range of five Stage Builder blocks on either side of Scar, infinitely high up or down.

2 second charge: 13-17%, decent horizontal knockback, calls back hyenas within a range of seven Stage Builder blocks on either side of Scar, infinitely high up or down.

3 second charge: 24-26%, heavy horizontal knockback, calls back hyenas from anywhere on the stage (it is rare that you'll have the chance to charge this long, and it is not always possible to call the hyena back from anywhere).

Neutral Special: Geyser of Shadow: A stone geyser twice the size of a C4 appears in front of Scar, pulsating slightly. This is your cue to get away from it. After three seconds, the geyser shoots a spray of green steamy water into the sky, about a Ganondorf and a half into the air, lasting for 1 second before falling back into the geyser, which vanishes. The spray of steam has decent priority and a tiny vacuum effect. Anyone (including Scar) who hits it takes average vertical knockback and 12-13% fire damage. The geyser hits at close range, and fires up and falls quite quickly. Because you can't control how long the geyser lasts before blowing (it's always three seconds), this isn't that great unless your foe is inept.

However, if you use Scar's Side Special while standing over the geyser, the hyena will sit on top of the geyser, holding in the flow until they are attacked off the geyser or Scar calls them back. This way, you can control the eruption of the geyser to some extent, but the hyena takes 10 HP damage if they are forced to stay on the geyser after it blows. Decide whether it is worth it to damage your henchman for hitting an opponent. This is best to use trickily to foes at high damage levels who may get KOed by the geyser. Scar can have one geyser out at a time.


One out of five times, the geyser won't erupt, but will leak out a billowing cloud of green smoke, shrouding the area of one and a half Stage Builder blocks, one Ganondorf high. This deals no damage to Scar, his foes, or any hyenas placed over the geyser (which vanishes after spewing the smoke). However, it conceals anything behind the cloud, making it possible for Scar to set up some trickery from inside the cloud. The cloud lasts for 15 seconds. Foes can also use this to their advantage if Scar allows them to. You can see the silhouette of characters behind the smoke, although not exactly what they are doing, making this a clever move to use.


Up Special with Hyena: Skeletal Chain: In one smooth midair motion, Scar turns behind him and grabs the hyena following him by the tail in one paw, and swings up forward above his head. As it is being swung, the hyena swings an antelope skeleton that appears in its mouth while Scar is grabbing it, which latches the duo to the edge. This provides Scar with one long tether recovery, about the length of Zamus' Side Special. This allows Scar to recover from a good distance if he accompanied by a hyena. However, he can only hang onto the ledge with this tether recovery for 3 seconds before the skeleton breaks and leaves Scar and his hyena in a helpless state, them most likely falling to their dooms. Because of this, it is wise to quickly pull Scar up so he grabs the ledge directly, which is safer. If spammed for edge-hogging, the time before the skeleton breaks shortens, so be sure not to abuse this decently-ranged recovery. The skeleton deals 4-5% and low knockback to foes, but has awful priority as the hitbox, most attacks being able to break it. This move has quick startup, but lags a lot if Scar hits the ground after becoming helpless or if he misses the edge over the stage (upon which the bones vanish and Scar pulls the hyena back behind him). Use carefully, as it can be beaten by a competent edgeguarder.

Up Special Alone: Flaming Execution: Scar jumps up, his lower body stretched out downwards, his upper body extended above him. Scar roars fiercely and bares his teeth and claws, as a fiery red aura appears around him. This jump can be directed up (giving Scar a decent vertical boost, but little horizontal range) or forward (giving Scar more horizontal range, but very little vertical distance) with the control stick. Just using the Up Special alone gives a mix of horizontal and vertical range. Scar jumps in his fiery aura for about the time of Ganondorf's Dark Dive, then bends his lower body up, his upper body aimed down, claws brought out mercilessly in front of him. Scar now enters a speedy plummet, which can cause a self-destruct for careless players. If foes hit Scar when he's jumping, they take 5-7% fire damage and below average knockback.

However, if they hit his claws or mouth right at the end while he is about to plummet, or while he's plummeting, Scar snares them with his claws and brings them down with him for a suicide KO. Compared to Bowser and Ganondorf's Side Specials, this move is slightly superior in the way that Scar will never die first or cause Sudden Death on the last stock. However, if a foe is caught, there is a minuscule period of one or two frames that the foe can perform the input for an air dodge and escape from Scar, who plummets to his doom. This is extremely difficult to pull off, but makes the move not entirely risk-free. If Scar grabs a foe over the stage, he slams them down onto the stage for 14% and good vertical knockback, although he can be attacked by other foes, making this slightly punishable. If he ends up landing on the stage after plummeting, Scar suffers from a large amount of ending lag. This recovery can be gimped under stage lips if caution is not used. Accidents are also common here, making this recovery somewhat iffy. The inspiration from the fiery attack comes from the final battle of the Lion King, from 1:44 - 1:48.


BASIC ATTACKS

Basic Combo, Hit #1: Cruel Claw: Scar extends a paw a short distance in front of him then swipes it upwards in an 'uppercut slash' of sorts. This has below average priority and hits at fairly close range. It starts and ends fairly quickly, and deals no real knockback to foes. However, it pulls foes toward Scar slightly, making them susceptible to the next, closer-ranged combo hit, or a tilt. This hit deals 3% to foes and makes a distinct scratching noise whenever used.

Basic Combo, Hit #2: Taunting Grin: After his claw hit, Scar rapidly opens his jaws a bit and snaps them together menacingly. This has low priority and hits at a close range, the hitbox being on his sharp teeth. This starts up with almost no lag, but has a brief period of ending lag that Scar can be punished for. This deals below average knockback to the foes it hits. This combo has the potential to KO an opponent if they have high damage, and is fairly useful for combos as well. Of particular note, Scar's teeth get sharper every time he uses this combo, which makes his Forward Smash a bit stronger, knockback-wise, which it is fairly lacking without. The knockback can be increased several times through landing this combo hit, although it resets after a few times. This is not detailed under the F-Smash due to having already been written here. This hit deals 3% alone and 6% with the above hit. This basic combo is as fast as that of DK.

Hyena Bonus: Fanged Fury: If a hyena is out when Scar uses his basic combo, it rapidly turns around and chomps five times extremely rapidly, covering Scar's backside in a manner like a faster Bowser side taunt, complete with flying slobber. This has low priority and hits at close range, dealing no knockback, but trapping the foe for Scar to hit after finishing his combo (he must do this quickly, however, as the foe may recover first). This starts and finishes extremely quickly, making it great for building damage. Scar and his hyena are still vulnerable to attacks from above during their combos, however, so be careful where you use this combo. If a foe hits the hyena out of this, it gets separated from Scar, who will have to reunite with it to get it back. Each bite deals 1-2% per chomp, for a maximum of 10%.

Dash Attack: Bone Toss: A simple bone the size of a Ray Gun appears in Scar's paw. Scar carelessly tosses the bone forward, it going about the distance of Wolf's Blaster. The bone has fair priority and disappears once it hits the ground, going at an arc downwards. Scar has a tiny bit of startup and ending lag throwing the bone, and can't move until the bone hits the ground, making this move punishable unless you have a hyena out. The bone deals below average knockback and 6-7% to foes. This is not the best attack for Scar to use when alone. Make sure you have a hyena out here to maximize the attack potential.

Hyena Bonus: Boney Bait: Scar tosses the bone as usual, having the same priority, range, and speed as when he's alone. The bone deals almost no knockback, and only 3-4% here, though. However, seeing the bone go flying, the hyena tailing Scar will chase after it, ramming into foes for 8-9% and average horizontal knockback. The hyena has superarmor frames while charging, and charges at the speed of Captain Falcon's dash (speedily). The bone doesn't vanish when it hits foes or the ground here; instead, the hyena grabs it in its mouth, stopping its charge when reaching the bone, and begins chewing on it.

It is now separated from Scar, and heals 1 HP per second chewing on the bone. However, it is entirely vulnerable here. Also, when reuniting with it, either by touching or by Side Special, Scar and the hyena lag for a second, as Scar whacks the bone out of the hyena's mouth, for it to retreat back behind its ruler. This is a good attack for damaging and KOing as long as you can prevent yourself from being punished. A good way to do this is to this is to quickly dash after foes near the chewing hyena as Scar (who must wait until after the bone has been caught to move) and knock them far enough away for the hyena to heal a small bit of HP before reuniting with it before your foe can return to attack. Use this move in different situations to see what way allows you to reap its bonuses to maximum effect.


TILTS

Forward Tilt: Ember Paw: A small patch of flaming embers appears on the ground in front of Scar, who evilly swats it into the faces of foes directly in front of him with one paw. The embers have below average priority and appear as a small pile in front of Scar, having a rather small hitbox. This move has a small bit of startup lag, but very little ending. Because of the small hitbox, the embers deal decent knockback, and deal 7% fire damage to foes. A unique twist to this move is that if the embers are not outprioritzed and destroyed after one second, they settle on the ground, leaving a patch of embers the size of half of a Stage Builder block, dealing 5% fire damage and below average vertical knockback to foes who walk over or land on it. Scar can have up to three patches out at a time. Each patch lasts for five seconds before vanishing. This may not be the most useful side effect for KOs, but it is great to combo foes into for more damage. Hyenas have no effect on this move, but beware, as hyenas who walk over patches of embers take 5 HP damage. Scar is better off jumping over patches when accompanied by a hyena, although Scar himself is not effected by the patches.

Down Tilt: Skeletal Puppet: From his low-to-the-ground crouching position, Scar takes an antelope skeleton head on one paw, two claws sticking out the eyes, and opens and shuts his paw to make the skeleton 'chomp' foes, before it vanishes. This has average priority and hits at fairly close range. The chomp occurs over the time period of Ganondorf's D-Tilt. This deals 5% and low knockback to foes. However, the main use occurs if you hit a foe with the move and keep pressing the move's input. If you do so, a tiny vacuum effect will occur, pulling in the foe (who won't have been knocked back much at all) and trapping them in several multiple chomping hits, like Wario's Chomp. Scar can continue using the move to keep on making the skeleton chomp. However, the foe is not trapped, and can DI out and punish Scar. Using this against a wall to build damage is probably the most advantageous use because of this. Foes take 2-3% per chomp here. After releasing the foe from this chomping combo, foes take barely below average knockback. Hyenas have no effect on this move, although occasionally, it will break out laughing like hyenas do if a foe is caught in the chomps for a fair time period. This has no effect, but is annoying nonetheless.

Up Tilt: Gothic Mane: Scar sweeps his head upwards, his dark black mane flowing upwards with him, in a headbutting move of sorts. This starts up fairly quickly, but has a fair bit of ending lag for a tilt, as Scar brings his head back down. The priority is average, while the range is fairly close to Scar. Foes who are hit by this move take 7-8% and average vertical knockback. The move is fairly similar to Dedede's U-Tilt in terms of usefulness; this move is faster and generally more vertasile, however. It is slightly weaker, as well, though. This move is a good juggling attack, but doesn't defend Scar's back area well, making it a large target if Scar misses his foe. Also, Scar must be quick to defend himself if he hits a foe who has low damage, and can therefore DI down and retaliate. Hyenas have no effect on this move.

SMASHES

Forward Smash: Chow Down: Scar possesses a unique two-hit F-Smash. While charging this Smash, Scar crouches down on the ground, like a lion getting ready to pounce. Upon release, Scar snarls and springs forward in a pounce. This is the first hit, which traps hit foes for the next hit. Scar has superarmor frames while pouncing, but since foes must be hit with the pounce to be hit with the second hit (for which Scar is perfectly vulnerable), they have a clear target if not. Foes are caught if they hit Scar's outstretched paws while he is pouncing. This hit deals no knockback, but instead pushes foes to the ground, where they are hit with the next part of this Smash. Foes hit by the pounce take a minute 3-5% from Scar's claws. The range Scar pounces is determined by the charge of the Smash. It can range from one Stage Builder block at no charge, to two Stage Builder blocks at full charge. If Scar doesn't hit any foes, not being able to proceed to the next hit, he lands in a hunch before righting himself, having decent ending lag, making this a punishable move, although fairly easy to hit with, especially on larger foes, although smaller opponents can duck under Scar as he's pouncing. If the foe is hit while over the edge, Scar will perform an instant footstool jump off the foe, making it difficult for them to recover. However, if he uses this carelessly off the edge, Scar enters a helpless state, so be careful with your range.

After Scar hits a foe or foes, he pulls them to the ground, where they flail slightly, like with Bowser's D-Throw. Scar then stands over the foe, his hind legs being in the background, while his front faces the screen. From here, Scar rapidly swoops down and delivers one crushing bite to the opponent's midsection. This takes a split second to do, Scar being entirely vulnerable while he's over the foe, but not taking that long to end the move. The bite deals 9-13% to foes, making this a damaging move if used properly. However, the knockback is fairly poor, hitting the foe forward, but at a vertical diagonal angle, making this hard to kill with unless Scar is close to an edge, or the foe has ridiculously high damage. Overall, this can be good or bad for you depending on your playstyle. Either way, it's one of Scar's best damage rackers, so use it efficiently.


Hyena Bonus: Predatory Rush: When Scar has a hyena out, the time it takes to charge this Smash doubles. When charging, the hyena paws the ground and pants heavily. If Scar charges the Smash less than halfway (which would be the time for a normal Smash attack), he performs the normal pounce and bite attack from above, the hyena doing nothing. It gets separated from Scar, however, it is only a short distance away, and can be easily reunited with. However, if the Smash is charged more than halfway, the hyena makes a barking noise like a dog and rushes under Scar while he's pouncing. This gives the Smash attack a wall of sorts that can be difficult to dodge, although most foes will never let Scar charge that long. The hyena has superarmor frames for the first few frames while charging under Scar, but can be hit and separated from Scar after that. The hyena has below average priority and hits at close range while charging. If the foe hits the charging hyena or pouncing Scar, they are hit with the full attack. The charge deals a light 2-4% to foes, but doesn't knock them back at all, only trapping them for the next hit.

For the next hit, while Scar gives the trapped foes a big bite while standing over them, the hyena hunches over the backside of the foe, and gives the foe a chomp there (for some characters, this can look rather painful, as the hyena chomps their manly area). This deals 6-8% to foes, but doesn't really contribute to the knockback of the move at all. The hyena can be hit out of this move while biting, as can Scar, who must reunite with the hyena if separated. Having a hyena out here mainly contributes to the damage that the move can deal. The most you can deal with a hyena present is 30%, as foes caught by Scar pouncing are also hit by the rushing hyena, as well as both bites. Scar can still pounce over the edge with this move if not careful, but still has the footstool jumping effect. Hyenas don't give this move any more ending lag than Scar has while alone, the long charge time making up for this. As a small side effect, if you fully charge the Smash with a hyena out and catch a foe, the hyena heals 5 HP for every foe hit. This is rare, though. The hyena retreats behind Scar after the move, as Scar himself rises as normal.


Down Smash: Clawed Crevice: While charging, Scar leans low to the ground, claws outstretched in front of him menacingly. Upon release, Scar claws them back to himself, starting quickly, and having average ending lag. This opens up a lava-filled crevice where he scratched open the ground (these are common in his and the hyenas' secret lair). This move has two hitboxes. The first hitbox is Scar's claws are he draws them in. This hit has average priority and hits at below average range. This hit deals 6-11% and below average vertical knockback. It is difficult to kill with this hit, making it somewhat advantageous for foes who can't dodge in their position to get hit with this hit instead of dodging and falling victim to the more damaging hit below.

The second, more prominent hitbox is on the lava-filled crack that Scar opened. This crack stays open for three seconds after it is opened, closing after this time. Scar can only have one crevice out at a time. The crevice is about the size of one Stage Builder block. If anyone other than Scar lands or walks onto it, they get caught in the crevice, dealing one hit per every second they are caught in there. This can total up to three hits, depending on whether they were caught right from the start, or walked onto it after that. The crack cannot be attacked, and must be touched to catch a foe. Each hit deals 5-8% fire damage, with the last hit dealing below average vertical knockback. This is mainly for dealing damage, not KOing. After Scar recovers from his scratching, he can attack any foes caught in the crack.

Unlike DK's Headbutt or Pitfall, foes aren't launched until the final hit, making this a great way to build damage on a foe quickly. Hyenas have no effect here, so damaging foes with powerful attacks that involve a hyena is a great option. Another unique touch is that this move slightly powers up Scar's Forward, Up, and Down Air attacks, due to this Smash sharpening his claws. Every time he uses this Smash, the knockback of the move increases slightly, although after a few uses, this cycle will start from the beginning again. This is not touched on in Scar's aerials section, but is still in effect because of this move. Use this Smash to incorporate some fiery manipulation into your playstyle.


Up Smash: Mounds of Trouble: While charging this Smash, Scar does nothing except strike a badass pose. Upon release, a red mound of termites erupts out of the ground behind Scar. These mounds are a comedic prop in the Lion King 2, where Scar's following lions face these pests in their desolate outcast home. The mound launches opponents who hit the top area of the mound, dealing average vertical knockback. The range increases depending on the charge time. It can rise from just barely above Scar (who is about as tall as Luigi) to a Ganondorf off of the ground. The mound rises fairly quickly, and disintegrates after staying out for a brief period to hit foes.

If Scar fully charges this Smash, termites stay on any foes hit by the mound for five seconds, doing 2% poison damage per second. The mound hits foes as it is rising, but can also hit foes while it is disintegrating (although with much less force), like Bowser's U-Smash in a way. The mound hits at close range because of its hitbox, but because of its height, this is not a problem. The mound has average priority; it crumbles if the priority of an enemy attack beats it. This Smash is best to use unexpectedly, as its effects are easy to avoid on a careful foe; make sure they don't see it coming. The main Smash deals 8-14%.


Hyena Bonus: Scratching Savages: If Scar charges this Smash to half full or more when followed by a hyena, termites will land on the hyena, causing it to scratch in misery to try and get them off. This deals rapid multiple hits to opponents who come in contact with the flailing hyena. It also deals them a termite poison damage effect like the one above, this time for three seconds. The scratching hyena has low priority, and hits at fairly close range. The hyena traps the opponent in their agonizing scratching, being fairly easy to escape from, and dealing below average knockback with the last hit. Hyenas scratch for about three seconds before stopping and waiting in place to be reunited with Scar. During their three seconds scratching, Scar cannot reunite with his hyena, having to wait till after they finish. Although it is sometimes difficult to hit foes with the scratching because of the mound that can hit foes away as the hyena starts itching, this move has limited usefulness, although using it to edgeguard or trap foes while Scar charges a Smash is quite useful. The scratching can deal from 1-9% with all of the hits.

AERIALS

Neutral Air: Rump Toss: A fairly simple aerial; Scar sneers as he looks upwards, turning his head to face backwards, and lifts up his back to toss foes into the air. This has fairly low priority, and hits foes at close range who hit Scar's raised back. Scar lifts and brings down his back with decent speed, making this move hardly punishable if you hit with it, unless you land before it is finished, upon which you receive a good deal of ending lag as Scar straightens up. Because this only covers above Scar, this leaves him quite vulnerable if used incorrectly. The knockback dealt by this aerial is below average as well. If you can use it to combo foes into an U-Air, go for it. Otherwise, an F-Air is a better option due to the wonky hitbox here for an N-Air. Despite this, it can "scoop" foes up who are slightly under Scar, if they are directly behind him, so this can prove helpful offstage to boost foes into a B-Air to KO them by gimping. This move deals 6-7% to foes.

Hyena Bonus: Lion's Launch: If he is followed by a hyena, the hyena jumps up over Scar's back as he tosses his back up, which launches the hyena a small distance up in the air. The hyena flies about the height of a Pikmin into the air (which is a minute distance), chomping upwards three times at different angles before landing behind Scar again and continuing to follow him. The bite has a rather large hitbox, making this a more fitting N-Air for Scar. The first two bites deal no knockback, while the last one hits foes upwards with average power. The chomps have slightly below average priority, and hit at a decently close range. Using this to juggle foes is quite helpful, as his U-Air can't really do that. Just stay airborne until the hyena is done chomping, lest you suffer from landing lag. Scar's back can still hit foes while tossing the hyena, meaning this move can deal up to four hits. The hyena deals 3% per chomp, for a maximum of 9%.

Forward Air: Battle Scar: Scar has a fairly simple F-Air that hits in a fairly complex manner, depending on the part of the hitbox you land on foes. For the move, Scar leans back furiously and slashes his paw horizontally left to right in front of him, in a manner that would 'scar' anyone unfortunate enough to fall victim to it. This move has average priority and starts up quickly, but ends with a small deal of ending lag. The lag is not too much of an obstacle, as long as you don't land before completing the attack.

The range of the move is fairly close to Scar, but hit claws extend the move a tiny bit more to make this not too difficult to land. If foes just barely hit his claws, they take 4% and low knockback. This helps Scar to not be punished if he almost misses the move, although it can still be retaliated against by foes with high-priority, quick, or longer ranged aerials. If a foe hits the dead center of Scar's paw, they take 6-7% and below average knockback. This is likely the hitbox that you will land most often, which is not a bad thing, as it is an excellent edge-guarding tool, although if you land it too far away or too close, it won't work. Finally, if the foe is almost touching Scar's body as he swipes, the foe is swept along with his paw, which throws them backwards over Scar's shoulder, essentially dealing them average backwards knockback. This deals 8-9% to foes. If you are onstage and throwing foes off, this can be quite useful. Otherwise, be too careless and you could save foes from a potential gimped KO. This is quite an interesting aerial, so be sure to make use of it. Hyenas have no use here, so this can be used effectively even without them, although Scar has a much harder time recovering without one if offstage.

Back Air: Kingly Kick: This is a simple move in appearance. Scar simply extends a leg backwards and deals a clawed kick to foes. This has slight startup lag, but ends quickly, making it hard to punish if timed correctly. Scar has decent priority with this move as well, making it hard to hit through, but easy to shield-grab him from. Scar extends his leg out a fair deal, giving this move average range. Used in walls of pain, this is an excellent tool to knock foes offstage with and follow them off to KO them. However, Scar's fall speed increases somewhat, making it harder to recover when offstage, so with an already iffy recovery, it's best to exert caution with this move. Hanging from a ledge for an initial edgeguard, then unexpectedly using this to KO a foe before hopping back onto the ledge can be a great strategy. This move deals 6-8%, and has a slight sweetspot for knockback on Scar's claws, the knockback being average in this situation, and being below average otherwise.

Hyena Bonus: Fearful Frenzy: When Scar uses a B-Air with a hyena following behind him, Scar cruelly grabs the hyena by the neck, chuckling wickedly. Being suspended in midair in this precarious position, the hyena panics and begins flailing its paws and legs fearfully. This deals multiple rapid midair hits to opponents. The flailing has below average priority, and hits at a fairly close range. Scar grabs the hyena quickly, and releases it after a split second of its flailing. The flailing has a tiny vacuum effect that 'sucks' foes into the hits, although foes can DI back out with relative ease. This move has an additional effect depending on how high up Scar is when he uses the move; for every Luigi off the ground Scar is, the hyena flails faster, doing more hits over the same period of time. This can help Scar accumulate more hits in fierce aerial battles. Unlike his B-Air alone, Scar's fall speed does not increase here. If he lands this move before it is finished, the hyena is separated from Scar, and must be reunited with. This move deals a low set knockback, and 1% for each of the multiple hits, for up to 16 hits at maximum height.

Up Air: Chalkboard Claws: This move has three hitboxes, and the one you hit depends on how this move effects you. For this move, Scar reaches his front paws up, claws gleaming and outstretched for a brief period, then with an awful chalkboard-esque screech, drags them down to beneath him, like a slightly slower Wolf D-Air, before bringing them back to him. The first hitbox is on the top of Scar's claws as he brings them up. This has below average priority, as they come up rather quickly, and hit at below average range. If a foe hits these claws, they are knocked upwards with below average strength. It is hard to KO foes with this, and is almost impossible to juggle with, due to Scar still having to go through the rest of the move. Foes above Scar get hit by this as he uses the move. This is quite punishable, so try to be above or in front of foes when using this move. This hitbox deals 5% to foes.

The second hitbox occurs to foes who are hit when under Scar as he brings his claws down. This serves as a strong spike to foes who are hit. However, because Scar holds his claws up for a fairly long period of time, and doesn't bring them down too fast, this can be tricky to pull off. Foes can attack Scar while he's bringing up his claws to save themselves. Scar also plummets at a fairly fast speed after spiking, which makes his risky recovery even harder to pull off. However, if your foe has high damage and you can hit them down while staying onstage, by all means go for this, as it is a great ledge defending move for Scar. This has average priority and spikes foes with decent power. Scar has a good deal of ending lag if he lands before this move is over. This move spikes as soon as Scar begins bringing his claws down, and stops after he reaches maximum clawing range and brings them up. Foes must be below Scar to get spiked. This hitbox deals 7-8% to foes.

The third and final hitbox hits foes who are behind Scar as he brings his claws down, making his screeching noise. As he makes the awful din, foes within half of a Stage Builder block behind Scar enter their helpless animation, due to their ears being subjected to this racket. If a foe is on the ground and gets hit with this, they enter a dizzy animation, due to having nowhere to fall. This has no priority, due to just being sound, and lasts untl Scar reaches maximum clawing range. This is a great way to trick your foes into being rendered impotent, but Scar can be punished due to the startup lag, so be aware. This hitbox deals just 1% to foes. As a bonus, if Scar uses this move against a wall, the hitbox for the sound stunning doubles in range, due to the sound being louder and more irritating. Hyenas have no effect on this move.


Down Air: Predoratory Dive: Scar growls, as he bends his claws downwards at an angle, then dives rapidly downwards, claws extended wickedly in front of him. This is in several ways like a typical stall-then-fall aerial. However, like several of his other aerials, Scar has a few different hitboxes for this move, all of which are on his claws. The way the foe is hit depends on the distance they were hit from. The move's range is slightly below average. Because of the forwards and downwards angle Scar dives, foes have to be in front of Scar to be hit by this. Scar can easily self-destruct if he uses this offstage, as he can't stop the move after diving until he hits solid ground. He stalls for slightly longer than Toon Link, and plummets a bit slower as well. Scar suffers from average ending lag as he recovers from his fierce dive.

The first hitbox occurs on foes who barely nick Scar's claws as he's diving (the hitbox doesn't appear until he dives). These foes take low vertical knockback and 4-5%. This is very punishable for Scar and is almost useless, as it won't KO or lead to any combos. The second hitbox happens to foes who hit Scar's claws from normal range. These foes take average vertical knockback and 6-8%. This is harder to retaliate against, and can KO foes with high damage levels. These two hitboxes have average priority. The final hitbox occurs on foes who directly and closely hit Scar's claws, at about the same range as Jigglypuff's Rest, except this only works on the claws. These foes are speared and brought down with Scar, in a similar manner to his Up Special. Getting speared deals 9%. Foes can't escape from this move (not that they'd have time to), making it a viable "Scaricide" move, although Up Special is easier to land, due to not having to connect point-blank to land it. If the foe is brought down onto solid land, they receive 12-13% and above average vertical knockback. Using this above the stage is a better option, due to less possibility of accidents. Plus, Scar alone has better edgehogging options to gimp the foe rather than sacrifice himself while gimping the foe.


Hyena Bonus: Hyenas in the Hole: Instead of diving when he has a hyena out, Scar makes his minion do the work. He turns to grab the hyena by the ears, looks at the confused hyena with a cruel smile, then hurls it downwards below him, the hyena shrieking and plummeting down butt-first at the speed of Toon Link's D-Air. Hitting the hyena on the sides deals below average sideways knockback, while hitting its butt spikes foes with average power. The hyena has average priority on its body, although only the sides and below are part of the hitbox. Scar lags for a brief period starting the move; he grabs the hyena almost laglessly, but has a bit more lag as he smiles at it before hurling it. The hyena hits at a close range. Using this move above a foe offstage to spike them while sacrificing a hyena can be useful, although the hyena doesn't stop falling if it hits a foe, having to wait till it gets to the ground. If it hits the ground, it creates a small comical dust cloud and shakes its head for three seconds; Scar cannot reunite with the stunned hyena until it has recovered and gotten to its feet after this time period. The plummeting hyena deals 8-10% to foes. Scar can still move in the air after throwing the hyena. Use this move at appropriate times for best results; sacrificing a hyena is generally not smart unless it assists Scar.

OTHER ATTACKS

Downed Attack: Beastly Baring: Scar alone simply rolls to his feet, giving a big chomp while facing the screen with his sharp canine teeth (canine as in the front fangs, not as in dog-like). This is a simple get-up attack that hits at close range, due to the hitbox on Scar's teeth, and has little lag starting or ending. Scar's teeth have below average priority, but like the second hit of Scar's basic combo, landing this move increases the knockback of his F-Smash slightly due to sharpening his teeth. This functions the same way that his basic combo does for this mechanic. This move deals 4-5% and low knockback.

Hyena Bonus: "Lion Around": While Scar is lying on the ground, the hyena he is being followed by rolls on its back laughing, not being able to get knocked down with its master due to being unable to be separated unless Scar wills it to for an attack. The hyena rolls comically in place due to Scar lying "lion" around, causing Scar to bound to his feet angrily, facing backwards at the hyena, who stops laughing and rolls to its feet as well in a salute. Scar rolls his eyes as he turns back around, his hyena following. There is slight startup lag while the hyena laughs, although Scar is not vulnerable during this time due to still having invincibility frames from falling. However, there is a bit more lag as Scar hops to his feet (although he does so quickly) and stares angrily at the hyena for laughing before recovering entirely. There are two hitboxes here; foes who touch Scar's back legs as he turns around in his small jump take 4% and low knockback. This hitbox hits at close range and has low priority. This hitbox also comes out before the next one.

The second hitbox is on the paw of the saluting hyena. This hitbox deals a lesser 3%, but better, below average knockback. This hitbox comes out shortly after Scar hops to his feet, making this a unique, two-hit get-up attack. The salute hits at close range, comes out quickly, and has low priority. Scar and the hyena have a bit of ending lag as Scar turns around to continue the fight, having been turned around for this move. This can be helpful in some situations, and rather useless in others. Whether or not it should be used depends on your playstyle.


Flipped Attack: Sneaky Scorch: As Scar sneakily rolls to his feet, he swats a small pawful of flaming embers (like the ones from his F-Tilt) back behind him. However, because this is a minor attack, the flames do not stay on the ground after they are launched; they vanish after hitting a foe, or if they hit nothing. Hyenas can't be hurt by these flames either. This attack starts quickly and ends with a slight bit of lag. The flames have decent, but not great priority. Scar's paw has a weak hitbox as he flicks the embers, while the embers themselves are the main hitbox. Foes hit by the flames take 6% fire damage and are stunned, longer if they have more damage. Foes who hit Scar's paw take 4% and low knockback. The range of this attack is rather close, so be cautious when using this. Hyenas have no effect here.

Tripped Attack: Ebony Shredder: From his tripped position sitting on his haunches with a pissed expression, Scar rapidly lifts his claws up and performs an insanely fast five-hit scratching move, like his attack from Kingdom Hearts. The first four hits trap foes, while the last hit deals average knockback. This is great knockback for a situational, but it's easy to DI out of, and has a small bit of ending lag that can be punished. This move starts up rather quickly, and hits at a fairly close range. Scar's claws have below average priority, and have a tiny vacuum effect to foes on the ground. This can be great to retaliate against punishable attacks that can trip Scar. The first four hits deal 2% to foes, while the last one deals 3%, for a maximum of 11%.

Hyena Bonus: Caught Unawares: While the hyena laughs at their tripped king, Scar uses the opportunity to swiftly prowl into the background and pounce on the position he was just tripped on, in front of the hyena, which startles it out of laughing and makes it jump back into normal position, which Scar proceeds to do as well, chuckling to himself. This starts and ends fairly quickly, but is slightly awkward to hit with, due to Scar's pounce not being a two-sided attack like most get-up attacks. The pounce have average priority, and hits at a below average range. This attack deals 5-7% and below average knockback to foes. This can be useful for starting combos on foes, but make sure you know where the hitbox hits so you don't make yourself more vulnerable.

Ledge Attack: Tufted Swish: A simple ledge attack; as he climbs onto the ledge, Scar sweeps his black-tufted tail alongside his body, swatting away foes at a close range. Scar's tail has low priority, being rather flimsy. This attack starts and ends rather rapidly. Foes who hit the tuft of Scar's tail take below average knockback, while those who hit the main part take a low set knockback and have a 25% chance of tripping. This can be a useful ledge attack to clear foes away at close range, but Scar must be quick about it, or he may get punished. This attack deals 3-6% to foes.

Hyena Bonus: Over His Head: When Scar hangs on a ledge with a hyena, the hyena grabs onto Scar's tail in its mouth for dear life. As you could imagine, Scar is undoubtedly less than pleased with this. As he climbs onto the ledge, he flicks his tail alongside him like he does in the above attack when he's alone. However, because the hyena is still holding on, the flick causes the hyena to be launched forward and off Scar's tail, flying forward the distance of one Stage Builder block a tiny bit off the ground behind landing in a heap in front of Scar, getting separated. Here, Scar's tail loses the hitbox it had above, the flying hyena now having the hitbox. The hyena is a fairly large hitbox, hitting at close range but still being fairly large. This provides a wall of defense for Scar as he recovers. However, the hyena can be attacked out of flying to easily knock it off the edge for an easy KO, forcing Scar to follow it if he wants to save it. Once it lands, the hyena is also stunned, sitting in a dizzy heap, and Scar must wait two seconds before he can reunite with it. The hyena flies and falls rather quickly, and deals below average knockback, although it can knock foes with high damage back a good deal. Be careful when you use this; it's plenty helpful, but it's not without its risks. The hyena deals 7-8% to foes.

Ledge Attack (Over 100%): Struggling Pounce: Scar struggles onto the ledge, his back legs kicking, and pounces onto the stage, landing in front of the ledge. Foes who hit Scar's front claws or underside area take below average knockback. This move has a good deal of startup lag, and a slight deal ending as Scar recovers his footing slightly. This move hits at below average range, and has below average priority, making it not the most ideal move to use unless you are sure you can hit a foe with it, as Scar can be easily punished and knocked right back off the ledge if he misses with this attack. It deals 4-5% to foes.

Hyena Bonus: Regicidal Rush: As Scar struggles to get onto the edge, his hanging hyena quits gripping his tail and starts rushing and climbing up Scar's back onto the stage, being afraid of going down with their king. The hyena climbs onto the stage with a chomp as Scar struggles to get up. After the hyena chomps, Scar pounces onto the stage as normal, landing in front of his hyena angrily. This increases the range of his pounce when he's alone, and adds a two-hit attack if the foe is hit by the pounce and the chomp of the hyena. The hyena counts as separated from Scar until he pounces up, which automatically reunites him with his underling. If a foe hits the climbing hyena while it chomps before Scar pounces, it can get hit off the ledge, and Scar has slight ending lag with the pounce, so he cannot recover the hyena by reuniting. Because of this, you should exert caution when using this attack. The hyena has slight starting lag while it climbs Scar and chomps (which has low priority and hits at close range), and slight ending lag after Scar pounces (which hits at below average range and has decent priority). The chomp traps foes to get hit by Scar's pounce, which deals surprisingly average knockback. The hyena deals 3% with its chomp, while Scar's pounce deals 5-6% to foes.

GRAB AND THROWS

Grab: Feral Snare: When alone, Scar simply extends a paw in front of him, with below average range, then whisks it back in, snaring any foe who touches the paw on his claws and holding him or her up in the air tauntingly. This has a quick startup time, but slight ending lag as Scar pulls his paw back in and regains his composure. This is fairly useful for a grab, although it can be punished by competent players. However, this is not the only grabbing option Scar possesses...

If you press the grab button and forward on the Control Stick, Scar stretches out his body and extends both paws in front of him, with better range than the above grab, then pulls them back in, snaring foes on his claws and holding them like the above grab. This has a tiny bit more startup lag and a good deal more ending lag than the above grab, as Scar has to get back to his feet after stretching out (it looks a bit like Bowser's grab from a dash). Using this to pull in vulnerable foes and deal damage is quite effective, seeing as Scar's throws are a high point of his.


If you press the grab button and up on the Control Stick, Scar reaches above his head with a single paw, while keeping his other three limbs on the ground, in an arc before putting it back on the ground. This grab has slightly less range than DK's U-Tilt, which it has similar range to, but in a more scratching manner, rather than swatting like DK. Scar holds caught foes like the above two grabs. This grab variation has the least startup and ending lag of Scar's four grabs, but the least range. However, the priority of this grab is slightly higher than the average grab (all of Scar's other grabs have the priority of a standard grab), making it possible to grab foes out of lower priority aerials. This may be the best use of this, so take advantage of it.

Finally, if you press the grab button and down on the Control Stick, Scar will briefly get an evil gleam in his eyes (which gives this move fair start-up lag) before lunging down in front of him, claws outstretched to dig into the flesh of his foes. This has a good deal of ending lag, as Scar leaves his claws down in front of him for a brief period before pulling them up again. If a foe gets grabbed while onstage, he holds them like normal. The range of this move is slightly shorter than DK's D-Tilt, making it difficult to use onstage. However...if it's used offstage...


Scar stretches his paws down a below average distance, trying to grab recovering foes. If he misses, he pulls his paws up as normal, with the same startup lag as the above grab onstage, and more ending lag, making it dangerous to whiff. However, if a foe is grabbed, Scar holds them offstage by their arms, automatically dealing 5% of knockbackless damage (this is dealt to foes who are hit with the above grab as well onstage). Scar can use his normal throws on foes here, but it is his Down Throw that benefits the most from this position. Using it from this position serves as an excellent way to gimp foes from onstage, especially those with poor vertical recoveries.

Choose your direction and snare your foes, just watch out, as no grab direction is flawless. Scar can only shieldgrab using his neutral grab, seeing as the Control Stick is used to move the shield while it is up. From a dash, Scar pounces forward slightly, getting about the same range as his side grab, although slightly more startup and ending lag as he gets up, making it less useful.


Hyena Bonus: Protecting the King: When Scar has a hyena out, he sacrifices versatility for range and damage. As Scar grabs in front of him, his hyena turns around and bites behind him to try and grab foes behind Scar. This two-sided grab gives Scar great range, but Scar can only use his neutral grab with a hyena out. The bite of the hyena also has less range than it appears to, foes having to be quite close to its mouth to get caught. Foes are grabbed as usual by Scar (who has a few different effects with some throws with a hyena out), and foes caught by the hyena are held in its mouth. If Ed in particular grabs a foe, the foe will always get drool on them (not only every other grab), increasing their likelihood of tripping a bit.

Scar and the hyena have a bit more startup and ending lag than Scar does with his normal neutral grab, balancing out the good range. Scar's hyena can also be attacked while grabbing although it doesn't become separated by just using the move; players have to hit the hyena away while it's grabbing to fully separate it. Use this with care; it is one of Scar's best tools for building damage, but it can be punished in several different ways if you are careless.


Grab Attack (Scar): Jugular Chomp: Scar pulls the foe to him (or leans down to the foe if he is holding the foe over the edge with his down grab) and bites down on the foe's neck. This has moderate ending lag, but starts fairly quickly, making it usable, but not abusable. It deals 2-3% to foes. Like the second hit of the basic combo, Scar's teeth get sharper every time he uses this attack, which makes his Forward Smash a bit stronger, knockback-wise, which it is fairly lacking without. The knockback can be increased several times through using this move, although it resets after a few times. This is not detailed under the F-Smash due to having already been written here and under the basic combo.

Grab Attack (Hyena): The Lion's Share: When a hyena has a foe, they have a unique grab attack. This attack is also the only attack in which you control the hyena and not Scar (who stands idly behind the hyena once a foe is grabbed. This also works in vice versa if Scar grabs a foe). By solely pressing the attack button, the hyena will shake the foe like a chew toy, then release them, sending the victim forward behind Scar with below average knockback and 5%. This is not that helpful, as it can be punishable for Scar: his hyena cannot be attacked while grabbing and throwing here, as it is not separated, but Scar can do nothing to defend himself yet.

If you press the attack button and backwards (towards Scar), the hyena will swing the foe in its mouth backwards, tossing the foe a small distance into the air at their king. There are a few frames here where the victim can air dodge to escape what happens next, and possibly punish Scar. However, it is difficult to pull off regularly. If the foe doesn't dodge, Scar grabs the foe in his mouth and proceeds to hold them. The foe is now grabbed by Scar. To avoid unfair chaingrabs, Scar cannot throw the foe back to the hyena for another grab attack, although the hyena can still be used in some of Scar's other throws. This is a great way to build damage, although if abused, foes will eventually learn the timing of how to dodge and you will pay the price. Use erratically for best results. Handing the foe off does a knockbackless 3% to the victim.


Forward Throw: Inner Kitty: Scar looks away from the victim disgustedly, holding the foe in front of him with both claws, then pushes him or her away and downwards at the same time, shoving his claws into the victim while doing so. This knocks the foe downwards with great power, but because of the sharp claws, the foe is spiked forward diagonally at the ground, making them bounce off it upwards for below average knockback. With expert timing, the foe can floor tech out of the ground hit, giving them time to punish Scar as he gets back in normal position. Although using it near an edge where the foe can be sent downwards (and possibly into position for a down grab), regular use onstage is not recommended, seeing as there are less punishable, more damaging throws out there. This throw deals 6-7% to foes.

Forward Throw with Hyena: Hot Pursuit: Scar holds the victim in front of him, sneering, then drops him or her to the ground, telling the hyena to, "Kill him," nonchalantly. The hyena proceeds to dash forward at the foe, growling. The dropped victim has a few frames to get a headstart in running from the hyena, who tails the foe in a straight line at Sheik's dashing speed, which is quite fast. If the hyena gets close enough to the victim, it will give the foe one powerful chomp dealing 10% and average knockback. This has little lag starting or ending, and has average range and priority. However, the foe can avoid the hyena by jumping over it, or rolling/dodging through it, which makes the hyena stop in their tracks in place confusedly. The hyena can be attacked anytime it is running from Scar, which means the foe can perform a quick attack to knock it away and punish it severely.

The hyena will run until it gets to a ledge (which makes it skid to a stop), or a wall (which makes it crash and stop clumsily), but otherwise pursuing the foe until he or she attacks, dodges, or gets hit. Overall, when using this on a foe with little wiggle room, this can be quite effective to deal damage, but is dangerous against a competent player. The hyena gets separated from Scar after the chase, which makes it ideal to have the foe get hit near you so as to make reuniting easy.


Back Throw: Vice Release: A fairly standard throw; Scar stands up on his hind legs slightly for more power, while hurling the foe behind him angrily, before getting back down on all fours. This deals the best horizontal knockback of his grabs, being just slightly less powerful than DK's B-Throw. This is a great throw to use near the boundaries on a walk-off stage for a nice clean KO. One thing to note is that Scar turns to face the direction he just threw the foe (backwards) after this attack. This throw deals 8% to the foe. Nothing too special here...

Back Throw with Hyena: Leftovers: Scar grabs the foe in his mouth, then turns and tosses the foe to the hyena behind him, for the hyena to grab them in their mouth and toss them back in the same way, dealing slightly below average backwards knockback. This is a passback sort of throw, which takes a little while to do, but is effective of transporting the foe back a good distance. This is still great to use near the boundaries of a walk-off stage, but it takes longer to do than Scar's B-Throw when he's alone, so this is more punishable. Despite this, don't overlook this throw. Because the hyena is having the "leftovers" that Scar handed back to them, there is a 1 in 5 chance that the hyena will heal 5 HP when this throw is used. This throw deals a rather large 12% to foes.

Down Throw: Digging In: Scar drops his hapless victim to the ground, then, pressing his paws against their gut, extends his claws farther than usual, slicing into the foe's stomach and knocking them forward with moderate power. However, the foe stays grounded as they are launched, so they slide across the floor rather than soar into the air. At high damage levels, this is effective to lead foes into traps or combos, as the foe can't use a getup attack until they lose most of their sliding momentum, so Scar can pursue the foe and attack, although this attack has slight ending lag as Scar gets up. Another unique mechanic for this move is that if Scar holds the back button after using the Down Throw here, the foe will slide backwards under Scar rather than forwards. This is most helpful if you are near a ledge with a gimpable character, as if a foe falls off a ledge while sliding, some of their momentum carries on in the air. This throw deals 7% to foes. Make sure you implement this into your playstyle; it can prove handy at the right times. Hyenas have no effect on this throw.

Down Throw (Holding a foe over the edge): Deathly Release: For Scar, this is all but mandatory. Scar gets an evil gleam in his eyes, holding the foe over the ledge with his claws digging into their arm flesh, them rips out his claws while tossing the foe forward off the edge. The foe is sent into a spinning footstool jumped effect, and is knocked slightly forward with below average knockback. Using this to gimp foes is the best use for this diabolical throw. As Scar is a competent edgeguarder, he can pursue his foe down and footstool them again to ensure a KO, or just use some aerials to KO them off the side. Either way, if you can grab a foe off the edge, make sure you use this throw and not any other, as they are much less effective. Plus, you don't want to waste the opportunity you had for grabbing the foe offstage, as this can be difficult to pull off. This throw deals 8% to foes. As Scar can only use his down grab to catch foes like this when no hyena is present, hyenas have no use for this throw.

As a bonus, Scar can use his Up Taunt to power up the move. While the Up Taunt is being used, it becomes twice as hard to button mash out of the grab. However, it takes a full three seconds for Scar to use the taunt, so it is very rare that a foe will ever be idiotic enough to allow the use of this bonus. If Scar can pull it off, though, he will throw the foe with twice as much malicious power, dealing 14% and double the knockback of the normal variation of this throw. The foe's fall speed is also increased a good deal, so if a foe has crappy recovery, they are pretty much screwed. If a foe escapes, Scar still says the rest of the taunt (although he doesn't attack), so he can be punished rather thoroughly. Extremely difficult to pull off, but almost a certified KO if it works.


Up Throw: Playing with your Food: Scar leans his head back as he lightly tosses the foe into the air above him, dealing 1% and no knockback...yet. The foe has several frames here where they can air dodge to avoid to following attack. This takes practice to get the timing down, but it is not difficult to learn, so your best use of this move is against players who are unfamiliar with the match-up against Scar. If the foe doesn't dodge, Scar deals the foe a vicious chomp, having "eaten" his food. This deals above average vertical knockback to the foe, the best of Scar's grabs. Depending on the speed of the Scar players or the foe, either character can attack the other after this move. It provides for some interesting set-ups in matches, so use it to your advantage from time to time. The main chomp deals 10% to foes.

Hyena Bonus: Slobbering Mangy Stupid Poacher: Hyenas have no effect on this move itself, but if they are following Scar during its duration, they watch the foe get "eaten" and drool hungrily, leaving a small puddle of drool on the stage that foes have increasing tripping likelihood over. The puddle stays out for 10 seconds before vanishing, and covers the same distance as a Banana Peel. This can be helpful to set-up foes after this throw, so it is worthwhile to use this throw with a hyena out, as they will drool even if the foe air dodges Scar's chomp. No damage is dealt by this effect, though.

FINAL SMASH


A Surprise To Die For...: Scar lets out a loud roar, echoing with the Final Smash effect, then does a surprisingly high jump off the top of the screen. He is seen prowling on a rocky cliff ledge above a large gorge in the Pride Lands.


The screen slowly scrolls down to show the foe(s) Scar was facing at the bottom of the gorge, peering around their new surroundings in a full cinematic cutscene. Every foe out gets transported here; entering the gorge cannot be avoided, although the main Final Smash can. Suddenly, rocks start shaking around at the foe(s)' feet, getting their attention. A bird cry can be heard as a massive wildebeest stampede is seen, while the movie stampede BGM, To Die For..., starts playing in the background dramatically. The wildebeests draw closer to the characters, who start running away.


Your opponents now gain control of their characters fleeing away from the stampede. The screen here is the size of the normal onscreen area used in the Subspace Emissary, being decently large to allow room for foes to evade the wildebeests as it scrolls to the right with moderate speed. The wildebeests travel at about the running speed of Bowser, an average running speed, and stay at the back of the screen, taking up about one third of the overall stage, and never slowing down, staying in their massive stampede. If a foe falls behind and hits the wildebeests from any angle (above, in front, wherever), they take 25% and insane vertical knockback. Three hits from the wildebeests will KO almost all foes, from 0%, and lower for lighter foes. Characters stay at their normal running speeds, not getting any buffs, so it makes it top priority for slower characters to stay at the front of the scrolling screen (although if you run off it, you still get KOed, as this is a scrolling walk-off area). It is possible to evade the wildebeests through staying ahead, but it is not that simple.

The gorge is not a flat area, it has many rocky ledges and bumps that need to be climbed, some needing even a recovery move to scale. Foes must be near the front of the screen to clear the ledges safely, as the wildebeests simply bound gracefully over the ledges without slowing down. For characters with poor recovery, this is quite dangerous, so be careful. Over some of these ledges, there are old dead trees that serve as platforms to hop onto the ledge. These can serve as handy platforms to characters with slow or poor recoveries, but there is a one in three chance that each tree will snap under the weight of the character, making them fall in a helpless effect to the ground, and almost certainly getting hit by the wildebeests. There is no set stage layout here, so predicting when you will have to jump and recover is not possible, as the gorge area changes with each use of the Final Smash. After about 30 seconds of this fleeing, a cliff platform will block the path, which foes will need to use their recovery onto, the wildebeests stopping below. If foes make it onto the platform, they are safe. Once all foes are KOed or make it onto the platform, the Final Smash ends, and the foes are transported back to the stage. Foes can only be KOed once in the gorge; if a foe with multiple stocks is KOed, they vanish from the gorge and reappear back on the stage when the Final Smash ends. If there is only one foe, and he or she gets KOed with multiple stocks, the Final Smash ends early. If a character loses their last stock, the game ends if there is one character, or the announcer announces the player's defeat if it is a FFA.

Scar is prowling on the cliffs above, running to see the hell he is causing the running foes. He has a few controls that he can perform from up here:

By pressing B, Scar roars, causing a single boulder to tumble into the gorge, bouncing across the running character(s)' path and into the foreground. Boulders come in many sizes, from the size of Kirby, to the size of Bowser. Foes who hit boulders take 10-20% and good backwards knockback, usually sending them into the stampede. They have high priority and good range, so dodging is generally your best hope to avoid these. Air dodging with momentum is best, as other dodges may slow you down, which is the last thing you want. This may prove to be a distraction to your foes, so use it to your advantage.

The other command Scar can use is triggered by pressing Down and B. Scar will yell, "Time for lunch, my friends!", for the three hyenas to bound into the gorge from the cliffs and participate in the chase as well. Hyenas can be attacked to be knocked back, but they are invincible, even if knocked into the stampede, as they are enjoying their feast of panicked animals. If hyenas get close to a character, they give a hard chomp to them, dealing 15% and high knockback, having the possibility to KO foes off the front of the screen. This has decent range, is fast starting and ending, and has high priority. The only way hyenas can vanish is when the screen gets to a cliff that requires recovery, the hyenas being unable to jump over them. Scar must wait five seconds after the screen scrolls over these sections before summoning his minions again. It doesn't matter if you summoned a hyena before using the Smash; they can be used here either way. If they are present at the gorge at the final safe cliff, one of the three hyenas (at random) will appear alongside Scar as he returns to the main stage, with all of its HP, even if Scar used the Final Smash with a hyena with low HP present. If no hyena is present here, Scar returns alone.

Scar can use all three of his solo taunts here, and by pressing the A Button, he gives some good old-fashioned evil laughter, as this is not a main taunt, but is necessary for such a cruel villain. This is a truly entertaining Final Smash that all players can participate and have fun in.


PLAY-STYLE

Scar & the Hyenas obviously have a highly new and unique play-style. There are two very different play-styles you can adopt for this character: you can play as Scar alone, or with a hyena present. This can often determine how you perform in matches, and even whether or not you win.

Scar is a relatively speedy character with decent strength and lag in his attacks. Having a hyena out increases his power, but decreases the safety and trickery of Scar. Due to this, he has a harder time being consistent with his attacks with a hyena, due to the added lag. Plus., Scar now not only has to worry about his own damage, but that of his hyena. 75 HP is a reasonable amount to keep your hyena alive for some time, but most of the competent attacks for Scar and his hyena will separate them. Against competent foes, it can be difficult to keep a single hyena alive for too long, although some attacks can heal them. Although Scar's playstyle with the different hyenas won't change noteably with each of the three hyenas, each contributes something new to Scar. Shenzi has power, Banzai has speed, and Ed has drool. Choose one to start with, then call out a new one whenever necessary.

Although staying in control with a hyena out can be difficult, you'll want one out anyways, just for the sake of not having to bring it out later. Scar can separate from it using his Side Special, and do things that he has to do alone, such as some aerials with better gimping ability, a better grab, and some added trickery for some other moves. You'll want to be able to reunite fairly quickly, so stay near your underling at all times; it can barely defend itself without you.

One of Scar's big advantages is his air game. Although his recovery is rather mediocre at best, with or without a hyena, Scar can hang out near the edge and use aerials to knock foes away, then recover his jumps with the ledge and repeat the process. Hyenas can provide some new options while in the air, but they generally detract from gimpability and add to damage. Scar's multiple grabbing option when alone is another big plus for him. He has more vertasility in his grabs than a lot of the cast. Plus, the effects of some throws can bring a whole new layer to his character if used properly.

However, Scar is nowhere near a perfect character. He has a character size unlike any other in the game. He's not the largest overall, but he's definitely the longest, and is not short either, making him prime combo and chaingrab food for smaller characters. For a character his size, Scar's Smashes and moves in general are not that great at dealing knockback. Hyenas can buff the damage, but the knockback as a whole remains fairly poor. Gimping foes is the best way to KO foes with Scar. However, almost any character will have little problem gimping Scar's hyena tether and suicide recovery when alone. Moderation offstage is best if you want to play it safe. Dealing damage is no problem at all, though. Hyenas really help in this department, and even alone, some of Scar's tilts and Smashes have effects that can be easily used to combo foes, although it takes practice to master.

Overall, matches with Scar are pretty intense and complicated. Using a sharp mind to manipulate opponents into Scar's traps can perform wonders against foes. However, foes have things they can do to make the match-up pretty difficult. Like Olimar, Scar can be picked up fairly easily, but he takes a long time to play effectively. Be prepared for chaos on the battlefield if you choose Scar & the Hyenas!


TAUNTS AND VICTORY / LOSS POSES

Up Taunt: Scar gets a wicked look on his face, as he sits proudly and darkly and says, "Long live the king". A great line to use after a KO, and can be used to power up his Down Throw while over the stage (see it for more detail).

Up Taunt with Hyena: Scar takes out a leg of fresh zebra meat, for the hyena to start drooling uncontrollably (although not getting on the stage), while Scar says, "I don't think you really deserve this..." before dropping it. Scar has a disgusted look on his face as the hyena scarves down the meat. This takes about 5 full seconds to finish, but heals 10 HP to the hyena each time, due to them healing themself.

Side Taunt: Scar gets a serious look on his face, as he tells foes to, "Run. Run away, and never return!", just like he told Simba after killing Mufasa. This is hilarious to use during his Final Smash.

Side Taunt with Hyena: The hyena present breaks into peals of uncontrollable laughter, rolling on the floor behind Scar, who facepalms and states, "I am surrounded by idiots". The hyena gets up a short while later.

Down Taunt: Scar gets a falsely concerned look on his face, as he asks, "Must it all end in violence?", before chuckling evilly to himself at the irony of his statement.

Down Taunt with Hyena: Scar prowls around the hyena, stating the soliloquy from the soundtrack opening of Be Prepared: "I never thought hyenas essential...they're crude, and unspeakably plain...but maybe, they've a glimmer of potential...if allied to my vision and brain". The hyena just sits stupidly while Scar talks, not understanding all of the big words.

Victory Pose #1: Scar sits proudly in the middle of the screen, facing his clapping opponents, and roars out, "I am the king!" in triumph. Shenzi, Banzai, and Ed stand at Scar's sides, performing clumsy bows for their new king, like Pikmin when Olimar wins.

Victory Pose #2: Scar prowls around Shenzi while Banzai looks open-mouthed and Ed looks like he always does (drooling and maniacal). While prowling, Scar talks to Shenzi, saying, "You look nervous. Is it the scar?" At this point, he stops prowling and extends a claw, then traces the scar over his eye, asking, "Do you want to know how I got it?" Shenzi lets out an audible gulp, as Scar starts laughing evilly, while the hyenas sit anxiously.

Victory Pose #3: Scar's army of generic hyenas chase away the losers, snapping at their arses, while Scar, along with Shenzi, Banzai, and Ed, starts singing the last few lines of Be Prepared. They sing, "Yes our teeth and ambitions are bared: be prepared!" After singing, the hyenas and Scar laugh wickedly, as Scar stalks up to the screen and scratches his claws down it, making a glass-shattering sound and blacking out the screen, with only the results being shown from there on out.

Victory against Simba: Simba is seen among the losers, surrounded in a circle by the three hyenas. He growls at each of them to keep them at bay, but he is unable to get out of the circle. Scar watches this sadistically, and comments, "This looks familiar...hmm, where have I seen this before?", before laughing wickedly. If there are multiple Simbas (or other characters he has unique poses against) in the losers, he performs the pose for the highest ranking of the characters.

Victory against Timon & Pumbaa: Timon and Pumbaa approach a sitting Scar on bended knee. Pumbaa nervously says, "Your majesty! We gravel at your feet!", as the duo begins kissing Scar's paws comically. Scar roars in disgust, sending the duo reeling backwards in panic, then lies down in a bored manner, while the three hyenas watch Timon and Pumbaa hungrily. Not wanting to fall victim to Scar's wrath, the duo simply bow before Scar, while Timon whispers in an annoyed manner to his warthog buddy, "It's grovel, not gravel!"

Victory against Zazu (from Iago & Zazu): Scar lies on his back lazily, his hyenas drooling at his side, while Zazu sits haplessly in a boney cage, singing 'I've Got a Lovely Bunch of Coconuts' to please Scar, albeit with a weary and disgusted look on his face.


Victory Theme: A clip from the end of Be Prepared. Scar's victory poses are too dark to share the bright main Lion King victory theme, Circle of Life.

Loss Pose: Scar lies down lazily, clapping for the foes who defeated him with his scarred eyebrow raised sarcastically. The three hyenas sit in a circle around Scar, licking notable wounds from the fight on their arses like dogs.

Loss Pose against Simba, Timon & Pumbaa, Zazu, or another Scar: Scar stands with false admiration, and says in a quiet voice, "Forgive me for not leaping for joy. Bad back, you know...", before falling to the ground on his side, keeping his eyes open, but remaining motionless. The three hyenas sniff Scar stupidly, not realizing he is still awake.

OTHER

Icon: Scar shares the main Lion King icon, which is Rafiki's famous tree painting of baby Simba.


Wiimote Sound: Scar proclaims angrily, "I am the king; I can do whatever I want!"

Crowd Chant: The crowd, consisting of men and women, chant, "Long live the king! Long live the king!" over and over.

Kirby Hat: Kirby dons Scar's black mane and his famous scar on his eye. He also gains the ability to produce geysers like Scar. However, this is not as useful as Scar's, seeing as Kirby has no way to control the flow of boiling water.

Alternate Colors:

(Hyenas have different color tints to match those of Scar)

Standard
Red Tint (Red Team)
Blue Tint (Blue Team)
Green Tint (Green Team)
Dark Gothic
Albino
Nuka

Nuka


Nuka is the oldest (and slightly neurotic) son of Zira, and half brother to Kovu and brother to Vitani. He has a straggly black mane and appears small and weedy, and is often tormented by termites. His voice was provided by Andy D**k (<-- Smashboards did this). Nuka means "smell" or "stink" in Swahili.


He serves as an alternate character model for Scar in Smash, and as such, has several differences worth noting from his father:


  • Nuka is faster than Scar, having 6.5/10 speed, but is also weaker and lighter than his father, having 5.5/10 power and 6/10 weight.
  • Nuka has different steam colors than Scar. For his Neutral Special, the geyser steam is red, not green. Likewise, for his Down Smash, the crack is green, not red.
  • Nuka has a much more spasmatic idle pose than Scar. He itches himself wildly due to having lots of annoying vermin. Instead of stalking for his crouch, Nuka gets against the ground on his back and scratches it violently on the floor.
  • Nuka has a different, more dorky-sounding voice actor than Scar, who is voiced evilly and calmly. Likewise, for his attacks, Nuka's anger is more comedic, and his laughter is more insane than actually evil.
  • Nuka cannot crawl like Scar; however, he can wall cling for three seconds, an ability his father lacks.
  • The hyenas that can accompany Nuka are tannish colored rather than gray.
  • Nuka has a new Down Taunt when alone; he looks side to side comically and asks himself, "It is just me or is it getting hot in here?"
  • Nuka has no unique victory poses against any of the main Lion King cast.
  • Replacing the Joker-mocking victory pose is a new one specifically for Nuka: He laughs crazily, standing onstage, panting, "I did it for you, mother!" He then says more controllably and darkly to himself, "And I did it for me!"
  • Whenever Scar would normally say 'King' (as in 'Long Live the King'), Nuka replaces the saying with 'Chosen One", (the title he hopes to achieve over his younger brother, Kovu) so he says, "Long live the chosen one!"

CODEC CONVERSATION

*Press Select*

Snake: Colonel! There's a black-maned lion in here, and he looks pretty pissed.

Colonel: That's Scar, Snake. He's a schemer, and will stop at nothing to get what he wants.

*Scar's evil laughter from Down Special is heard outside the call*

Snake: What the...he just called a hyena out of a cloud of smoke! He's ordering it to assist him in his attacks! Who does he think he is?

Colonel: Scar is the provider for a gang of vicious hyenas. By hunting for their dinner, he has earned the loyalty of Shenzi, Banzai, and Ed.

Snake: This violates so many laws of nature. Lions and hyenas are supposed to be mortal enemies.

Colonel: *sigh* This is Smash, Snake.

Snake: Right. I should've stopped believing in rationality here a long time ago...

*End of Transmission*

ASSIST TROPHY


Zira: Zira is the main antagonist of The Lion King II: Simba's Pride. She is voiced by Suzanne Pleshette. Widely believed, although not explicitly stated, to be Scar's mate, she is the mother of three cubs: Nuka, Vitani, and Kovu. Zira means "hate" in Swahili.

Zira, her three children, and some other lionesses who supported Scar's cause were banished to a desert-like area filled with termite mounds known as the Outlands. To many, Zira is viewed as the leader of the Outlands.

In Smash, Zira makes her appearance as an Assist Trophy. As she appears, she growls, “This one’s for you, Scar!”, as she proceeds to run around the stage at the dashing speed of Captain Falcon. Occasionally, she’ll pounce on a foe in a feral manner. The pounce has the same properties of the pounce from Scar’s F-Smash, and can be avoided in the same manner. However, instead of biting the foe she catches, Zira and the foe roll around on the floor, Zira biting the foe ruthlessly the whole way. After rolling the distance of three Stage Builder blocks, Zira lands on top of the foe, who is launched. This deals 15% and decent knockback to the foe. However, if she and the foe roll off an edge, she pushes the foe down with her claws while falling with her victim, in a suicidal take-down move of sorts. This will cut short her AT time if it happens, but is an inescapable death for foes who fall with her.

Another effect that Zira has is to grab a flaming branch in her mouth as she runs, lighting the ground she runs past on fire for a short period. She lights the distance of three Stage Builder blocks on fire at a time, which burn up to the height of Ganondorf and deal 10% fire damage and good knockback to foes. The flames last three seconds before subsiding. Only one area can be on fire at a time. Zira attacks with decent frequency for an AT, and lasts for 25 seconds before vanishing with a snarl. She is not a rare Assist Trophy, but is not a common one, either.


STAGES


Elephant Graveyard: You fight on the home turf of the hyenas, which is filled with all sorts of elephant bones and whatnot. The stage takes place in front of the main bull elephant skull of the graveyard, in which the hyenas live. The main area is the size of Final Destination, but the tusks serve as two walls on the sides of the stage. Foes can stand on the tusks (the area there is the size of one Stage Builder block), although beyond the tusks are pits, with the side boundaries close by. This makes battles near the walls quite perilous, so stay away if you have high damage. The only real hazard here are buzzards. Occasionally, a single buzzard will swoop down from above and try to peck at characters, dealing a light 5-7% and low knockback. These are no real danger, as they can be KOed as easily as Shy Guys. After 45 seconds on this tier, the floor caves in and characters fall down to an underground area, with a midair falling floor like that one Castle Siege.


After a few seconds of falling, you are now in the geyser-filled underground area where Scar himself lives. This area is as big as the main docking area of Delfino Plaza, counting the water on either side. Here, there is a massive cliff wall going off the top of the screen to the right, while a walk-off edge is on the left. Geysers are common in the rocky background, but have no effect on battle. After a minute here, the floor shakes in an earthquake-esque manner, before caving in. Characters fall with the same falling floor from the above tier, before landing back in front of…the bull elephant skull? But how? You have no time to ponder such questions, as the battle continues back from the first tier. A fitting home stage for Scar & the Hyenas.


MUSIC

Be Prepared
Chow Down (The Lion King on Broadway)
Simba Confronts Scar (The Lion King on Broadway)
Final Battle (The Lion King)
My Lullaby (The Lion King 2)
The Madness of King Scar (The Lion King on Broadway)
The Elephant Graveyard (The Lion King)
To Die For... (The Lion King)


Pride Rock: The majestic home to the lions and lionesses, named 'pride' after the term for a group of lions. This is all but mandatory for a Lion King stage. Here, you fight on the standard sloped point of rock that is shown regularly in the movies. This area is about the size of Bridge of Eldin. However, it is slanted downwards, the cliff point of the rock being on the left side, while the rest of the rock slants down to the right. The cliff point to the left serves as an edge, where characters can be KOed off the bottom boundary. As a small feature here, characters can hang on the edge for double the normal time before losing their invincibility frames. On the right edge of the screen, where the rock slants down, there is a walk-off edge. However, the side boundary is thankfully not too close, to prevent easy, cheap KOs. The only other stage elements here are a weather change. Occasionally (about every minute and a half), a heavy rain will commence. However, unlike on Distant Planet, it will not wash away characters, but merely increase the likelihood of slipping for its duration (10 seconds). Other times, instead of rain, the African sun will rise high overhead, dealing 1% of knockbackless damage to grounded characters every 3 seconds, lasting for 20 seconds. In the background, there are all sorts of African wildlife and foliage, adding to the wild effect of the stage.

MUSIC

Circle of Life (The Lion King)
This Land (The Lion King)
I Just Can't Wait to be King (The Lion King)
Hakuna Matata (The Lion King)
Can You Feel the Love Tonight (The Lion King)
Under the Stars (The Lion King)
He Lives in You (The Lion King 2)

King of Pride Rock (The Lion King)

MORE EXTRAS?

You want more? Well, at 17, 865 words, I think you have enough to keep you busy for a long time. However, expect a Trophies list, Event Match, and SSE Role in the near future.
 

BKupa666

Barnacled Boss
Moderator
Joined
Aug 12, 2008
Messages
7,788
Location
Toxic Tower
LOL @ responses.

But seriously, it won't happen again. I just needed to get all that text off my laptop for later.

*waits for epic responses*
 

Wizzerd

Smash Ace
Joined
Feb 24, 2009
Messages
929
Awesome moveset. The attacks seem original, but the mechanic seems a bit unoriginal... still awesome, though.
 

Hyper_Ridley

Smash Champion
Joined
Dec 21, 2007
Messages
2,291
Location
Hippo Island
Like with Iago and Zasu in MYM4, you did a great job of incorporating random scenes from the movie into attacks. Great job!

edit: @Trophy Master: Bass and Treble should be posted tommorow, or even tonight If I feel up to it. :bee:
 
Status
Not open for further replies.
Top Bottom