• Welcome to Smashboards, the world's largest Super Smash Brothers community! Over 250,000 Smash Bros. fans from around the world have come to discuss these great games in over 19 million posts!

    You are currently viewing our boards as a visitor. Click here to sign up right now and start on your path in the Smash community!

Make Your Move 5

Status
Not open for further replies.

Kholdstare

Nightmare Weaver
Joined
Oct 10, 2008
Messages
1,440
Comments on Rail Forlde:

COMMENT REMOVED DUE TO LEGAL ISSUES.

Comments on Heat Man:

Check my review blog (if I get a review of Medli up tonight) about a week from now.

:bee: Hint, hint.

Comments on Father Time:

Holy crap, K.Rool.

This moveset just screams awesome. I LOVE his attacks, particularly Sands of Time and Temporal Discrepancy the most. The Forward Special is just too confusing to comprehend, though.

Excellent, excellent job.
 

KingK.Rool

Smash Lord
Joined
Nov 26, 2005
Messages
1,810
Father Time is certainly creative. Adding the concept of time to Brawl opens up a considerable number of options. I'm surprised you didn't make Father Time a gimping master. But forcing him to use his Sands of Time for KO's is kind of poetic, and having an entire moveset based around setting up opponents for the Sands of Time is pretty awesome.


I do have one problem with this moveset though, and it really hampered my enjoyment while reading it;

His Down Special is mandatory for his other moves to work. There is simply no point in not setting up a timeline immediately. Which begs the question, why is an entire Special designated to setting up a timeline, when everyone will use it once at the beginning of a stock and then completely ignore it from then on?
It's literally a useless Special, in that it achieves nothing the game couldn't have handled automatically.

Timeline could have easily been merged with His Hour, since that move requires a timeline anyway.
Glad you liked it, Junahu. I figured Timeline COULD be an automatic thing, but... I consider a sort of check to his power that he needs to find a quiet moment to get his whole game going, and therefore loses an active Down Special. Or something like that, anyway.

Comments on Father Time:

Holy crap, K.Rool.

This moveset just screams awesome. I LOVE his attacks, particularly Sands of Time and Temporal Discrepancy the most.

Excellent, excellent job.
Well, thanks, Khold! That's the kind of emphatic reaction I was hoping I'd get. :cool:

The Forward Special is just too confusing to comprehend, though.
Edit: Skipping Record, even I couldn't understand it at first. And I'm not too sure I understand it now.
Basically, time jumps to a random position on the timeline, between the time you set His Hour and the time you used the move again to go back in time, right? So this move is technically only usable in the "past".
Well, what do you expect? Time travel is complicated! /copout

Basically, you're skipping into a random moment in the future. Since Brawl cannot read the future, it's a future you've already played through, then skipped back from with His Hour. So yeah, Junahu; you can only use it when you're in the past. :bee:
 

Kholdstare

Nightmare Weaver
Joined
Oct 10, 2008
Messages
1,440
SOCRATES


The master of debate has arrived! Through his insatiable curiosity and infallible logic, he shall debunk your existence!

One of the greatest contributers to Western thought, the teacher of teachers has joined the Brawl! The mentor of Plato, who in turn influenced Aristotle and the rest of modern thought; this philosopher makes the likes of Nietzsche bow in reverence!

Best known for founding his titular concepts of Socratic irony and the Socratic method, he however had the greatest impact on the grasp of ethics.

If there be a axiom of spurious authenticity, Socrates will be there to disprove it!

STATS

Power: *** Although an intellectual and an old man, you can't underestimate this logician! With the last of his breath, he shall see to the justification of his reason! Fear this mind of utmost determination!
Speed: *** With calculating speed does Socrates approach his foes. Step by step, bringing them ever closer to their foolish demise. Can you stop this genius?
Weight: *** Can not a man live in luxury, and not grow fat? What sweetbreads hast thou been feasting upon, so that your girth is so pronounced? Perhaps not so profound as in that stereotypical descendant of our destroyers, with facial hair so astounding, but nonetheless of slightly greater mass than of most men.

ATTACKS

Yet again I ask thee (for some reason in Middle English), how does a man more akin to his intellectual facilities, engage against the likes of super powered abominations as so found in Super Smash Bros.? Why of course with rapier wit and rationale indomitable! Also with his walking stick.

Come then fools, and taste the mettle of this man of reason! What do your fists, swords, and knees mean, if they have no purpose? (other than to brutalize each other, for the entertainment of peons)

A-Attacks

Standard: "This is not the philosopher you are looking for" Socrates waves his hand in front of him, as though using some sort of "mind trick", but it rather buffets the opponent. He can do this quite quickly, and all day.

Side: Swings the excess of his toga at the opponent, knocking them away in a wave of citizen's cloth

Up: Points toward the sky, searching for answers. Has the side effect of knocking opponents into the air

Down: Sweeps the ground in front of him with his walking stick

Dash: Rushes the opponent, beating them aside with his stick

Side Smash: Reasons, that his opponents must be weightless because they don't consist of actual matter. Then smashes their non-existent masses afar with his stick.

Up Smash: Again using the same argument as before, reasons his opponents' weightlessness and uppercuts them into the sky

Down Smash: Extends his hands to either side of him, and pushes his weightless foes into the ground

SPECIALS

Standard: Socratic Method
{Chargeable} The basic thesis held by Socrates' opponents is "Attacks are the key to victory." Then holding them in deadlock, questions their definite assertions on it. Such as, "Attacks are vital things to our existence" and "A key is not a vital thing to our existence." Thus Socrates makes the opponent comply, that those two axioms are contrary to their thesis, they stating that "attacks are not the key to victory." This complete ownage of their principals, causes the opponent to fly off in depression, further proving that attacks are not the key to victory. Hold B to increase the range and ardor at which Socrates revokes fallacious conjectures. Release to create an area of interrogation.

Side: Welfare of the Soul
Preaches such admirable philosophy, that his opponents seek to follow him as a teacher. They emulate his status quo and take damage equal to the amount he took from the last attack. (No damage equals no taking no damage) However he insists that he is not a teacher, and only works to bring self-invoked insight. The opponent eventually achieves this and "flies" off to other things.

Up: "Gravity? Where's the proof?"
Anachronistically disproving a fundamental principal of the universe, Socrates counters the affect of gravity for a short while by arguing its non-existence. Due to this, he is free to move through the air as though flying; but always moving up. Of course, not even he can hold fact at bay for long; and is eventually dragged back down again.

Down: Socratic Irony
Socrates has let down his guard?! He seems to have given up the fight; apparently he doesn't know how to defend himself. An enemy attacks, showing this newcomer how to truly "Brawl it out." Socrates dodges and sends the enemy flailing forward! The arrogant fool is dazed in his humiliation! Socrates then takes his time to demonstrate his true ability; the opponent is PWNED in all aspects in which the term is relevant.

AERIALS

Standard: Spins himself, so that his toga becomes a whirlwind of citizen's cloth; and catches enemies in its vortex of democracy

Up: Shakes his walking stick upwards

Down:

Side: Swats away at the vain and fallacious with his cane

GRABS

Grab hit: Questions the opponents' state of being, causing such a conundrum in their minds that they actually take damage!

Forward: Fells the opponent by proposing various unanswerable questions; the opponent tries to escape, but trips on Socrates' toga

Back: Annoys the opponent with questions, until they rush towards him; he then trips them.

Up: Disproves the opponents' susceptibility to gravity, and throws them upwards; where they escape the stratosphere. (Opponents, at the apex of their launch, gain the same ability as Socrates during his Up-B. Of course this means that they'll continually rise up for a while)

Down: Socrates hits the opponent over the head with his walking stick, so that they fall prostate to the ground. He then batters them with questions, until their minds explode from inept reasoning.

FINAL SMASH

THE PEOPLE"S VIRTUE

Lol.
 

Kholdstare

Nightmare Weaver
Joined
Oct 10, 2008
Messages
1,440
(lemon) is taking over.

Snake Man is going to be posted first, as I am coming along well with him.
 

Jimnymebob

Smash Champion
Joined
Sep 26, 2008
Messages
2,020
NNID
Jimnymebob
How I miss the chat :laugh:.
I may have to nip in some time to have a chat with you guys.

In other news- I had a fun little absence, but I may start working on a moveset that revolves around a special mechanic. It may never happen, and probably won't, but if it does then I hope you enjoy it.

It'll remain anonymous for now, but it is a Pokemon that may not have been done before.
 

Jimnymebob

Smash Champion
Joined
Sep 26, 2008
Messages
2,020
NNID
Jimnymebob
I support your set all the way, Jimny. =D
Thanks HR.

I'm pretty sure I remember K.Rool announcing and canceling Father Time a while back, and I can assume that it hasn't been as heavily worked as a lot of your other movesets. However, for a moveset based around a special mechanic, it works extremely well, and was a good read.
It's not a top contender, but it should definitely not be overlooked- even if just for it's uniqueness.

Mewthree was a surprising moveset to say the least, and I wasn't expecting him to come out of the SM (which I have read, just not commented on XD), as I thought he relied on the actual story to give him the effect he had.
Turns out I was wrong.

Mewthree fits into the actual game very well, and you did a great job of showing his disturbing personality just from his actions, so I congratulate on that. That moveset probably had the greatest effect on me when it comes to reading it, as it did creep me out a fair bit, and I could visualize it all too well XD.

The 3D Sonic game bosses (Chaos and Dark Gaia) were also cool, although I'm still having troubles picturing DG fighting, but that's because Sonic was smaller than one of it's eyes XD. However, the movesets were great, but lack of a FinalHazard moveset is disappointing :p.
What do you mean he was a crappy boss design? XD
 

majora_787

Smash Hero
Joined
Jun 23, 2007
Messages
6,122
Location
Texas
I'm just gonna stick with my lazy scheduel of MYM movesets. But, I won't go for quality anymore. So that means I'll pick people I like and do what I can.

So has anyone done Salvador?

And also, I liked the Scorates moveset. Haven't seen one like that since I skimmed MYM1. :laugh:
 

KingK.Rool

Smash Lord
Joined
Nov 26, 2005
Messages
1,810
You mind killing the GIANT PAGE-STRETCHING image there, Khold? At least move it to this page, or something. It kinda bothers me. :ohwell: EDIT: Thanks, dude.

Socrates is basically a perfect example of why MYM 1 wasn't ALL bad. :bee:
 

majora_787

Smash Hero
Joined
Jun 23, 2007
Messages
6,122
Location
Texas
What, did I do that thing where I don't notice a moveset repost when I see one? :bee: Oh well.

Actually, I got an even better idea than just Doctor Salvador. I'll probably save telling you guys until I get it worked out, but...it'll be my first "transformation" character, I BELIEVE...
 

SirKibble

Smash Champion
Joined
May 2, 2008
Messages
2,400
Animal Crosser


The fan-named "Animal Crosser" is the controllable boy or girl from the game/series Animal Crossing. The Crosser lives out his or her life in their town, doing activities that you choose, which can range from paying off a house loan to completing the museum's archaeological exhibit. But you don't have to be productive, either. You could just run around and beat your neighbors with a bug-catching net instead. . .


Statistics

Rather than list a variety of average stats, suffice is to say that Animal Crosser fits a very average mold for every stat. He's got two jumps, and no wall-jump/crawl abilities. A very average fighter, as far as statistics go.


Standard Attacks

Standard Combo ~~~ Converse
Animal Crosser waves a hand, attempting to indulge in a little conversation. But wait! Conversation with his enemies?! It would seem that no one can resist a chat with this lovable guy. This move has brief startup lag, and any opponent facing Animal Crosser in the direction he's facing (in other words, essentially looking him in the eye), within about one-fourth the length of Final Destination, will stop anything they're doing and cause them to briefly talk with the Crosser. If they are in the air, they will stop anything they're doing and will fall, but they will regain control as soon as eye contact is lost. The conversation lasts for about a second, at which point both characters will turn around and become controllable again. There is little ending lag this way, but if the Crosser waves and no one is there, he'll don a sad expression for a second, giving the move a fair amount of ending lag. This attack is best used to stop approaches or to quickly defend from direct attacks. After an effective use, the character this move was used on will become unable to be affected by it for the next five seconds.
[ 0% ]

Forward Tilt ~~~ Junk Mail
What do we do when we have letters we don't want? We throw them at people, of course! The Crosser takes a sealed letter and tosses it forward. It'll fly straight forward about a quarter the length of Final Destination before sharply dropping toward the ground. It can drop over ledges like this, and it travels very quickly. Once it hits the ground, if it does, it sits for a second before vanishing. The letter deals 3% damage and flinching knockback to anyone it hits while flying. There is little lag on either end of this move. This is mildly spammable, but due to the nature of its knockback, is mainly just a weak medium-ranged projectile.
[ 3% ]

Up Tilt ~~~ Confetti Toss
Animal Crosser takes armfuls of confetti and tosses them into the air! Must be celebration time. That, or it's just another battle tactic. The confetti covers an area roughly similar to the area a Party Ball would drop its contents over, lasting for about three seconds. All characters, including the Crosser himself, will be unable to use moves inside the thick cloud of confetti. If a move causes them to enter it (such as a Quick Draw or Falcon Kick), they will promptly stop the move as they enter the confetti area. Absolutely no moves can be used from within the area. Projectiles, however, will pass through it with ease. There is little startup or ending lag to this move, but the Crosser cannot use it again until the confetti from the previous celebration disappears.
[ 0% ]

Down Tilt ~~~ Sweet Syrup
Syrup?! Well, whatever works, I guess. Animal Crosser takes a small bowl of syrup and pours it on the ground in front of him. There is a moderate amount of startup and ending lag for this Tilt. The syrup patch is about the width of a single Stage Builder block, and remains for about twenty seconds, during which time Animal Crosser is unable to use this move again. Anyone who steps onto the syrupy area (including the Crosser) will be temporarily stuck in the gooey mess, and will take about half a second to free their feet from it. In addition to that, the syrup seems to attract bugs from off the screen. Generally, two or three will fly in every time this move is used, and will hover around the syrup. After it disappears, the bugs won't leave, but will not gravitate toward any specific area, fluttering about as they please. Hmm. . .
[ 0% ]

Dash Attack ~~~ Clumsiness
Katrina the fortune-telling black cat told you you'd be clumsy today! The Crosser trips over his own feet, tumbling forward. He goes about a Battlefield platform's length forward. Aside from the distance covered, it's just like his normal trip, leaving him sitting on the ground afterward. Anyone he hits while tumbling forward will take 5% damage and has a 50% chance of tripping as well!
[ 5% ]


Smash Attacks

Forward Smash ~~~ Axe Swing
Animal Crosser whips out his trusty axe, and swings it horizontally. The axe blade is unusually large compared to the handle, making this a short-ranged move that doesn't distinguish between the handle and the blade of the axe for a hitbox. After the somewhat long startup lag, the hit delivered passed quickly, dealing an impressive 18 - 28% damage, with strong knockback! There's quite a bit of ending lag after the swing, but it's a powerful blow if you can land it. Rumor has it that you can use this move in conjunction with another...
[ 18 - 28% ]

Up Smash ~~~ Balloon Gift
A balloon materializes some distance in front of Animal Crosser, about the height of the Smashville one above the ground, carrying a small wrapped present. It will slowly float toward you as you charge this move. When you release the charge, Animal Crosser will jump up to the height of the present, snatching it down. If you don't time the release right, this won't accomplish anything, and the distance of the balloon when you start charging is determined randomly. Sometimes you can release instantly, sometimes you'll have to wait for a full charge, and sometimes you'll have to time a jump in the middle.

If you manage to snatch the present, a few things can happen. The present can contain a few different things:

  • Nothing - If the present is empty, the Crosser won't even bother opening it. The present box then becomes a throwing item, dealing small knockback and 4% damage to anyone you hit with it. This has a 15% chance of happening when this move is used.
  • A Fossil - This serves as another throwing item, albeit a move powerful one, dealing 10% damage with okay knockback. The fossil is the most common present, appearing 25% of the time.
  • Stationery - As the Crosser pulls out a stack of paper, most of it tumbles to the ground, covering a distance about a Battlefield platform's length wide around him. The paper remains for the next five seconds, and has a dramatically increased 80% chance of tripping opponents who step over the area. This happens about 20% of the time.
  • Food - The Crosser retrieves from the box a piece of fruit (randomly chosen from an apple, an orange, a peach, and a pear), which he hurriedly devours, healing himself for 10% damage. This happens about 10% of the time.
  • Fan - A standard Fan item is pulled from the box. This happens about 10% of the time, but will not happen if items (or even just the Fan) is turned off.
  • Box In a Box - This functions just like the empty present, only the Crosser opens the box to reveal another, which he uses as a throwing item like the other. This has the disadtantage, however, of him having to deal with the short time in which he opens the present. This happens about 15% of the time.
  • Bomb - 5% of the time, the Crosser will pull out a bomb, like Link's, which has a very short fuse. If not thrown instantly, it will explode in his face. The bomb only explodes over a very small radius, and deals 5% damage with flinching knockback.
[ Variable Damage ]

Down Smash ~~~ Shovel
With a swift motion, the Animal Crosser produces his shovel, which he then uses to dig a hole in the ground right in front of him, about the size of a Pitfall's affected area. It's a bit more obvious than a Pitfall's trap, and holds opponents about as long. Charging the move will increase the depth of the hole, making it hold opponents longer than a Pitfall. If an opponents gets buried, you can hit them with another attack, or you can dig them up with another use of this move over the same area, at which point the Crosser will slip the shovel under them and toss them into the air, dealing 15% damage and pretty good knockback. The holes will automatically fill themselves in after five seconds. As a special bonus, you can dig up Pitfalls with this move! Dig up an enemy's, then set it for yourself!
[ 15% ]


Aerial Attacks

Neutral Aerial ~~~ Money Bag
Animal Crosser pulls out a bag of money almost as big as he is, and swings it full circle, like Ike's Neutral Aerial. It's similarly slow, and doesn't reach too far, either. The bag deals 10% damage and okay knockback if it hits, so what's worthwhile about this attack? When the bag connects, three coins will spill out, falling to the ground below. Animal Crosser and Animal Crosser alone (only the one that initially used the attack in the case of a ditto) can then pick up the coins and throw them. The coins deal 5% damage and weak knockback to anyone hit, but you've got three of them as a reward for landing that swing of the bag! After the Animal Crosser has thrown the coins, all players may pick them up and throw them like a normal item.
[ 10% + 5% ]

Forward Aerial ~~~ Fish Slap
Somehow the Crosser's pockets have the ability to hold fish safely. He whips one out, which is about as big as a red Pikmin, and swings it forward like Olimar does for his Forward Aerial. The fish deals only 4% damage and weak knockback, but the attack has virtually no lag at all, making this attack perfect for interrupting your opponent. That's a slippery fish, though...
[ 4% ]

Backward Aerial ~~~ Runaway Fish
Animal Crosser goes through the same motion as in his Forward Aerial, but this time, he doesn't swing the fish forward! Why not? Because as he goes to, that slippery fish jumps out of his hands, leaping behind him! He goes a similar distance that a red Pikmin does in Olimar's Forward Smash before dropping the same way. All the while, the fish deals 5% damage and weak knockback. Upon striking the ground, the fish flops around just like a Goldeen, only it deals flinching knockback with 5% damage to anyone it contacts. This has a longer ending lag than the F-Air, as the Crosser fumbles behind him for the fish briefly.
[ 5% ]

Up Aerial ~~~ Old Stationery
The Crosser takes out a stack of old paper (five pieces of it, to be precise), and throws them upward. They actually won't fly upward at all, being, y'know, paper and all, but after being tossed, they'll float toward the ground until they hit it. As they fall, they'll each deal 2% damage and flinching knockback. They'll fall at about the speed the Parasol item did in Melee, spreading over a decent distance due to there being five of them. This move is best used to set up a more powerful attack, probably a ground-based one, so it may be most useful near the ground. There is little lag overall, but the move can't be used a second time until the first batch of paper has all hit the ground and disappeared.
[ 2% per hit ]

Down Aerial ~~~ Pitfall Drop
Animal Crosser drops a Pitfall, like the item. Note that while it looks exactly like a normal Pitfall, this one is, in fact, considerably weaker, only giving very slight downward knockback in the air and only burying opponents for a brief time on the ground, either way dealing 8% damage. Here's another catch, though. Animal Crosser doesn't drop the item as an offensive technique. Rather, the dropped item acts like any item that's just appeared, and has to be grabbed and thrown after use of this move. For this reason, it is often most useful close to the ground, where you can drop it and then pick it up rather quickly. Only one of these Pitfalls may be present or in effect for any single Crosser at a time.
[ 8% ]


Grab & Throws

Grab ~~~ Normal
Animal Crosser's Grab is very normal, highly akin to Mario's in terms of...everything.

Pummel ~~~ Shake
Animal Crosser leans back and then forward again, giving his opponent a shake. You can repeat this pretty rapidly, but it only does 1% damage each time.
[ 1% ]

Forward Throw ~~~ Nook's New Worker
Animal Crosser takes the old worker clothes he got from Tom Nook when he moved in, and pulls the shirt over his opponent's head. This does no damage, but the unlucky victim now works for Tom Nook for the next 10 seconds. Workers are expected to perform at their best, not letting themselves settle for anything less than highest quality. What that means for the victim of this Throw is that while they work for Tom Nook, they are confined to using their Specials, and nothing else! This is a good way to limit your opponent's available tactics for a while. This effect cannot be stacked, and the Throw will fail, with the Crosser simply releasing his opponent, if they're already working for Nook. This is a slow Throw, and opponents can still try to break the hold while the Crosser is forcing the shirt onto them.
[ 0% ]

Backward Throw ~~~ Reset
The Crosser whips out a black box with a red button on it. Is that... Oh, no! It's the Reset button! He presses the button, and runs backward, as Mr. Resetti pops out of the ground. Assuming the Crosser's opponent to be the perpetrator, he begins lecturing him. He'll lecture for about three seconds before realizing that the Crosser is there, grumbling and going back underground as he realizes who really pushed the button. During those three seconds, the enemy has superarmor, but can still be attacked for damage. This is also a slow throw, and if the enemy breaks free before you push the button, YOU'LL get the lecture instead, giving them an opportunity to rack up the damage on you! In other words, only use this Throw when you're sure you can pull it off, or you'll be sorry! Additionally, after its use, this Throw won't work on an opponent for the next 30 seconds, so make good use of it!
[ 0% ]

Up Throw ~~~ Umbrella Smack
Animal Crosser reaches in his pocket with his free hand and pulls out an umbrella, then opens it up, sending his opponent flying upward. The actual Throw portion of this attack is ho-hum, dealing only 5% damage with relatively weak knockback, and being somewhat slow as well. However, on the plus side, Animal Crosser will keep the umbrella he pulls out, it functioning like a weaker version of the Parasol item from Melee. It does half the damage and knockback of the normal item, and only slows your fall speed by half as much, but it can still prove quite useful at times.
[ 5% ]

Down Throw ~~~ Designer Prices
Animal Crosser pulls a flashy shirt out of nowhere, quickly putting it on his opponent. This has no effect on his opponent, and will disappear after a few seconds. However, such wonderful artistry comes at a price. A single gold coin will fly out of Animal Crosser's opponent and into the Crosser's hand, essentially granting him a free throwing item for use of this Throw. The coin deals 5% damage and weak knockback to anyone it hits when thrown, and other players can throw it as well. This is Animal Crosser's fastest Throw, but is still only moderate in speed.
[ 0% ]


Special Attacks

Neutral Special ~~~ Gyroid
Animal Crosser fumbles in his pocket for about half a second, then throws a little robotic gyroid (seen here) forward. It's about the size of Olimar, and is thrown forward about a Battlefield platform's length. Only one gyroid may be present per Animal Crosser in a match at a time. It does nothing when thrown, but the gyroid will remain there for the next 30 seconds, and will make a strange noise every 6 seconds, emitting a quick shockwave that covers an area about Bowser's size instantly. The noise deals 5% damage and flinching knockback. The gyroid can be attacked, and will be destroyed after taking 30% damage. If it's destroyed, it's remains will still lie on the stage, so you won't be able to summon another one, but you won't reap the benefits of its attack.
[ 5% ]

Side Special ~~~ Bug Net
The Crosser swings a bug net forward, in a vertical swing much like Ike's Forward Aerial, with a similar range, motion, and speed. If it hits anything (whether it be an opponent or solid ground) during its arc, the swing will stop, and if it's an opponent, he'll deal 8% damage and okay knockback, but nothing special. However, this attack has an addition use when combined with the Down Tilt. Remember those bugs that flew in to the syrup? You can catch them with the net. Once you've caught a bug, your next swing of the net will be performed with the bug in the net. If you miss, the bug is released, and will start flying around again. If you hit with this swing of the net, the bug will latch onto your opponent, biting to deal extra damage in the same fashion as Olimar's Pikmin in his Side Special. The bugs are about as easy to shake off as a red Pikmin, and deal 2% damage each time they bite, and do so at a rate of about one bite per half-second.
[ 8% (+ 2%) ]

Up Special ~~~ Fishing Rod
When this attack is used for recovery, it functions as a tether, reaching about as far as a six-Pikmin Pikmin Chain. However, the farther you have to throw out the line, the more of the line you'll use up. When this attack is used on the ground, or in the air when there isn't a ledge to grab, it will wind up the line, which is necessary to use the recovery. The farther you have to recovery from, the more line you'll have to wind up, and the less you'll have available if you don't wind up. It only takes about a second to wind up the full length of the line, so try to get that in quickly after you use this move to recover. Luckily, this is a very fast recovery, functioning faster than any other tether in the game to compensate for its debilitating weakness.
[ 0% ]

Down Special ~~~ Plant
This is a multi-part move, functioning differently as the situation progresses. All stages of this move can only be used on the ground.

The first time this move is used, the Crosser will pull out a small seed, and quickly bury it in the ground. This takes about a second to do, and the spot where the seed is planted will quickly sprout into a tiny seedling. This will mark the spot where the rest of the steps of this move will have to be used, so choose it carefully. Using the move after this in a different spot will do nothing (but you can dig the seedling up with your shovel [Down Smash] to restart somewhere else).

Use this move again near the seedling to water it. Animal Crosser will pull out a watering can and quickly water the seedling. This, again, takes about a second. Roughly three seconds after being watered, the seedling will grow, to about the height of Mario. You can still dig the tree up at this point to restart somewhere else. You'll have to water it one more time for the tree to reach full size, and three seconds after that, it will grow to be about as tall as Ganondorf, sprouting a full set of leaves as well.

At this point, the move begins to serve a purpose. Using the Down Special near the tree will now cause Animal Crosser to shake the tree. This, once again, takes approximately one second. 90% of the time that he does this, a piece of fruit will fall to his feet, which he can eat to restore 3 - 4% damage. Enemies can eat it as well, if they knock him out of the way. 10% of the time, the tree will instead procude an angry horde of bees, which will swarm to attack any opponents who are within about a Battlefield platform's length of the tree. The bees will remain around the tree for five seconds after first appearing, dealing constant damage (about 4% per second) to those they swarm after. After the bees come from the tree and go away, it will stop producing anything when shaken.

A fully-grown tree has one more function. Using an uncharged Forward Smash twice (or a fully-charged one once) on the tree will cause it to topple over the opposite direction, it reaching forward as far as Ganondorf is tall (of course), and dealing 20% damage and great knockback to anyone it hits. The tree falls somewhat slowly, but the hit is well worth it if you can land it. After chopping down the tree, the stump can be dug out with the shovel to restart the move somewhere else.
[ Variable Damage ]

Final Smash

Final Smash ~~~ Hometown Day Celebration
It's the day the Crosser's hometown was founded! What does that mean? A massive party, of course! Various Animal Crossing characters will begin to appear on the ground in the stage, pushing opponents toward the edges. Opponents will have to jump and run to try to stay on the stage, especially on smaller stages that will fill up quickly, but the Crosser is free to move and attack during this Final Smash, so that he can keep them at bay. On stages like Final Destination, the stage will fill up in about five seconds, whereas stages like New Pork City won't fill up entirely over the entire course of the Final Smash. Either way, the Final Smash lasts 15 seconds, and the Crosser is invincible for the duration of it.
[ 0% ]


Playstyle Summary
A lot of Animal Crosser's moves are meant to work with each other. His Down Special should be utilized to its full potential (felling the tree over an edge is a beautiful tactic that's sure to hinder recovering opponents). Additionally, make sure that the Down Tilt and Side Special are used together, as it adds a nice little buff to the otherwise boring Side Special. Use attacks like the Neutral Special, the Down Smash, and the Down Aerial to set traps for your opponents, keeping them on their toes at all times.

The Crosser relies on a lot of items for his game as well. The Down Aerial profits you a weakened Pitfall, the Up Throw profits you a weakened Parasol, you can gain fruit from the Down Special, and the Up Smash can provide all sorts of fun items. Using these to their full potential gives Animal Crosser a much-needed advantage over opponents, especially when playing with items turned off.

Animal Crosser also has a few quirky moves that serve their own purposes. The Standard Combo can stop many approaches, and the Foward and Backward Aerials can also stop a fair number of approaches. The Forward Tilt makes for an uncannily useful edgeguarding technique, the Up Tilt is a strictly debilitating move, and the Up Aerial is a standard damage-racker, lending the Crosser to have a good variety of moves, with nearly every type available.

Unfortunately, having a lot of types of moves means that the Crosser is short on any particular kind, especially KO moves. He really only has three options: two consecutive uses of the Down Smash, a good hit from the Forward Smash, or the tree from the Down Special when felled via the Forward Smash. Luckily, his various traps and debilitating moves help him set these up without too much difficulty, but you'll still have to earn your KOs with this guy.


Taunts & Victory Poses

Up Taunt ~~~ Letters From Home
The Crosser pulls out a letter from his pocket, then opens and reads it, beaming brightly as he does.

Side Taunt ~~~ Relaxation
The Crosser pulls a leaf from his pocket, then drops it to the ground. In a puff of smoke, it becomes a couch (yeah, I never understood it either). He reclines on the couch for a second or so, then hops off of it and puts it away, back in his pocket...somehow...

Down Taunt ~~~ Exterminator
The Crosser looks down and notices a bug, as his eyes go wide. His expression suddenly changing to determination, he stomps down hard, killing the filthy creature. What a guy!

Up Victory Pose ~~~ Great Friends
A few randomly-chosen animals from Animal Crossing appear around the Crosser, high-fiving him and congratulating him about his victory.

Side Victory Pose ~~~ Angry Bees
The Crosser is nowhere to be seen, then rushes by, waving his arms franticly. A split second behind him is a swarm of bees, who chase him past the other side of the screen.

Down Victory Pose ~~~ Striking Gold
A rock appears in the victory area, and the Crosser pulls out his trusty shovel. As he strikes the rock with the shovel, it...spits out a bag of money?! What luck! The Crosser jumps up and down in his joy!

Loss Pose ~~~ Worn Out
The Crosser appears in the background, panting heavily, bent over with his hands on his knees.


Basic Extras

Universe Symbol ~~~ Leaf


Entrance ~~~ Last Stop!
A train pulls up to the spot where Animal Crosser is starting the match, and he hurries out, looking cheerful as always.

Wii Remote Sound ~~~ Gleeful Cheer
A bright and cheery "Woohoo!" the only sound the Crosser ever makes, is his Wii Remote Sound.

Kirby Hat ~~~ Crosser Cap
Kirby gets a cap like the Animal Crossers, in addition to the Gyroid move, which functions the same way.


Alternate Colors & Costume

The Crosser has eight outfits, each one of his "pool ball" shirts, plain-colored shirts with a white circle on the chest and a single number in the center of the circle. They are all as follows:

  • One-Ball Shirt: Yellow (default)
  • Two-Ball Shirt: Blue (Blue Team)
  • Three-Ball Shirt: Red (Red Team)
  • Four-Ball Shirt: Purple
  • Five-Ball Shirt: Orange
  • Six-Ball Shirt: Green (Green Team)
  • Seven-Ball Shirt: Brown
  • Eight-Ball Shirt: Black

Alternate Costume ~~~ Female Crosser


The female's default outfit is the pink one seen above, and her color swaps simply change the color of that same outfit. Her alternate colors are the same as the male's, but with no black costume, a pink one to replace it, and with the default as the pink one.
 

Kris121

Smash Journeyman
Joined
Nov 26, 2008
Messages
263
Location
THE INTERWEB
Awesome the animal crosser I see you got to this one quickly. I tottaly called the up special to be the fishing pole!! Maybe a suggestion to all other animal crossing sets to put in golden items. I don't really know I had a tom nook set with that. I loved how many of the moves flowed together. Converse= genius
I LOVE YOU SIRKIBBLE

I'll miss ya when you have to go...
 

Agi

Smash Lord
Joined
Jul 27, 2008
Messages
1,120
Location
SE Washington
Animal Crosser

Okay... I'm not going to do a full-fledged review of this, but in thee interest of +1 post count, I have this to say...

The individual moves were fantastic. Creative stuff all over the place. One critique: HE'S LOWER TIER THAN PICHU. Buff him up, for sure... seriously.
 

SirKibble

Smash Champion
Joined
May 2, 2008
Messages
2,400
Awesome the animal crosser I see you got to this one quickly. I tottaly called the up special to be the fishing pole!! Maybe a suggestion to all other animal crossing sets to put in golden items. I don't really know I had a tom nook set with that. I loved how many of the moves flowed together. Converse= genius
I LOVE YOU SIRKIBBLE

I'll miss ya when you have to go...
Thanks. I'm glad you liked it, since it was your comment on Balloon Fighter that got me thinking about the moveset. :bee:

Okay... I'm not going to do a full-fledged review of this, but in thee interest of +1 post count, I have this to say...

The individual moves were fantastic. Creative stuff all over the place.
Yay! :bee:

One critique: HE'S LOWER TIER THAN PICHU. Buff him up, for sure... seriously.
I know. :( We've been over this in the chat. I recognize the error of my ways with this one, and will strive to balance better in the future. :dizzy:
 

flyinfilipino

Smash Master
Joined
Sep 11, 2007
Messages
4,319
Location
North Carolina
@Animal Crosser: Ah! You didn't do that thing you did with Balloon Fighter at the beginning...you know, that thing?

Anyway, Animal Crosser is a really creative moveset (as expected). It's easy and interesting to read, which is something we can always attribute to you, and rather minimalistic in description, I must say. (It's a little...refreshing? :) ) However, a few descriptions are a little vague, and some details that might be important are left to interpretation
like the positioning of the opponent after the forward and down throws, and whether or not you can use the neutral special again, ever, if the gyroid is destroyed
. The Animal Crosser uses some fun little moves that involve items (I really love items!) and has plenty of moves that don't do immediate damage at all (love those non-damaging tilts! :bee:)! It seems like his moves would be very difficult to make effective, though, especially at KOing, as you said. That down special, while fun, seems way too unwieldy to make effective in a heated battle.

Hopefully I'm not being too negative here...I don't like critiquing movesets mainly on exactly how well they'd play in an actual Smash game, 'cuz that's a little unrealistic. Other than his glaring weaknesses as a character, Animal Crosser's got a great and creative moveset, and you certainly made the most out of this peaceful warrior. :bee:
 

UserShadow7989

Smash Journeyman
Joined
Aug 13, 2007
Messages
306
Awesome. The moveset was very detailed and left out nothing, but compact enough to read through in one sitting. I love the way the moves flow together, and especially the Down Special. As stated above, he's very weak. I suggest boosting his aerials and tilts' damage by 1.5x to make him stronger.
 

SirKibble

Smash Champion
Joined
May 2, 2008
Messages
2,400
@Animal Crosser: Ah! You didn't do that thing you did with Balloon Fighter at the beginning...you know, that thing?
Oh, yeah... That thing...

Anyway, Animal Crosser is a really creative moveset (as expected). It's easy and interesting to read, which is something we can always attribute to you, and rather minimalistic in description, I must say. (It's a little...refreshing? :) )
I do what I can. Good to know I'm still good for something around here. :laugh:

However, a few descriptions are a little vague, and some details that might be important are left to interpretation
like the positioning of the opponent after the forward and down throws, and whether or not you can use the neutral special again, ever, if the gyroid is destroyed
.
Aw. Those Throws leave them right in front of him, where they were during the grab. And the Gyroid disappears after the 30 seconds whether it was broken or not.

The Animal Crosser uses some fun little moves that involve items (I really love items!) and has plenty of moves that don't do immediate damage at all (love those non-damaging tilts! :bee:)!
Thanks. I have a feeling all those non-damaging moveset were the death of this moveset, though...

It seems like his moves would be very difficult to make effective, though, especially at KOing, as you said. That down special, while fun, seems way too unwieldy to make effective in a heated battle.
This is probably true. Live and learn, I guess. :ohwell:

Hopefully I'm not being too negative here...I don't like critiquing movesets mainly on exactly how well they'd play in an actual Smash game, 'cuz that's a little unrealistic. Other than his glaring weaknesses as a character, Animal Crosser's got a great and creative moveset, and you certainly made the most out of this peaceful warrior. :bee:
Thanks. Suffice it to say, this moveset's become more one of entertainment value than an actual contender or anything. It was fun to write, so as long as people enjoy reading him, I'll be satisfied. :p

Awesome. The moveset was very detailed and left out nothing, but compact enough to read through in one sitting. I love the way the moves flow together, and especially the Down Special. As stated above, he's very weak. I suggest boosting his aerials and tilts' damage by 1.5x to make him stronger.
Thanks. Glad you liked it. As far as buffing goes, I won't be making any adjustments to this particular moveset. I don't like to do that. I'll just consider the weaknesses (quite literally, in this case) of the moveset when making my next. :)
 

Red Arremer

Smash Legend
Joined
Nov 27, 2005
Messages
11,437
Location
Vienna
I can only repeat what most people said before - Crosser is an extremely well-done and unique set, just like expected from a Kibble set. Original moves, crazy ideas...

Unfortunately, it suffers the same thing as I expect from a Kibble set, which is especially the balance, but, in some small parts, the lack of description as filipino already said.

Overall, though, a very good moveset of high quality!
 

Jimnymebob

Smash Champion
Joined
Sep 26, 2008
Messages
2,020
NNID
Jimnymebob
Animal Crosser is a great set Kibble, and was fun to read, and has some unique and interesting moves.
However, I have to echo what other people have said about the balance issues.

That doesn't make it any less creative though, so good job :bee:.
 

Red Arremer

Smash Legend
Joined
Nov 27, 2005
Messages
11,437
Location
Vienna


"It's over!!"
ASHE / GREY
joins the fight!


Megaman ZX Advent Tunes - Through the Lightning
Megaman ZX Advent Tunes - Destiny
Megaman ZX Advent Tunes - Target Chaser
Megaman ZX Advent Tunes - Flashover
Megaman ZX Advent Tunes - Bullet Drive
Megaman ZX Advent Tunes - In the Wind
Megaman ZX Advent Tunes - Overloaded
Megaman ZX Advent Tunes - Drifting Floe
Megaman ZX Advent Tunes - Twisted Vine
Megaman ZX Advent Tunes - Rush Trash Squash
Megaman ZX Advent Tunes - Brimstone
Megaman ZX Advent Tunes - Oriental Sentinals
Megaman ZX Advent Tunes - Whisper of the Relics
Megaman ZX Advent Tunes - Organic Line
Megaman ZX Advent Tunes - Evil Heritage
Megaman ZX Advent Tunes - Path to the Truth
Megaman ZX Advent Tunes - United Forces
Megaman ZX Advent Tunes - Rockman a (Antique) Remix


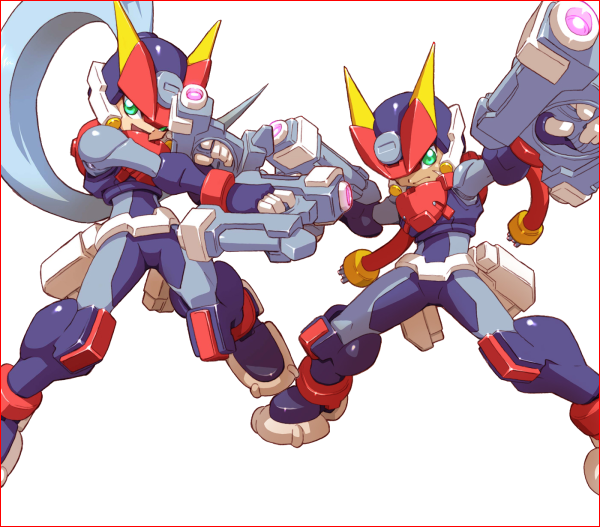
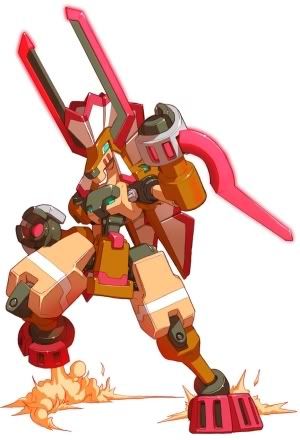
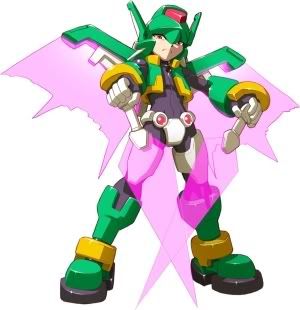
Ashe and Grey are the main heroes of the newest iteration of the Megaman ZX subseries: Megaman ZX Advent. Unlike in the predecessor, Ashe and Grey have different properties and slightly different abilities, with Ashe having stronger but slower bullets and Grey's being the other way around. Their introduction to the story is different, as well. However, in Smash, both are the same character, only cosmetically different with name, voice and look (Ashe has a big grey pony, Grey has two cables on his back).

In this moveset, Ashe is taken as the main character, though everything just applies for Grey, too. The moveset is different from what you've seen so far. Ashe is a normal Reploid, a kind of human-like robots that populates the world together with humans. She is able to fuse with Biometals, in her case the Biometal of the Model A, becoming a Megaman. She also is able to copy data from other Megamen, and the bosses of the game, the so called "Pseudoroids", creatures that have been corrupted by the evil Biometal Model W. The general moveset uses properties from the original Reploid form, Model A and Model ZX. All other forms Ashe can take on in Megaman ZX Advent are implemented differently into the moveset. Onto that, though, later.


Screen Name: Ashe [or Grey]
Size: 6/10 - Ashe is a bit taller than Mario, though built slimmer.
Weight: 5/10 - Ashe doesn't weigh extremely much, but she ain't a feather either.
(Running) Speed: 6/10 - Ashe doesn't actually run, she dashes along the ground using air boots.
First Jump: 7/10 - Ashe's first jump is amazing, she hops up very far.
Second Jump: 4/10 - Her second jump is not as good, though, causing her to somersault in mid-air.
Fall Speed: 6/10 - Due to being a Reploid and therefore made of metal, Ashe falls quickly, but not like a stone.
Shield: 5/10 - Fair standard.
Crouch: 6/10 - Her crouch is actually quite good, she kneels down and is able to dodge most projectiles with it.
Crawl: Yes.
Wall Jump: Yes. - Unlike usual wall jumps, Ashe only hops up a little just to cling back onto the wall, allowing her to climb up walls just by jumping up on them.
Hover: No.
Wall Cling: Yes. - However, unlike the usual wallclings, Ashe will slide slowly down.
Gliding: No.


In Megaman ZX Advent, Ashe and her Biometal Model A are able to copy enemy data, allowing her to become the defeated enemy. This applies pretty much to all of the bosses she faces: the other Megamen using other Biometals, as well as the Pseudoroids who have been corrupted by the Biometal Model W. When she transforms, she gains the abilities of these other beings. Of course, those of the Megamen are similar to hers, only the attacks and a few attributes changing. However, when transforming into one of the Pseudoroids, Ashe gains a completely new set of abilities.

Ashe has access to all of the Megamen Models (A, F, P, L, H) from the very beginning of a fight, and can change with her Down Special (which will be further explained in its description). She can, however, also gain up to three boss movesets, depending on how many and which different opponents she faces. In Megaman ZX Advent, Ashe will copy the data of the boss when defeating him. In Smash, however, she gains only data for one the 8 bosses after KOing an enemy, making it a rather situational ability, similar to Kirby's Copy ability. Depending on whom Ashe KOs, she gains the data of one of the 8 Pseudoroids. Whom she has to KO in order to gain a special boss data you can gather in the description of the Pseudoroid abilities.
The Megamen all have the same moveset, just with some changed moves (which will be explained in the respective moves) and some slightly altered stats or abilities. The Pseudoroids, though, have all their own small movesets, which I will explain when there.


Down Special:

A-Trans
This move is very important to Ashe's gameplay. She will yell out "A-Trans!", and a small circle menu will pop up, showing the icons of all unused Megaman Models and Pseudoroids forms. This means Model H, L, P and F if in Model A form. A, L, P, and F is in Model H form, and so on. Ashe has to scroll quickly through the menu to get the wanted icon and as soon as she releases the Special button, will transform into the desired form in a small flash, with almost no ending lag, unlike the usual transformations in Brawl. If she has KOed an enemy, a new icon will show up, giving her the ability to transform into one of the Pseudoroids. She can have up to 7 icons in her menu if she is fighting in a Free for All and KOs every enemy with different outcomes for the boss ability at least once. Unlike in the game, the menu won't stop the time and the enemy still can hurt Ashe while she chooses her icon. If she gets hit, the menu screen disappears. If used in mid-air, she will slowly fall down, but still fall, so hurry up if offstage! Depending on what icon she chooses, Ashe's stats and moves will slightly or completely change. However, no matter what form she takes on, the Down Special and the Up Special will always be the same. Also, note that if Ashe is KOed, she will be respawning as the form she had last. All of the forms have their own voice actor, by the way.
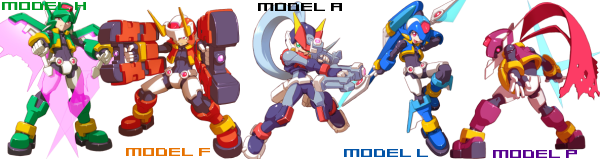
Here all of the icons:


Model F


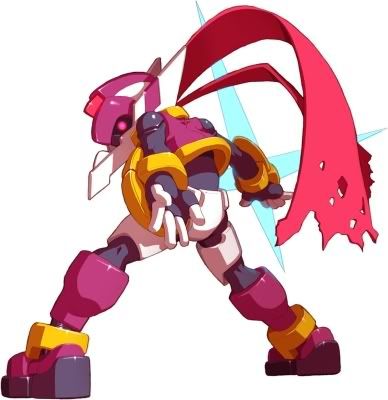
So you've chosen to use Model F and its owner Atlas, the Fire Megaman... or should I say Fire Megawoman, as Atlas is female? Anyway. If in Model F form, Ashe becomes slightly heavier (6/10), and a little bit more knockback is added to her moves. All moves not using the Saber will additionally recieve fire element. Ashe also will take 30% more damage from electric- or wind-based attacks in this mode. Model F's move descriptions are colored Orange.

Model P


Siarnaq is the one who owns Model P, resulting in the Shadow Megaman. As you can see from the picture, Model P is a ninja. If Ashe transforms into this form, her dash speed and roll are faster, the roll making her invisible (she reappears on the spot she rolled to). Her airdodge and spotdodge will become a little better, as well. Besides this, her wallcling will become an actual wallcling, and additionally, she can cling to ceilings. How that works? Well, just like the normal wallcling, she just will hang from the ceiling with a claw when the player presses Up. She can use Model P's Neutral Special from this, as well, it will be handled like a midair move. However, she can't hang from a platform just forever - after 2 seconds, she just drops down. All of Model P's extra move descriptions are in Purple.

Model L


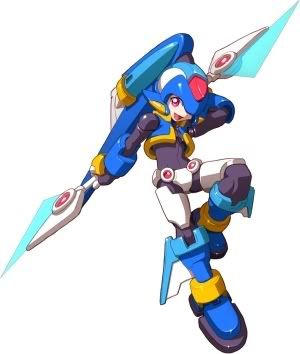
Tethis is the wielder of Model L, and able to become the Ice Megaman. Model L is a bit different from the former two Models, as it will change the saber of the moves into a lance, making the hitbox having more range, but being generally slower. Additionally to this, all saber moves have ice element (a 10% chance of freezing the enemy, too). Model L takes 30% more damage from fire-based attacks. What is different to the other models is that Model L can swim, and therefore won't drown if Ashe is knocked into water. All of Model L's attack descriptions are Blue.

Model H


Aeolus uses Model H, and becomes the Wind Megaman when merging with it. Now, Model H is the most complicated of the 5 Megamen. He again has the same moveset, but will change the saber, as well! This will make the moves have less range, but faster, and adding in electric element (with a 10% chance of stunning the enemy). Model H is a bit lighter than other models (4/10). The aerial mobility of Model H is astounding, though. By pressing the Jump Button and Down simultanously in mid-air, Ashe will start hovering down slowly, just like Peach with her parasol. However, she can cancel the hover and continue jumping or attacking out of it. The hover can be activated always and has no decay. Additionally to this, Model H has not only two jumps, but also an airdash! Ashe can only use this once, but can go in any direction (except down, as it will activate the Hover) by pressing the Jump Button and the direction you want to go to. This allows awesome abilities to recover. The dash goes about 2/3 of Smashville's smaller platform, in whatever direction you want it to go. As another downside, Ashe takes 30% more damage from ice-based attacks. Additional move descriptions for Model H are Green.

Neutral Special:

Charge Buster
When using the Neutral Special in Model A form, Ashe shoots out one single little bullet in yellow that flies straight forward. If she presses the Special Button again, she shoots a second round, with a maximum of three bullets being allowed on the screen. Each bullet deals 3% damage and flinching knockback if it connects. They are small (a bit bigger than Snake's grenades) and fly about the speed of Falco's lasers. However, if the Special Button is held, Ashe starts up charging her buster. She can move around freely while doing so, and will shoot as soon as the button is released. This will result in one bigger shot flying faster, but still straight forward. There's two levels of charging, one being reached after 1 second, the second after 5 seconds of holding down the Special button. The small charge will result in a blue colored bigger shot (around the size of Wolf's blaster) dealing 7% with low knockback. The fully charged shot has the size of Samus' halfly charged shot and will deal 15% damage with below average knockback. The charge cannot be stored, and all bullets have infinite range. Lag is minimal on both ends for all charges.

Megaton Crush
The Megaton Crush is a very interesting move, that can be angled. If Ashe presses the Special Button, she will make a grunt and gather momentum. This is where you can angle the move! If you press Up or Down, she will throw her knuckle gun upwards or downwards. Otherwise she just punches forward. If she hits forward or upward, she will shoot a fireball additionally to the punch. The punch deals 7% damage and low knockback, the fireball deals 5% damage and flinches. It has the range and speed of one of Wolf's blaster shots. Now, if Ashe angles the move downwards, something else happens. She will punch the ground, releasing 2 small waves of fire travelling along the ground on both sides, dealing 10% damage and low knockback. The firewaves travel a Battlefield platform in each direction, and move rather slow. If they hit a grabable ledge, the flames will continue running downwards, making for a perfect edgeguarding move and working fine against Planking. If the hit an edge that isn't grabable, they will simply distinguish. In either way, the startup lag is average, and the ending lag as well - even bad in the case of the down angled Megaton Crush. Only one fireball or wave can be out.

Kunai
Ashe throws out 4 Kunais, Japanese throwing knifes. They go in a straight line, but are thrown in different heights. The first one and the last one are at the same height, the second one is just below the first one, and the third one is just below the second one, leaving a height hole in between third and last Kunai. Each blade deals 2% damage and flinching knockback, a bit similar to Sheik's needles. Ashe doesn't need to charge the Kunais, unlike Sheik, though. The startup lag is okay, the ending lag is average, as Ashe holds out her arm for a bit before returning to normal stance. If Ashe uses this move in mid-air, she throws them in a different angle. Instead of 4 blades arranged in different heights but going straight, she will throw them out in a spread way, one going horizontally forward, one going vertically down, and the other two in angles in between. The blades will go in infinite distance or until they hit an obstacle, and fly in the speed of Fox' blaster. Only one set of Kunai can be out.

Ice Wall
Raising her hand in front of her, Ashe summons a small spikey block of ice. It's solid, and acts like your usual wall. It has the same size as Ashe. If someone touches it, they will recieve 1% damage and little knockback (thus not allowing wall infinites). Untouched, the wall will stay for 3 seconds and then shatter into small pieces. If Ashe uses one of her attacks on the wall, it will shatter, as well, but this time into 4 icicles. They are the size of Samus' uncharged plasma shot and spread diagonally in a <-pattern. If someone is touched by them, they will recieve 6% damage and low knockback. They go through drop-through platforms, but not solid ones.

Sonic Boom
Ashe swings her saber in front of her quickly, causing a small pink shockwave to appear. It travels along the ground or, if used in mid-air, in a straight forward line. The wave has the range of Wolf's blaster and travels in the speed of Falco's laser. It has the size of a Waddle Dee. If someone is hit by it, they will take 6% damage and be stunned just like with Falco's laser. This move is very useful to put pressure on your enemy or get them off your tail. If the enemy touches the sword while Ashe slashes forward, they recieve additional 2% damage.


Side Special:

Homing Shot
When starting up this move, a purple scannerfield (it has the size of Donkey Kong but is in a < shape) will appear in front of her. The field stays for 3 seconds, and will render Ashe helpless as long as she has it opened. When it disappears, she is able to move again. She can be knocked out of this state, as well. Or, if the player presses the Shield button, Ashe will automatically cancel the forcefield automatically. Now, what happens is if some obstacle or enemy enters the scanner range, they will be locked on. If they are locked on, pressing the Special button again will shoot out purple strings of energy that home into them. These shots will deal 10% damage and below average knockback - the direction depending on how the bullet flew. The shots can only travel inside of the scanner field. Startup and ending lag are average for the scannerfield, almost nonexistant for the shots. There are as many shots as required to hit all targets marked in the field.

Knuckle Buster
Ashe raises the knuckle gun and shoot a single bullet. It has the size of a Pokeball and travels with the speed of Falco's laser. It deals 6% damage and flinching knockback if it hits. Now, what makes this baby so special is that you can give it direction input after shooting it. Still having the gun raised, you can press up, down, or the opposite direction for the shot to move into these directions. It also goes through drop-through platforms. This allows Ashe to pressure her enemies and mindgame them, as well. Only 2 Knuckle Busters can be out at a time, and the move has low startup and below average ending lag.

Cross Star
Ashe throws out a big ninja star. It starts up quick but has, like the Kunai, some ending lag. The star has the width of Toon Link's Boomerang. It will fly forwards at a slow speed (again, the boomerang is a good comparison), and about a third of Battlefield's main platform. It then stays where it is, rotating in place for a second. It then will fly straight backward into the direction where it came from, no matter if Ashe is still there or not, and then move infinitely or until it hits an obstacle. If it hits an obstacle on the way in either direction, it will only deal one hit with 5% damage and low knockback. However, if someone is caught in the static rotating of the blade, they will recieve 4 hits as a maximum, each dealing 3% damage, and the last one average knockback straight upward. It then will still launch its back travelling, so it still can hit someone then!

Freezing Dragon
Concentrating for a moment, Ashe spreads forward her arm and yells "Dragon!". Her palm glows and releases a small snake-like dragon that goes in a slightly wavy line, but still straight. It goes infinitely and rather slow, and is as long as one of Battlefield's smaller platforms. If someone touches the dragon, it will cause 10% damage and freezes the opponent, knocking them straight upward. Due to being able to call two of the dragons, Ashe can nicely use them to control the stage. The startup lag is bad, and the ending lag is average, but it's still a very useful attack to keep in mind when using Model L.

Plasma Cyclone
Ashe crosses the two sabers coming with Model H and focusses for a moment. Then she sweeps her arms in front of her, releasing a tornado of the size of Mario. It goes in a slightly curved pattern up. When used from the left edge of Battlefield, it will reach the right lower platform, touching the top with its "foot". It goes rather slow, about the speed of Luigi's fireball. If the tornado touches an enemy (and only another character) or reaches the end of its range, it will vanish. It deals 6% damage and stuns the enemy like Zero Suit Samus' stungun, as well as dealing electrical damage. The startup lag is kinda bad, the ending lag not as bad, though, allowing to possible follow up with another attack if the tornado hits. This move is great for setting up combos or putting pressure on the enemy, though there can only be one tornado out at a time. If someone is hit by the slash itself, they'll be stunned just enough to eat the tornado, and recieve 4% additional damage, making a total of 10%.


Up Special:

Beginner's Recovery
This move is taken from Megaman ZX Advent's Beginner Mode. Normally, when Ashe falls into a pit, she instantly dies. If the player plays on Beginner Mode, though, she loses some of her health when falling into a pit and is given the chance to float into safety. If she falls into a pit while in this mode, she then loses her life. This is ported into Smash, too! When using the Up B, Ashe becomes transparent, with a Biometal (Model A for itself and the Pseudoroid forms and the respective other models for the other Megamen) glowing inside of the diffuse body. Ashe is able to float 3 seconds around wherever she wants with this before she enters helpless state. The controls of this recovery are awkward and unresponsive, a bit like Pikachu's Volt Tackle. Beginner's Recovery gives Ashe Superarmor, but does no damage or knockback.


Jab Combo:

ZX Saber
This move has 2 attacks. Ashe uses her ZX Saber - a green beam sword - in both of them. Holding the blade in her right hand, she first swings it in front of her - diagonally downward. This deals 5% damage, has okay range and low knockback. It's averagely quick for a jab. The second hit comes out quicker and has better range, but only deals 3% damage and just barely hits the enemy, knocking them away a bit further. In that, she swings the sword upward again, stretching her arm out. A very basic Jab combo, but it's okay to get a few quick %s or get the enemy off a little.

Dash Attack:

Slide Kick

This attack is rather quick. When dashing and pressing the attack button, she will let herself onto her metallic rear and slide further, stretching out her foot. So, basically, she is kicking while sliding. The move has some startup lag (due to her getting down) and a bit of ending lag, but a rather good range. It deals 8% damage and below average knockback. Nothing too fancy, but still useful.

Forward Tilt:

Spark Punch
Ashe thrusts quickly forward with her guns. Yawn... But wait! This isn't all. Haha, you thought that's a generic punch, eh? Well, no. If Ashe connects with her punch, it will cause a small electric spark to stun the enemy. And that's not all. If another enemy (or a destructable object) is around in one Battlefield platform's distance, the spark will fly to them - and from there it goes on and on and on, thus creating a chain lightning. The punch itself deals low knockback and 10% damage, as well as stunning the enemy. Additionally to this, every hit target of the chain lightning will recieve 5% damage and be stunned, as well. Although this move has low range, it comes out very quick, making it able for Ashe to set up combos with this.

Up Tilt

Slice
Getting out the ZX Saber, Ashe will stab it upwards and then quickly slice down to right in front of her (hence the name "Slice"). This will do average knockback and 12% damage. Getting hit by the stab will result in 5% damage and straight upward knockback, though only below average. It comes out with below average startup lag and has medium end lag. Due to its acceptable quickness, its range and the disjointed hitbox, Slice is perfectly used as a defensive move, as it covers the whole are from Ashe's head to her front in one quick slash, screwing up shorthopped approaches quite easily.

Down Tilt:

Double Buster
Ashe kneels up from her crouching position, holding her two guns, one in each hand. She then fires a shot from Model A's uncharged Neutral Special each in each direction, but down-angled. If she uses it at a ledge, the bullet will continue flying infinitely, otherwise it just will hit the ground and vanish. If one of the bullets hit an enemy (on the ground), they will recieve 6% damage and trip, allowing a follow-up attack from Ashe. If they are hit mid-air, they will recieve the same damage, but enter fastfall which they cannot stop for 0.25 seconds. It has medium startup and ending lag, and very limited range when not used at a ledge due to the downward pointing angle.


Forward Smash:

Charge Saber
Ashe will hold her saber overhead, charging the move. As soon as she releases, she slashes it in front of her. But not only the slashing happens. Additionally to this, four bits of energy escape, flying diagonally upward (just like shown in the header). The slash does 5% damage and no knockback. However, the "projectiles" are the actual attack, dealing 20% (30% charged) damage and high knockback, making the Forward Smash Ashe's only really reliable KO move. The bits fly a bit further than the slash goes and only one can hit an enemy. Above average startup lag and very bad ending lag. This, though, has about the same range as Ike's Forward Smash.

Up Smash:

Flying Blade
Ashe activates the ZX Saber and throws it up, causing it to rotate right above her. The sword will spin for a few moments and then return. There is no hitbox besides the blade above Ashe, who can be attacked during this move. The rotating lasts 1.5 seconds and if someone touches it, will be caught in the move, recieving a maximum of 8 hits dealing 2% (3% charged) damage. At the last hit, the saber glows a bit brighter, dealing average knockback upwards. The Smash has low startup lag, but horrible duration and ending lag, as well as rather bad range. It can be used as a good juggling move or dealing some quick damage, though.

Screw Halberd
Since using the former attack doesn't make much sense with a halberd, Model L recieves a separate attack for an Up Smash. Facing the screen from whereever she is, Ashe rotates the Halberd Model L is equipped with in a circular form. This covers her whole body and creates a hitbox of about the size of Bowser. It has below average startup and ending lag, deals 15% (20% charged) damage and average knockback. This move counts as a saber attack. It's very useful to get rid of enemies with this move, due to it being rather quick and having a big hitbox. Not to mention it will allow noone to really touch Ashe, as well. Additionally, the hitbox will simply eat projectiles (knocking away grenades and Waddle Dees).

Down Smash:

Ground Breaker
Ashe first gathers momentum (when charging) and then rams the knuckles of her gun into the floor, causing a small yellow shockwave to appear right around her. This covers the distance of a whole Battlefield platform (with Ashe in the center) and if used near an edge, simply will stop where the platform ends. If the enemy is hit, they will be knocked slightly upwards and be in hitstun until they hit the ground, recieving 10% (18% charged) damage. The move has some startup lag, but almost no ending lag, making it a great tool to start up with possible combos, or just get rid of the enemy.


Neutral Air:

Skull Crush
Ashe swings the ZX Saber in front of her, ending the slash in between her legs. This move is rather quick, deals 8% damage and below average knockback. However, there is one additional sweetspot - right at the tip of the sword in the moment she holds it in between her limbs, a small hitbox appears. If someone is touched by it, they will be spiked into the opposite direction of what Ashe's facing, recieving 15% damage. Since the sweetspot is only a small part of the move for a few frames, it's hard to pull off, but one of Ashe's few KO possibilities. The move has low startup and average ending lag (just for the purpose of the sweetspot being out a tiny bit longer), and has acceptable range.

Forward Air:

Reflection Beam
Holding out her gun and aiming it forward, Ashe fires a purple beam of the size of Falco's laser. It also travels at a similar speed. Other than that, nothing happens. If someone gets hit by the attack, they recieve 6% damage and flinch. Only one beam can be out a time. Now what makes this attack so special is, as the name suggests - if it hits an obstacle of any form (enemy, wall, platform, etc.), it will bounce off of it and continue its flight in a different angle. The beam bounces off of 4 obstacles and flies infinitely otherwise. If it hits its 5th obstacle, it will do its damage if appliable and vanish. This move is perfect for putting pressure on the enemy!

Back Air:

Biometal Raid
This move actually involves the Biometal! However, it's not the Biometal Model you're currently using, but always will be Model A. When performing this attack, the Biometal bursts out, becoming a small hitbox, that flies backward and diagonally down. The Biometal flies quick and when it reached its peak (think of Luigi's Back aerial that has about the same range) return to Ashe and vanish. Ashe herself will turn around halfly, stretching her arm out after Model A. The Biometal knocks enemies away with low knockback and 10% damage, but has insanely high priority, making it a perfect move to disrupt the opponent's aerial game should they approach Ashe's back.

Up Air:

Rolling Slash
Ashe gets out the ZX Saber and does a somersault, causing the green blade to cover her in a circular pattern. In fact, she kinda looks like a wheel in this move. She does one spin, so the move ends rather quick, as well. If someone gets hit, they will recieve average knockback into the direction the saber is going at this moment, and 15% damage. It covers Ashe's whole body, as well. It has above average startup lag, though, and average ending lag.

Down Air:

Fission
Holding the Saber right below her, Ashe enters a higher sped fastfall. This may look like Link's, but don't think it's the same! Despite similar looks, this move has a totally different outcome. Now here is what it does. Ashe drops down. If she hits an enemy, she will not spike them, but the enemy will be stuck to the saber with Ashe until she hits the ground or the move releases. If this move is performed from the top platform of Battlefield, it will hit the ground. Just a bit higher and it will end before the ground part is made. This move then has different outcomes, as well. If the enemy is stuck on the saber, they will recieve 3% damage no matter what. If she releases the move in the air, Ashe will sweep the saber away, dealing 7% additionally and below average "knock"back, just into the direction she is facing. However, if she hits the ground, the enemy will recieve 10% damage and lay on the ground like he was knocked down, with Ashe pulling out the sword. The move has below average startup lag, and the ending lag depends on the situation - in the air it's low, on the ground it's rather bad. Now, but that's not all that is to this move. If Ashe uses the Down Aerial and hits noone, but only the ground, two small rocks will fly up in a small ballistic curve. It's very little range these rocks have, and they only deal 3% damage and flinch, but it's a good protection against enemies who approach if they think they could hit Ashe in her cooldown from the move.


Ashe's Grab is averagely quick, but rather closeranged. Her dashgrab has similar properties, though here the ending lag is a bit worse. Nothing too fancy, overall. She holds the enemy up on their collar (or uhm... their head in Kirby and co.'s case...).

Pummel
Ashe rams the knuckle of her gun into the victim's face, dealing good 3% damage with each. The pummel has average speed, so you might get a couple of hits before the enemy is able to break out.

Forward Throw
Ashe puts the enemy onto their feet and then dashes forward, ramming her shoulder into them. This causes her to move a bit, too. The enemy is knocked out of grabbing range (and immediate dashgrabbing range) and will recieve 10% damage. A very quick throw, and good if you want to get some distance to your opponent.

Back Throw
Turning around with her throwee, Ashe sets them onto their feet. She then leaps towards them and walljumps - using the victim as a wall! This will knock the enemy away slightly, dealing good 11% damage. Ashe herself will enter the air with this, the move ending in mid-air similar to Captain Falcon's Up Special. Ashe is able to perform a move as soon as her leaping animation from the throw ends - which doesn't take too long.

Up Throw
Ashe throws the enemy up a bit and then does the Megamerge/A-Trans stance, with a small flash coming out. This flash creates a (non-visible) shockwave that shoots the throwee up with good range and 8% damage. A quick throw with good KO capabilities - one of Ashe's rarely spread possibilites to land one -, but weak in terms of damage.

Down Throw
Ashe grabs ahold of the throwee's shoulders and leaps into the air. She does a few somersaults and then suddenly stops, facing into the opposite direction but upside down, catapulting the victim into the ground. She then does the last part of the spin and lands on her feet. The enemy will not fly far away (outside of chaingrab range) but recieve good 12% damage. Though, this throw has some ending lag as Ashe shakes her head.
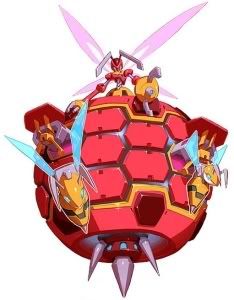


Giga Crush
If Ashe has the Smash Ball, you should quickly take cover... as a literal bullet hell is to break out. When it's activated, Ashe transforms automatically into Model A should she have a different form and vanishes offscreen. She appears in the background of the screen as a transparent blue cube (purple if you play Grey) starts to rotate around her, becoming bigger and bigger, covering whole Battlefield. Then, the cube disappaears and Ashe lets out a battlecry, starting to shoot out of her guns like insane. This will cause purple bullets of the size of Pokeballs to start spreading around her in the shape of a spiral with 6 arms and infinite range. They rotate with Ashe being in the center. Everyone who gets hit by one of the arms will recieve 30% damage and high knockback. The spiral moves rather slow, but still is hard to escape. It lasts 5 seconds and then vanishes, Ashe returning back to the place where she left off, panting and returning back to battle stance. This will keep her in Model A, so if you want to transform, do it now when the opponent recovers from the attack!


In Megaman ZX Advent, 8 of the several bosses the game has are so called "Pseudoroids". Those are creatures who have been influenced by the evil Biometal Model W, corrupted, and infected with being a Maverick. Due to having some Biometal in them, Ashe is able to copy their data upon defeating them, allowing her to transform into the Pseudoroids and perform their special attacks and traits. In Smash, Ashe can do a very similar thing! All enemies carry "data" of one of the 8 Pseudoroids in them, and, if KOed, Ashe copies this data. Additionally to the 5 Megaman models, she will be able to use the Pseudoroid form the KOed enemy gave her. It can be chosen among the icons in the Down Special. As already mentioned, the Down and Up Special of Ashe will remain the same in the Pseudoroid forms. Otherwise, these 8 characters have an own small moveset! If Ashe KOs herself in a mirror match, she won't gain any Pseudoroid data, though. Let's look whom we have...

Buckfire the Gaxelleroid


Buckfire is a fire-based Pseudoroid, and the boss of the Transport Train. He is about the size of Captain Falcon (tho bulkier) and dashes at the same speed, and has no walk, but high traction. His weight is above average, he jumps very high, but only has one jump, and no mid-air jump.
Buckfire's Data is carried by: Captain Falcon, Falco, Mario, Luigi, Ness


Special Attack: Burning Arrow
When pressing the Special button, Buckfire launches 3 arrows engulfed in fire - one flies in a straight line horizontally, the other two are launched in a 45° angle upward and downward. They fly slowly, but go through obstacles (meaning if they hit something, they will continue their way) except solid platforms or walls. If someone is hit by an arrow, they recieve 12% damage and flinch. The move has about the same lag as Falco's Neutral Special.

Attack: Double Tomahawk
If you press the attack button while not moving, Buckfire will throw out two spinning tomahawks (they more look like discs, though), one on each side. They have the size of Zero Suit Samus' charge shot. First they float forward and then diagonally upward. If someone gets hit by it, they recieve 5% damage and flinch. Ending and startup lag are below average, and the speed of the projectiles themselves is not amazing, but not bad either - comparable with a thrown Waddle Dee.

Aerial Attack: Meteor Kick
If the attack button is pressed in the air, Buckfire will kick diagonally down (a bit like the Down Aerials of Sonic or Zero Suit Samus), but with a huge hitbox. He goes down in a high speed. The hitbox is about the size of Buckfire himself. If someone is hit, they recieve 16% damage and good knockback, making it a nice KO move. However, as a downside, this move is extremely laggy on both sides, and can easily KO Buckfire if he is just above a pit. If she does hit an enemy above a pit, he still will fall down, as he cannot cancel it unless hitting a platform.


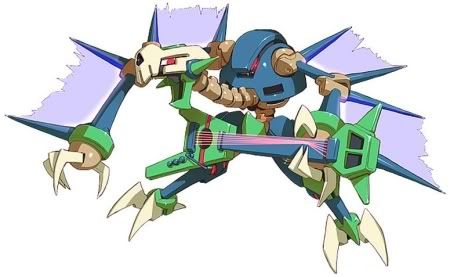
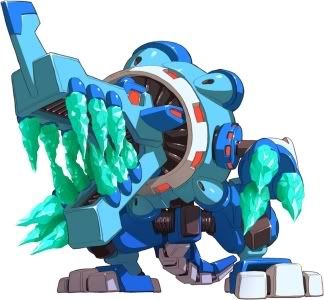
Chronoforce the Xiphosuroid


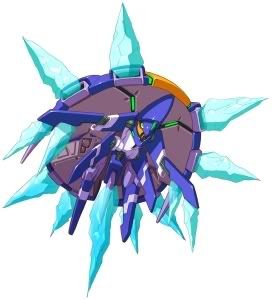
Chronoforce is an ice-based Pseudoroid and the boss of the Arctic Floe area. He is the size of Charizard, though put horizontally. In the game he wouldn't be able to move without water, but in Smash, he can use his leg-like extensions to slightly hop forward at a slow pace. He has a pathetic jump as well, but can glide, and swim in water, just like Model L. He has average weight. Additionally to this, he will take 5% less damage and no knockback if he is attacked from the top, due to his hard shell.
Chronoforce's data is carried by: Link, Squirtle, R.O.B., Ice Climbers, Lucas

Attack: Ice Needle
This is Chronoforce's primary mean of defense. He will summon an icicle in front of him and shoot it straight forward, dealing 7% damage and low knockback. There's a 25% chance that it freezes his opponent. The icicle goes with the speed of Zero Suit Samus' Neutral Special and has the size of Wolf's Blaster. It has below average startup and ending lag.

Special Attack: Time Bomb
This is the actual thing you want to use when recieving Chronoforce's data! Chronoforce gets up into a floating position, and turns his belly to the screen. In this position, he is still vulnerable. His tail will go around the body in a few hops similarily to a clock hand (and doing the same sound). Now what happens is that the whole battlefield freezes. Not only slowing down, but completely stopping the time - except for the timer. For a whole of 5 seconds. Chronoforce only can use this attack once and needs 2 minutes to recharge it, though, additionally to not dealing any damage or so. If you hit an enemy while they are frozen in time, they will be able to move again as soon as their hitstun has worn of though. Additionally to this, the startup lag of this move is very horrible and it's highly punishable if it can't be completed. Nevertheless a very great move!


Rospark the Floroid


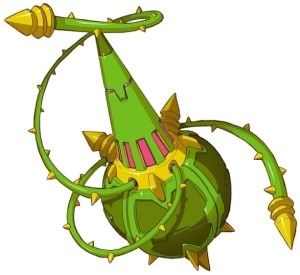
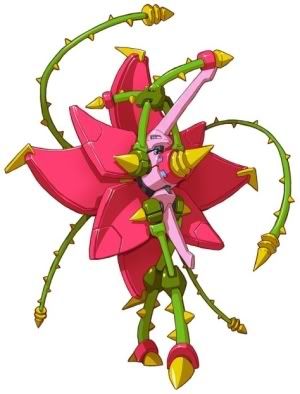
Rospark is an electric-based Pseudoroid and the boss of the Tower of Verdure. He has two forms - Bulb Form is standard. If he climbs a rope or vine, he will "bloom" and become the actual enemy. In this form, Rospark can only move along the vine. He can move in between them using his wire attacks, though. In Bulb Form, Rospark is of the height of Mario but a bit wider, and moves incredibly slow by spinning around himself. He's rather heavy in this form, falls extremely fast, too. He can't dash, and his only jump is pathetic. If on a vine and in his actual appearance, Rospark can climb the vines extremely quick, and is of the size of Captain Falcon. If he gets knocked or jumps off his vine, he will enter Bulb Form. If you press up or the attack button when standing next to a vine and are in bulb form, Rospark will climb it and enter normal form.
Rospark's data is carried by: Ivysaur, Zero Suit Samus, Marth, Kirby

Up Attack: Vine Growth
When pressing up and attack when standing still on the ground, will cause Rospark to shoot out a vine out of the tip of his bulb. The longer you hold the attack button, the higher the vine grows. The vines are indesctructable and will stay there for the rest of the match. If the stage loops, the vine will stay in its place and still be there if you return. If there is a ceiling, the vine will stop there. The move does no damage, has nearly no lag on both ends and the vine grows rather quick, reaching the upper platform of Battlefield in only 1.5 seconds.

Attack: Rose Wire
When pressing only the attack button will cause both forms of Rospark to whip forward with one of their wire extensions. The move has good range (Zero Suit Samus' Forward Smash is a good example), but average startup and ending lag. It deals 10% damage and below average knockback. When hanging on a vine, Rospark can use his Rose Wire (and the Spark Wire, too) in order to swing from vine to vine. By holding the control stick into the side Rospark whips to, he will swing forward if there is a vine, changing it!

Charged Attack: Spark Wire
If the Rose Wire is charged (by holding the attack button down until the Pseudoroid flashes), it will deal 5% more damage, and instead of below average just stun in place. Otherwise, this move is basically the same as the Rose Wire.

Special Attack (Bulb Form): Bulb Shot
If the special attack button is pressed when Rospark is in his bulb form, he will shoot a needle from his top. It goes straight upward, is rather quick, and deals 4% damage as well as flinching knockback. This attack is rather spamable.

Charged Special Attack (Bulb Form): Bulb Spark
Just like the Spark Wire, the Bulb Spark just adds 3% damage and stuns the enemy in place instead of knocking them away a bit. It has the same charge time as Spark Wire.

Special Attack: Rose Stinger
If Rospark uses his Special Attack on a vine, he will throw out 3 needles, one straight horizontally, and the other two in 60° angles up- and downward. The needles fly rather quickly, deal 5% damage each and below average knockback. There's almost no lag on both sides, and there can only be one wave of needles out.

Charged Special Attack: Spark Stinger
Now this is different from the other charged moves. If Rospark uses the Spark Stinger, he will throw out again 3 needles, this time ones with electric energy. They're not able to be touched. They stop after flying a little distance, and lines are drawn from each to the other two. Now, the whole triangular area covered in between these three corners is a whole hitbox, dealing 12% damage and stunning in place, making it able for Rospark to follow up with a Rose Stinger or a Rose Wire. The charge takes longer than those of the other two attacks, though.


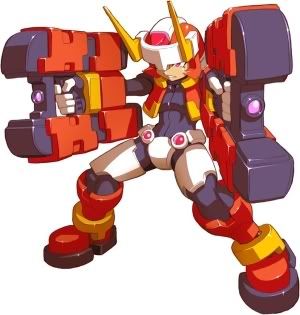
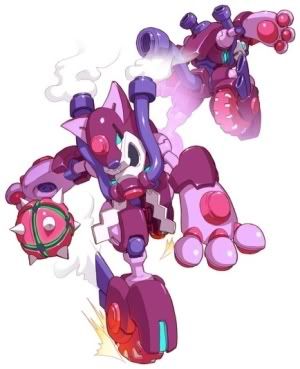
Queenbee the Hymenopteroid


Queenbee is a fire-based Pseudoroid and the boss of the Control Center. Despite the fact she has a hive attached to her body in the picture, Ashe will transform into Queenbee without a hive. A picture is below this explanation. Now, Queenbee moves rather slowly on rolls, Jigglypuff's dash is similar to how fast she moves on the ground. She has 7 jumps (comparable to Jigglypuff's) and great aerial mobility to make up for this, though! Queenbee is about Peach's weight.
Queenbee's data is carried by: Zelda, Peach, Samus, Olimar, Pit


Attack: Needle Shot
Queenbee raises her spike upward and aims it diagonally forward and down. She then shoots a small energy projectile in the form of a needle, straight diagonally down. This can fly through everything, including walls and solid platforms. It will deal only 4% damage, flinch and flies rather slow, though, and 3 of the needles can be out at once. It can be shielded, but will just continue flying. The move has below average startup and ending lag.

Charged Attack: Fire Shot
This move is basically a spiced up version of the Needle Shot. If Queenbee charges her Needle Shot, she instead will fire a fireball (size of a Pokeball) out of her spike. It will explode upon impact with any obstacle into a Bob-Omb-explosion sized blast, dealing 12% damage and above average knockback, but flies slower than the Needle Shot.


Vulturon the Condoroid


Vulturon is a non-elemental Pseudoroid and the boss of the Scrapyard area. He is around the size of Donkey Kong, is as heavy as ROB and has a very slow ground movement, hopping forward. As an idle stance, he bands his head. His jump and aerial mobility is rather good though, and by holding the jump button, he can hover for 4 seconds, just like Peach. He can wallcling and walljump, as well. If he does former, he can use both of his attacks (just with the 90° change to upward for the Guitar Hammer).
Vulturon's data is carried by: Charizard, Mr. Game & Watch, Wolf, Ike, Wario

Attack: Guitar Hammer
Vulturon simply swings his guitar swiftly forward and slightly upward. Good range, average lag on both sides, with 17% damage and above average knockback. Nothing too fancy here.

Special Attack: Sound Vibration
Playing on his guitar, Vulturon causes a circular soundwave to engulf him and quickly spread into covering a whole Battlefield Platform. The move has low starting and ending lag, and deals 12% damage with enough knockback to shove the victim out of the soundwave's area. A very fast attack, and good for damage racking or getting the enemy off your tail.


Hedgeshock the Erinaceroid


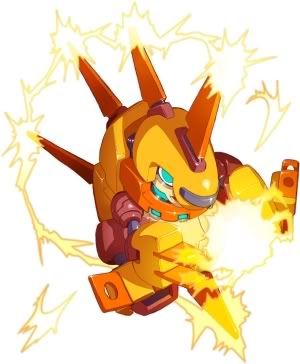
Hedgeshock is an electric-based Pseudoroid and the boss of the Mysterious Laboratory. She has the size of Kirby, a good dash speed and an average jump. She is very light, as well, so keep out.
Hedgeshock's data is carried by: Pikachu, Jigglypuff, Sonic, Meta Knight, Diddy

Attack: Plug Shot
Hedgeshock shoots a little ball of electric energy. This will go straight and fly rather quick (Falco's laser speed), dealing 4% damage and stunning the enemy for a short bit. The startup and ending lag is minimal, and she can have 3 bullets out at a time. They have infinite range.

Down Attack: Rolling Dash
If Hedgeshock starts this attack, she will curl up into a ball and quickly roll forward (about Sonic's Spin Dash's speed). If she hits someone while it, she will do above average knockback and 5% damage. Very quick attack with low startup but a bit of an ending lag. It will either go half of Battlefield's main platform or end early if the player releases the attack button. It also can be used to dodge projectiles.

Side Attack: Rolling Spike
This attack is very similar to the Rolling Dash, but instead of curling up to a ball only, Hedgeshock will spread out her spikes, becoming a wheel of thorns. If she hits someone with this attack, they will recieve 12% damage and low knockback straight upwards, otherwise it has the same properties as Rolling Dash.

Special Attack: Spark Ball
Hedgeshock bows down and emits 5 electric projectiles (they have the size of Mario's fireball). One goes vertically up, two horizontally and the other 2 in 45° angles in between, each straight ahead. Getting hit by one of these will result in 5% damage and being stunned in the place like Zero Suit Samus' Neutral Special works. The attack has average ending and startup lag, and the projectiles fly rather slow.

Aerial Special Attack: Air Spark
This move is pretty much the same as the Spark Ball, just with the 5 directions swapped by 180° - what went upward now will go downward.


Argoyle and Ugoyle the Shisaroids


Argoyle and Ugoyle are two Pseudoroids working together. They have no elemental alignment and are one of the bosses in the Waterfall Ruins. You control only one of them when transforming, though (Argoyle). Argoyle is a bit smaller than Mario. He has a good walk speed and dash speed is even better due to having skates, but his traction is horrible. Argoyle's jump is average, and his weight is below average.
Argoyle and Ugoyle's data is carried by: Sheik, Fox, Toon Link, Lucario, Yoshi

Attack: Ar-Throw
Argoyle pulls out a bomb and throws it forward. The bomb has the size of a soccerball item and explodes upon impact on an obstacle, dealing 8% damage and below average knockback. It flies the same speed as Link's Gale Boomerang, has below average startup and little ending lag.

Special Attack: Ghost
If Argoyle uses the special attack, he will summon a slightly transparent image of Ugoyle that is always in front of him. If Argoyle turns around, Ugoyle will just switch sides to be in front of Argoyle again. Ugoyle will stay out until Argoyle gets hit. Otherwise, this move does nothing. It has very high startup lag, and the ending lag isn't too good either.

Special Attack (with Ghost out): U-Kick
Ugoyle materializes and does a little flipkick right in front of Argoyle. This will deal 12% and average knockback to an enemy hit by it. The move has low startup and ending lag, making it perfect to surprise enemies with! It, though, only works if Ugoyle is summoned, and Argoyle does nothing while Ugoyle attacks, so keep that in mind.

Combination Attack: Rock Bomb
If Argoyle performs an Ar-Throw bomb and Ugoyle uses the U-Kick on it, this will cause the bomb to start glowing green. Ugoyle kicks the bomb diagonally upward, with the explosive flying in a ballistic curve up and then down. Now, the bomb itself doesn't change in terms of properties, but instead of dealing 8%, it will 12% damage upon impact and instead of knockback will stun the enemy in place, leaving them open for another attack.


Bifrost the Crocoroid


Bifrost is an ice-based Pseudoroid and the boss of the Biolab area. He is huge - Bowser looks a bit tiny in comparison to him. His jump is pathetic and he moves extremely slow by walking. However, Bifrost is extremely heavy (about the same weight as Giant Metal Bowser). He even turns around very slow.
Bifrost's data is carried by: Bowser, Donkey Kong, Ganondorf, King Dedede

Special Attack: Crocod'wheel
Pressing the special attack button as Bifrost will cause the crocodile to spit out a buzzsaw. It will race along the ground with above average speed, and has the size of Kirby. If someone gets hit, they recieve moderate knockback and 6% damage. It's mainly for Bifrost to be able to get his enemies away. If it reaches an edge of a platform, it simply will fall down until it's out of the screen. Bifrost can only have one wheel out.

Attack: Ice Bite
Bifrost will open his gigantic maw. He then will shut it, biting anyone and crushing them in between his strong jaws who is in reach. This will result in 20% damage and good knockback. The startup lag and ending lag are both incredibly horrible, but during the whole time of this move, Bifrost has Superarmor. Additionally to this, he can keep his maw open by holding down the attack button. This then will work like Link's shield just on a far bigger scale, disabling projectiles of enemies and blocking them off.

Attack (Part): Ice Fang
This attack is done automatically by Bifrost if he holds his maw open in the Ice Bite. Out of his maw, an icicle projectile will shoot out, going slowly forward. Every 2 seconds, an icicle will be automatically shot. They travel with the speed of the Ice Climber's Neutral Special, will deal 7% damage and low knockback if they hit, with a 25% chance of freezing the enemy.


Up
Ashe does a recharging animation to her gun, exclaiming "How's this?!"

Side
Ashe throws up one of her unused Biometals, catches it. While holding it forward she yells "It's over!"

Down
Ashe yawns and crosses her arms, taunting the enemy with a cocky "Is that all?"


Although she seems not really strong or good at the first look, Ashe's Playstyle is very easy to summarize: Adapt to your enemy. Having trouble with a character who's all in your face? Use Model L's better range and freezing moves to get them away from you, then switch to to a projectile-heavy form like Model P to hold them at bay with your bullets. Is your enemy good on the ground but bad in the air? Model H is the way to go and dominate them with your aerial movement and speed. Someone planking? Surprise them with Model F's Megaton Crush flames. Whatever the situation Ashe is put in, she is able to adapt easily. Her attacks are highly variable and her movement can switch quickly. Additionally to this you can get a Pseudoroid form if you KO your enemy, allowing Ashe to extend her gameplay even further and surprise her opponents with a new form of gameplay. Unfortunately, no matter what form she takes on - outside of a few Pseudoroids - Ashe has much trouble in KOing her opponents, having to rely only on a few laggy moves or her Up Throw. Nevertheless: Ashe is very hard to master as you need to time the transformations and be able to use all of them in a strategy against other characters, but once you can control her, she is incredible hard to deal with - because she can handle everything.
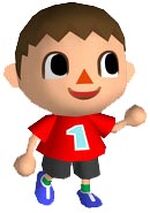


Entrance
Ashe, in her Reploid form, yells "Megamerge!" with a small flash covering her, as she transforms into Model A.


Alternative costumes
I won't list the color schemes for all forms, too lazy to do that... but if you scroll through the color swaps, you will be able to play as Grey, just like you can play as Classic Wario. It won't only change the looks, but also the screenname, narration, Snake codec, voice actors and whatnot.


Victory Poses

Up
Ashe, in her Model A form, transforms into human form with a flash. The Biometal floats next to her, and Ashe gives it a thumbs up while grinning.

Side
Ashe being in her human form, holds Model A in her palm, the Biometal trying to escape from the grasp. It eventually does and knocks Ashe on the head.

Down
A transserver, the save points of Megaman ZX A, platforms with computer a computer terminal, is seen. Ashe, in Model A form, jumps onto it, with a computer voice saying "Mission Report Submitted.". Then Ashe does a victorious fist pump.

Loss
Ashe in human form, simply clapping as Model A floats next to her.


Victory Theme
Megaman ZX Advent - Model A, ROCK ON! (starts at 0:30)
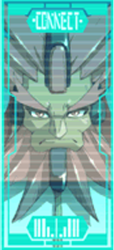

Codec Converation
Snake: Colonel, who is that girl?
- Static -


Master Mikhail: Hello? Ashe?
Snake: Who are you?


Master Thomas: Apparently we are on the wrong channel...
Master Mikhail: Are you Ashe's opponent?
Snake: So that girl's name is Ashe?
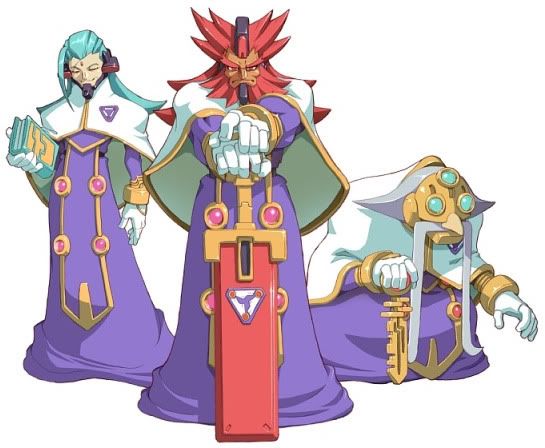
Master Mikhail: I see. Well, we might as well tell him about her. We are Mikhail and Thomas, part of the Sage Trinity.
Master Thomas: Yes, that's Ashe. She uses the Biometal Model A to transform into a Megaman.
Master Mikhail: Model A has the ability to copy data from other Biometals, allowing its user to transform into other Megamen.
Master Thomas: It even allows Ashe to copy the abilities from enemies who have been corrupted by the evil Biometal Model W, the Pseudoroids.
Snake: That's much information... so basically, she can transform into every form that has contact to that Biometal?
Master Mikhail: That is correct. Due to this, Ashe can adapt to every form of battle, and is able to fight hand to hand as well as close-ranged.
Snake: Interesting... that will prove to be an exciting mission.
Master Thomas: Don't underestimate her. She's a seasoned Bounty Hunter.


Master Thomas and Master Mikhail are two scientists, and part of the Sage Trinity. To put it short: The Sage Trinity is basically the government of Ashe's world. The third member of the Sage Trinity, Master Albert, is the main villain of Megaman ZX Advent, whose malicious plans are revealed rather soon in the game. The other 2 members and Ashe do their best to stop Albert. All 3 members of the Sage Trinity have names that are references to the 3 scientists in the Classic series - Thomas Light, Albert Wily and Mikhail Cossack.

Note: If you play as Grey, all female references will be replaced with male ones, and all mentions of Ashe's name will be replaced with Grey's.


Kirby Hat
Megaman Models: Kirby gains the helmet of the respective Megaman Model, and their Neutral Special (Charge Buster, Megaton Crush, Kunai, Screw Halberd and Sonic Boom)
Pseudoroids: Kirby simply will copy Model A, gain its helmet and the Charge Buster as Neutral Special.


Unlock Message
Ashe, the wielder of the Biometal Model A and its copy abilities, is now among the fighters!


Credits Song for Single Player
Megaman ZX Advent Tunes - Target Chaser


Logo


Jimnymebob

Smash Champion
Joined
Sep 26, 2008
Messages
2,020
NNID
Jimnymebob
Ashe and Grey is a great moveset, possibly your best in this contest. The fact I don't know anything about Megaman outside of Megaman X3 made this a bit difficult to understand at first, but once I reached the end of the set I had come to understand what all the different terms and forms meant, so that was great :bee:.

The best move in the set was definitely the forward tilt. When I read it I was like, generic move, can be forgiven, then cool, a twist, not so generic after all, then finally, woah, that's a great idea, and you can set up some good mindgames and cover a lot of ground with it.

The layout was great yet again, and you never seem to disappoint with that, especially with your custom made section titles- it just goes to show that if you go the extra mile it'll pay off. The pictures of the different robot forms were a necessity, so I'm glad you decided to show them instead of showing little pictures to go with certain attacks. You also did a good job at picking who was related to which Pseudodroid (Apologies if that isn't right XD).

The moveset was creative, and the balance was fine, and the transformation mechanic worked well, and was similar to something I was going to try with one of my movesets that I scrapped, but not for a transformation.

Great job Spadefox :bee:.
 

Gareth Lionheart

Smash Rookie
Joined
Apr 27, 2009
Messages
3
Wow... there goes the Megaman set I had planned for MYM6... >_> Guess I'll have to find a new character, lol.

Oh, well. Atleast this version of the set was great. Highly eye-pleasing. The A-Trans system is handled very well. I particularly liked the Final Smash, Giga Crush, as it seems relatively balanced compared to the game-breaking Megaman ZX Advent version. The way you implemented the Pseudoroid forms is also interesting. The use of "Beginner's Recovery" was also clever. Does it work anytime you press Up B or does it activate only when you hold Up B and fall into a pit?
 

Red Arremer

Smash Legend
Joined
Nov 27, 2005
Messages
11,437
Location
Vienna
Thanks for the comments.

Up B works whenever you press Up B, but since it's a bit awkward to use I doubt you would use it onstage. =P
 

Chris Lionheart

Smash Champion
Joined
Apr 6, 2008
Messages
2,076
Location
Make Your Move
Oops, I was accidentally logged into my brother's account while commenting on Spade's set.... well instead of wasting another post, I'll comment on a previous one.

Mewthree

As much as I hate to admit it, this is, without a doubt, the best OC ever made set-wise.

The set has great organization and is pleasing to the eye.

The Aerial Shield mechanic was very fitting to character and creative, while still keeping balance.

Up Tilt is my favorite of the tilts due to its clever 2nd hit and comboing potential.

The F-Smash, while certainly creative, hardly seems to be fitting of the F-Smash spot. In addition to this, there is apparently no benefit to charging the move. And lol @ the Pokemon Anti-Christ.

The Forward Aerial is one of my favorite moves in the set, being an aerial throw with a special effect when used with the A combo.

The Side Special is truly... ugh... cute? Anyway, I like it for its uniqueness, though it might be overpowered, that is if the eaten damage actually heals Mewthree.

The Up Special is definitely a good move, likely being one of the marks of a skilled Mewthree player. Lots of versatility and uses to this special.

The Down Special has to be my favorite move in the set by far. Lot's of practical applications for mind control and yet the move is not broken. As for the secondary effect, very very disturbing... I love it. XD

Overall, like I said, the set is definitely the best OC made to this point. The moves, while unique in their own right, also really bring out the personality of the cute, yet demented, little furball.
 

Hyper_Ridley

Smash Champion
Joined
Dec 21, 2007
Messages
2,291
Location
Hippo Island
Ashe had a ton of creative moves. My favorites were the FTilt, DSmash, Dair, Fair, and both of Model F's unique specials. That's a lot of favorites. The other ones were mostly good, too. The jab and dash attack were the only two truly bland moves in the set, but when there's a lot more moves in total than a normal move set, having a few generic moves isn't a concern.

The form changing mechanics were really unique, probably the best I've seen in MYM. Though I think adding some MYM characters to the Psuedroid data would have made it even more awesome.

Now for some nitpicks:

I feel the FSmash doesn't vary enough in its charge damages. Did you know that Luigi's FSmash goes all the way from 11% to 22%? That's double the initial damage! The idea is that chargng takes so long that it does a lot more damage to make it worth using it. I'd suggest making the charged damage 30%

The other thing (and this one is really super-nitpicky so feel free to ignore it)...I'm can't say I'm a fan of calling the Uair being claimed to be one of Ahse's best moves when it is has above average startup lag and average end lag. The move itself isn't imbalanced, but reading the last sentence gave me the same feeling as when people say Ike's FSmash is broken. Just something to consider.


edit: Spade fixed my nitpicks. Yayness


Overall, though, this is seriously a fantastic move set. Definitley a contender for your best.

Excellent work Buddy. =)


@Chris: The F-Smash lets you stay in Umbreon form longer when you charge more. That was why I put it in the F-Smash slot. Thanks for the compliments, though, it means a lot to hear you praise my OC. =)
 

KingK.Rool

Smash Lord
Joined
Nov 26, 2005
Messages
1,810
Animal Crosser's a great set, Kibble. I note that you've reached a new echelon of laziness when it comes to stats. :p

The moves, however, are mostly incredibly creative, and as usual, the whole set's very easy to navigate and read. You got the classical non-damaging tilts, and the variety of prop moves that Animal Crosser demands, ably implemented. A highly enjoyable outing, as always.

Comments on Ashe coming soon. The organization's great, for a start. :cool:
 

Baloo

Smash Ace
Joined
Nov 14, 2008
Messages
781
Animal Crosser is amazing, one of your best. I love how incredibly detailed the stats are, amazing. :p The moves are original. Yeah. Umm...

*terrible moveset commenter*

Ashe was great as well. Great organization, great moves, great Forward Tilt.

Is there anyone who would be willing to draw an OC for me? It's really simple looking. :kirby2:
 

Wizzerd

Smash Ace
Joined
Feb 24, 2009
Messages
929
Animal Crosser: He/she was one of my most wanted characters who didn't make it into Brawl along with Paper Mario and Ridley, and you certainly did him/her justice. I love how you drew interesting moves from things like bell bags and Mr. Resetti. Although I wonder why you referred to the Animal Crossing leaf as an acorn. ;)

Ashe: I've never played Megaman ZX Advent, but I loved this set. Cool moves in there, good detail- as other people have said, the organization is really clever, unique but readable. And I thought you weren't a specials-first person... :p.
 

Red Arremer

Smash Legend
Joined
Nov 27, 2005
Messages
11,437
Location
Vienna
And I thought you weren't a specials-first person... :p.
I said that I like to put Specials last to keep the spice in the set. If they are necessary to understand the set (like Ashe's Down Special), I can understand putting them first. ;P

Thanks for the comments.

@Baloo:
Truly, a horrible moveset commenter. Just blabbering what everyone else said. <_<
 

Baloo

Smash Ace
Joined
Nov 14, 2008
Messages
781
@Baloo:
Truly, a horrible moveset commenter. Just blabbering what everyone else said. <_<
Of course. I've said that myself. My comments always suck. Don't have to be so harsh though. >_>

But fine. You asked, I'll give. I will write a full review of this moveset. Not now, maybe tomorrow. But I will.

:dizzy:
 

Red Arremer

Smash Legend
Joined
Nov 27, 2005
Messages
11,437
Location
Vienna
No, I didn't ask for a review. I asked for a slightly better commentary but "Good organisation, good moves, good [insert a move one of the predecessing posters mentioned]"
 

Baloo

Smash Ace
Joined
Nov 14, 2008
Messages
781
Alright. Fine. Better commentary.

First of all, the wall jump idea is cool. The special mechanic was a bit hard to understand at first, I had to read through it a few times to understand. That might just be me though. For Model H, her air dash, it seems pretty useless. Two thirds of Smashville's smaller platform is not very much. You might wanna make it a bit bigger. The Down Aerial is great, it seems like Asheaside would be possible with it. :p The Pseudoroids are a nice extra, Rospark and Chronoforce are my favorites. As I said before, great layout.

Okay, so that's not as long and detailed as one of MW's comments, but it's better than "Good organization, good moves, good [insert a move one of the preceding posters mentioned]"
 

Plorf

Smash Apprentice
Joined
Jan 28, 2009
Messages
124
Location
Silver Spring, MD
I must agree with many of the other comments. Though I have never played Megaman ZX Advent, and am somewhat of a snob of the Classic series, I found the set very enjoyable. I was somewhat disappointed at attacks that were either not very original or were very similar to the character's other attacks, but I'm sure there wasn't that much to work with. I'll note that the formatting was very nice; the headers and the images were well done and actually helpful. It was good that you gave a lot of description to some of the moves, since they'd be fairly ambiguous for one who does not know the game.

All in all, a strong set. It's probably my favorite of yours so far in this contest.
 

TheSundanceKid

Smash Lord
Joined
Jun 8, 2008
Messages
1,636
Location
The Secret Kingdom
Animal Crosser

It's a very creative set, Kibble. I enjoyed reading it even though I haven't played any AC games. I really like the A combo and lulz would ensue when used at the right time.

*opponent is targeted by Halberd's laser*

(Animal Crosser) Hey! Wanna talk?

The set is really underpowered though....


That's right. SUNDANCE just commented on a set =O!​
 

SirKibble

Smash Champion
Joined
May 2, 2008
Messages
2,400
Ashe is a beautiful moveset, and I mean that both literally and in a less physical sense. The various forms could be confusing if left to have more than a statistical change on the entire moveset, so confining the serious changes to the Neutral and Side Specials (for the most part, anyway *looks at Up Smash*) was definitely a smart move. Anyhow, the moves are all quite nice as well, with even the ones that are less interesting, such as the Dash Attack, are still worthwhile pieces of the moveset. Most of the moves like that, that would be a bit boring, are made more interesting by added quirks, like the jumping of the spark in the F-Tilt or the energy bits from the F-Smash. Additionally, I love the mechanic with the Pseudoroids or whatever they're called (I need to play this subseries, I really do). All in all, a most excellent moveset. If I may be so bold, I'd even dare say it's my favorite of yours this contest.

Now to respond to a couple of things...

I can only repeat what most people said before - Crosser is an extremely well-done and unique set, just like expected from a Kibble set. Original moves, crazy ideas...
Thank ye. :)

Unfortunately, it suffers the same thing as I expect from a Kibble set, which is especially the balance, but, in some small parts, the lack of description as filipino already said.
Someday, I'll be able to properly balance a moveset. As far as that description bit goes, I'm still in pursuit of that perfect level, that's highly-readable but still appropriately detailed. I think I'm getting close, but it seems I still have some progress to make. :p

Overall, though, a very good moveset of high quality!
:bee:

Animal Crosser is a great set Kibble, and was fun to read, and has some unique and interesting moves.
However, I have to echo what other people have said about the balance issues.

That doesn't make it any less creative though, so good job :bee:.
Kibble's Report Card:

Creativity: A+
Balance: F-

Animal Crosser's a great set, Kibble. I note that you've reached a new echelon of laziness when it comes to stats. :p
Actually, I did type up all the stats. Then I looked over them, and thought to myself, "These are pointless, they're all average" and replaced them with what you see there. So it's not so much laziness on my part as trying to make things more concise. :p

The moves, however, are mostly incredibly creative, and as usual, the whole set's very easy to navigate and read. You got the classical non-damaging tilts, and the variety of prop moves that Animal Crosser demands, ably implemented. A highly enjoyable outing, as always.
Yeah, those non-damaging Tilts may be a trademark of mine or something, but the whole non-damaging thing can't be good for balance. :laugh:

Animal Crosser: He/she was one of my most wanted characters who didn't make it into Brawl along with Paper Mario and Ridley, and you certainly did him/her justice. I love how you drew interesting moves from things like bell bags and Mr. Resetti. Although I wonder why you referred to the Animal Crossing leaf as an acorn. ;)
Thank you. I'm glad you enjoyed my pulling of all the Animal Crossing wonders I could remember.
It was late, I wasn't thinking... Yeah, okay, I got no excuse, I fixed the so-called "acorn."
:dizzy:

Animal Crosser

It's a very creative set, Kibble. I enjoyed reading it even though I haven't played any AC games. I really like the A combo and lulz would ensue when used at the right time.

*opponent is targeted by Halberd's laser*

(Animal Crosser) Hey! Wanna talk?
:laugh:

Glad you (read it and) enjoyed it, Sundance! :)

The set is really underpowered though....
I know, I know!! Will you people never let me live this down?! :cry:

Just kidding, I'm okay. Drill it into my brain as many times as you want so I really get it. :psycho:

That's right. SUNDANCE just commented on a set =O!​
I feel so honored. :bee:
 
Status
Not open for further replies.
Top Bottom