Welcome to Smashboards, the world's largest Super Smash Brothers community! Over 250,000 Smash Bros. fans from around the world have come to discuss these great games in over 19 million posts!
You are currently viewing our boards as a visitor. Click here to sign up right now and start on your path in the Smash community!
It appears that you are using ad block :'(
Hey, we get it. However this website is run by and for the community... and it needs ads in order to keep running.
Please disable your adblock on Smashboards, or go premium to hide all advertisements and this notice. Alternatively, this ad may have just failed to load. Woops!
Oh god, this is kinda embarrassing. 24 hours, and Kupa got one real comment. ONE. What are we, back in the days of MYM 3? I don't know whether it's some sort of anti-Kupa bias, but seriously? For shame, man.
Anyway, I haven't got the time for an exhaustive analysis, like I did last time, but I will say that I like the musical sub-mechanic you've got going; it gives the moveset a certain feel, y'know? You took full advantage of the unique potential of the crab-shape combatant, and I do feel like it's quite the step forward for you. It's probably my favorite of yours so far, and it needs more comments.
I know, it's completely rediculous! I get more comments and his sets blow mine out of the water! Here he takes a character with almost no moveset potential, makes a great set from it with a variety of entertaining moves and does it in a easily read writing style, and people still ignore it. If you didn't read Sebastion, go back and do it right now. The Specials and Final Smash are awesome, not even mentioning the rest of the moveset. (My favorite is the creative grab. It's not something people usually give a lot of thought.) I'm re-reading it right now, and it is one of the few sets I've read twice.
I'm kinda too lazy to multi-quote here, so I'll just respond to the Sebastian comments in order.
With Sebastian, I tried to cut down on the excess of detail I had with Skurvy, while still maintaining the comical writing style. I chose the Final Smash I did because of how it well it suits his musical character, and I'm glad I did.
Naming icon and crown chant? Just making the organization complete, as everything else had a name. Plus, there's nothing really wrong with naming them, is there?
Extra effects making a character broken? Those were my main balancing points to keep Sebastian from becoming a light, fast Meta Knight. He has those attributes, but things like knocking his U-Air crown off and his legs enlarging for D-Throw are just side effects that add to or take away from how awesome the move is, and it seems to have worked.
About the musical mechanic, I really didn't see a whole moveset mechanic I could use for Sebastian, and the props on their own idea was getting old. So, I decided on a way to mix the attacks together in a relating way that contributes to Sebastian's party-loving musical personality. Definitely one of the higher points in the set, if I do say so myself.
Hearing that this set topped Scar & the Hyenas is pretty big, so I'm glad to hear that now. When I decided on the 20 seconds, I just played 'Under the Sea' on Youtube, and copied the length of the chorus. If you think about Sebastian's moveset, it's not as bad as it seems. It's still a challenge, no doubt, but Sebastian still has high speed, and could even use Scuttle to fly under the stage to stall while singing. It would take skill to pull off, but is not as bad as, say, staying in place for 7 seconds for Arthur's Neutral Special. Making him a combo master was an easy step toward balancing his light weight. Speaking of which, this is most of the reason why I made him fast as well. Plus, if you see the movie, he's pretty darn fast when escaping Chef Louie in the kitchen, so it's not really too much of a stretch.
It's great to hear praise for these sets; maybe my problem is that I generally post them on the weekends when no one's around. I should try posting my sets maybe mid-week next time. As many people will tell you, Specials and Final Smash can bring so much to a moveset, so you should always try and go all out on them. And grab mechanics have kind of become my new specialty, so there's no real surprise there.
Thanks for all the commentary so far. I appreciate it.
SEBASTIAN:
Sebastian seems to be a big step up for you in playstyle, BKupa. While his playstyle isn’t the most original out there, it actually exists and is decently consistent, so I commend you for that. I trust you’ll keep improving on that. The actual moves I feel aren’t quite up to your originality standard in some areas compared to Kaptain Skurvy, but you don’t use all that many props and keep him from getting too random, so I suppose it’s good.
The final smash was rather interesting, too, although I find it strange that foes can’t attack each other. If anything it’d make the final smash all the better for Sebastian as his foes killed each other while having to dodge the attacks, but eh. Another small criticism is that I feel it should be easier to lose the shell, as you’d have to spam it insanely to lose it right now. It’s a cool mechanic, I feel it deserves more use.
I absolutely love the ftilt and tapping A in time to the music despite how that’d be insanely hard to program due to how many songs there are in Brawl, much less a MYM Smash. Sometimes I like to crouch to the music with a char with a noisy crouch like good old Ganon. . .I imagine getting actually rewarded for it! Absolutely brilliant move.
You did a lot what I thought was really a rather bland character and yet still made him very true to himself, as always. The down special singing is great and adds to Sebestian’s playstyle considerably, but I think it’d be rather awkward with how it would drown out the background music, especially if you’re trying to use your ftilt to conduct it while your singing makes it hard to hear it properly. Perhaps if you’re singing and using ftilt you have to tap A to his singing?
The detail is a lot more stomachable, although I found the fair and bair slightly confusing. Still, much better then your usual standard and you’ve gotten a lot better at not droning on needlessly. Despite not having many extras, I’m rather fond of the assist trophy. Excellent character choice there. Rather take a memorable minor one then a not so memorable major one, no? Also fits excellently with Sebastian.
So yeah. I’d agree with the others in saying this is your best yet, Kupa. Great job!
TINGLE:
So yeah. It’s been a while since I’ve read a Wizzerd set, and despite hating the character I decided to give this moveset a try due to it being an actual (unfortunately) SSB4 candidate and me being very familiar with the character despite detesting him.
So he seems to be yet another trap character. Instant playstyle points, right? Yeah, but to be quite honest the whole trap/stage control character thing is beginning to get rather overdone, and you don’t really put much of a spin on it. Not much of a complaint with this moveset in particular, I’d just like to see more movesets with good playstyles that don’t rely on traps, like Acid Seaforce and Jumpluff.
That said, the whole trap thing makes Tingle flow beautifully, even if the actual playstyle description at the end is rather generic and not particularly descript. The moveset is somewhat awkward in that way in that has a good trap playstyle but doesn’t know what it is itself entirely, suffering in a fashion similar to Metal Man.
That said, this moveset has some deliciously original moves in addition to the good playstyle, such as the usmash. That’s one of my favorite moves without a doubt. Still, my favorite move in the entire set though is the final smash. It’s just so brilliant and fitting, and it’d be hilarious to see people like Ganondorf and Snake in the tingle suits. It makes all the more sense when Tingle can just suck all the rupees to his bag to hog them all and then use them to summon bodyguards to boot, and it sounds like a lot of fun to play with. Quite possibly my favorite final smash ever.
While this moveset does take a lot from Rosy Rupee Land to make it true to character, which I recognize due to having had the displeasure of playing it, it also has a lot of stuff that’s completely and utterly random. The boss key/door and the scarecrow, despite being awesome, are particularly bad culprits of this. The fishing rod is another of them despite being hilarious. Might I suggest it have an additional effect against Ganondorf for the lulz?
The slight randomness doesn’t hurt the set all that much, but it does make the set feel somewhat unpolished in that the playstyle seems to of sort of come together on its own with you slapping moves together and not really realizing what the playstyle was (Hence the bad playstyle description). The moveset feels unpolished. Still, it turned out good anyway, and there are tons of ridiculously original moves. This is another great trap character, to be certain. Like with Metal Man, I’d just like to see some more polish go into making the playstyle description complete the flow of the moveset. While Tingle wouldn’t have this moveset by any stretch of the imagination if he were in Smash, it’s sad that he wouldn’t. I wouldn’t mind his inclusion at all despite hating the character if he had a movset this epic.
ELIAS:
I’ve been wanting to see how a Panel De Pon character would work in Smash while keeping true to the mechanics of the game for a considerable time. While others may of wanted you to branch out from the mechanics more, Kibble, this is pretty much exactly what I was looking for. This easily tops the crosser, no questions asked.
However; I feel that there was actually more potential you could tap into without leaving the mechanics of Panel De Pon, like juggling blocks about so that they land in a chain or something before hitting the ground. What you have is rather basic and to the point, though, making the moveset more viable for an actual inclusion in Smash.
The tilts are rather boring on their own, but they’re all tools for the playstyle. Sacrificing some originality to make the playstyle flow is a perfectly acceptable one, and I commend you for it. That said, you weren’t branching our with the panel mechanic more to try to keep things basic, right? Honestly, I think I’d have a hard time remembering which tilts swapped what. I think it’d be a lot easier if there was some move that could specifically change anything you saw fit somehow, although that’s just my personal taste.
The smashes being usable in the water is absolutely epic. The final smash takes advantage of this mechanic, but it’s not just a generic boost to the mechanic and still manages to be flashy and cool. Well done. Very well done indeed.
While the aerials weren’t as interesting as the rest of the set, I was particularly fond of the dair, it being memorable all this time after I read it. Still, it’s a shame the cool move is so useless. Bah.
I think this moveset could’ve easily been super vote worthy if it wasn’t trying so hard to be simple. If you were going for an actual Smash inclusion, you’d be using Lip, not Elias, no? Make a move that creates a pool of water so she can abuse her smashes properly and allow her more freedom in moving the panels are my main suggestions for this set. It’s not a bad set by any stretch of the imagination, easily topping the crosser, I just feel this easily has potential to be absolutely incredible. I’m intending to tap into that potential with Thanatos next contest. . .This moveset is a good foundation, but I feel there’s still a lot more there that’s untapped for Panel De Pon.
SAKURAI:
Oh god. This moveset has killer originality, impressively detailed, seems relatively balanced at a glance (Sorry, Agi has convinced me otherwise now that he’s more fully analyzed it), great organization and pictures on every move, and is above all else absolutely hilarious. All it’s really lacking is a playstyle. I’d easily support this as the winner if it had somehow managed to come up with one.
This moveset leaps out at you and strangles you until you’ve fully read it. The humor BEGS you to keep reading on, even through the extras. The only real complaint I can come up with is what the other have pointed out time and time again: It’s more of a meme man then Sakurai. I pointed that out to you so long ago back when you were first making it. Still, it’s hilarious none the less, and there are still plenty of things that are actually Sakuraish in there, such as the landmasters, Ganondorf’s sword, the knee of justice, tier punch, Kirby bias. . .Too much to list, really.
While some moves drone on and on a while with funny stories such as the dsmash, it’s worth it without a doubt, as the hilarity just motivates you to go on all the further. If anything, those towers of text only increase readability.
I’m also amazed at how you’ve managed to creep me out with this set, as Sakurai makes a Kirby tattoo on his stomach “munch on pizza”, how other characters can devour Sakurai’s shed skin and how he can come out of it at all, as well as how in actuality that Sakurai is a robot. The later two contradict in that one time he’s shown as having robotery underneath and the other muscles, but who really cares in a moveset this random? Oh, you also get more points for having Dracula’s ftilt. Clearly that move made Dracula win MYM 3. One can only hope it’s what Sakuari will need to win MYM 5.
RAVEN:
. . .I’m gonna go out and say it. This moveset easily stands out as the most negative experience by far of the five movesets I’m commenting here. Raven suffers more from the awkward descriptions and redundancy that plagued Gwen, but much more so. The moveset isn’t very polished, and you sometimes say the exact same thing twice in two sentences right after each other. The descriptions in general can also sound rather confusing. This moveset was very hard to get through.
The moves were a bunch of arrow shots, but I think that’s all this character can really do if I recall, so you’re off the hook there due to limited moveset potential due to the character you picked. I think it might be rather annoying for Raven to so regularly shout out random stuff, but I take it that’s how he’s supposed to be seeing he’s the perverted joke character of his tales of game.
The thing that comes out to me to praise the most is that you actually tried to make a real playstyle description for Raven. This is a huge step up from your previous sets here, although all you really do is just describe how to use the individual moves rather then how to link them for the most part. Raven is consistent in his playstyle, though it’s a playstyle we’ve seen a lot and is very hard to not be consistent with once you know you’re going for it: Range. What the playstyle boils down to is camping. Never seen that before. . .
Gwen and Arthas had great playstyles, you just failed to describe them all that well. It’s the same thing that I have against Metal Man and Tingle. Those two movesets could easily be among my very favorites if some more work was put into that. I feel in particular Gwen has a lot more potential.
TINGLE:
So yeah. It’s been a while since I’ve read a Wizzerd set, and despite hating the character I decided to give this moveset a try due to it being an actual (unfortunately) SSB4 candidate and me being very familiar with the character despite detesting him.
Yeah, maybe Tingle isn't quite ideal because most of America isn't so fond of him, but he is the only reasonable SSB4 Zelda newcomer. I've always had a soft spot for him, I think he's funny and quite unique.
So he seems to be yet another trap character. Instant playstyle points, right? Yeah, but to be quite honest the whole trap/stage control character thing is beginning to get rather overdone, and you don’t really put much of a spin on it. Not much of a complaint with this moveset in particular, I’d just like to see more movesets with good playstyles that don’t rely on traps, like Acid Seaforce and Jumpluff.
I thought about that too. The problem was that I just have problems coming up with a coherent playstyle and adhere to it throughout the set, so I ripped off what seems to be a relatively common playstyle. I have my ideas for moves quite randomly, and so they don't always fit. You're right, it's something to work on.
That said, the whole trap thing makes Tingle flow beautifully, even if the actual playstyle description at the end is rather generic and not particularly descript. The moveset is somewhat awkward in that way in that has a good trap playstyle but doesn’t know what it is itself entirely, suffering in a fashion similar to Metal Man.
Even with such a broad theme I wasn't always able to capture it across the board. I guess it was a good idea to take a playstyle, unoriginal as it was, to focus on. It's been a problem, as many attacks in my sets are very random, as you commented on Bundt.
That said, this moveset has some deliciously original moves in addition to the good playstyle, such as the usmash. That’s one of my favorite moves without a doubt. Still, my favorite move in the entire set though is the final smash. It’s just so brilliant and fitting, and it’d be hilarious to see people like Ganondorf and Snake in the tingle suits. It makes all the more sense when Tingle can just suck all the rupees to his bag to hog them all and then use them to summon bodyguards to boot, and it sounds like a lot of fun to play with. Quite possibly my favorite final smash ever.
I'm glad you liked the usmash. I was really worried about broken-ness on it, but considering how I gave it so much lag and weak power, I sort of underpowered it, which is better than overpowering it, I guess... I'm very relieved that you liked the final smash. Originally I had something planned out where Tingle is a bank and he repossesses one of the crucial items of the opponent (Link's Master Sword, Chef Kawasaki's apron) to handicap them, but I got stuck on what to do for Princess Peach, and I didn't want to have to do 39+ (if I used MYM characters) different final smashes. So I came up with that, and since it was a bit of a last-minute thought, I'm glad that it worked.
While this moveset does take a lot from Rosy Rupee Land to make it true to character, which I recognize due to having had the displeasure of playing it, it also has a lot of stuff that’s completely and utterly random. The boss key/door and the scarecrow, despite being awesome, are particularly bad culprits of this. The fishing rod is another of them despite being hilarious. Might I suggest it have an additional effect against Ganondorf for the lulz?
I never actually played Rosy Rupeeland due to it never being released in the states, and I had to just read the Wikipedia article on it extensively. I wish I could blame that, but it's really another problem of mine. Maybe I could sacrifice some originality for coherence to the set.
The slight randomness doesn’t hurt the set all that much, but it does make the set feel somewhat unpolished in that the playstyle seems to of sort of come together on its own with you slapping moves together and not really realizing what the playstyle was (Hence the bad playstyle description). The moveset feels unpolished. Still, it turned out good anyway, and there are tons of ridiculously original moves. This is another great trap character, to be certain. Like with Metal Man, I’d just like to see some more polish go into making the playstyle description complete the flow of the moveset. While Tingle wouldn’t have this moveset by any stretch of the imagination if he were in Smash, it’s sad that he wouldn’t. I wouldn’t mind his inclusion at all despite hating the character if he had a movset this epic.
That's true. My sets are very random, and I should probably tone that down. I also am very bad at writing playstyle sections. Of course he wouldn't play like this in Smash, but neither would your King K. Rool! Thank you for the feedback.
Even though I canceled my plans (besides Psycho Mantis, Greed, Plug Man, and Dr. Wily), I have a few plans I might do (I'm not saying anything is definite; you know how I am with canceling halfway done plans).
A few Megaman X series mavericks.
Some Pokemon.
A couple of fictional humans, portrayed in pop culture movies and television shows.
A high tier character that is in Brawl remix.
RAVEN:
. . .I’m gonna go out and say it. This moveset easily stands out as the most negative experience by far of the five movesets I’m commenting here. Raven suffers more from the awkward descriptions and redundancy that plagued Gwen, but much more so. The moveset isn’t very polished, and you sometimes say the exact same thing twice in two sentences right after each other. The descriptions in general can also sound rather confusing. This moveset was very hard to get through.
The moves were a bunch of arrow shots, but I think that’s all this character can really do if I recall, so you’re off the hook there due to limited moveset potential due to the character you picked. I think it might be rather annoying for Raven to so regularly shout out random stuff, but I take it that’s how he’s supposed to be seeing he’s the perverted joke character of his tales of game.
The thing that comes out to me to praise the most is that you actually tried to make a real playstyle description for Raven. This is a huge step up from your previous sets here, although all you really do is just describe how to use the individual moves rather then how to link them for the most part. Raven is consistent in his playstyle, though it’s a playstyle we’ve seen a lot and is very hard to not be consistent with once you know you’re going for it: Range. What the playstyle boils down to is camping. Never seen that before. . .
Gwen and Arthas had great playstyles, you just failed to describe them all that well. It’s the same thing that I have against Metal Man and Tingle. Those two movesets could easily be among my very favorites if some more work was put into that. I feel in particular Gwen has a lot more potential.
I actually do agree with you. I really only did Raven as a filler character of sorts. I'm willing to admit that he is my worst moveset of MYM5, though I would atleast call him better than most of my MYM4 stuff. It was sort of intentional. The last thing I want is to have a huge vote spread. Raven was mostly for his personality and comic value, though some of his moves were quite interesting. I'm surprised you didn't praise some of the moves like the Up and Down Smashes.
Anyway, I have a little... okay... big... thing to post on the next page.
ELIAS:
I’ve been wanting to see how a Panel De Pon character would work in Smash while keeping true to the mechanics of the game for a considerable time. While others may of wanted you to branch out from the mechanics more, Kibble, this is pretty much exactly what I was looking for. This easily tops the crosser, no questions asked.
However; I feel that there was actually more potential you could tap into without leaving the mechanics of Panel De Pon, like juggling blocks about so that they land in a chain or something before hitting the ground. What you have is rather basic and to the point, though, making the moveset more viable for an actual inclusion in Smash.
The tilts are rather boring on their own, but they’re all tools for the playstyle. Sacrificing some originality to make the playstyle flow is a perfectly acceptable one, and I commend you for it. That said, you weren’t branching our with the panel mechanic more to try to keep things basic, right? Honestly, I think I’d have a hard time remembering which tilts swapped what. I think it’d be a lot easier if there was some move that could specifically change anything you saw fit somehow, although that’s just my personal taste.
The smashes being usable in the water is absolutely epic. The final smash takes advantage of this mechanic, but it’s not just a generic boost to the mechanic and still manages to be flashy and cool. Well done. Very well done indeed.
While the aerials weren’t as interesting as the rest of the set, I was particularly fond of the dair, it being memorable all this time after I read it. Still, it’s a shame the cool move is so useless. Bah.
I think this moveset could’ve easily been super vote worthy if it wasn’t trying so hard to be simple. If you were going for an actual Smash inclusion, you’d be using Lip, not Elias, no? Make a move that creates a pool of water so she can abuse her smashes properly and allow her more freedom in moving the panels are my main suggestions for this set. It’s not a bad set by any stretch of the imagination, easily topping the crosser, I just feel this easily has potential to be absolutely incredible. I’m intending to tap into that potential with Thanatos next contest. . .This moveset is a good foundation, but I feel there’s still a lot more there that’s untapped for Panel De Pon.
Glad you thought highly of most of the moveset, Warlord. It's true, I tend to try to keep things simple, as even with characters like Elias, who have no chance at all of ever making it into Smash, I like them to feel like they wouldn't be incredibly out of place in the existing roster. Granted, MYM is a direct afront to that roster by now, but I still feel like submissions (at least mine) should try to fit in without being too much of a black sheep.
I'm glad you liked the water Smash Attack mechanic; I figured it'd help aleviate some of your grief at this being yet another water moveset to have something unique in there.
I definitely agree that I should've give a little more effort toward giving Elias a way to access her powered-up water Smash Attacks somehow, but I have to disagree about the Tilts being hard to remember how they switch. The Up Tilt switches the top panels, the Down Tilt switches the bottom panels. The Forward Tilt does the side panels, left if you using it to the left and right if you use it to the right. Angling the F-Tilt lets you switch the corners of the stack.
Anyway, still, thanks for your commentary, and I'm glad you had mostly praise for the moveset.
SEBASTIAN:
Sebastian seems to be a big step up for you in playstyle, BKupa. While his playstyle isn’t the most original out there, it actually exists and is decently consistent, so I commend you for that. I trust you’ll keep improving on that. The actual moves I feel aren’t quite up to your originality standard in some areas compared to Kaptain Skurvy, but you don’t use all that many props and keep him from getting too random, so I suppose it’s good.
The final smash was rather interesting, too, although I find it strange that foes can’t attack each other. If anything it’d make the final smash all the better for Sebastian as his foes killed each other while having to dodge the attacks, but eh. Another small criticism is that I feel it should be easier to lose the shell, as you’d have to spam it insanely to lose it right now. It’s a cool mechanic, I feel it deserves more use.
I absolutely love the ftilt and tapping A in time to the music despite how that’d be insanely hard to program due to how many songs there are in Brawl, much less a MYM Smash. Sometimes I like to crouch to the music with a char with a noisy crouch like good old Ganon. . .I imagine getting actually rewarded for it! Absolutely brilliant move.
You did a lot what I thought was really a rather bland character and yet still made him very true to himself, as always. The down special singing is great and adds to Sebestian’s playstyle considerably, but I think it’d be rather awkward with how it would drown out the background music, especially if you’re trying to use your ftilt to conduct it while your singing makes it hard to hear it properly. Perhaps if you’re singing and using ftilt you have to tap A to his singing?
The detail is a lot more stomachable, although I found the fair and bair slightly confusing. Still, much better then your usual standard and you’ve gotten a lot better at not droning on needlessly. Despite not having many extras, I’m rather fond of the assist trophy. Excellent character choice there. Rather take a memorable minor one then a not so memorable major one, no? Also fits excellently with Sebastian.
So yeah. I’d agree with the others in saying this is your best yet, Kupa. Great job!
I really didn't think Sebastian's playstyle would turn out that great, and I guess I was wrong. He was the last of my old-styled movesets, so to speak. The rest are more thought-out with better original playstyles, so you can definitely expect better in the future.
The Final Smash was meant for offense mainly on Sebastian's part and defense on the victim's part. It wouldn't be as interesting if the foes battled it out instead of having them flee from the orchestra sections, in my opinion. I like your idea about the shell, and it might make sense to have it break with less uses, but the shell counter was meant to help Sebastian against projectile-users, so the spam rate I set was fair, I think.
F-Tilt was more of a pipe-dream for Smash on my part; I never really plan my movesets by what is easy or difficult to program, just on how original and cool they would be. Recently, making supposedly bland characters (moveset potential-wise) into viable sets has been my thing, as with Scar and Iago & Zazu (BTW I have one more part-Disney set before I stop this little trend of mine). I meant the Down Special to kind of co-exist with the background music, like DK's Final Smash, but with more BGM. I get your point with the F-Tilt + Down Special mix, though, and that is something I'll definitely change.
Skurvy was a lesson learned for me in terms of unnecessary detail, but the F-Air and B-Air would be some of the simpler moves to understand. Perhaps I threw in a bit too much info on how to escape via DI? F-Air is a multi-hit move that renders foes helpless at close range, while B-Air blows foes back. That's about as simple as I can make them now. The AT was a last-minute addition, as I was rather lost in terms of a stage, and I thought Louie would be funny to see chasing foes around.
Thanks for reading and commenting! This may be my best set so far, but there is better to come in MYM6...
"When I become the Make Your Move winner, all female movesetters will be required to wear.... TINY MINISKIRTS!"
Story
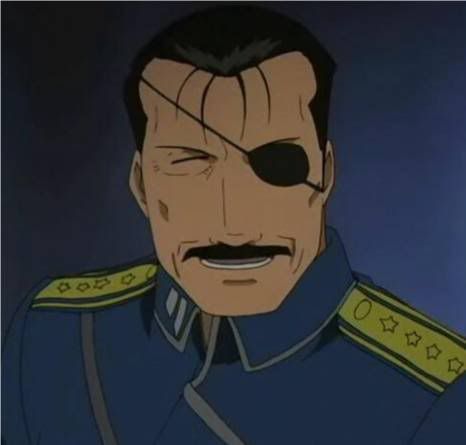
Roy Mustang is one of the more important characters in Fullmetal Alchemist, though this may not be saying much, as Edward and Alphonse Elric hog most of the show's spotlight. Despite this, Roy is one of the fan favorites of the show, largely due to his performance in Episode 13, in which he is quoted as saying things like "When I become the fuhrer, all female officers will be required to wear... TINY MINISKIRTS!" and "Dog, huh... I LOVE DOGS! Of course! Dogs embody loyalty, they follow their master's commands above all else! Be a jerk to them and they don't complain, and they never once beg for a paycheck! Trust me Fuery, they're the great servants of man! Loyal canine how we salute thee! [laughs maniacally]" On top of being one of the show's most comical characters, Mustang is also (somewhat arguably) the most broken character in the show, not counting the homonculi, whose ressurection abiilities make them nearly invinceable. With just a flick of his fingers, he can create a huge explosion.
Mustang is a lieutenant colonel in the State Alchemists army. He leads a crew of loyal soldiers, the most notable among them being Lieutenant Riza "Hawkeye" and Lieutenant Havoc. Riza is seen as Roy's faithful guard and hinted lover, though the two are never officially stated as being a couple.
Mustang, the Flame Alchemist, is rather legendary among the army members for his accomplishments during the Ishballan "War" (more like massacre). Roy deeply regrets his actions during the war, though he was "too cowardly" to take his own life. He is known to be the one who killed Winry Rockbell's parents, two doctors who treated both wounded State and Ishballan people during the war. Roy did not want to take their lives, but he was ordered to do so, as their treating of Ishballan patients simply put those Ishballan's back into the fight.
Roy first appears in the show when he invites Edward Elric to join the State Alchemists. Once Edward is recruited, Mustang serves as his superior officer. Though Edward is allowed to go off on his own quests thanks to Mustang's generosity, Mustang has information on everything the Elrics do on their travels. Edward resents Mustang, seeing him as being oppressive, though Mustang is, perhaps, the closest thing Ed has to a father figure.
At the end of the series, Mustang defeats and kills Fuhrer Bradley, aka Pride, and becomes a lowly recruit stationed alone in the wilderness. He barely has any screen time in the Fullmetal Alchemist movie, but he reappears near the end, commanding his former lieutenants (now ironically his superior officers) to victory against the invading Nazi forces, helping to save all of Shamballa (the Fullmetal Alchemist world) in the process. His life from that point onwards remains a mystery. Did he ever become the fuhrer? Are he and Riza a true couple? Who knows?
Abilities
Roy, pictured on the right, is the Flame Alchemist. True to the series, he is an innately broken character. He has the reach. He has the speed. He has the power. He even has the fire!
How could anyone hope to defeat a decent Mustang player? Well, he has an interesting weakness. He is completely reliant on his gloves to create the spark that he uses to unleash fire. When he attacks, his gloves are left revealed and become a seperate vunerability point. Each glove has 10% stamina. When they are attacked and drop to 0% stamina, the gloves tear, making them completely useless. Mustang is forced to put on a new glove (or pair of gloves) in order to keep fighting. Each glove takes a half second to replace! The gloves are in his pockets when he is not attacking.
Note that all of Roy's single-hand fire attacks use his right hand by default. If his right glove is destroyed, he will use the left hand if it has a working glove. In the case of dual-hand fire attacks, their damage will be halved (rounded up) when only one working glove is present.
In addition to the glove durability weakness, Mustang's fire is weak to water. If something like Water Gun/F.L.U.D.D. comes into contact with Roy's fire... the water will always take priority. Also, Roy himself can be drenched, making him unable to produce a spark for a short time (the amount of time being based on the amount of water that hits him, with a maximum of one second for something such as being completely drenched by a fully charged Water Gun/F.L.U.D.D.). This basically gives Mustang a very bad matchup against Squirtle and movesets such as Azumarill and Elias.
Stats
Height/Width- Human (Average)
Mustang would compare to Ike in both height and width.
Weight- Below Average
Due to a lack of weaponry or a heavy build, Mustang is rather light for his size, being a bit heavier than Marth.
Walking Speed- Slow
Mustang is known for being lazy and putting off things like paperwork until the last minute.
Running Speed- Above Average
When he finally does get to his duties, Roy tends to be pretty quick about it. This is the essence of a good procrastinator, is it not?
Jumps- 2
First Jump- Average
Roy's physical abilities aren't known as being exceptionally high.
Second Jump- Average
Again.
Falling Speed- Below Average
Roy's falling speed is somewhat slow, giving him a rather respectable air game while not making him particularly easy to juggle.
Traction- Great
An experienced soldier like Mustang isn't clumsy... or is he? At any rate, he turns quite well and doesn't trip often.
Dodges- Great
Mustang's dodges are seemingly effortless, being slight, fast, and short-durationed.
Crouch- No
Crawl- No
Wall Jump- No
Wall Cling- No
Glide- No
Animations
Standing Pose
Mustang stands lazily with both hands in his pockets, looking not really interested in the battle.
Idle Pose
Mustang throws his head back and yawns. He looks even more bored. He does not take his hands out of his pockets, as doing so would expose them to attack.
Walking Pose
Mustang walks slowly, keeping his hands in his pockets. He doesn't look like he is even aware that a battle is going on.
Running Pose
Mustang runs forward at a quick pace, leaning forward slightly as he does so. He keeps his hands in his pockets. He has a rather hurried expression on his face.
First Jump
Mustang jumps upwards. Nothing special about the animation. His hands are still in his pockets.
Second Jump
Mustang performs a front flip with his hands still in his pockets.
Shield
Mustang takes his right hand out of his pocket (or left if he has no working right glove and a working left glove) and snaps his fingers, creating a shield of fire that somehow acts much like a normal shield. It has an unlimited duration, but is more fragile than a normal shield and deals 1% per second to foes who touch it.
Sidestep
Mustang steps to the side barely while taking his right hand out of his pocket and doing the "come on" motion very quickly.
Forward Roll
Mustang jumps into the air similarly to Samus's Down Special (though not as high) and presses his hand on the ground, pushing off of it for a second jump of sorts, doubling his horizontal distance.
Back Roll
Effectively just like the forward roll but with a backflip (and of course it goes backwards).
Air Dodge
Mustang veers to the side while turning 360 degrees one time with both hands out of his pockets and spinning around with him.
Specials
Neutral Special- Hawkeye
Riza Hawkeye, the girl pictured with Mustang, is always in the background similarly to the Pokemon Trainer. When Mustang gives the order (you press Neutral B) saying "Hawkeye", Riza will pull out her pistol.
A targeting reticule similar to the one in Snake's Final Smash (but smaller, being only roughly the size of a human character's head) appears in the center of the stage. A little directions box will appear in the bottom right corner of the stage, reading A- Fire, B-Exit. This should be pretty self-explanatory. Aim the reticule with the control stick. Press A to fire the pistol. Press B to exit snipe mode. When Riza fires, the bullet takes a rather interesting path- it travels in a straight line from where she is to the targeted point in a mere fraction of a second, but it remains in the background until reaching the targeted point, thus only striking enemies in the reticule. Note that there is some beginning lag before Snipe Mode can be entered, but there is none upon exit. There is only a very slight lag between an input of the A button and the firing of Riza's gun. Should a foe be struck by the bullet, damage will be based upon where they were struck. The damage of this move distinguishes between body parts- dealing a full 15% damage on head shot, 7% on chest shot, and 3% on non-critical points such as the leg or arm. Knockback will always be decent and in a random direction. Mustang is incapable of moving while this special is being used, making him very vunerable to attack. Him being attacked does not cause the special to end though, as the one performing the move is Hawkeye, not Mustang.
This attack is one of the few moves that can be performed while Mustang is disabled through torn gloves or by being drenched. It is also very effective when Mustang is very far from the foe, making it a natural camping "projectile".
Side Special- Mark Of Alchemy
Mustang's index finger catches on fire at its tip (by default, this is the right glove, though if the left glove is the only untorn one, it will work with the left). Who needs a pen when you can just burn scorch marks into things, right? He will now begin drawing a transmutation circle with his finger, leaving it scorched into anything it comes into contact with.
This can be aimed downwards or upwards by pressing diagonally on the Control Stick, allowing Mustang to scorch a transmutation circle into the ground in front of him or a platform above him. But transmuation circles are not limited to simply drawing them into the stage.... they can be drawn into characters too! OUCH! If Mustang burns a transmutation circle into a character (friend or foe), that character takes constant hits of 1% and flinching (roughly 7 per second), though the character can DI away. He can even draw the symbol onto himself by pressing the Control Stick in the direction opposite of the direction Mustang is facing after he has already pointed it forwards. Note that you can change the direction you draw while you do so, starting a new circle in the new direction and leaving the unfinished circle in the old direction. It takes a full 3 seconds to draw a complete transmutation circle, though you can always come back to that spot to continue drawing. Transmutation circles last until the thing they were planted on is destroyed- such as a character losing a stock or Mustang destroying a section of the stage with one of his moves. The beginning and ending lag of this move is low. The hitbox is just the tip of Mustang's finger at the end of his fully stretched arm.
So, you may now be asking what makes the Transmutation Circles useful and any different from those of Alphonse. The circles serve as a way for Mustang to unleash fire at the point they are drawn, even catching foes with the symbol marked on them on fire.
Using this special where there is already a complete circle will result in Roy burning the circle, causing it to set on fire for 5 seconds, dealing 5% (with no flinch or knockback) per second to all who touch it. The circle will be unharmed and will continue to glow brightly for 10 seconds afterwards, dealing 1% per second to all who touch it.
Up Special- Phoenix Rising
Mustang snaps his fingers and a spark forms, allowing him to create fire and bend it into the shape of a burning phoenix.
He hops onto it and it acts like a mobile platform, it burning him for 3% per second. He performs a large-scale loop much like the one from Metaknight's glide. Instead of ending in a glide, it travels diagonally upwards after finishing the loop, allowing Mustang to travel as far as he wishes at the cost of 3% damage per second. It flies rather quickly, being a bit faster than Pit's Up B and the loop being roughly the speed of Metaknight's Shuttle Loop. Foes who come into contact with the Phoenix take 3% per second just like Mustang. Yes, they can hop onto it like a platform and knock Mustang off, making this a fairly easy recovery to gimp. This move has medium beginning lag and low ending lag. Similarly to Sonic's Up B, Roy is not left helpless after jumping off of the Phoenix, but he is unable to perform specials until reaching the ground or being hit.
Down Special- Flame Gloves
Mustang takes off his current pair of gloves and replaces them with new ones.
This whole move takes roughly one second (1/2 second per glove). He takes off his old pair of gloves quickly, but places the new pair on slowly. This works sort of like a charge storing projectile in that you can cancel it early, likely leaving Roy gloveless or with only one glove. In this situation, he will simply put on one or both gloves the next time you use the special, as Roy will not take off gloves that still have full stamina.
If both gloves have full stamina, he will instead snap his fingers and start burning himself by touching himself with his fiery hands. While this may appear masochistic, he is in reality burning his wounds closed, healing himself for 3% per second. You can move at any time during this. This effect of the move has fairly low lag on both ends.
The main use of this move is to replace torn gloves, though if your gloves are so much as damaged, you may want to replace them while you have the opportunity to do so... you certainly wouldn't want a weak jab or projectile destroying your glove(s). When your gloves are in perfect shape, this move can be used to heal Mustang. While this might seem broken, simply hitting him with a weak attack or projectile to knock him out of it and damage his gloves, keeping him from healing himself again.
Normal Attacks
Neutral A- Shovel
In Fullmetal Alchemist, Mustang and Ed had a duel which resulted in the stage being destroyed. They were ordered to repair it. It's only fitting that the shovel Roy used here should make it into his set somehow.
Roy pulls out a shovel and starts swinging it from the ground upwards in front of him. This sends dirt flying a short distance (roughly Bowser's width).
There are two hitbox's to this move: the shovel which is roughly the size of Marth's sword and the dirt spread. The shovel deals 7% and scoops the foe in an upwards and forwards arc for good knockback. The dirt deals 3% and low forwards knockback. It is possible for both hits to connect (with the knockback from the first hit taking priority over the second). This move has medium lag on both ends (as he must take out and put away the shovel). Great (disjointed) priority. No hitstun. This move lasts for as long as you hold the A button, with roughly 2 attacks being performed per second.
In addition, Transmutation Circles (including opposing ones) on the shoveled area are destroyed. This applies to both those of Mustang and of Alphonse. Also, objects such as Snake's mines or items can be scooped up along with the dirt, turning them into short-distance projectiles (or simply for disarming mines).
While this isn't a bad move (and has some of the best priority out of Mustang's moves), it is a much less efficient way to rack damage than Mustang's great tilts are. This is really only useful when dealing with opponent's who expect to out-prioritize you. Mixing it up is always a good idea, afterall. It's additional anti-trap and anti-transmuation circles use is also great.
Dash Attack- Smoldering Embers
Mustang continues running forward roughly a Battlefield platform as he drops coals on the ground behind him. At the end of the run, he snaps his fingers and the coals ignite.
They will continue to burn for roughly a second. Anyone who steps on them will take 10% damage enter the Superspicy Curry animation without the fire spewing from their mouths for roughly a second and a half. This move has low beginning lag but has a rather lengthy duration (roughly half a second) and medium ending lag. No hitstun is dealt by the embers.
While the effect of this move makes it tempting to use, it can be very predictable and is easy to punish. It may have some gimping usage (if you manage to throw the coals off the ledge) and anti-approach use, but the difficulty of using this properly may outweigh the benefits.
Tilts
Side Tilt- Burning Blade
Mustang snaps his fingers while swinging his hand forward. The resulting flame is shaped suspiciously like a curved blade and extends a distance of nearly a Battlefield platform ahead of Mustang.
Foes who are struck by the flame take 17% and above average horizontal knockback. This move has low lag on both ends. There is some duration (roughly 1/4th of a second) and a slight lingering effect afterwards. Fortunately for the foes, this move isn't completely without it's weaknesses. The priority of the flame is very weak- seeing as it is not even solid. There are also several spots in which this move's hitbox does not reach- most notably being a gap roughly the width of ZSS's skinny body between Roy's hand and the flame. Short characters can also avoid this by ducking (and of course it is possible to jump over the flame). No hitstun.
This attack is very straight-forward and spammable. It is definitely one of Mustang's most useful attacks for damage and isn't without KO'ing potential. Far reaching, fast, and strong, it is a prime example of one of Mustang's attacks. Just be careful when using this, as, like many of Mustang's attacks, the fire can be out-prioritized with ease, leaving Roy's glove vunerable.
Up Tilt- Flame Lance
Mustang waves his hand over his head once while snapping his finger. This creates a line of fire that extends over him (with a gap roughly the size of his hand between his finger and the flame). The flame is shaped sort of like a spike or a spear.
It extends about 1/3 of the way from the main platform of Battlefield to the top (center) platform. It is quite thin, being about the same width as that of Marth's sword. The flame deals 15% and good upwards knockback to those struck by it. Low lag on both ends. A duration of roughly 1/4th of a second with a slight lingering effect. The flame has abysmal and deals no hitstun.
Like the Side Tilt, this is very straight-forward and will likely be used a lot. It is one of most useful attacks for easy damage and to protect from above, while still having KO potential. Far reaching, fast, and strong, it is a prime example of one of Mustang's attacks. Just be careful when using this, as, like many of Mustang's attacks, the fire can be easily out-prioritized, leaving Roy's glove exposed.
Down Tilt- Ring of Fire
Mustang ducks down while spinning 360 degrees, almost breakdancing. He arms swing at his sides as he snaps, releasing a ring of fire along the floor (and reaching up to about Pichu's height).
The ring reaches roughly half a Battlefield platform on either side of Mustang with a gap the size of his hand between his fingers and the flame. This deals 12% damage to struck foe(s) and quite literally sweeps them off their feet, dealing decent upwards knockback to them and causing them to air trip! This move has low beginning lag and low ending lag and a duration of roughly 1/3 of a second. The flame has abysmal priority.
Note-
Unlike most dual-hand fire attacks, damage is unaffected if one glove is lost. Instead, the ring will only appear on one side at a time, following Mustang's working glove.
This is similar in use to the other two tilts, though it is typically used for a different purpose. It is one of Roy's most useful attacks for it's great speed, reach, and decent damage with the ability to hit on both sides. The air tripping is also a nice bonus, allowing Roy to turn what would have been a successful approach into a Sakurai-flaming moment. If damage and knockback is what you want, then it is a much better idea to just use the side tilt (it's reach and duration is better anyway). As usual, try not to use it at unsafe times, as the low priority of the flames leaves Roy's gloves exposed (and this time, both gloves are exposed).
Smashes
Side Smash- Infernova
Mustang snaps his fingers, sparks running through them. As you charge this move, he will repeatedly snap his fingers, creating more and more visible sparks. When you release the smash, a large burst of flame the size of Bowser is created. The closest edge of the burst to Mustang is one Bowser width away from Mustang (making the center 1.5x Bowser's width away).
This move deals 2 hits of damage per foe it hits. The first one, which effects every foe, is a direct hit. Each struck foe takes 10...15% damage and high upwards knockback. The next hit is a nova, which reaches Bowser's width in circumference from every struck player (so effectively, every one who gets struck by the first hit gets struck by the second hit with potential to strike foes who weren't struck by the first). Every single struck foe gets nova'd, releasing a burst of flame from their bodies that deals 10...15% damage to themselves and foes within the circumference. If Mustang were lucky enough to strike 3 foes with the first hit, there would be 3 novas, dealing 30...45% damage to all foes. This is in addition to the first 10...15% damage, giving this move the potential to do 40...60% damage to 3 foes (or 120...180% total!) Note that, despite the first hit dealing knockback, the 2 hits actually happen at the exact same moment. This move has medium beginning lag and low ending lag. It has a duration of roughly 1/2-3/4 of a second. No hitstun is dealt.
Just for quickreference, here is a damage range:
1 foe = 20...30% damage per foe (20...30% total)
2 foes = 30...45% damage per foe (60...90% total)
3 foes = 40...60% damage per foe (120...180% total)
(Note that to exceed 3 targets, minions/summonables are necessary)
4 foes = 50...75% damage per foe (200...300% total)
5 foes = 60...90% damage per foe (300...450% total)
6 foes = 70...105% damage per foe (420...630% total)
7 foes = 80...120% damage per foe (560...840% total)
8 foes = 90...135% damage per foe (720...1080% total)
9 foes = 100...150% damage per foe (900...1350% total)
10 foes = 110...165% damage per foe (1100...1650% total)
WOW!
(High numbers like this are, of course, difficult to impossible to obtain. I am merely charting up to 10 because I have no idea how many foes this is capable of hitting, and it of course variable by the size of the foes .)
Additional Notes-
Allies can be hurt by this (including the nova). This can be used to purposely rack up high damage on struck foes at the cost of your allies... make sure they are ok with this.
This move combines really well with minions/summonables, as they allow the number of novas to go past 3... making this move a true nightmare for those it strikes. Naturally, this makes Mustang a good teammate for characters such as Dedede and Arthas.
The more players there are on the field, the more useful this move is. It can be a must have in FFA's (especially when fighting inexperienced opponents). Its damage potential per target is something that non-Final Smashes can only dream of when 3 opponents are struck. Even with only one target, this move deals good damage (though not enough compared to the side tilt to be worth the extra lag + duration) and has great KO'ing potential. This move can be difficult to use, as the hitbox is a considerable distance away from Mustang, despite it's size. Definitely a move to master!
Up Smash- Don't Play With Matches
Mustang pulls a match out of his sleeve, snaps his fingers and throws it into the air. This move "charges" as the match is being thrown into the air. Release the A button and Mustang will cause the little fire of the match to become a huge explosion.
This move has medium beginning lag, a variable duration depending on how long you wait to release the A button (though it takes roughly 1/4th of a second for the explosion to happen once you do so) and low ending lag. The match travels about the distance of a fully charged Snake Up Smash at a fast speed before spiraling downwards at an even faster speed. The explosion created by this move is roughly twice the circumference of Din's Fire and deals 18% damage and good upwards knockback. No hitstun is dealt. In addition to the explosive effect, if a foe touches the match before it explodes, the fire spreads from the match to their bodies, setting them on red fire for 5 seconds, dealing 2% per second. When Mustang releases the A button under this circumstance, both the foe and the match will explode, dealing 18...23% damage and good knockback to the burning foe and 18% damage and good knockback to foes who come into contact with either explosion!
Note-
Unlike most smashes, Mustang is able to move while "charging" the smash. This allows him to have some self-defense while he waits to cause the explosion. He is unable to perform any action other than releasing the smash or walking however. His gloves will be exposed until the smash is released and the move ends.
The match will not be extinguished when it hits the floor, allowing it to work sort of like a mine.
This move is an effective anti-air projectile when used correctly. With proper timing, 45% damage can be dealt to struck foes (9% from burning and 18% from each explosion.) Sounds pretty painful, right. This move is certainly not without its downsides, though. Mustang (and more importantly, his gloves) is vunerable over the entire duration of the move, only able to move or release the smash. Against an experienced foe, Mustang will often be forced to detonate the match prematurely and pray that his gloves don't get hit before he can react.
Down Smash- EXPLOSION
Mustang faces the screen, claps his hands together (charging pose), and then swings his arms to his sides as if he were karate chopping, while snapping his fingers on both hands. This causes every single transmutation circle that belongs to Mustang to explode with fire.
The explosions caused by this move are each the size of the explosion caused by a Bob-Omb. All struck characters (friend, foe, or self) take 30...35% damage and great upwards knockback. This move has fairly high beginning lag and low ending lag, making it Roy's slowest-starting smash. The explosions disappear after a mere instant, so proper timing is required. No hitstun is dealt by the explosions. The foe does get roughly 1 frame of invinceabiilty after being hit by the first explosion. This keeps them from being dealt multiple hits (which would really reach rediculous damage numbers if the circles were placed just right).
This is Mustang's most unique and versatile smash. Draw the circles anywhere you want using your Side Special- the stage floor, the tops or bottoms of platforms, foes, even yourself! The only limit is that you must have something to draw them on! You cannot help but love this move!
Aerials
Neutral Aerial- Searing Flames
Mustang snaps his fingers (one hand) and flames burst from every direction around Mustang.
The flames reach roughly half a battlefield platform in circumference around Mustang. Struck foes suffer decent knockback and are set on fire for 3 seconds, taking 5% per second. This move has low beginning lag, nearly no duration, and low ending lag, making it a very fast move. The flames have very low priority, but Mustang only exposes one glove and for a very short time, making this, perhaps, Mustang's safest attack. No hitstun. The flames from this move are blue and are thus distinguished from other sources of burning.
This move is mainly used when other moves are too risky. It can deal decent damage (15% over 3 seconds), but additional uses of this move do not stack properly. Setting the foe on fire with this move while they are already on fire from this move will merely cause the duration to be renewed. Burning caused by other moves will stack with this, as the flames are different temperatures and colors.
Forward Aerial- Flamerang
Mustang cast one hand forwards as he snaps his fingers, sending out a large boomerang made out of orange fire.
The boomerang is roughly 3 times the size of Link's boomerang (with no wind effect, of course). It travels at a rather slow speed (3/4th the speed of Link's boomerang). It goes 3 Battlefield platform's distance before either hitting a foe or disappearing. Oddly, it will not return on it's own, but if it strikes a foe, it will pull the foe back to Mustang (or actually back to the spot where it was thrown from, as it will not factor in Mustang's current location, unlike the other boomerangs). Struck foes also take 12% damage. This move has low beginning lag and fairly low ending lag. No hitstun (though the foe is trapped inside the fire until it reaches it's destination). The Flamerang has a weird type of priority- if it collides with another projectile, the other projectile will go right through it and neither projectile will be affected.
This move is more than just another damage dealer. Though it is fast to start up, has great range, and deals decent damage, the flight speed of the boomerang is to slow for serious damage racking with it. It is most ideally used for it's effect of drawing foes towards Mustang's original location. This is a great set up for moves such as a Neutral Aerial. It is also a decent gimping tool when used properly.
Back Aerial- Fiery Crescent
Mustang turns toward the screen or the background (depending on which gloves are available), turns his head to look behind his original direction, and swings his arm upwards from roughly waist-level to above his head while snapping his fingers, creating a bright crescent moon shaped trail of yellow flames.
The flames reach about a swords-length in distance, and seem to have a basic slashing reach. There is a slight gap, about the size of a fist, between Mustang's hand and the fire. Struck foes take 15% and good upwards knockback. This move has low lag on either end. It has a short duration. It is further complimented by a slight lingering effect, much like that of Lucario's aura attacks. The flames have very low priority. No hitstun is dealt.
This move is almost as good for damage racking as the side tilt. It is a faster move than the aforementioned tilt, but sports less reach and less damage. This move has some juggling use as well as a source of vertical KO's (though Mustang has no lack of those). Definitely one of Mustang's more useful moves.
Up Aerial- Erupting... Burning...FINGER!!!
Mustang jumps upwards roughly the height of Roy's Up Special while snapping his fingers. A mighty multi-colored (red, orange, yellow, and some blue) flame appears at the tip of his index finger. He thrusts it upwards at the height of his jump.
Foes struck by this move take 19% and great upwards knockback. This move has a small hitbox (only the tip of Roy's finger at the end of his outstretched arm). Low lag on both ends, but the duration is rather lengthy, especially if it hits, as it will act much like a sweet-spotted knee of justice, stunning the struck foe and Mustang in place before dealing it's powerful knockback. Great priority.
This move contrasts heavily to many of Mustang's fire moves. It may have the power and some of the speed, but it has great priority and a bad hitbox. This is a great move for finishing off foes if you can land a successful hit. It is also a reasonable buff to Roy's recovery when used to grab the ledge, though Roy will fastfall for a brief time after using it, returning to his original height, so this has little benefit to your recovery if used repeatedly.
Down Aerial- Spiral of Flame
Roy faces the screen and casts both hands downwards snapping his fingers. This move looks a lot like Lucario's Final Smash, though it is reasonably different. He creates a flame that travels downwards at a rapid speed and forms repeated and predictable loops.
There are gaps between each loop of flames, with only one side to connect them. The loops are about a character size apart, making it possible for some characters to just avoid the move altogether. The flame travels until hitting the stage or leaving through the bottom line. Foes struck by the flames take 15% and are forced to follow the loop- either being dragged down to the stage or spiked to their doom. The move has medium lag on both ends. While it's duration is variable depending on Roy's distance from the stage/bottom line, the flame travels roughly the distance from Battlefield's top platform to the stage in 3/4 second. Mustang is forced to remain still the entire time, but he aerial stalls over the entire duration. He is, of course completely vunerable to attack. Rather than simply move, the flame spreads, so it the flame will form a complete pillar once the move ends. If Roy is attacked, the flame will stop spreading, oddly, and simply disappear. No hitstun is dealt by the flame. Projectiles can safely pass through.
This move is definitely not recommended for frequent use. It is a lot slower, more predictable, and riskier than Roy's other moves. While it does have an amazing reach, it's power is really not all that great. It's best application would probably be for "spiking" and/or gimping purposes.
Situationals
Ledge Attack- Fireball
Ah, the generic fireball.... what would a fire user be without it? Mustang jumps up from the ledge and very quickly snaps his fingers while casting his hand forward. A powerful orange fireball that looks more like a missile than that of Mario/Luigi's fireballs is sent out.
The fireball is roughly three to four times the size of Mario and Luigi's fireballs. It travels at a medium projectile speed (a bit faster than Wolf's laser) a distance of roughly half of Final Destination. Upon hitting it's target, the fireball explodes, dealing 5% damage and medium knockback to the first foe and setting all foes (including the struck foe) within a Battlefield Platform's width in circumference of that foe on orange fire for 3 seconds, dealing 3% per second to them. The fireball has a weird form of priority- other projectiles that hit it will go right through, leaving both projectiles unaffected. The beginning lag of this move is low and the ending lag is fairly low.
Being a situational move, this is far from Mustang's most reliable attack, but it is an effective move when available. Mustang players may want to consider using an offensive edge game once in a while just to spam the hell out of this projectile. This gets to be very predictable though, so it is not recommended to this often. The burning caused by this move is marked by orange flames and thus will stack with other sources of burning, but additional uses of this type of burning will only renew the duration.
Rising Attack- Aura of Flame
The sound of Mustang snapping his fingers is heard but his hands are still in his pockets. He jumps up, covered in flames much like the Nair.
The flames reach only a short distance from Roy's body. Foes struck by them take 10% and decent upwards knockback. This move has low lag on both ends. This move has a very short duration, as if it were almost instantaneous. Good priority. No hitstun. Roy's gloves are not exposed during this attack.
Being a situational move, this attack can't be used often/reliably, but it is rather effective and the only move Mustang has that is truly safe (does not expose his gloves at all). Not much really needs to be said about it.
"Z" Button
Grab- Seize
By default, Mustang simply grabs with his left hand. If he has no working right glove, however, he will grab with his right hand instead.
This grab has very average stats for a grab. It's nothing special at all. What is special, however, is the amount of variety Mustang has during his grab. He is able to use his Neutral and Side Specials as well as simple pummels and throws.
Neutral Special- Hawkeye
See Neutral Special earlier in the set. Now that the foe is grabbed, they are a sitting duck for a headshot.
Side Special- Mark of the Alchemist
See Side Special earlier in the set. Now that the foe is grabbed, Mustang can draw a significant portion of the transmutation circle on their bodies. He won't be able to draw the whole thing in one go, but it certainly helps to have some of it done.
Pummel- Pyromaniac
Mustang snaps the fingers of his free hand. It starts radiating yellow fire. He presses it to the foe's head and they are set on fire.
This throw has medium lag on both ends. Basically the foe is set on fire until they are thrown or escape the grab, taking 4% per second. This fire is distinguished by other sources of burning in that the flames are yellow. It stacks with other sources of burning, but a second usage of this source of burning will simply renew the duration.
This is one of the better grab attacks in the game, but it in no way helps keep the foe locked for a grab. It does, however deal good damage and combine well with the down throw.
Forward Throw- Mustang.. PAWNCH!
Mustang brings his hand back while snapping his fingers. Intense flame gathers around it. You know what happens from there.
This punch is very fast compared to it's cousins, the Falcon Punch and the Warlock Punch. It has nearly no beginning lag and medium ending lag.
It can be charged by pressing and holding A while pressing forwards as if you were performing a smash, the power of the charge being denoted by color (pale red, red, orange, yellow, blue, in order from weakest to strongest).
No Charge- Pale Red
Deals 5% and below average forwards knockback.
1/2 Second Charge- Red
Deals 10% and above average forwards knockback.
1 Second Charge- Orange
Deals 15% and good forwards knockback.
1 1/2 Second Charge- Yellow
Deals 20% and great forwards knockback.
2 Second Charge- Blue
Deals 25% and high forwards knockback.
The foe is set on fire in accordance to the color he is struck by, but this causes no additional harm to them. Instead, if other foes are struck by the thrown foe, they instantly take some knockback and damage equal to the damage of the punch that was used.
Naturally, you will not be able to get out a fully charged punch unless the foe is at a really high damage percentage.
Back Throw- You Have Insulted My Honor
Mustang snaps his fingers, coating his hand in multi-colored (red, yellow, orange, blue) fire and slaps his foe across the face using his free hand. They are sent behind him due to the way he swung his arm, as well as the amount of force he used.
This throw is very fast, having little lag on either end, but it is also one of Mustang's weakest throws. The foe is dealt 4% and medium backwards knockback.
Up Throw- Made You Look
Mustang snaps his fingers, the palm of his hand glowing red. He points down at the foe's feet (or whatever they have). The foe looks down. Mustang then uppercut slaps them.
This throw has low lag on both ends but a rather long duration (roughly 1/2 second). The struck foe is dealt 9% and good upwards knockback.
Down Throw- Shades of Flame
Mustang's presses his free hand on the foe's chest (this is absolutely awesome against females, is it not?) and uses the power of the fire already on them to deal damage to them. The foe collaspses to the floor if any fire was on them.
This throw has fairly low lag and a rather high duration with little ending lag. The damage of this throw is based on what colors of flame are currently burning on them. If the foe has multiple shades on them, the damage is additive.
No Flame- 0% damage and no collaspe
Red Flame- 4% damage
Orange Flame- 6% damage
Yellow Flame- 8% damage
Blue Flame- 10% damage
Note-
Even though the foe will be collasped to the ground for roughly a second, when they get up, they will have about a half-second of invinceability frames, making it impossible to chain grab.
It is very easy to atleast get the yellow flame (as it comes from Mustang's pummel), but the other flames may be difficult to maintain for the purpose of this throw. Definitey use a different throw unless you have multiple flames on the foe (and/or want to be perverted against chicks ).
Final Smash- Large Target
When used, every foe on the stage suddenly gains the size and power of Giga Bowser but retain normal vunerability, (though are just larger versions of themselves). WHAT THE ****!? Why would you even use this Final Smash.
Mustang will say "You idiots.... you've just made yourself/yourselves larger target(s)!"
Mustang becomes invinceable. You can now attack your now giant opponents. How could you possibly miss, right?
This Final Smash lasts 20 seconds.
Watch and be amused as the normal-sized Mustang destroys gigantic foes. This is even funnier when there are multiple foes and they try and kill each other, or don't have significant room to fight on smaller stages such as Battlefield.
Taunts
Up Taunt- Torch
Mustang says "Well, I guess I can't torch you all."
Side Taunt- Sleep
Mustang says "Let's just hurry up so I can sleep."
Down Taunt- Too Slow
Mustang says "Too slow". He snaps his fingers and an explosion occurs in the background in front of him. This can interestingly be used to hit foes who sidestepped in that location, dealing 10% and medium upwards knockback to them.
Loss Pose
Mustang starts wildly clapping his hands. Little does he know (or think to realize), he's creating sparks. An explosion happens under the feet of every loser, including himself, star KO'ing them and making them hit the camera after the victor finishes their pose.
Victory Poses
Up Pose- Miniskirts
Mustang says "When I become the fuhrer, all female officers will be required to wear... TINY MINISKIRTS!"
Side Taunt- Overdoing Things
Mustang says "I hope I didn't overdo it."
Down Taunt- I've Had Better
Hawkeye appears next to Mustang and says "How was your match?" Mustang replies with "I've had better."
Pros
Many of his attacks are fast, far-reaching and powerful.
F-Tilt is very effective at racking up damage.
No lack of KO moves.
Powerful (and hilarious) Final Smash.
Can trap the field with Transmutation Circles.
Can remove other player's transmutation circles and mines with his shovel.
Neutral B is a good projectile.
Effective recovery.
Can sometimes heal himself with Down Special.
Cons
Large target.
Light for his size.
Most moves have bad priority.
Reliant on his spark gloves, which can be destroyed.
Doesn't combo well.
Playstyle
Mustang has speed, power and reach. He also has some very unfortunate weaknesses such as bad priority and a reliance on destructable spark gloves.
Mustang players must be good at spacing. For this reason, Marth mainers also tend to be good at Mustang. Chances are, you will be using your tilts (especially Side and Up Tilts) very often. While powerful, your smashes are often not worth it compared to your tilts.
One tactic is to trap the stage with transmutation circles using your side special. You can trap allies, foes, the stage, minions, yourself... anything really, as long as it's solid. Once you have enough of these circles, your Down Smash suddenly becomes a very tempting option. Use this move for camping and edge-hogging. It can also be used to scare foes.... who would want to run right up to a Mustang who has a complete transmutation circle on him? He may just be crazy enough to "suicide bomb". This complements your spacing style, as it may help keep foes far enough from Mustang to where they can't punish him.
Advanced Mustang players will sometimes find that the best thing to do... is not attack!? Mustang's gloves are only exposed when he attacks/performs moves. For this reason, inexperienced Mustang players can easily be conquered by their opponent. Experienced Mustang players will usually play defensively until the foe is open and then punish them with a mighty side tilt. Despite having such a versatile set, this is a habit among most Mustang players, making him predictable and yet a force to be reckoned with.
To summarize this playstyle, the three most important tactics to playing Mustang are spacing, camping, and defensive play.
Opponents of Mustang should pick moving stages to eliminate Transmutation Circles (though they will re-appear if they haven't been blown up via Down Smash when the stage returns to the point they were set). To oppose Mustang, the foe must be able to stay close to Mustang. If Mustang is given space, he will begin to draw Transmutation Circles or unleash his best move- the side tilt- with little fear of being punished. If you can eliminate Mustang's gloves, pressure him for as long as possible. Without them, he is all but defenseless. Don't give him any opportunity to replace them.
Extras
Icon
The series icon of the FMA series is the transmutation circle.
Kirby Hat
Kirby gains Mustang's hair and a miniature version of his jacket. How awesome is that?
Another Kirby appears in the background with Hawkeye's hair and jacket. This allows Kirby to use Mustang's Neutral Special, Hawkeye.
Codec Conversation
-PUSH SELECT-
Snake: Octacon, who's this man I am fighting? Octacon: That's Lieutenant Colonel Mustang. Snake: Is he one of ours? Octacon: No. He is a member of the State Army of Shamballa, another world in which Alchemy replaces conventional science. I believe you have already fought numerous foes from that world. Remember the Elric Brothers and the Homonculi? Snake: . . .How many ****ing Fullmetal Alchemist characters are there!? Octacon: Don't be disappointed. Mustang is clearly the best Fullmetal Alchemist movesetset so far.
Sorry, Warlord. I couldn't resist.
Snake: What are these movesets of which you speak? Octacon: Umm... nevermind. *leaves the conversation* Snake: Sometimes I wonder what is wrong with that man....
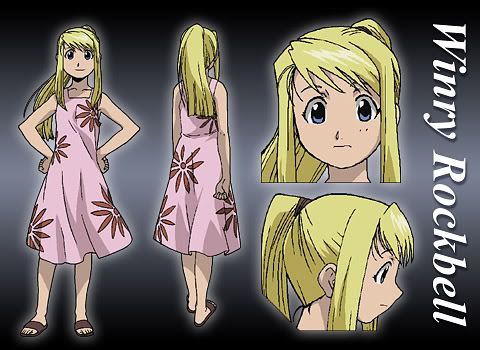
Assist Trophy - Winry
Winry, childhood friend and mechanic of the Elric brothers, emerges from the assist trophy. She throws wrenches in an arc similar to the Hammer Bro. assist trophy for similar damage and knockback, though if anybody comes close to her she’ll beat them over the head with the wrench to deal a solid 20% and large knockback.
If the summoner of the assist trophy is Ed, Al, or a robotic character such as Rob or a robot master, they can go over to Winry for her to stop attacking and start tuning them up. She heals Alphonse and the robotic characters at a rate of about 5% per second. For Edward, she heals the health of his automail blade rather then him directly. Winry lasts roughly 20 seconds.
Stage – Lab 5
The entire stage looks rather metallic, and there are mass red bubbling cauldrons in the background. Several prisoners can also be seen being held captive behind bars. No objects in the actual arena besides a transmutation circle at the center, and the stage is around the length of Final Destination. There are walls on the sides of the stage, but the ceiling is too high up, you still able to get star KOs. If you stay against the wall for long, spikes will come out before retracting back into the wall, doing 10% and average knockback. This prevents infinite chain grabbing. This stage is essentially just a less broken version of Shadow Moses at heart. . .
But what fun would that be? There are a few various events that can randomly happen on the stage.
Sometimes an explosion will occur in the background next to the prisoner's cell, busting it open and freeing them. The prisoners will then hastily run out from the background onto the stage and then off the foreground, coming up against the cameras before getting out of vision, causing mass blocking of the view. As they overlap with the stage, they do 15% and above average knockback if you don’t do a dodge.
The guardian of the lab, Slicer, will also occasionally come out onto the battlefield to join the fray. He’s a sturdy suit of armor that functions as an even slower even more powerful version of Ike. While he can’t use items, he’s insanely heavy, like as heavy as Bowser with a metal box, thus he can’t be KOd by conventional means. However, once he takes 30 stamina worth of damage, his helmet will be knocked off. Slicer’s little brother will still continue to control the suit of armor and fight on, but after taking another 30 stamina worth of damage will crumble to dust. However; once his helmet is knocked off, it can be used as a throwing item, and Slicer can put it back on to reset his stamina back to the full 60, so be careful. While Slicer is powerful, he’s so insanely slow that he’ll only really affect anything in a FFA where he can actually hit something.
The –other- guardian of the lab, Barry the Chopper, will also occasionally come out onto the battlefield. He’ll leap in from the background doing a downward slash for 20% and spiking downwards, then his blades will get stuck in the ground, leaving him vulnerable. He’ll then go into the background again before coming out again in another random period 10-15 seconds later. Barry has 40 stamina you must take out before the living suit of armor will crumble to pieces.
The stage hazard who has the most notable effect on the battle is Tucker. He’ll follow a player’s horizontal position while in the background for 5 seconds, then grab them. Tucker cannot jump, so this is the easiest way to avoid him. If he –does- grab you, however, he’ll pull you over to the transmutation circle and cause a massive explosion double the size of Bowser for 30% and huge knockback, creating a cheap knock off of the philosopher’s stone. Tucker will take it and run off into the background with it. You can escape Tucker’s grab quite easily by button mashing, but at high percentages it becomes hard to escape. Still, it’s not terribly hard to just avoid him in the first place.
SSE Role
Before the level where you run away from the Pig King Statue as Lucas, PIKACHU and POKEMON TRAINER are seen together, Pikachu mounted on the trainer’s shoulder. They’re walking through a forest together. A Metapod falls down from the trees and wiggles back and forth. The trainer takes out his Pokedex to inspect the Metapod to see if it’s worth catching, then rolls his eyes and sends out Charizard to dispose of it with a fire blast for some quick experience points. The screen fades out then slowly fades back in for the Pokemon Trainer to look tired. He looks at his pokedex again, it showing data on Jigglypuff with a blinking mark over the trainer’s location, this apparently being where they’re located. The Pokemon Trainer lets Pikachu look at the pokedex and points at Jigglypuff’s picture for the electric rodent to nod and let out a “Pika!”. You play through a level as the two characters and rather then subspace enemies there are various wild bug Pokemon for the enemies. You have access to Ivysaur and Charizard alongside Squirtle.
At the end of this level, the trainer comes up into a clearing to see GLUTTONY chasing JIGGLYPUFF around in circles. Gluttony is drooling in mass, going very fast, Jigglypuff barely able to keep fleeing. Pikachu’s cheeks crackle with electricity upon seeing this and the trainer sends Ivysaur out into battle. You play as the trainer, Pikachu, and Jigglypuff all against Gluttony. Gluttony has maxxed hunger for the entire duration of the battle to keep the three on one from being a cake walk.
Upon defeating Gluttony, he’s turned into a trophy. Jigglypuff angrily goes up with his her marker and doodles over Gluttony’s face, then happily goes up to the trainer and nods in thanks. Before any pleasantries can be exchanged, though, LUST comes into the clearing with an army of subspace creatures. Lust extends out a finger to touch the base of Gluttony’s trophy to revive him, then motions out her other arm to have the army attack. Gluttony leads the charge as the trainer and his pokemon have intimidated looks on their faces. The trainer lets out Charizard and hops on top of him along with Pikachu and Jigglypuff, flying up and away from the army. However, Lust extends out her fingers and wraps them around Charizard, bringing him down to the ground. The trainer, Pikachu, and Jigglypuff hop off Charizard and run frantically as Gluttony drools over Charizard’s tail, putting out the flame on it and turning him into a trophy, Lust and the subspace army still on their tail. Lust extends out her fingers to stab Pikachu and Jigglypuff as she chases them, turning them into trophies which her minions catch. Lust goes to stab the trainer, but he nimbly dodges. Lust still manages to snag Ivysaur’s pokeball, however. The trainer comes up to a cliff, cornered. He turns around to look at Lust, then reluctantly jumps off. Thankfully he lands in a pool of water. Lust looks over the cliff to see if the trainer is still alive to see nothing, then goes to leave. The camera zooms into the water to reveal the trainer holding onto Squirtle tightly under the water, then going up for air the moment Lust leaves. The trainer and Squirtle head in the opposite direction of Gluttony and Lust hastily, the trainer being seen next when he encounters Lucas.
After the first level with Pokemon Trainer and Lucas, we are shown Lust, Gluttony and their subspace forces hauling along the trophies of Charizard, Jigglypuff, and Pikachu. One of the primids is carrying Ivysaur’s pokeball. The pokeball. Suddenly, Ivysaur’s pokeball starts wiggling around violently, and Ivysaur escapes from the pokeball. He uses vine whip to touch the trophy bases of Charizard and Jigglypuff. Charizard snorts at Gluttony and smacks his fists together, ready to fight, but Ivysaur carries him away by wrapping his vines around Charizard, carrying him away, this not being a fight they can win. Jigglypuff runs off along with them, but gives a regretful look back at Pikachu’s trophy. . .Lust gives a dismissive motion to Gluttony and some of her forces to go after them while the rest of them continue on their way. You play as Jigglypuff, Ivysaur, and Charizard for a level, the former two not having the trainer around with his annoying voice to bug you. Enemies will constantly come at you from the rear in this level, so you’re encouraged to keep moving.
At the end of the level, you’re shown a cutscene of Charizard leaping off over a cliff as Jigglypuff and Ivysaur hop onto his back and ride on him. Due to Lust not being with the group chasing them, she can’t bring Charizard down like before. However, this is far from over. Gluttony laughs maniacally and takes out a trophy gun and starts firing it rapidly at Charizard, who does graceful aerial maneuvers to dodge. After a while, Charizard gets too far away, much to Gluttony’s dismay, him going back to head to Lust and putting away the trophy gun. He hastily runs back to Lust at a frantic pace and points out in the direction they escaped for Lust to facepalm and motion her troops to come along with her. Lust sees how far off the Pokemon are over the water and sighs. . .How will they chase after them now? Suddenly, WOLF comes up in his Wolfen and gives a thumb up to Lust, motioning her to come over for a ride. Lust looks at the disturbing lack of space in the tiny one man plane and raises an eyebrow for Wolf to spread apart his legs and motion to his lap, smirking. . .He wants Lust to sit his lap?!? Lust grits her teeth and extends out her fingers to get a grip around Wolf’s neck, choking him briefly before releasing him. Lust hops on top of Wolf’s ship, Gluttony following her lead (Carrying Pikachu’s trophy), then she motions off to Charizard. Wolf sighs and flies in the direction they went, them being long off camera by now. The camera zooms in to a deserted island in the general direction Charizard flew off to, it more likely then not being where he landed. Lust and Gluttony hop off the ship, and Lust takes Pikachu’s trophy from Gluttony. Lust hands the trophy to Wolf and points to the subspace bomb factory in the sky for Wolf to nod, taking the trophy and flying off towards it. Gluttony and Lust proceed to go further into this uncharted island. . .
We’re shown a cutscene inside a base of some sort, with ROY MUSTANG at a desk, filling out mountains of paper work. After watching this for a brief bit, King Bradley, comes into Mustang’s office for Mustang to hastily get up and salute him. . .Such a suck up. Anything to one day become the fuhrer. . .Bradley gives a dismissive motion for Mustang to go at ease, then the king takes out a photo of Ganondorf and Bowser to show to Mustang. Bradley runs his finger across his neck, then throws the picture into the trash can. Mustang nods to the king for him to leave, Mustang sinking back into his chair and sighing. How is he supposed to get to them, much less capture them, with such little warning? Mustang sighs. . .He presses a button nearby for SAMUS and SNAKE to come into the room. Mustang brings up a pictures of the subspace bomb factory and the Halberd on his computer and points to it for the two of them to nod and head out after taking some papers for mission briefings and what not. Next, EDWARD and ALPHONSE come into the room. The camera shows Mustang’s point of view from behind the paperwork, only able to see Al due to Ed being so short. Mustang gets a thought bubble with Ed and a “?” for Ed to jump up above the paper work and throw a little tantrum, causing the paper work to fly everywhere. Alphonse laughs while Mustang facepalms. . .Mustang just brings up a picture on his computer of the island Charizard, Ivysaur, and Jigglypuff went off to with a photo of Wrath next to it. Ed gets out of his tantrum for it to just start up once more upon seeing the little gremlin Homunculi. Mustang drums his fingers and points outside to a boat for Al to nod, dragging his brother out with him. . .We cut to Bradley who is seen secretly watching Ed and Al leave Mustang’s office. He shakes his head and paces back to his quarters, where SLOTH, his secretary, is waiting for him. Bradley motions off to the boat for Sloth to smirk and nod, turning into a mass of water as she goes out through a vent. . .
Another cutscene opens up showing Ed and Al aboard the boat, it sailing off for the island. Ed looks rather bored as he slumps up against the wall while Al looks out to see. Everything seems to be going smoothly. . .Until a crash on the ship occurs. Ed and Al go out to look at what caused it for it to be a bunch of pathetic pirates in a poorly made old fashioned ship. TOON LINK stands at the helm of this ship, leading the raid against them. Perhaps he’s short on Rupees? Perhaps he thought the ship was one of Ganon’s? Who knows. They put up a plank and start running up onto the much more modern ship Ed and Al are on, but Al casually blocks the way, them getting knocked overboard as they try to pass his massive armor. Ed runs to go down onto the small pirate ship, Al close behind. Some army men from the modern ship go to help the Elric brothers, but the scrawny plank collapses under Alphonse’s large weight, preventing them from coming along. You play a level on Toon Link’s ship (Which is enlarged so as to be a level), various toon pirates being the enemies.
After this level, Toon Link is seen running up to Ed to slash him across the face, but Ed casually transmutes a wooden spike up out of the ship to send Toon Link flying back. Toon Link prepares to run at Ed again, but he is flung away by the ever annoying launcher from the Pirate Ship stage, flying off and landing on Ed and Al’s ship. Toon Link lands deep within the ship to find that it’s sinking and the men panicking to try to prevent it from doing so. A level starts up where you play as the vastly superior Link clone, getting out of the ship before it sinks, there being a time limit. The enemies are various military soldiers in the FMA style.
After getting out of the ship, Toon Link finds the source that’s causing the ship to sink to be Sloth, as she turns one of her arms into water and shoves it down a man’s throat to drown him. She turns to Toon Link and chuckles, petting him like a child. Toon Link, disgusted with this, takes a slash at her, but Sloth picks him up with one of her watery arms and flings him overboard. Ed and Al watch from the puny pirate ship, unable to get back up onto their main ship. Al tries to steer the pathetic ship into the main ship to attack it, but this just causes it to crash due to it already being damaged. It sinks into the sea. Sloth chuckles and jumps into the water, turning her body fully into liquid and rocketing off towards the island at amazing speeds. We then get a shot of Ed, Al, and Toon Link sinking close together, watching Sloth swim off. Al goes to shake Toon Link’s hand, but Ed and Toon Link just swim off, not trying to go for any pleasantries. Al shakes his head, then a underwater level starts, you playing as all three characters. The enemies are various Water Pokemon and aquatic Mario/Kirby/Zelda/DK enemies. Underwater, you have infinite mid air jumps, but your attacks are slightly slower.
Before continuing with Ed and Al, we cut back to the base with Mustang and Bradley. Bradley is seen in his room, pacing back and forth. . .Suddenly, an image comes up on his computer screen showing Wario coming in through the sewers with an army of subspace forces. Bradley clenches his fist and chuckles. . .Finally he can ditch his little cover up here and move on to further greatness with Master Hand. He nods to Wario, then quickly cuts the screen as Hughes comes in. Hughes raises an eyebrow, but Bradley hastily does a dismissive motion to Hughes. Hughes gets a thought bubble of Sloth, pointing to her empty seat, for Bradley to shrug and glare at Hughes angrily. Hughes reluctantly leaves. . .Bradley sighs. He can’t keep Hughes around any longer. He presses a button on his desk for ENVY to come in through an alternate entrance. Bradley runs his finger across his neck for Envy to nod and chuckle. . .He turns into a female officer and heads out into the hallway after Hughes. Envy takes out a gun and points it at Hughes. We’re shown a mug shot of Hughes as he turns around, then the camera instantly blacks out as a gun shot is heard. The camera comes back in to reveal that a certain box has been watching this entire incident. . .Looks like Snake didn’t leave for the Halberd just yet. He waits for Envy to leave, then hastily gets rid of his cover and runs for Mustang’s office. Upon getting there, he finds Mustang already fighting against a bunch of subspace forces, Wario commanding them. Snake takes out a grenade, then you play as him and Mustang in a standard SSE enemy battle. Wario is seen in the background commanding them, regularly using his taunts on you.
Upon defeating the enemies, Wario’s jaw drops. His army has ALREADY been defeated?!? Guess the troops he plowed down along the way already took down a sizable amount of them. Mustang snaps his fingers to cause Wario’s buttocks to light on fire, and he hastily runs around the corner to flee. Snake and Mustang go to chase him, but when they get around the bend Wario is on his motorcycle, fleeing quickly. Snake takes out his rocket launcher and Mustang prepares a powerful attack, but before anything further can happen, Bradley steps out from his office, no longer in his military uniform, blocking their way. He takes off his eye patch to show the symbol of the Homunculi, revealing himself as Pride. Master Hand would never accept it if Wario didn’t make it out alive. Pride draws his sword and slashes forward at the shocked Mustang for a boss battle to start.
Boss: Pride
Play as: Roy Mustang, Snake
Attacks at 100%
Ultimate Eye- Pride reaches up and places his hand on his forehead. Anyone who attacks Pride while he’s in this stance has their attack blocked and countered with a swift kick. Pride’s counter-attack deals 1.2 times the damage and knockback the attack would’ve dealt. Look for the obvious tell and this attack is easy enough to prevent.
Piercing Thrust- Pride lunges forward a fair distance (two battlefield platforms forward) and thrusts his sword outward. This attack is incredibly fast and can easily catch you off guard. Fortunately the thrust is high enough that it can be ducked under. Either duck this or spot dodge it. Deals 14% and medium knockback.
Casual Slice- Pride casually walks forward whilst swinging his sword from left to right. A fairly predictable attack considering he move so slowly but if he does it near you it can wrack up some damage quickly as it’s possible to get locked in the attack. 6% and very low knockback.
Attacks at 50%
Psycho Crusher- A very close range attack, Pride thrusts his arms out and grabs the opponent by the throat. He then lifts them off the ground and begins to squeeze. Wriggling the control stick is the only way to break free of this attack and if the control stick is NOT wriggled, the player will lose a stock instantly. The player will take continuous damage until they break free of Pride’s grasp, receiving 2% every second and a half that passes.
Raging Inferno- The arena you’re fighting in slowly becomes engulfed in flames; as the battle rages on, the flames grow larger. The flames deal the same amount of damage and knockback as the flames on the Pictochat stage so it’s best to try and wrap up the fight quickly.
Attacks at 25%
Body Reform- Pride’s body begins to quake slightly as his wounds begin to heal. It takes him a total of 4 seconds to heal and if the move is successful, he’ll recover his health up to the 50% mark. If attacked at all during the process of this attack, Pride will stagger backwards and be vulnerable to attack
Attacks at 10%
Neck Breaker- A variant of the Psycho Crusher attack; instead of slowly crushing the player, Pride crushes the character’s neck instantly costing them a stock. Fortunately this attack is slightly slower than its other form due to Pride being worn down.
Attacks at 5%
End of the Line- Pride rushes forward as quickly as in his Piercing Thrust attack. If he grabs an opponent, he tosses them into the air and impales them on his sword. He then tosses the opponent’s limp body away and laughs. This attack is rather fast, covers the entire arena length and instantly kills any opponent he grabs. Fortunately, it can be jumped over and, once leapt over, leaves Pride in a vulnerable state where you can easily reduce his HP to zero.
After defeating Pride, Mustang triumphantly stands over him. Looks like his long campaign to become the fuhrer has finally payed off. However; Mustang’s brief moment is cut off when Snake motions to the corpse of Hughes. Mustang clenches his fist and lets out an angry cry, then motions for Snake to leave, him not being seen again until he normally is on the Halberd.
The next cutscene shows Ed, Toon Link, and Al washing up on the island the Elrics were assigned to go to, albeit at another spot on it. Alphonse hastily gets up and starts getting the water off him, thankful that none got on his blood seal. Ed does a quick transmutation on Al to remove the rust his armor acquired and gives his brother a thumbs up for Al to nod in thanks. Al gets a thought bubble showing Wrath, the reason they were supposed to come here in the first place, and points to it for Ed to nod to him. Meanwhile, Toon Link has already run off, long gone, the Elric Brothers scurrying off after him to catch up. You place another level as the two alchemists, the enemies being more various Wild Pokemon due to this island being uninhabited. The Pokemon are considerably stronger than the bug ones from the forest level with Pikachu and the Trainer.
Before continuing the new sub section with the FullMetal Alchemist characters, you play the first Zero Suit Samus/Pikachu level early. However, in the cutscene where Zero Suit Samus normally finds Pikachu being forced to power a machine, Samus spies into the room rather then barging in. We see Wolf placing Pikachu’s trophy into the machine, then reviving the rodent and slamming the door to the machine shut. Wolf chuckles as Pikachu is tortured as a power source for the camera to cut to Samus’ face, letting out a slight gasp. She comes into the room and primes her pistol for Wolf to just let out a chuckle and gets into his feral fighting stance. You brawl Wolf as ZSS. Upon defeating him, Samus frees Pikachu from the machine and then mass Robs come into the room to attack Samus as normal, but they also revive Wolf from his trophy status. Wolf gives Samus a smack to the face, then backflips out over the Robs and out the exit of the room, the door closing behind him. Samus scowls as she gets into a fighting pose alongside Pikachu, and the level plays normally.
The next cutscene opens with Charizard landing on the island and looking around. Ivysaur motions forward with his vines and the other characters follow. Another level in the same design as the last one with Ed, Al, and Toon Link takes place with Ivysaur, Charizard, and Jigglypuff.
At the end of this level, Toon Link, Ed and Al are seen walking by, the Pokemon watching from some foliage. Jigglypuff sees Al in his huge armor and hides behind Charizard. Charizard gets angered by this and roars at the warrior who caused Jigglypuff to cower in fear, coming out into view, Ivysaur hastily coming out alongside him. Jigglypuff stays in hiding while Ed is slightly taken aback by the dragon. Ed goes up to attack, but Al holds him back, not fond of hurting animals. Ed and Al are left with no choice, however, when Toon Link simply leaps out and slashes Charizard across the face, a battle starting up. You play as Ed, Al, and Toon Link against the two PT Pokemon and Jigglypuff.
After the battle, Toon Link, Ed and Al continue on their way, Al shaking his head at the beasts turned into trophies. After they’re gone, Jigglypuff comes out and revives Charizard and Ivysaur. Charizard goes to go after the alchemists, but Jigglypuff and Ivysaur hold him back. Charizard sighs and allows Ivysaur and Jigglypuff to mount on his back once again, flying off into the distance off the island. The camera cuts back to Ed, Al and Toon Link walking through the island, and they suddenly hear some childish laughing. They turn to the laughing, but nobody’s there. They run off after it. . .The camera shows a mug-shot of Wrath, who is in hiding. You play another level as Ed, Al and Toon Link that loops around in mass in a maze like fashion, you having to catch Wrath. You’ll rarely if ever actually see him on camera, and if you do he’ll probably be exiting the door of the room you come into. The only way to catch him is to corner him into a “room” without an exit besides the way he came in.
The next cutscene shows Ed grabbing WRATH as he tries to flee, but Wrath suddenly smacks him away with impressive force. This pisses Ed of and he starts fighting Wrath, Alphonse sighing as he reluctantly goes to help his brother. After a bit of this, Sloth reveals herself, leaping out in front of Wrath and taking a hit for him, Wrath excitedly yelling out “Mommy!” at the sight of her. Ed raises an eyebrow at this, but Sloth just lets out a smirk and turns her arm into water, swinging it forward at him. You have three characters (And thus three stocks) against Sloth and Wrath, but they’re both out at once, ganging up on you.
Wrath and Sloth fall to the ground, turned into trophies. Al looks down at the trophy of Sloth regretfully. . .She looks so much like their own mother. Al reaches down to touch the base of the trophy, but Ed smacks his hand away. There’s no way that monster could be their mother! Suddenly, Gluttony and Lust come out into view with a sizable amount of subspace forces surrounding the clearing Sloth was just fought in. Lust extends out a finger to revive Sloth and Wrath, touching their trophy bases, and the army proceed to attack the Elric brothers from all angles alongside the three Homunculi. Toon Link and the Elric brothers put up a decent fight, but ultimately get turned into trophies. Wolf comes down in his Wolfen, back from having delivered Pikachu to the Subspace Bomb Factory. Wrath, Gluttony and Lust hop on top of the small ship, Gluttony and Wrath carrying the trophies of Ed, Al, and Toon Link, but when Sloth goes to get in Wolf motions down to his lap again, making room for her. . .He doesn’t know when to quit. Sloth turns her arm into a watery substance and smacks him, then gets on top of the Wolfen alongside Wrath. Wolf scowls and flies off for the Subspace Bomb Factory.
Before anything else happens, we’re shown a brief cutscene of Charizard flying with Ivysaur and Jigglypuff. He suddenly gets swarmed by those bird enemies that can be picked up as weapons when they impale their beaks into the ground and is forced to do some barrel rolls to avoid them. . .However, this causes Ivysaur and Jigglypuff to fall off the beast’s back, falling down into the ruins and turning into trophies. Ivysaur and Charizard aren’t seen again until they normally are in the SSE, and Jigglypuff is found alongside Ivysaur.
The cutscene where Kirby runs off and leaves the princess he saved from Petey and Piranha and Bowser turns her into a trophy, then makes a shadow version of her plays out a good deal differently. Instead of Kirby simply running off, Envy appears and smacks him away, causing him to fly off into the distance where he’s not seen until his next cutscene. The princess sees this and goes to run frantically, but Bowser appears and grabs the princess from behind. Bowser throws the princess to the ground and gets in the pose from his dthrow, but Envy comes up in front of Bowser, shaking his head and wagging his finger. Master Hand would never accept this! Bowser sighs and simply smacks the princess unconscious, turning her into a trophy. Envy then transforms into the princess and lets out a chuckle at Bowser, who gives him a thumbs up. Bowser gets into his Koopa Klown Car to take the princess’ trophy to the Halberd and the cutscene ends.
In the next cutscene, Envy then attacks the heroes as the princess normally did due to being in her form, the cutscenes looking the same with the exception of Envy not having the shadow energies radiating off him like the shadow princess. The battle against the princess is also made somewhat harder, as after defeating Envy while he’s in the form of the princess you’ll have to battle him as his true self, him having two stocks.
After defeating Envy, he’s turned into a trophy, but still in the form of the princess so the cutscene remains unchanged. After Mario’s/Link’s misunderstanding, Dedede whisks by in his trophy cart and picks up Envy’s trophy, thinking he’s the real princess. Kirby then comes by and frees the trophies of the character who lost the previous battle along with Envy, also thinking he’s the princess. Mario/Link help Envy up depending on which princess he is. The characters who battled against Envy and know his true identity glare at him, but he just smiles and laughs, hiding behind Mario/Link. Mario and Pit/Link and Yoshi see that the hero is far from willing to let them attack Envy, and just head off in the opposite direction. Kirby heads off after Dedede, motioning Envy to follow, and he hastily heads off after him. The princess’ lover sighs and chases after him, while Pit/Yoshi follow the hero with little thought. You play as Envy in the form of the princess in the levels where you chase after Dedede now as opposed to Link and Yoshi/Mario and Pit.
After playing the first of the two cave levels with Mario/Link’s party, there’s an interruption as we cut back to Mustang, who is located outside the Subspace Bomb Factory with his men, prepared to launch an attack. Mustang motions his forces to move in, snapping his fingers to hasten them up, but this accidentally causes a flame to materalize and burn off a random soldier’s hair, him running around frantically. Mustang facepalms and puts the fire out, then the men run inside. Mustang takes a different route then his men inside, preferring to go it alone, hence there are no soldiers to help you in the level. You play a fairly standard subspace bomb factory level with Mustang, but in the background you can sometimes see your men helping you out.
After this level, Mustang is seen entering the room the Ancient Minister is found in when he reveals his identity. His men are already inside of here fighting off the Robs, but there are far too many, them quickly subdueing and KOing Mustang’s army. Mustang snaps his fingers to burn off the Ancient Minister’s robes to attempt to reveal his identity, but the AM hastily runs out of sight before we can see anything of him. Mustang goes to run after him, but all the doors slam shut and a hologram of Ganondorf appears and laughs as several Darknuts come into the room through Ganon’s dark portals. You play a battle as Mustang against them, then another brief cutscene plays where yet more Darknuts come out and overwhelm Mustang.
In the cutscene where Mario’s/Link’s party chase after Bowser, he is carrying Luigi’s trophy as he flees rather then that of the princess. However, Mario’s/Link’s party catch up to Bowser before he gets away. Kirby goes to smack Bowser with his hammer, but all of a sudden Envy reveals his true colors as he does a swift kick at Kirby to knock him away from Bowser. The princess’ lover stares at Envy in shock for him to smack him across the face, then turn into his true form. Bowser hops off the cliff and Envy runs after him to follow, and they both leave in the Koopa Klown Kar together, heading off to the Halberd. Mario/Link’s party isn’t seen again until their final level where they battle against mass subspace enemies, them reuniting with Link and Yoshi/Mario and Pit which lengthens that cutscene slightly.
Before the Snake/Meta Knight/Lucario level, we are shown Envy and Bowser in the room with the princesses in the cages, Bowser carrying Luigi’s trophy. Envy transforms into Mario, and Bowser nods at him. Bowser proceeds to go out of sight as Envy opens the cages of Peach and Zelda, reviving them. They look excited to see Mario. . .But not so much when he attacks them. You play as Envy again, though with Mario’s moveset rather than his own, you still not getting to unlock him yet.
After assaulting the princesses, the battle is seen raging on rather than the princesses being turned into trophies in the cutscenes, although it’s not really shown as much of a battle, as Envy is owning the princesses considerably. Bowser creeps out behind Luigi’s trophy and touches it from the back, then quickly goes back into hiding before Luigi notices him. Luigi stares in horror at his brother attacking the princesses. He goes up to Envy and frantically talks in gibberish, but Envy knocks him down with an fsmash. Luigi is angered at his brother. . .What the heck is he doing? Now is finally his time to take the spotlight! You play as Luigi in a battle against Mario/Envy.
The battle is still going between the “Mario Bros”, you getting a decently cool fight scene for Luigi’s vengeance that I won’t bother to detail. However; before either brother can finish the other, Bowser intervenes and leaps out, smacking Envy down with an fair and turning him into a trophy. Bowser extends out a hand to Luigi. . .Luigi looks very reluctant to shake, hesitating in mass. In the background behind Luigi we see a primid come over and revive Envy, who turns back into his own form briefly before turning into Peach (Albeit now looking dark and evil, in her Shadow Queen form from Paper Mario 2). The primid presses a button to close a door to block off the real Peach and Zelda, getting them out of Luigi’s sight. This all happens very quickly, Luigi being completely unaware. Envy comes over to Bowser’s side and gives Luigi a kiss on the nose which of course gets Luigi to shake Bowser’s hand (After the shock of the kiss, of course.). Bowser gives a hearty evil laugh and the cutscene ends. . .Luigi has been successfully manipulated.
Snake/Meta Knight/Lucario’s level now happens as normal, but instead of finding the princesses at the end, they bump into Envy, Luigi, and Bowser. Luigi is in his Mr. L costume, Envy finishing the costume up by putting on his mask for him as they arrive. Bowser motions Luigi and Envy out to attack, and you fight the pair of them, Envy still in Peach’s form.
After Luigi and Envy are turned into trophies, Bowser takes out a trophy gun and starts firing at Meta Knight’s party in mass. They are forced to flee the area, and Bowser goes over to revive Luigi and Envy’s trophies. They’re still in the general room where Peach and Zelda were normally fought. . .And Luigi finally realizes he hasn’t seen anything of Zelda since the Mario incident, getting a thought bubble of her. He points up to the thought bubble and speaks gibberish to Bowser for him to hastily pull Envy over, who is still in Peach’s form. Luigi shakes his head and points up to the thought bubble of Zelda again for Bowser to slash the thought bubble into pieces. Luigi does his down taunt, but Envy goes over and kisses him on the nose again, which causes Luigi to stop thinking of the other woman. Bowser and Envy go to leave, Bowser motioning Luigi to come along, but he holds up his finger as if to say “Just a sec”. . .Bowser shrugs and leaves with Envy, Luigi waiting for them to leave. . .He goes over to the controls of the room and opens up the door out of curiosity to find Zelda and the real Peach. Was he just faking his allegiance to Bowser all along? Who knows. He motions for the princesses to come along with him, and you play the normal level you do with the princess pair where you escape the Halberd, only now with Luigi as an additional character.
The remainder of the Halberd plays out as normal, only now with Luigi added in the Duon boss fight. In the cutscene when Duon is revealed though, Bowser and Envy (Envy back in his normal form) are seen watching in disgust due to Luigi (Yes, he’s playable for that boss) being alongside the others. Upon being defeated, both are shocked, and they hastily hop off in Bowser’s clown car.
After this, we get another entirely new section, where we see Bowser and Envy riding in the Koopa Klown Kar. The Klown Kar goes to land down on the ground in a secluded area a good ways off from where the rest of the action is taking place. Bowser and Envy gets out of the transportation vehicle, then Bowser snaps his fingers to cause a portion of the ground to open up to reveal a mechanical base inside. Bowser and Envy hop inside, then it starts closing back behind them as if nothing happened. Here we see SONIC look at the base closing back up, and he hastily runs inside just before it closes with his insane speed. Bowser and Envy turn around and see Sonic for Bowser to let out a loud roar, summoning subspace creatures to attack Sonic. Bowser and Envy flee, not having time to waste, then you play a level in this underground base as Sonic.
After the level, we see GREED being held in a cell. He looks bored as all hell, but suddenly Bowser and Envy come up to his cell. Greed grits his teeth, pissed at seeing the ones holding him here, but Envy gives a dismissive motion and chuckles. Envy unlocks the cell and enters it, extending out a hand to help Greed up. Greed smacks Envy's hand away, but Bowser comes in behind Envy and takes out a bag of cash. Greed's eyes turn into dollar signs as he happily takes the bag of cash. Envy extends his hand out to Greed to shake. . .But Greed realizes the fatal error of Bowser and Envy. He hastily runs out of the cell while Bowser and Envy are still in it, then slams the cell shut before they can leave, locking them in. Bowser glares at Envy angrily for trusting Greed for him to just shrug. Greed runs off hastily, chuckling. Some subspace enemies come to the prison door to let out Bowser and Envy, Bowser motionining off to where Greed went and letting out an angry roar. You play another level in this base as Greed.
Greed keeps heading for the exit, ignoring all the enemies that attack him along the way, them not phasing him in the slightest. He's the ultimate shield, remember? Greed sees Sonic getting beat up by a considerable amount of Subspace foes. Greed lets out a reluctant sigh, but then goes over to the Hedgehog's aid, coming down on the enemies with a powerful drop kick. Greed extends out his hand to Sonic and shakes it, then they proceed along together through the base. The two of them see a way out of the base, but it's closing, and fast. Sonic makes it out easily, but it becomes clear that Greed isn't going to make it. Sonic sees this and reluctantly goes back into the base to help Greed, who just got attacked by another swarm of enemies. You play a battle level as Sonic and Greed. After defeating the enemies, a brief cutscene shows Greed smashing down the door, then the pair leave.
Before the level where DK, Diddy, Captain Falcon, and Olimar invade the subspace bomb factory, we’re shown a cutscene of, Lust, Sloth, Wolf, Gluttony, and Wrath (The later two whom are carrying the trophies of Ed, Al, and Toon Link) entering it, meeting up with the Ancient Minister. The Ancient Minister salutes his superiors for Sloth to give a dismissive motion to the Ancient Minister, allowing him to be at ease. In the background, Wolf can be seen turning around and leaving, going back into his Wolfen, being rather annoyed. He doesn’t particularly like being reduced to a delivery boy. . .Lust points to the Elric brothers for the Ancient Minister to nod and motion for them to come along with him. He opens up a secret room where a massive transmutation circle is ready along with tons of Robs moving about mess chemicals. Mustang is also seen here, along with several of his men, right in the middle of the Transmutation circle. Lust pats the Ancient Minister on the head for him to look down at the ground regretfully. . .Lust does a dismissive motion to Gluttony for him to let down the three trophies with a breath of relief. Lust and Sloth revive the trophies of the two Elric Brothers, and Lust points towards the Transmutation Circle with a thought bubble of the Philosopher’s Stone. . .She wants him to transmute Mustang and his men into it. Ed goes to lash out at her, but Sloth wraps her watery arms around him to hold him back. Lust chuckles and points to Al, who is being held by Gluttony. Lust snaps her fingers for Gluttony to take a bite out of Al, him letting out a cry of pain. Ed frantically tries to get out from Sloth’s grasp, but to no avail. Wrath comes up in front of Ed while he’s being held, sticking his tounge out at him and taunting him, infuriating him all the more. Lust points at the transmutation circle once again for Ed to reluctantly gets on his knees and prepare to do the transmutation. . .The Ancient Minister, unable to bare watching this slaughter, hastily leaves the room, going back out to the main room, closing off the doors inside. The DK/Diddy/Captain Falcon/Olimar level now plays as normal.
In the cutscene where the Ancient Minister normally reveals his identity as ROB, everything for the most part goes the same way, but Ganondorf simply forces the Robs to blow themselves up rather then set off subspace bombs. After the Ancient Minister reveals his identity and joins forces with the characters, rather then fleeing out, he hastily opens up the door where Ed and Al are being held and motions the characters down to attack. There are all the more Subspace forces inside of here, but they easily manage to free Mustang, Ed, and Al, and they also revive Toon Link’s trophy. Lust, Sloth, and Gluttony hastily go to flee the factory, heading back out into the main room. Sloth takes out a remote control and presses it for the Robs to start taking out the subspace bombs, and they escape, a door closing behind them and blocking the characters from chasing them. You play the normal escape level here, only now with the additional characters of Toon Link, Ed, Al, and Mustang. You also go on to use these characters in the fight against Meta Ridley.
Wolf’s been busy getting his *** kicked the entire SSE and being made fun of. . .He’s had enough taking orders. He’s doing things his way. Before the Great Invasion cutscene, we see Wolf flying off towards the Halberd where everyone is preparing for battle, Fox getting his arwing. As Fox and Falco get up in their arwings to fly alongside the Halberd, Wolf’s Wolfen crashes into Fox’s arwing and causes them to both crash. Both pilots hastily eject from their Arwings before they hit the ground and clash against each other in mid-air, and a standard Brawl occurs. . .And you play as Wolf. Yeah, you’re actually getting to play the villain in this SSE for the first time, outside of Envy copying people. After defeating Fox, Wolf gloats over Fox for a brief moment, having had his 15 minutes of fame, before Falco and a hoard of other characters arrive. Wolf reluctantly gets into his Wolfen and flies off into the distance as the other characters get up and revive Fox, who angrily shakes his fist at Wolf as he flees. The great invasion cutscene now occurs as normal, although the cutscene before it is edited slightly to show Greed and Sonic joining the rest of the cast at the Halberd, having fled the prison base.
In the Great Invasion, the Ganon Cannon is quite crowded with villains. Ganondorf, Bowser, Wolf, Lust, Gluttony, Sloth, Wrath, and Envy are all seen on board, standing together. Aside from that, no changes to the scene take place. However; in the cutscene where Bowser normally betrays Ganondorf, all the Homunculi take out trophy guns rather then Ganondorf, aiming them at the Nintendo villains. The Nintendo villains perform their various sidesteps, then you play as them against the Homunculi in a 3 on 5 battle. Only one foe from each side it out at a time, but they have one more man then you, keeping this far from easy, and besides, the highest ranking of your characters is in D tier!
After defeating the Homunculi, the Nintendo villains all do victorious taunts. Bowser and Wolf continue to walk forward, but then Ganondorf takes out a trophy gun and fires it at Bowser as normal. Unlike the normal cutscene though, Bowser dodges the shot and gets into a battle with Ganondorf. Wolf takes Ganondorf’s trophy gun and aims at the two fighting, wanting all the credit from Master Hand for himself, but Ganondorf smacks the gun out of Wolf’s grip and it falls off into the abyss. You now choose one character out of Bowser, Ganondorf, and Wolf for a three way Brawl. The losers get turned into trophies at the hands of the winner, and the winner goes to go before Master Hand then get defeated by Tabuu.
In the cutscene where Dedede normally squares off against Bowser, he’ll find the winner of the Nintendo villain brawl and fight them instead of it always being Bowser. Later on, the winner will be seen whaling on the trophies of the two losers like how Bowser whaled on Ganondorf.
Everything continues as normal, but you also have to hunt down the trophies of Sonic, Greed, Wolf, Jigglypuff, Toon Link, Ed, Al, and Mustang. If you find Ed and Al’s trophies, a cutscene will play in which Ed and Al stand before the four trophies of the five Homunculi. Ed goes past them without a second thought, but Al stares down at Sloth’s trophy again, unable to shake off the thought that she’s so similar to their mother. Alphonse slowly reaches down to revive her once more, Ed running up to stop him, but ultimately being too late. Sloth gets revived, then hastily turns her arms into water and extends them to revive Wrath, Envy, Gluttony, and Lust, touching their trophy bases. All five Homunculi quickly run up the stairs to the Great Maze, ignoring the Elric Brothers. Ed facepalms at Al while he just shrugs, then it continues as normal, them being added to the Great Maze party and finally being unlocked.
A few small sections are added to the Great Maze. The forest where Pokemon Trainer was introduced is added, containing the shadow versions of Gluttony, Lust and Jigglypuff, and PT and Pikachu’s shadow versions are also moved here. Wolf is moved back to Pikachu’s old spot due to him not showing up at any place in particular. Another new section is an underwater one with parts of Ed’s ship and Toon Link’s ship where the shadow versions of Ed, Al, Toon Link, Wrath, and Sloth are found. Yet another additional section is made for the prison base introduced towards the end of the SSE where the shadow versions of Greed and Sonic are found. A final additional section is Mustang’s base, contaning the shadow versions of only Mustang, Envy, and Pride (The boss).
Impossible to deny that Roy has my vote for Führer winner for Make your move.
I also liked how you got Hawkeye, doing what she does best..shooting the **** out of people.
As a suggestion, possibly a Ishbalan war costume? Roy and Hawkeye look younger, flames look more intense and Hawkeye is sniping instead of shooting a pistol.
well... its been a while since I last commented on a set...
Anyhow, I really like this set Chris. Pretty much all of his moves were really cool looking and creative, and I LOLed at a few of them (uair & fthrow). This set actually reminded me a bit of warlord's alphonse set, in that Mustang would pretty much be broken if it weren't for the fact that his gloves could be destroyed (alphonse would have been broken had it not been for his trasmutation circle reliance). Some of his attacks can do crazy amounts of damage with multiple explosions, but they do leave very much open to having his gloves destroyed. And I have to add that the way you incorporated Riza into the set was pretty awesome.
My main complain is the FS, which feels very tacked-on. I was expecting some sort of boost to his flame attacks, in addition to making his gloves impervious to damage. Or you could allow any flames that he creates to remain on the field for a set amount of time.
But overall, this is probably one of my favorites from you chris, although I still feel that arthas is your best in the contest. Awesome job
My main complain is the FS, which feels very tacked-on. I was expecting some sort of boost to his flame attacks, in addition to making his gloves impervious to damage. Or you could allow any flames that he creates to remain on the field for a set amount of time.
Excellent moveset, Chris. I wanted to see Mustang made as I was watching FMA, and this moveset fulfills all my expectations. It never ceases to amaze me how much can be pulled from a single type of attack, such as fire, for various moves and uses. The glove mechanic made things really interesting, aside from the creativity of the attacks. I also like how you managed to pull Hawkeye into the moveset as well. The only part of the moveset I don't like is
How could I resist reading this guy with an opening line like that? xD
Anyways, like his fellow FMA character Alphonse, I loved this guy from beginning to end.
The glove mechanic was a shining example of "simple but clever". Having him keep his gloves in his pockets for the idle animation was a brilliant way of explaining why you can't just attack his gloves whenever you'd like. That you even included a few moves where he doesn't expose his gloves shows that you put a lot of thought into how this guy would function.
The moves themselves were also fun and creative. I never thought you could make so many varied ways of manipulating fire, but I'm glad I was proven wrong. The side special was win, as were the jab, dash attack, all of the smashes, Fair, Dair, Fthrow, DThrow...wow, that's a lot of win moves xD. I don't know the source of the final smash but it was lulzy regardless.
Balance-wise, Roy's an interesting dude. He has speed, power, and range, but he's big, has low priority on his moves, and his gloves only have 10HP so if you beat out one move Roy will most likley lose a glove. I'd say he checks out just fine.
Roy's balance also ties together nicley into his playstyle. The fact that he usually has a pure blind spot right in front of himself takes "spacing character" to a whole new level. I also loved how you mentioned drawing a transmutation circle onto himself to make sure to keep enemies at bay, that was epic.
Overall, Roy Mustang is easily one of my favorite sets from you, Chris. It might even potentially beat out Arthas in my eyes, and I have high hopes for this set when voting comes around.
Game of Origin: Metal Gear Solid 2: Sons of Liberty (also appears in MGS3 and 4) Costumes: The one above. Camoes are:
-Pallid green.
-Auburn.
-Cyan blue
-Silvery grey
-MGS2 outfit
-Same with the original long hair Background:
Raiden whose real name is Jack is a character in the Metal Gear Solid series. He is the protagonist of the Plant Chapter, the main act of Metal Gear Solid 2: Sons of Liberty. His role as the protagonist of Metal Gear Solid 2 was a controversial twist, both for the unexpected substitution of the established hero, Solid Snake, and for his androgynous appearance. Raiden also appears as a non-playable character in Metal Gear Solid 4: Guns of the Patriots, his appearance and use of a high frequency blade recalling the recurring Cyborg Ninja character. In battle, he uses his blade and knife combined with outstanding martial arts. Stats:
Power: Slightly Below Average
Shield Constancy: Long
Weight: Mid-weight
Height: Tall (=Snake)
Running Speed: Not half bad
Jumping Speed: Quick
Falling Speed: Fast
Jumping Height: Excellent
Aerial Steerage: Unhasty
Attack Speed: Above average
Attack Range: High
Grab Range: Low
~Wall Jump~ Stage: Outer Haven:
On top of Liquid Ocelot’s gigantic ship. This stage is as big as Smashville. The two big stacks are background as well as the sunset above the sea. The “frame” is also set to a position from where you can not reach the lower part of the ship so meteor smashing is possible. Getting stage gimped is not fortunately. Taunts:
Up: Slowly strokes the blade with his fingers: “I don’t fear death…”
Down: Shrugs smiling arrogantly: “What are ya gonna do?“
Side: Slashes downwards shaking his head and looking angrily: “Cut the crap!” Special Ability 1: Fluid Skeleton:
Raidens artificial blood seems to make him more resistant against non-severe wounds.
If the received damage caused by one attack is at 15% or below, he takes 2% less damage instead. Special Ability 2: Raijin:
If you jump while running, the horizontal distance is tripled but the vertical height is halved. Note:
(left handed) Knife’s power > katana’s power (right handed)
_________ Attacks:
<><><><> Combo A: Triple Slash: A sweeping slash horizontally from right to left followed by a quick horizontal slash from left to right. Finally Raiden does a full turn while lifting the blade over the head to forcefully slash top down diagonally in front of him. The third slash extends to 270 degrees and thus slightly damages foes in behind as well delivering less knock back.
F-Tilt: Dancing Katana: Raiden slashes bottom up forming the shape of a “C” in front of him. He turns around after doing so to prevent delay.
U-Tilt: Bend Sabre: He does one full turn while slashing vertically from behind to in front. (Looks like the third hit of Link’s Up-Smash)
D-Tilt: Bow Slice: First a quick horizontal cut, then a stab. (Separate attacks)
Running A: Martial Arts: Raiden thrusts his katana onto the ground fixing it. He then swings from one side to the other “laying” collaterally in the air. When reaching the other side, he firstly slashes vertically downwards with his knife and then pulls out the katana to follow up with another top down slash. (Three hits in total// Super Armor during the first frame)
F-Smash: Cross Slice: (Very repetitive name isn’t it?) A diagonal slash from up-right to sidewards left followed by another top down diagonal slash crossing the shape of the previous one.
U-Smash: Hilt Batch: Raiden now holds the katana’s hilt with the left hand and bashes diagonally upward with it. Very fast and surprisingly powerful and obviously low ranged.
D-Smash: Broken Propeller: He kneels and sweep slashes horizontally in front with the katana. The knife is used at the same moment to slice away enemies in behind. Both blades move contraclockwise.
_________ Aerials:
<><><><> N-Air: Disparate Thrust: Thrusting both right and left at the same moment using the katana and knife.
F-Air: Quick Torture: First a stab with the katana, another stab with the knife, finally a diagonal hook-slash from up-right to down-left using the katana.
B-Air: Metal Claw: Raiden turns around slashing vertically from in front to behind before thrusting the katana downwards as if he wanted to stick it into the earth in front of him. (Serves as a meteor smash// A bit of delay)
U-Air: Alternate Bow Slice: Firstly the knife if thrust upwards, secondly he is using a vertical slash looking like a fast “Bend Sabre”.
D-Air: Alternate Disparate Thrust: Thrusting the katana downwards and the knife upwards bending downwards creating a meteor smash. (Considerable delay)
_________ Throws:
<><><><> Forward: Homicide: Raiden quickly slashes horizontally after letting the enemy go hitting the neck of the enemy and thus he collapse onto the ground. (Yeah, kind of unrealistic but at least creates easy combos and might be a chain grab)
Backward: Piggyback: Raiden jumps on the enemy’s shoulders and then pushes him backwards onto the ground while jumping off. (Super Armor during four frames while jumping off)
Upward: Alternate Hilt Batch: This time the right hand is used to batch the enemy upwards. Also, he has to position his right hand on the left side first to make this work since the left hand is holding the enemy. (Weaker than the Smash of course)
Downward: Skull Divide: Works exactly like Homicide just with a vertical top down slashing motion.
_________ Specials:
<><><><> B: Overload: Using a mechanic device attached to his heart, he can make his artificial blood boil, meaning that his inner organs actually take damage while straining the muscles in order to increase their capabilities. Press and hold B to charge up the device. The continuous damage Raiden takes per second ranges from 2-10%, adding 2 percent every second he charges. You can’t charge any further after reaching 10% / 5 seconds. Every 2 percent mean 3 percent of additional damage to any attack with which you hit the enemy. If you reached Raiden's limit and press B, he will glow white for a moment healing 20%. (He took 30% of damage while fully charging, so no complaints please) You can press A+B to discharge the device to set its level back to zero stopping the internal damage and power up.
(No percentage recovery but works faster)
F-B: Cyborg Assassin: Raiden dashes forward thrusting his knife. The distance is half of a “Fox Illusion”. If the knife comes in touch with an enemy, it is thrust through his stomach “grabbing” the enemy. You can now press A to use the regular grab attack (katana stab).
Or tilt forward to pull the knife out and immediately punch on the enemy’s wound with the same hand still holding the knife which caused it. Tilt backward to simply take the enemy with Raiden as he turns around before throwing the enemy away thus pulling out the knife. (Dash can obviously be used as a recovery move)
U-B: Clamp Shot: Raiden angles his legs and arms. He then stomps in the opposite direction you are pointing with the control stick and spins one time extending his arms slashing foes nearby with the katana and knife. After that he collides the two blades above his head in the motion of a closing clamp delivering slight knock back. Last note being the recovery distance which is the same as Squirtle’s (faster movement though).
D-B: Vibration Sound Wave: Raiden collides the tips of the katana and knife to trigger a sync mechanic in both weapons creating an almost invisible sound wave. All enemies in the range of a “Wolf Reflector” are pushed away (distance being greater than Ness’s D-B) and Raiden gains a Super Armor for the first three frames.
How can people say that Mustang was a good moveset. It had tons of good ideas, but it had so many balance issues (He's worse than SFII Akuma!) that this moveset should not even be considered for voting in this contest. Absolutely terrible.
Of course, if you'd fix some of his glaring balance issues (as in either make his attacks do a lot less damage or give them a lot more lag) then you should be fine. As of right now, though... absolutely, absolutey terrible.
that Raiden one sounds pretty cool. I like how his neutral b is designed similar to Roy's, but i wonder how his grabs would look on characters withou necks(like Kirby) and what his FS is.
How can people say that Mustang was a good moveset. It had tons of good ideas, but it had so many balance issues (He's worse than SFII Akuma!) that this moveset should not even be considered for voting in this contest. Absolutely terrible.
Of course, if you'd fix some of his glaring balance issues (as in either make his attacks do a lot less damage or give them a lot more lag) then you should be fine. As of right now, though... absolutely, absolutey terrible.
Did you even read the set... if you read his glove mechanic, then that alone would be a significant balancing factor. Do you have any idea how debilitating a weakness it is to have to spend over half a second reapplying a glove every time someone punishes your move with an even decently powerful attack. On top of this, I gave most of his moves **** priority, like what you'ld see on Captain Falcon or Sonic so that it is actually possible to out-prioritize and punish him.
Had you actually read into it, you would realize that you can't just spam high damage moves and win... you actually have to play intelligently.
The thing is that, he has such fast and long-ranged moves he can prevent people from even getting near him. Much like we brushed off Meta-Knight as a mid-tier at the beginning of Brawl because of how light he was... and now people are trying to get him banned because he's a tough ****er to fight! Not to mention that in addition to speed, you also get power which MK doesn't have.
The glove mechanic doesn't save the moveset. If somebody got close enough to damage him, he could just Ftilt them away and then swap out the gloves. It's just too easy to be good with Mustang.
Haha, just popping out of the grave to say hello, guys. I'll be done with exams this week so back on soon, looking forward to catching up and spending time on my movesets, finally. It's a shame that I've now missed out on a large portion of MYM4 and MYM5, perhaps I need to work on my time management.
Anyway, be back later.
Edit: Wait, this is coming to an end soon? Jeez! It hardly seems to have begun yet!
A d*mn fine set you've got there, Lionheart. I see why you saved this one for so long. . .Does that really mean that your moveset quality determines so much on the character you pick, though? I'm surprised that we still haven't had something as good as Arthas until now from you. Either way, enough questioning it. It's here, and it's beautiful (But clearly Otacon has not finished reading Alphonse yet).
I liked Hawkeye's inclusion as the others did, very fitting and unique. Surprised she was only used for one move, but this is a Mustang yet, not a Mustang and Hawkeye set, no? Not like Hawkeye could get her own set anyway. May as well stick her in with Mustang.
While there are plenty of really really cool moves in there, mainly the ones HR mentioned, there are some less interesting ones, mainly the uber ones that Mustang is apparantely going to rely on, such as the tilts and nair. It seems kind of lame that he relies on these less interesting moves and also throws balance into the question at the sheer speed and power of the moves.
However; Mustang is very easy to interrupt in his attacks and can be punsihed heavily with no gloves. While normally priority as the only weakness is unforgivable, the mechanic makes it come together just fine, in my opinion. Mustang sounds like he'd be interesting to play against (Yeah, the moveset actually wanted to see me play against a char more then play as them. Weird, I know, but it sounds like an interesting match up).
He might be a bit on the strong side with that crazy ftilt and how it doesn't take -that- long to replace his gloves, but it's nothing as bad as Ocon claims. This moveset flows much better then your others and actually has a half decent playstyle section. The moveset also seems much better polished then your others, although you still tend to repeat the exact same sentences in some moves such as the stacking/non stacking fire damage and the uberness of the tilts in general. Never was fond of that in Gwen, not fond of it here, although it's not nearly as bad here.
On the final smash I think it'd be good if you stated whether or not the enemies were powered up from becoming large. More detail would be helpful there. It'd make the most sense if enemies were, say, in giant mode with a mushroom without any buffs. What say you?
I hate you for making the final smash Envy's death.
I honestly can't decide whether this moveset beats out Arthas or not, but I'm beginning to lean that way. Great job with it!
Vaati, here are my thoughts from looking over your moveset.
Firstly, you're going to want to beef up the level of detail on those moves. Really explain to us how the moves work, which'll also encourage you to make them interesting. Imagine Mario's Special attacks described as such:
B: Throws a fireball
Up-B: Jumps upward, punching people as he goes to make them spit out coins.
Down-B: Charges FLUDD to shoot water that pushes opponents back.
Side-B: Swings cape, reflecting projectiles.
Obviously, there's a lot more to it than that, so try to really explain everything to us. Ranges, damage percentages, speed, etc. are all widely appreciated.
The other thing is to organize things. What you've got there is a real white wall of text. Liven it up a bit with some color and some other formatting to make it easier on the eyes.
~~~ SECTION ~~~
Move Name
Just look at how easy this description is to find and read, because of the organization of what's around it!
So much detail on the SSE, parts, you guys! Amazing.
I can't imagine trying to co-ordinate later of these additions with earlier.
I think if I do add that extra, Will will just pop in around the time Kirby, Dedede & co. are looking around for trophies. 'cause subspace is sort of like the Dark Space, I dunno.
...
and I'm *really* sure I won't finish in time for MYM5. This is going to take me until July.
Actually, the SSE Role was all Warlord's making (as were all of the extras minus the codec and the Kirby hat. It serves as a uniform to all of the Fullmetal Alchemists sets (6 thus far) in the contest.
Extras are by no means required and they have no bearing on how well your moveset does at all. Most MYM'er choose to outright ignore them.
To those who don't get Mustang's FS, it's from the manga. Mustang's response to finally finding the person who killed his best friend: "There's no need to say anything more, Envy. The first thing I'm gonna turn to ash is your tongue." He then proceeds to **** Envy up fifty ways to Sunday, including, but not limited to: evaporating the fluid in his eyes twice, thanking him for turning into his monstrous true form because it makes him a bigger target, blasting his lower jaw off to shut him up (just like he promised), and torching him while he looked like Hughes.
Would there be a "template" of any sort? I'd like to make a moveset for this/next time, but I don't know what I should cover or what order I should cover everything in; any help would be appreciated. :3
Statistics, for things like power and range. This *is* technically an extra, but nearly everyone makes them.
Four special moves.
A jab attack and a dash attack.
Three tilts.
Three smashes.
Five aerials.
A grab, pummel and four throws.
A Final Smash.
Damage percentages on every move.
Probably in that order, but you can put the specials later. Also, there are some extras which you can add. They aren't required, but they certainly make the set look better.
Statistics, for things like power and range. This *is* technically an extra, but nearly everyone makes them.
Animations, for entrances, being dizzy and the like. This is optional again but everyone makes them.
A playstyle section outlining how the character should be used.
Three taunts.
Three victory poses and a loss pose.
A Kirby hat. Pictures are nice but you can just describe them.
A codec conversation.
An item.
An assist trophy.
A stage.
Alt costumes.
An SSE role.
An SSE boss.
Trophies.
Event matches.
You don't need all of these, but a few are always nice.
TYVM; I'll see that the character I have in mind gets at least the ones relevant to Brawling, like the requisites, the stats, the animations, and the character-specific extras (codec, Kirby hat). May not do the item or AT or any of the extras like that, but we'll see.
EDIT: Also, suxxorz about the swine flu man. Get well soon!
I know it is almost closing time for the MYM5 but I had a moveset back on page 117 where It got ignored. I finally figured out that If I can't see the pictures, you guys can't. Sorry about that. They are there now, and I know that I will get a penalty for not having the picture there but could a authority maybe see what's there? Sorry for the inconvenience.
Stats are more important, and yes, situationals are technically extras, but he might as well suggest them to a newcomer.
Also, nice new Edgeworth set, it's a nice twist on the trap character we've seen a lot of in this contest, and it's certainly a step up from the other movesets from this game.
I might as well say it now though: I have nothing else for MYM5, so now I just need to focus on plans for MYM6, and actually deciding on something, as well as picking my votes. Expect more Kirby sets this time.
JumpHeight: First Jump is average. Midair Jump is as high as Falco's first jump, which is the highest first jump in Brawl.
Fall Speed: Very low.
Size: Similar to Mario's
Weight: Light
Special Feature: Mach-Dodge
Wilfre hovers in place during his airdodge, just like in Melee! If you press left or right on the control stick with the shield button, Wilfre will zip along in that direction during his airdodge as far as 1/3 of battlefield with some cool after-images accompanying it. As a tradeoff, Wilfre may only use one airdodge each time he enters the air.
Neutral Special: ColorDrain
Wilfre holds his staff above his head as it begins to shine. After .3 seconds of startup lag, he then thrusts it forwards. If he hits an opponent, they take no damage and set knockback as far as ½ of battlefield while a multicolored ball of energy flies from their body into Wilfre’s staff. Cue evil chuckle and average end lag.
Draining color doesn’t seem to be that dangerous, but in the world of Drawn to Life, color is pretty much the essence of life itself. Each time an opponent is struck, they lose some color as well as some functionality of their moveset. The drained energy is transferred to Wilfre’s staff and represented as an aura of light around it. Wilfre’s staff moves get various buffs with more colored drained, with some abilities being outright locked until you reach a high enough level (and unlike the myriad of other moveset buffers in MYM, Wilfre’s buffs are actually *gasp* simple and consistent within the same move!). Wilfre keeps the boosts until he is KO’d, though a few attacks cause the level to drop as well. When the opponent is KO’d they regain all of their color. Wilfre can get his power leveled up by taking away color from different opponents, but each enemy loses their own color in order (so Wilfre takes 2 levels from 1 character and takes 1 level from another, the second character would have lost the first level, not the third).
There are 6 levels of boosts (and level 0 which you start at), each one represented by a different color aura and each one taking taking away more of the opponent’s abilities: Level 1: Opponent’s clothes lose their color (become white with black outlines). Use of taunts is taken away. I know, this should be the final level, it’s far too broken. Level 2: Opponent’s elemental attacks lose their element (ice, fire, electric, darkness, ect) and the element is applied to select moves on Wilfre’s moveset. The hitboxes for the elemental stuff disappears from the opponent’s attacks. Level 3: Opponent’s weapon loses color (or something similar). All of their attacks deal 2% less damage. As we all know, this causes all of their moves to have the knockback of Fox’s laser (h) Level 4: Opponent’s body loses the rest of its color. At this point they may no longer dash (which means no more dash attack), and their smashes are taken away as well except for FSmash. Level 5: The opponent’s HUD loses its color and the opponent can no longer use their specials except for up-special.
Now, the final boost is achieved by holding down during the startup animation, which causes Wilfre to strike the ground with his staff. This causes the stage itself to lose all its color! The entire stage becomes a white nothingness with outlines over 3 seconds, Wilfre gaining super armor the entire time. When this happens, all stage hazards are disabled, and on a moving stage the screen freezes. Breakable objects are now pass-through. At least the blast zones still work! Wilfre can get this boost whenever he wishes, so it’s not a bad idea to just get this right off the bat to start out with a power-up.
SideSpecial: ShadowHunter
Wilfre holds out one hand as a shadowy gas pours out from it and forms itself into a ghost-like shape. This ghost is the size of Luigi and immediately after being formed it starts to slowly chase after the opponent with the most color remaining in their system, flying around the stage in any direction and since it’s a ghost it can go through solid objects. It has 16 HP and super armor against any attacks that deal less than 7 damage. Upon making contact with an opponent it reaches out with both hands to grab them (this has no startup lag whatsoever) and then starts to carry the opponent back to Wilfre, this time going as fast as Wario’s dash. The opponent can escape with 1.2x the difficulty of a normal grab, and right after escaping the ghost disappears. When the ghost reaches Wilfre it remains in place, allowing its creator to unleash an attack on their victim. There is average startup and end lag to summoning the ghost, and if this move is used with one out, the current ghost will die when the new one is formed.
Up Special: Dark Portal
Down Special
STANDARDS
Jab: Colorful Sparks
Wilfre jabs his staff forwards, dealing 7% and flinching knockback. Below average startup and end lag. Then, for each level color he has, Wilfre will emit a small spark of energy in the same color as that level, with each spark dealing 1% and flinching knockback. The sparks come out in rapid succession and are impossible to DI out of.
Forward Tilt: Stun Orb
Down Tilt
Up Tilt: Palm Thrust
Defying all that we know about Brawl mechanics, Wilfre's UTilt has him thrusting his palm...UP! ZOMGWTFBBQ! This disgustingly unsmash attack deals 7% with vertical knockback that KOs at 190%, and it has average startup lag with low end lag. The only hitbox for this move is Wilfre's palm right above his head, so it's not too great...
...until you steal the enemy's elemental attributes of course. When Wilfre performs the move under this condition, a burst of the stolen element emits from his palm, covering an area the size Kirby above his hand. The elemental blast is a disjointed hitbox that deals 13% with vertical knockback that KOs at 160%. With elements stolen this is a pretty good anti-air, though you should ignore this move until then.
Up Smash: Basic Drawing Shape
Wilfre swings his staff in a small circle above his head. This deals 5 hits over .4 seconds, each hit dealing 3% with the final hit dealing vertical knockback that KOs at 140%-110%. With levels of color built up, there will be a ring of light in the same color as its level that is drawn along the ground in sync with Wilfre’s motions. Each ring is as thick as a red Pikmin is tall, and each level is further outwards than the previous one. Curiously, the rings alternate starting in the front or back of Wilfre with each successive level. The rings only affect the ground (disappearing off edges), and contact deals 12% and vertical knockback that KOs at 90%. Below average startup and end lag.
Neutral Aerial: Ring of Power
Wilfre spreads his arms in a typical clear-out fashion like most (Brawl) Nair. This has low startup lag with average end lag, and his arms are lingering hitboxes that last for .3 seconds. They deal 8% and KO at 190% when they come out, then deal 4% and KO at 230% while they linger.
With elements stolen, As Wilfre spreads his arms a ring of the stolen element forms around him with a radius as long as Mario's height. The ring lasts as long as the arms are hitboxes, and during that time they deal 10% with knockback that KOs at 170%. At level 5, the elemental ring continues to last during the end lag of the move, allowing Wilfre to utilize it as a pressure tool in addition to its defensive capabilites.
Forward Aerial
Back Aerial
Up Aerial: Cliffhanger
Wilfre waves a hand above his head, creating a black platform of shadows as wide as Dedede is tall. This has above average startup lag but no end lag, and the platform lasts for 6 seconds. Only 1 platform may remain in play at a time until you reach color level 5, then you may have 2. Typical recovery blocker? Not quite, as characters are allowed to go through the bottom of the platform and yet they can still stand on top, and it even has grabable edges. If anything this is a gift for your opponent, and since Wilfre has a good recovery himself he won’t make much use of it…
This all changes once you reach color level 3. When Wilfre creates the platform he also leaves a small shadow bat, no bigger than half of Olimar, hanging on the underside. When an enemy is below the platform’s vertical height and within one Bowser of it horizontally, the bat leaves its perch and suicide-rams the opponent. The bat dies in one hit, and its attack only deals 3%, though with pretty good hit-stun. The real killer is the sheer speed of its attack, the same as Falco Phantasm. This means that the opponent pretty much has to perform counter-measures the moment they enter its range, making even the best adversaries more predictable.
Yay Miles Edgeworth! The special mechanic behind this one was unobtrusive enough to feel like it would work in-game, and I muchly enjoyed the creative ways of collecting evidence.
But it doesn't look like the type of evidence Miles collects matter at all (making your choice to colour code them a little, odd)
And, as is becoming a habit for me, I would have preferred the Neutral Special to have either an extra effect, or to not exist in the first place. As cool as a move that says "HAY GUYZ I'M COLLECTIN EVIDENSH!" is, I'm not seeing why Miles couldn't just pick it up as an item (other than the fact the Murder Weapons have actual item properties)
But all in all, it was still a heck of a good moveset that genuinely understands the Ace Attorney series.
It's a massive shame though that you saved the best part (Jean mother****ing Armstrong!) for last
And those headers are awsome (it's a lame compliment, but it's true)
Down Throw
Edgeworth takes out his camera and flashes into the throwee's face with its light, making the victim dizzy for 2 seconds. It deals no damage, thoughl.
Thanks for the bump at the DThrow, I changed it again. I think it should work now.
I thought similarily about the evidence color codes, so I just cut them down to 3 - the automatic points, the investigation points and the testimony points. The testimony points are important to be differntiated from the other evidence because of the penalty.
As for the Neutral Special - I wouldn't know what else to put there but the move I currently have. Collecting puddles or blood stains as items is a little bit hard, and especially because the FAir's item properties the system would need to be changed completely.
As last note, I doubt Armstrong has intercourse with his mother, out of all people.

") Thank you for the feedback.
Thank you for the feedback.