
-
Welcome to Smashboards, the world's largest Super Smash Brothers community! Over 250,000 Smash Bros. fans from around the world have come to discuss these great games in over 19 million posts!
You are currently viewing our boards as a visitor. Click here to sign up right now and start on your path in the Smash community!
It appears that you are using ad block :'(
Hey, we get it. However this website is run by and for the community... and it needs ads in order to keep running.
Please disable your adblock on Smashboards, or go premium to hide all advertisements and this notice.
Alternatively, this ad may have just failed to load. Woops!
Please disable your adblock on Smashboards, or go premium to hide all advertisements and this notice.
Alternatively, this ad may have just failed to load. Woops!
Make Your Move 6 - Nothing Gold can Stay
- Thread starter Hyper_Ridley
- Start date
- Status
- Not open for further replies.
Frown
poekmon
I might actually make something this time.
KingK.Rool
Smash Lord
- Joined
- Nov 26, 2005
- Messages
- 1,810
Okay, so I have a few things I want to mention before I start commenting on what's been posted so far.
1) I don't think you guys understand the goal of putting a link-up space at the beginning of the thread. You want people to scroll down on the first page and notice it immediately, new people who are just getting into MYM and reading the first page. Putting your link-up space on page 3 is just as useless as putting it on page 93; better edit an older post than take up space in the thread.
2)
3) Let's get some commenting going, people!
Tryclyde is generally pretty cool. Snake-based movesets are interesting and the hydra mechanic is pretty fitting and not too convoluted - although you wouldn't know it from the way you describe it. From head to toe, this moveset is incredibly wordy and overdetailed. You're still not really using those semicolons, and have annoying run-on sentences like "However, if you press the A Button again, Tryclyde will strike forward powerfully, having average range, like the apple, and moderate priority", just for a mild example I picked out at random; you seem a bit hung up over small details. I don't like most of the attacks that necessitate pictures, since, of course, they're quasi-prop attacks. And you still have a few of those alliterated na- oh, I see.
In the plus column, there's an awful lot of creativity in this moveset, and your overall playstyle is more distinct here than ever before. I've never understood why you people write "Playing Against" sections - aren't you trying to promote your character, not show off why they're weak? Ditto the match-up sections; figuring that kind of thing out properly needs some real competitive knowledge. Oh well, whatever floats your boats. NAMING AN ICON? BLASPHEMY!
So even though I've nitpicked a lot, it was a good read and a good set that deserves a few more comments.
Envy's pretty good, although I'm not quite enthralled. Dash Attack is reused from Gluttony! HACKS! I like the zombie submechanic a lot - especially Cannibalize, genius attack - but the whole parasite thing is a bit obscurely explained and doesn't really pique my interest. The throws, on the other hand, are all excellent. The codec is hilarious mostly because it seems like you've finally run out of ideas and just gave up on trying to make witty ones. XD
On the whole, it's a cool set, and I feel as though the zombie mechanic should have been the spotlight. My favorite of yours is still Skarmory, I think.
I'll read and comment the others later, this took forever for some reason.
1) I don't think you guys understand the goal of putting a link-up space at the beginning of the thread. You want people to scroll down on the first page and notice it immediately, new people who are just getting into MYM and reading the first page. Putting your link-up space on page 3 is just as useless as putting it on page 93; better edit an older post than take up space in the thread.
2)
I don't believe Warlord cares about or pays much attention to his organization, although he has gotten better at it lately. Maybe Ocon, Junahu, Daddy or myself would be better examples?To many here *MW*, organization means just as much as the content of the set itself.
3) Let's get some commenting going, people!
Tryclyde is generally pretty cool. Snake-based movesets are interesting and the hydra mechanic is pretty fitting and not too convoluted - although you wouldn't know it from the way you describe it. From head to toe, this moveset is incredibly wordy and overdetailed. You're still not really using those semicolons, and have annoying run-on sentences like "However, if you press the A Button again, Tryclyde will strike forward powerfully, having average range, like the apple, and moderate priority", just for a mild example I picked out at random; you seem a bit hung up over small details. I don't like most of the attacks that necessitate pictures, since, of course, they're quasi-prop attacks. And you still have a few of those alliterated na- oh, I see.
In the plus column, there's an awful lot of creativity in this moveset, and your overall playstyle is more distinct here than ever before. I've never understood why you people write "Playing Against" sections - aren't you trying to promote your character, not show off why they're weak? Ditto the match-up sections; figuring that kind of thing out properly needs some real competitive knowledge. Oh well, whatever floats your boats. NAMING AN ICON? BLASPHEMY!
So even though I've nitpicked a lot, it was a good read and a good set that deserves a few more comments.
Envy's pretty good, although I'm not quite enthralled. Dash Attack is reused from Gluttony! HACKS! I like the zombie submechanic a lot - especially Cannibalize, genius attack - but the whole parasite thing is a bit obscurely explained and doesn't really pique my interest. The throws, on the other hand, are all excellent. The codec is hilarious mostly because it seems like you've finally run out of ideas and just gave up on trying to make witty ones. XD
On the whole, it's a cool set, and I feel as though the zombie mechanic should have been the spotlight. My favorite of yours is still Skarmory, I think.
I'll read and comment the others later, this took forever for some reason.
leafbarrett
Smash Lord
*deleted message*
Kholdstare
Nightmare Weaver
- Joined
- Oct 10, 2008
- Messages
- 1,440
It looks okay from a glance, I can't read it right now, though. You do need to add some color.Roserade
<He commands you...now all of you...obey him world!! Lelouch of Code Geass and of the rebellion joins the Brawl!!!>
 "What's wrong? Your opponent is just a school boy. Or have you finally realized, the only ones who should kill are those prepared to be killed!!!"
<Description>
<Description>
THIS CONTAINS SPOILERS. READ AT OWN RISK.
Lelouch Lamperouge (or his real name, Lelouch Vi Brittania) is the main character of Code Geass. In the beginning of the series, after seeing a land known as "Brittania" destroying and practically enslaving Japan, Lelouch decides to fight his own race and will in his own word, "Oblitherate Brittania!!"
Lelouch meets a girl named C.C., who give Lelouch this incredible power known as Geass. The Geass enables the user, with direct eye contact, make the chosen person obey me him, no matter how strong the will. It may only be used once per person, and it can be anything! Seriously. Lelouch decides to use this power, with the name Zero and the power of the Black knights to try and fight back against Brittania, and create a safer place for his sister Nunally. However, Lelouch is forced to fight his childhood friend, Suzaku, and things get complicated. At a certain point, Lelouch loses control of his Geass, and can't turn if off. At the end of the first season of Code Geass, we are seen with Lelouch aiming a gun at Suzaku, and Suzaku vice versa. A single gun shot is heard.
In the second season, Code Geass R2, Lelouch returns as a high school student, but seems to have forgotten about his sister, and his Geass. However, when he remeets C.C., Lelouch regains all of his memories and his Geass, and C.C gives him a special lens that blocks the Geass from going crazy. Obviously, Lelouch resumes his role as Zero, and attempts to crush the Brittania empire again, only to discover that they have Nunally with them.
Later on in the second season, Lelouch meets his father once again, Charles Zi Brittania, and confronts him, and tried to kill him. However, he finds out his father is immortal and is immune to Geass. However, he still finds a way to stop his father, and, in a way, kill him. He then claims the throne as Lelouch Vi Brittania, the 99th King of Brittania. He then calls Suzaku as his knight of Zero.
Lelouch then has to face off against his 2 family members, Schneizel el Britannia and his own sister Nunally. However, he manages to overcome them both and now rules the world with an iron fist. As Lelouch is about to execute the Black Knights and all those who oppose him, he sees a person dressed up as Zero. It was really Suzaku, and he kills Lelouch, stabbing him in the chest. However, this was all part of Lelouch's plan to create a better world. All the hatred of the world gathered on him, and when he died, the world was a better place. Lelouch dies smiling, and in his sister's arms, as you see her crying, begging for his brother to not die.
<Stats>Lelouch Lamperouge (or his real name, Lelouch Vi Brittania) is the main character of Code Geass. In the beginning of the series, after seeing a land known as "Brittania" destroying and practically enslaving Japan, Lelouch decides to fight his own race and will in his own word, "Oblitherate Brittania!!"
Lelouch meets a girl named C.C., who give Lelouch this incredible power known as Geass. The Geass enables the user, with direct eye contact, make the chosen person obey me him, no matter how strong the will. It may only be used once per person, and it can be anything! Seriously. Lelouch decides to use this power, with the name Zero and the power of the Black knights to try and fight back against Brittania, and create a safer place for his sister Nunally. However, Lelouch is forced to fight his childhood friend, Suzaku, and things get complicated. At a certain point, Lelouch loses control of his Geass, and can't turn if off. At the end of the first season of Code Geass, we are seen with Lelouch aiming a gun at Suzaku, and Suzaku vice versa. A single gun shot is heard.
In the second season, Code Geass R2, Lelouch returns as a high school student, but seems to have forgotten about his sister, and his Geass. However, when he remeets C.C., Lelouch regains all of his memories and his Geass, and C.C gives him a special lens that blocks the Geass from going crazy. Obviously, Lelouch resumes his role as Zero, and attempts to crush the Brittania empire again, only to discover that they have Nunally with them.
Later on in the second season, Lelouch meets his father once again, Charles Zi Brittania, and confronts him, and tried to kill him. However, he finds out his father is immortal and is immune to Geass. However, he still finds a way to stop his father, and, in a way, kill him. He then claims the throne as Lelouch Vi Brittania, the 99th King of Brittania. He then calls Suzaku as his knight of Zero.
Lelouch then has to face off against his 2 family members, Schneizel el Britannia and his own sister Nunally. However, he manages to overcome them both and now rules the world with an iron fist. As Lelouch is about to execute the Black Knights and all those who oppose him, he sees a person dressed up as Zero. It was really Suzaku, and he kills Lelouch, stabbing him in the chest. However, this was all part of Lelouch's plan to create a better world. All the hatred of the world gathered on him, and when he died, the world was a better place. Lelouch dies smiling, and in his sister's arms, as you see her crying, begging for his brother to not die.
Attack: 6
Lelouch doesn't have alot of KO moves. His main KO move involves using his Geass, and that's his, pretty much, only strong move. However, he still can rack up damage decently, and his Geass KO move is powerful.
Running speed: 5.5
Unfortunately for Lelouch, he's not exactly the athletic type. He runs pretty much as fast as Ike.

(Note: He still runs perfectly no problem. He doesn't stop in the middle of his tracks. I just wanted to show this picture, cause i find it funny =P.
Attack speed: 7.5
Fortunately, he attacks fast. He has only little lag on his attacks...mostly.
Range: 8
And he has pretty good range too. Just watch out though as his long range attacks force him to leave himself right open.
Weight: 4
Jumps: 5
Not a good jumper, but not bad either.
Height: 7.5
He's a tall Brittanian student. He's about as tall as Marth.
Falling speed: 7
Lelouch can be light.
Wall Jump: No
Again, not the athletic type.
Wall Cling: No
Glide: No
<Special Abilities>
The hatred gathered
This tactic was used on the last episode, sort of. As the match progresses on, for every hit Lelouch hits on to the opponent, the opponent's character will start hating him. How you ask? Well, in order for the opponent to hate Lelouch, you must cause them hell, and frustration. This goes for the same as there character is playing. For every miss that the opponent fails to land on you (when Lelouch dodges or blocks) and every hit that Lelouch hits the opponent, there will be an increase for of 1 hatred point. Here's how the system works:
1-5 hatred points: Very small anger
6-10 hatred points: Small anger
11-15 hatred points: Medium anger
16-20 hatred points: High anger
21+ hatred points: Very high anger (AKA, OMG, I CAN'T STAND THIS GUY!)
What do the hatred levels do you ask? Well....go to the down special for the full details. Note that it's possible for the opponent to lose the hatred points by hitting Lelouch, or Lelouch misses the opponent. Good luck young prince of Brittania....
The hidden mask
At the very beginning of the mask, Lelouch starts off with showing his face, but with his cape and stuff. However, if you perform his side taunt, Lelouch will put on his mask, become the person known as 'Zero.' As Lelouch becomes Zero, his attacks will increase by 1% for every hit, his running speed will increase by 1, and he looks totally badass. However, in order to use Geass, it takes an extra half a second to work the Geass, as Zero's mask covers Lelouch's entire face, and, while the mask does have a special mechanism that allows Lelouch's right eye to be visable, it takes half a second for it to happen.
Also, for a cool visual effect, if the opponent keeps on aiming at Lelouch's mask (aka, his head) and manage to rack up about 40% damage, the mask will break off. As the mask breaks off, not only will you not be able to become Zero no more, as soon as the mask breaks, you get to see Lelouch looking angry and with a frown, looking badass xD.
Be careful about using the power of Zero.
<Special attacks>This tactic was used on the last episode, sort of. As the match progresses on, for every hit Lelouch hits on to the opponent, the opponent's character will start hating him. How you ask? Well, in order for the opponent to hate Lelouch, you must cause them hell, and frustration. This goes for the same as there character is playing. For every miss that the opponent fails to land on you (when Lelouch dodges or blocks) and every hit that Lelouch hits the opponent, there will be an increase for of 1 hatred point. Here's how the system works:
1-5 hatred points: Very small anger
6-10 hatred points: Small anger
11-15 hatred points: Medium anger
16-20 hatred points: High anger
21+ hatred points: Very high anger (AKA, OMG, I CAN'T STAND THIS GUY!)
What do the hatred levels do you ask? Well....go to the down special for the full details. Note that it's possible for the opponent to lose the hatred points by hitting Lelouch, or Lelouch misses the opponent. Good luck young prince of Brittania....
The hidden mask
At the very beginning of the mask, Lelouch starts off with showing his face, but with his cape and stuff. However, if you perform his side taunt, Lelouch will put on his mask, become the person known as 'Zero.' As Lelouch becomes Zero, his attacks will increase by 1% for every hit, his running speed will increase by 1, and he looks totally badass. However, in order to use Geass, it takes an extra half a second to work the Geass, as Zero's mask covers Lelouch's entire face, and, while the mask does have a special mechanism that allows Lelouch's right eye to be visable, it takes half a second for it to happen.
Also, for a cool visual effect, if the opponent keeps on aiming at Lelouch's mask (aka, his head) and manage to rack up about 40% damage, the mask will break off. As the mask breaks off, not only will you not be able to become Zero no more, as soon as the mask breaks, you get to see Lelouch looking angry and with a frown, looking badass xD.
Be careful about using the power of Zero.
Down Special -----> Zero Requiem

Please refer to the special ability, "The hatred gathered," for full details.
First of all, there is 2 conditions. 1 is that Lelouch must not be wearing his Zero mask on. Another is that Lelouch must have some anger drawn on to him. Okay, here is what happens. Lelouch will say, "Suzaku!!" All of a sudden, from the last episode of Code Geass, Suzaku, dressed up as Zero, will fall down from the sky. Lelouch will then standstill where ever he is, and you will control, temporaly, Suzaku as Zero. Unfortunately, he is only a Marth clone, with a sword that has a bit more range, and a bit more power. You must quickly run to where ever Lelouch is, and perform a stab to him (AKA, neutral B button). If Lelouch gets hit by the opponent, this move will fail, and 5 hatred points will be lost.
If you do manage to stab him, Lelouch will then collaspe on the ground and say to Suzaku, "You will live on...always wearing that mask and fighting as a knight for justice." You will then control Zero, AKA Suzaku AKA Marth clone, depending on how long the hatred is and the opponent, believing Zero to be their savior, will cheer for him. The beginning hatred for Lelouch is very small right? So, you can use Zero Suzaku for 10 seconds and not only that, the opponent will cheer, "Zero!! Zero! Zero!!" no matter what the opponent's controller does for 10 seconds, therefore the opponent will not be able to use the attack button against their savior Zero, until time is up. They are still free to run away though. For each hatred level, the longer it takes effect is an added 5 extra seconds for each level. However, when the hatred level is at very high, you may control as Suzaku Zero for as long as you want.
If you ever want to quit, just press the down B button again, and Lelouch's dead body will resurrect from the dead (he just rises back up from where he was stabbed >.>). However, even though when times runs out, Lelouch will come back from the dead anyway, since Lelouch was stabbed pretty bad, he'll have been suffered a total 25% damage. Also note that if Suzaku Zero gets K.O.ed, the stock loss will still count, and you'll be forced to play as Lelouch again. If the opponent gets K.O.ed while they're still cheering for Zero, they'll stop cheering as soon as they're K.O.ed and they'll be able to fight back now. Suzaku Zero and Lelouch share the same damage percentages (though the 25% damage doesn't happen until Lelouch is brought back to life). Be careful.
Neutral Special -----> Geass

Lelouch motions his arms around, and while he does, he says, "I, Lelouch Vi Brittania, command you..." All of a sudden, a small red symbol will fly out of Lelouch's eye, and travel straight forward. That is the Geass ladies and gentlemen. It takes about a whole second for the Geass to fly out of Lelouch's eye. Now for something hard to do. First of all, the opponent must be on the same platform/level as Lelouch is, or otherwise, the Geass will miss the opponent. Second of all, Lelouch requires direct eye contact with the opponent. Therefore, as the Geass symbol flies straight forward, it must hit the opponent's head for it to work at all (the opponent can easily dodge the Geass by ducking, though the Geass will still effect opponents that are short like Pikachu and Kirby, as long as they're on the same platform). Finally, the opponent must be in a 4 small stage builder block range.
There are various Geass commands the Lelouch can use. It all depends on what you do AFTER the Geass has hit the opponent. This involves moving the control stick, or pressing a certain button. However, you must note that you only have 2 seconds to decide what you wanna do. Otherwise, the opponent will break out of the Geass control. Also note that Lelouch may only use his Geass to the opponent once. However, he may still use his Geass as many time as he wants to his other opponents, and as soon as THAT opponent loses a stock, he can use his Geass on them again. And one final rule: If you abuse your Geass by using it over 5 times a stock, the Geass will lose control, and Lelouch will be forced to use it, with no control over it, every 20 seconds. Therefore, when he uses it, he'll be left wide open for a whole second. Anyway, here are the commands:
Pressing B button again: "...Die!!!"
His opponent will laugh a little bit, and, if they can talk, say, "HAPPILY YOUR HIGHNESS!!!!" All of a sudden, they will take a bomb from there pocket, slam it to the ground, and will be sent flying high sky. This is Lelouch's main KO move. This will cause the opponent to have 28% damage with great knock back. I would suggest using it when Lelouch has racked up enough damage (at least 80-100%). Also, make sure you're not in a 1 small stage builder block blast radius, or otherwise Lelouch will be sent flying too. As soon as they slam the bomb to ground, the opponent will regain control over themselves.
A Button: "Hand it over!!!"
This use may be only good for matches with items on, but there are still some other uses to it. The opponent will run to Lelouch, and hand over what ever item they have to Lelouch (it can be a baseball bat, a pokeball, or something like that). This also counts for smash balls. If the opponent has broken a smash ball and Lelouch uses this command, the opponent will lose the smashball, and Lelouch will then be able to use his final smash. Of course, if the opponent does not have an item with them, they will not give Lelouch anything. Instead, they'll question themselves, "..What item?" and be confused for 3 seconds, letting Lelouch give an opportunity to attack. If the opponent does not have an item, Lelouch is able to use his Geass on them again.
Control stick upwards: "Jump!!"
The opponent will jump up and down for 12 seconds of the current stock. This may seem like a bad command, as when the opponent jumps, Lelouch can't land a clear hit. However, this also means that the opponent can't land a clear hit either, always jumping up and down. This can also be use to screw up the opponents recovery, as they may waste there second jump too.
Control stick downwards: "Give me 20 push ups!!!!"
The opponent will go down to the ground and...start doing push ups. They will do 1 pushup for every half a second, so that's 10 seconds for the opponent to finish doing there pushups. The opponent must finish there pushups before regaining control again. Otherwise...start doing pushing up boy! Lelouch can use this to attack the opponent, though since the opponent is on the ground, he can't use high attacks or anything.
Control stick forward: "Kill everyone here!!!"
This may seem like a useless move when he's facing the opponent by himself, but still, the opponent will say, "Yes your highness!!!" and will look around the stage for opponents. The opponent will not attack Lelouch, but they will go to both ends of the stage twice, looking for opponents. If they do find other opponents in a 4 way match, the Geass controlled opponent will...well attack to KO them.
Control stick backwards: "Do not avoid me!!!"
The opponent will be unable to dodge, block or roll out of the way when Lelouch uses this Geass command for 15 seconds of the opponent's current stock. This is a very good use, as Lelouch can use this to ensure a clear hit on the opponent without them doing anything funny. The opponent can still jump to dodge however.
Side special -----> C.C.

Lelouch's partner C.C., helps Lelouch in certain conditions. It takes about a 2 second wait for C.C. to magically appear in front of Lelouch, which obviously takes time. I suggest using it when you're at a safe place. Fortunately, C.C. may be called out at and time during that match, but C.C. only has 4 different abilities, and what she chooses to help you with depends on the condition. Any what she can do is:
1. If Lelouch is about to be attacked by a projectile, C.C. will come right in front of Lelouch, say, "He mustn't die!!!" C.C. will then block the attack, and Lelouch will be safe from the projectile.
2. If Lelouch has a higher damage percentage than his opponent, and his opponent is about to launch a smash attack, C.C. will dress up as Zero, appear behind the opponent, and fall off the stage. This will cause the opponent to immediately stop there smash attack, be distracted for 3 seconds, giving Lelouch a chance to attack them.
3. If Lelouch has his Geass out of control, C.C. will give Lelouch a special lens that will block his Geass. Unfortunately, this means that Lelouch will not be able to use Geass for the remainer of his stock. You better use it before you get these lens.
4. If Lelouch has none of the above conditions, C.C. will say to Lelouch, "Boy where is my Pizza?" C.C. then lets out a raspberry, and disappears. Lelouch just got owned.
Up special -----> Nightmare frame

Lelouch will let out a whistle, and his Nightmare frame known as the "Shinkiro," will appear from the bottem of the stage and below Lelouch. It will then fly up, pick up Lelouch, and send him upwards about 6-8 stage builder blocks (depending, and it controls ROB's up special.) If you press the Up B button again, Lelouch will hop into the Shinkiro and pilot it.
While Lelouch is in the Shinkiro, whatever harm is done to it will still hurt Lelouch too (and will still cause knockback to the Shinkiro), but the stats are know the same as ROB. It's jumps are great, with it reaching 5 stage builder blocks a jump. While in the Shinkiro, he may only stay in there for 15 seconds, and once that time is up, he may only stay use again after 20 seconds. It's best not to pilot it in case you need it for a recovery, but if you must pilot it, it has 2 different moves:
A button: Lelouch will activate it's Absolute defense mechanism. It takes about 2 seconds for it to come out, but with it, it can block any attack in front of it, and the shield won't drain. Of course, the back is still exposed.
B button: The Shinkiro will let out a power beam attack from it's chest, that deals off about 25% damage, and nice knockback. However, it's a thin blast, so it can easily be ducked. The speed for the attack is the beginning of Captain Falcon's neutral B, and the ending lag of Ike's forward smash. It travels as far as it wants! This is a very useful move for the Shinkiro, and it's only attack. Be careful when using it.
Once the Shinkiro has suffered 40% damage, it will fly away, and Lelouch will fall out of it. Remember, you will have to wait for 10 seconds ONLY if you decide to pilot it. You do not have to wait if you just chose to recover.
<Standard A attacks>
Neutral A -----> Cape attack
Lelouch will attack with his cape by throwing it forward, making it swipe forward. He will then kick the opponent with a foot forward, and end it off by quickly bring his gun out, and firing one bullet at them. The first 2 hits don't really do alot of damage (about 3-4% damage) and all they do is cause the a flinch, but the gun shot can deal off about 5% damage with little knockback. The range for the first 2 attacks only reaches what's in front of Lelouch, but the gun shot can reach up to 2.5 small stage builder blocks. The hit box are Lelouch's cape for the first hit, his foot for the second hit, and the bullet for the final hit. There is hardly any beginning lag, and a bit of ending lag. Good for racking up damage, and KOing at around 400% damage (yeah, the bullet is THAT weak), but otherwise, not a really good move.
Side tilt -----> Birds of justice
Lelouch lifts his cape and suddenly, 2 light red pigeon birds start flying forward to the opponent. If one of them hit the opponent, it causes about 5-6% damage with little knockback. They fly forward about 3.5 stage builder blocks forward, and go about as fast as Samus' neutral B. The hitboxs are all around the red birds flying. Nothing else. There is the about the beginning lag of Link's side tilt, and the ending lag of Marth's neutral B. This is a good surprise projectile to attack with if Lelouch doesn't have enough time to use his Geass or anything as it is one of Lelouch's faster projectile moves (and his only ones.) The only problem is that Lelouch is left wide open when he's releasing the birds.
Down tilt -----> Gun threaten
Lelouch will aim....a gun at his head? Lelouch is probably trying to bluff his way out of a situation, as the opponent must REALLY want to KO Lelouch. If he is hit while in this pose, he will counter the opponent, let out a "gotcha!!" and fire the gun at the opponent, dealing off 8-10% damage with little knockback. Lelouch will stay in the pose for about 2 seconds, and will then put his gun away.
You press the down tilt button again while he's in the pose, Lelouch will quickly fire the gun downwards diagonally dealing off about 6-8% damage. It's range is only what's right in front of Lelouch, and it has a bit of lag at the beginning, but hardly any lag at the end however. It's best sticking with the recovery, but if you do think that the opponent is NOT going to attack you, it's wise to use this attack.
Up tilt -----> Chess piece throw
Lelouch will throw a chess piece upwards (looking closely, it's a king) about 2 small stage builder blocks, and while it's in the air, Lelouch will say, "If the king doesn't lead, how do you expect his subordinates to follow?" The entire animation is about 1 and half second. The hitbox is small and it's only the king chess piece that was thrown upwards. It deals off about a small 6-7% damage with little knockback unfortunately. While the chess piece is out of Lelouch's hands, he has super armor frames. If Lelouch (somehow at 500% damage or something o.o) manages to KO an opponent with this attack, Lelouch will say, "Checkmate," at the end.
Dash attack -----> Speeding Lulu
Lelouch will speed quickly forward about 1.5 small stage builder blocks (it looks like he's sliding) and any opponent in the way will look like they've just been hit a lot of times, and will suffer 10-12% damage, with ok knockback. This is one of Lelouch's better moves. It's speed has only very little lag at the beginning, and only a bit of ending lag. As he is using this move, he can destroy items like the capsule or crate without being hurt with a maybe explosion inside of them. Of course, the price for this move is that Lelouch loses an hatred level point every time he uses this move.
<Smash Attacks>
Side smash -----> The gunshot kill
Lelouch will bring out his gun, and automatically shoot 2 gun shots forward. Each gun shot will do about 5% damage each, with only a flinch. The range for the gun bullet will reach only 2 small stage builder blocks forward. The gun shots can easily be avoidable, considering they only travel the speed of Lucario's neutral B projectile. There is hardly any lag the beginning, and the ending lag is small. However...that's not the real forward smash.
Lelouch will then spin his gun, and THIS part of the move is chargable. Lelouch will then pull the trigger as hard as he can, and off the speeding bullet goes. This time, the bullet travels the speed of Link's arrows. It reaches about 3 small stage builder blocks forward. The damage it causes is around 7-8% damage with little knockback uncharged, and 11-12% damage with nice knockback fully charged. For course, while it may be a bit easier to hit the opponent with this attack then the previous bullets, it's still dodgable to the opponent.
Up Smash -----> Fabulous!!!

Lelouch puts his hand behind his cape, and that is his charging stance. He will then release his charge, swing his arms forward upwards diagonally, and it will leave behind a beautiful rainbow. Fabulously. Unlike the arm wave upwards, the rainbow will stay in it's place for 2 seconds, before it disappears. Anyway who, the rainbow will do 8% damage if anyone touches it. Uncharged, the arm swing that Lelouch does will cause 13% damage, and ok knockback upwards diagonally, while fully charged, this attack does 17-18% damage with nice knockback. The range for this move is about 1 small stage builder blocks up diagonally, but there it a rainbow that follows it. It has decent range overall. The speed for this move is about the beginning lag of Ike's side tilt and the ending lag of Link's forward smash.
Down Smash -----> Self suicide bomb
Lelouch will lift up his cape, and show that to his opponent that his body has a bomb that will explode if it hits. Lelouch's move in the last episode of the first season. If the opponent does attack Lelouch's bomb, it will explode, causing Lelouch 11% damage, no matter what the charge, and to his opponent, 15% damage with ok knockback uncharged, and 18% damage with nice knockback fully charged. However, for the bomb to explode, the opponent must do an attack that deals at least 10-15% damage, so just one blast from Fox's blaster = No. The bomb's explosion will cover a whole 2.5 stage builder blocks in total around Lelouch. It takes about half a second for Lelouch to reveal the bomb, and another half to regain control. Lelouch will not suffer any knockback, and rather, he will collaspe to the ground. This is a very dangerous move, as it can hurt Lelouch badly. I suggest only using this move when the opponent is at a high percentage, and yeah.
<Aerial attacks>
Neutral Aerial -----> Using Geass on the Smash Bros camera man?
Lelouch will use his Geass to the front of the screen, aiming it at the Smash Bros. camera man? Lelouch will command, "Close up on me!!!" The camera will then close up on Lelouch..and that's it? However, if anyone is outside of the camera range (which is about half a stage builder block on each side of Lelouch), they'll suffer about 1% damage a second. It takes about a whole second and a half for the camera to zoom him on Lelouch. This may seem kind of ridiculous for a move, but all's fair in love, fun and war right? The camera will zoom in Lelouch for about 3-4 seconds, and then it will zoom out again. This can be used to cause some confusion for player opponents, and can cause opponents recover in the wrong direction.
Forward Aerial -----> Fake out Geass
Lelouch will do the same animation as his Geass attack, only instead, he's not actually using his Geass. He will then immediately bring out his gun, and fire it straight forward at the opponent hopefully. This attack will deal off about 12% damage with ok knockback. This move has average beginning lag, and the ending lag of Ike's forward smash. The bullet will reach about 3.5 small stage builder blocks straight forward. This move can be used to trick people that he's about to use his Geass power, but he's really going to attack straight forward!!! Of course, it takes a while to bring his gun out, so be careful.
Backwards Aerial -----> A mirror and a Geass
Lelouch will quickly turn around, and bring out a mirror from his pocket. He will go quickly as possible to use his Geass power on himself. He will then use Geass to command himself, "Forget the pain!!!" It takes a whole 3 seconds for this to happen. This will cause Lelouch to be healed up by 15% damage. While this move may be a healing experience, Lelouch may only use this move every 20 seconds. After all, the Geass rule counts towards him too. If Lelouch is interrupted while he's using this move, the mirror Lelouch is holding will break, causing 5% damage to himself AND to the opponent. Geez, how fragile is that mirror?
Downwards Aerial -----> Aerial kidnapping?
This was done in episode 4 when Lelouch manages to escape with Suzaku. Just watch it. Anyway, Lelouch swings his arms greatly downward to try and grab the opponent. If he does manage to grab the opponent, he will then wrap his cape around his opponent, and the opponent will not be able to escape. You can either press the down aerial button again to throw the opponent down, grounding them with 10% damage, or this can go into an auto grab when you land back on the ground. This move has above average beginning lag, and the ending lag of Ike's forward smash if it misses. The range for Lelouch's arm will reach a whole small stage builder block directly below him. This can also best be used when he is near a pit, where Lelouch can perform, Lelouchcide. Or something like that.
Upwards Aerial -----> Geass to the sky
Lelouch will turn his head upwards, and he will command...the clouds? This may be him trying to use Geass on god...but whatever. His command will be, "Shine brightly on me!!!" If Lelouch manages to do this move without being interrupted for 3 seconds (it's an incredibly laggy move), a sunlight wave will shine directly on Lelouch, and will continue to travel straight downwards on the stage, for about 4 stage builder blocks downwards. Lelouch will not be effected by the waves, other than beautiful visual effects. However, if the opponent somehow touches the sunlight wave, they'll be blinded, not being able to move for 2 seconds, and suffer 10% damage. The sunlight wave disappears in only 1.5 seconds though. So it may not be worth it to spam this move or anything.
<Throws/grabs>
Beat down -----> Elbow smash
Lelouch uses his elbow to attack his opponent. He quickly attacks with it, and pulls it back, getting ready to attack with it again. The speed for the beat down is fast, and it deals about 2% damage. A basic beat down attack.
Forward Throw -----> The fatel shot
Lelouch kicks his opponent forward, and brings out his gun quickly. He then lets out 1 single bullet shot forward. This move was done in episode 23 i believe? Anyway, the bullet will do about 10% damage, with okay knockback. The opponent looks like they were just shot pretty bad, and it looks like they are dead. Scary.
Backwards Throw -----> Chess control
Lelouch will throw his opponent behind him, and bring out a pawn chess piece. He will then motion his pawn as it looks like he was moving forward on a chess board, and all of a sudden, the opponent moves forward just like the chess piece! This is best used near an edge, because as he moves the opponent backwards, it will make the opponent helpless in the air. I didn't know chess pieces had so much power. O.o
Upwards Throw -----> ...Choke hold?
Lelouch will grab his opponent by the throat, and start squeezing his hands. He will then squeeze so hard, that it will cause the opponent to fly diagonally upwards. What is he? Darth Vader? Anyway, this will cause about 11% damage, with ok knockback. Not a good move, but not a bad one either. Alright?
Downwards Throw -----> Stomp
Lelouch will throw his opponent to the ground, and he will stomp on them for about 3 times, and then he'll stop. This move will cause no knockback, but about 13% damage. Lelouch seems cowardly in this attack. I mean, he's stomping opponents when they're down on the ground? What's up with that?
<Final Smash>
The Code (AKA: Fan Theory "Lelouch is still alive!!!")
If Lelouch is wearing his Zero mask, he will immediately take it off when he uses his final smash. Lelouch will let out, "I am Zero!!! The man that creates miracles!!!!" Lelouch will then attempt to use his Geass at the sky, probably aiming his Geass...at god? Anyway, all of a sudden, Lelouch's left eye will turn into a Geass as well, and now, he has 2 eyes with the Geass. He may now use Geass as much as he wants to the opponent, without losing control over it. Unfortunately, this means his side special will not be able to work anymore. Nevertheless, you probably weren't going to use it anyway. Why? Because with this special Geass, and having used it against god (no offense to those who believe in god. It's just a moveset people), Lelouch is now...immortal! He is invincible for the next 20 seconds he uses this final smash, and if he falls off the stage by accident or something, he will not lose a stock. Lelouch can also use his down special without getting hurt. As soon as his final smash is over within 20 seconds, Lelouch's Geass power will return to normal, and he will lose his immortality. That is all.
<Playstyle>
Lelouch Vi Brittania is not known for directly going out to the battlefield and fighting the opponent. He's known for being the commander of the Black Knights, but this moveset if for Lelouch/Zero. Not the entire rebellion squad is it? Anyway, let's go on and talk about Lelouch.
Unfortunately for Lelouch, he's not the athletic type at his high school. He has only an average running speed and he's not exactly a powerful opponent. However, Lelouch is good at range combat, using his projectile moves to attack. Lelouch, though not good at sports, is a freaking genius. He's skilled at far range, and okay at close range. He doesn't really have any close range good KO moves, but his up smash, if it hits properly, can send opponents flying at around 90-140% damage.
Let's start with his good things. A good Lelouch player should have his Zero mask on (by pressing the side taunt) on most times in the early rounds. This will cause him to be a slight bit more powerful, and a bit more faster too. Lelouch should try to get as close as possible to his opponent without getting hurt, and stay in that position. A couple of his basic attacks, like his side tilt and side smash, can do all the moving for Lelouch. However, as soon as he performs one of those attacks, he should get away immediately to avoid any counter attacks (in case those attacks fail to hit or something). Lelouch's down special is a special one. I suggest only using it when Lelouch had recently attacked the opponent a lot with the attack. I suggest the forward smash, as it has the opportunity to land an easy 3 hits.
Lelouch also has more than enough counter attack moves to make opponents stay away. There is his down tilt, that's basically a counter move. There's also his down smash, which will threaten opponents to stay away from Lelouch. However, you should be warned that Lelouch's bomb can easily be disengaged with a simple projectile. When using the down smash, it's that time to go on offense.
Lelouch should dodge a lot too. Try your best to spot dodge the opponent. Then follow it up with your Geass move!!! That is the best time to use it, without the opponent running away on you. After that, press the B button if the opponent is at a high percentage to go for the kill. If the opponent is not at a high percentage, use one of Lelouch's other moves to make the opponent do something utterly ridiculous (like 20 pushups xD). Note that Geass can only be used to the opponent once. Be careful when using it. Decide what you want to do with it.
Lelouch's aerials are nothing special. Against a CPU, kind of useless sort of. Against a player, great. Lelouch's neutral aerial can cause them to be confused when recovering. Also, his backwards aerial is vital if Lelouch needs to be recovered by a couple of percentages. His up aerial, while laggy, is a great ranged attack, that suns out the opponent. Bad pun i know, but not the point. His downwards aerial, as long as Lelouch has an extra stock, can be used for the finishing blow on the opponent easily...if you can grab them that is.
For Lelouch's bad defaults, Lelouch has a to wait a whole second before his recovery arrives. Opponents can easily spike him until then. Also, Lelouch doesn't exactly have good jumps, so he's just begging to be juggled around a lot. Finally, Lelouch's main KO move, his Geass is plenty hard to hit with. With the opponent dodging, jumping and crouching all the time, how can Lelouch use this move? It's best just to use his better KO moves, like his up smash and down smash. However, his down smash involves him getting hurt too, and his up smash is kind of hard to hit with.
Lelouch is no easy character to control, but he doesn't go down that easily either. Just prepare to use moves when the time is right, and you should be fine.
<Extras>
Stuff that everyone has in there extras
Up taunt: Lelouch lets out an laugh so evil, that he can't stop laughing for 3 seconds, making it that Lelouch is so easily open if he performs this taunt. Best not to use this taunt if you don't got 3 seconds.
Side Taunt: Lelouch kind of has 2 taunts for his side one. His first is when Lelouch puts on his Zero mask and let's out a, "Time to crush Brittania and bring glory to Japan!!!" His second one is when he slowly takes his mask off, and shifts his eyeballs to the front screen. Lelouch...is staring at you. O_o
Down Taunt: Lelouch says, "The only ones who should kill are those prepared to be killed." Is he saying that he knows and is prepared to be killed anytime, while KOing other opponents?
Victory music: The last 10 seconds of the TV size song, COLORS by flow, AKA the first opening of Code Geass
Classic mode victory music: Continued Story (Code Geass OST)
Victory pose 1: Lelouch says to himself this, "I....destroy the world....and create it....anew..." Lelouch closes his eyes, and looks noble and stuff. Those were his last words before he died in Code Geass.
Victory pose 2: Lelouch motions his hand, uses his Geass power, and says, "Lelouch Vi Brittania commands you...Obey me subjects!! Obey me world!!!" Then the Geass flies to the front screen, and you hear the crowd cheering, "All hail Lelouch!!! All hail Lelouch!!" They keep on cheering forever (till you're ready for the next match of course) and Lelouch points his finger forward, and smiles evilly.

Victory pose 3: Lelouch looks like he still has his Zero mask on. Lelouch slowly takes it off in a cool fashion, stares at it for a second, and quickly shifts his eyes to the front screen. He stares at you...O_o Basically the same
thing as his side taunt.
Lose pose: Lelouch will wear his Zero mask on, and look away from the opponent, appearing to be glaring at the winner and wanting revenge.
Symbol: None other than the Black Knight's symbol

Entrance: It seems like Lelouch is looking to the side. He will turn his body forward, and seemingly use his Geass to the front screen. His below pic should explain things a bit more.

Snake Codec
Snake: This is Snake. We got some guy here with a weird eye power.
Colonal: Watch out Snake. His name is Lelouch Vi Brittania. He has a power called Geass that allows him to bend the will of anyone.
*bit of static*
Lelouch: Yes....And i use this power...to oblitherate Brittania!
Snake: What the-? How the heck do people keep on hacking our channal?
Lelouch: So Snake...tell me something. Why do you choose to fight me?
Snake: Because i have orders to stop you and defeat you...Lelouch.
Lelouch: Very well then....look behind you!
Lelouch seemingly right behind Snake: Lelouch Vi Brittania commands you...Die!!!!
Snake: What the-? NOOOOOOOOOOOO!!!!!!
Assist trophy

Lelouch's little brother joins the brawl, and he seems to have brought his Geass with him. His Geass is different from Lelouch's however. His Geass can be used to stop time. He will activate his Geass as soon as he is summoned, and in 3 stage builder block range, time will freeze for the opponent (of course, the player that's using Rolo will not be effected at all). They will not be able to move at all for 5 seconds, and that's not all to Rolo's abilities. As soon as he activates his Geass, he will bring out his gun, go up to the frozen opponent, and shoot them with it. There will be no knockback, just 20% damage to the opponent of course. If there was no opponent in range of Rolo, he will not go after the opponent for the kill. If Lelouch was the one that summoned him, he will say at the beginning, "Big brother!! I'll protect you!!"
Event matches
#12: The rebellion attacks!!!
Character: Lelouch (2 stocks)
Assistance: Ike, Link
Opponent: Bowser, Ganondorf, Dedede (One at a time)
Music: All Hail Brittania
Description: Lelouch decides to strike back on the kings of smash. Team up with Ike and Link of the other rebellions, and strike back on Bowser, Ganondorf and Dedede!!!!
#19: Brothers
Character: Lelouch
Opponents: Luigi and Mario
Music: If i was a bird?
Desciption: Lelouch is in a corner where 2 brothers team up on him. Luckly, his brother Rolo is here to save the day. Use the Rolo assist trophy to help you win the match!!! There will only be 1 assist trophy on at a time, and it will always be Rolo. Also, Lelouch is the only one able to use the assist trophy.
#27: Grab it!!
Character: Shiek or Lelouch
Opponent: Shiek or Lelouch
Neutral character: Peach
Desciption: Peach has the star rod!!! Grab it away from her by attacking her or using the Geass power on her!!!!!
Special Make Your Move Event match: Battle of the genius'
Character: Lelouch or Light and Ryuk
Opponent: Lelouch or Light and Ryuk
Description: Finally, the match you've all been waiting for. Choose who do you think is smarter, and brawl!!!
Trophies
Lelouch: Lelouch Lamperouge is the title character and protagonist of the series. He was born as Lelouch vi Britannia, the Eleventh Prince of the Britannian Imperial Family and seventeenth in line for the throne. His father is the Britannian Emperor, Charles zi Britannia, and his mother was Marianne vi Britannia. He was sent to Japan as a political hostage for questioning his father's cold regard for his mother's assassination and the crippling of his blind sister Nunnally. When Britannia invaded, he went into hiding with his sister, taking refuge with the Ashford family. Seven years later, he discovers an enigmatic girl known as C.C., who grants him an ability called Geass, which allows him to command others to behave as he wishes. Seeking to build a better world for his sister, he pursues the destruction of Britannia under the guise of his masked alter-ego Zero.
Suzaku: Suzaku Kururugi is Lelouch's childhood friend and son of Japan's last prime minister, Genbu Kururugi. He is both a secondary protagonist and antagonist of the series, aligned against Zero's Black Knights but nevertheless intent on changing the Britannian Empire for the better. He claims that achieving results by wrong or illegal methods is meaningless, wanting to change Britannia from within. Suzaku is an Honorary Britannian and part of the Britannia army, later becoming the pilot of the experimental Knightmare Frame Lancelot as a member of the R&D Division. He later falls in love with Princess Euphemia, who is murdered by Zero. In the second season, Suzaku is granted a position in the Knights of the Round by the Emperor for his capture of Zero. His title and rank is Knight of Seven. Suzaku desires to become the Knight of One, a status that will allow him to rule Area 11 by his choosing.
C.C.: C.C. is an immortal girl who outwardly appears to be little more than 16 years old. She becomes Lelouch Lamperouge's accomplice when he makes a Geass contract with her. She is willful almost to a fault, usually doing whatever she wants regardless of whether or not it inconveniences others, particularly with Lelouch. She also likes to withhold information, usually telling people just enough to leave them wondering. C.C. has a strong penchant for pizza, especially Pizza Hut's (which sponsors the show in Japan, though the logo is blurred out in the English dub); she constantly orders pizzas to Lelouch's house using his credit card. She also carries around a stuffed toy of "Cheese-kun", the company's mascot in Japan. Her love of pizza is often used for comedic effect, as she was twice willing to risk capture simply to get a piece of a giant pizza being made by the Student Council (which is ruined both times). Both Lelouch and Kallen sometimes refer to her as "Pizza Girl".
Kallen: Kallen Stadtfeld is a Britannian-Eleven girl who goes by her Britannian name when attending Ashford Academy, where she pretends to be ill to explain her prolonged absences. She believes herself to be Japanese at heart and prefers to be known by her birth name, Kallen Kouzuki. Kallen is a member of a Japanese resistance cell led by her brother, who died prior to the first episode, and later joins Zero's Black Knights. She is the group's most talented pilot and on par with the Knights of the Round. She pilots the unique Guren Mk-II. Her devotion to Zero is unmatched among the rest of the Black Knights.
Rolo: Rolo Lamperouge is introduced in the second season as an assassin posing as Lelouch's brother, placed there to observe Lelouch following his memory rewrite at the end of the first season. Rolo pilots the Vincent Prototype, and possesses a Geass power in his right eye that allows him to temporarily freeze the subjective experience of time for all persons within a given range. Whenever Rolo uses this power, his heart stops until the effect ends. He is manipulated by Lelouch into supporting the Black Knights and seems to become dependent on Lelouch over time, treasuring a locket given to him by Lelouch on his birthday and always referring to him as "brother".
The Black Knights: The Black Knight are a group of revolutionaries created by Lelouch (under the guise of Zero) in his campaign to overthrow Britannia. He introduces the group to the world as an organization which protects those without power from those who have it. Under his leadership, the Black Knights grow in strength exponentially, becoming a force rivaling the Britannian army. Ultimately, the Black Knights gain legitimacy when the newly-formed United Federation of Nations contracts the Black Knights (organized as a private military company) to become their military force.
Charles zi Britannia: Charles zi Britannia is Lelouch's father and the 98th Emperor of the Holy Britannian Empire as well as one of the main antagonists of the series, he has 108 different consorts. A strong proponent of Social Darwinism, he views equality as an evil that must be dispelled, and to this end he encourages class conflict and military expansionism so as to maintain social evolution and progress. He also suffered a horrific childhood of his family murdering each other for sucession, forging a pact with his brother V.V. to create a world without lies. Acquiring allies in Marianne and C.C., Charles created the Sword of Akasha, a weapon designed to facilitate the Ragnarök Connection, remaking the world into a place without lies by killing "God", which is the collective individual unconsciousness of all mankind.
Marianne: Marianne vi Britannia is the fifth wife of the Emperor of Britannia and the mother of Lelouch and Nunnally, titled the 98th Empress of the Holy Britannian Empire. She is nicknamed "Marianne the Flash" for her piloting skills, having been the test pilot for the Ganymede Knightmare Frame with the support of the Ashford Foundation, which was then a contender in the development of the first Knightmare Frame prototypes. Bismarck Waldstein claims that the only person he had to use his Geass against before Suzaku was Marianne, which shows that she must have been particularly skilled. When Lelouch was a child, she was assassinated in the Imperial Palace in broad daylight, purportedly by terrorists, and the culprits were never found. The fact that the impenetrable security of the palace was powerless is what convinced Lelouch that her murder was no random act of terrorism.
Nunally: She is Lelouch's sister and the main reason he's become Zero for. Nunally born Princess Nunnally vi Britannia, daughter of the Emperor of Britannia, Charles zi Britannia, and Marianne vi Britannia. She was 87th in line of succession to the Britannian throne and she is the Eleventh Princess of the Holy Britannian Empire. When her mother was assassinated, Nunnally was paralyzed by bullet wounds, and went blind due to psychological trauma. Lelouch believes that she may be able to see again someday. After the confrontation between Lelouch and the Emperor of Britannia about the murder of their mother, both Lelouch and Nunnally were exiled to Japan as political prisoners. They then went on to live in Kururugi residence where she first met Suzaku Kururugi. In information provided by the novels, Nunnally privately had a terrible time coping with the changes in her life and would throw tantrums when left to her own at Kururugi residence, destroying nearly anything she could get her hands on.
emergency
Smash Journeyman
My Fail MYM Opinions
- Faked and Opinionated by emergency
My mini-reviews are actually just some crap that no one cares about. This is my warning, that these little blurbs I spit out are nothing useful. Just my opinion on certain things and a couple of moves.
Tryclyde
- Oh, I remember these things from my NES! Righto, I was int rested in the mechanic that you added with growing the heads, and the multiple effects and causes that come with each spurt. The head-popping side-effect was a good touch.
- Onto to the moveset, I just took a quick skim to see about how much I had to read, and judging on how long it took me to scroll down, you had a lot of words.
... *reads*... - Alrighty, I'll pick out some moves.
- The Neutral Special was pretty nice, it has great way to setup several strings of attacks, if placed correctly. I also like the references to the other enemies that you see in the game. Fry Guy. <3.
- The Up Special, Ha. Albatoss~ I see, he works much like a moving magic carpet. That was sneaky. I loved this move.
- Forward Smash, Tweeter! (Ha, sorry. Just had to say it.)
- Down Smash, I loved this move too, since it's so integrated into using the surroundings, (Poor Tweeter, dies for a hopefully good cause.) The sheer possibilities with this move, is got me thinking of: NSpec (Fry Guy), Fsmash (Tweeter), Usmash (Fire Snake), + Dsmash (Quicksand). That can wreck some huge damage. :D
- As the set itself, I believe it is highly detailed in almost every aspect. IMO, I would rather read a set with less technicality in it. Colors were fine, Sort of bland with just white under-text. Headers were great (pewpew). Overall, it was a fantastic read, and brings back some old memories.
Envy
Death the Kid
Lelouch
Entries shall be made as soon as I finish reading.
Chris Lionheart
Smash Champion
Lelouch
Lelouch was certainly an interesting set. Some of the moves, such as the Neutral Special, did exemplify great creativity, but others, with one of the worst cases being the Down Tilt, showed anything but creativity (why is the move so close to being a generic counter?). More blatant than the occassional creativity flaw, however, are the balance issues with the moveset. The Neutral B just seems grossly overpowered. When used as a KO move (and it isn't his only KO option), it is quite balanced. A couple commands just struck me as insanely broken: 1) "Jump" and 2) "Do Not Avoid Me!" I don't think I should have to explain why permanently shutting down the opponent's ability to defend themselves or causing them to auto-jump for the rest of the match is overpowered. I am aware that Geass can only be used on a foe once per stock... but geez... use it early on and you are set. Another big problem with this set is something that Junahu regularly criticizes- the overuse of moves that can only be used a limited number of times per stock. This includes the Neutral Special and Side Special. You have also implemented a rather large number of moves with large recharges, such as the Up Special (piloted) and the Bair.
Overall, Lelouch is a good set. Plenty of versatility (covers everything from damage racking to gimping to KO'ing to defense), a reasonable amount of creativity, and a good amount of detail (though I don't get why the Fair has no damage percentage). It is clearly a step up from anything you have made in MYM5. It still has a lot of room for improvement, however.
leafbarrett
Smash Lord
Notes: Negligable in this case means that the knockback won't really have any effect until the opponent is at maybe 150%, and even then, it will only send them a small distance.
As far as speed goes (hers is above 10), Sonic's speed = 20/10, just to give you a meterstick. For acceleration, it means that when she turns, she's immediately at top speed again.
Ratings from most extreme to average (attack descriptions):
Hyper (almost never used; reserved for direct attacks that go at least 3 times as far as Samus's Grapple Beam and indirect attacks that only stop when they hit someone or something, no matter how far they travel; also for the exact opposite, where direct range is virtually nonexistant and indirect range only goes as far as Lucario's Force Palm)
Ultra
Super
Very
Slow/Fast
Medium Slow/Fast
Medium
The total at the bottom of the stats is the sum of all the stats and miscellaneous point changes. An average score would be about 75 to 85.
S = 90 or above (possibly broken)
A = 80-89 (great)
B = 70-79 (good)
C = 60-69 (below average)
D = 50-59 (poor)
E = Below 50 (horrible)
Roserade

Stats
Power: 2.07/10
Aside from one move that requires perfect aim with a hard-to-aim move, she has virtually no killing potential. Even at high damage, opponents don't have too much to worry about as long as they're careful.
Special: 2/10
Standard: 2.2/10
Grab: 3/10
Defense: 0/10
Roserade makes Jigglypuff look like a heavyweight. It's incredibly dangerous for Roserade to engage in close-range melee, because any hard hitter can easily OHKO her, even from the middle of Final Destination, and Ike can kill her with... just about anything.
Priority: 10/10
This is one area where Roserade really shines. Virtually every move will tear straight through most melee attacks and at least cancel most projectiles.
Combos: 6/10
She's... okay at juggling opponents with a few of her moves, but for the most part she struggles to get good combos because of her cooldown.
Range: 9/10
Roserade has exceptional range. Her direct attacks can hit from farther away than any other character by an incredibly large margin, and can strike through even moderately thick walls with her longest-ranged attacks, such as her f-smash and forward special. However, her lack of projectile attacks does hinder her overall range. No matter how far her direct attacks can hit from, 90% of projectiles still have an edge over her. In addition, that range is heavily restricted to a single direction; most of her attacks have massive range in one direction (most notably forward) but virtually none in the other directions. Combined, she can strike from anywhere, but if an opponent keeps moving around her (particularly above her), she has to rely heavily on prediction.
Direct: 15/10
Indirect: N/A (-1, limits max rating to 10)
Accuracy: 5/10
Speed: 11.5/10
In running speed, Roserade is unparalleled, excluding Sonic, who can't be outclassed in movement speed by anyone (except maybe Shadow). However, even Sonic can't compare to Roserade's turning speed; she can literally turn in place. The instant one foot is on the ground, Roserade can turn around, and she doesn't even slow down. Her turning ability is on par with dash dancing. Her attack speed is below average, though. Her attacks launch rather quickly, but she has problems with cooldown.
Max Speed: 13/10
Turning Speed: 15/10
Attack Speed: 6.5/10
Jump: 10.4/10
Roserade has an incredible jump, and even has a half-decent third jump to work with. Her second jump is just as high as her first. Combine Falco's first jump with ZSS's second jump, add in another half-Mario jump, and you've got Roserade's total jump.
First Jump: 10/10
Second Jump: 10/10
Third Jump: 4/10 (no effect on jump stat; add 1/2 of rating to misc.)
Recovery: 15/10
Petal Dance gives Roserade great range as a recovery, and doesn't put her into freefall. However, that's not the main reason she gets such a high recovery rating. The main reason is Vine Whip. With the 2 jump boosts she can get off of a wall, combined with her 3 jumps, even without a wall jump OR Petal Dance, she's capable of covering a vertical distance equal to a maximum size custom stage, from the bottom of the bottom block to the top block (high enough to land on the top block without needing the edge). Vine Whip is a bit easy to catch her in the middle of, but Petal Dance is very hard to intercept due to the hitbox surrounding her body, so a smart player can combine the 2 to get a virtually unstoppable recovery. Of course, this doesn't do her any good if she gets KOd by an attack's launch, so this almighty recovery combo's true use is to prevent her from being gimped while off-stage.
Maneuverability: 12/10
Traction: 15/10
Aerial Maneuverability: 9/10
Final Smash: 5.93/10
Cross Poison works kinda like Marth's Critical Hit in that both involve lunging forward quite far along the ground and striking upon running into an opponent, as well as the fact that if you don't get out of the way of the lunge FAST, you're going to get hit. Cross Poison is one of the weakest (if not THE weakest) Final Smashes in terms of damage and knockback. However, the effect from the poison racks up a lot of damage, and the flower it plants helps restore Roserade a little, too.
Power: 1.8/10
Range: 7/10
Other: 9/10
SUBTOTAL: 83.4/100
Miscellaneous: -1
Roserade has a plethora of special conditions. The majority of them assist her, but the hindering conditions are severe enough to slightly outweigh the bonuses.
+Natural Cure +2
+Leech Seed +1
+Poison Point +2
+Steadfast +1
+Third Jump +2
+High Wall Jump +3
+Extended Wall Cling +1
+Extended Reach +1
+Distance Edge Grab +2
+Extended Dodge +1
+Distance Grab +1
+Poison +2
+Tech Versatility +1
-Glass Jaw -5
-No Guard -10
-Butterfingers -5
-Lightweight -2
-No Strength -1
=Ledge Getup Change +0
TOTAL: 82.4/100
Rating: A-
Overall, a skilled character, though her stats are so out-of-balance with each other that it takes a skilled player to take advantage of her potential. She struggles in 1v1 matches because of her horrible power, which forces her to play a game of keep-away in order to outlast her opponent, although her Toxic Spikes do have good gimping potential. However, team battles are where she truly shows her worth. If you're in a team battle, then you want her on your side, especially if you're a power hitter. Roserade's ability to rack up opponents' damage with her poison and her long range make her the ideal partner for someone who can get kills at low damage. In addition, with a teammate helping her, her weak knockback can actually be used as a slight advantage, allowing her and her teammate to juggle an opponent back and forth.
Abilities:
Natural Cure, Leech Seed, Poison Point, Steadfast, Extended Reach, Extended Dodge, Ledge Getup, Tech Versatility
-Natural Cure: Sleep, freezing, burial, dizziness, slowdown, stun, and (oddly enough; you'll see why below) metal affect for half the normal time. Roserade is immune to flower and poison (including white Pikmin). The reason that metal falls into this category is because it hinders her movement so severely.
-Leech Seed: When Roserade inflicts a flower status on another character (even through the use of a Lip Stick), for every 2% damage the flower inflicts, Roserade heals 1% damage.
-Poison Point: When Roserade is grabbed, for every 2 seconds she is held, she inflicts 1% poison damage to the holder. In addition, when she grabs an opponent, for every second she holds the opponent, she inflicts 1% poison damage.
-Steadfast: Not counting banana peels, Roserade will not trip.
-Extended Reach: Roserade can grab an edge from slightly farther away than most characters.
-Extended Dodge: Roserade's rolling dodges go a little farther, and the effect lasts a little longer for sidestep dodges.
-Poison: Roserade is capable of poisoning an opponent. (See below.) In a 2v2, even if team attack is turned on, she cannot poison her teammate.
-Tech Versatility: Roserade has several options for what she can do when she performs a tech. For example, she can choose to instantly spring off of the ground into a jump, or launch forward/backward into a sort of aerial rolling dodge, or even attack straight out of the tech. Her teching is slowed down a little to allow players to perform these.
Detriments:
Glass Jaw, No Guard, Butterfingers, Lightweight
-Glass Jaw: This simply means that the character has less than 0/10 defense. For Roserade, it corresponds to -5/10 defense. What this means for Roserade is that with a fully charged forward smash, Ike can KO her from the farthest side of Final Destination even at no damage.
-No Guard: Roserade’s shield does not protect against attacks from behind. In addition, even when blocking an attack, Roserade will still take 1/10 of the move's original damage every time the shield is hit.
-Butterfingers: Roserade's grab can be broken in half the standard time for a normal hold. In addition, she can only hold onto the edge for half of the standard time before she falls.
-Lightweight: When Roserade's grab is broken, she slides twice as far back as a normal character, and there is a slightly longer delay before she can move again.
-No Strength: While metal, Roserade is rendered almost helpless. She can't dash, her walking is reduced to minimum speed, her jumps are all half-height and have very little horizontal movement... she can't even stand up straight for long!
Conditions:
Ledge Getup Change
Ledge Getup Change: Apart from her attack when getting up from an edge, all of her edge animations remain constant. They don't change to a slower animation at >100%, like other characters. However, she is slow to get up from an edge to begin with, unless she grabbed it using Vine Whip or a tether.
A note about Roserade’s poison: Excluding the effect of Poison Point or any throws/pummeling, any poison inflicted does NOT wear off; in addition, it is accumulative. Her poison has 4 stages of intensity. The first time a target is poisoned, he or she will only take 1% damage every minute (60 seconds). The second stage (requires 2 additional poisonings, total of 3), the time decreases to 40 seconds. The third (6 total) drops the delay to 20 seconds, and the fourth (10 total) drops it to 10 seconds.
Specials
B: Sleep Powder
Roserade sprays blue-colored pollen a short distance in front of her. It does no damage, but it will put any opponent that breathes it in to sleep. The pollen doesn't linger behind the leading portion of the move.
Speed: Medium launch, very slow-moving pollen, cannot be used more than once at a time (pollen has to fade before it can be used again)
Range: A little longer than Samus's Grapple Beam (long), spreads upwards & downards to match her height (medium short)
Up-B: Petal Dance
Lunges in a chosen direction, cloaked in a swirl of petals. Covers a large distance, has a decent hitbox surrounding her entire body, and drags the opponent along with a series of hits, but inflicts minimal damage and knockback. The direction can be changed mid-path and can be curved. This move does not send Roserade into free-fall, but she cannot use Vine Whip until she lands. Ironically, the long distance that it carries her makes it very difficult to spam.
Knockback: Drag x 5 + Minor x 1
Angle: Drag x 5 + Back-up or forward up, depending on the direction traveled.
Damage: 1% grass x 5 + 3% grass
Speed: Fast
Range: Travels long distance (ultra long), medium surrounding hitbox
Over-B: Vine Whip
When pressed but not held, swings a blade-tipped whip forward. If held, shoots the whip straight forward, after which it can be used just like Sheik’s whip. Has enormous range. The tip does more damage, but the base will inflict poison. In midair, the whip shoots straight forward, and if it’s in range of a ledge, it will automatically latch on to the edge. If it is out of range of the ledge, but in range of a wall, even a wall angled downward, it will stick into the wall, and she will fling herself upwards and launch a second whip out to latch onto an edge or into a wall, which she can then pull herself up into a huge jump from.
Knockback: Very low
Angle: Forward
Damage: 8% grass or 5% poison
Speed: Medium with ultra long cooldown
Range: Hyper long horizontal, ultra short vertical
Down-B: Toxic Spikes
Scatters 5 toxic four-pointed spikes in front of her. The spikes remain on the ground for 10 seconds before disappearing. If they hit a target, they will automatically disappear.
Knockback: Flinch
Angle: None
Damage: 3% poison
Speed: Fast, but can't be reused until all the spikes have vanished
Range: Total of about the length of Snake's long grenade toss (super long), with the spikes evenly spread if they all land on the same flat surface
Standard
Weak attacks
A: Kick
A simple kick.
1%, flinch, very fast
AA: Double Kick
A second kick, bringing her foot back around a second time.
1% + 1%, flinch + flinch, very fast + very fast
AAA: Twirl Kick
Kicks, brings her foot back for another, then spins and kicks a third time.
1%+1%+2%, previous + negligable
AAAAA...: Flurry Kick
After the first three kicks, continuously kicks back and forth like the first 2 kicks. Will also work if you just hold the A button after the 3rd attack in the combo.
1%+1%+2%+1%+1%..., previous + flinch + flinch..., previous + ultra-fast
Tilts
Up-A: Twin Kick
Performs a quick handstand upward lunge, kicking above her twice. Similar to Pit's up-tilt, but weaker.
Damage: 3%+3%
Knockback: Up + up
Speed: Fast
Range: Medium vertical, hyper short horizontal
Forward-A: Vine Swing
Spins forward and lashes out with her whip. As usual, the tip hits hardest, but not by very much.
Damage: 6% grass or 8% grass
Knockback: Forward
Speed: Medium-fast
Range: Long horizontal, short vertical
Down-A: Trip Kick
Quickly sweeps the ground in front of her.
Damage: 3%
Knockback: Trip (slight upwards)
Speed: Super Fast
Range: Medium short horizontal, super short vertical
Smashes
Up-Smash: Power Whip
Shoots both vines straight up, with the tips colliding a considerable height above her. If she hits someone at that point (where the most damage is done), she quickly jerks the whips apart, slashing the opponent again, and slams them into the ground in front of and behind her, striking over a ridiculously large semicircle from in front of her to behind her. Does decent damage and inflicts poison if she hits with the point where the tips meet, and the tips do decent damage on the way down, but the whips themselves hit for relatively little damage, though on the way down, no part of the attack is poisonous. She will perform the second part of the attack if and ONLY if she hits with the very small sweetspot where the tips collide. If she hits with the sweetspot, the blade tips of the second strike are incredibly potent, and are her most potent attack. The knockback of the sweetspot aims the victim directly at that spot, but the second hit much be as precise as Marth's forward-smash (which bases its most potent strike on the very tip of the sword) and even then, it only works when the target is on the ground (including the target hit by the first sweetspot). The knockback of the first sweetspot is unbelievably fast (in order to get the target down to the second strike's sweetspot in time), but it's set in stone & is immediately canceled by the second strike, and it's impossible for the second strike to completely miss the target (meaning that the sweetspot can't just instantly spike someone off the cliff from 0% or at all, for that matter).
Damage: 4%-7% grass or 8%-13% poison + 18%-23% grass or 4%-7% grass
Knockback: Up or down-forward + up
Speed: Very slow charge, fast launch, very slow cooldown; super fast launch for second attack, but super slow cooldown
Range: Hyper long vertical, short horizontal (first attack); hyper long semicircular
Forward-Smash: Rose Whip
Viciously launches the whip forward, and jerks it to the side if she hits with the tip (at the edge of the attack's range).
Damage: 3%-6% poison or 7%-11% grass + 2%-4% grass
Knockback: Forward or stun+forward
Speed: Medium slow charge, very fast launch, medium slow cooldown
Down-Smash: Seed Bomb
Seed Bombs the ground in front of her with one flower, then behind her with her other flower. Will plant a flower if it hits directly.
Damage: 8%-14% grass/flower
Knockback: Forward-up/Backward-up
Speed: Medium-Slow
Range: Medium
Dash A: Assasin Lunge
Kicks off the ground and lunges forward, using one of the whip blades like a knife to slash forward along the length of the lunge.
6% grass, backward-up, medium range, fast
Aerials
Neutral-Air: Rose's Thorns
Twirls in midair with her whips twirling around her.
Damage: 1% x 5+1% poison
Knockback: Drag x 5+ forward-up/backward-up
Speed: Fast, but slow cooldown
Range: Short
Up-Air: Whip Drill
Spins around, her whips extended above her head and wrapped together, the tips making a sort of drill.
Damage: 7 hits but only 4% total
Knockback: Negligable x 7
Speed: Fast
Range: Medium upwards, short horizontal, super short downwards
Forward-Air: Twin Whip
Swings her whip in front of her twice.
Damage: 3% grass x 2
Knockback: Forward-up x 2
Speed: Fast x 2, medium cooldown
Range: Long horizontal, short vertical
Back-Air: Twin Back Whip
Spins and swings the whip behind her, then quickly spins a second time to strike again. Similar to her forward-air, but slightly stronger.
Damage: 3% grass + 4% grass
Knockback: stun+backward
Speed: Fast x 2, medium cooldown
Range: Long horizontal, medium vertical
Down-Air: Vine Flip
Flips and swings her whip vertically straight down in reference to the screen.
Damage: 7% grass
Knockback: Down (tip) or up (base)
Speed: Medium
Range: Medium
Ledge (<100%): Lunge Kick
Flings herself forward in a sliding kick.
2%, long range
Ledge (>100%): Axe Kick
Pulls herself up into a handstand, then axe kicks.
3%, medium range
Standup Attack: Sweep Kick
Swings her legs in front of and behind her in a kick. Very weak.
1%, medium range
Grabs
Z: Bind
Swings her whips forward and wraps them around the opponent from a distance. Longer than Link's Hookshot, but not by much.
Range: Very long
Pummel: Constrict
Squeezes the opponent with her whips and digs her thorns into the opponent.
2% poison non-accumulative
Speed: Medium
Up-Throw: Handstand Kick
Holds the opponent above her and handstand-kicks them with both feet.
6%, up
Forward-Throw: Thrust Kick
Shoves a foot against the opponent while holding them in place, then releases to shove them forward.
4%, forward
Back-Throw: Vine Slam
Swings them in a sideways arc with her whip and slams them into the ground.
8% poison non-accumulative, backward-up
Down-Throw: Stomp
Jumps up, slams the enemy into the ground below her, then stomps on them.
4%+2%, up
Items
Item Neutral: Swings the item forward.
Item Tilt: Swings the item harder, stepping forward to do so and giving the attack surprising range.
Item Smash: Spins with the item and swings it diagonally down. One of her slowest attacks. Shoots 4 stars from a Star Rod.
Item Dash: Jumps forward, twirling the item around her to hit up to 4 times but for minimal damage for all of them.
Home-Run Bat Range: Very high, sweeps the ground
Final Smash: Cross Poison
Roserade brings her arms in across her chest and her eyes twinkle. Roughly a second later, she lunges forward (roughly as far as Marth’s Critical Hit) and, with the petals of her flowers scattering into the air, she slashes with the blades on the tips of her whips, clutched in her semi-humanoid hands normally concealed by the petals. If she hits, she smirks, then springs back onto her hands and then springs back again to right herself and to put distance between her and the target, as well as to show off a little. If she misses, she grimaces and kicks backwards, also to put distance between her and the enemy. This inflicts both toxic poison and flower on the opponent.
Damage: 11% poison
Knockback: Low
Angle: Forward
Speed: Medium-slow charge, very fast launch, very slow "cooldown"
Effects: Plants flower; toxic poisoning: 10 seconds of 2% per second, then 10 of 1% per second, then the poison reverts to fourth-level intensity.
Taunt/Victory/Loss
Taunts:
Up: Faces the screen (crowd) and bows.
Side: Extends only the blade of one of her whips out of her flower and licks the broad edge, almost like a teasing female assassin might.
Down: Makes a taunting motion, as if to say “bring it on”.
Victory Poses:
1: Performs a short ballet twirl, followed by a bow. She murmurs "rade" as she bows.
2: Launches into the air with an elaborate Petal Dance, landing gracefully on one knee with her arms extended and her hands against the ground; her head is bowed some. After landing, she'll glance towards the screen
3: Giggles teasingly and mischievously, holding a flower in front of her mouth.
Matchup-specific: If Lucario, Pikachu, or any of PT's pokemon was in the match, she will look back at them and wink, as if to simultaneously flirt and taunt. When she does this, that pokemon will actually blush.
Loss Pose:
Roserade is facing towards the screen, but her head is turned to the side (inwards regardless of where she's standing). Her vision is directed at the victors, at whom she's glaring. She is clapping, although it seems forced. Her teeth are clenched. She's a very poor sport, but she at least has the decency to try to congratulate the victor(s) in a civil, polite manner (although she isn't very good at it).
Miscellaneous
Fall Speed: Medium
Gender: Defined, female
Voice: Feminine, alluring, “innocent”-sounding and very mischievous (basically, femme fatale)
Height: Only a little taller than Pikachu. This is a fairly big contributor to her light weight.
Trophy Description:
With the graceful, flowing movements of a dancer, Roserade strikes out with her thorn-covered whips, which give her massive range. She doesn’t have any knockback power, though, so she has to rely on a strategy of keep-away. Her light frame is incredibly easy to send flying, and yet it allows her to move and turn with astonishing agility; it also allows her to effortlessly jump as high as any other brawler, even allowing a third jump. She can recover from any fall where her Vine Whip will reach the edge or a wall, so players must rely on her light frame to send her soaring.
Alternate Costumes
-Shiny
-Both flowers red and skin blue
-Both flowers blue and skin red
-Both flowers white
-Both flowers and hair red
-Both flowers black
Quirks
-If Lucario, Pikachu, or any of PT's pokemon is in a match with her, their attention will be diverted towards her (unless they were the winner of the match). The aroma from her flowers is particularly powerful for male pokemon. Lucario is defined as a male in the game, and while Pikachu's gender isn't specifically defined, it's assumed to be a male. The same goes for all 3 of PT's pokemon.
Snake Codec:
Snake: Okay, I've faced some silly opponents, but this is just ridiculous. A PLANT?
Otacon: It's a Roserade, a flower pokemon.
Snake: Flower pokemon, huh? This should be a piece of cake.
Otacon: Snake, haven't you ever heard the expression, "Every rose has its thorns"? Roserade takes it literally; she's equipped with vines that are covered in toxic thorns! If you're hit by the thorns, you'll be poisoned, and the poison doesn't wear off. Not only that, but she's incredibly fast and can strike from long distance using the whips.
Snake: Still, she's a flower pokemon. There's no way she can take a hit, right?
Otacon: True, Roserade is the lightest fighter to have joined thus far, so if you can catch her, a couple of good hits should do the trick. Just make sure you don't grab her.
Snake: What? Why?
Otacon: Her body is also covered in almost invisible toxic thorns, to if you try to grab her, you're going to get yourself poisoned.
Snake: Ugh... I shouldn't have left my lighter at home.
Crowd Cheering: Alternates between men saying "Rose" and women saying "Rade" in quick succession.
Kirby Hat: Kirby gets Roserade's white hair (petals?) as a headdress, and his hands have the 2 rose bouquets on them.
Animations:
Entry:
A large rose bud appears. The petals scatter to reveal Roserade crouching inside, at which point she stands up.
Standing:
Neutral: She stands with her arms crossed in front of her body and her legs straight.
Idle 1: She will extend a blade from her flower and examine it, making sure it's sharp.
Idle 2: She will perform a quick ballet twirl.
Idle 3: She will hop from one foot to the other in a mock boxer stance.
Special 1: At over 100% (if you somehow manage to survive that long), she will be hunched over with the sides of her arms (right next to the top; it's a replacement for using her hands) on her knees, panting.
Special 2: While metal, her legs will shake and her arms will hang limply as she struggles just to stand. After a few seconds, she will fall to her hands and knees, panting heavily.
Movement:
Jumps:
-1: Springs upwards into the air with a quiet "Hmph" (or something along those lines ^^; ).
-1 (metal): Crouches, then thrusts her legs against the ground to jump. Very slow to get off the ground.
-2 Forward: Similar to ZSS's down-B jump.
-2 Backward: A backflip.
-3: A somersault in whichever direction she's moving.
Landing: Virtually no landing animation. She lands on her feet with zero lag.
Landing (metal): When she lands, she immediately falls to one knee from the force, then gets to her feet.
Walking: Walks almost like a model on a catwalk. (She has a little bit of an ego.)
Walking (metal): She has to heave her legs forward with each step.
Running: Sprints forward with her arms behind her, leaning forward and thrusting her legs backward against the ground (a bit like Sheik).
Running (metal): She cannot run at all while metal.
Crouch: Lays down, making herself a very low target.
Crawl: She, well, crawls. (Think ZSS.) She has to raise her body a little in order to get on all fours and crawl.
Shield:
Hugs her arms against her body in a crossed position as a pair of large curved leaves materialize in front of her. As time passes or the shield takes damage, the leaves turn brown and wither.
Statuses
Stunned: She's down on one knee, holding her head and swaying slightly.
Recovering: She shakes her head a little and stands up.
Sleep: Similar to stunned, except her arms are limp and her head is simply hanging forward. (Side note: The only sound she makes while sleeping is light breathing.)
Waking Up: She opens her eyes and looks around quickly, almost as if she's embarrassed to have fallen asleep in the middle of battle.
Buried: Her body is literally buried halfway into the ground (up to her waist) and she's trying to pull herself out. (Unlike most characters, she is actually moving while buried, instead of being frozen on a single frame.)
Shrink: She shakes her head and shudders.
Grow: She looks upwards with her eyes closed and moves her arms outward, a little bit like one of Pit's taunts (mimicking that wasn't what I had in mind for this, but it's the best example I can come up with).
Superspicy Curry: Hops from one foot to the other. The petals on her flowers are burned away and she's clutching her mouth with her hands. She cries out in short bursts as if she's in pain (more than other characters who eat it, except maybe Ivysaur), simply because she really is in a lot of pain. (She's a plant, what do you expect?)
Injuries:
Injured: Her mouth opens in a cry of pain. Her eyes are clenched shut, and teardrops form at the corners of her eyes. Her injured sounds are either a whimper, a short cry, or a sort of cough/choke sound (this is normally reserved for a blow that has mostly horizontal knockback, meant to mimic the sound she'd make if kicked in the stomach that hard; when she makes this sound, it's as soon as the hit lands, unlike most injury sounds).
KOd: Normally a pained "Rade!!!" On occasion, she'll let out a short scream.
Star KOd: A long, agonized "Roooooose...!!!"
Laying Facedown: Her head is turned to the side and her arms are at her sides. (Basically, a normal laying pose.) Her eyes are closed, and it looks like she's asleep.
Laying Face-up: Her head is turned to the side again, and her eyes are closed. Her arms and legs are spread out a little. Again, she looks like she's sleeping.
Getting Up:
Standing Up (facedown): She pushes herself to her knees and stands up.
Standing Up (face-up): She rolls over then stands up just like her facedown pose, except a bit faster.
Rolling Forward: A simple roll.
Rolling Backward: Rolls into a handstand and jumps backward.
Techs
Ground: Catches the ground with her hands. If nothing is pressed, she will spring upward a bit and right herself in the air, landing gracefully on her feet. Alternately, you can immediately spring off of the ground into a jump. You can also spring forward or backwards into a aerial "rolling" dodge, in which you travel along a low arc which spans the same distance as a rolling dodge, but allows you to jump over gaps or down to a lower level. (As soon as you reach the level that the ground is, you regain control.) Another option is to perform a getup attack directly out of the tech.
Wall: Absorbs the impact with her legs, bending her knees. If nothing is pressed during a small delay in the animation, she launches a vine towards the wall, causing the knife to stick, and pulls herself into a wall cling. Alternately, you can immediately launch off the wall straight forward, angled down, or angled up, or you can immediately drop out of the tech. You can also perform a neutral-air out of the tech.
Ceiling: Absorbs the impact with her legs, bending her knees. She will drop down normally if nothing is pressed during the small animation delay. By pressing up, you can have her cling to the ceiling for a moment longer; she will launch her vines into the ceiling and hang for a brief moment. From there, you can either lunge downwards at any angle, swing from the vines and leap forward/backward, or lunge straight down into a fastfalling down-air.
Ledges:
Ledge: Clings to the edge with her forearms and struggles to pull herself up.
Ledge Jump: Pulls herself upwards and launches herself into the air.
Ledge Jump (vine): Quickly retracts the vine and releases the edge, launching her body into the air. (She does a kind of handstand for this, so she launches upwards feet-first.)
Ledge Climb: Heaves her body back onto solid ground with obvious difficulty. Cannot do a standard ledge climb when clinging to the edge with a vine.
Ledge Dodge: Pulls herself onto the ground (with some difficulty) and rolls forward.
Ledge Dodge (vine): This one is unique in that although it is slower than the standard, it doesn't leave her vulnerable at any point until she's back on her feet, at which point she can already react normally. She kicks away from the edge, swinging backwards (the distance she goes depends on the length of the vine) to be slightly above ground level, then pulls herself forward along the vine and launches into a roll. (Because of her light frame, when she kicks off the wall, she swings backward quite quickly.) During the entire process, she is invulnerable.
Dodges:
Sidestep Dodge: Steps into the foreground/background for a moment, pulling her body back as if trying to press herself flat against a wall (trying to get out of range).
Forward Roll Dodge: Lunges forward a bit and into the background/foreground, then kicks off the ground again as she lands, twisting to face the other direction.
Backward Roll Dodge: Kicks backwards into a handstand then rolls backwards to get back onto her feet.
Air Dodge: Twirls in midair.
As far as speed goes (hers is above 10), Sonic's speed = 20/10, just to give you a meterstick. For acceleration, it means that when she turns, she's immediately at top speed again.
Ratings from most extreme to average (attack descriptions):
Hyper (almost never used; reserved for direct attacks that go at least 3 times as far as Samus's Grapple Beam and indirect attacks that only stop when they hit someone or something, no matter how far they travel; also for the exact opposite, where direct range is virtually nonexistant and indirect range only goes as far as Lucario's Force Palm)
Ultra
Super
Very
Slow/Fast
Medium Slow/Fast
Medium
The total at the bottom of the stats is the sum of all the stats and miscellaneous point changes. An average score would be about 75 to 85.
S = 90 or above (possibly broken)
A = 80-89 (great)
B = 70-79 (good)
C = 60-69 (below average)
D = 50-59 (poor)
E = Below 50 (horrible)
Roserade
Stats
Power: 2.07/10
Aside from one move that requires perfect aim with a hard-to-aim move, she has virtually no killing potential. Even at high damage, opponents don't have too much to worry about as long as they're careful.
Special: 2/10
Standard: 2.2/10
Grab: 3/10
Defense: 0/10
Roserade makes Jigglypuff look like a heavyweight. It's incredibly dangerous for Roserade to engage in close-range melee, because any hard hitter can easily OHKO her, even from the middle of Final Destination, and Ike can kill her with... just about anything.
Priority: 10/10
This is one area where Roserade really shines. Virtually every move will tear straight through most melee attacks and at least cancel most projectiles.
Combos: 6/10
She's... okay at juggling opponents with a few of her moves, but for the most part she struggles to get good combos because of her cooldown.
Range: 9/10
Roserade has exceptional range. Her direct attacks can hit from farther away than any other character by an incredibly large margin, and can strike through even moderately thick walls with her longest-ranged attacks, such as her f-smash and forward special. However, her lack of projectile attacks does hinder her overall range. No matter how far her direct attacks can hit from, 90% of projectiles still have an edge over her. In addition, that range is heavily restricted to a single direction; most of her attacks have massive range in one direction (most notably forward) but virtually none in the other directions. Combined, she can strike from anywhere, but if an opponent keeps moving around her (particularly above her), she has to rely heavily on prediction.
Direct: 15/10
Indirect: N/A (-1, limits max rating to 10)
Accuracy: 5/10
Speed: 11.5/10
In running speed, Roserade is unparalleled, excluding Sonic, who can't be outclassed in movement speed by anyone (except maybe Shadow). However, even Sonic can't compare to Roserade's turning speed; she can literally turn in place. The instant one foot is on the ground, Roserade can turn around, and she doesn't even slow down. Her turning ability is on par with dash dancing. Her attack speed is below average, though. Her attacks launch rather quickly, but she has problems with cooldown.
Max Speed: 13/10
Turning Speed: 15/10
Attack Speed: 6.5/10
Jump: 10.4/10
Roserade has an incredible jump, and even has a half-decent third jump to work with. Her second jump is just as high as her first. Combine Falco's first jump with ZSS's second jump, add in another half-Mario jump, and you've got Roserade's total jump.
First Jump: 10/10
Second Jump: 10/10
Third Jump: 4/10 (no effect on jump stat; add 1/2 of rating to misc.)
Recovery: 15/10
Petal Dance gives Roserade great range as a recovery, and doesn't put her into freefall. However, that's not the main reason she gets such a high recovery rating. The main reason is Vine Whip. With the 2 jump boosts she can get off of a wall, combined with her 3 jumps, even without a wall jump OR Petal Dance, she's capable of covering a vertical distance equal to a maximum size custom stage, from the bottom of the bottom block to the top block (high enough to land on the top block without needing the edge). Vine Whip is a bit easy to catch her in the middle of, but Petal Dance is very hard to intercept due to the hitbox surrounding her body, so a smart player can combine the 2 to get a virtually unstoppable recovery. Of course, this doesn't do her any good if she gets KOd by an attack's launch, so this almighty recovery combo's true use is to prevent her from being gimped while off-stage.
Maneuverability: 12/10
Traction: 15/10
Aerial Maneuverability: 9/10
Final Smash: 5.93/10
Cross Poison works kinda like Marth's Critical Hit in that both involve lunging forward quite far along the ground and striking upon running into an opponent, as well as the fact that if you don't get out of the way of the lunge FAST, you're going to get hit. Cross Poison is one of the weakest (if not THE weakest) Final Smashes in terms of damage and knockback. However, the effect from the poison racks up a lot of damage, and the flower it plants helps restore Roserade a little, too.
Power: 1.8/10
Range: 7/10
Other: 9/10
SUBTOTAL: 83.4/100
Miscellaneous: -1
Roserade has a plethora of special conditions. The majority of them assist her, but the hindering conditions are severe enough to slightly outweigh the bonuses.
+Natural Cure +2
+Leech Seed +1
+Poison Point +2
+Steadfast +1
+Third Jump +2
+High Wall Jump +3
+Extended Wall Cling +1
+Extended Reach +1
+Distance Edge Grab +2
+Extended Dodge +1
+Distance Grab +1
+Poison +2
+Tech Versatility +1
-Glass Jaw -5
-No Guard -10
-Butterfingers -5
-Lightweight -2
-No Strength -1
=Ledge Getup Change +0
TOTAL: 82.4/100
Rating: A-
Overall, a skilled character, though her stats are so out-of-balance with each other that it takes a skilled player to take advantage of her potential. She struggles in 1v1 matches because of her horrible power, which forces her to play a game of keep-away in order to outlast her opponent, although her Toxic Spikes do have good gimping potential. However, team battles are where she truly shows her worth. If you're in a team battle, then you want her on your side, especially if you're a power hitter. Roserade's ability to rack up opponents' damage with her poison and her long range make her the ideal partner for someone who can get kills at low damage. In addition, with a teammate helping her, her weak knockback can actually be used as a slight advantage, allowing her and her teammate to juggle an opponent back and forth.
Abilities:
Natural Cure, Leech Seed, Poison Point, Steadfast, Extended Reach, Extended Dodge, Ledge Getup, Tech Versatility
-Natural Cure: Sleep, freezing, burial, dizziness, slowdown, stun, and (oddly enough; you'll see why below) metal affect for half the normal time. Roserade is immune to flower and poison (including white Pikmin). The reason that metal falls into this category is because it hinders her movement so severely.
-Leech Seed: When Roserade inflicts a flower status on another character (even through the use of a Lip Stick), for every 2% damage the flower inflicts, Roserade heals 1% damage.
-Poison Point: When Roserade is grabbed, for every 2 seconds she is held, she inflicts 1% poison damage to the holder. In addition, when she grabs an opponent, for every second she holds the opponent, she inflicts 1% poison damage.
-Steadfast: Not counting banana peels, Roserade will not trip.
-Extended Reach: Roserade can grab an edge from slightly farther away than most characters.
-Extended Dodge: Roserade's rolling dodges go a little farther, and the effect lasts a little longer for sidestep dodges.
-Poison: Roserade is capable of poisoning an opponent. (See below.) In a 2v2, even if team attack is turned on, she cannot poison her teammate.
-Tech Versatility: Roserade has several options for what she can do when she performs a tech. For example, she can choose to instantly spring off of the ground into a jump, or launch forward/backward into a sort of aerial rolling dodge, or even attack straight out of the tech. Her teching is slowed down a little to allow players to perform these.
Detriments:
Glass Jaw, No Guard, Butterfingers, Lightweight
-Glass Jaw: This simply means that the character has less than 0/10 defense. For Roserade, it corresponds to -5/10 defense. What this means for Roserade is that with a fully charged forward smash, Ike can KO her from the farthest side of Final Destination even at no damage.
-No Guard: Roserade’s shield does not protect against attacks from behind. In addition, even when blocking an attack, Roserade will still take 1/10 of the move's original damage every time the shield is hit.
-Butterfingers: Roserade's grab can be broken in half the standard time for a normal hold. In addition, she can only hold onto the edge for half of the standard time before she falls.
-Lightweight: When Roserade's grab is broken, she slides twice as far back as a normal character, and there is a slightly longer delay before she can move again.
-No Strength: While metal, Roserade is rendered almost helpless. She can't dash, her walking is reduced to minimum speed, her jumps are all half-height and have very little horizontal movement... she can't even stand up straight for long!
Conditions:
Ledge Getup Change
Ledge Getup Change: Apart from her attack when getting up from an edge, all of her edge animations remain constant. They don't change to a slower animation at >100%, like other characters. However, she is slow to get up from an edge to begin with, unless she grabbed it using Vine Whip or a tether.
A note about Roserade’s poison: Excluding the effect of Poison Point or any throws/pummeling, any poison inflicted does NOT wear off; in addition, it is accumulative. Her poison has 4 stages of intensity. The first time a target is poisoned, he or she will only take 1% damage every minute (60 seconds). The second stage (requires 2 additional poisonings, total of 3), the time decreases to 40 seconds. The third (6 total) drops the delay to 20 seconds, and the fourth (10 total) drops it to 10 seconds.
Specials
B: Sleep Powder
Roserade sprays blue-colored pollen a short distance in front of her. It does no damage, but it will put any opponent that breathes it in to sleep. The pollen doesn't linger behind the leading portion of the move.
Speed: Medium launch, very slow-moving pollen, cannot be used more than once at a time (pollen has to fade before it can be used again)
Range: A little longer than Samus's Grapple Beam (long), spreads upwards & downards to match her height (medium short)
Up-B: Petal Dance
Lunges in a chosen direction, cloaked in a swirl of petals. Covers a large distance, has a decent hitbox surrounding her entire body, and drags the opponent along with a series of hits, but inflicts minimal damage and knockback. The direction can be changed mid-path and can be curved. This move does not send Roserade into free-fall, but she cannot use Vine Whip until she lands. Ironically, the long distance that it carries her makes it very difficult to spam.
Knockback: Drag x 5 + Minor x 1
Angle: Drag x 5 + Back-up or forward up, depending on the direction traveled.
Damage: 1% grass x 5 + 3% grass
Speed: Fast
Range: Travels long distance (ultra long), medium surrounding hitbox
Over-B: Vine Whip
When pressed but not held, swings a blade-tipped whip forward. If held, shoots the whip straight forward, after which it can be used just like Sheik’s whip. Has enormous range. The tip does more damage, but the base will inflict poison. In midair, the whip shoots straight forward, and if it’s in range of a ledge, it will automatically latch on to the edge. If it is out of range of the ledge, but in range of a wall, even a wall angled downward, it will stick into the wall, and she will fling herself upwards and launch a second whip out to latch onto an edge or into a wall, which she can then pull herself up into a huge jump from.
Knockback: Very low
Angle: Forward
Damage: 8% grass or 5% poison
Speed: Medium with ultra long cooldown
Range: Hyper long horizontal, ultra short vertical
Down-B: Toxic Spikes
Scatters 5 toxic four-pointed spikes in front of her. The spikes remain on the ground for 10 seconds before disappearing. If they hit a target, they will automatically disappear.
Knockback: Flinch
Angle: None
Damage: 3% poison
Speed: Fast, but can't be reused until all the spikes have vanished
Range: Total of about the length of Snake's long grenade toss (super long), with the spikes evenly spread if they all land on the same flat surface
Standard
Weak attacks
A: Kick
A simple kick.
1%, flinch, very fast
AA: Double Kick
A second kick, bringing her foot back around a second time.
1% + 1%, flinch + flinch, very fast + very fast
AAA: Twirl Kick
Kicks, brings her foot back for another, then spins and kicks a third time.
1%+1%+2%, previous + negligable
AAAAA...: Flurry Kick
After the first three kicks, continuously kicks back and forth like the first 2 kicks. Will also work if you just hold the A button after the 3rd attack in the combo.
1%+1%+2%+1%+1%..., previous + flinch + flinch..., previous + ultra-fast
Tilts
Up-A: Twin Kick
Performs a quick handstand upward lunge, kicking above her twice. Similar to Pit's up-tilt, but weaker.
Damage: 3%+3%
Knockback: Up + up
Speed: Fast
Range: Medium vertical, hyper short horizontal
Forward-A: Vine Swing
Spins forward and lashes out with her whip. As usual, the tip hits hardest, but not by very much.
Damage: 6% grass or 8% grass
Knockback: Forward
Speed: Medium-fast
Range: Long horizontal, short vertical
Down-A: Trip Kick
Quickly sweeps the ground in front of her.
Damage: 3%
Knockback: Trip (slight upwards)
Speed: Super Fast
Range: Medium short horizontal, super short vertical
Smashes
Up-Smash: Power Whip
Shoots both vines straight up, with the tips colliding a considerable height above her. If she hits someone at that point (where the most damage is done), she quickly jerks the whips apart, slashing the opponent again, and slams them into the ground in front of and behind her, striking over a ridiculously large semicircle from in front of her to behind her. Does decent damage and inflicts poison if she hits with the point where the tips meet, and the tips do decent damage on the way down, but the whips themselves hit for relatively little damage, though on the way down, no part of the attack is poisonous. She will perform the second part of the attack if and ONLY if she hits with the very small sweetspot where the tips collide. If she hits with the sweetspot, the blade tips of the second strike are incredibly potent, and are her most potent attack. The knockback of the sweetspot aims the victim directly at that spot, but the second hit much be as precise as Marth's forward-smash (which bases its most potent strike on the very tip of the sword) and even then, it only works when the target is on the ground (including the target hit by the first sweetspot). The knockback of the first sweetspot is unbelievably fast (in order to get the target down to the second strike's sweetspot in time), but it's set in stone & is immediately canceled by the second strike, and it's impossible for the second strike to completely miss the target (meaning that the sweetspot can't just instantly spike someone off the cliff from 0% or at all, for that matter).
Damage: 4%-7% grass or 8%-13% poison + 18%-23% grass or 4%-7% grass
Knockback: Up or down-forward + up
Speed: Very slow charge, fast launch, very slow cooldown; super fast launch for second attack, but super slow cooldown
Range: Hyper long vertical, short horizontal (first attack); hyper long semicircular
Forward-Smash: Rose Whip
Viciously launches the whip forward, and jerks it to the side if she hits with the tip (at the edge of the attack's range).
Damage: 3%-6% poison or 7%-11% grass + 2%-4% grass
Knockback: Forward or stun+forward
Speed: Medium slow charge, very fast launch, medium slow cooldown
Down-Smash: Seed Bomb
Seed Bombs the ground in front of her with one flower, then behind her with her other flower. Will plant a flower if it hits directly.
Damage: 8%-14% grass/flower
Knockback: Forward-up/Backward-up
Speed: Medium-Slow
Range: Medium
Dash A: Assasin Lunge
Kicks off the ground and lunges forward, using one of the whip blades like a knife to slash forward along the length of the lunge.
6% grass, backward-up, medium range, fast
Aerials
Neutral-Air: Rose's Thorns
Twirls in midair with her whips twirling around her.
Damage: 1% x 5+1% poison
Knockback: Drag x 5+ forward-up/backward-up
Speed: Fast, but slow cooldown
Range: Short
Up-Air: Whip Drill
Spins around, her whips extended above her head and wrapped together, the tips making a sort of drill.
Damage: 7 hits but only 4% total
Knockback: Negligable x 7
Speed: Fast
Range: Medium upwards, short horizontal, super short downwards
Forward-Air: Twin Whip
Swings her whip in front of her twice.
Damage: 3% grass x 2
Knockback: Forward-up x 2
Speed: Fast x 2, medium cooldown
Range: Long horizontal, short vertical
Back-Air: Twin Back Whip
Spins and swings the whip behind her, then quickly spins a second time to strike again. Similar to her forward-air, but slightly stronger.
Damage: 3% grass + 4% grass
Knockback: stun+backward
Speed: Fast x 2, medium cooldown
Range: Long horizontal, medium vertical
Down-Air: Vine Flip
Flips and swings her whip vertically straight down in reference to the screen.
Damage: 7% grass
Knockback: Down (tip) or up (base)
Speed: Medium
Range: Medium
Ledge (<100%): Lunge Kick
Flings herself forward in a sliding kick.
2%, long range
Ledge (>100%): Axe Kick
Pulls herself up into a handstand, then axe kicks.
3%, medium range
Standup Attack: Sweep Kick
Swings her legs in front of and behind her in a kick. Very weak.
1%, medium range
Grabs
Z: Bind
Swings her whips forward and wraps them around the opponent from a distance. Longer than Link's Hookshot, but not by much.
Range: Very long
Pummel: Constrict
Squeezes the opponent with her whips and digs her thorns into the opponent.
2% poison non-accumulative
Speed: Medium
Up-Throw: Handstand Kick
Holds the opponent above her and handstand-kicks them with both feet.
6%, up
Forward-Throw: Thrust Kick
Shoves a foot against the opponent while holding them in place, then releases to shove them forward.
4%, forward
Back-Throw: Vine Slam
Swings them in a sideways arc with her whip and slams them into the ground.
8% poison non-accumulative, backward-up
Down-Throw: Stomp
Jumps up, slams the enemy into the ground below her, then stomps on them.
4%+2%, up
Items
Item Neutral: Swings the item forward.
Item Tilt: Swings the item harder, stepping forward to do so and giving the attack surprising range.
Item Smash: Spins with the item and swings it diagonally down. One of her slowest attacks. Shoots 4 stars from a Star Rod.
Item Dash: Jumps forward, twirling the item around her to hit up to 4 times but for minimal damage for all of them.
Home-Run Bat Range: Very high, sweeps the ground
Final Smash: Cross Poison
Roserade brings her arms in across her chest and her eyes twinkle. Roughly a second later, she lunges forward (roughly as far as Marth’s Critical Hit) and, with the petals of her flowers scattering into the air, she slashes with the blades on the tips of her whips, clutched in her semi-humanoid hands normally concealed by the petals. If she hits, she smirks, then springs back onto her hands and then springs back again to right herself and to put distance between her and the target, as well as to show off a little. If she misses, she grimaces and kicks backwards, also to put distance between her and the enemy. This inflicts both toxic poison and flower on the opponent.
Damage: 11% poison
Knockback: Low
Angle: Forward
Speed: Medium-slow charge, very fast launch, very slow "cooldown"
Effects: Plants flower; toxic poisoning: 10 seconds of 2% per second, then 10 of 1% per second, then the poison reverts to fourth-level intensity.
Taunt/Victory/Loss
Taunts:
Up: Faces the screen (crowd) and bows.
Side: Extends only the blade of one of her whips out of her flower and licks the broad edge, almost like a teasing female assassin might.
Down: Makes a taunting motion, as if to say “bring it on”.
Victory Poses:
1: Performs a short ballet twirl, followed by a bow. She murmurs "rade" as she bows.
2: Launches into the air with an elaborate Petal Dance, landing gracefully on one knee with her arms extended and her hands against the ground; her head is bowed some. After landing, she'll glance towards the screen
3: Giggles teasingly and mischievously, holding a flower in front of her mouth.
Matchup-specific: If Lucario, Pikachu, or any of PT's pokemon was in the match, she will look back at them and wink, as if to simultaneously flirt and taunt. When she does this, that pokemon will actually blush.
Loss Pose:
Roserade is facing towards the screen, but her head is turned to the side (inwards regardless of where she's standing). Her vision is directed at the victors, at whom she's glaring. She is clapping, although it seems forced. Her teeth are clenched. She's a very poor sport, but she at least has the decency to try to congratulate the victor(s) in a civil, polite manner (although she isn't very good at it).
Miscellaneous
Fall Speed: Medium
Gender: Defined, female
Voice: Feminine, alluring, “innocent”-sounding and very mischievous (basically, femme fatale)
Height: Only a little taller than Pikachu. This is a fairly big contributor to her light weight.
Trophy Description:
With the graceful, flowing movements of a dancer, Roserade strikes out with her thorn-covered whips, which give her massive range. She doesn’t have any knockback power, though, so she has to rely on a strategy of keep-away. Her light frame is incredibly easy to send flying, and yet it allows her to move and turn with astonishing agility; it also allows her to effortlessly jump as high as any other brawler, even allowing a third jump. She can recover from any fall where her Vine Whip will reach the edge or a wall, so players must rely on her light frame to send her soaring.
Alternate Costumes
-Shiny
-Both flowers red and skin blue
-Both flowers blue and skin red
-Both flowers white
-Both flowers and hair red
-Both flowers black
Quirks
-If Lucario, Pikachu, or any of PT's pokemon is in a match with her, their attention will be diverted towards her (unless they were the winner of the match). The aroma from her flowers is particularly powerful for male pokemon. Lucario is defined as a male in the game, and while Pikachu's gender isn't specifically defined, it's assumed to be a male. The same goes for all 3 of PT's pokemon.
Snake Codec:
Snake: Okay, I've faced some silly opponents, but this is just ridiculous. A PLANT?
Otacon: It's a Roserade, a flower pokemon.
Snake: Flower pokemon, huh? This should be a piece of cake.
Otacon: Snake, haven't you ever heard the expression, "Every rose has its thorns"? Roserade takes it literally; she's equipped with vines that are covered in toxic thorns! If you're hit by the thorns, you'll be poisoned, and the poison doesn't wear off. Not only that, but she's incredibly fast and can strike from long distance using the whips.
Snake: Still, she's a flower pokemon. There's no way she can take a hit, right?
Otacon: True, Roserade is the lightest fighter to have joined thus far, so if you can catch her, a couple of good hits should do the trick. Just make sure you don't grab her.
Snake: What? Why?
Otacon: Her body is also covered in almost invisible toxic thorns, to if you try to grab her, you're going to get yourself poisoned.
Snake: Ugh... I shouldn't have left my lighter at home.
Crowd Cheering: Alternates between men saying "Rose" and women saying "Rade" in quick succession.
Kirby Hat: Kirby gets Roserade's white hair (petals?) as a headdress, and his hands have the 2 rose bouquets on them.
Animations:
Entry:
A large rose bud appears. The petals scatter to reveal Roserade crouching inside, at which point she stands up.
Standing:
Neutral: She stands with her arms crossed in front of her body and her legs straight.
Idle 1: She will extend a blade from her flower and examine it, making sure it's sharp.
Idle 2: She will perform a quick ballet twirl.
Idle 3: She will hop from one foot to the other in a mock boxer stance.
Special 1: At over 100% (if you somehow manage to survive that long), she will be hunched over with the sides of her arms (right next to the top; it's a replacement for using her hands) on her knees, panting.
Special 2: While metal, her legs will shake and her arms will hang limply as she struggles just to stand. After a few seconds, she will fall to her hands and knees, panting heavily.
Movement:
Jumps:
-1: Springs upwards into the air with a quiet "Hmph" (or something along those lines ^^; ).
-1 (metal): Crouches, then thrusts her legs against the ground to jump. Very slow to get off the ground.
-2 Forward: Similar to ZSS's down-B jump.
-2 Backward: A backflip.
-3: A somersault in whichever direction she's moving.
Landing: Virtually no landing animation. She lands on her feet with zero lag.
Landing (metal): When she lands, she immediately falls to one knee from the force, then gets to her feet.
Walking: Walks almost like a model on a catwalk. (She has a little bit of an ego.)
Walking (metal): She has to heave her legs forward with each step.
Running: Sprints forward with her arms behind her, leaning forward and thrusting her legs backward against the ground (a bit like Sheik).
Running (metal): She cannot run at all while metal.
Crouch: Lays down, making herself a very low target.
Crawl: She, well, crawls. (Think ZSS.) She has to raise her body a little in order to get on all fours and crawl.
Shield:
Hugs her arms against her body in a crossed position as a pair of large curved leaves materialize in front of her. As time passes or the shield takes damage, the leaves turn brown and wither.
Statuses
Stunned: She's down on one knee, holding her head and swaying slightly.
Recovering: She shakes her head a little and stands up.
Sleep: Similar to stunned, except her arms are limp and her head is simply hanging forward. (Side note: The only sound she makes while sleeping is light breathing.)
Waking Up: She opens her eyes and looks around quickly, almost as if she's embarrassed to have fallen asleep in the middle of battle.
Buried: Her body is literally buried halfway into the ground (up to her waist) and she's trying to pull herself out. (Unlike most characters, she is actually moving while buried, instead of being frozen on a single frame.)
Shrink: She shakes her head and shudders.
Grow: She looks upwards with her eyes closed and moves her arms outward, a little bit like one of Pit's taunts (mimicking that wasn't what I had in mind for this, but it's the best example I can come up with).
Superspicy Curry: Hops from one foot to the other. The petals on her flowers are burned away and she's clutching her mouth with her hands. She cries out in short bursts as if she's in pain (more than other characters who eat it, except maybe Ivysaur), simply because she really is in a lot of pain. (She's a plant, what do you expect?)
Injuries:
Injured: Her mouth opens in a cry of pain. Her eyes are clenched shut, and teardrops form at the corners of her eyes. Her injured sounds are either a whimper, a short cry, or a sort of cough/choke sound (this is normally reserved for a blow that has mostly horizontal knockback, meant to mimic the sound she'd make if kicked in the stomach that hard; when she makes this sound, it's as soon as the hit lands, unlike most injury sounds).
KOd: Normally a pained "Rade!!!" On occasion, she'll let out a short scream.
Star KOd: A long, agonized "Roooooose...!!!"
Laying Facedown: Her head is turned to the side and her arms are at her sides. (Basically, a normal laying pose.) Her eyes are closed, and it looks like she's asleep.
Laying Face-up: Her head is turned to the side again, and her eyes are closed. Her arms and legs are spread out a little. Again, she looks like she's sleeping.
Getting Up:
Standing Up (facedown): She pushes herself to her knees and stands up.
Standing Up (face-up): She rolls over then stands up just like her facedown pose, except a bit faster.
Rolling Forward: A simple roll.
Rolling Backward: Rolls into a handstand and jumps backward.
Techs
Ground: Catches the ground with her hands. If nothing is pressed, she will spring upward a bit and right herself in the air, landing gracefully on her feet. Alternately, you can immediately spring off of the ground into a jump. You can also spring forward or backwards into a aerial "rolling" dodge, in which you travel along a low arc which spans the same distance as a rolling dodge, but allows you to jump over gaps or down to a lower level. (As soon as you reach the level that the ground is, you regain control.) Another option is to perform a getup attack directly out of the tech.
Wall: Absorbs the impact with her legs, bending her knees. If nothing is pressed during a small delay in the animation, she launches a vine towards the wall, causing the knife to stick, and pulls herself into a wall cling. Alternately, you can immediately launch off the wall straight forward, angled down, or angled up, or you can immediately drop out of the tech. You can also perform a neutral-air out of the tech.
Ceiling: Absorbs the impact with her legs, bending her knees. She will drop down normally if nothing is pressed during the small animation delay. By pressing up, you can have her cling to the ceiling for a moment longer; she will launch her vines into the ceiling and hang for a brief moment. From there, you can either lunge downwards at any angle, swing from the vines and leap forward/backward, or lunge straight down into a fastfalling down-air.
Ledges:
Ledge: Clings to the edge with her forearms and struggles to pull herself up.
Ledge Jump: Pulls herself upwards and launches herself into the air.
Ledge Jump (vine): Quickly retracts the vine and releases the edge, launching her body into the air. (She does a kind of handstand for this, so she launches upwards feet-first.)
Ledge Climb: Heaves her body back onto solid ground with obvious difficulty. Cannot do a standard ledge climb when clinging to the edge with a vine.
Ledge Dodge: Pulls herself onto the ground (with some difficulty) and rolls forward.
Ledge Dodge (vine): This one is unique in that although it is slower than the standard, it doesn't leave her vulnerable at any point until she's back on her feet, at which point she can already react normally. She kicks away from the edge, swinging backwards (the distance she goes depends on the length of the vine) to be slightly above ground level, then pulls herself forward along the vine and launches into a roll. (Because of her light frame, when she kicks off the wall, she swings backward quite quickly.) During the entire process, she is invulnerable.
Dodges:
Sidestep Dodge: Steps into the foreground/background for a moment, pulling her body back as if trying to press herself flat against a wall (trying to get out of range).
Forward Roll Dodge: Lunges forward a bit and into the background/foreground, then kicks off the ground again as she lands, twisting to face the other direction.
Backward Roll Dodge: Kicks backwards into a handstand then rolls backwards to get back onto her feet.
Air Dodge: Twirls in midair.
goldwyvern
Smash Ace
This is my link-up space. To be edited laterz. Metapod, MM set, etc. yeah...
Alright..thanks for reading my moveset first of all.Lelouch
Lelouch was certainly an interesting set. Some of the moves, such as the Neutral Special, did exemplify great creativity, but others, with one of the worst cases being the Down Tilt, showed anything but creativity (why is the move so close to being a generic counter?). More blatant than the occassional creativity flaw, however, are the balance issues with the moveset. The Neutral B just seems grossly overpowered. When used as a KO move (and it isn't his only KO option), it is quite balanced. A couple commands just struck me as insanely broken: 1) "Jump" and 2) "Do Not Avoid Me!" I don't think I should have to explain why permanently shutting down the opponent's ability to defend themselves or causing them to auto-jump for the rest of the match is overpowered. I am aware that Geass can only be used on a foe once per stock... but geez... use it early on and you are set. Another big problem with this set is something that Junahu regularly criticizes- the overuse of moves that can only be used a limited number of times per stock. This includes the Neutral Special and Side Special. You have also implemented a rather large number of moves with large recharges, such as the Up Special (piloted) and the Bair.
Overall, Lelouch is a good set. Plenty of versatility (covers everything from damage racking to gimping to KO'ing to defense), a reasonable amount of creativity, and a good amount of detail (though I don't get why the Fair has no damage percentage). It is clearly a step up from anything you have made in MYM5. It still has a lot of room for improvement, however.
For the down tilt, to be honest, it was the best i could think of without being "leg sweep." I might change it to sometime else....though i don't really have any ideas..
As for the neutral B, opponents DO have the ability to avoid the attack. They can jump, turn around, or be on another platform. However, considering that i DO think it's broken as well, i'll change it that the opponent does it for only 15-20 seconds or something. I said Geass was his MAIN KO move. Not his only one.
As for the stock limits, i personally think it would be OOC for Lelouch to able to use Geass more than once on one opponent...but for the side special, i guess i could work it out with like a 10 second recharge or something.
As for the large recharge things, i guess i could make it shorter...much shorter for the up special, though it's only to pilot it.
Overall, thanks for commenting on the moveset (even if it contains some major spoilers)...did i really not put damage percentages on the F-air? That's my bad. Thanks for the mini review Chris Lionheart. *thumbs up*
@leafbarrett: You know, you didn't have to repost it....It could be a bit better organized. Needs some color, and some more detail to the moveset...espically the neutral B. I suggest adding the speed to the attacks. It determines if a moveset is balanced or not.
Chris Lionheart
Smash Champion
Alright..thanks for reading my moveset first of all.
For the down tilt, to be honest, it was the best i could think of without being "leg sweep." I might change it to sometime else....though i don't really have any ideas..
As for the neutral B, opponents DO have the ability to avoid the attack. They can jump, turn around, or be on another platform. However, considering that i DO think it's broken as well, i'll change it that the opponent does it for only 15-20 seconds or something. I said Geass was his MAIN KO move. Not his only one.
As for the stock limits, i personally think it would be OOC for Lelouch to able to use Geass more than once on one opponent...but for the side special, i guess i could work it out with like a 10 second recharge or something.
The Geass limit was perfectly acceptable. The Side Special doesn't need to be a stock limit or a recharge. It simply needs a slightly higher cast time if anything. CC is likely going to be used for projectile defense mainly. Nothing she does really warrants nerfing the move, IMO. The only part of the move that could bring up balance issues is the part where she confuses opponents by dressing as Zero and jumping off of the stage. Perhaps just reducing that "stun" time to 1 second would be a good way to fix that.
Also, C.C. is hot.
Yes, yes she is, though Kallen is much hotter.
As for the large recharge things, i guess i could make it shorter...much shorter for the up special, though it's only to pilot it.
Overall, thanks for commenting on the moveset (even if it contains some major spoilers)...did i really not put damage percentages on the F-air? That's my bad. Thanks for the mini review Chris Lionheart. *thumbs up*
Yeah... I didn't really appreciate the spoilers considering I haven't finished Code Geass yet, but I couldn't resist reading a set on Lelouch.
@leafbarrett: You know, you didn't have to repost it....
And yes, it is against the rules to repost sets, leafbarrett. Personally, I would let this slide this one time seeing as you are a newcomer, but just edit changes into the old post and announce the changes in a new post if you want changes to your set to be known.
phatcat203
Smash Apprentice
Okay, for Lelouche, while reading it, the Neutral B is, well, extremely versatile at least. However......you can't CROUCH and do a Neutral B move.....you'll do your Down B instead. Just pointing that out to you.
That Down Smash.....well, it makes sense for it to hurt you, but I'd just Blaster him.....BOOOM! Anyways, unless you time it right, or your opponent's just stupid/CPU, they'll likely just hit you with a projectile. Which means you'll just take damage.
The Final Smash is good..not really an uber attack, it enhances one. And I like the immortality.
Roserade: I really like this set....but it does seem a little broken at a glance. The stats are broken, as 10 is Sonic, and she's faster than that. Though you may consider Sonic to be much farther up, so meh. Everything Soars except for power and the fact that she can't take a hit at all. I like the abilities, both the enhancers and the hampers. It makes for a great balancing factor. However, none of these really make or break her moveset, unlike they would if....well, pretty much any esteemed member of MYM had created it. I like that, though. They help her/hinder her, but the moveset doesn't revolve around them. It's like a mechanic that DOESN'T force you to memorize 75 lines of text to actually be able to play the character. MW, that's to you >_>
goldwyvern
Smash Ace
TRYCLYDE: this was a bit nostalgic, as i owned SMB2 on theNES (one of 3 NES games i owned). The way you made a mutant connection with the enemy and the boss was disgusting yet epically satisfying. i loved several moves and ROYAL ORAL is an epic move name. once again, a set has made me happy that im a MYMer.
lordvaati
Smash Master
*note: I have not played Mother 3 yet, but I did this guy anyway, because he is that Kick***.
If I forgot anything(I don't think I did) let me know.
A NEW FIGHTER JOINS THE BRAWL!

The Masked Man, the Mysterious minion of the Diabolical King Porky, has joined the Brawl!! His motives are unknown, but he will take down anyone who stands in his path!!!
Profile

The “Cute little monster” of Porky, the Masked man is a person who was brought back from the dead as a cyborg though a similar process used to make the Ultimate Chimera. He was gifted with the ability to remove the 7 needles from the Earth to awaken the dragon of destruction. He is Porky’s right hand man, and the leader of the sinister Pigmask army. His backstory is unknown, but he is stated to be connected to Lucas…
Stats
Power:6/10
The Masked Man has no guaranteed finishing techniques, meaning that he has to usually attack with combos and have a set up. His smashes are quite poor, since they have minimal knockback,, but his side and down specials can send people flying if sweetspotted, so he can be quite a threat with combos.
Movement speed:8/10
His movement is quick, allowing for fast approaches without lag. Good for dash attacks and dash grabs.
Attack speed:9/10
One of the fastest attackers in the game. Barely below Meta on attack speed.
Range: 7/10
His sword has fairly good range, and much like the beam sword, will even extend for some moves. His neutral special is also good for laser camping. The only thing keeping him from a10 is that his grab range is quite poor- it’s the shortest of the 3 Mother reps- but also has the least grab lag of the 3, as well.
Weight:3/10
the Masked Man is VERY FLOATY, and is probably the lightest of the Mother/Earthbound cast. The fact that he is floaty makes it easier for him to recover, but it leaves him very vulnerable to Star Kos. Barely above Mr. G&W in weight.
Jump(s): 5/10
Mask is a completely average jumper ,with the lowest jumping height of the 3. Basically the same as Mario.
Height:5/10
He is probably the tallest member of the Mother cast. About equal in size to Mario.
Falling Speed: 4/10
As stated before, he is a float faller.
The Masked Man can also perform a Glide.
Summary
The Masked Man relies on his quick attacks and sword's range to make up for his lack of heavy hitting techs. while he's mostly a hand-to-hand fighter, his neutral B can be used to poke shots at opponents far away. since his attacks have very little lag, he can perform combos much easier than most other characters. someof his best techniques are performed by comboing and opponent into his fairly strong >B attack, which has great knockback if the opponent is hit by the direct center of the lightning. he also has very good grabs, and his lack of lag in his moves and his fast movement means he can perform chaingrabs. but the Masked Man has his share of weaknesses, too. for one, he has the lowest jump of the Mother reps(which is still pretty average, though) , but he is the only rep who can Glide, and can also Glide-cancel(attack out of a Glide.) however, his air game is questionable. due to his light weight, slow falling, lack of knockback in his aerials, and vulnerability in the air, the Masked Man has the worst time in Midair combat, meaning skilled Masked Man users have to keep a strong ground game to use him effectively.
Specials
B: Arm cannon

The Masked Man fires a shot from his arm cannon, which works similar to Falco’s blaster: both fire singular shots in a burst. The shots cause flinching, and do 3%dmg. Each. Can be used to poke at an opponent from a distance.
>B: Intense Lightning

The Masked Man swings his sword forward, and a bolt of lightning strikes the ground. Looks similar to Pikachu’s Thunder special, but instead of striking himself strikes the ground in front of him, and the move has more considerable kockback. An indirect hit will only do 9%dmg , but if someone gets hit by the center of the attack, they will take 18%dmg with very high knockback.
^B: Wing Jet
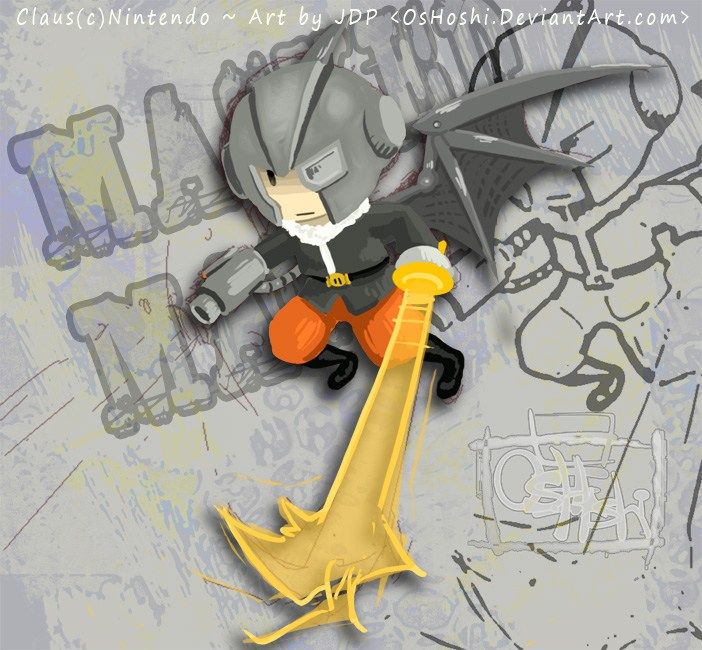
The Masked Man’s bat-like wings will activate, and he will fly back to the stage.
The move is similar to Snake’s Cypher ^B, but it only lasts half as long very good or vertical recoveries, but fairly bad for horizontal can be used to glide-cancel.
vB: Shield Killer

Possibly the deadliest and most sinister of the Masked Man’s Specials. He charges up and then makes a huge swing with his sword, striking the opponent. an indirect hit will only do 10%dmg, and a direct one will do 20%, with fair knock back. But what makes the move so deadly is that if used on a blocking opponent, IT WILL AUTOMATICALLY BREAK THEIR SHIELD!! This will put the opponent into shield stun, leaving them completely open to more attacks from the Masked Man. A new twist to the vB counter attacks.
A abilities
Neutral A:
the Masked Man does sword slices forward in an upward motion, and can keep going on as long as A is pressed, similar to link. 2% each hit.
F-tilt:
the Masked Man stabs his sword out forward.The sword, similar to the plasma blade, will also extend at the point, meaning it can catch people off guard with it's slightly boosted range. 7%dmg at the tip, 5%dmg at the base.
D-tilt:
the Masked Man crouches and does multiple kicks out forward, just like Ness and Lucas’. he kicks slower, but the hits do more damage. This move can also cause tripping, but it has a lesser chance of doing that, in comparison to Lucas' D-tilt. 8% each.
U-tilt:
the Masked man quickly swings his sword up at the sky. Has minimal knock back, but can be used for comboing.makes it easier for the Masked Man to perform chaingrabs. 5%dmg.
Dash attack:
the Masked Man swings his sword out in front of him and swings it rapidly.Again, like with the plasma sword, the Masked Man's sword will extend . 14%dmg.
Smash Attacks
F-smash:
holding the Sword above his head, the masked man Quickly brings it down, similar to a hammer motion. Hit opponents get electrocuted. knockback is average. 10-17%dmg.
U-Smash:
Pk Love. Similar to Lucas’ U-smash, Masked Man releases a strong burst of PSI above his head.Whereas Lucas' can hit the opponent with multiple shots, The Masked Man hits them with one, single Powerful attack. also like Lucas', it can crumble platforms. 12-27%dmg.
D-smash:
Taking his sword, the Masked Man Stabs it into the Ground, sending out a small wave of electricity around him. The size of the wave is small, circling around the Masked man's body.The move gives the opponent electrical stun. 3%dmg each hit, for a max of 30%.
Aerials
N-air:
the Masked man does a quick spin in midair, much like Ness' n-air. however, since he has a sword, the Masked man has a considerably larger hitbox than Ness'. knockback is average, and contact gives electrical stun. 7%dmg.
U-air:
Stabs his sword directly up in the air, like Link’s U-air.in comparison though, the knockback is quite poor, but thelength of the sword is longer, so the player is more likely to strike the opponent sucessfully. 12%dmg.
D-air:
the Masked Man does a downward hook kick. 10% if it connects. Can also Meteor Smash.
B-air:
the Masked Man has his wings withdraw and slice the opponent.Knockback is great with this move. works effectively as a counter attack. 8%dmg.
Grabs
Standard:
the Masked man head butts them.due to lack of grab lag, this move can be used multiple times. 2% each hit.
U-throw:
the Masked Man holds them in the air, shocks them, then throws them up. 15%dmg.
F-throw:
the Masked Man holds them in front of the blaster, then sends them flying by firing it. the damage is good, but the opponent is sent a very small distance, so it's not quite an efective killing grab. 14%dmg.
B-throw:
the Masked Man throws the opponent behind him using his sword.the opposite of his f-air, this one has considerably better distance. 10%dmg.
D-throw:
He holds the opponent to the ground then fires a single shot. can be used for chaingrabbing. 6%dmg.
Final Smash: Last Needle
A devastating move, a golden needle appears in front of the Masked Man, which he then pulls out. Afterwards, the battlefield is engulfed in chaos. The attack in nature is similar to PK Starstorm, but instead of raining PSI energy, it rains down destructive meteors all over the place(similar to the end of Mother 3). Also unlike PK star storm, they don’t go through the stage- they crash into it. The explosion itself only does 10-13%dmg with little knock back, but if some one is hit by a meteor when it Blows up, they will take 37%dmg with extremely high knock back.
Status
The Masked Man has no Role in the Subspace Emissary, but can be unlocked by beating Classic mode with Lucas on Hard or higher without continuing. The Battle will be on Final Destination. Unlocking him also unlocks a new song in the stage New Pork City: Pokey Means Business.
http://www.youtube.com/watch?v=0OGWRuRVeY0
Taunts
U-taunt: Masked man starts shooting sparks from himself, as if he was malfunctioning.
f-taunt: Masked Man sticks his sword out, as if challenging someone, then swings it.
d-taunt: masked man looks around, as if someone is talking to him.

Smash Taunt: Masked Man also has a special, 4th taunt. The conditions is that the battle has to be at New Pork City, and one of your opponents has to be Lucas. A mysterious voice will talk to the Masked man. when the taunt is used,the screen will go white and It will say one of these lines
“……Why are you fighting? You two shouldn’t be fighting. It must be so sad for you to do this…”
“…..you are not an emotionless machine…you have feelings too. You must know of sadness as well…..”
“It’s so painful for a mother to watch her only sons fight like this. Please end this…..”
“……It must be so exhausting. You need to rest…..”
“……Claus…..”
The Essential Kirby Hat
Unlockable songs:
NOW WHO'S THE COOL GUY:http://www.newgrounds.com/audio/download/143702
THE END OF THE PIGMASK ARMY:http://www.newgrounds.com/audio/download/153706
The Masked Man, the Mysterious minion of the Diabolical King Porky, has joined the Brawl!! His motives are unknown, but he will take down anyone who stands in his path!!!
Profile
The “Cute little monster” of Porky, the Masked man is a person who was brought back from the dead as a cyborg though a similar process used to make the Ultimate Chimera. He was gifted with the ability to remove the 7 needles from the Earth to awaken the dragon of destruction. He is Porky’s right hand man, and the leader of the sinister Pigmask army. His backstory is unknown, but he is stated to be connected to Lucas…
Stats
Power:6/10
The Masked Man has no guaranteed finishing techniques, meaning that he has to usually attack with combos and have a set up. His smashes are quite poor, since they have minimal knockback,, but his side and down specials can send people flying if sweetspotted, so he can be quite a threat with combos.
Movement speed:8/10
His movement is quick, allowing for fast approaches without lag. Good for dash attacks and dash grabs.
Attack speed:9/10
One of the fastest attackers in the game. Barely below Meta on attack speed.
Range: 7/10
His sword has fairly good range, and much like the beam sword, will even extend for some moves. His neutral special is also good for laser camping. The only thing keeping him from a10 is that his grab range is quite poor- it’s the shortest of the 3 Mother reps- but also has the least grab lag of the 3, as well.
Weight:3/10
the Masked Man is VERY FLOATY, and is probably the lightest of the Mother/Earthbound cast. The fact that he is floaty makes it easier for him to recover, but it leaves him very vulnerable to Star Kos. Barely above Mr. G&W in weight.
Jump(s): 5/10
Mask is a completely average jumper ,with the lowest jumping height of the 3. Basically the same as Mario.
Height:5/10
He is probably the tallest member of the Mother cast. About equal in size to Mario.
Falling Speed: 4/10
As stated before, he is a float faller.
The Masked Man can also perform a Glide.
Summary
The Masked Man relies on his quick attacks and sword's range to make up for his lack of heavy hitting techs. while he's mostly a hand-to-hand fighter, his neutral B can be used to poke shots at opponents far away. since his attacks have very little lag, he can perform combos much easier than most other characters. someof his best techniques are performed by comboing and opponent into his fairly strong >B attack, which has great knockback if the opponent is hit by the direct center of the lightning. he also has very good grabs, and his lack of lag in his moves and his fast movement means he can perform chaingrabs. but the Masked Man has his share of weaknesses, too. for one, he has the lowest jump of the Mother reps(which is still pretty average, though) , but he is the only rep who can Glide, and can also Glide-cancel(attack out of a Glide.) however, his air game is questionable. due to his light weight, slow falling, lack of knockback in his aerials, and vulnerability in the air, the Masked Man has the worst time in Midair combat, meaning skilled Masked Man users have to keep a strong ground game to use him effectively.
Specials
B: Arm cannon
The Masked Man fires a shot from his arm cannon, which works similar to Falco’s blaster: both fire singular shots in a burst. The shots cause flinching, and do 3%dmg. Each. Can be used to poke at an opponent from a distance.
>B: Intense Lightning
The Masked Man swings his sword forward, and a bolt of lightning strikes the ground. Looks similar to Pikachu’s Thunder special, but instead of striking himself strikes the ground in front of him, and the move has more considerable kockback. An indirect hit will only do 9%dmg , but if someone gets hit by the center of the attack, they will take 18%dmg with very high knockback.
^B: Wing Jet
The Masked Man’s bat-like wings will activate, and he will fly back to the stage.
The move is similar to Snake’s Cypher ^B, but it only lasts half as long very good or vertical recoveries, but fairly bad for horizontal can be used to glide-cancel.
vB: Shield Killer
Possibly the deadliest and most sinister of the Masked Man’s Specials. He charges up and then makes a huge swing with his sword, striking the opponent. an indirect hit will only do 10%dmg, and a direct one will do 20%, with fair knock back. But what makes the move so deadly is that if used on a blocking opponent, IT WILL AUTOMATICALLY BREAK THEIR SHIELD!! This will put the opponent into shield stun, leaving them completely open to more attacks from the Masked Man. A new twist to the vB counter attacks.
A abilities
Neutral A:
the Masked Man does sword slices forward in an upward motion, and can keep going on as long as A is pressed, similar to link. 2% each hit.
F-tilt:
the Masked Man stabs his sword out forward.The sword, similar to the plasma blade, will also extend at the point, meaning it can catch people off guard with it's slightly boosted range. 7%dmg at the tip, 5%dmg at the base.
D-tilt:
the Masked Man crouches and does multiple kicks out forward, just like Ness and Lucas’. he kicks slower, but the hits do more damage. This move can also cause tripping, but it has a lesser chance of doing that, in comparison to Lucas' D-tilt. 8% each.
U-tilt:
the Masked man quickly swings his sword up at the sky. Has minimal knock back, but can be used for comboing.makes it easier for the Masked Man to perform chaingrabs. 5%dmg.
Dash attack:
the Masked Man swings his sword out in front of him and swings it rapidly.Again, like with the plasma sword, the Masked Man's sword will extend . 14%dmg.
Smash Attacks
F-smash:
holding the Sword above his head, the masked man Quickly brings it down, similar to a hammer motion. Hit opponents get electrocuted. knockback is average. 10-17%dmg.
U-Smash:
Pk Love. Similar to Lucas’ U-smash, Masked Man releases a strong burst of PSI above his head.Whereas Lucas' can hit the opponent with multiple shots, The Masked Man hits them with one, single Powerful attack. also like Lucas', it can crumble platforms. 12-27%dmg.
D-smash:
Taking his sword, the Masked Man Stabs it into the Ground, sending out a small wave of electricity around him. The size of the wave is small, circling around the Masked man's body.The move gives the opponent electrical stun. 3%dmg each hit, for a max of 30%.
Aerials
N-air:
the Masked man does a quick spin in midair, much like Ness' n-air. however, since he has a sword, the Masked man has a considerably larger hitbox than Ness'. knockback is average, and contact gives electrical stun. 7%dmg.
U-air:
Stabs his sword directly up in the air, like Link’s U-air.in comparison though, the knockback is quite poor, but thelength of the sword is longer, so the player is more likely to strike the opponent sucessfully. 12%dmg.
D-air:
the Masked Man does a downward hook kick. 10% if it connects. Can also Meteor Smash.
B-air:
the Masked Man has his wings withdraw and slice the opponent.Knockback is great with this move. works effectively as a counter attack. 8%dmg.
Grabs
Standard:
the Masked man head butts them.due to lack of grab lag, this move can be used multiple times. 2% each hit.
U-throw:
the Masked Man holds them in the air, shocks them, then throws them up. 15%dmg.
F-throw:
the Masked Man holds them in front of the blaster, then sends them flying by firing it. the damage is good, but the opponent is sent a very small distance, so it's not quite an efective killing grab. 14%dmg.
B-throw:
the Masked Man throws the opponent behind him using his sword.the opposite of his f-air, this one has considerably better distance. 10%dmg.
D-throw:
He holds the opponent to the ground then fires a single shot. can be used for chaingrabbing. 6%dmg.
Final Smash: Last Needle
A devastating move, a golden needle appears in front of the Masked Man, which he then pulls out. Afterwards, the battlefield is engulfed in chaos. The attack in nature is similar to PK Starstorm, but instead of raining PSI energy, it rains down destructive meteors all over the place(similar to the end of Mother 3). Also unlike PK star storm, they don’t go through the stage- they crash into it. The explosion itself only does 10-13%dmg with little knock back, but if some one is hit by a meteor when it Blows up, they will take 37%dmg with extremely high knock back.
Status
The Masked Man has no Role in the Subspace Emissary, but can be unlocked by beating Classic mode with Lucas on Hard or higher without continuing. The Battle will be on Final Destination. Unlocking him also unlocks a new song in the stage New Pork City: Pokey Means Business.
http://www.youtube.com/watch?v=0OGWRuRVeY0
Taunts
U-taunt: Masked man starts shooting sparks from himself, as if he was malfunctioning.
f-taunt: Masked Man sticks his sword out, as if challenging someone, then swings it.
d-taunt: masked man looks around, as if someone is talking to him.
Smash Taunt: Masked Man also has a special, 4th taunt. The conditions is that the battle has to be at New Pork City, and one of your opponents has to be Lucas. A mysterious voice will talk to the Masked man. when the taunt is used,the screen will go white and It will say one of these lines
“……Why are you fighting? You two shouldn’t be fighting. It must be so sad for you to do this…”
“…..you are not an emotionless machine…you have feelings too. You must know of sadness as well…..”
“It’s so painful for a mother to watch her only sons fight like this. Please end this…..”
“……It must be so exhausting. You need to rest…..”
“……Claus…..”
The Essential Kirby Hat
Unlockable songs:
NOW WHO'S THE COOL GUY:http://www.newgrounds.com/audio/download/143702
THE END OF THE PIGMASK ARMY:http://www.newgrounds.com/audio/download/153706
If I forgot anything(I don't think I did) let me know.
Alright thanks. That was kind of my bad. I'll just make his Geass work as long as they're on the same ground levelOkay, for Lelouche, while reading it, the Neutral B is, well, extremely versatile at least. However......you can't CROUCH and do a Neutral B move.....you'll do your Down B instead. Just pointing that out to you.

Ahh...but the explosion's range is 2.5 stage builder blocks. As long as Lelouch gets within that range...ah forget it. I'll just make it that Lelouch must be hit by an attack that deals off 10-15% damageThat Down Smash.....well, it makes sense for it to hurt you, but I'd just Blaster him.....BOOOM! Anyways, unless you time it right, or your opponent's just stupid/CPU, they'll likely just hit you with a projectile. Which means you'll just take damage.
Thanks dudeThe Final Smash is good..not really an uber attack, it enhances one. And I like the immortality.
@Masked man: Uhh...first of all, you shouldn't make a moveset for someone that you don't know a lot about. Secondly, it could use a bit more detail (like speed, range, and other descriptions.)
lordvaati
Smash Master
oh, don't worry, I knew enough to make an authentic moveset (via spoiling-trust me, all of his specials were used in M3), but just stated i have yet to play mother 3.So this is kind of fan service. and I kind of did describe his speed and range.( unless you wanted moreAlright thanks. That was kind of my bad. I'll just make his Geass work as long as they're on the same ground level
Ahh...but the explosion's range is 2.5 stage builder blocks. As long as Lelouch gets within that range...ah forget it. I'll just make it that Lelouch must be hit by an attack that deals off 10-15% damage
Thanks dude
@Masked man: Uhh...first of all, you shouldn't make a moveset for someone that you don't know a lot about. Secondly, it could use a bit more detail (like speed, range, and other descriptions.)
 )
)Chris Lionheart
Smash Champion
Masked Man is certainly a photogenic set, but there really isn't much more to it than that. The moves are quite generic and the set is underdetailed. It isn't -bad- for a newcomer set, but it certainly needs work. Perhaps you should read the work of others, such as MasterWarlord and the above TWILTHERO to get some idea of what it takes to be noticed.
KingK.Rool
Smash Lord
- Joined
- Nov 26, 2005
- Messages
- 1,810
Death the Kid is an interesting enough set. It's pretty wordy; your biggest problem is still with the writing style, there, TWIL. I also thought you'd do something a bit more interesting with his main symmetry dealie, but I guess it makes picking stages more complex, at least, right? You cover a lot of detail and have a decent amount of creativity, although it's nothing mind-blowing. And I can't believe you stole Prinny's organization without even changing color. Tsk, tsk, man. Turns me off from reading all of it, actually.
Now, Rosalina's pretty good for a newcomer set. Welcome to MYM, n88! The main things I'd suggest to you would be to switch up the color a bit - reading a solid wall of teal is pretty trying for the eye, so I'd suggest some bolding and changed colors and sizes. I'd also suggest trying to make the attacks stand out a bit more - in fact, your best resource will be those useful links in the first post. You've got all the detail, though, and that's great to see.
I'll read and comment Heatran, Lelouche, and Roserade later, or try to, anyway.
Now, I'm just going to tell everyone who hasn't already to go read Adeleine!!! It's a really amazing set, probably the best posted yet, actually. It's simple, easy to read, and tons of fun. Just because Kibble's not around any more doesn't mean that you don't owe it to him to read his final moveset.
n88
Smash Lord
- Joined
- Oct 10, 2008
- Messages
- 1,530
Thanks for the input. The resaon it's like that is because I did all of the original formatting in Microsoft Word, forgetting that it wouldn't stay like that when I copied it into the posting thing. So, yeah it's a little bit improvised. I'm trying to fix it up a bit before I get going on my next set.Now, Rosalina's pretty good for a newcomer set. Welcome to MYM, n88! The main things I'd suggest to you would be to switch up the color a bit - reading a solid wall of teal is pretty trying for the eye, so I'd suggest some bolding and changed colors and sizes. I'd also suggest trying to make the attacks stand out a bit more - in fact, your best resource will be those useful links in the first post. You've got all the detail, though, and that's great to see.
Chris Lionheart
Smash Champion

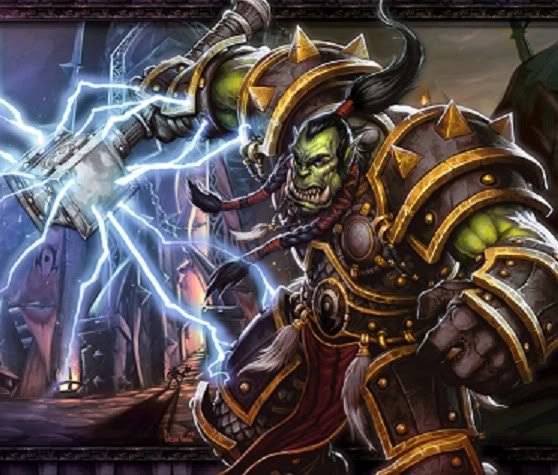
Thrall
"We don't go do stupid things when someone yells 'For The Horde'!"
Rise of the Warchief: Story
Thrall, birthname Go'el, is the son of Durotan and the warchief of the orcish Horde. As a baby, he was found among the bloody bodies of his murdered parents by Blackmoore, the human commander of the internment camps. He was given the name Thrall, which means slave in the human tongue and raised to be a gladiator. Thrall was a perfect fighter, large and fierce even by orc standards and as intelligent as any human. Blackmoore's abusive beatings, both in and out of the ring, took their toll on Thrall. He eventually decided to escape. After being captured again and taken to another internment camp, Thrall was enlightened by an orc there. He learned that the Horde had turned to demonic corruptions and that the old shamanistic ways were far better for the orcs. Thrall then escapes again and seeks Grom Hellscream, his eventual best friend and the only other prominent orc who wished to embrace the old ways. Thrall would become very prominent in the orcish community, eventually even becoming the new warchief. Soon after becoming the warchief, Thrall leads the Horde to a new land and establishes the kingdom of Durotar.
Moveset
Stats
Size- Very Large
Due to being mounted on a large wolf (and not exactly being small himself), Thrall is roughly as tall as Ganondorf and as wide as Bowser!
Weight- Heavy
Thrall is very heavy, given the combined weight of his orcish brawn with the weight of his large wolf. He is roughly 1.25x as heavy as Bowser.
Walk Speed- Slow
When walking, Snowsong (Thrall's wolf) takes a breather so to speak. She's not trying to go fast. Thrall's walking speed is roughly that of Bowser's.
Dash Speed- Fast
You'ld be surprised by how fast Snowsong can run. She is able to keep up with Marth!
First Jump- Great
Snowsong has some powerful hind legs. They allow her to jump 1.33x that of the average jumping height. You can also get some good horizontal distance.
Second Jump- Below Average
Snowsong isn't able to jump very well in the air, as she must support Thrall's weight and can't even take advantage of her muscled legs to do so. This isn't as bad as something like Peach's second jump (what second jump), but it is not good by any means.
Falling Speed- Fast
Though not the fastest faller, Thrall's weight (and that of his mount) gives him a fast falling speed. This does not help his recovery or air game.
Traction- Very Great
Snowsong nevers trips and turns very easily. This does not make Thrall's traction perfect, however, as icy panels (and similar effects) can greatly decrease Snowsong's ability to turn and stop.
Dodges- Poor
Due to Thrall's massive size, most of his dodges are not good. The exception to this is the sidestep, which is one of the fastest in the game thanks to Snowsong's fast animal reflexes.
Crouch- No
Crawl- No
Wall Jump- No
Wall Cling- No
Glide- No
Animations
Standing Pose
Thrall holds his hammer in his right hand while sitting on his mount. Both he and the mount look straight ahead, not doing much.
Idle Pose
Thrall looks around looking rather bored. Snowsong growls once in a while, likely desiring a fight.
Walk Pose
Nothing really special. Snowsong simply walks forward like a typical wolf would.
Running Pose
Thrall's running pose looks much like this, except he holds his hammer right-handed.
First Jump
Snowsong leaps upwards, using her hind legs to jump high.
Second Jump
Snowsong simply spins around 360 degrees, gaining some considerable (but below average) height.
Shield
{5% damage per hit}
A powerful shield of electricity eminates from Thrall's hammer as he raises it over his head. This electrical shield deals 5% and decent horizontal knockback (KO's at 130%) to any foe who comes into contact with it. The shield does weaken over time or when it takes damage (evidenced by the electricity turning from a powerful blue to a weaker yellow and eventually just sparks).This shield takes just a bit longer to bring up than other shields.
Sidestep
Snowsong jumps to the side very quickly, dodging any attack by a longshot. She then jumps backwards after a fairly average duration. This sidestep is great for its almost non-existant lag in comparison to other sidesteps that does not involve losing duration.
Roll Dodge
Shadowsong runs straight ahead (or quickly turns around and runs the other way if you use the backroll) for a distance similar to Mewtwo's roll dodge. Though the lag is little, the duration is a bit long, making this one of the worse roll dodges.
Air Dodge
Shadowsong veers to the side just a bit, narrowly dodging attacks. Thrall pays for the non-existant lag with a miniscule duration, making great timing a must.
Specials
Down Special- Founding Durotar
{20% stamina} {2% damage per hit}

Thrall's most important move, period. Thrall pulls out a primitive looking battle horn and plays one loud note on it in order to call in one Orc Peon. This move has low total lag, but a duration of roughly 1 second. The peon hase 20 stamina and is capable of attacking with a basic downwards pickaxe swing, but its attacks are pathetically weak, only dealing 2% damage and low horizontal knockback (KO's starting at 300%) at a rate of 1 attack every second. The attacks are quite fast though, having very low beginning lag and no ending lag (this does little to make them less pathetic though). The peon will stand still naturally, only fighting if attacked. Peons can jump but have no air attack. The Peon has a medium movement speed and can jump at an average height in order to reach platforms that they have been ordered to build buildings on. Cannot air attack.
The use of a Peon is not to provide damage however, for the peons are builders, not combat units. When Thrall uses his Down Special when next to a Peon, a little menu will be pulled up. With three symbols- build, repair, and destroy. A little orcish hand will appear on the screen, serving as your cursur, which is controllable with the yellow c-stick or with motion controls, allowing Thrall himself to keep moving while issuing orders. You can use this to pick the building you wish to build. You must press A to make your selection, though in the case of Repair, pressing B allows you to make a selection as well.
Build

Click this symbol and another menu will open up.The menu will contain all of the currently available buildings. Select the building you wish to build by pressing A on the symbol of said building. You must then choose where to place the building on the stage. If the entire selection area is green, the building can be built, but if the selection area turns red, then there is not sufficient room to build the building. Press A when you have found your spot to finalize the order.
There are two very sizeable differences in the building processes between Thrall and Arthas. First, Thrall's buildings are built directly onto the stage, rather than in the background, making them vunerable to attack. Second, unlike the Acolytes, Peons actually go inside of the building they are constructing while they build it, making the Peons invunerable unless the building is destroyed while they build it, in which case they will be ejected from the building at the moment of its destruction and become vunerable.
Buildings will be explained fully later in the moveset.
Repair

A peon can also be made to repair buildings. This is done by hitting the Repair symbol, pictured above on the first menu. If you press A to make your selection, you must now control the cursur to select the building you want to repair, pressing A again to finalize the order. When you press B to select the Repair command, the Peon will now permanently auto-repair the damaged building that is nearest to him. Just like in the building process, the Peon will be inside of the building he is repairing, making him invunerable to attack unless the building is destroyed or until he finishes repairing it.
Note that- both for building and repairing- each Peon can only restore 10 stamina per second to the building he is building or repairing. Naturally, this makes high hp buildings take longer to build than lower hp buildings.
Destroy

While a Peon can build and repair buildings, he can also destroy them. When you select the Destroy symbol, you can now control a cursur which allows you to select targets for the Peon to destroy. This can be used in one of two ways. First, it can be used to choose a foe for the Peon to pursue and attack. More importantly, however, it allows you to order your Peon to destroy buildings at a rate of 10% per second. Just like with Building and Repairing, the Peon will be inside the building he is destroying.
Now I know what you are thinking. Why would you want to destroy a building that you put hard work into constructing? The answer is quite simple, my friends. By destroying a building, that part of the stage becomes free again. This allows you to relocate buildings to new places or simply to change the shape of the stage once again.
An interesting effect is that all of the parts (stamina) that the Peon harvests from that building are stored with the Peon that did the job. The next time that Peon tries to build that type of building, the stamina he took off of the destroyed building is already available towards the new building, making construction much quicker and easier.
Unfortunately, if you destroy a Stronghold or Fortress, you cannot build a new Stronghold or Fortress. You must build a new Great Hall and upgrade it to gain a new Stronghold/Fortress. For this reason, it is recommended that you be careful in choosing the location of your Great Hall.
Neutral Special- Chain Lightning
{10% (first jump) -1% (each additional jump)}

Likely one of the most powerful spells in Warcraft 3, Chain Lightning is one of the best moves of the Far Seer (Thrall's class).
Thrall's hammer starts building up electricity as soon as you press the B button. An aiming reticule now appears on the stage, allowing you to choose up to 9 locations simply by pressing A on the desired location (which can be anywhere in the field, ground or air), a little highlighting mark appearing wherever you choose. It is worth noting that you can drag selected locations, effectively changing them by pressing and holding A on them, moving them to a new place, and releasing A. When you press B a second time, Thrall will release the electricity in his hammer by swinging it forward. This sends out a lightning bolt that travels from one selected place to another in the order you selected the locations. It also grows weaker each time it jumps. While traveling towards its first location, the lightning deals 10% damage and stuns the opponent for roughly a second. Each time the lightning reaches a targeted point, it deals 1% less damage. The "charge" of the move can be stored, allowing you to release the lightning at a later time with the points already selected. This move has low beginning lag (before charging it), a variable charge duration (that does nothing but allow you to select points), a fairly high beginning lag when you release the lightning, and little to know ending lag.
This move can be very useful for creating a deadly web of damage. If you place your targets just right, a foe can be entrapped for the entire duration of the move and take up to 54% (10+9+8+7+6+5+4+3+2) damage and be stunned for the time it took for all of the lightning strikes to occur + the 1 second stun for the last hit! This move certainly packs a lot of power. It does come at the price of being very predictable, however.
Side Special- Far Sight
{N/A}

Thrall, like other Far Seers, has the ability to... well... see far. In WC3, this is used to reveal areas of the map as well as make opposing invisible units visible.
Press Side Special and Thrall will use his Far Seeing abilities. This move has low lag on both ends and a variable duration that is, of course, based on how long hold B. By default, this only selects the area right in front of Thrall, but holding B will allow you to control location Thrall will be viewing. Release B to make your selection. The viewed area would be roughly 3 of Bowser's widths in circumference. Though view zones are permanent in duration, only one can be on the field at a time. Using the side special again will simply remove the view zone. Also note that view zones can be anywhere on the field, both ground and air.
When a foe (or ally when friendly fire is on) steps into this area, they are no longer protected against Thrall's attacks by sidesteps, roll dodges, and air dodges (unless of course that roll dodge brings them out of the view zone). This is because Thrall can now predict their movements very easily. Shields will still protect them, as will counters, and invinceability because, despite Thrall predicting these actions, he cannot hit through the protections granted by these defenses. All invisible foes will also be completely normal while inside of the viewed zone.
Up Special- Wind Walk
{N/A}

Though this is an ability of the Orc Blademaster, it would not be completely unrealistic for Thrall to perform this move, given his magical talents.
When you use the Up Special, Thrall will become invisible (having the same properties of a character who has picked up the cloaking device). This move has a full second of beginning lag, as Thrall and his mount take some time to become completely cloaked. He (or rather his mount) gains the ability to run on air, allowing Thrall to move at dashing speed in any given direction. Thrall can attack with his dash attack while doing this, allowing him to attack not only at any elevation with his dash attack but also in any direction! Wind Walk ends after 2 seconds. Thrall is not left helpless after this ends, but he is unable to perform this move again till hitting the ground.
The most obvious use of this move is for recovering, but there are plenty of good uses for this move, such as damage protection (cloaking) it provides as well as the ability to dash in all directions. While the damage protection aspect of this move seems very tempting to spam, the move has a full second of beginning lag in which it is painfully obvious what you are trying to do.
Normal Attacks
Neutral A- Change of Perspective
{N/A}
No animation.
This move causes the player to switch from playing as Thrall to playing as one of his units- the first picked unit being the one closest to Thrall and the rest being the one closest to that unit and so on (never scrolling back to a previously selected unit until the cycle of units has been completed). This has no startup lag at all and there is no visual change at all to signify that this has been performed except that the currently controlled unit with have a little arrow over his head that matches Thrall's color.
While in control of the unit, a number of actions can be performed:
A- Switch Perspective to a different unit.
B- Return to playing as Thrall.
Tilts- Performs the attack of the unit in the direction of the control stick.
Aerials- (When applicable) Performs the aerial attack of the unit in the direction of the control stick. Keep in mind that the "Nair" simply switches perspective).
Shield Button- Allows the unit to shield, sidestep, roll, and airdodge just like Thrall.
Grab Button- Allows the unit to perform its grab, pummel, and throw.
Jump Button- Jump (not applicable to the Wind Rider, the Demolisher, and the Troll Batrider.)
C-Stick/Motion Controls- Moves Thrall.
Some special cases would include Troll Berserkers, Raiders, Kodo Beasts, Troll Batriders, Troll Witchdoctors, Shaman, Spirit Walkers, and Tauren, who have unique moves:
Troll Berserker- All smashes are Berserk. Holding the "charge" will cause the Berserker to keep throwing spears in the direction the control stick is pointed (and it is freely controllable even while holding) at twice the regular attack rate, at the cost of taking double damage.
Raider- All smashes are Ensnare. The net will be thrown in the direction of the Control Stick. Ensnare gets a 1...3 second duration based on charge.
Kodo Beast- Devour works with both tilts and smashes, as the Kodo Beast has no auto-attack.
Troll Batrider- All smashes are Unstable Concoction. The Troll Batrider will charge like Wolf's F-Smash in the controlled distance. The attack will only occur if a foe is struck.
Troll Witchdoctor- Forward Smash is Serphent Ward. Up Smash is Healing Ward. Down Smash is Stasis Ward. You can freely control where you place the wards by "charging" the smash and selecting the highlighted portion of the stage when it is where you wish for it to be.
Shaman- The Side Smash and Up Smash are both Lightning Shield, though you must use a cursor to select the target unit, character, or area to cast it on. The Down Smash is Blood Lust. Again, you must select the unit or ally to cast it on.
Spirit Walker- The Side Smash and Up Smash are both Spirit Link. A cursor is used to select the unit to cast it on. The Down Smash is Ancestral Spirit. A cursor is used to select the Tauren or Spirit Walker corspe to cast it on.
Tauren- The tilts are all Ike's side tilt but in the direction of the control stick. The smashes are all Ike's F-Smash, but controllable towards any direction. The Aerials are all Ike's Fair, except controllable in any direction with the Nair being the same as the Fair.
Dash Attack- Charge!
{3% un-sweetspotted, 7% sweetspotted}
Thrall charges forwards swinging his hammer. This causes him to move forwards about twice as quickly as his dash over a distance of a Battlefield platform. This hitbox of this attack is quite impressive, as the hammer swings over the entire distance and also reaches nearly a sword's length in front of Snowsong when the dash attack ends. Foes struck by head of the hammer at the end of the attack take 3% and low knockback (KO's starting at 180%) when struck during the charge but 7% and good forwards knockback (KOs starting at 110%) when struck at the end. This move has no lag whatsoever. Great priority. No hitstun. The attack is noteworthy in that it does not stop Thrall from dashing, as he can continue the dash as soon as the attack finishes.
This attack definitely defies Thrall's usual slow but strong style. This is actually a very useful attack. Relatively passable for damage racking due to its quick and far-reaching nature. If you manage to hit with the sweespot, this is one of Thrall's more effective attacks. This attack is also very useful for recovering when combined with his Up Special.
Tilts
Forward Tilt- Berserk
{2% damage unsweetspotted, 6% damage sweetspotted}

Thrall let's his battle spirit be known by swinging his hammer diagonally downwards from above his left shoulder to the right of his body. He has a very fierce appearance while doing this.
This attack is marked for its special traits. While it does have a fairly high amount of beginning lag, it has no ending lag at all. In addition, the next A move to follow this one up has no beginning lag at all. This comes at a trade off, however. Until the next A move he uses ends (including ending lag), Thrall will take an additional 50% damage (rounded up). This attack is markedly weak, only dealing 2% damage and fairly low forwards knockback (KOs starting at 250%) unsweetspotted or 6% and low forwards knockback (KOs startng at 200%) when the head of the hammer hits.. Great reach roughly that of Marth's sword. Medium priority. No hitstun.
This attack has obvious use as a combo tool, albeit a risky one. It is a very flexible move, as it completely nullifies the beginning lag of the next attack. This makes it very compatible with all moves that have high beginning lag, including itself. You can use this attack repeatedly to score a nice combo, though it is possible to DI out of. A better use of the move, however, would often be to follow it up with a slow-starting power attack to finish off foes. Purposely not sweetspotting this move can be to your advantages at decent percentages, as it should space the foe to where a sweetspotted hammer can hit them. This move is certainly rewarding, but the price it carries can be very heavy if your opponent is able to predict you.
Up Tilt- Hammer Smack
{4% unsweetspotted, 8% sweetspotted}
Thrall swings his hammer over his head towards the direction he is facing much like Link's Up Tilt (it doesn't have quite the same reach).
Struck foes take 4% and low upwards knockback (KOs starting at 200%) unsweetspotted and 8% and above average forwards knockback (KOs starting at roughly 130%) on a sweetspotted hit. This move has medium beginning lag and some slight ending lag. Good reach, roughly 2/3 of Link's uptilt (though the sweetspot is merely the head of Thrall's hammer). Good priority. Some hitstun. While this attack may appear to be nothing special at a glance, its sweetspot and sourspot really help to give it a different feel. In addition to this, it is possible to hold the A button to delay your swing, as the attack will, oddly, only occur once A is released.
This move may seem generic at first, and it can indeed be used for the generic purpose of damage racking, with some KO potential when sweetspotted, but the attack does have functions that most take for granted. The sweetspot/sourspot move effectively makes this move two different attacks in the hands of a skilled player. An unsweetspotted move can simply stun the foe and set them up for a second hit, particularly an aerial. A sweetspotted move has decent power and KO'ing potential and could possibly set up for a forwards combo. The delay feature of the attack gives it some great mindgame potential. Hell... you could even shield cancel the attack to increase the mindgame.
Down Tilt- Shockwave
{1% unsweetspotted, 5% sweetspotted, 7% shockwave}

Thrall swings his hammer from directly in front of him down to the ground with significant force. This creates a yellowish shockwave that travels forwards a considerable distance.
The shockwave travels roughly 1/5th of Final Destination at a very slow speed (roughly half that of the IC's ice block), stopping only it if hits the edge. It is a ground-hugging projectile, though it has a horizontal height roughly that of Kirby. The shockwave goes right through characters and obstacles, keeping on its path until reaching its distance. Foes struck by it take 7% and good upwards knockback that KOs starting at 110%. Foes struck by Thrall's hammer take an additional 1% from the sourspot and 5% from the sweetspot. This move has fairly high beginning lag and medium ending lag. The reach of the hammer is considerably shorter than that of the Side Tilt, really only being half of Marth's sword. The shockwave has no priority so to speak, not interrupting opposing attacks, but still hitting the foe, but the hammer does have medium priority. No hitstun.
This move is useful for exactly what it sounds like- a ground-hugging projectile that deals good damage and knockback. It is by no means spammable due to its lag, but it combines well with Thrall's Side Tilt. This attack is also useful for the fact that it travels right through obstacles, a very important factor given the fact that Thrall creates obstacles in the form of buildings.
Smashes
Side Smash- Storm Hammer
{5...20% damage}

Thrall brings his right hand, holding the hammer, behind his head and winds up (charge pose). He then throws his hammer forward like a boomerang (it spinning more like a flipper than a boomerang) it being covered in powerful electricity.
This attack is a mighty one indeed. It sports a reach of 2 Battlefield platforms, deals 5...20% damage and stuns foes for 1...4 seconds (adding 5% damage and 1 second of stun for each second spent charging). The hammer flies about 3/4 as fast as Link's boomerang, returning as soon as it strikes a foe or travels the maximum distance. This move has high beginning lag, fairly high ending lag, and a maximum duration of roughly 1.25 seconds (roughly the amount of time it takes the hammer to travel that distance and back). Great priority. Note that the foe cannot be stunned again while suffering from the stun caused by this move.
A very high risk, high-reward move. If it hits, the foe is going to be in stunned for quite some time. If it misses, Thrall is sure to be punished. This move is made especially effective when used after Thrall's Side Tilt.
Up Smash- Forked Lightning
{12% damage}

Thrall raises his hammer the maximum length over his head and charges electricity (charge pose). When you release the charge, lightning bolts will burst from the hammer.
Charging this move does not increase damage or knockback. Rather, it increases the number of bolts of lightning that spread from the hammer. 0 seconds of charging will cause only 1 bolt of lightning to rise straight upwards. 1 second of charging will add two diagonal bolts (one on each side). 2 seconds of charging will add 2 additional horizontal bolts of lightning (one of each side). Charging it for a third second will increase the reach of all bolts by 50%. The normal circumference of the lightning bolts is half of a Battlefield platform. Foes struck by this attack take 12% and great upwards knockback that KOs starting at 100%. This attack has high lag on both ends and a duration of about 1/3 of a second. Great priority. No hitstun.
Aside from its interesting charge bonus, this attack is quite straight forward. Powerful and sizeable in reach but slow. An ideal attack for protecting from above to do its awesome reach and priority. This move is also quite useful as a finisher.
Down Smash- Feral Spirit
{10...20...30% Stamina Per Wolf} {4%...7%...10% Damage Per Hit}

Thrall raises both of his hands over his head and starts softly chanting in an unknown language (charge pose). Upon releasing the smash, Thrall brings his arms down and two Ethereal Wolves appear out of nowhere, one on each side of Thrall.
There are three types of Ethereal Wolves- Spirit Wolves, Dire Wolves, and Shadow Wolves. The uncharged version creates Spirit Wolves with 10 stamina that deal 4% damage per hit. Dire Wolves with 20 stamina that deal 7% per hit are created when the smash has been charged for 1 second. Shadow Wolves that deal 10% per hit and have 30 stamina are created when this smash has been charged for 2 seconds. This move has about 1.33 seconds of beginning lag but no ending lag. Only two Ethereal Wolves may be on the field at a time. Using this Smash while there are already Ethereal Wolves on the field will simply replace the old ones with the new ones. More information on the wolves can be found in the Units section (a part of the Major Mechanics).
This is definitely Thrall's most useful smash overall, as it summons 2 fairly powerful minions without requiring a building to do so. The wolves are always an asset to Thrall- crucial in the early game in which he has no army and helpful in the late game just for adding a couple extra attackers to his army. It is definitely in Thrall's best interest in be a good distance away while using this smash so that he can charge it and create significantly more powerful wolves.
Aerials
Neutral Aerial- Orb of Lightning
{11% damage}

Thrall points his right arm, including his hammer, forwards. A orb made of lightning the size of Mario's head appears roughly Mario's height in front of the hammer. Thrall rotates his arm slowly, the orb of lightning orbiting him as if following the hammer.
This move lasts for as long as you hold the A button. The orb moves at a slow speed, about Thrall's walking pace going clockwise. Foes struck by the orb will take 11% damage and great upwards knockback (KOs starting at 100%). While this move has low lag on both ends, the slow movement speed of the orb may make a long holding duration necessary to get any real effect out of the attack. Great priority. No hitstun. This can be maintained even if Thrall hits the ground.
Depending on the position of your foe and their experience, this can be a very effective move or a very bad one. If the foe is in the initial forwards hitbox, then this can be a good finisher. If the foe is behind you, this is a bad option. If they are above you, the attack becomes even worse. This attack could perhaps be seen as more of a ground attack than an aerial.
Forward Aerial- Pulverize
{2% unsweetspotted, 7% sweetspotted}

Thrall swings his hammer much like Ike's Forward Aerial, squishing foes he strikes.
Upon striking a foe, that foe is pulverized, turning them into a cartoonish pancake-like version of themselves with normal arms and legs for about 2 seconds. They fall at half speed in this form and their height is greatly reduced, but their weight is also reduced by 20%. Naturally their upwards reach is also quite gimped. The struck foe also takes 7% damage sweetspotted and 2% unsweetspotted and some below average downwards knockback (does killing percent even apply here?). This attack has high starting lag and high ending lag. Great reach, being just a bit shorter than that of Ike's Fair. Great disjointed priority. No hitstun.
A cartoonish and unorthodox move that doesn't particularly chain well into other attacks. Really only useful for reducing a foes weight, making KOs easier. This attack is predictable and slow enough to see coming and easy to punish.
Back Aerial- Hammer Storm
{5% unsweetspotted, 9% sweetspotted}

Thrall swings his hammer backwards. He then starts swinging it around 360 degrees without so much as turning around, accomplishing this by switching hands when necessary.
This attack functions similarly to Marth's Side Special, in that you have to press A to make Thrall switch hands, thus proper timing is necessary to keep the attack going. Each hit of this attack deals 5% unsweetspotted and 9% sweetspotted. Medium knockback (KOs starting at 130%). Medium lag on both ends. Good reach, almost that of Marth's sword. Good disjointed priority. No hitstun. If Thrall hits the ground while performing this move, he will finish his current swing and then end the chain.
Another unorthodox aerial, but this can be quite effective when you get the timing down. You can keep it going or end it at choice, making the move quite versatile. It's decent damage and knockback makes it an acceptable move and it's lower lag makes it a better choice for straight-forward purposes than Thrall's Fair.
Up Aerial- Helicopter
{1% per hit unsweetspotted, 5% per hit sweetspotted}
Thrall starts spinning his hammer over his head like a helicopter blade.
Cartoonishly, this move reduces Thrall's falling speed by 20% while active, making it nearly average. Foes struck by the attack take 1% per hit unsweetspotted and 5% per hit sweetspotted. Very low knockback is dealt (KOs starting at 700%). This attack has a lag, number of hits, and duration similarl to Pit's Up Air but has a reach much like that of Ike's Uair. The sweetspot of the attack only occurs on the outside edge (the head of the hammer), and only on one side at a time. Good disjointed priority. No hitstun.
This attack can rack up a considerable number of hits, but it is easy to DI out of. It is also a nice option for lowering Thrall's falling speed.
Down Aerial- Snowsong Kick!
{5% damage}
Thrall and his mount rapidly descend just like Sonic, Samus, and Shiek's Dair. Upon striking a foe, Thrall footstool jumps off of them.
Foes struck by this attack take 5% and Thrall footstool jumps off of them. Other than the footstool effect, this attack is basically identical to the Dairs of Sonic, Samus, and Shiek, having the same or similar reach, lag, falling speed, etc. Medium priority. No hitstun.
This attack can be very useful thanks to the footstool jump effect. I don't think it needs to be said that this can be used for both recovery and gimping purposes. Be careful, however, as this attack can easily cause Thrall to SD.
Situationals
Thrall has no ledge attack or tripped attack because he cannot trip and cannot grab the ledge.
Rising Attack- Wild Wolf
Snowsong leaps to her feet, facing the direction she was facing before using the attack, and kicks backwards.
Struck foes take 5% damage and medium knockback that KOs starting at 150%. This move has low lag on both ends, medium reach, medium priority, and no hitstun.
An average attack by all means, but it is a situational. What more is there to say?
Grab/Throw
Grab- Banner of the Horde

This grab has two stages. In the first step, Thrall waves a flag bearing the pictured symbol, having some low beginning lag. After a slight pause, the second step occurs in which all units under Thrall's command grab in the direction they are facing. The grab itself has average reach, lag, and duration. Thrall is able to control the units once the foe(s) have been grabbed, allowing them to pummel and throw.
Thrall's grab is able to grab multiple foes at once (depending on how many units he has) and it can be used to great effect, but he pays for it by having no direct grab and only one simple throw (which can be performed in any direction.)
There are some unique cases however:
The Wind Rider and Troll Batrider can aerial grab due to their ability to fly.
The Demolisher cannot grab.
Pummel
The pummel of all units deals 5% and has high beginning lag for a pummel but no ending lag. Wolves bite the foe. Units with weapons bash the foe on the head (or body if head is not applicable) with their weapon. The rider of the Kodo Beasts beats the foe on the head with the drumsticks.
Throw- Toss
All units simply toss the foe in the direction you press the control stick, dealing 5% damage and medium knockback (KOs starting at 140%) to the grabbed foe. Average lag and duration for a grab.
Final Smash- Earthquake

The entire main part(s) of the stage (excluding platforms) start shaking. All foes move 75% slower over the effected areas and trip once every 2 seconds. This Final Smash lasts for 20 seconds. Opposing buildings take 10% damage per second.
This Final Smash is countered simply by remaining airborne for as much of the duration as possible and fighting on platforms.
Taunts
Up Taunt-
Thrall raises his hammer above his head and lets out a loud cheering roar.
Side Taunt-
Snowsong starts running around in circles, chasing her tail.
Down Taunt-
Thrall jumps down from Snowsong and starts to.... DANCE!?

Victory Poses
Up Pose-
Thrall says "The beginning of knowledge is the statement 'I do not know'."
Side Pose-
Thrall triumphantly shouts "BLACKMOORE, TONIGHT YOU SLEEP IN HELL!"
Down Pose-
Thrall says "We don't go do stupid things when someone yells 'For the Horde!' "
Major Mechanics
Buildings
Summary
Buildings are the essence of Thrall's moveset. They provide the Orcish Warlord with summonable fighters, offensive towers, and stage controlling options. Thrall's building work very differently from that of Arthas. Firstly, they are built on stage. Secondly, Thrall is able to order his Peon's to build specific buildings, unlike the set order established in Arthas's set. Now, there is a tech tree that limits this freedom, but once certain buildings, such as towers, are available, the freedom really gets its advantages.
Buildings are constructed by ordering a Peon to do so and choosing the location on the stage. The peon is protected while building (atleast until said building is destroyed), but the building is completely vunerable. The Peon constructs a building at a rate of 10 hp per second, the time it takes to build a building obviously scaling to how much hp said building has. The time it takes to build a building can be extended by attacking the building. A Peon can also be ordered to repair damaged buildings (also at a rate of 10 hp per second).
Buildings are divided into small, medium, and large. The category not only decides the buildings size, but also the amount of stamina (and building time) the building has.
Certain buildings (Great Hall, Stronghold, Fortress, Barracks, Spirit Lodge, Beastiary, Tauren Totem) can be entered by Thrall. This is done by pressing towards the Building when next to it. Thrall can then choose to produce units (or tech tree upgrades). Thrall, unlike Orc Peons, is vunerable to damage while in the building, but has super armor.
Buildings are highly vunerable to damage from fire and explosive sources, taking double damage from these sources.
Buildings are solid and cannot be passed through by any character, counting as a wall of sorts. This means that D3 can chain people against them, but being thrown against a building does damage said building for the amount of the throw.
Tech Tree
Thrall's buildings have a tech tree limiting what buildings can be built based on what buildings already exist. The entire tech tree is controlled by the primary building, the Great Hall.
The Great Hall (or its upgrades) must exist to build anything (except for the Great Hall, of course). Possession of the Great Hall allows construction of the Barracks, the Watch Tower, and the Voodoo Lounge.
Upon upgrading the Great Hall to the Stronghold, the Spirit Lodge and the Beastiary become available.
Upon upgrading the Stronghold to the Fortress, the Tauren Totem becomes available.
If the Great Hall, Stronghold, or Fortress are destroyed, currently existing buildings will remain functioning, but new buildings cannot be built. For this reason, some Thrall players choose to build multiple Great Halls/Strongholds/Fortresses.
A pictured version of the tech tree is provided below. This is the true WC3 Orc Tech tree. The Smash version excludes the War Mill and the Orc Burrow. It does, however add in spike walls (a form of fortification).
Building One- Great Hall
{100% stamina}
This is the most basic Orc building, required to build ANYTHING else. It (and it's upgrades) are the largest buildings, barely able to fit on a Battlefield platform and being as tall as Ganondorf. The Great Hall serves literally no function except to be the master of the tech tree. Building the Great Hall unlocks the Stronghold upgrade as well as the Barracks and the Watchtower. It also enables you to build level one Spiked Barricades. A Great Hall has 100% stamina, thus taking 10 seconds to completely build, assuming that it is not attacked during the construction process.
The Great Hall also comes complete with some unit upgrades:
Pillage-
Peons, Grunts and Raiders are healed for 1% each time they land an attack. Upgrade takes 10 seconds.
Troll Regeration-
Troll Headhunters, Troll Berserkers, Troll Witchdoctors, and Troll Batriders are healed for 1% hp every second. Upgrade takes 10 seconds.
Berserker Strength-
Adds 10 hp to the Grunt. Upgrade takes 10 seconds.
Steel Melee Weapons-
Adds 1 damage to the attacks of Grunts, Raiders, and Tauren. Upgrade takes 10 seconds.
Steel Ranged Weapons-
Adds 1 damage to the attacks of Troll Headhunters, Troll Berserkers, Demolishers, Wind Riders, and Troll Batriders. Upgrade takes 10 seconds.
Steel Unit Armor-
Adds 5 hp to Grunts, Raiders, Troll Batriders, Tauren, Troll Headhunters, Troll Berserkers, Wind Riders, and Demolishers. Upgrade takes 10 seconds.
Building Two- Stronghold
{150% Stamina}
This is an upgraded version of the Great Hall. It is created by entering the Great Hall with Thrall and selecting the upgrade to Stronghold button. It takes a full 10 seconds to upgrade into a stronghold. Upon finishing the upgrade, the Stronghold has 150% stamina. The Stronghold unlocks the Fortress upgrade, as well as the ability to build the Beastiary and the Spirit Lodge. You are also able to build level two Spiked Barricades.
The Stronghold also comes with some extra unit upgrades:
Thorium Melee Weapons-
Increases the damage of Grunts, Raiders, and Tauren by an additional 1%. Upgrade takes 15 seconds.
Thorium Ranged Weapons-
Increases the damage of Troll Headhunters, Troll Berserkers, Demolishers, Wind Riders, and Troll Batriders by an additional 1%. Upgrade takes 15 seconds.
Thorium Unit Armor-
Increases the stamina of Grunts, Raiders, Tauren, Troll Headhunters, Troll Berserkers, Wind Riders, and Demolishers by an additional 5%. Upgrade takes 15 seconds.
Building Three- Fortress
{200% Stamina}
This is the final upgrade of the Great Hall. It is created by entering the Stronghold with Thrall and selecting the upgrade to Fortress button. It takes a full 10 seconds to upgrade into a Fortress. Upon finishing the upgrade, the Fortress has 200% stamina. The Fortress is necessary to build the Tauren Totem, home of the strongest (non-hero) melee unit in Warcraft 3. It also enables you to build level 3 Spiked Barricades.
The Stronghold also provides an even further increased selection of upgrades:
Arcanite Melee Weapons-
Increases the damage of Grunts, Raiders, and Tauren by an additional 1%. Upgrade takes 20 seconds.
Arcanite Ranged Weapons-
Increases the damage of Troll Headhunters, Troll Berserkers, Demolishers, Wind Riders, and Troll Batriders by an additional 1%. Upgrade takes 20 seconds.
Arcanite Unit Armor-
Adds an additional 5% hp to Grunts, Tauren, Raiders, Troll Headhunters, Troll Berserkers, Demolishers and Wind Riders. Upgrade takes 20 seconds.
Building Four- Barracks
{75% Stamina}
This is the most basic of the Orc's unit production buildings. It produces the Grunt, the Troll Headhunter, the Troll Berserker, and the Demolisher. These can be produced by entering the building with Thrall and selecting the desired unit. The Great Hall is required to build the Barracks. The Barracks is a medium sized building, taking up 3/4 of a Battlefield platform and being as tall as Bowser. The Barracks has 75% stamina, and thus takes 8 seconds to build, assuming no damage is dealt to it during the construction process. The Great Hall is required to build this building.
Building Five- Watch Tower
{50% Stamina} {10% damage per hit}
This is an offensive Orc building. It is the smallest and least durable Orc building as well. It takes up half a Battlefield platform and is as tall as an average human character, such as Marth. The Watchtower fires a large ballistae arrow at a rate of 1 shot every three seconds. Each of these projectiles has a large size (twice as wide as one of Pit's arrows), flies quickly (roughly the speed of Falco's laser) and travels half of Final Destination. The tower will auto-aim at random foes to get within half of Final Destination's distance of it. Foes struck by its projectile take 9% and medium upwards knockback (KO's starting at 140%). The Watchtower has 50 stamina, and thus takes 5 seconds to build, assuming no damage is dealt to it while it is under construction. The Great Hall is required to build this building.
Building Six- Beastiary
{75% Stamina}
This is a unit production building. It is a medium sized building, having the same dimensions and durability as the Barracks. The Beastiary is able to produce the Raider, the Kodo Beast, the Wind Rider, and the Troll Batrider. To produce these units, you must enter the building as Thrall and select them. The Beastiary has 75% stamina, taking 8 seconds to build, assuming that it is not damaged during the construction process. A Stronghold is required to build this building.
Building Seven- Spirit Lodge
{75% Stamina}
This is a unit production building. It is a medium sized building, having the same dimensions and durability as the Barracks. The Spirit Lodge is able to produce the Shaman, the Troll Witchdoctor, and the Spirit Walker. To produce these units, you must enter the building as Thrall and select them. The Spirit Lodge has 75% stamina, taking 8 seconds to build, assuming that it is not damaged during the construction process. A Stronghold is required to build this building.
Building Eight- Tauren Totem
{75% Stamina}
This is a unit production building. It is a medium sized building, though it's dimensions are different from that of the Barracks, the Beastiary and the Spirit Lodge. It only takes up half a Battlefield Platform in width, but it is as tall as Ganondorf, the same height as the Great Hall/Fortress/Stronghold (and taller than other medium sized buildings). The Tauren Totem is able to produce the mighty Tauren. To produce this unit, you must enter the building as Thrall and select it. The Tauren Totem has 75% stamina, taking 8 seconds to build, assuming that it is not damaged during the construction process. A Fortress is required to build this building.
Building Nine- Spiked Barricades
{10...20...30% Stamina}
This is a defensive fortification meant to damage its attacker. Though the smallest buildable object, it is not technically a building. The spikes of a Spiked Barricade have a width of only 1/5th of a Battlefield platform and reach upwards either the length of the building they are built onto or, if they are built onto the stage rather than a building, the height of Marth. When built directly onto a building, the spiked barricades fortify both sides of the building, not reducing the damage the building takes, but dealing damage to foes who strike it with their bodies. Foes who make direct physical contact with a Spiked Barricade take damage.
The Spiked Barricade has 3 levels:
Level One (Great Hall Required)- Deals 1% damage. 10% stamina.
Level Two (Stronghold Required)- Deals 3% damage. 20% stamina.
Level Three (Fortress Required)- Deals 5% damage. 30% stamina.
Higher level Barricades can be built as soon as their required part of the tech tree exists, skipping the lower barricade forms. Existing low level barricades must be upgraded by having a Peon build the higher level barricade onto the Barricade or unto the Building fortified by the Barricade. The stamina of the currently existing barricade is counted into the building time of the upgraded barricade, thus if a level two barricade already existed with full stamina, it would take one second (as opposed to three) to upgrade it to a level 3 barricade.
Spiked Barricades do not punish foes who strike them through more indirect or disjointed means, such as weapons and projectiles.
Building Ten- Voodoo Lounge
{50% stamina}
A very unique building that can only be built when items are on, making it more of a casual easter egg than a true part of Thrall's playstyle. The Voodoo Lounge is an item producing building. The Voodoo Lounge has 50% stamina, thus taking 5 seconds to build, despite it's status as a medium building. You must have the Great Hall to build a Voodoo Lounge. Anyone- friend or foe- can enter it and select an item that they wish to obtain. Theyl will be carrying the item when they leave the Great Hall. The items that can be purchased are:
Healing Salve-
Heals for 5% per second until the healed character is attacked. Press neutral A to heal Thrall. You can also throw it in order to strike allies, but beware that foes can be struck as well. There are 2 Healing Salves available when you first build the Voodoo Lounge and a new one is stocked every 20 seconds.
Scroll of Speed-
Doubles the movement speed of the holder and makes them immune to tripping. There is 1 speed scroll available when you first build the Voodoo Lounge and it takes 20 seconds for a new one to be in stock.
Potion of Clarity-
The holder of the item can drink from the potion by pressing A, healing them for 10%. The potion has 3 doses. There is 1 potion of clarity available when you first build the Voodoo Lounge and it takes 45 seconds for a new one to be in stock.
Potion of Healing-
The holder of the item can drink from the potion by pressing A, healing them for 20%. The potion has 1 dose. There is 1 potion of healing available and it takes 30 seconds for a new one to be in stock. The Potion of Healing is available when a Stronghold exists.
Scroll of Town Portal-
The next time Thrall uses his Up Special, he will teleport directly to his highest tier central building (Great Hall, Stronghold, Fortress). If multiple central buildings of the same tier exist, Thrall will teleport to the first one he created. There is 1 SoTP available when the Stronghold is in existence and it takes 20 seconds for a new one to be in stock.
Lightning Orb-
The item's holder can throw the Lightning Orb just like a bomb. The orb will orbit around anything it hits, dealing single hits of 11% and great upwards knockback (KOs starting at 100%) to those who strike it for 10 seconds. There is 1 Lightning Orb available when the Fortress is in existence and it takes 30 seconds for a new one to be in stock.
Tiny Great Hall-
The holder can throw this capsule type item. In true DBZ fashion, a whole Great Hall, belonging to the owner of the item, springs up immediately as soon as it hits the ground. This gives the item's owner the ability to construct buildings just like Thrall, as this Great Hall has the ability to produce Peons. There is 1 TGH available when the Fortress is in existence and it takes 1 minute for a new one to be in stock.
Units
Summary
Units are an important part of Thrall's playstyle and the most important benefit of Thrall's building mechanic. They are produced by entering certain buildings as Thrall and selecting the unit you wish to build. Note that each unit producing building can only produce one unit at a time. Units can be unlimited in supply, but they are limited by their build times. They are perfectly vunerable to damage and knockback, each unit having a unique stamina amount. Thrall is at a disadvantage to Arthas in that he cannot keep his units alive via healing.
Units are computer controlled and simple-minded. Melee units will pursue foes. Ranged units will auto-aim at foes. They completely lack the ability to shield or use other defensive tactics, losing out on the main advantage of being AI controlled. They are, however, much harder to control off the stage than other AI.
When any of Thrall's units, with the exception of Ethereal Wolves, die, a corspe is left in the location they died. These are useless to Thrall (except that the Spirit Walker can ressurect Tauren and Spirit Walkers), but Arthas can make good use of these. Corspes can be knocked off the stage and they naturally disappear after 1 minute has passed.
Orc Peon
{20% stamina} {2% per hit}
Peons are pitiful units created by Thrall's down special. They each have 20% stamina and can attack with a simple downwards pickaxe swing for a measly 2% and low horizontal knockback (KO's starting at 300%) at a rate of 1 attack every second. The attacks are quite fast though, having very low beginning lag and no ending lag (this does little to make them less pathetic though). Peons will only attack if attacked and their only real use comes in their ability to either be projectile walls and more importantly to build buildings. Peon's run at a medium movement speed. The Peon has no air attack but can jump an average height (the jumping allows them to move onto platforms to build stuff).
Spirit Wolf
{10% stamina} {4% damage per hit}

The weakest version of the ethereal wolves created by Thrall's Down Smash. These are created if the smash is not charged. The Spirit Wolf has 10% stamina and attacks by biting for 5% damage and decent knockback (KOs starting at 150%) at a rate of 1 attack per second. The attacks have low beginning lag and no ending lag. The attacks of the Spirit Wolf have medium reach comparable to that of a basic Mario punch. Great priority. No hitstun. Spirit Wolves run as quickly as Thrall. The Spirit Wolf can jump as high as Thrall's first jump and has an aerial attack. There can only be up to two ethereal wolves on the field at a time.
Dire Wolf
{20% stamina} {7% damage per hit}
The average strength version of the ethereal wolves created by Thrall's Down Smash. These are created if the smash has been charged for one second. The Dire Wolf has 20% stamina and attacks by biting for 7% damage and decent knockback (KOs starting at 150%) at a rate of 1 attack per second. The attacks have low beginning lag and no ending lag. The attacks of the Dire Wolf have medium reach comparable to that of a basic Mario punch. Great priority. No hitstun. Dire Wolves run as quickly as Thrall. The Dire Wolf can jump as high as Thrall's first jump and has an aerial attack. There can only be up to two ethereal wolves on the field at a time.
Shadow Wolf
{30% stamina} {10% damage per hit}
The strongest version of the ethereal wolves created by Thrall's Down Smash. These are created if the smash has been charged for two seconds. The Dire Wolf has 30% stamina and attacks by biting for 10% damage and decent knockback (KOs starting at 150%) at a rate of 1 attack per second. The attacks have low beginning lag and no ending lag. The attacks of the Shadow Wolf have medium reach comparable to that of a basic Mario punch. Great priority. No hitstun. Shadow Wolf's run as quickly as Thrall. The Shadow Wolf can jump as high as Thrall's jump and has an aerial attack. There can only be up to two ethereal wolves on the field at a time.
Grunt
{30% stamina} {10% damage per hit}
The Grunt is the most basic warrior of the Horde, a savage orcish warrior who attacks with a battleaxe. These are created in the Barracks and have a creation time of 10 seconds. The Grunt has 30% stamina and attacks by swinging its battleaxe downwards at a rate of 1 attack per second, dealing 10% damage and medium knockback (KO's starting at 130%) with each hit. These attacks have medium beginning lag and no ending lag. Great reach (about 75% of Marth's sword). Great disjointed priority. No hitstun. Grunts move at a medium movement speed. The Grunt can jump an average height and has an aerial attack.
Troll Headhunter
{20% stamina} {5% per hit, projectile}
The Troll Headhunter is a basic projectile using unit of the Horde. These are created in the Barracks and have a creation time of 10 seconds. The Troll Headhunter has 20% stamina and attacks by throwing spears at a rate of 1 attack per second. The spears deal 5% damage and low upwards knockback (KO's starting at 700%). The spears travel at a speed equal to one of Link's uncharged arrows a distance of half of Final Destination. These attacks have medium beginning lag and no ending lag. Medium priority. No hitstun. The Troll Headhunter auto-aims at random foes, throwing its spears right at them. Medium movement speed. The Troll Headhunter can jump and throw spears in midair (though the aerial attack has little to no benefit over a regular one).
Troll Berserker
{20% stamina} {6% per hit, projectile}
The Troll Berserker is an evolved form of the Troll Headhunter. These are created in the Barracks and have a creation time of 15 seconds. The Troll Berserker has 20% stamina and attacks by throwing spears at a rate of 1 attack per second. The spears deal 6% damage and low upwards knockback (KO's starting at 700%). The spears travel at a speed equal to one of Link's uncharged arrows a distance of half of Final Destination. These attacks have medium beginning lag and no ending lag. Medium priority. No hitstun. The Troll Berserker auto-aims at random foes, throwing its spears right at them. Troll Berserkers move at a meidum running speed. The Troll Berserker can jump and throw spears in midair (though the aerial attack has little to no benefit over a regular one). The Troll Berserker comes equipped with the Berserk ability. This ability halves the time between attacks and doubles the damage the Troll Berserker takes. It will only use this if it is not under attack.
Demolisher
{30% stamina} {10% damage per hit, projectile}

The Demolisher is the siege weapon of the Horde. These are created in the Barracks and have a creation time of 20 seconds. The Demolisher has 30% stamina and attacks by launching rocks of its catapult at a rate of once per second. The rocks can only be shot in arcs similar to those of a Link arrow and the Demolisher will auto-aim at random foes within it's firing radius. A foe right next to the Demolisher cannot be hit by it. The rocks thrown by the demolisher fly at boomerang speed and deal 10% damage and medium upwards knockback (KOs starting at 125%) to those hit by it. The Demolisher can target a foe within Final Destination's length. The Demolisher is immune to knockback and is completely immobile, except for the fact that it can be pushed by characters and minions because of its wheels. The Demolisher can also target opposing buildings and attack them, doing triple the normal damage to them. The Demolisher works like a building, in that it can be repaired by Peons.
Raider
{30% stamina} {10% damage per hit}
The Raider is a highly mobile hit and run unit for the Horde. These are created in the Beastiary and have a creation time of 20 seconds. The Raider has 30% stamina and attacks by swinging its sword horizontally at a rate of once per second, dealing 10% and medium upwards knockback (KO's at 130%). The attacks have medium beginning lag and no ending lag. Great reach, equal to that of Marth's sword. No hitstun. The Raider has a fast movement speed on par with Thrall. Can jump as high as Thrall's first jump and has an aerial attack. Also comes equipped with the Ensnare ability, which allows it to pull out and throw a net just like Link's bomb. If this net strikes a foe, they are ensnared for 1/2 second, causing them to enter freefall and/or be incapable of movement for the duration of their binding. The bind ability can only be used once every 5 seconds.
Wind Rider
{30% stamina} {10% per hit + 1% per second for 5 seconds, projectile}

The Wind Rider is a Orc who rides a Wyvern into battle. These are created in the Beastiary and have a creation time of 30 seconds. The Wind Rider has 30% stamina and attacks by throwing spears, auto-targeting random foes, at a rate of 1 attack per second, dealing 10% damage and low upwards knockback (KOs starting at 500%). The attacks have medium beginning lag and no ending lag. Spears fly 1/4th the distance of Final Destination at a speed equal to that of Link's uncharged arrows. Medium priority. No hitstun. The Wind Rider is always flying, giving it the ability to fly anywhere it wants, seeking foes all over the stage. It flies quickly too. The Wind Rider possesses the Envenomed Spears ability which poisons every spear it throws. Poisoned spears cause the foe struck by them to be poisoned for 5 seconds, taking 1% per second.
Easter Egg- GoldWyvern
There is a 1% chance of the Wind Rider's wyvern being gold.... a GoldWyvern!
Troll Batrider
{20% stamina} {10% per hit, projectile; 20%, suicide}
The Troll Batrider is a Troll that rides a giant bat into battle. It is created in the Beastiary and has a creation time of 30 seconds. The Troll Batrider has 20% stamina and attacks by throwing vials of explosive liquid once every second, auto-targeting random foes and opposing buildings. The attacks have high beginning lag and low ending lag. The vials are thrown exactly like Link's bombs. Each vial explodes on contact dealing 10% damage and medium upwards knockback (KOs at 140%) over a radius equal to that of one of Link's bombs. These attacks deal double damage against buildings, due to being explosive. The Troll Batrider is able to fly freely and quickly, chasing down random foes. It also comes equipped with the Unstable Concoction ability, which causes it to fly towards the nearest airborn foe and suicide bomb as soon as it reaches them, dealing 20% damage and spiking the foe downwards, also destroying the Troll Batrider.
Kodo Beast
{30% stamina}

Orcs have tamed the lumbering Kodos to be their beasts of burden. The Kodo Beast is ridden into battle by an orc who raises the spirits of allies through his war drums. The Kodo Beast is produced at the Beastiary and takes 30 seconds to build. It has 30% stamina. It is incapable of attacking, but it buffs the attacks of all allied units within half of Final Destination by 1/5th of that attack's power (with a minimum increase of 1%). The Kodo Beast is slow moving, only able to move at the speed of Bowser's walk and is incapable of jumping. Having multiple Kodo Beasts does not cause the damage increasing effect to stack, so only one or two of these units are recommended. The Kodo Beast does possess the Devour ability, which allows it to bite and swallow an enemy, dealing 3% per second to them while they are in its stomach. The trapped foe can escape through controller inputs. The Kodo Beast can only devour one enemy at a time.
Shaman
{20% stamina}

The Shaman is a powerful supporting spellcaster of the Horde. It is produced at the Spirit Lodge. The Smash version of the Shaman takes 20 seconds to build, has a mere 20% stamina and cannot attack. It can, however, provide powerful buffs to allies via its abilities. The first ability of the Shaman is Bloodlust which has a 1 second beginning lag, which causes one ally to have 40% less attack lag. The second ability of the Shaman is Lightning Shield which has a 3/4 second beginnning lag and surrounds an ally or building with an aura of electricity for 5 seconds, dealing 5% per second to foes adjacent to the shielded player or building. The Shaman runs at a medium speed and can jump at an average height. It targets objects or players within the length of Final Destination from it.
Troll Witch Doctor
{20% stamina}
The Witch Doctor is a secondary supporting spellcaster of the Horde. It is produced at the Spirit Lodge. The Smash version of the Witch Doctor takes 20 seconds to build, has a mere 20% stamina and cannot attack. It can, however, provide stage control and other effects via its abilities. The first ability of the Witch Doctor is Healing Ward which has a 2 second beginning lag and places a healing ward with 1 hp at a location on the field (the Witch Doctor instinctively targets a place in which the most allies can be affected). This ward heals allies in its area (a battlefield platform circumference) for 3% per second. The second ability of the Witch Doctor is the Stasis Trap Ward, which takes 1 second to cast and creates a ward with 1 hp at a random location on the field. This ward causes foes who step on the ground within its distance (one battlefield platform circumference) to be stunned for 1 second. The third ability of the Witch Doctor is the Serphant Ward, which has a 1 second cast time and creates a ward with 1hp at a location on the stage (the Witch Doctor instinctively targets an area near foes). This ward has a snake head in the middle of it that lashes out at opponents within its area (1 Battlefield Platform circumference) for one hit of 10% and good upwards knockback (KOs starting at 110%). The Witch Doctor can run at a medium speed and jump at a medium height. Its maximum targeting range is the length of Final Destination.
Spirit Walker
{30% stamina}
The Spirit Walker is another supporting caster of the Horde. It is produced at the Spirit Lodge. The Smash version of the Spirit Walker takes 20 seconds to produce, has 30% stamina and cannot attack. It will not be around for very long, but it has some very helpful abilities while it lasts. The first ability of the Spirit Walker is Ethereal Form, which is always active, protecting the Spirit Walker from all outside harm. The second abiliity of the Spirit Walker is Spirit Link which has a 1 second beginning lag, links another unit's soul to the Spirit Walker's soul. Half the damage taken by this unit (rounded down) is taken by Spirit Walker instead. The last ability of the Spirit Walker is Ancestral Spirit, which ressurects a fallen Tauren (either Spirit Walker or Tauren) from the dead with 100% of its hp restored. This ability takes a full 5 seconds to cast. The Spirit Walker can run at a medium speed and jump. It can target within the length of Final Destination.
Tauren
{70% stamina}
The Tauren of Kalimdor are a mighty race. They are produced at the Tauren Totem. It takes 45 seconds to create a Tauren. The Tauren has 70% hp and possesses 3 attacks which are identical to three of Ike's attacks in function- Ike's Side Tilt, Ike's Side Smash, and Ike's Forward Aerial (which can be used in either direction). The Tauren moves at an average speed and can jump as high as Thrall. The Tauren possesses the Pulverise ability, which causes foes within half a Battlefield platform's circumference of its attacks to take 10% damage (this will only trigger on foes not struck by the attack itself). The Tauren is truly the king of summonable units, but it also has a hefty requirement, both in build time and in its 3rd Tier Tech Tree requirement.
Details
Pros
Heavyweight.
Fast dashing speed.
Potentially good recovery.
Has projectiles.
Side Special is a form of anti-defense.
On-stage building makes Thrall a master of literal stage control.
Units are very useful.
No lack of KO options.
Cannot trip.
Can grab multiple foes at once.
Cons
Large target.
Fast faller.
Recovery is easy to gimp due to its long start-up.
Has trouble racking damage and comboing.
Many moves are quite predictable.
Reliant on CPU controlled minions.
Cannot grab the ledge.
Buildings can be destroyed.[/CENTER]
Playstyle
To play Thrall is to master the stage and bend it to your will. Thrall is an absolute master of controlling the stage by literally changing its shape with buildings. Thrall himself is a underpowered and often predictable character, but through the use of summonable units, Thrall can seize victory if he can stretch out the battle long enough.
Thrall players should always start by finding a good place to camp (quite literally). You will need to be a good distance from your foe and have sufficient room to build a Great Hall at the least. Once the Great Hall has been built, most players would choose to immediately upgrade it. It is to the player's advantage to get atleast one Barrack onto the field ASAP, allowing them to build basic, but effective, units.
The actual building and unit producing strategies are very flexible and vary from player to player depending on their playstyle. Some may choose to build multiple Barracks and rely on Grunts for their reliability, relatively quick building time, and ability to be upgraded through Pillage, Berserker Strength, and Melee Weapon and Unit armor upgrades. Other players may choose to give the opponents projectile pressure through the use of many Troll Headhunters or Berserkers boosted with Troll Regeneration, Ranged Weapon, and Unit Armor upgrades. Other players may choose to make a mad dash for the 3rd Tier of the Tech Tree and build an army of Tauren and Spirit Walkers- a powerful combination by all means. The smartest of players will adapt to the situation, however, maintaining a reliable army all the way till 3rd tier where they can produce those mighty Tauren. Unit producing strategies can also be used to adapt to the opponent- if the opponent prefers the air, Raiders are a very effective counter, for example. Building strategies must also conform to the stage, of course. Thrall might not want to be picky about what he builds on a smaller stage, like Battlefield, for example.
Buildings can be used for all sorts of purposes. A watchtower placed at the edge of the stage can be an interesting gimping measure- it's projectile can gimp Pit's recovery quite well and it's presence prevents foes from simply performing their ledge attack to get back to the stage. It may even be able to shoot the foe off of the ledge. All buildings change the shape of the stage. They can turn a normally flat stage into a more unorthodox one by acting as a wall. This naturally makes infinite chain grabs possible for D3, but being thrown against a building damages the building. Buildings can also absorb projectiles and prevent straight-forward approaches.
Thrall himself isn't the best comboer. His only real "comboes" are typically a chain of two attacks (F-Tilt to something else). F-Tilt can be combined with any A attack to eliminate the beginning lag of the second move. This can be used to summon wolves much more easily, land a quick stun from Side Smash, or simply to store the lagless move and suprise the foe with it later as the situation calls for. He does have some moves with interesting uses. The Side Special is another method of stage control, as it creates an area within which foes cannot defend themselves against Thrall's attacks very well. The Neutral Special creates an effective web of lightning, creating an oft predictable but potent pattern of lightning jumps. This can be used for widespread stage control or as one huge trap, adding a lot to Thrall's versatility. Thrall can be gimped very easily thanks to the 1 second startup of his recovery, but his recovery sure is effective, especially when combined with its ability to use Thrall's dash attack in the air.
Unlike Arthas players, Thrall players must actively control their entire base. They must choose what buildings are produced. They must choose what units are produced. They must keep their buildings repaired. All in all, Thrall can be a very hard character to master. Not only must the player worry about his own self, but he must protect inanimate objects. It can be a lot to handle. Thrall has a lot of trouble in the early game, but if you play your cards right, he is able to really shine late-game.
A very interesting and useful move is Thrall's Neutral A which allows him to instantly switch to playing as a unit instead of himself. This is completely lagless so you can surprise the foe by suddenly making that brainless unit of yours controllable at any time, possibly landing a painful attack right in their face. This could also be used to actively choose who/what/where you want to target with important unit moves. Why not Spirit Link, Bloodlust, or Shield of Lightning Thrall or a human ally, for example?
Opponents of Thrall should pressure the orc warlord as much as possible from the very beginning of the match. Don't give Thrall the opportunity he needs to produce buildings. If at all possible, prevent him from summoning Peons and Ethereal Wolves. In fact, try and keep him from doing anything meaningful at all- building stuff, placing Chain Lightning points, etc. Almost every important part of Thrall's strategy takes time that you simply cannot afford to give him. Thrall is literally a camping character, but he does not want you to approach until he has established a base of operations. Take the fight to him.
Characters countered by Thrall:
Pit- Watchtowers can be used to gimp his recovery.
Arthas- Thrall possesses superior building capabilities to Arthas and can build more quickly.
Characters Who Counter Thrall:
Arthas- Thrall is incapable of healing his units and his units produce corspses for Arthas to exploit.
Mustang- Mustang can really nuke minions and buildings with his fire, particularly his F-Smash.
Klarrann- Klarrann can banish Thrall's units.
Bowser/Snake/Roy/Charizard/Zelda/Captain Falcon/Ness/Lucas- All of these characters possess fire and/or explosive damage and/or powerful (but often slow) attacks which are effective against Thrall's stationary buildings.
Stages That Counter Thrall:
All moving stages- Thrall can still build on these, but the buildings he constructs leave the fight when the stage moves and do not re-enter the fight until the stage shifts back to where they were constructed.
Extras
Character Portrait

Codec Conversation
Snake: Octacon, I'm fighting a green man.
Octacon: Oh, that's Thrall, warchief of the orcish Horde, the enemies of the human Alliance.
Snake: So I get to exterminate the green guy. I'll enjoy this.
MasterWarlord: You racist b*****d! The Horde are the good guys!
Snake: How do these people keep getting on our line?
Assist Trophy- Jaina Proudmoore
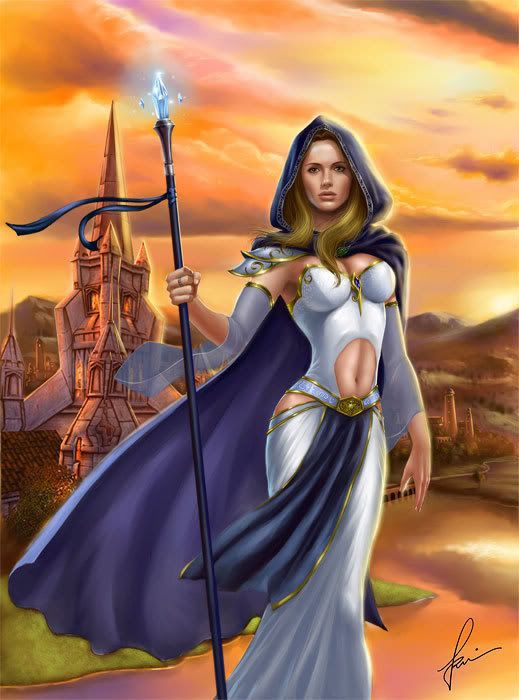
The human archmage, Jaina Proudmoore, is an ally of Thrall and many players speculate that she may be his lover, though there is little evidence to support this.
Jaina Proudmoore warps onto the stage much like an FE character and surrounded in a sphere of magic. She is invinceable to attack and leaves after 10 seconds, though Elementals and Blizzards created by her remain.
Jaina Proudmoore possesses the following spells:
Blizzard

Jaina targets a random area 1.5 Battlefield Platforms in width and casts Blizzard on it. Ice rains down from the sky covering the entire area. It goes down all the way to ground unless a platform stands in its way, just like Pikachu's Thunder. The Blizzard lasts for 3 seconds. Deals 10% and very low knockback per second to those inside of it. Can be DI'd out of. This spell has some beginning lag.
Water Elemental
Jaina summons a water Elemental. This spell has about a second of beginning lag. The elemental has 30 stamina and disappears after 60 seconds. It attacks with an attack that has medium lag on both ends, throwing out a projectile made of water that travels 1/4th of Final Destination at a medium projectile speed and deals 5% damage and medium knockback in the direction the projectile was flying. The Water Elemental can aim in any direction and will auto-aim at foes. Jaina can have up to 2 Water Elementals.
Brilliance Aura

The player who summoned Jaina and all of their allies recover 1% hp per second while within 1/4th of Final Destination of Jaina.
Mass Teleport

If the player who summoned Jaina or any of their allies take knockback, Jaina will teleport them back to where they were when they were struck. This has very low beginning lag and no ending lag. This is used to save the player who summoned Jaina from a painful death.
Boss- Manoroth (sp?)
The Pit Lord, Manoroth, is the master of the Orcs thanks to a foolish deal struck by the orc chieftan, Gul'dan. It is up to Thrall and Grom to free their people from demon corruption.
The Pit Lord has average boss hp and is about the size of Galleom. It can move, but only at a very slow pace (and it rarely takes more than a step forward.) It is at the far right hand corner of the stage at the start of the battle (and you are on the far left). You fight it on a simple walk-off stage with a background that appears to during the night at a mountain base.
Attacks:
Cleaving Attack
The Pit Lord slashes much like in this animation, striking foes both on the ground and in the air with its blade. Those struck take 10...30% damage and medium (KOs starting at 150%)...great (KOs starting at 80%) knockback.
Rain of Fire

The Pit Lord targets a random area 2 Battlefield Platforms in width and casts Rain of Fire on it. Fire rains down from the sky covering the entire area. It goes down all the way to the ground. The Rain of Fire lasts for 3 seconds. Deals 10...30% per second and very low knockback to those inside of it. Can be DI'd out of. This spell has some noticeable beginning lag and is signalled by the Pit Lord's eyes glowing with fire.
Howl Of Terror

The Pit Lord let's out an ear-splitting shriek (the player may want to have their volume turned down for this fight). Anyone within 1/4th of Final Destination from it is stunned for 1...3 seconds (reducable by controller inputs). He will rear his head upwards before shrieking.
Doom
The Pit Lord summons a Doom Guard unto the field. The Doom Guard has 50 hit points, is about twice as tall as Bowser (and about the same width as Bowser) and possesses some mighty abilities:
Cleaving Attack
The Doom Guard slashes much like the Pit Lord's Cleaving attack, striking foes both on the ground and in the air with its blade. Those struck take 5...15% damage and medium (KOs starting at 150%)...great (KOs starting at 80%) knockback.
Rain of Fire
The Doom Guard targets a random area 1.5 Battlefield Platforms in width and casts Rain of Fire on it. Fire rains down from the sky covering the entire area. It goes down all the way to the ground. The Rain of Fire lasts for 3 seconds. Deals 5...15% per second and very low knockback to those inside of it. Can be DI'd out of. This spell has some noticeable beginning lag and is signalled by the Doom Guard's entire body glowing with fire.
War Stomp

The Doom Guard stomps the ground, this move having the same hitbox as the ground-slamming portion of D3's Super Dedede jump (the body and the star area on both sides, but War Stomp creates a shockwave). Struck foes take 10...30% damage and trip.
Author's Comments
Thrall was made with one goal in mind: To take what made Arthas a great set and vastly improve on it while keeping a unique flavor of it's own. Thrall himself is a far more direct character than Arthas, having more simple damage moves, many of which are simple melee or projectiles. Just like Arthas, Thrall is made great by his building and unit mechanics. Thrall's mechanic is different from Arthas's in that buildings are built on stage, adding a whole new level of strategy into Thrall's playstyle. Thrall is also given much more freedom of control over what he builds, what units he produces, and is even able to control units to a limited extent.
It is my hope that Thrall will be everything Arthas was and so much more. It is a visual representation of how much I will be stepping up from MYM5 to MYM6. Take a look at Arthas and then take a look at Thrall. The same concept, but vastly improved upon. Most of all though, I hope that you, the MYM community, will enjoy reading this set as much as I enjoyed making it, if not more, for you are my friends, and if something I do brings you joy, then that means more than winning this trivial popularity contest of ours.
~ Chris
Junahu
Smash Ace
I'm already falling behind all these new movesets. I told myself I wouldn't this time, but I already am.
Masked Man: although you do include enough detail for people to understand your attacks, there's not nearly enough to excite anyone reading them. You seem to have a good understanding of the character and the pictures are helpful, but there isn't a lot I can say beyond that, the moveset being as short and boilerplate in executation as it is.
The organisation was genrally readable, but the font sizes and colours were a little haphazard, particularly when the moveset used dark colours like Blue.
Edit: A new moveset already. And it's long enough to scare the pants off Steven. And it has the special mechanics right down at the bottom (I assume it's more like an appendix than mandatory reading). Hoo boy, time for fun..
Is it really that wordy? =/ Eh...I'll try my best next time. Hmm...well what else could i do with symmetry? =/ Anyway, thanks for commenting on it dudeDeath the Kid is an interesting enough set. It's pretty wordy; your biggest problem is still with the writing style, there, TWIL. I also thought you'd do something a bit more interesting with his main symmetry dealie, but I guess it makes picking stages more complex, at least, right? You cover a lot of detail and have a decent amount of creativity, although it's nothing mind-blowing. And I can't believe you stole Prinny's organization without even changing color. Tsk, tsk, man. Turns me off from reading all of it, actually.
And...come on...Prinny's organization looks pretty...@Thrall: Whoa....that looks major impressive Chris. I haven't exactly finished reading it yet (i just finished the specials), but from what i'm reading so far, it looks very good. I'm liking the down special a lot, though for the standard special, do you choose where the lightning bounces with the control stick or C stick (like since you use the C-stick for the menu thingy with the down special, i'm guessing it goes the same as the standard special?) Also, can Thrall choose where the lightning lands as long as he wants? Like there's no 5 second time limit or anything? Just want to get that clarified. Just 2 minor nitpicks. *continues reading, though is really tempted to post L below it*
Chris Lionheart
Smash Champion
Thanks. And as for your issues, the Control Stick is used. I didn't think to add that rather minor detail, considering the Down Special used the C-Stick for obvious reasons. Thrall has no time limit. Chances are, if none is specified, there is none.@Thrall: Whoa....that looks major impressive Chris. I haven't exactly finished reading it yet (i just finished the specials), but from what i'm reading so far, it looks very good. I'm liking the down special a lot, though for the standard special, do you choose where the lightning bounces with the control stick or C stick (like since you use the C-stick for the menu thingy with the down special, i'm guessing it goes the same as the standard special?) Also, can Thrall choose where the lightning lands as long as he wants? Like there's no 5 second time limit or anything? Just want to get that clarified. Just 2 minor nitpicks. *continues reading, though is really tempted to post L below it*
Kholdstare
Nightmare Weaver
- Joined
- Oct 10, 2008
- Messages
- 1,440
lordvaati
Smash Master
LMFAO. that's a pretty trippy AT.
@Junahu: so I'm too serious with my explanation? hmm.......
@Junahu: so I'm too serious with my explanation? hmm.......
Kholdstare
Nightmare Weaver
- Joined
- Oct 10, 2008
- Messages
- 1,440
LMFAO. that's a pretty trippy AT.
@Junahu: so I'm too serious with my explanation? hmm.......
I'm unsure if that was intentional. Thanks!
Smady
Smash Master
My first commentary in MYM6! I’d say this was a better batch than in MYM5, Tryclyde is better than Golbez and Envy is better than K. Rool.
Tryclyde: Very good. This is a continued improvement from you – with less mindless detailing and some fun ideas, but you still do fall into the crux of overstating at times. You get hung up on little details and this makes it a confusing read. As well, your writing style doesn’t mesh well, you should start linking together your thoughts in a progressive way to continue this evolution of your MYMing, I think.
But enough criticism of your writing style! As I said, this moveset is very good. This is one of your better movesets. The special mechanic is interesting and I always enjoy your specials that shoot out a variation of things, the ones here are more interesting than Bowser Jr’s, although the amount of heads affecting moves does merit more organisation than you give it; a few small graphics would be decent enough, although I can’t falter your image work either. Your dedication with the extras and detail is admirable, but you would do better to edit it down somewhat.
Hobbes: This probably isn’t worth commenting on right now, but your organisation is actually superior to some long-time MYMers. Charming newcomer moveset thus far.
Envy: Aye, this, from the beginning, is blatantly your best homunculi moveset. Love the parasite form and statistics thing you made with MS paint partially. I’m also considering how to get rid of statistics; this is a good concept. Really, all the specials are very fun. I love the ideas behind Envy invading other players, stealing moves, items and such. You pull this off very well in the moveset, specifically in his down smash and parasite form.
This one was surprisingly awesome in a few ways. Maybe I should go read the FMA manga, as the ideas behind this set are gruesomely awesome. Your organisation – reminiscent of Wrath to myself – is good. The image work is typically ‘appropriate.’ I look forward to Sloth.
Adeleine: I commented in MYM5, but I can’t remember how much. Kibble put in so much effort to make essentially a four-in-one and it’s very impressive - perhaps not his best, but worth a read for any MYMer.
Death ‘The’ Kid: First, I hate this moveset for completely ripping off Prinny’s organisation, colouring – everything presentation-wise. That coupled with the copious B code errors and childish grammar lets me know, yes, I am reading a Twilty moveset.
This isn’t bad for you per se, but really, this isn’t up to standard. I suppose you know this already, though, so I’ll just spout some positive stuff: the moveset is fun. It’s almost self-satirical in how it portrays a character obsessed with symmetry or perfection, yet has the messiest grammar and sloppiest [or should I say, copy-est] layout ever. I’d say this was an accident with anyone else, but it is that Twilty charm we’ve all missed. Your use of images initially is a welcome addition to your repertoire, but this soon fades out of the set completely and we’re back to some generic moves again.
It’s all very promising, but it’s not MYM5 standard, let alone MYM6. Take some time on your next set to improve and I’m sure you’ll be on level with everyone else soon.
Rosalina: Generic and needs more detail, neither of which being a new complaint for newcomers. As a newcomer, it’s not a bad one. Just look to other sets on similar pages for an idea of what is expected. In the least, the “special abilities” section with everything labelled “NO” made me laugh.
Heatran: So this guy has INSANE detailing and colours to go along with them. It’s somewhat intimidating to look at some of these areas, let alone read, so yeah, you need to work on organising it so it’s welcoming. Maybe try using different fonts, messing with less saturated colours or fewer colours, more images… Try to use the centre tags more as well, right now it looks very unprofessional. What’s there is good, but you definitely need to work on editing. Also, spellings like “AREIALS” on the biggest headers make an *** of you and I.
Speaking of the moveset itself, not bad for a Poké-set. There aren’t that many generic moves and everything fits Heatran quite well. Sifting through other people’s comments, I have to agree with HR – there is potential here, if you just look at some of the better-looking movesets. You need to use lots more B coding, images and a better palette of colours. I recommend red. =P
Lelouch: Oh wow, another Twilty moveset already, in the same commentary. To compare, this one is a lot more well-rounded with the images, has better grammar and is generally an improvement, although they both are anime movesets and of a similar kind of character… We can all guess which was made second.
I liked how you fitted in the character’s personality with the hatred mechanic and all the moves are random, but fitting, which is what you’re all about. One last note is that those trophies descriptions are ridiculous; that’s 1224 words and no one is going to read those unless they’re mad. Just link to Wikipedia and be done with it!
Roserade: Another newcomer set, wie? Not bad in that regard, but you do, as do most of the others, need to be more detailed and have a more cohesive layout. Some of your headers are far too large and their uniform colourings keep them from standing out, although that doesn’t mean use the rainbow. Also, some of your moves are a little bit generic.
As well, your statistics and ‘speed’ or similar sections are all really confusing. You give Roserade a 83.1(/100) and I frankly don’t know what the heck that means. Be more descript in the future, as this sounds like another kind of interesting statistics idea.
Masked Man: Another newcomer moveset… so Claus, I see you’re Masked Man. The amount of images and how appropriate they are is encouraging, but the same cannot be said for their descriptions. Be much more descriptive in the future. It’s not bad for a newcomer moveset at all, but look at the other sets so far that are organised well and received thusly, then you’ll be able to improve. One sentence for each move is taking us into the Niko zone, which is like the Twilight Zone and the Dead Zone rolled into one black hole.
Thrall: Finally, I’m up to Thrall. I’ve been looking forward to this one since you told me about it some months ago. Looks awesome at a skim, but I’d like to dive deeper.
I like the building mechanic over Arthas’. It’s more accurate that the peons go inside the buildings and can be attacked, then ejected like in WCIII rather than the way Arthas did things with stuff in the background. It is also cool to think that one could build this stuff without halting play for themselves – good catch there. Unsurprisingly, the specials are all great. The switcher move is notable by itself as it’s awesome to think one can indeed do this with the moveset. Only you have tried this RTS implementation out and it deserves mention, it works extremely well. Again as expected, every move is fitting, if not ripped right from Warcraft III! Very well done.
The mechanic this time is, I feel, better than Arthas’. It’s another example of you lifting something right from the game and effortlessly implementing it in Smash. Overall, it’s just kind of daunting how epic this moveset is and it really can’t be summed up in a comment. Thrall feels far more like his WC3 self than your other WC3 sets and his playstyle does seem to command an army more affectively and easier than Arthas did.
Awesome work again, Chris. Just one big criticism from me, though... it is very similar to Arthas. It's much better, but you're treading over a lot of the same ground here. It's fine now, but I'd rather you tried to avoid this kind of set again, to be honest. This is perfect enough. Hell, the Thrall moveset could be amazing by itself with some adjustments.
And that ends today's SD's Super Cool Catch-Up Special.
phatcat203
Smash Apprentice
lool@wood spider AT. Khold, make more like that lol
Hyper_Ridley
Smash Champion
Thrall:
Epic!
So, the mechanic. It's like Arthas' but this time you manually control what to build and the buildings can be interacted with. That already scores major points with me since now it's player-controlled instead of random, yay! I loved the item-producing building, now items can actually be used in tourneys, lol. Granted, due to the sheer complexity of his mechanics, I doubt that many players would have the patience to learn him for competative play, but the good Thrall players will be really fun to see overwhelm their opponent with Orc armies. Nothing wrong with niche characters on the roster.
Despite relying on his mechanic for most of his playstyle, the regular moveset also contained a lot of interesting moves. The neutral A and DSmash were my favorites, which both happen to work off of his mechanic anyways. There's just no avoiding that mechanic is there xD. I also enjoyed the UTilt for being a sweet-spot move that makes the sourspot have actual reasons to hit with it.
Balance-wise, I'm not even gonna try to figure him out with so much things to take note of xD. But even if he did turn out SS tier, few players would ever be able to achieve that potential so he still wouldn't be as saturating as MK or Dedede.
So overall, awesome. I enjoyed every minute of it. Fantasic MYM6 debut, and I certainly hope to see more epicness from you in the future. =)
Kholdstare
Nightmare Weaver
- Joined
- Oct 10, 2008
- Messages
- 1,440
(h)lool@wood spider AT. Khold, make more like that lol
Thanks. We need moar humorous stuff.
UserShadow7989
Smash Journeyman
- Joined
- Aug 13, 2007
- Messages
- 306
I'm sorry, I wasn't aware of that. I'll keep it in mind during MYM 7. I didn't have an older post. I was busy all day, and by the time I got there it was already at page 3. I posted the Link-up Space because I won't be able to fit all of my sets into my signature.Okay, so I have a few things I want to mention before I start commenting on what's been posted so far.
1) I don't think you guys understand the goal of putting a link-up space at the beginning of the thread. You want people to scroll down on the first page and notice it immediately, new people who are just getting into MYM and reading the first page. Putting your link-up space on page 3 is just as useless as putting it on page 93; better edit an older post than take up space in the thread.
Thrall: I haven't been able to fully read this set, but I can tell that Thrall trades several shortcomings and difficultly in proper use for superior numbers and extreame versatility. I find this a step up from your already impressive Arthas set in MYM5, and I enjoyed all the material from Warcraft 3 that you implemented into it. I can honestly say this set has a stylish sense of balance and plenty of charm, in addition to being a wonderful nostagola trip for WC3 fans. I wish I could be more constructive, but I'm still not at the level needed to give you of all people advice... and to be honest, I feel sorry for whichever reviewer will have to read and reread every last detail of that.
Junahu
Smash Ace
This alone isn't a bad thing at all, the idea is solid and the improvements are clear; but Thrall has so much more that needed to be explained that the organisation and pacing you've employed here is almost criminal. Thralls attacks and the special mechanic are on completely seperate planets here, if your moveset is to be believed.
It all just felt.. fragmented, like you believed the reader would care enough about the moveset to piece it together themselves without your help.
It also doesn't help that you often describe the actual important parts of a move after you've made us sit through the stuffy details. And that methodology is carried through to the special mechanics, denying the reader even the most tentative understanding of what Thrall is about until after they read the attacks.
And this is clearly just degenerating into a rant, which was not my intention. The moves themselves, along with the special mechanics are both clever and perfectly suited to the character.
I'm just annoyed that the one thing you really should have improved over Arthas, readability, ended up worse than its forebear.
Gotta admit. I lol'd. In a good way.Death ‘The’ Kid: First, I hate this moveset for completely ripping off Prinny’s organisation, colouring – everything presentation-wise. That coupled with the copious B code errors and childish grammar lets me know, yes, I am reading a Twilty moveset.
That's exactly what i aim forThis isn’t bad for you per se, but really, this isn’t up to standard. I suppose you know this already, though, so I’ll just spout some positive stuff: the moveset is fun.
Thanks for the first part of the first paragraph commentary, and[COLOR=rd"]Lelouch:[/COLOR] Oh wow, another Twilty moveset already, in the same commentary. To compare, this one is a lot more well-rounded with the images, has better grammar and is generally an improvement, although they both are anime movesets and of a similar kind of character… We can all guess which was made second.
I liked how you fitted in the character’s personality with the hatred mechanic and all the moves are random, but fitting, which is what you’re all about. One last note is that those trophies descriptions are ridiculous; that’s 1224 words and no one is going to read those unless they’re mad. Just link to Wikipedia and be done with it!
.
for the second part of the second paragraph.Random + fitting = me? O_o The trophy descriptions aren't THAT bad =P
Also, spit it out! Is Lelouch a good moveset or not? Not trying to be demanding or anything...but still!
Yes, Pokemon Trainer Gold is going to be a huge (hopefully) improvement writing style. I'll double check it and everything...just don't expect it for a while or anything...
MasterWarlord
Smash Champion
SLOTH

 BACKGROUND
Sloth is one of seven homunculi named after the seven deadly sins from the Full Metal Alchemist series. Sloth is completely different in the manga and anime, the one you see here being the manga incarnation. Not shown in this picture, Sloth has chains around his arms that he uses considerably in the moveset and in his fight scenes/panels as whips.
Sloth is a fairly typical strong but dimwitted character. He uses words only when absolutely necessary, and doesn’t form them together all that well. His insane laziness causes him to take naps in the midst of battle and take countless years to simply build a tunnel. If Sloth were willing to actually work, he’d quite possibly be the most powerful of the homunculi, but his laziness and his lack of intelligence hold him back from the title.
Sloth isn’t named after the sin of laziness for nothing, unlike his anime counterpart. Sloth suffers from a far more severe version of Pokemon Trainer’s stamina (It’s 1.5X as bad to be precise), but unlike PT’s Pokemon Sloth doesn’t have anybody to switch out to while he rests, thus he has to find time in the middle of battle to do so. Standing perfectly still is the most basic means of doing so, causing his energy to regenerate 1.5X as fast as it normally degenerates, but taking a nap with your neutral special is the main way you’ll be replenishing your stamina, as you regenerate 5X as fast as you normally degenerate when asleep.
Oh, and please, bear with me on the order in which the moves are presented. It makes the most sense this way. It’s not perfect, but unless you want the moves completely moved out of their categories and put in a totally random order it’s the best I can do.

Standard Attack – Chain Whip
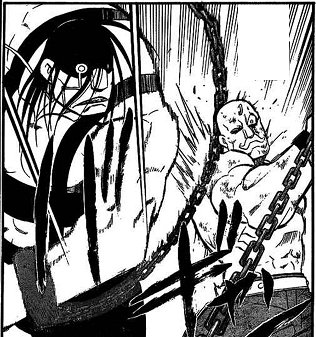
Sloth raises up his arm upon the first press of A, his arm being a htibox with average range and priority that does 7% and knockback that kills at 280%. Upon the second press of A, Sloth quickly moves his arm back down into it’s initial position for the same properties. This has below average lag.
Sloth isn’t aiming to hit with his arm, though, he’s using the chain on his arm as a flail. The end of the chain on the arm he jerked around will raise up and then slam down for 13% and knockback that kills at 180%. The chain is disjointed, but doesn’t reach out all that far from Sloth. . .
Dashing Attack - Collapse
Unlike the dashing attacks of many MYM characters that Junahu is rather disgusted with, Sloth doesn’t keep running during or after this dashing attack. Why would he want to do that? Running is far too tiresome. Instead, all of his movement instantly ceases as he falls over forward in exhaustion from having dashed. This has surprisingly little lag, and Sloth’s body is a high priority hitbox as he falls that deals 16% with knockback that kills at 110%. After completing the attack, Sloth is laying on his stomach, ready to use a situational. This is the real punisher for not having bad ending lag, as Sloth’s rising attacks don’t make him actually rise and his rolls to actually get up are very laggy and easily punishable.
Forward Tilt – Chain Toss
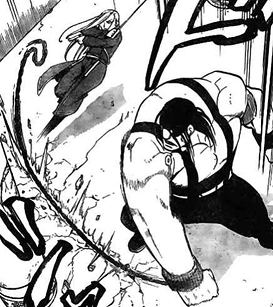
Sloth moves his arm back as if preparing for a wind up punch, then hurls it forward. This causes Sloth’s chain to fly it’s full length forward, Sloth making use of it’s range. The chain reaches two thirds of Final Destination away from Sloth with disjointed priority and does 15% with knockback that kills at 150%. This has average lag.
However, once you throw out the chain, Sloth doesn’t pull it back in. He’ll drag it along as he moves about. If you use your neutral A during this time, the end of the chain will be the part that raises up and slams down. This the main reason you’ll be wanting to throw out your chain. Using your ftilt with your chain already out will cause Sloth to pull it back in, having no hitbox and average lag. This means you can’t use the ftilt on it’s own all that well due to having to “reload” it, so you’ll mainly want to throw out your chain when left alone then rely on the neutral A.
Up Tilt – Chain Clash
Sloth thrusts his arms upwards like DK does when charging his dsmash. His arms aren’t hitboxes for this move, but this causes his chains to swing up over his head. The range is dependent on whether Sloth has sent out his chains with his ftilt and fair or not, the chains potentially able to go very high into the sky if they’re both extended out. The main part of the chains only deal 5-10% with knockback that never kills based on charge, but where the ends clap together deals 20% and vertical knockback that kills at 85%.
Keep in mind that if the chains aren’t either both extended out or both unextended, then the ends won’t clash together, thus creating no deadly hitbox. You’ll generally want the chains unextended for this move simply due to foes being unlikely to be so insanely high. This move has high starting lag and above average ending lag.
Down Tilt – Swirling Pain
Sloth flings both his arms forward for above average range and little starting lag, though bad ending lag. This deals 12% and an awkward type of set knockback. The foe travels the distance of a Battlefield platform while spinning around rapidly, dizzy, over the course of a second. Sloth is unfortunately unable to take advantage of this due to the bad ending lag of the move (Yes, the ending lag is THAT bad. Don’t whiff this.). This is only worth mentioning due to how quickly it first comes out in comparison to Sloth’s other moves. Beyond that, the move is disgusting.
Neutral Aerial - Cannonball
Sloth tucks in his legs and holds onto them, going into a cannonball pose and spinning rapidly. This causes Sloth’s entire body to become a hitbox that does 18% and knockback that kills at 75%, and he has super armor for the entire duration of the move. This has surprisingly little lag for a move so powerful, but the catch is that you can’t come out of it until you hit the ground, and the move has bad landing lag
So how to make use of the move? Fistly, it sweetspots the ledge like Bowser’s down special with no lag whatsoever. Secondly, a similar effect will occur if you splash into water, and you even get a nice bonus of some water splashing up and pushing foes away slightly like FLUDD when you land.
Forward Aerial – Bound in Chains
Sloth jerks one of his arms forward to hurl forward one of his chains just as far as in his ftilt, two thirds the length of Final Destination. This has nearly identical properties to the ftilt, but in the air. The main purpose of why you’ll be using this over the grounded version, though, is that it’s also a tether recovery. This allows you to recover horizontally without using your side special to force you into slumber. Still, this is just as flawed as every other tether recovery and doesn’t automatically aim for the ledge like them, so you’ll rarely be able to make use of it. On the plus side, it goes out very far and comes out very quickly, so you might be able to grab the ledge before the foe gets on the ledge to edge hog you. This move won’t be interrupted by landing on the ground.
So the move is a tether recovery? Fascinating. Never heard that one before. Well, the chains don’t only latch onto ledges. They can also latch onto the edges of platforms that aren’t normally grabbable, such as Battlefield platforms and the obnoxious stage builder parts with ungrabbable ledges. If you bind your chain to a platform like this, then you can’t be knocked away further then the length of the chain from where you bound yourself. Foes can get around this by attacking the area the chains are bound down to and break you loose, but otherwise you’re impossible to KO.
Sloth’s fair has him launch his right arm forward while his ftilt has him launch his left arm forward. This allows you to control the two chains bound to Sloth’s arms separately, meaning you can be bound down at two separate places, as well as have two separate places where you can flail your chains with your neutral A.
Back Aerial – Kinklink
Sloth swings both of his chains out behind himself at once their full distance, then pulls them back in. If both his chains are already out via ftilt/fair, then the beginning lag of the attack is drastically reduced from it’s otherwise high lag as he only pulls the chains back in. Sloth is relatively exposed if he whiffs this if the opponent is right up in his face, but this attack has little potential to be punished from a distance.
For a brief moment in-between when Sloth throws out the chains and reels them back in, the ends of them have a grab priority hitbox, the foe getting caught up in the chains before Sloth pulls them back to him. Should Sloth grab somebody with the chains, he’ll plummet downwards for a potential Slothcide or deal 20% and knockback that kills at 80% if he lands on solid ground with them.
Up Aerial - Jumpchain
Sloth spins his chains around himself rapidly in a motion as if he were playing jumprope with it. Both chains must be extended out the same length for this move to work, or else Sloth will simply do generic upward flailing when he performs this move.
If the chains are both unextended, then the move has below average lag on both ends and the chain is a hitbox that deals 12% with knockback that kills at 160%. This can be used to help Sloth’s recovery slightly as it considerably slows his descent, but it’ll just hurt you if you spam it in a similar fashion to Mario’s side special.
If both the chains are both extended out, Sloth does the same spinning motion and the chain does the same damage/knockback, but since the chain is so much farther out, the hitbox around Sloth is very large, creating a protective barrier around Sloth. It’s pretty much impossible to get past the disjointed hitbox to Sloth if you’re outside it, but if you’re already inside the chains you can easily punish him. This doesn’t help with Sloth’s recovery at all, so use it for spacing and to block projectiles.
Down Aerial – Stomp
Sloth stomps downwards in a more exaggerated animation then Ganondorf’s dair. This is a spike just as powerful as Ganondorf’s that does 21%! This has starting lag comparable to Ike’s fsmash. . .Good god. Seriously? Sad, but true. Thankfully once the starting lag is passed the move is brief in duration and there’s only below average ending lag, but the starting lag makes this impossible to use for actual gimping. Range and priority are a bit better then Ganon’s dair.
So what –do- you use the incredibly laggy spike for? Well, if you hit the ground with the kick, a large indent in the ground is made, identical to the one in Sloth’s fsmash (The very next move you’re about to read), giving you an alternative means of creating them. In addition, you can have one hole each from Sloth’s dair and fsmash, allowing you to make two holes instead of just one.
Forward Smash – Behemoth’s Tomb
Sloth rips out a chunk of the ground from where he’s standing, then smashes it forward. The chunk of ground is as long as Sloth is tall. This is slightly laggier then Ike’s fsmash. It has disjointed priority and deals 26%-34% with knockback that kills at 80%-60% based on charge time.
After successfully finishing the move, the land that Sloth ripped up out of the ground will stay where Sloth slammed it down, leaving a hole as long as Sloth is tall and as deep as Mario is tall, and also leaves the ground which Sloth ripped out in front of the hole, significantly altering the stage layout. Needless to say, this can’t be used on platforms that aren’t as deep as Mario’s height, such as the paper thin platforms of Battlefield.
Now, here’s where the stage altering begins to serve a purpose. If you’re in the hole you created when Sloth goes to take a nap, Sloth will pull over the ground he ripped out over himself to form a sort of tomb as he goes to sleep, burying himself within the stage as he slumbers. This makes him completely impervious to all damage, and he bursts up out of the ground once his nap time is up with little lag, though he refuses to stay underground for more then 5 seconds due to lack of air. You’ll generally want to open up a tomb and always retreat back to it when your time starts ticking down.
Be warned, though. Characters with moves that can go inside the stage like Snake and his dsmash and MYM characters who can alter the stage layout can dig up Sloth from his tomb, so beware these match ups. There can only be one tomb out at a time regardless of the amount of Sloths.
Up Smash – Chain Swing
Sloth thrusts his arms upwards and his chains and his chains along with him, just like in his utilt. In fact, the entire move seems identical to the utilt at first, but the chain is a weak hitbox that does 1-2% and the part where the chains clash together does no damage, but has a grab hitbox, and if they’re hit by it Sloth hastily reels the chains back in to get the foe in his regular grab. This move looks like it starts up slow like the utilt, but in the middle of the animation it suddenly speeds up, having half the lag on both ends. This gives the two moves decent mindgame potential when used together.
So an upward grab? That’s it? Well, if your chains are unextended and you stand under a drop through platform when you use this move, the chains will latch onto it, and Sloth will then proceed to swing around the platform, rapidly going above and under it as he swings. Contact with Sloth as he spins about like this does 27-39% and knockback that kills at 75-45%. Sloth has super armor during the move. He has to keep spinning like this for at least 3 seconds, after which he can press A to casually come down with below average lag or launch off with his momentum into his nair by pressing B.
On long drop through platforms, such as the one on Smashville, Sloth can move back and forth along the platform as he spins around it at a decent speed. This can give him massive stage control on stages such as that, but if he keeps spinning around the same platform for 6 seconds, he’ll cause it to crash into the ground from his weight and give himself abysmal ending lag. The fallen platform stays in the background and never comes back on it’s own, but if Sloth comes in front of it and uses his usmash, he’ll lift it back up into position with high lag, repairing it. The earlier given example of the Smashville drop through platform is absolutely ideal to use this on due to how the platform moves back and forth.
To use this on drop through platforms below you, you can input a dsmash right after inputting the usmash to cause Sloth to aim downwards instead of upwards. This allows you to use this on the main platforms of stages like Delfino Plaza and Halberd which also happen to be drop through. You can destroy these sorts of platforms like any other, though you’ll kill yourself in the process and they’ll be restored the next time the stage scrolls to bring them back on screen.
Down Smash – Steel Whirlwind
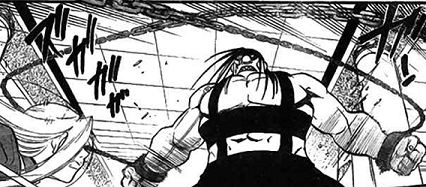
Sloth strikes a T pose as he extends out his arms, then starts spinning around rapidly. Sloth’s body is a decent priority hitbox that does 23-34 hits of 1% and flinching with the last hit doing knockback that kills at 250-200% based on charge. Very little lag, but a ridiculously long duration that begs for enemies to come from above and dair you.
But why would the foe have to do that instead of hitting you normally? Well, if your chains are thrown out with your ftilt/fair, they’ll spin around with Sloth in a circle of death. The chains do the same damage as Sloth, but all in one hit, and the knockback is vertical knockback that kills at 150-100% based on charge.
While this move is infinitely more appealing to use if you’ve thrown your chains out in the distance to give the move truly absurd range, if either of your chains are out they’ll tangle around Sloth as he rapidly spins them around, the range of the attack slowly decreasing over the long duration, causing him to be completely bound by his own chains by the end of the attack. He falls over in the direction he was facing after the attack is finished laggily (Ready to use a stomach rising attack), and he can’t use any other attacks (Besides rising attacks) until he throws his chains back out again with his ftilt and fair to free himself.
Neutral Special – Slack Off
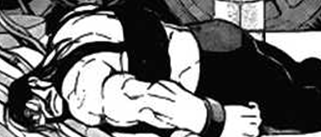
Sloth goes into a pose similar to Dedede’s crouch and falls asleep with little lag. From here, there’s absolutely nothing you can do, but you regenerate your stamina incredibly quickly, making this a vital tool in Sloth’s arsenal. This means you’ll be wanting to slack off whenever you have a free moment. When the foe’s respawning is an obvious time, but another one is when they’re just off stage, seeing Sloth can’t gimp to save his life anyway. You can come in and out of slumbering with below average lag, so don’t be afraid to use it, but if your foe will soon be up in your face again it’d be a better idea to just stand still and not be greedy. Being put to sleep by things such as Jigglypuff’s singing or Raiden’s sleeper darts will regenerate your stamina just as if you manually went to sleep.
Side Special – Titan Rush
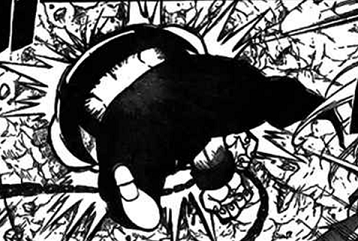
With very little beginning lag, Sloth goes just barely under the length of Battlefield, turning into a blur as he does so. How the hell does Sloth move so d*mn fast? Sloth is very surprisingly the fastest homunculus, he’s simply too lazy to use it. He uses all his speed in one burst in this move. . .Any foes who get hit by Sloth as he zips by at a blinding speed take 17% and knockback that kills at 90%. This move is beastly.
If this is used in the air, Sloth instantly goes into helpless after going the set distance. After touching the ground from recovering or if this move is used on the ground, Sloth will be exhausted and begin napping and refuse to get up for 3 seconds(Though he has super armor during this forced sleeping and no lag upon getting up, so a foe can’t just fully charge a smash to send him back out again). During this forced sleeping, Sloth won’t regain any stamina.
Sloth essentially has an absolutely perfect horizontal recovery, but upon reaching the stage he’ll take plenty more damage and possibly get sent right back out again. In addition, Sloth can’t recover vertically at all, so this is certainly one of his low points.
Up Special – Death Leap
This move is extremely comparable to Dedede’s up special, but Sloth only goes half as high as the floaty penguin king before crashing back down and doesn’t create stars at his sides when he lands, the move having worse ending lag then Dedede’s up special to boot. In return, Sloth has super armor for the entire move doesn’t have to cancel it to grab ledges, and his body is a hitbox that does upward knockback as he ascends, though it’s still a rather bad trade off overall. This’ll rarely be able to get you back to the stage from any significant distance, though it’s vastly preferred over the side special whenever possible.
Despite not needing to cancel the move to grab ledges, Sloth is still able to. What purpose does this serve? When Sloth lands on the ground, he slams into it with such force that his feet get ingrained in the stage. Sloth is unable to move like this, though on the plus side he takes no knockback (Though he still takes as much hitstun as ever). Canceling the move prevents this from happening. Sloth’s feet will be knocked out of the ground if he takes 30%, though he can come out of it earlier if he so desires by using his up special again to leap up out of the ground.
Down Special – Boulder Smash
This is nothing whatsoever like Charizard’s side special, so remove any notions of that idea immediately. Sloth lifts a massive boulder up out of the ground, and then carries it around slowly until you press B again to throw it. This works just like when a character is carrying Bonsly (Who Sloth can carry around with no speed penalty or lag throwing him) in terms of how slow Sloth moves and the arc the boulder’s thrown in, though other characters besides Sloth aren’t strong enough to budge the boulder. The boulder is double Kirby’s size, and deals 1.5X the damage and knockback of Bonsly when thrown. You can also press A to casually put the boulder down for weak set knockback and 5% without throwing it.
While this is incredibly powerful, the move is too laggy to really use all that well. Thankfully though, there’s little lag in taking out the rock and setting it down, so you can use it as a decent means of approach, the boulder blocking projectiles or pretty much any attacks from the front as you slowly come toward your foe.
And now you finally get to see why the specials came so late. . .If you latch onto the boulder with a chain via ftilt/fair, you’ll be unable to go farther then the distance of the chain from it. . .and be unable to be knocked away farther from the boulder then the distance of the chain. While this may sound like just an alternative to latching onto platform edges, foes can’t break the chain bindings to the boulder, unlike platform edges, keeping you securely chained to the stage. They can, however, attack the boulder to try to force it off the edge to drag you along with it, though the boulder has Metal Mario’s weight and infinite stamina. If you dig up a pit with your fsmash/dair and place the boulder inside it, the boulder will be firmly secured in the ground and foes will be unable to move it at all, keeping you 100% safe from being KOd.
While Sloth isn’t strong enough to use the boulder as a flail on the end of his chain with only one attached, if you fasten both chains onto the boulder he’ll be able to use it as a deadly ball and chain and move about freely, albeit at half his already sluggish movement speed and he falls twice as fast when he’s at the maximum distance of his chain and pulling the boulder along with him. Using your neutral A, bair, or dsmash with the boulder attached to the end of your chains gives you a massive deadly hitbox on the end. Whatever you do with the boulder though, keep in mind that the moment you set it down or throw it, it’ll vanish in 15 seconds.
Grab - Normal
Sloth grabs the foe in an animation nearly identical to DK’s, though he has more range and slightly more lag on his grab. His regular grab is overall better then DK’s, though his dashing grab is awkwardly laggy. Nothing to see here.
Pummel – Doze Off
Sloth suddenly falls asleep standing while he holds the foe, regaining his stamina at 3X the rate it normally degenerates. While this isn’t as fast as he normally regenerates when sleeping, standing obviously isn’t as comfortable as lying down. Pressing the pummel input a second time causes you to wake up and be able to throw the victim.
It’s good to get in a bit of sleep before you throw the foe, but it’s unlikely you’ll be able to get in anything worthwhile and still manage to get in a throw until higher percents. Don’t get too greedy with this or you’ll lose your free throw.
Forward Throw – Chain Throw
Sloth ties the end of the chain around the foe then throws out the chain in his ftilt, the foe taking the same damage as in the move. If the chain from Sloth’s ftilt (Not his fair) has already been thrown out, Sloth has to pull in the chain before he performs the throw, during which time the foe can easily escape.
After the throw is complete, Sloth and the foe will be bound together by the chain, unable to move farther then the distance of the chain from each other. If Sloth uses his ftilt to reel back in the chain, he’ll cause the foe to trip as he causes them to come back in, in a perfect position to be regrabbed for a chain throw! If you try to just use this throw again, though, Sloth will untie the chain that bounds him and the foe together. . .There goes the potential chain throw. Ah well. It still sets you up to use another throw, at least.
If you don’t use the fthrow again, the foe automatically breaks loose from the opposite end of the chain after 15 seconds. In addition to the obvious use of this throw for combos, you can use this when at high percents to render the foe unable to KO you. If you use this on a teammate, you can make both of yourselves nearly impossible to KO, but keep in mind you can’t link yourself to the same foe more then once every 30 seconds.
Oh god, there’s more, just for one throw? Sorry, sorry, just bare with it a little longer. . .Anyway, if you go to try to pick up a boulder you’ve created when you’re bound together with your foe, Sloth will take off the chain from his arm and tie it to the boulder. This robs you of your ftilt until you get the chain back, but the foe is stuck to the boulder while you can move about freely, albeit they can still attack it to move it. . .Unless you put it in a pit from your fsmash/dair. If used properly, this gives you plenty of time to sleep in peace.
To get your chain back, simply press A next to the end of the chain once the foe has escaped from it. If the foe manages to knock the boulder off the stage and it still has the chain attached, don’t worry. It’ll respawn around your arm in 10 seconds.
Back Throw – Gravedigger
Sloth smacks the foe into the ground behind him for 7%, leaving the foe in their downed state. This is relatively fast, but that’s all that’s notable about it. at first glance.
That’s all to the throw, unless you use it in a hole dug with Sloth’s fsmash/dair, in which case Sloth will hastily pull the ground over the foe to fill in the hole to trap them in the tomb. The foe is stuck inside for a full 5 seconds, and there’s nothing button mashing can do to help them. While this does no extra damage then normal, it allows Sloth plenty of time to take a nap, set up his chains, or dig another tomb.
Up Throw – Spine Breaker
Sloth lifts the foe above his head and lets out a mighty roar as he tries to snap the foe in half. While he probably would be able to do this to some of the lighter characters, Smash censors this visually delightful feast from occurring. This deals 10% to the foe and causes the foe to fall down onto the ground in pain afterwards. This throw’s damage output is –okay-, but Wario’s fthrow and Bowser’s dthrow do 12%, so it’s far from spectacular.
What makes this throw one of Sloth’s best, though, is the fact that he breaks the foe’s spine in his attempt to rip them in half, a cracking noise like Snake’s pummel (Though more exaggerated) heard when he does this throw. This prevents the foe from crouching (And thus they can’t use their dtilts/dsmashes/down specials), jumping higher then a short hop, double jumping, and most importantly prevents them from turning around. This lasts 10 seconds. This is any slow hulk’s dream, being able to bring down a foe to their level and make them easy to approach. So long as you stay behind the foe, there’s really not all that much they can do to you besides short hopped bairs, seeing they can’t turn around.
Oh, and remember that horrible dtilt? When the uthrow is taken into account, it’s actually a decent addition to Sloth’s arsenal. If the foe has a broken spine when you use the dtilt on them, it’ll deal double damage to them due to it rapidly forcing them to turn around for a very impressive 24%, though keep in mind this’ll be just what the foe needs to get their spine back into shape, so use the dtilt right when it’d heal automatically anyway.
Down Throw – Body Slam
Sloth releases the foe, then quickly jumps up and body slams them. . .Ouch. This deals 14% and knockback that kills at 120%. In addition to being Sloth's only throw for actually KOing his victims (Which it's pretty d*mn good at), this also creates a pit like the ones from his fsmash and dair where he body slammed the foe. It counts as one created by the fsmash by default, though if there's already one created by the fsmash it'll count for the dair. If he already has two pits out, no pit will be created.
Ledge Attack – Butt Slam
Sloth heaves himself up onto the platform in one fluid motion backwards, using his bulk as a hitbox. This seems familiar. . .Turns out it’s DK’s old ledge attack from 64. This does 8% and set knockback that pushes foes off the stage a bit like Ganon’s ledge attack, has average priority and below average end lag with very little start lag. You can use this to buy yourself a small bit of time to rest while your foe’s off stage briefly, although if you’re used to fast characters with good spikes you’ll probably try to gimp them like an idiot and get killed yourself.
Ledge Attack Over 100% - Laziness
Sloth isn’t all that hurt after reaching 100%, just tired and feeling lazier then ever. He slowly clambers up onto the ledge for 5 multiple hits of 2% and flinching as he flails about clumsily. The attack is laggy, and it can’t be used for edgehogging due to the invincibility frames being very brief. What makes it potentially useful is that if there’s a pit from your fsmash/dair where Sloth flails up onto the ledge, he’ll instantly go to sleep inside it, pulling the ground up over himself.
Rising Attack (Either side) – Rollover
Sloth rolls over onto his either side, trying to get comfortable before he falls asleep. This does 8% with lengthy hitstun, Sloth’s body being an average priority hitbox. This is actually impressively fast, and can combo up for some quick damage . .But you have to be knocked over in the first place to do it. Your dash and dsmash can knock you down on demand, but your dsmash is rather impractical for this purpose. Your best bet would be hitting your foe with a dash then following it up with some “rising” attacks.
Due to the long hitstun and low lag, this could be used to cheaply combo up for as much damage as you desire. . .If not for the fact that you have to eventually go to sleep, interrupting your infinite. If you lay down for longer then 4 seconds at once, Sloth enters a forced sleeping state identical to the one from his side special. It’s only natural, seeing the whole reason he’s rolling over so much is he’s trying to get comfortable for a nap.
A complete philosopher’s stone spawns in front of Sloth as the camera zooms in on him, and he promptly devours it whole, absorbing all it’s power in a brilliant red flash. This restores Sloth’s stamina and prevents it from going down whatsoever. In addition, when Sloth stands perfectly still, he regenerates 1% second, and he regenerates 5% per second while sleeping with his neutral special. This lasts 60 seconds.
If you manage to sleep constantly throughout the entire final smash, you can potentially heal up to 300%, but this is near impossible. This final smash is more of a slow burner then others and one you’ll want to use towards the end of your stock to heal yourself. You’ll ultimately be playing the same way with it, but instead of being forced to do it to keep your power you’ll be healing yourself by stopping to rest, making you nearly unstoppable.
Early on in the match, you’ll want to get in a grab and break the foe’s back with a uthrow, then stay behind them and set up your two pits via fsmash/dair. These pits never go away via normal means until you sleep in them, and few foes have the capability to remove them themselves. You want your pits up as soon as possible. If your foe is giving you a particularly annoying time with their bairs while their spine is broken, extend out your chains and make yourself some space with your uair, then proceed to finish making your pits. Once the foe’s back is about to heal, quickly go dtilt them for some quick damage.
This is the most awkward phase of Sloth’s game, just racking up general damage. Aside from the uthrow/dtilt combo, other possibilities include dashing attack to spammed rising attacks, but for the most part you’ll be forced to use just a few powerful hits to get up the foe’s damage. It’s perfectly normal for Sloth to get extremely behind in the damage count here, don’t worry. He doesn’t need to rack the percents that high anyway.
As you fight, you’ll generally want to keep at a distance and stand still as much as possible. Save your pits for sleeping tombs for when your stamina gets low, and try to use them after landing a hit to ensure you don’t get attacked as you go into the pit. Always try to keep at least one pit in reserve, though. If you use your last one, try to make another ASAP. You don’t want to have no tomb to go back to when your stamina is in the red.
While Sloth can get comboed to all hell, particularly due to his weight and size and giving his foe 3 free seconds to rack his damage when he recovers from a long distance via Side Special, his highlight aside from his power is his durability. It’s not his recovery, seeing it’s not all that spectacular. It’s his ability to chain himself to the stage. While chaining yourself to a platform is only a temporary solution, if you put a boulder in a pit and chain yourself to it you’re invincible. Your up special is a quicker option for this when you cement your feet in the ground, but provides less freedom due to restricting your movement.
Once you get yourself to a high percentage, your first priority should always be to bound down to –something-. If you can manage to do that, it doesn’t matter how high your percentage gets, you’ll just simply never go down. Foes who focus on taking chances to get your damage all the higher will do little to stop you when they should be focusing on preventing yourself from being bound to the stage.
KOing the foe obviously isn’t a problem once they’re up to a remotely acceptable percentage, but it can be tough which option to choose among your many absurdly powerful moves. It’s really no contest, though. The side special is without a doubt your best option. . .Assuming you don’t whiff it. However; there are ways of getting around it. If you make a pit on one end of the stage and use your side special facing towards it from the other end, Sloth will end his mad dash in the pit and go to sleep safe and sound inside it. Thus you have a all powerful move with no start lag or penalty for missing, albeit it requires set up and is somewhat predictable once you get into position for it.
Well, that’s all well and good. . .But what about moving stages where Sloth doesn’t have time to make pits, hmm? Unlike most characters which require set up, Sloth is perfectly viable if not better on moving stages! . .Or at least the competitively viable ones, anyway. Your usmash and nair are the main things that make life far easier on these stages, considering you can spin around the main platform and even potentially destroy it. On Halberd, you only have two platforms to destroy before there’s nothing to stand on at all, so if you get ahead you pretty much have the match. Delfino Plaza too regularly renews its’ platforms and has too many to destroy them all before it lands, but the fact Delfino has water is extremely appealing for your nair. You can abuse your nair more then characters can abuse their spikes on Delfino, and your usmash still remains a beastly option despite being unable to suicide like with Halberd.
So overall, ignore your damage percentage as it climbs ever higher and just stay bound to the stage as best you can, only coming out from your bindings to take naps if absolutely necessary. It’s safer to just stand in place, and seeing Sloth fights at a range so well anyway you have little reason to budge from your well fortified position anyway.
Always stay up close to Sloth whenever possible. Sloth performs best when you’re at a range and give him plenty of time to bound himself as he pleases, but there’s not all that much he can do to resist if you stay in his face constantly. Just take care that you don’t get grabbed while you pester him about, as his uthrow can severely limit your options and allow him to set up with ease, or god forbid, actually get a few hits in on you.
Don’t camp Sloth. Sloth is a god when fighting at a range, seeing his chains shred through pretty much any projectile whatsoever, and doing so just gives him more time to set up. If you somehow manage to annoy him with projectiles, he can just make a boulder to absorb all your projectiles with ease.
Don’t get cocky if you’re ahead in damage percentage. If anything, unless you’re AT LEAST 50% ahead of him, you should be shaking in your boots. Once you get him up to a high enough percentage to finish him, stop focusing on attacking him and instead focus on preventing him from binding himself to the stage. Only if he’s unbound should you attempt to actually use a KO move on him, and during the rare instances you’ll catch him off his guard with no chains attached to anything when he’s at high percents, pursue him relentlessly like you did when you were first racking his damage. If you don’t kill him now, you probably never will.
Good characters to use against Sloth are ones with ways of getting him out of the ground while he sleeps and ones with good bairs, as if you have a good bair having that be your only way of hitting Sloth isn’t a problem, making his uthrow rather useless. Considering how easy it is to damage rack Sloth, power characters tend to perform better against him.
VS. Meta Knight – 75/25, Sloth’s favor
Sloth’s priority eats through even mach tornado with little to no problem, and Sloth outranges MK just as well if not better then DK. Sure, MK can rack up Sloth’s damage to all hell regardless, but that’s hardly something to brag about, seeing Ganondorf can rack up Sloth’s damage just fine. Considering both of Sloth’s recovery specials both abuse super armor, there’s little Meta Knight can do to gimp him either. Meta Knight has considerable problems finishing Sloth off, though Sloth couldn’t have it easier.
VS. Snake – 70/30, Snake’s favor
Snake’s dsmash is the main thing he has going for him here. Snake gives Sloth little to no chance to rest underground thanks to it, meaning Snake’s main strategy should be to play defensively with his mines while Sloth’s power goes away from his laziness. All hope isn’t lost for Sloth as he can still stand still to regenerate stamina, but this isn’t nearly as effective unless you set yourself up properly. Considering Snake’s bair sucks, it’s possible, but Sloth will without a doubt have to work much harder then Snake for the win.
VS. King Dedede – 0/100, King Dedede’s favor
Dedede absolutely ***** Sloth in every way imaginable. The chain grab is obviously the first thing that leaps out at you, and seeing Sloth is so huge and heavy he can be made as big a victim to it if not bigger then Bowser. In addition, Dedede’s bair is godly, thus Sloth’s uthrow is of little use to him. Sloth has to keep Dedede at a distance if he ever hopes to win, but seeing one grab is all the damage Dedede needs and that he can easily KO the beast anyway, there’s pretty much nothing Sloth do to resist.
VS. Acid Seaforce – 85/15, Sloth’s favor
Yes, Seaforce can rack up Sloth’s damage. What else is new? Sloth feels no pressure at all from his percentage climbing up, he just casually continues to bind himself to the stage and tanks all the damage without a second thought. Considering Seaforce has problems finishing off foes such as even Jigglypuff, it’s nigh impossible for him to kill Sloth. As if that wasn’t enough, if Sloth takes a nap, all poisons are instantly cured, if he really insists on keeping his damage low.
VS. Raiden – 60/40, Sloth’s favor
The main thing Sloth has going for him here is that Raiden’s sleeping darts are near useless against Sloth, as he regains stamina when asleep. So long as you chain yourself up before you fall asleep, there’s not much he can do to you. If Raiden tries to push you away in a locker to your doom, he won’t be able to push you any farther then the chains will allow, so he has problems killing you just like everybody else. Still, if Raiden can catch you with your chains down, he does have some surprisingly powerful moves to finish you with, meaning the match up definitely isn’t too one sided.
VS. Alphonse – 50/50
This is a rather intriguing match up. Of course, the main thing that leaps out at one at first for Sloth’s favor is that he’s so massive that he’s nearly entirely immune to Al’s chain grab, but he’s sadly far too large to go inside Al’s armor to control him. In addition, Sloth can destroy Alphonse’s transmutation circles by smashing them into the ground and making pits.
So why is the match up even then? Alphonse’s dair earthquakes can force Sloth up out of the ground while he’s sleeping, and Al has no shortage of methods with which to KO Sloth. Al will want to play defensively while Sloth’s stamina ticks down, hiding behind walls where he can make transmutation circles in peace and dairing whenever he tries to sleep. If Al can force Sloth to go on the offensive, the match up can go more his way.
VS. Miracle Matter – 90/10, Sloth’s favor
Considering Matter is only able to use a few of his moves at any given time, you know exactly what’s coming, helping you greatly in this match up. There’s little need to even bother binding yourself to the stage when you’re up against damage rackers like cutter and spark matter, but you’re given more then enough warning of when to do so when bomb and stone matter show up. In addition, when Miracle Matter takes a good couple seconds to change to his next form is a great time to make another pit or climb into one to rest. This is one of Sloth’s easiest match ups. A shame Matter can’t use more of his options at once. . .
VS. Ryuk – 80/20, Sloth’s favor
Sloth can just bind himself to the stage or hide underground the moment the death note is about to go off, it’s pretty much impossible to use it to finish him. If Ryuk wants to have any hope whatsoever of winning, he has to never fall behind in stock count and KO Sloth without his death note, then suffer the penalty for breaking the rules. While this is possible, it’s far from easy.
VS. Metal Man – 40/60, Metal Man’s favor
Metal Man’s dair projectile which travels through ground can hit Sloth while he’s napping inside the stage. While this won’t dig him up like some other moves, it causes him to awaken from his sleep and damages him, so it may as well. While Metal Man isn’t an all star at KOing, Metal Man can build up the stage with his ridiculously large arsenal of traps as he sees fit while Sloth’s stamina goes down with him unable to do much to stop it. Still, Metal Man won’t have an easy time designing the stage, as Sloth is excellent at destroying stage traps by obliterating platforms via usmash and making pits. Metal Man has the match up, but he’ll have to play very conservatively and he’ll still have a hard time finishing Sloth.
VS. Arthas – 25/75, Arthas’ favor
Considering how long it’s gonna take anybody at all to KO Sloth, that naturally means all match ups against him are gonna be rather lengthy. . .Sounds great to Arthas. Gives him more then enough time to build an army. While Sloth will probably get ahead in the first stock, he’ll of taken so long to do it that by the middle of the second stock Arthas will have plenty of little helpers to pester Sloth and make life miserable for him. By the third stock. . .Ouch. Nasty stuff there. Sloth isn’t too fond of frost wyrms. Sloth can prevent this by killing the acolytes early on, but Arthas should be able to easily subdue the hulking behemoth due to his slowness.
VS. Count Cannoli – 15/85, Count Cannoli’s favor
Sloth is pretty d*mn easy to steal moves from, and considering how much his moves all rely on each other, just losing a single move can screw over many other moves in a domino like effect. Considering how basic of inputs his ftilt and fair are yet how vital they are to his game, Cannoli is pretty likely to cripple you severely with every button input he snatches. There really aren’t many button inputs you can afford to lose to the count here, hence why the match up is so strongly in his favor.
VS. Envy – 15/85, Envy’s favor
Considering Envy refuses to die in the traditional manner and requires damage racking to kill, Sloth’s pretty d*mn screwed here, as he somehow has to get Envy to 200% to kill him. This is a very long and tedious match up as both homunculi refuse to die, but considering Sloth is mostly just sponging up hits while Envy attacks him relentlessly, it’s very one sided. At least Envy can’t use his fthrow on you. The two homunculi complement each other decently as partners due to them both being such survivalists. You’d better convince Envy to let you onto his side or be doomed to face this match up.
Up Taunt - Yawn
Sloth stretches up to the sky and lets out a big yawn.
Side Taunt – Pitiful Foes
Sloth snorts in a high and mighty fashion then says “You not worth the effort.”.
Down Taunt – King of the Underground
Sloth turns to face the screen, roars, then beats his chest mightily, looking far more fearsome then DK’s more casual version of this taunt.
Entrance – Beast Awakened
Sloth bursts out from the ground as if he were slumbering inside it with his fsmash/dair.
Win Pose - Slumber
Sloth sleep. What? You want Sloth pose dramatically? Too tiring!
Loss Pose - Slumber
Sloth sleep. While Sloth could clap in Sloth’s sleep to satisfy your petty demands, Sloth above that. Ice Climbers not clap anyway, why Sloth?
I appreciate the organization comment. I'm just about to finish the final smash and add in specials. Then, I'll meet all the requirements.
I'm gonna add more once it's finished, I just really wanna get it done soon so it doesn't look like I submitted the set too early.
I'm gonna add more once it's finished, I just really wanna get it done soon so it doesn't look like I submitted the set too early.
Hobbes (as it is right now) looks pretty good, Straked. Quite the generic move here and there, a few grammatical errors, but the organization is really impressive. Overall, an interesting thing you got goin'.
I'm starting to feel more at home here.
I'm starting to feel more at home here.
Yeah, that's why I'm doing a run-down and fixing all of the mistakes. It's quite challenging to think of moves for a simple tiger.
The Final Smash seems to make up for any of those flaws. Thanks for the critique, Clow.
The Final Smash seems to make up for any of those flaws. Thanks for the critique, Clow.
Uhh, all these movesets to comment on.
I'll get to it.
Maybe.
Sloth is excellent, I HATE the character, but there are some very interesting attacks in there, namely the Steel Whirlwind and a few others I forget.
I'm stealing your method of stats by the way.
EDIT: Straked, I'm doing a moveset for both Calvin and Hobbes at some point, but yours is drastically different from mine, so it doesn't matter. Just thought I'd say. Yours is going nicely, by the way. You had the same idea for a FS as me, but that's alright. I'll think of another.
- Status
- Not open for further replies.