• Welcome to Smashboards, the world's largest Super Smash Brothers community! Over 250,000 Smash Bros. fans from around the world have come to discuss these great games in over 19 million posts!

    You are currently viewing our boards as a visitor. Click here to sign up right now and start on your path in the Smash community!

Make Your Move 6 - Nothing Gold can Stay

Status
Not open for further replies.

half_silver28

Smash Ace
Joined
Apr 25, 2008
Messages
862
Location
MYM, Ohio
ah, kangaskhan. one of the safari zone pokemon from R/B/Y that were near impossible for me to catch as a kid. *rages* :mad:

anyhow, this is a really cool set, I liked how pretty much every move had something do with the rage or babyskhan mechanics. A lot of the moves involving the baby or other moves like the dash attack seemed to exist to give the mama a chance to go for the kill with one of her powerful attacks. Everything seemed to come together perfectly and nothing really seemed out of character or just thrown in... except the up air (d). I'm not really a fan of cutting out throws, but in this set, it's actually fitting for only the baby to be able to grab. Great job with this one Rool!
 

UserShadow7989

Smash Journeyman
Joined
Aug 13, 2007
Messages
306
Clefable is a fun read. I'm glad to see you've put 'Neutral Aerial' and such next to each attack; I had trouble telling which was which before. The playstyle is the first of it's kind I've seen, and I love it. A 'Stone Wall' type- awe inspiring defense, but nothing else going for it. The writing style got a few chuckles from me, too. I'm also impressed by how you've implemented Strength and such- at first I didn't think they fit the projected personallity of Clefable, but you've proven otherwise. Bravo

Kangaskhan was a very creative set, despite the limited source material you were working from. Everything in this set screams "Kangaskhan" to me. The Rage mechanic, and the Babyskhan mechanic were both wonderful ways to turn bland into exciting, and other then a few bland spots (Up Air) I enjoyed reading this set.

To be honest, I'd love to play as either of the above for real. Good job, both of you.

@MW: I already said this in the chat, but thanks. I fixed the spots you pointed out last night around 12.
 

KingK.Rool

Smash Lord
Joined
Nov 26, 2005
Messages
1,810
Kangaskhan: Very cool moveset! The mechanic doesn't feel forced, and it gives her a quite unique playstyle. This set has plenty of personality too. I love how every attack is a Pokemon attack but you didn't fall prey to the "Pokemon Syndrome": every attack was a fitting one. I have a few minor complaints, though. You seem to have gotten a bit lazy at times with her. You didn't make situationals, which shouldn't be too hard, and I don't really like pseudo-grabs when the effect can usually be relegated to a throw (even though you seem to have anticipated this complaint with "this is NOT me being lazy" comment.) Still, very good job.
Thanks, Wiz! It BETTER not have Pokemon syndrome, considering I made up the term (or the concept, at least). :p

Situationals are something I've never done and never intend to. Seems like a waste of time, and I always skip reading them, too.

Kangaskhan sounds like a great character. The moveset sounded creative and it was fun reading it. I do not thing I a saw any generic move in the set except maybe the UP Air. The baby does not sound to easy to separate in the majority of the moves and sounds helpless by himself. Then again it is a baby. I like the UP Special the most.

O darn I was hoping to place my Oliver moveset as the first post on this page :mad:. Guess I will use it in the next one .
Sorry about that, but thanks for the comment, anyway. Yeah, the Uair... I hate Uairs...

Thanks for the comment, Khold! I'm glad you liked it. :)

ah, kangaskhan. one of the safari zone pokemon from R/B/Y that were near impossible for me to catch as a kid. *rages* :mad:

anyhow, this is a really cool set, I liked how pretty much every move had something do with the rage or babyskhan mechanics. A lot of the moves involving the baby or other moves like the dash attack seemed to exist to give the mama a chance to go for the kill with one of her powerful attacks. Everything seemed to come together perfectly and nothing really seemed out of character or just thrown in... except the up air (d). I'm not really a fan of cutting out throws, but in this set, it's actually fitting for only the baby to be able to grab. Great job with this one Rool!
Ugh, I had the same problem, man. :mad:

Anyway, glad you liked it. And yeah, the Uair... I hate Uairs...

Kangaskhan was a very creative set, despite the limited source material you were working from. Everything in this set screams "Kangaskhan" to me. The Rage mechanic, and the Babyskhan mechanic were both wonderful ways to turn bland into exciting, and other then a few bland spots (Up Air) I enjoyed reading this set.
Thanks, Shadow! And yeah, the Uair again... I hate Uairs. I slack off on one attack, and of course every comment mentions it. :laugh:

Absolute win.
What can I say? I like my sweeteners. ;)
 

Junahu

Smash Ace
Joined
Nov 15, 2005
Messages
899
Location
Shropshire Slasher
MamaKahn & Joey: Wow, Rool! You sure showed Clefable what for!


wait... that's not a comment. Let's try this again..


Kangaskhan & Babyskahn: At the risk of sounding generic, this is the kind of stuff that cements you as the de facto Pokemon moveset maker. The organisation is pleasing, the colour scheme spot on, and you show an understanding of pokemon that no other MYMer can boast.
You have a neat contradiction between the moves mamakahn can use and those Joey can use, along with the moves that become better without Joey and those that suffer in his absence. And they come together surprisingly smoothly too. I loved reading Kangaskahn, every bit of it.


But you can't have good commentry without some criticisms;

The abusive/caring parent connundrum caught me by surprise, especially since you waited until the very end to tell us about it. In fact, your introductions did very little to inform us of just how many moves resulted in Joey being ejected from the pouch or similarly abused. The only one I thought made any sense, was Protect the Brood.
And on that note, there appears to be some excessive favouritism towards the abusive side. Even the moves that are blatantly for protecting Joey with are ironically set up by putting Joey in danger in the first place.
You don't NEED any moves to be "abusive". Simply having Joey leave the pouch and act as bait is abusive enough. There was no reason to include things like additional effects on Skull Bash and Earthquake to help paint the picture.
This isn't like Donna and her camera, you shouldn't be throwing your baby out just because you want to lay a trap, or because you want to use a mamakahn specific move like Thrash.


smaller stuff;
1) "Baby Charge" is a move that specifically invokes an action BY Joey. So why can't he use it when alone?
2) Why can Joey use Thrash when he doesn't have a Rage-meter? He can also use Final Smashes, which is just wrong considering what it is.
3) You mention that one of Joey's advantages when alone is his ability to grab. Without mamakahn to follow up, what's the point of grabbing?


I was always under the impression that Giovanni was forcing Kangaskahn to fight by holding her Joey to ransom
 

n88

Smash Lord
Joined
Oct 10, 2008
Messages
1,530
Link’s forgotten reincarnation joins the Brawl!

Game Boy Color Link

Overview
Well, obviously, this is Link ‘Nuff said.

Game Boy Color (GBC) Link is a version of Link based on his appearances in Oracle of Ages and Oracle of Seasons. These two games were some of the best (if not the best) games you could get on that iteration of Nintendo’s handheld. In these games, Link used tools and items that varied quite a bit from his usual repertoire, which are represented in this moveset. Also, he will be affectionately referred to as GBC throughout the moveset.

Stats

Size: 3/10
GBC is a bit older and taller than Young Link, but still doesn’t stand up to the same height as most of the cast.

Weight: 3/10
GBC is pretty light. He’s small, he doesn’t wear much armor. There’s not a whole lot to weigh him down.

Walk Speed: 5/10
GBC was not renowned for speed in the GBC games, but he wasn’t too slow either.

Dash Speed: 8/10
GBC uses a Pegasus Seed to shoot forward at high speeds.

Traction: 9/10
GBC can turn on a dime and give you a nickel in change. And he won’t trip.

Attack Speed: 7/10
GBC Link is faster than the Twilight version, but not as fast as his Toon counterpart.

Power: 4/10
Most of GBC’s attacks are lacking in power, but he’s got a few strong attacks.

Priority: 6/10
GBC employs attacks that vary greatly in priority, but are just about average.

Reach: 5/10
Another average statistic. GBC has some range due to his mad disjointed hitboxes, but it’s no great shakes.

Fall Speed: 4/10
GBC is a somewhat floaty character, but nowhere near fighters like Kirby and Jigglypuff.

1st Jump: 6/10
An athletic flip that moves GBC upwards a good distance.

2nd Jump: 7/10
GBC’s mid-air jump is surprisingly powerful.

Recovery: 7/10
GBC has a tether in addition to a strong Up-B, but his recovery move does have a bit of lag on it.

Combo: 8/10
This is one of GBC’s real strengths. He’s pretty fast and he’s got a plethora of low knockback moves to beat his opponents with.

Shielding/Dodging: 5/10
GBC has a small shield and average dodges.

DI/Aerial Movement: 3/10
GBC’s aerial mobility is bad.

Crouch: 8/10
Seeing as how he’s not too big to begin with, it’s easy for GBC to crouch down low.

Grab: 8/10
GBC’s Long Hook gives him a good amount of range on his grab.

Pivot Grab: 8/10
GBC’s Long Hook triumphs again, giving him superior grabbing range.

Special Abilities
Float: NO
Glide: NO
Crawl: NO
Wall Jump: YES

GBC has a Wall Jump about as powerful as Sonic’s.
Wall Cling: NO
Aura: NO
Tether: YES

GBC uses his Long Hook to latch onto the ledge from a distance.

Animations

Standing:
GBC Link goes into a fighting stance and bounces back and forth a bit with his sword (The Noble Sword) held in front of him and pointing outward. Curiously, he doesn’t seem to be carrying a shield…

Idle:
GBC takes two practice strokes with his sword. One is directed down and to the left and the other is directed down and to the right. Surprisingly, these strokes actually hit for 6% damage and flinching knockback each. Unfortunately, it takes a long time without moving to perform the Idle animation, so this isn’t very useful.

Walking:
GBC walks forward at a normal pace. He has a very cheerful, confident expression on his face.

Dashing:
GBC’s dash actually has a tiny bit of Start-up lag (about 1/10 of a second). During this time, GBC pulls out his Seed Satchel and throws a Pegasus Seed at his feet before dashing. The Dashing animation is the same as the Walking Animation, but faster, and GBC leans forward a little bit.

Shield:
GBC holds his sword in front of him vertically and turns his head to the side. The shield-bubble appears around him, naturally.

Airdodge:
GBC falls into the background as he turns to face the screen. His body is spread-eagled and he is holding his sword up and away from his body.

Rolldodge (Forward):
GBC is instantly replaced by Ricky the Kangaroo (GBC’s head can be seen sticking out of his pouch), who hops forward and turns around before being replaced by just GBC again. No-one knows why a male Kangaroo has a pouch, but this is a decent Rolldodge nonetheless.

Rolldodge (Back):
Pretty much the same as the forward roll, but Ricky doesn’t turn around.

Spotdodge:
GBC hops into the background, ducks, and covers his head. This spotdodge comes out a bit slowly, and lasts a medium length of time.

1st Jump:
GBC jumps upward. If he does not attack, he will roll in mid-air at the apex of his jump.

2nd Jump:
The animation for this jump is much the same as the first, but GBC does his roll more slowly.

Crouching:
GBC ducks down low. His sword is held parallel to the ground, and almost touching it. He will look around if left in this pose long enough.

Asleep:
GBC falls asleep on one knee. His head rests on his raised knee. The tip of his sword touches the ground, and the hilt is held loosely in his hand.

Dizzy:
GBC spins around in circles and stumbles back and forth clumsily. His eyes are turned into swirls while he does this.

Helpless:
GBC drops with his hands out stretched. Moosh’s flute is held in his left hand. He isn’t carrying his sword.

Falling:
GBC drops with his arms spread for balance and his left foot held slightly in front of his right.

Hangin’:
GBC holds onto the edge with his right hand and holds his sword in his left. He will occasionally try to scramble up onto the stage.

Grab:
GBC shoots his Long Hook forward much the same as Link uses his Hookshot. The Long Shot will retract and drag enemies to GBC, who uses the Long Hook to hold them in place.

Grab Release:
GBC’s jerks his left arm (the one he used to hold the victim) up as the opponent escapes.

Coming out of Grab:
GBC slides backward and sticks his arms out to prevent falling over.

Swimming:
Dmitri appears below GBC as soon as he hits the water. Thanks to Dmitri, GBC has unlimited swim time, and can move very fast (C. Falcon’s dash speed) in the water. Dmitri can maintain this pace even when going against the current on Jungle Japes!

Standard Attacks
A: Wooden Sword Slash

GBC does a single vertical swipe in front of him with his sword, which takes on the appearance of the Wooden Sword for this move. This hits for 3% damage and flinching knockback. This attack has low priority and is kinda slow for a jab. GBC can use this attack to trap opponents, hitting them multiple times before they can escape, but to offset this, GBC has no two-hit or three-hit combo.

Hitbox: Sword (Disjointed)

Dash Attack: Extended Jump

GBC jumps forward about the length of two Battlefield platforms. The animation is the same as his normal jump animation, but GBC does 3 roll/flip things instead of one. GBC doesn’t go as high as his normal jump with this attack. The hitbox (which is GBC’s entire body) lasts the entire time that he’s in the air, and knocks the opponent behind GBC and upward. The attack does 5% damage and has average priority and knockback. It’s not very fast, though. This is mostly used to take opponents by surprise.

Hitbox: GBC’s body

Tilts

A↑: Ricky

Ricky appears, as in the roll animation (GBC is safely in his pouch once again). This time, Ricky performs a massive uppercut instead of rolling. This upper cut has excellent reach, and deals 9% damage and average knockback. This attack has high priority, but it takes a moment for Ricky to appear and disappear, so this has above average start-up and significant cool-down time. Ricky is part of GBC’s hurtbox for this move, but in exchange, this attack has superarmor frames until after Ricky’s punch.

Hitbox: Ricky’s Glove (Disjointed)

A→: Noble Sword Slash

The animation is pretty much the same as his jab animation, as is the hitbox. The only visual difference is that GBC is clearly using the Noble Sword and not the Wooden Sword for this attack. Non-visually, this attack does 6% damage, below average knockback, and high priority, as well as being pretty fast.

Hitbox: Sword (Disjointed)

A↓: Cane of Somaria

GBC swipes the Cane of Somaria low to the ground and in front of him. This attack cannot trip opponents, but deals 5% damage and average knockback. This attack is average in terms of speed, and has average priority as well. What this attack does have going for it is that if it does not hit an enemy, it will create a small block at the edge of the cane’s hitbox. This block has 20 hp, and can be pushed to the left or right by GBC. There can only be one of these blocks on the stage at any given time. These blocks can be used to disrupt long range attacks or protect GBC from projectile fire (temporarily). If the attack is used again, any prior blocks still on the stage will instantly disappear.

Hitbox: Cane (Disjointed)

Situational Attacks​

Ledge Attack < 100: Bomb Toss

GBC will pull out a bomb with one hand and throw it onto the stage near the ledge before he climbs up. The bomb explodes at the same time that GBC makes it onto the stage, about 0.5 seconds after the button is pressed. GBC is immune to the explosion, which deals 10% damage and high knockback. The bomb has very high priority and comes out pretty fast as well. This is an excellent way to get opponents off of your back while climbing onto the stage. The bomb moves very fast and has a short fuse, so it is somewhat difficult and dangerous to catch.

Hitbox: Bomb, Explosion (Projectile)

Ledge Attack > 100: Block Push

GBC pulls out the Cane of Somaria and slowly climbs onto the stage (he takes about half a second). At the same time he reaches the stage, he swipes the cane in front of him, creating a block that slides all the way across the stage and drops off of the other side. As it moves across the stage, it deals no damage but repeatedly knocks opponents down (like Falco’s laser lock) and pushes them across the stage. Opponents hit by this attack will be unable to escape and the block will drag them until it carries them off the stage (They Must Recover!!) or the block hits a wall. If the block hits a wall, it will cease all motion, but continue to exist. Much like the block created by the D-Tilt, this block has 20 hp and will disappear if another block is created.

Hitbox: Block (Projectile)

Downed Attack: Gale Seeds

GBC will throw a Gale Seed at the ground near his feet on either side of him as he gets up. The seeds will instantly turn into mini-tornadoes, and push opponents away from GBC about the distance of the left Skyworld platform. As it carries them, it does four hits for 2% damage each (total of 8%). These tornadoes suffer from low priority.

Hitbox: Tornadoes (Projectile)

Tripped Attack: Rising Spin Attack
It really sucks if you trip. On the upside, you can perform the legendary Spin Attack as you get up! GBC will spin his sword around him (just once) as he gets up. This attack hits once for 9% damage and high (outward) knockback. This attack comes out pretty fast and has average priority.

Hitbox: Sword (Disjointed)

Swimming Attack: Bite

Thanks to his handy friend Dmitri, GBC has a Swimming Attack! This attack consists of Dmitri rearing back and then chomping on whoever’s in front of him. This attack is comparable to Fox’s F-Smash in terms of speed, and hits for 10% damage and average knockback. This attack has very high priority. Unfortunately, you won’t get many chances to use this attack.

Hitbox: Dmitri’s Head (Disjointed)

Smashes

A↑: Bomb Flower

GBC crouches down and starts to pull something out of the ground. He will hold this pose while the attack charges, giving him the appearance of someone who will get a hernia shortly. When the attack reaches maximum power or is released, GBC will pull a Bomb Flower out of the ground and throw it over his head, where it detonates after a moment. Uncharged, this attack deals out 8% damage and average knockback. Fully charged, this attack does 13% damage and very high knockback. It also has transcendent priority. Unfortunately, this attack is very, very slow. Even uncharged, there are about 30 frames between button input and the bomb’s explosion, followed by an additional 30 frames of cool-down time. That’s an entire second of being unable to move or take any action outside of the Up-Smash. This is still one of his best KO moves, though.

Hitbox: Explosion (Projectile)

A→: Shield Rush

GBC pulls out his shield and holds it in front of him while appearing to run in place. This is the charging animation. When the attack is released, GBC rushes forward a short distance (about the same distance as Squirtle’s F-Smash) while holding the shield in front of him for protection. This attack hits for 5% damage and average knockback when uncharged, as well as having good priority. Fully charged, the attack does 8% damage and the knockback and priority aren’t really any better either. The attack itself comes out at average speed. However, during the entire charge-time and execution of the attack, the shield serves as a reflector with about the same power as Pit’s Shield. The reflecting is really its primary use.

Hitbox: Shield (Disjointed)

A↓: Shovel

GBC pulls out the shovel and makes a pose as if he is about to dig. When the attack is unleashed, GBC will quickly make a digging motion with the shovel in front of him. This attack hits for 5% damage uncharged and 9% damage fully charged. The attack is pretty fast and has average priority. The useful thing about this attack is that it pops the opponent up directly in front of GBC and has enough hitstun on it to allow a free jab or f-tilt on anyone who gets hit. Unfortunately, this only hits on one side of GBC.

Hitbox: Shovel (Disjointed)

Aerials

A: Horizontal Slash


GBC simply swipes his Noble Sword in front of him horizontally. This is a very fast attack, but has low priority, and only hits for 3% damage. The knockback is poor as well. This is only really used to disrupt enemy attacks in the air. Otherwise, it’s useless.

Hitbox: Sword (Disjointed)

A↑: Shovel Jab
GBC quickly takes out his shovel and holds it vertically over his head. This attack has inverted sexkick properties. In other words, the first few frames of the attack are relatively weak, but the attack will do more damage if it hits later. For the first 12 frames, the shovel will do 4% damage and very low knockback, as well as having low priority. After those first frames, the shovel will do 7% damage, average knockback, and have high priority.

Hitbox: Shovel (Disjointed)

A←: Ember Seed

GBC throws an Ember Seed behind him. This instantly creates a pillar of flame behind GBC that looks exactly like Ness’s PK Fire. The fire lasts for 4 seconds, and deals out 20 hits of 2% damage each for an impressive 40% damage total (like Ness’s PK Fire, it also deals no real knockback). You can SDI out of this attack fairly easily, but it still helps GBC’s ability to control the stage.

Hitbox: Bad-*** Pillar of Flame (Projectile)

A→: Shield Bash

GBC pulls out his shield (the animation is similar to the way Link pulls out bombs) and brings it over his head quickly to attack people in front of him. The shield does 7% damage, high knockback, and has average priority and speed. This is GBC’s best aerial kill move.

Hitbox: Shield (Disjointed)

A↓: Block Drop

This is the third (and last) of GBC’s attacks using the Cane of Somaria. GBC will perform a fast swipe below him with the Cane. This creates a block that instantly drops off the screen (it will disappear if it hits the stage). The attack has two hitboxes: The Cane itself and the block. The cane does 7% damage and is a spike of average strength (below average priority). The block does 4% damage and average knockback straight up (high priority). The spike can’t be used to gimp until very high percents, as otherwise the follow-up block will catch up to the opponent and knock them back upwards, allowing them to recover. If this attack is used, any prior blocks will disappear.

Hitboxes: Cane of Somaria (Disjointed), Block (Projectile)

Z: Long Hook

GBC extends his Long Hook in the same way other Links use their Hookshots. This has one very interesting effect besides being a tether recovery. Instead of normal knockback, this will cause GBC and whoever gets hit by the attack to switch places. This tether is very difficult to edgehog because it will cause anyone hit by it to switch places with GBC, leaving him on the ledge and the edgehogger off-stage. The Long Hook does no damage, however.

Throws​

Pummel: Smack

GBC will smack the victim of the grab with the flat of his sword. This only does 1% damage, but can be used a lot.

Up Throw: Seed Satchel

GBC pulls out his Seed Satchel and throws a Gale Seed and an Ember Seed at the opponent. The Gale Seed turns into a tornado and carries the opponent and the Ember Seed upwards about one Ganondorf-height over GBC’s head. While the victim is being carried upwards, the Ember Seed deals 10 hits of 1% damage each. The final hit knocks the opponent upwards (average knockback), after which the seeds disappear. Any character that falls prey to this attack is immune to outside attacks until they have been set free from the tornado created by the Gale Seed.

Back Throw: Bomb

GBC pulls put a bomb, then pushes the opponent behind him and throws the bomb at them. The bomb explodes on impact. This does 10% damage and low knockback. The direction of knockback is straight up.

Forward Throw: Power Glove

GBC sheaths his sword and picks up the victim of the throw (they are carried face-down). As in DK’s F-Throw, GBC is free to carry the victim around for a few seconds (the time increases with damage) before throwing them wherever he pleases. The victim takes 5% damage when they are picked up and an additional 4% when they are thrown. The throw itself has low knockback. During this throw, one might notice that GBC is wearing his Power Glove.

Down Throw: Dig

GBC digs a hole with his shovel, and the victim of the throw takes 4% damage and falls into it. The victim is trapped much like if they were hit by a Pitfall or DK’s Side-B, but they are not trapped for as long.

Specials​

B↓: Oracle Switch

This power will toggle Link’s other Specials and his Final Smash between Oracle of Ages themed set and an Oracle of Seasons themed set. The default set is the Oracle of Ages set. There is no visual cue to indicate a change, but a loud pinging noise instead. Some of the tools in the Oracle of Ages set are in Oracle of Seasons and vice versa, but I felt that they feel more like they’re from the game I put them with.

Oracle of Ages Set

B: Spin Attack

The renowned Spin Attack makes another appearance! Pressing the Special Button once will cause GBC to hold his sword in front of him. The attack takes about 1 second to fully charge (It can only be used at full charge), and GBC’s sword will start to flash Black and White when the attack has reached maximum charge, but GBC does not unleash the attack. While charging and when the attack is fully charged, GBC can move back and forth (GBC does not turn around when moving backwards, and he retains his walking forward animation, giving him the appearance of moonwalking). He can also jump. When the button is pressed again, GBC will unleash the Spin Attack. This hits for 12% damage and above average knockback. This also has transcendent priority.

Hitbox: Sword (Disjointed)

B↑: Moosh’s Flute

GBC pulls out Moosh’s flute and blows a short note on it. If used on the stage, Moosh will float down and land on a random part of the stage. Moosh can be mounted only by GBC, who merely has to touch him to climb on. If used in the air, this will cause GBC to go into helpless and Moosh to swoop in from the bottom of the screen and rescue GBC (This takes a moment, and GBC can drop off the screen before Moosh shows up if he’s not careful. If Moosh is currently sitting on the stage, then the lag will be even greater, as Moosh has to fly over from wherever he is to come to GBC’s aid. This takes a variable amount of time, but the bottom line is that it will take too long to be useful). Moosh’s horizontal movement can be controlled with the analog, and tapping B will cause Moosh to flap his wings and rise a little in the air. Moosh can stay in the air for exactly 5 seconds, after which he will drop like a rock. If GBC is riding Moosh, Moosh can be attacked to raise GBC’s % meter, but all damage is halved and Moosh always has superarmor. There is no hitbox for this attack.

B→: Seed Shooter

GBC pulls out his trusty Seed Shooter and fires one seed randomly. There are five types of seeds, each of which has a different effect. Universal properties will be described first. The direction the seed is fired in can be altered by holding the input and moving the analog around. All seeds will disappear in a puff of smoke after crossing ¾ FD and not hitting a character. All seeds bounce off of walls without damaging them. Now, onto specific seed types:

Scent Seeds are basic seeds that have no special effect. They do 4% damage and low knockback. These seeds constitute 80% of all seeds fired.

Ember Seeds are seeds that burst into a pillar of flame upon striking a target, much like PK Fire. These seeds do 2% on impact, and the pillar of flame that is created has similar properties to the one created by GBC’s B-Air, but hits 5 times at 3% each (15% total). The final hit has low knockback. These seeds make up 11% of all seeds fired.

Gale Seeds turn into a mini-tornado and deal 5% damage when they strike a target. This tornado pulls everyone but GBC towards it with the strength of the wind that sometimes appears on the Pictochat stage. Gale Seeds make up 4% of all seeds fired.

Pegasus Seeds do 6% damage and freeze whoever was hit in place for 1 second. Pegasus Seeds make up 3% of all seeds fired.

Mystery Seeds will randomly perform the effects of any of the other seeds. These seeds make up 2% of all seeds fired.

Oracle of Seasons Set​

B: Biggoron Sword

GBC pulls out a massive sword and performs a single swipe with it. This attack is very slow (just a tad faster than the Falcon Punch), but hits for 18% damage and very high knockback, as well as having very high priority. This is GBC’s best KO move by far.

Hitbox: Biggoron Sword (Disjointed)

B↑: Magnetic Gloves

GBC holds his newly gloved hands over his head and uses the magnetic power of his gloves to draw himself towards the ledge. The connection between his gloves and the ledge is displayed by bright blue beams of light. Anyone who touches these beams will take 5% damage and be knocked upwards. This recovery works within the distance of the main Battlefield platform’s length, but isn’t very effective unless GBC is close by. At the edge of its range, it will merely seem as if GBC is DI’ing towards the ledge, but if GBC is within the distance of two small Battlefield platforms, he will actually be drawn towards the ledge at a good pace. On the stage, the Magnetic gloves will do nothing. GBC has superarmor while using this move off the stage. Who knew those ledges were magnetic?

Hitbox: Beams of Light (Disjointed)

B→: Bombchu

GBC pulls a out a Bombchu and throws it in front of him. It will land about the same spot a Waddle Dee would, and motor across the stage from there. When it hits an opponent or a wall, it will explode, giving 9% damage and low knockback. It will run off the stage if it encounters a ledge.

Hitbox: Explosion (Projectile)

Final Smash

Oracle of Ages Final Smash: Harp of Ages

GBC pulls out his harp and starts strummin’ away and tapping his foot. Opposing players will be seen performing whatever animations they performed after GBC’s last death in reverse, and in the reverse order they performed them in. As time reverses, GBC will be healed all the way back to zero. When the Final Smash ends, GBC has been completely healed, while opponents retain all damage and stock loss. Opposing players will also be left wherever they were when GBC last died.

Oracle of Seasons Final Smash: Rod of Seasons

GBC’s Rod of Seasons appears in his hands. The four seasons will now each take place in a specific order. GBC will be free to move around and attack as he wishes. These changes take place automatically. Any changes described in a season cease to occur at the season’s end. No Smash Balls will appear until the Final Smash is over.

Spring: Abundant plant growth appears no matter what stage you are on. Flowers are present everywhere, and a large tree will grow somewhere on the stage (in the background). This tree bears apples that anyone can eat to restore 3% health apiece. Opponents will have all their attacks’ damage lowered by 25%, rounded down (by this, I mean that attacks that normally do 4% do 3% during spring, not -21%). Knockback is cut in half for all players (including GBC).

After 15 seconds…

Summer: During the summer, the weather is hot and muggy. The fruits have dropped off of the tree, but the plant-life is otherwise the same. A large sun appears in the background to signify the change. All opponents will take damage at the rate of 5% per second. This season lasts 10 seconds, so that’s 50% automatic damage.

After 10 seconds…

Fall: The Plant life dies out and the tree loses its leaves. All players besides GBC get defense nerfed so that they take double damage and knockback.

After 10 seconds…

Winter: The ground is covered with ice, and background elements are covered in a thick layer of snow. A small glacier (Bowser-sized) appears somewhere on the stage, which has the same effects as the IC’s glacier (it’s just as powerful, but smaller). Players besides GBC will slide on the icy ground and the chance of tripping will significantly increase.

After 10 seconds…

The Final Smash is finally over.

Playstyle

GBC is a very versatile character thanks to his many tools. As in the Legend of Zelda games, you must use the right tool in the right situation. As a result, GBC has a lot of good attacks that are very situational and must be used intelligently. He has a few traps that can catch the opponent unawares, but he isn’t really a trap character.

GBC has some KO problems, as he only has two good killers, the Biggoron Sword and his Up-Smash, and both are very slow moves. However, he is a great comboer, and has a powerful (if slow) recovery. Due to this, he can struggle against small characters with KO power because he can’t combo them as well and they can probably KO him first. As a result, he is NOT the Meta Knight counter the community is looking for. However, he shuts down projectile specialists fairly well thanks to his cane, shield, and bombchus. He performs fairly average versus heavy-weights (he can combo the crap out of them, but they only have to hit him a couple times to finish them off). Vs. the traditional damage racker that can’t KO, his performance is comparable.

Taunts/Victory Poses​

Up Taunt: GBC plays a tune on his harp briefly.

Side Taunt: GBC does a Goron Dance! (B, A, B, A)

Down Taunt: GBC stretches his arms and yawns.

Win Pose 1: GBC appears with Nayru on the win screen. She is playing on her harp while he sits on a rock and listens. How romantic.

Win Pose 2: GBC appears with Din on the Win screen. The two are dancing as in the Oracle of Seasons Opening. They end with a flourish and hold their pose.

Win Pose 3: GBC appears alone. He swipes his sword in the air a few times, and then puts it away.

Loss Pose: GBC claps good-naturedly for the winner. He’s a good sport.

Miscellaneous Info

Entrance:
GBC warps onto the stage in time-warp style. (Couldn't find a picture, am incapable of describing)

Color Changes:
Color……………………Appearance
Green……………………Default
Blue……………………….Blue Shirt/Hat, Browner Hair
Red………………………..Red Shirt/Hat
White…………………….White Shirt/Hat, White Boots
Black……………………..Black Shirt/Hat, Grey Leggings, Black Boots, Black Hair
Light Green…………..In-game colors (Light Green clothing, Black Hair, Pale Skin

Kirby Hat: Link’s Hat

After copying GBC, Kirby gets to wear Link’s hat and gains either Biggoron Sword or Spin Attack (50% chance of either)

Crowd Chant:

The crowd starts chanting “Link Link Link Link, Link Link Link Link, Link Link Link Link Link Link!”

Music:

These games had such an awesome selection of music that it was hard to pick just a few. Here are some memorable ones.

Intro
Evil Spreads
Here Comes Maple!
Din’s Dance
Nayru’s Song
Overworld Theme

Snake Codec Conversation
Snake: Mei-Ling! Link took his clothes off!

Mei-Ling: !

Snake: Sorry. What I meant to say was “Mei-Ling! Why am I fighting another Link?”

Mei-Ling:…

Snake: I just got confused for a minute, okay?

Mei-Ling: O…okay Snake. Whatever you say. You’re fighting another reincarnation of Link. It’s a different person with the same spirit.

Snake: And the same name, and clothes, and some of the same gear.

Mei-Ling: Just be careful not to confuse him with the other Links. His fighting style isn’t even similar.

Snake: Alright, thanks for the advice.

Stage​

Maku Tree

This stage starts off with a fight in front of the Maku Tree. This is a walk-off stage with no hazards. After 10 seconds, the view rotates 90 degrees to the right, and starts to pan right. Fighters are forced to climb into the Maku tree and move towards the stairs at a slow pace. After being in this perspective for 8 seconds, the fighters will have to enter a stairwell leading up the inside of the Maku Tree (Not visible in picture). The camera will climb, forcing the combatants up the stairs. After 10 seconds, the top of the stairwell is reached. At the top, the foliage forms a stage about the size of the Online Waiting Room. The fight remains here for the rest of the battle.

Assist Trophies​

Nayru


Nayru is the Oracle of Ages and is named for the Goddess of Wisdom. When Nayru is summoned from an Assist Trophy, she pulls out her Harp of Ages and start to play. Nayru’s Song (See: Music Section) will play as she does this. The effect of this is that all characters (except for the summoner) will repeat everything they did in the last 15 seconds backwards at half speed. All fighters retain all damage they had before Nayru was summoned (you don’t get un-KO’d or un-damaged) If someone was KO’d in the last 15 seconds, they do not receive an extra stock, but go through the animation backwards regardless. While they’re busy moving around backwards, the summoner is free to pummel the crap out of them. They won’t take any knockback, but continue on their backwards adventures.

Din


Din is the Oracle of Seasons, and is named for the Goddess of Power. When Din emerges from an Assist Trophy, she will start to dance in the center of the stage. Anyone who runs into her takes 15% damage and average knockback. Meanwhile, the stage will undergo one of the four seasons from GBC’s Final Smash randomly. The season will last for 15 seconds, and the summoner is immune to all effects. After Din leaves the stage, any scenery will remain the same, but status effects will no longer take place.
 

Wizzerd

Smash Ace
Joined
Feb 24, 2009
Messages
929
Gameboy Color Link: I have to say, you have a fun little moveset going here, especially since it's only your second moveset! This is above par as for newcomer sets, having some interesting moves (I liked the ones involving the Cane of Somaria) and pretty good playstyle and balance (though the statistics scared me for a bit, his only real con is power, lol). However, I think you can improve on some things. A few moves like the nair feel unoriginal. You might need more detail as well. It also seemed a bit awkward to say things like A (arrow) instead of writing out Up Tilt. Still, this was a fun excursion, and I'd like to see more from you.
 

Agi

Smash Lord
Joined
Jul 27, 2008
Messages
1,120
Location
SE Washington
««««««Kangaskhan»»»»»»

Also the first set I read this contest... well, the first one I read without reviewing in mind. Anyways, Kansaskhan was a great set. Tons of risk-reward factor throughout the whole set, with the Rage and Separation mechanics. I did think it was strange, how for being such a "caring parent" she relied on using her own child as a weapon.
 

n88

Smash Lord
Joined
Oct 10, 2008
Messages
1,530
Gameboy Color Link: I have to say, you have a fun little moveset going here, especially since it's only your second moveset! This is above par as for newcomer sets, having some interesting moves (I liked the ones involving the Cane of Somaria) and pretty good playstyle and balance (though the statistics scared me for a bit, his only real con is power, lol). However, I think you can improve on some things. A few moves like the nair feel unoriginal. You might need more detail as well. It also seemed a bit awkward to say things like A (arrow) instead of writing out Up Tilt. Still, this was a fun excursion, and I'd like to see more from you.
Yeah, there are a few attacks I knew were kinda generic as I was making them (Specifically, the nair and some other sword attacks), but I thought they went well with the set and made sense, so I kept 'em anyway. Thanks for the feedback!

GBC Link was very good and I see you like the word disjointed. ONe question I would like anserwd is at about what damage does the Biggoron Sword KO a character like Mario at?
I LOVE the word Disjointed. I prefer the word dislodged, but that word doesn't come up as much when talking about movesets. I wqas thinking that the Biggoron Sword would KO our average character (Mario) in the mid-90's (with no DI). Again, thanks for the feed back. I'll be updating with more details sometime in the next week, so any other questions might be answered then.
 

MasterWarlord

Smash Champion
Joined
Aug 24, 2008
Messages
2,902
Location
Not wasting countless hours on a 10 man community
LUDICOLO


BACKGROUND

Ludicolo debuted in the 3rd generation of Pokemon. Ludicolo loves to dance, and both of his abilities, Rain Dish and Swift Swim, make him more powerful in the rain. Because of this, Ludicolo is by far most commonly used on Rain Dance teams in competitive play in Pokemon, which is actually surprisingly fitting to the Pokemon’s character. Ludicolo always seems to be quite happy, though he’s at his peak when on the dance floor.

Several music pieces you might like to listen to as you read through:


Miror B.’s Theme (Colosseum) (Pokemon)
Miror B.’s Theme (XD) (Pokemon)
Bramble Blast (Donkey Kong)
Disco Train (Donkey Kong)
Garnet Sky (Street Fighter)
Chun Nan (Day) (Sonic)
E 101-Beta (Sonic)
Elite Four (3rd Generation) (Pokemon)
Wallace’s Theme (Pokemon)
Rayquaza’s Theme (Pokemon)


STATS

STAT
CHARACTER COMPARISON
OVERALL RANKING
AERIAL MOVEMENT
:wario: X 1.2
11/10
ATTACK SPEED
:metaknight: X 0.9
9/10
MOVEMENT
:pikachu2:
7/10
RECOVERY
:dedede:
7/10
JUMPS
:falco:
6.5/10
SIZE
:wario:
6/10
WEIGHT
:mario2:
5/10
TRACTION
:mario2:
5/10
PROJECTILE RANGE
:dedede:
4.5/10
FALLING SPEED
:wario:
3/10
POWER
:sonic:
2.5/10
PRIORITY
:falcon:
2.5/10
MELEE RANGE
:wario:
2.5/10


TILTS

Forward/Back Tilt – Cha Cha Swing
Ludicolo turns himself sideways and points in the direction you tilted while letting out a big stupid grin. This does 6% and trips foes and bad priority, but comes out lightning quick with below average range.

Up Tilt – Raspberry Headbang
Ludicolo headbangs three times for this move. If you hold A down for this move, he’ll do it slower, though if you mash A while performing this move he’ll do it faster. Either way, it’s already below average lag if you don’t do anything, and the laggiest it can get is average. Each headbang does 4% with horrendous vertical knockback and terrible priority. While this doesn’t keep foes in for multiple hits, if you do it fast enough you can get them all in before the foe is knocked away.

Down Tilt – Twist
Ludicolo smiles stupidly again as he turns to face the camera and points down to the floor on either side of himself, impaling the ground with his hands. This has little start-up lag as usual. After this, you can press A again (Like Snake’s ftilt) to start spinning around, which Ludicolo will do for as long as you hold A.

The hitbox for this move is Ludicolo’s hands, which are incredibly tiny and bad priority hitboxes. They only do
2% and weak knockback on contact, making the attack rather useless. . .But if used on a tripped foe (Combo this from the ftilt!) or one knocked down, Ludicolo’s hands become grab hitboxes that cause the foe to spin around with him, being pinned down to the ground by his hand as he spins about and taking 2% per every half second.

Foes can try to DI out of this while they’re on the ground, but Ludicolo can use a sort of DI to move his fingers as well to try to keep them over top of his foes. The foe can DI about much faster though, so Ludicolo will need to mindgame the foe with it to keep them down for long.


RAIN DANCING

Yes, there’s an actual reason those three tilts came first and a justification for them sucking so much. You see, if Ludicolo uses these moves in time to the music of the stage, rain will begin to pour down onto the stage, causing water to rise from the bottom of the screen ever so slowly.

Getting a major beat right with your ftilt/btilt raises the water up Ganondorf’s height, and if you quickly use the opposite tilt immediately after, it’ll go up Mario’s height afterwards. When using your utilt, you must match the tempo of how quickly you use the move to the tempo of the music. If you’re currently in the correct tempo, it’ll raise at a rate of 1.5 Ganondorf’s height per second, but if you’re not it’ll only go Kirby’s height per second. As for the dtilt, so long as you keep spinning around the water will go up Mario’s height per second. While it wouldn’t take all that long to get the stage completely enveloped in water,
the water level steadily goes down the distance of Kirby’s height over every 2 seconds. . .

So what exactly does this water do?
When underwater, both foes and Ludicolo have 4 extra “mid-air jumps” after their default ones about as good as Dedede’s where they’ll swim upwards. In addition, fire attacks near useless and all electric attacks creating hitboxes across the entire screen that does 3% and no flinch due to the water conducting the electricity.

So how does it benefit Ludicolo specifically? When Ludicolo is underwater, several of his moves gain additional properties, and his aerials all become nearly lagless and help Ludicolo recover in a fashion much like Wario-Man, as his aerials will cause him to swim about through the water. In addition,
when underwater, Ludicolo regains 1% every other second.

. . .Dancing to the beat of the music? Good god. That sounds like a nightmare to program, what with how many godd*amn tracks there are. . .How is this accomplished? When Ludicolo is on-stage, he has music that automatically overrides the default music of the stage. What music is it? None other than the tracks linked at the start of the moveset. In addition to stages in the my music section, you can set which of Ludicolo’s tracks are more likely to play when he’s in a battle. Besides, would you really want the foe to counterpick Distant Planet just so they could make the music track Environmental Noises? While having only 10 tracks to play as with Ludicolo may seem annoying, Ludicolo’s music selection is far better then that of most stages and isn’t low in quantity either.


SPECIALS

Neutral Special – Leech Seed
Ludicolo spits a seed forward from his oversized gullet with below average lag, it traveling the distance of 1.5 Battlefield platforms at the rate of Falco’s laser. If the seed connects with a foe, it’ll leech onto them (shocker!). The seed deals 1% to the foe and heals Ludicolo of 1% per second, but can easily be destroyed just like Pikmin. If not destroyed, the seeds last forever, and you can stack them as much as you like.

Considering the foes can so easily dispatch of the seeds, they’re generally not worth the trouble. . .But if you have 3 or more seeds on the foe (Not all that hard seeing how spammable the attack is) then use a water move on the foe,
the seeds will mature into saplings and constrict the foe from doing much of anything at all (Although you WON'T get healing from this variant of the move). The foes will be caught by all the saplings until they struggle out of it with grab difficulty, more seeds increasing the difficulty of escape. If the foe is underwater when you spit the seeds at them, they’ll mature into the saplings upon contact with the foe after 3 seconds.

Side Special – Hydro Pump
Ludicolo opens his mouth even wider then his other moves to the point of it covering nearly his entire body, then constantly begins pumping out water. This has above average starting lag (As much as it takes to charge FLUDD), and what comes out is essentially FLUDD. However; if you’re underwater, Ludicolo will constantly spew out a stream of water and is able to move about and jump as he does so at his normal speed. The water here is 1.5X as powerful as FLUDD. . .But while pumping out your water, you’ll be using up your water supply as the water level goes down at the rate of Ganondorf’s height per second.

Up Special – Water Spout
Some water the width of Ludicolo appears underneath Ludicolo and pushes him upward. The water deals 5 hits of 1% and flinching per second while foes make contact with it it and is disjointed, though the water doesn’t last long enough to get more then 8% or so out of it. The amount Ludicolo gets pushed up by the water depends on his percentage, the less damage he has, the higher he goes up. At 0%, it goes double Sonic’s spring jump, while the distance keeps getting halved for every 30% Ludicolo takes. No matter how high he goes, Ludicolo can still use attacks after coming out of the move, but can’t use his up special again until touching ground. This essentially makes Ludicolo’s recovery when he actually needs to recover suck when he’s out of the water, but if nothing else it prevents him from being gimped early on. Below average starting lag, no ending lag.

If Ludicolo is on the ground when he uses this move, the water won’t push him up and isn’t a hitbox, simply creating a geyser out of the ground that seems to serve little to no purpose.
If Ludicolo stands over the water spout and uses his side special, though, he’ll be able to use it as if he was underwater, though he has to continue to stand on the spot the geyser is in order to be able to keep pumping. The water spout vanishes after 30 seconds at 0% and the duration keeps getting cut in half for every 30% Ludicolo has. Only one water spout can be out at a time, and using it as a recovery will destroy any grounded ones. Average lag on both ends.

Down Special – Ice Beam
Ludicolo shoots forward a beam of ice from himself with average starting lag the distance of half a Battlefield platform with low end lag. The ice is of course disjointed and deals 10% with average knockback that kills at, say, 250%, being rather impractical for KOing. If you use ice beam on a water spout from your up special, though, it’ll freeze in place and become a solid wall. While it only has 15 stamina, it’s a decent way to buy yourself some time to dance as foes have to jump over it or destroy it to get you.

If used in the air, all the properties of the move stay the same, but Ludicolo aims the ice beam straight downwards and his fall speed is cut in half as he performs the move. This doesn’t turn the move into a spike or anything, meaning this isn’t all that great for gimping. . .
But if you use the ice beam just above some water, it’ll freeze over and become solid. This ice can’t be broken through, but only lasts 4 seconds. If you hold B after turning the water directly under you into ice, Ludicolo will be pushed up by the force of his own ice beam as he continues to spray out the ice beam, the ice spreading out in both directions at the rate of a Battlefield platform a second. If the water is at a level to be just below the ledge, you can use this on a foe that’s recovering to trap them under the ice and gimp them.

STANDARDS

Standard Attack - Absorb
Ludicolo opens his mouth up wide like he does in several moves, but it’s even more exaggerated then usual in a fashion like Wario’s neutral B. The first part of this move is nearly identical to Wario’s neutral B, though once Ludicolo chomps down on a foe he’ll only deal half the damage. However; in return, Ludicolo heals as much damage as he deals to the foe. Unlike Wario’s neutral B, Ludicolo isn’t magically able to shrink foes larger then himself to get them to fit into his mouth, this move simply turning into a low priority hitbox that does 5% and terrible knockback against them.

If you use this over a water spout from your up special, Ludicolo will suck up the water from the spout for half a second and look rather bloated. While this will destroy your water spout,
it doubles Ludicolo’s weight. While the massive weight boost is welcome, this sadly cuts Ludicolo’s movement, aerial movement, jumps, and the speed he moves at in his fair (When underwater) in half. If you’re underwater when you use this move, the game will act as if you did it next to a water spout. Also, if you use your side special, the starting lag will be negated, though this will use up the water inside Ludicolo.

While this may seem broken at first, seeing Ludicolo will die the moment he’s off stage at a high percentage if there’s no water the weight will do little to help him survive, and at low percents it just makes Ludicolo combo fodder. While this can be of some help underwater when you have an essentially infinite recovery, it severely limits your aerial game, the main reason for getting all the water in the first place.


Dashing Attack - Clumsiness
This attack does indeed cause Ludicolo to stop dashing like the dash attacks present in Brawl. . .and puts him into his tripped state. Ludicolo is a terrible priority hitbox as he falls that deals 6% and non existent knockback, though the attack does happen fast. While the attack is laughably bad in general, the main reason you’ll use is to use your tripped attack.

SMASHES

Forward Smash – Razor Leaf
Ludicolo shoots forward two razor sharp disjointed leaves at the same time with little lag on either end. The first of the two leaves always goes forward the distance of a battlefield platform, but how far the second leaf goes is based on charge time. At no charge, it’ll just go barely in front of Ludicolo, while at full charge it’ll go double the length of a Battlefield platform. No matter how much you charge, the leaves will vanish upon hitting the ground, and both deal 3% and weak set knockback forwards.

If you charge the smash halfway (There’s a good bit of leeway, the timing is forgiving), then the two leaves will be shot forwards the same distance and collide with each other,
causing them to both go forwards the same distance again. But of course, the set knockback the leaves give is exactly how far they jump forwards after colliding (Half a Battlefield platform), and the leaves will keep repeating this until going off the edge of the screen. This is a potentially amazing damage racker, but foes will be able to DI out of it after 5 or 6 hits, based on their size. Only one set of leaves can be out at a time.

If you use this over water, then you can be much more careless with this attack, as the leaves will skip off the top of the water like skipping stones. You can make the leaves leap frog over each other if you fully charge the smash, making two very annoying hitboxes to get around. While the low lag may make this move sound very appealing, keep in mind that you have to halfway charge the attack or use it on top of (not under) water, or else it’s horrendous.


Up Smash – Rain Dish
A rain cloud the size of Bowser appears triple Ganondorf’s height above Ludicolo and proceeds to rain down on him with very starting little lag. The move has a duration around that of Bowser’s dsmash, and the water deals 15-24 hits of 1% and flinching based on charge, the last hit doing very weak knockback. Little end lag.

If less then half of the hits connect, Ludicolo’s rain dish on top of his head will become filled up and he’ll start healing 1% every other second as the dish on top of his head is filled with water (This doesn’t stack if he’s underwater). If he’s hit by any attacks that do more then flinch him, though, the water will be knocked out of his dish, and if foes attack the rain cloud with anything other then a projectile it’ll vanish and Ludicolo will get horrible ending lag.

If you use your ftilt/btilt with rain in your dish,
it’ll be flung forward with identical properties to FLUDD. This is decent to get you some spacing while raising the water level at the same time, if done properly.

If used underwater, Ludicolo won’t stand by and let the rain fall in his dish, seeing he has no need to, and the move has average start lag. Instead, so long as the rain cloud remains underwater,
the water level will automatically raise up at half the rate it automatically goes down, and the cloud never expires. However; it can still be destroyed by any melee attack, so you can’t rely on it all that much. Rain clouds slowly rise up at a rate of Ganondorf’s height per second, going through all obstacles and vanishing when they get above water, so you can’t rely on these too heavily to keep up the water level. You can only have one of these clouds at a time and this has average lag.

Down Smash - Breakdance
The animation, lag, duration, and priority of this move are all identical to Wario’s dsmash. While Wario’s dsmash is far from an ideal move, Ludicolo does multiple hits throughout the duration of the attack, 20-30 hits of 1% and flinching based on charge to be precise, the last hit doing below average knockback that won’t realistically kill anything. While this move has surprisingly powerful damage racking capabilities, it’s easy to DI out of and the long duration and bad priority make this punishable.

This move can be used for rain-dancing like your tilts. While the lag makes it a riskier option, if you use it during a series of big beats the water level will rise double Ganondorf’s height. It doesn’t have to be exact, you’ll get a slight consolation prize based on how much of the dsmash is during one of these beat series, and no matter what the water level will always rise at least Wario’s height.

The fact that water will constantly spray out of Ludicolo’s rain dish as he breakdances if he had some from his usmash can make this move significantly easier to pull off as it pushes foes away from you. While it only reaches out Ludicolo’s width on either side, it constantly keeps coming out for the duration of the move, though this of course uses up the water in his rain dish.

AERIALS

Neutral Aerial - Whirlpool
Ludicolo spins around rapidly for as long as you mash A in a fashion like a everlasting neutral A combo. As Ludicolo spins about, he’s a horrendously bad priority hitbox that deals
4 hits of 1% and flinching per second. While this has nearly no lag whatsoever, it’s horrendous priority can’t interrupt much of anything or get foes out of your face.

When used underwater, a whirlpool forms around Ludicolo that’s nearly identical in size to Mach Tornado. This boosts up the damage to 6 hits per second and naturally gives a big buff to the priority, though not nearly as absurdly good as the move it resembles, still able to be beaten by attack of decent power. While the attack is near impossible to DI out of like Mach Tornado, the attack will only continue so long as you continue to rapidly tap A, which causes you to rise like Mach Tornado (Making this a good underwater recovery). If you go over the water while in the whirlpool, it’ll vanish, and you’ll just transition into the normal generic nair.

After you’re done tapping A, Ludicolo will shoot the whirlpool out in one of the four basic directions at the speed of Bowser’s dash based on what you input with above average lag, randomly if you input nothing. The whirlpool travels the distance of half Battlefield before dispersing, and of course disperses instantly if the water level lowers below it. If any foes get caught in the whirlpool as it gets sent away, they’ll be sucked in with grab priority then shot out the bottom of it with 15% and a spike the power of Rob’s dair. This can be air dodged through and is quite predictable, but is one of Ludicolo’s potential KO options.

Forward Aerial – Swift Swim
If this is used above water, Ludicolo simply does a single swimming motion in mid-air, dealing 5% and terrible knockback with pathetic priority, his body as the hitbox ever so briefly. This has non existent lag.

If used underwater, though, Ludicolo starts swimming about until you release A,
Ludicolo controlling just like how you control gliding, but with much better handling. You can easily perform loop de loops and whatever else suits your fancy. There’s no limit to how much you can use this unless you go above the water level, but this has no hitbox at all. You can go in and out of swift swim with little to no lag.

Back Aerial – Vine Whip
A pair of vines come out of the fur in Ludicolo’s back, reaching out behind him the distance of Wario’s width. This has average start lag, though very little ending lag if whiffed and the vines go back into Ludicolo’s fur. The end of the vines are a grab hitbox, and if the foe is grabbed, Ludicolo doesn’t simply throw them (Using the bair with a foe in your grasp just lets them go) or go down for a suicide KO, but instead keeps the foe bound behind himself, unable to move. . Foes can button mash out with regular grab difficulty and won’t take any damage from this, and there’s not much you can do to hit foes when they’re bound behind yourself, though this of course gives you plenty of time for rain dancing or lets you get some free healing.

While the obvious use of this is for suicide KOing and buying time, there is still one move you can hit foes with while they’re bound to you.
If you use your dsmash, foes will take all the damage as they’re grinded against the ground and Ludicolo, preventing foes from avoiding the powerful damage racker, although foes can still button mash out of the grab while the dsmash is performed.

If used underwater, the water makes the vines mature to make them reach out an entire Battlefield platform behind Ludicolo
, though it increases the end lag if the move is whiffed. Still, with all the added range and the fact you’re underwater, you can swift swim over to the edge of the screen, then turn around so the foe goes off the blast zone. Whether underwater or on land, this can also be used as a tether.

Up Aerial – Aqua Ring
Ludicolo turns to face the screen and sweeps his arm in a circle motion with one arm over his head. No lag, terrible range and priority, 5% and terrible knockback. If used underwater, the hitbox on Ludicolo’s hand is removed, but he crease a aqua ring above himself, vertically tiny but as wide as Bowser. The ring lasts 10 seconds or until the water level rises below it, and you can only have one at a time.

No, this isn’t a trap, and characters can go right through it with no problem.
If Ludicolo swims through the ring, though, he’ll heal 1%. If you use your fair to swift swim and go up through the hoop with it then continue to hold up, you’ll be able to constantly do loop de loops into the ring, healing 1% a second in addition to the 1% every other second you heal by being underwater.

However; there’s a catch.
Foes can get the same effect by going through the aqua ring, so you’ll generally want to hide under the stage while you use swift swim to keep going through your aqua ring. While hiding outside of the range of foes and healing yourself may seem quite broken, if you choose to do this there’s not much you’ll be able to do about keeping the water level up, so you can’t do this for long.

After the aqua ring’s 10 seconds are up, it’ll suddenly close in on itself.
If anybody is inside the ring as it does this, they’ll be constricted by the ring as it tries to shift out of existence, squeezing the life out of them. This prevents foes from doing anything outside moving and jumping until they button mash out with grab difficulty. The easiest way to make use of this is to grab a foe with Vine Whip, swim through the ring just before it’s about to expire, then let the aqua ring close on the foe as they pass after you.

Down Aerial - Surf
Ludicolo puts his hands against himself and raises them up high as he opens up his mouth wide, then starting falling downwards at the rate of Toon Link’s dair with no starting or ending lag whatsoever. Unlike most fast falls, Ludicolo only deals 6% and below average knockback to anybody he comes into contact with, continues to fall even if he hits someone, can’t sweetspot ledges with the move, and has horrible priority, thus this has no redeeming properties.

This has no additional effect if used underwater, but if you start this above the water and then land on it, the move finally starts to serve a purpose as Ludicolo’s downward momentum instantly stops and he
starts surfing on top of the water. He goes forward at the rate of Mario’s dash, continuing to do so long as you hold A, and is able to turn around as he surfs by pressing left/right. As he surfs, a tidal wave rises up under him, raising up Ganondorf’s height every second to elevate Ludicolo farther up above the water.

Upon releasing A, Ludicolo will jump off the wave, still able to use his second jump and up special, and the
tidal wave that he was surfing on will crash down in the direction it was currently going and spike foes for a very impressive 20% and a spike slightly more powerful then even Ganondorf’s dair. This has below average lag and the wave is obviously disjointed, but the wave won’t be tall enough to all that much range when it crashes unless you surf on it for a good bit. This is one of Ludicolo’s primary KO options and a great way to finish off the foe after you’ve hydro pumped them off the stage, but if the water level is too high then you won’t be able to touch them, and if the water level’s too low there’s not much that can be done either unless you’ve gotten the wave incredibly high.

THROWS

Grab - Normal
Nothing to see here. Ludicolo reaches forward with both of his tiny arms for microscopic range, though it is pretty fast.

Pummel – Seed Bomb
Ludicolo spits a seed at the foe that latches onto them, seemingly doing no damage, but after 2 seconds pass, it explodes and deals 3%. While this is pretty fast, once the bomb explodes it’ll knock the foe out of your grab, even if you were performing a throw. You can use this to buff up some of Ludicolo’s pitifully weak throws, as some are fast enough to be done before a seed bomb explodes.

Forward Throw – Focus Punch
Ludicolo reaches back to prepare for a punch as he utters a cry, having as much starting lag as Warlock Punch. Foes can still escape while Ludicolo is performing the wind up, meaning he’d probably never pull this off. . .If not for his pummel. The seed bombs won’t knock foes out of the grab when Ludicolo is performing focus punch,. When foes are in the hitstun of the seed bombs, button mashing won’t help them, greatly helping you in actually landing this at higher percents. Should the focus punch actually connect, it deals 10% with knockback that kills at 165%. While the damage for the throw is indeed rather low, you have to keep in mind that you can buff it up with two or three seed bombs. While this won’t KO all that early, it’s Ludicolo’s only method for scoring more traditional KOs.

Back Throw – Ice Punch
Ludicolo generically turns around with the foe still in his grasp and punches them for 5% and nearly no knockback. Where’s the ice part of ice punch? Well, if you stand on top of some frozen water from Ice Beam, then Ludicolo’s fist will become engulfed in ice as he punches and the attack gets buffed to 12% with knockback that kills at 175%. Nice.

Up Throw - Mist
Ludicolo extends up one of his hands to the sky as he lets out a cry, then two small mists come down, one around Ludicolo and another around his foe. The throw ends after this, but the mists continue to circle around both Ludicolo and the foe for 10 seconds after this. They start their rotation at the top of the foe and slowly go down. While they’re quite small, they can potentially block attacks from foes or block your own attacks. Basically, when the mists are up not much fighting will be able to get done, which is great for the early game. No damage, but you can manage to tack 6% on with seed bomb if it comforts you.

Down Throw – Grass Knot
Ludicolo gets himself inbetween the foe and the camera as some tying noises are heard, then gets out of the way to reveal that the foe is now tied down to the stage by some grass roots. While they can still do whatever while bound down to the stage, they can’t move or jump until they use dsmashes/dtilts to destroy the grass knots binding them down, which have 20 stamina. If created underwater, the grass knots mature to have 30 stamina. This of course is good for buying some time early game which Ludicolo so desperately needs. On the downside, this does no damage at all and you can’t knock them away from their roots, them staying firmly in place, and if you try to tack some damage on with seed bomb you’ll knock them out from the roots.

FINAL SMASH - FLOOD

Ludicolo turns to face the screen and claps as the screen zooms in on him, letting out a loud cry, then the entire stage becomes flooded with water for 15 seconds. . . .Oh great. Another fascinating mechanic booster. I can hear Junahu whining already.

While this is of course a welcome bonus for Ludicolo in and of itself, it’s not exactly devastating, considering the water is up too high for him to use his moves that interact with the top of it (Fsmash, dair, and down special). However; once the stage is turned into a sea,
other various wild water Pokemon will start coming from the sides of the screen to attack foes, all of which Ludicolo is immune to. Below are the various Pokemon that can show up, and they’re all invulnerable.

Goldeen

Finally! Now that Goldeen’s in actual water she can finally be put to some use! Finally, vengeance!. . .Or not, seeing Goldeen (Same size as her pokeball form) is still far from powerful, swimming in from the edge of the screen and swimming off towards the other end. Contact with Goldeen does 5% and weak knockback, but they fly across the screen at the rate of Sonic’s dash, and one of them spawns every 2 seconds. These are good distractions to the actual threats.

Tentacool

Tentacool’s main body is the size of Jigglypuff, but his tentacles extend down Marth’s height from him. Tentacools come in from either the top or bottom of the screen at random and head for the opposite direction at the speed of Ganon’s walk, moving quite slowly, though they’ll go after anybody who comes within half a Negative Zone’s radius of him at the speed of Mario’s dash. If foes get out of his range, he’ll just continue on his way to the opposite side. If he actually gets within melee range of a foe, though, he’ll use poison sting, which posions the foe with 1% damage per second for 30 seconds. Quite a nasty damage racker that can burn on after the final smash is over, although these only spawn every 3 seconds.

Cloyster

Cloysters are the size of Bowser and behave nearly identical to Tentacools, but spawn every 4 seconds and move twice as slowly. If they touch someone, though, they’ll explode, doing knockback and damage on the level of a bob-omb. These are the main devices you’ll be using for KOing, but seeing only 3 of them will show over the duration of the final smash and how they move so slowly, you’ll have to bump foes into them to get any use out of them.

Clamperl

Halfway through the final smash, a Clamperl (DK’s width but only Kirby’s height) drops like a rock (Rate of Bowser’s down special) from the top of the screen and lands on a random part of the stage (Though it will land on solid ground). Clamperl is a hitbox as he falls that spikes at the power of Ganondorf’s dair and does 20%.

Once he lands, Clamperl will open up and have several pearls around his main head.
Anybody can go up to Clamperl and press A rapidly to take the pearls like how they’d eat food, and there’s enough pearls to heal up to 25%. While foes are perfectly able to take the pearls, they’ll be more then occupied with all the hazards and Ludicolo is far faster underwater anyway, so this shouldn’t be a problem.

Magikarp

A Magikarp comes in from the side of the screen just like Goldeen at the very start of the final smash, being roughly Wario’s size. This Magikarp travels at a speed so that it’ll swim off the other side of the screen once the final smash is over, varying from stage to stage. Magikarp does absolutely nothing under normal circumstances, but if attacked, it’ll evolve into the almighty Gyarados. To get your foe to actually hit Magikarp, you’ll have to stay alongside it and try to bait your foe into attacking you, then watch the chaos unfold as you use the poor Magikarp as a meat shield. . .

Gyarados

Gyarados is massive, having the length of Battlefield, and his head alone being the size of Bowser, but he won’t get in the way due to swimming into to the center of the stage and going into the background once summoned very quickly. Once there, Gyarados roars and performs Hyper Beam, which functions just like Lucario’s final smash, Gyarados aiming after the foe who attacked him in Magikarp form. While this could be considered insane in combination with all the rest of the final smash going on, you only have 15 seconds to get Magikarp to evolve, and even after then there’s some lag before Gyarados actually performs Hyper Beam.

After the final smash is complete, the water drains down at a rate of triple Ganondorf’s height per second to the level it was before the final smash started. All Pokemon from the final smash currently on the stage vanish,
with the exception of Cloysters, who will explode.

SITUATIONALS

Ledge Attack – Fake Out
Ludicolo goes to leap up onto the edge with average lag, turning into a bad priority hitbox that does 5% and terrible knockback. However; if you hold down A, Ludicolo will get ready to jump, but then will go back to hanging on the ledge. The start-up is when he has most of his invincibility frames, so you can abuse the fake out property of this to edgehog and plank, though there are still some frames where you’re vulnerable, of course. Once over 100%, though, you lose the ability to fake out with the move and it becomes among the worst ledge attacks in the game.

Rising Attack – Flail
Ludicolo rapidly flails about on the ground in an insanely spammable attack that doesn’t make him rise. His body is a terrible priority hitbox that does 2% and very weak upward knockback.

If used underwater, Ludicolo will rise up Mario’s height when performing this attack.
He can perform additional rising attacks by continuing to press A rapidly, only going into a normal state once he stops tapping. The thing about this attack is that Ludicolo rises up around the amount a foe will be knocked up from the attack, meaning Ludicolo can keep pressing A to combo this in mass until he reaches the top of the water level.

Tripped Attack – Hat Trick
Ludicolo gets up quickly and leans down so that his rain dish is covering him from view of the camera, then rapidly spins it around with little lag on both ends. The rain dish is a bad priority hitbox that does 15 hits of 1% and flinching. While this does surprisingly good damage, if you’re out prioritized during this attack you’ll be unable to hold any water in your rain dish for 20 seconds, the water simply sloshing out when Ludicolo tries to catch it with his usmash as he lets out a pained cry.

OVERALL PLAYSTYLE

Early on in the match, you’ll obviously want to focus on your rain dancing to dominate later on in your stock. Of course, this is the time when you’re most vulnerable, so you’ll want to get out of this phase as soon as possible. While you’re as speedy as ever, you have essentially no methods of KOing, and your range and priority are easily eaten through.

Of course, your foe is no fool, they’ll realize how vulnerable you are during this time and do their best to prevent you from dancing. However;
you have plenty of methods to buy yourself some time to get up the rain level. Hide behind a frozen water spout, bind the foe to the ground with Grass Knot, create barriers between both you and the foe with Mist, stand over a water spout and hydro pump the foe away, whatever. In addition, it’s not like you’re entirely helpless while dancing either, seeing the moves can still damage. If you try to actually hit the foe with the dance moves, things will be made a lot easier for you, but then you probably won’t be able to get into the beat as well. A particularly nice method in the early-game though is to bind your foe to yourself with Vine Whip, then breakdance to make them suffer some punishment while getting the rain to rise.

You shouldn’t be all that worried about damaging the foe, seeing your KO methods revolve in “gimping” them off the stage once it’s covered in water, which don’t rely on percentage all that much. Instead, try to focus on keeping your own percentage low with Leech Seed and keeping rain in your dish. Absorb is also another nice option in the early game.

Once the rain starts coming up, don’t stop your dancing routine until it’s up really high. You want as much time as you can to play underwater, and while some moves prefer to have the water level lower you can make use of them later once the water comes back down again. Once you’re satisfied with the water level, it’s finally time to party.

The most obvious thing to do is to abuse Hydro Pump to all hell here, but foes will be able to fight against it and will be unlikely to be KOd by it alone. Instead, disable the foe with mass Leech Seeds to prevent them from resisting,
THEN Hydro Pump to your heart’s content. Other options include your nair which you can use for damage racking if you really need it, as well as shooting the tornado away for a potential gimp kill. If you’re worried about your percentage getting in the way of things once the water goes down, start healing in an Aqua Ring. Try to create it where a foe can easily get to it to bait them into it, then trap them inside it (Possibly by dragging them into it with Vine Whip) and Hydro Pump ‘em away.

Once the water level starts going down from it’s previously high level, you still have a chance to go out with a bang before it’s gone for good. When the water gets to just above the stage, quickly start creating a tidal wave with Surf, then crash it down on the foe just before the water level gets too low. When the water gets below the ledge, you can casually poke the foe off under the ledge then trap them down there with Ice Beam for a watery grave. Hell, you could potentially even KO with razor leaf what with the set knockback in a manner like how chain grabs KO off walk offs, but that’ll only work if the foe is already a good way towards the edge of the screen when they fall into it.

When practicing Ludicolo, you’ll generally want to choose your favorite of his available songs and stick with it as you learn when to use which moves for maximum rain fall. The Miror B. assist trophy can help greatly in this endeavor. When Ludicolo is in play in online, the player who’s using him’s my music will be selected, and you can tack on you’re my music settings for Ludicolo to name tags, so you should always be able to play your preferyellowgreen music track. Seeing Ludicolo relies so heavily on the rain,
you’ll have to get into the beat in order to play him.

PLAYING AGAINST

Like any good character which requires set-up, the time to destroy Ludicolo is before he sets up. Your best bet is focusing on outclassing his range and priority, especially seeing his main way of stalling to get time on the dance floor is through his uthrow and dthrow and his grab range is so tiny.

If you’re at all decent,
you should be able to score a KO or possibly even two before he gets the water level up, but as the water rises the tide will turn heavily in Ludicolo’s favor. At this point, you should be trying to focus on surviving his crazy attacks rather then going after him, but make sure you don’t leave him too alone, less he just raises the water level even higher. This is without a doubt the hardest part of fighting Ludicolo, surviving his underwater onslaught. He can quite possibly make you lose all three of your stocks with the water level high enough, but if you manage to survive long enough for the water level to go back down, it’s quite easy to pick things up where they left off at the start of the match, shredding through his range and priority and laughing in the face of his horribly weak “power”.

MATCH UPS

VS. Meta Knight – 10/90, Meta Knight’s favor
You want somebody to pressure you? You got it. Meta Knight is the god of all damage racking with no lag whatsoever on his attacks, and what with mach tornado and his disjointed hitboxes you’ll be hard pressed to hit him at all with your pathetic priority while you raise up the water level. Even once you do get up the rain, Meta Knight’s glide rivals swift swim in terms of maneuverability, and he’s moer then happy to just keep gliding under the stage to hide when the rain’s up. Should you pursue him, you’re just as likely to get gimped as you are to gimp him. There’s a reason this guy is SSSSS tier. Trying to outgimp the master is a big no-no.

VS. Snake – 20/80, Snake’s favor
Considering Snake has a mix of both power and speed, he has very few problems in finishing off Ludicolo early when the rain’s down, the disjointed hitboxes of terror in his tilts absolutely slaughtering Ludicolo’s laughable priority to boot. Snake can quite possibly KO Ludicolo thrice before he even gets up all the rain, and if he does manage to somehow get it up Snake manages to survive the storm pretty well due to being so awkwardly heavy and having such a great recovery.

VS. King Dedede – 60/40, Ludicolo’s favor
Ludicolo shares Wario’s vulnerability to Dedede’s chain grab alongside his size, but he does have a way of getting around it. If Dedede goes through a water spout along the ground in his mad quest to chain grab you across the stage, he’ll trip and you’ll be freed from the grab. When combined with Dedede’s relative slowness this allows you a free pass to get the rain up, but considering how godly Dedede’s recovery is it’ll be difficult to successfully gimp him. Still, while Dedede’s up B may have super armor at some points, it’s still perfectly vulnerable to Hydro Pump, so Ludicolo has the match up, albeit barely.

VS. Pikachu – 25/75, Pikachu’s favor
Considering nearly all of Pikachu’s attacks will conduct electricity in the water, Ludicolo will have to deal with a lot of additional damage underwater that he won’t be too fond of having once the water lowers down. In addition, Pikachu’s a fast one, he’ll give Ludicolo big problems as he sets up, and seeing Ludicolo’s recovery on land is non existent at higher percentages, he’ll die off quickly. Without a doubt one of Ludicolo’s harder match ups.

VS. Bowser – 50/50
While you wouldn’t think of Bowser as one to keep up the pressure particularly well, his fire breath will instantly free him from the roots of Ludicolo’s dthrow, robbing Ludicolo of one of his best options to occupy foes as he dances, and Bowser’s koopa klaw will be a prime tool for him in this match up. Seeing you’ll get ahead in stock count before the rain gets up anyway, you can just grab Ludicolo with the claw when he comes after you for a suicide KO, though Bowser needs to beware of Vine Whip and Leech Seed which would prevent him from doing so. Despite all he has going for him, Bowser’s slowness still means Ludicolo won’t have too hard of a time getting the rain up, making the match up even.

VS. Jumpluff – 60/40, Ludicolo’s favor
Sunny Day VS. Rain Dance. Which will prevail? Considering Ludicolo’s tilts and dsmash instantly causes some rain to fall, this instantly cancels out sunny day, and considering Jumpluff has to use a somewhat laggy special to revive Sunny Day he’ll have problems here. Still, Jumpluff doesn’t entirely detest the rain, as the water will help Jumpluff’s plants grow just like Sunny Day and the extra jumps will help get Jumpluff even higher, though he won’t get any of the other Sunny Day bonuses.

VS. Acid Seaforce – 60/40, Ludicolo’s favor
While Acid Seaforce’s playstyle revolves around pressuring the opponent to come to him, Ludicolo feels no pressure, happy to just sit back and dance. Ludicolo only really has to start to worry once he 100% if the water’s not up as then he’ll be robbed of his recovery. Seaforce’s awkward aerials can make him tricky to gimp at times, but if all else fails you can use disable him via Leech Seed/Vine Whip then swift swim over to the edge with him or Hydro Pump him away. In addition, if you play your cards right you can get healing to lessen the effects of the poison, though it’s not easy.

VS. Sloth – 50/50
This is quite the interesting match up, as both characters feel no need to pressure each other and have plenty of time to set up. Sloth will be perfectly bound in place while Ludicolo will have as much water as he needs. . .Considering Ludicolo’s main method of getting foes off the stage (Hydro Pump) to KO them won’t work when Sloth is so tied down to the stage though, this makes things look rather bleak on Ludicolo’s side. As if that wasn’t enough, raising the water allows Sloth to play with an all powerful super armor no lag move in his nair.

However; if you use vine whip on one of Sloth’s boulders, you can bind yourself to it like Sloth does with his chains. Still, considering your vines are a lot shorter then his chains, this won’t allow you much freedom.
However; if you’re underwater while bound to the boulder and rapidly swim away from the boulder with your fair, you’ll cause Sloth’s chains on the boulder to snap and steal the boulder from him! You can then go swim over the edge and use your bair to drop the boulder off into the abyss, then proceed to push Sloth off the edge. In addition, Sloth’s uthrow is rather useless considering how great his bair is.

But why would you want to fight such a potentially great ally? Ludicolo can use his dthrow and uthrow on Sloth to increase his defenses to even greater heights, and in return when Ludicolo gets to a high percentage he can also bind himself to Sloth’s boulders to prevent himself from getting KOd, and Sloth will absolutely love you for allowing him to abuse his nair.

EXTRAS

Up Taunt - Uproar
Ludicolo pulses awkwardly as yellow shockwaves come out of him briefly. If the volume for the music is turned down below the default or off completely, this will raise it back up to the default. This prevents foes from turning off the music and utterly screwing you over, though real life mindgames of turning the sound down on the TV will still exist or getting the crowd to shout at tournies and drown out the music will still occur. . .

Side Taunt – Spit Up
Ludicolo spits some water upwards, then catches it back in his mouth. Delicious!

Down Taunt – Russian Dance
Ludicolo folds his arms and turns to face the screen, rapidly kicking forward in one of those Russian style dances.

Entrance – Wipe Out
Ludicolo surfs in on a tidal wave from the background, but then wipes out, faceplanting onto the stage.

Win Pose 1 - Macarena
The name pretty much says it all. He continues to do the dance until you leave the results screen.

Win Pose 2 - Flood
Ludicolo points upwards, causing rain to quickly fall from the top of the screen and flood it, washing the losers off the screen. Ludicolo chuckles and swims off the screen, then a Cloyster comes down from the top of the screen and explodes, leaving the results screen in blackness.

Win Pose 3 – Water Spout
A water spout comes up underneath the losers, causing them to be lifted up into the air and flail about helplessly as Ludicolo chuckles.

Win Pose with Sakurai - Surf
Ludicolo surfs down onto the stage on a massive tidal wave on a Yoshi surfboard, Sundance on the board alongside him. Ludicolo also has unique victory music for this pose.
There ya go, Sundance.

Loss Pose - Clap
Ludicolo claps, though he claps in such a manner that he creates a slight beat through doing so.

Assist Trophy – Miror B.


Miror B. strikes a pose upon being summoned from the assist trophy, then takes out a boom box from his ridiculously oversized hair and steps into the background, immune to any form of attack. The boom box starts playing one of his two themes at random, which overrides the current background music until it would normally loop, at which point Miror B. and his boombox vanish and the regular music starts playing again.

However; if any Ludicolos are among the fighters, Miror B. won’t change the background music and will start dancing to the music, not going into the background.
He uses Ludicolo’s tilts and dsmash with doubled power and is invulnerable. However; Miror B. won’t pursue your foes for you, simply standing in place and using his dance moves, so you have to knock foes into him. What makes Miror B. so notable though is that he causes rain to fall just like Ludicolo, and he dances to the music in the perfect fashion to maximize how much rain he causes to fall.

Miror B. lasts a surprisingly long 90 seconds here, giving you a good long time to see him in action. Why so long? Because you can learn how to dance to the music properly by watching his actions.
If you’re having trouble picking up Ludicolo and getting into the beat, watching the pro do it might help you in learning how to play him.

Ludicolors


Salvo Fenris

Smash Apprentice
Joined
Oct 17, 2008
Messages
87
Location
Kentucky
Sweet unmerciful Jesus. Remind me never to leave on vacation as a new MYM opens ever again. I don't think I have the attention span to completely catch up on movesets, although as the set posting slows down, perhaps I'll cover some ground. However, seeing as I have YET to post a moveset, I'm not sure I should even bother offering comments on others' sets. I doubt they will hold much credibility, as I have no actual experience, nor have I been particularly active.

I do intend to remedy this. I WOULD say I plan to have my first set in by the end of this contest, but with my unpredictable schedule and constant battle with my own laziness and procrastination, I'm not sure if that will actually happen. I do intend to have a set in before Kibble returns, though.

Also, to help with all the moveset reading I have to do, I'd like to know if anyone has suggestions of sets I should read posthaste, and will maybe inspire me to read more or get cracking on my own. I apologize for what most of you will probably consider a useless post from an inactive member. Hopefully I'll find time to remedy that issue this time.
 

n88

Smash Lord
Joined
Oct 10, 2008
Messages
1,530
Also, to help with all the moveset reading I have to do, I'd like to know if anyone has suggestions of sets I should read posthaste
Mine:)

Really, though, I would read Envy and M.Bison first. Thise are both pretty good.

Looks like there's gonna be a lot of Poke-sets.
 

Wizzerd

Smash Ace
Joined
Feb 24, 2009
Messages
929
Where does everybody get these dancing Pokemon sprites?
Well, this was another completely random Pokeset, but I still found it to be tres cool. The rain dancing mechanic was very interesting (though I would have probably preferred if you introduced it at the beginning of the set) and it makes me happy to see a character with water strength who actually can make water for use. Doubles tactic with Leviathian and Elias ftw! You didn't have as much detail as most of your other sets, but that wasn't a big deal as it still has above average detail and it makes it very readable. If I have to moan about something for this to actually become criticism, I'll complain about the organization. The dancing Pokemon has been done to death and without them the organization is just simple bolded colored headers, and changing the color of the text for the meat of the moveset can become hard to read in large chunks... nevertheless, this was a very cool set with a great playstyle, and the matchups section is an interesting and fun extra.
 

KingK.Rool

Smash Lord
Joined
Nov 26, 2005
Messages
1,810
Amazing set, droogy. It's the first one I've read this contest....BE PROUD :cool:
I'm SO proud. :bee::bee::bee:

MamaKahn & Joey: Wow, Rool! You sure showed Clefable what for!


wait... that's not a comment. Let's try this again..


Kangaskhan & Babyskahn: At the risk of sounding generic, this is the kind of stuff that cements you as the de facto Pokemon moveset maker. The organisation is pleasing, the colour scheme spot on, and you show an understanding of pokemon that no other MYMer can boast.
You have a neat contradiction between the moves mamakahn can use and those Joey can use, along with the moves that become better without Joey and those that suffer in his absence. And they come together surprisingly smoothly too. I loved reading Kangaskahn, every bit of it.
What a great comment. Means a lot, Junahu. I'm glad you mentioned the organization, too, which I was rather happy with, in general.

But you can't have good commentry without some criticisms;

The abusive/caring parent connundrum caught me by surprise, especially since you waited until the very end to tell us about it. In fact, your introductions did very little to inform us of just how many moves resulted in Joey being ejected from the pouch or similarly abused. The only one I thought made any sense, was Protect the Brood.
And on that note, there appears to be some excessive favouritism towards the abusive side. Even the moves that are blatantly for protecting Joey with are ironically set up by putting Joey in danger in the first place.
You don't NEED any moves to be "abusive". Simply having Joey leave the pouch and act as bait is abusive enough. There was no reason to include things like additional effects on Skull Bash and Earthquake to help paint the picture.
This isn't like Donna and her camera, you shouldn't be throwing your baby out just because you want to lay a trap, or because you want to use a mamakahn specific move like Thrash.
Heh, I can always count on you to point out the things I'd hoped no one would notice. I tried to stay true to the character by making all the attacks that use Babyskhan offensively incidental: when he's a bludgeon, it's accidentally so; he runs because he just so happens to be in the way; throwing him is Kangaskhan trying to save him, whether you use it as that or not.

I understand the complaint, though.

smaller stuff;
1) "Baby Charge" is a move that specifically invokes an action BY Joey. So why can't he use it when alone?
2) Why can Joey use Thrash when he doesn't have a Rage-meter? He can also use Final Smashes, which is just wrong considering what it is.
3) You mention that one of Joey's advantages when alone is his ability to grab. Without mamakahn to follow up, what's the point of grabbing?


I was always under the impression that Giovanni was forcing Kangaskahn to fight by holding her Joey to ransom
1) Well, when you're just controlling him, you have access to the full-fledged Dizzy Punch, so you don't really need the baby's version... or so my logic goes.

2) Uh. I dunno, lol.

3) Uh. You need to stop spotting stuff like this, Junahu. Move along, everybody. :urg:

««««««Kangaskhan»»»»»»

Also the first set I read this contest... well, the first one I read without reviewing in mind. Anyways, Kansaskhan was a great set. Tons of risk-reward factor throughout the whole set, with the Rage and Separation mechanics. I did think it was strange, how for being such a "caring parent" she relied on using her own child as a weapon.
Thanks for the comment, agi, and I'm honored to have posted the first set you read!

...

Oooh, a Pokemon - and a trap-based Pokemon, no less! How interesting! :bee:

First off, I'd like to point out that the page is being stretched by your alt colors, there. Might want to move Sundance Yoshi down to the next row to prevent that. I hate stretched pages.

So anyway, the tempo-based mechanic that begins a Rain Dance is something I've dabbled in, but it never panned out, even though I DID have an idea (and a half-completed set) that similarly changes the stage's music and relies on your timing in relation to the music. Not a big fan of the tilts, they're a bit tough to envisage...

And then the trap playstyle shines through! The Specials are a dead giveaway, with the Up Special that can be manipulated and is closely tied to the other Specials. Leech Seed seems kinda broken, considering tossing Pikmin willy-nilly at the foe is only a bad strategy because you run out and have to pick them all over again every few seconds; with a less laggy, infinite supply of life-sapping seeds that also immobilize the foe half the time, it seems like Ludicolo would be another broken trap character. I'd nerf that one attack, just a bit.

Forgot to mention, I'm not a fan of this stat layout, either. That's really a section I think you should be trying to make as inconspicuous and short as possible, even though its current iteration is pretty easy to take in. On a related note, the dancing sprites are distracting and generally a bad idea, but no one listens to me on that, so whatever.

I prefer the Aerials to most of the rest of the set, which seems to focus altogether too much on the traps, ergo, the Water Spouts. The Aerials are generally awesome, and the whole idea of having underwater combat is amazingly cool anyway, although he has a few too many underwater traps, whether or not they're used offensively.

I think you overuse your bolding - I'd personally only use it for a few key words here and there, while half of Ludicolo's information is bolded and green, especially all the facts about his traps.

XD at all the in-jokes and random stuff that Sundance got you to put in. I'm guessing that by MYM 8, your movesets will look more like Sakurai than anything, and will have a huge bolded "THERE YOU GO, SUNDANCE" at the end.

Aaaaand I accidentally posted this before I was done typing. In general, I don't like this quite as much as Sloth; it's way more detail-heavy and considerably more complicated, with quite a few sub-mechanics - or maybe they're just plain old traps - to complicate things. Still a great set, around Envy's level.
 

half_silver28

Smash Ace
Joined
Apr 25, 2008
Messages
862
Location
MYM, Ohio
@Ludicolo: Here's a set I was definitely looking forward to, & it didn't disappoint! The whole rain dance mechanic was integrated perfectly, my only complaint being that many of the music choices don't really fit ludicolo specifically. Of course that's just a minor complaint, it doesn't really take much away from the set.

All of ludicolo's other moves, and the ways that the water affects them were very cool as well. I especially liked the multiple move interactions with the ground-based water spout. ludicolo's playstyle was great as well; he's nearly a damage racking god, and he becomes a gimping god once the water level is high enough, but he has VERY little in the way of KO options.

So all in all, I would have to say that this is my favorite set of yours so far, & definitely one of the best in the contest so far. :bee:
 

kirbywizard

Smash Hero
Joined
Jan 4, 2009
Messages
6,713
Location
Napa, California . . . .Grapes For Miles
3DS FC
0989-1847-5768

One of my favorite pokemon and a very fun moveset. The tilts felt useless at first but I was quickly proven wrong. He sounds like a beast underwater, the only thing I found annoying was how to learn how to use him. Getting in tune with certain songs, sounds like a hard task to accomplish but well worth it in the end.
 

TheSundanceKid

Smash Lord
Joined
Jun 8, 2008
Messages
1,636
Location
The Secret Kingdom
win Pose With Sakurai - Surf
ludicolo Surfs Down Onto The Stage On A Massive Tidal Wave On A Yoshi Surfboard, Sundance On The Board Alongside Him. ludicolo Also Has Unique Victory Music For This Pose.
there Ya Go, Sundance.
:cool: :bee: Freaking awesome! Thanks, Warlord!

Yoshi alt is now required for every set.

Anyway, Ludicolo was a great set. You really captured his dancing spirit as well as both his plant and water moves. The rain dance mechanic thing was really cool, and I liked how it's not a move but rather a condition that the player must meet.

Great set, man! :)
 

Chris Lionheart

Smash Champion
Joined
Apr 6, 2008
Messages
2,076
Location
Make Your Move
Ludiculo

Overall, I must say that I enjoyed this set, though it definitely did not stand out as being as great as Sloth. Many of the moves seemed really generic except when combined with water. A trivial complaint, for sure, because Ludiculo relies so much on his brilliant water mechanic.

I must disagree with K.Rool somewhat. Ludiculo is definitely not a trap character. Only his Up Aerial and Final Smash really qualify as trap moves. The Up Aerial is a very conditional trap and isn't even a trap in primary function. The Final Smash is irrelevant for obvious reasons.

One of the big problems with the set is balance issues. Ludiculo has an amazing recovery when his damage is less than 30% and a good recovery until it gets to 60%. By itself, this is not bad by any means, but Ludiculo has so much ability to heal himself. He gets healed for 1% per second just by having water in his dish (whether by his Up Smash or by his mechanic), can get healed for an additional 1% per second for every leech seed on the foe (and leech seeds sound really easy to use), and can get healed even more by swimming through his underwater Up Aerial or by using his Neutral A. On top of the ability of his leech seeds to heal, they can also really gimp the foe. The balance of the Bair to Down Smash combo can also be called into question, but this is atleast passable.

Ludiculo has meh-worthy KO'ing potential, but when you combine early protection from gimping, a great recovery (atleast while underwater and/or at lower percents), the extreme ease that it can heal itself, good damage racking, and some good gimping options.... his balance can be really questionable. Throw in some good projectile options and you have the ultimate camper. This can, of course, be fixed through minor tweaks, most importantly to his ability to heal himself.

This set is definitely a great set thanks to quite a bit of originality in its mechanic and the interactions of moves with said mechanic, as well as how true-to-character the set is. The moveset flows together very well for something so unorthodox. Balance issues and the very bland nature of many attacks when not interacting with water keep this from being an absolutely amazing set, though I still consider it to be one of the best so far.
 

MasterWarlord

Smash Champion
Joined
Aug 24, 2008
Messages
2,902
Location
Not wasting countless hours on a 10 man community
Also, to help with all the moveset reading I have to do, I'd like to know if anyone has suggestions of sets I should read posthaste, and will maybe inspire me to read more or get cracking on my own. I apologize for what most of you will probably consider a useless post from an inactive member. Hopefully I'll find time to remedy that issue this time.
Sloth and Clefable are generally the most popular recommendations, though I wouldn’t rule out Thrall or Kangaskhan (Which I’m finally going to get to read past the standards now that Ludicolo is done).

Looks like there's gonna be a lot of Poke-sets.
There’s always been mass Poke sets since MYM 2. It’s not exactly unexpected.

Where does everybody get these dancing Pokemon sprites?
Well, this was another completely random Pokeset, but I still found it to be tres cool. The rain dancing mechanic was very interesting (though I would have probably preferred if you introduced it at the beginning of the set) and it makes me happy to see a character with water strength who actually can make water for use. Doubles tactic with Leviathian and Elias ftw! You didn't have as much detail as most of your other sets, but that wasn't a big deal as it still has above average detail and it makes it very readable. If I have to moan about something for this to actually become criticism, I'll complain about the organization. The dancing Pokemon has been done to death and without them the organization is just simple bolded colored headers, and changing the color of the text for the meat of the moveset can become hard to read in large chunks... nevertheless, this was a very cool set with a great playstyle, and the matchups section is an interesting and fun extra.
He’s random? A tad bit, seeing I gave him vines for vine whip, a couple ice attacks, along with Aqua Ring and Water Spout, but that’s about it. Anyway, I’ve never been one to go out of my way for organization, aside from the bolding as of late, which I might drop unless I can manage to get my detail level back down to Sloth’s where it’s best received.

Oooh, a Pokemon - and a trap-based Pokemon, no less! How interesting! :bee:
I’ll just get this out of the way right here and now. . .The up special is more ammunition for Ludicolo and foes can still go through it with ease, while even if you freeze it it’s nothing more then a wall. The only aerial “trap” is the uair, and the trap part of it isn’t even the main function. The nair is a projectile in the non Mach Tornado part, not a trap, and I have no idea how you could even possibly consider any of the other moves as traps.

First off, I'd like to point out that the page is being stretched by your alt colors, there. Might want to move Sundance Yoshi down to the next row to prevent that. I hate stretched pages.
Done. Didn’t stretch it on my cpu.

So anyway, the tempo-based mechanic that begins a Rain Dance is something I've dabbled in, but it never panned out, even though I DID have an idea (and a half-completed set) that similarly changes the stage's music and relies on your timing in relation to the music. Not a big fan of the tilts, they're a bit tough to envisage...
The tilts were rather obligatory and were supposed to be generic so that they could be fodder for the mechanic. You were making a set like this at one time? Was it that Jimmy T. from way back?

And then the trap playstyle shines through! The Specials are a dead giveaway, with the Up Special that can be manipulated and is closely tied to the other Specials. Leech Seed seems kinda broken, considering tossing Pikmin willy-nilly at the foe is only a bad strategy because you run out and have to pick them all over again every few seconds; with a less laggy, infinite supply of life-sapping seeds that also immobilize the foe half the time, it seems like Ludicolo would be another broken trap character. I'd nerf that one attack, just a bit.
Nerfed Leech Seed. I wasn’t too worried seeing they only give you a 2% gain, but it’s nerfed. Really though, if you’ll look at my match ups, I feel he’s more underpowered then anything. I’m much more confident here then with Sloth on balance.

Forgot to mention, I'm not a fan of this stat layout, either. That's really a section I think you should be trying to make as inconspicuous and short as possible, even though its current iteration is pretty easy to take in. On a related note, the dancing sprites are distracting and generally a bad idea, but no one listens to me on that, so whatever.
God forbid somebody tries to get original with the stat layout. You people are never satisfied. I should’ve just done it your way from the bloody start.

I prefer the Aerials to most of the rest of the set, which seems to focus altogether too much on the traps, ergo, the Water Spouts. The Aerials are generally awesome, and the whole idea of having underwater combat is amazingly cool anyway, although he has a few too many underwater traps, whether or not they're used offensively.
The aerials were indeed the most fun part of the set to write and what I was most happy with, seeing they were gonna be the bread and butter of his underwater play. They actually came to me first while the throws came last, which was quite surprising. I almost pulled a Rool Tanookie and just gave him a grab seeing it was taking so long to come up with throws.

I think you overuse your bolding - I'd personally only use it for a few key words here and there, while half of Ludicolo's information is bolded and green, especially all the facts about his traps.
That bolding was one of the things that made Sloth so readable. Was it more overdone here then there?

XD at all the in-jokes and random stuff that Sundance got you to put in. I'm guessing that by MYM 8, your movesets will look more like Sakurai than anything, and will have a huge bolded "THERE YOU GO, SUNDANCE" at the end.
If it actually gets him to read something, sure. The randomness is clearly Sakuari’s fault, not Ludicolo’s.

Aaaaand I accidentally posted this before I was done typing. In general, I don't like this quite as much as Sloth; it's way more detail-heavy and considerably more complicated, with quite a few sub-mechanics - or maybe they're just plain old traps - to complicate things. Still a great set, around Envy's level.
Yeah, I was noticing that this was a lot more detailed then Sloth as I wrote it. I was also willing to let Sloth have some actual generic attacks seeing how little potential he has outside his chains, which resulted in him being simpler. I still don’t particularly see how Ludicolo is so mind bogglingly complicated, though, particularly when put next to the likes of Envy, Al, and Ryuk.

@Ludicolo: Here's a set I was definitely looking forward to, & it didn't disappoint! The whole rain dance mechanic was integrated perfectly, my only complaint being that many of the music choices don't really fit ludicolo specifically. Of course that's just a minor complaint, it doesn't really take much away from the set.
Yeah, I can’t say I was that satisfied with some of the choices and I picked the last three just for some more actual Pokemon tracks. Sorry about cutting the extra SF track you gave me, eheh. . .But at least it all sounds good none the less, at least. Glad you liked the rain dancing!

All of ludicolo's other moves, and the ways that the water affects them were very cool as well. I especially liked the multiple move interactions with the ground-based water spout. ludicolo's playstyle was great as well; he's nearly a damage racking god, and he becomes a gimping god once the water level is high enough, but he has VERY little in the way of KO options.

So all in all, I would have to say that this is my favorite set of yours so far, & definitely one of the best in the contest so far. :bee:
Your favorite? Thanks! :bee: Glad you liked the playstyle/interactions/underwater shenanigans.


One of my favorite pokemon and a very fun moveset. The tilts felt useless at first but I was quickly proven wrong. He sounds like a beast underwater, the only thing I found annoying was how to learn how to use him. Getting in tune with certain songs, sounds like a hard task to accomplish but well worth it in the end.
I thought Miror B. was a good way to make competitive players actually plays with items on just to see how to dance properly through him, but yeah, it’d definitely take some getting used to. Thanks for reading.

According to K.Rool, Ludicolo's a trap character.

:ohwell:
IT’S A TRAP

Ludicolo was very impressive Warlord, as was Sloth a while back...gah, I've got a lot of sets to catch up to on reading @_@...
Many thanks, MT. I look forward to Little Mac. *Watches as he already’s posted by the time I finish typing up commentary*

:cool: :bee: Freaking awesome! Thanks, Warlord!

Yoshi alt is now required for every set.

Anyway, Ludicolo was a great set. You really captured his dancing spirit as well as both his plant and water moves. The rain dance mechanic thing was really cool, and I liked how it's not a move but rather a condition that the player must meet.

Great set, man! :)
Thanks Sundance! Glad to have the lolchillinz blessing. The grass part of him allowed me to get beyond my phobia of the water part. :p The Sakurai win pose was indeed lulzy and we without a doubt need more Yoshi in MYM.

Ludiculo

Overall, I must say that I enjoyed this set, though it definitely did not stand out as being as great as Sloth. Many of the moves seemed really generic except when combined with water. A trivial complaint, for sure, because Ludiculo relies so much on his brilliant water mechanic.


Glad you enjoyed it, but yeah, it’s probably not as good as Sloth.

I must disagree with K.Rool somewhat. Ludiculo is definitely not a trap character. Only his Up Aerial and Final Smash really qualify as trap moves. The Up Aerial is a very conditional trap and isn't even a trap in primary function. The Final Smash is irrelevant for obvious reasons.
THANK YOU.

One of the big problems with the set is balance issues. Ludiculo has an amazing recovery when his damage is less than 30% and a good recovery until it gets to 60%. By itself, this is not bad by any means, but Ludiculo has so much ability to heal himself. He gets healed for 1% per second just by having water in his dish (whether by his Up Smash or by his mechanic), can get healed for an additional 1% per second for every leech seed on the foe (and leech seeds sound really easy to use), and can get healed even more by swimming through his underwater Up Aerial or by using his Neutral A. On top of the ability of his leech seeds to heal, they can also really gimp the foe. The balance of the Bair to Down Smash combo can also be called into question, but this is atleast passable.

Ludiculo has meh-worthy KO'ing potential, but when you combine early protection from gimping, a great recovery (atleast while underwater and/or at lower percents), the extreme ease that it can heal itself, good damage racking, and some good gimping options.... his balance can be really questionable. Throw in some good projectile options and you have the ultimate camper. This can, of course, be fixed through minor tweaks, most importantly to his ability to heal himself.
As I told Rool, I feel he’s underpowered if anything personally, but bah. Moveset makers are generally immune to seeing the balance flaws of their own sets. Perhaps I’ll tone down the healing somewhat in addition to Leech Seed in general.

This set is definitely a great set thanks to quite a bit of originality in its mechanic and the interactions of moves with said mechanic, as well as how true-to-character the set is. The moveset flows together very well for something so unorthodox. Balance issues and the very bland nature of many attacks when not interacting with water keep this from being an absolutely amazing set, though I still consider it to be one of the best so far.
Glad you liked it despite some issues. Yeah, there were a lot of attacks that were bland when not interacing with water, but the idea was for those moves’ main effects to be the underwater ones while the out of the water ones were just obligatory things to fill up button inputs.
 

TWILTHERO

Smash Lord
Joined
Aug 19, 2007
Messages
1,880
Location
Canada
Wow, Ludicolo looks awesome MasterWarlord. I like the rain dance mechanic a lot, although Ludicolo with Falco's jumps sounds a little weird...:ohwell: Oh well, this moveset is still an awesome moveset (even more awesome with the Miror B assist trophy :bee:).
 

SkylerOcon

Tiny Dancer
Joined
Mar 21, 2008
Messages
5,216
Location
ATX
Ah! You posted Lucicolo. I'm about to go eat and then see a movie, but I'll read it when I get home.
 

MarthTrinity

Smash Lord
Joined
Aug 9, 2007
Messages
1,954
Location
The Cosmos Beneath Rosalina's Skirt
"Let's Keep It Clean! Now Come Out Boxing!"

Little Mac joins the Brawl!


-Backstory-
Little Mac is a young, 17-year old boxer from the Bronx as well as the star of Nintendo's popular franchise, Punch-Out!! Originally appearing in Mike Tyson's Punch-Out!!, Mac rose the ranks, fighting various wacky opponents along the way to the final showdown against Iron Mike himself. Mac defeated Mike Tyson in a final boxing match and then seemingly went away...

Super Punch-Out!! came and went with mild reception, most notably because it seemed to lack Little Mac, the fan favorite character, instead replacing him with some weird little blonde guy. According to the main developers of Punch-Out!! Wii, Mac was missing from Super Punch-Out!!, but according to Nintendo of America, the character in Super Punch-Out!! was simply a more matured Mac...

Regardless of Super Punch-Out!!, Mac returned in Super Smash Brothers Brawl as an Assist Trophy as well as Captain Rainbow where a morbidly obese Little Mac needed Rainbow's help to get back into shape.

Fianlly making his return to the ring, Mac returned in Punch-Out!! Wii, fighting a slew of old rivals and a few new ones. After defeating Mr. Sandman and various other foes, Nintendo's own Donkey Kong challenged Mac to one final boxing match. Mac toppled the ape and went down in history as the TRUE Punch-Out!! champion!

-Special Mechanics-​

Mechanic One: Doc To The Rescue! – Several moves in Mac’s set rely heavily upon direct interactions with Mac’s coach, Doc Louis. Doc stays in the background during a majority of the fight, only coming onto the actual playing field for some moves (such as the Side Special). While Doc is invulnerable to attack mostly (Ryuk’s down tilt can still hurt him…), Doc is a necessary part of Mac’s playstyle, without managing where Doc is, you may not be able to pull out the moves you need to, when you need to. The Side Special gives some more details about the Doc mechanic.


Mechanic Two: Have a Heart! – In Punch-Out, Mac needed hearts if he wanted to attack. Running out of hearts left Mac unable to attack and vulnerable to counterpunches. Fortunately this only happened if you got too aggressive with a foe and kept hitting them when their guard was up. Mac would also lose some hearts if he started taking a serious beating from an opponent.

In Smash, the Heart Mechanic works in a very similar way. Next to Mac’s % at the bottom is a small image of a heart with a number in it. This number starts at 30 for every fight, but diminishes if you punch a shielding opponent, get out prioritized, or start taking a beating from your opponent. If the heart meter reaches zero, Mac will become notably winded as well as turning a vaguely purple color. During this time, Mac’s speed will drop by about a third, his jumps will reduce by about one third of their normal power and his attacks will become unusable (although he can still have Doc set up equipment during this time).

With this many drawbacks, you must be screwed, right? Well…not entirely. When Mac enters his exhausted state, Doc will become worried about him and respond faster. Some set ups for attacks (which will be pointed out later) will increase dramatically due to Doc’s concern for the boy from the Bronx. You can use this to your advantage, but make sure you don’t neglect Mac’s hearts, if you lose heart, you just have to fight back harder Mac, baby!

Now, in order to restore Mac’s heart meter back to its former glory once it’s been depleted to zero is actually quite simple. Wait for an opponent to attack Mac, and then dodge it using any dodging method (forward/backward roll, spot-dodge, air-dodge) and Mac will instantly regain spirit, boosting him back up to 25 hearts. So in theory, a competent Mac player could use his exhausted state to set up some of his attacks, dodge one of his opponent’s blows and then launch a full out assault with his restored hearts. You CAN also use the Down B while exhausted to recover 15 hearts instantly.

As Doc would say: “A comeback is like a yo-yo. You’re gonna go down, but you’re comin’ right back up!”

-Stats-​

Size: 5/10
There’s a reason why he’s called Little Mac...Mac isn’t very tall, but he’s fortunately a small target then! He’s about Mario’s height, maybe a tad taller.

Weight: 5/10
107 lbs. Isn’t gonna get Mac very far. Fortunately he’s not the lightest of lightweights, but he’s got some problems staying on stage sometimes.

Walking Speed: 5/10
Mac can really shuffle when he needs to! His walking stat is rather impressive!

Running Speed:7/10
And his running stats are no disappointment either! Mac’s a boxer so he has to be fast or he’ll be tasting canvas in seconds!

Traction: 7/10
A boxer also has to be graceful on his feet. Slipping and sliding everywhere won’t help him keep his title belt, so fortunately Mac has some good control over his traction.

Power: 6/10
Mac’s fought amongst the toughest of them, so it’s no surprise he can hold his own with some powerful punches!

Attack Speed: 7/10
With numerous quick blows, Mac’s got some lightning fast attacks. Unfortunately, some of his other attacks require some serious set up

Range: 3/10
Punches only go so far, so Mac suffers direly in the range section. Fortunately he’s got Doc to help him out a bit though!

Priority: 4/10
Mac’s a little guy…and he’s only fighting with his fists, so unfortunately, his priority is gonna suffer a tad bit.

First Jump: 4/10
Not spectacular by any means, Mac’s only human, you can’t really blame him for not having the best recovery.

Second Jump: 5/10
…so much for being human eh? A second jump better than his first really aids Mac’s recovery!

Recovery: 5/10
Mac’s Up B recovery can be either phenomenal or lackluster depending on a few variables…I’ll get to that later…

Fall Speed: 4/10
Mac’s light so he won’t fall too quickly, fortunately this aids his air game tremendously.

Crouch: 4/10
Mac sits on his haunches, his gloves raised in front of his face. This reduces his height by about 1/3 of his total height.

Crawl: No
Wall Jump: No
Wall Cling: No
Hover: No
Glide: No


Animations

Basic Pose
Mac bounces on his feet, his arms raised to chest level as he rocks his shoulders back and forth, basic boxing stance pretty much.

Idle Pose
Mac lowers his gloves to his sides and bounces on the balls of his heels, still rocking his shoulders and breathing in and out audibly.

Walking Pose
Mac quickly shuffles forward, his gloves in front of his face and his right foot always leading.

Running Pose
Mac starts to hop forward as he shuffles along, clearly and noticeably picking up speed.

Dashing Pose
Mac gets really low to the ground and sprints forward, his gloves still covering up his face as he runs. It’s essentially the same animation from his Brawl Assist Trophy.

Crouching
Little Mac bends at the knees, raising his gloves before his face as he slowly breathes in and out.

Jump 1
Mac kicks off the ground, his right arm slightly extended before him.

Jump 2
Little Mac kicks off of thin air! He suddenly leaps high into the air, pumping his fists downward as he jumps!

Shield
Mac blocks high holding his forearms before his face as the standard bubble shield forms around him.

Forward Roll
Mac’s forward roll has him sliding forward while behind the stage (as if he spot dodged) while sliding around the foe. Goes about a Bowser width forward and leaves him facing the opposite direction he was originally facing making it great for juking behind a foe for some quick punches.

Backward Roll
Instead of a backward roll, Little Mach simply leans backwards, allowing him to quickly dodge attacks and then retaliate. Very little ending lag on this roll, but no distance moved.

Side-step Dodge
Mac raises his gloves over his face and in true Punch-Out fashion leans to side of the stage furthest from the camera. Very little lag but it also has a rather short duration period, similar to Meta Knight’s.

Air Dodge
Mac pulls his gloves to his face and twists his body so he’s facing towards the camera.

Swimming
Unfortunately for him, Mac’s gloves get in the way of him doing any fancy swimming…however he can still tread water. While actually swimming, he does the breaststroke.

Drowning
Mac thrashes around before going under, one glove still raised above the surface for a moment before he loses his stock.

Dizzy
Mac’s arms slump to his side as he rocks slowly, stars circling his head.

Asleep
Taking advice from Mr. Sandman, Mac goes to dreamland, dropping to one knee and slouching over.

Extended Recovery
Mac has a little extra added onto his gameplay; an extended recovery. If Doc is close enough to the edge of the stage, he’ll hold his hand out to Mac as he tries to recover. This adds about a Kirby width to the ledge for Mac and Mac only. Unfortunately, Doc isn’t quite as strong as Mac; if Doc helps pull Mac up, it’ll take half a second longer for Mac to get on stage than it normally would.


-Special Attacks-​

Neutral B: Tagging Punch
Mac jabs forward with a single punch with zero start up and end lag. If it connects, this punch deals 1% with no knockback or flinching. So…if it’s a single punch that does no knockback and minimal damage, what good could it possibly do you?

Simple; because this attack is so fast, it can be used to smack the opponent before they can smack you! If Mac hits an opponent as they’re attacking (during the start up frames of the attack), their attack will be nullified, causing the opponent to flinch like one of Falco’s lasers. Yes, the priority for this move is unparalleled so long as Mac strikes during the start up of the opponent’s attack. Any later and Mac will get swatted away, too soon and Mac will simply jab them once.

When Mac successfully “counterattacks” a foe with this move, a large yellow star will appear over Mac’s head, this will come into play during the Up B recovery option, so read there for more details.

Obviously this attack can’t simply be spammed against an competent opponent; if you do nothing but jab at them in hopes that they attack you, any smart opponent would simply grab Mac and throw him; this attack can NOT out prioritize grabs.

Like boxing, you have to wait for your chance to strike with this move! Wait till your opponent lets their guard down for an aggressive attack, then counterpunch to send ‘em reeling!

Side B: Doc Stole My Bike!
A rather unconventional dash attack; Doc hops on his bike and exits the background, appearing on the field and hastily biking towards Mac’s position! Doc travels about as fast as a dashing Link and is a high priority, low knockback hitbox, dealing 11% if he smacks into a foe!

However…Doc IS only riding a bike. If the opponent hits the front wheel (with a down tilt ONLY) it’ll pop! This, obviously, means that Doc won’t be reaching your position for a while longer. Fortunately he whips out a bicycle pump and inflates the tire. The entire act of re-inflating the tire takes two seconds. What’s to stop an opponent from constantly popping the tires, rendering Doc useless, you ask? Easy; he patches it up with an “X” shaped patch. “X” shaped patches make everything better. Everything. Until Doc reaches Mac’s location, he’ll be untouchable.

Now, besides acting as a rather odd Side B (with the potential to hit -ANYWHERE- on the stage), this serves as Mac’s prime way of getting Doc to come to him (if for whatever reason Mac can’t get to Doc). Now to prevent this from being broken; Doc can only peddle after Mac for five seconds; any longer and he becomes winded, resting for four seconds before the Dash Attack can be used again.

If Mac is at zero hearts when he uses this attack, Doc show his concern by speeding up considerably; instead of biking at a Link dashing speed, he’ll move at a Charizard dashing speed.

Up B: Star Uppercut
This is where the stars from the Neutral B and/or Up Throw come from! In Punch-Out!!, the Star Uppercut is Mac’s trademark finishing blow; a powerful spiraling uppercut to the jaw will send most anyone to the mat! In Smash, it’s also one of Mac’s most flexible KO moves as well as his prime mode of recovery. The exact recovery height, damage and knockback is all variable depending on how many Stars Mac has obtained via either his Neutral B or Up Throw.

Zero Stars: Assuming Mac hasn’t obtained ANY Stars from his opponent, Mac’s basic uppercut will be incredibly weak, causing only 6% and very low-low knockback. In terms of recovery, it acts sort of like Zero Suit Samus’ Down B vertical distance with almost no horizontal recovery. Obviously this isn’t going to help you recover very well…

One Star: With one Star, Mac’s gloves will have a faint bronze aura around them. When activated, Mac unleashes a moderately powerful uppercut, dealing 9% and low-medium knockback. In terms of recovery, Mac will travel vertically about the distance of Bowser’s Up B and about a Kirby width of horizontal distance.

Two Stars: Mac’s gloves obtain a glowing silver aura with two Stars. Upon use of Mac’s Up B with two Stars, Mac’s uppercut will deal 11% and medium knockback. In terms of recovery, this uppercut will boost Mac about the distance of Ganondorf’s Up B vertically, and Diddy Kong’s Side B horizontally.

Three Stars: With three Stars, Mac’s Up B is nearly unmatched, plus his gloves glow an awesome gold color! This move will deal a whopping 15% and high knockback…providing you hit with it that is. In terms of recovery, Mac is given an EXCELLENT recovery option here, vertical distance rivals that of King Dedede’s Up B (albeit a tad shorter…) with just as much air control as the penguin king for horizontal distance.

Unlike Punch-Out!!, Mac won’t lose his Stars if hit (Because…ya know? That’d kind of defeat the purpose of being a recovery option…), but instead loses any stars he was in possession of before being KO’d. So oddly enough, you’re actually most vulnerable right after spawning…


Down B: Quick Breather!
This move will only work providing that Doc is standing within one Bowser width of Mac. Upon activation of the Down B (providing Doc is right there) Doc will set down a stool from the back of his bike that Mac will sit down upon. While sitting down, Mac will regain a heart per half second and heal 1% per full second sitting down.

Now, before the cries of “broken!!” ring out, there’s a few things that help keep this move in check. Obviously, the biggest of which is the fact that the move can only be used providing Doc is right there. If Doc is across the stage, you’re unable to use it. Second of all, while it may have very little start up lag (after all, he’s just putting a stool down…), this move suffers from considerable end lag (one second) as Mac has to stand up, shake himself out and THEN will Doc put the stool back on the bike.

Needless to say this move is very situational; if you happen to have some down time in a match (such as your opponent was just KO’d) or if you’re just fighting a particularly campy foe, this move can be great for helping to revive Mac a little bit…just don’t abuse it, okay?

Another point of interest; if Mac has exhausted his heart supply, Doc will eat a chocolate bar while Mac sits on the stool. For whatever reason, this aids in the healing process! Mac will instantly recover 15 hearts as well as 6%. Unfortunately, this adds to the move’s end lag (by about a second) as Doc must finish his candy bar before he can do anything else. THIS however is perfect for last ditch efforts as Mac can move after healing…he just can’t use Doc; make it count


-Standard Attacks and Tilts-​

A Combo: Jumping Rope
Upon activation of this move, Doc will pull a jump rope off the back of his bike and hand it to Mac instantly, yes, this move is incredibly fast. Tapping the A button causes Mac to, what else? Jump rope! The faster you tap the button the faster Mac jumps rope. This causes minor knockback and about 4% with moderate priority. Once you stop tapping the A button, Mac will drop the rope instantly, allowing him to move about freely (although Doc can’t move for a bit afterwards as he has to pick up the rope again).

But wait, there’s more! While tapping the A button at the maximum speed, the jump rope will begin to blur, appearing as if there is a ring of orange around Mac. At this time, Mac is invulnerable to projectile attacks (except explosions). Of course, if Mac starts to slow down he’ll become vulnerable again…so make sure you can keep up the pace!

Dash Attack: Bull Charge
Mac stops in place and then hops a short distance into the air. A moment later, Mac hops forward three times and launches a powerful uppercut right into the opponent’s face dealing 12% and medium-high knockback.

Needless to say this move has an incredibly high duration period making it quite difficult to land. As Mac hopes, he travels about 1/3 of Final Destination before uppercutting, so make sure you have the room to land this attack…timing isn’t so much a factor as much as luck is with this one.

Side Tilt: Through The Pain!
Another attack requiring Doc’s set up. Upon activation of the side tilt, Doc will pull two dumbbells from the back of his bike and place them down before him. This gives Mac a few options for this attack…choose which one seems the most appropriate for the given situation.

The first option is the direct attack. Pick up the dumbbells like a weapon and throw them at a foe! They travel surprisingly fast and cause quite a sting, dealing 4% and low-medium knockback. Unfortunately they’re rather low priority…not really the best use for this move.

The MAIN use for this move is to give Mac a nice attack bonus! Press the side tilt command again while standing next to the grounded dumbbells and Mac will pick them up, proceeding to do some reps. Tapping the A button causes Mac to start doing the reps, the faster you tap, the fast he lifts those weight! Upon completion of eight reps (eight taps of the A button), Mac will take on a red tinge; at this time, his damage and knockback for the next attack (whether it hits or misses…) doubles! This is an excellent way to steal some low % KO’s from lighter opponents and to finish off the heavier ones! High risk, high pay off; all or nothin’ Mac, baby!

Up Tilt: Doc’s Gotcha!
Providing that Doc is somewhere nearby when you activate this move, Doc will rush on stage and hoist Mac into the air triumphantly! Er…isn’t this a bit early for a celebration? Regardless, Doc thrusting Mac into the air makes Mac act like a high priority hitbox that deals 10% and medium upward knockback! Talk about using your head huh?

This move suffers from a bit of end lag as Doc realizes his silly mistake and sets Mac down. He then quickly runs back to his bike behind the stage.

Down Tilt: Melted Chocolate
It seems that Doc doesn’t realize he’s on the battlefield. Pulling out a bar of chocolate, Doc takes a bite out of it and then drops it to the ground accidentally. Looking visibly disappointed, Doc watches as the chocolate bar melts, creating a sticky puddle of chocolate, bleck!

Any opponent that steps in this chocolate goo will be stuck their momentarily until the wriggle free. The puddle does no damage but lasts for six seconds before disappearing. Moderate beginning and ending lag for this move…fortunately it can be used most anywhere.


-Smash Attacks-

Side Smash: Cyclone Punches
Mac begins winding up for a series of devastating punches, better watch out! Once the charge is unleashed, Mac throws four punches in quick succession at his opponent’s stomach. Each Punch does 3-5% per hit with minimal knockback (except the final hit that causes medium knockback).

This is Mac’s trademark punch from Super Punch-Out!! Be cautious though, it’s got a nasty bit of punishable start up lag but, fortunately, not very much on the end lag. Overall, this is one of Mac’s most viable KO moves as you’re almost guaranteed to land all four hits if you land the first one...just make sure you do land the first punch or Mac will be easily punished.

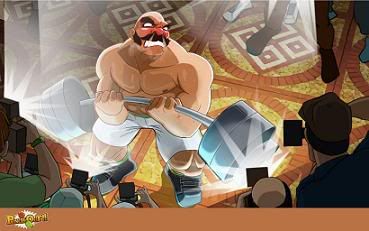
Up Smash: Weight Lifting
Doc hurls a rather sizeable barbell onto the stage directly before him. As the move charges, Doc begins adding weights two at a time to the barbell, effectively increasing its weight! Now, this Smash attack is actually rather unique; Mac can charge it from anywhere (since it’s not actually him doing the work), but once the charge is released, Doc will simply leave the weight where it is.

The weight acts like a throwable projectile, much like Bonsly or Peach’s turnips. Depending on the weight, Mac will either instantly pick up the weight (as if it were like a bat) or slowly pick it up (like a crate or a barrel). Hitting the opponent with the barbell causes medium-high knockback (higher if the barbell has more weight on it) and about 18-23%.

Be cautious however…any opponents can also pick the barbell up and throw it off stage…or of course, they could always throw it directly into Mac’s face…

Down Smash: The Sandbags
Doc pulls a large sandbag off of the back of his bike and eventually places it on the ground before him. Depending on how long the Smash is charged for, the sandbag Doc pulls out will vary in height. At minimum charge, the sandbag is the height of Kirby; at max, it’s Ganondorf’s height. Now, a sandbag isn’t gonna do much on its own, is it?

Of course not! Striking the sandbag causes it to swing in the opposite direction it was hit from; the harder the hit, the faster and more powerful the swing is. Now clearly…getting hit by a sandbag is gonna hurt…this attack deals about 10-19% depending on where the bag hits the foe. At the very end, it’ll cause around 19% and medium knockback. Near the middle or at the top however will only cause around 10% and low-medium knockback. The additional length added to the sandbag obviously makes it easier to hit with both…

But of course…what goes around comes around; if an opponent hits the sandbag towards you…you may want to duck.


-Aerial Attacks-

Neutral Air: Double Lariat
It seems as though Soda Popinski isn’t the only Russian that Mac’s been learning some moves from! Extending his arms out at his sides, Mac begins to spin rapidly, striking the foe with several low knockback, moderate priority hits that each cause 3% (up to six hits).

Not only can this be used as an effective damage racking attack, it also keeps Mac somewhat a loft, allowing him to extend his horizontal recovery. A good idea for Mac’s recovery is to use your second jump, extending your horizontal distance with the neutral air and then use the Up B for full recovery.

Forward Air: Speed Bag Pummel
Mac begins to quickly cycle his gloves before him, striking the foe with numerous (about 12 max) blows that deal 1% each with little knockback. This attack is a prime damage racking move as it comes out almost instantly. Unfortunately, it lacks the range and knockback necessary for it to be a great aerial attack, but it’s certainly not terrible…

Back Air: Mac Attack
Mac holds his fist before him as it begins to tremble, he’s storing up energy for a killer blow! Spinning around, Mac jabs fiercely forward with a powerful punch! An opponent struck by Mac’s powerful punch will receive medium-high knockback and take a solid 15%. This attack however suffers from about ¾’s of a second worth of lag, making it highly unspammable…this is another one of Mac’s all or nothing attacks…

Up Air: Throwing Off The Gloves
Well…this move name is quite literal! It seems as if Mac’s borrowed Aran Ryan’s Glove-On-A-Rope to use against his opponents in Brawl! Swinging his arm in an arc over his head, Mac’s right glove flies off and smacks the foe causing 11% and low-medium knockback. This attack also suffers from a tiny bit of start up and end lag, but it’s exceptional for spacing purposes.

Down Air: The Bronx Bomber
Pulling back his left fist, Mac shoots towards the ground before him at a 45-degree angle. If he makes contact with a foe as he falls, Mac will punch them diagonally downward into the ground. Once Mac touches the ground next to the opponent, he hits them a second time with a fierce uppercut, sending them flying into the air again. If Mac doesn’t encounter an opponent in the air, he’ll still launch the uppercut regardless of whether or not an opponent is there making this a punishable move if missed.

This move has a slight bit of start up lag (nothing to noticeable, basic stall then fall lag) and fairly decent priority. The first punch (while falling) deals 5% and a diagonal downward spike. The uppercut however deals an additional 7% and knocks the foe airborne with medium knockback.

This attack is, oddly enough, exceptional for knocking foes into the air, allowing Mac to either set up his equipment or to pursue his foes with some more aerial attacks.

-Grabs & Throws-

Grab: Being a boxer, Mac doesn’t actually GRAB his opponents, but instead launches a single punch towards the opponent’s head. If the head connects, they’ll start rocking back and forth like they’re in their dizzy animation. From here, Mac will be able to launch his pummel and various throws. Unfortunately, this also gives Mac the distinct disadvantage of having a grab that can simply be ducked…
Pummel: Gut Feeling
Mac socks the opponent constantly in the gut like a punching bag, dealing 1% per hit. Fortunately this attack is incredibly quick, potentially racking up 10% at a time.

Forward Throw: Gut Buster
Mac launches a fierce punch straight into the opponent’s stomach dealing 9%! Ouch! Once hit, the opponent clutches at their stomach and slowly waddles back about a Bowser width before keeling over.

Like most of Mac’s other throws, this one does set knockback and is more about giving Mac time to set up his other attacks than actually acting as a potential KO move. A word of notice however, if the opponent would normally waddle off the edge while moving backwards, they’ll simply keel over when they reach the edge instead of walking off.

Upward Throw: Seeing Stars
Mac crouches down and then unleashes a painful uppercut to the opponent’s jaw, sending them flying into the air with low-medium knockback. Fairly basic huh?

Well, there’s a bit more to this, and it’s actually rather luck based. Each time Mac uses this attack, he has a one in ten chance of a star appearing. As any Mac players knows, stars = good; these stars act identically to the ones that appear after successfully using Mac’s Neutral B and aid Mac’s Up B recovery in the same way.

Maybe you could rely on this if you’re rubbish at countering with the Neutral B…

Downward Throw: On The Ropes
Mac jabs the opponent in the head with a fierce blow; they’re down for the count! The opponent spins in place for about half a second before falling down, flat on their face. Mac is now free to move around and set up various equipment before the opponent gets back up.

If you’re knocked “to the mat,” tap the A button to crawl to your feet. The more damage you have, the harder it is to get up. Fortunately, you also have super armor during the “getting up” animation so Mac players can’t simply knock you down and then beat you up. This attack does 7% and no knockback.

Back Throw: Juke and Jive
The opponent, slightly staggered from being “grabbed” throws a feeble punch at Mac who quickly spins around them and retaliates with a quick jab to the back of the foes head. The opponent is sent spinning forward in a similar way to Meta Knight’s Side B, flying two Bowser’s widths forward (or backward rather). The opponent suffers from considerable end lag (albeit with super armor) as they’re slightly dazed still before standing; Mac however is perfectly free to set up any equipment he may need before the opponent can snap out of their daze. This attack deals 8% and mild, set knockback.

Another quick note however; if the opponent does not touch the ground after spinning away, they don’t enter a dazed state meaning you can’t just camp the edges and throw your opponent to their doom.


-Situational Attacks-

Ledge Attack (Under 100%): Chin Ups
Mac begins doing chin ups, pulling himself up twice before actually pulling himself onto the stage. Each time he pulls himself up he takes a swipe at the stage with his right glove dealing 6% and medium knockback.

Ledge Attack (Over 100%): Fading Fast
Mac pulls himself up wearily before taking a few exhausted swipes forward. Deals 3% and low knockback.

Rising Attack (From Back): Sit Ups
Mac begins doing sit ups rapidly, striking foes with his upper body! This attack deals 3% and can hit up to four times as he does four sit ups total. Very short range and low-medium knockback.

Rising Attack (From Stomach): Push Ups
Tell me you didn’t see this coming? You didn’t? Liar. Mac begins doing push ups, four in total…essentially it’s the same as the other rising attack, but with a slightly longer hitbox.


-Final Smash-

Mac’s glowing, what will happen now?! With a tap of the B button, Mac jabs forward with a single punch. Impressive, no? Really? It’s not? Well of course its not if you miss the punch! A flubbed jab means a flubbed Final Smash, it’s all or nothing, Mac, baby!

If you connect with the jab…that’s where the -REAL- fun begins! The screen then pivots to a behind the back view of Little Mac with his opponent directly before him! The Final Smash essentially recreates Punch-Out!! Although with a few changes…

Since your opponents are not boxers (unless you’re fighting another Mac of course…) they won’t really know what to do here! The confused opponents can’t even attack you now! Pressing the A button causes Mac to jab forward with his right fist, whereas pressing the B button causes a punch from the left! Holding up causes Mac to aim for the head!

An overall rule for this Punch-Out!! is that head shots do more damage, 4% in fact whereas body blows only do 2%. Now, why wouldn’t you want to use head blows exclusively? Simple; the opponent may not be able to fight back…but if they hold up, they’ll begin to cower, covering their head with their hands! Fortunately this leaves their body wide open to punches! However, if the opponent holds down, they’ll block their body with their hands leaving their face wiiiiide open for some forced reconstruction!

Perfecting Mac’s Final Smash means recognizing when to attack the face and when to work the body; if you attack blindly, you’re gonna end up not doing much damage. Use the opponent’s slow reaction time against them; Mac can punch much faster than they can block.

Overall this lasts for 12 seconds. As a side note, any opponents not directly involved in the Punch-Out!! will be magnified, receiving 1% per second.


-Taunts-

Up Taunt: Boxer Shuffle
Mac jabs forward with a flurry of punches, all while showing off his fancy footwork!

Side Taunt: The Champ Is Here!
Mac throws both arms into the air as he turns to face the camera! Mac really is the true underdog story!

Down Taunt: Shadow Boxing
Mac jives while casing his shadow on the ground before him or any walls behind him. Occasionally, the shadow won’t move the same as Mac, causing him to look at it with a puzzled expression.


-Victory Animations-​

Victory Pose 1: Title Holder
Mac holds his title belt over his head as Doc runs in from the side of the screen. Doc throws his arms around Mac’s waist and lifts the triumphant Mac onto his shoulder and shouts, “Woowee! Mac, baby!”

Victory Pose 2: Close Call
Mac appears in the center of the win screen, slightly hunched over. He stands up and waves to a seemingly invisible audience as Doc dashes up, raises his hand and says, “He can always take a whoopin’!”

Victory Pose 3: Back To Training!
Mac glances around and then pumps his fits, keeping them held up at about head level to both sides of him. Doc then bikes past, stops and calls out “Good job Mac, baby! But we gotta get back to trainin’, baby!”

Victory Pose 4: Yoshi Pizza
Sundance walks out onto the victory screen dressed as a stereotypical Italian-American gangster and pulls out a box containing a YOSHI-SHAPED PIZZA. Little Mac and Sundance then begin to eat the pizza while the losers watch on. Mac's normal victory theme also changes to this song: http://www.youtube.com/watch?v=jyYZUhSeRYc
THERE YA GO, SUNDANCE!

Lose Pose
Mac claps as he sits on a stool, Doc standing behind him while eating a chocolate bar.

Victory Theme: Get Up Mac!

Entrance
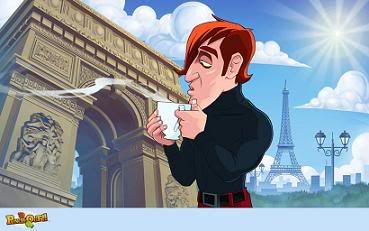
Doc rides onto the stage on his bicycle followed shortly after by Little Mac who runs after him, wearing his pink sweatshirt. Doc climbs off the bike and into the background while Mac throws off his sweatshirt, raising his fists and reading himself for the fight.

-Doc Conversations-

Upon use of Little Mac's Down B special, Doc will sometimes have a little conversation with him about the current opponent he's fight. If there's more than one, he'll pick a random opponent.

:mario2:: Mac, baby! This guy looks awfully familiar…you sure we haven’t seem him somewhere before? Anyway, hit him fast and dodge that jump punch!

:luigi2:: Mario’s little bro may not be as famous as his brother, but his fiery uppercut’s nasty! Don’t let him get too close, baby!

:peach:: Mac! Mario might get mad if you smack Peach around too much! Fireballs, baby! Fireballs!

:bowser2:: You’ve fought bigger, nastier guys than this overgrown turtle, Mac! Take him to the mat with some fast punches!

:dk2:: Him again?! Don’t let him make a monkey out of you Mac, dodge his punches and counterpunch!

:diddy:: For a chimp he’s got some quick moves! If he starts throwin’ banana peels, keep an eye on your footin’, baby!

:yoshi2:: This guy’s playin’ dirty Mac, baby! You’ve seen all kind’sa crazy stuff, but this guy’ll fightcha with his tongue! Stay sharp!

:warioc:: Mac, Wario likes lots of garlic; what do you think is better? Garlic, or chocolate? Hahahaha.

:link2:: A sword?! That’s just cheatin’! Mac, hit this sucka with an uppercut and don’t let him get back in the ring!

:zelda:: Well it’s normally not right to hit a girl, Mac…so I’m not sure what to tell you…

:shiek:: Normally it’s not right to hit a girl, Mac, but I’m pretty sure that princess changed into a guy! Take him…her…it…potato, whatever! Take ‘em to the mat Mac!

:ganondorf:: This guy makes Mr. Sandman look like a beansprout, Mac. But you know what they say, the bigger they are, the harder they hit! Wait, that’s not right…

:toonlink:: Didn’t you fight this guy already Mac, baby? Either way, jab, hook, counterattack, do what it takes to take this pipsqueak down!

:samus2:: Mac, baby! What do you think about me gettin’ one of those suits of armor? I think I’d look pretty good in one of those, baby!

:zerosuitsamus:: That robot had a lady inside of it? Now I've seen everything Mac, baby...

:pit:: Mac, baby! Don’t go hittin’ girls alright? Wait…That’s a guy! Change of strategy, Mac; beat him senseless!

:popo:: Two against one isn’t fair Mac! Even the odds with some smooth punches! You think they get hot in those parkas…?

:rob:: Mac, baby! You think robots like chocolate? I couldn’t imagine something that doesn’t like a good ol’ chocolate bar…

:kirby2:: Now this is my kinda guy, Mac, baby! Big, round, likes chocolate! We’d get along just fine!

:metaknight:: I’ve heard lots about this guy Mac, baby! Dirtiest character around! But you’ve got speed and strength to spare! Take this cheater down!

:dedede:: Well he’s big, and he never shuts his trap…but he’s nothin’ like King Hippo, baby! Treat him like that lug and you’ll be eating canvas!

:olimar:: What a wimp, Mac, baby! This guy sits around eatin’ chocolate bars while he gets somebody else to do all the fightin’! Show him what it means to work for once with some fancy footwork!

:fox:: Mac, baby! This guy’s a fast one! He’ll go to all kinds of crazy lengths to dodge your attacks! Remember to double tap R, or Z to…wait a second…

:falco:: Pizza? Cake? Bread? This bird’s makin’ me hungry Mac, baby! I might just take a little break for a quick chocolate bar…

:wolf:: Didn’t we alright take down this sucka, Mac? Either way, watch out! He’s got strength and speed to boot!

:falcon:: This guy’s got a killer straight Mac, baby! I once heard it blew up an entire galaxy…nah…what kind of punch could do that?!

:pikachu2:: Mac, baby! Watch where you’re punchin’! Slip up and you could be in for a shocking surprise! Get it? Hahahahaha!

:pt:: Look at this sucka watchin’ his friends fight! Be careful, Mac, three against one are odds I don’t like…!

:lucario:: Seems like this guy’s been goin’ through some crazy trainin’ of his own! All I know is he uses aura…so make his aura black and blue, Mac, baby!

:jigglypuff:: This puffball’s got a killer hook! Toast this marshmallow and we’ll be makin’ s’mores, Mac, baby!

:marth:: Alright Mac, show this pretty boy some real fightin’ skills alright? Some blows to that face of his oughta sort him out!

:ike:: He’s a powerhouse, Mac, baby, but he’s slow as molasses! Use your speed, baby! Use your speed!

:ness2:: He may be a little kid, but he’s got some nasty psychic voodoo goin’ on! Smack the taste outta his mouth and end the match quick Mac, baby!

:lucas:: This kid better get used to fightin’ folks bigger than him otherwise he won’t get anywhere, right Mac, baby?

:gw:: Watch out, Mac, baby! You’re fightin’ a livin’ chocolate man! Chocolate
doesn’t fight fair, so watch your back and punch hard!

:snake:: This guy’s armed to the teeth with weapons, baby! He’s also a master of stealth…fortunately, that doesn’t do much out here! Hit hard, baby!

:sonic:: He’s fast Mac, baby! But he’s not unstoppable! Hit hard and he’ll be picking glove out of his teeth for weeks!


-Stage-

The Ring
Where else would Mac’s home stage be other than the ring where all the action takes place?! The Ring is a simple arena that plays out on a relatively flat boxing right. The ropes around the ring act sort of like the Bumper item, throwing away any opponents who bump into them. The Ring is surprisingly big (about the size of Final Destination) and without walk off edges (due to the ropes blocking the side blast zones. The only way to KO here is either straight up or over the side of the ropes…for whatever reason this ring floats in space. Don’t ask why.

During the course of the match, several famous Punch-Out!! contenders will appear to shake things up a bit…

Glass Joe

Ah, good ol’ Glass Joe…poor guy never seems to win a fight! When Joe climbs into the ring, things are about to get…the exact same. Glass Joe doesn’t really DO much…on occasion he’ll take a swing at the players, but mostly he just stands about, cowering and covering his face. Poor Joe can in fact be KO’d by dealing 30% worth of damage to him; once KO’d, he releases a shower of croissants which each heal 2%.

King Hippo

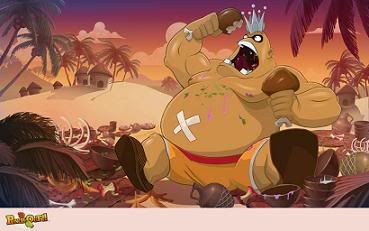
All the way from the Hippo Islands (where ever those are…) comes the massive King Hippo! Once Hippo’s waddled his way into the ring, move space will become noticeably more constricted. Getting too close to Hippo will leave you with an overhead smash to the head. However, like Joe, Hippo can also be KO’d; by deal 50% worth of damage to Hippo, the massive monster of a man will fall. If you attack his head, his pants will drop; hit him in the gut for double damage!

Bald Bull​

Bald Bull’s possibly the toughest of the foes that appear on this stage, if only for one reason…he can’t be KO’d…except by one character. Bald Bull will shuffle his hands about and then jab forward with a powerful hook! He’ll also occasionally unleash his Bull Charge attack which will send you flying, even at low percents! Now, Bald Bull has 80% worth of health…but like his previous appearances (at least the tougher time around) Bald Bull CAN’T be knocked down! Except by Mac’s uppercut. Yes. Mac alone is capable of taking down Bald Bull…fortunately he’s only a stage hazard.

Soda Popinski

He may not be able to drive so he’ll walk all over you! The…soda pop…addicted Russian is the last opponent possible on the stage. When Popinski appears, he’ll start unleashing a flurry of uppercuts! These cause a nasty amount of damage, so be careful! Overall, Popinski has 100% health…if you can topple him, you can topple anyone!

Regardless of health however, each opponent will vanish after 20 seconds…

STAGE MUSIC
Punch-Out Theme Remix: http://www.youtube.com/watch?v=kRgk0hLdQt8
Minor Circuit Fight: http://www.youtube.com/watch?v=2KmocGW5x_0&feature=related
Major Circuit Fight: http://www.youtube.com/watch?v=f0V6Q-YLuN0&feature=related
World Circuit Fight: http://www.youtube.com/watch?v=ebYp_adEDYk&feature=related
Soda Popinski: http://www.youtube.com/watch?v=iYhQO57hmPQ
Disco Kid: http://www.youtube.com/watch?v=MSUt6AghGLk&feature=related
Bear Hugger: http://www.youtube.com/watch?v=ed6Hs-NUDsk&feature=related
Aran Ryan: http://www.youtube.com/watch?v=nno-FUI0HAQ&feature=related
Mr. Sandman: http://www.youtube.com/watch?v=_7VoqXGtOi0
Glass Joe: http://www.youtube.com/watch?v=Ts_qn-yCcPA&feature=related
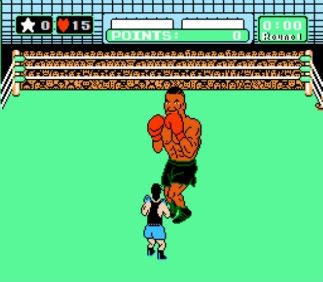

-Assist Trophy-​

"Iron" Mike Tyson

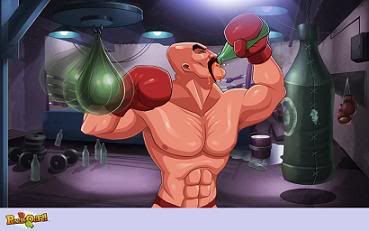
Mac's rival in the original NES Punch-Out!! and real life boxer Mike Tyson joins the fray as a summonable Assist Trophy! When summoned, Mike will stand where he was called to and violently uppercut any opponents too foolish to get close to the former undisputed heavyweight champion of the world. Iron Mike's uppercuts do about 15% and high knockback, so make sure you avoid him or you'll be sent flying! Mike stays around for a full 10 seconds; if you managed to avoid him for all 10 seconds, he'll say, "I've never seen such finger speed before!" as he vanishes. Yep, that's it. No ear biting jokes here...wait...

-Match Up-​

Vs.Wispa:100/0
Mac has a 100/0 match up against Wispa due to Doc being on his side. Doc can't resist a good chocolate bar.

PLAYING AS - Float Like A Butterfly
When playing as Mac, once must follow the basic rule of boxing; stay on your toes and wait for an opening. If you rush in blindly expecting to take out foes with your side smash or aerial attacks, you may be in for a rude awakening. The key aspects of Mac’s playstyle is to set up your plans in advance, make sure Doc is close at hand when you need him and use the Tagging Punch when you see an opening.

If a Mac player wants to be good, they have to plan, plan plan. Make sure Doc sticks close or your lack of important equipment based moves may be your downfall. Fortunately, Mac has an exceptional game against projectile campers (which is fantastic considering he’s got such short range) due to his various equipment aspects. For example, Mac’s Neutral Combo can counter most projectiles just fine. Another line of defense can be the down smash sandbag set up; the sandbag will endure most projectiles, allowing Mac to have a temporary wall between himself and his foes allowing him to use his Down B to restore health while safely tucked away from projectile spammers.

When Mac gets up close, Tagging Punch will be your real bread and butter. Without a mastery of this attack’s timing, maining Mac is a long, tough road. Not only is this the best way to aid Mac’s recovery, it also can help save yourself from some very nasty Smash attacks. While the timing is easiest with Smash attacks, theoretically any attack can be countered so long as it doesn’t come out instantly…just the timing’s very difficult. Regardless, abuse this move if your foe is too close for comfort, build up your Stars and unleash a powerful uppercut right in their face for an easy KO!

Several of Mac’s prime KO moves have a considerable amount of lag (side smash, dash attack, back air) or other limiting factors (Up B). Considering this another reason to plan ahead with Mac, your best KO moves are going to require a bit of planning in order to trap your foe with them.

As far as Mac’s heart system goes, keep a careful eye on the number at the bottom. If your hearts dip too low, abuse this opportunity to set up some equipment with Doc or have Doc race to your location…sometimes it’s actually best to let yourself tire out just so you can get Doc there faster! Speaking of setting up the equipment and planning ahead, almost all of Mac’s throws provide perfect opportunities for this, use them!


PLAYING AGAINST – Sting Like A Bee
A fight against an experienced Mac player can be hell if you’re unprepared; fortunately, that’s exactly what you should do, make your opponent unprepared. If Mac sets up a piece of equipment, destroy it or use it against him. If Mac summons Doc, burst his tires so the Mac player is required to think with what they have for a while.

Mac players, especially n00b Mac players tend to be over reliant on the Tagging Punch. While this has the possibility to cancel out all your powerful KO moves, it does nothing against throws; Tagging Punch happy Mac? Toss him aside! It’s also recommended to stay low while fighting a Mac player; because his “grab” is so easy to dodge, his options will become limited at close range.

Projectile spamming usually works well against the short-ranged boxer but make sure to watch your surroundings as Doc could plow into you without warning. If the Mac player tries to abuse their Down B move, punish them severely and quickly!

Another prime way to successfully gimp a Little Mac main is to reduce their opportunities to gain Stars. Without Stars, Mac’s recovery is far less than stellar, so long as you don’t let Mac counterattack, you should be fine in this aspect.

One final tip is to watch the opposing Mac’s heart meter; if it starts to dip, you can be assured that the Mac player will attempt to back roll your next attack or find a time to use their Down B. Stay aggressive against Macs, but watch just how aggressive you’re being…


Wizzerd

Smash Ace
Joined
Feb 24, 2009
Messages
929
MasterWarlord said:
He’s random? A tad bit, seeing I gave him vines for vine whip, a couple ice attacks, along with Aqua Ring and Water Spout, but that’s about it.
Oh no, I mean that the moveset came with very little warning and the character itself was random... but that obviously isn't an issue by any means. The moveset itself wasn't random at all.

Little Mac: You got really creative on this one. I certainly would have never been able to make a MYM-quality set out of a boxer with only punches. The moves are sort of unoriginal, and the specials are kind of random, and I have a really minor complaint that too many of Doc's moves involve chocolate bars (lulz "You’re fightin’ a livin’ chocolate man! Chocolate doesn’t fight fair, so watch your back and punch hard!"). You did a good job giving him a unique playstyle when he has so little to draw from. Good job!
 

kirbywizard

Smash Hero
Joined
Jan 4, 2009
Messages
6,713
Location
Napa, California . . . .Grapes For Miles
3DS FC
0989-1847-5768
I will read the Mac moveset, right after I post this


Oliver Duke of Tanas


Oliver, The Duke of Tanas is a senior member of the Begnion Senate that was thought to be executed in Fire Emblem Path of Radiance for his crimes against the state after being defeated by the Greil Mercenaries. In Radiant Dawn it was revealed that he was saved by Duke Hetzel and was hiding in his beautiful estate in the Dukedom of Tanas after his defeat. He is one of the few recruitable bosses in Radiant Dawn. . . Oliver in the both Path of Radiance and Radiant Dawn is shown as being a bad guy, yet his ideals are screwed but are not entirely immoral. Oliver is very different compared to most of the other priest from the Fire Emblem game which are kind hearted.

size- large: 7/10
Oliver is slightly taller then Ike and not quite as wide as King Dedede. His waist possibly the waist of Ike's waist multiplied three times.

Weight:7.5/10
Oliver is very heavy and is a little heavier then great king ganondorf. His appearance is taken from Fire Emblem Radiant Dawn were he is a little fatter then from his appearance in Path of Radiance.

Walk Speed- slow 3.5/10

Oliver walk speed is that of only wario's walk speed.

Dash- average: 5.5/10
O poor Duke of Tanas you run so much in every Fire Emblem game you have been. For a fat man Oliver can run very fast. His dash speed is a little faster then Mario's dash speed.

First Jump: 5.5
Oliver uses his feet with all his might while staring up into the sky to jump. Oliver first Jump is as high as Zelda's first jump.

Second Jump:8.5/10
A alluring bright light surrounds oliver's body that pushes him a little higher. Oliver does a small 360 in the air as the light pushes him upward. The vertical gain is a little less then Ness's second jump.

Fall Speed:3/10
Oliver fall speed is even less then Luigi's. Making him a rather large and slow target on his way down to the ground

Traction:
Oliver's Traction is very good. He does not slide as far as Luigi's and immediately begins to go the direction you wish for him to go. Sadly due to his rather fancy get up his chance of tripping is 3%, even more then Luigi's trip percent.

Oliver has very good dodges in the air. His regular dodge on the ground is very fast but his roll is very slow and can easily be predicted an punished.

Power: 8/10
Oliver has very strong magical and physical attacks throughout his moveset. I would say some where between Ike and D3.

Combo Ability 9/10
Oliver's combo ability is very good, a good amount of his moves tie in well with each other. Think of Luigi in the air when it comes to combos.

Priority 8/10
Oliver has fantastic priority on almost all of his attacks, but certain side effects and lag hold him back

  • Crouch: No
  • crawl: No
  • wall jump: No
  • wall cling: No
  • glide: No
Weapon:
Oliver is a saint in his latest appearance so he can use all levels of Light Magic. His weapons consist of these Light Tomes Valaura ( A high Level of corrupted magic that causes a poisoning effect), Rexaura( High level Light magic, the strongest in the game), Nosferatu ( A light magic tomb that has healing property) Also ellight ( which is a slightly stronger light tomb then light) .

Poison Effect
When an opponent is hit by Valaura she or he will become poisoned. When the opponent is poisoned he or she will go into a state as if they were hit by Lip's Stick. They have a purple like color and take 5% damage each second. The more damage they have, the longer the effect last. 0-20%= lasts for 2 seconds 20-40%= lasts for 3 seconds 40% and higher= lasts for 4 seconds

Broken Nose :ohwell:
Everyone once in a while when Oliver takes to many hits to the nose he screams
“Oww!!! My nose! My beautiful nose!”. When he screams this he takes 1% damage :mad:

Standing Pose: Come To Daddy:
Oliver stands while holding his the most recent used Light Magic Tomb while posing like so.

If the enemy is ranked high in the beauty chart ( located in standard A attack) he will say “Come To Daddy”

Idle Pose: Fancy Mustache
Oliver begins to stroke his mustache as he looks around for anything that is beautiful.

Walk Pose:
On The Cat Walk Oliver walks normally like any fat man would, his belly jiggles after each step. He looks similar to his Standing pose yet his other arm is out to the side swinging side to side.

Running Pose
:Oliver has two running poses.

First Running Pose: For Beauty

If Oliver is running towards the opponent, he has a rather serous face and is tightly grasping his tomb. His hand is tightened into a fist.

Second Running Pose: Not The Face!!!
If Oliver is running away from the opponent, he is sweating with fear and is running a little more frantically. He even runs faster then Marth when running away from the opponent.

Sidestep: You Can't Touch This
Oliver takes a step back, the animation is very fast, about as fast as link's sidestep.

Rolldodge: Dance With Grace
Just horrible, very laggy and will last very long at the end. Oliver does a spin holding his free hand not holding the tomb. His cape moves that as if blessed by the wind. Well until he gets hit that is.

Air Dodge: To Close

Oliver sweats like crazy with his arms flaying in a desperate attempt to dodge. It has no start up lag and lasts pretty long. Can easily dodge attacks in the air, but if he lands on the ground during this animation he suffers some minimum lag.

Swimming:
Oliver begins to do the back float, and will float towards the direction the control stick points to.

Sleep
Oliver mustache seems to go down, and Oliver closes his eyes. He then lays down on his back and little sleep bubbles ( like in jiggs rest) begin to appear. When Oliver wakes up he quickly jumps back up and twirls hi mustache.

Trip:
Oliver lands straight on his back, and lay there face looking up, with his hands spread out

Dizzy:
Oliver touches his forehead and twitches his mustache. Stepping forward and back.

Specials Filled With Beauty Pills

Down Special:Counter
Oliver takes one step back and holds out Valaura, Oliver stays still for a second. During this animation if Oliver takes any damage he will counter like Marth and Ike. Will cast valaura, launching the opponent away. It does the amount of knock back and damage equal to the attack Oliver just countered except the opponent is left with Poison side effect. Sadly Oliver is vulnerable for 3 seconds after Oliver leaves the counter animation so It can be easily punished if Oliver messes up. If this is used in the air Oliver will go into a free fall animation once it is over regardless if he was able to counter or not.

Side Special: You Can Not Escape Beauty's Grasp
Oliver Will launch a Nosferatu spell at the opponent. It is controlled very similar to Zelda's side B, but is much faster and easier to angle. It has a smaller hitbox though. It deals out 10% damage, and thanks to Nosferatu's healing priority. ( Which only works if it makes contact with the opponent) it heals Oliver by 5%. This move can easily be spammed .

How ever if this move is used next to one of Oliver's units, then instead of Oliver attacking with nosferatu, Oliver will pull out a Heal ( a staff that allows the user to heal units) and heal the unit but 10%/ This takes only .5 seconds and is great to keep useful units on the stage. This can only be used up to ten times each stock. If you try to heal a unit more, the staff will break.

Up Special: Rewarp
Oliver's third jump and filled with beauty. Oliver takes out a Rewarp staff ( it allows the user to wrap himself to any location on the map) and a warp symbol surrounds him and will warp him to a new location ( which will vary depending where the player is aiming his control stick). This only takes .5 second for him to warp, and he can be knocked out of this move. But he can use it again if he gets knocked out of it. When Oliver warps to a new location and is still in the air, then he goes into a free fall animation. Now if an opponent is caught in the warp circle ( note Oliver and the opponent have to be in the air for this to happen.) then he/she and Oliver will be warped to the same location. They do not fall into a free fall animation like Oliver. This can help, or hurt, it depend on the situation. Oliver warps as far as the length of Fox's side special.

If Oliver is on the ground it takes him a second to fully warp, but if the opponent attacks Oliver before he gets a chance to warp. Oliver will put away his rewarp and take out a warp staff. Oliver will then warp the opponent in any direction the control stick is pointed at. The opponent goes as far as the length of Fox's side special.

Neutral Special: Reinforcements
Oliver uses the rescue staff to warp a fire emblem unit next to him.
  • Takes about one second to warp one unit.
  • Most units can not jump.
  • Units must be drained of all stamina or knocked off stage for them to die
  • Units are free moving and do what ever they want.
  • If a unit activates a crit, it does three times the damage.
  • Only two units at a time may be allowed on the field.
  • Note Oliver can not damage these units himself.
Units Will Go into 3 possible Commands: Attack, Defend, Support. Oliver can have his troop change command by holding B while next to one of his units. While holding B, you can tell a unit what command to do just by moving the control stick

  • If You move the control stick to the right or left: The unit will go into attack
  • If You Move the control stick up: The unit goes into Support
  • If You move the control stick down: The Unit goes into defend.

Here is a list of the units. Units at the top are most likely to appear then units located at the bottom of the list.


General: 60% Stamina: Crit Chance 5%
Generals are big very durable units that have appeared in every Fire Emblem Game that has ever been made. Generals are about the size of Ganondorf. Generals are fantastic units to have on the field, they are fantastic when put into support to defend command but are rather lacking in attack command. Generals have 60% Stamina and have the most stamina out of all of Oliver's possible Units. The General can not jump, so it suffers in moving stages.

Defend: When a General is put into Defend command then they will be in front of Oliver to take damage from projectiles. The General does not flinch what so ever from any projectiles. If an opponent get close to the General, the General will attack with a Silver Lance. The attack takes about the same amount of time to launch as it takes Mario' Forward Smash. This has average range and deals 13%. The General is some what slow, so it might lag behind when Oliver moves to a new location.

Support: The General stays in the middle of the stage holding a might spear. The General throws the spear ( which also deal 13%) and goes as far as Final Destination. It can only go horizontally and travel straight. It takes 3 second for the General to throw another spear. The spear travels as fast as Falco's lazer, and can not be reflected. If someone gets to close to the General, he attacks with the silver lance.

Attack: The General doesn't do well in this command. The General slowly makes its way to the opponent and attacks with a Silver Lance. It is easy to attack him, or better yet knock him off stage. It might work well in small stages but the General shines in defense not offense.


Soldier: Stamina 15%: Crit 0%

Soldiers are typical lance wielding enemies, and are pretty easy to kill. They are only the size of Mario, and can easily be killed. They have the lowest stamina out of Oliver's units.

Defend: The soldier stays behind Oliver and only rush in front to attack opponents when they get to close to Oliver. Soldiers attacks with Iron lances up close and only deal out 8%. They are rather slow in attacking and are better of dead then defending.

Support: The soldier stays a pikmin throw distance away from the opponent and begins to toss javelins at a rapid pace. They give off no knock back and do 5% damage each hit. This is great to support Oliver from afar, or other units that are attacking the opponent. They can till be easily killed off though. The javelin is similar to the spear used by the General.

Attack: The soldier makes his way to the opponent and begins to attack with the Lance. Really useless and can be killed much quicker. It is a great way to get rid of him if you do not want him. They can be of some use, as they can actually jump, but only as High as Jigglypuff's first jump.


Sniper: Stamina 30%: Crit 15%
Snipers are experienced archers with more defense and HP. They are great support, but can not attack up close. They can easily rack up damage, that is if you cover for them. The sniper attacks only with a Silver Bow and that deals out 16% damage.

Defend: The snipers stays by Oliver's side and launches arrows at the opponent from any distance. It can move faster then a General and does not have to much trouble keeping up. It takes two seconds for him to launch an arrow. He isn't as good in Defend as he is in support though. The sniper can jump as high as zelda's first jumps.

Support: The Sniper goes to the center of the stage and begins to shoot arrows, it only takes a second for the Sniper to shoot each arrow, and can hit an opponent in any direction. Even if he or she is behind an obstacle. They are great support, and should be kept safe from harm.


Swordmaster: Stamina 25%: Crit 40%
Well experienced Myrmidons that have mastered the way of the sword. Swordmasters do not have high stamina but make up on their high crit chance. They use a silver sword and attack with quick slashes that deal out 8% each hit. His attacks are rapid, like Kirby's Jab Combo. He is quick on his feet and can easily catch up to opponents. They can only be in attack mode as they have no far range weapon, and are not to great of shields for Oliver like the Generals. It is only the size of Mario

Attack: The Swordmaster quickly dashes for the opponent and can even jump as high as Falco. They are only capable of one jump. They run as fast as Marth and can easily hunt down opponent in a small stage as Battlefield. Oliver can support the Swordmasters from afar with far ranged attacks. His high crit chance makes him deadly up close.


Paladin: Stamina 40%: Crit 5%

Strong horseman that can move to many far off location, and can easily support other units. The Paladin is great in all areas, but has to be commanded well depending on the citation. The Paladin I equipped with a Silver Sword, Hand Axe, and Silver Lance. It is the size of Bowser but only because of the Horse.

Attack: The Paladin can jump as high as high as Jiggs first jump. It will runs as fast as Ganondorf towards the opponent equipped with a Silver Lance, that does 16% damage each hit. The Paladin only takes .5 seconds for each thrust of his lance.

Support: The Paladin will retreat about 3 stage blocks away from the opponent and throw his hand axe. The axe will return like a boomerang and deal 14% damge, it takes him 3 seconds to throw the axe. The axe travels as fast as a Pikmin Throw. The main point of his support is not to attack from afar but to help out other units. When a unit only has 1/3 of his stamina left, the Paladin will quickly run towards the unit * it runs as fast as Sonic now* and rescue it. It will quickly take the unit back to Oliver * In which Oliver can heal the weakened unit*

Defend
: The Paladin will be close to Oliver and attack any close units with a Silver Sword that deal 15% damage. It is rather large so it can take a good amount of hits from projectiles, to give cover for Oliver.


Berserker: Stamina 50% : Crit 50%

Berserkers are strong axe wielding warriors with very high crit chance. They can run as fast as Bowser and are always swinging their Killer Axe like a mad man. They Can jump, swim, and can kill at 100% damage. They can only Attack Command and will not listen to reason. They will hurt the opponent, other units, and even Oliver. It take them 2 seconds to swing the axe and they deal out 20% damage each hit. They are the size of Ganondorf

Attack: Rampage across the stage and destroy everything in it's path, They are very dangerous to everyone and are the only units that can be damaged by Oliver.


Druid: Stamina 20% : Crit 30%
A magic user that is skilled in dark magic. Druids attack with the Dark Magic Tomb called Luna. They deal out 25% damage but it takes them a full 3 seconds to attack. The Luna spell aromatically homes in on the opponent and can only be dodged. It breaks through shields. They are the size of wario. They are only able to support.

Support: The Druids goes to the center of the stage and attacks with Luna constantly. It is vulnerable and he be protected at all cost. It can easily rack up damage from afar. His spell homes in on opponent so there is a good chance the opponent will try to eliminate this little guy.


Bishop: Stamina 25%: Crit 0%
A high level priest that has gained the ability to learn light magic and still holds the ability to use staffs. Bishops are equipped with a physic staff and Purge Spell. They can heal Oliver by 15% each time they use the Physic Staff. They can deal out 10% damage with the Purge Spell.

Support: The Bishop stays in the center of the field, and pulls out the Purge Spell and attacks from afar. It takes him two seconds for each spell. The spell can be shielded and dodged like normal projectiles. It homes in on the opponent like Luna.

Defend: The Bishop stays about two stage builder blocks behind Oliver and heals him with the Physic Staff. The Bishop can not jump but as long as the Bishop is two builder block spaces away from Oliver he can heal him.

Standard A attacks

Oliver's Standard A Attack changes from the level of beauty the person he is attacking has

Standard A Attack: Shut Up Beast
In this attack Oliver has two possible situation. Oliver extends his hand out and does a slapping motion as if he was slapping someone clear across the face. This only happens if the opponent is not to close to Oliver. It does 6% and knocks the opponent away. It knocks the opponent far enough to not have to worry about getting combo. This move is great when Oliver is looking for a good amount of free space.

Come Here My Sweet
The second situation for this attack only works if the opponent is to close Oliver. If the opponent is standing closer to Oliver, he or she will be grabbed by Oliver. This is not Oliver's normal grab, Oliver will hold the opponent by his or her hand as if inspecting him or her. This is when Oliver can use the rest of his standard A moves. The Hitbox for Oliver to go into this animation is as big as D3's Jab 1 attack. Note the opponent can shield this!!!

Judgment

Once the Player presses the A button a second time ( note this is only if Oliver has gone into the second situation not the first, if Oliver did not grab the opponent with his standard A, oliver will only repeat the standard A Attack again if the A button is pressed a second time). Oliver will then grade the opponent on his beauty Rank. Note if the player takes to long to press A, the enemy will escape just like any other grab.

Oliver's Beauty Rank List

The Beautiful People


:marth: :peach: :zelda: :link2: :pit: :zerosuitsamus: :luigi2:

If Oliver has any of the above characters, Oliver will go into a state of aw. Oliver will then quickly cast a close range spell of Nosferatu, dealing a whooping 20%. Thanks to Nosferatu Oliver will heal by 10%. The opponent is sent flying while looking slightly more beautiful then before. This can kill person at around the weight of mario at around 65% damage.

The Pretty but not Yet beautiful People

:falcon: :snake: :popo: :jigglypuff: :lucas: :olimar: :ivysaur:

If an opponent is ranked in the above section then Oliver will have a disappointed look and then begin to vigorously slap the opponent silly. Oliver does a total of 10 slaps, before throwing the opponent down to the ground. This has spike priorities and deals around 15%. This can kill someone like Mario at around 70%

The Average Joes

:falco: :fox: :gw: :kirby2: :lucario: :ness2: :mario2: :squirtle: :shiek:​

Oliver has a regular face as if he has seen better. Oliver pulls shoves the opponent forward, the opponent, goes into a tripping animation and Oliver launches ellight to follow up. This leaves the opponent stunned for a small amount of time. No one can knock out the opponent out of this stunned animation, but can still rack up damage. The opponent flies a bit upward when the stunned animation is does.Because the opponent is launched upward Oliver can not do an infinite combo with his standard A attacks.

Wow Kinda Ugly Folk


:yoshi2: :dedede: :wolf: :rob: :pikachu2: :metaknight:

Oliver gets a really disturbed face and slams his tomb against the opponent's face. The amount of damage this inflicts depends on the tomb. Noseratu= 10%, Valaura= 15%.ellight=5%. Once the opponent is slammed by the book, he or she gets stuck into the ground. This a very horrible situation as this gives Oliver time to launch his kill moves. Note, the tomb Oliver is carrying changes as he does different attacks. Later in the moveset Oliver will have certain attacks that use specific Tombs.

O Dear God My Eyes

:bowser2: :toonlink: :diddy: :dk2: :ganondorf: :ike: :charizard: :sonic: :warioc:

Oliver's face turns plale and disgusted. Oliver then says “Your crude weapons have no force against true magnificence! Blessed with such beauty, I have no foes... only inferiors! “. Oliver then launches a close range Valaura spell at the opponents. The enemy screams as the poison sets in and Oliver then quickly kicks the enemy away. This not only does 15% but leaves the opponent in a flower head like state. The enemy takes 5% damage every second, and the poison will last longer the more damage the opponent has.

Oliver's Beautiful Tilts


Forward Tilt: Out of My Way
Oliver does the all and mighty shove motion that you see in the Fire Emblem Radiant Dawn. Shove was a new game tech that was installed in Radiant Dawn. In Radiant Dawn it would allow characters to shove a unit that is lighter one space forward. Here this shove causes the opponent to trip and slightly push the enemy away. This small opening can let Oliver get in a grab or better yet a Standard A attack. Sadly a character like Luigi that has rather strange traction would slide a bit to far for Oliver to do follow up with anything. This moves does 6%. This is one of Oliver's few non-magical moves. This move has as much priority as Luigi's Nair so can easily cut through some annoying attacks, such as Olimar's forward Smash.

Down Tilt: Bear Hug

Oliver is a pretty big man, and who else is a big man. Well Bear Hugger from Punch Out seems pretty big as well don't you think they would have meet in some alternate universe? Well in this case they did and Oliver seems to have picked up the Bear Hugger's famous move the Bear Hug. This bear hug isn't as strong as the original but still does the job well. Oliver will open his hands up and attempt to grab the opponent. If this attack makes contact then the opponent is grabbed by Oliver and the player must rapidly tap the A button. For each tap Oliver deals out 3% damage. This is treated as a grab so the opponent can escape, but not as quickly as if he was being regularly grabbed.


Up Tilt: A Corrupted Blast
Oliver's most reliable kill move, but kills only vertically. Oliver raises his hand and a blast of Valaura appears above him. The blast is rather large and reaches a little bit lower then you would expect. Similar to Lucas's Upsmash, but yet weaker. This move is fast to activate and kills Mario's at around 100%. If you hold the A button then Oliver will keep his hand up, and the valaura will still be up, but will not kill what so ever. It will be gas like and if an opponent touches it then they will be poisoned. Anyone that touched this will also flinch a bit and leave themselves open. Oliver is not effected by this but his troops are. The gas lasts for 5 seconds and is great to keep the battle to the ground

Watch Oliver Dance in the Air ( Air Attacks)

Nair: Money for The Poor: Oliver's Got The Bling Bling * Rap Music Plays*

Oliver is known for being a very wealthy man, one of the largest stages in Radiant Dawn was his mansion filled with treasure and priceless works of arts. For his Nair attacks he opens his arms and spreads his legs. Flying out of his pockets is tons of gold coins, for some reason very very sharp gold coins. The coins come out quickly and surround Oliver for a small amount of time. The coins only do 10% damage but leave the opponent stunned for a short second in which can get slammed by Oliver's still airborne body which cause another 8%. This attack is controlled similarly like Lucas's Nair. It can kill Mario at around 180%. It has super lag if Oliver hits the ground before the animation is done. The coins actually fall down once the attack is done and stay on the stage for 5 seconds. Everyone except Oliver can trip after walking or running over the coins.

Fair: A Small Error
Oliver's strongest, and most powerful attack, but it is one of the most dangerous in his entire move set. Oliver begins to cast Rexaura at close range only to be launched by his own spell like a rocket. Rexauara begins to push Oliver backwards. Oliver's face begins to look uncomfortable and this moves does 5% in the beginning to Oliver himself. As long as the player is holding the a button the attack will continue and still push Oliver forward. The speed that Oliver is traveling is increasing drastically and can easily cause Oliver to be killed by crossing the boundaries. The blast that happens in the beginning in front of Oliver causes 18% if the opponent is hit, and can kill Mario at around 80%. This is not the strong part of the attack. If the opponent is hit by Oliver himself, then the amount of force and knockback is greatly increased. It can then kill someone like Mario at like 60%.

This attack can be slightly angled and work's great as a recovery move horizontally. But one big horrible mistake a player could make is having Oliver crash into the ground. Oliver will by forced to end the spell and be sent scraping against the ground and Oliver takes 20%. Anyone that crashes into him will be sent upwards a small amount and take 15%. If Oliver gets near the edge he will grab it, If there is no edge then Oliver will fall, but won't be helpless and will have a chance to recover with one other move. This Fair comes out quickly but has the lag of Ike's forward smash to actually stop it. Risky but can be deadly in the hands of a good player. It has the greatest priority in the entire game sadly, this has to be kept fresh and can be dodged from afar.

On another note, if Oliver's center body makes contact with the center of the opponent during this attack, then the opponent will be slammed like if he got hit by a rocket in a cartoon. When this happens, he or she will be stuck to Oliver until this move ends. So you can nail your opponent like this and kill him and yourself by blasting off the stage.[/COLOR]

Bair: When Push Comes To Shove
:A safer and much weaker version of Fair. With this attack Oliver casts a Nosferatu spell, but made a mistake of having it appear behind him. The blast of Nosferatu deals out 12%, and if it hits, heals Oliver by 6%. This launches Oliver a little bit forward, and has pretty good priority. It comes out very quick and if the enemy is hit by Oliver himself then the enemy take 18%. Has some good amount of lag. Oliver enters a cool zero gravity animation once the blast is over. This is the part where Oliver can get very easily punished. This attack has good knock back on both front and back. So to prevent of getting punished for the ending try to make sure the opponent gets hit by Oliver or Nosferatu. This move kills Mario at around 110%.

Dair: Bask in The Beauty
Oliver quickly uses nosferatu above him and launches himself downward at a very fast rate. Oliver is like a rocket when he launches himself down. If someone is caught under him then they will crash to the ground with Oliver and will get stuck as if they were hit by a pitfall. If Oliver does not hit an opponent then he simply land on the ground on his tip toe as if there was no force what so ever. This move is great for getting Oliver out of the air quickly and has high priority so it can help Oliver get away from air game characters like Luigi. This move can act as a spike but Oliver also dies with the opponent, and chances are you will be below the opponent if you are knocked off the stage.

UpAir: Please Move if You Will
Oliver pulls out the great and mighty warp staff.(A rare staff found in most fire emblem games.)Oliver uses the staff to send anyone above him or next to him, to be warped under him. This gives Oliver the opportunity to go for a Dair, or even a Nair. If the enemy is below Oliver, when Oliver activates the wrap staff. Then he or she will be warped above Oliver. Oliver can only use this once every time he jumps off the ground or platform. This move is very fast, fast enough to lets say warp someone like Marth that is right under you about to hit you with an Uair. This can save Oliver even from spikes such as Mario's and DK's spikes. It doe no damage, and has no startup or end lag.

Grabbing and Taking What Is Beautiful

Oliver's Attempt to Grab
Oliver opens his arm, and clumsy steps forward with his right foot, while he lifts up his left foot. As if he was hopping on one foot.

Pummel Animation
Ok time to bring that Beauty Chart Back. Oliver has 5 possible Pummel Animations.
  • Animation 1: Time to Pay your Taxes
  • Deals 4% Damage. Oliver Begins to use Nosferatu on the opponent healing himself by 3%. This animation only works if Oliver grabs The Beautiful People in the Beauty Rank List. With this animation the opponent has little more trouble ecaping from the grab.
  • Animation 2: Let Me Rearrange that Face
  • Oliver begins to slap the opponent silly dealing 8 % damage each hit. This animation only happens if Oliver grabs The Pretty but not Yet beautiful People. This animation is a lot easier to escape from but Oliver can pummel twice before the opponent is released when the opponent is above 20%
  • Animation 3: Bask in The Fat?
  • Oliver begin slamming the opponent against his large stomach. Dealing 5% damage. This animation only happens when Oliver grabs The Average Joes. The opponent can only take up to four pummels before he or she is released. They can escape sooner if they are at low damages.
  • Animation 4: Reading Its Good For Your Brain
  • Oliver begins slamming his tomb against the opponent's face. Noseratu= 4%, Valaura= 5%. ellight 3%. This only happens if Oliver grabs Wow Kinda Ugly Folk.

  • [*]Animation 5: An Embarrassment Towards The Living
  • Oliver begin blasting short Valaura spells on the opponents face. Does 3% damage each hit, and also the poison effect. This animation only happens when Oliver grabs a person ranked under O Dear God My Eyes. This is his best pummel so if your ranked low on his beauty list, you better be carfeul fighting up close.

Oliver's Throws

Forward Throw: Hold Tight
Oliver throws his opponent down on the ground, and does a mighty shove. This is a very strong version of Oliver's Forward tilt. This launches his opponent in a straight horizontal angle. This can easily kill Mario at Around 100%. If Oliver grabs the opponent over the edge, because there is no ground under the opponent Oliver will throw the Opponent down. The opponent will not be able to grab the edge for a short moment. This is not an automatic kill though, the throw is rather weak when this happens, and the opponent can still manage to recover. Can give a good scare though. Does a total of 9% if Oliver gets to shove.

Down Throw: Pressure Point
Oliver throws the opponent below him and does a huge stomp,giving off 5% damage. Oliver then quickly does a rexaura spell above him, pushing himself downward on to the opponent. This gives off 10% and launches the opponent upward. This is Oliver's strongest throw and can kill at 95%.

Back Throw: Gentle Massage
Oliver get behind his opponent and launches a ellight spell on his or her back. This causes on 11% but gives off good knock back. The opponent is launched far in a daignol direction. If he or she hits an obstacle or the ground it self, they will automatically be stuck into the obstacle or ground. They will most likely be far enough where Oliver can attack from afar, or give Oliver enough time to run. This works best in a stage such as Shadow Moses where someone could get stuck right next to Oliver. Giving Oliver the chance to score a kill.

UpThrow: A Quick Trip
Oliver throws the opponent just above him, and stabs him or her with the warp Staff. The Warp staff activates, and sends the opponent in front of Oliver . The opponent is dazed, and this gives Oliver the chance to sneak in an Standard A Attack. This throw does no damage.

Release: If the opponent escapes Oliver's grab, Oliver is pushed and almost knocked off balance.

Oliver Smashing His Way to Victory​

Forward Smash: A Stunning Blast
Oliver begins charging a Valaura a little bit in front of him. This attack reaches as far as king dedede's forward smash. When not charged it kills Mario at 80%, when fully charged it kills Mario at 70%. This takes long to fully charge up all the way, and has a good amount of ending lag. Longer the King Dedede's forward smash. This doe have very good effect though. The spell takes a little while for it to completely fade away, even after Oliver can freely move again. A beautiful smoke like substance is left over for about three seconds. If the opponent touched this smoke, then they will become poisoned. The opponent is also poisoned if he or she gets hit by Valaura all together. This smash does 12% damage if the opponent makes contact with the begining of the attack not the smoke.

DownSmash. Galdr Choir

Oliver will take out a Rescue staff ( a rare staff that can warp allies next to the user of the staff) and Oliver will begin to Charge up the staff. Three warp circles begin to appear , one to the right of Oliver, one to the left, and the last one above Oliver. Once the player releases the smash, Reyson pops out on top, Leanne pops out in the left, while Rafiel pops out in the right. These three Herons all begin to sing separate Galdr. Reyson's Hit box is 1/3 of Luigi's negative zone. This is not much of an attack, but more like booster for Oliver. This move takes pretty long to start up, but ends with a good amount of lag. The move is horrible when fighting up close. It does have some super armor at the end. The Herons are invincible but Oliver isn't. Oliver quickly warps the herons away at the end of the attack. Can be charged for 15 seconds. Note if any of Oliver's units, such as a druid or soldier are caught in the blast, then they as well get some stat boost. Also immune to Reyson/s Sorrow.

Rafiel
Will Begin to Sing the Galdr Bliss (in Radiant Dawn it it raises an ally's Biorhythm to its highest point ) Bliss will raise Oliver's overall power, to make him a force to be reckon with. The effect lasts longer , the more Oliver gett to charge it. Can last up to 30seconds fully charged

Leanne:
She sings the Galdr known as Vigor (in Radiant Dawn it gave an ally one more chance to move) that increases Oliver's overall speed in attacks. The effects last depend on how long the smash was charged. Can last up to 30 seconds seconds fully charged

Reyson:
Reyson appears with a rather frustrated face ( Reyson and Oliver never got along at all in both games ) and begins singing the Galdr Sorrow.( in radiant dawn it lowered an enemy units biorhythm). Anyone except Oliver (including his troops) that is caught in the Galdr will become lighter and weaker. The effect lasts longer, the more that downsmash was held. Fully Charged and it can last up to 30 seconds.

Galdr(galdr (plural: galdrar) are arcane songs in the ancient language whose effects differ with the melody and the lyrics. The heron royals are known to sing the galdr of vigor, who can make a character able to act twice. Also, they can sing the Galdr of Rebirth to restore the soul of people. )

Upsmash: The Raven King

Oliver takes out his trusty rescue staff and unlike his downsmash where he trys to warp three characters, he is only warping one. A warp symbol appears above Oliver, once you release the A button the great Raven King Naesala appears. Oliver quickly ducks, as Naesala begins to quickly fly around right above Oliver. Is he trying to kill the fat saint or help him, it is hard to say. Well anyway as Naesala is flying around Oliver will be lay on his belly and can move to the right or left * about one building block space away, but Naesala will stay in place. Anyone that touches Naesala will be dragged into his frenzy and teared by his talons. This does up to 15% and then the opponent is launched Diagonally. This can kill Mario at 65%. This move has ok start up lag, and no end lag. Naesala is warped away at the end. Naesala will stay on the stage for about 3 seconds.

Naesala:http://fireemblem.wikia.com/wiki/Naesala

Pretty Situations​
  • Ledge Grab:
  • Oliver holds on to the ledge with the hand that is not holding a tomb.
  • Ledge Attack: Just A Sec
  • Oliver climbs up the edge and waves his hand very sluggishly after wasting up strength pulling himself up. The hand does 3% damage, and has knockback similar to Luigi's Ftilt.
  • Ground Up : Get Up And Go:
  • Oliver gets on his feet and quickly puts out his hand, as if wanting to say what can you do. His hands come out quick and do 3% damage.

Dash Attack : Help I've Fallen And Can't Get Up!!! Screw You Life Alert Won't Help!!! :mad:
Oliver goes from his running animation to falling face down on to the floor. It happens immediately and Oliver does not move an inch forward. His whole body can cause damage. This move has no start up lag, but has some noticeable end lag as Oliver trys to get up. Deals out 10% damage.


Final Smash

Into The Heart Of The Serenes Forest.​
Serenes Forest is a nation located North west of Begnion. It was destroyed in the Serenes Massacre which lasted only three days. Not only was the forest destroyed but only five Herons survived the massacre. The forest plays a key role in both Path of Radiance and Radiant Dawn. It is revived in Path of Radiance . Before Serenes Forest was restored in Path Of Radiance, Oliver would take many troops and even beautiful maidens into the destroyed Serenes Forest in hopes of finding a Heron that survived. Later Oliver manages to get his hands on Reyson, only to have him escape into Serenes Forest. Oliver takes a large army, and goes after the Heron. Ike and crew pursue Oliver into one of the longest chapter in the entire game. Shortly after Oliver's defeat in Path of Radiance the serenes forest is restored.

For Oliver's Final Smash, everyone on the stage will be warped to the restored Serenes Forest. The opponents are left dazzled of the Forest's Beauty, but do not seem to realize Oliver's Army Charging at them while Oliver rides on a throne being carried by four soldiers. The opponents are trampled and receive 60% damage, and then are hit by the Griel Mercenaries pursing Oliver. This last hit will kill someone such as Mario at around 80% damage. In the end everyone is warped back to the stage.

  • [*]Winning Pose:
    Oliver Raises His hand Like The first picture in this post. He then gives off a creepy smile.
  • Winning Pose 2 Oliver does the pose he does in Radiant Dawn after defeating an enemy.
  • Seen here Link
  • Losing Pose Oliver simply claps with both of his hands, his light magic tucked away. His mustache is kinda pointing downwards in disappointment.

Entery: similar to Ike and Marth, but is shown holding a rewarp staff.

Random Quotes:
  • Quote One:
  • This you may hear when Oliver loses his first stock. It is a small chance that you hear it but matches him so. “I have seen death's vistas and returned an even wiser, more exquisite man! Take it in! Bask in the beauty!”
  • Death Quote:
  • Occasionally when Oliver loses his last stock you can hear him say these last words “Aagh... Still so many beautiful things...that...I...don't own.”

Taunts

  • Taunt 1: “Unsightly man... Prepare yourself! “ Oliver exclaims as he strokes his mustache.
  • Taunt 2: Oliver begins to sweat to a large extent, and takes two steps back. He cowers in fear.

  • [*]Taunt 3:
    Oliver swings his hand back as his Light Magic Tomb opens and the pages begin to turn rapidly. Then a glowing ray of light surrounds him.

Codec Conversation:
Snake: This guy is the complete opposite of perfect health.
Colonel: Never underestimate your opponent Snake.
Snake: I think that guy is having a stroke
Colonel: Snake it's a trick don't fall for it
Snake: He won't move anymore
Colonel: . . . . . . I guess this mean you win. . . .

Stage
The Journey


Music
Oliver's Fall
Beauty Is A Mad Mistress
Everything Into The Dark
Ascent
Powerful Foe
Stalking Menace

The Journey is a stage composed of five main areas. This stage is similar to castle siege as it changes locations every minute. The four main areas are Forest, Mountain, Village, Desert, and Temple. They do not go in any order but are completely random.

Forest


In most areas in a Fire Emblem game there is a forest covered section. This forest section gives the unit that is standing in this section more avoidance which makes it harder for that unit to actually get hit. In this area the light is much darker so some items like turnips, and grenades are much harder to spot. In the background a large forest with many beautiful plants can be scene. There are 3 main platforms on this stage similar to battlefield. You can not walk to the side and kill yourself on this stage. A large hole is found on each side of the stage. The hole is covered by leafs as to try to hide it. If you fall into the hole you can grab the edge, if you keep falling you will lose a stock. If a fire attack is used in this stage, then the whole forest will begin to turn on fire. Each player begin to take damage as teh fire grows worse.

Mountain


Mountains are areas on the map which only a few units can cross. The are hard terrain that when a unit is placed here makes it harder for an enemy to hit the unit. Similar to the forest but is a dream for bandits, berserkers and flying units. Here we have large sharp jagged rocks on the bottom of the stage. WHile we have a large main platform above, which is like a super large battlefield platform. If someone hits the spikes they take 20% damage!!!. The weather can change from sunny, snowy, rainy and the stage also can change to night. When it turns snowys, characters take damage as they are in the air and are much slower on the ground. WHen it rains the ground becomes very wet and slippery. There is a 5% chance of a lightning bolt randomly hitting someone on the stage causing 20% damage.

Village


In fire emblem villages are small areas in which visited, characters can be reward with items, or better unit new units. Here we have a flat stage ( which you can die by just walking to the side), in the background small villagers can be seen walking around, as if nothing is happening. This stage would be pretty boring if it were not for the bandits. About twenty seconds fighting in this stage a bandit will show up. Bandits are known for destroying villages in Fire Emblem games. The villagers panic and run away. The bandit begins to attack the players, and only has 20% stamina. When you beat the bandit, the villagers will throw a random item as a reward.

Desert


Desert are on of the most annoying terrain in Fire Emblem games. The greatly decrease movement on almost all units in the game. All except for flying units and magic users.Here large sand dunes cover the map. Ground movement is great decreased and units take damage as they walk on the hot burning sand. In this stage air game is must if you do not want to rack up damage. For each step you take on the sand you take 2% damage.

Temple

Usually the last stages for Fire Emblem games ( that have been releases in the USA) are large temples. With the final boss waiting at the end. This stage has two large statues, one on each side. The statues are are to heavenly maidens holding their hands out to one another. These ar ethe two only main platforms on tge stage. Between them lies. Holy water. The water does not heal or give out damage. There is a 40% chance instead of water it is unholy dark water. It is a purple color, and if it shows up the temple grows dark, and the maidens are replaced with demon statues. The dark water gives out 10% damage for anyone that swims in it.​

How To Use Oliver
Oliver is a rather large unit can can be easily comboed by the likes of characters like Luigi, and can run into trouble with heavy weights such as King Dedede. In the beginning of the match it is crucila that you bring two units. Command your units where they will be most useful, and try to get rid of weak ones such as the soldier. Do not concentrate on your units, and let your opponent worry about them. If it is a large stage begin to use your Side Special as your unit take cover for you or charge at the opponent. If your stuck with units such as the Bishop, Sniper, or Druid then it is best you protect them from the opponent as they help you from afar.

Oliver has a good close combat game but it can be easily be shut down by character with really disjointed hitbox like Marth and characters with high priority moves like Luigi. Oliver should try to stay on the ground, his air game is ok but not great. Half of his moves in the air is to get him back safely to the ground and away from opponents. Oliver does not have a great gimping game, but has a great amount of KO potential moves so you won't have to worry much about gimping. If for some reason the opponent is trying to recover back on stage your best bet is to spam side special to rack up more damage before he gets back on stage.

Having Oliver approach isn't the greatest idea, he won't do such a great job and will most likely just get trapped trying to approach character like D3, Luigi, Marth, Kirby, and will just get ***** approaching Meteknight. Stay from afar and attack. When an opponent gets to close use your Standard A combo and tilts. Set up for smashes and try to keep your opponent grounded. A useful move for this is Oliver uptitl which leaves a poison effect smoke above him. This can help prevent opponents from approaching from above. If you get lucky and knock your opponent clear across the stage but still didn't kill him. Charge up your down smash and give Oliver a boost to his speed and strength. Your main strategy is to annoy the hell out of your opponent and rack up damage.

Oliver's recovery is pretty good for a heavy weight and you shouldn't worry about getting gimped with Fair, and UP special at your side.

Fighting the protector of beauty
What you want to do here is to approach quickly to Oliver and try to get his units out of the way. Units such as Bishops, Druids and Sniper should be taken care of quickly before they can rack up even more damage. You should begin to notice which ones are a threat towards yourself ( Swordmaster, Sniper, Druid, and Bererker), and see which ones are their to defend the Fat Priest ( General, Bishops). If you are characters such as Meteknight, and Sonic you should have no problem speeding through Oliver's units and nailing the fat priest. Oliver can out camp characters such as Olimar if Oliver has certain units such as the General and Bishop.

Oliver isn't as good up close then he is from far away. Attack with high priority moves and watch out for his Standard A combo. Moves such as Ftitls and Dtitl are there to push you away so Oliver can rebuild his units. When you manage to get Oliver into the air now is your chance to rack up damage quickly. But there are some risk, those risk being UP Air, Fair, and Dair. They can quickly get Oliver out of the air or send you to your doom. Try to keep Oliver not to high up in the air, and just above the ground. The lower he is to the ground the less useful his air attacks actually are.

Oliver can be gimped easily if he is sent at a lower angle. He can easily recover horizontally, but you can edge hog him when he uses his Up special. But seeing how fat he is , there is a good chance you won't be knocking him off the stage early in the game. Try to focus on star KO, his floating isn't helping him survive a star KO.

MatchUps

Oliver vs Metaknight: 40/6o Metaknight's favor

Let us see what do we have here a small blue puff ball with great speed, fantastic recovery, deadly air game, and pretty good ground game. He also gots that tornado that can easily just eat away at all your troops and slice through them to get to you. He can easily just go right above your units and even just rampage across them with his fast attacks. Well camping him is out of the question when he can easily get close to you. Well what do you have left, well you are not in a bad spot when Metaknight is right next to you. He still beats up close but not by much, but he can easily get you up in the air and that is where you have some trouble. He won't have trouble keeping you in the air, and when this happens you want to get back to the ground as fast as possible. Well the good news is you have a great recovery horizontally and an ok recovery vertically. You wont get knocked out or gimped to early but you will have to be on your toes in this one.

Oliver vs Dedede: 60/ 40 Oliver's Favor

Chain Grabs are useless when you have units backing you up. Dedede's waddle dees are no match for your superior units. You can easily out camp this fat *** and force him to approach. Close combat is a little more even, but as long as you keep your units healthy they can easily help you gang up up on Dedede. He is a big target so that makes it easier for you to score in hits. Stay with small stages when vsing D3, your units can help you a lot more in small stages, and as always stay to the ground. Overall as long as you keep your units in shape you wont' have to worry about silly grabs. A warning though, D3's back air can really push away some of your units.

Luigi:30/70 Luigi's Favor >_>

This ****er really nows how to keep you in the air. It would be great if you could camp him, to bad his nair out priorities your Side Special and his down special can easily knock away your troops. Luigi can just as easily approach with short hops towards you. Pick large stages like Final Destination to keep away from this green Plumber. What is even worse is Luigi has an easy Jab combo on you. He can jab grab, down throw and easily juggle you up to 40% damage or even more in the air. Use up tilt to poison the air around you so that way Luigi can take some amount of damage as well. Luigi can jab upB you as well. His up can kill you at around 60% so that makes things even worse. You can not out camp him, and his air game can chop through most of your attacks. This is indeed a horrible match up for Oliver. Use upair and down air to try to avoid getting juggled.

Ed: 40/60 Ed's favor: I hate air game, how about you?
Well sadly you won't be able to camp him thanks to his side special. And he probably won't have much trouble getting pass your units and killing them. Your units are helpful just not to much if they are out there alone. Have your troops retreat or stay near you for support when he gets close. You do not want to let yourself open at close range thanks to Ed's cursed down special. Once that hits you can rest assured you will rack up damage quickly. ED is annoying from afar ( because you can't camp him to well) and can be deadly up close. Try not to let him leave any of those fancy magical circle majigges on the ground. They can set up for some very painful obstacles. When is up close you better hope you do not just have soldiers to back you. Try to keep your distance from this shrimp >_>.

Assist Trophies

Begnion Senate
The powerful Begnion Senate that control the great, powerful, large nation, that is known as Begnion. The Begnion Senate is comprised of Begnion aristocrats known as the Sainted, a group of peers that also simultaneously hold high-ranking ecclesiastical positions and who claim to have been chosen by the goddess to assist the apostle in ruling the Begnion Empire. In Radiant Dawn they overthrow the Apostle and take control of Begnion.

When This Assist Trophy is activated 5 of the Begnion Senators appear.One senator will be chosen at random and then attack. Once The Senator is done attacking they all warp away * except Oliver if he was already on the field*
These Five are none other then these Senator.

Lekain
Lekain launches a huge Rexaura spell that slowly begins to make its way to the stage. The player only has about 5 seconds before the spell engulfs the entire field. The Rexaura spell deals out a huge 30% damage. Lekain then releases a strong magical spell that makes it where no magic based attacks may be used in the next ten seconds

Numida
Numida quickly summons three Berserkers that begin to rampage the field. All platforms, and obstacles are destroyed. The stage is left in ruins for the rest of the match. Numida simply laughs as this is all taking place

Oliver
Oliver quickly uses his rescue staff to warp three huge Heron statues. The statues begin to flap their wings causing a large guts off air the can easily blow opponents clear across the edge. If anyone touches the statues they take 10% damage. The statues are quickly warped away at the end.

Hetzel
Hetzel takes out a Fortify staff as he shakes in fear. He uses the Fortify staff to heal everyone on the field completely.

Valtome
Valtome begins to cast many Valaura spells across the stage. These are extremely strong and leave off a poison like cloud that stays for 10 seconds. The spell itelf has no knockback and deals out 12% damage. The stage in a mater of seconds in engulfed in poison.

* Note if Oliver is on the field then he will jump in with the rest of the Senators and will not be effected by this assist trophy, well except from Hetzel*
 

Dr. Albert W. Wily

Smash Rookie
Joined
Apr 13, 2009
Messages
13
Location
Trying to make a robot that doesn't suck.
I will read the Oliver moveset, right after I post this


Smeargle

Smeargle debuted in Kirby 64: The Crystal Shards, where she met and befriended Kirby after being possessed by Dark Matter and defeated by the star warrior. As repayment for driving the demon out of her, Smeargle guides Kirby to the next stage, and shows up throughout Kirby's quest to paint helpful items for him, sometimes inadvertently giving him clues to find Crystal Shards.

Smeargle is a budding young artist, but her skills with the brush are simply majestic. They're so majestic, in fact, that her paintings literally come to life. It's through this that she proves herself a valuable addition to Kirby's team, as well as a strong contender in Brawl!


Perspective
An artist's perspective changes a lot about their paintings, giving them different meanings and messages. In Brawl, Smeargle switches between four different perspectives via her Specials, which allow her other attacks to function slightly differently. For example, the Up Special sets Smeargl's Self Perspective, wherein she'll find all her recovery, healing, and defensive moves, while her Side Special triggers her Power Perspective, where Smeargle finds the moves that are viable for KOing foes. When using any of her Specials, Smeargle simply twirls her brush in her hand quickly, taking about a quarter-second. The animation is the same for all four Specials, so it keeps your opponent guessing.

Gallery
Smeargle's "gallery" of paintings can only have three at a time. In other words, only three painted creatures may exist per Smeargle player on the field at any given time. These can only be destroyed by Smeargle herself, unless an opponent knocks them over the edge of the stage; they don't have HP that can be depleted. When Smeargle exceeds her gallery's quota, her oldest painting will simply vanish as the new one is painted.


Size ~ 6/10
Smeargle stands about the height and width of Ness or Lucas.

Weight ~ 3/10
Smeargle is a bit of a lightweight.

Movement ~ 5/10
Smeargle isn't speedy moving around, but she's not slow. This applies both on the ground and in the air.

Traction ~ 5/10
Smeargle doesn't slip around too much, but neither does she stick to the ground.

Jump ~ 6/10
Smeargle's jumps are just a bit above average.

Fall ~ 5/10
Smeargle's not particularly floaty, but not a fastfaller either.

Atk Spd ~ 10/10
Smeargle's attacks happen lightning-fast, but largely consist of trap-type moves that will take some time to perform their functions. Regardless, she suffers very little lag.


Neutral ~ Free Perspective
An open-minded perspective gives Smeargle a range of attacks, none of which are especially good at any one particular thing. Basically, this form is without any glaring weakness or strength. It's an effective middle ground for new Smeargle players to start on, and for experienced players to rely on as necessary.

Side ~ Power Perspective
An emphasis on power in her strokes makes attacks in this perspective powerful and threatening, but is sometimes detrimental to Smeargle herself, as such an outpouring of energy is likely to take its effect on the budding artist.

Up ~ Self Perspective
This introspective outlook gives Smeargle a variety of self-help moves, mainly by way of recovery, healing, mobility, and defense.

Down ~ Mystery Perspective
Elusive as they come, this perspective is full of unpredictable traps and unusual attack methods. This perspective is arguably the hardest to use right, but is deadly in the hands of a good player.


Neutral ~ N-Z


Smeargle, in one swift stroke, paints an N-Z, a Waddle Dee-like enemy with a black body and white feet. This happens quickly, with barely any startup or ending lag. N-Z are surprisingly resilient and can't be sent flying at all.

A Free N-Z will simply stand in the place it's painted, essentially functioning as cannon fodder for Smeargle. It can absorb an infinite number of hits, only falling over when hit, and quickly standing back up.

Power N-Z will instead run back and forth on the platform they're painted on, at about Jigglypuff's running speed, dealing 3% damage and weak upward knockback to anyone they hit, including Smeargle. They'll turn around at ledges and walls, covering the entire width of the platform with their run.

Those N-Z created in the Self perspective will attempt to follow Smeargle around, despite her running speed exceeding their own. They'll absorb hits just like the Free N-Z, but following behind Smeargle, can be more valuable in certain situations. They'll always try to get behind her, so don't count on them to block any frontal assaults, and also note that a stationary shield is sometimes better for your purposes.

Mystery N-Z are a peculiar breed. These stand in place, serving no apparent function and dissolving into a black cloud at the slightest hit from enemy attacks. If they manage to hang around for three seconds, though, they'll suddenly vanish and reappear behind a random opponent, leaping toward them in a single small bound, dealing 3% damage and weak upward knockback. They'll perform this same attack every three seconds, if kept alive.


Forward ~ Galbo


Smeargle quickly paints a Galbo, a fiery enemy with a large mouth that comprises the better part of its body. Galbos have the ability to spew flames, generally doing so in spurts. These have little lag to paint, though not as little as easy paintings like the N-Z. Galbos are somewhat heavy, being mildly difficult to knock around.

Free Galbos sit in place with their eyes closed, suddenly opening them and breathing flames every three seconds for about a second, over a range similar to a Fire Flower, dealing similar damage. They won't damage Smeargle, so hiding in the flames is often a smart idea.

Power perspective Galbos are more dangerous about their attack, spewing a fireball every three seconds the size of Kirby that shoots forward as fast as the pink puffball dashes. These deal 15% damage and good horizontal knockback, disappearing on impact, but Galbo will only fire off two of them before stopping, sitting there idly for the rest of its lifespan.

Self Galbos breathe hot air instead of flames, which is soothing to anyone (even opponents) directly in front of their mouths. They'll do this for a second at a time, healing for 2% damage during that second, before waiting the normal three second interval.

Mystery Galbos spew a deep purple smog (Fire Flower's range), which deals no damage, but reverses enemies' up/down and left/right controls for five seconds. The rate of attack for these Galbos is the same as the others.


Up ~ Tick


Smeargle can quickly paint the simple Tick, and does so almost effortlessly, right in front of her. Ticks are light and easy to send flying off the screen, with the exception of Mystery Ticks, who cannot be hit.

Free Ticks stap sit idly on the ground, extending their needles upward stabbing in a pattern. They'll sit still for two seconds, then extend their spike for two seconds, repeating this cycle endlessly. Their stab deals 10% damage and pretty good knockback.

A Tick made in the Power perspective sits idly on the ground until an opponent comes within the range of Marth's Up Smash directly above it, at which point it will instantly extent the spike on its head, creating a tall, thin hitbox that deals 15% damage and pretty good upward knockback. It holds the spike for half a second before retracting it again. After retracting the needle, it has to wait five seconds to attack again.

Self Ticks aid Smeargle in getting off the ground, sitting idly until she runs up to them, at which point they'll project their spike upward, sending Smeargle twice her normal jump height into the air.

If Smeargle paints a Mystery Tick, it will take about a second to sink into the ground (it does nothing to opponents during this time), at which point it can no longer be seen or hit. If it does this on a pass-through platform, it will fall through, but on solid platforms, it will sit and wait in the ground, stabbing upward like a Free Tick when an opponent passes over it. These Ticks are weaker, however, dealing only 10% damage and weak upward knockback.


Down ~ Mite


Smeargle paints a Mite quickly, in only a single, swift stroke. Mites are frail and are easily knocked around, but will often dig underground to become invulnerable.

Free perspective Mites will begin digging at the ground the instant they're painted, making their way underground. This takes them about two seconds, and anyone who touches them as they do this will take 8% damage and be buried. After this, the Mite does nothing.

Power Mites dig down like Free ones, but much more quickly, taking about half a second. This part of the attack deals no damage now. After they get down, however, they'll sit and wait for an opponent to step on them, at which point they'll hop up, dealing 10% damage and moderate upward knockback. After they've done this, they'll dig underground again.

Self Mites dig endlessly, never moving underground and not burying opponents. Every second or so, they'll kick up a rock about the size of a Pokeball item, kicking it toward Smeargle. They can generally reach her if she's within about half of Battlefield's length. These rocks will damage enemies for 5% damage and flinching knockback, but can't damage Smeargle, serving as cover fire more than anything else.

Mystery Mites repeatedly slap, rather than dig into, the ground. This creates a cloud of dust around them about the size of Bowser. Opponents who enter the cloud will move slowly, as if affected by the Timer item, for the next five seconds.


Dash ~ Hack


Smeargle skids to a stop as she paints a Hack in two swift strokes that take about a quarter second to perform. This axe-like creature is heavy and hard to knock around.

A Free Hack will simply run forward after being drawn, moving at about the speed of Mario's run. If it reaches a ledge, it will hop down it, landing on lower ground if possible, before running forward again. Anyone it hits will take 8% damage and weak downward knockback.

Power Hacks run forward similarly to Free Hacks, but upon approaching an enemy, will swing their heads backward and then throw them forward, planting into the ground. This happens with moderate startup lag, and the powerful axe swing deals 18% damage and great diagonal knockback. Unfortunately, after performing this once, Hack gets its head stuck in the ground, and becomes useless.

A Self Hack serves as a projectile reflector as it runs forward. These won't deal any damage or knockback as they run, but their metallic heads will gleam as projectiles approach them, reflecting the projectiles back at their users.

Mystery Hacks don't run like the others, but sit in place and swing their heads forward, releasing the axe blade as a boomerang-like projectile. It travels forward the distance Link's boomerang does if Smashed before returning to Hack, moving at about the speed of Luigi's fireball the whole way. The whirling blade deals 10% damage and flinching knockback upon hitting someone, and will drop to the ground as it does, rendering Hack useless after he scores one hit. As long as he keeps missing, though, he'll continue to throw his boomerang head as soon as he gets it back.


Forward ~ Fishbone


Smeargle paints a Fishbone with three sweeps of her brush, this taking a slightly longer amount of time than most paintings due to the different colors. Note that only in the Power perspective can Smeargle charge up this attack, in which case she'll simply continue painting over the completed Fishbone as she charges. Fishbones are somewhat light and easy to knock around.

Free Fishbones will launch their large red heads forward to attack, sitting in place as they do so. The sharp projectile travels forward for half the length of Battlefield or until it strikes an opponent, dealing 8% damage and flinching knockback. It fires one every two seconds, the smaller pieces growing to become larger and moving up the body, with a new small piece appearing every time.

Power Fishbones swim forward in a haphazard pattern, similar to Mewtwo's Shadow Ball in Melee, at about the same speed. They proceed forward indefinitely, plowing through enemies they run into while dealing 12 - 20% damage and good diagonal knockback.

After painting a Self Fishbone, Smeargle will swiftly grab it and hold it in her free hand. This means she can't grab items, but as long as she's holding the Fishbone, it will stab at opponents who grab her, releasing her from the grab and dealing 2% damage and flinching knockback to them.

Mystery Fishbones collapse into three pieces on the ground as soon as they're painted. Three seconds later, vibrating a bit in the second beforehand, the three pieces each rocket upward at the speed of Sonic's dash, at random angles up to 45 degrees from the vertical either way, each dealing 5% damage and moderate knockback toward the next (the red toward the orange, orange toward yellow, and yellow toward red).


Up ~ Snipper


Smeargle paints a Snipper around her, its massive claws surrounding her evenly. The Snipper is about the size of Bowser, and is very heavy. Because of its large size, it takes Smeargle a bit longer to paint the Snipper, having above average lag. Just like with the Fishbone, only the Power Snipper is capable of being charged up.

Free Snippers will snap their claws shut once after being painted, almost instantly, before retreating into the ground, never to be seen again. The claws deal 12% damage and pretty good upward knockback if they hit.

Power Snippers behave much like Free Snippers, but are capable of charging their crushing claws to deal 15 - 25% damage with good upward knockback, though the closing of the claws is considerably slower. These also retract into the ground after snipping once.

After being painted, Self Snippers will quickly grab onto Smeargle with their claws, holding her tightly. Until she moves (or after three seconds), the Snipper secures her in place, essentially giving her superarmor. She is still capable of performing attacks from the Snipper's grasp, but it will let go as soon as she moves away.

If a Mystery Snipper is painted, it will take about half a second to lightly touch the tips of its claws together above it. As it does so, its entire body turns to stone, and becomes a stage obstacle, capable of running into and being stood upon. Characters can also push it around at the same speed they could carry a crate. When any of Smeargle's paintings' attacks strike the Snipper statue, it will explode, damaging anyone within a short distance of it for 18% damage and decent knockback away from its center.


Down ~ Plugg


Smeargle paints a Plugg in front of her. Plug takes a moderate amount of time to paint, but nothing overwhelming. Pluggs have a moderate weight, being able to be knocked around somewhat easily. As with Smeargle's other Smashes, only Power Pluggs can be charged up.

Free Pluggs jump into the air a short distance, flipping over to plug themselves into the ground. This takes them about half a second, and as they do so, two balls of electricity about the size of a Party Ball shoot out in either direction. They shrink as they go, disappearing after traveling one-fourth the length of Final Destination. These deal 10% damage and stun enemies like Zero Suit Samus' Paralyzer. After this, Plugg's head is stuck in the ground, and he becomes useless.

Power Pluggs sit still for about a second after being painted, shivering violently. After a full second has passed, they'll short out and explode, dealing 18 - 30% damage and high diagonal knockback within about the range of a Blast Box. The battered Plugg sits on the ground after the explosion, and does nothing.

Self Pluggs will stand in place, doing nothing until Smeargle runs past them. If she does so, the Plugg lets out a brief electric shock, jolting Smeargle. For the next five seconds after this, Smeargle has 1.5 times her normal running speed and jump height! This can be done multiple times, but Plugg will not shock Smeargle again until the effects of the first jolt have worn off.

Mystery Pluggs sit in place with their eyes closed, creating an unstable magnetic field around them. It turns on and off every two seconds, starting out off as they're painted. The magnetic field pulls anything within a Smart Bomb explosion's radius toward Plugg at Mario's dashing speed.


Neutral ~ Zeban


Smeargle paints a green Zeban around her, which is just big enough to fully encompass her. She does this in one full-circle sweep of her brush, this being a quick painting. Zeban cannot be hit by opponents, and attacks made on him will simply pass through.

Free Zeban are essentially a random escape tool for Smeargle. The Zeban will instantly spit Smeargle in a random direction, she moving about the distance a Fire Fox travels before regaining control. She has superarmor for the duration of this launch, so it's a decent escape method, though the random direction can be difficult to work around at times. After launching Smeargle, Free Zeban sit helplessly, doing nothing.

Power Zeban take a little longer to spit Smeargle out, swelling up for about half a second before they do. After this, they'll spit her toward the nearest enemy, for a similar distance. Unlike the Free Zeban, the Power Zeban's launch does not give Smeargle superarmor, but she does become a high-priority hitbox while launching, which deals 12% damage and pretty good diagonal knockback. Power Zeban do nothing after launching Smeargle, and Smeargle enters a helpless state if she ends up in the air.

Self Zeban are one of Smeargle's recovery options. They'll swell up like Power Zeban before spitting Smeargle out, but have a different target than their Power counterparts. If a ledge is within the area they can shoot Smeargle, they'll fire her toward the nearest one, she sweetspotting the ledge as she hits it. If a ledge is not within their range, they'll simply fire Smeargle toward the absolute center of the stage. Smeargle enters a helpless state after this, and the Zeban also becomes useless.

Mystery Zeban will swell up like Power and Self Zeban, but will then rapidly melt and stick to Smeargle's body. This takes about a second to full perform, but leaves Smeargle coated in a thin film of green slime, which lasts for the next ten seconds (or until the Zeban is destroyed by Smeargle painting new creatures). This sticky film prevents Smeargle from bouncing off of surfaces she's knocked into, she instead sticking to them firmly. For example, while Ganondorf's Down Aerial is likely to bounce her off the ground and up to her death normally, while this film remains, Smeargle would simply stick to the ground, falling on her back or front. If she strikes a floor, this will always be the case. In the event that she's slammed against a wall or ceiling, she'll retain an aerial pose, able to use her Aerial Attacks immediately.


Forward ~ Pteran


Smeargle performs a single sweep of her brush overhead, very quickly, painting the Pteran. Pterans are easily knocked away, as they're very light.

Free Pterans will fly directly forward from the point they're painted at, moving at about the speed of Ness' PK Thunder projectile. Anyone they contact, they'll deal 7% damage to.

Power Pterans begin flying forward like Free ones, but after traveling about one-fourth the distance of Final Destination, will make a sharp plummet downward, angling themselves up to 20 degrees from the vertical to aim at an opponent. The beginning of their flight deals no damage, but the powerful plummet downward, during which they'll move slightly faster, deals 18% damage and strong upward knockback. After hitting the ground, the Pteran gets its beak stuck, and is useless.

After painting a Self Pteran, Smeargle will reach up quickly and grab onto its feet. She then has the ability to control its flight path, essentially being able to perform a glide like those of characters like Meta Knight or Pit. She has no Glide Attack, letting go upon any button press and entering a helpless state.

Mystery Pterans flap their wings like other Pterans, but don't move at all. Instead, they form a whirlwind around them, which takes about two seconds to fully form. The whirlwind, which is about as tall and wide as Ganondorf, will pull in closeby opponents and spin them around for a second before throwing them upward, out of the whirlwind. This deals 5% damage and make the opponent unable to use attacks for the next three seconds.


Backward ~ Scarfy


Smeargle spins around twice, sweeping her brush behind her each time to paint a Scarfy. Despite what it sounds like, this is a relatively fast painting. Scarfy are somewhat heavy, and have an alternate form they'll take for some paintings--a one-eyed brown creature with fangs that otherwise looks much like the form shown above.

Free Scarfys will sit in place until hit with an attack from an opponent. When the opponent's attack hits, so long as Scarfy remains within one Negative Zone's area of the perpetrator after being knocked away, Scarfy will take on its beast form, following the opponent at the speed of Lucas' PK Thunder (and with similar turn radius) until it touches them, where it will explode, dealing 10% damage and flinching knockback. This will destroy Scarfy.

Power Scarfys are painted in beast form to begin with, and will immediately start chasing the closest player. Unfortunately, as you may have guessed, that's almost always Smeargle, so she'll have to draw them toward another player in order to not be hit. They explode on contact, dealing 14% damage and moderate upward knockback.

Self Scarfys, when painted, appear in beast form, and will quickly bite onto Smeargle and throw her upward. This happens in about a second, and will deal 10% damage to Smeargle. The upward knockback, however, is often useful for recovery, being roughly equivalent to that of Mario's Up Throw. Note that this does NOT put Smeargle in a helpless state like her other recovery options. After tossing Smeargle up, Scarfy returns to its cute, normal form, and becomes useless.

Mystery Scarfys behave just like Free Scarfys, only they must be hit to be kept at bay! Every five seconds, if these cute creatures haven't been hit at least once in the previous five seconds, they'll target within a Negative Zone's radius, targetting the closest opponent and homing in like Free Scarfys do, dealing the same damage and knockback with their explosion.


Up ~ Propeller


Smeargle paints a Propeller in one overhead sweep of her paintbrush overhead, doing so quickly. Propellers are light and easy to knock around.

Free Propellers sit in the place they're drawn, periodically creating a cloud of ice around them, covering an area about as large as King Dedede. They'll switch the icy cloud on and off every second. The icy blast deals multi-hit damage like the Ice Climbers' Blizzard, up to 10% each time.

Power Propellers sit in place like Free ones, but won't do anything until an opponent comes onto a direct vertical or horizontal alignment with them. In other words, the opponent must be directly above, below, to the right of, or to the left of the Propeller, at which point the Propeller will start moving in that direction, at about Jigglypuff's dashing speed. The Propeller still has the ability to target, despite moving only in a straight line, adjusting its path if another opponent (or the same one) lines up with it in a different direction. In this way, these Propellers target opponents. Dodging past a Propeller as it passes will lose it. These Propellers deal 8% damage and weak upward knockback when they hit an opponent, but until dodged or knocked away, will continue to strike at the opponent.

Self Propellers are instantly grabbed by Smeargle and carry her upward. They'll carry her up like Snake's Cypher, and she can let go at any time by dodging. If she doesn't let go prematurely, this carries her almost as high as Snake's Cypher. However, once she lets go, unlike Snake, she enters a helpless state, and the Propeller flies off the top of the screen.

Mystery Propellers hover in place until an opponent passes below them, at which point they'll turn to ice, frozen solid. This happens almost instantly, and the Propeller then proceeds to drop at high speed, about what Sonic travels upward during his Spring Jump. Upon striking an opponent or the ground, the Propeller explodes into a cloud of frozen shards about the size of Bowser. These shards deal multi-hit damage up to 20%, but the Propeller is destroyed by this act.


Down ~ Zoos


Smeargle paints a Zoos below her in two swooshes of her brush. This takes a little longer than most paintings, but is still quick. Zoos are easy to knock around, being very light.

Free Zoos sit in place, squeezing a droplet of water out of their clouds every two seconds. These droplets fall down at the speed of Ness' PK Thunder projectile, and deal 3% damage plus very weak set downward knockback. It's just enough to knock opponents off their feet if they're standing on the ground, and isn't especially useful for spiking.

Power Zoos sit in place as well, but will throw lightning bolts about the size of Squirtle out of their clouds. They'll alternate sides, throwing one bolt every second. These are thrown in arcs that can vary like the Hammer Bro. Assist Trophy, covering a similar area, though Zoos never jumps. These lightning bolts deal 12% damage and stun opponents like Zero Suit Samus' Paralyzer.

Self Zoos will let Smeargle land on their cloud as she falls past them. She can remain on the cloud for three seconds, moving it as she pleases by tilting the control stick. The cloud moves about as fast as Pit during his Up Special. Smeargle can jump off the cloud, finishing the move prematurely, if she wants. Whether time runs out or she jumps, Smeargle will enter a helpless state after this, and the Zoos' cloud dissolves, the creature vanishing in a puff of smoke shortly after.

Mystery Zoos will sit idly until an opponent comes within a Battlefield platform's length of them, at which point they'll dart toward the opponent at high speed, until their cloud covers the victim's head. They can still be knocked away, but as long as they're not, they'll deliver a jolt to their victim every second, which deals no damage or knockback, but provides an automatic interruption of anything they're currently doing.


Grab ~ Normal
Smeargle reaches forward to grab with her free hand. This is nothing special, having a similar range and speed to Mario's grab.

Pummel ~ Special
Smeargle has no traditional "Pummel," but is capable of using all of her Special Attacks with an opponent grabbed. Holding the grab button after a grab and tilting a direction (or not tilting at all for Free perspective) will cause her to twirl her brush in one hand when the button is released, making her able to change perspectives before throwing her opponent.

Forward ~ Ghost Knight


Smeargle paints a Ghost Knight in two swift strokes, between herself and her enemy. Ghost Knights have a moderate weight.

Free Ghost Knights will simply stab their lance forward into the enemy, dealing 10% damage and pretty good diagonal knockback. They'll sit in that same spot afterward and stab anyone who gets within range, which is similar to Marth's Shieldbreaker. The stab takes about half a second to perform, with some startup and ending lag.

Power Ghost Knights perform a horizontal sweep of their lances, beating their enemy hard for 15% damage and good diagonal knockback. Unfortunately, they'll spin around after this and become dizzy, unable to do anything else.

Self Ghost Knights, after being drawn, do not attack Smeargle's victim, but will give Smeargle their lance, which she can then use as a battering item. She lets go of her victim as she takes the lance. The lance is equal in power to the Lip's Stick item, and has a similar range, but doesn't have the added effect of a flower.

Mystery Ghost Knights will perform two quick slashes toward their victim, drawing an "X" over them. This deals no damage or knockback, and the foe is then released. For the next three seconds, they are unable to use their Neutral Special attack.


Backward ~ Emp


Smeargle quickly paints an Emp between her and her opponent. After doing so, she tosses her opponent behind her onto the ground. They'll take only 3% damage from this toss. This all happens rather quickly. Note that Emps are light and easy to knock around.

Immediately upon being painted, Free Emps will don a scared expression, presumably upon seeing Smeargle's opponent. They'll close their eyes and turn around, running blindly. Moving at about Mario's dash speed, they'll deal 12% damage and flinching knockback to anyone they hit, which will almost always include the opponent Smeargle tossed backward.

Power Emps have mustered a little more courage, and will puff up their bellies and turn around to face the opponent on the ground. As long as the opponent lies still, Emp won't do anything, but he'll charge as soon as Smeargle's victim stands up (rolling dodges and Situational Attacks will count toward this). At that point, Emp will make a Skull Bash-esque dive in that direction, dealing 15% damage and good diagonal knockback if he connects. A player who knows what's going on will usually be able to avoid this hit, but when the other possible Emps Smeargle can paint are factored in, it's not so obvious.

Self Emps will turn toward Smeargle after she tosses her victim, and will blast her with cold air. A thin layer of ice forms around Smeargle, which will absorb exactly 15% damage without Smeargle taking any. After taking 15% damage, the ice will break off. She'll still take knockback from attacks, but the damage-blocker is very handy. This takes about a second to fully perform.

Mystery Emps stand in place after being drawn, growing slightly every second. Every time it grows, it gains a small amount of weight, but after the fifth growth spurt, it suddenly becomes immovable by hitting, now being about Bowser's size. This large penguin will lumber in a random direction, at about Ganondorf's walk speed, dealing 12% damage to and burying anyone he runs into. Upon falling over a ledge or hitting a wall, the massive penguin will pop, disappearing instantly.


Up ~ Bronto Burt


Smeargle paints a Bronto Burt over her enemy's head in a very short amount of time. Bronto Burts are light and very easy to send flying away.

Free Bronto Burts will grab onto their victim's heads and start flying straight up, at about Kirby's falling speed. This deals no damage, but opponents will have to struggle to break the grip before being carried off the top of the screen. Bronto Burt will stop and release the victim if he runs into a ceiling.

Power Bronto Burts fly up a short distance, then divebomb into their victim. Smeargle can still lose her grip on the enemy during this time, and the full attack takes about a second. If Bronto Burt hits, he'll deal 18% damage, knocking the opponent to the ground. This impact also dazes Bronto Burt, though, and he becomes useless as he collapses to the ground.

Self Bronto Burts won't attack Smeargle's opponent, and she'll simply release them after painting one. These will hover over Smeargle's head until they're destroyed, and will boost her jump height to 1.5 times normal every time she jumps. This applies to both ground and mid-air jumps.

Mystery Bronto Burts will quickly drop to the ground and glare forward, as Smeargle releases her opponent from her grip. They'll sit there indefinitely, and any opponent who comes eye-to-eye with them will constantly take damage (4% per second) until they break eye contact.


Down ~ I3


Smeargle flings her brush into the air about the height a Fire Fox can travel, it spinning in mid-air as it paints an I3 right above her opponent's head. She then catches her brush as it comes down. This is Smeargle's longest painting by far, and the opponent may still break the grip during the painting of the I3. I3 cannot be moved by enemies' hits, and is roughly the size of a crate.

Free I3s will simply drop on Smeargle's opponent, dealing 14% damage and burying them before the I3 disappears. This takes about one second.

Power I3s will hover in mid-air, turning their eye as best they can to look downward. They'll then close their eye and release a massive laser from the bottom of their cube, which is as wide as the cube. This brief laser will travel through ground and anything else in the way, dealing 25% damage and great diagonal knockback. Unfortunately, Smeargle is also caught in the beam, so she'll take the damage and knockback as well. Use wisely.

Self I3s will hover over Smeargle's opponent as she lets them go. They'll continue to hover as the battle goes on, and will drop similarly to the Free I3s only when Smeargle's opponent hits her. On the plus side, this serves as a guard against comboing, but it also means that your opponent can do a quick, easy attack and then dodge the I3.

Mystery I3s drop just like Free I3s, but instead of dealing damage, they'll simply shrink their unlucky victims, who suffer the same statistical changes as they would under the effects of a Poison Mushroom. This effect lasts for the next five seconds, and can't be stacked.


Final ~ Dark Matter


Smeargle takes about two seconds to paint four Dark Matters around her, each about the size of Kirby. The Dark Matters will last for 15 seconds, each doing something different (due to all being painted in a different perspective). Smeargle becomes vulnerable after painting the Dark Matters, and they do not count toward her gallery quota.

The Free Dark Matter hovers around aimlessly. Every few seconds, it'll flash brightly and spit out an enemy akin to one of Smeargle's paintings. The one it spits is random between those available in the Standard Attacks, Smash Attacks, and Aerials, and will always have the same abilities as a Free perspective painting. These enemies don't count toward Smeargle's quota, but will disappear when the Free Dark Matter creates a new one. Essentially, this Dark Matter has its own quota, which is only a single enemy.

The Power Dark Matter rushes blindly about the stage, darting through walls and floors similarly to Pikachu during his Volt Tackle. He has no aim, simply darting about randomly at high speed, dealing 20% damage and good knockback in the direction he's traveling to any opponents he hits.

The Self Dark Matter revolves around Smeargle, serving as a high-priority shield that will block any attacks that hit it. It circles at a moderate speed, so well-timed attacks can still get through, but the circle is tight enough that Smeargle is generally well-protected. Enemies that touch this Dark Matter are given weak knockback away from Smeargle, but no damage.

The Mystery Dark Matter sits in place, doing nothing until an opponent comes within a Smart Bomb explosion's radius of it, at which point it will begin to follow them as fast as Lucas' PK Thunder projectile. This Dark Matter will not switch targets, and will travel around stage obstacles to reach its target. If it does so before disappearing, it will possess the victim, taking full control over their actions until it goes away. Opponents caught by this act similarly to how they do in Luigi's Negative Zone, and will frequently fall asleep or perform taunts against their will. Possessed opponents still have some control over their actions, but will randomly perform actions that weren't input or receive status conditions like sleeping or dizziness.
 

kirbywizard

Smash Hero
Joined
Jan 4, 2009
Messages
6,713
Location
Napa, California . . . .Grapes For Miles
3DS FC
0989-1847-5768
Mr. Mac seems like a superb moveset. Everything ( well maybe not some of his air attacks) seems to tie together. The only thing I could imagined getting pummeled by Mac as I read the moveset was D3. I am not sure but I do not think I saw to many KO potential moves, but I am not saying it didn't have enough. A lot of his KO's seem easy enough to pull off with the right player behind the wheel. Ah forward throw plus UP B sounds like a dream :)
 

TWILTHERO

Smash Lord
Joined
Aug 19, 2007
Messages
1,880
Location
Canada
Little Mac is certainly a great moveset MT. I like the concepts in many of the moves. I also like the Doc conversations MT.
Overall, great moveset :bee:

Oliver seems like an interesting moveset alright. I certainly find the reinforcements special interesting, but i find to be a little random...as like any unit can come out....Also, maybe it's just because of Smashboards going all white on me, but the purple and pink text...i find come of plain and kind of hard to read. =/ Overall, i like the moveset, but...Ike is not ugly. >_>

And Smeargle seems to be the best moveset yet. Give Wily the prize everyone!!
 

Darkurai

Smash Master
Joined
Aug 20, 2007
Messages
3,012
It says "Smeargle" you ignorant little ****.
Don't you dare say that to me when you know very well you edited it. I wouldn't have cared if it was a mistake, and I would've accepted you changing it. However, swearing at me is not acceptable.
 

Darkurai

Smash Master
Joined
Aug 20, 2007
Messages
3,012
"I solemnly swear I am up to no good."

Is that what you mean?
Sorry, no. I won't take to this harassment kindly.

And before someone calls me on it, yes I did indeed edit my post as well. I felt it came off as hypocritical to include a censored word in that post.
 

kirbywizard

Smash Hero
Joined
Jan 4, 2009
Messages
6,713
Location
Napa, California . . . .Grapes For Miles
3DS FC
0989-1847-5768
Oliver seems like an interesting moveset alright. I certainly find the reinforcements special interesting, but i find to be a little random...as like any unit can come out....Also, maybe it's just because of Smashboards going all white on me, but the purple and pink text...i find come of plain and kind of hard to read. =/ Overall, i like the moveset, but...Ike is not ugly. >_>!
I kept the units random for in fire emblem games I found some of the mechanics such as the crits very random in many occasions. I put Ike in the bottom for after all the two do not seem to get along in the game :laugh:
 

kirbywizard

Smash Hero
Joined
Jan 4, 2009
Messages
6,713
Location
Napa, California . . . .Grapes For Miles
3DS FC
0989-1847-5768
Darkurai just ignore him. He is acting like a troll and is getting thsi thread off topic. I am sure he will get reported if he keeps this up. Ok we could be discussing about two brand new movesets that just popped out . Also Darkurai can you give me a link to your moveset. I want to see some of the edits.
 
Status
Not open for further replies.
Top Bottom