What tenacity. Simultaneously amazed and joyful am I, to see that MakeYourMove is still alive. Why, who would have thought that this crazy (yet awesome) idea would ever find a sequel, far less a 6th installment. From distracting rabid Smash fans from the torturous wait for Brawl, to distracting jaded Smash fans from the limits of Brawl; how time has passed. I shudder to think how my early works in the first board, compare to these detailed products of Smash love and labor.
Perhaps I too shall join the fray yet again!
So yeah, I'm probably going to make a moveset here.
Like this one:
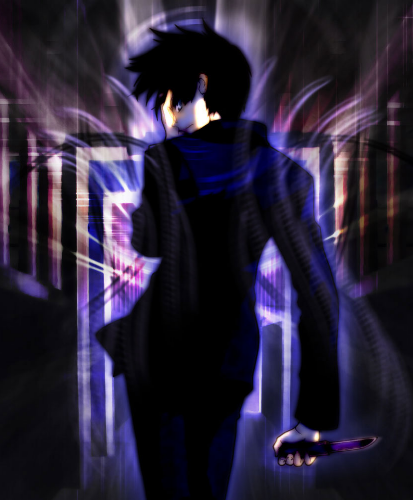
SHIKI TOHNO
-BACKGROUND-
From the twisted world of Tsukihime and Melty Blood, enters the demon hunter Shiki Tohno. Once a normal student burdened by anemia from a childhood accident, his life soon becomes one of both reverie and nightmares. Cursed as well from the accident, he gained the Mystic Eyes of Death Perception; granting him the ability to see the "death" of all things and the capacity to affect them. Perhaps it was fate, that these eyes and his forgotten past were to drag him into the fantasy he now finds himself; a world of demons and vampires, of immortals and creatures beyond human understanding.
[Made as spoiler free as possible. Go play Tsukihime and Melty Blood if you want to know more about this badass. Also note that there is no Tsukihime anime.
http://i239.photobucket.com/albums/ff11/MetaLord_2007/Hisuisays.jpg]
-STATISTICS-
The sole survivor to an ancient clan of demon hunters who were devoted to breeding the perfect human, Shiki, when his bloodline is awakened, gains abilities at the peak of human potential. His almost superhuman agility and skills are meant to slay the most inhuman of creatures, making him a cruelly efficient and dare I say it, deadly assassin.
Weight: Approximately the same as Marth. Still just a high school student, he hasn't yet the bulk of an adult.
Size: Again, similar to Marth. He's just your "average" teenager.
Ground Speed: Amazing. Faster than C. Falcon, he glides across the stage like a specter. Still slower than Sonic of course, but can turn during dashing just as quickly.
Air Speed: Imagine the smooth DI of Zamus combined with the falling speed of Wolf. As quick in the air as he is on the ground, he rivals even Metaknight in the sky.
Power: He wields his inheritance, a knife inscribed with the name of his clan: Nanaya, as weapon of choice against the otherwordly forces that threaten humanity. Certainly not as powerful as a sword; it is best for quick unexpected attacks.
Attack Speed: Wielding his knife with speed equaling, perhaps surpassing Metaknight's, it's unlikely that an opponent will ever get the first move. That is, if they ever move again.
Jump: Comparative to Marth's jump height. Air game is excellent thanks to this, DI, and fall speed.
Crawl: No
Wall Jump: Yes
Wall Cling: *No
Hover: No
Glide: No
*Can run on walls. Works just like moving during a wall cling.
-ANIMATIONS-
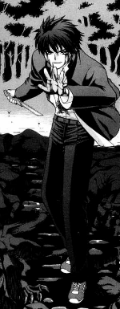
Standard Pose: Stands with his knife held backhanded, eyes focused intently on the world before him.
Exhausted: Holds his chest, as if in pain
Idling: Sweeps back his hair and narrows his eyes with a mischievous smile. What is he thinking?
Walking: Casually walks forward with his knife behind him. There's something menacing about it.
Running: Your average run, except with a knife
Dashing: Stays low to the ground and appears to glide across the stage.
Forward Jump: Leaps forward and flips just before landing.
Backward Jump: Flips backwards
Mid-Air Jump: Pushes against the air below him for a second jump
Crouching: Bends his legs down (which I suppose is what crouching is)
Hanging: Hangs with one hand, with the other by his side holding the knife
Swimming: Breaststroke
Forward Roll: Dashes forward and turns around to get behind the opponent
Bacward Roll: Back flip
Side Step: Instantaneously turns on his right foot into the background
Air Dodge: Leans his body into the background
Shield: Holds both arms up to cover his face
Trip: Rolls forward onto his back, grimacing
Dazed: Holds his head and struggles to stand
Sleeping: Sits down and dozes off
UNIQUE MECHANICS
Mystic Eye Killer - The concept of death isn't something that should normally be perceived by the human mind. As such, Shiki is under constant strain when his brain conceives the lines of death. Like an overworked engine, if Shiki perceives "death" for too long, his mind will fail under the burden. To prevent this he wears the Mystic Eye Killer, a pair of indestrucable glasses which cancel out his Mystic Eyes.
After 2 min without his glasses, Shiki becomes exhausted from the stress of his Mystic Eyes. Although his attacks become no weaker, he becomes visibly tired. After one more minute, he'll become dazed whenever he makes an attack. Use the Mystic Eye Killers to prevent this. While wearing them, he will start to recover and after 2 min will return to his default state.
Levels of Perception - As Shiki makes longer use of his Mystic Eyes, they inevitably become stronger as his mind attempts to reach the ultimate perception of death. This results in a greater effectiveness at manipulating the areas of fated destruction.
As time passes, when Shiki isn't wearing his glasses, his attacks gradually gain higher hit stun and shield breaking properties. At maximum (after 3 min) hit stuns of all his knife attacks increase by 150%. The same attacks also gain 2X effectiveness at destroying shields. With his glasses on however, the effect is reversed at an equal rate.
Find a balance between the two mechanics! Take notice of Shiki's animations to check how much time has passed. If you risk passing the time limit, your damage potential will sky rocket and your opponent will fear using his shield. But be wary of getting dazed your self!
STANDARD ATTACKS
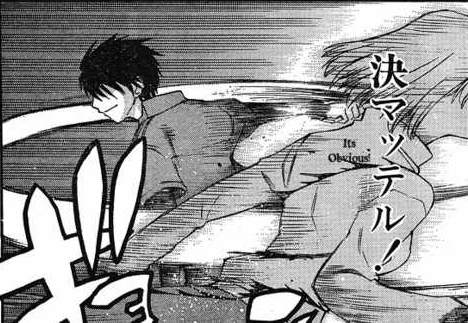
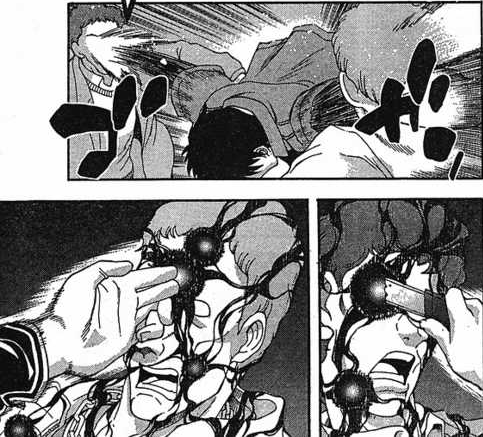
The Mystic Eyes of Death Perception; a psychic ability which endows one with the sight of "death." After a near death experience, Shiki can now see black, jagged lines across all things. These are the places at which existence is fated to end, the "death" of an object. His eyes allow him to touch these lines, and with a sharp object, cut across them. This induces the instant, fated destruction represented by the lines. An irreversible effect. Areas where these lines meet appear as fathomless, black dots; and piercing them means the annihilation of the object's existence; in living beings, even immortal ones, death is the result of this non-existence.
Thankfully, since there is no "death" in Brawl, this power won't make him imba(imbalanced) or overpowered... maybe.
Rather than cause death, Shiki's attacks have higher hit stuns than most others, making it easy for him to combo. Some of his attacks cause extreme damage to shields as well, like Marth's Standard-B. It's even rumored that he can incrementally decrease the strength of his opponent's attacks.
(KO percent estimates refer to Mario's weight)
(Bowser-length = amount of stage a standing Bowser covers)
(Attacks based on Melty Blood moveset. Not to say that I'm copying everything)
Standard-A
A 3-hit combo. Swipes forward with his left hand then does a low kick, and finishes with a horizontal knife slash. He moves slightly forward during the second and third attack.
The slash has purely lateral knockback, meaning opponents are sent flying parallel to the ground. This is in addition to a high hit stun like Wolf's combo.
Like most 3-hit combos, it comes out extremely quickly and is almost impossible to escape once caught. Take advantage of its unique knockback and chase at mid-low percents. At high percents, you can stand close to the edge against characters like Ike and send them flying beyond recovery. Or you can cancel in the middle of the move and grab or use a tilt.
Forward-Tilt
A 2-hit combo. Thrusts forward with his elbow and arcs his knife up in front of him. The first attack stuns the opponent in place for a shorter time than Snake's, but the second comes out faster. You can attempt an infinite lock, but its going to be much harder due to the lower stun. The knife slash has 2 points of knockback: within the arc and at the circumference.
The former area lifts opponents vertically into the air and can KO at the top, while the latter launches opponents sideways. Both have high hit stuns comparable to Wolf's side-tilt.
Best used as a killing move since the first hit comes out so quickly. Make sure to use the vertical knockback in the middle of a stage and the horizontal near the edge. Again, take advantage of the high hit stun at low percents for chasing.
Up-Tilt
Spins forward and brings his right leg down onto opponent's heads. Acts like Samus' but slightly weaker in terms of knockback. As spammable as Lucario's though. Bounces opponents off the ground with high hit stun. 10%
Use it to rack up damage at low percents or spike opponents at the edge. KOs off the top at around 200%.
Down-Tilt
Two quick knife slashes while crouching. Drags the opponent in for both hits. Low knockback but capable of tripping. 5% each hit
Use it to rack up damage or for an unexpected hit.
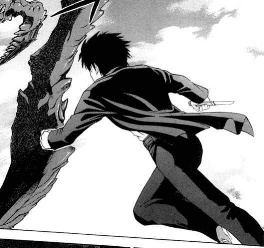
Dash - "Come on then. Let's die together."
A fearless charge toward even the most unsurmountable of odds; Shiki is blind to all else except a single point. With inhuman precision does he pierce it, driving in his knife with the momentum of the colliding bodies. 13% + % of Cancelled move
During this move, Shiki holds his knife outwards and thrusts it after moving a Bowser-length. But, what makes it special is that it can break super-armor. A fully charged Donkey Punch? An Ike Smash? A Warlock Punch? It doesn't matter what kind of frames they have, because this move destroys them. And if it does, then the knockback and damage is sent right back at the opponent. A "super armor counter" as it can be called. But otherwise this knocks opponents behind Shiki at a constant distance of about a Bowser-length. Thus, due to this move's long endlag, Shiki is completely vulnerable to counterattack.
Take chances! If you see someone charging super armor smashes or a reverse-Warlock Punch, run toward them and attack! But if you miss... good luck dodging.
Side Smash - Severance
"I can see them; the lines of death," Shiki muses to himself. Those ever present black lines entangle the opponent before him, showing him where to cut. As he concentrates the pain in his head intensifies, but now the lines thicken and grow. "There," he says.
Shiki focuses his eyes and attempts to directly cut the lines on his opponent. He readies his knife and stepping forward, swings his arm at a blinding speed, severing existence. 25%
One of Shiki's best killing moves, this deadly attack rivals Marth's tipped F-Smash in terms of knockback. Combined with its forward movement (about 3/4 of Wolf's F-smash), shield breaking properties, and massive priority this is something even the mightiest of foes will want to avoid. But with its long startup and endlag, you're going to have to predict your opponent's movements beforehand.
Use it to keep opponents on their toes! Mix it up in your attacks for some interesting results. Remember that it absolutely devastates shields, so expect sidesteps, roll dodges, and jumps for those used to it.
Up-Smash - Asunder
"Above?" Shiki reacts to a movement in the sky and sees a blur of black lines. "How stupid, do you want to die so badly?" he mutters as he brings his knife up. "I see it, your end"
Shiki slashes across the sky once and then drives his knife upwards. The slash acts just like the initial hits from Link's U-Smash. If he hits the middle of the opponent with his thrust, he pierces their point of death for extreme damage and knockback. 5% - Slash 15% - Off center thrust 20% - Center thrust
Try to master the art of hitting opponents in the middle. Remember, middle means that a line from the point of impact divides the hitbox into two equal areas. The tolerance decreases with smaller characters, so practice with someone like Bowser first. Although much harder to hit than Marth's U-Smash tipper, hitting the point of death (a "pointer") can kill off the top at around 50%.
Down-Smash - Transpierce
"I'm surrounded," thinks Shiki. Extending both knife and hand he says, "No problem at all."
Crouching, Shiki thrusts both arms outward impaling those foolish enough to stand close to him. One hand holding the knife straight, the other simply using two fingers; the points of death are skewered all the same. Opponents are sent flying horizontally across the stage. 22% - Knife 20% - Hand
Different from your usual sweeping move, this attack comes out almost immediately on both sides meaning roll dodging is somewhat effective at evading it. But this is made up by its speed and knockback. Use it as a quick KO move like Metaknight's.
Neutral
A mid-air slash where he passes the knife into his left hand to swing. A powerful single hit, it has doesn't have any sex kick properties. Use it like you would Metaknight's for a KO. 12%
Another excellent killing move with no start lag and little endlag. Utilize your airspeed to juggle airborne opponents.
Forward
Shiki forcefully swings his leg down in mid-air, sending opponents plummeting into the ground (or an endless abyss). 10%
A nice spike similar to Snake's F-air, though it comes out heck of a lot faster. Not quite as powerful of course, but much easier to hit due to its speed. Chase opponents to the edge and finish them off with this.
Back
Shiki stabs the air behind him. 10%
Like a lot of b-airs in this game (for some reason) this move is pretty effective for KOs. Think Ike's only with less range and knockback, but higher hit stun.
Up
Shiki arcs his knife upward. 8%
A pretty pathetic move due to its lack of noticeable knockback. Would have been effective for juggling... if Shiki had multiple jumps like Metaknight. Use it just for the sake of mixing things up.
Down - Flash Run: Six Demons
Shiki descends to earth with an air cutting kick. 15% Whole duration
Unlike Zamus' and Sonic's d-airs, this move drags the opponent down with Shiki until it ends. You can use it as a suicide spike! Even better, you can cancel it with your Up-B! Works like Wolf's Up-B but with no knockback at the end.
-SPECIALS-
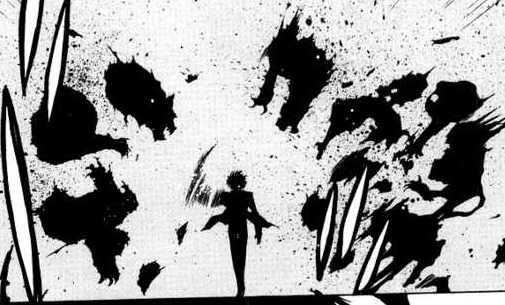
Neutral - Across the Lines of Death: Summer Snow
"All around me, the world is filled with death," thought Shiki. "Ha... Ha Ha Ha Ha. Good."
Shiki begins to cut everything around him, shredding both the living and non-living to oblivion. His arm moves with indescribable speed, creating an area of invisible destruction. 20% Whole duration
Tap B to sustain it for up to 3 seconds. This attack catches and drags in opponents for continuous damage, and flings their remains in random directions. Blocks projectiles too! However, it prevents Shiki from moving for the duration, and has some endlag.
Doesn't cancel your momentum, so use it while moving to catch your opponent! It covers both sides of Shiki about 3/4 Bowser-lengths on each side, giving it the most range of Shiki's standing atttacks. Its random knockback direction makes it hard for chasing though, but you can use it off the stage for an unexpected spike!
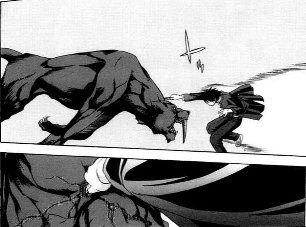
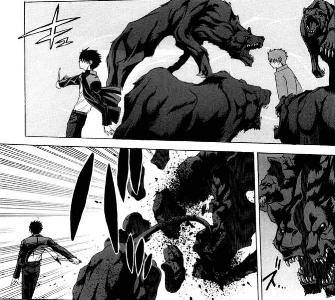
Side - "Disappear, Fragile Thing"
Blind to their mortality these creatures act recklessly, walking straight to their destruction. Everything ends eventually; the line between being and non-being is thinner than anyone can imagine. "Let me show you how brittle your existence is," said the god of death.
Shiki faces the mortal things before him, clearly seeing their inevitable ends. In an instant he disappears from their sight, and in another reappears behind them. They fall into nothingness, their infinitesimal pieces no longer visible. 9%
This move has Shiki moving faster than the eye can follow and cutting apart everything he passes. Covering a distance slightly farther than C. Falcon's side-b, with a speed near a Fox Illusion, and rendering Shiki untouchable in the middle like Metaknight's cape; this is the ultimate approach move. Opponents take damage after Shiki reappears. It has a constant knockback that sends opponents straight up from where they were caught. Special: decreases the strength of opponents' attacks by 1 use. That is, make it as if they used the move once more than they actually did.
Rather than for attack, use this to keep pressure on your opponent. Faster than your dash and rendering you untouchable for the duration, even characters with projectiles won't keep you at bay. But watch out for its minor endlag. It may not be that long, but if you carelessly reappear right in front of your opponent, except a painful reprisal. Also take advantage of its special ability! Especially effective against people that spam smashes.
Up - Flash Run: Seven Angels, Crescent Moon
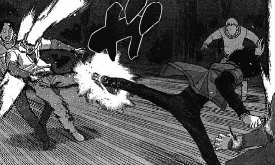
A kick no one understands. Shiki performs a deadly rising kick and finishes with a mid-air flip kick. It drags opponents in for 7 hits and launches them skywards, making a 75 degree angle from the horizon; goes a bit farther than Marth's Up-b. 7% Rising Kick 7% Flip Kick 10% Air blade
Wouldn't you believe it, this thing is an awesome KO move. The flip kick creates an instantaneous blade of air with excellent knockback. Use it to finish off juggled enemies or to stave off would be edgeguarders. A lot better than Sonic's stupid double jump thing, am I right? Of course, it doesn't work if you caught them in your rising kick first. For recovery, it has the same disadvantage as Marth's; you can get caught under the stage. So remember not to use it directly below the edge.
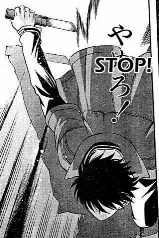
Down - True Death: Nanaya
Shiki holds out a hand, daring his opponent to attack. All offensive comes to naught as he jumps back in an instant. "Off with your head" he taunts. A knife embeds itself into flesh, a hand twists a delicate neck... it's over.
A counter move where Shiki lifts his hand in front of himself. If he's attacked the moment it's used, he jumps back and throws his knife across the stage. He remains standing until it hits something, at which he suddenly appears and twists the neck of the victim. The unfortunate soul falls to the ground unconscious (like with Snake's d-throw). Special: Decreases strength of opponent's attacks by 2 uses. 2 X Countered Attack %
The counter lasts for only 3 frames (1/20 sec) in one direction and the miss endlag leaves you completely open for a quick smash, so make yours count! The knife travels faster than Fox's laser so you won't be standing for long, but you can still take damage during those frames. Most useful against projectile attacks, because you reappear where your knife lands; usually stuck in someone. For walls and items, Shiki just lands nonchalantly near them and picks up his knife. Otherwise, if the knife hits nothing, Shiki just reappears where it stops. Travels the length of Final Destination... take care not to throw it off the stage.
Pummel - Across the Lines of Death: Dissection
Shiki slashes the lines on his opponents as they flail about, slowly erasing their existence. 1%
Slower than other pummels, each hit decreases their strength by 1 use.
If you like spamming grabs, then make sure to use this too. Perfect against those who spam smashes instead.
Forward - "Away"
Sends the opponent flying back with a powerful kick. 8%
Back - "Stay Down"
Spins his body to lift his opponent, and slams them into the ground. 9%
Up - "Fall"
Jumps up with his opponent and launches them into the ground with his knife. 10%
Down - Grave 10%
Shiki pushes his opponent onto the ground and stabs their point of death, leaving them unconscious.
-SITUATIONALS-
Ledge Attack
Shiki lifts himself up and stabs forward.
Ledge Attack >100%
Swings up from the edge and lands with a powerful downward slash.
Rising Attack
Jumps unto his feet while swinging his knife at a blinding speed.
-FINAL SMASH-
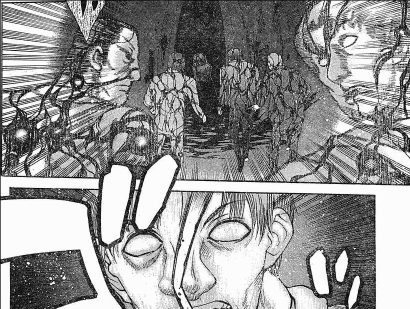
TOHNO GLAND: ATTACK OF THE IDIOT HEROINES AND MINOR LOVE INTERESTS
Yes, the infamous source of Shiki's massive harem of supernatural women enters the Brawl. Some claim it to be pheromones, while others believe its his personality but no matter what it is no female seems able to resist him. The gland has enamored the princess of the original vampires, an immortal heretic hunter of the Church, his adopted sister of a demonic bloodline, his twin maids, his schoolmate turned vampire, his adopted sister of a branch family, a girl able to see the future, a succubus, and a genius alchemist. Fear its power!
All female characters automatically join Shiki's team for the rest of the match. Shiki summons his harem to destroy everything else. It's unblockable and unstoppable. Eventually the girls start fighting over Shiki and end up killing themselves and annihilating the stage. Shiki wins no matter what.
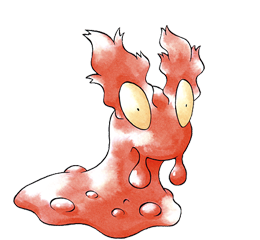
This is what it looks like:
Wait... that's not it.
-REAL FINAL SMASH-
MYSTIC EYES OF DEATH PERCEPTION:
Up
Toggles the Mystic Eye Killers.
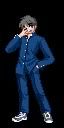
[Not wearing] Shiki takes the glasses from his pockets and puts them on with one eye closed and a grin. He says, "Guess I didn't need to see them after all."
[Wearing] Removes his glasses and puts them in his pocket. He says, "I'll show you what it means to kill things."
Side
[Wearing] Puts his hand behind his head and says,"Maybe we should stop before someone gets hurt."
[Not wearing] Takes a readying stance and says, "Your existence; I'll erase it."
Down
[Wearing] Clutches his chest and groans, "No... not now!"
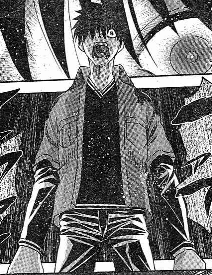
[Not wearing] Grabs his head in pain, then lets out a demonic howl.
[1] Shiki puts on his glasses and breathes a sigh of relief
[2] Holds his knife up and looks at the screen


 . I wondered how you'd pull off the recovery, and it turned out to be good. Congrats on your first set!


 )
)