MasterWarlord
Smash Champion
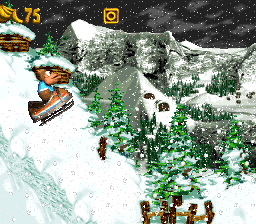
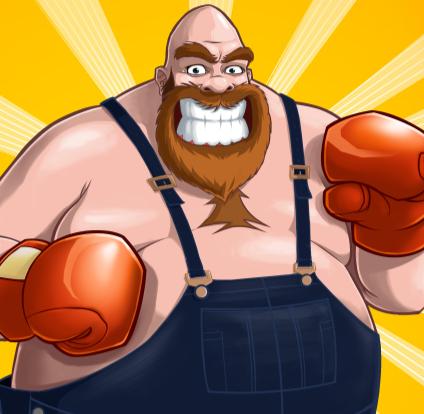
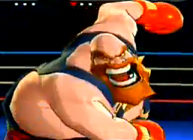
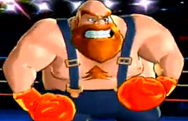
BEAR HUGGER
/// BACKGROUND \\\
/// BACKGROUND \\\
The Bear Hugger is a rather easy opponent in Super Punch Out, being the first opponent in the arcade version and the second in the SNES version. Ironically, he’s much harder in the Arcade version despite being the earliest opponent, his bear hug being a one hit KO, though it’s still quite easy to dodge. Where the Bear Hugger truly began gaining steam was with the revival of the Punch Out series on Wii, where his character was much more explored and defined, revealing him as a rather stereotypical Canadian boxer. –Apparently-, he actually trains with a real bear. Then again, anything makes sense when we keep in mind Great Tiger exists.
/// STATS \\\
Weight »»» 10
Size »»» 10
Power »»» 9.5
Priority »»» 9
Range »»» 7.5
Falling Speed »»» 6.5
Aerial Movement »»» 5
Movement »»» 3
Traction »»» 3
Attack Speed »»» 2
Jumps »»» 1.5
Recovery »»» .5
Yeah, Bear Hugger is a character of extremes. This guy makes Ganon and Bowser look like speed demons, and he makes Link’s recovery look like Meta Knight’s. That said, his power is truly something to be feared, and he easily tops Bowser as the heaviest character in the game. In addition, living up to his name, Bear Hugger’s priority tops absolutely anything that’s not disjointed due to his many grab-like moves, and when combined with his great range it’s near impossible to hit the guy without punishing his end lag.
/// SPECIALS \\\
Neutral Special - Spit
The Bear Hugger spits (No, not syrup, and) down twice, once on each of his boxing gloves, then rubs them together eagerly. This takes slightly less then for Lucario to fully charge a aura sphere. This makes your gloves nice and sticky for 12 seconds until it wears off. This turns all your punching moves into grab hitboxes, foes sticking on to the gloves rather then being smacked away with knockback. Foes will still take the damage the punch would normally deal and you get a grab in for even more free damage. What’s not to like? Using this move with already sticky gloves renews the duration.
[0%]
Side Special – Defensive Stance
Bear Hugger brings up his gloves to block his face. While you’re locked into this stance, you’re incapable of jumping, crouching, and turning around, but you can move at half your already sluggish movement speed. Pressing up and down moves your gloves (Which block anything) up and down, though, and they’re roughly the size of Kirby in front of you. Your block can prevent practically any attack, and there’s low lag to come in and out of this stance. Unfortunately, you’re only able to use your jab, neutral, side (To come out of the stance), and down special while in this stance. This prevents foes from easily camping you and can make the inevitable pressure you’ll have to deal with easier to handle, but the real clincher is that with sticky gloves, any melee attacks you block will instantly count as a grab. There’s no need to use a laggy move to grab the foe, just let them come right into your grasp!
[0%]
Up Special – Tether Overalls
Bear Hugger unstraps one of the straps on his overalls, then whips it forward at a diagonal angle. While he could perform a generic uppercut for a recovery, that wouldn’t really take him much of anywhere what with his tubbiness, now would it? Anyway, this is the generic terrible tether you’ve learned to loathe because of Ivysaur and company. Even for a tether it’s horrible, reaching out only half as far as Ivysaur’s it’s twice as laggy to come out, giving foes all the more time they need to edgeguard you. Contact with the end of the overall strap does 8% and average set knockback. This is Bear Hugger’s only disjointed hitbox. Whether he gets on the ledge or not, Bear Hugger near laglessly re-fastens the strap upon going into helpless or grabbing the ledge.
[8%]
Down Special – Timber!

The Bear Hugger spins around as if in a daze for as long as you hold the B button, then upon release he falls over backwards yelling out “Tiiiiiiiimber!” (If you fall into the background/foreground, you whiff the move, though the timing is easy). If you just casually press down B, he’ll simply fall over backwards with no spinning, the spinning mainly serving to allow you to turn around to face the way you want before you collapse, which deals 26% and knockback that kills at 75%. While the collapse –is- very laggy (Start-up of Dedede’s fsmash), the Bear Hugger gets super armor when doing so, so he at least can’t be interrupted. The end lag, though, is still perfectly open for punishment, and Bear Hugger is left lying on his back at the end of the move. The main way you’ll actually be landing this is to use it like a counter – absorb an enemy’s move as you collapse on top of them.
Used in the air, this move functions differently, essentially being Bowser’s down B with the Bear Hugger going horizontal in mid-air, saying his line, then falling. Unlike Bowser, Bear Hugger can’t sweet-spot the ledge like this, so don’t try anything fancy. It’s still as powerful as the grounded version and the lag is still all there along with even worse landing lag, but you still have super armor as you fall, so it –possibly- could be used as an excuse to get out of the air (Though it’s too laggy to save you from being star KOd).
[26%]
/// STANDARDS \\\
Standard Attack - Jab
The Bear Hugger does a casual jab forward. It’s actually pretty damn fast, but the priority is only average, and the range like that of Bowser’s neutral A. It’s pretty weak to boot, just 6% and weak set knockback. It serves as a good move to discourage foes to get the hell away seeing how many laggy moves Bear Hugger has, but the main time you’ll actually be using it is when you’re in your defensive stance – there’s little else you –can- use then.
[6%]
Dashing Attack – Collapse
Bear Hugger skids to a stop, but despite his slow speed the big guy seems to of picked up too much momentum, falling over forwards. He flails his arms frantically, trying to stay up, having superarmor for a brief period, then falls over face first, going into his lying on stomach state with bad lag (Though this starts up instantly). This strangely has no real hitbox, but if a foe hits you as you fall over with a melee attack it’ll just bounce off Bear Hugger’s flab and it’ll hit them back for double damage/knockback. The force of the blow will knock Bear Hugger back up to his normal stance to boot. This is an excellent defensive move and can work wonderfully with prediction, but this is far from an easy move to throw out.
[Variable Damage]
/// TILTS \\\
Forward Tilt – Gut Buster
Bear Hugger does a punch directly forwards with range identical to Bowser’s ftilt, but with double the end lag (Bowser’s ftilt is pretty fast) and priority. This does 11% and knockback that kills at 170%, but the real draw of this move is when your gloves are nice and sticky – it’s easily your best grab available, what with the relatively low lag and the great range, and during the end lag your glove is still a lingering grab hitbox (Only with sticky gloves) in front of you, leaving you well defended from the front as the move winds down.
[13%]
Up Tilt – Smack Down
Bear Hugger raises his arm above his head, then whishes it down in an arc in front of him, ending with his hand down at his feet. This has an arc around Marth’s height that starts above Bear Hugger and then falls down in front of him, and the move is surprisingly quick to come out, only the end lag being notable (D3 usmash start lag). This deals 10% and spiking knockback down onto the ground (This doesn’t reach down onto the ledge if that’s what you’re thinking), leaving foes in their grounded states. While this is Bear Hugger’s main anti air grab thanks to the range and low start lag, if your gloves –aren’t- sticky this is rather bad, as even if you hit with it you’ll probably be punished due to the end lag.
[10%]
Down Tilt - Stomp
The Bear Hugger lifts up his gigantic foot from under his mass of fat and says “I’m gonna. . .” for start up lag of roughly half a charged Aura Sphere, then stomps down, saying “Stomp ya!”, his foot reaching out Wario’s width in front of him. The move can be canceled once the start-lag is complete, right into a shield, so you don’t have to be too conservative with this. That said, considering this is one of Bear Hugger’s few relatively safe moves, it’s not too powerful. Just 9%, average priority, and knockback that kills at 250%. Due to the telegraphed nature of this move (The dialogue helps a lot), it’s great to bait the foe in, then just cancel it and shield grab them.
Other then being a decent defensive move, this move is notable for being Bear Hugger’s only move with a grab hitbox without getting his gloves sticky. However; this only works when the foe is on their back/stomach, lying on the ground, as Bear Hugger’s foot pins them to the ground. From here you can do any button inputs, most notably Timber over and collapse on top of them for the KO or take the time to get some spit on your gloves. Jumping will cause you to release your grip on the foe early before they button mash out.
[9%]
/// SMASHES \\\
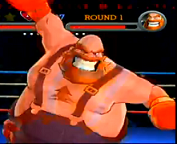
Forward Smash – Right Hook
Bear Hugger does a pretty run of the hill right hook (Which is much more exaggerated then in the picture), going in a very slight upward arc the size of Bowser (Though only the glove is a hitbox as it creates the arc). The priority is good, but the lag is the real thing bogging the move down (Bowser’s fsmash start lag on both ends!). This move deals 27-36% and knockback that kills at 120-85%. While this move is notable for it’s range and ridiculous power, it flies right over small/crouching characters due to the upward arc.
[27-37%]
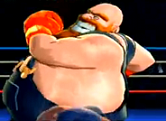
Up Smash - Flex
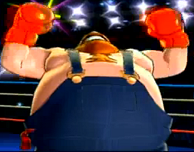
Bear Hugger reaches his arms up into the air like the first picture and holds the pose for as long as Wario’s ftilt takes to execute, laughing, creating two lingering hitboxes above himself the size of Mario with bad priority that deal 9-15% and upward knockback that never kills. Bear Hugger then sweeps his arms downwards in an arc the size of Bowser on either side, going into the pose in the second picture. This has not hitbox, but his arms sweep foes into his body. If the foe is trapped between Bear Hugger’s arm and his body while he does the second pose (Which lasts the same amount of time), they’ll be caught in a grab hitbox and be dealt 18-29%, then pass out on the floor from Bear Hugger’s BO (For 1-2 seconds based on charge). Perfect chance to stomp them. No start-up or end lag on this move. While the second hitbox is very appealing on this move, the fact that you have to go through the second one to get to it rather unappealing. With sticky gloves, though, the first hitbox is actually worth hitting with, leaving this move with no real blind spot.
[9-15%] [18-29%]
Down Smash – Bear Crusher
Bear Hugger turns to face the screen and starts smacking his fists together, laughing as he does so. The only hitbox on this move is when the gloves clash together, which has a hitbox around the size of Kirby with decent priority that deals 13-21% with knockback that kills at 160-130%. The move has nasty lag on either end (1.75X D3’s usmash), but the actual execution of the move is fast. Now, he smacks his fists together a total of three times, which isn’t really all that notable. . .Unless you get sticky gloves. Then the foe won’t be sent flying from the first time your fists smack together and will be stuck on the glove for the entire animation, getting smacked twice more for a potential total of 39-63% (!!!), and you’ll still grab them afterwards to boot! Of course, that’s only if you hit the initial time Bear Hugger’s gloves smack together, and hitting with the move at all is also easier said then done.
[13-21%]
/// AERIALS \\\
Neutral Aerial – Double Smack
Bear Hugger turns to face the screen and simply punches outward to either side, creating a hitbox the size of Mario on either side of himself. Low lag on either end, decent priority, and the gloves deal 10% with knockback that kills at 200%. While there are no changes with this in the air, the gloves are slight lingering hitboxes before the end lag kicks in and the move continues uninterrupted on the ground, and –that- is the place where you can use the stickiness to grab foes.
[10%]
Forward Aerial – Overhead Swing
Bear Hugger brings his arm above and behind his head for the start lag of DK’s fair, then swings it forward in a arc that covers an area the size of Bowser in front of him, ending with his arm angled downwards in front of his feet. His glove is a good priority hitbox all the way through, dealing 14% and knockback that kills at 125% away from the glove. End lag is about that of Wario’s bair. Now, while the move’s decent, it’s very hard to hit the foe in the direction you want with this move, which would primairily be downwards to hit them at the end of the move to gimp them. If your glove is sticky though, your glove is a grab hitbox all the way through, only letting the foe go at the end of the move to spike them directly downwards. A very nice gimper, especially considering you can grab a foe behind you, above you, wherever, really, then spike them downwards.
[14%]
Back Aerial – Roundhouse Punch
The start-up lag and animation of this move is identical to the previous, but Bear Hugger then whirls his arms to twist it around his body, causing him to spin around rapidly. His arm is not a hitbox here, only his body as he spins for .75 seconds with extremely high priority. He deals 18% and knockback that kills at 120% here, but the end lag is absolutely terrible, and the landing lag worse. Bear Hugger ends up facing the opposite direction he was initially at the end of this attack.
[18%]
Up Aerial - Squash
Bear Hugger turns to face the camera and claps his fists together above his head. He does a very large sweep, his arms/hands pushing foes up to the middle where they connect during the large starting lag (Bowser’s uair). The main hitbox is when the fists connect, creating a hitbox the size of Wario (He has superarmor during this part so priority doesn’t matter) that deals 14% and squashes foes into cartoonish pancakes. Foes slowly drift down around Mario’s height while like this, though they’re completely invulnerable and you can go through them with ease. This restores the foe’s jumps/up special so it can’t be used to gimp, but it’s good to buy Bear Hugger some time so he won’t get gimped himself.
. . .What? You don’t like the move for some strange reason? Surely you must be joking! Bah. Well, if Bear Hugger’s gloves are sticky and he hits somebody with the move, they’ll stick to his gloves and he’ll bring his gloves underneath himself so he can ride on top of the crushed character, using their floatiness to recover. This essentially gives him triple Wario’s DI and gives him a 1/10 falling speed, giving him an actual decent recovery, though foes have no real reason to come out to gimp him when they can just casually edgehog his tether. You’re more likely to use it as a suicide.
[14%]
Down Aerial – Diving Punch
Bear Hugger flips over to face upside-down in mid-air, then falls like a rock (twice the rate of Sonic’s dair). Contact with his fist isn’t even a spike, just a high priority spike that 18% and sideways knockback that kills at 70%. This reaches out Mario’s height underneath the Bear Hugger. . .But doesn’t Bear Hugger have a better stall then fall with super armor? Sure, this one’s slightly (not much) less laggy, but. . .Bah. This move only particularly sticks out with sticky gloves, as then any foes hit will fall with Bear Hugger to his doom. If he hits ground instead of suiciding with the foe, they’ll take an additional 8% and average set kncokback.
[18%] [8%]
/// THROWS \\\
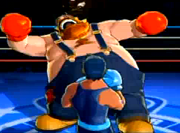
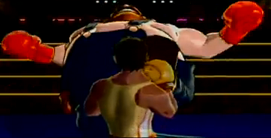
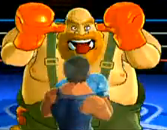
Grab – Bear Hug
This is the grand-daddy of Bear Hugger’s game. Bear Hugger opens his arms up wide then clashes them together, holding the foe like pictured above. While his actual main grab is as awkward and laggy as Bowser’s, the range is quite good (Slightly less then Dedede’s). Still, you’ll mainly want to use your ftilt and utilt as your grabs once your gloves are sticky with your spit, and having multiple grabs makes you far less predictable. Grabbing foes with anything other then this (Besides dtilt) will translate into this grab stance.
[0%]
Pummel - Squeeze
Bear Hugger squeezes the foe hard in his grasp, dealing a very meaty 6%, saying “Need a hug?” as he does so. This is a ridiculously laggy pummel and you’ll rarely be able to use this and still get a throw in.
[6%]
Forward Throw – Catch and Release
Bear Hugger essentially performs his utilt with the foe still in his grasp, bringing them up over his head with one arm, then slamming them into the ground for 8%. . .If your glove is sticky, though, they’ll stick to your glove after the throw is complete and you’ll automatically regrab them. The Bear Hugger saying “Catch!” as he does so. If use this throw again right afterwards he’ll say “and release!” as he performs the throw. . .You can get the idea of where this goes. You can only chain grab for as long as your gloves are sticky, and the throw is moderately laggy, so you won’t get –too- much damage off this.
[9%]
Back Throw – Counterpunch
Bear Hugger puts his hands behind his head, sticks his tongue out, and says some gibberish, taunting his opponent. From here, the foe will attempt to punch you (Or just poke you in Zoop Triangle’s case), but Bear Hugger will smack the foe away with a punch, out prioritizing them with his bulk and dealing 14% with knockback that kills at 180%. If somebody else interferes with this throw, you can potentially be hit by the enemy’s punch and the person who knocks you out of the throw. All enemy punches deal 10%, and this throw –is- rather laggy.
[14%]
Up Throw – Wind Up Punch
Bear Hugger winds up a big punch as he holds his victim with a single hand. During this time they can escape the grab as Bear Hugger charges, him only releasing the punch when you release A. If your glove is sticky, though, the foe won’t be able to escape while you wind up. This charges up as fast as DK’s neutral B but has a 1.5X higher max charge so it can become even more powerful, but you can’t store the charge and it only kills at 100% fully charged due to the knockback being vertical.
[1-28%]
Down Throw - Faceplant
Bear Hugger shoves the foe’s face into the ground, saying “Kiss it!” as he does so, chuckling to himself. While this only deals 7%, it has very high hitstun as the foe brings their head (Or just their rough face area) up from the ground. This is the perfect chance you need to stomp on them and renew your spit or to timber on top of them.
[7%]
///FINAL SMASH – Maple Syrup\\\

The Bear Hugger laughs very heartily as the camera zooms in on him, then he takes out a bottle of maple syrup and slathers it all over his gloves, rubbing them together to make them nice and sticky, then gameplay resumes as normal. For the next 30 seconds, your gloves will be permanently sticky, enabling you to go wild with catch and release chain grabs, gimping, you name it, really. In addition to all the fun you can have in your grab happy state, your neutral special is replaced by taking out the syrup and drinking it, healing you of 3% per second with below average lag to come in and out of the stance. If foes just run like the cowards they are when you’re at your peak condition, just sit back and heal to force them to approach you.
[0%]
/// PLAYSTYLE\\\
So you’ve picked the Canadian, eh? Quite honestly, he’s more grab oriented then even the great penguin king
(Wizzerd. . .)
Once your gloves are sticky, things become much, much easier. You’ll mainly want to turtle up into your defensive stance and block your foes’ attacks so they get stuck to you rather then using a laggy attack, and you can still poke away with fast jabs while in the stance to lure them in anyway. In addition, you can still renew your spit while like this and if you predict that a foe’s going to roll behind you (You can’t turn around), you can just Timber on top of them.
So what should you do in the instances where your foe is grabbed? Catch and Release chain grab is the blatantly obvious choice, but you don’t want to get too greedy with it, as you want your last throw to be a faceplant so you can stomp on them and renew the stickiness on your gloves to repeat the cycle all over again! Yeah, Bear Hugger racks up the percentages disturbingly fast for a heavyweight, and considering his chain grab shenanigans work on the entire cast without exception, you should be able to rack up your foe’s percentage just as quickly as they can yours, and they sure as hell will, what with how much of a slow fat fart you are. Of course, there’s always your defensive stance to combat those foes too fast for their own good, but that only works if your gloves are –already- sticky.
So anyway, once both your foe’s percentage and your own is high, you’ll both be dying off pretty quickly. Bear Hugger obviously has a very large amount of KO moves, it being more a matter of which moves aren’t then which are. However, the main point of choice is Timber, as it’s the only one that can actually hit a foe you’ve stomped on. Considering you’re already stomping on foes all the time throughout the match, following up one with a timber should hardly be a problem. You can potentially even go for an early KO, by gimping the foe on the way back if your gloves are already sticky, seeing Bear Hugger’s air game is surprisingly decent outside his terrible recovery. Still, you’d be better of just taking the time to renew the spit.
But anyway, as previously said, you’ll both be dying off quickly. Despite Bear Hugger’s weight, he dies off very fast due to his absolutely horrendous recovery, which makes even Link’s look half decent. While his weight will ensure he won’t die at absurdly low percents if he plays his cards correctly, he still has to be quite careful. The main thing preventing him from being absolutely and utterly ***** by people like MK is that if foes insist on taking you off stage, you can just suicide with them with your uair or dair. While you could go for the fair instead, it’s unlikely you’ll make it back to the stage if you try to gimp your foes back, seeing how horrendous your recovery is. It barely even needs to be edge-hogged.
So despite not playing entirely offensively, Bear Hugger is really a glass cannon. He both damage racks and KOs easily, but it’s just as easy to do the same to him thanks to his slowness, size, and recovery, so pretty much you either obliterate or suck with the guy, meaning you’ll see few people with Bear Hugger in their secondaries, only as a solid main.
/// MATCH-UPS\\\
Vs. Meta Knight: 25/75, Meta Knight’s favor
Meta Knight is easily able to capitalize on Bear Hugger’s weaknesses better then anybody else, really. Bear Hugger absolutely hates disjointed sword style attacks as they go right through grabs, and mach tornado is only the icing on the cake. Of course, Meta Knight is also an expert gimper, something Bear Hugger fears even more then fast pesky characters. Surprisingly, Bear Hugger’s best option early game to get himself room is Timber – the superarmor makes it outprioritize Mach Tornado, and once MK’s deep into the move he can’t come out of it as easily as he’d want to. Bear Hugger can definitely go for the early KO against MK due to his light weight, but considering how ungimpable he is, the situation is still far from ideal on his side of the spectrum, and Meta Knight’s advantages still far outweigh his.
Vs. King Dedede: 40/60, Dedede’s favor
While Dedede’s chain grab can’t be used on everybody, it’s far more effective on those it can be used on then Bear Hugger’s, and the big lard isn’t an exception. Bear Hugger thankfully isn’t infinited like DK or even Bowser, being more in league with Wario (Without the grab release), so this is still –possible-. Bear Hugger can avoid being grabbed by using super armor in his down B, but more important is that Bear Hugger’s dtilt and his sticky punching moves out priotize regular grabs. Dedede’s chain grab is still superior, but Bear Hugger can play a very nice defensive game against Dedede and do some damage right back to him with his own chain grab. Bear Hugger’s KO potential also far outweighs Dedede’s, but Dedede doesn’t need to send Bear Hugger out far before he can bair him to all hell. This surprisingly isn’t that bad of a match up, but it’s still clearly in Dedede’s favor.
Vs. Wario: 70/30, Bear Hugger’s favor
While Wario’s air game –is- killer, he’s not good at gimping in any way, shape, or form. It’s more a substitute for his ground game, really, which means it doesn’t bother Bear Hugger as much. If anything, Wario should be the one who has to worry, as Bear Hugger can just grab Wario out of the air to bring him back down to the ground. In addition, while Wario’s priority is very good, it’s still jointed, and Bear Hugger’s grabs easily outclass it, robbing Wario of another of his advantages. Of course, Wario will be surviving much, much longer with his vastly superior recovery, but that’s really just about all he has going for him. His damage racking and KOing isn’t bad, but Bear Hugger outclasses him in both regards, Wario not able to capitalize on either of Bear Hugger’s weak points that well (Slowness and gimpability).
Vs. Diddy Kong: 65/35, Bear Hugger’s favor
The most notable thing about this match up is the brief lag Diddy takes to set up bananas – it’s a perfect invitation to spit up on your gloves. Diddy makes your openings to get your gloves sticky for you – how generous! While Diddy will spam his peanut popgun to force you to come over to his banana peel traps, you can just go into your defensive stance and turtle up with little problem to force him to approach. That said, Diddy can own you up pretty badly once he gets in close, but so long as you stay on the defensive you can get in your precious grabs. Diddy can’t damage rack nearly as well and generally has to play on Bear Hugger’s terms when he’s used to forcing characters to play on his, which proves quite problematic for him. Diddy Kong is really lost here, and his low KO potential and only “meh” gimping only seals his fate in being unable to phase Bear Hugger.
Vs. Falco: 45/55, Falco’s favor
Falco’s chain grab can easily 0-death combo you at early percents by d-throwing you to the edge of the stage and dairing (Bear Hugger’s hitbox is such that it’s a guaranteed hit) him to his doom. Stay the hell away. Falco’s grab is pretty bad anyway, so it’s not that hard to avoid getting grabbed at early percents. . .But still, the fact that one grab at 0% entirely kills you is very scary. You –WANT- to take damage so you become immune to Falco’s chain grab. Of course, it’s much harder to turtle up and focus on out prioritizing the grabs on Falco then Dedede due to Falco’s superior speed, but if you can manage it, the match up is easily yours, seeing your superior KO potential. Seeing Bear Hugger has to work to get the match up into his favor while it starts in Falco’s favor, Bear Hugger loses the match up yet again, but this is far from impossible.
Vs. Mr. Game & Watch: 35/65, Game & Watch’s favor
Game & Watch is essentially a lesser Meta Knight for Bear Hugger to deal with. Game & Watch thankfully isn’t as much of a gimping god as Meta Knight, but G&W has something MK doesn’t – his abundant BKupa style prop moves outprioritize Bear Hugger’s grabs which he relies on so heavily. G&W’s dreaded bair is very much Bear Hugger’s bane. That said, Bear Hugger can try to go around these walls between him and G&W with his wide variety of grabs, such as using utilt on G&W as he approaches from the air. G&W also doesn’t keep up as utterly absurd pressure as MK does on Bear Hugger, but it’s still very obvious he has the match up while Bear Hugger is the one who has to work for it.
Vs. Bowser: 60/40, Bear Hugger’s favor
While Bowser is far from the master gimper, he hardly needs to be. He just needs to hit you with a high knockback move then casually hop on the edge and laugh. Sometimes he won’t even need to, seeing your recovery is so bad you practically gimp yourself with it. While you KO easier, Bowser’s recovery, while far from good, easily is superior to yours and means he’ll be surviving a good deal longer then you could hope to. That said, you rack up damage on him much faster, the only thing Bowser has going for him being his fire breath which goes through your grab style moves. Bowser will be playing defensively with his fire breath and waiting for your sticky gloves to expire, then going on the aggressive once it’s down. Try to beat him to the punch with your faster grabs like jab and ftilt, seeing his fire breath has some slight lag on it. Anyway, in a heavyweight match, both combatants can KO with ease in general, so it goes to Bear Hugger for his better damage racking capabilities. Bowser is far from helpless with his defensive game, but considering Bear Hugger is attacking while Bowser is defending, he gets the match up.
Vs. Fox: 75/25, Bear Hugger’s favor
This is pretty much the Falco match up minus the chain grab, and when you take that out everything looks pretty favorable for Bear Hugger. Fox’s laser spam is actually worse then Falco’s to boot, as Bear Hugger can just shrug off the damage from Fox’s no hitstun laser while he gets his gloves sticky and then proceed to utterly own McCloud. My how the mighty have fallen since the Melee days. . .
Vs. Ike: 65/35, Bear Hugger’s favor
Ike is one of those weapon characters that Bear Hugger hates so much due to them out prioritizing his sticky grabs, but considering how superior he is to Ike in racking damage it’s not nearly as notable as it is in other match ups of this kind against the higher tiers. Ike will want to play defensively to out prioritize the grabs, though Ike will just be poking Bear Hugger while when he gets past Ike’s defenses he’ll be racking up massive damage. While Bear Hugger’s KO ability is superior to Ike’s, his terrible recovery evens this out. Still, even if Bear Hugger somehow finds himself getting behind in the damage he can knock Ike off stage with a Timber then go sacrifice himself to gimp Ike’s recovery by getting in the way of Ike’s side special, or using a sticky uair/dair/fair.
Vs. Captain Falcon: 50/50
How is a match up against worst character in the game not in his favor? What? You say it’s Ganondorf? It’s just those idiots’ bias against the slow power characters. How else is Dedede only ranked at SIXTH?!? That’s absurd. Moving on to the match up, Bear Hugger’s priority reigns supreme even without sticky gloves to such points that he barely even needs to bother getting them sticky, but Captain Falcon’s knee of justice can finally get some use here against Bear Hugger. Bear Hugger is a ridiculously large target making the sweetspot actually possible (And quite easy) to land, making it a viable KOer and gimper. While CF still isn’t –that- powerful, he’s powerful enough to get him off the edge and edgehog him casually for the kill. CF isn’t a total slouch in attack speed either, meaning Bear Hugger’s only true advantage is priority. Bear Hugger will be playing rather defensively here. This match up is quite common to come out with one of the two fighters completely killing the other, leaving no room for error on either side in this heated match up.
Vs. Little Mac: 35/65, Little Mac’s favor
While Little Mac is far from entirely reliant on traps, Bear Hugger will easily give Mac the time he needs to get them up. Bear Hugger’s many, many, many punishable moves also make him easy bait for tagging punches, meaning Little Mac will be getting up to a full power star punch in no time. This makes his recovery superior to Bear Hugger and allows him to compete (though he still definitely loses) in KO potential. Little Mac is also relatively fast, meaning he can damage rack to boot, though Mac’s traps and recovery are the main things that give him the edge here. Stranegly enough, Bear Hugger’s best hope here is to try to kill Mac at low percents by gimping him (Quite awkward for a heavyweight) before he can work up his star punch. Naturally, considering Bear Hugger is even thinking of such a thing outside his normal palystyle, the match up is in Mac’s favor.
Vs. Bald Bull: 85/15, Bear Hugger’s favor
Bald Bull is notorious for how vulnerable he is to chain grabs, and Bear Hugger’s chain grab is no exception. Sure, he’s no more vulnerable then anyone else to it, but he gets grabbed all too easily. Bald Bull really can’t get around Bear Hugger’s sticky gloves, making Bear Hugger rack up Bull’s percentage much, much faster then visa versa. That said, Bald Bull will survive for much longer due to his momentum stopping aerials and the fact his recovery isn’t absolutely abominable, and considering Bear Hugger can’t gimp without suiciding Bull’s main weakness is unexposed. Still, all Bull can answer to Bear Hugger with is a high powered bull charge from all the damage he’ll of taken, he’ll easily get one or two charges in. . .Just seeing he won’t of gotten any other moves in, it won’t matter much.
Vs. Von Kaiser: 65/35, Bear Hugger’s favor
While Von Kaiser is a respectable damager what with his blatantly overpowered bthrow and what-not, Bear Hugger is still superior with his chain grab shenanigans he has going on. Considering Bear Hugger will get Kaiser to 50% long before visa versa, Kaiser will be very hard pressed to damage Bear Hugger due to how much pressure he keeps up on him, preventing him from staying at the percentages he wants. Kaiser’s KO potential is surprisingly very respectable and can compete with even Bear Hugger’s, Kaiser perhaps having a slight edge here due to Bear Hugger’s recovery, but Bear Hugger dominates the damaging phase far more-so then Kaiser the KOing phase.
Vs. That Other Bear Hugger: 100/0, MasterWarlord's favor
/// EXTRAS \\\
Up Taunt – Canadian Pride
Bear Hugger looks at the camera and says “What’s with this huggin’ nonsense? The name’s Georgie!”.
Side Taunt – Eh Bomb
The Bear Hugger scratches his buttocks and farts. “I think I’m gonna go drop a bomb, eh?”.
Down Taunt – This Is Canadian Power
The Bear Hugger whistles the first bit of the Canadian national anthem. Oh well Canada what you gonna do.
Entrance - Flex
Bear Hugger does an aerial timber from the top of the screen down to his starting position, then performs his usmash to flex, showing off, and laughs.
Win Pose 1 – Bad Fur Day
A squirrel scampers out from behind Bear Hugger and hops up on his shoulder, then scampers all around him, Bear Hugger trying to catch him in annoyance. Bear Hugger eventually smacks him away successfully. As the taunt goes on, he says “Get your tail out of my eyes! How am I supposed to see like that?”
Win Pose 2 – Endless Beatings
Bear Hugger turns to the losers and laughs, saying “You've come back for another spanking, eh?”.
Win Pose 3 – Have some Syrup, friend
Bear Hugger comes over to the second place loser and takes out a bottle of maple syrup. He offers it to them, saying “Want some syrup?” for them to turn and look at Bear Hugger questioningly, then he drinks the syrup and pukes it up on them, laughing.
Win Pose against Sakurai – Drunken Glory
Bear Hugger and Sundance are sitting around a fire, roasting some delicious squirrel. Sakurai is present as well, but he sticks his hand in the fire and it goes alight, him running off-screen in panic. Bear Hugger and Sundance laugh, then clink their mugs together and drink their Yoshi-brand Maple Syrup flavored beer, getting drunk. This song plays rather then Bear Hugger’s usual victory music during the pose.
Loss Pose – I am tree I won’t budge
Bear Hugger folds his arms and looks away from the winner in annoyance, refusing to clap. Isn't he just the most beautiful guy around?

 ). If I have to b*tch about something it's the unoriginality of certain attacks, but of course this is a part of our whole feasibility movement and I'm part of it too. Yeah, good moveset here.