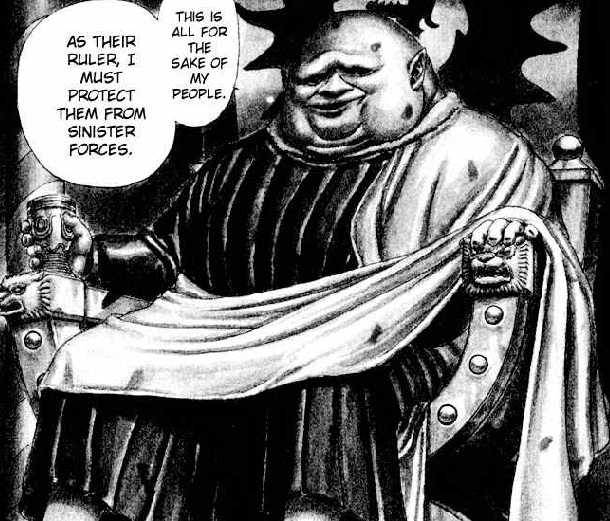
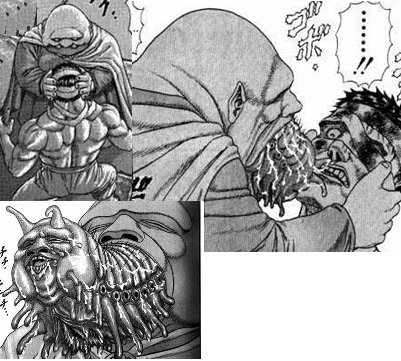
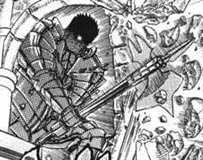
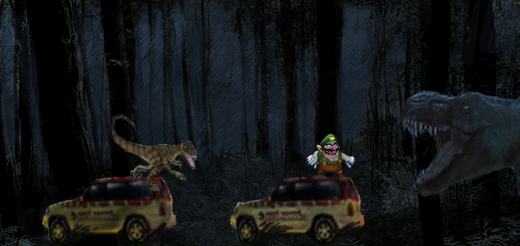
The Count is an apostle (The servants of Godhand) from the Berserk manga series. He was once a good man, but once his wife cheated on him and participated in pagan activities he used the power of his Behelit to escape the madness. While allowing him to get over the unfortunate turn of events and giving him untold power, it drove him insane. He has his guards bring him the people under the false pretenses of accusing them to be pagans, then devours them alive. Not a pretty sight. While he is ultimately defeated, he is offered one more chance for survival by Godhand. . .If he sacrifices his daughter, the only thing he still holds in value. The Count refuses, and is then promptly dragged to the gates of hell.
The Count is able to turn parts of his body (Or all of it for that matter) into slime and extend it. In addition, he also has mind flayer like abilities in that he can use his slime to brainwash unwilling victims, leeching off of their brain. He also has a rather monstrous demonic slug form, the peak of his power.
Priority »»» 10
Traction »»» 10
Weight »»» 9.5
Falling Speed »»» 8.5
Size »»» 7
Range »»» 6.5
Recovery »»» 6
Attack Speed »»»5
Aerial Movement »»» 3
Power »»» 1.5
Movement »»» 1
Jumps »»» .5
You can’t honestly tell me you were expecting these stats from a fat a
ss like him, can you? That horrendous movement would make one think he was sitting in his throne (Which he isn’t, he walks normally), for crap’s sake. That’s also not an exaggeration in attack speed at all. It’s rare for him to have that much lag, the only thing bogging him down being the long duration of a good amount of his attacks. He’s also pitifully weak and has no attacks that cause actual knockback beyond some set knockback, relying on his grab-game to score KOs. Beyond that, nothing else is too surprising, but the Count has ways to make up for his bad ground mobility (He doesn’t even have a dash). . .Though the same can’t be said for his p
iss poor air game.
The Count has no aerials. Seriously.
Neutral Special – Bodyguard
The Count claps his hands casually to summon Zondark, his captain of the guard, who comes in from the background with very little lag. He has a very stupid AI and has a miniature moveset of his own (Detailed later).
While Zondark only takes half as much damage as normal, the catch is that he and the Count share the same damage counter. The Count can’t resummon Zondark after he gets KOd for the rest of his stock.
If you press this button input with Zondark already summoned, you’ll instantly switch control to Zondark and he’ll start taking full damage while the Count takes half damage.
You can swap at any time even if your character is in hitstun/is in the middle of a move with no lag or visual indication whatsoever. When your other character is being controlled by the cpu, they'll generally play defensively and aim to protect you/themselves, meaning you don't have to constantly babysit the cpu character (Usually Zondark), though you'll have to swap between them a bit to get much offense done. Both are essentially immune to grabs/combos seeing you can just switch control to the other character to free your comrade. This helps massively with the Count’s otherwise high vulnerability to them. . .
[0%]
Up Special – Slime Base
The Count’s lower half turns to slime, then starts rapidly extending upward (You control the horizontal movement) triple Ganondorf’s height, propelling up his upper half. You can easily sweetspot a ledge with this to end the move early and this all happens pretty fast, but this has no hitbox. Hitting the Count’s main body with a melee attack ends the move early, but hitting the slime won’t hurt the Count at all. You can easily sweetspot a ledge with this to end the move early and this all happens pretty fast, but this has no hitbox. Hitting the Count’s main body with a melee attack ends the move early, but hitting the slime won’t hurt the Count at all.
While it is a respectable recovery, using it on the ground is where this move truly shines. If used on the ground, you can manually control the slime with the analogue stick, allowing you to extend and retract it as you please. Since the Count is still technically connected to the ground via his slime base, he can use all his ground moves from atop this makeshift podium. This is an excellent way to get the Count out of harm's way, and decent compensation for the fact he has no aerial attacks.
If you input the Up Special once you already have a slime base it’ll quickly snap back to the Count. This is your only real way to get up into the air due to the Count’s bad jumps. In addition, seeing the Count has no –real- aerials, if you input a “dair” when within double Ganon’s height of the ground the Count will perform the Up Special in reverse. This creates a slime-base underneath him to firmly secure himself to the ground, where he can actually function.
[0%]
Side Special – Slimeball
The Count coughs up a ball of slime that flies forwards unaffected by gravity, going two Battlefield Platforms at the rate of Ganon’s walk. It’s the size of Mario’s fireball and has identical disjointed priority, dealing 6% and small set knockback on contact. This has below average lag making it a great projectile, though the fact it moves so very slowly and it’s out-prioritzed by nearly all other projectiles can limit its’ use at times.
If you hold B during the starting lag of the move, the Count will instead puke the slimeball on his hand then lob the slimeball forward. It travels in an arch-like arc half a Battlefield Platform forward before falling down to earth. The lag is increased ever-so slightly for this and all it does is buff the move by 1% despite decreasing its’ range so severely. What’s the point? Well, you can use your up special to get at a nice elevation so the slimeball will fall down a lot longer before vanishing, thus increasing the range. You can also take advantage of the arch-like arc of the projectile to hit foes while hiding behind Zondark
[6%][7%]
Down Special - Behelit
The Count takes out his Behelit (The first of the five pictures) from his cloak, the source of all of his power, gaining superarmor for the start lag. He holds it up to summon a random member of Godhand (Besides Femto) who then tells you to “Bring the sacrifice”. Unfortunately, you can’t just sacrifice the foe, as that’d hardly be a “sacrifice”, now would it? The Count becomes controllable again after this brief bit of lag while the Godhand member stays where you summoned them.
This is your que to bring over Zondark or a teammate to sacrifice, as if you just ignore the Godhand member by leaving them idle for 10 seconds, they won’t take too kindly to it. If you –do- ignore them, they’ll summon in an army of d
amned souls to drag you to hell from the background for an instant KO (Though you have more then enough time, this is more of an easter egg).
Once you bring over your sacrifice, the Godhand member envelops them in an aura of darkness to instantly KO them, then vanishes.
This dark ritual restores the Count of half of his percentage. While a welcome bonus, without Zondark the Count’s percent will go back up to where it was pretty d
amn fast without him there to save you from being comboed/chain grabbed. Use this strictly as a last resort.
[0%]
Grab - Leech
The count reaches forward with his stubby arms for absolutely terrible range and huge lag. It’s nearly impossible to ever grab anything with this. Zondark on the other hand has an excellent grab, but can’t do to anything once he’s grabbed the foe. . .But this allows the Count the chance to grab the foe from Zondark. The foe has no “grab release” animation upon getting out of the Count’s grab to prevent Zondark from just regrabbing them the moment they escape.
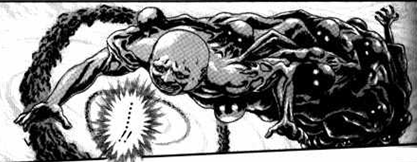
Anyway, once you’ve grabbed the foe, you can input your pummel to begin letting your slimy essence out of yourself and begin forcing it down the foe’s throat. He faces away from the screen as he does this to avoid being as disturbingly graphic as the picture. This does no damage, and you’ll struggle to notice any effect of this until you continue pummeling the foe for 5 seconds (You can stop pummeling and pick up where you left off). . .
If you do it for 5 seconds, two slimy tentacles sprout out of their body and starts rapidly pelting at them, doing 1% every other second and being unable to be removed. At 7.5 seconds, their controls reverse at random intervals briefly in addition.
At 10 seconds, the Count takes over their body entirely for a KO (A slimy head sprouting out of the foe’s head as their head just lays limply, devoid of life) and the foe loses their stock while you gain control of them while the Count’s old body falls over lifelessly and vanishes. You can play as the foe normally (They’ll respawn with a fresh body), with the exception of their grab and neutral B being replaced by the Count’s, you still having Zondark at your disposal if he’s still alive/hasn’t been summoned yet (Though if he’s dead, feel free to Whorenado away).
But that’s still not all. You can also grab Zondark and force your essence into him, the Count able to do so 5X as quickly due to Zondark not resisting him and getting massive buffs to his moveset, now becoming your primary character as his arms bust off in a (cartoony) explosion and tentacles come out to replace them. Why not just instantly summon Zondark and take him over at the start of a match? Well, while Zondark is now a great damage racker, it’s near impossible for him to KO, and there’s no going back once you take this form due to the Count’s old body vanishing so you’ll inevitably get behind in the stock count. The only time you should do this is after you’ve KOd the foe to further secure your lead. If you accidentally grab Zondark and don’t want to take him over yet, simply press B to release him.
[0%]
Standard Attack – Whirl
The Count rather stupidly spins in place once. His body is a insanely low priority hitbox that deals 3% and weak set knockback. You can keep “whirling” around in circles for as long as you want and there’s little lag in entering the stance, meaning it’s a decent move to make space, if nothing else.
If the Count has slime extended out under him with his Up Special, the move becomes incredibly useful, though, as not only does this makes the Count’s main body spin about,
but also the slime connecting him to the ground. The slime base deals 5 hits of 1% and flinching per second as it grinds about with infinite priority and can’t be damaged (As always), and is the only way in which you can make your slime-base a (gigantic) hitbox.
[3%][5% per second]
Forward Tilt – Slime Wall
The Count retracts his arms into his robes, them brings them back out as slimy tentacles and merges them together, creating a slimy wall the size of Ganondorf in front of him. This has little lag and has no hitbox, but it’s not a trap, as the Count has to hold his fused arms out in this position to keep the wall up.
The wall absorbs all attacks (Including projectiles) and you can keep it up as long as you hold A. This serves as an alternative defense against camping once Zondark croaks.
[0%]
Up Tilt – Tentacle Swat
The Count retracts his arms into his robes, then brings them back out as slimy tentacles and rapidly flails them above his head as if swatting at flies. The tentacles are disjointed hitboxes that reach up Mario’s height above the Count, covering everything directly above him and slightly to the sides. Contact deals 7% and weak set horizontal knockback and the move has below average lag on both ends to boot, the only downside being the slightly long duration (Talking Wario’s dsmash here). In any case,
it’s great anti-air, further bolstering the Count’s defense.
[7%]
Down Tilt - Cannibalize
The Count turns to face away from the screen, then does a sweeping motion downwards with his arms. The vast majority of the time this does nothing but give the Count a bit of lag,
but if there’s a foe who’s lying on the ground within the small range he’ll proceed to cannibalize them, dealing 6 hits of 1% per second and healing himself for the same amount. Even if you use an attack that specifically knocks the foe down they’ll roll away long before you can do this, but Zondark can hold them down for you to allow you to feast. . .
[6% per second]
Forward Smash – Drawing Close
The Count retracts his arms into his cloak as he charges the smash, then upon release they come out as slimy tentacles. The tentacles go directly forward by default, but you can angle it like a tilt. The length of how far they go out is based on charge, varying from 1-2 Battlefield Platforms. The ends of the tentacles form a grab hitbox together, the Count reeling in the foe afterwards to put them in his regular grab. If he doesn’t grab anyone, he’ll still extend out his tentacles the whole way and have to retract them, making this highly punishable. This only works as an alternative grab at high percents, as foes can still escape the grab while being reeled back to the Count (Though the timer will be refreshed once they get put in his main grab). While this has plenty of setbacks, it’s a great option to mix things up with at higher percents. Seeing how many grabs you need to get in to brainwash the foe, you’re definitively gonna want some variety.
This is more then an alternative grab though in that
it can also save Zondark should he be knocked off-stage. Much like your regular grab, you’re able to grab Zondark with this move. While using the two characters in tandem to cover up each other’s blind spots should prevent this from happening in the first place, this gives you some very welcome leeway. Unlike normal characters, Zondark can still perform attacks while being dragged by the Count’s tentacles. This means you can switch control to him and throw your battleaxe onto the stage (Down Special) to defend the Count while he’s helping you recover.
[0%]
Down Smash – Puke in Disgust
The Count turns to face the camera, then pukes a stream of slime downwards. This has low lag on either end, but a duration as long as Wario’s dsmash. This does 22-35 hits of 1% and tripping (Not flinching), and if foes are already tripped (Including by another hit in this attack) they’ll be knocked down. With the disjointed priority, the only big downside on this move is the
tiny range of it,
but you can solve that by using your Up Special to get into the air before you rain down your slime on the foe. Just be cautious of the overly long duration. . .
[22-35%]
Up Smash – Slime Explosion
The Count starts bringing up a layer of slime under himself as if you were using the grounded Up Special as you charge,
the move having an identical animation. The maximum height it’ll go up is double Ganondorf’s, just as always. If you already had a slime-base under you, it extends farther up then it would normally be allowed otherwise, losing the surprise element but increasing your elevation all the more.
Upon release, all of the Count’s slime explodes with little lag in a gooey disjointed explosion that deals 27% and spikes foes down to the ground. Once they hit the ground, they’ll shake the goo off themselves for a bit more stun, which is needed for the Count not to get punished due to him going into helpless after the move’s complete. . .And also probably get you a free grab via Zondark.
[27%]
Special Forward Smash - Vomit
Due to having no aerials, the Count makes up for it with all the more moves that he can use while grounded. Unlike normal Specials, the Count can’t use his Special smashes when in the air, but considering he’s never in the air (Without a slime-base connecting him to the ground) anyway outside when he’s forced to be it hardly matters.
For this move the Count leans back and gets a constipated look as charging, then upon release pukes forward a giant blob of slime 1.5X the size of Bowser. It travels in an arch-like arc, going a tad bit above the Count and traveling half a Battlefield Platform forwards before crashing down, vanishing as it does so. The move has high start-up lag (Ike’s fsmash) with below average end lag. Should the blob hit anyone, it’ll trap them within it with disjointed grab-priority. Foes must escape from the blob with the usual grab difficulty, but they can’t be hit while inside it. Used next to the ledge this could theoretically gimp, but the high lag makes it very hard to do so, and even if you do hit them with it the fact the blob falls so slowly doesn’t guarantee a KO. Foes take 5-10% a second while in the slime blob.
The Count can interact with foes trapped in a blob by going up to grab them, turning his arms/head into slime and going in the slime blob with the victim as he performs his pummel.
The foe will still have to escape from the slime blob before they can escape from the Count’s regular grab, giving you much more time to pummel the foe. The best way to actually hit with this is to have Zondark grab the foe first, though the foe will probably escape before you pull off this laggy move until higher percents.
[5-10% per second]
Special Down Smash – Tidal Slime Wave
The Count’s entire body turns to slime as he crashes downwards. This deals no damage, simply pushing foes away with a strong FLUDD-like effect, though it’s useless for gimping seeing it can only be used on the stage. The Count then forms into a puddle of slime that’s as wide as 1-2 Battlefield Platforms. From here, you move the Count’s invisible main essence across the puddle at his usual walking speed, then press A to have him lurch out and try to grab foes. While he pops out with below average lag, if the move’s whiffed you’ll get terrible lag. The Count can only stay like this for 5 seconds, at which point he’ll automatically pop out.
While the ending lag may seem rather unattractive,
you’re invincible for the rest of the entire move outside the brief start-up lag. Your best bet for actually grabbing foes with this is to try to pressure them into dodging with Zondark (The Count won’t pop out of the puddle when AI controlled, don’t worry), which is easier said then done. You’re better off using him as bait, though it –is- possible to distract the foe with some of Zondark’s quicker attacks.
[0%]
Special Up Smash - Devour
The Count turns to face his head upwards, opening up his mouth as wide as possible. He extends it open farther then normally possible by using his slime abilities as you hold the charge, but only
upon release it becomes a (grab) hitbox where he’ll chomp down any foes that fall into his mouth. His mouth can be as wide as Kirby to 1.3X Bowser’s width, meaning that you’ll have to charge the move in order to be able to devour larger characters. This has next to no lag, but the Count holds his big fat mouth open for a full second before you can perform other button inputs. Thankfully, you can move him left and right and extend/retract his slime base while performing this move to make it more feasible to land, though only at half the Count’s already slow speed.
Once you’ve devoured someone, they’ll take 3% a second while inside you and must escape with grab difficulty. You can use your Side Special for the foe to be spit out and be hit by the projectile the moment they get out, or better yet use your Special fsmash for them to be contained within the blob you spit out, automatically being “grabbed” by it. If the foe escapes before you do anything, you’ll explode in a slimy explosion as they burst out of you, being forced to perform your Special Dsmash. This is great anti-air and a way to much more easily land those Special Fsmashes.
[3% per second]
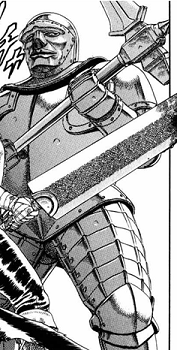
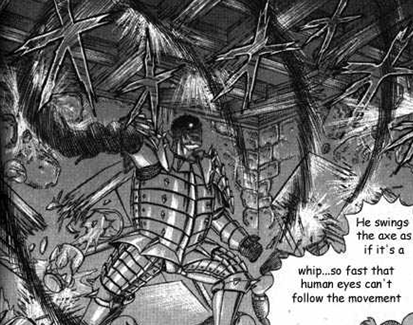
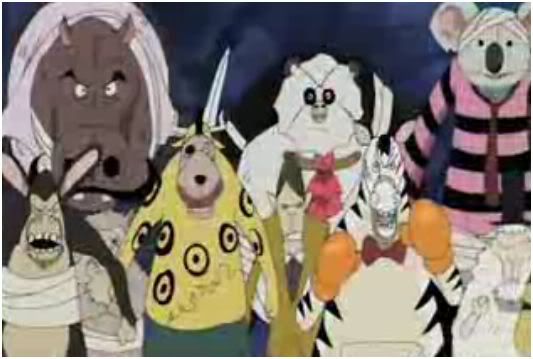
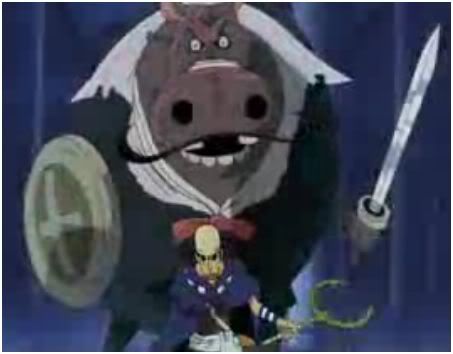
Zondark is the Count’s captain of the guard and seems to be a rather typical egotistical fellow. After failing to defeat Guts (The main protagonist of the series), he becomes hellbent on revenge, claiming he’d do anything in order to defeat him. Anything? Oh ho ho! The Count has just the thing for you, Zondark.
Size »»» 9
Weight »»» 8
Priority »»» 7
Falling Speed »»» 7
Range »»» 6
Traction »»» 6
Movement »»» 4
Jumps »»» 3.5
Attack Speed »»» 3.5
Power »»» 2
Recovery »»» 2
Aerial Movement »»» 1.5
Zondark’s inferior to the count due to a more limited moveset, slowness (Though once again, on many of his moves it comes from long durations rather then actual lag), and bad recovery. Zondark can’t do anything remotely worthwhile on his own, but when you put somebody between two characters everything becomes much more complicated.
Neutral Special – Bodyguard
See the Count’s Neutral Special.
Side Special – Spinning Blade
Zondark takes his battleaxe and starts spinning it in front of himself rapidly.
This reflects projectiles and deals 10 hits of 1% and flinching per second to those caught in the large disjointed hitbox, but is very easy to DI out of. This is a surprisingly fast move, but has a laughably long duration of 5 seconds, meaning the foe has more then enough time to go behind him and fully charge an fsmash…If not for the Count. Have Zondark stand in front of you and spin his blade to negate projectiles and force an approach, then punish the foe when he rolls/jumps around him.
While having two walls against Projectiles in the Count’s ftilt and Zondark’s Side Special may seem pointless, try making a wall with the Count then switching control to Zondark (The Count will keep the wall up until you switch back to him) and using Side Special against a foe trapped between you and the wall.
This is an excellent way to potentially get a free 50% (!).
When Zondark’s taken over by the Count, he turns to face the screen for this move, and you can move around the spinning blade at the speed of Mario’s run in any direction you please with your tentacle arms as you spin it, able to move it up to a Battlefield Platform in any direction.
This means you can move it about so you aren’t defenseless and can prevent foes from using DI to get out, though they can just DI out of it’s range to prevent you from getting more then 28% or so out of this. The move’s ending lag gets a slight increase in this otherwise broken version, meaning you’ll have to push foes away with the battleaxe during the main move to avoid being punished (And even then they can hit you with a projectile). This is the main thing that makes Zondark such a terror when combined with the Count.
[1-50%]
Up Special – Thrust of Salvation
Zondark swings his axe upward then crashes it down, making for a mini-tether around the distance of Snake when he’s crouching. This has large lag, but foes hit by the disjointed axehead get spiked with decent power and take 16%. Needless to say, you’ll be saving Zondark with his fsmash a lot.
If Zondark is on the ground when he uses this move, it simply translates into a large range upward grab where Zondark impales foes on his axehead, dealing 4% and putting the foe in his regular grab. While the range beats out his normal grab and it does some damage to boot, the lag is average on both ends.
When taken over by the Count, Zondark first extends his tentacles out the distance of Two Battlefield platforms before slamming his axe down, giving this recovery far more range. While it’s still a tether, anybody who dares to edge-guard you will more likely then not get spiked and die with you. Unfortunately, this version of the move loses its’ grab hitbox properties when used on the ground, functioning identically to the aerial version. The one thing Zondark becomes worse at when the Count takes control over him is grabbing.
[16%][4%]
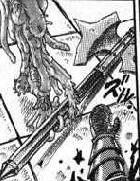
Down Special – Axe Toss
Zondark turns to face the screen and angles the direction he’s going to throw his battleaxe in (Which you have complete control over), then hurls his battleaxe as it rapidly spins. He throws it 3 Battlefield Platforms away, and it does a single solid hit of 20% and spikes foes to the ground, and the hitbox is around the size of Bowser, having infinite priority. While the move only has average lag on both ends,
Zondark has to wait for the axe to hit the ground and has to go pick it up before he can use any of his axe oriented moves (Most of his moveset) again, meaning that if you use it to gimp (And it’s hard enough to get a foe off-stage what with the duo’s lack of knockback) he’ll never get it back. Zondark never uses this move when under control of the AI, so you don’t have to worry about him doing anything stupid with it.
Now then, if Zondark is taken over by the Count,
he’ll extend out the tentacle he threw the axe with to catch it at the end of it’s arc, then pull it back to himself at the end. All the while you’re still capable of moving and using your non-axe attacks after the initial end lag of throwing the axe is done, though you always have to stay within 3 Battlefield Platforms of the axe or you won’t be able to catch it at the end. While you could use the move for gimping and *gasp* kill stuff, if Zondark’s tentacle arm is hit as he’s extending it out to get the axe it’ll retract (Though Zondark won’t take any damage), meaning it’s still very risky.
[20%]
Neutral A – Axe Spin
Zondark starts spinning around with his axe rapidly in place. This has the range of a third a Battlefield Platform on either side of him as he continuously spins about, doing so for as long as you hold A. The axe is a disjointed hitbox that deals 9% and average set knockback and
blocks projectiles, but there’s a window where Zondark can be hit due to not constantly keeping the axe on either side, meaning Side Special is your primary projectile defense. While this instantly comes out and you can hold it as long as you want,
Zondark gets dizzy at the end of the move, having ending lag that’s as long as the time you spent spinning.
There’s no limit to how long you can hold this or how dizzy Zondark can get, and if you swap to the Count while Zondark’s spinning his AI will keep doing it forever, making this the ultimate way to “set and forget” Zondark. When you want to use him for other things, end his spinning and grab him with the Count to snap him out of his dizziness. With the Count’s essence in him, the ending lag is cut by 75%.
[9%]
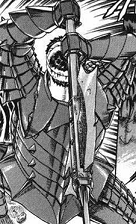
Side A – Axe Slam
Zondark lifts his axe over his head, then slams it down in front of him. The axehead reaches out half a Battlefield Platform ahead of him and is a disjointed hitbox the size of Kirby dealing 9%. While the move comes out nearly instantly, should Zondark miss he’ll have to pull his axe out of the ground over the course of 2.5 lengthy seconds (If used next to the edge, he’ll continue the arc of his axe to hit said ledge), foes taking 2% per second.
Should anybody get hit, they’ll be pinned to the ground under Zondark’s axe during the ending lag in their knocked down state where the Count is free to cannibalize on them.
If the Count has taken over Zondark, then he musters the strength to pull his axe out of the ground with below average lag should he miss.
[13%]
Up A – Headbutt
Zondark performs a headbutt upwards with nearly identical properties to Dedede’s utilt (11%), though the knockback is set and rather weak. In addition,
should Zondark actually hit anyone with the otherwise overpowered move,
he’ll hold his head in pain for bad ending lag afterwards, meaning this should only be used if the Count is nearby to defend Zondark during the end lag.
With the Count having taken over Zondark, the slimy head of the Count leeching off of Zondark’s head bites upward as Zondark headbutts, shielding Zondark’s head from the pain he’d otherwise take. This eliminates the ending lag when you hit with the move and also makes the priority disjointed.
[11%]
Down A - Stomp
Zondark performs the obligatory Warlordian stomp with average range and below average priority,
holding down foes who are lying on the ground under his boot (The move turning into a grab hitbox on them) and dealing 10%. Unlike Dingodile and Bear Hugger, this is just an alternative grab, as Zondark can’t follow it up with anything, being locked into position. However; the Count is more then happy to take advantage of the situation and cannibalize on his foes (They’re too low to the ground to grab). . .This is one of Zondark’s very few moves he can throw out with little thought, there being below average lag on either end, though unlike his ftilt he needs the Count to knock the foe down first for him (Probably with his dsmash).
If the Count has taken over Zondark meaning he can’t punish the stomp with his other body, so he simply uses his tentacles to pummel the foe with, dealing 7 hits of 1% per second. In addition, the stomp will knock foes down and then pin them, them not having to be already knocked down.
[10%] [7% per second]
Dashing Attack - Collapse
Zondark clumsily collapses in an animation similar to Dedede’s dash, but lower start lag and better range/priority. This deals 14% and knocks foes down to the ground.
This also leaves Zondark in his knocked down state, where he’ll have to use one of his incredibly laggy rolls or situationals to get out of the position.
If the Count has taken over Zondark, he’ll catch himself with his tentacles at the end of the move and push off the ground to get to his feet with much lower lag.
Grab – Normal/Leech
Normally Zondark has Dedede’s ridiculous grab but no throws, meaning the Count is the one who’s required to follow up the grab, more often then not with one of his own. When taken over by the Count, this translates into the Count’s regular grab. . .Complete with the terrible range and huge lag of it due to the Count now being in command of the body, meaning
it’s impossible to hit with it.
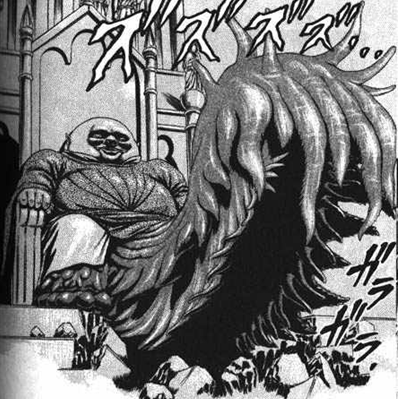
The screen zooms in on the Count as he goes under a massive transformation, turning into a massive demonic slug-like creature as tall as Giga Bowser and twice as wide, becoming invulnerable. From here, you can bring out two tentacles in each direction by pressing A or B in the direction you choose, reaching out with the range of three Battlefield platforms at high speeds. To pinpoint exactly where the tentacle comes out of the Count, you can move them slightly before they come out of him. While the ending lag of bringing out the tentacles is somewhat bad, you can bring out all eight at once if you spam enough button inputs, the ending lag of each individual tentacle only preventing you from using that specific tentacle again.
Should you grab anyone with a tentacle, they’ll be pulled back to the Count where he performs his normal pummel on them at twice the normal speed and difficulty to escape.
Each of the eight tentacles is assigned to one of your eight button inputs (B and A in the four cardinal directions), and your ninth button input (Neutral B) allows you to make use of Zondark (Who is invulnerable during the final smash) as always. Neutral A allows you just chomp the Count’s main mouth, which is a rather small hitbox but instantly KOs anything it hits, the Count devouring the victim.
The thing about this final smash is that the Count moves insanely slowly and it’s easy to just hide on the ledge away from the Count out of tentacle range. . .if not for Zondark. While he’s still his usual slow self, if you grab him you can infest him with your essence as if you’d brainwashed him normally, then proceed to own anybody hiding on the ledge with your Side Special. Anybody you KO becomes a brainwashed level 9 AI partner, but they’ll vanish and Zondark will return to normal when the Final Smash ends.
Lasts 10 seconds.
[0%]
At the start of the match, the obvious thing to do is to immediately bring forth Zondark and turtle up with him on the far side of the stage. Have Zondark use either his neutral A or side special (Side Special if you can handle the micro-management of switching back to him renewing it) and hide behind him as you create a slime base with your up-special so you can get tall enough to fire projectiles over him. If the foe gets close, lob a slimeball by holding down the input or use a special fsmash to hit them.
However; the defensive fortress of the Count is far from impenetrable. Hell, in this turtled up mode he’ll probably only get in one actual hit on the foe as they have to jump over Zondark to get to the Count. The Count can’t function as a stereotypical ranged character all that well, he’s more doing this just to get the foe to approach. Once they do, the Count will want to try to catch them in his mouth as they jump over Zondark with a Special Usmash.
From here on out, the foe will constantly be in your face. You have no way of getting them back at that range to camp them again due to lack of knockback, though if –they- want to fight at a range it’s very easy for you to turtle up to force them to do so. From here, you’ll be primarily relying on the fact you have two characters at your disposal to get the foe to actually be hit by your moves. Once you hit with one move, many more will generally follow, as most of the duo’s combinations result in holding the foe down for the other to whale on, more often then not ending in a crucial grab for the Count.
While both the Count and Zondark are ridiculously vulnerable to being juggled and comboed individually due to their lack of aerials, you can just switch to the other character and knock them out of it, as the enemy will generally be too busy kicking the other character’s a
ss to dodge. In addition, the Count using a “dair” when being juggled to connect himself to the ground followed by immediately whirling via Neutral A proves to be an excellent way to escape combos.
Damage should always be a secondary concern for you rather then a focus. You can theoretically KO somebody at 0%, the only thing damage does for the duo is make their grabs harder to escape. That said, early on getting –some- damage should definitively be a goal due to foes escaping grabs near instantly at low percents (Try to go for Zondark’s side special against the Count’s ftilt slime wall). Beyond that, though, focus exclusively on grabs. Once you get your foe halfway ready for the kill (5 seconds of pummeling), they’ll be taking constant damage anyway, so you won’t have to worry much about it. At 7.5 seconds, their controls will be randomly reversed, meaning you’ll get a few free hits which’ll be all you need to take them out for the count.
While one hit does generally lead to a few more, it’s pretty d
amn difficult to land that first hit, especially considering the fact that you essentially have to control two de-synched characters at once. Things do get much easier later when the foe takes constant damage/gets reversed controls, but the hard part is getting to that phase. The Count’s a character of momentum in many ways. The main thing that allows him to be able to build it up, though, is the sheer amount of time he’ll be sticking around. The Count’s recovery is pretty good and Zondark can try to stop foes from going after him, and Zondark simply won’t ever die so long as the Count lives due to his fsmash. They also have a variety of defensive measures and can easily save each other from long strings of moves, and as a last ditch resort the Count can shrug off half the damage he’s taken by sacrificing Zondark.
Once you’ve taken over the foe, you’ll generally only want to stay in their body if they’re godly damage rackers (Meta Knight) and otherwise should go over to take over Zondark (Assuming you haven’t had to sacrifice him), abandoning the foe’s old body. While taking over a heavyweight gives you the ability to KO through traditional means, you generally won’t have the time to get the foe’s percentage up due to your own being so high, so you shouldn’t get too greedy. Just try to get ahead for the next stock. After taking over Zondark, hide behind your axe as you spin it out away from yourself with Side Special and use it for your main damage racking or Down Special on occasion to mix things up. Up close, use your alternative grabs (Ftilt, Dtilt). Just don’t expect to stick around long – you have no aerials and the Count won’t be able to save you from being juggled to your doom. The Count’s ability to get ahead in the next stock builds on his momentum aspect all the more, as he won’t need nearly as many grabs if the foe actually has some damage on them.
The Count can become an absolute god in doubles matches if paired up with somebody who can camp, a three character fortress with two firing projectiles being much harder to penetrate. The Count is more able then most to do this with team attack on, as he can just extend his slime-base up in order to fire over his teammate. The real highlight of the Count in doubles though is the ability to sacrifice his teammates for his Down Special. If they already have high damage and are gonna die, why not? This increases the Count’s already insane durability to even higher levels.
VS. Meta Knight: 30/70, Meta Knight’s favor
While both The Count and Zondark can easily outprioritize the whorenado, if he times it well he can pick up both characters in it to rack up ridiculous damage, making it a constant threat at all times. In addition, while he’s busy whaling on one of the two characters and the other comes up behind him, he can use Shuttle Loop to hit both in front of and behind him to both separate the duo for further damage. Meta Knight racks up the Count’s percentage ridiculously fast and can easily go to gimp Zondark before the Count can save him, meaning the Count will want to sacrifice him for some healing before he attempts to do so, Zondark being more of a bother in this match-up then anything.
While the Count has a pretty good recovery that’s not that easy to gimp and can stay up out of the range of Meta Knight’s dsmash to make KOing him somewhat difficult, there’s always the constant threat of Shuttle Loop, and the Count won’t be getting a lot of hits in anyway while he’s still alive without Zondark to back him up. When the Count –does- KO Meta Knight (Probably late on the second stock), there’s the potential for the Count to come back and have some Meta Knight dittos, but why not just pick Meta Knight in the first place? Sure, you’ll still have Zondark, but he’ll just serve as a punching bag for the other Meta Knight to use to rack up your damage. You’re best off just sacrificing him before you take over Meta Knight.
VS. King Dedede: 60/40, The Count’s favor
Let’s see. . .Dedede can’t chain grab for the same reason he can’t chain grab the Ice Climbers, his great recovery/durability doesn’t matter because the Count doesn’t KO via knockback, he can’t camp to force an approach due to the two characters both negating projectiles and sending out some of their own at the same time. . .All of Dedede’s major advantages are moot in this match-up. The one thing Dedede –can- do (And very well at that) is to just use wall of pain style bairs on Zondark off stage and keep doing so, not giving him a chance to retaliate and using his multiple jumps to get him far enough off the stage for the Count to be unable to save him with his fsmash. Once that’s done, he can proceed to chain grab the Count to his heart’s content. Of course, the Count will see this strategy coming a mile away and will do everything in his power to prevent Dedede from doing so, so this isn’t exactly an easy task for the Penguin King.
VS. Diddy Kong: 40/60, Diddy’s favor
A key factor to this match-up is that the Count is immune to Diddy’s banana peels (And tripping in general) when he has a slime base underneath him, though the same can’t be said for Zondark, who Diddy will combo to all hell. He’s really just a punching bag for Diddy to damage in this match-up, so you might just want to not summon him at all until late in the match then just instantly sacrifice him to keep your percentage low. Still, it’s possible to get some use out of Zondark if you keep him firmly in one spot constantly using Side Special to deflect Diddy’s projectiles. In any case, though, you’re mostly on your own for this match-up. While without his bananas Diddy is only sub-par, the same can be said for the Count without Zondark, only more-so. It’s a fun-match up in that both characters are forced to fight in awkward ways they’re not used to and it’s still far from impossible for the Count.
VS. Lucario: 70/30, The Count’s favor
Unlike most characters, the Count only has to get up Lucario’s percentage so far (So he won’t instantly escape grabs), so that means Lucario will have very limited powers as far as actually KOing the Count goes, especially coupled with the Count’s durability. Lucario really doesn’t have all that much going for him here. His damage racking is only subpar, especially when he can’t camp. The best thing he has going for him is his dair as it allows him to get in multiple hits without becoming vulnerable to the character he’s not “comboing” due to hovering in the air, but the Count can just devour him with special usmash if he abuses it too much.
VS. Ice Climbers: 35/65, Ice Climbers’ favor
So then, two dual characters who rely on grabs. . .While the Count can’t be chain grabbed by the ice climbers, he’ll have a –very- difficult time pummeling either of them for significant periods of time, and thanks to his lack of knockback matters certainly aren’t helped much in that he can’t separate the duo. As if that wasn’t enough, both climbers have separate timers for how much you have to pummel them, meaning you have to keep specifically going for the same one. The only way you can really get in any pummeling is to grab one climber with Zondark and grab the other with the Count, but this is much easier said then done. On the bright side, without their chain grab and the Count’s good defenses the Ice Climbers can’t do much back to the Count, but the Count is much more limited then they are.
VS. Sloth: 85/15, The Count’s favor
The main clincher of this battle is that Sloth binding himself to the stage won’t help matters at all – the Count doesn’t deal in knockback, instead KOing via his pummel. Even without his main technique, though, Sloth isn’t helpless. He’ll find himself given plenty of opportunity to just make pits and rest up to keep his ridiculous strength up and keep from getting tired. The bad news for Sloth isn’t over, though, as once the Count takes over his body he can just use Sloth’s fthrow to chain himself to Zondark to essentially make the both of them indestructible. Sloth will have to try to KO Zondark first each stock as he –will- eventually die, and one mess-up means it’s all over. A very difficult match-up for him.
VS. Von Kaiser: 55/45, Von Kaiser’s favor
Seeing the Count is perfectly content to leave his foes at around 50% before just going crazy with grabs to try to go for the KO, Kaiser is pretty much free to do with his percentage as he pleases. Hell, if Kaiser avoids the duo’s few moves actually capable of inflicting damage like the plague, he can make the Count focus more on grabs so that he can still stick with the faster versions of his moves better for damage racking. Even if he fails at this, his own grab-game is a force to be reckoned with what with his bthrow, and when it comes time for the KO Kaiser can rack up his own damage to get the more powerful versions of his moves (Particularly his beastly neutral special) without as much fear as usual due to the duo’s lack of knockback. . .Just so long as he doesn’t get grabbed, of course. When Kaiser racks up his own damage to gain access to his KO moves is by far the riskiest part of the match for Kaiser and the one point where the Count can possibly mount a come-back against him. If he grabs him at this point, he’ll probably get him up to 5 or 7.5 seconds of pummeling, at which point the next grab is all too easy to attain and it’s essentially all over. A very heated match-up.
VS. King Hippo: 65/35, The Count’s favor
King Hippo will have massive amounts of trouble starting up his combo-game due to the other character he’s not comboing simply just casually hitting him out of it, not letting him get in more then one hit. Hippo’s only real hope is to combo The Count (Not Zondark – the Count can easily get higher up then you with his Up Special) high up into the air due to their lack of aerials, but he has to get high enough for Zondark to be unable to just use Up Special to drag him back down to the ground into his dreaded grab. Thanks to Hippo being a combo –heavyweight- with poor jumps/high fall speed, this is far from easy, though possible. While it’s easy enough for Hippo to KO the Count, it’ll take a d
amn long time for him to get his percentage up, and the Count can just heal half of it once it finally gets up that high by sacrificing Zondark. . .Though if that happens, you can use all your regular combos on him and get his percentage back up in an instant due to Zondark not interrupting your combos, so it’s not much to be worried about.
VS. Mr. Sandman: 60/40 The Count’s favor
Sandman has to land one specific hit to start his combos, which is far from difficult on such awkward characters with so much punishable ending lag. The thing is that once he does stun one of the duo, the other will prevent him from racking up the damage on them, taking away the highlight of his game. Sandman’s best hope to actually get in the damage he so desperately needs is to first stun the Count, then stun Zondark with his very punishable moves so he can’t interrupt his combos on the Count. While this is surprisingly not that difficult to do, the catch is that Sandman has to keep up both their hitstun at once to keep them from snapping out of the stun and interrupting his combos.
To do this, you’ll have to stun them very close together and use some attacks that can hit both of the duo at once (Dsmash). While you won’t be able to keep them both stunned for the full duration, the fact that you’re whaling on two characters means that the Count’s damage will still go up at a respectable rate. The only thing making this somewhat harder then normal for Sandman is that once you stun the Count, Zondark can just run away when you try to stun him so the Count’s stun expires, or so even if you stun him you won’t be able to keep both characters stunned due to them being separated. This can make this phase of the battle very frustrating and the main thing that loses him the match-up.
When it comes time for the KO, things are much simpler for Sandman in that he just has to land one good hit. He doesn’t have to worry about the Count’s camping –too- much in comparison to other characters, seeing the Count fails at it and the Count can’t just run and keep camping due to his terrible movement speed.
VS. Espeon: 50/50
While it’s pretty easy to set up Sixth Senses on both The Count and Zondark, it’s difficult to punish them in the required window of time due to most of their attacks having little lag, simply having long durations. The fact that many of Espeon’s prediction based moves also rely on the foe being in the air doesn’t help matters, considering the Count and Zondark have no aerials to predict. All is not lost for Espeon, though, as they can do little to knock Espeon off of his wish hotspots due to their lack of knockback, meaning he can stay contently down at 0% with little problem. Considering how much he’ll be using them, setting up some Future Sight traps in addition to the Wishes are bound to get Espeon some good damage in. Still, while the Count prefers to have damage on his foe, it’s not mandatory. The match-up can go either way.
VS. Mario Remix: 60/40, The Count’s favor
While Mario can’t do the main focus of his entire moveset all that well, comboing, gimping is still an excellent option, especially against Zondark’s horrible recovery. If Mario can manage to take out Zondark (And he’ll have plenty of chances to charge his FLUDD), then the leftover Count will be easy pickings due to him now being perfectly vulnerable to being comboed up the wazoo. Of course, the Count will ensure that it’s far from an easy task to gimp Zondark and will do everything in his power to keep him on the stage, pulling him back with his fsmash before you get him out too far, and considering how limited Mario’s options are (He can’t even camp, yet the Count can), he’s very predictable. Count’s advantage, hands down.
VS. Kholdstare: 25/75, Kholdstare’s favor
The Count is immune to Kholdstare’s infamous infinite chain grab due to Zondark, but that’s only so long as he lives. Obviously Khold’s goal will be to get him out of the way. Due to Zondark being a similar height to, it’s more then easy for him to land a “cold stare” on Zondark, so that’s instantly a point against him. While the Count can normally save Zondark from being KOd, Khold can just chain grab him the moment he knocks Zondark off stage, most probably into his ice wall, preferably while Zondark’s still in his hitstun from being knocked off so he can’t throw his axe onto the stage to prevent it. While this isn’t easy to do, it isn’t terribly difficult either, while the Count will be struggling significantly to prevent his face from being continually shoved against an ice wall while Zondark falls to his doom.
VS. Bleak: 50/50
Both characters can camp and make walls to hide behind (Or use Zondark as a living wall in the Count’s case), but the thing is that both of their main projectiles can’t be arced, meaning that their projectiles can’t be arced, meaning that you can just fire a projectile and duck behind your wall for a sort of snowball fight. However, you –can- change the direction Bleak’s side special is fired, and even if it’s a bit laggy you can angle it so that it shoots the Count as he comes out from hiding to fire a projectile. Bleak still can’t hit the Count while he’s low to the ground hiding behind Zondark, though, which presents a problem as both characters are just awkwardly turtled up unable to hit each other, neither wanting to approach.
While both have equally bad approaches, the Count is much more dominant then Bleak when he finally gets there, so he’ll be the one who wants to approach and end the stalemate. This would give him the match-up if it weren’t for Bleak’s ability to push back foes with moves like his ftilt, forcing them to stay back at his desired range. This proves very annoying for the Count due to his ridiculously slow movement speed, him HAVING to use his special dsmash in order to be able to approach, becoming immune to the windy effect. Thankfully for the Count, Zondark isn’t disgustingly slow in movement speed and can get up to Bleak without that much hassle, but even Bleak who’s rather poor at melee range can easily take Zondark solo, punishing his awkwardly long attacks while keeping the Count away. Once the Count –does- get to Bleak, though, he’ll be in for a lot of pain as the two gang up on him what with his poor melee options before he finally escapes and resumes his camping. The ownage goes back and forth between the two parties for a very heated battle.
VS. Raven: 50/50
Raven has a distinct advantage in the camping phase of the battle in that she can shorthop fairs to stay behind her wall, then bring her ghastly arm through the wall and twist it around Zondark to either hit the Count or Zondark in the back (Going around his spinning axe). There’s no limit to it’s range, but she’ll want to get up close due to the limited duration of it. However, if she gets too close, the Count can just use a special fsmash/lob a slimeball over her wall, and he’ll be happy to move every so slightly to get into range to do so. Better yet, at this range the Count can use a special dsmash to go under Raven’s wall and pop up under her to grab her, ignoring any of her shadow bug traps to boot.
That said, Raven can abuse her neutral special to essentially make a duplicate of herself while still staying perfectly safe behind the wall. So what if she takes 1% per second? She can’t be grabbed, so she can’t be KOd. The fact it has an infinite float also makes it plenty easy enough for it to go over Zondark to get to the Count, and it’s super armor means it’s immune to grabs – which means it’s completely immune to over half of the Count’s moveset. Raven can keep doing this with little problem as the Count and/or Zondark are forced to awkwardly approach her, during which time she can just unsummon her duplicate and fair through her wall for easy pickings. Just make sure you grab the Count and not Zondark, or else the Count will punish you severely as he goes under your wall with his Special Dsmash then comes up to tentacle **** you, and considering you’re damaging yourself for him he’ll only need a few grabs to KO you. Couple this with the Count’s ridiculous durability/Raven’s low KO potential and how he’s not that hesitant to sacrifice Zondark here (His uses are limited in this match-up), and he still very much has a fighting chance against Raven despite her ridiculous damage racking.
VS. Spadefox: 35/65, Spadefox’s favor
While Spadefox can easily take away Zondark from the Count by using Neutral B against him, the catch is that Spade has to hit the Count with it, not Zondark. This means the Count can just always stay up and out of it’s range with a slime base and behind Zondark at all times, and just use a special dsmash to become invulnerable whenever he gets close. Of course, playing so conservatively is rather annoying and one mess-up means Zondark’s death. You’ll want to get in what few hits you can on Spade with Zondark while cowering with the Count, then as your percentage climbs from Zondark taking damage, sacrifice him with your Behelit before Spade inevitably hits you with neutral B and takes him away. You should have a slightly lower percentage then Spade, and Spade is far from one of those dreaded combo heavyweights, so this is a semi possible match-up, though still clearly in favor of Spade, especially when he can potentially take away your all important grab with his uair/usmash combo.
VS. Specter: 40/60, Specter’s favor
Specter has more then enough time to set up his defenses against the Count. While the Count can try to camp him while he’s doing so, his projectiles are rather slow, and Specter will be bringing up his monkey army, throne, and barriers faster then the Count can bring them down. Once he’s set up, he can easily just approach straight up to the Count, possibly through the background without any fear of getting hurt, then have an up-close fight against the Count. While the Count is also pretty good in the air when he has a slime base and can compete with Specter’s air-game pretty well with his faster attacks, the catch is that the moment the Count messes up Specter will punish him dearly for it, as one hit and the Count will become unconnected from his slime-base and have literally no means of defending himself. With Specter’s floatyness, he can stay just out of Zondark’s range as he does so, and even then Specter’s monkies can provide good distractions for him.
Still, Specter is no combo character. He’s very slow in attack speed, and won’t be getting in all –that- many hits before the Count gets back into position and takes out his barrier/any pestering monkies. Specter will have to play hit and run with the Count to renew his defenses before going on the offensive again, and he’s more then capable of doing so with how he has among the highest movement speed and the Count among the worst. Zondark comes in very handy for the Count here due to him actually having half-decent movement, but the fact that the Count is even considering trying to pressure with a slow lug like Zondark shows something is terribly wrong. Still, the Count has a plenty good chance if he manages to pin Specter down in a grab before he flees and get in a lot of pummeling/damage on him, which is far from impossible.
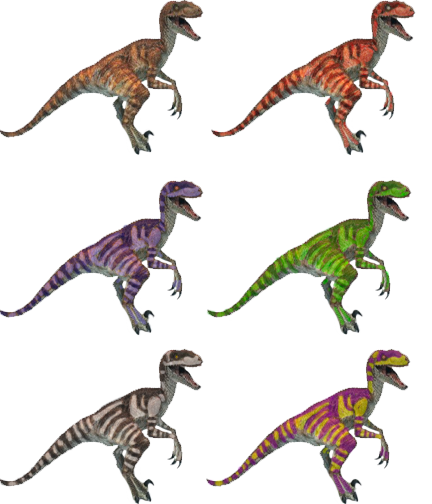
VS. The Raptors: 35/65, The Raptors’ favor
Early on in the fight things will be in the Count’s favor thanks to him being able to summon Zondark in an instant while the lead Raptor has to perform a laggy move to summon his buddies to his side. This can lead into several free grabs towards the start of the fight to get you a great head start, but considering how much faster the Raptor is then you and how he can still repulse you with some swift attacks he’ll eventually get in one of his allies. After he gets the first, the second is far easier due to the first covering him, then before you know it you’re swamped in a sea of Raptors. Much like Zondark makes you immune to grabs, the leader Raptor’s buddies make him immune to your grabs, meaning he’s immune to most of your moveset. The amount of viable moves you have are very limited and if the lead Raptor makes the pack go into aggressive mode, you’ll be pressured to no end.
That said, the few moves that do actual damage do rather hefty damage, so if you –do- manage to get in a couple good hits on the summoned Raptors you can leave the leader all alone again. From here, you can pick up where you left off, probably only needing just a couple more grabs to KO him. While it’s hard to get off your laggy moves on the Raptors when all three are swarming you with fast moves, the summoned Raptors only have level 5 AI, meaning it’s much easier to get them into one of your awkward moves then an actual player.
VS. Wheel Gator: 65/35, The Count’ favor
While Wheel Gator is far from known for camping, he’s capable of it, particularly against the awkward slow duo. He can use his Side Special for some limited camping and devour up any projectiles you send his way, spitting them back at you. This means you’re forced to approach, which the Count hates. That said, Wheel Gator can’t aim any of his projectiles, so you can just travel forwards with a slime-base underneath you to absorb his projectiles. Once you are up close to him, the main other feature that’s a boon for Wheel Gator when he’s playing defensively is his grab based moves, but the Count has plenty of his own to compete with. Hell, he even has a disjointed grab in his fsmash and special fsmash that beat out other grabs, so Wheel Gator will really have his work cut out for him. As if that wasn’t enough, once it finally comes time for the KO for Wheel Gator, he’ll have trouble getting the Count stuck in his mud trap seeing he can just casually go over it with his Up Special. Even his bthrow used for forcing foes into his trap is proved useless due to Zondark interrupting it.
So what CAN Wheel Gator do? He’ll want to create his Mud Trap earlier then normal and hide within it for his defensive game, seeing his grabs are outclassed in both quantity and quality by the Count and camping doesn’t work well. If he can kill off Zondark KOing the Count becomes much easier, though that’s easier said then done. The one truly saving grace Wheel Gator has though is his ability to gimp. If he can get the Count off stage and gimp his recovery, he can KO the Count without racking damage or using his mud traps, which prove troublesome. Seeing this is such a preferable option for Wheel Gator, though, the Count will be doing his best to stay at center stage and far away from the edges. He won’t let you send him into the burning pit that easily.
VS. Tauros: 80/20, The Count’ favor
Both characters are very “bleh” in the air, but the Count has a better substitute for aerials via Up Special and a much better recovery, so he can actually apply some aerial pressure here, though he certainly can’t gimp him. The other main thing against Tauros is that his prime set-up for his KO moves is his fthrow, and Zondark exists solely to interrupt grab/combo games. This leaves Tauros hard pressed to score KOs, his supposed advantage, and he’s still a rather mediocre damage racker. Tauros can do little to resist the Count’s onslaught of grabs. His best hope is to pick a stage with walk offs so he can abuse his throws, but he has to be very close to the edge if he doesn’t want to give Zondark to interrupt them and those stages are all banned anyway thanks to the penguin king.
VS. Glaceon: 50/50
Unlike all those other characters who can hide behind walls, Glaceon can only fire six shots before his wall expires, and even before then it’ll be short enough for the Count’s projectiles to go over it and hit Glaceon. Glaceon is forced to approach here, which he really can’t do all that well. Of course, he still has Ice Beam at his disposal, but Zondark can reflect it and the Count can just casually elevate himself a bit and let his slime base take the hit. While Glaceon can’t really afford to spend much time up close to the Count, once he’s up there he can just chill them and spam bairs so he can just hide while their damage racks up. Considering Glaceon has two characters to chill sharing the same percentage, he can rack up their percent ridiculously fast, even if Zondark only takes half damage.
On the other hand, Glaceon’s main KO methods in his grab/freezing (Level 5 chill) gives more then enough time for the Count/Zondark to interrupt it, giving Glaceon a much more difficult time KOing while the Count has no more trouble then usual. While Glaceon can’t do much while he’s running and hiding and waiting for their percent to go up, he doesn’t need to, especially if he manages to get in some bairs. Their percentage will go so high that he can just poke them with a weak move for a KO eventually. Of course, this gives the Count plenty of time to get in grabs. Really, it’s anyone’s game.