• Welcome to Smashboards, the world's largest Super Smash Brothers community! Over 250,000 Smash Bros. fans from around the world have come to discuss these great games in over 19 million posts!

    You are currently viewing our boards as a visitor. Click here to sign up right now and start on your path in the Smash community!

Make Your Move 7 - It's Over, Nothing to See Here

Status
Not open for further replies.

MasterWarlord

Smash Champion
Joined
Aug 24, 2008
Messages
2,902
Location
Not wasting countless hours on a 10 man community
One day Pokeset posted the day after it was made. >>>Venusaur/Ninetales

GOLEM


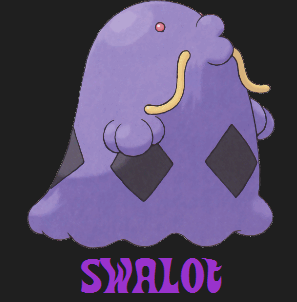
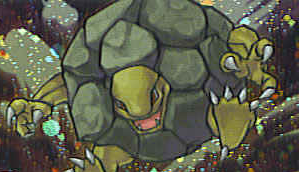
Golem is a Rock/Ground Pokemon, the final evolution in the Geodude line. Golem was one of the original four Pokemon that evolved by trading, one of the biggest marketing schemes Pokemon’s ever managed to pull off. Golem was originally in the Overused tier (Which only consisted of a grand total of about 15 Pokemon, a very exclusive club) in the original games, being strong competition for Rhydon. While his stats were a tad worse, Explosion was more then enough to keep him in the running. As time went on, both Rhydon and Golem tended to get outclassed as more new Pokemon came out, their three quadruple weaknesses sealing their fates. In the 4th generation Rhydon got a new evolution in Rhyperior. . .Considering even with this Rhydon/perior is still Underused though, needless to say Golem is doomed to Neverused. . .

It’s time for a comeback. . .Time to relive Golem’s original glory days! What better place to get fame then Smash Bros? If it can make nobodies like the Ice Climbers big names, then surely it can do the same for Golem, much less considering he’s a Pokemon. As a random Pokemon, Golem is automatically more recognizable then Edward Elric.


STATS

Weight: 10
Size: 9.5
Traction: 9
Falling Speed: 8
Aerial Movement: 4
Movement: 2
Jumps: 2

SPECIALS

GROUNDED DOWN SPECIAL - DIG

Golem starts digging into the stage. Unlike most underground moves, Golem does NOT magically vanish into the ground – he actually starts destroying ground and digging into the stage, making more room that can be walked around in. Golem can make a hole as large as himself over .2 seconds, and there’s no limit to how long he can keep digging, but Golem can’t dig through the edges of the platform he’s on, only the interior.

While staying underground once you’ve done a lot of digging can be a good survival technique, if Golem or a foe gets hit into the edge of one of these holes by an attack that would KO them or would KO them if they had 20% more damage, they’ll go flying through the wall, albeit with only 75% of the usual knockback. So, no, hiding underground with Golem won’t let you survive forever. In fact, it’s a rather poor idea, as the fact you’re down lower means you’ll have to go up higher to reach the ledge, and Golem’s recovery is primarily horizontal

If you input this as a smash next to a hole you already started digging into, Golem will crouch down and sweep his arms together to make some ground to close up the hole, trapping any foes inside over .2 seconds. Of course, they can still get out by attacking the ground Golem closed up and it only has 25 stamina. If Golem inputs this move as a smash over regular ground, then he’ll close up the opening underground as he goes into it (25 stamina again), giving him more time to dig around.


AERIAL DOWN SPECIAL - EARTHQUAKE

Golem crashes down onto the ground with impressive force, causing the ground under him to sink downwards Ganondorf’s height, the ground to his sides sloping down to connect the ground that sunk down to the rest of the stage. Golem can make as much ground sink down as he wants, but the lowest any ground can go is quadruple Ganon’s height if there’s nothing under it (Meaning it can go down forever on a stage like Yoshi’s Island). This has .35 seconds of lag on either end, though if you want to speed up the process of setting up the stage how you want even further you can do some digging. If you Earthquake over an area you dug, the stage will sink down past where you dug in addition to the standard of Ganondorf’s height.

Golem’s body is a hitbox that does 6% and set knockback away as he crashes down, and anyone on the platform he crashes down onto is dealt 10% and set vertical knockback. Not too impressive? Well, anybody underground with their feet firmly planted on the ground on the platform Golem’s on will take 25% and .7 seconds of hitstun.


SIDE SPECIAL – DEFENSE CURL/ROLLOUT

On standard ground or the air, Golem performs Defense Curl, tucking in his head and curling up his limbs around his rocky shell over with half a second of lag to enter and exit the stance. While in the stance, Golem takes 75% of the usual damage and knockback, nothing worthwhile to accommodate the lag.

If Golem activates on the slope or the tip of a slope, Golem will go into the position much more quickly and start sliding down it, his body going faster/him becoming more powerful based off how steep the slope is. The ideal set-up for Golem is to have one side of the stage not sunk down by Earthquake at all while having the opposite side sunk down all the way, the middle sunk down just the right amount to make a nice bridge. If you can manage to pull this off and hit the foe at the bottom of the slope, then this deals 37% and KOs at 50% (On a stage Final Destination’s width). Pretty insane, but that's only with the best possible slope and assuming they just sit there idly at the bottom while you roll down from the top, waiting to get run over. Around halfway through the “perfect run”, Golem gains superarmor/anti-grab armor, and even before then he still gets the usual bonus from Defense Curl.


UP SPECIAL – ROCK SLIDE

In the air, Golem throws his arms up into the air and lets out a cry, causing several rocks to fall down from the sky in a line in front of him. The rocks that fall further away from Golem fall more quickly then the rocks that fall closer to Golem, meaning that by the time they reach Golem (.15 seconds) that they’ll of formed a downward slope. The rocks are solid and during the brief moment they perfectly form a slope as they fall (They slow down here for some leeway), you can Rollout along them to “slide” down the rocks for a horizontal recovery. This obviously gives you zero vertical recovery, but the slope the rocks give you to slide down is 80% as long as Final Destination, giving Golem excellent horizontal recovery. Despite the rocks being solid, they only deal 3% and very weak set vertical knockback that sends foes through them as they fall, preventing them from being cheap sources of gimping. Aside from recovery, the aerial Up Special can also give you an even higher starting point to Rollout down a slope to the foe, giving you an artificial starting point.

On the ground, 10 rocks fall skyward over .3 seconds to land directly in front of Golem dealing the same set knockback/3% as they fall, though the knockback is now sideways so the rocks don’t combo into each other. Once they land on the stage, they don’t do much beyond vanish in 10 seconds. . .But if you the rocks land on the slope/the tip of a slope, they’ll start sliding down the slope, allowing you to camp from the top. The rocks still only do 3%, but now the sideways knockback is useful for camping and it’s possible to hit with more then just one.

If a foe is trapped underground and you use Rock Slide to place some rocks over the opening they need to attack to get out, then the rocks will fall down onto them when they open it up, dealing the same damage/knockback as when you first summoned them. Due to the enclosed space the foe is inevitably trapped in, the sideways knockback probably won’t do much to save them from getting hit multiple times by the rocks unless they retreat further down into the hole, but then you can just close up the hole again!


NEUTRAL SPECIAL – EXPLOSION

Golem enters the same pose from Defense Curl, but curls up much more tightly and glows red over 1 second before exploding in an explosion half the size of a Smart Bomb’s, dealing 40% and knockback that kills at 45% to anything in the vicinity. Of course, this also kills Golem instantly, and he’ll always die first. Besides, while Golem is invincible during the starting lag, he gives more then enough time for any remotely competent foe to get away from him with the lag and the relatively short range on the move. . .

The main way you actually score suicide KOs with this is underground. If used there, then any ground you’ve dug will instantly cave in as if you Earthquaked from above, instantly KOing anybody there AND helping to set-up the slope for the next stock. Unfortunately, Golem still dies first here. . .


STANDARDS

NEUTRAL ATTACK – SMACKDOWN

Golem jabs forward with his left fist, then his right, and so on. Each hit deals 3% and weak set knockback, and there’s .15 seconds in-between each jab. You can hold this down like most similar jabs, but foes generally won’t get hit more then once by this, making it rather poor outside a GTFO move.

While this trips the foe at low percents (30% and below) and it can stack, the move knocks foes too far away for it to combo. However; if used at the bottom of a slope facing up the slope, the foe will slide back down the slipe to you while they’re tripped, making for a free 30%. This also of course works splendidly against walls underground, though any infinite jab works well against walls and most foes can do the same to you.


DASHING ATTACK – SHOULDER BARGE

Golem lifts up his shoulder and puts it in front of him as he runs. A keep dashing version of Ganondorf’s dash attack, really, but with much worse power – 5% and weak set knockback. No, Golem’s arm does not randomly out-prioritize projectiles to make this an approach.

If used on a slope, this powers up the move due to Golem running faster downhill during this attack. It’s still not much to get excited about as the knockback will always be set, but the thing you need to be interested in here is the fact that you can instantly cancel this into Rollout, Golem keeping up all the momentum that he had from shoulder charging. Considering Golem goes a good bit faster with Rollout then this attack, it means that you can play mindgames with the foe into making them think you’re going to Rollout them then Shoulder Barge them instead. Golem’s still going very fast either way, so if they dodge incorrectly they’ll get hit. This move has all the threat of a potential Rollout without forcing you to commit to one.


FORWARD TILT – ROCK THROW

Golem does a wind-up punch as he reaches backward and leans back on one foot before lobbing a punch forward. As it sounds, this has an awkard .6 seconds of lag, yet deals an unremarkable 9% that KOs at 160%. If used next to a rock from Rock Slide, though, Golem will pick up the rock as he leans back and fling it forwards, it dealing the same knockback. While the lag makes it far from ideal to keep an approaching foe at bay, the rock out-prioritzes most other projectiles, allowing you to play the camping game against fellow campers. This move can also be angled, meaning you can throw it down a slope to make one of the rocks you slide down your slope have an extra punch behind it.

UP TILT – SUPERPOWER

Golem turns to face the screen and flexes as he roars, instantaneously creating a giant red aura around himself half the size of a Smart Bomb explosion, dealing only 5% but superb knockback. Unfortunately the superb knockback is superb set knockback, so it’s not gonna KO any time soon, but it gives Golem plenty of space and the massive disjointed priority destroys most projectiles. This move alone is the only GTFO move Golem needs while he sets everything up, but this unfortunately can’t be spammed, as with every use Golem becomes 10% lighter and his attacks lose 10% of their power. Golem can’t lose more then 70% of his power/weight in this fashion.

. . .So when do you use this exactly? If you use at the start of a match as a GTFO move to help set-up, you’ll be too weak to actually use what you set-up. If you use it later on in the match when you’re about to die, you’ll just make yourself die sooner due to the weight reduction.

The ideal way to use this move is at the start while using dsmash and digging to set-up, then to get the foe underground and explode on them to finish up. If they’re underground when you explode, any lost power won’t matter due to the cave in automatically KOing the foe.


DOWN TILT – MUD SPORT

Golem roars as he starts rapidly kicking up mud for .35 seconds. The mud is a horribly weak hitbox as it goes forward Bowser’s width before hitting the ground, dealing 6%. Once it hits the ground, though, it forms a generic tripping trap as wide as Bowser. . .That only lasts 3 seconds. As if the effect wasn’t tacked on enough, you’ll struggle to make much use of a generic trip trap in 3 seconds, yes? Well, if you use this one a slope/next to one, the mud will quickly slide down the slope, giving you a MOVING generic tripping trap. Doesn’t sound quite as generic now, does it? Furthermore, when the foe trips on the mud when they’re on a slope, they’ll slide downwards a Battlefield platform’s width.

RELEVANT LEDGE ATTACK – RAMP

Golem swings his body in an arc so that he slams into the platform he’s hanging on from below. If anybody is foolish enough to be under that portion of the stage, they take 15% and get spiked. The first time Golem does this, the end of the ledge will become angled up slightly, making it good if you’re on a wonky stage like New Pork/Hyrule and can just the ramp to continue your Rollout onto another portion of ground.

The second time Golem does this, the end of the ledge will be angled straight upwards, making Golem be launched vertically if he Rollouts into it. This is the only thing preventing Rollout from being a suicide KO and you just Rolloutting off the stage.

On the third use, the ledge will actually be awkwardly angled backwards, meaning Golem will be launched back up the slope. Unfortunately he won’t have enough momentum to make it back up if your slope is that big, but this means you have another shot at Rollouting over somebody who dodged you. Considering this makes Rollout a bit slower to end though, you may want to stick with the purely vertical ledge. Your call.


SMASHES

FORWARD SMASH – STONE EDGE

Golem smacks the foe with both arms and headbutts them at once. This deals an impressive 25-35% and pitfalls foes. This has poor range and as much lag as Ike’s fsmash, but Golem has superarmor/anti-grab armor during the start-up lag. Unfortunately, Golem can’t really take advantage of the pitfall status that well. . .Pitfall a foe at the bottom of the slope, go up the slope, then Rollout back down the slope? They’ll of gotten out of it long before then. Using this twice on the same foe deals knockback that kills at 200%.

However; if a foe gets pitfalled on ground right over where Golem dug (Kirby’s height maximum between the solid ground and the underground), they’ll be shot through the solid ground underground! Needless to say, this is obviously an easier way to trap them underground then getting them in through one little opening and sealing them in.


UP SMASH – SANDSTORM

Golem points forward in the direction he’s facing during the charging, then lets out a smug smirk as he releases the charge and a sandstorm laglessly starts up. The sandstorm lasts for 10-30 seconds and covers the entire screen, blowing in the direction Golem was facing when he activated the attack. If foes are going against the sandstorm, it cuts their movement/aerial movement in half, and every 5 seconds they’ll take 1% and flinch. Nothing much, but if they don’t get used to dodging it it’ll randomly interrupt a lot of their attacks. This attack can make approaching Golem on top of his slope much more tedious.

DOWN SMASH – EARTH POWER

Golem turns towards the screen and puts his hands on his legs during charging, then lifts up one of his legs (The leg on the side he was facing) and slams it down into the ground in a sumo-esque fashion. This only has .25 seconds of lag and Golem’s leg is a hitbox that deals 12-19% and knockback that kills at 200-170%.

Of course, that’s not the main point of the move. . .It makes the ground on the platform Golem was on stretch out to be deeper. No, Golem doesn’t make the ground sink here – he makes more of it so that he has more to play with, essentially. How else do you expect him to dig in paper thin platforms like the Delfino Plaza stage transition platform? The ground that comes down is created varies between Kirby-1.5X Ganon’s height based off charge.


AERIALS

NEUTRAL AERIAL – ROCK CLIMB

Golem roars skyward for for .4 seconds of lag as he stalls in midair briefly, then a massive amount of rocks fall from the sky double Bowser’s width. They fall as such so that they cover up an entire vertical portion of the screen for 1 second, vanishing upon hitting the ground. The rocks deal 1% and flinching every 0.1 seconds. If Golem presses up on the control stick while overlapping with the rocks, he can climb then like a ladder, although he’s also able to move left and right instead of just up and down to maneuver away from foes if necessary. Unfortunately Golem doesn’t gain much vertical height due to having climb faster then the rocks fall – if you get on the rocks at the soonest possible moment and climb them the entire time, you’ll climb up 1.35X Ganondorf’s height. Still, considering the fact this doesn’t put Golem into helpless and the fact it’s entirely ungimpable make it a welcome addition to his recovery.

Golem can also use this attack as a sort of wall that foes must DI through to get to him, taking plenty of damage in the process. They can still wait it out, of course, but considering Golem’s projectiles and other moves are unaffected by the mass falling rocks and they out-prioritze enemy projectiles, there’s not much else they can do.


FORWARD AERIAL – MEGA KICK

Golem kicks forward with his feet hastily over .28 seconds, though with Golem’s usual poor melee range. The kick deals 10% to any foe it comes into contact with a Battlefield platform’s worth of set knockback, the move also propelling Golem backwards the same distance. As if he wasn’t impossible enough to gimp, going out to Golem actually HELPS his recovery! This is a good attack for ending aerial combat due to it separating Golem and the foe and it being rather quick. The move can also be angled at a diagonal downward angle so Golem isn’t helpless to being juggled.

Golem’s body is a high priority hitbox as he gets propelled backwards that deals 13% and knockback that kills at 160%, though that’s rather irrelevant outside FFAs, right? Wrong. Golem can Mega Kick off of walls, namely the ones underground, helping to make him a deadlier combatant there.


BACK AERIAL – IRON HEAD

Golem turns around as he does a headbutt, his head turning a darker gray color and shining briefly with a mere .2 seconds of starting lag. This deals a rather “meh” 7% and knockback that kills at 200%, though the fact the move’s so fast makes it Golem’s best option for participating in genuine aerial combat, yes? Well, it would, if not for the half a second of ending lag. . .But during this ending lag, Golem’s head has superarmor/anti-grab armor, and the size of his small head is exaggerated for the move much like Bowser’s fist in his ftilt. Another option for safely getting out of aerial combat. While not as good, this one doesn’t require you to actually hit with it.

UP AERIAL – CLING

Golem reaches up into the air, his arms short ranged low priority weak hitboxes that deal 6%. At least you can use it for juggling due to its’ speed, right? Eheh heh. . .

You might notice that the move has a grab-like animation, but the thing is Golem isn’t reaching out to grab the foe for a generic suicide KO – he’s attempting to grab a ceiling. If you grab a ceiling, Golem will hold onto with both arms and you’ll be able to climb along the ceiling back and forth at his usual movement speed. The relevant application of this is if you have a large portion of ground you’ve dug underground, so you can stay at the top of the hole away from foes while they struggle to get out. While clinging to the ceiling, you have a good few button inputs. . .

  • Horizontal Movement via control stick
  • Explosion via neutral B
  • Canceling the move into Dig via Side B if you reach ground on either side of yourself
  • Climbing up through the ground to the surface via Up B without making an opening
  • Using the grounded version of Rock Slide via down B. There’s a bit more of a gap between when each rock falls, but you can move during it and they’ll always fall under your current location, allowing you to camp
  • Releasing your hold on the ceiling via A/Shield

While one might wonder how Golem gets to the ceiling if he makes an underground pit deep enough that the foe is having trouble getting out of, that’s no problem for Golem due to him having a wall climb. Unlike those fancy wall runs of those various Junahu/Mendez sets, Golem can wall climb forever. Foes can also wall climb on Golem’s walls to prevent Golem from making a pit so deep that it’s inescapable, though they climb very slowly, much slower then Golem.


DOWN AERIAL – CRUSH

A fairly elementary stall then fall, dealing Ganon dair esque knockback/damage but killing Golem in the process. Unusable off-stage. On-stage, it’s still pretty useless due to the awkward lag.

If Golem lands on ground that’s been dug in with no more then Kirby’s width in solid ground separating him from the dug ground, Golem’s legs will crash through the solid ground, getting him stuck. In this position, Golem has permanent superarmor and anti-grab armor, and the only limitations to him are that he can’t move, Rollout with Side B (Though he can still Defense Curl), utilt, or use any attacks that involve his legs. Pretty ridiculous move, but the foe can uproot Golem by going underground and hitting his legs which are dangling about, Golem taking the knockback of the attack. Even here, though, Golem’s not entirely defenseless. Those attacks that involve his legs? If he inputs them he’ll flail his legs around, making them low priority hitboxes that deal 5% and set downward knockback. Inputting utilt causes Golem to uproot himself from the ground early.

When you have such a high percentage that you really don’t mind it going up further and the foe is about to make it up your massive mountain, you can dair to force them to go back down the mountain and into the only opening to go underground to get to your legs! They can whale on you all they want from up-top, you won’t die. One could theoretically just keep popping out before the foe could reach them and then just use the dair before the foe could get to them, but if Golem uses this in the same area twice (Or anywhere within a Battlefield platform of it) within 30 seconds he’ll crash through the ground the second time, destroying it as if he dug through it and falling to the bottom of the pit with 2 seconds of hitstun.


GRAB-GAME

GRAB - STANDARD

If by standard you mean standard fare for a non-grab oriented heavyweight. Golem’s grab is terrible, on par with Ganondorf’s (Which is still landable, mind you, just far from ideal). . .But it’s well worth grabbing with Golem. His throws are BEASTLY.

PUMMEL - HEADBUTT

Golem headbutts the foe for 3% over .35 seconds. Standard pummel fare. Don’t risk going for too many pummels when you’ve got those superb throws.

FORWARD THROW – MUD SLAP

Golem kicks up some mud onto the enemy, dealing a paltry 4% to them and only knocking them back a Battlefield platform. However; the mud will stay on the foe for 12 seconds, and if they dash during this time they’ll trip, slipping downwards a Battlefield Platform if on a slope. Oh, and if a foe reaches a slope during the initial set knockback of the attack, they’ll slide down the whole freaking way. This attack gets the foe to the bottom of your slope, and forces them to WALK back up to it to get to you at HALF SPEED due to your Sandstorm. Jesus Christ. As if that wasn’t enough, if you hit a foe with Mud Sport (The trap or the initial hitbox) when a foe is Mud Slapped, Mud Slap’s duration resets.

BACK THROW – STRENGTH

Golem smacks the foe to the ground behind him for 5%, then pulls up a massive boulder from the ground that’s the size of his shell and smacks it behind him. Golem turns around and waves to the foe mockingly, chuckling slightly for .25 seconds of ending lag. The boulder runs the foe over and they essentially get “grabbed” by it, stuck to it as they roll as far as Golem would go if he used Rollout, only going a Battlefield Platform if the terrain isn’t sloped.

If you haven’t used your ledge attack more then once, then the foe will roll straight off the edge, making this an alternative to Rollout definitely worth looking into. . .Or at least it would be if the foe couldn’t button mash out if there’s no ground underneath the boulder. Any button mashing the foe did before then still counts too, they just can’t break out until they go off-stage. If the slope is steep enough so that the foe rolls fast enough and/or they have enough damage to make this too hard to escape in time, this can be an alternative KO move.

Even if you aren’t using this as a KO move, the move without a doubt has alternative uses. Make an opening to the underground at the bottom of the slope so that the foe will go underground and ricochet back and forth a bit underground before finally coming to a halt. Considering foes take 4% per second while being rolled around, this can be a nice damage racker and buy you more time to set-up whatever.

On a stage like Hyrule Temple or New Pork City, you can set up ramps via ledge attack in such a way that you can roll the foe across the entire godd
amn stage as they get launched to the next platform. Say on New Pork, you launch the foe from the right off a ramp so that they land on the elevated section on the left, then you have a reverse ramp that sends them back over to the right side, then they roll back down the right side and fall off into the bottom section. The fun never stops!

UP THROW – SEISMIC TOSS

Golem holds onto the foe tightly as he turns to face the camera, then leaps off the top blast zone with them in a similar manner to Kirby/Meta Knight’s uthrow before crashing down with the foe, crashing down into the ground to make it sink down an absolutely massive amount – quadruple Ganondorf’s height. At this point Golem lets the foe go and they’re launched upwards with 16% and intense vertical knockback. Because of the fact the foe will be so far down when they go up, though, this only KOs at 160%.

DOWN THROW – ROCK TOMB

Golem jumps on top of the foe, crushing them under his massive girth for 12% and sending them through the ground double Ganondorf’s height, destroying any ground in their way as if Golem was digging, stopping early if they reach the bottom of the platform’s depth (Likely if Golem hasn’t increased the depth via Earth Power). Golem proceeds to top the ground with three large rocks which stay over the foe, then Golem is free to leave as the foe is left in their tomb. The rocks at the top have 50 stamina, meaning it’ll take a good bit longer for the foe to get out then if you trapped them underground normally, giving you plenty of time to set-up further. As if that wasn’t enough, this obviously gets Golem some free ground dug.

FINAL SMASH – FISSURE

Golem lets out a massive roar as the screen zooms in on him, then crashes down to the ground if he’s in the air (PLEASE don’t use this off-stage) or simply does a sumo-stomp if on-stage, causing the platform he’s on to split in half at point he used the final smash. Anybody underground instantly gets KOd as the underground collapses as if Golem exploded there. The stage shortly falls off the bottom blast zone, then rocks will start raining from the sky in mass covering the entire screen, functioning identically to the rocks in his nair. Golem can climb up them just fine with absolutely nowhere to stand on, but any survivng foes will have to rapidly keep jumping/using recoveries while constantly getting hit by mass flinching hits. While Golem is far from a aerial combatant, he can come down to the foe’s level and hit them with a diagonally downward angled fair to make life all the more hellish for them.

The falling rocks last for 10 seconds before the rocks finally clear to reveal the stage now resting on top of a massive amount of rocks (Better then having landed on whatever’s below the blast zones, at least), increasing the depth of the stage by the depth of Yoshi’s Island. A godly final smash indeed.


PLAYSTYLE

Golem doesn’t have an instantenous set-up, but his set-up game doesn’t make him fall behind at all like most similar characters. Golem can spam dsmash to increase the depth of the stage and dig around all day, taking damage like the beast he is. It doesn’t matter. You can abuse your utilt to get lots of breathing room to do this relatively undisturbed to get a massive amount of underground space. Once you’ve spammed dsmash enough, you’ll want to dig all the way down on one side of the stage, then slowly leave a bit more solid ground as you work your way over to the other side of the stage where you won’t dig at all. After you’re done digging. If you can manage to get in some grabs during this time, uthrow/dthrow can also assist in this, uthrow getting you more immediate ground while dthrow prevents the foe from bothering you for a while.

Once you’ve dug a sufficient amount, you’re ready to cave in the tunnel to make your slope with Explosion. The ideal ways of getting the foe underground are fsmash and dthrow. If you’re doing the former, leave a bit of extra solid ground on what’s going to eventually become the bottom of the slope (Two Ganondorfs worth), but dig the rest as you would normally. . .Then dthrow the foe on the correct side you need to dig on and quickly go underground. From here, you can make an opening far away from them and go over to where the foe is, then just dig ever so slightly to link the section they’re in with the main cave. . .Then you can activate the big bang to cave in the foe and equalize the damage percentages and gain back all that lost power/weight from utilt.

So now the foe and Golem are down to 2 stocks and Golem’s perfectly set-up. If you want, you can simply repeat the process to make the slope even more insanely steep to make things even easier on the last stock, though on the last stock suicide KOs aren’t an option due to Golem dying first. Still, Golem might want to do some more digging anyway without the intention of exploding rather then advancing immediately to the next phase of his game. If you can manage to dig an underground maze with lots of swervyness and what-not while still having some solid ground inbetween the swerves, then when the foe finally reaches you at the top of your slope you can dthrow/fsmash them underground. Of course, you’ll of placed the only way out of the cave at the bottom of the slope, and they’ll have to run through the entire godd
amn maze you’ve created to get out. While they’re busy doing that, you can set up usmash and/or spam dsmash some more, and when they do finally get out they’ll have to climb up the freaking slope again. Oh, and if you have a small portion at the top with no ground dug underneath it (So it won’t collapse when you Earthquake), you can go over there to Earthquake to hit underground foes.

The main phase you’re working to get to is camping at the top of the slope with Rock Slide/Throw and Mud Sport. The foe will be struggling to get up, especially with Sandstorm in effect, and when they finally do you can sadistically force them to repeat the whole journey with fthrow/bthrow. Did I mention that once they get close to reaching you that there’s a giant falling wall of rocks from nair coming down, forcing them to stay away or take damage to get to you? If you’ve set up an underground maze, you can of course use dthrow/fsmash to send them into it. If you want to set up a more complicated underground maze, you can also make an opening at the top and make the maze go primairily back and forth rather then up and down so the foe can roll the whole way through it with strength. When Golem reaches high percentages, he doesn’t even need to force the foe back down the slope/underground himself – he can use dair to force the foe to go underground themselves! This can be a particularly nice way to lead into a KO with rollout if you’ve set up a nice underground Rollout track with Dig. When they finally get there to smack you out, you can just fall through the ground and rollout them to force them to run from you Indiana Jones style. Aside from this, Bthrow is generally the more conservative KO option. If you get too impatient, though, you can always shock the foe by actually moving from your well fortified position by coming down the slope to meet them with Dash Attack only to cancel it into Rollout.


MATCH-UPS

VS. PROBOPASS – 50/50

Golem obviously wants to set up his slope here so that the top is at the left, as this makes KOing Probopass much easier then it’d be otherwise. This also makes it considerably more difficult for Probopass to advance up the slope to approach Golem, but considering Probopass can send up his mini-noses to camp back at you he doesn’t feel that much of a need to approach anyway. Probopass is more specialized in traditional camping then you are meaning his attacks will generally do more damage, but because Probopass will have to take his mini-noses so far away from you he’ll be entirely defenseless, taking all your Rock Slides with little chance to resist them beyond using the disjointed hitboxes of his mini-noses to block them, though it’s complicated to both do this and hit Golem at the same time. If Golem is foolish enough to leave an underground opening at the bottom, Probopass can hide down there to be immune to Rock Slide, though Golem shouldn’t be stupid enough to do that. It’s a close match-up in damaging once Golem gets to his camping phase on the slope, though Golem generally has a much easier time scoring KOs due to it being impossible for Probopass to get to the left side of the screen.

However;, Probopass is actually good at pressuring Golem as he sets-up at the start with his mini-nose camping, them not particularly minding Golem’s utilt and some of their attacks even able to hit him through it. Furthermore, because Golem is using the utilt so much he’ll be nice and light, and during this phase of the fight using Probopass’ Side Special as a KO move is actually feasible due to him actually being able to go backwards. If Golem stays primarily underground as he sets-up, though, Probopass won’t have many opportunities to do this, and if all Probopass can do is damage him it doesn’t matter since Golem can just explode. Eventually Golem to come up to get Probopass underground to explode upon him, though, making the start of the match quite a heated battle, though slightly in Probopass’ favor. Considering Golem has to win the part of the match-up where Probopass is slightly better before he gets to the part where he’s better, the match-up isn’t in Golem’s favor, but it’s not in Probopass’ favor due to Golem’s advantage being larger when he does get it.


VS. VENUSAUR – 70/30, GOLEM’S FAVOR

Golem’s gimping is pretty mediocre. Fair isn’t –bad- for it, but when combined with Golem’s poor vertical recovery/high fall speed he really can’t afford to go out far after Venusaur to use it. That said, Golem’s got more then enough power to send Venusaur up farther then he can recover, and Venusaur’s very helpless to try to approach up Golem’s massive defensive mountain and will be about ready to cry when he has to go through the whole freaking thing again. . .And again. AND AGAIN. Despite Venusaur taking eons to reach Golem and barely doing anything once he gets there, Venusaur will undoubtedly heal off the damage at the bottom of the slope/underground, meaning Golem really isn’t accomplishing all that much. Golem will want to not send Venusaur underground once he reaches the top of the mountain, instead opting for the bottom of the slope so he can keep pelting him with rocks. . .But inevitably Venusaur will heal faster then Golem can damage, and Venusaur enjoys this going on and on to get more solar power. That said, Golem can very easily set-up an absolutely perfect slope on Venusaur and score two underground explosion suicide KOs on Venusaur. With such an insanely massive slope, if Golem lands one Rollout, Venusaur is going off further then he can recover, period, whether or not he’s at 0%. Considering how long this goes on for, Venusaur will inevitably have a full power Solarbeam, but considering Venusaur struggles so much for damage and he only has one shot at it while Golem can Rollout again and again makes it a difficult match-up for him.

VS. SWALOT – 70/30, GOLEM’S FAVOR

Swalot’s Down Special, his main tool for feasibly landing grabs, is rather throwaway here since Golem has all the tools he needs to make Swalot approach while Swalot has no tools whatsoever to make Golem approach. Considering Swalot is so horrible at approaching, he’s gonna have a field day with this match-up, falling victim to pretty much every trick in Golem’s book. If Swalot can manage to get in some poison-damage he can play a slight stalling game with Golem, but that’s about it. When Swalot –does- reach the top of the mountain, he generally does have an easier time landing a grab then Golem, but Swalot’s grabs won’t mean much until Golem finally has 200% while Swalot has to go through hell to get to Golem again when Golem gets his grab. If nothing else, though, Swalot can score his KOs with relative ease. . .Once he finally has that percentage. . .Once he finally gets up Golem’s mountain and –DOESN’T- get sent back down before he can grab him. . .The main thing preventing the match-up from being too terrible for Swalot is that Golem is right at the edge when in his camping phase, ready to for you to bthrow him off and start some gimping on him. If the bthrow alone doesn’t kill him, though, it’s doubtful Swalot’s awkward gimping will finish the job.

VS. ARBOK – 35/65, ARBOK’S FAVOR

Arbok is excellent at approaching, allowing him to get up Golem’s mountain with relative ease, though the fact his dashing speed is as high as it is makes him suffer more from Sandstorm, and Arbok isn’t particularly adept at getting around Golem’s utilt as he sets up. Considering the fact Golem prefers to shield rather then dodge, though, what with his stereotypical heavyweight large shield/slow dodges, Arbok will be getting in plenty of grabs, which are pretty much everything for him. Considering when he gets to Golem the rock monster will be at the far side of the stage Arbok has little trouble scoring KOs. Damage isn’t an issue either, as Arbok can just casually wait for Golem’s damage to go up while he can’t do much of anything about it if Arbok just wants to wait for the damage to rack up rather then approach. Considering Golem gets the first two stocks with relative ease with an ideal set-up, though, it’s not an unwinnable match-up for Golem.

VS. NINETALES – 50/50

Golem has the perfect grab-game for Ninetales to take advantage – Golem badly wants to land grabs at many points during his game for his delicious throws meaning he’ll be spamming the grab, but the grab is bad and easy to force Golem into grabbing Ninetales’ tails with. Golem will want to primarily be relying on fsmash to get Ninetales underground for the suicide KOs at the start of the match and to send her underground to force her to approach up Golem’s mountain again, considering all his other options are throws. Considering the lagginess of fsmash, though, using it and it alone for this proves troublesome for Golem.

It’s not all lollipops and rainbows for Ninetales either, though, as while Golem will go for several natural unprovoked grabs on his own, Golem almost never will buy into Ninetales’ attempts to force him to grab her unnaturally. There are very few instances to use the dair/uair combo as well seeing Golem is never in the air, there’s a ceiling above him when he’s setting up and there’s ground preventing you from going under him when he’s at the top of his mountain.

Unfortunately for Golem, Ninetales can abuse her uair to casually go in an L shape to approach Golem rather then marching up Golem’s mountain, and by the time Golem manages to get Ninetales down again (If he doesn’t fall for grabbing Ninetales’ tails) the mere 5 second cooldown will of already passed. However; considering Golem has such an easy time setting up on Ninetales due to her being unable to force him to grab when he doesn’t want to, he can easily make a nice long maze, then use bthrow to send Ninetales down it to get the damage he’s struggling to get otherwise. Considering this requires a grab, though, Ninetales enjoys this significantly. . .Though the fact Golem KOs Ninetales so much earlier keeps him in the running, particularly when we take into account the fact Ninetales’ primary KO move is vertical – when Golem reaches high percents, he can come down from his mountain and try to silently bthrow Ninetales off the edge. Of course, Ninetales can still just use fsmash instead of uthrow for the KO, so it’s not like this shuts Ninetales out. Indeed, this is a very close match-up with both characters having lots of checks and counters to each other’s movesets.


VS. HOUNDOOM – 45/55, HOUNDOOM’S FAVOR

Houndoom can’t really do all that much to threaten Golem as he digs around to set-up, but when he comes up to try to force Houndoom underground to explode him he’ll have a hellish time doing so, especially thanks to his new awkward low weight from utilt. The absurd power of Houndoom’s fsmash can finish Golem off pretty easily during this phase, and if Houndoom misses the pay-off for Golem isn’t that much larger then if he misses any other attack, seeing Golem –has- to get Houndoom underground due to having 30% power.

If Golem manages to get past the phase, though, which is doable, the match-up turns to his favor as he enters the camping phase of his game. Houndoom’s projectiles will just go straight into the mountain and disingrate while Golem’s projectiles will slide down to hit Houndoom. Because Golem so easily stays on just one portion of the stage during this phase, Houndoom struggles to take much advantage of his various lingering fire hitboxes/flashfire boosts. One would think Houndoom’s broken throws would level the playing field, but they only work if Houndoom has enough damage for Golem to stay in his grab for obscene periods of time, and even if Houndoom does pull them off Golem doesn’t really mind being unable to use his smashes/dash. Even if he did, Golem can just send Houndoom back down the slope and force him to re-approach while he regains the abilities. Houndoom’s relatively poor recovery/low weight don’t do him any favors here.

Despite the two separate phases favoring one characters over the other, the fact Golem has to earn his way to the phase where he dominates seals the deal for Houndoom. . .Albeit narrowly, considering when Houndoom wins his phase Golem can still potentially pull off a comeback from a stock behind considering the fact that the ball will be staying in Golem’s court for the remainder of the match.
 

Katapultar

Smash Lord
Joined
Nov 24, 2008
Messages
1,258
Location
Australia
After I've commented on this fella, Im going to make another set.

[size=+3]Golem[/size]
A Pokemon with a playstyle similar to a character who's name I spell wrong apparently. Or so I think. Having a ground and aerial down special in 2 seperate attacks makes the set look intimidatingly long, as one would first think when glancing over the set.

I've come to conclude that altering the stage in such ways is very hard to imagine, and that images would help the reader, just like how Sheep Man used a image to help the reader understand the Neutral Special. Even though it's a 1 day set, it's hard to see the results of Golem's meddling, in which case I question how he can make ceilings.

Im my thoughts, Golem is hard to understand. And explosion is kind of bad since a character always loses all their traps and summons when they die. The only time you'd want to use it is during the end of a match. Eventually though I'll expect you to contradict my tacked on thoughts, in which some cases this comment is useless. Like to keep it long however.
 

Kaiser6012

Smash Cadet
Joined
Dec 28, 2009
Messages
32
Location
Brisbane, AUS
A new entry that isn't a Pokemon!


Joe Musashi, last ninja of the Oboro Clan, joins the brawl!


"He is stronger than steel and moves faster than a whirlwind. Sometimes he hides in mud. Other times he transforms his shape like an ever changing cloud. Although his fighting spirit burns like fire, his mind is as calm as still waters.
Should Shinobi fail before completing the mission, he will disappear before the dawn and vanish forever.
Keep this in your heart and mind."
-Excerpt from the Secret Manual of Oboro Ninjutsu


...the CIA dossier is old and musty, quite obviously left to decompose in a filing cabinet somewhere. The seals on it have long since lost their glue, making the files technically unsealed and ripe pickings for the likes of you. The files go into great detail about a group called the Oboro clan and a company/conglomerate named Zeed. The title of the folder: "Shinobi Incidents"...

"Year 19XX: Joe Musashi once again took up arms against the Zeed conglomerate, this time on a much larger scale. Zeed, now renamed Neo Zeed and under the command of a man named the Ninja Master, initiated the conflict by launching a pre-emptive assault on the Oboro Clan, killing all Warrior and Slayer operatives the Oboro Clan possessed and stealing away before being detected. Joe Musashi, absent on a self-imposed training regime at the time, returned to learn of Neo Zeed's attack from the dying master of the Oboro clan, as well as a direct insult: Musashi's betrothed, Naoko, had been kidnapped to bait Joe Musashi into combat against Neo Zeed.
Joe set off, his first order of business was to cleanse the Oboro headquarters. When the Blue Lobster, the cyborg remains of the samurai Lobster, had been dealt with, Joe moved on to Tokyo, where a rendezvous with the Shadow Dancer turned ugly when he revealed his true loyalty to Neo Zeed. He did, however, reveal one of Neo Zeed's plans - to hijack a shipment of nuclear armaments and use them to power a mechanical army.(see overleaf)"


Statistics
Size:
Musashi stands tall, about as tall as any humanoid, though his build is slightly thinner than most - around Captain Falcon.
Weight: -
Musashi has a few tools and that weighs him down, though not as much as "Mr. Utility Belt". He's slightly lighter than Snake.
Jumps: -
/
Musashi's first jump is quite high, comparable to Lucario and slightly lower than Falco. His second jump, though, is fairly low, only as high as a Meta-Knight second jump.
Aerial Speed:
Musashi isn't really very manoeverable in the air - about as manoeverable as ROB when he's up in the big blue.
Fall Speed:
/+
Musashi knows how to slow his fall, so he doesn't fall quite as fast as his weight would allow - around the same speed as Captain Falcon. When he goes into Fastfall, though, he drops like Snake with an anvil tied to his ankles.
Recovery: -
Musashi isn't fantastic with recovery, but with a reasonable tether and an almost guaranteed edgeguard-cancelling up-B move he has his options. A little worse than Zero Suit Samus.
Move Speed: -
Musashi is fast, undeniably, but not as quick as, say, Sonic or Captain Falcon. A little slower, though not by much.
Traction:
Musashi is able to stay on his feet but isn't able to stop himself very quickly. Around about average, like Mario.

Shield?: Joe Musashi has a shield like Link and Toon Link, but it's only active when Joe Musashi is walking or crawling. It also only protects against attacks that hit Musashi's torso.

Wall Jump/Crawl/Wall Hop: Musashi has 'em all. His wall hop is only slightly lower than his normal first jump and his crawl, while presenting half his height and crawling at a speed similar to Lucario, has the same shield as his walk, though it blocks projectiles that hit the high half of Musashi's body.


A WORD ON KUNAI
Unarmed combat is important, but if you lack weapons you have failed to prepare. Even the smallest knife is preferable to nothing at all. Be sure that your weapons do not desert you in your time of need.
-From the Secret Manual of Oboro Ninjutsu

A fair selection of Musashi's moves use, or are enhanced by, using kunai either as knives or projectiles. To use these, though, Musashi needs to keep a careful eye on how many kunai he has that can be used.
Under Joe's portrait there is a small image of a kunai, beside which is a number corresponding to how many kunai Joe has left. Joe starts a match with 10 shuriken and every time he loses a stock he returns with 10 shuriken.
Some moves require a certain number of kunai to use and some reduce the number of kunai you have. If Musashi doesn't have the kunai needed for a move, he will either use a different move or simply not use the kunai in the move. Most of the time the kunai add damage and knockback to the attack, so it's beneficial to have kunai at all times.
Joe Musashi can get his kunai back by attacking. Every time he hits his opponent with a move or combo of moves that does not expend kunai, the opponent drops kunai. The number of kunai dropped is proportional to damage - at 5% damage caused, the opponent drops 1 kunai with every 2% over causing another kunai to be dropped.
When Musashi picka up kunai, they go into his stock. An opponent can pick up kunai and use them as weapons much like the beam sword or Lip's Stick. The kunai aren't really effective, however, and do a little more damage/knockback than the fan with a slightly slower attack rate. When thrown, though, they cause flinching hitstun and 4% damage, coincidentally the same damage and knockback as Musashi's neutral special.
Musashi can have up to 50 kunai in his stock at any time. If Musashi has 50 kunai, opponents do not drop more.
In the following moveset, moves followed by a number in brackets means the move requires that many kunai to be used. A move followed by a number in square brackets denotes a move that expend that number of kunai.


SPECIAL ATTACKS

Neutral Special:Kunai Throw [1]
A humble throwing knife is a potent tool in the Shinobi's steady hand. It strikes as quick as a cobra and as silently as the owl on the wing, leaving nary a clue as to who sent the weapon but the dead man who recieved it.
-From the Secret Manual of Oboro Ninjutsu

Joe hunkers down slightly and throws a kunai. The kunai deals 2% damage with flinching knockback, similar to Falco's blaster in speed but with a faster fire rate, roughly 2 kunai thrown per second. If the final kunai Musashi has is thrown, the damage increases to 4% and causes a small amount of set knockback, similar to Wolf's blaster when the opponent is at 0%. Throwing kunai has a negligable amount of starting and ending lag (roughly 0.15 seconds each end). The kunai throw is the only attack that is exempt from stale move negation - throwing 1 kunai is the same as throwing 50.
If a kunai is "charged" momentarily, like Link's Hero Bow (only needing 1/4 second for full effect) then the kunai is thrown as if it was a final kunai (increased damage and knockback).
Kunai thrown are aimed at Musashi's opponent automatically, but do not track (I.E They are thrown to where the opponent is but their flight path never changes). If a "charged kunai" is thrown, Musashi can aim it by aiming the D-stick at wherever you want the kunai to go.
Musashi can throw multiple kunai in a chain, similar to Fox's SSB64 Blaster. All kunai are aimed at the same opponent even if another opponent gets closer. If you manually aim a kunai at another opponent, though, that opponent becomes the "target" of Musashi's kunai.
Kunai thrown have a low priority - they can be knocked out of the air pretty easily.

Side Special: Chain
Those who choose to wield the Manrikugari are to be feared indeed, for the chain is the epitome of the Shinobi discipline - fluid and able to change at a touch yet at the same time ever-able to bring ruination to those who oppose it.
-From the Secret Manual of Oboro Ninnjutsu

One of Musashi's numerous chain moves, this attack has a brief beginning lag (0.3 seconds) where Musashi leans back and whips out his chain. This beginning lag is exactly the same for every chain move Joe Musashi uses, from his grab to his down smash. The end attacks may be quite different though.
In this move, if it is used as a "tilt special" like Samus' normal missiles, the chain is whipped forward at a roughly 30 degree angle out to the length of a single battlefield platform. An opponent that is hit within the range suffers 11% damage with medium-good knockback at 80° (kills at 150% upwards). The ending lag if an opponent is hit with this version of the attack is considerable (0.75 seconds, to be exact), enough that, should the opponent shield with the attack, they can pull out a combo on Musashi. This use of chain has middling to good priority, as the weight gives the blow a bit of power to knock aside other blows.
The attack, however, has a sweetspot right at the end of the chain. If the opponent is hit at this sweetspot the opponent takes 4% damage and is held there for roughly 0.5 seconds as their feet are tangled together by Musashi's chain. In that time, Musashi can input a direction. Depending on the direction, different effects occur as follows:

Neutral: If no input is made, Musashi simply yanks the chain out from under the opponent, causing them to trip forward at Musashi's feet and suffer 5% damage.
Forward: Musashi performs a jumping kick while bringing the opponent forward that sends the opponent sprawling backwards. The attack causes weak knockback at 40° (kills at 210%) and causes 6% damage.
Backwards: Musashi pulls the chain in much the same manner as in Neutral B special, but with a much greater expenditure of effort. It is the only variant that suffers any significant ending lag (0.4 seconds) but the opponent takes 6% damage and is drawn just behind Musashi by the attack.
Up: Musashi draws the chain up so forcefully that humanoid opponents are almost flipped on their head. Opponents of roughly human proportions (Mario, Lucario etc.) take the most damage from this attack, suffering 13% from having their skull brutally bashed into the ground. Opponents that aren't human proportioned but are humanoid (King DeDeDe, Squirtle etc.) take 10% damage and other opponents (Kirby, Ivysaur etc.) take 7% damage. Note that super-heavyweights cannot be thrown by this attack (like Sloth and the Ultimate Chimera)
Down[1]: Musashi steps on the chain to trip the opponent while his second hand pulls out a kunai. Musashi trips the opponent in place and follows up with a kunai at point blank range. The throw itself causes 5% damage while the kunai causes 4%.

A "Smash special" like Samus' Super Missile causes the chain to be flung straight out like Sheik's chain. The chain, in this situation, reaches a little further than the Chain Trip detailed above (roughly 1 1/4 battlefield platforms) and causes 8% damage in the range with medium knockback at 35° (kills at 165%) and has a fair bit of ending lag (0.45 seconds). Sweet-spotting the chain causes 15% damage with mid-high knockback that's purely horizontal (kills at 135%) with less (0.3 seconds) end lag.
The normal hit with the chain has middling priority. Sweet-spot attacks with the chain have a uniformly excellent priority, able to stop even Meta Knight's Mach Tornado if timed correctly.

Down Special: Ceramic Grenade
As time flows onwards, a Shinobi rides the stream and looks for flotsam that can aid him in his missions. To deny technology is to deny effectiveness in combat.
-From the Secret Manual of Oboro Ninjutsu

Musashi pulls out a bomb, similar to Link's down special. The bomb is a bit smaller than Link's and is pure gray with a short fuse that sparks and fizzes. When Musashi throws it at an enemy, they take 9% damage with miniscule knockback at 45° (couldn't kill at anything below 300%). The explosion is comparable to Link's bombs.
The main difference between Link's bombs and Musashi's grenades is that Musashi's grenades bounce. If thrown from the ground, the bombs don't detonate on contact with the ground but bounce and (if it doesn't hit anything along the way) roll to a stop. The bombs detonate if they roll into anything in front of them, be it a wall or an opponent.
The bomb has an 8 second fuse and rolls the full distance in roughly 5 seconds. The bomb can roll anywhere from half the length of Final Destination to the full length.
The bombs have a very low priority - almost any attack can detonate the bombs.

Up Special: Kunai Storm[1-8]
Many men are wary of the shadows around them... they watch their backs and their sides carefully. All too often, though, they forget that death can come from above as well.
-From the Secret Manual of Oboro Ninjutsu

Musashi leaps into the air in a forward somersault almost identical to his second jump. The only difference is that, at the beginning of his jump, Musashi throws up to 8 kunai in a quarter-circle, going from 90° to 180° in an even spread. If B is pressed multiple times, Musashi will remain in a somersault position until he reaches the same height as where he began, throwing kunai every time you hit the button. Musashi has a 0.2 second delay between the initial strike and the secondary attacks, after which there is almost no delay between kunai thrown (0.05 second delay).
The secondary kunai thrown have a 50% chance of being thrown somewhere near any given opponent (within 2 kunai space, so the kunai could end up 1 above or 1 below) and a 50% chance of being thrown within the bottom 3 kunai. Musashi can throw up to 3 kunai in any single barrage, but the actual number thrown is random.


NORMAL ATTACKS

Neutral A: Kunai Slashes(2)/Hand-to-Hand
Use every weapon in every concievable way - knives can be thrown and slashed with, used for both defence and offence and needs little care to be deadly.
-From the Secret Manual of Oboro Ninjutsu

If Musashi has 2 kunai, he uses them to slash at the opponent. He is able to use a 2-swing attack, similar in mechanic to Jigglypuff. The first slash is a horizontal cut with the right hand that causes 3% damage and flinching. The second, a rising slash with the left hand, causes 5% damage and low to middling (can't kill) knockback to 20°.
If the first slash is chained into any Manrikusari move like forward special or grab, the beginning lag is reduced to 0.2 seconds. The attacks have bog-standard average priority for disjointed hitboxes and reach out as far as Marth's width.

If Musashi does not have 2 kunai, he then resorts to fisticuffs. Joe's first punch, a left jab, causes 2% damage and flinching. The second, a right hook that Musashi leans heavily into, causes 4% damage and low knockback to 90°. The attacks have low priority and have slightly less range than his kunai attacks.

Forward Tilt: Kunai Cross-slash (2)/Revolver Kick
To be fluid in combat is key - flow from a block to a dodge to an attack to a killing blow to another block. Your opponent will slice as if through water while you make the final strike.
As Musashi moves forward, he lashes out with both the kunai in his hands, drawing them across in an X witht the same range as the second neutral A. The attack causes 9% damage with low-middling knockback at 60° - enough to get an opponent away but not enough to kill.
If Musashi has no kunai, he will perform a kick similar to Snake's final neutral A combo attack. The kick has better range than the Cross-slash but only does 7% damage with the same knockback as Cross-Slash.
Kunai Cross-Slash has negligable starting lag and a small amount of finishing lag (0.2 seconds finish lag). Revolver Kick has moderate starting and finishing lag (0.25 seconds each side).

Up tilt: Katana Flash
Keep alert to threats all around you - even to the skies. Foes can approach from any direction and a Shinobi must be aware of every potential foe around him.
-From the Secret Manual of Oboro Ninjutsu

Possibly the most vanilla of Musashi's attacks, Musashi draws his katana on his back and performs two slashes above his head in a sweeping motion. The second slash is optional, like Meta Knight's forward tilts. The attacks have a hitbox that reaches down to a touch in front of Musashi, a bit behind him and about 3/4 Ganondorf height. The first slash causes 5% damage whilst knocking the opponent very slightly into the air while the second slash causes 7% damage with middling to high knockback (kills at 150%)
The first strike has a bit of lag to begin with (0.2 second lag) but little ending lag. The second slash, should Musashi use it, has negligable beginning lag and a fair bit (0.25 seconds) ending lag.

Down Tilt: Tall Poppies
If an opponent blocks your moves, sometimes it is prudent to aim lower and cut them down at their feet where shields cannot reach. Poppies that grow tall are destined to be cut down first and hardest.
-From the Secret Manual of Oboro Ninjutsu

Musashi makes a lightning-fast slash at the opponent's legs with his katana. The attack has almost no starting or ending lag and the attack causes 10% damage with tripping knockback. The range of the attack is decent, reaching almost a Bowser width, but the main weakness of this attack is that it happens a lot faster than most - the hitbox only lasts for a number of frames, meaning the opponent has to be in range when the attack is launched for it to hit.


SMASH ATTACKS

Forward Smash: Katana strike
The sword has been a tool and companion of all who walk the path of death for centuries. In the hands of Shinobi, who know the secrets of folded steel, the tool becomes a weapon suitable for the Grim Reaper himself.
-From the Secret Manual of Oboro Ninjutsu

Musashi draws his katana, slashes outwards and sheathes it again in one fluid motion. The net effect is a forward smash that is basically the opposite of Ike's forward smash - a surprisingly small (1/2 Bowser width, but reaches slightly above Musashi as the sword comes from the sheathe to a strike position) but powerful attack that causes 15% and middling to high (kills at 165%) knockback that fully charges to an attack that causes a whopping 24% damage that kills at around 100%.
The slash has a minimal amount of ending lag.

Down Smash: Circle Pummel
To be surrounded is to be defenceless. if a Shinobi is caught unawares, defeat is inevitable... unless the Shinobi has set a trap even he himself cannot comprehend.
-From the Secret Manual of Oboro Ninjutsu

Another move involving Musashi's chain, when you charge this smash Musashi appears to stand still. When released, like all chain moves, has a bit of starting lag that is the exact same animation as the other chain attacks.
This attack is a bit easier to sweetspot, mostly because the hitbox has a lot less range than his other chain attacks. To begin with, Musashi flicks the chain down at a 45° angle, causing the hitbox to reach out to about Marth's width in front of him. Musashi then flicks the chain back around in a circle with roughly Meta Knight's width range behind him before bringing the chain back down around the front with the same range as the previous circle.
If an opponent was hit with the initial flick down, they are almost bound to be hit by the second circle. The attack causes an initial 7% damage with tripping knockback, the circle causes 12% damage with middling (kills at 200%) knockback, with the angle depending on where they were hit in the circle. The forward attack causes much the same damage, with the final hit on the grounded foe knocking the foe for middling (kills at 170% if you're lucky) knockback directly behind Musashi.
If Musashi keeps hitting the attack button, the circling is repeated, but it now causes 9% damage that suffers badly from stale move (reduces to a peeny 4%) and loses a lot of the chain's natural priority (it now clanks with most disjointed hitboxes instead of breaking through like it did.)

Up Smash: Crescent Kick
Maintain a keen eye and a steady head and nothing cannot be achieved. Even a foe in the midst of a strike can be deterred with a clever manoeuver.
-From the Secret Manual of Oboro Ninjutsu

Musashi crouches down in preparation for this attack then, upon release, vaults backwards in a powerful 360° kick. The attack is meant more as a way of bringing aerial foes back to the ground rather than keep them in the air.
The attack isn't a very powerful attack - the attack causes 10% damage uncharged and 18% charged with middling knockback (kills at 200%) but the knockback angle changes based on where the opponent is hit - the angle of the attack is 100° greater than where the opponent is. This means that any opponent directly in front of Musashi is hit up and a little behind Musashi and people directly above Musashi are knocked backwards and slightly down.
The attack has negligable beginning lag but substantial (0.4 seconds) end lag.

Aerials

Neutral Air: Twirling Chain
Just as the body can be broken, so too can the heart and soul of a fighter bend and snap under pressure. Sometimes all it takes is a show of skill to win.
-From the Secret Manual of Oboro Ninjutsu

More a way of keeping his opponent away from him than a viable attack form, Musashi pulls out his chain and swings it around in a figure 8 around his body. The range is okay, hitting everything within 1/2 bowser's width around him. Within range harvests 8% damage with middling (kills at 200%) knockback, while hitting at the very edge of the range (the sweetspot of the attack) deals 14% damage with mid-high (kills at 150%) knockback.
The attack has negligable starting lag and minor (0.15 seconds) end lag as Musashi puts his chain back.

Forward Aerial: Tearing Slash
Strike swiftly and without remorse - a foe is to be honored with a quick death and masterful show of skill.
-From the Secret Manual of Oboro Ninjutsu

Musashi draws his katana in mid-air and performs a rapid horizontal slash out front, flattening his body as he attacks. The attack has good range (a little less than a Bowser width) and causes 15% damage with good knockback (kills at 135%)
The attack has minimal starting and minor (0.1 seconds) end lag and the hitbox is surprisingly narrow - the opponent has to be directly in front of Musashi for the blow to connect.

Down Aerial: Sex Kick
The disciplines of martial arts demands constant training and experimentation. What may come easily today could be the very move that spells your demise tomorrow. Adaptation is the key.
-From the Secret Manual of Oboro Ninjutsu

Musashi does a variant on the stall-then-fall kick, very much like Zero Suit Samus. Musashi starts to fall immediately, though at a slower rate than most STF moves and causes 8% damage on impact.
One of the main differences between this attack and most STF attacks, though, comes with the recoil. Upon impact, Musashi is popped up slightly and the opponent has all momentum ceased and suffers very light downward knockback - it is, in effect, a minor footstool jump. Musashi gains back no jumps from this attack, but if timed well Musashi has enough time to attack with a second aerial.

Back Aerial: Kunai Defence [4]/Tornado of Blades
Your strength comes in your ability to kill with no warning. One moment foes surrounding you are cut down like so much wheat and next second a foe with you in his sights cannot see for the shuriken in his eyes.
-From the Secret Manual of Oboro Ninjutsu

If Musashi has any kunai to spare, he will throw four in quick succession - one straight behind him, one at a 45° angle down from the first and two more straight behind. Each kunai causes 5% damage with flinching knockback.
The attack has almost no lag on either end. The kunai are thrown in a 1-1-2 pattern with 0.1 second delays in between - that is, the first kunai is thrown, then the second, then the last two are thrown simultaneously.
If Musashi has no kunai, he will instead draw his katana and basically twirl in the air with his katana held out, causing an effect similar to that a tornado would cause if it had sucked up a sword in it. The attack causes 7% damage with low-middling (couldn't kill) knockback at a 60° angle.
The attack has minor beginning lag and a substantial amount of end lag (0.45 seconds)


Grapples

Grab: Chain Lasso
If an opponent is unable to fight, then they have been conquered already. If your opponent has no hands, he cannot bear arms against you.
-From the Secret Manual of Oboro Ninjutsu

Musashi pulls his chain out again, this time throwing it straight forward. If the opponent gets hit by the chain as it's flying out, the opponent is held exactly where they were standing - they aren't pulled to where Musashi is like with normal grabs.
If you use a running grapple, Musashi simply screeches to a halt and performs the move as per normal, as if the player stopped running and instantly performed a grab.
The grab itself causes 3% damage to the opponent. If the chain doesn't grab a target, the end lag is considerable (0.6 seconds)

Pummel: Point Blank Kunai[1]
There is but one thing better than throwing a shuriken at your opponent - and that is throwing a shuriken at your opponent when you know it is going to strike true.
-From the Secret Manual of Oboro Ninjutsu

Musashi throws a kunai at the grappled opponent causing 2% damage per kunai. The fire rate is roughly 3 kunai thrown every 2 seconds. Note that if the opponent is able to break free of the grapple as a kunai is being thrown the kunai will still be thrown and will probably cause damage to the person who broke out of the grapple.
This move is unique, as there is no "non-kunai" variant - if you have no kunai, then you can't pummel.

Forward Throw: Shoulder Crash
The first move in single combat is often a mistake - it allows your opponent the benefit of knowing your plans. If you portray the wrong plans, however, your opponent will leave themselves vulnerable.
-From the Secret Manual of Oboro Ninjutsu

When Musashi performs this throw, he pulls the opponent towards him while withdrawing his chain and, should either player not do anything, pauses slightly before drawing his katana and mowing down the opponent, causing 11% damage with mid-high (kills at 155%) knockback at a 65° angle.
During the pause (roughly 0.45 seconds long), the opponent can perform any move, from a jab to countering with a grab of their own. Should this happen Musashi's throw is cancelled and he takes the damage as normal.
There is, however, a second option. Should the player press both B and A at the same time at any point in the throw up to the pause, Musashi will carry out the throw up to the actual sword slash, whereupon Musashi will simply jump away from the opponent one battlefield platform. Should the opponent attack during the pause if Musashi has cancelled the throw Musashi will instead duck while the opponent blunders forward, causing the opponent to trip over Musashi onto the floor.
That isn't all, for when the opponent lands Musashi gets up, turns and performs a ground-up slash (think Rough Divide from FF VIII), causing 17% damage with high knockback (kills at 120%) at 80°.
The normal variant of the throw has minor end lag. The cancelled throw has nigh-on no end lag while the counter-throw has medium (0.25 seconds) end lag.

Back Throw: Kunai Chaser[1]
Any blow can be hardened - any kick can come with a punch, any strike of a sword can be followed with a body blow and any thrown weapon can be chased down.
-From the Secret Manual of Oboro Ninjutsu

Musashi pulls the opponent behind him and kicks the opponent away, causing 9% damage and leaves them standing. If Musashi has a kunai, he throws a kunai at the vulnerable opponent almost instantly after the kick, causing an extra 5% damage. The kicker from this move comes from the fact that it has absolutely no end lag. None whatsoever. Though the animation can be left to continue after the kunai is thrown, it doesn't have to - Musashi can hit the flinching opponent with any move he so desires, providing Musashi can launch the attack in time. The throw has minor starting lag.

Down Throw: Kunai Double-Bluff[1]
...indeed, showing the opponent your plans can be a good thing - particularly if your plans have changed. False hope is better than no hope at all.
-From the Secret Manual of Oboro Ninjutsu

This attack has exactly the same animation as the back throw, with the only exception being that Musashi keeps the chain tethered to his opponent. If the opponent does nothing for 0.3 seconds - a little more than the time it takes to recover from a kunai, coincidentally - Musashi untethers the opponent and no further effect occurs apart from a fair bit of lag (0.45 seconds).
If the opponent attempts to move, dodge or shield in this time, however, Musashi anticipates the movement and brings the opponent back for a second helping. Musashi pulls the opponent back to him, untethering the chain and freeing his right hand to deliver a powerful downward punch to the sprawling opponent in the process.
The extra punch causes middling knockback (kills at over 200%) and an extra 6% damage. The punch offers little (0.15 seconds) end lag.

Up Throw: Hurricane Blades
To confuse your opponent is a great thing, but at some point your opponent must fall. Remember this: even the greatest decoy is just that: a decoy.
-From the Secret Manual of Oboro Ninjutsu

Musashi pulls the opponent towards him, snapping the opponent in the face with a backward kick while untangling his chain from them. Musashi then unsheathes his katana, coming around in a full circle to deliver a low to high slash before following the opponent into the air and following through with a powerful overhead slash.
The attack is another option for Musashi to KO an opponent, this time from the top blast done. The attack causes 4% damage with the kick, 6% damage with the first cut and 12% damage with the final slash. The only attack with noteworthy knockback (the kick has flinching knockback, enough to open the opponent for the second blow, the second has set knockback up 3/4 of a battlefield platform, the third has high (kills at 115%) knockback at a 87.5° angle).
The main factor that stops this being spammed to hell and back is the lag - the beginning lag is minor but the ending lag is horrific (0.6 seconds) as Musashi fastfalls to the ground and recovers there.

FINAL SMASHES: OBORO NINJUTSU
This is the final lesson, the longest taught and the most dangerous. A weapon that strikes deep at the enemy but draws from the life of the Ninja. The last lesson of the Oboro... the Oboro techniques of ninjutsu: Ikazuki, a barrier of lightning and a keen edge against foes; Kariu, the art of fire and wind, a burning tempest guided by the winds of the just; Fujin, the spirit technique that lifts the soul and hides true intent; Mijin, the technique of pure power that no mind can fully comprehend and no body can fully master.
Thus do lessons of the master end - when there is nothing left for one man to teach, only lessons from the wide earth can be useful. Know your way, for it is your life.
From the Secret Manual of Oboro Ninjutsu


When Musashi activates a smash ball, he draws his katana and waits a full second. Musashi has super-armor for the duration, but if the opponents can cause more than 20% damage to Musashi or cause Musashi one Final Destination's distance worth of knockback the final smash is cancelled, as well as inflicting the knockback if it is the cause of cancellation.
During this second, Musashi can input a special move command. Doing so activates one of four final smashes: Ikazuki, Kariu, Fuujin and Mijin. If no input is made, Ikazuki is used as a default.

Neutral Final Smash: Ikazuki (Thunder Barrier, Blade of Heaven's Arms)
Ikazuki - just as lightning strikes hard and true without mercy, steel shall bear the fangs of thunder... but just as the smart creature flees from lightning, so shall harm avoid the bearer of thunder.
-From the Secret Manual of Oboro Ninjutsu


From the waiting pose, Musashi thrusts his katana skywards as a bolt of lightning fully as wide as Musashi himself strikes the steel. The lightning arcs around Musashi in a tightening ball, starting at a battlefield platform's width and contracting to contact Musashi. Foes touching the lightning take 2% damage a hit, causing anywhere from 10% damage (if the opponent is initially caught in the sphere) to 18% damage (if the sphere contracts into an opponent) with flinching knockback.
The sphere takes a second and a half to contract fully, whereupon Musashi is surrounded by a field of electricity marking the continued function of Ikazuki. The effects are threefold:
1) All melee damage caused is changed to electricity damage (with the temporary hitstun that goes with powerful electric attacks) and cause +1% (if the weapon is a body part, like a fist), +2% (if the weapon is a kunai) or +4% (if the weapon is the katana or the Manrikugari) as well as a minor boost in knockback (kill percentages are decreased by 10%, set knockback is increased by a battlefield platform).
2) Musashi gains complete invulnerability to any and all attacks for the duration. Knockback is cancelled and Musashi takes no damage from attacks.
3) Opponents in contact with the field take 4% damage and are thrown back a battlefield platform in set knockback. This causes 4% damage to the Ikazuki (see below).
Ikazuki lasts for 25 seconds or until the field takes 50% damage from non-electrical sources (electric attacks do no damage or secondary effects but cause normal knockback), whereupon the electricity dissipates from Musashi's body harmlessly and the effect is ended.

Forward Final Smash: Kariu (Flaming Body, Shroud of Living Fire)
Kariu - the flames that burn within every warrior have the potential to engulf and destroy every foe. Focus and discipline turns the honed Shinobi fighting spirit into an avatar of fury and fire.
-From the Secret Manual of Oboro Ninjutsu


When this move is initiated, Musashi thrusts his katana into the sky in a passing resemblance to the Ikazuki Final smash, then rapidly brings the katana back to the initial position. When this animation is performed, four pillars of fire spring up from the floor to the height of three battlefield platform lengths and begin to rotate in a tight circle (no room to stand between Musashi and the fire), causing 11% damage with low-middling knockback. As the pillars spring up, A fiery lung dragon forms within the rotating colums, flies up between them all and out the top of the pillars. This process takes about 1.5 seconds from the lung beginning to form to it erupting from the top of the pillars.
The pillars themselves continue to rotate around Musashi after the dragon bursts free, though their height drops to 1 1/2 battlefield platforms and cause only 6% damage with pitiful knockback. The dragon, though, is under complete control of Musashi. The dragon is the length of two battlefield platforms, has manoeverability good enough to turn a circle the size of Bowser and is slightly faster than Captain Falcon's run speed. Any movement originates from the head of the dragon and the tail wags roughly 3 times every second.
The dragon has three main areas of attack: the head, the bulk of the dragon's body and the tip of the dragon's tail. The head is the main point of attack and causes 15% damage with mid-high knockback (kills at 145%). The body causes 2.5% damage with flinching knockback a maximum of ten times (if the opponent is "swallowed", see the A special below), meaning that, if the opponent is caught in the body, it won't get out until it has been hit by the tail. The tail causes 8% damage with middling (kills at 170%) knockback at either 85° or 5°, depending on what way the tail is pointing at the time (pointed down means the opponent flies up, up means a potent meteor smash).
While the dragon is flying, Musashi can use two moves by pressing either A or B. Pressing A causes the dragon to open it's jaws wide, meaning the opponent misses the head but is hit by the full body and tail attack. Pressing B causes the dragon to reverse direction, changing the point of control of the dragon momentarily from the head to the tail. In 0.75 seconds, the tail and head switch positions, returning control to the head of the dragon as before.
The dragon lasts for 11 seconds. After this time the dragon simply continues it's current flight path, the pillars sink back into the ground and Musashi resumes combat himself.

Up Final Smash: Fujin (Spirit Revival, Hidden Strikes in the Mist)
Fujin - Honor above all. If the shinobi follows the old ways, then they shall have powerful help... the ancestors of the warrior shall grant them flight as lofty as the shinobi's ideals and the spirits themselves shall aid the shinobi directly.
-From the Secret Manual of Oboro Ninjutsu


Musashi levels his sword horizontally as four transparent copies of Musashi transpose upon Musashi, appearing beside him before jumping into his standing form. Throughout the effect, Musashi will have several after-images of himself appear as he moves.
This final smash, like Ikazuki, yields several benefits, though they are not as readily apparent as Ikazuki. They are:
A) When Musashi uses a move that involves throwing kunai, two transparent arms reach out at slight angles up and down from the main arm. When Musashi throws the kunai, two "ghost kunai" are thrown in a fan pattern along with the real kunai. The ghost kunai cause 1.5% damage with no knockback.
B) Musashi's jumps are increased dramatically - equivalent to Musashi wearing a Bunny Hood when it comes to jumps. If Musashi has a bunny hood as well as Fujin, then Musashi gains only the increased speed as well as a boost to the vertical component of the Kunai Storm that makes it equal to a Falco initial jump.
C) With every attack that doesn't expend kunai, Musashi will suffer either no increase, 0.2 seconds or 0.4 extra seconds of starting lag. During each of these periods, Musashi will attack using two after-images as well as his normal attack. The afterimage attacks do no damage, but they appear to be completely normal attacks to the point where the extra attacks are. Each attack is placed randomly in the attack series so the decoy effect is not easily predicted.
This final smash lasts for 14 seconds, after which the after-images simply disappear. There is no great fanfare, so people may be taken by surprise when Musashi is able to short-hop them again.

Down Final Smash: Mijin (Self-Destruction, Rampaging Power of Self)
Mijin - A mission must be completed if it has been commenced, even at the cost of the shinobi's life. Mijin, the most powerful tool in any ninja's arsenal, is also the one with two edges - it drains the vital spark of life and brings the shinobi that much closer to the grave.
-From the Secret Manual of Oboro Ninjutsu


Mijin is a technique of unashamed extremes. Quite possibly the most powerful final smash available to Musashi, it is the one with the highest cost.
When Musashi uses this final smash, Musashi inverts his katana and thrusts it into the ground. When the katana hits the ground, Musashi turns to granite. Musashi then explodes in a blast as big as an explosives box being detonated, causing shards of stone to fly out in all directions uniformly (I.E a typical fan pattern). The explosion causes a massive 45% damage with amazing knockback (kills at 55%) and the shards of stone cause 20% damage and kill at relatively high percentages (kills at 95%).
It's at the very instant of detonation that the payment is extracted - Musashi loses a stock if you're playing a stock match, his team loses a point if you're playing a timed match or Musashi loses half his coins if playing a coin match. If playing a stock match and Musashi loses his last life in this fashion but manages to kill his final opponent, Musashi is deemed to have won the match.
If Musashi still has a stock or is not playing a stock match, however, Musashi's katana remains embedded in the ground. Other opponents can take the katana and even use it as a weapon (it is treated as a Beam Sword with no extra reach on smash attacks and slightly less knockback but more damage - 9% on a normal attack, 14% on a tilt attack and 18% on a smash attack.)
This, however, comes with a side-effect: after either 6 seconds or when the Musashi player presses the A and B button together, the Mijin effect happens in reverse: shards of stone fly towards the katana randomly from the area around the stage and the explosion occurs, confined to a much smaller area (similar to a Snake C4 explosion) and causing less damage (30% damage) but with better knockback (kills at an incredible 40%). After this effect Musashi suffers slight ending lag as he retrieves his katana and readies himself for combat again.


OTHER MOVES

Dash Attack: Running Slash
Let nothing stand in the way of your righteous victory. Pain and injury can mend, foes can be cut down, but the failure of a mission cannot be resolved. You have but one chance to succeed.
-From the Secret Manual of Oboro Ninjutsu

With this attack, Musashi takes a small leap (very small, only as high as Snake's crouched form) and, at the end of his hop, draws his katana in a lightning-fast sword slash with a large end hitbox (a little lower and a shade thinner than Bowser). The attack causes 12% damage with surprisingly high knockback (kills at 130%) at a 37.5° angle and has substantial starting (the hop takes 0.5 seconds) and ending (0.45 seconds) lag.
More notable than anything, though, is the fact that Musashi has super-armor throughout the attack until the ending lag is over.

Ledge Attack: Bounding Slash
A shinobi can turn even the greatest fault into an advantage on their part. If he has but a fingerhold in the war, it shall be won by him.
-From the Secret Manual of Oboro Ninjutsu

Musashi pulls himself up from the ledge almost identically to his normal ledge jump - the only difference is the jump is a fair bit lower and drawing his katana all the while. He then descends rapidly, bringing his katana down on the opponent's heads. The attack causes 11% damage with middling knockback straight down (kills at 190%).
The attack has a bit of both starting and ending lag (0.2 seconds starting, 0.3 seconds ending)

100% Ledge Attack: Chain Trick
It is only when a situation is critical that a shinobi is truly powerful. Only using as much force as is needed is the Shinobi way - it reveals less about the shinobi.
-From the Secret Manual of Oboro Ninjutsu

Musashi, instead of clambering sorely back on stage and performing a weakened attack, instead decides on a more decietful route. Pulling out his trusty chain yet again, Musashi flicks it over the edge of the platform he's clinging on to.
If the attack hits, the chain wraps around the opponent's feet and Musashi yanks them back towards him. The attack only causes 5% damage with set knockback equal to 2.5 battlefield platforms, but the knockback is angled at 285° - behind and a little bit down from the hitbox, sending them plummeting into the void.
Musashi doesn't get back onto the platform after this move, making it an excellent edgeguarding attack. The attack suffers middling lag (0.3 seconds) at either end.

PLAYSTYLE

Joe Musashi is a ninja, but he isn't all about speed. Musashi is a character focussed on pressure and mindgames, forcing the opponent to go where Musashi wants and making them second-guess even the most basic strategic choices.
Musashi's most happily spammable move - the Kunai Throw - is a dangerous thing to play around with, as a single wrong move can force the opponent to realistically have to take anywhere between 20 and 30 damage. This makes a short stream of kunai in the air a powerful deterrant to staying up there and allows Musashi to direct his opponents through the air.

That's a good thing, though, because Musashi's air game is not a strong point - far too predictable. On the ground, Musashi has an excellent closing move (charge attack) and this, combined with Musashi's walking shield, means he is able to cross the distance in a blink of an eye. When up close, his opponent has to start guessing.
Literally. All of Musashi's chain moves share a starting animation and have differing sweetspots that, if hit, can cause ruination for the opponent. Even if Musashi uses his other attacks, their general lack of starting lag makes predicting and blocking moves a peril. The only moves that come out slow - most of Musashi's katana moves - are dedicated finishers.

Grapples - both with forward special and the normal grapple - are another big part of Musashi's games, especially thanks to the fact that they are both chain moves and normal grapples are easily landed. In particular the forward throw on it's own and the back and down throws used in tandem makes opponents mentally paralyzed to take openings that are there in case the openings are, quite literally, counter-productive.

Care must be taken when playing Musashi that your moves don't get predictable. Though the selection of chain moves runs the gamut from hitting behind Musashi to a mid-range attack, they are liable to be simply shielded and punish Musashi for his generally lengthy end lag. This, combined with his generally poor recovery, makes Musashi vulnerable to a concerted assault and skilled defenders. In this case, both grapples are wonderful counters, though it's not an ideal match.


MATCH-UPS

Musashi VS. Lunge: 85/15 (Musashi's Favour)
Heinrich Lunge is in big trouble trying to catch this master of misdirection. The smart Musashi player can cripple Lunge's murder game with his chain moves and only the most well-versed Lunge player has much hope for identifying the right moves for the situation.

So that means Lunge is forced to play the part of the victim - already on the back foot, Musashi can further push Lunge off balance by using his more predictable moves - approaching using his Kunai Shield is an almost given and after the approach, Musashi is able to keep Lunge in check with his heavier moves like fSmash, kunai throw or even a sparing use of fair or dair.

Lunge has his options - playing a more defensive game will force Musashi into a less predictable gameplay style, most of which will involve the coveted chain moves used to knock out the civilian, but then there's the issue of actually knowing which chain move was used where. This makes the Lunge match-up a nigh-impossible victory for Lunge. Only a great deal of luck and some seriously good timing can save him from complete annihilation.

Recommended Final Smash: Fujin - Make Lunge's job just that little bit harder by throwing all pretense of predictability out the window and bring some aerial combat into the game for Musashi. Fujin makes the moveset available to Musashi all that broader and allows for some beautiful fake-outs that ruin the carefully laid plans that Lunge needs.


Musashi VS. Sheep Man: 55/45 (Musashi's Favour)
Sheep Man, at first glance, has a strategy that is anathaema to Musashi. A set-up character that is able to keep Musashi at bay and builds power with every attack? Musashi shouldn't have a chance!
Fortunately, Musashi has a single powerful equalizer in the fight: his ability to individually aim kunai. With just 3 aimed kunai, any particular cloud that Sheep Man has made is destroyed. Destroying the right cloud at the right time can rob Sheep Man of everything from his setup to his recovery.

When push comes to shove, however, Sheep Man does have time to reset the clouds and/or polarize Musashi, but in the meantime Musashi can advance and cause a world of hurt on the remaining clouds or, indeed, on Sheep Man himself.

The main problem for Musashi is, though, that Sheep Man will almost definitely set his clouds back up the moment Musashi slips up, and Musashi will be hard pressed to get out of the range of the new cloud setup. It becomes an arms race to see which foe can succeed: Musashi with a substantial amount of knockback to throw Sheep Man out of his net or Sheep Man to set up another trap for Musashi. In the end, the base fact that Musashi can crack this egg in the first place as well as beating it down time and again makes him a slight favourite, though both of these fighters must expect their normal strategies to be counterfeited badly - Musashi can't trick Sheep Man because Sheep Man has so much stage control potential, while Sheep Man's set-up is vulnerable to fall apart at Musashi's few ranged attacks.

Reccomended Final Smash: Ikazuki - No mistakes here, Ikazuki tears great holes in Sheep Man. Unlike PIKACHU, who has some non-electrical options like Quick Attack or Skull Bash to wear down Ikazuki's duration, Sheep Man has almost no choice but to keep Musashi away.

Musashi VS. Dr. Strangelove: 10/90 (Dr. Strangelove's Favour)
Musashi suffers badly thoughout this match simply through his lack of competitive ranged attacks. His kunai, while they can stop Strangelove in his tracks, are only a temporary measure that will eventually run out.

Musashi's main recourse - either stop an opponent's strategy cold using kunai or approaching and confusing the hell out of them - is cut short in horrific fashion by the simple inclusion of a Doomsday Device. A stockpile rapidly takes the wind out of Musashi's sails and defusing Strangelove's bombs is a near impossibility.

Musashi's one hope that brings this match from the brink of Ganondorf-like failure is his speed. If Musashi is able to get to Strangelove in time, Musashi can use some of his faster moves to keep Strangelove off balance, particularly Musashi's neutral combo and dair to build damage rapidly and using fsmash and grapples to end the match.

Overall, though, even a master ninja can't fight a wall of armanents laid down by a man who is absolutely unafraid to die. Musashi is put so far onto the back foot with this matchup it isn't funny.

Recommended Final Smash: Mijin - Normally a Musashi player should avoid using Mijin unless they can be guaranteed a double-kill. In this case, though, where using any other jutsu would present only a greater threat of detonating the feared Doomsday Device. Thus, when it comes to crunch time, the best option is to beat your opponent to the punch and detonate the Doomsday Device yourself by means of a self-destruct attack. That way, you lose no more than Dr. Strangelove and you have a chance to pay him back for your death in full.

Musashi VS. Silver: 65/35 (Musashi's Favour)
Silver's telekinesis is awesome, no doubt about it. If Silver is able to force Musashi into the air from his secure bunker of phychic barriers, Musashi has no hope, especially as Silver is so able to send Musashi skywards and into disturbing territory for Musashi.

The trick for Musashi, though, is in his speed and sheer unpredictability. Musashi can approach almost as quickly as Sonic can and his pressure game is a fantastic tool for delaying Silver's plans. Despite the fact that Silver's main playstyle isn't disrupted by Musashi's shenanigans, Musashi still has enough hard-hitting attacks to make Silver suffer.

Another minor factor that grants Musashi some measure of comfort is, ironically, his poor recovery. Because his tether recovery is as effective, and in some cases even better, than his Up-B, Musashi isn't as easily gimped as other characters by control swap. Indeed, Silver could suffer worse than Musashi as carefully planned chain moves can be mistaken for control-screwed side B moves. This puts Silver into the prime firing line for Musashi's other chain moves.

In short, Silver's main playstyle is still viable and that doesn't worry the competent Musashi player, but several of Silver's minor strategies are cut away by Musashi's speed and weight, making this a winnable, but not easy, match for Silver.

Recommended Final Smash: Kariu - When Silver walls himself in, this is by far the most efficient way of getting him to suffer for his bunker. By making himself such a stationary and obvious target, Silver suffers badly from both the potential spike effect of the tail and the high knockback of the head itself. It's a lose-lose situation for Silver, either take masses of damage and/or a KO or sacrifice your defensible position.

Musashi VS. Doppelori: 50/50 (Even)
The addition of Final Smashes to the match makes Musashi an insanely powerful opponent. If Musashi gets a final smash, not only is he able to choose between four choices depending on the situation but he'll be able to use his ninjutsu almost every 60 seconds, as there is almost no doubt that Musashi'll be saving his kunai for special situations in this match.

Once Doppelori actually starts her attack routines, there's very little to stop her from hurting Musashi badly and there's a good chance that Musashi will fail in that case. Actually getting there and trying to stop Musashi from exploiting her, as well as forcing Musashi away, is fraught with peril. Musashi is fast enough to get to Doppelori before she even has a chance to begin her assault with his dash attack and can make backing off a very bad idea for her with the decoy chain moves.

Overall, it's a pretty even match up - Doppelori has it over Musashi in normal combat, but with the inclusion of regular Final Smashes Musashi takes the lead, although it will mean Musashi has to survive that long...

Recommended Jutsu: Ikazuki - By the time Musashi has a hold of the smash ball, he'll be bruised and battered with no mistake. Using Ikazuki will turn the tables, not only negating Doppelori's attacks but opening her up for supreme punishment from Musashi's close-up game.


MISCELLANY AND ANIMATIONS

Standing Animation: Musashi stands slightly side-on, both hands holding a kunai. If Musashi has less than 2 kunai, he instead stands with one hand resting warily on the hilt of his katana. (Like this for the first pose: 1:58 and this for the second: 6:01)

Slow Walk Animation: Musashi turns so that he's fully side on while he walks, holding his kunai in front of him in a cross (like this: 5:13). If Musashi doesn't have 2 kunai, Musashi instead walks forward with his hand still on his katana (Like this: 5:13).

Walk Animation: If Musashi has 2 kunai, then his walk is almost exactly the same as his slow walk, only slightly faster. If Musashi has no kunai, then Musashi walks with both his arms bent at his sides, his hands balled into fists (like this: 0:09).

Running Animation: Musashi darts forward, his hand on his katana hilt as he goes (like this: 2:44).

Crouch Animation: Musashi kneels down, his upper body as straight as he keeps his hands in front of his face. If he has two kunai, he'll be holding them out in opposite directions - one pointing up to the left, one down to the right. (Like this: 6:54).

Crawl Animation: Musashi keeps his general crouch pose, lifting his legs ever so slightly to move himself along with two kunai crossed in front of his face (like this: 5:00). If Musashi has less than 2 kunai, he keeps much the same pose but his hands are free and kept low near his feet, though they do swing with his movement(like this: 1:56).


Up Taunt: Musashi pulls out of his clothes a piece of paper and inspects it. Pausing and zooming in on the paper shows that it has writing and pictures on it - a picture of the current stage, one of the current combatants, some scribbles and the name of the combatant. It's a hit dossier, which (if Musashi has killed an opponent within 5 seconds of performing this taunt) Musashi stamps with a rubber seal and puts it back into his outfit. If he hasn't, then he simply looks up at the fighters around him, nods and puts it away again. (The dossier looks something like this: 0:07).

Side Taunt: Musashi turns to look out at the background, a sudden stir of the wind picking up Musashi's headbands dramatically as he poses. (Like this: 0:08).

Down Taunt: Musashi turns in to face the camera, his hands in the "typical" ninjutsu pose as blue symbols start to swirl out from his hands. (Like this: 3:28).

Victory Pose 1: Musashi jumps into the air and performs a Kunai Storm around the victory platform, missing everybody but leaving kunai scattered around the area. Musashi then lands on his feet and sends a similar spray outwards towards the camera.

Victory Pose 2: Musashi uses the jutsu of Kariu, instantly summoning the fire dragon, which circles Musashi once before roaring like the crackling of a burning house at the camera while tangled around Musashi, looking almost like a pet.

Victory Pose 3: Musashi pulls out another hit dossier and stamps it. He then tosses the paper up into the air, throws two kunai through it and then catches the paper with his chain and pulls it back into his hand before crumpling the dossier in his hand.

Special Victory Pose 1 (Win against Sheik): Musashi and Sheik duel across the front of the victory screen, Musashi wielding two kunai while Sheik is fighting with bare hands. After a bit Musashi takes a bit of a step back, throws a kunai past Sheik's shoulder and barrels forward while Sheik is distracted, cutting down Sheik with his katana. He then sheathes his katana and turns away with nothing more than a derisive "Hmph!". Turns out he doesn't enjoy fighting imposters...

Special Victory Pose 2 (Win against any opponent with only 1 point difference): The normal victory screen is replaced by a bamboo forest... only there's two people missing! The other fighters, if there are any, are lying on their backs around the floor. The camera quickly pans up to show the second-place combatant standing on the bamboo stalks, with Musashi in front. He jumps and lands on his other foot and the other fighter attempts it but he falls down into the forest. Musashi looks back at the empty air, shakes his head and pulls out a scroll with the second-place's insignia on it. Musashi can learn, just like he can try to teach his worthy opponents.

CODEC Conversation (Between Mei Ling and Snake)
Mei Ling: He is stronger than steel and moves faster than a whirlwind... Sometimes he hides in mud, other times he transforms his shape like an ever changing cloud.
Snake: *Groan* Not another proverb, Mei Ling, can't you see I'm busy?
Mei Ling: It's not a proverb, Snake! It's a quote from the Manual of Oboro Ninja Arts.
Snake: This guy's a ninja? No wonder I can't draw a bead on him.
Mei Ling: Mmm. Joe Musashi is one of the last of the great ninja of the Oboro clan. He's a master fighter and uses everything from throwing knives to ceramic grenades.
Snake: I've seen that. What I'm more worried about is how he uses them.
Mei Ling: Right again. Musashi's fighting style is so fluid that nobody can predict what he'll do next. Stay away from him, especially that chain!
Huh. At least he can't counter me like Gray Fox can.

A Mystery Conversation:
?????: You gotta help me, Jaunty. What can you tell me about this guy?
Jaunty: Oh Mikey, yeh've got a wee knack for gettin' inteh scrapes, don't yeh? That there's Joe Musashi, one of them... what'cha call em... ninjas!
Mikey: Ninja? You can't expect me to buy that sort of bull, Jaunty. Who is he really?
Jaunty: Y'think oI'd be kiddin' around at a time like this, Mikey? He's a ninja, and a thumpin' good 'un too. Keep away from 'im - he's shiftier than the whole lot of them Legion goons put together.
Mikey: Any advice?
Jaunty: Well, if ya gotta get to 'im, get to 'im with ya Gun and ya voodoos. He moight be loaded down with weapons and whatnot, but get him from range and he's a pansy.
Mikey: Once again, you're surprisingly helpful, Jaunty.
Jaunty: Always a pleasure to help, Mikey.

Team Insignia: The Japanese Kanji for Shinobi (Seen here: 1:02

MUSASHI'S ROLE IN SSE​

Musashi's role in SSE begins just after Ike ruins the Ancient Minister's plans for the Battlefield Fortress. Just before that stage ends, the camera cuts to a bamboo forest where a small japanese-style house resides. The scene cuts to within the house, showing Musashi kneeling at a table, calligraphy pen in hand and paper on the table. Musashi applies the last strokes to the hit dossier, writing the name of the subject in the same code as the "scribbles" below. The pictures are enigmatic, showing a ball of Subspace in the area and a white hand in the subject area - in simpler terms, it's a hit dossier for Master Hand. After finishing the dossier, Musashi takes a last look at the document, nods in satisfaction and puts the document away in his clothes. He then gets up and walks to the door, taking down his katana from beside the door frame before leaving.

The next time the players see Musashi is a fair bit later, standing in front of the Subspace ball that was King DeDeDe's castle. Musashi is standing in front of it, looking up into the centre of the chaos. Deciding on experimentation, Musashi steps backwards onto a loose rock, which he picks up and throws into the ball. The Subspace ripples and ever so slightly grows, convincing Musashi that going into the sphere is folly. He turns and runs out of the canyon, beginning the first playable section - Cave Redux.
NEW STAGE: CAVE REDUX
Musashi heads back through the second cave systems traversed by Mario and company, only this time less Subspace enemies are present and more environmental dangers, such as landslides and craters caused by the Subspace Bomb are apparent. The trip is technically easier than the first, but Musashi has only two stock to deal with the dangers, making it a fair challenge.

When Musashi finds his way out of the caves, he meets up with Mario and Co. They're keen to enlist Musashi's help in fighting the Ancient Minister, but Musashi is only interested in one thing: getting into Subspace. Mario and Musashi come to an impasse, neither willing to help the other until Pit points out the Halberd, implying to the player that it could be strong enough to break in. Musashi looks up at the hulking behemoth and shakes his head. He slams his fist into his palm and a cutscene of him running through a bamboo forest plays - it seems Musashi is more interested in speed rather than power.
The camera then turns to Kirby, who is standing a little back from Mario and Musashi. When Musashi is finished, Kirby bounces up and down to draw the quarreling pair's attention. A cutscene plays of when Kirby and the princess were blown off the Halberd by the Arwing. Perhaps one of those could be used to breach the Subspace Barrier!

Musashi, seemingly agreeing with Kirby's request, nods and bows to Mario in farewell before dashing away into the distance. The rest of the group look at Mario, who shrugs and points to the Ancient Minister. The others nod and go after the Ancient Minister, the game continuing as normal for a while.

The next time Musashi appears, a bit after the events introducing Captains Falcon and Olimar, he is at the lake shore where Fox and Diddy Kong fought Rayquaza, complete with the still-smouldering wreckage of the Arwing Fox used. Musashi is poking through the wreckage, trying to find anything salvagable in the blasted craft but is interrupted by another similar craft, this one much darker with red highlights (the Wolfen, if you couldn't guess) swooping low and strafing the area with laser fire, causing Musashi to leap back and pull his chain out of it's clip at Musashi's hip and fling it at the ship in retaliation. The scene cuts to Wolf (where his name is revealed), who barks out a harsh laugh as he looks down on the now absolutely broken Arwing and flies off into the sky. As it does, the camera zooms out slightly to show Musashi clinging for dear life on the back of the Wolfen, riding it out until he can get off safely, then a bit more to show the looming shape of the Sargasso Hideout, what passes as Star Wolf's hideout. Musashi holds tight as the Wolfen lands in a hangar bay in the Hideout and waits until Wolf has left to inspect the cockpit. After seeing the cockpit is filled with incomprehensible symbols and buttons, Musashi heads into the Hideout to confront Wolf.

NEW STAGE: SARGASSO HIDEOUT
Musashi's main purpose here is to follow Wolf, but the situation is made just that little bit harder by the inclusion of several dozen hardened criminals under the employ of Wolf. They'll be tough nuts to crack, but Musashi's got the edge over them. He'll have 3 stock to get to the end, and he'll need them all.
Overall, the actual stage is constructed much like the first Subspace Research Facility, only instead of multiple small areas the main area is a sprawling tower-like structure that just keeps going up and up with staircases galore. It's quite long, so the player has to exercise caution when progressing through the area.
Enemies come in three basic variants: Turrets, Guards and Mechas.
Turrets are fixed, armoured units that track Musashi with burst-fire lasers. The bursts are semi-controlled, meaning if Musashi shields for a lonng period of time or airdodges, the bursts will be delayed until Musashi is vulnerable again. The bursts are (barely) able to be spot dodged and, to cap it all off, the Turrets themselves are relatively hardy, having about the same health as an AutoLancer. The best way to approach the Turrets is to charge, jump over the first laser burst and shield-dodge the rest of the way.
Guards are the simian thugs and rogues that mostly populate the Sargasso Hideout. They are armed with blaster rifles much like Falco's and have as much health as the regular primid does at this point of the game. The best way of approaching these guys alone is to simply duck and approach with your shield up, deflecting all the blaster fire with a Kunai Barrier. Most of the time, though, this can't be done thanks to the accompanying Mecha.
Mecha are the elites of the Sargasso Hideout. Armed with twin missile launchers and powerful close-range punches, they're the pinnacle of what the Sargasso has to throw at Musashi. There'll almost always be one or two supporting a group of scattered Guards, making what would be a straightforward firefight a bit more risky. Dashing into the Mecha's range is an easy ask, though if supported by Guards a more careful spotdodging approach has to be employed.

After Musashi has fought his way up the Sargasso, he finds Wolf at the top, tracking the Great Fox as it flies towards the Halberd for a firefight. Seemingly deciding to help the Halberd finish off Star Fox, Wolf turns to go and spots Musashi. A brief look of recognition sets on Wolf's face as a small flashback of the events at the lake re-occur. Seems he saw Musashi at the lake, assumed he was allied with Fox and thought he'd taken him out. Back in the present, Wolf gets down into battle position while Musashi is forced into combat.
Before the two can really get down to fighting, however, another person shows his hand... his... Master Hand. All the screens on the Sargasso suddenly flicker into static, causing Wolf to look around in confusion and anger. Before he can do anything, the screens all clear to show a picture of Master Hand, who points into the Hideout as dark purple balls start to drift from ventilation shafts in the ceiling - Subspace Bugs!
The bugs coalesce in the middle of both Wolf and Musashi into a humanoid shape - like Musashi, but instead of dark and pale, this one is more red and looks mechanical. Both Musashi and Wolf recognise the threat (Musashi moreso than Wolf) and both join temporary forces to deal with the new threat.

BOSS: SHADOW MASTER
"The Shadow Master is the pinnacle of Zeed's bio-technological research. Combining the skill and strength of ninja teachings with the inner power of robotics, the Shadow Master almost proved a match for Musashi. Only by overloading the core system of the Master and causing it to self-destruct did he succeed in his mission."
-Trophy description for the Shadow Master
The Shadow Master is a boss unlike any other - almost a match against Musashi himself, the Shadow Master plays much like Musashi does, with all of his moves performed in a more stop-start, robotic fashion. At lower difficulties this is quite noticable, but on Intense the stopping is almost completely removed.
the Shadow Master uses all of Musashi's kunai moves with an infinite supply, as well as his martial arts moves and a few surprises of his own:
-When the shadow Master blocks three attacks in tandem, it releases a sound burst from it's position much like an Off Wave but much weaker (causing around 20% damage on Intense with mid-weak knockback)
-The Shadow Master can use a sliding attack, barreling foot-first into an opponent. The attack is quite fast but not unblockable and causes 23% with middling knockback on Intense.
-The Shadow Master never throws one kunai. When he throws kunai, he will always throw them in either groups of three or five.

When the Shadow Master loses half it's health, it uses something that would make even Musashi afraid: it's own version of ninjutsu. Activating this ability is blatantly obvious, as the Shadow Master raises his hand and surrounds himself in a beam of light, which then coalesces in a flaming aura (think Dragon Ball) around him before that too is absorbed into the Shadow Master. This is a permenant change and renders the following attacks usable/changed:
-The Shadow Master's Kunai are replaced by Wolf-esque energy blasts. Reflectable by Wolf's reflector, they cause 7% damage with flinching knockback.
-The Shadow Master gains a Final Kunai attack, although this is changed to a massive ball of energy that the Shadow Master charges with a bit of lag, much like Rayquaza's Hyper Beam. The attack is reflectable and causes 21% electrical damage with mid-high knockback.
-The Shadow Master is faster. Any breaks are cut by half and his general speed is increased in attacks by roughly 1/4.
-As well as the Kunai Storm, the Shadow Master can perform the Perfect Storm. At the beginning of the attack, the Shadow Master begins to levitate, slowly rising to 3 Ganondorf's above where he currently stands. He then unleashes a barrage of energy blasts that attack randomly within a 180° arc below him.

The Shadow Master is one of the more difficult bosses thanks to his fast moves and super-powered second half, but has surprisingly little HP - he has a tiny bit more health than Master Hand does in the Boss Rush Mode compared to other bosses.

When the Shadow Master is destoryed, Wolf and Musashi cease fire to discuss terms. Musashi shows Wolf the dossier he has, but Wolf pushes it away, apparently not interested in helping Musashi. Musashi, clearly reluctant to resort to less honorable means, pulls a bag full of something very bulky out of his clothes and offers it to Wolf, who reaches out for the bag.
Musashi, however, yanks the bag away from Wolf and again proffers the dossier to Wolf. Wolf, clearly annoyed by the turn of events, nods and snatches the dossier from Musashi's hand as he walks back down towards the Wolfen, Musashi following behind.

After these events, Wolf heads to the Subspace Bomb Factory, arriving just as everybody is gathering for their final assault. Wolf is understandably annoyed that he has to partner up with both fox and Falco, but Musashi holds him at bay by taking the bag out of his clothes and shaking it again. Wolf snarls at Fox and Falco before turning abruptly away, however.

Entering Subspace, Musashi rides a jet-powered surfboard across the water before making a prodigious leap into Subspace with the rest of the team. Wolf flies the Wolfen in and can't help but fire a few potshots at the exploding SubSpace Cannon.

The story continues as is up until the point where the team face off against Tabuu for the first time. Musashi leads the attack, jumping forward and throwing two kunai just as Tabuu uses his Off Waves. Musashi's kunai are deflected and the rest of the team are shown being trophified, with Musashi's trophy being the only one standing at the front, still in kunai-throwing pose.

Finally, Musashi's trophy is found nowhere in Subspace. Wolf's turns up near the end, and if Wolf is revived he is the one who revives Musashi. Musashi is obviously crestfallen at his defeat at the hand of Tabuu, but Wolf reminds Musashi about their fight with the Shadow Master - neither of them could have succeeded alone, but as a team they won. Sometimes even lone wolves had to run with a pack.
Musashi recovers from his funk and nods to Wolf. He then bounds up the stairs, Wolf taking a more leisurely pace.

In the Great Maze, Wolf is fought in the Subspace Bomb Factory. Musashi is fought in the Forest.
 

Katapultar

Smash Lord
Joined
Nov 24, 2008
Messages
1,258
Location
Australia
Yay, a new entry that isn't a Pokemon.... Darn it, you've gone and broken the cycle!

[size=+3]Joe Musashi[/size]
It's your first set I see. Mind telling me what game series this guy comes from? That tends to get rather annoying when people don't do that.

For a newcomer, the set is very well worded and BBcoded. Im quite impressed. Even though there's the tendancy to perhaps overdetail your attack descriptions such as in the Side Special, you can tone it down by stating the attack's use right at the end rather than interrupting the sentence flow only for the attack's use to be stated in the end. There's also some cases of bad repition in a attack description such as stating "should you", as in the F-throw, or "this attack is one powerful attack." (that last one may not have been there, my mistake).

The set is impressive on newcomer standards (you've got to appreciate the big Final Smash), as I mentioned beforehand. Good luck in the rest of the contest from here.
 

Kaiser6012

Smash Cadet
Joined
Dec 28, 2009
Messages
32
Location
Brisbane, AUS
:D Thank you! It's awesome to get some feedback so quickly.
You're right on it all, on further examination. For future reference, Muashi is from the Shinobi series from SEGA, arcade and genesis.
I may have spent a bit too much on each attack, and looking over it there is far too much repetition. I suppose it was just that, once I got it all done, I was keen to get it out there and didn't read it over as I should've. And yes, the Final Smashes were big fun to do, especially adapting them from what was in the games.
Again, thank you. For everybody else out there, the Mystery conversation is a clue to the next moveset. See if you can guess what the next set's gonna be!
 

Junahu

Smash Ace
Joined
Nov 15, 2005
Messages
899
Location
Shropshire Slasher
Joe Musashi Thank you so much for breaking that execreble chain of Pokemon daysets. Maybe now they'll stop long enough for me to comment on them all at once. In the meantime, I may as well further applaud this quality moveset.
As much as people will probably complain about the lack of flashy showmanship in the set, the earthy subtlety is pitch perfect for a ninja, and very smash-suitable. And, needless to say, the excerpts from the secret manual are a fantastic touch.

Attack descriptions do tend to lean towards excessiveness, and they could have certainly been condensed in many cases. In a set that is all about the subtle differences beween similar looking moves, being concise and simple is paramount.
And, I know this advice is going to contradict what I just said about shortening the descriptions, but you should go into a little bit more depth about how you can use certain moves (such as the grenade, which has an extremely long 8 second fuse, making it an interesting hybrid of a projectile and a trap)

And now, lesser complaints.
  • On attacks where he uses the kunai for slashing instead of throwing, does he expend kunai for that?
  • Some of the quotes from the Secret Manual made me expect the following move to behave a certain way, or have a certain quality that matched the quote
  • The organisation, particularly the colours you've used, is for lack of a better term, ugly and un-ninja-like. The dark blue attack names are particularly difficult to make out. Hopefully, you'll spend a little more time choosing a more suitable visual representation for your next set
 

Kaiser6012

Smash Cadet
Joined
Dec 28, 2009
Messages
32
Location
Brisbane, AUS
Thank you for the review! I'll try and incorporate some of the things you mentioned into the next set. It doesn't encourage the same sort of quote system, but I'm sure I'll be able to do something.

Attacks... I couldn't help but try and describe everything, but it became a bit muddled. I'll condense the attack and try and add in a bit of use for each move.

I thought I was clear on how the kunai worked, but looking back on my description I find I didn't. For reference, the brackets around the number of kunai are the key: curved brackets indicate the kunai are needed but not expended, while square brackets indicate the kunai are expended, used up in the attack.

The quotes are completely oversights on my part. I'll search out any oversights and try and not make the same mistakes for the next set.

The colours... ah, the colours were meant to mean something: the excerpts tried to get the type of paper the text was written on in the mind of the reader. The others, however, were a best approximation and the colour of the broad headers is, on reflection, a poor choice - almost unreadable. I won't make the same mistake next time!

Next set, I'll make some suitable colour choices.
Maybe some browns, reds and a sickly sort of gray... yeees...
 

darth meanie

Smash Journeyman
Joined
Jun 6, 2008
Messages
452
A Comment Wall Approaches!

Arbok

Arbok takes the simple idea of poison damage and turns it on its head. Instead of taking the usual routes of stalling to build up damage, you use it to force the opponent to approach by forcing them to kill you before the poison damage gets too high. It's a simple yet brilliant idea, the best kind of idea.

The attacking dodging enemies bit is a little weird for me though. The dash attack seems incredibly unwieldy for attacking (how often do you have a dodging opponent in the back screen while you're approaching with enough time for you to react and hit them?), but great for being an extend-able roll. With moves like Glare and Leer (a move that feels rather contrived itself, and unnecessary with the dash attack's long term dodge ability), it doesn't seem like you're really encouraging the opponent to dodge as much. Sure, you've got those tasty grab hitbox moves, but most of those are grounded, and the two moves that hit both the stage and background are aerials, where the opponent doesn't have the ability to defend against it at all without a shield!

Overall though, I really enjoyed this set, but the ideas you had didn't seem to flow together quite as well as they should've.

Ninetales

A moveset designed around countering grabs? Sounds like garbage tier against everyone except Dedede and every MW set ever! Wait, it actually works?

Yeah, that was my reaction to this set. You'd think something based around getting grabbed would be easy to counter; just don't grab. The way you literally force the opponent to grab is brilliant and sadistic, making the opponent have to accidentally grab your tails again and again.

In fact, once Ninetales gets a few grabs off, she seems unstoppable! Freezing the opponent in place and flambeing the with flamethrower? Forcing the opponent to use their grab as their only close range attack? Not even the air is safe with the incredibly oddly implemented Swift!

The fact that a set based on countering grabs can in fact seem overpowered is a sign of your fantastic ingenuity. I really liked this set, balance issues aside, and it manages to tackle its methodology through several means, not just the same one repeated over and over again like some are.

Cloyster

Wow, that mechanic is really awesome, and perfectly in character. Same with that shield, a shield that is perfect invulnerability but can still be moved around is a brilliant twist, and most people don't change shields around anymore. Unfortunately, after that point, Cloyster takes a bit of a downward dive.

The specials are fairly good and help Cloyster's goal, but you really don't seem to have as much of a focus around either protecting his face or attacks that make it vulnerable as I originally thought. It ends up with a lot of fairly uninspiring projectile moves. And those smashes. I salivate over Simon's massive pulsing drill as much as the next guy, but they were completely unnecessary for Cloyster, and really did nothing more than look cool. Which they do.

It's clear by the playstyle section that you weren't entirely sure where you were going with this set. It's sad, because this moveset had such a brilliant start to it, but at the end, it just crumbles apart. Even your usually brilliant wit was a little less flawless than usual, more smileys and less humor.

This moveset did remind of one thing Tirkaro. You've got everything you need to make that brilliant set that blows us all away, and I eagerly await the day that you do it.

Houndoom

Usershadow! Hey what's up man? Got a new Pokeset for us? It's all good!

Houndoom is pretty sweet conceptually, Flash Fire took a bit to get my head around, but making every move a great offensive and defensive set up, while zoning the enemy? Wanting to head towards the area I just attacked? Juicy playstyle written all over it.

A lot of the attacks seemed rather fillerish and predictable though; when you have a flamethrower for a special, you don't need a few more for your tilts. If you had emphasized the differences and advantages between Fire Spray, Scorched Earth, and Flamethrower better, this would have been more tolerable.

Moves like Howling Flare and Fire Blast were much better, and creative ways to make use of that mechanic, and I wish more of the moves had done this. Overheat for example interacts in no way with Flash Fire other than doing more damage and knockback when he's under its influence. If you could say recharge it faster while over flames, that'd make it a more interesting attack.

Also, a few of those throws are freakishly broken. 25%? Don't forget the fact that if you grab an opponent over flames, they're taking damage from being over it, and you don't describe that attack like being a particularly short animation.

Golem

Cairne 2.0. Another terrain digger, and Golem seems less a digging Pokemon too me, but I can see how you'd see him as one, so that's nothing major at all. Golem's pretty intimidating with that freakishly complex Down Special, but it all comes together rather nicely. I'm not sure I completely understood the Up Special though; it seems like at any time it's either a minor nuisance or a completely ridiculous damager, and I have a hard time telling when it's which one.

Again, terrain modification on this scale is something that I'm not completely comfortable with. Sure, it'll work on the Bridge of Eldin, Smashville, or Final Destination... but as you said yourself, it just doesn't work on moving stages, even competitive ones like Delfino Plaza or Norfair. Even with moves like Earth Power, this kind of exclusive focus on terrain modification just doesn't sit well with me.

Neither, for that matter, does the fact that it lasts from stock to stock. While Golem may be fairly balanced on 3 Stock No Items Final Destination matches, he crumbles everywhere else. This seems like a weird complaint, especially from me, but I feel that it's a valid complaint that Golem is just too reliant on a very specific set of match conditions.

Golem gets too complicated for his own good. Simplicity is what makes flow, and when you're talking about your options for when you're hanging from the underground ceiling that you made, its clear that simplicity has been given the same treatment as the dead hooker I know is in your bathtub.

Oh yeah, wow at the fact that this is a one-day set with this much complexity and depth behind it. You crazy MW.

Joe Musashi

Way to go for your first set Kaiser! You clearly went all out here. Blows the stuffing out of the average first moveset. I can't believe you actually put in Match-Ups, I didn't do that until like my seventh moveset! You definitely get an A for effort; this shows an incredible amount of potential. So remember that, because I'm going to spend the rest of this comment detailing what you need to do now so you can do even better with your second one, and it's likely going to sound way negative.

First of all, organization. This very much has a first moveset organization; the small fonts, odd colors, and lack of line breaks. Try to put at least on enter between each paragraph and header to make things more readable, it all runs into each other. What I did for my first set was copy as best I could another set's organization, and after doing that, I got the hang of it. Choose another set with good organization and emulate it, and your next moveset should be a lot more approachable.

Second, detail. You put a lot of effort into this, it's clear. There's a lot of stuff you go over, almost too much stuff. While you want to cover all of the important stuff, you want to also be brief, and not spend too much time explaining the small stuff. This takes a while to grasp, so don't feel like you need to perfect this, it took me a long time to get better at it, and I'm still working on improving my writing style. Understanding where you want to go from here is a good way to go.

And really, those are this sets only truly remarkable weaknesses; the presentation. Your playstyle is somewhat shallow, but its pretty deep for a first set. I guarantee you, you improve where you can and if you step it up for your next sets, you'll be a force to be reckoned with in this contest.
 

ElPanandero

Smash Lord
Joined
Jan 31, 2010
Messages
1,100
NNID
ElPanandero
Only time to do one, so I pick Golem.

It's refreshing to see a pokeset for a once-godly Red/Blue pokemon, and I first off admire you for iterating that in the set's introduction.

I enjoyed the stage alteration, though the whole wall climb thing would have been nice to note with the specials (almost missed it int he aerials), and i didn't find the Up special confusing at all, I liked it, beats the generic "rise up" specials.

My only issue comes with the practicality of managing to actually dig sufficiently deep holes, and I don't see the point of the ground Down B as the Aerial version seems so much more efficient for both digging (unless im understating his height compared to ganondrof's).
 

Neherazade

Smash Journeyman
Joined
Apr 5, 2009
Messages
359
Location
Gensokyo.
HYEZ! my birthday was yesterday, and I recieved a near-guaruntee of a new MACbook (laptop)... It will be replacing the ****-computer I got 5/6 years ago (hand-me-down from my dad). Good new it once I get it (*giddy*) I'll finally be able to post my sets! I'm now up to nearly 15 (OMFG!) sets in production. About half of them are completed concepts and two of them are in production.
 

darth meanie

Smash Journeyman
Joined
Jun 6, 2008
Messages
452
HYEZ! my birthday was yesterday, and I recieved a near-guaruntee of a new MACbook (laptop)... It will be replacing the ****-computer I got 5/6 years ago (hand-me-down from my dad). Good new it once I get it (*giddy*) I'll finally be able to post my sets! I'm now up to nearly 15 (OMFG!) sets in production. About half of them are completed concepts and two of them are in production.
Everyone gets a whole bunch of ideas at a time. I'd suggest you focus on one set at a time, you'll get less frustrated, and you learn a lot about how to improve after each set. If you already have a set halfway done, you won't be able to improve as much with the knowledge of the last on you did!
 

Hyper_Ridley

Smash Champion
Joined
Dec 21, 2007
Messages
2,291
Location
Hippo Island
Whee, I'm actually responding to the comments on my set!

Char-bok-ok!

Arbok takes the simple idea of poison damage and turns it on its head. Instead of taking the usual routes of stalling to build up damage, you use it to force the opponent to approach by forcing them to kill you before the poison damage gets too high. It's a simple yet brilliant idea, the best kind of idea.
:bee:

The attacking dodging enemies bit is a little weird for me though.
This isn't the first set to do this you know. Arbok just actually makes it a fore-front of his gameplay instead of taking it onto stuff for obligatory creativity.

The dash attack seems incredibly unwieldy for attacking (how often do you have a dodging opponent in the back screen while you're approaching with enough time for you to react and hit them?)
If you're using it mainly to attack you're doing it wrong. It's supposed to help you get around projectiles from far away and to chase after opponents (he's an offensive pressure character remember?)

As for attacking with it, it's called "prediction". Yes, I know, Arbok can't be played like he's in a single-player boss fight and actually uses Yomi and mix-ups to succeed. But then again, I'm not surprised for someone to be unable to comprehend this idea considering Brawl is one of the most reaction-based games ever.

but great for being an extend-able roll.
So you acknowledge what one of the main uses of the Dash attack is for but still whined about it not being an amazing "attacking attack". (clap)

With moves like Glare and Leer (a move that feels rather contrived itself, and unnecessary with the dash attack's long term dodge ability), it doesn't seem like you're really encouraging the opponent to dodge as much.
Yes, Glare and Leer requiring the enemy to DODGE-ROLL towards Arbok in order to beat them doesn't encourage dodging. Flawless logic right there folks!

Leer stops the opponent from using projectiles PERIOD as long they're under it's effect. It stops the enemy from running away and using projectiles to keep Arbok from getting out once he's inside. Dash attack is for the actual approaching and chasing after someone who hasn't been Leer'd.

Sure, you've got those tasty grab hitbox moves, but most of those are grounded, and the two moves that hit both the stage and background are aerials, where the opponent doesn't have the ability to defend against it at all without a shield!
Because short-hopping don exits.

And against aerial people, they could always, I dunno, HIT ARBOK?

Overall though, I really enjoyed this set, but the ideas you had didn't seem to flow together quite as well as they should've.
You enjoyed it so much that you completley forgot about basic principles and techniques of fighting games and Smash Bros. (h)
 

darth meanie

Smash Journeyman
Joined
Jun 6, 2008
Messages
452
(SRY) H_R, I think I misunderstood the length of those two aerial moves. I thought they had longer animations, and would take too long to shorthop. Still, it strikes me at least as odd that those two moves hit into the foreground and background without a really good reason. I didn't look back at the movesets for those comments and went off memory, because, to be fair, there were a lot of them.
 

darth meanie

Smash Journeyman
Joined
Jun 6, 2008
Messages
452
a srs business set :o

I AM ASSUMING DIRECT CONTROL


HARBINGER

Harbinger is a Reaper who leads the Collectors, a hyper-advanced race of insectoid creatures who have replaced evolution with technology. Harbinger connects to the Collector General (shown above) through cybernetic implants, and the Collector General in turn is able to give Harbinger the ability to control the Collector armies.

Soundtrack goes here.


STATS

Recovery: 8
Size: 6
Power: 4
Attack Speed: 4
Move Speed: 3
Weight: 1

Ouch, Harbinger looks like a worse Peach from these stats, and that's a pretty bad position to be in. Sure, he can recover pretty well, but it doesn't matter if even average characters can KO you from 70% easily. What saves him from garbage tier?

SPECIAL MECHANIC

When Harbinger spawns, two Collector Drones fly down from the sky, with the exact same stats as Harbinger, but a gutted selection of moves and 25% stamina. Every thirty seconds of the match, another Collector Drone will fly in as long as there are no more than two Collector Drones already fighting.


Not particularly impressed? Well, the Collector Drones will keep fighting if Harbinger is defeated, and if the Collector Drones survive for at least fifteen seconds after Harbinger dies, one of them will stagger back. Its eyes glow yellow, and Harbinger's voice booms ASSUMING DIRECT CONTROL. The Collector levitates into the air and yellow light streams from its entire body as it transforms.

Harbinger is then resurrected at 0% damage, without having lost a stock. The opponent must now start all over again to kill Harbinger.


SPECIALS

Up Special: Wing Beat

The wings on Harbinger’s back buzz, and after a split second of delay he hops upwards in the air a battlefield platform in height. Using this does not cause him to enter fallspecial, and you can repeatedly use your Up Special to jump higher into the air, but each jump becomes weaker and weaker. After five jumps, you no longer gain any significant height, and by eight jumps you’ll actually still be falling, but more slowly. When Harbinger isn’t using this, the energy regenerates rather quickly, he can spend a long time in the air with this.

Collector Drones can use this move, and they use it a lot. They’ll try to spend most of the battle up in the air, far away from the opponents, taking potshots at the foe with their assault rifles. They do have to drop down every few seconds though, and they are much more vulnerable then.


Side Special: Collector Particle Beam


Harbinger slings this heavy weapon from over his shoulder and wields it like an oversized assault rifle. After pulling out the gun, he fires a thin yellow beam of energy that traces a line between the barrel of the gun and whatever he’s aiming it at. Contact with the beam pushes the foe back slightly and out of the beam, and deals 1% every .1 seconds of contact.

While it’s a decent damage builder, where this gun really shines is in locking the foe down by creating a ‘wall’ they cannot pass with your gun. It can zone the foe where you want them, or help keep them away from your drones. It’s hardly infalliable, as the opponent can roll past it or air dodge through it, but properly used it can give you the buffer zone you need in a crucial moment. It’s not spammable though, it takes Harbinger a whopping half second to pull it out and stow it.


Neutral Special: Seeker Swarms

Seekers are tiny little bug-like robots that the Collectors use for, well, collecting people. After a punishable start-up period, these insects begin to swarm around Harbinger. When released, they’ll condense into a cloud and chase down opponents. Any attack will destroy a Seeker, but Harbinger can summon a dozen or so at once, even without fully charging this move. It also leaves him punishably vulnerable at the end, but if you got it off, the opponent has bigger things to worry about.

When they reach an opponent, they’ll cling on like Pikmin. The opponent has about two and a half seconds to shake them off, and they better shake them off, because for each seeker attached to the opponent after they’ve stuck on, they’ll freeze the opponent in a stasis field for a quarter second or more, depending on damage. Expect to freeze opponents for around two seconds at early damage levels, and up to six or more seconds at high damage levels, fully charged.

While in stasis, an opponent takes no knockback or damage under any circumstances, cut off from outside world. The only way to affect this opponent is through grabbing them. Collector Drones also behave differently when an opponent has been put into a stasis field, one of them will automatically hone in on the enemy in stasis, and grab them. The Collector will then fly up to the top of the screen in about four seconds, 'collecting' the foe. This KO's both the opponent and the Collector Drone.

If the opponent escapes the stasis field before the Collector Drone hits the top boundary line though, look out. The Drone is now basically a sitting duck, and is easy pickings for the foe, who is likely isolated away from your opponents. If you don't want your drones to grab the foe though, just tap the shield and special button together, and they'll ignore the foe in stasis.

You can use this as a KO option on foes around 150%, regardless of their weight. An opponent can attack seeker swarms or shake them off to avoid being in stasis for very long, but if you lock the opponent down or if they can't fight the bugs too effectively, you can keep them in stasis for a while. Even if they destroy the seeker swarms, the swarm will at least distract them somewhat.


Down Special: Summon Husks

Harbinger motions with his left arm like a salute and makes some rapid clicking sounds. After two fifths of a second, a Husk begins to crawl on to the stage from the background, behind Harbinger. Harbinger can have up to three husks on the field at any time.


A Husk behaves kind of like a zombie, and once it climbs up on to the stage (during which it is vulnerable) it will immediately begin to run towards the nearest opponent at Luigi's dash speed and grab them. Yes, Husks can grab opponents put in stasis by your Stasis Field.

They have a ridiculous slow bite that does 6% a shot but that they can rarely get off even once when they grab a foe. Multiple Husks can grab a foe at once though, and their grab increases in strength as more cling to the opponent. If three Husks grab a foe at a high percentage, they can easily build up huge damage.

Husks have a whopping 50% stamina, but are instantly KO'd if they ever leave the ground, and have Super Armor to all attacks that do flinching knockback. Spammable projectiles may as well not exist as far as Husks are concerned, but any attack that has KO potential will kill them. Combine with their vulnerability when they are summoned, and they serve as little more than distractions when thrown out at random.


STANDARDS AND TILTS

Jab: Barrier Charge

This move has two different fucntions. If you hold down the button, purple sparks will appear around Harbinger as he charges up a barrier. Every second he holds it down will absorb about 5% damage that he might otherwise take, and he'll have Super Armor against attacks until they break it. However, if Harbinger is attacked while charging up his barriers, he takes the damage, loses the barrier, and takes a great deal of stun.

If you tap the button though, Harbinger will block an attack with his barriers, motioning with his hands Darth Vader style. There's lag between the moment you press the button and when he absorbs the hit, about a fifth of a second's worth, but the time frame you have to block the attack is about a quarter of a second, so it's somewhat forgiving. Blocking an attack has no end lag, and even deals about 3% damage to close up foes.


Dash Attack: Rifle Butt

Harbinger shifts his momentum mid run, swinging his assault rifle from his side rather than over his shoulder and ramming the butt of the weapon into the opponent's side, dealing 8% damage with moderate knockback, but not enough to kill at a reasonable percentage. Slightly below average start up time, but has a fair bit of ending lag.


If you tap the A button or Side Special input after swinging with this attack, but before Harbinger puts the weapon back, he'll start firing with the Assault Rifle. It sprays bullets in about a 30 degree angle focused on where he's pointing, with each bullet dealing 2% damage. It's fairly strong up close, and does flinching knockback, but will knock the opponent out of its effective range quickly. Collector Drones can also use this move as well.


Forward Tilt: Fire Bomb

Harbinger throws his left arm forward, and fires a white ball of energy that sparks with red flames straight forward. It is about the size of a half-charged Aura Sphere, and moves at the same speed, but with less lag.

When the ball hits, it deals very little knockback, but a good bit of hitstun and 9% damage. At very high percentages and close range, it can combo into itself for two or three hits.


Oh yeah. If you hit a Husk with this attack, it deals 30% damage to it. The husk then glows a bright red as fire pours out of it. The Husk is now an Abomination. This nasty piece of work functions as a suicide trooper, running itself at the nearest opponent and exploding once it gets near, with the same effect as an explosive box. Deals around 15% damage, kills around 150%. If it dies from any cause, it'll explode too.

They're one of Harbinger's best sources of KOs, and highly threatening to foes who cannot just attack it and knock it out of the way like regular husks. Lock an opponent down with other Husks or a Seeker Swarm, and the opponent can get very uncomfortable. Watch out though, these things don't account for collateral damage; you could easily lose other Husks or even Collector Drones in the explosion.


Down Tilt: Beehive Barrier

Crouching, Harbinger holds out his right hand as a jet of yellow energy shoots out, dealing 8% damage and a great deal of hitstun. The move has almost no lag either, which would make it a great combo move if it weren't for the large glowing wall now separating the two characters.

The barrier acts just like that, a wall, which prevents anyone from crossing past it or rolling past it. The barrier is curved outwards like a lens, and is about the size of Ganondorf. It ignores all attacks from the outside, but an attack from the inside will instantly cause the barrier to collapse.

Collector Drones will prioritize hiding behind this wall, and will fly over behind it, popping up to briefly fire at opponents before ducking back down below cover.

Of course, opponents can easily jump over this, if it wasn't for the fact that you're blasting your Particle Beam straight up to make it almost impossible to cross over the barrier. All in all, you can entrench yourself pretty tight with this shield. Of course, it lasts only fifteen seconds, but you can get another one out pretty quick, and the opponent is bound to get across at some point.

Oh yeah, don't try to summon any husks if you want to keep your barrier. The dumb monsters will just run right through it, shattering your shield. Way to go.


Up Tilt: Barrier Transfer

Harbinger raises his arms as purple energy sparks from his body. After about a third of a second, waves of purple energy shoot out of his arms upwards as he releases his barrier, hitting three times for 1% each with moderate knockback on the final hit.

If Harbinger has a barrier up, when he uses this attack it draws from the energy in his barrier, dealing an extra hit for the total amount of charge his barrier has. Unfortunately, you can't pull infinite damage out of it, because the opponent will eventually DI out after forty or so hits. Their fault for letting you get a barrier that strong anyways.

Oh, and if any Collector Drones are within a Battlefield platform of you, they'll gain the barrier you exhaust. If only there was a way to get your Collector Drones near you while maintaining a defensible position! Unfortunately, barriers don't stack, so you can't add two barriers to get a stronger one. Their barrier is only as strong as the strongest one you've had on yourself.


SMASHES

Side Smash: Black Biotic Sphere of Doom

This aptly named sphere is Harbinger's signature attack, for what it's worth. After charging up a ball of pitch black energy in his arm, he releases it, which follows the same trajectory as the Fire Bomb in his Forward Tilt. If it hits an opponent, it will shove them back two Battlefield platforms, then burst, dealing 13-22% damage and amazing hitstun as the opponent is covered in biotic energy.

The attack ignores Husks, Seeker Swarms, and Collector Drones, so you can launch it while your minions prepare. You can't follow up on it directly on your own, but a few husks or an abomination certainly can.

Oh, and as you might expect, such a useful attack has crippling start and end lag. At least it goes through Beehive Barriers!


Up Smash: Neural Surge

Almost cartoonish yellow and green lines stream from Harbinger's body, before the air around him crackles with energy, leaving a lingering hitbox. The result is a self-sacrificial attack, that deals as much damage to Harbinger as it does to the foe. Enemies in the range of a Smart Bomb of Harbinger take 18-27% damage, and Harbinger takes the same. The move also has huge end lag, but deals just as much hitstun to the foe, enough that anything else you have on the field can take advantage of it easily.

So what's the point of taking a massive risk and hurting yourself just to break even with damage? Collectors in range of this attack will heal for the same amount, and their AI is at least good enough to know that they want to be in range of this. How useful!


Down Smash: Release Control

Alright, so you've set up your defenses, you've built some damage, you've managed to protect your Collector Drones even, and the heal you just gave your drones has left you at a damage percentage high enough that you'll be KO'd by a light breeze. What do you do now? Wait for the opponent to focus on taking out your drones before finishing you off? Of course not. So do you suicide in hopes that the Collector Drones will last long enough? Not a chance.

You go out with a bang. Charge up this smash and Harbinger shines bright, glowing with energy as he hovers just above the ground. Harbinger's voice booms RELEASING CONTROL as the vessel he's contained it crumbles to ashes as beacons of light shine out of its face and arms, dealing 28-42% damage with almost no knockback. The beams also have a bit of stun to them, enough to give your Collector Drones an extra second or so. Hope that one of them survives long enough!


AERIALS

Neutral Aerial: Collector Assault Rifle


This is the attack that Collector Drones love to spam. Hold the button down, and Harbinger or a Collector will pull out their Assault Rifle and start firing. It shoots about five shots every two seconds, and each shot deals 2%. You can angle the fire in any direction, although it has a fairly wide spread; you can't shoot with any sort of accuracy at long ranges, but fast enough to be annoying.

Also, while if you use any other attack you have to put the rifle back in a laggy action, jumping or using Wing Beat leaves the rifle out, meaning that you can effectively hover for a while, poking at opponents from up high with your gun.


Forward Aerial: Plasma Spray

A flash of orange light surrounds Harbinger's left arm as he sprays a burst of red fire forward. This slow move has a lingering hitbox that makes it difficult to dodge, and the flames fall to the ground after having been fired.

No it's not a trap, but it can turn Husks into Abominations from the air. It's also pretty decent at infilicting damage, averaging between 7-11% in the air or on the ground.


Up Aerial: Cryo Bomb

Oh look, another projectile Uair. Way to go meanie. This move, which is definitely not a copypasta of Probopass's Magnet Bomb, causes Harbinger to throw an orb of light like in his FTilt, except in a distinctly upwards direction. It falls back down after a little bit, and explodes into ice when it hits an opponent or the ground, an explosion that deals 6% damage and leaves behind an icy cloud for two seconds.

If an opponent is either hit by the attack or passes through the cloud, they become chilled, and freeze five seconds after getting struck by it. Unfortunately, the freeze only lasts about half a second, give or take for the opponents damage level. What this means is your opponent has a choice: attack and get frozen in the middle of fighting, or stall and let you set up more husks or charge your barriers up. Either way, you win.


Down Aerial: Biotic Drop

Harbinger stalls in midair, drawing biotic energy to himself to power up his barriers like he's one of Samus's charge shots. After a ridiculous full second of lag, this stall leads into the inevitable fall, as he heads crashing down to earth. When he hits, his barriers explode in a purple bath of energy, dealing 15% damage and KOing around 150%. Like most of his attacks, ridiculous hitlag and end lag abound.

It's predictable and punishable, but if you pull it off, you get your barrier charged up to 15%! And if any Collector Drones were caught in the explosion, their barrier is raised to 15%. Not bad for a stall and fall! Note it won’t raise anyone’s barrier over 15%, yours or the drones’.


Back Aerial: Biotic Bairier

If you found the previous pun unbairable, you have no sense of humor.

Harbinger's wings rapidly buzz, slowing his fall speed. Ultimate stalling move! Except he can't move left or right either, so it’s totally crap. Harbinger’s barriers go hyperactive, visibly sparking on his back, so if an opponent gets near his back or attacks him from behind, the barriers will block it regardless of how charged they are, and defend him against the attack. A decent defensive maneuver, and you can even use it to make yourself a living shield for your drones, although that'd take some balls.


THROWS

Grab: Singularity

In lieu of an actual physical grab, Harbinger reaches out with biotic energy to grasp the foe. A sphere of blue light the size of a Poke Ball generates over the nearest foe, growing slowly. This isn't some crazy overpowered long range grab though, because it takes two thirds of a second to perform, and the opponent can move out of the way of it.

So it's underpowered right? Not when you can lock the opponent down with husks and seeker swarms! It's just right powered, my favorite kind of powered! One the sphere is fully charged, it's the size of a bumper and affects everything inside and just next to it, suspending it in midair. This also means any Husks that you used to get this attack off will instantly die as well.

The pummel causes the singularity to swirl, twirling everything in it around, temporarily expanding it's size to about 150%, and dealing 3% damage for every foe caught in the field. This also means that if you catch your Husks in it, you can at least do more damage by flaying their bodies around as well!


Down Throw: Collapse

The singularity collapses, exploding into biotic energy which creates a lingering hitbox. This deals 11% damage and massive hitstun, with massive end lag for you as well. You know the drill by now; your minions will be getting some extra damage during this time while you and your foe regain balance.

Forward Throw: Pull

The opponent is caught in a field of biotic energy and pulled towards you. The opponent cannot act, just like in stasis, but they still will take damage and knockback for the duration of the field, about one and a half seconds. This has a good bit of ending lag, but you can nail a foe with an attack instead, and your Collector Drones can take potshots at the foe.

Back Throw: Throw

A simple KO move. Throws the opponent away and deals 8% damage, KOs around 175%. Man, Harbinger is terrible at KOing!

Up Throw: Lift

Like with Pull, the opponent takes no damage, but instead is floated towards the top of the screen. This time, they cannot do anything for two seconds, and they float down at a greatly reduced fallspeed after the effect ends. It can't KO, but the opponent is very vulnerable as they descend, and won't get back to the ground for a good three seconds or so, plenty of time for you to charge your barriers or prepare a seeker swarm.

FINAL SMASH

Harbinger has the Smash Ball! It's time to do some Collecting! The Collector Ship warps into space overhead, and countless Seeker Swarms and Collector Drones descend from it. The opponent is a sitting duck to get KO'd by these Collectors, and even if he survives the thirty second onslaught, they leave behind three Collector Drones to protect Harbinger. Uh-oh!

PLAYSTYLE

Harbinger is a rather complex character to play as. The guy has an incredible amount of difficulty getting KO's; none of them are straightforward and they all have a relatively high damage percentage requirement. Harbinger can build damage pretty effectively, but unlike damage rackers, he does it slowly, locking the opponent down, and only really effectively building up damage later in the match, when the opponent is already around 70% or so and more vulnerable to Husks, Seeker Swarms, and Singularities.

This is why Harbinger needs to regenerate; he'll spend the first life trying to build up damage, and the second one going for the KO. He's KO'd at early perecentages, and barrier charge only saves him from so much damage. Besides, that is better expended on your Collector Drones than yourself.

And Collector Drones. How you handle them depends much on how your opponent handles them. Some will prioritize destroying them, while some will focus more on you and take down the Collector Drones later, or when its convenient. Believe it or not, the latter are generally more dangerous than the former. If a foe tries to focus on your Drones, you can wall them off with your Side Special, heal them with your Up Smash, or build up your barriers and give them extra defenses while the foe ignores you. It's hard enough to survive to reassume control that your foe doesn't have to go far beyond making sure you don't have three drones to try to kill you.

In the beginning of the match, you'll want to immediately protect your Collector Drones, as this is where they're most vulnerable. Try to push off opponent approaches with your Side Special and get up a Beehive Barrier so you have a nice defensive area. If you keep the opponent away, your Drones will be able to build up damage slowly. They're horribly inaccurate, but the Collector Assault Rifles do their job of making it harder for the foe to approach and earning you some damage while you set up.

In order to try to survive to regenerate, you'll want to have at least two Collector Drones, preferably three. Fortunately, Harbinger has a slew of moves to delay for another Collector Drone to come, if you don't have enough; Seeker Swarms, Cry Bomb, and Black Biotic Sphere of Doom are three good examples; or simply camping behind a Beehive Barrier with your Side Special, while an opponent will be able to Air Dodge through your wall, it'll let you buy some time.

If you do have enough Collector Drones, you'll want to focus on helping them survive. Use those same stalling techniques to try to charge up your barriers; a barrier charge of 20% or more is an absolute lifesaver. Get Husks on the ground if you can, or Seeker Swarms, spam the field with everything you can to distract the foe. And don't have a Beehive Barrier on the ground, without you to protect it the Collectors will be sitting ducks while they hide behind it. Once you have the best chance you can, release control and try to catch the opponent with it.

Even if everything goes perfectly though, you'll probably start your second stock with no Collectors, and another one isn't coming for thirty seconds. Hopefully you've built your opponents damage up by this point, so focus on your Husks to take the foe down. Use your Side Special to create a 'ceiling' over the opponent and force them to stay low to the ground in range of the Husks. They'll build up damage for you, and if you hit one with your Fire Bomb, it'll turn into an Abomination and hopefully score you a KO. If not, grab them with Singularity while your Husks hold the foe down and try to toss the enemy away.

At the end of this match, you'll probably not be able to regenerate. It's much easier for the foe to keep your Collectors away at this point, and you'll be hardpressed to avoid taking any damage. You may want to suicide KO again when you hit around 80% damage or so, and hopefully build up some more damage. If you're really lucky, when your next stock starts (with two Collector Drones) you'll be able to go right into KO mode; Seeker Swarms will become an excellent KO option again here now that you have two Drones.


MATCH UPS

VS Subaru! 25:75

Ah, Subaru. The heavy momentum character. Stalling her is a recipe for disaster, and she can threaten your Collector Drones more than any other character, breaking through your defenses and Wing Roading to them in midair for some heavy damage. Indeed, you're going to have a very tough time protecting your Collector Drones against her. Fortunately, you can use your Beehive Barrier to get some semblance of protection from her, getting them on the ground behind a wall. She can still Wing Road over you, but you'll do better.

Husks are out of the question. She'll knock them away easily with her Forward Tilt or Smashes, and can completely bypass them with Wing Road. Instead, you'll want to focus on Seeker Swarms; the little buggers will kill her momentum and make her vulnerable while she tries to shake them off.

Singularity is also a good shot, if you can land it. Forcing Subaru to stand still is hell, but if you can with Seeker Swarms, Black Biotic Sphere of Doom, or some combination of them, she'll be easy pickings with your Up Throw, putting her in a situation she doesn't like as much.

As it is though, Subaru really makes it hard for a guy like you. You want to keep foes still and keep them from approaching, but Subaru never wants to stop moving, and once she starts, she's like a wrecking ball, except the wrecking ball is Subaru, and the condemned building is your Collector Drones, followed by you.


VS Venusaur! 60:40

Venusaur is a bit of a stall-fest to fight. While Venusaur focuses on regaining his own health, which he does very well, you focus on getting your regeneration. Fortunately, Venusaur isn't particularly good at fighting aerial foes, so you don't have to worry too much about the well-being of your Collector Drones. They prefer to fight very high up in the air, far out of Venusaur's range.

Now Venusaur on the other hand is going to be doing a lot of snoozing. Harbinger does his damage slowly, not much faster than Venusaur can regain it with rest.

Beyond that, Venusaur loves Husks. He loves them so much. 50% stamina to use Leech Seed off of while I rest and become completely immune to their attacks? Aw, you shouldn't have! You really, really shouldn't have.

Suffice to say, Venusaur will have no trouble getting his Solar Beam primed, but with Beehive Barrier, he won't have much of a chance to fire it; the barrier completely walls it off thanks to our inability to define height in anything other than units of Ganondorf.

Harbinger shouldn't have much trouble getting his Barrier Charged and getting three Collector Drones with a lot of barrier energy either. Eventually, Venusaur's lazy habits will get the best of him, as his inability to really threaten Harbinger's Drones will lead to be the death of him. Harbinger can stall as he stalls, and ensure that he'll always have a way to come back. Venusaur's terrible recovery doesn't give him that luxury.

Eventually, Harbinger will hit him with a Singularity or Abomination, and that'll be the end of it. Venusaur can drag the match out for a long time though, and with moves like Sludge Bomb and Giga Drain, he's not defenseless against Harbinger either. Eventually he will get that full power Solarbeam and blast Harbinger away too. With his difficulty in fighting the drones though, even one drone has a significant chance of surviving if Harbinger got a barrier on it. The Match will eventually lead into Harbinger's favor.


EXTRAS

Extras? From Darth Meanie? Surely you're joking, that guy wouldn't know an extra if it hit him in the face! His Final Smashes are boring as hell, and he doesn't even read them when he reads other sets! Hell, he didn't even understand Doppelori until everyone pointed it out to him, and he just laughed "hur hur casual" like the douchebag he is (not actually true).

Anyways, let's get these over with. Harbinger's taunts are a little different than the usual character's taunt, as it has no lag or animation. Instead, he shouts telepathically, saying something cryptic and annoying like: THIS HURTS YOU or WE ARE YOUR SALVATION THROUGH DESTRUCTION or STRIKE THIS VESSEL DOWN, AND A THOUSAND MORE SHALL REPLACE IT. Guy is a real freak.

He only has one victory pose too, the jerk. All the usually clapping opponents are put into stasis, and he just stands there, saying YOU CANNOT STOP THE INEVITABLE. How boring.

He also has a codex conversation, if you're interested:


Otacon: It can't be! That's a Collector!
Snake: A what?
Otacon: A Collector! I thought they only existed in my Western RPGs!
Snake: I keep shooting this guy down, but he keeps coming back.
Otacon: They're being lead by Harbinger! As long as one Collector remains, he can keep fighting at full strength.
Snake: Any suggestions on how I can beat this guy.
Otacon: Listen up Snake, you need to--
Otacon/Harbinger: ASSUMING DIRECT CONTROL
Snake: ...Dammit!


FIENDS

Just like ATs and pokeballs, Fiends are various characters that appear midmatch to cause havoc. Who says you have to be limited to what Brawl has, for your extras?

Fiends appear as tiny dolls, which will bounce around until eventually coming to a stand-still (they are surprisingly bouncy). When that happens, the fiend itself appears from the doll in a puff of smoke. The fiends do not have any allegiance and will simply attack whoever they can. The dolls can be attacked and launched, and are as heavy as the Soccor ball item. Since the fiends are extremely powerful, most players will team up to launch the doll off-stage, in order to prevent the fiend appearing. Like ATs, only one fiend can be in battle at any one time. Any SSE boss can come out as a fiend, whereupon they will do their (Normal difficulty) thing for 12 seconds.

Below are some of the other fiends that can come out to play:


Fiend: Scion

A Scion is a fiend with 100 HP and lasts for one minute unless it is destroyed. A Scion is a Husk that has been attached to an assault rifle for extra firepower, and the massive sac on its back is a goo made up of five or six other husks, a disgusting mush made of human organs and cybernetics.

Scions have two attacks, a spray of bullets that behaves like Sheik's Needles, except without any charge time, and a shockwave attack. The shockwave spreads across the entire ground in multiple explosions the size of Bowser, dealing 20% damage and knocking foes high into the air. Scions will use this attack a lot, making the ground very unsafe to be on. Everyone wants to be in the air when a Scion is on the ground.


Fiend: Praetorian

A Praetorian is another husk variant, made of a whole bunch of husks ground together. When it opens its mouth, you can see the skulls of the humans who made it, powering the behemoth. It floats around like some sort of battle tank, with 75 Stamina. It has three attacks, a simple melee attack where it whacks opponents who get too close to it away.

It also fires lasers from its eyes. These beams are actually streams of gas under mass effect fields, firing them at such high velocities that they look like directed energy weapons. The beam deals about 20% a second and has a very strong push effect, if not quite as strong as Kyogre. You DON'T want to get caught by this beam.

A Praetorian will also occasionally glow purple, meaning it's charging its barriers. In a few moments, it'll slam towards the earth, releasing a smart bomb sized shockwave that deals 25% damage and knockback that KOs around 100%. Worst of all, this gives the Praetorian 50% stamina worth of barriers, and it's programed to prioritize this attack when its barriers are offline. It'll take teamwork if you expect to fight off this monstrosity.


COLLECTOR SHIP STAGE


The Collector Ship is a massive spaceship with technology far beyond Alliance military levels. It is capable of identifying ships in stealth fields and has main guns that will rip through all but the toughest shields and armor.


Inside the Collector Ship are these hexagonal floating platforms. Each platform is a little less than half the size of Battlefield, and has one side with a raised ledge, and a raised area in the center. They're high enough to force you to jump across them, but not so high as to let you perform infinites off of them. They spin and interlock, so that anywhere from one to four of these platforms will be on the screen at any time. They'll either connect end to end, or stack up in a staggered formation, where one will stack on top centered where two others connect, acting as a drop through platform.

These platforms will connect and break down at random. Sometimes one will float away, carrying any enemies on it offstage to their deaths, or one will break away, and the camera will follow it, leaving the rest to die. When the camera is going to follow a platform, you can tell because an arrow will appear on screen and the platform it will follow will glow.

Try to keep your opponent from reaching the platform they need to land on, and use the everchanging terrain to your advantage!
 

Katapultar

Smash Lord
Joined
Nov 24, 2008
Messages
1,258
Location
Australia
[size=+3]Harbinger[/size]
What game does Harbinger come from? Cus I don't know. Probably some 360 or PS3 game. Hopefully us fella have broken the cycle of Pokesets now, and we can get going.

First, I must say that Barrier is poorly emphasised in this set:

This move has two different fucntions. If you hold down the button, purple sparks will appear around Harbinger as he charges up a barrier. Every second he holds it down will absorb about 5% damage that he might otherwise take, and he'll have Super Armor against attacks until they break it. However, if Harbinger is attacked while charging up his barriers, he takes the damage, loses the barrier, and takes a great deal of stun.

The introduction of the move is a bit akward: stating that he absorbs 5% by holding it up would surely make me think that the barrier is always active while holding it, but right after that you tell me that Harbinger can be attacked during the charge, meaning that he has to use the barrier by releasing it. Though you don't specify wether the charge is store or auto, nor wether the charge only applies to the tap input.

To further bash at the barrier(s), you don't really place much emphasis on their uses in the set while explaining the attack. I at least think that it's important, seeing as how it interacts with a few of the other moves like the U-tilt for protecting drones.

One major problem is not specifying any range on the Side Special. That will make or break the attack's balance. Essentially there is a fair load of neccesary details missing from some of the other attacks that the reader cannot interpret by common sense. The FS is very guilty of this despite being a FS, as well as the spawning points of the Drones at the start of the match.

In the end, the set has some absent detailing. The concept itself was handled to a fairly good degree, but not extreme to the point that it impresses me to what I think at least. The best part was the extras. People should do more extras, especially if it's for a character they like a lot and if they want to get the character's personality out to the reader. Don't need to be too harsh on yourself for attempting the long forgotten.
 

KingK.Rool

Smash Lord
Joined
Nov 26, 2005
Messages
1,810
Okay, can I take just a moment to criticize my fellow MYMers before I try to do some catch-up?

HR - Dude, I think you're getting a bit too defensive. All the little "*gasp*"s and "ZOMG"s and other little sarcastic, patronizing touches you've been adding whenever you talk about your movesets nowadays really makes it seem like you... I don't know... it makes it seem like you don't think much of other people's sets/opinions. Yes, maybe meanie missed that this attack or that attack did this or that - but maybe he just didn't LIKE the way this attack or that attack did this or that.

Not a personal attack of any kind, so please don't take it that way, HR. (sry)

Katapultar, man, I respect that commenting every set, and fairly quickly, is a very good thing. That said, your comments have been getting worse and worse. Your comment on Joe Musashi quite literally says three things -

1) "I want to know what game series he's from."
2) "You have a slight overdetail problem."
3) "I like big Final Smashes."

Now, is it just me, or do you never actually say anything that would hint at how much you like this set, or, more importantly, WHY you like this set? No mentions of creativity, balance, playstyle, anything that could help Kaiser in the future. Just "watch out for repetition". And just now, on Harbinger:

One major problem is not specifying any range on the Side Special. That will make or break the attack's balance.
Is it really a major problem? I mean, look at the big picture a bit, please, man!

Anyway, maybe I'm alone in this. I do appreciate that you comment everything - it would just be nice if it felt like you did so out of interest, instead of out of some twisted obligation. Your Pokeset comments especially demonstrate this unfortunate little quirk.

And again, as with HR, please don't take offense. I hate giving offense.

So now that I'm done with that messy business, I'm going to take a momentary hiatus from my hiatus:

Sheep Man, a set I was especially looking forward to, and it's quite impressive, really. This is what you do, and always have - penetrate to the heart of the character and then entirely structure every facet of their gameplay around what you find there. Sometimes it works better than others, and this here is one of those occasions when it works to perfection. You've got that "harvester" playstyle again, but with fewer attacks that feel like you just ran out of ideas (they're still there, though - turning a generic attack into a mechanic booster, as you did in the dash attack, is one of the oldest slip-ups in the book). I suspect that Sheep Man's complexity turned a lot of people off, but apart from that blasted chemistry lesson in the down smash, it really is just a matter of paying attention. The writing style, others have mentioned - you're guiding us through this moveset, it's very pleasant.

At the end of the day, I think this moveset's main flaw is that Electrode did it first the playstyle, for all its clever interactions and self-contained ingenuity, is not groundbreaking. Obviously, that's hardly a flaw - we can't expect every set to be groundbreaking - but hey, otherwise you'll be asking me why I didn't Pick him after SVing him (not that he'll have any trouble getting into the Top 50 himself).


A sort of harbinger to the wave of Pokesets - pun intended - I have Abomasnow next. I know I said I was going to hold off on all your sets until that MYMer review, but you have so many that I feel obligated to read/comment at least one more.

Wow, that FS makes mine look creative. ;)

Abomasnow's playstyle comes together, not out of interactions, but out of fairly simple concepts working in unison. I love the very jointed focus on both ice and plant, two types that can't really fuse for any other character, and just as one would expect, they result in a very defense-oriented character who sits planted in a pile of snow. That's scarily perfect for a Pokemon who's really just a walking Christmas tree.

Of course, he has all the hallmarks of the typical heavyweight, but is this a problem? Does he sacrifice creativity to be just that, like Klubba? I wouldn't say so. Snow-based playstyle with a bit of roots sprinkled in, very nice organization, an excellent interpretation of character - although some attacks, especially those that manuever his snow around the stage, feel uninspired. It's a great set.

Not the set you were hoping to get a comment on just now, but it's one of yours regardless, so be content for now.


Merge already knows what I think of Yukari, but just to reiterate for the sake of everybody else, it's a hell of a set. The portals have been done, but here they make for such a clearly etched playstyle, allowing for a brilliant flow of ideas to be transmitted right into the reader's mind. That slightly disjointed writing style is much improved, no doubt a result of having so many fantastic proofreaders (:bee:). At times, the set feels like something from a bygone age, something very worth preserving. It's old-school with new sensibilities. Very good work, as usual.

Aran Ryan, now - what a weird set. His goal seems to be entirely different from most sets nowadays. His playstyle is not clear-cut, in the least. He's a smattering of offensive-character tropes that would probably fee quite at home in an actual Brawl. He gives in to props openly and unapologetically. If only because you're going back to your roots, I have to respect that, dude.

But as for the set itself? I gotta say, while reading, I largely felt unimpressed. The playstyle section is another matter. When you so baldly say that Aran Ryan would be fun to watch in a Brawl, I have to face facts and admit that you're completely right. His manic energy and luck-o'-the-Irish - even though I'd prefer to see more drunken brawling - is pretty unique in and of itself. Yeah, sure, if we reduce him he's just "offense character with good pressure options", but since reduction is dumb, I rather like this set, more than I probably should. Call it a guilty pleasure.

I'm going to leave it at that for now. I've got Sparky & Pidgit followed by Valozarg coming up next, and then all the Pokesets. Hey, they should at least be easy, short reads, right? RIGHT?!? :(
 

Koppakirby

Smash Cadet
Joined
Aug 13, 2009
Messages
52
Scary, but not 'Giygas' scary.

When even I don't know who it is, it is never a good sign
Eh. That's just a little fun. I'm sure he's well known in your little fantasy realm. ANYWAY, Harbinger is another good concept. He can get KOed easily(Which is something I'm experimenting with right now), and he has those Drone Thingies. Anyway, I love the use of the husks and Swarms, especially love how you can turn the Husks into Abominations with the Fire Bomb attack. I love when moves intersect like that. The sasis is a rather cool idea, and I also love singularity. Even if some of the throws are unoriginal. The set as a really creepy vibe to it, which is one reason I love it so much. The barruers confused me though, but I find really out-of-the-box concepts a little crazy. I think you were saying that the Barriers can be transferred to Drones? Also, like Katapultar before me, I gotta say that the Final Smash really isn't special. It's pretty dull. But my next xouple sets will have dull FSs, so yeah. All in all, I liked this set. It was good, and had some interesting concepts. But it wasn't the best. Also, is that Doppelori thing true? XD
 

Junahu

Smash Ace
Joined
Nov 15, 2005
Messages
899
Location
Shropshire Slasher
I'm doing what I always do when I comment in bulk. I strip out all positive commentry, and simply focus on proving I read the sets. Or, if you want a "cool kids" reason for these crappy comments; you make a quick moveset, you get a quick comment. <-- Edit: this was totally a joke. Is my self depreciating sarcasm really that hard to spot?

Edit: People don't like negative commentry without positive commentry alongside it. People are also somewhat offended by lazy comments. So, yeah... sorry. But hey, I read your sets, and I wanted to show that I did, so I commented.

Venusaur:
The term you were looking for in that introduction is "symbiotic relationship"
There's some rather oddly athletic shenanigans going on here. N-Air? U-Throw?
While Solarbeam/stall play is perfectly suitable for Venusaur, the fact that its preevolution is already in Brawl means Venusaur comes across as a little unsteady
Sludge Bomb seems to be sitting awkwardly in Take Down's spot (surely it'd be better to simply sever all references to Venusaur's Poison typing, than to include one token poison attack).
Rest as a D-Smash may as well be a meme, considering the number of pokesets that use it.
I totally don't have many legitimate nitpicks for this set. Can you tell?


Shedinja:
Since you need Nincada to shed itself in order to make a Shedinja, why can Shedinja duplicate itself so effortlessly?
The attacks are very Dr Strangelove, in that it would take a miracle for the player to decifer any of it.
Shedinja Vs Shedinja?
Extremely, extremely lazy. I agree. As is this comment. You get what you give... <- Edit: hmmm, guess this one is kind of cruel. Sorry


Probopass:
¬_¬ Magnetic North wouldn't be constant on certain stages such as Delfino
Using magnetism always brings about a very important question. Wouldn't the magnetic fields from one Probo, effect other Probos too? I mean, people know how magnets work, right?
Can you KO mini-noses? I know you can't damage them but...
I never pegged Probopass as a particularly... electric type pokemon. Or much of a magnet pokemon either (aren't both those things the realm of Magnemite?)
If the foe sees you try to explode, aren't they just going to shield?

Bellsprout:
Excellently suitable organisation (presuming it was deliberate)
Not every character has an item generating attack, fire attack or explosion attack. In fact, very few characters have any of these things
Endure is way too strong (an infinitely extendable super-counter that fully negates the attack, can be used while moving and can be cancelled out of by attacking?)
You compare Razor leaf to ray gun a little too much
"Bellsprout will grow a tiny tree in front of him".... ... (no)
250% unavoidable Final Smash?!
Swalot:
Sludge bombed controls assume the foe is using a controller with an analogue stick. You can't really smash a D pad. Well, you could double tap it, but that's unintuitive compared to how Smashes are normally performed on that controller
Yawn's a bit wierd on Swalot
God I hate instant KO pummels, regardless of how well it suits the character. Way to invalidate the core mechanics of Smash by turning it into a stamina match
Further on this complaint, Swalot's entire playstyle is centered around stopping the foe from moving or and then piling damage on them. Which makes it into even more of a stamina match now that he removes knockback from the equation too.
:p 
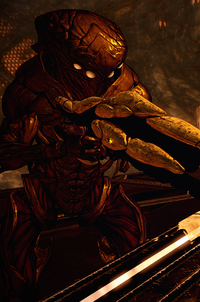
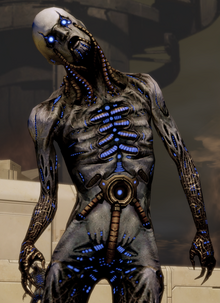
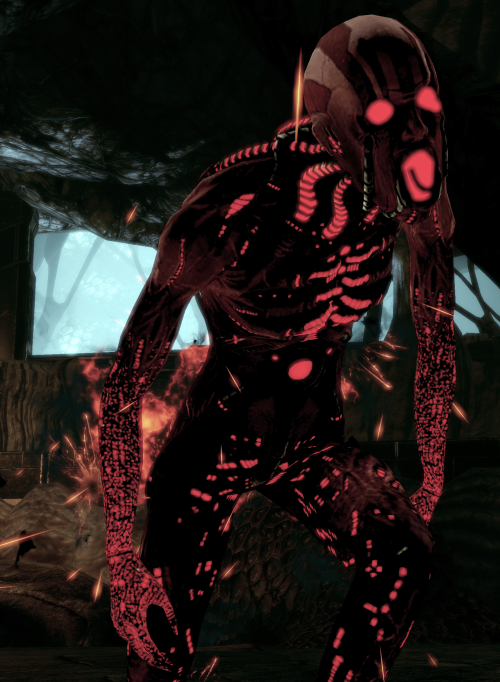
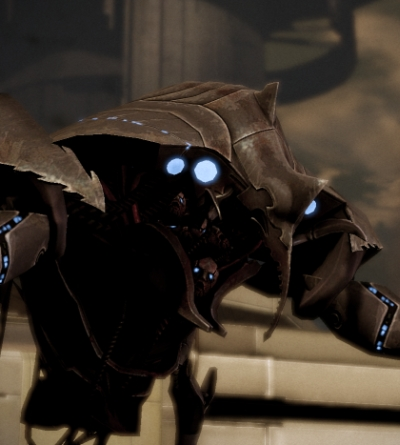
sorry, I'm just releasing all my pent up frustration over KO pummels and knockbackless playstyles, on you, because there's not really much else to complain about. There's a crapton of other sets which treat knockback like an extra effect, or try to KO in some quarantined isolated fashion. Yours just got the short straw
Arbok:
Arbok Glares and Leers and Scary faces with the pattern on his hood, not with his actual eyes (except in the anime, which is not a respectable source of pokefacts)
Stop complaining about your other sets. Your jibes are getting malicious
If you're not sorry, I'm not going to forgive you. The dash attack should last until you RELEASE A, not until you press it a second time
Shed Skin makes very little sense from a "this is what snakes do!?" perspective
*Turns off Internet Browser*
Ninetails:
Anne Elmtod...
MM9:Megaman...
Joe Calzaghe...
TAC...
Guaranteed, prepackaged Imprison 40% combo.... 9_9
Rest? REST!? This is seriously an in joke, right? Why else would every pokemon be required to have it?
You already know how silly Swift is, but I'll say it again anyway... SWIFT!!?!?!


meh, that's 7 out of 12 pokesets I've read so far. Just remember that the pokemon bandwagon is not a toy.
 

Neherazade

Smash Journeyman
Joined
Apr 5, 2009
Messages
359
Location
Gensokyo.
Getting my computer tomorrow/Monday/really-hope-it's-tomorrow.

@he-who-gave-me-advice: BUTT OUT! jk:laugh: Thanks. Me and my ADHD brain have to write down EVERY idea we get so we don't forget. I plan to revise my sets based off comments I get (they're just concepts, right?) before I release them.
 

Koppakirby

Smash Cadet
Joined
Aug 13, 2009
Messages
52
A new one day threat approaches, It is known as Kirby

Noddy


Noddy is an enemy in the Kirby series that is mainly just an obstacle. It gives the Sleep Ability when swallowed, which basically allows other baddies to get free shots at Kirby. In the Anime, Noddy actually posed a threat, as groups of them could control minds through causing nightmares. Dedede used this ability to make the Cappy Townsfolk 'get dat dere kerbeh'. In Brawl, Noddy's strategy is to get everyone else asleep so he can strike.

Stats

Size-As big as Kirby
Weight-3/10
Walk Speed-2/10
Run Speed-3/10
First Jump-3/10
Second Jump-4/10
Tracion-8/10
Priority-3/10

Specials

Neutral Special-Yawn
Noddy's eyes lower and he suddenly opens his mouth and makes a huge yawn. Wow. I just yawned while writing this attack. Seriously. Just a coincidence. Anyway, this yawn actually has a hitbox; Noddy's length in front of him will get tired and take a nap. About a 4 second nap. This attack has lots of ending lag, and the attack itself is already kind of long. Not to mention if this attack is used within 5 seconds of his Rest attack, he'll use Rest afterwards. This attack does no damage, but it has unbeatable priority and isn't negated by shields. Noddy will have other sleep-inducing attacks, but this is his 'set-up' attack. It's worth saying that even though this attack has a timed snooze, if hit with an attack that doesn't effect the dreams or the snooze, the opponent will wake immediately.

Side Special-Nightmare
Noddy will concentrate really hard, and a small flicker of black light will appear about 2 Pokeballs away from him. It flashes for .3 seconds before vanishing. If someone is in that spot when the flash goes off, it doesn't do anything. If they are ASLEEP and in that spot during this attack is when something happens. An extra 1.5 seconds is added to the Snooze's length, and now they'll take 4% damage every second that they snooze before waking up! There is no knockback, and priority is little, but there's little probability of being attacked during this attack. The attack itself is instantaneous, it takes under .5 seconds to execute. Nightmares can not be doubled over.

Down Special-Rest
I think I may have succeeded in making the first non-Pokémon set with Pokémon Syndrome. Anyway, Noddy crouches down and takes a snooze for 4 seconds. It's a long attack, yes but it does serve some purposes. One, it heals Noddy 10% damage after use. However, its length prevents it from being spammable. If Noddy is hit during Sleep Mode, he'll come out of it and take full damage and knockback. It does have a second use. And boy is it a doosy. Reprogramming. Noddy will reprogram the character he is fighting against.
Like he does in the anime, Noddy will gain a little control over the opponent. Luckily, this isn't silly/gamebreaking/stupid like the Kafei Mask in my Fail Set. If the Opponent is within one Bowser of Noddy(Either side) when using this attack AND having a percentage equal or above 150% AND asleep Noddy will control them. He'll have control of them for a good 10 seconds. So this gives him a good amount of time to either KO other opponents or throw himself off the ledge, losing the opponent a stock. During this time, Noddy moves into the background, invincible to hits.

Up Special-Cap Copter
Noddy spins his cap right round baby, like a record baby, right round round. Noddy takes off straight up Ganondorf's Height times 1.7 at Sonic's running speed by swinging his cap like a helicopter, propelling him upward. This little helicopter attack is a fairly simply one, but it's also one of the hardest to control. Like the Dedede Stomp/Jump, he can't change direction during it, so point the direction you want to shoot him in first. So I suppose 'Straight in that direction' would be a better description than 'Straight up'. The attack is rather quick, maybe a second long, and has a tad lag at each end. Anyone hit by Noddy's amazing cap powers takes 11% damage and high knockback. The hitbox is as large as Noddy his self.

Standards

Jab-Nose Bubbles
A different kind of jab. You must continue to mash this button once pressing it or the attack will be ruined and you'll suffer enormous ending lag. Like pumping a balloon, Noddy will fall asleep and generate a nose bubble. The Bubble will get bigger and Bigger the more you mash. When it becomes as large as Noddy(Maybe taking 1.2 seconds, it all depends), it pops, it's radius as twice as big as it was before. This attack sends everyone except Noddy away by the power of the Bubble. Noddy will wake afterwards. This attack is mainly knockback, but it does do 2% damage. It is also good for defense, as if the bubble is popped by an opponent before it reaches full size it will pops and send them flying away, just not quite as far as at full charge. This move KOs at 170%.

Dash Attack-Nightcap Whip
Noddy suddenly stops and flings his cap forward, causing on end of it to hit the opponent, causing a little damage. The range of this whip is about 3 fourths of Noddy in front of Noddy. This attack has a small hitbox and priority to match, but it deals 9% damage and is one of Noddy's only KOing moves. The knockback from this attack is surprisingly large. However, so is the starting and ending lag. This attack KOs at 165%.

Up Tilt-Lullaby
Ah, Lullabies. Old Tricks into luring young ones into becoming drowsy so they'll fall asleep easier. In Brawl, Noddy sings one to lull the opponent to sleep for 2 seconds, or to make the opponent fall asleep longer. A prolonging attack. Noddy will sing a sweet melody for about the same length of Jigglypuff's Sing, and anyone caught in the radius(Same Size as Jiggly's Radius for Sing) will either fall asleep for 2 seconds, or will have an extra 2 seconds added to their snooze time. It doesn't deal any damage, and has medium priority.

Forward Tilt-Here, get comfy
Noddy is compassionate. He pulls out a Pillow from Hammerspace and sets it in front of him. If used near a Sleeping Opponent, the Pillow will somehow reappear under their head/body/potato and offer and 1.5 seconds of blissful sleep. The setting of this pillow takes about as long as when Diddy Throws a Banana, as he takes the time to Fluff it before setting it down. How he does this without arms is anyone's guess. However, the pillow can also be picked up if set away from a sleeping foe and chucked to deal 2% damage and surprisingly heavy knockback, a method of KO. It kills at a high percent though, around 160%. Setting pillows is a rather low-priority attack.

Down Tilt-Warm Milk
What's better than a Class of Warm Milk to help you get to sleep? Actually, I wouldn't know if it helped. I've never tried. I doubt anyone reading this has. But we're basing this entire set around falling asleep, right? Yes we are. Anyway, with very little lag and priority to match, Noddy will pull out a Glass of Warm Milk. Yummy, I suppose. Noddy will carry this around until A is pressed, when Noddy will drink it. Noddy will heal 8% in this time, but that's not why it's useful. Use it/attempt to drink it within the same range of the Up Tilt of an opponent, and Noddy and him/her will move into the background, impervious to damage. Noddy will offer the Glass to the opponent, who will drink it(Sadly, it does heal the 8%). This will take about 2 seconds, but who cares? Now they come back out into play. If Noddy uses Yawn on them, they'll sleep for 7 seconds as opposed to five! This will only happen if Noddy Yawns them in five seconds of this, though. Although they will become drowsy during this time period, cutting their speed 1/4th for the five seconds.

Smashes

Up Smash-Vivaldi
Admittedly, I'm not entirely familiar with the concept of Vivaldi. It's like Nature Sounds or soothing music, right?
*Wikis it*
Oh, Seasonal Music. I suppose it's good material for Noddy to utilize. Anyway, Noddy begins to sing, radius twice as large as that of Jigglypuff's Sing attack, but priority much lower, and glows one of four colors, chosen randomly. These colors have an effect on the opponent, depending if you sang with them in your radius, However, these attacks will do nothing if they aren't already asleep. Before I go into detail on those colors, this attack takes around .9 seconds to execute. Yep, a long one. Anyway, Seasonal Colors time.
Winter(Light Blue)-The Opponent is frozen solid, allowing you to get some damage racked in. This freeze deals 7% damage and takes as long as a normal freeze. After the freeze, the opponent will wake up immediately. Better use this attack late in their snooze, I suppose.
Spring(Green)-Ah, Spring. Nothing Fancy here, just deals 10% points of Water damage to the opponent. This won't wake them.
Summer(Red)-Ah, Summer. Fun in the sun. The opponent will suddenly burst into flame, taking 12% damage and medium knockback. This will wake them.
Fall(Orange)-Fall. One would call Summer the lazy days, but Fall is so calming. It adds another 2 seconds onto the snooze time.

Forward Smash-Pillow Fight
Another KO move, Noddy? Sheesh. Anyway, Noddy pulls out the pillow and refuses to put it down now that they attack has been charged. Anyway, now Noddy, very similarly to Lucas' Forward Smash in lag, priority, and knockback, will swing the pillow! It deals 5% damage, but the knockback is high. The hitbox contains most of the pillow, so watch out. Probably best used as sort of an edgeguard or a defensive move. This move is so strong, it KOs at 160%!

Down Smash-This Prism Plains Remix is the best.
(cd)
http://www.youtube.com/watch?v=6xnzuCkRDrs&feature=related


Real Down Smash-Unpleasant Awakening
Noddy concentrates really hard, and sends a Nightmare into the mind of anyone sleeping one Bowser away of him in either direction at the time of using this attack. Now, upon the time of awakening, the opponent will suddenly take 10% explosive damage and medium upward knockback! This Nightmare transfer process takes about .8 seconds, and has medium priority. If combined with a regular Nightmare attack, it will deal an extra 2% damage upon awakening. This attack could be considered a KO move, but it only KOs at high percentages like 180%.

Aerials

Neutral Aerial-Jet Lag
I really don't wanna write Aerials for Noddy. But I suppose it has to be done. Anyway, during this attack, Noddy suddenly tints grey for about a second in air, signaling a classic ailment. He'll glow grey for about a second, not changing depending on landing on ground or being hit, once it starts it can't stop. Anyway, if anyone touches Noddy during this period, their speed will suddenly decrease by 25%, and they'll also be stunned. This will last for 5 seconds, like most Noddy Afflictions. This slow down gives Noddy time to Yawn on them and put them to sleep, which has an extra second now that Lag as been applied. As a Bonus, if Noddy uses Rest during his time grey, he'll sleep for a second longer. If he yawns while grey he'll automatically use rest.

Forward Air-Air Puff
Seriously, why isn't this one of Kirby's Moves? Noddy takes a quick breath in(Supplying about .5 seconds of lag), then exhales, causing a small puff of air to travel from his mouth 2 Pokeballs forward at Ganondorf's walk(Exhale is .3 seconds long). This puff's hitbox takes up it's entire model, which is about as half as Large as a capsule. The puff deals 6% damage, and does hitstun rather than knockback. It really stuns the opponent, making them fall right out of the air.

Backward Aerial-Cap Spike
AGH BACK AERIALS ARE SO HARD TO WRITE AGH I HATE YOU ALL AGH AGH AGH. Anyway, Noddy's nightcap suddenly punches downward, like a fist at whoever is behind Noddy. Surprisingly, it serves as more of Down Aerial because the cap reaches below Noddy. It takes about as long as Link's Down Aerial, but as LOT less priority. If hit by this fist punch the opponent will take 7% damage and medium downwards knockback. The hitbox for this attack is about as large as Noddy's cap. This aerial doubles as a Meteor Smash besides not being a Down Aerial.

Up Aerial-Lesser Yawn
Noddy turns his head up(Taking about .2 seconds), and coughs out a small little burst of yellow smoke(.5 seconds), which floats upward at Dedede's walk for Ganondorf's height before vanishing. If an opponent makes contact with the cloud, they'll suddenly fall asleep for a second, dropping like brick in Helpless Fall state. This doesn't do any damage, but it's good in KOing people from a ledge. However, it has enough ending lag to make it so it isn't totally spammable.

Down Aerial-Cradle
Noddy's nightcap curls underneath him in a crescent shape, and begins to glow Yellow(.7 seconds). Then a Small Crescent Moon will form underneath Noddy, dealing 12% damage to anyone who touches the Moon during formation with unbeatable priority and medium knockback. Now, Noddy could jump from the Moon to the platform, but if he falls asleep in the Moon, he'll heal DOUBLE. The only problem is the Moon vanishes after 4 seconds of existence, meaning Noddy has to fall Asleep just as the Moon forms, and will have to have a way off it. Worse still, the moon will crumble to dust if hit because of its 5% HP.

Grab and Throws

Grab-Pleasant Dreams
Noddy falls asleep for about .6 seconds when the Grab Button is pressed. Even if he shields, he's asleep while doing it. This is where Noddy's Nightmares come to reality. If someone is in Grab range and asleep when Noddy uses this move, Noddy will find a Link with their nightmares........

Pummel-Rip Van Winkle
Noddy's throws aren't throws. They are ways of torturing the snoozing opponent. This move is made to make sure they don't wake during that time, as the opponent needs to be asleep for Dream Torture. With this Move, Noddy glows Pink for .6 seconds, and then 1 second is added to the snooze time of the opponent. Spam it enough and you'll get the desired finished product; a comatose opponent! Well, not quite. The longest snooze is 10 seconds.

Up Throw-The Falling Dream
You know, the one where you fall to Earth from Space or something. Anyway, with this attack, Noddy will send a Blue Rift of energy over to the opponent's mind(.5 secs). Afterwards, Noddy will wake up, but the Nightmares rages on, dealing 1% damage every second, or adding one percent damage every second if you already had Nightmare on them. When they wake up, they will be buried.

Forward Throw-The Test Dream
It's the night before the exam. You had a heck of a hard time studying. You are exhausted! You go to bed, and dream about the exam being hard. Really Hard. Then the teaches goofs and says she gave you the wrong one. You get a harder one. The other one was for the remedial class. Anyway, Noddy glows black, and in the same time as all his throws(.6 secs), he'll transfer over black energy to the victim. He'll then wake up, but the Victim will take damage every second, starting at 1 and growing by 1 each time until they wake up. The damage count can't go higher than 10, though. That is to be expected.

Back Throw-Flashback
I'm rather proud of myself for coming up with this attack. Sure, it doesn't fit into the playstyle all that well, but it's very unique! Anyway, Noddy will glow white and channel white energy into the opponent for .6 seconds, after which Noddy will wake. The snooze will continue as normal, not having any extra effects. When the opponent wakes, they will suffer the damage and knockback of the last move they used on Noddy beforehand! Nice, yes?

Down Throw-Irrational Fears
We all have them, don't try an deny it. Heck, there's a medical condition; forget what it's called; which is 'The feeling that you are being perpetually watched by a duck'. What the heck? Anyway, Noddy will glow brown this time, transfer energy over a .6 second period, and then awake. The damage is just like that of the up special, 1 second, 1% damage. Or adding 1%. You know. When the foe awakes, a Gooey Bomb will be attached to them, regardless if items are on or off.

Final Smash

Ya Snooze, ya lose

The only problem with that logic is that Noddy would lose. Anyway, with this attack, Noddy emits a large yellow glowy aura that covers the whole stage in a matter or of 4 seconds. Anyone who touches this aura will fall asleep, not to wake up for 15 seconds. They'll all immediatly have Nightmare and the Up Throw's effect on them. This gives Noddy plenty of time to do whatever he pleases. Because he's Noddy.

Playstyle

Listen up boys and girls, it's time for some Noddy playstyle. Isn't that facinating? Anyway, Noddy is a Damage Racker. He has to rack up lots of damage so he can either activate his ability to control people(Best in Multiplayer circumstances), or KO them with his other KOing moves. Also, I know you're gonna throw out Noddy's God-Tier-esque moves. You might've forgotten his horrible stats though. Yeah, they suck. Anyway, playstyle time!
Noddy has lots of moves to increase the length of the snooze his opponent can take, so it's best to stack these up the best you can. You should attempt to stun him with a Dashing Attack, neutral aerial, or the jab. then use the Warm Milk attack on them. Best then put them to sleep, and stack on a nightmare, then Grab them, pummel if you wish, and use any of the Nightmare attacks.
Playing defensive? The Nose Bubble jab is a good attack to use in this situation, even better than shielding in some situations. Even if you aren't planning to rack damage, putting the enemy to sleep is a good technique. Don't forget to heal often. Two good moves for retreat are the Down Aerial and Up Special.
I'm pretty sure you'll find some flaws with Noddy, especially in the aerials. Hate those things. But I hope he's a fun addition to the MYM cast that you'll learn to love and enjoy.

Matchups

Noddy VS Bellsprout: 40/60(Bellsprout's Favor)
Bellsprout needs to be rooted in one place for most of the time anyway, so Noddy should be able to approach him fairly easily, right? Well, must of Bellsprout's attacks make him harder to apporach, especially Razor Leaf and Endure. Noddy can however bypass these attacks(Save endure), by using his Up Special and Down Aerial. Once Noddy has Bellsprout in his clutches, well....Muwahahahahahahaha! Of course, Noddy will have to use a his Down Throw to un-root him.

Noddy, Noddy, and Noddy VS Valozarg: 70/30(Noddies' favor)
This ratio may not be 100% correct, but Noddy will definatley have an easier time fighting him because of his small size, his sleep inducing attacks, and 150%. Seriously, a team of 3 Noddies can take Valozarg, as they can will him off the stage, rather than knock him off.

Noddy VS Kirby: 80/20(Noddy's favor)
lawl when kirby tries to eat noddy he falls asleep and noddy kills him lawl​
 

Koppakirby

Smash Cadet
Joined
Aug 13, 2009
Messages
52
The second of three Kirby sets. Third will come later. So, not so one-day.

Bomber

Bomber is an enemy in the Kirby series of Video Games that gives the ability 'Crash', which kills everyone except Kirby on the screen in one hit. Bomber is a highly explosive foe, and his own abilities rival that of the ability he gives, but only by little. Bomber's abilities are activated by falling or by hit by fiery attacks. Bomber brings these tendencies into Brawl, and the result is a risky character with a high learning curve.

Stats
Size: Most Kirby Enemies are as Large as Kirby, Bomber is no exception.
Walking Speed-2/10
Running Speed-4/10
First Jump-Dark Blue Bombs can't jump
Priority-10/10
Weight-6/10
Control in Air-0/10
Bomber is standard Kirby size, his walking speed is less than average, and he has no jump. However, his priority is off the charge, and he's surprisingly heavy. He drops like a brick though.

Special Mechanic
Bomber has quite a few things that make him unique.
1. He has 1 Aerial. A Neutral.
2. He has no percentage, because if he is hit he'll go into his Self-Destruct(Explosion) attack, listed later on.
3. Factories. Bomber has no Stock. He does have Factories, however. When Bomber explodes, a Factory(About the Size of Bowser) produces a new one in about a second. These Factories can be built anywhere to supply Bombers every time Bomber explodes, but it has its own stamina. 60 HP. Not a lot. What's worse, Bomber can only have 1 Factory out at a time! However, there is hope. Bomber can either build a new one with his Down Special, or he can reserve a place while a New One is still in play. Bomber can reserve a place for a new Factory while an old one is up. He does this with his Down Special. More detail on it there.
4. No grabs and throws! How do you expect him to grab? With his Explosive Devices? Sheesh. Just because some characters are telepathic, doesn't mean all are. No grabbing onto ledges, either.
5. If he falls for Gannondorf's height and hits an object afterwards(Opponent, item, projectile, ground, wall, hazard), he goes into his Explosion attack.

Explosion
Time for epic style. At lots of points through this set, Bomber will randomly enter this attack. Well, I shouldn't say randomly, he must be provoked. But anyway, here's the deal on Explosion.
If you haven't guessed, Bomber is a character dependent on high knockback and almost that alone. With this attack, Bomber explodes, a graphic showing a explosion similar to the Smart Bomb's around him. Unlike the Smart Bomb's, his only lasts .8 seconds. Anyone caught outside this will take 10% damage and flinch a little. Anyone caught inside this will take 25% damage and high knockback that has a possibility of KOing at 120%. Unfortunately, this explosion destroys Bomber, causing the factory to have to spawn a new one in a second's worth of lag.

Specials
Neutral Special-Stop
What?, is what you may be asking. Well, Bomber here has a couple moves where it may be best to stop in the middle of it. This move is exactly that. No matter what move it is(Besides Explosion), using the neutral special in it causes Bomber to stop and drop to the ground if in air. This move takes .4 seconds to execute, as it is a simple cancel.

Side Special-Thrusters
Bomber's back will begin to spurt flame, and in 3 seconds, he'll burst forwards at the speed of Sonic running. He'll travel for about the length of Battlefield before stopping. If he hits ANYTHING during this time, he goes into Explosion. The setting of the fuse is instant, no lag, no nothing. If this attack propels Bomber up a ramp, he'll continue to sail in that angle until the end of attack or when stopped. So yes, this attack can make him airborne. If stop is used during the first 3 seconds of this attack, it'll still stop. And yes, Bomber can move around and attack during the 3 second charge.

Down Special-Factory
With almost no Lag, a Factory will spring out of the ground in front of Bomber. This factory springs up in a .9 seconds, but this attack is all invincibility frames anyway. This Factory deals 12% damage and high-knockback to anyone hit by it during its rising, KOing at 140% damage.
If there is already a factory out, Bomber will stick a flag into the ground, with either a '1', '2', or '3' on it depending how many times he has done this so far. You see, once the current factory is destroyed, a new one will pop up in the place of the '1' flag. After that one is gone, a new one will appear on '2', and a new one will appear on '3' once that one is gone. However, once you place 3 flags, you can't reserve places any more for the entire match. Also, each Factory has 60 HP stamina, in case you forgot.

Up Special-Tilt
Bomber tilts his body straight up with little difficulty. It takes about .4 seconds. However, during this odd position, he is immobile. He can use Stop to flip back onto his feet, though. If he uses the Side Special during this, he'll fly up 2 times Gannondorf's height into the air! That's high!

Standards

Jab-Windbox
This attack's name basically tells you what it is. As you may guess, not many people are going to want to approach Bomber, and for good reason. With this attack, as long as the button is a held, a fan will emerge from the top of Bomber and start pulling players within 2.33 Bowsers of him in with its power. This windbox is rather strong, and only heavier and faster characters will have an easy time getting away from the force. When spawning/putting away the fan, .9 seconds are required. The fan also increases Bomber's height by doubling it, but it is no hitbox.

Dash Attack-Lunge
Bomber jumps forward slightly, about the length of two Pokeballs. This Jump will deal 5% damage and medium knockback to anyone within the Jump's radius. More importantly though, if this attack is used during the First 3 Seconds of the side special, if the impending burst hits ANYTHING it will explode. The regular small jump takes around .4 seconds.

Forward Tilt-Drill
Thankfully, Bomber can do a couple things other than blow up, although it is his more prominent abilities. Anyway, that spike on his Front suddenly extends and becomes a Drill, spinning for about .6 seconds(The extension and closing take .4), racking up 2% damage and stun for every time the drill hits out of its average 10 hits. However, the hit boxes are small, so it tends to miss. I mean, the drill(Therefore area the spinning Hitboxes are limited to) is about the size of a Pokeball.

Down Tilt-Dud
THE WORLD IS CRUEL! I MUST END IT! I'LL BLOW UP NOW! I HAVE NOTHING TO LIVE FOR NOW THAT MY WIFE LEFT ME!
...........
..............
.......
Crap, I'm a dud. All that did was fool the opponent into thinking I would initiate Self-Destruct. Oh well, I suppose that 1.2 seconds of high-priority was a nice time to reflect. I guess I'm not a loser after all!
Personally, I wish you charged.
..D...D...Do you really think that, Noddy?

Up Tilt-Handy
The Kirby series has a lot of disembodied floating hands. Like that one that picks Kirby up on numerous Game Over screens. Anyway, a Hand will appear, and make a small punch above Bomber, dealing 9% damage and heavy backwards knockback in the direction Bomber isn't facing. Afterwards the hand vanishes into the Darkness from whence is came. This attack is quite similar in terms of lag to a similar attack used by Master Hand. The priority is also astounding.

Smashes
Forward Smash-Drill Launch
Remember that ability in K64 where you had a drill and you could launch it? Well, if the drill attack is charged, Bomber will shoot is drill forward, traveling straight ahead until it hits the KO boundaries(Or and upward Ramp, which it will follow up, same thing for walls. Yeah, goes right up walls.), at about Kirby's run. While the charging for this is rather long(1.4 secs, maybe?), it carries the opponent with them, just like Bellsprout's Razor Leaf. So the constant hits of 2% are actually a really effective racking system. The Drill itself is just under the size of Bomber himself. 5 Seconds after a drill launch, Bomber can conjure up new drills.

Down Smash-Self-Destruct
Goodbye, Cruel World! Bomber locks his body up(His legs retract(.6 seconds)), and waits another .6 seconds to go into Explosion. This is basically suicide. It has high priority, so not lots of attacks can penetrate Bomber before the explosion, but why would they want to?

Up Smash-Catch!
Just like last time, a hand appears! Oh noes! Handy will grab Bomber and give him a toss, flinging him slightly less than the width of Battlefield! The total Height he'll reach during the throw is 1.2 Gannondorf's height! Meaning he'll explode upon touchdown! There is a way to prevent this though: Stop and the Neutral Aerial. This entire attack takes about a second to execute. The whole throw phase has very high priority.

Parachute
This is the Neutral Aerial. The only Aerial. It's a rather simple one; in .5 seconds, Bomber will deploy a parachute(Looks similar to the Parasol.......), that prevents him from exploding in high falls. Unfortunately, he has no recovery, as this move only slows descents. It slows them about.....Bomber's Normally walking speed. His Aerial Movement also suddenly boosts up to a 6 while on a parachute, although his air traction sucks. In the .5 seconds of deployment, Bomber is invincible. If struck again, he'll lose the parachute all fall to his doom(Maybe).

Final Smash
Bomber's Final Smash is very powerful, considering it's a pretty hard task for him to get a Smash Ball. Bomber makes a huge explosion, making everyone lose a stock, and reviving them with 300% Damage! Evil, I know? The explosion lasts about the same time as his standard explosion.

Playstyle
Bomber; The Ultimate Unapproachable Character. Seriously, explosions on impact are kinda hard to deal with, yah? Well, here's how Bomber is gonna play out.

Bomber's factories are going to be a top priority, but he may need to spread them out on certain stages. So after making a single Factory right after the start of the match, Bomber should use his Up Special, combined with both of his Neutrals, to clear some ground, you know? Blaster also may use Drill Launch a couple of times to rack up damage, then go in with his Side Special combined with the das attack. Or conversly, bring them in with the jab.

The More Blasters that die, the higher opponents' percentages go. So Blaster has an odd suicidal playstyle. Funny, maybe I ain't looking hard enough, but this seems to be the only character who's playstyle revolves around suicide. Suicide can be caused through a variety of ways; the way of throwing yourself off a cliff(Very effective when fighting is below), using the side special, or using the Down Smash.

Speaking of the Down Smash, how about those Mindgames? Down Smash and the Down Tilt. Nobody is gonna know which one you're using. Use this to your advantage. And finally, Reserve if you feel you need to, there are plenty of projectile-using characters out there.

Match-Ups

Bomber VS Blaster: 10/90(Blaster's Favor)
This shouldn't come as a surprise, but if it does, Blaster has all really difficult to dodge projectiles. Like, even if Bomber could jump, he really isn't gonna get anywhere near Blaster. Even with his aerial transportation.

Bomber VS Bellsprout: 40/60 (Bellsprout's Favor)
Geez, hopefully the third MU will be good. Anyway, Bomber's actually pretty good for this battle due to the simple fact he can unroot Bellsprout. Yeah, nice! However, Bellsprout's got enough long-range attacks to keep him at bay. If he does come clsoe enough though, Blaster should be able to put the hurt on Bellsprout.

Bomber VS Bully: 70/30 (Bomber's Favor)
Ask and you shall receive. Bully only has a couple moves that are projectile, and terrible traction. So really, Bomber just has to be between Bully and the factory. Bully will dig his own grave. Bully is the perfect example of a character Bomber was meant to fight.

Bomber VS Noddy: 90/10 (Bomber's favor)
Another amazing MU simply because Noddy's whole Damaging racking playstyle won't work. Without it, he's hopeless. Not to mention he'll blast himself to bits with the Nightmare attacks. Not to mention you can't put Factories to sleep.
 

darth meanie

Smash Journeyman
Joined
Jun 6, 2008
Messages
452
This is my imitation of MT! :'(

Noddy & Bomber

First off, let me say that both of these movesets have some pretty sweet concepts behind them. You did a better job with nightmares in Noddy than I did in my Darkrai set a whole MYM ago, and made a character who truly revolves around suicide KOing. Your writing style has also become much more approachable than before, and while it still feels a little childish, it's also friendly and comfortable to read.

Now here comes the big problem though. While these sets have awesome concepts behind them, they flounder mechanically. Let's start with Noddy.

Okay here. The first thing that struck me was Noddy's jab. It's hideously underpowered, and takes a long time to get a very small benefit. All of his "standard attacks" that are physical attacks are horribly weak, and don't help his playstyle either, with the exception of those tilts. You call them 'KO attacks' when they don't kill until around 170% or later, and you already said that he would KO opponents by controlling them while they're asleep at over 150%. Wouldn't it make more sense to focus on this rather than giving him several other not fully thought out KO moves?

On the subject of throws, can I just say that making his grab game his nightmare control was a brilliant move, basically a stroke of genius. On the other hand, there are some mechanical problems with the pummel. While I'm sure that this was never your intention, the way you phrase it, Noddy can force the opponent to sleep indefinitely by spamming the pummel, which I know you didn't mean. Even with the ten second limit though, with Nightmare involved that can hit 80% damage with a single move! That's pretty insane. While a few throws, like the pitfalling one, were clever and brilliant, the others were a little more obtuse.

That said, I actually really enjoyed Noddy. Bomber was also pretty fun, but his problems are even more evident. For example, you never actually discuss what it takes to destroy one of Bomber's factories! While I'm not one to generally fault someone for missing a detail or two, this is pretty important information! Further, your sense of time is a little off. .4 seconds to use a canceling move? That's really long. And three seconds to charge up his Side Special? That's enough time for me to use 4 Falcon Punches in a row!

Once I was able to look past the flawed mechanics, Bomber was actually an absolutely brilliant set. Defending the factories with kamikaze techniques while trying not to blow up the factory, the suicide based fighting, potential mindgames, lopsided focus... it's really a piece of work!

The problem is, you stumble over it mechanically, and don't reach that potential your idea had. It's really sad actually, because I can see some of your ideas in the playstyle, but they don't come into fruition in the set proper.

What I want you to take away from this is two things; you have some really clever ideas, and that you need to work better and getting them to implement in Brawl. I'd suggest you look some more and the details of other sets or the mechanics of Brawl at the Smash Wikia in order to get further grounded in the system. This isn't supposed to be insulting, I had to check these several times in order to really understand how some things worked when I started here.

Also, I'd suggest you get someone to proofread your sets. A second pair of eyes that can spot these weaknesses will help you learn to spot them yourself. You can ask people to preview your work in the chat, I'm certain MT, me or Rool (once he ends his hiatus) will be happy to help. You've certainly stepped up your game since the beginning of the contest KK!
 

BKupa666

Barnacled Boss
Moderator
Joined
Aug 12, 2008
Messages
7,788
Location
Toxic Tower
Harbringer:
This is one 'minion' set pulled off well, and I think it's the mechanic that does it. His options to respawn remind me of Cairne, but obviously completely different. I'm fascinated by Harbringer being a lightweight concentrated on survival (as you'll see in a few posts (SMIRK)), and he does so by defense. His shield options add some great extra 'spice' to the set. You obviously put a lot of thought into how each shield interacts with certain minions. The F-Tilt interaction with Husks are sweet too. What keeps me from liking Harbringer more than, say, Abomasnow, is a slight feel of disjointedness. He has minions mixed with weapons and shields, and they aren't particularly categorized throughout the set. Still, Harbringer is a solid, middle-of-the-pack effort.

Noddy and Bomber:
These two have a similar feel to Pidgit and Sparky, except as seperate sets that are actually done somewhat well. The two do have some ridiculously cool concepts. Noddy's grab-game is awesome, and the nightmare element reminds me of a minor Tryclyde throw I included. Still, he feels rather weak as a whole. Because causing the victim to self-destruct seems like his best option, why not focus the set more on that? Bomber, I feel, is the better set, but he still has flaws. DM pointed it out, and I'll say it again; you've got to be more careful with the sheer amount of time you add to moves. Three seconds is longer than two Warlock Punches. I'm not a huge fan of leaving out moves just to have things that make him 'unique'. That said, an entire moveset based around self-destructing? The closest thing we have to that is Dingodile, and Bomber is still vastly different. The increase of quality in your concepts is rather mind-boggling, KK. If you can keep working at areas like proper and balanced detail (and do something with organization, please!), I could see a bright future for you.
 

goldwyvern

Smash Ace
Joined
Nov 25, 2008
Messages
519
Location
Holy keys locked in the jet, Batman!

~~Under My Wing~~
Goldwyvern's Occasional Rare Review Corner


By MarthTrinity​

I dont fault you on making this in over 1 day, MT. The end result was great and it helped revive the thread and such. Plus the source character is very obscure in the sense that he has few appearances and has one or two claims to fame. Unlike the guys that make Type Wild, though, you manage to make a full set of moves for Swalot to fight with without having to stick a Pinsir in him ;). Youve always managed to show that youre one of the most fun MYMers around, showin' all dem youngin's hows its done.


PRESENTATION:
Very minimalist, as all the one-day pokesets are. Very nice though, especially the Heavy Heap on the opening (lolHeavyHeap). The colors you did use were very fitting and very nice for this sort of set. It says Swalot, and thats all it needs.


WRITING STYLE:

Do we really need this section to be that well explained in an MT set? You really manage to be very informative and funny at the same time. While it can get a bit out of hand at times, it mostly has a very controlled sense to it. "MY NUTS D:" was bit off, but still funny, and I guess fitting to where you took it from. Its not as distracting as the humor in a Tirk set though (No offense Tirk), though, so youve certainly nailed this part down very easily.


PLAYSTYLE:

Swalot's playstyle is a bit of a fresh idea and a bit of something we've seen who knows how many times before. I like the concept, but maybe you couldve strayed a bit farther from the "KOs with grab game, usually using only the pummel" style and more towards the "Heavyweight damage racking poison damage maniac with the epic floor trap and willingness to eat whatever stands in his way" style. How it is currently still has a good amount of flow to it though, and I find its a nice hybrid playstyle. Nice job.

CHARACTERIZATION:
Very very fitting. For Swalot. Swalot has little character beyond his appearance and his pokedex entry, which you put in very seamlessly. Beyond that, you might not have had Pinsir in the moveset (Win poses dont count (WARY)), but there were a couple of slips, mostly in the UTilt. "MY NUTS D:" and the attack itself are a bit unfitting and isnt 100% for the playstyle. Mostly a good job, if only due to the simple source character.


BALANCE:

TBH, I know less about balance than some other MYMers, but I think Swalot is a good amount balanced, just not perfectly. Swalot does have some good attacks and some very nice ways to KO, but not to the extent that he cn just spam his attacks until he can land a grab and KO. Beyond that, the moveset is a relatively balanced one, although with a bit of over/underpoweredness depending on how the person playing Swalot plays Swalot.


OVERALL:

Easily one of the best in the little movement rush we had ourselves recently, up there with Probopass and Venusaur (The two best ones other than this in my opinion, no offense to the others), and a very good set on your impressive and long resume of sets. About equal to Silver, which I loved.​
 

Wizzerd

Smash Ace
Joined
Feb 24, 2009
Messages
929
Posting the handful of comments I have so far

Probopass: And we come to the first of the one day Pokesets. This is a phenomenal way to start it off, meanie; I only have one real issue I need to get out of the way - the mechanic is a little too reminiscient of MYM4 in that it's the main source of playstyle, and on a semi-related note I'm worried that even with Iron Defense it might screw him over in certain matchups. Then again, seeing as he has the mini-noses for pseudo-camping, the aerial theme and Lock-On (regardless that I find the latter somewhat underdetailed) plus this is a one day set, it's not a very significant criticism.

The set could benefit from a little extra information here and there, but it's nothing serious, and I'm familiar with Probopass already. Overall, I think Probopass feels very polished considering the time-frame he was made in. Good job meanie.

Venusaur: And the first of three MW one-dayers. Despite being made in a short period, Venusaur goes for a rather difficult to balance theme, with excessive healing but #screamman recovery. The set's balanced well enough in my opinion, but I think Venusaur's a little too lopsided in terms of healing over firepower. His lack of recovery would completely screw him over against quick powerful moves, but anyone with firepower below a certain point would barely be able to touch him.

I hope I'm not coming across as negative, as I -do- really like Venusaur, I just think you went for a little too lofty of a concept for a one day set. The playstyle comes together very well and there's little to no filler, while he doesn't end up as a flowchart, and he still manages to have interesting moves like Down and Up Aerial, plus the shenanigans with the Solarbeam and all. Overall, Venusaur is a very solid set to me.

Shedinja: This is not at all your best, Katapultar. The mechanic is horribly Pokemon Syndrome - the invincibility is fine, but being KOed by X category of attacks automatically just makes him seem all the more rushed. It would completely screw him over in certain matchups while making him almost completely invincible against anyone with a predictable air game or without an air game at all. I could be wrong and I expect that I am; there's so much going on. Shedinja would probably either be garbage or broken tier.

I really, really wish I could like this set, because there are so many elements that could have been brilliant. The stock buildup, the clones, the staring at his back, it sounds so fun thematically but it just wouldn't work in my opinion mechanically. Unfortunate this had to be a one-dayer.

Bellsprout: You're improving, KK. Very very slowly, but you are getting better. First off, this template looks horrible. The color is too bright, the Comic Sans isn't all that fitting and the whole thing being centered is rather unsightly. It just looks rather sloppy overall, though it's an improvement.

You're missing a lot of details in places, and there are a bunch of things that are just off. The Down Special, which is evidently supposed to be the crux of his playstyle, doesn't tell us what it means to have "free reign over the platform" or what happens if a grab is attempted, plus it sounds like it would make him invincible against anyone without fire or explosion attacks. The Up Tilt doesn't say how long the tree lasts, the Dash Attack doesn't say lag, trajectory or how it dodges, the Up Smash doesn't say how long the line of trees travels, the pummel doesn't say how quickly it lowers weight, etc. There's some horrible balance flaws in there too, like how you call a move taking half a second to execute not just quick but really quick and how all of Bellsprout's setups take ridiculous amounts of time when you consider how much they should (supposedly) be spammed.

And yet, in the end, Bellsprout is the best set you've ever made by far, which attests to the improvement you've made since you first came here. Bellsprout DOES have a playstyle (albeit one that only works in theory) and his balance/detail is a hell of a lot better than your earlier sets. Like with Shedinja, it's a shame this had to be a one-dayer, as it could have been so much more.
 

Apemasta'

Smash Cadet
Joined
Jan 6, 2008
Messages
56
Location
Southern California
Oh my, Pokesets. Almost makes me feel like a tool for having a couple under construction. Like all of my sets... I swear, someday I'm going actually going to post movesets.
 

darth meanie

Smash Journeyman
Joined
Jun 6, 2008
Messages
452
HARBINGER

Harbinger’s defensive/zoning play isn’t exactly groundbreaking, but how a good chunk of them flow together is the main highlight through the interactions. Side Special is a particularly ingenious move despite its’ simplicity, and there’s some stuff so that the husks/Harbinger can make things easier for each other via the husks holding down foes and Harbinger lightning the Husks ablaze/using fsmash. Of course, better yet is the Collector Drones, who despite their incredibly small selection of attacks actually have cooperative AI. Healing them and having them hide with you in your barrier actually seems to be intuitive rather then a chore. The extras were also pretty good stuff. That stage in particular ages well despite its’ simplicity.
Glad you liked it. The Side Special was likely to have been relegated to a weaker input, but once I realized the fantastic potential it had for zoning the opponent, I moved it back to a special. When it came to Collector Drones, the plan I had seemed simple enough; I wanted to keep them out of the fight but still doing damage, high up in the air with ranged weapons worked royally. I also designed their AI around what you would want them to do, which is why I felt they'd be more useful. Since several moves have such obvious actions for the Collectors to take, it was easy to get that to work, and for ones where it wasn't, like the Seeker Swarms, you can choose their reaction.

Ah, DM’s infamous aerials and throws. Nothing new here, but the throws are more relevant then usual despite their genericness and the aerials only have the occasional black sheep. While balance normally isn’t an issue, the fact that you –intend- for him to have to KO over 2 “stocks” (the second being a “Reincarnation”) and then make his next “Reincarnations” impossible by not giving him starter drones feels very iffy to me, much like Venusaur’s intention of fail recovery/god-like healing seems to you.
I think that it takes a lot of searching to find this. Certainly, not every aerial and throw is interesting and engaging, but very few sets are able to pull that off. Besides, Rider and Probopass both had very heavy aerial games, and Abomasnow and Rider both had strong, central throw games, so I don't see how you can say that I have an 'infamous' problem with these moves.

While Probopass had a selfadmittedly boring throw game, it was a subset of his moveset. With the control from his mini-noses, a standard four throw format would be awkward, and a different input system is necessary to begin with for him to move the opponent around. The simple shooting throw may be boring, but it's very important to his playstyle.

And I don't see what's wrong with Harbinger either. I wonder what 'black sheep' moves he has for his aerials. The Neutral Air which is the Drones' staple move? The Fair that gives him badly needed close combat options and lets him use his husks to full potential from above? The admittedly situational, but useful Dair? The Uair that gives him more stalling/positioning options? Or his defensive Bair that gives him another option to protect his Drones?

The throw game is the same way, his grab alone should disavow any accusations of genericness; complaining about the throws creativity in light of the grab would be like saying that a smash has boring damage and knockback. Besides, each one has different uses, it introduces the pull field effect, adds onto the high lag / stun and minion effects, and gives him a KO move. I think his throw game is perfectly satisfactory.

Ending it on a positive note, it’s certainly one of the better sets in the contest. I just had to jynx it when I said you were inconsistent, didn’t I? Beyond Saber, you’re pretty much the most consistent person quality wise this contest.
:bee:
 

BKupa666

Barnacled Boss
Moderator
Joined
Aug 12, 2008
Messages
7,788
Location
Toxic Tower
Chucky


"I'll be your friend till the end!"

A classic slasher villain if there ever was one, hailing from the Child's Play series. Chucky is a notorious murderer, who, after being fatally shot, transferred his soul into a Good Guy doll via voodoo magic to stay alive. His innocent frame hides a vicious and ruthless individual, easily enabling him to surprise and attack incompetent adults.

Of course, being stuck in a doll is far from ideal for a murderer of Chucky's stature; due to abusing his magic, he'll be stuck in his plastic body forever unless he finds a new host. Throughout the movies, he relentlessly pursues his young owner in an attempt to transfer his soul back into a human. Chucky's small frame surprisingly hides the strength of a grown man, allowing him to take opponents completely by surprise. He's also quite proficient at wielding a knife.

About Chucky

You'll notice once you select Chucky for a test-play that he's an extremely fast character; to be precise, he's a bit slower than Sonic, but leagues faster than Falcon. Chucky needs this speed to outmanuever his opponents, as he's far and away the lightest character in the game. Chucky is an all-around good character, weight aside. Although his range is less than impressive, he's got priority and strength going for him (although his KO methods are rather unorthodox). He's not dreadfully slow attacking, and he's a rather small target. Problem is, nearly every other character in the game can outlast the demonic doll, simply because he's a featherweight. You'll have to use speed, in addition to a special ability of his, to outplay your enemies.

Specials

Neutral Special - Disguise
Chucky sits down laglessly, becoming inanimate, and says a little catchphrase in an innocent child's voice. "Hi, my name's Chucky! Wanna plaaaay?", "I like being hugged!", and the like. The sitting Chucky now has invincibility to any attack that deals less than 25% (although fire attacks still hurt the doll).

In addition, he becomes a heavy throwing item, ala Bonsly. Characters can pick up Chucky and throw him at opponents for 6% and a bit of stun. However, due to moving slowly carrying the doll, characters other than DK will have trouble KOing Chucky like this. In addition, he can return to life and bite his carrier with a tap of A, dealing 5% and causing them to drop him, as he regains movement. Chucky remains sitting for three and a half seconds, although he can't do anything, other than use a get-up attack to regain movement. This move can be used once every twelve seconds.

Sounds quite handy, yes? Against a competent opponent, you'll be near relying on this move to stay in the game. Opponents will be destroying Chucky at laughably low percentages if you don't strategically use this move to stick around. Notice the word 'strategically'? Well, after the first time Chucky uses this attack, an interesting little curse begins. Chucky begins taking 1.25 times more damage from enemy attacks, due to evilly twisting and perverting the voodoo arts used to keep him safe in his doll's body.

If it used a second time or beyond, the damage he takes increases to 1.5, then 1.75, capping at two times the norm. This curse is a big deal for him; he can't stall in his body over and over to avoid being KOed even more easily as a result, nor can he damage enemies during this time. You'll need to pick and choose very carefully when to save yourself with this. A player's ability to do so plays a huge part in Chucky matches.
[ 0% ]

Side Special - Tool Chuck
Chucky pulls a small toy hammer out of his overalls pocket and tosses it, having some cool down lag to cope with. The tool's default trajectory is horizontal, but in the short period of startup, Chucky can angle it in any direction. The hammer is about the size of a Pikmin, and travels half of Battlefield at a fast speed before vanishing. The hammer can be stopped with a well-timed attack, but you're better off just dodging. You'll want to toss your hammer from a ways away, as you'll be easily punished at melee range.

If the hammer hits an enemy, it sticks gruesomely into their eye to deal 9%, as the foe stumbles backwards. The distance they stumble depends on their damage level, ranging from two character widths to half of Battlefield at high damage. If they reach an edge, they'll fall into their footstool effect. Chucky can use this move to distance his enemies from him, or to KO them, whether it be by having them stumble off the stage, or off a walk-off boundary. You can't camp by throwing hammers though; only one can be present at a time.
[ 9% ]

Down Special - Aflame
A click is heard inside the doll; a split second later, Chucky catches fire and roars, "Son of a bitch!" Immediate contact with his body deals 5-6% and some set knockback. While this is nothing special, the fire's priority is stellar. No jointed priority can damage Chucky through the fire. Chucky can now approach with less fear; this move is rather helpful when Chucky is in danger, and you don't want to disguise yourself. Cancel the move by pressing the input again.

Of course, being lit aflame isn't exactly a good thing for Chucky. If you hold it for more than five seconds, Chucky begins taking 2-3% per second, screaming in agony as he does so. During this time, Chucky's running speed is increased, as if he grabbed Superspicy Curry. There's no reason you'd actually need this little buff, though, considering Chucky is fast enough as it is. Once you've entering this danger zone, you have to wait twelve seconds before catching fire again, or the penalty will be in effect from the getgo. Continuing to activate and deactivate the flame before the penalty will cause it to come into play more quickly the next time around. Don't get carried away; if you play with fire, you'll get burned!
[ 5-6% ]

Up Special - Choke Wire
Chucky pulls out a yellow-and-black cord and, with a bit of lag on both ends, casts it forward two character widths. He can tether to ledges to recover, but there is a far more important use. If Chucky snares a foe with his wire, it'll snag them by the neck and pull them to him. He'll sit on his enemy's back and choke them with the wire, telling them, "Nothing like a strangulation to get the circulation going!"

Choking deals 1-2% per second to an enemy, but it's much more deadly than that. If a foe remains choked for more than five seconds, they'll turn blue and be KOed, as if in stamina mode, for Chucky to say, "Presto, you're dead!" Chucky can mash A to hold on, while his enemy can mash to free themself. While you'll never flat out choke a foe until high damage levels when they find escaping troublesome, Chucky does have ways to delay his opponent's escape via stun. This is one of your better KO options, especially considering how the cord can snag foes out of high-priority attacks.
[ 1-2% per second ]

Basic Attacks

Basic Combo - Slice and Dice
A cute three-hit combo with Chucky's knife; he performs one sideways slash, then one upwards poke, finishing with a downwards stab. The first two hits deal 3%, while the stab deals 4%. Chucky can pull this little series of slashes out extremely rapidly, but takes a split second to extract his knife from the ground after the closing stab. He has more range than the knife's animation would indicate; hitting the knife's tip deals a bit more damage. The second hit can KO at 220%, while the finishing stab puts foes in their downed position, and can spike aerial foes lightly.
[ 3-10% ]

Dash Attack - Freeze!
Chucky stops and tosses his knife in a forward, downward arc, landing it in the ground two character widths in front of him. Chucky's knife provides great defense in front of him, which he needs, due to having moderate cooldown lag. If the thrown knife hits an opponent, they'll freeze in pain for a second, taking 10-11%. Chucky can retrieve his knife, whether it be in the ground or an opponent. After a second, opponents can extract the knife from their body, though. They cannot wield it, and if they throw it at the doll, he'll catch it. They can, however, deprive him of his knife for twelve seconds by tossing it off the stage. This will also happen if Chucky uses the move too close to the edge. A fairly helpful move, as long as you understand the knife's trajectory.
[ 10-11% ]

Tilts

Forward Tilt - Slash
Chucky performs a horizontal slash at his opponents, with a bit of lag on both ends. The knife's reach isn't great, but can KO at around 150% without the sweetspot. If you tap the input again during the ending lag, he'll perform a second reverse horizontal slash, with the same properties as the first. Both hits deal 4-5% to foes. A simple close-ranged damage-builder of Chucky's. Why not slash at foes with a wall to their backs, so they ricochet back into the second hit without a well-timed tech? Definitely a 'you cruel bastard' technique, but what the hell? Life's short, go for it!
[ 4-10% ]

Down Tilt - Stab
Chucky roars in fury as he stabs at his opponent's shins, with the speed of R.O.B.'s D-Tilt. That can't feel good...If this close-ranged attack connects, the victim will take 5% and begin holding their wound. Should they attempt to walk, run, or jump over the next three seconds, they'll take 1-2% and utter a pained noise. Of course, characters with good melee range will fare just fine fighting Chucky from where they are. However, characters who need to stay on the move or flee to set up traps are in for problems. Although Chucky can repeatedly stab with this quick attack to build damage, he cannot stack the wound effect.
[ 5% ]

Up Tilt - Poke
Chucky sticks his knife upwards a short distance, cackling to himself, before putting it down. Grounded enemies who hit the knife take 5-6% and a bit of hitstun. However, if an aerial enemy falls onto it, they'll leap up Marth's height in pain, before falling back down in their footstool effect. The knife has some priority to it, meaning you can catch enemies out of short-hopped aerials. Enemies can steer their fall away from a second hit at the apex of their jump, so it's not flawless. Still, what could be more fun than prodding enemies into a stage hazard or off a low ceiling boundary?
[ 5-6% ]

Smashes

Forward Smash - Ball Pump
Chucky takes out a ball pump and stabs its end forward a character width, with the lag of Shield Breaker. If it hits an opponent, the sharp pump will impale the character, dealing 8-13% and holding them there for a split second. Although the victim can mash off, Chucky can press A to press the pump, using the air to blast the victim forward a character width and into their tripped position, dealing an extra 5%. If charged halfway or higher, the victim must wait a split second before rolling or using a get-up attack, due to the stab wound. The set knockback makes conventional KOing near impossible...taking advantage of the stun with Up Special isn't conventional, though.
[ 8-18% ]

Down Smash - Lil' Slugger
Chucky extracts a child's baseball bat and slams it to the ground directly in front of him, screaming out, "Batter up!" Adorable, yes? If you get decked by Chucky's bat, you'll get knocked into your downed position, taking 12-13% initially, plus 1-10% gradual damage from concussion over the next five seconds. Chucky cannot KO with this Smash unless he hits an offstage foe; in this case, his swing will spike them with moderate strength. You deal more damage here than with F-Smash, but rather than simply punishing the foe's stun, you'll have to read their get-up options in order to follow up.
[ 12-23% ]

Up Smash - Heathen Prayer
Chucky raises his hands in prayer to the voodoo gods, surging with electricity in the process. The doll has .33 second lag on both ends, and has a very close-ranged hitbox. Like, you have to be on top of Chucky to get hit. Even then, it'll just deal three or four light hits of 4-5% and some set knockback. A Smash so drastically inferior to your others should never be used, right? Chucky's prayer hasn't been for naught, it seems. For the next seven to twelve seconds, the curse Chucky gets from using Neutral Special is nullified.

You can spam Neutral Special to your twisted heart's delight during this time; this comes in quite handy when you're in dire need to defend and your speed can't quite get you away. However, after this time period, the gods punish Chucky for perverting the voodoo magic. Chucky's curse comes into effect at double its normal rate now; one Neutral Special will cause enemy attacks to deal 1.5 damage, and another will max it out at double damage. If you use this with the curse maxed out, the curse will just carry over on your next stock. This is absolutely a last-resort move, although if it'll net you an upset KO, don't hesitate to take a risk.
[ 4-20% ]

Aerials

Neutral Air - Shredder Circle
Chucky extends his knife and spins around once, with extreme speed. There isn't too much range to the move, but the sheer speed keeps it viable. This slash deals 6-8% and knockback that KOs around 185%. This aerial has a vital use in the air; when Chucky uses Neutral Special in the air, he can't get out until he hits the ground (you can't use a get-up attack to cancel it in mid-air). If you don't want to get pummelled in the air, why not just throw your foes off with a few quick N-Airs?
[ 6-8% ]

Forward Air - Skewer Plunge
Chucky points his knife forward a short distance, pausing for a split second, before plummeting down, diagonally forward to the ground. Chucky pointing his knife forward is a stunning 2-3% hitbox, while the plummeting traps foes in multiple hits of 3%. Both hits have quite short range, but even if you don't land the hits, the move gets Chucky out of the air fast (although he lags on the ground for a brief period). It's generally not a good idea to be up there, due to his vulnerability. Offstage, this is suicide, although Chucky can bring a vicitm down with him, trapped in the multiple hits.
[ 2-15% ]

Back Air - Knife Uppercut
Chucky turns around gradually, then performs a strong upwards slash. The momentum of the slash turns Chucky around, allowing him to better position aerials that require close-range to work properly, such as the above two. The slash itself deals 8-9%, and can KO off the top around 165%. Try not to short-hop the move unless you're guaranteed a high-damage KO from it; landing lag sure isn't fun for Chucky.
[ 8-9% ]

Up Air - Trip Wire
Chucky extracts his Up Special cord, tosses it up Mario's height in a loop, before stowing it and going helpless. It a foe gets caught in the loop, Chucky tightens the rope, snagging them from the air and putting them in a footstool effect. He won't go helpless after a successful snag, so he can follow up with a F-Air if necessary. Chucky has .4 seconds of lag on both ends of this aerial, making it among his slower ones. It can tether to edges for a lousy close-ranged recovery, so don't try using it on foes near a ledge or you risk fouling up.
[ 0% ]

Down Air - Bag-Head
Chucky takes out a plastic Ziploc bag the size of Olimar's helmet and casts it downwards, where it falls down Ganondorf's height at a slow rate. If it lands on a foe, it'll seal around their head, freezing them in place as they have to mash out of the suffocating bag. Bags deal 1-2% per second, and footstool aerial characters. Like Up Special, five seconds of suffocation instantly KOs victims; if Chucky uses Up Special to grab a bagged character, the bag's suffocation time is carried over to his wire-choking time, allowing for a quicker KO. This is easier said than done, though, due to a bit of lag on both ends of the move. One bag can be out at a time.
[ 1-2% per second ]

Grab / Throws

Grab - Murderous Lunge
Chucky lunges forward a character width, trying to grab a victim by the neck and pull them to the ground. Chucky covers slightly more range from a dash-grab. He doesn't suffer too much lag if he misses either; he'll simply perform a roll back to his feet. Chucky sits on his opponent's back if he connects.
[ 0% ]

Pummel - False Hope
Chucky...releases his victim?! Is he insane? Not quite. His victim is still in their downed position, with Chucky in their vicinity. Potentially, he can read their get-up options and punish severely. He can even lock the downed victim with a basic combo up until around 40%. Just make sure to dodge get-up attacks; come now, these mistakes are elementary!
[ 0% ]

Forward Throw - Blackmail
Chucky sits himself on his victim's shoulders, puts his knife to their face and tells them to, "Move!" The victim can press A to accept, upon which you gain control of the victim for three seconds, before Chucky falls off. Move them into an obstacle, off a boundary, off the stage, or simply to a more strategic location for Chucky. Conversely, the victim can press B, refusing to submit to Chucky. This causes Chucky to stab the victim harshly, dealing 13-14% and knockback that KOs around 135%. It's win-win for him, although most foes won't give you the luxurious KO option out of this.
[ 13-14% ]

Back Throw - Backstabber
Tell me you saw that coming. Chucky releases his victim behind him, looking all smiley and innocent for a split second. The victim can attack Chucky during this time, but he can time a press of A to parry the strike and slash back, dealing 10% and stunning them for a split second. Attacking with disjointed attacks destroys this, but repeatedly blocking noobs with this can build exceptional damage. Smart players will wait out the split second of Chucky waiting to parry, then strike when the animation finishes and Chucky lags for a brief period.
[ 10% ]

Down Throw - Fatal Finisher
Chucky rolls the victim on their back, and gains the ability to mash A to repeatedly stab them. Each stab deals 3% and is fairly rapid; you'll get in three or four stabs before most foes can mash away. Aside from building damage, each stab hinders the victim's mashing ability for seven seconds. Whether they be stuck in a wire, bag, or grab, this throw is a major thorn in enemy sides. You'll be using this gem a lot.
[ 3% per stab ]

Up Throw - Butcher
The simplest of Chucky's throws; he simply tosses his victim up before slashing them three times rapidly. Each slash deals 4%; the first two trap the victim, while the third brings the character back toward the ground. Unless they tech or roll, they end up in their downed position. DIing from the first two hits can prevent this. This and D-Throw are the consistent damage-builders out of Chucky's throws, if you hadn't figured it out yet.
[ 4-12% ]

Final Smash

Final Smash - Voodoo Storm
Chucky utters a few syllables in an echoing voice, causing the skies to darken with lightning clouds, which erratically strike all over the stage frequently. These deal 14-15% and the knockback of Pikachu's Thunder to everyone but Chucky. They also stun characters on the ground when they strike. The demonic doll can spam Neutral Special to his heart's content here, without the curse affecting him like it does during U-Smash. Chucky has one final change to his moveset here. If he grabs a foe, he can't throw them. Instead, he bends over them and begins crazily reciting an ancient voodoo spell.

If he is allowed to do this for five seconds, his doll body falls lifelessly, as the character rises and laughs with Chucky's voice. He has transferred his soul into the opponent's body, KOing them instantly. The character won't respawn until the Final Smash is over and Chucky returns to his doll body, but Chucky heals 5% per second in his new host. Chucky can pull this off without much difficulty, as his escape-hindering moveset is complimented just fine with the stunning lightning here. The Final Smash lasts a whopping 25 seconds. As Chucky would say, let's play!
[ 14-15% lightning ]

Playstyle

You need to get down two facts about Chucky right off the bat...he's helluva fast, and helluva light. You can flee from attacks and punish even the shortest period of lag without trouble, but if you slip up once, you're offstage, where you'll be likely gimped or finished off. How do you combat this? By strategically defending yourself, that's how.

Chucky is in possession of powerful voodoo magic; by saving himself from damage and knockback with Neutral Special, Chucky is able to counter his miniscule weight and stick around in battle. You should never just throw out Neutral Special wherever and whenever, though. You think Chucky goes down crazily fast now? Just watch how fast this doll gets trashed when the rate he takes damage at is increased. Try to refrain from disguising yourself until your death becomes imminent, rather than to just, say, defend from campers.

In the earlier phases of the match, you've got to use your speed to avoid damage for as long as possible. Chucky can approach fairly well with moves like Down Special, Side Special, Dash Attack, or a short-hopped N-Air. He can string his speedy tilts together to build damage quite well. Oh, and if he avoids your attacks, he can nearly rush in and punish them. Basic attacks and tilts are your best bet for damage at this stage. Chucky also has some rad grab-release-thru-pummel combos. Your opponent will be taking damage at a rapid rate if you play well, make no mistake about it. The problem is, nearly any character can outlast Chucky with ease.

Once Chucky begins taking damage, his defense is limited, unless he wants to waste a Neutral Special. He can pull out Down Special for temporary safety, but he'll take damage if he begins relying on it. Chucky is incredibly vulnerable in the air, as well; N-Air can give you some space, but many characters can stay out of its range and keep on pushing the doll. Be extremely cautious when attacking; no matter how fast you can be, you want to prolong using Neutral Special for as long as possible.

When you've racked up enough damage, you'll want to try to go for the KO and get the lead before Chucky dies off. The doll's regular KO options are rather limited, as many of his attacks focus on damage-building and disabling rather than knockback. Because of this, choking is the best way to KO, by far. You'll have to set it up with stunning moves, though, because the cord is much easier to dodge than the average Z-Air. F-Smash and D-Smash are great options for this, as they rack good damage to hinder your foe from escaping, while still stunning the vicitm.

At 0%, above average button mashers will be able to hang on to their victim for just one and a half out of the five seconds necessary for a KO with Up Special. Once your victim has more damage, though, the job becomes much easier. At 120%, an average button masher can score a KO without a lot of effort. Moves like D-Air and D-Throw only lower the damage percentage needed for a KO. Overpowered at all? Chucky needs to KO as early as he can, because once his opponent respawns, he's bound to run into trouble.

Once this happens, you're best off trying to butcher your enemy up for the next stock as well as you can before you die off. If you play perfectly, you may be able to save your Neutral Special until now to last longer and possibly even score another KO before you die. As this is unlikely for the average player, though, pulling out an U-Smash to maximize your time onstage is a nice last-ditch option. You can also try suiciding-KOing with the likes of F-Air or F-Throw, although this is incredibly difficult.

In summary, Chucky has great options for damage-building, but he absolutely must rely on this in combination with his speed to get the lead as soon as possible. In most matches, the opponent will be able to deal enough damage to Chucky to force him to throw Neutral Special into the mix before he wants to. Work your assets to the best of your ability to delay your use of this defensive move, and use it very strategically when it comes time to do so. If you can get the lead early on, your survival techniques can scrape you a win, but if you fall early, it's near impossible to get back up. Matches with Chucky go down very quickly, as Chucky builds damage at an incredible rate, but dies early as well. You're in for one hellish playtime!

Match-Ups

Vs. Venusaur - 55/45
Chucky can get in Venusaur's face much more easily than it would like by catching Aflame. That said, once Chucky gets to Venusaur, he has to make sure he stays there. You'll take a lot of damage with Leech Seed if you slip up. One subtle advantage Chucky has here is that he's facing a powerful character; unless Venusaur plays in an unorthodox manner, the Chucky player can read when the Venusaur wants to KO him and use Neutral Special accordingly. Chucky can also punish the Grass Pokemon without difficulty. Heavyweights can KO Chucky easily, but Chucky can damage them more reliably, and read their predictable KO moves.

Once either character gets momentum on the other, they're likely to take a stock. A good idea for Chucky to take an early lead is to pressure Venusaur toward the edge with Side Special, then gimp his awful recovery. His disjointed cord can also snare Venusaur out of his 'aura' moves that would hurt Chucky himself. Chucky has more options for victory, but the options that Venusaur has shuts down Chucky a lot more than vice versa. For example, Chucky can't use Down Special to approach infinitely, and Neutral Special is, well, Neutral Special. Venusaur can also knock light little Chucky far away before charging his KO move rather handily. This close match goes to Venusaur in the end.

Vs. Harbringer - 40/60
While Chucky has no problem finishing off your summons with his fast attacks, he's likely to take more damage than is good for him from them before he gets to you. Harbringer can add to this by blasting Chucky with Side Special, or by dicking with him via Seeker Swarm. Harbringer's light weight, while generally a weakness of his, doesn't matter a whole lot in this match-up, due to Chucky not aiming to KO with knockback.

Harbringer doesn't have to worry too much about setting up defenses, and when he does, Chucky has trouble penetrating them; he'll generally have to use Down Special to do so, which when spammed, damages him. Sealing the deal for Harbringer is his F-Tilt to Husk combo KO option; because it's a fire element, it can hit Chucky out of Neutral Special. Chucky has to use fast moves to finish off Collector Drones as soon as possible, then use Down Special to break Harbringer's spacing moves and finish him before vice versa. Easier said than done for the demented doll.

Animations

Up Taunt - Maniacal Murderer
Chucky enters his innocent doll pose and proclaims, "I like being hugged!" in a high-pitched voice, before becoming his murderer self again and letting out his crazy evil laugh.

Side Taunt - Scolding
Chucky points his knife forward and tells his victims, "You've been naughty...very naughty!"

Down Taunt - Soul Seeking
Chucky wants to play! He calls out, "It's time to play hide the soul! And guess what...you're it!"

Entrance - Toy Box
Chucky's innocent and colorful cardboard box appears onstage, which he promptly shreds his way out of with a snarl.

Victory Pose #1 - Sharpening
The possessed toy pulls out his knife and begins sharpening it on a spinning stone, cackling to himself.

Victory Pose #2 - Voodoo Doll
Chucky plays around with voodoo dolls of the losers, twisting their dolls into painful positions, which the losers mirror in the background.

Victory Pose #3 - Just Dropping In
Chucky's knife is seen onstage, but the doll is nowhere in sight. A scuffling is heard, as the losers peer around nervously. With a roar, Chucky drops in from above, pulling out his knife and cackling. He turns and tells the losers, "Goodnight, assholes!", before scurrying offstage and leaving them in further panic.

Loss Pose - Destruction
Chucky's flaming, blackened body is seen onstage. With one eye upon, the barely alive doll attempts to inch its way toward its knife, but it merely twitches in place, one arm outstreched.
 

ElPanandero

Smash Lord
Joined
Jan 31, 2010
Messages
1,100
NNID
ElPanandero
Chucky

Overall a pretty fun set, a good throw back to the movie character. Although I felt the 12 second cool down is a little long for someone as light as Chucky, while the 5 seconds may have been a little fast (though I may be overestimating the difficulty of escaping). ...
 

Junahu

Smash Ace
Joined
Nov 15, 2005
Messages
899
Location
Shropshire Slasher
Harbinger: I've yet to purchase and play Mass Effect 2 (and I'm on a plot blackout until I do) so I have to make the assumption that this is how fights with him act within the game. However, and here's where my ignorance of the plot kicks in, I would think that the ability to assume direct control would be something Harbinger could do at will, rather than only when he's actually in direct peril. It would certainly help reduce the sheer volume of stalling attacks Harbinger deems neccessary to use, as there are truly so many that it precludes him from playing in any other fashion.
And the Husks; these things come right out of left-field in my opinion, and tarnish the set's main focus of the collector drones. True, you do make them extremely useful and relevant, so my complaint is rather one of aesthetics and match flow... 9_9

Anyway, no more whinging. Harbinger was a truly entertaining set, with enough simple twists to keep my interest and a playstyle that is unashamedly camper-ish (That's a good thing. Because way too many people make campers and pretend that they're something else). Every attack managed to keep a good balance between creativity and practicality and, of course, I'm pleased as punch to see you putting in some extras now.

But... the Final Smash... at least try to embellish it with a little more pep than a token paragraph


Chunky Chucky: Even if hell froze over, your sets would still be a reliable source of quirky glee. So thanks for being consistantly entertaining.
You've embellished absolutely every attack with an additional effect, though in a way that brings Brawl's randomness by design (the essence of any good party atmosphere) to mind. Almost every attack manages to be clear enough in its effect and purpose, with only the smash attacks being jarring to look at. It definitely feels and acts like Chucky, which is an accomplishment in itself
The adaptation of various standout moments in Chucky's career is, for the most part, better handled than the obvious scene/quote rips that decorate your other sets. I much apreciate the subtler touch employed here, and the end result is all the better because of it.

Instant KO pummels/grabs, are something that irritates me however. They take far too many variables out of the game, and in this case, it cheapens Chucky's playstyle immensely.

Also, one of these days, you're going to have change to a new organisation template...
 

Katapultar

Smash Lord
Joined
Nov 24, 2008
Messages
1,258
Location
Australia
Sorry KK, the mood for commenting on your 2 sets fell out of me. I'll be one of the many others to you've definitely improved, more and more so. From reading the 2, I'll try and scoop up some advice. First, I liked your sense of releasing what's on your mind, but it would be better to get to the point and save it for last, though I think Im repeating this advice too much. In addition to the concept of writing, while DM said that he, MT or Rool could help preview, I can too (I usually get on SWF 1-2 times a day). Though by yourself it would be good to make sure you check your sentences twice, think aloud to yourself and see if they make sense. Works pretty darn well. And finally, if an attack has some usefulness in conjunction with another, try to state it in the attack to remind the reader, say if a standard goes great with a special. That's some advice I can give you from reading Noddy and Bomber (hopefully it isn't misleading). Keep improving, as by now you should definitely get the award for the most improved MYMer. Hands down in my opinion.

Another horror character from Kupa! Who next?

[size=+3] Chucky[/size]
Chucky's an alright set. No Pennywise buzz to it though. The concept of the Neutral Special is nice, but it didn't seem to carry on in any special way from there, everything seemed...kind of dull. Even with some not so generic effects, the set felt boring due to having little interactions with the great specials. It was only with the D-throw where being able to stop mashing did I see something else that was great.

What Im trying to say is, to put it simply, is that the set felt very generic. Maybe somewhat unexciting without a extra image or 2 to go with it since Pennywise had that.

On the other hand, I liked the colored organisation (your organisation usually is most impressing for what you've got to work with), the Neutral Special and the Down Special, and the Final Smash (which was possibly broken but I don't really care, still a pretty good idea).

By the way, this comment is not based on character bias. I hate the character though, but that had nothing to do with the comment itself.
 

Kaiser6012

Smash Cadet
Joined
Dec 28, 2009
Messages
32
Location
Brisbane, AUS
UNCLE CHUCK-CHUCK

Well now... this is a fun set, no doubt about it, but it feels a bit bland. I think it's because most of the set isn't about exploiting strengths but trying to cover up weaknesses. Worse, the only thing that helps out your main power is a bad thing for you. Most of the attacks you've got seem to pull Chucky to a complete standstill, which is bad for a speed deamon.
That being said, you've made the beginnings of an awesome serial killer set, especially with the cord and the bags. If you maybe made more of a focus on his size and general "innocent" demeanour... maybe a couple of mindgames and less of a focus on speed could really make this set shine. I give this set two-and-a-half knives out of five. Less speed, more psycho and this'd be a killer!

Also, as a side note, I'm starting work on a Story Mode with potentially characters from MYM 5, 6 and 7. Anybody who wants a say in the roster rock over to this poll: yeah, the one right here.
A few rules, though: you can only vote once a day and the polls close when voting commences for MYM7. It'll be entered bright and early for the comp in MYM8.
Finally, I've made a change in plan for the next set I'll be doing. Shadow Man is out, but there is another set I'll be working on as I make the Story mode.
Have fun, guys and dolls!
EDIT: I apologise. The link has been fixed to show the right link, not something random.

P.S anybody who doesn't get the joke, Uncle Chop-Chop is a nickname Mark Brandon "Chopper" Read uses when referring to himself. Chopper is a notorious street criminal who basically made a living beating the @%(% outta people.
So yeah.
 

darth meanie

Smash Journeyman
Joined
Jun 6, 2008
Messages
452
I Wanna Play

Chuckie Cheese

How droll of a set BKupa. First of all, I found this set to lack any sort of charm. Despite the subtle dark humor, the lack of distracting and jarring images made it all seem boring. Besides that, it was quite unsmash, and had too much of an emphasis on speed to be interesting, regardless of how in character it was. You should've put some mindgames in. Beyond that, he's swimming in props. Even if they're character defining, what is this, MYM4? He fights with nothing but the items that drop from the sky like everyone else, so it's realistic.


The moveset itself came together more nicely than I expected. While I've had enough of stamina style KO moves as the next guy, the use of stunners to extend the length of these moves, and the use of several different types made his playstyle MUCH more interesting than it would have been otherwise. Truly, playstyle has become a strength of yours lately; Zinger, Stanley, and Chucky all had these nice fusion of concepts that created surprisingly good sets from a lot of simple ideas.

On the other hand, the tendency you had to take a backdoor to rebalancing moves disappointed me. No BKupa, adding a recharge time to a move to balance it is not an acceptable strategy, especially when there's not a single way to tell without an excellent sense of time when the time has expired or not. I found this especially egregious with the aflame move, which was far too propish for me to accept (he bursts into flame for no discernable reason), but it had a full recharge mechanic without any numbers inside it or any outward signs of what was going on in it.

Also, your use of priority is still a bit frustratingly obtuse. Jointed priority really isn't as clear cut a line as we though it was, so just saying a move cancels all of it out doesn't exactly work. Plus the Up Tilt claims to have good priority to protect from aerials from above. Aerials don't clank though. Ever.

That said though, the use of the choke wire and ziplock bags in conjunction with stunning moves created a very compelling set that actively works at wearing the foe down for their kill move and using set ups that feel natural, not forced. It also perfectly fits the style of a slasher villain; although I've never seen the series, you captured the character perfectly. A good job here.
 

Hyper_Ridley

Smash Champion
Joined
Dec 21, 2007
Messages
2,291
Location
Hippo Island
Chucky

Sadly I've never seen any of his movies besides a few clips, but I have to say that the moves definitley had a cruel, brutal vibe to them, with the side-special being the most notabe IMO. I liked how you managed to give his knife swings actual interesting effects without forcing it. His playstyle was cool, it was like a balanced Meta-Knight (though Chucky does "regular" KOs instead of gimping). Though bleh @ instant-KO move, lulz.

Netural Special WOULD be great except that you're punished so much for using it. Besides letting my enemy charge a smash for when the move ends, I end up with a stat nerf for using it at all, and then after the TEMPORARY relief from USmash, I jsut end up punished EVEN MORE. Invincibility frames (not even full invincibility either, just from non-fire attacks that deal less than25%) are not worth this many negative after-effects, especially when other characters have invincibility attached to real damaging attacks with none of the drawbacks.

In your defense, tehcnially his UTilt can be said to "outprioritize" aerials in the sense that his knife swing will provide a wall against the enemy's attack that prevents them from reaching Chucky's hurtbox. That's actually exactly how Street Fighter's "priority" works, it's just how well your attack's hitbox blocks the enemy. Just thought I'd get that out there.

I'd place this set just under Fat Bastard's level. It's well-characterized (AFAIK), and while it didn't really do anything amazingly, it does do most things pretty well.
 

MasterWarlord

Smash Champion
Joined
Aug 24, 2008
Messages
2,902
Location
Not wasting countless hours on a 10 man community
CHUCKY

I don't see the main problems you lot are seeing with the moveset. Props? Good god, people, he's using his knife for over half the moveset, which he'd probably be constantly having out. Instant KO grab. . .? While I'm obviously biased, Chucky doesn't actually do it through his pummel, for once, and this stereotype isn't one that dominates an entire moveset, more often then not (Unless you're the Count). I particularly like the dair/Up Special stacking together. . .And Junahu, please tell me why you dislike Harbinger stalling, but fully embrace the fact that he camps? I'm beginning to realize how crappy these stereotypes really are, Rool.

So we're disliking stereotypes based off smash practicality, or what, now? Apparantely that's the only valid complaint DM's got on Golem, who's very, very, very far from Lunge's level. Instant KOs aren't nearly as wonky as mechanics that are so insanely complicated they have to handle themselves, Junahu. At least you still have to rack up damage rather then getting up an arbitrary mechanic, which already puts instant KOs well below many other concepts for feasibility. Sorry that we just skip the bit with them randomly flying off a blast zone.

Now that I'm done ranting, we'll get back to Chucky. The one thing I can't get on-board with that everybody's praising is that this set is void of tacked on effects - dtilt and dthrow are the main culprits with randomly doing extra stuff despite looking to be just as ordinary knife stabs as everything else. Dthrow's playstyle relevant, okay, so I won't go on forever for one move. . .Though Usmash deserves special mention, seeing it's just a generic magic syndrome mechanic manipulator that ultimately isn't any more useful then using Neutral B twice.

Christ, I complained about three moves and excused one of them for one paragraph! Either looking at the other ridiculous complaints made me way too pessimistic, or there's really not much to complain about here. . .Which there isn't. Definitely one of your better movesets.
 

Junahu

Smash Ace
Joined
Nov 15, 2005
Messages
899
Location
Shropshire Slasher
. . .And Junahu, please tell me why you dislike Harbinger stalling, but fully embrace the fact that he camps? I'm beginning to realize how crappy these stereotypes really are, Rool.
I didn't say I liked him camping, I said I liked how frank the set was with its identity as a camping/stalling moveset. My main complaint on the stalling, stems from my belief that Harbinger could, and probably should, be more aggressive than the set encourages him to be. Camping and Stalling are not the same thing. For one, you can be an aggressive, short range camper..

Sorry that we just skip the bit with them randomly flying off a blast zone.
That's the best, most satisfying part of playing Smash Brothers. It's a certifiable trademark of the game's kinetic frenzy. The players don't stop moving, one moment they get blasted off of the stage, and the next they're right back into the frey.

Besides, I liked Chucky. The KO by strangulation irked me, but it was hardly a deal breaker.
 

Junahu

Smash Ace
Joined
Nov 15, 2005
Messages
899
Location
Shropshire Slasher
Double, and Triple post... Must be a Junahu moveset

Everyone knows the deal, you open this post up in a new window. That way you have access to all the music and such, at once


Dracula's Castle: You can one-shot Wargs? YEAAAAAH-ah crap, here's Death
Dracula's Castle Chipmix: Same song, with even more retro flair
Dracula's Castle Judgementmix: Same song, only in a bad game this time

The Tragic Prince: Prince, because his dad's Dracula. Tragic, because he got stoned by Medusa heads AGAIN.
Dance of Pales: Skeletons with boomerangs... Skelerangs!? SKELERANGS!?
Tower of Mist: Mist could pass...
Wood Carving Partita: I'm interested in this..
Wandering Ghosts: Who's up for a copy-pasta boss from the previous game?
Nocturne: Nothing says "gothic" like a cute fairy song sung to an androgenous dhampir
Hidden Track: This is a Playstation Black Disc. Cut #1 contains computer data, so please, don't play it.
Prologue:Die monster! You don't belong in this world!
Festival of servants: That's.. that's a mighty LARGE floating ball of tortured corpses firing lasers at me.
Enchanted Banquet: Death in the dream world will set your soul wandering for all eternity.

Black Knight: STOP...JUMPING!
Monster Dance: What a horrible night to have a curse
Clockwork: Boy, it sure would be lame if I had to play this stage again, in reverse... ¬_¬
Simon's Theme: With a title like that, you would expect it to be Simon's theme. Strangely enough though, it's not.
Calling from Heaven: British Death kills you with cards. He's just that much more sophisticated
Dance of Illusions: Playtime's over! Grant..me..POWWWEERRRR!
Violin Theme: Hey, it's not a bad game, at least until you press start
The Sinking old Sanctuary: Same game, +1 character. That totally justifies spending another £50
Darkness of Fear: So, you have a character who manipulates the fabric of time, what's his special attack? A giant laser..
Empty Tome: Lord DraculaaaaAAAAA!
Order of the demon: H-he's... WALKING!? Oh, God, he supposed to be teleporting around predictably! Shi- Run!
Riddle: What a horrible night to vanquish this miserable little pile of morning sun. And the night!

Hungarian Dance No.5: As made famous by Donkey Konga and Leslie Nielson
Toccata and Fugue in D Minor: A genuine classic, accept no substitutes.
Rusty Level 3: It's totally not a Castlevania clone. See? You CAN'T whip the candles
A Secure Place: Zombies and Vampies are the same thing, right? This track is justified... right?
Credit Line of Whole Staff: Play this track once you've read the whole set, for maximum feeling of acheivement.


Castlevania Legends Alucard boss: Apparantly, not canon. But then again, nothing on the Gameboy is.
Castlevania III Alucard boss: Aim for the head Trevor!
Castlevania III Alucard level1: Donut you just love name entry cheat codes, eh "AXEARMOR"?
Castlevania III Alucard ending: Alucard feels guilty because he killed his real father
Kid Dracula Galamoth boss: Oh that wacky prince of evil! What adventures will he get into this time?
Castlevania Sotn Death: He has nothing better to do than to steal all your weapons and armor
Castlevania Sotn Granfaloon boss: Someone, please, make a moveset out of this.
Castlevania Sotn Galamoth boss: Optional bosses are such a pain
Castlevania Sotn Alucard boss?: Is he a boss in every Castlevania game or something?
Castlevania Sotn Trevor, Grant & Sypha boss: Killing your old teamates/zombies is three times the fun.
Castlevania Sotn Nightmare: Sucks to be that Succubus
Castlevania Dawn of Sorrow Soma boss: Some of these sprites look awefully familiar..
Judgement Alucard's Ending: Donut worry, none of this will come within a 5 mile radius of the moveset itself
Alucard Vs Richter: Crush this flea who invades my castle!


Author's Note/: If you're a cool kid, you'll recognise what this set is a "homage" to immediately. If not, or you have a shrivelled black heart of coal, then try to enjoy it on its own merits. If you can't do that, then... serves me right I suppose...


\/Time for the moveset then\/
 
Status
Not open for further replies.
Top Bottom