“To get something, you evidently have to take it away from somebody else.”
Lust is one of seven homonculi, the main antagonists of FullMetal Alchemist, a popular anime and manga. Each of the homonculi are named after one of the seven deadly sins. This moveset is based off her anime incarnation. Lust prefers to work in the shadows and manipulate other to do her bidding, but is more than capable of fighting on her own. Lust's main power is to extend out her fingers to stab people, them being razor sharp.
Stats:
Size: 6.5/10 Lust’s size is nearly identical to Marth’s, the standard human height, but she’s slightly shorter what with her being a woman.
Weight: 5/10 Due to being a humanoid she’s not –that- light, but far from heavy.
Walking Speed: 3/10 Lust takes her time, walking casually.
Running Speed: 7/10 Thankfully, Lust can still run swiftly when need be.
Traction: 8/10 Lust is rather graceful in this regard.
Power: 5/10 Lust’s moves for the most part are rather weak, but she still has a couple of moves with some half decent knockback. Still, the amount if nearly never enough to KO.
Attack Speed: 7/10 Lust has lots of fast moves and has very little starting lag most of the time, but has notable ending lag on a good few occasions that will keep those seeking nothing but speed away from her.
Range: 6.5/10 Lust’s main advantage that sets her apart is how far she can stretch out her fingers. Still, not all her moves have good range and Lust has no projectile, her just having some select moves with good range.
Priority: 6.5/10 Lust’s moves are really out there in that some have good priority while others have little, it varying from move to move. She isn’t too consistent with priority, but on the whole it’s a bit above average, especially when you weigh in the disjointed hitboxes.
First Jump: 6.5/10 Lust is decently agile.
Second Jump: 4/10 However, Lust doesn’t have magical powers that can make her gain that much ground in the air.
Recovery: 6.5/10 Lust’s recovery isn’t outstanding, but she has the option to recover vertically orhoizontally, a luxury unavailable to most characters. She can also deal quite well with those who attempt to edge guard her.
Fall Speed: 4/10 Lust is slightly floaty, but not extremely so.
Crouch: 6.5/10 It reduces her size a good bit.
Crawl: 5/10 Above average movement speed.
Wall Jump: No.
Wall Cling: Yes.
Hover: No.
Gliding: No.
Basic Actions/Animations:
Basic pose: Lust has her arms at her sides in a fairly standard pose for a woman.
Idle pose: Lust puts a hand on her hip and leans to the side.
Walking: Lust walks slowly and elegantly, being completely casual about the battle.
Running: Lust cuts the class out of her movement to pick up a bit more speed.
Dashing: Lust hunches over and starts dashing forward.
Crouching: Lust lowers to the ground in a pose like a cat ready to strike.
Crawling: See ZSS’s. Sexy characters are mandatory to have a crawl in this fashion.
Jump 1: Lust crouches down close to the ground then springs up. She goes through the motion very quickly.
Jump 2: Lust spins around in the air as she rises, it being fairly standard, albeit her hair flies around in the wind a good bit during it.
Shield: Lust extends out her fingers and impales them into the ground in front of her to block as the standard bubble shield forms.
Sidestep: Lust does a motion like Zelda’s dsmash, but leans into the background as she does so.
Rolling: Lust leaps off the ground very slightly forwards/backwards.
Air Dodge: Lust extends her fingers very slightly and turns to face the screen as she does a quick slash to force herself to be pushed into the background, then leans back into the playing field.
Wall Cling: Lust impales her fingers into the wall she “clung” to, hanging there as you “cling” to the wall.
Sleeping: Lust falls over onto her back and extends out her fingers to make a pillow. She’s one of the few who actually sleeps on the ground.
Dizzy: Lust staggers back and forth with her arm on her head, and occasionally accidentally extends out her fingers on the hand holding her head, stabbing herself.
Special Attacks:
B – Lust’s Grasp: Lust extends out her fingers straight ahead in the direction she’s facing, you able to control the fingers in which direction they go vertically as they move forward at the speed of Ganondorf’s run. Upon reaching out the distance of two battlefield platforms with her fingers without coming into contact anything, they’ll retract back to her at the same speed, leaving her open if you whiff this. This has no start up lag whatsoever, so this is a good move to catch foes off guard with. Lust’s fingers are a disjointed hitbox (And this counts as a grab) in the move, but you don’t need to attack them as her fingers are no longer hitboxes when they’re retracting back to Lust, so if you just wait a moment you can punish her with ease.
If the fingers come into contact with a foe, the fingers will retract back to Lust and she’ll hold them as if she grabbed them normally. If Lust grabs somebody in the air, she’ll retract the fingers back to herself, floating in midair briefly, then fall like a rock with them to potentially Lustcide. If you use this move in the air at all Lust will float as she uses it, making it a good tether recovery and an alternative to the up special. Lust can grab foes edge hogging with no problem to Lust-cide with them, though beware that you can’t just camp off the edge trying to grab somebody by taking advantage of the float, as this move makes you go into your helpless state if you whiff it in the air. This move can also be used to grab items, but who ever plays with those?
B Side – Seduce: Lust reaches out her arms to try to grab a foe, it doing no damage and counting as a grab. This has good range for a grab and nearly non existant lag on either end, even should you miss it. Upon grabbing someone with this move. . .She doesn’t throw them. She. . .Kisses them?!? Lust lives up to her name here as she tries to use her appearance to try to shock her enemies. Upon kissing the foe, they’ll be stunned for a lengthy 2 seconds, allowing Lust to fully charge a fsmash or whatever else she pleases. Considering the move has little lag on either end, it’s totally broken, right? Not so much, considering this move is actually realistic in that people won’t fall for it multiple times. . .At least most people with half a brain. This move even has no effect whatsoever on some characters, such as females, obviously. Against females, mindless beasts, and brats, Lust won’t even try it (No hot action for you or pedophilia/beastality for the weirdos) and instead will simply smack them to the ground for 5%. Below is listed who will fall for Lust’s act and how many times they will do so (Those with N/A Lust smacks to the ground). The count is reset when the target loses a stock.
The move can also be performed in the air, still counting as a grab like Bowser’s side B. If performed in the air, the foe is sent into their helpless state instead of being stunned, meaning this move’s best use is most probably for gimping. The move has more ending lag in the air if you miss, though, so be cautious.
(This is hardly a necessary read, so feel free to skip to the section with your characters. If you’re even remotely close to a regular at the time I wrote this a month before MYM 4 ended, your sets will be on here.)
Code:
[B]Brawl Cast:[/B]

Mario: 1
Luigi: 2
Peach: N/A
Bowser: 3 (With how much he hits on Peach, he’ll happily take as many chances as he can to get it on, but when he starts getting the crap beat out of him he’ll stop gawking)
Donkey Kong: 2
Diddy Kong: N/A
Wario: 2
Yoshi: N/A
Link: 1
Zelda/Shiek: N/A
Ganondorf: 0 (He’s a heartless villain, he’s used to this)
Toon Link: N/A
Samus/Zero Suit Samus: N/A (On regular Samus, Lust will take Samus’ helmet off, thinking she’s a guy like all the Metroid noobs, but then will be stunned herself for 2 seconds as she realizes she’s a woman. Samus’ helmet will remain off for the remainder of the match and Lust will just smack her to the ground with any more attempts.)
Pit: 2 (He’s an angel. He can’t hit a woman!)
Ice Climbers: N/A
R.O.B.: 0 (Robot)
Kirby: N/A
Meta Knight: 0 (The mask acts as a shield, and a kiss mark will be left on it for 10 seconds)
King Dedede: 2
Olimar: 0 (Same case as Meta Knight)
Fox: 1
Falco: 1
Wolf: 1
Captain Falcon: 3 (How could any chick resist the captain’s manliness? She obviously can’t be faking him out.)
Pikachu: N/A
Pokemon Trainer: N/A
Lucario: N/A
Jigglypuff: N/A
Marth: 0 (Unlike the rest of the Brawl cast, he’s married)
Ike: 1 (All those who think he’s gay are crazy yaoi folks. He’s AT LEAST Bi.)
Lucas: N/A
Ness: N/A
Snake: 0 (He’s seen enough women with freaky powers, he’s not gonna fall for this routine.)
Sonic: 1
Mr. Game & Watch: 1

[B]SSB4 Candidates: [/B]

K. Rool: 2 (Donkey Kong 64 ending anyone?)
Ridley: N/A
Bowser Jr.: N/A
Krystal: N/A (Since she’s a ***** she might actually fall for it, but Lust doesn’t try it.)
Mewtwo: 0 (Genderless and evil)
Roy: 1
Little Mac: 1
Black Shadow: 0 (Heartless villain, same case as Ganondorf)
Isaac: 1
Ray 01: 0 (Robot with no emotions)

[B]MYM Characters:[/B]

[B]-MasterWarlord-[/B]
Voldo: 0 (Mindless killer)
Nightmare: 0 (SOOOOOULLLLSSS!!!)
Cervantes: 0 (Undead villain)
Cortex and Tiny: 3 (Both of them are quite stupid in this regard)
Dimentio: 0 (His mask is a shield like Meta Knight’s)
AI Colonel: 0 (Computer Program)
Joker: 1 (It would be zero, but the Joker thinks this is a fine chance to terrify her with his infamous “Why so serious”? routine.)
Klump and Krusha: 3 (Krusha is ******** and Klump is far from the brighest guy around)
Capsule J2: 1
Zasalamel: 0 (He’s beyond the pleasures of life and only seeks death)
Illidan: 0 (Villain)
Beast Boy: 2
Halberd Crew: 1 each (Except for Mace Knight, who is robotic)
Gluttony: 6 (The worst case by far. Gluttony can never accept having to fight his precious Lust.)
Envy: 0 (He’s more then familiar with Lust’s routine, he’s one of her associates)

[B]-Chief Mendez-[/B]
Megaman: 1 (He’s a robot so he doesn’t have the urges, but he’s still rather shocked)
Dracula: 0 (What is a woman? A miserable little pile of crap.)
Simon Belmont: 1
Phoenix Wright: 1
Sora: 1
Deoxys: 0 (Genderless)
Mach Rider: 2 (Wanna go for a ride on my motorcycle, babe?)
Cat Clancer: N/A
Gordo: N/A

[B]-SirKibble-[/B]
Superstar Helpers: 1 Each
Mr. Shine and Mr. Bright: N/A
Dynablade: N/A
Protoman: 2 (He’s a robot, but with those shades he obviously still somehow gets some)
Frog: 1
Gemini Man: 0 (Robot)
Cappy with two Gordos: N/A

[B]-KingK.Rool-[/B]
Headless Horseman: 0 (Usual case for serious villains)
Squeak Squad: 1 Each
Powers Kirby: N/A
Grim Reaper: 0 (He’s probably had some people do this to him before in his day job to cheat death)
Snorlax: N/A
Electrode: N/A
Galaxy Man: 0 (Robot)
Jafar: 3 (While fitting the heartless villain stereotype, he’s not exactly immune to feminine charm, as seen with Jasmine in the movie)
Zant: 0 (Villain)
Chef Kawasaki: 1

[B]-Chris Lionheart-[/B]
Sam Lionheart: 4 (He’s really persistent with getting some action with Kelsey. . .)
Kelsey: N/A
Ashencroft: 0 (He’s only the devil himself)
Michael: 0 (He’s a divine angel, he knows who’s sinful and who’s not)
Bastian: 2 (In his little world his long poems make him a good womanizer)
Haar: 1
Arthas: 0 (Villain, Undead)

[B]-Hyper_Ridley-[/B]
Hyper_Ridley: N/A (HR would obviously fall for this, but Lust doesn’t try it)
Nack: 1
Daroach: 1
Bass.EXE: 0 (Robot)
Death: 0 (Another incarnation of the Grim Reaper)
Wheelie: N/A
The Raptors: 0 (A fleshy woman! Yum yum!)
General Grevious: 0 (Partly robotic)

[B]-Spadefox-[/B]
Kefka: 0 (Whee another heartless villain)
Guntz: 0 (Bounty hunter, no interest in women)
Aeon: 1
King Harkinian: 0 (What would Queen Harkinian say?)
Lyon: 0 (Heartless villain)
Bill: 1

[B]-Dancingfrogman-[/B]
Metal Knuckles: 0 (Robot)
Tails: N/A
Dr. Robotnik: 2
Tails Doll: 0 (Emotionless robot that wants your soul)
Omega: 0 (Robot)
Undead Hero: 0 (While a hero, he’s undead)

[B]-Junahu-[/B]
Donna: N/A
Megaman 9 Megaman: 1 (Just like regular Megaman)

[B]-Kholdstare-[/B]
Fierce Deity Link: 1
Angry German Kid: 0 (He will ****ING KILL YOU!)
Shadow Beast: N/A
Wiz: 1
Anonymous: 0 (His pummel is entitled “****”. . .)
Sir Aaron: 1

[B]-BKupa666-[/B]
Kaptain Skurvy: 1
Ken: 1
Iago and Zazu: N/A (While Iago would indeed probably fall for it, Lust doesn’t bother trying it)
Hades: 1 (Same case as the Joker. Hades still intends to attack her, but wants to have some fun with her first.)

[B]-TWILTHERO-[/B]
Sagi: 1
Leonardo: 1
Gibari: 1
Milliarde: N/A
Guillo: N/A
Kalas: 1
Giacomo: 0 (Villain)
Gaara: 0 (No value of human life)
Sasuke: 1
Three Days Grace: 1

[B]-Tanookie-[/B]
Maria: N/A
Alucard: 1
Peter Pan: 0 (I’ll never grow up! Girls are gross!)

[B]-MarthTrinity-[/B]
Sloth: N/A
Pyramid Head: 0
Henry Townshed: 1
Shanoa: N/A
Smithy Gang: 0 (They’re all robots)
Axem Rangers: 1 for each member (Unless pink is out, then 0)

[B]-TheSundanceKid-[/B]
Kid Goku: 1
Sakurai: 0 (He made the game, he knows what Lust’s moves do)
L: 1

[B]-Kitsuneko345-[/B]
Plusle and Minun: N/A
Delibird: N/A
Apollo Justice: 1
Klavier Gavin: 3 (Have you not seen the hordes of screaming fangirls in his final smash?)
Ema Skye: N/A

[B]-SkylerOcon-[/B]
SkylerOcon: 0
Toon Link Remix: N/A

[B]-SmashDaddy-[/B]
Vivi: 1
Raiden: 1
Solidus Snake: 0 (Villain)
The Horde: N/A

[B]-Half_Silver28-[/B]
Batman: 1
Spyro: 1
Midna: N/A

[B]-Agidius-[/B]
Simirror: 1
Mallow: 1

[B]-Lenus Altair-[/B]
Raphael: 0 (He kills his own women with no hit to his conscience)
Venger: 0 (Villain)
Yusuke: N/A

[B]-~Cruxis~-[/B]
KOS-MOS: N/A
O’Chunks: 2 (He’s not the brightest fellow)
Aladdin: 1

[B]-Sonic the Baron-[/B]
Hobo Santa: 2 (He’s a hobo, he’s used to getting some from random people on the street)
Youtube Toilet: 0 (Inanimate object)

[B]-The Trophy Master-[/B]
Prof. Rowan: 1 (The first time is sheer shock, he’s not interested in it)
Pokey: 0 (Mindless Beast)
Dr. Mario: 1

[B]-Tornadith-[/B]
Gatomon: N/A

[B]-Akiak-[/B]
Dexter: N/A
Wynaut: N/A

[B]-Smashbrosmike-[/B]
Scorpion: Infinite (Because the moveset is that bad)

[B]-Generictacokid-[/B]
Pokemon Trainer without Pokemon: Infinite (Above case)

[B]-PrincessPeachLuver-[/B]
Vexen: Infinite (Above case)
So in conclusion, unless you want to memorize every single bloody character’s reaction to the move, you’d best think logically about which characters wouldn’t fall for the attack. This makes a bigger skill gap in good Lust players due to them being able to memorize the effects of the move. Smash Bros. always has been a series that’s given large attention to small details.
B Up – Finger Spring: Lust does a handstand, and weighs down on her fingers, then the fingers extend out for her to use them as springs, a “sproing!” sound being heard as she launches herself backwards. Lust goes up triple Ganondorf’s height for an excellent vertical recovery and the width of Bowser backwards for this recovery. This move doesn’t exactly make logical sense in the air, but it’s her main recovery none the less. Lust must choose between horizontal or vertical recovery between her up and neutral special, her unfortunately not able to have the best of both worlds. As Lust shoots up (Which takes about half a second), her body is briefly a hitbox with high priority (Though not perfect), doing 10% with average knockback away. Due to going into your helpless state at the top of the rainbow arc, this obviously isn’t good as an actual attack on it’s own.
B Down – Nail Polish: Lust casually takes out some nail polish and starts coating her fingernails with it. Great time to do that in the middle of a battle, huh? Don’t worry, this is far from useless, and is merely a cover up for what it really is – venom. This functions as a chargeable move where you can hold the charge like the neutral Bs of Samus and DK, but there’s no big hit to be fired upon charging. Instead, for each two nails you polish with venom, your moves will deal 1% extra poison damage (Or at least the ones with the nails as hitboxes, which is nearly all of them). It takes half a second to envenom each nail (If you zoom in you can see them turn green), meaning it takes 5 seconds to fully charge the move. The bonus damage from poison is 1% per second until all the poison damage is surpassed, although if you hit a foe with another move before all the poison damage for the last move has accumulated it will overwrite the previous poison. This makes Lust a fierce damage racker, but doesn’t add to her abilities too considerably seeing the effect isn’t nearly as potent on a character who can actually follow up their attacks thus overwriting the poison. The effects of the venom will be used up after 10 hits (Multi hit attacks still only count as 1 hit), and if you use this button input when maxxed you’ll just start renewing the current venom coating. Just make sure you charge this with extra care in comparison to other charged attacks, as if you’re hit while charging all the poison you’ve coated on your nails will be splattered, you having to start the process over.
Basic Attacks:
Neutral A Combo - Lust’s Pull: Lust stabs out one of her fingers forward upon the first press of A, it going out the length of a Battlefield platform. This does 4% and a flinch to anything it comes in contact with. Upon the second press of A, Lust curves her finger in an arc, then jerks it back towards her, pushing anybody in range right up in front of her for 5% and another flinch. This has slight ending lag as Lust retracts her finger, but not longer then the hitstun, so you can still take advantage of your foe if you hit them. It’s just something to keep in mind in case you miss as it gives a small window to punish the move.
Forward Tilt – Nail Wall: Lust lifts her hands up above her head, makes her fingers go into an arch without extending them so they face downwards, then extends out her fingers to impale into the ground. This only covers directly in front of Lust, and the hitbox is only around when Lust first extends her fingers to smack them down into the ground. This has decent priority with 7% damage and below average knockback, there being slight starting lag but nowhere close to average. After you’ve made a wall in front of yourself with your fingers, you have to press A again to take them out. This has average starting lag, but some earth comes up out of the ground as Lust does this, created a small disjointed hitbox in front of Lust that reaches half a Battlefield platform and does 3 hits for 1% and flinching. There is no ending lag for the second attack. What’s interesting about this attack is that while Lust’s nails are in front of her like a wall, it will block projectiles. You can keep the wall in front of you as long as you want, then kick up some earth as your foes come closer to get around your wall.
Up Tilt – Bed of Nails: Lust raises one hand above her head and puts her other hand onto the ground. Lust then extends out the fingers on her hand on the ground out to turn into a little bed of spikes the size of length of a battlefield platform going up the height of Wario, and at the same time slashes downwards with her other hand above her head. The slash above Lust’s head has a hitbox the size of Kirby directly above her with below average priority, and the entire move has average start up lag as she sets it all up. The slash above her head does 7% and spikes them into the “bed of nails” she’s prepared, which in turn does another 8% with slightly above average upward knockback. It’s possible to hit with just the bed of nails, but only the tips Lust’s fingers are hitboxes meaning the main way you’ll get foes into it is with the other hit. Lust holds out the bed of spikes just long enough for anyone hit from the slash up high to be hit into it, then retracts all her fingers and puts her hands at her sides, giving the move very brief ending lag. This is one of Lust’s laggier attacks, but still has damage racking potential, especially with poison damage.
Down Tilt – Earth Driller: Lust points to the ground with her pointer finger, then extends it out to stab into it. She then rapidly spins the finger around, causing rock chunks to fly about as she drills into the earth. The nail is a constant hitbox that does 5 hits of 1% per second with a flinch so long as you hold A with decent priority, having a hitbox half Lust’s height. The rock chunks fly the width of Bowser away before hitting the ground and vanishing, doing 2%. Two rocks chunks come out from the ground either side every second as Lust drills into the ground. Due to Lust’s neutral A combo not being an infinite, this will be the button input you’re using when your foe is up against a wall. This has below average lag to get into the position with nearly no lag to come out of it.
Dashing Attack – Lunging Swipe: Lust leaps forward, slashing her nails down onto her target. This does an impressive 10% and average knockback and is very fast to start up. However, if you don’t hit the enemy with the attack, Lust will fall to the ground after doing the slash, going into her tripped state. This is a great move to throw in to mix things up, but foes will become very used to predicting this move and punishing it if you abuse it. Assuming Lust misses the move, she travels a Battlefield platform away from where she started the attack.
Smash Attacks:
Forward Smash – Night Slash: Lusts slashes forward with her fingers, having average range and bad priority. This does. . .5% and a stun? This has virtually no starting lag whatsoever, but Lust stands in place for a full second (Yes, the stun lasts a second) after this. After this, the area where Lust slashed will flash briefly and five huge claw marks the size of Bowser (When all together) will appear as a loud slash sound is heard. This is disjointed from Lust and does 19-20% with above average knockback, 25-26% and huge knockback fully charged. The main attack won’t occur if Lust is hit before it happens, meaning that while this move is easy to hit with Lust is in for hell if she does somehow miss. This is without a doubt Lust’s main KO move, though foes at low percentages can button mash to get out of the stun before the main attack occurs, so Lust still has to rack considerable damage before this will actually finish anyone.
Up Smash – Spinning Tower: Lust does a handstand and extends her fingers, balancing herself on them. Lust extends her fingers more and more as you charge the attack, them potentially extending to triple Ganondorf’s height if you fully charge the attack. Upon releasing the charge, Lust spins her legs about from her new height, doing 10 hits in half a second that do 2% each, then finishes by clapping her legs together for 10% and above average knockback. All of the moves have good range and priority as far as melee range goes due to Lust’s long legs. This move is Lust’s most powerful and can do 30% total, but it can only be used for anti air. If you don’t charge the smash attack at all, Lust won’t extend her fingers whatsoever, but if you do, they can be attacked to interrupt the attack, knocking Lust down to the ground as she loses her balance. Though she won’t take any damage from the attack that hit her fingers, she’ll have a second of end lag as she gets back up to her feet which is easily punished. This move has good mindgames for when you’re going to release the attack, and you’ll need to use them to the fullest if you want to actually connect this move.
Down Smash – Five Star Finisher: Lust turns to face the screen and steps into the background, then starts extending out her fingers into a complicated design. She forms a star shape with all her fingers, it being razor sharp. Contact with the “star” deals 17-18% with average knockback, and the move has slightly below average starting lag as she forms the design. The move is disjointed as Lust is in the background with her fingers in the foreground, but also has slightly below average ending lag as she carefully retracts her fingers out of the star design to avoid tangling them. Depending on how much you charge the attack, different star designs will be made. The only difference in the star designs is the size of their hitboxes, no matter how fancy they look. . .Save the fully charged one, anyway.
This makes a good defensive move, especially if you charge it, and is a great move to walk into a clash in a free for all with. Just keep in mind if you whiff it you can easily be punished, and it’s far from a good KO move or damage racker. The more you charge the attack, the more ending lag it will also have as Lust has to come out of the more complex designs, but it’s not much, the fully charged version only going to very slightly above average end lag.
Below are the various star designs:
0-24% Charged: Five-Pointed Star (Hitbox the size of Wario)
25-49% Charged: Marian Star (Hitbox the height of Marth with Wario’s width)
50-74% Charged: Pentagram (Hitbox the size of Bowser)
76-99% Charged: Star of David (Hitbox the height of Ganondorf with Bowser’s width)
100% Charged: Death Star (Hitbox the height of Ganondorf with 1.5X Bowser’s width)
This final version of the attack sets Lust’s fingers on fire, giving the fully charged version a bonus 5% fire damage. This still does stack with any poison damage you may have from envenoming your nails, so this can potentially be lethal, especially with the range of the move.
Aerial Attacks:
Neutral Aerial - Whorenado: Lust puts her hands at her sides, makes them face away from her, then extends out her fingers at different angles to cover her from all sides. She then rapidly spins around, making a whirlwind around herself. This lasts as long as Meta Knight’s Mach Tornado without mashing B to increase it’s duration, and has all the same damage/knockback/hitstun/range as it, as well as it’s dreaded ridiculous priority. However, Lust’s version of the otherwise broken move has horrible landing lag, meaning it can only be performed in the air, and in the air it’s short duration and the fact it leaves you helpless after performing it like Mach Tornado makes it not the best option. This –can- work as a good damage racker, but if used carelessly like one would use Mach Tornado will get you punished.
Forward Aerial – Finger Propellers: Lust puts both hands in front of her and extends out all her fingers, then rapidly spins them around. The fingers create a hitbox the size of Wario in front of her with average priority. The attack lasts half a second and does 8 hits of 2% damage (A total of 16%!), the final hit doing below average knockback. There isn’t much lag on either end, but it’s very hard to hit with the actual hitbox of the attack as it creates a slight wind effect in front of you that pushes foes away weakly (Like half the power of Dedede’s neutral special). This can be used for gimping, but it’s not very good at it and prevents the juicy damaging hitbox from connecting. Still, this may be just what you need if your foe is JUST going to make the ledge. This can also be spammed to help Lust’s recovery, as it pushes her backwards the distance of Bowser’s width.
Back Aerial – Finger Cage: Lust puts her hands behind her back, then turns around, the move making her face the opposite direction like Marth’s bair, her hands now in front of her. One is at her waist level while the other is behind her head. She then extends out her fingers the length of half a Battlefield platform. The fingers at Lust’s head level do below average downward knockback, while the fingers at her waist level do below average upward knockback, and both do 7%. If you hit the outside of the “cage” you’ll just be knocked away, but if you go inbetween the two extended fingers you’ll keep getting knocked into the other fingers for the duration of the attack. Lust holds out her fingers for half a second, the move having no starting or ending lag. This can potentially do up to 28%, but you have to sweetspot it perfectly, and even if you caught them at the very start of the move perfectly a foe can DI out to take only 21%. Foes larger then Wario are too big to fit into the “cage”, so this move will be used heavily on smaller opponents while you won’t find yourself touching it at all against larger ones.
Up Aerial – Nail Clash: Lust holds up her arms in a diagonal fashion, then extends out her fingers the length of a Battlefield platform upwards. This covers above Lust to the left and right with average priority, doing 8% with average knockback. However, directly above Lust isn’t covered, so if a foe directly DIs inbetween the two diagonally upwards sets of fingers, they can get a hit in on Lust. However, this move is two part, another attack being iniated if you press A after the first. The first part has little starting lag, but average ending lag if you don’t do the second part. The second part has Lust clash her fingers together into the center, hitting anyone who tries to punish her. This does 12% with slightly above average knockback and has little start up, but once again average ending lag as Lust pulls her fingers apart, them having gotten stuck together. You should intend to either hit with one part of the attack or the other when using it. Of Lust’s aerial arsenal, this is the best one for KOing, but you should rely on your smash attacks for that, her aerials generally just being damage rackers.
Down Aerial – Nail Drill: Lust flips in mid-air, stopping her momentum as she floats for a moment, getting into a handstand position. Her legs are a hitbox briefly, doing 7% and below average upward knockback, though this is just the setup for the main part of the attack. This first little part takes around a third of a second. Next, Lust reaches her arms out upwards and extends out her fingers, spinning them around like a drill as she goes downwards. You can control Lust’s horizontal DI much better as she goes down, but she’ll constantly go downwards (Not at a super fast speed like a typical stall then fall, her normal falling speed). This moves does multiple hits until Lust hits the ground, her fingers being the hitbox, sticking out about half her height below her (Or above her technically) with average priority. The nails do 8 hits of 1% with flinching per second, and the move has a slight suction effect to pull you into it. When Lust hits the ground all her nails will stab into it, causing anybody who was carried along with the attack to take 10% and average knockback. The move has average ending lag as Lust pulls out her nails from the ground.
The goal of the move is to get foes to be carried with you down to the ground for mass hits on the way and the final hit at the end, the suction effect making it hard to DI out of, but this is far from hard to avoid due to the initial attack warning, the punishable ending lag, as well as the fact that Lust only covers below herself. This is a decent damage racker, but should be used rather sparingly, the Whorenado usually being a better option.
Grab and Throws:
Grab – Lust’s Embrace: Lust reaches both arms in front of her to try to grab a foe, then upon grabbing them pulls them up right against herself, her arms around the target and her face up against theirs. This has only average range for a grab, but is very fast. If you want a more ranged grab, use your neutral special.
Pummel - Seduce: Lust kisses the enemy. Identical to the side special, just within another button input. The main function of the side special is to do it in the air which you can’t do with a grab, sending the foe into their helpless state. You cannot use the pummel to use to trick foes more times then you’re normally able, it still adding to the same count as the side special.
Forward Throw - Tickle: Lust lets the foe out of her embrace and extends out her fingers, tickling the foe with them to cause them to slowly walk backward as they laugh. Lust seems to be toying with her enemy here even though she could simply impale them. As the foe walks backward, they’ll defy gravity, walking backwards over an edge. They must button mash out of this, it taking just as much to get out of a plain old grab, but being harder at higher percentages. You'll rarely be able to use this to send foes far out enough that they can’t recover, but this can be useful to send them into hazards or off the blast lines, as they move backward at their normal walking speed which generally means they’ll go farther then the knockback of any of your throws would do to them. Still, you won’t be using this often.
Back Throw – Lust’s Endless Latch: Lust jerks the opponent so they’re facing away from her, then hops up on their back, her legs around their neck. Lust will stay latched on for a lengthy 3 seconds, and during this time she can mash A to slash at the foe, doing 1% per every 4 presses of A. This is a great damage dealer, and while the enemy can’t damage Lust during this they are still completely free to move around, meaning they can suicide with Lust latched onto them, her unable to get off until she does so automatically. The foe can also simply button mash to get Lust off of them in the same fashion as if they were grabbed, it taking the same amount of button mashing to get out of a grab to get Lust off. Another key detail is that Lust is unable to do this against short characters or those that lack necks, her just falling on her rump and giving the move bad lag when she tries. Not like she could really do this against Kirby, right?
Up Throw – Balancing Act: Lust tosses the enemy into the air, not dealing any damage, then extends out one her fingers to catch them on it as they fall down. Lust’s finger then spins around rapidly and the foe starts taking five hits of 1% per second. However, Lust has trouble balancing the foe on the tip of her finger, and the foe can use DI to fall off early. You control Lust’s finger with the control stick as the foe tries to get off, forcing yourself to keep the balance. The thing is though is that Lust is TOO responsive to you moving the control stick, meaning if you go too hard against the way the foe’s going you’ll knock them off the other way. In any case, the victim can mindgame that they’re going one way and then go the other to mess Lust up, keeping this far from broken. A skilled Lust player would be lucky to get over 10%, so unless you want to perfect this move stick with the dthrow.
Down Throw - Massage: Lust puts her hands up on the target’s shoulders and start massaging them. . .Then extends out her fingers to dig her nails into their shoulders after causing them to fall off their guard, making them fall to the ground. This does 10% and makes the foe fall to Lust’s feet. The massaging part of the move actually heals 1% off the foe due to making them relax, and if the move is interrupted before Lust stabs out her fingers the damage won’t be done.
Situational Attacks:
Rising Attack (Either Side) – Spider Legs: Lust extends out all her fingers except her thumbs, then raises them up onto the ground to impale the direct area around her. This has average range and priority around her with tiny lag, doing 6-7% with below average knockback. Lust then pushes her fingers into the ground hard to force her body up, using her fingers to support herself, having her feet hanging off above the ground, having the eight fingers out in a “spider leg” pose briefly, then unextends them and lets herself drop to the ground. This has slight ending lag, but it’s below average.
Ledge Sweep (Under 100%) – Creeping Fingers: Lust holds onto the platform with only one hand and extends out her pointer and middle finger from her other hand up out onto the stage, stabbing them down for small range and low priority with 3% and small knockback. If you hold A, Lust will advance her fingers forward, them “walking” along, them constantly being a hitbox, and a disjointed one at that. You can extend the fingers out as far as you want, them going at the speed of Meta Knight’s run. However, before you can come out of this attack you must let go of A for Lust’s fingers to start coming back to her. It’s easily possible to get multiple hits with this, but this is dangerous to gamble with and could spell out your doom, especially in a free for all.
Ledge Sweep (Over 100%) – Nails on Chalkboard: Lust scratches the edge of the stage with her nails, causing anybody within the range of Bowser of the ledge to be stunned very briefly as a screeching noise is heard, then climbs up onto the stage. The duration of the edge scratch is brief, being nearly lagless. However; the move has ending lag which is punishable if the foe isn’t stunned, meaning you should only use this move if it’s a guaranteed hit. This does no damage and is meant to set up for another attack. The amount the foe is stunned for is extremely brief and barely enough for you to punish at all unless they’re also at a high percent to increase the stun time, the stun mainly just being so you can climb up safely.
Tripped Attack – Blinding Dust: Lust extends out the fingers of one her hands slightly and does a flicking motion forward on the ground as she gets up from the ground, having tiny lag. This creates a cloud of dust in front of Lust the size of Kirby, being a disjointed hitbox that does 1% with set knockback. This is mainly just to get foes away from Lust as she recovers from going into the trip rather then an actual attack, being mainly defensive.
Final Smash – Medusa’s Legacy:

Lust gets the smash ball and activates it. . .What’s she turning those fingers of hers into now?!? Snakes? Snakes! SNAAAAAAAKES! Why did it have to be snakes?!?
Lust stands in place, invulnerable, and you control the snakes as they constantly extend out in the direction they’re facing at the speed of Mario’s run. Contact with the heads of the snakes chomping at the front of the ever extending beasts deal 20% with huge knockback, and the snake heads are around the size of Kirby, all overlapping in the same horizontal and vertical positions in mass, some of the heads being in the foreground while the others are in the background, moving as if they were one entity. You have complete control over choosing which direction the snakes face as they keep extending outward. As you go farther and farther, the trail from the snake heads to Lust becomes more and more massive, eventually covering up massive portions of the screen. The final smash only ends when you hit this massive trail you’ve created, just like in the ancient game simply entitled “snake” where you can’t hit your “tail”. To keep the final smash from going on too long, the movement and turning speed of the snakes speed up as times goes on, eventually getting to the point of being as uncontrollable as Pikachu’s final smash after 30 seconds. Upon the snakes running into their own mass overlapping bodies, they’ll let out a cry of pain and all retract back to Lust in an instant, the snakes reverting back into her normal fingers, her being vulnerable once more.
Overall Play Style – Lusting for a Kill:
Upon your first few tries playing as/against Lust, she may seem a bit overpowered. She’s one of the faster characters on the cast, but still manages to pack a punch in some of her moves. The fact some of her moves have large range also help, and the potential bonus damage from poison makes her a damage racking beast. What keeps her down from among the level of the other gods of Smash? How much potential there is to punish her. Casuals won’t notice the great windows to punish Lust in many of her attacks, but those who analyze Lust won’t have that much of a problem against her. This is one of your foes you’ll want to more carefully look over (And not just cause she’s sexy), as otherwise you’ll be owned by her damage racking prowess and fall into what’s essentially a zero start up KO move in her fsmash, her main and nearly exclusive KO move. Her fsmash, however, is the main thing you’ll be looking to punish against her, as you can get in a nearly fully charged fsmash of your own when she whiffs hers. The fsmash is a massive part of her game, and you’re going to want to avoid it along with her stunning move which could make you a sitting duck for it at all costs.
Lust will be spending a good bit of her time in the air for damage racking, seeing she has a weakened version of the single best move in the game with her Whorenado along with another potentially good damage racker in her bair. Lust is also good at gimping with her side special, chasing after the enemy far away from the platform to use it then making it back with her above average recovery. Lust has two recoveries she can choose depending on where she is away from the ledge, able to recover both horizontally and vertically unlike most characters who have only one option available (Or do both at once). Lust’s best bet for a KO against a foe being wary of her fsmash is to knock them off stage with one of her moves that does decent but not killer knockback, then gimping them to their doom.
Lust has good potential to devastate foes unfamiliar with the match up, though any competent player will force themselves to familiarize themselves with Lust after getting their rear ends handed to them. However; if Lust plays unpredictably and uses her fsmash sparingly, only when it’s guaranteed to hit (Such as after seducing the foe), enemies will be devastated and left with few options to take her down. Good Lust players will make their openings few and far between, and only those who can exploit them to the fullest and capitalize strongly on any mistakes she makes will consistently beat her. Keep yourself from becoming overwhelmed with Lust and you’ll have a good shot at taking her down.
While Lust is slower enough than Ocon for him to combo her decently, Lust is far from outright slow, being on the fast side of the spectrum, just not being able to compare to Ocon. Lust’s power is the main thing that will give Ocon trouble in this match up, her playing somewhat defensively (Rare for her) in this match up. Lust will shut down most approaches made by Ocon with her utilt and nair, and should he abuse projectiles she’ll simply put up a wall with her ftilt. Ocon will have his work cut out for him approaching Lust, and he’ll rarely be able to combo her in the air due to her high priority nair. However; once getting up to Lust, Ocon can still combo her decently on the ground to rack up damage while Lust has more of a problem doing damage to Ocon despite having some fast moves.
Still, Lust will KO at reasonable percents with her fsmash while Ocon will have to rack Lust’s damage to absurd percents before having much hope of finishing her, particularly with how bad his fsmash is. While Lust has some problems damage racking in this match up and has to change her play style from offensive to defensive, she has a slight edge on Ocon due to his inability to KO and Lust’s ability to force him to approach.
Despite not being able to damage rack Lust in the air as easy as some other characters, he can still manage to gimp her with little to no problem. This allows Skyler to KO Lust at much more reasonable percents, around the percent Lust can finish Skyler off with her fsmash. Lust and Ocon have a variety of advantages of each other, but it all comes out rather even with a bunch of checks and balances.
Taunts:
Up Taunt – Envy of Humans: Lust clenches a fist and says “You don’t know just how lucky you are. . .”. Good to use if you trip a lot.
Side Taunt – Kiss Blow: Lust raises her hand to her mouth, kisses it, then does a tossing motion and blows out her mouth, blowing a kiss. This actually creates an invisible tiny projectile that goes forward defying gravity at the speed of Ganondorf’s walk that’s disjointed, doing 1% with no knockback, not even a flinch. Only one of these invisible projectiles can be out at a time, and the taunt has average lag.
Down Taunt – Unimpressed: Lust folds her arms and says “Is that the best you can do”? in a arrogant fashion.
Entrance – Anxious for Battle: Lust comes in from the background and folds her arms, drumming her fingers on one of her hands as the announcer counts down.
Results Screen Poses:
Win 1 – Lusting for more: Lust lays on her side, holding her head in one of her hands while she drums her fingers on the other in boredom. She calmly states “I expected more of you. . .”.
Win 2 – One’s Trash, Another’s Treasure: Lust takes out a tiny amateur made Philosopher’s Stone. She inspects it, then mumbles “Worthless. . .” and tosses it behind her as she walks off camera. The stone lands in the middle of the losers who all turn to look at it, then leap at it to try to claim it, a dust cloud forming as cries from the losing characters are heard. If there is only one loser, they simply take it and walk off screen.
Win 3 – Pink Nail Polish: Lust starts coating her nails with her venom from her down special. . .But then is enraged to see her nails turning pink rather than green. She crushes the vial containing the polish in her hand, shards of it flying everywhere, and frantically starts trying to rub the pink coloring off for the remainder of the time you stay on the results screen.
Win Pose with Gluttony – Mistress’ Pet: Gluttony turns to the losers and drools, then looks up at Lust and says “Can I eat them?” for Lust to smirk and reply “Be my guest.”. Gluttony laughs maniacally and tackles the two clapping losers, a dust cloud forming to obscure Gluttony devouring the characters as chomping sounds are heard while Lust watches.
Loss – Forced Respect: Lust grits her teeth as she glares at the winner, her eye twitching, but forces herself to clap for them. Occasionally her fingers extend outward toward the winner in anger to attack them, but retract before they reach them, her forcing herself to do so fairly quickly before they get out too far.
Kirby Hat – Lusting for Pink: Kirby gets Lust’s hair and her homonculis symbol on his forehead. Kirby extends out his arms just like Lust, gaining the power from swallowing her. Kirby’s neutral special functions in an identical manner to Lust, though Kirby obviously performs his own throws if he grabs somebody with it.
Alternate Colors:
-Dark green dress (Standard, green team)
-Blood red dress (Red team)
-Bright teal dress (Blue team) -Night sky black dress
-Obnoxiously bright pink dress with blonde hair
-Violet purple dress
-Silver dress with black leopard spots
Snake Codec Conversation:
Otacon: Snake, are you there? This is urgent!
Snake: You have the WORST timing, Otacon. . .
Otacon: Sorry to interrupt your mission, but there’s this woman named Lust that’s been sent out to assassinate you. Don’t be fooled by her looks, she’s evil.
Lust: Oh come on, Snake. Can we get back to our fun?
Snake: Just hold on a second. . .
Otacon: Who was that?!?
Snake: It’s a side mission. . .
Otacon: . . .Get away from her now, Snake. Before she kills you.
Snake: *Random satisfied grunting noises*
Lust: *Moaning*
Otacon: Snake? Snake!
SNAAAAAAAAAAKE!
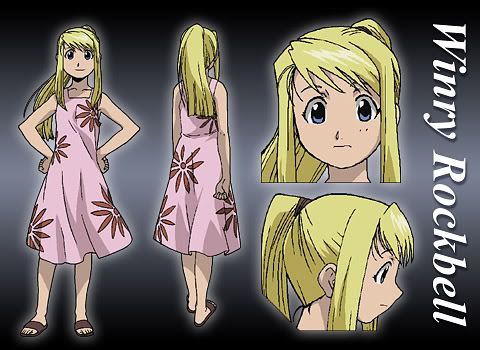
Assist Trophy - Winry:
Winry, childhood friend and mechanic of the Elric brothers, emerges from the assist trophy. She throws wrenches in an arc similar to the Hammer Bro. assist trophy for similar damage and knockback, though if anybody comes close to her she’ll beat them over the head with the wrench to deal a solid 20% and large knockback.
If the summoner of the assist trophy is Ed, Al, or a robotic character such as Rob or a robot master, they can go over to Winry for her to stop attacking and start tuning them up. She heals Alphonse and the robotic characters at a rate of about 5% per second. For Edward, she heals the health of his automail blade rather then him directly. Winry lasts roughly 20 seconds.
*** Stage – Lab 5: ***
The entire stage looks rather metallic, and there are mass red bubbling cauldrons in the background. Several prisoners can also be seen being held captive behind bars. No objects in the actual arena besides a transmutation circle at the center, and the stage is around the length of Final Destination. There are walls on the sides of the stage, but the ceiling is too high up, you still able to get star KOs. If you stay against the wall for long, spikes will come out before retracting back into the wall, doing 10% and average knockback. This prevents infinite chain grabbing. This stage is essentially just a less broken version of Shadow Moses at heart. . .
But what fun would that be? There are a few various events that can randomly happen on the stage.
Sometimes an explosion will occur in the background next to the prisoner's cell, busting it open and freeing them. The prisoners will then hastily run out from the background onto the stage and then off the foreground, coming up against the cameras before getting out of vision, causing mass blocking of the view. As they overlap with the stage, they do 15% and above average knockback if you don’t do a dodge.
The guardian of the lab, Slicer, will also occasionally come out onto the battlefield to join the fray. He’s a sturdy suit of armor that functions as an even slower even more powerful version of Ike. While he can’t use items, he’s insanely heavy, like as heavy as Bowser with a metal box, thus he can’t be KOd by conventional means. However, once he takes 30 stamina worth of damage, his helmet will be knocked off. Slicer’s little brother will still continue to control the suit of armor and fight on, but after taking another 30 stamina worth of damage will crumble to dust. However; once his helmet is knocked off, it can be used as a throwing item, and Slicer can put it back on to reset his stamina back to the full 60, so be careful. While Slicer is powerful, he’s so insanely slow that he’ll only really affect anything in a FFA where he can actually hit something.
The –other- guardian of the lab, Barry the Chopper, will also occasionally come out onto the battlefield. He’ll leap in from the background doing a downward slash for 20% and spiking downwards, then his blades will get stuck in the ground, leaving him vulnerable. He’ll then go into the background again before coming out again in another random period 10-15 seconds later. Barry has 40 stamina you must take out before the living suit of armor will crumble to pieces.
The stage hazard who has the most notable effect on the battle is Tucker. He’ll follow a player’s horizontal position while in the background for 5 seconds, then grab them. Tucker cannot jump, so this is the easiest way to avoid him. If he –does- grab you, however, he’ll pull you over to the transmutation circle and cause a massive explosion double the size of Bowser for 30% and huge knockback, creating a cheap knock off of the philosopher’s stone. Tucker will take it and run off into the background with it. You can escape Tucker’s grab quite easily by button mashing, but at high percentages it becomes hard to escape. Still, it’s not terribly hard to just avoid him in the first place.
*** SSE Role: ***
Before the level where you run away from the Pig King Statue as Lucas, PIKACHU and POKEMON TRAINER are seen together, Pikachu mounted on the trainer’s shoulder. They’re walking through a forest together. A Metapod falls down from the trees and wiggles back and forth. The trainer takes out his Pokedex to inspect the Metapod to see if it’s worth catching, then rolls his eyes and sends out Charizard to dispose of it with a fire blast for some quick experience points. The screen fades out then slowly fades back in for the Pokemon Trainer to look tired. He looks at his pokedex again, it showing data on Jigglypuff with a blinking mark over the trainer’s location, this apparently being where they’re located. The Pokemon Trainer lets Pikachu look at the pokedex and points at Jigglypuff’s picture for the electric rodent to nod and let out a “Pika!”. You play through a level as the two characters and rather then subspace enemies there are various wild bug Pokemon for the enemies. You have access to Ivysaur and Charizard alongside Squirtle.
At the end of this level, the trainer comes up into a clearing to see GLUTTONY chasing JIGGLYPUFF around in circles. Gluttony is drooling in mass, going very fast, Jigglypuff barely able to keep fleeing. Pikachu’s cheeks crackle with electricity upon seeing this and the trainer sends Ivysaur out into battle. You play as the trainer, Pikachu, and Jigglypuff all against Gluttony. Gluttony has maxxed hunger for the entire duration of the battle to keep the three on one from being a cake walk.
Upon defeating Gluttony, he’s turned into a trophy. Jigglypuff angrily goes up with his her marker and doodles over Gluttony’s face, then happily goes up to the trainer and nods in thanks. Before any pleasantries can be exchanged, though, LUST comes into the clearing with an army of subspace creatures. Lust extends out a finger to touch the base of Gluttony’s trophy to revive him, then motions out her other arm to have the army attack. Gluttony leads the charge as the trainer and his pokemon have intimidated looks on their faces. The trainer lets out Charizard and hops on top of him along with Pikachu and Jigglypuff, flying up and away from the army. However, Lust extends out her fingers and wraps them around Charizard, bringing him down to the ground. The trainer, Pikachu, and Jigglypuff hop off Charizard and run frantically as Gluttony drools over Charizard’s tail, putting out the flame on it and turning him into a trophy, Lust and the subspace army still on their tail. Lust extends out her fingers to stab Pikachu and Jigglypuff as she chases them, turning them into trophies which her minions catch. Lust goes to stab the trainer, but he nimbly dodges. Lust still manages to snag Ivysaur’s pokeball, however. The trainer comes up to a cliff, cornered. He turns around to look at Lust, then reluctantly jumps off. Thankfully he lands in a pool of water. Lust looks over the cliff to see if the trainer is still alive to see nothing, then goes to leave. The camera zooms into the water to reveal the trainer holding onto Squirtle tightly under the water, then going up for air the moment Lust leaves. The trainer and Squirtle head in the opposite direction of Gluttony and Lust hastily, the trainer being seen next when he encounters Lucas.
After the first level with Pokemon Trainer and Lucas, we are shown Lust, Gluttony and their subspace forces hauling along the trophies of Charizard, Jigglypuff, and Pikachu. One of the primids is carrying Ivysaur’s pokeball. The pokeball. Suddenly, Ivysaur’s pokeball starts wiggling around violently, and Ivysaur escapes from the pokeball. He uses vine whip to touch the trophy bases of Charizard and Jigglypuff. Charizard snorts at Gluttony and smacks his fists together, ready to fight, but Ivysaur carries him away by wrapping his vines around Charizard, carrying him away, this not being a fight they can win. Jigglypuff runs off along with them, but gives a regretful look back at Pikachu’s trophy. . .Lust gives a dismissive motion to Gluttony and some of her forces to go after them while the rest of them continue on their way. You play as Jigglypuff, Ivysaur, and Charizard for a level, the former two not having the trainer around with his annoying voice to bug you. Enemies will constantly come at you from the rear in this level, so you’re encouraged to keep moving.
At the end of the level, you’re shown a cutscene of Charizard leaping off over a cliff as Jigglypuff and Ivysaur hop onto his back and ride on him. Due to Lust not being with the group chasing them, she can’t bring Charizard down like before. However, this is far from over. Gluttony laughs maniacally and takes out a trophy gun and starts firing it rapidly at Charizard, who does graceful aerial maneuvers to dodge. After a while, Charizard gets too far away, much to Gluttony’s dismay, him going back to head to Lust and putting away the trophy gun. He hastily runs back to Lust at a frantic pace and points out in the direction they escaped for Lust to facepalm and motion her troops to come along with her. Lust sees how far off the Pokemon are over the water and sighs. . .How will they chase after them now? Suddenly, WOLF comes up in his Wolfen and gives a thumb up to Lust, motioning her to come over for a ride. Lust looks at the disturbing lack of space in the tiny one man plane and raises an eyebrow for Wolf to spread apart his legs and motion to his lap, smirking. . .He wants Lust to sit his lap?!? Lust grits her teeth and extends out her fingers to get a grip around Wolf’s neck, choking him briefly before releasing him. Lust hops on top of Wolf’s ship, Gluttony following her lead (Carrying Pikachu’s trophy), then she motions off to Charizard. Wolf sighs and flies in the direction they went, them being long off camera by now. The camera zooms in to a deserted island in the general direction Charizard flew off to, it more likely then not being where he landed. Lust and Gluttony hop off the ship, and Lust takes Pikachu’s trophy from Gluttony. Lust hands the trophy to Wolf and points to the subspace bomb factory in the sky for Wolf to nod, taking the trophy and flying off towards it. Gluttony and Lust proceed to go further into this uncharted island. . .
We’re shown a cutscene inside a base of some sort, with ROY MUSTANG at a desk, filling out mountains of paper work. After watching this for a brief bit, King Bradley, comes into Mustang’s office for Mustang to hastily get up and salute him. . .Such a suck up. Anything to one day become the fuhrer. . .Bradley gives a dismissive motion for Mustang to go at ease, then the king takes out a photo of Ganondorf and Bowser to show to Mustang. Bradley runs his finger across his neck, then throws the picture into the trash can. Mustang nods to the king for him to leave, Mustang sinking back into his chair and sighing. How is he supposed to get to them, much less capture them, with such little warning? Mustang sighs. . .He presses a button nearby for SAMUS and SNAKE to come into the room. Mustang brings up a pictures of the subspace bomb factory and the Halberd on his computer and points to it for the two of them to nod and head out after taking some papers for mission briefings and what not. Next, EDWARD and ALPHONSE come into the room. The camera shows Mustang’s point of view from behind the paperwork, only able to see Al due to Ed being so short. Mustang gets a thought bubble with Ed and a “?” for Ed to jump up above the paper work and throw a little tantrum, causing the paper work to fly everywhere. Alphonse laughs while Mustang facepalms. . .Mustang just brings up a picture on his computer of the island Charizard, Ivysaur, and Jigglypuff went off to with a photo of Wrath next to it. Ed gets out of his tantrum for it to just start up once more upon seeing the little gremlin Homunculi. Mustang drums his fingers and points outside to a boat for Al to nod, dragging his brother out with him. . .We cut to Bradley who is seen secretly watching Ed and Al leave Mustang’s office. He shakes his head and paces back to his quarters, where SLOTH, his secretary, is waiting for him. Bradley motions off to the boat for Sloth to smirk and nod, turning into a mass of water as she goes out through a vent. . .
Another cutscene opens up showing Ed and Al aboard the boat, it sailing off for the island. Ed looks rather bored as he slumps up against the wall while Al looks out to see. Everything seems to be going smoothly. . .Until a crash on the ship occurs. Ed and Al go out to look at what caused it for it to be a bunch of pathetic pirates in a poorly made old fashioned ship. TOON LINK stands at the helm of this ship, leading the raid against them. Perhaps he’s short on Rupees? Perhaps he thought the ship was one of Ganon’s? Who knows. They put up a plank and start running up onto the much more modern ship Ed and Al are on, but Al casually blocks the way, them getting knocked overboard as they try to pass his massive armor. Ed runs to go down onto the small pirate ship, Al close behind. Some army men from the modern ship go to help the Elric brothers, but the scrawny plank collapses under Alphonse’s large weight, preventing them from coming along. You play a level on Toon Link’s ship (Which is enlarged so as to be a level), various toon pirates being the enemies.
After this level, Toon Link is seen running up to Ed to slash him across the face, but Ed casually transmutes a wooden spike up out of the ship to send Toon Link flying back. Toon Link prepares to run at Ed again, but he is flung away by the ever annoying launcher from the Pirate Ship stage, flying off and landing on Ed and Al’s ship. Toon Link lands deep within the ship to find that it’s sinking and the men panicking to try to prevent it from doing so. A level starts up where you play as the vastly superior Link clone, getting out of the ship before it sinks, there being a time limit. The enemies are various military soldiers in the FMA style.
After getting out of the ship, Toon Link finds the source that’s causing the ship to sink to be Sloth, as she turns one of her arms into water and shoves it down a man’s throat to drown him. She turns to Toon Link and chuckles, petting him like a child. Toon Link, disgusted with this, takes a slash at her, but Sloth picks him up with one of her watery arms and flings him overboard. Ed and Al watch from the puny pirate ship, unable to get back up onto their main ship. Al tries to steer the pathetic ship into the main ship to attack it, but this just causes it to crash due to it already being damaged. It sinks into the sea. Sloth chuckles and jumps into the water, turning her body fully into liquid and rocketing off towards the island at amazing speeds. We then get a shot of Ed, Al, and Toon Link sinking close together, watching Sloth swim off. Al goes to shake Toon Link’s hand, but Ed and Toon Link just swim off, not trying to go for any pleasantries. Al shakes his head, then a underwater level starts, you playing as all three characters. The enemies are various Water Pokemon and aquatic Mario/Kirby/Zelda/DK enemies. Underwater, you have infinite mid air jumps, but your attacks are slightly slower.
Before continuing with Ed and Al, we cut back to the base with Mustang and Bradley. Bradley is seen in his room, pacing back and forth. . .Suddenly, an image comes up on his computer screen showing Wario coming in through the sewers with an army of subspace forces. Bradley clenches his fist and chuckles. . .Finally he can ditch his little cover up here and move on to further greatness with Master Hand. He nods to Wario, then quickly cuts the screen as Hughes comes in. Hughes raises an eyebrow, but Bradley hastily does a dismissive motion to Hughes. Hughes gets a thought bubble of Sloth, pointing to her empty seat, for Bradley to shrug and glare at Hughes angrily. Hughes reluctantly leaves. . .Bradley sighs. He can’t keep Hughes around any longer. He presses a button on his desk for ENVY to come in through an alternate entrance. Bradley runs his finger across his neck for Envy to nod and chuckle. . .He turns into a female officer and heads out into the hallway after Hughes. Envy takes out a gun and points it at Hughes. We’re shown a mug shot of Hughes as he turns around, then the camera instantly blacks out as a gun shot is heard. The camera comes back in to reveal that a certain box has been watching this entire incident. . .Looks like Snake didn’t leave for the Halberd just yet. He waits for Envy to leave, then hastily gets rid of his cover and runs for Mustang’s office. Upon getting there, he finds Mustang already fighting against a bunch of subspace forces, Wario commanding them. Snake takes out a grenade, then you play as him and Mustang in a standard SSE enemy battle. Wario is seen in the background commanding them, regularly using his taunts on you.
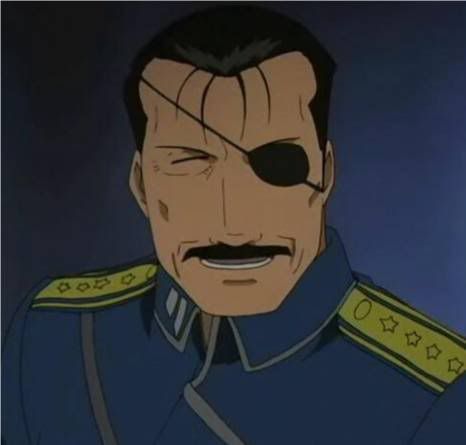
Upon defeating the enemies, Wario’s jaw drops. His army has ALREADY been defeated?!? Guess the troops he plowed down along the way already took down a sizable amount of them. Mustang snaps his fingers to cause Wario’s buttocks to light on fire, and he hastily runs around the corner to flee. Snake and Mustang go to chase him, but when they get around the bend Wario is on his motorcycle, fleeing quickly. Snake takes out his rocket launcher and Mustang prepares a powerful attack, but before anything further can happen, Bradley steps out from his office, no longer in his military uniform, blocking their way. He takes off his eye patch to show the symbol of the Homunculi, revealing himself as Pride. Master Hand would never accept it if Wario didn’t make it out alive. Pride draws his sword and slashes forward at the shocked Mustang for a boss battle to start.
Boss: Pride
Play as: Roy Mustang, Snake
Attacks at 100%
Ultimate Eye- Pride reaches up and places his hand on his forehead. Anyone who attacks Pride while he’s in this stance has their attack blocked and countered with a swift kick. Pride’s counter-attack deals 1.2 times the damage and knockback the attack would’ve dealt. Look for the obvious tell and this attack is easy enough to prevent.
Piercing Thrust- Pride lunges forward a fair distance (two battlefield platforms forward) and thrusts his sword outward. This attack is incredibly fast and can easily catch you off guard. Fortunately the thrust is high enough that it can be ducked under. Either duck this or spot dodge it. Deals 14% and medium knockback.
Casual Slice- Pride casually walks forward whilst swinging his sword from left to right. A fairly predictable attack considering he move so slowly but if he does it near you it can wrack up some damage quickly as it’s possible to get locked in the attack. 6% and very low knockback.
Attacks at 50%
Psycho Crusher- A very close range attack, Pride thrusts his arms out and grabs the opponent by the throat. He then lifts them off the ground and begins to squeeze. Wriggling the control stick is the only way to break free of this attack and if the control stick is NOT wriggled, the player will lose a stock instantly. The player will take continuous damage until they break free of Pride’s grasp, receiving 2% every second and a half that passes.
Raging Inferno- The arena you’re fighting in slowly becomes engulfed in flames; as the battle rages on, the flames grow larger. The flames deal the same amount of damage and knockback as the flames on the Pictochat stage so it’s best to try and wrap up the fight quickly.
Attacks at 25%
Body Reform- Pride’s body begins to quake slightly as his wounds begin to heal. It takes him a total of 4 seconds to heal and if the move is successful, he’ll recover his health up to the 50% mark. If attacked at all during the process of this attack, Pride will stagger backwards and be vulnerable to attack
Attacks at 10%
Neck Breaker- A variant of the Psycho Crusher attack; instead of slowly crushing the player, Pride crushes the character’s neck instantly costing them a stock. Fortunately this attack is slightly slower than its other form due to Pride being worn down.
Attacks at 5%
End of the Line- Pride rushes forward as quickly as in his Piercing Thrust attack. If he grabs an opponent, he tosses them into the air and impales them on his sword. He then tosses the opponent’s limp body away and laughs. This attack is rather fast, covers the entire arena length and instantly kills any opponent he grabs. Fortunately, it can be jumped over and, once leapt over, leaves Pride in a vulnerable state where you can easily reduce his HP to zero.
After defeating Pride, Mustang triumphantly stands over him. Looks like his long campaign to become the fuhrer has finally payed off. However; Mustang’s brief moment is cut off when Snake motions to the corpse of Hughes. Mustang clenches his fist and lets out an angry cry, then motions for Snake to leave, him not being seen again until he normally is on the Halberd.
The next cutscene shows Ed, Toon Link, and Al washing up on the island the Elrics were assigned to go to, albeit at another spot on it. Alphonse hastily gets up and starts getting the water off him, thankful that none got on his blood seal. Ed does a quick transmutation on Al to remove the rust his armor acquired and gives his brother a thumbs up for Al to nod in thanks. Al gets a thought bubble showing Wrath, the reason they were supposed to come here in the first place, and points to it for Ed to nod to him. Meanwhile, Toon Link has already run off, long gone, the Elric Brothers scurrying off after him to catch up. You place another level as the two alchemists, the enemies being more various Wild Pokemon due to this island being uninhabited. The Pokemon are considerably stronger than the bug ones from the forest level with Pikachu and the Trainer.
Before continuing the new sub section with the FullMetal Alchemist characters, you play the first Zero Suit Samus/Pikachu level early. However, in the cutscene where Zero Suit Samus normally finds Pikachu being forced to power a machine, Samus spies into the room rather then barging in. We see Wolf placing Pikachu’s trophy into the machine, then reviving the rodent and slamming the door to the machine shut. Wolf chuckles as Pikachu is tortured as a power source for the camera to cut to Samus’ face, letting out a slight gasp. She comes into the room and primes her pistol for Wolf to just let out a chuckle and gets into his feral fighting stance. You brawl Wolf as ZSS. Upon defeating him, Samus frees Pikachu from the machine and then mass Robs come into the room to attack Samus as normal, but they also revive Wolf from his trophy status. Wolf gives Samus a smack to the face, then backflips out over the Robs and out the exit of the room, the door closing behind him. Samus scowls as she gets into a fighting pose alongside Pikachu, and the level plays normally.
The next cutscene opens with Charizard landing on the island and looking around. Ivysaur motions forward with his vines and the other characters follow. Another level in the same design as the last one with Ed, Al, and Toon Link takes place with Ivysaur, Charizard, and Jigglypuff.
At the end of this level, Toon Link, Ed and Al are seen walking by, the Pokemon watching from some foliage. Jigglypuff sees Al in his huge armor and hides behind Charizard. Charizard gets angered by this and roars at the warrior who caused Jigglypuff to cower in fear, coming out into view, Ivysaur hastily coming out alongside him. Jigglypuff stays in hiding while Ed is slightly taken aback by the dragon. Ed goes up to attack, but Al holds him back, not fond of hurting animals. Ed and Al are left with no choice, however, when Toon Link simply leaps out and slashes Charizard across the face, a battle starting up. You play as Ed, Al, and Toon Link against the two PT Pokemon and Jigglypuff.
After the battle, Toon Link, Ed and Al continue on their way, Al shaking his head at the beasts turned into trophies. After they’re gone, Jigglypuff comes out and revives Charizard and Ivysaur. Charizard goes to go after the alchemists, but Jigglypuff and Ivysaur hold him back. Charizard sighs and allows Ivysaur and Jigglypuff to mount on his back once again, flying off into the distance off the island. The camera cuts back to Ed, Al and Toon Link walking through the island, and they suddenly hear some childish laughing. They turn to the laughing, but nobody’s there. They run off after it. . .The camera shows a mug-shot of Wrath, who is in hiding. You play another level as Ed, Al and Toon Link that loops around in mass in a maze like fashion, you having to catch Wrath. You’ll rarely if ever actually see him on camera, and if you do he’ll probably be exiting the door of the room you come into. The only way to catch him is to corner him into a “room” without an exit besides the way he came in.
The next cutscene shows Ed grabbing WRATH as he tries to flee, but Wrath suddenly smacks him away with impressive force. This pisses Ed of and he starts fighting Wrath, Alphonse sighing as he reluctantly goes to help his brother. After a bit of this, Sloth reveals herself, leaping out in front of Wrath and taking a hit for him, Wrath excitedly yelling out “Mommy!” at the sight of her. Ed raises an eyebrow at this, but Sloth just lets out a smirk and turns her arm into water, swinging it forward at him. You have three characters (And thus three stocks) against Sloth and Wrath, but they’re both out at once, ganging up on you.
Wrath and Sloth fall to the ground, turned into trophies. Al looks down at the trophy of Sloth regretfully. . .She looks so much like their own mother. Al reaches down to touch the base of the trophy, but Ed smacks his hand away. There’s no way that monster could be their mother! Suddenly, Gluttony and Lust come out into view with a sizable amount of subspace forces surrounding the clearing Sloth was just fought in. Lust extends out a finger to revive Sloth and Wrath, touching their trophy bases, and the army proceed to attack the Elric brothers from all angles alongside the three Homunculi. Toon Link and the Elric brothers put up a decent fight, but ultimately get turned into trophies. Wolf comes down in his Wolfen, back from having delivered Pikachu to the Subspace Bomb Factory. Wrath, Gluttony and Lust hop on top of the small ship, Gluttony and Wrath carrying the trophies of Ed, Al, and Toon Link, but when Sloth goes to get in Wolf motions down to his lap again, making room for her. . .He doesn’t know when to quit. Sloth turns her arm into a watery substance and smacks him, then gets on top of the Wolfen alongside Wrath. Wolf scowls and flies off for the Subspace Bomb Factory.
Before anything else happens, we’re shown a brief cutscene of Charizard flying with Ivysaur and Jigglypuff. He suddenly gets swarmed by those bird enemies that can be picked up as weapons when they impale their beaks into the ground and is forced to do some barrel rolls to avoid them. . .However, this causes Ivysaur and Jigglypuff to fall off the beast’s back, falling down into the ruins and turning into trophies. Ivysaur and Charizard aren’t seen again until they normally are in the SSE, and Jigglypuff is found alongside Ivysaur.
The cutscene where Kirby runs off and leaves the princess he saved from Petey and Piranha and Bowser turns her into a trophy, then makes a shadow version of her plays out a good deal differently. Instead of Kirby simply running off, Envy appears and smacks him away, causing him to fly off into the distance where he’s not seen until his next cutscene. The princess sees this and goes to run frantically, but Bowser appears and grabs the princess from behind. Bowser throws the princess to the ground and gets in the pose from his dthrow, but Envy comes up in front of Bowser, shaking his head and wagging his finger. Master Hand would never accept this! Bowser sighs and simply smacks the princess unconscious, turning her into a trophy. Envy then transforms into the princess and lets out a chuckle at Bowser, who gives him a thumbs up. Bowser gets into his Koopa Klown Car to take the princess’ trophy to the Halberd and the cutscene ends.
In the next cutscene, Envy then attacks the heroes as the princess normally did due to being in her form, the cutscenes looking the same with the exception of Envy not having the shadow energies radiating off him like the shadow princess. The battle against the princess is also made somewhat harder, as after defeating Envy while he’s in the form of the princess you’ll have to battle him as his true self, him having two stocks.
After defeating Envy, he’s turned into a trophy, but still in the form of the princess so the cutscene remains unchanged. After Mario’s/Link’s misunderstanding, Dedede whisks by in his trophy cart and picks up Envy’s trophy, thinking he’s the real princess. Kirby then comes by and frees the trophies of the character who lost the previous battle along with Envy, also thinking he’s the princess. Mario/Link help Envy up depending on which princess he is. The characters who battled against Envy and know his true identity glare at him, but he just smiles and laughs, hiding behind Mario/Link. Mario and Pit/Link and Yoshi see that the hero is far from willing to let them attack Envy, and just head off in the opposite direction. Kirby heads off after Dedede, motioning Envy to follow, and he hastily heads off after him. The princess’ lover sighs and chases after him, while Pit/Yoshi follow the hero with little thought. You play as Envy in the form of the princess in the levels where you chase after Dedede now as opposed to Link and Yoshi/Mario and Pit.
After playing the first of the two cave levels with Mario/Link’s party, there’s an interruption as we cut back to Mustang, who is located outside the Subspace Bomb Factory with his men, prepared to launch an attack. Mustang motions his forces to move in, snapping his fingers to hasten them up, but this accidentally causes a flame to materalize and burn off a random soldier’s hair, him running around frantically. Mustang facepalms and puts the fire out, then the men run inside. Mustang takes a different route then his men inside, preferring to go it alone, hence there are no soldiers to help you in the level. You play a fairly standard subspace bomb factory level with Mustang, but in the background you can sometimes see your men helping you out.
After this level, Mustang is seen entering the room the Ancient Minister is found in when he reveals his identity. His men are already inside of here fighting off the Robs, but there are far too many, them quickly subdueing and KOing Mustang’s army. Mustang snaps his fingers to burn off the Ancient Minister’s robes to attempt to reveal his identity, but the AM hastily runs out of sight before we can see anything of him. Mustang goes to run after him, but all the doors slam shut and a hologram of Ganondorf appears and laughs as several Darknuts come into the room through Ganon’s dark portals. You play a battle as Mustang against them, then another brief cutscene plays where yet more Darknuts come out and overwhelm Mustang.
In the cutscene where Mario’s/Link’s party chase after Bowser, he is carrying Luigi’s trophy as he flees rather then that of the princess. However, Mario’s/Link’s party catch up to Bowser before he gets away. Kirby goes to smack Bowser with his hammer, but all of a sudden Envy reveals his true colors as he does a swift kick at Kirby to knock him away from Bowser. The princess’ lover stares at Envy in shock for him to smack him across the face, then turn into his true form. Bowser hops off the cliff and Envy runs after him to follow, and they both leave in the Koopa Klown Kar together, heading off to the Halberd. Mario/Link’s party isn’t seen again until their final level where they battle against mass subspace enemies, them reuniting with Link and Yoshi/Mario and Pit which lengthens that cutscene slightly.
Before the Snake/Meta Knight/Lucario level, we are shown Envy and Bowser in the room with the princesses in the cages, Bowser carrying Luigi’s trophy. Envy transforms into Mario, and Bowser nods at him. Bowser proceeds to go out of sight as Envy opens the cages of Peach and Zelda, reviving them. They look excited to see Mario. . .But not so much when he attacks them. You play as Envy again, though with Mario’s moveset rather than his own, you still not getting to unlock him yet.
After assaulting the princesses, the battle is seen raging on rather than the princesses being turned into trophies in the cutscenes, although it’s not really shown as much of a battle, as Envy is owning the princesses considerably. Bowser creeps out behind Luigi’s trophy and touches it from the back, then quickly goes back into hiding before Luigi notices him. Luigi stares in horror at his brother attacking the princesses. He goes up to Envy and frantically talks in gibberish, but Envy knocks him down with an fsmash. Luigi is angered at his brother. . .What the heck is he doing? Now is finally his time to take the spotlight! You play as Luigi in a battle against Mario/Envy.
The battle is still going between the “Mario Bros”, you getting a decently cool fight scene for Luigi’s vengeance that I won’t bother to detail. However; before either brother can finish the other, Bowser intervenes and leaps out, smacking Envy down with an fair and turning him into a trophy. Bowser extends out a hand to Luigi. . .Luigi looks very reluctant to shake, hesitating in mass. In the background behind Luigi we see a primid come over and revive Envy, who turns back into his own form briefly before turning into Peach (Albeit now looking dark and evil, in her Shadow Queen form from Paper Mario 2). The primid presses a button to close a door to block off the real Peach and Zelda, getting them out of Luigi’s sight. This all happens very quickly, Luigi being completely unaware. Envy comes over to Bowser’s side and gives Luigi a kiss on the nose which of course gets Luigi to shake Bowser’s hand (After the shock of the kiss, of course.). Bowser gives a hearty evil laugh and the cutscene ends. . .Luigi has been successfully manipulated.
Snake/Meta Knight/Lucario’s level now happens as normal, but instead of finding the princesses at the end, they bump into Envy, Luigi, and Bowser. Luigi is in his Mr. L costume, Envy finishing the costume up by putting on his mask for him as they arrive. Bowser motions Luigi and Envy out to attack, and you fight the pair of them, Envy still in Peach’s form.
After Luigi and Envy are turned into trophies, Bowser takes out a trophy gun and starts firing at Meta Knight’s party in mass. They are forced to flee the area, and Bowser goes over to revive Luigi and Envy’s trophies. They’re still in the general room where Peach and Zelda were normally fought. . .And Luigi finally realizes he hasn’t seen anything of Zelda since the Mario incident, getting a thought bubble of her. He points up to the thought bubble and speaks gibberish to Bowser for him to hastily pull Envy over, who is still in Peach’s form. Luigi shakes his head and points up to the thought bubble of Zelda again for Bowser to slash the thought bubble into pieces. Luigi does his down taunt, but Envy goes over and kisses him on the nose again, which causes Luigi to stop thinking of the other woman. Bowser and Envy go to leave, Bowser motioning Luigi to come along, but he holds up his finger as if to say “Just a sec”. . .Bowser shrugs and leaves with Envy, Luigi waiting for them to leave. . .He goes over to the controls of the room and opens up the door out of curiosity to find Zelda and the real Peach. Was he just faking his allegiance to Bowser all along? Who knows. He motions for the princesses to come along with him, and you play the normal level you do with the princess pair where you escape the Halberd, only now with Luigi as an additional character.
The remainder of the Halberd plays out as normal, only now with Luigi added in the Duon boss fight. In the cutscene when Duon is revealed though, Bowser and Envy (Envy back in his normal form) are seen watching in disgust due to Luigi (Yes, he’s playable for that boss) being alongside the others. Upon being defeated, both are shocked, and they hastily hop off in Bowser’s clown car.
After this, we get another entirely new section, where we see Bowser and Envy riding in the Koopa Klown Kar. The Klown Kar goes to land down on the ground in a secluded area a good ways off from where the rest of the action is taking place. Bowser and Envy gets out of the transportation vehicle, then Bowser snaps his fingers to cause a portion of the ground to open up to reveal a mechanical base inside. Bowser and Envy hop inside, then it starts closing back behind them as if nothing happened. Here we see SONIC look at the base closing back up, and he hastily runs inside just before it closes with his insane speed. Bowser and Envy turn around and see Sonic for Bowser to let out a loud roar, summoning subspace creatures to attack Sonic. Bowser and Envy flee, not having time to waste, then you play a level in this underground base as Sonic.
After the level, we see GREED being held in a cell. He looks bored as all hell, but suddenly Bowser and Envy come up to his cell. Greed grits his teeth, pissed at seeing the ones holding him here, but Envy gives a dismissive motion and chuckles. Envy unlocks the cell and enters it, extending out a hand to help Greed up. Greed smacks Envy's hand away, but Bowser comes in behind Envy and takes out a bag of cash. Greed's eyes turn into dollar signs as he happily takes the bag of cash. Envy extends his hand out to Greed to shake. . .But Greed realizes the fatal error of Bowser and Envy. He hastily runs out of the cell while Bowser and Envy are still in it, then slams the cell shut before they can leave, locking them in. Bowser glares at Envy angrily for trusting Greed for him to just shrug. Greed runs off hastily, chuckling. Some subspace enemies come to the prison door to let out Bowser and Envy, Bowser motionining off to where Greed went and letting out an angry roar. You play another level in this base as Greed.
Greed keeps heading for the exit, ignoring all the enemies that attack him along the way, them not phasing him in the slightest. He's the ultimate shield, remember? Greed sees Sonic getting beat up by a considerable amount of Subspace foes. Greed lets out a reluctant sigh, but then goes over to the Hedgehog's aid, coming down on the enemies with a powerful drop kick. Greed extends out his hand to Sonic and shakes it, then they proceed along together through the base. The two of them see a way out of the base, but it's closing, and fast. Sonic makes it out easily, but it becomes clear that Greed isn't going to make it. Sonic sees this and reluctantly goes back into the base to help Greed, who just got attacked by another swarm of enemies. You play a battle level as Sonic and Greed. After defeating the enemies, a brief cutscene shows Greed smashing down the door, then the pair leave.
Before the level where DK, Diddy, Captain Falcon, and Olimar invade the subspace bomb factory, we’re shown a cutscene of, Lust, Sloth, Wolf, Gluttony, and Wrath (The later two whom are carrying the trophies of Ed, Al, and Toon Link) entering it, meeting up with the Ancient Minister. The Ancient Minister salutes his superiors for Sloth to give a dismissive motion to the Ancient Minister, allowing him to be at ease. In the background, Wolf can be seen turning around and leaving, going back into his Wolfen, being rather annoyed. He doesn’t particularly like being reduced to a delivery boy. . .Lust points to the Elric brothers for the Ancient Minister to nod and motion for them to come along with him. He opens up a secret room where a massive transmutation circle is ready along with tons of Robs moving about mess chemicals. Mustang is also seen here, along with several of his men, right in the middle of the Transmutation circle. Lust pats the Ancient Minister on the head for him to look down at the ground regretfully. . .Lust does a dismissive motion to Gluttony for him to let down the three trophies with a breath of relief. Lust and Sloth revive the trophies of the two Elric Brothers, and Lust points towards the Transmutation Circle with a thought bubble of the Philosopher’s Stone. . .She wants him to transmute Mustang and his men into it. Ed goes to lash out at her, but Sloth wraps her watery arms around him to hold him back. Lust chuckles and points to Al, who is being held by Gluttony. Lust snaps her fingers for Gluttony to take a bite out of Al, him letting out a cry of pain. Ed frantically tries to get out from Sloth’s grasp, but to no avail. Wrath comes up in front of Ed while he’s being held, sticking his tounge out at him and taunting him, infuriating him all the more. Lust points at the transmutation circle once again for Ed to reluctantly gets on his knees and prepare to do the transmutation. . .The Ancient Minister, unable to bare watching this slaughter, hastily leaves the room, going back out to the main room, closing off the doors inside. The DK/Diddy/Captain Falcon/Olimar level now plays as normal.
In the cutscene where the Ancient Minister normally reveals his identity as ROB, everything for the most part goes the same way, but Ganondorf simply forces the Robs to blow themselves up rather then set off subspace bombs. After the Ancient Minister reveals his identity and joins forces with the characters, rather then fleeing out, he hastily opens up the door where Ed and Al are being held and motions the characters down to attack. There are all the more Subspace forces inside of here, but they easily manage to free Mustang, Ed, and Al, and they also revive Toon Link’s trophy. Lust, Sloth, and Gluttony hastily go to flee the factory, heading back out into the main room. Sloth takes out a remote control and presses it for the Robs to start taking out the subspace bombs, and they escape, a door closing behind them and blocking the characters from chasing them. You play the normal escape level here, only now with the additional characters of Toon Link, Ed, Al, and Mustang. You also go on to use these characters in the fight against Meta Ridley.
Wolf’s been busy getting his *** kicked the entire SSE and being made fun of. . .He’s had enough taking orders. He’s doing things his way. Before the Great Invasion cutscene, we see Wolf flying off towards the Halberd where everyone is preparing for battle, Fox getting his arwing. As Fox and Falco get up in their arwings to fly alongside the Halberd, Wolf’s Wolfen crashes into Fox’s arwing and causes them to both crash. Both pilots hastily eject from their Arwings before they hit the ground and clash against each other in mid-air, and a standard Brawl occurs. . .And you play as Wolf. Yeah, you’re actually getting to play the villain in this SSE for the first time, outside of Envy copying people. After defeating Fox, Wolf gloats over Fox for a brief moment, having had his 15 minutes of fame, before Falco and a hoard of other characters arrive. Wolf reluctantly gets into his Wolfen and flies off into the distance as the other characters get up and revive Fox, who angrily shakes his fist at Wolf as he flees. The great invasion cutscene now occurs as normal, although the cutscene before it is edited slightly to show Greed and Sonic joining the rest of the cast at the Halberd, having fled the prison base.
In the Great Invasion, the Ganon Cannon is quite crowded with villains. Ganondorf, Bowser, Wolf, Lust, Gluttony, Sloth, Wrath, and Envy are all seen on board, standing together. Aside from that, no changes to the scene take place. However; in the cutscene where Bowser normally betrays Ganondorf, all the Homunculi take out trophy guns rather then Ganondorf, aiming them at the Nintendo villains. The Nintendo villains perform their various sidesteps, then you play as them against the Homunculi in a 3 on 5 battle. Only one foe from each side it out at a time, but they have one more man then you, keeping this far from easy, and besides, the highest ranking of your characters is in D tier!
After defeating the Homunculi, the Nintendo villains all do victorious taunts. Bowser and Wolf continue to walk forward, but then Ganondorf takes out a trophy gun and fires it at Bowser as normal. Unlike the normal cutscene though, Bowser dodges the shot and gets into a battle with Ganondorf. Wolf takes Ganondorf’s trophy gun and aims at the two fighting, wanting all the credit from Master Hand for himself, but Ganondorf smacks the gun out of Wolf’s grip and it falls off into the abyss. You now choose one character out of Bowser, Ganondorf, and Wolf for a three way Brawl. The losers get turned into trophies at the hands of the winner, and the winner goes to go before Master Hand then get defeated by Tabuu.
In the cutscene where Dedede normally squares off against Bowser, he’ll find the winner of the Nintendo villain brawl and fight them instead of it always being Bowser. Later on, the winner will be seen whaling on the trophies of the two losers like how Bowser whaled on Ganondorf.
Everything continues as normal, but you also have to hunt down the trophies of Sonic, Greed, Wolf, Jigglypuff, Toon Link, Ed, Al, and Mustang. If you find Ed and Al’s trophies, a cutscene will play in which Ed and Al stand before the four trophies of the five Homunculi. Ed goes past them without a second thought, but Al stares down at Sloth’s trophy again, unable to shake off the thought that she’s so similar to their mother. Alphonse slowly reaches down to revive her once more, Ed running up to stop him, but ultimately being too late. Sloth gets revived, then hastily turns her arms into water and extends them to revive Wrath, Envy, Gluttony, and Lust, touching their trophy bases. All five Homunculi quickly run up the stairs to the Great Maze, ignoring the Elric Brothers. Ed facepalms at Al while he just shrugs, then it continues as normal, them being added to the Great Maze party and finally being unlocked.
A few small sections are added to the Great Maze. The forest where Pokemon Trainer was introduced is added, containing the shadow versions of Gluttony, Lust and Jigglypuff, and PT and Pikachu’s shadow versions are also moved here. Wolf is moved back to Pikachu’s old spot due to him not showing up at any place in particular. Another new section is an underwater one with parts of Ed’s ship and Toon Link’s ship where the shadow versions of Ed, Al, Toon Link, Wrath, and Sloth are found. Yet another additional section is made for the prison base introduced towards the end of the SSE where the shadow versions of Greed and Sonic are found. A final additional section is Mustang’s base, contaning the shadow versions of only Mustang, Envy, and Pride (The boss).
") . After thinking about it and writing all the variables, its possible that Nu Gundam is around 10 move sets in 1 character. Through thinking up all those moves would be a hell of a job.. like breaking the shield, Beam Rifle, Beam sabers, Fin Funnels and even the body of the Nu Gundam it self. God this may be the hardest character to do..But I'm still doing it..
. After thinking about it and writing all the variables, its possible that Nu Gundam is around 10 move sets in 1 character. Through thinking up all those moves would be a hell of a job.. like breaking the shield, Beam Rifle, Beam sabers, Fin Funnels and even the body of the Nu Gundam it self. God this may be the hardest character to do..But I'm still doing it..
 ?
? But odds are I'll have a new favorite tomorrow.