
Excel_Zero
Smash Lord

A Peach Guide brought to you by Excel_Zero
---Index Table---
I. Introduction
II. Princess Peach's Biography
III. Buffs and Nerfs
IV. Peach's Physics
V. Standard Moves
VI. Smash Attacks
VII. Aerial Attacks
VIII. Special Moves
IX. Grabs/Throws
X. Final Smash
XI. Taunts
XII. Frame Data
XIII. Veggies In-Depth
XIV. Float In-Depth
XV. Advanced Techniques
XVI. Character Matchups
XVII. Stage Counterpicks
XVIII. Closing
Version 2.0 - Massive update. Added Frame Data, Move Summaries, Matchup Analysis and Stage Counterpicks. Removed some stuff and added the Closing section.
Version 1.1 - Switched Gameplay Videos section with the Useful Threads section. Added Move Analysis for Standard Moves. Glide Toss was added to the Advanced Techiniques section.(6-11-08)
Version 1.0 - Guide was posted. Sections from I to XI were added.(5-21-08)
I. Introduction
Welcome to my guide. Here I will be offering what I have learned so far with my experiences with Peach. I will include lot of information about her, like the damage and power of her moves for example.
About me... well my nickname is Excel_Zero (mostly use ZERO and EXCEL when playing Brawl), and I'm a top player from Puerto Rico. I found about this website and competitive gaming around March 2006, and started playing Melee competitively from there. My main was Fox but in the last months of Melee I switched into Peach, which is also my main now in Brawl. In my country I'm very well known, and I have only traveled once to a tournament in the states (Fast 1 at Orlando). I will possibly go to DBR Genesis this summer so maybe I will have another chance at competing on the states.
Now let's talk about the Guide's main point, Peach. Contrary to many people's beliefs, Peach is quite talented and pretty good in Brawl. She can hold her ground against most of the cast and a solid Peach is very hard to defeat. It was very easy to win matches in Melee with Peach, because of her dsmash, shield pressuring abilities and float canceling, but now that all that is removed she will have to work harder to win.
Dedicated to all those who are still using the Princess despite her nerfs. Enjoy the guide.
II. Princess Peach's Biography

Princess Peach (ピーチ姫, Pīchi-hime) is a video game character in Nintendo's Mario Video Game series, often playing the "damsel in distress" role in the adventure series. Peach is the human princess of the fictitious Mushroom Kingdom. She was known as Princess Toadstool until late 1996, when she added the name "Peach" to her signature in the opening scene of Super Mario 64.
Peach is generally depicted as kind, cheerful, well-mannered, and noble. Princess Peach also has an affinity for the color pink. Almost everything in her wardrobe (most notably her dresses) are pink. She most often wears a pink dress although she wore a white dress in Super Mario Bros.. She is nearly always portrayed in her traditional pink dress. She wears pinkish lipstick.
Her hair color is usually golden blonde, but starting in Super Smash Bros. Brawl it is depicted as being ice blonde and in the Mario cartoons her counterpart's hair was a burgundy color (as she had red hair in the original Super Mario Bros.). Her eyes are azure. She also wears sapphire earrings, a sapphire brooch, and a gold crown adorned with sapphires and rubies. She also added arm-length gloves to her ensemble in Super Mario World. In Super Smash Bros. Brawl she is shown wearing a sapphire ring on her middle finger. She wears red dress shoes with 4 inch heels.
III. Buffs and Nerfs
*This will be based in comparison between Brawl's Peach and Melee's Peach.*
-Buffs-
IV. Peach's Physics
-Overall-
Peach has excellent mobility in the air thanks to her Floating abilities (more will be covered later on). Her walk and dash are not that slow, but aren't that fast either. She can travel faster via dashing than floating, but the difference is not much. Her roll and dodging abilities are about average.
Ledge Autosweetspot: Yes
Auto-Canceled Aerials: 4/5
Walljump: No
Wall Cling: No
Crawling: No
-Weight-
Peach is the 24th heaviest character in the game. She is the second floatiest character in the game (losing only to Jigglypuff).
-Crouch-
Peach's crouch is not bad, but nothing special either. She cannot crawl so advancing/retreating while crouched is impossible by this way. However, via floats she can move certain distances and immediately crouch when she touches the floor. She can't crouch to evade low angled projectiles (unless she is on a sloped stage).
Projectiles that won't hit Peach while crouching on flat stages are:
-Recovery-
Peach's recovery is pretty good, and she can last long with it. Her second jump is shorter, but her parasol covers for that, since it gets her higher than Melee. She falls really slow with her umbrella, which is actually good when you need to go for the edge and someone is hanging on it (the parasol will hit the foe, get them out of the edge, and you will still be able to grab the edge). However, when she is facing away from the edge with her parasol open, she won't hang and will fall to her doom, unless you fastfall (which closes her parasol).
Her Peach Bomber (side B) also helps with horizontal recovery, and this move can now sweetspot the edge.
-Main KOing Moves-
Here's a list with the best killing moves, and the damage they kill.
-Top 10 Killing Moves [Upward]-
-Top 10 Killing Moves [Sideways]-
Remember that the KO damages of the attacks with sideway trajectory will kill much sooner if they are done near the edge or outside the stage.
Moves you should rely on for KOs:
Up Smash
Front Smash
Front Air
Back Air
Neutral Air
Front Tilt
Up Air
Up Tilt
of course the stitchface and the bomb are deadly tools that can KO probably much sooner but they aren't always available.
-Edgeguard-
Peach's edgeguarding abilities are mainly focused on chasing the opponent using float and intercepting them in midair with aerials (nair, fair and bair mostly). Turnips can be used also to interrupt certain recoveries. Another option is hanging on the edge, letting the opponent get over you, then ledgehop/ledgejump and aerial in their face.
-Edgeguard Counter-
To avoid being edgeguarded, try to use your float to maneuver moving back and forth and see if the opponent will try and reach for you with an attack. If you see an opening then grab on the edge. Also using the parasol to sweetspot the edge is quite safe, since the parasol's priority eats through lots of mistimed aerials.
-Camping-
Peach's camping game is based on throwing turnips to keep foes out of range. You can also use the float to get away from slower enemies who are not good chasing in the air. Using fairs out of floats are good spacing tools, and the uptilt is excellent to reach foes that are above you and keeping them away (preferably on higher platforms). The dair is another spacing tool which is pretty good since the multiple hits tend to keep foes at bay and you can keep spamming it while you are floating and moving, but moves with high priority and/or disjointed hitbox can penetrate through this. The dsmash can be used when the foe is on you and you want to get him away. You can also use the parasol to get them away and going to safety (but watch out for speedy characters since they can chase you, and Peach's falling speed is very slow).
A good defensive maneuver is floating and then fastfalling with airdodge and doing anything when grounded (like shieldgrabbing for example).
I. Introduction
II. Princess Peach's Biography
III. Buffs and Nerfs
IV. Peach's Physics
V. Standard Moves
VI. Smash Attacks
VII. Aerial Attacks
VIII. Special Moves
IX. Grabs/Throws
X. Final Smash
XI. Taunts
XII. Frame Data
XIII. Veggies In-Depth
XIV. Float In-Depth
XV. Advanced Techniques
XVI. Character Matchups
XVII. Stage Counterpicks
XVIII. Closing
Version 2.0 - Massive update. Added Frame Data, Move Summaries, Matchup Analysis and Stage Counterpicks. Removed some stuff and added the Closing section.
Version 1.1 - Switched Gameplay Videos section with the Useful Threads section. Added Move Analysis for Standard Moves. Glide Toss was added to the Advanced Techiniques section.(6-11-08)
Version 1.0 - Guide was posted. Sections from I to XI were added.(5-21-08)
I. Introduction
Welcome to my guide. Here I will be offering what I have learned so far with my experiences with Peach. I will include lot of information about her, like the damage and power of her moves for example.
About me... well my nickname is Excel_Zero (mostly use ZERO and EXCEL when playing Brawl), and I'm a top player from Puerto Rico. I found about this website and competitive gaming around March 2006, and started playing Melee competitively from there. My main was Fox but in the last months of Melee I switched into Peach, which is also my main now in Brawl. In my country I'm very well known, and I have only traveled once to a tournament in the states (Fast 1 at Orlando). I will possibly go to DBR Genesis this summer so maybe I will have another chance at competing on the states.
Now let's talk about the Guide's main point, Peach. Contrary to many people's beliefs, Peach is quite talented and pretty good in Brawl. She can hold her ground against most of the cast and a solid Peach is very hard to defeat. It was very easy to win matches in Melee with Peach, because of her dsmash, shield pressuring abilities and float canceling, but now that all that is removed she will have to work harder to win.
Dedicated to all those who are still using the Princess despite her nerfs. Enjoy the guide.
II. Princess Peach's Biography
Princess Peach (ピーチ姫, Pīchi-hime) is a video game character in Nintendo's Mario Video Game series, often playing the "damsel in distress" role in the adventure series. Peach is the human princess of the fictitious Mushroom Kingdom. She was known as Princess Toadstool until late 1996, when she added the name "Peach" to her signature in the opening scene of Super Mario 64.
Peach is generally depicted as kind, cheerful, well-mannered, and noble. Princess Peach also has an affinity for the color pink. Almost everything in her wardrobe (most notably her dresses) are pink. She most often wears a pink dress although she wore a white dress in Super Mario Bros.. She is nearly always portrayed in her traditional pink dress. She wears pinkish lipstick.
Her hair color is usually golden blonde, but starting in Super Smash Bros. Brawl it is depicted as being ice blonde and in the Mario cartoons her counterpart's hair was a burgundy color (as she had red hair in the original Super Mario Bros.). Her eyes are azure. She also wears sapphire earrings, a sapphire brooch, and a gold crown adorned with sapphires and rubies. She also added arm-length gloves to her ensemble in Super Mario World. In Super Smash Bros. Brawl she is shown wearing a sapphire ring on her middle finger. She wears red dress shoes with 4 inch heels.
III. Buffs and Nerfs
*This will be based in comparison between Brawl's Peach and Melee's Peach.*
-Buffs-
- Uptilt has been greatly improved, specifically in range.
- Her Parasol reaches higher than before.
- Nair and Bair can hit with 2 different hitboxes each.
- Front Tilt is generally better.
- Fsmash received a knockback increase.
- Uair had a range increase.
- Forward B is faster and has more range.
- Fair is faster and stronger.
- Neutral B is better and can kill.
- Downsmash doesn't kill anymore, and even if all hits connect it won't do much damage.
- Grabs were badly nerfed, and she cannot kill with them anymore (unless very high %).
- Float cancel is out (this only affects her fair).
- Veggies are easier for foes to catch, which hinders her camp game.
- Second jump doesn't give her much vertical height.
- She has a hard time KOing opponents. Knockback of lot of moves have been reduced.
- She cannot stall with Side B any longer.
IV. Peach's Physics
-Overall-
Peach has excellent mobility in the air thanks to her Floating abilities (more will be covered later on). Her walk and dash are not that slow, but aren't that fast either. She can travel faster via dashing than floating, but the difference is not much. Her roll and dodging abilities are about average.
Ledge Autosweetspot: Yes
Auto-Canceled Aerials: 4/5
Walljump: No
Wall Cling: No
Crawling: No
-Weight-
Peach is the 24th heaviest character in the game. She is the second floatiest character in the game (losing only to Jigglypuff).
-Crouch-
Peach's crouch is not bad, but nothing special either. She cannot crawl so advancing/retreating while crouched is impossible by this way. However, via floats she can move certain distances and immediately crouch when she touches the floor. She can't crouch to evade low angled projectiles (unless she is on a sloped stage).
Projectiles that won't hit Peach while crouching on flat stages are:
- Peach's Turnips (Peach must be right next to her for the attack to miss)
- Link's Fully Charged Arrows (unless there is a big distance in between)
- Toon Link's Fully Charged Arrows (only at a certain distance)
- Samus' Super Missile
- Samus' Uncharged Shot (sometimes hits and sometimes it's a phantom hit)
- Zero Suit Samus' Uncharged Paralyzer (Peach must be right next to her for the attack to miss)
- Pit's Arrows (when not angled or angled upwards)
- R.O.B.'s Uncharged Robo Beam (when not angled or angled upwards)
- R.O.B.'s Fully Charged Gyro (Peach must be right next to him for the attack to miss)
- Dedede's Waddle Dee Throw (Peach must be right next to him for the attack to miss)
- Olimar's Pikmin Throw (Peach must be pretty close, yellow pikmins only)
- Fox's SHL/SHDL (if lasers are shoot on the ground they will hit Peach)
-Recovery-
Peach's recovery is pretty good, and she can last long with it. Her second jump is shorter, but her parasol covers for that, since it gets her higher than Melee. She falls really slow with her umbrella, which is actually good when you need to go for the edge and someone is hanging on it (the parasol will hit the foe, get them out of the edge, and you will still be able to grab the edge). However, when she is facing away from the edge with her parasol open, she won't hang and will fall to her doom, unless you fastfall (which closes her parasol).
Her Peach Bomber (side B) also helps with horizontal recovery, and this move can now sweetspot the edge.
-Main KOing Moves-
Here's a list with the best killing moves, and the damage they kill.
-Top 10 Killing Moves [Upward]-
- Up Smash [Charged Sweetspotted] ~47%~
- Up Smash [Charged Unsweetspotted] ~59%~
- Up Smash [Uncharged Sweetspotted] ~80%~
- Front Smash (Frying Pan) [Charged] ~87%~
- Up Smash [Uncharged Unsweetspotted] ~93%~
- Front Smash (Frying Pan) [Uncharged] ~135%~
- Front Tilt ~139%~
- Up Air ~143%~
- Up Smash [Charged Sourspotted] ~143%~
- Up Tilt ~158%~
-Top 10 Killing Moves [Sideways]-
- Front Smash (Tennis Racket) [Charged Sweetspotted] ~65%~
- Front Smash (Golf Club) [Charged] ~93%~
- Front Smash (Tennis Racket) [Uncharged Sweetspotted] ~99%~
- Forward Air ~133%~
- Front Smash (Golf Club) [Uncharged] ~140%~
- Back Air [Sweetspot] ~150%~
- Front Smash (Tennis Racket) [Charged Unsweetspotted] ~150%~
- Neutral Air [Sweetspot] ~151%~
- Up Air [Unsweetspotted] ~179%~
- Neutral B ~193%~
Remember that the KO damages of the attacks with sideway trajectory will kill much sooner if they are done near the edge or outside the stage.
Moves you should rely on for KOs:
Up Smash
Front Smash
Front Air
Back Air
Neutral Air
Front Tilt
Up Air
Up Tilt
of course the stitchface and the bomb are deadly tools that can KO probably much sooner but they aren't always available.
-Edgeguard-
Peach's edgeguarding abilities are mainly focused on chasing the opponent using float and intercepting them in midair with aerials (nair, fair and bair mostly). Turnips can be used also to interrupt certain recoveries. Another option is hanging on the edge, letting the opponent get over you, then ledgehop/ledgejump and aerial in their face.
-Edgeguard Counter-
To avoid being edgeguarded, try to use your float to maneuver moving back and forth and see if the opponent will try and reach for you with an attack. If you see an opening then grab on the edge. Also using the parasol to sweetspot the edge is quite safe, since the parasol's priority eats through lots of mistimed aerials.
-Camping-
Peach's camping game is based on throwing turnips to keep foes out of range. You can also use the float to get away from slower enemies who are not good chasing in the air. Using fairs out of floats are good spacing tools, and the uptilt is excellent to reach foes that are above you and keeping them away (preferably on higher platforms). The dair is another spacing tool which is pretty good since the multiple hits tend to keep foes at bay and you can keep spamming it while you are floating and moving, but moves with high priority and/or disjointed hitbox can penetrate through this. The dsmash can be used when the foe is on you and you want to get him away. You can also use the parasol to get them away and going to safety (but watch out for speedy characters since they can chase you, and Peach's falling speed is very slow).
A good defensive maneuver is floating and then fastfalling with airdodge and doing anything when grounded (like shieldgrabbing for example).
A few notes before beginning with the Princess' moveset.
- The damages of the moves were done in Training mode, meaning that they aren't affected by the diminish of spammed attacks.
- I will be rating the move's knockback, speed and range using stars, 1 star ★ meaning worst and 5 stars ★★★★★ meaning best.
- KOs damage were tested against Mario, on the very center of Final Destination.
- There was no DI used on KOs tests.
Also:
Damage: Damage the attack does.
Knockback: How far can launch the attack. Rated with stars. ★
Speed: How fast the attack is overall (including startup, lag, etc.) Rated with stars. ★
Range: How much the attack extends and how far it reaches. Rated with stars. ★
Hitbox: If the move has more than one hitbox it will be explained here.
Sweetspot: If the move has a sweetspot it will be described here.
Auto-Cancel: If the move has only landing lag when landing (only for aerial attacks).
KOs at: At what damage the move kills and in which trajectory (Upwards or Sideways).
Special Properties: Special properties the move has, e.g. the move can meteor.
Description: A brief description on how the move looks.
Rating: The usefulness overall of the move.
Summary: A brief analysis on the move.
Combos: Useful possible combos for the move.
V. Standard Moves
1. Jab (First Hit) ~Royal Slap~
Damage: 3%
Knockback: ★
Speed: ★★★★★
Range: ★★
Hitbox: No.
Sweetspot: No.
KOs at: N/A
Special Properties: Set Knockback.
Description: Peach slaps the opponent very quickly.
Rating:

Summary:
Peach's jab is a very great move. It has good priority for a jab and clanks with many projectiles. It comes out on frame 2 and is her fastest and safest move in her aresenal. Believe it or not it's her most ranged move (second jab), and has awesome set ups for grabs. This move is great to follow up after using an Fair to keep you safe, not to mention it's great for refreshing stale moves.
Combos:
* Glide Toss forward > Jab > Grab
* Autocancel Fair > Jab > Grab
* Jab > Grab
2. Jab (Second Hit) ~Double Royal Slap~
Damage: 3%
Knockback: ★★
Speed: ★★★★★
Range: ★★★
Hitbox: No.
Sweetspot: No.
KOs at: 436% [Sideways]
Special Properties: None.
Description: After the first slap, Peach slaps with the other hand very quickly.
Rating:
*Summary and combos above.*
3. Dash Attack (First Hit) ~Lady Push~
Damage: 4%
Knockback: ★
Speed: ★★★
Range: ★★★
Hitbox: No.
Sweetspot: No.
KOs at: 720% [Sideways]
Special Properties: None.
Description: Peach extends her arms and lunges forward.
Rating:
Summary:
At first glance this move seems to suck compared to Melee, but is that true? Lets see, it recatches Turnips really well, refreshes moves, a nice combo starter at low percents. and is a nice surprise attack. It also has two different hits, and the second is slightly disjointed. Also, the first hit of it can set up for a sweetspotted Usmash. At certain percents you can Dsmash and then immediately Dash Attack them as they bounce off the ground. You should miss withwith your second hit and they should fly away from you and hit the ground again. This forces them to do an immediate wake-up animation and since they have no control over the timing of their get up; they just stand up immediately after hitting the ground.
*Credit to Villi for telling us this*
Combos:
1. Dsmash -> sends them behind you
2. Dash attack -> first hit catches them as they bounce on the ground
3. Running up smash -> catches them as the invincibility from their get-up animation wears off
4. Dash Attack (Second Hit) ~Double Lady Push~
Damage: 4%
Knockback: ★
Speed: ★★★★
Range: ★★★
Hitbox: No.
Sweetspot: No.
KOs at: 235% [Upwards]
Special Properties: When opponent is at high % the second hit is harder to connect, since the first hit sends them out of range. After opponent is above 220%, only the first hit will connect if the attack is attempted at short range.
Description: Peach extends her arms and lunges forward. Attack happens just after the first hit ends.
Rating:
*Summary and combos above.*
5. Front Tilt ~Can-Can Kick~
Damage:
- 13%
- 11%
- 10%
- 6%
Speed: ★★★
Range: ★★★★
Hitbox: "4"
- Close Range
- Average Range
- Long Range (tip of the heel)
- Upper Part of the move (after a few frames).
KOs at:
- 139% [Upwards]
- 166% [Upwards]
- 182% [Upwards]
- Unknown (later) [Upwards]
Description: Peach stretches backwards and throws a 90˚ angled kick.
Rating: *later*
Summary: *later*
Combos: *later*
6. Up Tilt ~Heart Bash~
Damage: 13%
Knockback: ★★★★
Speed: ★★★★
Range: ★★★★★
Hitbox: No.
Sweetspot: No.
KOs at: 158% [Upwards]
Special Properties: None.
Description: Peach raises both arms and unleashes a big heart-like magic.
Rating:
Summary:
Uh oh! What's this? This wasnt in Melee! This is Peach's brand new Utilt. Was this move added for the best? Absolutely! This move is awesome. It is EXTREMELLY disjointed with tons of range. It can stop EVERY Dair in the game, and almost anything coming down from above. This move should be used whenever the chance is open. You dont have to worry about it decaying, and it can be a nice KO move when opponents are at high percents. A VERY good move to use when opponents are above you. It's also pretty fast.
Combos:
* Dair > Uair > FF > Utilt - You can add an extra Dair depending on the opponent's weight.
* FF Dair > Utilt
* Ftilt > Utilt
* Dtilt > Utilt (low percents)
* Fsmash (Pan) > Utilt
7. Down Tilt ~Elegant Sweep~

Damage: 10%
Knockback: ★★★
Speed: ★★★
Range: ★★★
Hitbox: No.
Sweetspot: No.
KOs at: 174% [Upwards]
Special Properties: Meteors when opponents are really close to Peach's body when the attack connects. When used frequently Peach moves forward at a slow speed. Peach also retreats when you use down tilt and another move.
Description: Peach crouches, leans forward a little bit and throws a low angled slap.
Rating:
Summary:
Great move, but highly underused. It's Peach's second most ranged attack, and it's a nice sheild poker as well. This move has some nice AT's to it, if you repeatedly use Dtilt you'll gain forward momentum, and if you use Dtilt and perform an attack before the last few frames end you'll slide back, also if your on PS2 and its one the ice stage and you are sliding around everywhere you can Dtilt and it'll immediately stop you. This move is also a spike, it's extremelly situational and hard to pull off, but if you manage to it's pretty powerful.
Combos:
* Dtilt > Utilt (low percents)
* Dtilt > Nair
* Dtilt > Fair
* Jab > Dtilt
* Dtilt > Fsmash
VI. Smash Attacks
1. Front Smash (Golf Club) ~Peach Swing~
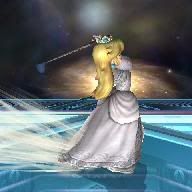
Damage: 15% Uncharged, 21% Charged
Knockback: ★★★★
Speed: ★★★
Range: ★★★★
Hitbox: No.
Sweetspot: No.
KOs at: 140% Uncharged, 93% Charged [Sideways]
Special Properties: Comes out randomly. Doesn't appear twice in a row.
Description: Peach grabs a Golf Club and swings it forward.
Rating:
Summary:
Possibly the best weapon you can get from her forward smash. It has superior range comapared to the other two, KOs better aside, is less of a hassle to set up, hits in the air and behind you, and is just better overall. You'll probably want this weapon to appear when you want a KO, you can do this by using the process of Fsmash elimination which is using your Fsmash to eliminate either the Pan or Racket so hopefully you'll get the Golf Club the next time you use Fsmash.
Combos:
*No specific combos for the Club*
2. Front Smash (Tennis Racket) ~Peach Swing~
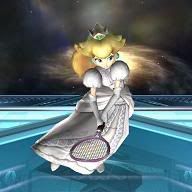
Damage: 12% Uncharged Unsweetspotted, 16% Charged Unsweetspotted, 13% Uncharged Sweetspotted, 18% Charged Sweetspotted
Knockback: ★★★★★
Speed: ★★★
Range: ★★★
Hitbox: No.
Sweetspot: The very edge of the racket.
KOs at: 216% Uncharged Unsweetspotted, 150% Charged Unsweetspotted, 99% Uncharged Sweetspotted, 65% Charged Sweetspotted [Sideways]
Special Properties: Comes out randomly. Doesn't appear twice in a row.
Description: Peach grabs a Tennis Racket and swings it forward.
Rating:
Summary:
At first glance this move seriously sucks. It has extremelly weak knockback, cant KO until the 150 percents, and has range and damage that is out classed by the Golf Club. So what is this move good for? Well, this move has a VERY powerful sweetspot at the tip of the Racket. This thing KOs at 99% uncharged at the center of FD, and at 60% at the edge. This move is very hard to DI properly because it's so unexpected. The knockback is naturally horizontal, and sends your opponent rocketing! This is also her second most powerful move second to the Bomb.
Combos:
* The weak spot of Bair > Racket
3. Front Smash (Frying Pan) ~Peach Swing~
Damage: 18% Uncharged, 25 Charged
Knockback: ★★★★
Speed: ★★★
Range: ★★★
Hitbox:
Sweetspot: No.
KOs at: 135% Uncharged, 87% Charged [Upwards]
Special Properties: Comes out randomly. Doesn't appear twice in a row.
Description: Peach grabs a Frying Pan and swings it forward.
Summary:
This is one of the three items Peach can get from her Fsmash. The Pan has the shortest range out of the three items. It has a sweetspot but is really hard to hit with. The oopponent has to literaly be inside you or extremelly close (by the handle). An uncharged sweetspot does 19%, and fully charged it does 27%. Anyways, This move is best used obviously, with stages that have poor vertical height (Green Greens for example) and not really good for high ceiling stages (Jungle Japes, etc). Even though you can't choose which item you get because its completely random, you do have the option of eliminating one of the two so you'll have a 50:50 chance of either getting a Pan or (whichever one you decided not to get rid of). Also the sound of it s awesome.
Combos:
* Pan > Utilt (low percents)
* Pan > Nair
* Pan > Fair
4. Up Smash ~Pirouette~
Damage: 8% Uncharged Sourspotted, 11% Charged Sourspotted/15% Uncharged Unsweetspotted, 21% Charged Unsweetspotted /17% Uncharged Sweetspotted, 23% Charged Sweetspotted
Knockback: ★★★★★
Speed: ★★★
Range: ★★★
Hitbox: 3. More details later...
Sweetspot: Peach's shoulders.
KOs at: 195% Uncharged Sourspotted, 143% Charged Sourspotted/93% Uncharged Unsweetspotted, 59% Charged Unsweetspotted/80% Uncharged Sweetspotted, 47% Charged Sweetspotted [Upwards]
Special Properties: None.
Description: Peach raises one arm and spins a few times.
Rating: *later*
Summary: *later*
Combos: *later*
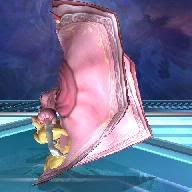
5. Down Smash ~Double-Edged Gown~
Damage: 5% Uncharged, 7% Charged
Knockback: ★
Speed: ★★★
Range: ★★★
Hitbox: 8 hits total, 4 on each side.
Sweetspot: No.
KOs at: 343% Uncharged, 264% Charged [Sideways]
Special Properties: Multiple hitbox attack.
Description: Peach extends her dress and spins.
Rating:
Summary:
This move was Peach's best move in Melee, but unfortunately it got toned down a bit in Brawl. However, it's still a great move! It has decently fast start up, a long duration (punishes spotdodgers), decent range, sheild pokes sheilds, can rack up damage, Peach can avoid some projectiles since she croutches while using this, has pretty good priority, a good "get off me move", and can stage spike characters. This move is great for refreshing your moves since it'll never KO anyways.
Combos:
* Jab > Dsmash
* Dsmash > Fsmash (low percents)
VII. Aerial Attacks
1. Neutral Air ~Princess Twirl~
Damage: 13% Sweetspotted, 9%-10% Unsweetspotted
Knockback: ★★★★
Speed: ★★★★★
Range: ★★★
Hitbox: No.
Sweetspot: First frames of the move.
Auto-Cancel: Yes.
KOs at: 151% Sweetspotted, 196%/216% Unsweetspotted [Sideways]
Special Properties: None.
Description: Peach spins while airborne.
Rating:
Summary:
One of Peach's better aerials. It's her fastest aerial, has two hitboxes, and is almost impossible to airdodge properly. This is a great move and has decent priority. This move can do up to 23% damage by Floating > Nair > and dropping the Float after the first hit connects.This is a good surprise killer for opponents who normally expect Fairs off the stage, this move is probably one of her best OoS options.
Combos:
* Dtilt > Nair (low percents)
* Ftilt > Nair
* Dair > Nair
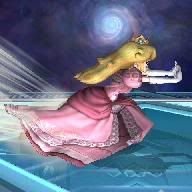
2. Forward Air ~Crown Smack~
Damage: 15%
Knockback: ★★★★★
Speed: ★★★
Range: ★★★★
Hitbox: No.
Sweetspot: No.
Auto-Cancel: No.
KOs at: 133% [Sideways]
Special Properties: None.
Description: While in midair, Peach takes her crown and hits the opponent with it.
Rating: *later*
Summary: *later*
Combos: *later*
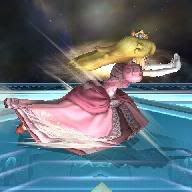
3. Back Air ~Flying Hip~
Damage: 14% Sweetspotted, 7% Unsweetspotted
Knockback: ★★★★
Speed: ★★★
Range: ★★★
Hitbox: No.
Sweetspot: First frames of the move.
Auto-Cancel: Yes
KOs at: 150% Sweetspotted, 375% Unsweetspotted [Sideways]
Special Properties: None.
Description: Peach hits you with her hips.
Rating: *later*
Summary: *later*
Combos: *later*
4. Up Air ~Floating High Kick~
Damage: 11%/12%/13%
Knockback: ★★★★
Speed: ★★★★
Range: ★★★
Hitbox: 3.
Sweetspot: Peach's heel.
Auto-Cancel: Yes.
KOs at: 179% [Sideways]/161%/ 143% [Upward]
Special Properties: None.
Description: Peach launches a high kick above her.
Rating:
Summary:
This move is an okay move. Probably her least useful aerial. It has good verticle range and boosts her upwards a little. It's a pretty nice juggling move. You can hit opponents on platforms with this.
Combos:
Dair > Uair
5. Down Air ~Stiletto Kick~
Damage: 3%, 5% last hit.
Knockback: ★
Speed: ★★★★
Range: ★★★
Hitbox: 4 hits. Last hit is stronger than the first 3.
Sweetspot: No.
Auto-Cancel: Yes
KOs at: N/A, 219%. [Upwards]
Special Properties: Multiple hitbox attack.
Description: Peach launches four speedy kicks beneath her.
Rating:
Summary:
This move is TOO good! It's more than likely Peach's best all round move and is one of the key things to learning her. This move is a great combo starter at low to mid percents. Without the fear of this move decaying it's a really nice move. You can get multiple Dairs in when starting combos depending on the character's weight. This move sheild pressures like no other, and isn't really punishable if you use it right. You can either Float and use this move, or use a SH to start your combos. The 4th kick has slightly more range than the other kicks.
Combos:
* Lol waaay to many to list, use your imagination
VIII. Special Moves
1. Neutral B ~Toad~
Damage: 3%
Knockback: ★★
Speed: ★★
Range: ★★★
Hitbox: 6 hits.
Sweetspot: No.
KOs at: 193%. [Sideways]
Special Properties: Counter move. Only activates if Peach is hit while Toad is out. Peach has invincibility frames during a brief period (just after she brings out Toad).
Description: Peach gets out her Toad and counters any hit thrown at her (excluding grabs).
Rating: *later*
Summary: *later*
Combos: *later*
2. Side B ~Peach Bomber~
Damage: 15%
Knockback: ★★
Speed: ★★
Range: ★★★★★
Hitbox: No.
Sweetspot: No.
KOs at: 240%. [Sideways]
Special Properties: Passes through people's shields, unless the shield is really small (it breaks it in that case).
Description: Peach launches herself a long distance and hits the opponent with her hip.
Rating:
This move used to suck *** in Melee. But in Brawl, it got some good improvements. The range was greatly increased, instead of an explosion an explosion of hearts appear. This move is best used for recovery, since it's safer than the Parasol. On the ground it's pretty risky. There are three types of Peach Bombers you can do (none of them vary in damage, just range). You can do the slingshot Bomber which will send you back a bit and then launch forward (has less range then the other two), I sometimes hit opponents behind me by doing this. The second is the regular Peach Bomber (has a balance of range between the other two). And the last is the Smash Bomber which is when you smash the control stick as if doing a smash and by doing that you'll actually gain more distance then the regular Bomber. This move is awesome if you connect with a recovering opponent like Link or any other characters with poor verticle recoveries. Since the Bomber has a little semi spike to it it should kill those characters pretty easily.
Combos:
Peach Bomber > Fair (low percents)
Throw Turnip > Peach Bomber
3. Up B ~Peach Parasol~
Damage: 1%, 4% last hit, 3% when umbrella is already opened.
Knockback: ★★
Speed: ★★★★
Range: ★★★★
Hitbox: 5 hits.
Sweetspot: Last hit, when the parasol opens.
KOs at: 182%. [Upwards]
Special Properties: Multiple hitbox attack. First hits have set knockback. When the attack is done Peach keeps her parasol open to increase horizontal movement.
Description: Peach jumps with her umbrella, and then opens it and starts falling slowly.
Rating:
Summary:
This move kind of got a shuffle of buffs and nerfs since its previous Melee form. It travels much farther vertically and horizontally than in Melee. However the landing lag that you could cancel in Melee is no longer in Brawl, and you suffer from lag anyways. It travels much slower than in Melee which can be both good and bad. This move isn't the best at attacking, however it's a ggreat surprise attack, hitboxes are basically everywhere on Peach's body. As a recovery it's GREAT when recovering horizontally since it grants her unlimited horizontal distance, but as a vertical recover it's medicore, but gets the job done most of the time. This move can be used to stall your death on stages like Delfino Plaza, Brawl Yoshi's Island (Waiting until the ghost thing pops up), Brinstar, Norfair, etc. If you recover with this move backwards away from the ledge, simply press down on either the control stick or C-stick to grab the edge while facing away from it. Also the top of the Parasol when recovering can stop some attacks, and projectiles from above. Also, this move has the potential to stage spike an opponent.
Combos:
Ftilt > Parasol
Dtilt > Parasol
4. Down B ~Vegetable/Turnip~

Damage: *See the "Veggies In-Depth" section.*
Knockback: Depends on the face of the turnip.
Speed: ★★★
Range: ★★★
Hitbox: No.
Sweetspot: No.
KOs at: *See the "Veggies In-Depth" section.*
Special Properties: Peach can pull a variety of turnips, each with different damage and knockback. She can also pull Bob-ombs, Mr. Saturns and Beam Swords.
Description: Peach ducks and gets a vegetable out of the floor.
Rating: *later*
Summary: *later*
Combos: *later*
IX. Grabs/Throws
1. Grab Attack ~Heel Stomp~
Damage: 2%
Knockback: N/A
Speed: ★★
Range: N/A
Hitbox: No.
Sweetspot: No.
KOs at: N/A.
Special Properties: None.
Description: Peach stomps them.
Rating: *later*
Summary: *later*
Combos: *later*
2. Front Throw ~Royal Slap~
Damage: 2%, 8% last hit.
Knockback: ★
Speed: ★★★★
Range: N/A
Hitbox: 2 hits.
Sweetspot: No.
KOs at: 234%. [Sideways]
Special Properties: None.
Description: Peach slaps the opponent's face.
Rating:
Summary:
Not as good as her Fthrow in Melee where it could KO at the edges. At 0-20% you can land one to three Fthrows after another if your opponent isn't expecting it. From around 22-30 ish percent, depending on how fast the character falls, they'll start falling on their backs (when's the last time you saw that happen?)after an fthrow. If they don't DI or DI wrong (toward you), you can catch them mid bounce/tech with a Peach Bomber or a short hopped fair. Peach Bomber isn't anything near unpunishable, though, so if they air dodge into a shield instead of teching or whatever you're going to be punished.Follow up number 2 is more pseudo chain-grabness. Chase them with a shield dashed jab. Fthrow, shield dash jab-grab. This should get them as they bounce or at least before they can do a get up attack, but be quick about it. Follow up 3 is a short hopped/auto-floated dair to floated dairs/aerials.
Combos:
* Fthrow > Fthrow > Fthrow (low percents)
* Fthrow > Fair
3. Back Throw ~Iron Hip~
Damage: 2%, 9% last hit.
Knockback: ★
Speed: ★★
Range: N/A
Hitbox: 2 hits.
Sweetspot: No.
KOs at: 355%. [Sideways]
Special Properties: None.
Description: Peach puts her opponent behind and hits with her hip.
Rating: *later*
Summary: *later*
Combos: *later*
4. Up Throw ~Gut Punch~

Damage: 2%, 6% last hit.
Knockback: ★
Speed: ★★★
Range: N/A
Hitbox: 2 hits.
Sweetspot: No.
KOs at: 303%. [Upwards]
Special Properties: None.
Description: Peach puts opponents above her and then she hits them with both hands.
Rating:
Summary:
This is probably Peach's worst move of her arsenal. It can't CG like it could on FFers in Melee. It's best use is probably for positioning on stages with platforms. Also if you're on teams and you accidently grab your partner, this is the best throw to use.
Combos:
* Uthrow > Utlit (only against heavy characters at 0% percent)
5. Down Throw ~The Royal Treatment~
Damage: 7%.
Knockback: ★
Speed: ★★
Range: N/A
Hitbox: No.
Sweetspot: No.
KOs at: 313%. [Upwards]
Special Properties: None.
Description: Peach puts opponents beneath her and she falls towards them.
Rating:
Summary:
Definately one of Peach's better throws. This throw can be utilized as a chain grab when used against Falco, Fox, and Wolf, and other fast fallers. You can successfully chain grab them by Down Throwing them, turn around grab them and continue the process. This works until about 26% or so and you can finish off with an Ftilt.
Combos:
* Dthrow> Ftilt
* Dthrow> Utilt
* Dthrow> Fsmash
* Dthrow> Dthrow.... (chaingrab)
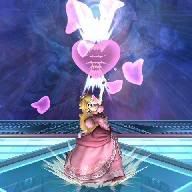
X. Final Smash
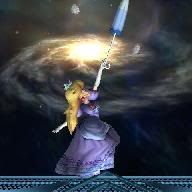
1. Final Smash ~Peach Blossom~
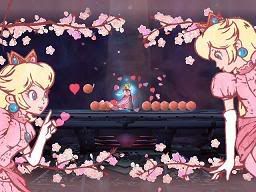
Damage: 10%/20%/30%/40%
Knockback: N/A
Speed: ★★
Range: ★★★★★
Hitbox: No.
Sweetspot: Closer to opponent.
KOs at: N/A
Special Properties: This puts opponents to sleep. This also drops peaches which you can eat to recover damage.
Description: Peach dances around and the screen covers with blossoms.
Move Analysis:
The closer they are to Peach, the longer the time they will sleep.
Each peach recovers 5%.
Final Smash drops 13 peaches.
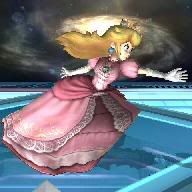
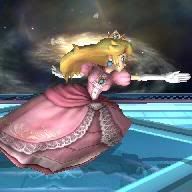
XI. Taunts
1. Up Taunt

Description: Peach gets her parasol out and spins it while saying "sweet".
2. Side Taunt

Description: Peach dances around moving her dress and singing "lala-la-lalala".
3. Down Taunt

Description: Peach does a spin then she winks while saying "aha".

 50-50
50-50 )
)