
Retro Gaming
Black and White Thinking
Retro Gaming said:NOTICE: I take no claim for Card's work. The original guide, in its unedited format, may be found here.
Basically what I'm doing is copying Card's guide as a new thread, where the discussion will be on what changes need to be made in order to update this guide after nearly a year of meta game developments. I will stick to Card's original formating choices as much as possible (as I can not deny that it is formatted incredibly well), but will likely be required to add sections. I will also keep my own log in the second post separate for Card's log, to make it easier for the community to look at what changes I make and evaluate my work. I will also take the work of other players, but I reserve the right to edit submissions for grammar and format.
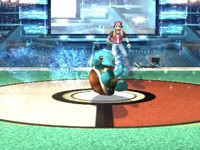
Pokemon Trainer:
an In-Depth Analysis & Guide
an In-Depth Analysis & Guide
This is a topic dedicated towards analyzing and discussing the newcomer known as the Pokemon Trainer. Everything from move sets, strategies, tactics, strengths and weaknesses will be updated in this thread. Not to mention any little secret or easter egg about the Pokemon Trainer will be updated here as well.
****** Notice: ****** This is not a final analysis! I have gotten my hands on the Japanese version of the game and have done a variety of tests with the Pokemon Trainer. I am merely reporting my findings, and many of these are subject to change in the coming years of gameplay. It is far too early to be writing up a FAQ or Guide, and I am no where near good enough at the game to be saying what is best right now. So this is more of an “Impressions” topic. Eventually I would like to turn it into a guide, so there will be reserved sections
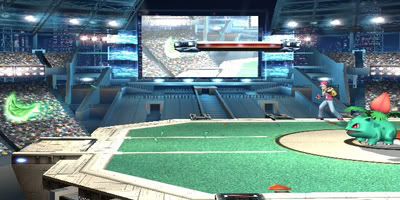
I suppose the best way to start this entry off is with the basic concept of the characters in question. Pokemon Trainer is a brand new character in the Super Smash Bros. franchise. The concept of his play style is completely unique when compared to any other character.
To quote the DOJO directly;
If you are reading this thread though, chances are you already know this… and chances are you also adore this character concept as much as I do. I’ve already decided with about 40 hours worth of play time that Pokemon Trainer is most definitely going to be my main character of this game, and I hope that through this analysis you can see why, and hopefully feel the same way as I do.No way! The Pokémon Trainer has finally arrived. And it looks like he doesn’t do his fighting directly.
Instead, he uses the three Pokémon with him—Squirtle, Ivysaur, and Charizard—to do the fighting for him.
So without further ado… enjoy!
~*~*~*~*~*~*~*~*~*~*~*~*~*~*~*~*~*~*~*~*~*~*~*~*~*~*~*~*~*~*~
Table of Contents:
- 1.0 – The Potential of the Pokemon Trainer
- 2.0 – Pokemon Change and its usefulness
- 2.1 – The Significance of Pokemon Change
- 2.2 – Pokemon Trainer doesn't care about Diminishing Returns!
- 3.0 – Pokemon Stamina (How does it work exactly?)
- 4.0 – The Three Pokemon at a glance
- 5.0 – Squirtle
- 5.1 – Initial Impressions
- 5.2 – Pros/Cons
- 5.3 – Overall Utility
- 5.4 – Tricks & Strategies
- 5.5 – Damage and Move-Data Analysis
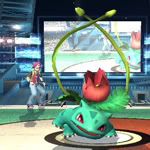
- 6.0 - Ivysaur
- 6.1 – Initial Impressions
- 6.2 – Pros/Cons
- 6.3 – Overall Utility
- 6.4 – Tricks & Strategies
- 6.5 – Damage and Move-Data Analysis
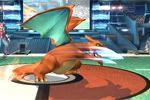
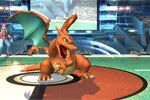
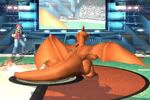
- 7.0 – Charizard
- 7.1 – Initial Impressions
- 7.2 – Pros/Cons
- 7.3 – Overall Utility
- 7.4 – Tricks & Strategies
- 7.5 – Damage and Move-Data Analysis
- 8.0 – Final Smash
- 9.0 – Costume Changes
- 10.0 – Other User Impressions & Links
- 11.0+ – Miscellaneous Frequently Asked Questions
- 12.0+ – Additional Content to be added!
~*~*~*~*~*~*~*~*~*~*~*~*~*~*~*~*~*~*~*~*~*~*~*~*~*~*~*~*~*~*~
Section 1.0 – The Potential of the Pokemon Trainer.

The Pokemon Trainer (hereby dubbed as P.Trainer for short purposes) is one of the most peculiar characters on the roster. What I mean by that is that there isn’t really a character that is remotely similar in terms of concept. Zelda/Sheik and Samus/Zero Suit Samus are probably the closest to the P.Trainer in that field, but even then they fall short. The true potential in the P.Trainer is that it is actually 3 complete characters in 1. This is most certainly a fact. There are no "if", "and's", or "but's" about it.
Take example any character on the roster; when asked to describe say… Marth. Most people would unanimously agree that Marth is a speedy character, with some solid K.O moves, and aerial priority, yet a lack of projectiles and a fairly simple recovery. How about Bowser? Most would state that he is slow but heavy, has a very useful Up+B and Neutral+B moves.
Yet when it comes to describing the P.Trainer, this is where the potential truly lies. P.Trainer could actually be described as being fast, slow, heavy, light, projectile user, amazing recovery, tether recovery, priority air game, stellar ground game, etc… etc… the list goes on. Do you see what I am getting at here? Because the P.Trainer is actually 3 separate characters in 1, the user actually gains access to a complete different array of play styles at their will. As it stands, the P.Trainer’s meta-game is completely undeveloped. Yet I feel that in the hands of the right player, the potential for this character is going to be enormous. The obvious down-side to all of this is that the P.Trainer cannot be ALL these things at once. The Pokemon Change will actually be more useful than just for swapping out fatigued Pokemon, believe me.
To make a reference example to Smash Melee, I could compare the P.Trainer to Ice Climbers. When Melee first released, Ice Climbers we’re ranked fairly low on the tier list and we’re almost non-existent in the Tournament Scene. But once players (read: Chu-Dat) started to harness the Ice Climbers potential, they slowly but steadily began to rise up in the tier list, and became much more popular. I feel that P.Trainer will turn out similarly. He won’t start off as a very high-tiered character, but the longer people have to mess around with every nook and cranny of this character, the stronger they will become.
~*~*~*~*~*~*~*~*~*~*~*~*~*~*~*~*~*~*~*~*~*~*~*~*~*~*~*~*~*~*~
Section 2.0 – Pokemon Change and its usefulness
Pokemon Change (Down+B), in my opinion, is somewhat viewed as an underrated move. Anyone who has come from playing any of the Pokemon games on Game Boy, knows that the entire meta-game really is a lot about Swapping in-and-out Pokemon in order to counter your opponents current Pokemon. What is ironic about this, is that the exact same strategy can be applied to Smash Bros, only this time your opponent has no way to switch out to another character (Pokemon)!
Perhaps some people have not even realized this yet, but this literally is what happens when facing off against P.Trainer. Squirtle, Ivysaur, and Charizard all share different roles in combat, and in addition to that all play differently against every character. Because of this, some characters have much more difficulty against different Pokemon in the P.Trainer’s arsenal. Whenever Ivysaur is having a tough time, maybe Charizard will prevail? Or maybe if Charizard can’t land any hits, Squirtle will do the trick? Then again, maybe Squirtle can’t get in range that might be when Ivysaur comes in handy?
It’s almost as if P.Trainer can Counter-Pick a character DURING the match!
Coming from personal experience, before I understood how to use the Pokemon Change effectively, I always viewed Charizard as being the least reliable of the three Pokemon. Yet when it came to fighting an Olimar, I just had so much trouble getting past his defenses with Squirtle or Ivysaur. All of a sudden I try out Charizard, and he starts to do a fantastic job against Olimar, burning his Pikmin with flamethrower and using huge area attacks which strike all around him, in addition to being very difficult to K.O due to his weight. Suddenly a character which I once thought was the least reliable suddenly became my most powerful Pokemon in this specific match-up.
This is exactly what Pokemon Trainer is about! The P.Trainer has at his disposal the abilities of 3 very different characters. If mastered, P.Trainer players will hold the complete advantage over other characters, since the opponent will be the one who has to “adapt” to the multiple different play styles for each different Pokemon, whereas the P.Trainer player will be already comfortable with whichever Pokemon is currently in play. Not to mention P.Trainer has totally different play styles and mind-games at his disposal throughout the course of a single match, which can lead to some very interesting matches to say the least.
I cannot stress enough HOW important it is to play with all 3 Pokemon, and not just use 1 the Entire fight!. Learning how to play with all 3 Pokemon, in addition to learning each Pokemon’s strengths and weaknesses, as well as counter-picks will be the key to becoming a Pokemon Master. (Ha-ha! sounds cliché, I know)
PS: Oh did I mention how Pokemon Change gives Invincibility frames? Avoiding some Final Smashes becomes a breeze with Pokemon Change!
Section 2.1 – The Significance of Pokemon Change
Ok... I've really just got to talk more about Pokemon Change. Now before you continue reading this paragraph, I just need to make a little disclaimer saying that you can play this character however you want. These boards are testament to saying that people get quite offended if you tell them how to play their video games. I want to avoid any flame wars of people telling me how they want to play P. Trainer. Quite frankly, go right ahead because I seriously do not care how you play him. I am just trying to explain how he SHOULD be played.
Now then... I've noticed quite a lot of topics on the P. Trainer boards, and in "Who will you main" threads in regards to the P. Trainer. What I mean by "main" is that it's a character that you would use the most, and probably learn to be the best with. Some people have been saying that they want to main just a single Pokemon of the three. Instead of utilizing the Pokemon Trainers Down+B, they want to just stick to a single Pokemon, and once they die switch twice to get back to the same Pokemon.
to be blunt, Choosing to main 1 of the 3 Pokemon is a complete waste of all the Pokemon Trainers potential, adaptability, and power.
I am trying to be as sincere as possible, but I know it can be somewhat difficult to recognize that over the internet. the P. Trainer's down+b is seriously one of the best moves he has, and it shouldn't go unnoticed. Remember like how Sheik players in Smash Melee never changed used their Down+B, and there are still a ton of jokes about it to this day such as people saying "What's the worst special move in Melee? Sheiks down+B lolz". This should NOT happen to the P. Trainer!
I've watched quite a lot of P. Trainer youtube matches, and there have been so many players who for example start with Ivysaur, and once they lost a stock they just used Pokemon Change twice and went back to Ivysaur. Now now, I know that the game has just released and people are still experimenting with everyone, but it still scares me to think that there might be some people who think they go to the tournament scene with the mindset of using only 1 Pokemon of the 3!
I said this in section 2.0, and I am going to say it again for extreme emphasis that
I cannot stress enough HOW important it is to play with all 3 Pokemon, and not just use 1 the Entire fight!
I mean... the Stamina of each Pokemon alone (see section 3.0) should be enough incentive to switch. Personally, I try to go through the entire cycle of Pokemon Change at least 3 times in a 4-stock match. Usually I do it unknowingly, because I switch because the situation seems right. Of course my logic does not apply in matches that only last 2:00 minutes long. I am simply talking about Melee Tournament standards of 4-stock matches (Those rules might not even be the same for Brawl tournaments!).
The P. Trainer has at his disposal 3 characters in 1. This means that the P. Trainer has 9 Special Moves, and 36 Move sets to work with DURING a single match. All 3 characters are very strong and are balanced appropriately as well. They each have their strong points, as well as their weak points. Surely you can see just how important it is to the P. Trainers meta game to utilize this advantage over every other character.
Section 2.2 – Pokemon Trainer doesn't care about Diminishing Returns!
In addition to all of this, P. Trainer's have another outstanding advantage (so does Sheik/Zelda to another extent) that no other character has.
Before continuing, I urge you to inform yourself about Diminishing Returns in Brawl at this thread; http://smashboards.com/showthread.php?t=141977
Basically what it means (in as few words as possible) is the more you successfully land an attack, the less damage and knock back it will do on the opponent when successfully used again.
This feature was in Melee, except in Brawl it's been over clocked and is really noticeable. This essentially turns the meta game upside down, since it forces players to utilize weaker and more damaging attacks early on, and then save their big K.O moves for last.
P. Trainer on the other hand.... really doesn't care about Diminishing returns. What I mean by this is that, whenever the P. Trainer performs a Pokemon Change, the Diminishing Returns on all his attacks are reset back to their default values! I'm sure you do not need me to explain just how great this is for the P. Trainer. Basically what this allows the player to do is spam all his most damaging and strong attacks, and once the percentage is high enough just Pokemon Change and clean the house.
Alternatively, Diminishing Returns is also a good thing for some characters. Some characters rely on Diminishing Returns in order to chain combos together. Toon Link is an excellent example since he can chain really weak B-Air's 5-6 times in a row with the right Diminishing Returns. Luckily for the P. Trainer though, this barely applies to Squirtle alone. Ivysaur and Charizard really do not have any insane chained combos (from what I could tell). Squirtle, on the other hand, is able to link almost all his aerials into another aerial. So once you bring out Squirtle, his Diminishing Returns will be reset so if the opponent is at high-damage, he'll be just K.O'd by his amazing aerials, OR if the opponent is at low percentage, Squirtle can start to lower his Diminishing Returns on his aerials and combo the opponent like crazy. It's a win-win situation!
Pokemon Change. Use it. Love it.
~*~*~*~*~*~*~*~*~*~*~*~*~*~*~*~*~*~*~*~*~*~*~*~*~*~*~*~*~*~*~
Section 3.0 – Pokemon Stamina (How does it work exactly?)
An article in previous Famitsu issue stated the following about Pokemon Stamina;
This is actually completely FALSE. (Actually it bears a slight truth... but anyways)Famitsu said:Pokemon get tired after 2 minutes, even if you use special moves.
I have done some thorough testing on the P.Trainer stamina amongst the Pokemon and I will share my results.
Firstly; Squirtle, Ivysaur, and Charizard all have the same Stamina (even though you would expect Charizard to have more… guess he doesn’t do his exercise!). Like Famitsu stated, they all have their own individual 2:00 minute stamina meter.
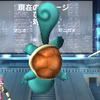
****** Important! ******
Whenever a fresh Pokemon is sent in, the Pokemon will have exactly 2:00 minutes until they become tired and fatigued. Here is the catch though; Whenever the Pokemon performs a Smash Attack, Aerial Attack, Special Move, or Tilt Attacks, exactly 0:01 second will be removed from the Pokemon’s current 2:00 timer. Running, Walking, Jumping, and Throwing your opponent has no effect on the timer. For example: Let’s say I do a 5:00 minute timed match and send in Squirtle. If I stand completely still, when the match timer reaches exactly 3:00 minutes (thus 2:00 minutes have passed), Squirtle will show signs of fatigue. Restart the match with the same rules but this time make Squirtle perform 20 Smash attacks in a row (which according to my data would be -20 seconds to Squirtles Stamina). When the match timer reaches exactly 3:20 minutes (thus 1:40 minutes have passed), Squirtle will show signs of fatigue.
How can you tell when a Pokemon is tired?
Well that is actually pretty easy. The Pokemon’s idle pose changes to a fatigued pose. Actually you might not even notice your Pokemon is fatigued if you are always moving, so it’s important to pay attention!
Squirtle: Leans over onto his front hands.
Ivysaur: Her bulb sulks down towards the side.
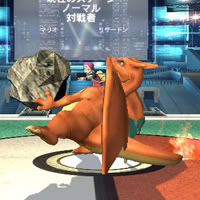
Charizard: Lowers his head and his wings drop a little.
What are the down-sides to using a fatigued Pokemon?
From what I could tell, there is absolutely no drop in movement or attack speed when a Pokemon is fatigued. The biggest down-side to being fatigued though is every damaging attack a Pokemon does, is severely weakened both in damage percent (%) and in knock-back. Generally, while fatigued every attack does at least 3% less damage than usual. I have taken damage data and they will be posted in the individual Pokemon sections.
Even though the P.Trainer’s Pokemon do less damage, they are still able to fight pretty much the same, since there isn’t really a speed drop.
How do I recover my Pokemon when it’s tired?
Switching out your Pokemon and fighting with the other 2 will allow it to recover from its fatigued status. But it is not instantaneous, it takes time to recover. You cannot get a Fatigued Squirtle, switch to Ivysaur, switch to Charizard, and switch to Squirtle and expect for Squirtle to have 2 minutes of fresh fighting.
From my testing, the exact formula for recovering stamina is;
0:01 second of bench-time = 0:02 seconds of stamina restored.
Basically what this means is that if you have a fatigued Pokemon, it will take exactly 1:00 minute in order to fully restore its stamina. It should also be noted, that the amount of time that a Pokemon is tired has NO EFFECT on how long it takes to recover Stamina. What I mean by that is, if you keep a Pokemon fatigued for 20:00 minutes, it will still take only 1:00 minute of bench-time in order to recover back to the full 2:00 minute stamina timer.
Can I only send out a Pokemon when it is at full stamina?
No. You can send out a Pokemon when its stamina is at any amount. Obviously though, the Pokemon will become fatigued sooner than expected.
Can I have more than 2:00 minutes of stamina?
No. A Pokemon’s stamina can never surpass 2:00 minutes. On the other hand, a Pokemon’s stamina can never go below 0:00 seconds into the negatives. This makes for quick and speedy recoveries, no matter how long you stay in fatigued.
Is there any delay upon quickly switching between the 3 Pokemon?
Actually... Originally I believed that there was. But there is in fact almost very little or no delay or cool-down for the Pokemon Change move. It is possible to continuously rotate through the 3 Pokemon without any cool-down on the ability. There is actually a 0.5 second delay from when you gain control of your Pokemon, until when you can use Pokemon Change once more. It is hardly anything that disrupts the flow of 'skipping' a Pokemon in the chain. It is even somewhat possible to skip a Pokemon as an opponent is flying towards a guaranteed K.O. If done quick enough, you can safely use Pokemon Change twice before the opponent can reach you after respawn. To know how long 0.5 seconds is, its about the amount of time it takes for the Standing to Crouching animation for the Pokemon to finish. So you can actually Hit Pokemon Change, then continue holding down, and when the next Pokemon comes out as soon as their crouching animation ends, hit B again for the second Pokemon Change.
Can Pokemon Change be used while in the Air?
Unfortunately... No.
~*~*~*~*~*~*~*~*~*~*~*~*~*~*~*~*~*~*~*~*~*~*~*~*~*~*~*~*~*~*~
Section 4.0 – The Three Pokemon at a glance
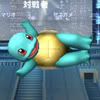
Squirtle, Ivysaur, and Charizard. It’s a little difficult to label each one into a specific category, but I will do my best.
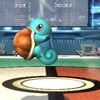
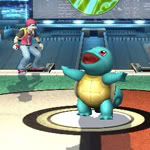
Squirtle: Squirtle is the little speed demon who really is all about jumping around like the ninja turtle that he is. There really is no reason for a Squirtle to be standing still for any moment, or to be grounded for that matter. Squirtle has an extreme aerial game, and out-prioritizes a lot of characters in the air. An easy comparison would be to say Squirtle is similar to Melee’s Jigglypuff with only 2 jumps.
Ivysaur: Ivysaur on the other hand actually is really about Range and Power. Many of her attacks make full use of her vines and leaves, and involve catching the opponent off-guard with attacks that just poke out. Because of this, it allows Ivysaur to play a very safe defensive game, and rack up a ton of damage with annoying ranged attacks.
Charizard: Charizards role should be fairly obvious. He got Power; He’s got Survival, although he’s a bit on the slow side. I know it may sound silly at first, but Charizard is all about doing large effect attacks, which do a ton of damage to boot. Almost all his attacks have enormous hit boxes which strike all around him, some are even very quick. Not to mention Charizard is the heaviest, and has the best recovery of the three, which allows him to be quite the killer stock-tank.
I’ll be going into even more detail with each Pokemon, but this is probably a quick summary of the three of them.
~*~*~*~*~*~*~*~*~*~*~*~*~*~*~*~*~*~*~*~*~*~*~*~*~*~*~*~*~*~*~

Section 5.0 – Squirtle
5.1 Initial Impressions
Squirtle really is just awesome. His animations and sound effects are really cute and funny. I said this earlier, but the first thing I thought about when I played Squirtle was “Oh my god it’s Jigglypuff”. He really floats similarly to her, and ALL of Squirtles aerials have a ton of priority, range, speed, knock-back, and combo potential… to the point where Squirtle can literally do a pseudo-Wall of Pain with his F and B-airs. He’s light on his feet, and can combo F-Air, into F-Air, into F-Airs… Although when you really want a K.O, it can be someone difficult to get with him.
5.2 Pros/Cons
Pros:
+Fast
+Very floaty, can weave in and out of with a pseudo-‘Wall of Pain’ aerial attacks
+Extreme priority hit-boxes on all almost all aerial attacks.
+Above average recovery
+Can tech-chase with his quick grab game
+Quick and longer-than-expected grab range
+Very low lag on aerial attacks
+Wall cling / jump
+Small in size
Cons:
-Light-weight
-Water-gun appears to be useless
-Has difficulty against ranged attackers, or characters with disjointed hit-boxes
-K.O’s can be somewhat hard to come by, since his Smash attacks are not particularly quick
-Water-gun appears to be useless
-Has difficulty against ranged attackers, or characters with disjointed hit-boxes
-K.O’s can be somewhat hard to come by, since his Smash attacks are not particularly quick
5.3 Overall Utility
Squirtle was made to be an annoyer. He’s just about dodging around all over the place at fast speeds, kicking out with his huge priority attacks at times catching the opponents off guard. He really can be quite hard to catch, while at the same time he whittles down the opponents HP and causes quite a lot of frustration. He has the potential to get a lot of K.O’s through his aerial attacks, as well as his edge-guard game (which involves jumping out and smacking your opponents). His F-Air is a surprisingly strong move, which has KO ability as well as priority and speed.
It’s also advised to NOT bring Squirtle in when you are already at high percents, because he is likely to get K.O’d himself.
5.4 Tricks & Strategies
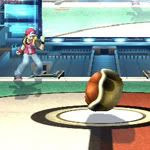
Water Gun Mobile Charge
It just so happens that Water Gun has a unique way of charging. In addition to it being a very quick charge time, and chargeable in the air or on the ground, Squirtle can also move horizontally while charging it in the air! This means that it’s possible to run towards your opponent, jump backwards and begin charging at the start of your jump, and you’ll continue in the same momentum path of the jump while charging. In addition to that, you can change directions in mid-charge. Often if you are sent soaring but still are alive, you can charge on your way back to the stage and lose no horizontal movement.
Although Water Gun still doesn’t have a very good use... it’s a neat technique regardless.
Hydroplaning (Squirtle's Super Wavedash)
Discovery Documented by: TobiasXK
SHORT VIDEO "TUTORIAL" UPLOADED: http://www.youtube.com/watch?v=2yTMrFboN2I
It's in the video, but here's a quick rundown of how it works:
During Squirtle's turnaround animation, there's a part where you're in the shell and the animation for you coming out of the shell. At a certain time during the "coming out" animation, you can perform an Up Smash that will slide very far across the stage.
I can't check things frame-by-frame, so it's hard to describe the timing exactly, but I can do it pretty consistently by now and I believe that if you wait until after you're entirely out of your shell, it's too late and you'll just hyphen smash. Adversely, doing it while you're still in your shell completely will just cancel the skid animation into a standing up-smash.
I also have performed it at varying lengths and speeds. I think this has to do mostly with timing, but it could also factor in momentum, as many other parts of this game do, so as we all experiment with it more we'll probably learn more about the mechanics of it.
More to come as they are discovered
5.5 Damage Data and Move Analysis
Jab – 3-hit combo – 3%, 2%, 4% (when fatigued 2%, 1%, 3%)
A quick three-fold attack, excellent to use immediately after landing an aerial. This move, strange enough, can actually be LINKED with a F-Tilt! The F-Tilt has such low lag and low knock-back that Squirtle can literally do F-Tilt > Jab > Jab > Jab as a combo. excellent way to rack up easy and quick damage, especially since F-tilt is such a fast opener.
Dash-Attack - 1-hit - 7-9% (when fatigued 5-7%)
Overall a fairly safe dash attack. Squirtle turns around and leaps forward, back first. What's good about this dash attack is that it has the property to go through a shielded opponent, which might not get you shield grabbed. What makes this move great as well, is that Squirtle has such a fast dash-dance that you can weave in and out of their attacks and quickly follow up with this. It has a lot of priority to boot, I would say its similar to Jigglypuff's dash-attack in Melee in terms of priority.
Tilts:
F-Tilt – 1-hit – 6% (when fatigued 4%)
Squirtle flicks his tail in front of him quickly. At first I thought it was nothing spectacular, but I was dead wrong. This move comes out incredibly fast, and has the potential to link into jabs and possibly even more. The only downside to this move is that the range isn't really worth nothing. But because it comes out so fast, it can be used after aerials and followed up very easily.
U-Tilt – 1-hit – 6% (when fatigued 4%)
Squirtle quickly stands on his tail. Excellent tilt attack, pops the opponent upwards so that Squirtle can follow up with an aerial attack. This is my new favorite move. Get this you guys, this move comes out and ends so fast, that its possible to link 2 U-Tilts INTO EACH OTHER. if the opponent is standing, the first U-tilt will knock them up, and the second U-tilt will hit them before they leave its attack radius. You don't even have to move, just U-tilt twice. It's sort of become a standard with me now, whenever I use U-Tilt I just press A twice instead of once.
This move has such outstanding combo potential as well. I have actually done the following Combo on a low percent Dedede on Castle Siege's first level;
(from base platform) U-Tilt, U-Tilt, [full jump] U-Air, U-Air, (land on platform), U-Tilt, [full jump] U-Air, U-Air, Waterfall
Most epic Squirtle Combo I ever did on the fly. The damage dealt by it was somewhere in the 60%+ range.... and people say this game has no combos!

D-Tilt – multi-hit (unsure on amount of hits) – 13% (if all hits connect) (when fatigued 9% if all hits connect)
Squirtle lies on his stomach and rotates rapidly around in front of him. I still cannot find an effective use for this move. It doesn't allow follow ups, and F-tilt is just as much range and allows more effective combos. The damage if all hits connect is great though, Squirtle is also very low on the ground while doing it, so he may avoid some attacks.
Smashes:

F-Smash – 1-hit – 14% (when fatigued 10%)
Squirtle withdraws in his shell and lunges forward. What I dislike about this move is that it has a very awkward animation that makes you think you would hit further in front. From what I can tell, when using the F-Smash, Squirtle sort of takes a small step BACKWARDS and then lunges forward. It's difficult to land this move, but then again so are most of Squirtle's smash attacks. This move apparently has super armor frames near the end of the Smash (During the part where Squirtle is inside his Shell directly). I haven't seen it be useful such as the Super Armor on Ike's Aether.
U-Smash – 1-hit – 16% (when fatigued 12%)
Squirtles most potent smash attack. Squirtle claps his hands against the floor and two large vertical streams of water rush upwards on either side of him. Can hit people standing above him on platforms, as well as people standing anywhere near him. Only down side is it doesn’t come out instantly, but doesn’t have that much recovery lag.
D-Smash – 1-hit – 11% (when fatigued 8%)
Squirtle withdraws again into his shell, then splashes around him. You almost want to use U-Smash in every situation where D-Smash would be used, so it’s a little obsolete. Although with the new discoveries being made about diminishing returns, it could be more useful.
Aerials:
N-Air – 1-hit – 9% (when fatigued 6%)
Squirtle gets into his shell and spins around wildly spraying water. It’s very useful to rack up damage, but does not have much K.O power.
F-Air – 1-hit – 12% (when fatigued 9-10%)
Say hello to Squirtles most amazing attack. This move is so beastly. Squirtle lunges his feet out in front of him. It comes out incredibly quick, does a great amount of damage, has an enormous priority hitbox all around it, and to top it off has combo capabilities AS WELL as K.O potential. Did I also mention that you can use this before landing, and then follow up with (what seems to be) instantaneous jabs to counter getting shield grabbed? Awesome attack.
U-Air – 1-hit – 10% (when fatigued 8%)
Squirtle flicks his tail above him. Another great move that you’ll be using together with the pop-up from a U-Tilt. Whenever an enemy is above you, you are almost sure to nail them with this, since it comes out so incredibly fast, and has such great priority. Lacks the K.O power of his F and B-airs, but still racks up damage and leads to more aerial combos. Refer to the U-Tilt description to see just how awesome this move can combo at certain percentages.
B-Air – 1-hit - 6-10% (when fatigued 4-7%)
Squirtles other awesome attack. He sticks his tail out behind him while he is laying in a horizontal position, so it has great range, not to mention comes out as quick as the F-Air. Using this and F-Air you can annoy your opponent to death, literally.
D-Air – multi-hit (unsure on amount of hits) - 10% (when fatigued 7%)
Squirtles D-Air is like a miniature Mario D-Air. Squirtle spins around like a top, and it has a sort of vacuum effect until the last hit which launches everyone outwards from him. Useful attack to follow up with the beastly F-Air. I just want to note that it is really important for the P. Trainer users to time the D-Air accordingly. The most important part of this attack is the final hit, which sends the opponent flying. If you land before the final hit, you become an EASY shield grab target, but the lag is much less when you land during/after the final hit.
Special Moves:
B – Water Gun – Uncharged: 12%, Fully Charged: 0% (when fatigued Uncharged: 9%, Fully Charged 0%)
I have yet to find an actual PRACTICAL use for Water Gun. The push back is nothing like I had imagined, its almost identical to Mario’s F.L.U.D.D as well. You can tilt the angle up and down while firing and it pushes the opponent back and does no damage. The charge time is quick, so whenever I have the chance I can charge it easily. If only it did actual damage, it would be so insanely useful. I’ve tried using it against recovering characters, but the push-back is barely hindering and its nothing that an F-Air couldn’t have handled. *shrug*
New Discovery (Found by: Elliot Gale): Water gun actually DOES do damage. If Squirtle uses an UNCHARGED Water Gun, he'll spray out a couple of water bursts directly in front of him (Very short-range). These little bursts actually do damage, 12% to be exact. Although this might seem useful, after noticing just how much lag there is after using the uncharged version, as well as how little knock-back there is, theres absolutely no way to follow this up with any combo.
This attack CANNOT K.O a character at 999%, thats how low the Knock-Back is on the uncharged version. Well actually it doesn't knock them back at all, Just does some Hit-stun. It should be worth nothing that You MAY catch your opponent off-guard and Grab them before they can react though
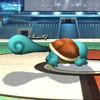
Side+B – Withdraw – 3-7% depending on when hit (when fatigued 2-6% depending on when hit)
All around, not a particularly useful move. Squirtle withdraws into his shell and slides along the ground. He doesn’t go very fast, and it’s very easy for opponents to avoid. The knock back and damage is also quite laughable. It can be used as a mind-game recovery though, since your opponent might not be expecting it. It should be noted also that during this move you are completely invincible. If you get attacked during a withdraw attack, you will just deflect in the other direction and take no damage. On the other hand though, there is a weakness to all this. If the opponent JUMPS on top of you, you'll enter a sort of "I'm a turtle and I've fallen and I can't get up" state. You really want to avoid that. Also... Be careful when using this move to recover. If the opponent jumps and smacks you, you'll ricochet and continue off the stage to your doom.

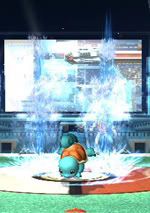
Up+B – Waterfall – 15% (when fatigued 11%)
Great recovery move. Squirtle is practically invulnerable during this attack, since the hit box is just so enormous and sticks out in front and below him. The only way for Squirtle to get hit is from on top and behind him. Also does a great amount of damage, and when used properly can be a great Up+B out of Shield. This move is also a great combo finisher, since it comes out so fast and the hit box is just huge. Very difficult to counter this move, apart from the very long landing lag Squirtle receives from it.
New Discovery: Similar to Roy's Up+B in Smash Melee, Squirtle can change the angle of which he climbs the Waterfall.
Immediately after pressing Up+B, slide the analog stick forward and downwards in order to make the Waterfall have more Horizontal Distance than Vertical. On the contrary, Immediately after pressing Up+B, keep the analog stick on up in order to make the Waterfall climb higher vertically than Horizontally.
Throws:
All of Squirtles throws basically involve placing the opponent in an area and smacking them with his shell once. they all cause the opponent to pop-up into the air, ready to be annihilated by Squirtles aerial game. At first I thought none of his throws were potent K.O moves, but WOW I was wrong! Everyone say hello to D-Throw. If you ever see the opponent at 130%+ grab into D-Throw KILLS! Even though D-Throw does the least damage, for some reason it has the ability to send the opponent sky rocketing. It really looks and sounds like it hurts too.
What is especially amazing is how Squirtle's grab game is just so phenomenal, and giving him a throw that can kill at high percents is just fantastic.
U-Throw – 11% (when fatigued 7%)
D-Throw – 7% (when fatigued 4%)
B-Throw – 10% (when fatigued 7%)
F-Throw – 9% (when fatigued 6%)
Taunts:
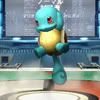
Note: The P.Trainer also taunts. He does a sort of "Alright!" pose that has been seen in videos.
Up-Taunt: Squirtle does a small backflip then when he lands, looks slightly towards the camera with his head and arms raised and says a short phrase. (Correction by TenshiOni: Squirtle shouts out "Zen-Zeni!" which is short for his name in Japanese, Zenigame)

Side-Taunt: Squirtle withdraws his arms and legs slightly then stands on his Tail. He twirls around and Water sprays out of him. Deadly cute.
Down-Taunt: Squirtle withdraws completely and does sort of a miniature shell break-dance
~*~*~*~*~*~*~*~*~*~*~*~*~*~*~*~*~*~*~*~*~*~*~*~*~*~*~*~*~*~*~

Section 6.0 – Ivysaur
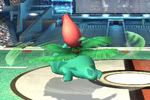
6.1 Initial Impressions
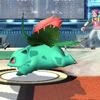
Ivysaur is such an awesome character. She’s all about racking up a ton of damage with as few attacks as possible, while at the same time having tons of range to poke the opponent with disjointed hit boxes and projectiles. All around could be considered to be the most reliable Pokemon of the three, since there isn’t really anything that Ivysaur’s insane range and damage cannot handle. In addition to Ivysaur having great range, she’s also got many ways to get people off of her. You know that when the P.Trainer sends out Ivysaur that the damage racking is gonna begin!
6.2 Pros/Cons
Pros:
+Above Average speed. Definitely not slow
+Awesome projectile attack
+Ranged attacks from almost every move
+Ranged grab allows for shield grabs on spaced-but-laggy aerials
+Killer K.O moves (U-Smash is one of the strongest smashes in the game)
+Racks up damage incredibly quick with a variety of moves
+BULLET SEED!!!!!
+Awesome projectile attack
+Ranged attacks from almost every move
+Ranged grab allows for shield grabs on spaced-but-laggy aerials
+Killer K.O moves (U-Smash is one of the strongest smashes in the game)
+Racks up damage incredibly quick with a variety of moves
+BULLET SEED!!!!!
Cons:
-Abysmal Recovery.
-Lighter than average weight.
-Many attacks, although ranged, suffer from lag (on the ground and in the air)
-Lighter than average weight.
-Many attacks, although ranged, suffer from lag (on the ground and in the air)
6.3 Overall Utility
What a beast that little Ivysaur is. Ivysaur really knows how to use her vines and leaves properly, since almost everything she does involves stretching her vines outwards, or using them to lunge herself forward. Ivysaur, like I mentioned earlier, is all about racking up damage. She has some quick, but laggy attacks, and most of her attacks are EQUAL to or STRONGER than Charizards (weird, I know right?) Actually when you compare the two, Ivysaur does more damage, but Charizard has what it feels like more knock-back. Ivysaur plays a very defensive game, and is all about just playing it safe, and attacking when the opportunity presents itself.
Oh… just so you know, Bullet Seed is a total match turn-around move. That move can easily rack up 40+% damage in addition to totally frustrating your opponent! More on that in the following sections
6.4 Tricks & Strategies
Avoiding the Edgeguard
Ivysaur just so happens to have one of the most easily edged recoveries in the game. But not all is lost, there are many things to do to avoid impending doom of someone grabbing the ledge.
First Rule: Save your second jump!
If you are sent anywhere off the level, with either a throw or an attack, ALWAYS save your second jump. I know most people have the tendency to spam the jump button when they are sent flying off stage, but for Ivysaur you shouldn't. Saving your second jump allows for that little extra time needed when your opponent rolls off the edge in an attempt to not get hit.
Second Rule: Use the Razor Leaf!
One of the best ways to not get edged, is once you are within horizontal range of the edge toss a Razor Leaf. If the opponent is on the ledge, they'll do one of two things. They will either roll the ledge, or they will take the hit. If they take the hit, they'll be stunned and within that moment you can vine-whip and grab the edge. If they roll the ledge, thats when the first rule comes in handy and you use your second jump to gain extra time to vine whip the edge once they are fully done their roll animation.
5.5 Damage Data and Move Analysis
Jab – endless hit combo – 3%, 2%, 2%, 2%, 2%, 1%, 2%, 1%...... (when fatigued 2,1,1,1,1,1….%)
Excellent jab attack. It has long range since Ivysaur extends both its vines and alternatively slaps the ground in front of her. It lasts as long as you hold down the A-button, and if the opponent is really close it causes them to be stuck inside of your jabs until they’ve taken quite a lot of damage. What also seems to happen, is after the initial 3-4 hits, it begins to speed up for the additional hits. ***** opponents against a wall too. It should be noted that just spamming Jabs at an opponent hanging on the edge, can be quite problematic.
Dash-Attack - 1-hit - 10-12% (when fatigued 7-9%)
Ivysaur slides on her belly into the opponent. Surprisingly powerful, and very quick. It has the potential to K.O at around the 150%. Squirtle and Charizard's dash-attacks don't K.O until the 200+% mark.
Tilts:
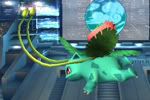
F-Tilt – multi-hit (unsure on amount of hits) – 14% (when fatigued 10-12%)
Ivysaur leans forward and the leaves on her back spin around rapidly like a buzz saw. Does great damage, and even is difficult to shield grab if its blocked. This move is seriously one of my favorite Ivysaur moves now. What makes this move awesome is the properties Ivysaur has while doing it. Ivysaur leans forward quite far, and then returns back to the original position. When spaced properly, this move simply cannot be countered. It leaves Ivysaur too far to be shield grabbed, and the fact that there is almost no lag afterwards makes it impossible to hit her with an attack. It should also be noted that this move comes out FAST, hits HARD, and leaves Ivysaur free to do whatever she pleases.
This move also links extremely well with B-Air. Doing a B-Air and hitting the opponent with the tips of her vines, and then following up with a F-Tilt as she lands leaves the opponents wondering what the hell just happened.
U-Tilt – 1-hit – 7% (when fatigued 5%)
Ivysaur plants her vines on the ground, and lunges herself upward. Great, quick priority attack for any aerial attackers who are crazy enough to get above Ivysaur. (seriously… Ivysaur destroys everyone who thinks it’s cool to jump above her). I found some peculiar things with this move as well. What makes it funny is that Ivysaur's entire hitbox actually leaves the ground, essentially making anything below Ivysaur... well just plain thin air. This doesn't really do much, but if Ivysaur performs an U-tilt and Marth performs his D-tilt.... the D-tilt will go between Ivysaur's vines and do no damage whatsoever. Sort of a neat trick I guess.
D-Tilt – 2-hit – 7% (when fatigued 5%)
Ivysaur slaps the ground in front of her with both vines. It makes a sound effect of 2-hits, but from what I could tell it always hits twice. Generally it’s an ok attack, nothing special.
Smashes:
F-Smash – 1-hit – 16% (when fatigued 11%)
Ivysaur plants her vines on the ground and lunges forward. Awesome smash attack since it comes out really quick, has quite the range, is difficult to punish, and most importantly catches a lot of people off guard. It’s also got K.O potential. I just love when Ivysaur shouts "Sou!" after using this move. Even though Ivysaur's U-Smash technically is stronger, the F-Smash will probably be used much more often since it is much more practical.
U-Smash – 1-hit – 17% (when fatigued 12%)
Ouch! Ivysaur lets out a cry as she shoots a huge poison cloud from her bulb. This smash attack packs a wallop. It’s in the league of strongest smash attacks in the games, next to Dedede and Ike’s F-Smash. Not only does this have a disjointed hit box above Ivysaur, but it also hits opponents who are grounded nearby. Although it has a little lag, it just makes people from above fear Ivysaur that much more.
D-Smash – 1-hit – 8% (when fatigued 5%)
Just judging by the damage this smash attack can do, you can see it’s the weakest Smash attack in her arsenal.an Ivysaur quickly slaps her vines behind and in front of her, dealing minimal damage and knock-back. It’s good for a quick damaging attack, but apart from that this move doesn’t even have K.O capability.
Aerials:
N-Air – Multi-hit – 10% (when fatigued 7%)
Ivysaur gets into a sort of missile shape and spins around rapidly. This move is great as it racks up damage, and has extremely low lag so it can be followed up with Ivysaur’s Jab, or even Bullet Seed.
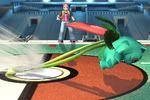
F-Air – 1-hit – 12% (when fatigued 8%)
Ivysaurs two vines come out, and make a fan-shaped slap in front of her. This is a great aerial, since it has enough power to K.O, while at the same time it has great range in front, and can’t be punished that easily. Great to use during a ledge hop as well.
U-Air – 1-hit – 16% (when fatigued 11%)
Oh my… it’s an aerial Up-Smash! That’s right; this move has almost the exact same properties as Ivysaur’s wicked U-Smash, except it’s not as strong. The only problem is that there is quite a lot of lag afterwards, and it actually propels Ivysaur downwards a tad after using it. Great K.O’ing aerial.

B-Air – 2-hit – 5% (when fatigued 3%)
A very weak aerial… but wow does it have RANGE! Ivysaur twirls around and does a 2-hit vine whip attack which is basically 270 degree motion behind her. The range on the vines is probably the longest of all vine-based attacks. It’s a shame that it doesn’t do more damage, but it helps for racking up damage from a distance that just cannot be countered.
D-Air – 1-hit – 10% (when fatigued 7%)
What the… was that Ivysaur’s Up-Smash but UPSIDE DOWN? Yes you heard that correctly. Once again the giant cloud from her bulb appears in yet another attack, only this time Ivysaur is upside-down and the attack is downwards. What’s neat about this attack (apart from the crazy knock-back it does) is that it actually stops Ivysaur’s momentum momentarily. This also has the ability to meteor, but it has a very small sweet spot which is very close to the bulb. So going for a meteor can be pretty risky, but it’s still an option. If the meteor fails, instead you will just knock the opponent upwards to the sides.
Special Moves:
B – Bullet Seed – 4,2,2,2,2,2,2,1,1,1,1…..% (when fatigued 2,1,1,1,1,1,1……%)
OH MY GOD. You know the first time this move was announced on the Dojo, I was like **** that seems quite crappy. Boy o boy was I wrong about that. Bullet Seed is seriously a candidate for most-broken move of the game. I put it in the same league as Peach’s down-smash in Smash Melee. No joke.
First of all let me explain how the move works. You hold B, and it creates a continuous stream of bullet seeds directly above Ivysaur. The stream is infinite as long as you hold-down B. It starts off doing 4%, then 2%, and then eventually every bullet will do 1% damage. But what makes this move seriously broken is the start-up. For whatever reason, right before starting up the Bullet Seed stream, Ivysaur sort of shakes her leaves around. This hit-box is located all around Ivysaur, and what it does is it pops players directly into the stream of fire. From there, the player is literally powerless to the barrage of Bullets. There is no way to escape really.
On average, a properly DI’d Bullet Seed does around 30-40% damage.
I have seen Bullet Seed do a whopping 80% damage once when the opponent landed perfectly in the middle of the stream! Basically at that time your opponent just gets carried to the top of the Bullet Stream, and that’s when they can escape. To top it off, the bigger the target, the harder it is to DI out of it! Not only does this deal a ton of damage, but it FRUSTRATES your opponent tremendously and causes them to lose their rhythm. It’s always been said by designers that when a player loses control of their character, its one of the worst feelings they can have during a game… well that is exactly what this move does.
Seriously at any time that Ivysaur’s collision is overlapping with your opponents, Press and Hold B and watch them squirm as they take at least 40% damage. Good practice to land this move is to know the same way Jigglypuff needs to overlap the opponents to do Rest. Tech Chasing, or Rolling into the Opponent during their laggy moves also helps. As long as they get hit by the instant pop-up from the activation, they are going to take damage.
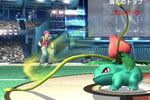
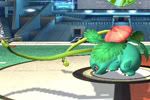
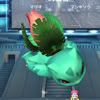
Side+B – Razor Leaf – 6-8% (when fatigued 6-8% ??)
Razor leaf is such an awesome projectile. It comes out fast, and has barely any lag. It can be very annoying when spammed, and has quite the long range. It can also be angled very slightly, but enough to be more useful than if it were just straight. To top all of this off, it has PRIORITY over other projectiles, and continues THROUGH them once they’ve collided. Nothing can stop the Razor Leaf except a wall. Another bright side to it is that it doesn’t lower in damage even with Ivysaur is weakened. So this can be exploited while racking up damage to send the opponent flying so you can safe switch to Charizard.
It is possible to also short-hop forward, throw a razor leaf, then move backwards before landing. So Ivysaur can get maximum range with Razor Leaf while still staying extremely defensive.
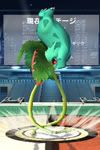
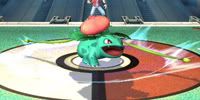
Up+B – Vine Whip – 7-10%, 13% Sweetspot (when fatigued 6-9%, 10% Sweetspot)
Ivysaur slaps her vine whips at a 45 degree angle in front of her. There is a sweet spot on this move which packs serious power and can K.O right at the top of the vines. It does the job as a tether recovery, and just note that the vines stretch WAY further when going for a recovery than when using it on the ground. Don’t be fooled by it. This move is great to use in combination with Razor Leaf spamming. One of the obvious things an opponent does when they are spammed with a projectile is Jump towards you, that’s when you slap em with this move!
On the contrary… this move is the reason why Ivysaur has an absolutely abysmal recovery. It is probably one of the worst recoveries in the game. It’s so incredibly easy to edge guard a Tether Recovery character (Ivysaur, Olimar, ZeroSuitSamus) that it hurts.
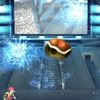
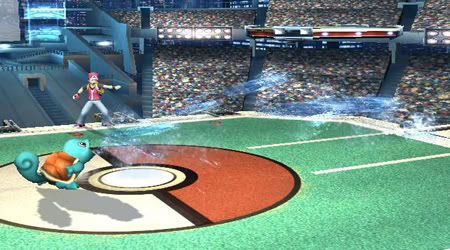
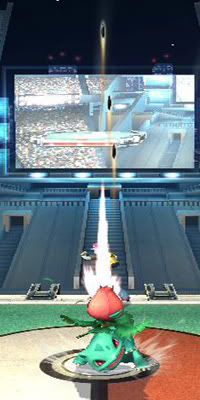
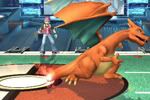
I have done some testing, and this is approximately the radius which I found where Vine-Whip will Auto-Sweetspot the Edge.
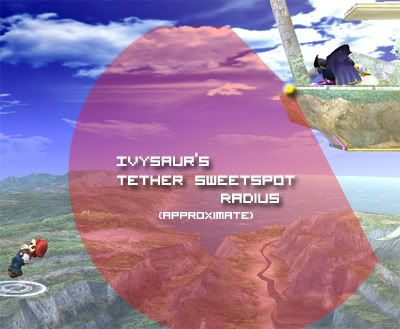
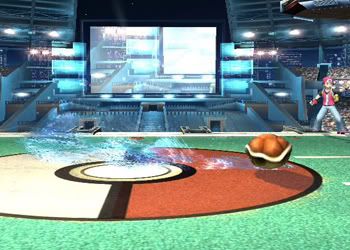
As you can see, the radius is quite large. The red area (if you haven't figured it out) is the area where when you use Ivysaur's Up+B it will extend the vine directly onto the edge (Yellow spot) and allow you to latch on. If you use Up+B anywhere outside of the red area, Ivysaur will just perform a regular Aerial Up+B and then begin to free fall to her doom. It is possible to grab onto the ledge while free falling though, so it's possible to use an aerial Up+B, miss the ledge, and grab it as you fall towards it.
As you can see, It is possible to tether recovery from ABOVE the edge, and BELOW the stage. Using Up+B in an area which isn't red below the stage can be quite tricky though. If you aren't in the correct area, you'll just do an aerial Up+B which will pass through the stage and just damage the opponent if they are standing there. You also need to be careful doing an Up+B above the stage, because it's possible to accidentally miss the sweetspot and just free-fall towards the ledge, and your opponent will get a free attack.
Tether Recovery Versions
Every Tether recovery in the game, in actuality, has 2 different versions of the same move. For the sake of simplicity and explanation, we'll call these 2 versions "Sweetspotted Tether" and "Tether Attack". They are two slightly different attacks, which have different properties and uses.
Tether Attack: This is when you are standing on the ground (or in the air) and you use a Tether ability (Up+B for Ivysaur) when there are NO nearby Edges to latch onto. In this case, Ivysaur will stretch out vines at a 45 degree angle and slap the air with a bright green burst at the tip of her vines. This move deals damage and knock-back (especially when sweet spotted). The vines always have a set distance and radius, and when used in the air leave Ivysaur in a free-falling state (Cannot do anything until landing on the ground). This move CANNOT Grab the edge.
Sweetspotted Tether: This is when you are in the air and you use a Tether ability (Up+B for Ivysaur) when you are NEAR a free edge that you can latch onto (basically the red radius in the screenshot above). Now the reason I underline the word free, is because the edge CANNOT be taken by another character. This is one of the major problems with Tether recoveries. If another player is hanging on the edge (invincible or not) Ivysaur will always perform an aerial Tether Attack in the direction performed, as opposed to the Sweetspotted Tether. The Sweetspotted Tether has a MUCH longer range than the Tether Attack, and if you are in the proper range it will automatically and (near) instantaneously latch onto the ledge. This version also does NO DAMAGE to your opponent.
Often times though it's possible to wall-spike an opponent who incorrectly times their edge-hog. I've had situations where my opponent avoided my Razor Leaf anti-edge, and then when they thought they had me beat, I would hit Up+B and because he was on the edge it would do a Tether Attack and them WHAM! He got smacked with my Tether Attack and wall-spiked to death. Unfortunately for me though, even though my vines hit the edge, because it was a Tether Attack and not a Sweetspotted Tether, I just fell to my doom shortly afterwards

Another interesting thing I found about this Tether Recovery; I call it Anti-Tether Stalling.
Ivysaur can only grab an edge 3 times with Vine-Whip. Any time she tries to vine whip an edge a 4th+ time, the Vine will extend, touch the edge, but then deflect off leaving Ivysaur to free fall once again. This mechanic applies to ALL Tether Recoveries in the game, and I assume it was put in place because Tether recoveries grab the ledge extremely fast, and it causes players to stall the game with invincibility frames. Luckily though, If you land anywhere on the stage, the 3-limit counter will reset back to 0, and you may vine-whip the edge another 3 times. Nothing to really complain about, since this actually HELPS the game and doesn't allow lamers to just stall the edge.
Throws:
Ivysaur has a great long-ranged grab which definitely should be exploited to the max. Ivysaur cannot really follow up with any combos from what I noticed, but her B and F-throws have the potential to K.O and higher percents.
Note: Ivysaur cannot tether the edge with her grab. Even though many characters can grab the edge using their long-range grabs (Lucas, Link, Toon Link, etc..) Ivysaur cannot. Either way it would essentially be the same thing as her Up+B so it makes sense as to why she cannot.
U-Throw – 10% (when fatigued 8%)
D-Throw – 10% (when fatigued 7%)
B-Throw – 10% (when fatigued 7%)
F-Throw – 8% (when fatigued 6%)
Taunts:
Note: The P.Trainer also taunts. He does a sort of "Alright!" pose that has been seen in videos.

Up-Taunt: Ivysaur crouches down a little and starts bobbing her head left and right. During that time, her leaves on her head start spinning around like a Helicopter, and at the same time her bulb begins to stretch smaller and larger. Makes a sound-effect for the spinning leaves while doing it
Side-Taunt: Ivysaur stands on her front legs and bounces around twice before tumbling over. Then she rolls back onto her four legs. Ivysaur makes a little "Hop Hop!" voice when she's on her front legs.
Down-Taunt: Ivysaur looks towards the camera and stretches one vine into the air, then stretches the other vine. Once they are both in the air, she does a 360 spin and crosses the vines by the end of her spin. She says something that is really incomprehensible as well (Sounds like... Fish FISH!...) Also while doing this taunt there will be smaller leaves which float around Ivysaur and fade away.
~*~*~*~*~*~*~*~*~*~*~*~*~*~*~*~*~*~*~*~*~*~*~*~*~*~*~*~*~*~*~

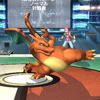
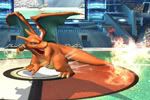
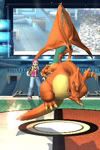
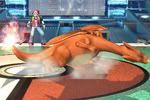
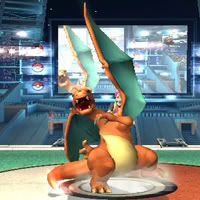
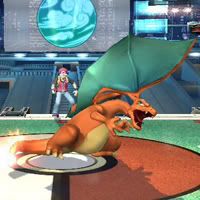
Section 7.0 – Charizard
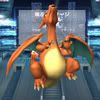
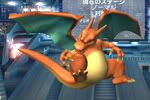
7.1 Initial Impressions
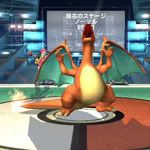
Charizard is just plain cool. There really isn’t another word to describe him. He always has an incredible fierce look on his face, not to mention he’s got some lava dripping down from his mouth! Charizard is the heavy weight, slower character of the three. He won’t be running circles around the opponents, but he’ll definitely be able to stand his ground. Some might say that Charizard is the weakest of the three Pokemon, but after using him tons I just have to say that he is the most USEFUL of the three. He’s got tons of raw power, and he can get a lot of damage up with few attacks. Notably a well timed Rock Smash or Flame Thrower can really crank up the damage.
7.2 Pros/Cons
Pros:
+Gliding ability and Triple jumps allows for recovery from almost all situations
+Heavy weight allows for strong survival capabilities
+Large area effect attacks
+Surprisingly long range attacks
+High damaging attacks (Notably Flame thrower and Rock Smash)
+Many K.O moves
+Well-timed Up+B out of shield can potentially K.O!
+Heavy weight allows for strong survival capabilities
+Large area effect attacks
+Surprisingly long range attacks
+High damaging attacks (Notably Flame thrower and Rock Smash)
+Many K.O moves
+Well-timed Up+B out of shield can potentially K.O!
Cons:
-Somewhat on the slow side.
-Faster characters can have their way with him. (if you let them!") )
)
- Large in size.
-Faster characters can have their way with him. (if you let them!
)- Large in size.
7.3 Overall Utility
Charizard really is the most useful character of the three I would say. Just combining the fact that Charizard is very heavy, as well as having one of the best recoveries in the game (a notch below Pit, Metaknight), Charizard ends up becoming a “survival” character more than anything. What this allows the P.Trainer to do is; Lets say you start a match with Ivysaur vs. Another player. Ivysaur ends up taking 90% damage before K.O’ing the opponent. Because Ivysaur has such a horrible recovery and is fairly light (would probably get killed at 130%), now would be the best time to switch in Charizard. Charizard can take that original 130% K.O, and bring it all the way to the 180+% spectrum. Within that time, Charizard can rack up as much damage as possible with many of his painful moves; possibly even get a kill himself! If he dies, you’ve got Squirtle to clean the house with!
I cannot stress enough of how good of a stock tank Charizard becomes. I mean it!
Such a great combination.
7.4 Tricks & Strategies
Glide Cancelling
Originally Posted by OoNoiroO
To glide, you hold the jump button after your character's second or more jump(assuming the character can glide of course). You can control the direction of you glide with up or down, but only toward the direction of your glide. If you go up, you will gradually lose speed, but gain altitude. Vice versa for going downward (common sense, right?)
If you direct your glide straight upwards, your glide will cancel. The most downward angle of a glide is around. Any time during the glide, you can press jump to cancel it or A to attack out of it. The gliding A attack is unique and not any of the character's regular aerials. (Charizard does a 360 twirl)
If your character has a remaining jump after canceling gliding midair, you will be able to do another action after canceling your glide in both ways. This includes using the remaining jump(s). You cannot glide again until you touch the ground EXCEPT for Metaknight, as his up B allows him to glide again. If your character does not have any remaining jumps after canceling a glide midair, you will enter a falling state.
If you land on the ground while gliding, you will be in a knocked down state.
To avoid this, press jump or A to cancel your glide right before you touch the ground. There will be no landing lag at all. Awesome for Charizard to follow up with Triple Jabs, or a Grab.
7.5 Damage Data and Move Analysis
Jab – 3-hit - 3, 4, 6%...... (when fatigued 2, 3, 5%)
Great jab attack, the first hit comes out fast, and if you hold the A button usually the next two hits will connect as well. Does a great amount of damage, and can be used in a variety of situations such as after a Glide Cancel.
Dash-Attack - 1-hit - 9-11% (when fatigued 6-8%)
Charizard sort of slides with his foot raised. If the opponent is hit, they pop upwards almost vertically. Great for following up with aerials, but the slow speed that it comes out, as well as the lag afterwards kind of makes you wish you had done another move during your dash instead. But I have done some killer combos with it, so it's definitely worth using when possible.
Tilts:
F-Tilt – 1-hit – 11-12% (when fatigued 8-9%)
Charizard flicks his tail in front of him. This move has massive range and quite a lot of knock-back as well. It also sets the foe on fire if it sweet spots. This move along with D-Tilt are some of Charizards quickest, and most useful attacks. It's seriously got to be one of the largest range tilts in the game. Very low lag afterwards as well.
U-Tilt – 1-hit – 8% (when fatigued 6%)
Charizard’s wings pop-up in a Triangular formation. This move is great because it pops the opponent upwards and allows you to follow up with his killer U-Air chomp. His wings also stretch out well above him, so its fairly safe to use in any instance.
D-Tilt – 1-hit – 12% (when fatigued 9%)
I don’t know what the designers were thinking! This move has even MORE range than the F-tilt, and even MORE knock back in addition to K.O potential! Charizard stretches his neck outwards and chomps close to the ground. This move is actually a very reliable K.O move. It comes out fast, and cannot be countered if used with the proper spacing.
Smashes:
F-Smash – 1-hit – 17% (when fatigued 12-16%)
Oh man! Ouch!!!! Charizard pulls his head back, and then rams it forward. This move reminds me a lot of Bowser’s F-Smash except there are two differences. Not only is it faster, but its longer range as well!
U-Smash – 2-hit – 5, 11% (when fatigued 3, 8%)
Charizard waves his wings above him for a two-fold up-smash. I changed my opinion completely on this move. I originally thought it wasn't that useful, but now it's become one of my most used smashes with Charizard. This move comes out instantly and the first wing-swipe hits everything infront of him, popping them upwards into the second wing swipe which can actually K.O at higher percents. What makes this move even better is the fact that U-Smash's can be performed during a Dash, so it makes an actual good approaching move.
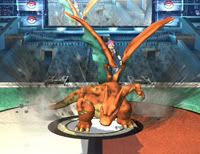
D-Smash – 1-hit – 16% (when fatigued 11%)
I call this move Earthquake, since that really is exactly what Charizard does. He stomps the ground and the earth comes up all around him. Excellent Smash attack since not only does it hit a large area, but it comes out quick! Does a ton of damage too.
Aerials:

N-Air – 1-hit – 9% (when fatigued 7%)
Charizard pulls some acrobatics and spins around in a 360. The tail has the ability to light the opponent on fire, but apart from that not a very effective move.
F-Air – multi-hit – 11% (when fatigued 8%)
This is one of Charizards best aerials. He breaths a huge gush of Fire in a large cone effect in front of him. What makes this great is that it’s possible to safely use it in the air without fear of getting shield grabbed, then jump again and do it again! Properly spaced this move also makes a great edge tool and can K.O them in the process. This will probably be the number one edging move. Charizard can utilize his 2 jumps to edge opponents coming back similarly to Pit or Metaknight. Just jump into them and blast them with this move and they'll die almost every time if they don't avoid it.
U-Air – 1-hit – 10% (when fatigued 8%)
I love this move. Charizard stretches his neck upwards and does a near instant chomp right above him. This move comes out really fast, and can actually be done in a combo to chain more U-Airs and keep your opponent air-born.
B-Air – 2-hit – 12-14% (when fatigued 9-10%)
This move has a surprising amount of range, and K.O potential. Charizard sort of does a twirl and flicks his tail behind him. It’s a two-fold attack because first he attacks with his claw, then the tail flick comes. The tail flicks sweet spot really has a lot of knock back compared to the non-sweet spotted version. Also lights the opponent on fire if sweet-spotted.

D-Air – 1-hit – 14% (when fatigued 10%)
Nice little meteor spike. Charizard thrusts downwards and meteors everyone below him. Great move for edging. Meteors aren’t that effective against some characters though unfortunately. In my opinion, this move unfortunately is very difficult to land thus making it not as practical. It resembles Smash Melee Ness D-Air in timing if you can understand what I mean.
Special Moves:
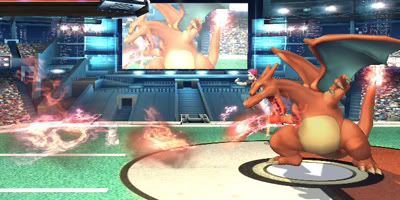
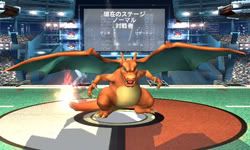
B – Flame Thrower – Easily racks 30% (when fatigued seems unchanged)
Awesome utility and damaging move. If it lands, it really is free damage, since Charizard can do it safely. It’s identical to Bowser’s flamethrower, except Charizard’s seems more focused and Bowser’s seems more radial. Use this to rack up as much free damage as you can! This move does eventually dwindle down in flame, just like Bowser's does in Smash Melee. In addition to this, It is possible to tilt the angle of the stream of fire by tilting the analog stick up and down. This makes it great for hitting enemies below you, or keeping enemies stuck in your stream as they try to get out of it.

Side+B – Rock Smash – 43% (when fatigued 38%)
Yes you read that right. 43% from this baby if you land it correctly. DO NOT underestimate this attack! A lot of people have been saying its slow, but that is not the problem. Land this move on an opponent who is SHIELDING and you will wreck their shield, and at the same time knock them back so far that they just cannot counter you. Short-Hop into Side-B is probably the best way to use this move. Charizard takes a rock out from somewhere and crushes it with his head. The rock explodes into tiny pieces which scatter off nearby.
If they don’t shield this move…? Well lets just say that they’ll wish they had!
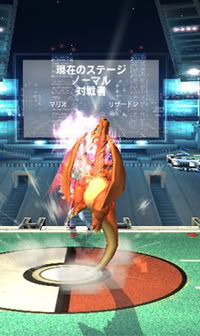

Up+B – Fly – 17% (when fatigued 12%)
This move works wonders during an Up+B out of shield. It can even K.O at higher percents. It has such insane priority to boot, although there is landing lag afterwards, so use it carefully. This move also has super armor during the moving animation. This really makes your opponents fear you when they are directly above you.
Throws:
Charizard has some great throws. His B and F-throw can K.O if you trick the opponent to D.I incorrectly and his other throws just pop-up the opponent for additional combos. Also Charizard has a wicked grab range. He stretches his neck out quite far and chomps on you to grab. Also, the D-throw, although it looks the coolest (Charizard steps on the opponent and breaths fire in their face! How badass is that!) It actually does the lowest damage. So if you can’t follow up with anything, opt to use the other throws instead.
Similarly to Squirtle; Charizard's Down-Throw has those strange properties. It does the lowest damage, but at high percents it can K.O people. It's so awesome when Charizard breaths a bunch of fire in their face and then they go FLYING. Abuse Charizard's Grab range at high enemy percents (150+%), since it's a great way to get K.O's. (Although Charizard usually K.O's before then, its good to know)
U-Throw – 11% (when fatigued 8%)
D-Throw – 6% (when fatigued 4%)
B-Throw – 10% (when fatigued 7%)
F-Throw – 10% (when fatigued 6%)
Taunts:
Note: The P.Trainer also taunts. He does a sort of "Alright!" pose that has been seen in videos.
Up-Taunt: Charizard twists his body so that he is facing the camera, while lowering his head. Then he lets out a great big roar while stretching his wings and looking upwards.
Side-Taunt: Charizard looks at the camera and stretches his wings outwards. He makes a growling sound effect during this time.

Down-Taunt: Charizard stomps his feet twice with a lot of fierce vigor. He looks angry.
~*~*~*~*~*~*~*~*~*~*~*~*~*~*~*~*~*~*~*~*~*~*~*~*~*~*~*~*~*~*~
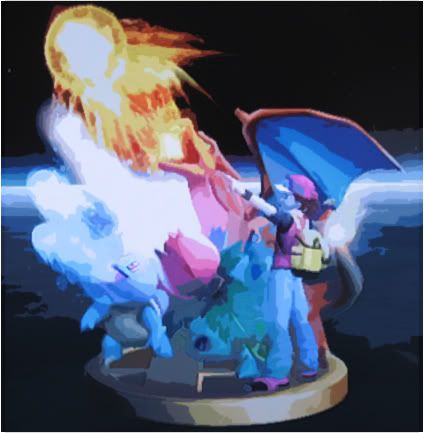
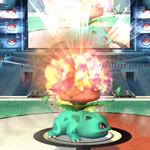
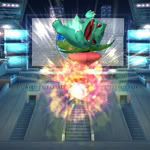
8.0 – Final Smash
Triple Finish


What can I say about this apart from it literally destroys anything situated in a horizontal path to the P. Trainers 3 Pokemon? Once activated, a cool Pokemon chat box appears at the bottom of the screen saying It’s Super Effective! It can be used in mid-air, and can pretty much cover the entire stage. Whoever it hits, usually dies as well (except during lower percents).
~*~*~*~*~*~*~*~*~*~*~*~*~*~*~*~*~*~*~*~*~*~*~*~*~*~*~*~*~*~*~
9.0 – Costume Changes
As it stands, there are 5 costumes for the Pokemon Trainer.
Default (Default colors seen on the Dojo)
Red
Blue
Green
White
Courtesy of Serebii.net for ALL Character Costume Images and 56k for compiling and hosting the images in the "ALL Character Costumes! new images, higher quality thread"
(http://smashboards.com/showthread.php?t=147571)

View the color changes here; http://www.youtube.com/watch?v=-nAeWY_o6dU
It’s basically Ivysaur gets a bulb of the same color, Squirtle’s shell changes color, and Charizard’s skin and wings change accordingly as well.
~*~*~*~*~*~*~*~*~*~*~*~*~*~*~*~*~*~*~*~*~*~*~*~*~*~*~*~*~*~*~
10.0 – Other User Impressions & Links
Feel free to submit your own impressions, guides, or anything at all related to Pokemon Trainer! It'll go in this section for everyone to get EVEN more information about this character!
User: I.T.P
Topic: Updated impressions of PT, my new main!
Thread: http://smashboards.com/showthread.php?t=142691
User: PopeOfChiliTown
Topic: Thoughts on Ivysaur and Charizard from a competitive standpoint.
Thread: http://smashboards.com/showthread.php?t=143672
User: MrPBody
Topic: Mr P BoDy's guide to maining Pokemon Trainer.
Thread: http://smashboards.com/showthread.php?t=146188
Note: A second guide which you should consider reading as much as this guide!
User: P. Trainer's Pokemon Run Speeds
Topic: YouTube Video showcasing the run speeds.
Thread: http://uk.youtube.com/watch?v=CNdLECu0Zh4
Note: Surprisingly... Charizard runs faster than Ivysaur who runs faster than Squirtle. This doesn't mean that Squirtle is the slowest however. Squirtle has the quickest dash-turn around, as well as jump which makes him all around the fastest. But in terms of pure run-speed... Charizard is as fast as Pikachu!
~*~*~*~*~*~*~*~*~*~*~*~*~*~*~*~*~*~*~*~*~*~*~*~*~*~*~*~*~*~*~
11.0 – Miscellaneous Frequently Asked Questions
This section will be dedicated towards just answering questions which are commonly asked about the P.Trainer and his Pokemon, but don't necessarily fit in a category;
Does Squirtle have infinite swim time?
No. He has the same swim time as every character.
Does Charizard get damage and/or killed when touching water?
Nope. That might make things a tad unfair for him after all.
Squirtle's water gun: If you charge it up, switch to Ivysaur, switch to Charizard, switch to Squirtle, is water gun still charged?
Strangely... No. Squirtle will lose his Water-Gun charge. Not really a huge deal, but whatever.
~*~*~*~*~*~*~*~*~*~*~*~*~*~*~*~*~*~*~*~*~*~*~*~*~*~*~*~*~*~*~
12.0 – Additional Content to be added!