
In the Kirby games, there was always a screen that tells you how to use Copy Abilities. It started with a description by Kirby, then the moves. But in Smash Bros., Kirby can only copy an enemy's Standard Special move. So in this guide-thingy, I'll give information on how to use these Special Moves effectively, especially against the original holder of the move. I will update this irregularly, due to certain aspects of testing, but will try to get this together into a good guide. Today, we'll start with Aura Sphere!
Lucario
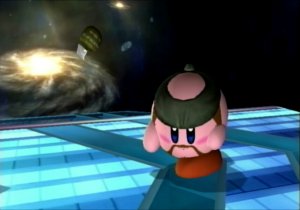
Wow! This Aura Sphere is as big as me!
Shoot it repeatedly to disrupt your enemy's
flow, or charge it up for a big K.O.!
B - Aura Sphere
Kirby can spam this move much like a Lucario can. Or in the words of philny3, smart spamming. You can shoot it repeatedly to disrupt your enemy and see what they do, or just break their flow and bring the battle's tempo to a much more moderate rate. Of course, if you need a mix up from regular kill moves, Aura Sphere can satisfy. Charge it up when you have the time. You can roll around while charging or charge after a kill. Even with your invincibility frames after a kill. This is a very versatile projectile, use it as such. It has rather excellent range and can also be used to edgeguard a foe offstage (well, duh). When fully charged, you can take a hop offstage and fire it. Kirby can also charge it when coming back to the stage himself. Unlike Lucario, with Kirby's multiple jumps, it is much safer to use offstage, so use that to your advantage.
Another Lucario trick with Aura Sphere's is Nearly Full. Charge up your Aura Sphere only to nearly full charge. If you aren't glowing with "awesome cosmic powah!" the chances are that your enemy may eventually, or even immediately, forget that you have it charged, and so you have a deadly projectile that retains nearly all of its original power and can kill almost as well. Great for a quick surprise or that KO you need.
Finally, Aura Sphere Charge. It brings up damage at a quick pace, eats shields, and due to it's quick rate of attacking, it can clear other moves from your queue, effectively removing their staleness. Aura Sphere charge shares diminishings with Aura Sphere.
Against Lucario
Kirby should NOT spam this move near Lucario. While Double Team is slow and can be easily punished if missed (which you should do if they use it too far), don't forget that Lucario can Reverse his DT to strike in the opposite direction and possibly hit you with the tip of his kick. Nonetheless, Double Team isn't a worry. Most Lucario's won't use it because it's so bad and is punished REALLY easily, and high percentage brings them closer to dieing like any other character. Your Aura Sphere outprioritizes his, period. At the same level of charge, your Aura Sphere's will always clash, and your Aura Sphere can beat his fully charged with a small shot, a trait that he does not share. On the same stock as he is, your Aura Sphere can always clash with his or even beat him out. When he's one stock below you at full power, you can literally start charging as his Aura Sphere heads for you, fire directly at it at close range and clash. Your Aura Sphere is that much better than his. Play smart and smart spam. Make sure not to shoot your fully charged Aura Sphere when he has his fully charged, which will be hard, since a Lucario will make sure he keeps his charged, and he's either a few stocks down or some percentage up after you have Aura Sphere. Please, do NOT swallow a Lucario when you are at high percentage. His Dair cancels momentum, so he can kill you quickly if you decide to do so. Also, with Nearly Full, don't be afraid of Double Team. The word "surprise" means something, and Double Team is too slow to counteract one of these at close range. Just don't keep a predictable pattern and power on through. May the Aura be with you.
-----------------------------------------------------------------
Ok, now, since I thought of a neat description, we're going red white and pink today! It's Mario Kirby time!
Mario
Wow! Look at these Fireballs flow!
spammable and flammable,
Look at them roll!
B - Fireball
Ok, with Kirby these fireballs are quick little buggers, but they lose momentum each bounce before they disappear. That means to even REACH your foe, you want to do a short hop before firing them off. Like Aura Sphere, they are good for controlling approaches and setting up some nice tricks. It can also be used for approaches/retreats and refreshing your queue. You can mix it up with short hops and full hops to give Kirby some awesome camping skill. You can also use these to hit them in their second jump so that their third jump is easily predictable, provided that you know the character's recovery tactics. On someone like Wolf, you can cause his third jump to never reach the stage at all with proper timing and placement. Therefore, the Fireball is excellent for gimping foes. They can also be used for ledge camping, to mix up your ledge recovery some.
The Fireball can also be used to setups, as I mentioned earlier. You can Fireball to a spike, like a Mario, or just F-Air/B-Air after. There is also Fireball to a Pivot Grab, which can set up nicely for anyone of Kirby's grab combos. Obviously, being very basic projectiles, Kirby can use them to rack up damage, which will go two ways. About 5% per hit plus is pretty good. Of course, this will weaken with decay, so watch out for that. Remember: FIREBALLS ARE MOST USEFUL IN THE AIR. K? Good.
Against Mario
Now, don't forget Mario can use Fireballs in the same ways you can. Except more, because combining these with his Cape and FLUDD makes him a master at gimping. You obviously WILL have to be careful of his cape. From what I've gathered, Kirby can indeed throw Fireballs faster than Mario, and they probably even have more stun. This puts you at a good advantage once you have this basic Copy Ability. With the amount of combos Kirby has, you can easily put Mario to shame depending on how close you use them. Remember, being that Mario's Cape is a threat on the ground, the best place to use fireballs no matter who you are facing is the air. They bounce and you could easily avoid a reflected fireball from a Double Jump. This is another versatile Copy Ability and it boosts Kirby's own original powers and abilities, so knowing how to use this well is crucial and can turn a battle against the famed plumber to your favor. Mario will regret he has the power to throw fire. Remember, outspam, outstun, and outstand. Happy Burning!
------------------------------------------------------------
So I randomly picked a power from my head, and now we're fighting old school style! It's time for G&W Kirby's debut!
Mr. Game & Watch
If the foods get too hot
I'll need a fan!
Stay away from dinner or
you'll get hit with the pan!
B - Chef
Ok, now Chef may not be the greatest Copy Ability, but it does have it's uses. Mostly, a G&W will use it for ledge guarding. It seems to work rather well on large characters with average recovery, like Donkey Kong. In fact, it even works rather well against opponents with good recoveries, such as King Dedede and Meta-Knight, so it works as an excellent wall period. The sausages themselves do minimal damage, but you can tap B repeatedly to increase the rate at which they are thrown. This ability also has quite a bit of ending lag, so use with discretion. The actual frying pan itself can do quite a bit more damage, and it actually does have knockback. It can push your foes into your other volleys for extra damage. However, if they are close enough to use the pan, you are playing riskily. If you don't hit, the ending lag can get you punished. On another note, the pan also has fish and chicken legs.
Sometimes, two of the foods striking the foe can guarantee you a quick U-Smash. Another option would be to trip them with a D-Tilt, and then punish with the pan. Chef is also good for clearing the ledge when coming back to the stage. When you think about it, it's much safer than Final Cutter, and possibly a match for aerial Hammer, due to it's longer range. But obviously, you still have to watch out for ending lag, unless you're using Chef all the way to the stage or ledge. It can interrupt recoveries, allowing for a spike with Final Cutter or D-Air, its hitstun can work well towards dash attacks or dash grabs, and if the opponent is silly enough to roll from spamming (the food's damage isn't that great, so stale move negation isn't much of a concern), then you can quickly punish said roll. The food leaves the opponents wide open for some crazy combos, so use that to your advantage. It can be used in midair to change direction and grab the ledge. It can also be used to interrupt the charging stage (the point where you hear the click, that is) of a smash attack. You can use it against an F-Smash camping Meta-Knight, predictable approaches, and more.
Against Mr. Game and Watch
If you must use it against Mr. Game and Watch, use it when it's unexpected. It does still work well for setting up combos. Like Lucario, you must look out for the D-Air after swallowing. Taking Game and Watch's power is rather unexpected, as it is believed to be useless, so copying G&W is excellent for mindgames. The frying pan itself is still a rather powerful weapon, and due to Game and Watch's light weight, you can take him down with it. Punish his Bucket Breaking recovery's ending lag with volleys of sausages. But be careful, since he can absorb it. But if he cannot reach you, he cannot harm you. Most everything mentioned previously can be done against him, but attack with caution, and from a safe, non oily distance, beat him over the head. Frying pans are always great weapons in movies, and now, sort of in Brawl as well! Happy Cooking!
------------------------------------------------------------
It's one of the most obvious candidates for Best Copy Ability! Everyone wanted me to do it, so here's to you all!
Pikachu
Bzzzzt! One jolt, two jolt
Yellow jolt, blue jolt!
It's shocking what I can do!
B - Thunder Jolt
Now this Copy Ability can change the Pikachu matchup in Kirby's favor. It's actually REALLY good. The way it works is that Kirby shoots a bolt of electricity that crosses surfaces like a slinky. The Pikachu boards have quite a few uses for this technique, some weird, some just plain cool! I'll paste all of them. Now, Thunderjolt is an easily spammable move. It can do 9% if you make the ball hit in midair, or just are close enough to make the electricity never touch the ground. Otherwise, this move will do 6%. It's really fast, can force approaches, rack up damage and restore other moves. Also, with Kirby's multiple jumps, you can safely spam it from midair. You can perform a rising Thunderjolt by doing a full hop, then at the peak of the jump, jump again and press B. You lose no height in the performing of this technique, and it is very useful. You can keep doing this until your jumps run out then land, rinse, and repeat. You can also DI horizontally during this. Thunderjolt is excellent for spacing, approaches, stage control, getting safely back to the ledge, attacking those trying to recover, messing up someone's flow, pressuring, and much much more. It activates a bit earlier than 19 frames, I believe. It can flow into a Final Cutter, F-Smash, or possibly a D-Smash. This move is truly a beauty for chaining. As with Mario's fireball, staling it is not a concern, and allowing all of Kirby's moves to be fresh is just an added bonus. It goes a pretty far distance across the stage too. Excellent for cruel mindgames, forcing the opponent into doing something that they would regret. It can travel around a small platform multiple times, giving you that space as your own domain to spam more jolts.
Techniques Pikachu AND Kirby Can Perform Include:
(Replaced Pikachu with Kirby. Credit to the Pikachu boards' "Silverspark")
1) Pivoted Thunderjolt
Version A
a) Flick the control stick left or right (Kirby should dash then stop) then do a reverse Thunderjolt
Version B
a) Dash in one direction for awhile, then do a reverse thunderjolt on the ground. Kirby should immediately face the other way and do a Thunderjolt. (This may require practice)
2) Ledge Jolting
-I'm going to call the trajectory that the jolt makes as it goes from the top of the ledge to the bottom the Circle.
a) 1st type: Extended Circle - this one has the most range and looks like a full circle when it goes over the ledge
b) 2nd type: Regular Circle - this one has medium range and doesn't go over the ledge as far as the extended Circle.
c) 3rd type: Tighter Circle - this one has the shortest range. The Circle can be seen moreso on the stage than over the ledge. The Thunder Jolt should look more like a line than a Circle as it crosses the ledge.
d) 4th type: Thunder Ball - if you stand at the edge and fire a Thunder Jolt, a ball of lightning will come out that will have a diagonally-downward trajectory
3) Double Circle Jolt
a) To do this, you're going to need good positioning. I tested this on Battlefield, and, well, I'll describe to you where I did it:
b) I did it on the ground, facing the left. It was 1 baby step to the left of the bluish-purplish glowing circle (right outside of it). If you were Pikachu, his tail should be hanging in between the house-looking rock structure in background.
c) Spam a few jolts until you get it right. If done correctly, the Thunder Jolt will actually circle the ledge twice in nearly same spot before going down to the bottom of the stage.
d) It can be done on FD if you spam jolt in between the 2 arrows while facing the ledge.
4) Hanging Jolt
a) Pick a stage with a platform that moves sideways (for this example, pick Smashville)
b) Jump on top of the platform, and move slightly away from the edge (enough to where if you do a thunderjolt, it won't fly off of the platform in the form of a ball. The thunderjolt should land on the moving platform and end as soon as it touches the bottom.
c) As the platform moves in one direction (for example, to the right), face the left, and spam thunderjolt. If done correctly, instead of going touching and along the platform, the thunderjolt will make a circle in mid-air.
d) It's most effective when the platform has gained the most momentum (near the middle of the stage)
5) Ball Lightning
http://www.youtube.com/watch?v=1XjPO5GDrJI
This Copy Ability is simply beautiful.
Against Pikachu
Pikachu can force us to approach with his Thunderjolts, then Quick Attack Cancel as soon as we get in range to punish us for getting in range. However, upon receiving this power, the matchup changes. No longer will we have to approach. There are two reasons for this. One, we can safely spam them in mid-air. Two, our jolts are actually faster than Pikachu's. And his unique tricks with Thunder Jolt? Unique no more. A Pikachu's better matchups generally allow him to pressure the opponent into approaching or screwing up. It's an excellent move. But with this, we force the Pikachu to approach us. No doubt a Pikachu will attempt to stay out of Swallow range. Pikachu's aren't comfortable with approaching due to the very nature of their approaching options. But now we can punish them for approaching with a wide variety of moves. Many Pikachu's will expect their power to be taken, because it's so great. Watch yourself. And remember, for any of Kirby's Copy Abilities, just because you have the power doesn't mean you should use it unwisely. Go for a shocking comeback, and thread 3000 volts down Pikachu's spine. Don't dish it out if you can't take it. Bzzzt, Crackle, Pop, Your Enemies! (Last sentence to be read in the tone of "Snap, Crackle, Pop, Rice Krispies!")
------------------------------------------------------------
Sorry for the hiatus, gang. Without further ado, the most Tactical Copy Ability, Snake Kirby, Spotlight!
Snake
BOOM! I'm a master with these Grenades!
My tactical planning is top notch!
I can really throw,
you already know,
So you might as well sit back and watch!
B - Grenade Pull
BB (tap) - Grenade Toss
BB (hold) - Angled Grenade Toss
B + Shield - Grenade Drop
Okay, so needless to say, I like this Copy Ability. In Brawl being a defensive game, a tactical Copy Ability isn't too much to ask, now is it? Especially since we were pretty much ripped off on MKs Tornado. The first thing I want to note, is that a grenade lasts for roughly 3 seconds after being pulled. Only three. What you want to do is to plan out the timing and how you wish to use the Grenade before you throw it. This is called Grenade Cooking. It is used to prevent opponents from catching your Grenade and using it against you. Actually when you think about it, 3+ seconds is plenty of time to think. However, also factor in the time that you will need for the Grenade to reach your opponent and the distance you wish to throw it at. Everything should be thought of. In fact, for this reason, it is better to not even pull the Grenade until you have had time to think. There are many ways to cook a Grenade. You can airdodge and re-catch the Grenade with an aerial, toss it towards the opponent, jump, hit them with an aerial while recatching it, etc. Figure out your own style. In fact, crucial in Grenade Cooking and other Grenade techniques is Grenade Dropping. As you may have noticed, when you pull out a Grenade, Kirby stands in an awkward position, and walks differently. Grenade Drop helps this, because afterwards you can pick it up and allow for all sorts of free movement. Now, remember how I said that Grenades are tactical? Grenade Stripping is a prime example of this. It's odd, but bear with me. Toss a grenade at your opponent. Then simply pull another grenade and Grenade Drop. The first grenade will stop in its tracks and fall flat. You can imagine the crazy things you can do with this. You can position a grenade perfectly and use the other grenade as a follow-up. For example, Grenade Strip, pick up second Grenade, jump at the enemy, airdodge, re-catch, toss upwards, Drop another Grenade, U-Throw, and slam them into the second (aerial) Grenade and spike them into the third (ground).
You may be wondering, well what's keeping the enemy from attacking during this sequence? Simple, Grenade Countering. While you're holding a grenade, if the enemy hits you, the Grenade explodes. However, if you shield, you get hurt... along with the enemy! However, if you shield, the enemy is the only one that takes damage. So while my sequence may or may not be realistic, that's the gist of it. Better yet, since Grenades are so flashy, you can toss them all around, Grenade Strip, etc. to keep your enemies from seeing obvious setups. For example, if you toss them around so that the opponent doesn't know where either will land and what's the timing on which, you could sneakily approach them and start off the Gonzo Combo, possibly ending with a grenade!. You can also do this juggling to trick the opponent into raising their shield, or lowering it. You could even maneuver in to drop a grenade right at their feet, shield the explosion and chase. Grenades are absolutely wonderful setups and should be used as such. All you have to do to use them... is think.
Against Snake
Generally, you really want to use Grenades on Snake the same way you would use them on anyone else. Mind you, however, many Snakes are tactical thinkers. They know what time the Grenades explode, and they know how to use a Grenade and all of its tricks. That's why you want to approach this in a more tactical manner. You must think of ways to use the Grenade yourself, your own style. Whether you want to juggle for mixups (I made that up) or Grenade Strip for trickery is all up to you. You can think up moves mid-battle. Remember that Snakes can secretly plant mines and C4, so watch your step; they have more tactical capabilities than you could possibly have. Stone is a powerful move, and Grenades can help to setup for one. One Grenade behind the Snake, one in your hands, dance around, F-Air, Grenade Drop, and slam. One thing I should also mention: the grenades themselves do minor damage upon impact. Remember that and you can time so many mixups. Watch the field carefully and use your grenades to detonate any hidden explosives that the Snake has planted. Use the Grenades to edgeguard as well, before he uses his Up B. Observe. Outplan. Outstand.
-RK Joker
------------------------------------------------------------
So, Dedede is next because he's so easy.
King Dedede

Whooooosh!
I can Inhale from a larger distance now!
It has a few tricks that helps me out!
B - Inhale
Inhale is pretty much the same as Kirby's Inhale, except it is slightly stronger, has longer range, but also a bit more ending lag. In team battles, if you are Inhaling and someone is trapped in the vortex, and another person hits you, both you and the enemy fall through the stage! You can use this with a teammate on opponents who won't be able to recover. You should be able to recover because your recovery is rather good. This is also better for Kirbycides due to its superior range. Having Dedede's Inhale is also a good thing simply because you get Super Armor frames as it starts. It is also far harder to escape. However, if Dedede's Inhale times out, the opponent is automatically spit out rather than being allowed to break out. Opponent's Inhal Break farther above you than our normal Swallow.
Against Dedede
Simply use this as you would your own Inhale. Kirby's Inhale has more priority still, so use it when you deem necessary. Use it to stop any too aggressive approaches, or Kirbycide when your percentage is far above that of your opponents. Use the Super Armor frames to negate possible kills, which is always nice, being that Kirby is a lightweight and Dedede is a heavyweight. On the subject of Kirbyciding, this is excellent, being that it is far harder to escape than Kirby's Inhale. Use this against Dedede's rather large shield to avoid shield grabs, or just spit Dedede over the edge and begin to edgeguard. Note: If Dedede swallows you, DO NOT ATTEMPT TO BREAK OUT. Otherwise, a U-Tilt can follow to kill you. Wait for an auto-star shot. Whilst many people see this as a joke ability of some sort, this is actually really good to take. Take this ability any time you fight against Dedede to further increase your advantage, but don't forget your own Inhale works too, so don't focus overly hard on getting this one.
Closing Notes:
Check out fromundaman's guide in order to help yourself with both Inhales. Found here: http://www.smashboards.com/showthread.php?t=224822
------------------------------------------------------------
So, next is one of my personal favorites, Bowser Kirby.
Bowser
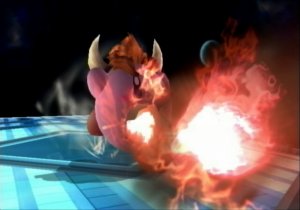
FWOOOOOOSH! This feels like being Fire Kirby!
I can breathe fire over medium distances!
But as I wear out, my flame soon diminishes!
B - Flame Breath
Flame Breath is actually a pretty average move. It has it's obcvious drawbacks, of course, including both start-up and ending lag, the fact that the flame can't stay out very long. This is slightly better since Melee, as the flames will never completely diminish (although that doesn't actually matter much), and can flow off of surfaces and sometime even split into separate streams. The flames are excellent for edgeguarding. It won't actually kill in any form or fashion (okay, minus below average gimping), but it's niche is racking up damage, and it does that well. However, it is easily SDId out of, which is a problem, especially since the start-up lag is essentially an early warning system to opponents. It has way more shortcomings than it can make up for and is essentially an unbalanced moves. This does find it's uses, however, and can be strung into. For example, the Gonzo String works better on larger characters, so after you do the second U-Air, you can retreat a little and breathe your Flame. It helps that it's direction can be altered, especially since this will probably be used earlier than the second U-Air. Flame Breath is a fine defense against SH-Aerials, to it's list of compliments. It is natural to use after throws at low percents and destroy certain characters' explosives of other projectiles. It stops rushing attacks, can be B-Reversed, and gets pass Marth and Ike's Counter moves okay. be wary, though, as this will not work with Fox Lucario, or the like. Snake's grenades will also bounce off of it (in midair, of course).
Against Bowser
Against Bowser, this move is wonderful. If anything, Bowser should be expecting you to copy his ability, because it will help to annihilate him. Earlier I stated that the Gonzo String worked best on heavy characters. Guess what? Bowser's heavy. Rather than finishing the string with a knock-away move like F-Smash or Hammer, try finishing it with the Flame Breath. Flame Breath works best on heavy characters. Bowser is truly cursed should you get his ability. You will be able to effectively edgeguard him, rack up damage above 50% in mere moments, and do pretty much everything I've mentioned about Flame Breath, minus the explosives. It's an excellent anti-aggressor and disrupter, and especially against Bowser. The first thing you want to do against Bowser is copy his flame. The second? Destroy him.
------------------------------------------------------------
So, it's time for Toon Link Kirby. Early, I know, but...
Toon Link
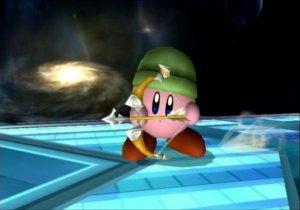
I can launch arrows just like Toon Link!
Just aim the bow, and watch the arrow go!
These arrows aren't quick, but have plenty of tricks.
B - Hero's Bow
Now, once Kirby gets any projectile, his battle prowess goes significantly up. He often has the ability to use the ability better than the original holder, due to his weight, agility, and multiple jumps with which to exploit the projectile's properties. The Hero's Bow has an insane amount of uses and properties. Kirby's own abilities added on to these projectiles can often enhance AT's, or create new combos. Anyways, Hero's Bow is a useful ability. You can spam it to force an approach, unless against someone with a laser, naturally, you can charge it up, to maximize its range and damage, etc. Now, if you manage to get someone up to 300%+, then two things become apparent. One, you're probably really bad at this game/the opponent is way too good at this game, and Two, they are now at a percent to get killed by a fully charged Hero's Bow. It's probably a good idea to practice your marksmanship with this ability. Do Target Practice a bit, try and hit the targets using only one arrow each, etc. This way you should be able to judge your movement and your target's movement to properly aim and hit with the arrow. You know, like real archery, almost. Of course, it's not all about hitting with the arrow. Some technique is involved in knowing how to aim and miss. You know, mindgames. Anyways, there isn't much to say about this ability that isn't already described below in the excerpt form the Toon Link Boards, so read that and replace Toon Link with Kirby and you'll be fine. They each have a rating next to them, so I suggest you learn the highest rated first. Do note, however, that I left ones with bombs necessary for a reason. If you happen to catch a bomb, make a note of it. But also mentally lower their ratings due to being situational.
What can Toon Link really do against you here? If Kirby vs Toon Link is 50:50, then it follows the same pattern as Kirby vs Pikachu: you now have an advantage... a slight advantage, but an advantage nonetheless. Toon Link still doesn't have to approach... if you shoot from the ground. You can easily use you aerial prowess and your newfound aiming skills to shoot from above. On top of that, if Toon Link just stands there, he will be pushed back and he will have to move up a bit. You remember what I said earlier about aiming to miss? You really should do that to mix it up. If you trick the Toon Link into moving early or anything, then you can easily hit him. Also, Toon Link can't much camp against you, being as you still have long range projectiles, you can fly, and you can stop any of his projectiles with an arrow, minus bombs, but... regardless. You merely have to use aim, skill, and quick thinking. Don't forget that Toon Link has the mastery of multiple projectiles. He may attempt to do some mixups - no he will. It is imperative to closely watch his moves and be careful - he hasn't lost any range. Run into battle bow in hand... and fire.
Lucario
Wow! This Aura Sphere is as big as me!
Shoot it repeatedly to disrupt your enemy's
flow, or charge it up for a big K.O.!
B - Aura Sphere
Kirby can spam this move much like a Lucario can. Or in the words of philny3, smart spamming. You can shoot it repeatedly to disrupt your enemy and see what they do, or just break their flow and bring the battle's tempo to a much more moderate rate. Of course, if you need a mix up from regular kill moves, Aura Sphere can satisfy. Charge it up when you have the time. You can roll around while charging or charge after a kill. Even with your invincibility frames after a kill. This is a very versatile projectile, use it as such. It has rather excellent range and can also be used to edgeguard a foe offstage (well, duh). When fully charged, you can take a hop offstage and fire it. Kirby can also charge it when coming back to the stage himself. Unlike Lucario, with Kirby's multiple jumps, it is much safer to use offstage, so use that to your advantage.
Another Lucario trick with Aura Sphere's is Nearly Full. Charge up your Aura Sphere only to nearly full charge. If you aren't glowing with "awesome cosmic powah!" the chances are that your enemy may eventually, or even immediately, forget that you have it charged, and so you have a deadly projectile that retains nearly all of its original power and can kill almost as well. Great for a quick surprise or that KO you need.
Finally, Aura Sphere Charge. It brings up damage at a quick pace, eats shields, and due to it's quick rate of attacking, it can clear other moves from your queue, effectively removing their staleness. Aura Sphere charge shares diminishings with Aura Sphere.
Against Lucario
Kirby should NOT spam this move near Lucario. While Double Team is slow and can be easily punished if missed (which you should do if they use it too far), don't forget that Lucario can Reverse his DT to strike in the opposite direction and possibly hit you with the tip of his kick. Nonetheless, Double Team isn't a worry. Most Lucario's won't use it because it's so bad and is punished REALLY easily, and high percentage brings them closer to dieing like any other character. Your Aura Sphere outprioritizes his, period. At the same level of charge, your Aura Sphere's will always clash, and your Aura Sphere can beat his fully charged with a small shot, a trait that he does not share. On the same stock as he is, your Aura Sphere can always clash with his or even beat him out. When he's one stock below you at full power, you can literally start charging as his Aura Sphere heads for you, fire directly at it at close range and clash. Your Aura Sphere is that much better than his. Play smart and smart spam. Make sure not to shoot your fully charged Aura Sphere when he has his fully charged, which will be hard, since a Lucario will make sure he keeps his charged, and he's either a few stocks down or some percentage up after you have Aura Sphere. Please, do NOT swallow a Lucario when you are at high percentage. His Dair cancels momentum, so he can kill you quickly if you decide to do so. Also, with Nearly Full, don't be afraid of Double Team. The word "surprise" means something, and Double Team is too slow to counteract one of these at close range. Just don't keep a predictable pattern and power on through. May the Aura be with you.
-----------------------------------------------------------------
Ok, now, since I thought of a neat description, we're going red white and pink today! It's Mario Kirby time!
Mario
Wow! Look at these Fireballs flow!
spammable and flammable,
Look at them roll!
B - Fireball
Ok, with Kirby these fireballs are quick little buggers, but they lose momentum each bounce before they disappear. That means to even REACH your foe, you want to do a short hop before firing them off. Like Aura Sphere, they are good for controlling approaches and setting up some nice tricks. It can also be used for approaches/retreats and refreshing your queue. You can mix it up with short hops and full hops to give Kirby some awesome camping skill. You can also use these to hit them in their second jump so that their third jump is easily predictable, provided that you know the character's recovery tactics. On someone like Wolf, you can cause his third jump to never reach the stage at all with proper timing and placement. Therefore, the Fireball is excellent for gimping foes. They can also be used for ledge camping, to mix up your ledge recovery some.
The Fireball can also be used to setups, as I mentioned earlier. You can Fireball to a spike, like a Mario, or just F-Air/B-Air after. There is also Fireball to a Pivot Grab, which can set up nicely for anyone of Kirby's grab combos. Obviously, being very basic projectiles, Kirby can use them to rack up damage, which will go two ways. About 5% per hit plus is pretty good. Of course, this will weaken with decay, so watch out for that. Remember: FIREBALLS ARE MOST USEFUL IN THE AIR. K? Good.
Against Mario
Now, don't forget Mario can use Fireballs in the same ways you can. Except more, because combining these with his Cape and FLUDD makes him a master at gimping. You obviously WILL have to be careful of his cape. From what I've gathered, Kirby can indeed throw Fireballs faster than Mario, and they probably even have more stun. This puts you at a good advantage once you have this basic Copy Ability. With the amount of combos Kirby has, you can easily put Mario to shame depending on how close you use them. Remember, being that Mario's Cape is a threat on the ground, the best place to use fireballs no matter who you are facing is the air. They bounce and you could easily avoid a reflected fireball from a Double Jump. This is another versatile Copy Ability and it boosts Kirby's own original powers and abilities, so knowing how to use this well is crucial and can turn a battle against the famed plumber to your favor. Mario will regret he has the power to throw fire. Remember, outspam, outstun, and outstand. Happy Burning!
------------------------------------------------------------
So I randomly picked a power from my head, and now we're fighting old school style! It's time for G&W Kirby's debut!
Mr. Game & Watch
If the foods get too hot
I'll need a fan!
Stay away from dinner or
you'll get hit with the pan!
B - Chef
Ok, now Chef may not be the greatest Copy Ability, but it does have it's uses. Mostly, a G&W will use it for ledge guarding. It seems to work rather well on large characters with average recovery, like Donkey Kong. In fact, it even works rather well against opponents with good recoveries, such as King Dedede and Meta-Knight, so it works as an excellent wall period. The sausages themselves do minimal damage, but you can tap B repeatedly to increase the rate at which they are thrown. This ability also has quite a bit of ending lag, so use with discretion. The actual frying pan itself can do quite a bit more damage, and it actually does have knockback. It can push your foes into your other volleys for extra damage. However, if they are close enough to use the pan, you are playing riskily. If you don't hit, the ending lag can get you punished. On another note, the pan also has fish and chicken legs.
Sometimes, two of the foods striking the foe can guarantee you a quick U-Smash. Another option would be to trip them with a D-Tilt, and then punish with the pan. Chef is also good for clearing the ledge when coming back to the stage. When you think about it, it's much safer than Final Cutter, and possibly a match for aerial Hammer, due to it's longer range. But obviously, you still have to watch out for ending lag, unless you're using Chef all the way to the stage or ledge. It can interrupt recoveries, allowing for a spike with Final Cutter or D-Air, its hitstun can work well towards dash attacks or dash grabs, and if the opponent is silly enough to roll from spamming (the food's damage isn't that great, so stale move negation isn't much of a concern), then you can quickly punish said roll. The food leaves the opponents wide open for some crazy combos, so use that to your advantage. It can be used in midair to change direction and grab the ledge. It can also be used to interrupt the charging stage (the point where you hear the click, that is) of a smash attack. You can use it against an F-Smash camping Meta-Knight, predictable approaches, and more.
Against Mr. Game and Watch
If you must use it against Mr. Game and Watch, use it when it's unexpected. It does still work well for setting up combos. Like Lucario, you must look out for the D-Air after swallowing. Taking Game and Watch's power is rather unexpected, as it is believed to be useless, so copying G&W is excellent for mindgames. The frying pan itself is still a rather powerful weapon, and due to Game and Watch's light weight, you can take him down with it. Punish his Bucket Breaking recovery's ending lag with volleys of sausages. But be careful, since he can absorb it. But if he cannot reach you, he cannot harm you. Most everything mentioned previously can be done against him, but attack with caution, and from a safe, non oily distance, beat him over the head. Frying pans are always great weapons in movies, and now, sort of in Brawl as well! Happy Cooking!
------------------------------------------------------------
It's one of the most obvious candidates for Best Copy Ability! Everyone wanted me to do it, so here's to you all!
Pikachu
Bzzzzt! One jolt, two jolt
Yellow jolt, blue jolt!
It's shocking what I can do!
B - Thunder Jolt
Now this Copy Ability can change the Pikachu matchup in Kirby's favor. It's actually REALLY good. The way it works is that Kirby shoots a bolt of electricity that crosses surfaces like a slinky. The Pikachu boards have quite a few uses for this technique, some weird, some just plain cool! I'll paste all of them. Now, Thunderjolt is an easily spammable move. It can do 9% if you make the ball hit in midair, or just are close enough to make the electricity never touch the ground. Otherwise, this move will do 6%. It's really fast, can force approaches, rack up damage and restore other moves. Also, with Kirby's multiple jumps, you can safely spam it from midair. You can perform a rising Thunderjolt by doing a full hop, then at the peak of the jump, jump again and press B. You lose no height in the performing of this technique, and it is very useful. You can keep doing this until your jumps run out then land, rinse, and repeat. You can also DI horizontally during this. Thunderjolt is excellent for spacing, approaches, stage control, getting safely back to the ledge, attacking those trying to recover, messing up someone's flow, pressuring, and much much more. It activates a bit earlier than 19 frames, I believe. It can flow into a Final Cutter, F-Smash, or possibly a D-Smash. This move is truly a beauty for chaining. As with Mario's fireball, staling it is not a concern, and allowing all of Kirby's moves to be fresh is just an added bonus. It goes a pretty far distance across the stage too. Excellent for cruel mindgames, forcing the opponent into doing something that they would regret. It can travel around a small platform multiple times, giving you that space as your own domain to spam more jolts.
Techniques Pikachu AND Kirby Can Perform Include:
(Replaced Pikachu with Kirby. Credit to the Pikachu boards' "Silverspark")
1) Pivoted Thunderjolt
Version A
a) Flick the control stick left or right (Kirby should dash then stop) then do a reverse Thunderjolt
Version B
a) Dash in one direction for awhile, then do a reverse thunderjolt on the ground. Kirby should immediately face the other way and do a Thunderjolt. (This may require practice)
2) Ledge Jolting
-I'm going to call the trajectory that the jolt makes as it goes from the top of the ledge to the bottom the Circle.
a) 1st type: Extended Circle - this one has the most range and looks like a full circle when it goes over the ledge
b) 2nd type: Regular Circle - this one has medium range and doesn't go over the ledge as far as the extended Circle.
c) 3rd type: Tighter Circle - this one has the shortest range. The Circle can be seen moreso on the stage than over the ledge. The Thunder Jolt should look more like a line than a Circle as it crosses the ledge.
d) 4th type: Thunder Ball - if you stand at the edge and fire a Thunder Jolt, a ball of lightning will come out that will have a diagonally-downward trajectory
3) Double Circle Jolt
a) To do this, you're going to need good positioning. I tested this on Battlefield, and, well, I'll describe to you where I did it:
b) I did it on the ground, facing the left. It was 1 baby step to the left of the bluish-purplish glowing circle (right outside of it). If you were Pikachu, his tail should be hanging in between the house-looking rock structure in background.
c) Spam a few jolts until you get it right. If done correctly, the Thunder Jolt will actually circle the ledge twice in nearly same spot before going down to the bottom of the stage.
d) It can be done on FD if you spam jolt in between the 2 arrows while facing the ledge.
4) Hanging Jolt
a) Pick a stage with a platform that moves sideways (for this example, pick Smashville)
b) Jump on top of the platform, and move slightly away from the edge (enough to where if you do a thunderjolt, it won't fly off of the platform in the form of a ball. The thunderjolt should land on the moving platform and end as soon as it touches the bottom.
c) As the platform moves in one direction (for example, to the right), face the left, and spam thunderjolt. If done correctly, instead of going touching and along the platform, the thunderjolt will make a circle in mid-air.
d) It's most effective when the platform has gained the most momentum (near the middle of the stage)
5) Ball Lightning
http://www.youtube.com/watch?v=1XjPO5GDrJI
This Copy Ability is simply beautiful.
Against Pikachu
Pikachu can force us to approach with his Thunderjolts, then Quick Attack Cancel as soon as we get in range to punish us for getting in range. However, upon receiving this power, the matchup changes. No longer will we have to approach. There are two reasons for this. One, we can safely spam them in mid-air. Two, our jolts are actually faster than Pikachu's. And his unique tricks with Thunder Jolt? Unique no more. A Pikachu's better matchups generally allow him to pressure the opponent into approaching or screwing up. It's an excellent move. But with this, we force the Pikachu to approach us. No doubt a Pikachu will attempt to stay out of Swallow range. Pikachu's aren't comfortable with approaching due to the very nature of their approaching options. But now we can punish them for approaching with a wide variety of moves. Many Pikachu's will expect their power to be taken, because it's so great. Watch yourself. And remember, for any of Kirby's Copy Abilities, just because you have the power doesn't mean you should use it unwisely. Go for a shocking comeback, and thread 3000 volts down Pikachu's spine. Don't dish it out if you can't take it. Bzzzt, Crackle, Pop, Your Enemies! (Last sentence to be read in the tone of "Snap, Crackle, Pop, Rice Krispies!")
------------------------------------------------------------
Sorry for the hiatus, gang. Without further ado, the most Tactical Copy Ability, Snake Kirby, Spotlight!
Snake
BOOM! I'm a master with these Grenades!
My tactical planning is top notch!
I can really throw,
you already know,
So you might as well sit back and watch!
B - Grenade Pull
BB (tap) - Grenade Toss
BB (hold) - Angled Grenade Toss
B + Shield - Grenade Drop
Okay, so needless to say, I like this Copy Ability. In Brawl being a defensive game, a tactical Copy Ability isn't too much to ask, now is it? Especially since we were pretty much ripped off on MKs Tornado. The first thing I want to note, is that a grenade lasts for roughly 3 seconds after being pulled. Only three. What you want to do is to plan out the timing and how you wish to use the Grenade before you throw it. This is called Grenade Cooking. It is used to prevent opponents from catching your Grenade and using it against you. Actually when you think about it, 3+ seconds is plenty of time to think. However, also factor in the time that you will need for the Grenade to reach your opponent and the distance you wish to throw it at. Everything should be thought of. In fact, for this reason, it is better to not even pull the Grenade until you have had time to think. There are many ways to cook a Grenade. You can airdodge and re-catch the Grenade with an aerial, toss it towards the opponent, jump, hit them with an aerial while recatching it, etc. Figure out your own style. In fact, crucial in Grenade Cooking and other Grenade techniques is Grenade Dropping. As you may have noticed, when you pull out a Grenade, Kirby stands in an awkward position, and walks differently. Grenade Drop helps this, because afterwards you can pick it up and allow for all sorts of free movement. Now, remember how I said that Grenades are tactical? Grenade Stripping is a prime example of this. It's odd, but bear with me. Toss a grenade at your opponent. Then simply pull another grenade and Grenade Drop. The first grenade will stop in its tracks and fall flat. You can imagine the crazy things you can do with this. You can position a grenade perfectly and use the other grenade as a follow-up. For example, Grenade Strip, pick up second Grenade, jump at the enemy, airdodge, re-catch, toss upwards, Drop another Grenade, U-Throw, and slam them into the second (aerial) Grenade and spike them into the third (ground).
You may be wondering, well what's keeping the enemy from attacking during this sequence? Simple, Grenade Countering. While you're holding a grenade, if the enemy hits you, the Grenade explodes. However, if you shield, you get hurt... along with the enemy! However, if you shield, the enemy is the only one that takes damage. So while my sequence may or may not be realistic, that's the gist of it. Better yet, since Grenades are so flashy, you can toss them all around, Grenade Strip, etc. to keep your enemies from seeing obvious setups. For example, if you toss them around so that the opponent doesn't know where either will land and what's the timing on which, you could sneakily approach them and start off the Gonzo Combo, possibly ending with a grenade!. You can also do this juggling to trick the opponent into raising their shield, or lowering it. You could even maneuver in to drop a grenade right at their feet, shield the explosion and chase. Grenades are absolutely wonderful setups and should be used as such. All you have to do to use them... is think.
Against Snake
Generally, you really want to use Grenades on Snake the same way you would use them on anyone else. Mind you, however, many Snakes are tactical thinkers. They know what time the Grenades explode, and they know how to use a Grenade and all of its tricks. That's why you want to approach this in a more tactical manner. You must think of ways to use the Grenade yourself, your own style. Whether you want to juggle for mixups (I made that up) or Grenade Strip for trickery is all up to you. You can think up moves mid-battle. Remember that Snakes can secretly plant mines and C4, so watch your step; they have more tactical capabilities than you could possibly have. Stone is a powerful move, and Grenades can help to setup for one. One Grenade behind the Snake, one in your hands, dance around, F-Air, Grenade Drop, and slam. One thing I should also mention: the grenades themselves do minor damage upon impact. Remember that and you can time so many mixups. Watch the field carefully and use your grenades to detonate any hidden explosives that the Snake has planted. Use the Grenades to edgeguard as well, before he uses his Up B. Observe. Outplan. Outstand.
-RK Joker
-ZajiceWhenever I play as Snake Kirby, I start playing a lot like I do when I'm Snake. I have a nade out at every opportunity. Kirby has great control of the nades with his aerial mobility, so he can jump and move in just the right spot to throw it. Don't forget he can do every trick we can do too. Shield dropped grenades, grenade stripping, grenade grabbing, everything really, with the added bonus of being able to use them in the air and off stage far better than we can. I've actually floated off-stage as Kirby and thrown nades until Snake gets blown away by one. Snake can throw one while trying to get back to the stage. Kirby can throw a bunch.
Kirby also has some fancy tricks he can do with nades that we can't. He can do a down B, with a nade in his hand and it'll explode without doing anything to Kirby. So if it's timed right, Snake gets hit with a down-b that explodes in his face. Also, if Snake grabs kirby out of this, he'll still get hit with an explosion, so port priority can be important for that. As long as Snake is 4th, he wont get hit away, but Kirby will.
I doubt you'll ever see this, but they can hit you with an up-b, and then a nade in their hand can explode at the end. And here's one I did by accident once when I was Snake Kirby. I had a nade in my hand, did an up-b and spiked with it. I was going to end up self-destructing with it cause I moved to far off the stage, but the nade exploded me out of it while Snake got spiked. This seems highly situational, but I'm throwing it out there.
He can throw us into nades with his throws too. Up-throw, if timed right, can slam Snake right into a nade. In fact, he can do this with any throw, depending on the placement of the grenade. B-throw when it's behind him, D-throw when it's right under him, and F-throw when it's in front. The downside for Kirby, is that he gets hit by the nade too, and he's far easier to kill than Snake is. The upside, is that it can put you in a perfect position for him. I once slammed him into a nade with up-throw, it exploded us both in the same direction, and I was in the perfect position to hit Snake with a b-air. Even if that doesn't happen, it still puts Snake in the air, where we don't want to be.
4TH PORT IS VERY IMPORTANT FOR THE THROWS
Fight for the 4th slot. If Kirby has 4th and the nade explodes before the throw is finished, Kirby won't get any knockback, and Snake will still be flung into the air. If Snake has 4th, it's the other way around, and at lower percents, puts Kirby in the perfect spot to get hit. Usually with an up-tilt or n-air. Kirby is put right in front of Snake no matter which way Kirby throws from what I've noticed. However at higher percents, Kirby will be blown too far away to reach. Kirby can still throw Snake into nades, but it's less effective without a lower port. He pretty much HAS to time it so both of you are knocked back by the nade, since if it explodes too early, it won't help Kirby much. If it's timed so both of you are hit, it puts Snake in the air with Kirby (where Snake doesn't want to be) but otherwise Kirby just throws himself in the air and leaves Snake safely on the ground.
Snake should be fighting for 4th anyway, but this gives Kirby all the more reason to not let him have it.
It's probably worth mentioning that Kirby can jump-cancel throw grenades too. You know, that thing like a glide toss, only it's done by canceling a jump by throwing something instead of canceling a roll by throwing something. Kirby goes a decent distance and it's WAAAY better than his glide toss, which barely goes anywhere.
-FromundamanWhen you grenade drop then grab it again, if you pull out another grenade, you drop the one you picked up. This can be used to just drop grenades on your opponent and/or trick your opponent into thinking you are no longer carrying a grenade.
That being said, it you don't have the timing right, you might just blow yourself up with two grenades.
------------------------------------------------------------
So, Dedede is next because he's so easy.
King Dedede
Whooooosh!
I can Inhale from a larger distance now!
It has a few tricks that helps me out!
B - Inhale
Inhale is pretty much the same as Kirby's Inhale, except it is slightly stronger, has longer range, but also a bit more ending lag. In team battles, if you are Inhaling and someone is trapped in the vortex, and another person hits you, both you and the enemy fall through the stage! You can use this with a teammate on opponents who won't be able to recover. You should be able to recover because your recovery is rather good. This is also better for Kirbycides due to its superior range. Having Dedede's Inhale is also a good thing simply because you get Super Armor frames as it starts. It is also far harder to escape. However, if Dedede's Inhale times out, the opponent is automatically spit out rather than being allowed to break out. Opponent's Inhal Break farther above you than our normal Swallow.
Against Dedede
Simply use this as you would your own Inhale. Kirby's Inhale has more priority still, so use it when you deem necessary. Use it to stop any too aggressive approaches, or Kirbycide when your percentage is far above that of your opponents. Use the Super Armor frames to negate possible kills, which is always nice, being that Kirby is a lightweight and Dedede is a heavyweight. On the subject of Kirbyciding, this is excellent, being that it is far harder to escape than Kirby's Inhale. Use this against Dedede's rather large shield to avoid shield grabs, or just spit Dedede over the edge and begin to edgeguard. Note: If Dedede swallows you, DO NOT ATTEMPT TO BREAK OUT. Otherwise, a U-Tilt can follow to kill you. Wait for an auto-star shot. Whilst many people see this as a joke ability of some sort, this is actually really good to take. Take this ability any time you fight against Dedede to further increase your advantage, but don't forget your own Inhale works too, so don't focus overly hard on getting this one.
Closing Notes:
Check out fromundaman's guide in order to help yourself with both Inhales. Found here: http://www.smashboards.com/showthread.php?t=224822
------------------------------------------------------------
So, next is one of my personal favorites, Bowser Kirby.
Bowser
FWOOOOOOSH! This feels like being Fire Kirby!
I can breathe fire over medium distances!
But as I wear out, my flame soon diminishes!
B - Flame Breath
Flame Breath is actually a pretty average move. It has it's obcvious drawbacks, of course, including both start-up and ending lag, the fact that the flame can't stay out very long. This is slightly better since Melee, as the flames will never completely diminish (although that doesn't actually matter much), and can flow off of surfaces and sometime even split into separate streams. The flames are excellent for edgeguarding. It won't actually kill in any form or fashion (okay, minus below average gimping), but it's niche is racking up damage, and it does that well. However, it is easily SDId out of, which is a problem, especially since the start-up lag is essentially an early warning system to opponents. It has way more shortcomings than it can make up for and is essentially an unbalanced moves. This does find it's uses, however, and can be strung into. For example, the Gonzo String works better on larger characters, so after you do the second U-Air, you can retreat a little and breathe your Flame. It helps that it's direction can be altered, especially since this will probably be used earlier than the second U-Air. Flame Breath is a fine defense against SH-Aerials, to it's list of compliments. It is natural to use after throws at low percents and destroy certain characters' explosives of other projectiles. It stops rushing attacks, can be B-Reversed, and gets pass Marth and Ike's Counter moves okay. be wary, though, as this will not work with Fox Lucario, or the like. Snake's grenades will also bounce off of it (in midair, of course).
Against Bowser
Against Bowser, this move is wonderful. If anything, Bowser should be expecting you to copy his ability, because it will help to annihilate him. Earlier I stated that the Gonzo String worked best on heavy characters. Guess what? Bowser's heavy. Rather than finishing the string with a knock-away move like F-Smash or Hammer, try finishing it with the Flame Breath. Flame Breath works best on heavy characters. Bowser is truly cursed should you get his ability. You will be able to effectively edgeguard him, rack up damage above 50% in mere moments, and do pretty much everything I've mentioned about Flame Breath, minus the explosives. It's an excellent anti-aggressor and disrupter, and especially against Bowser. The first thing you want to do against Bowser is copy his flame. The second? Destroy him.
------------------------------------------------------------
So, it's time for Toon Link Kirby. Early, I know, but...
Toon Link
I can launch arrows just like Toon Link!
Just aim the bow, and watch the arrow go!
These arrows aren't quick, but have plenty of tricks.
B - Hero's Bow
Now, once Kirby gets any projectile, his battle prowess goes significantly up. He often has the ability to use the ability better than the original holder, due to his weight, agility, and multiple jumps with which to exploit the projectile's properties. The Hero's Bow has an insane amount of uses and properties. Kirby's own abilities added on to these projectiles can often enhance AT's, or create new combos. Anyways, Hero's Bow is a useful ability. You can spam it to force an approach, unless against someone with a laser, naturally, you can charge it up, to maximize its range and damage, etc. Now, if you manage to get someone up to 300%+, then two things become apparent. One, you're probably really bad at this game/the opponent is way too good at this game, and Two, they are now at a percent to get killed by a fully charged Hero's Bow. It's probably a good idea to practice your marksmanship with this ability. Do Target Practice a bit, try and hit the targets using only one arrow each, etc. This way you should be able to judge your movement and your target's movement to properly aim and hit with the arrow. You know, like real archery, almost. Of course, it's not all about hitting with the arrow. Some technique is involved in knowing how to aim and miss. You know, mindgames. Anyways, there isn't much to say about this ability that isn't already described below in the excerpt form the Toon Link Boards, so read that and replace Toon Link with Kirby and you'll be fine. They each have a rating next to them, so I suggest you learn the highest rated first. Do note, however, that I left ones with bombs necessary for a reason. If you happen to catch a bomb, make a note of it. But also mentally lower their ratings due to being situational.
Against Toon LinkToon Link Boards said:Quickdraw
How to Perform: Simply Hit B just as you’re about to land.
Effect: Toon will shoot an arrow with no start up lag.
Note: This technique is used a lot, so learn it. It can be used after most of Toon's SH aerials, after a SH Bomb Pull and after a SH Arrow, this is called a....
Stages: All
Usefulness: 10/10
Short Hop Double Arrow (SHDA)
How to Perform: Simply SH, Hit B, quickdraw (all done quickly)
Effect: Toon will shoot two quick arrows in the one SH.
Note: You don't just have to do this in the one spot, you can jump backwards or forwards while doing this and it will be less punishable and better for spacing. This is a great tech and should be learnt by all Toon's.
Stages: All
Usefulness: 8/10
Full Hop Double Arrow (FHDA)
How to Perform: Full Hop through or onto a platform, Hit B, Quickdraw (all done quickly)
Effect: Toon will Full Hop, Shoot an Arrow, land on the platform and quickdraw.
Note: This is very similar to the SHDA and yet it can be more useful in some situations. Now picture Battle Field for a second, you can do the FHDA by standing underneath one of the side platforms or you can do it by jumping from one of the side platforms onto the middle platform. On some stages the FHDA can only be done the second way. What I really like about this move is that it's just as fast as the SHDA because you don't have to fall back down and it shoots the two arrows almost in the same spot, one after the other.
Stages: All except Final Destination, Bridge of Eldin, Mario Bros and Shadow Moses Island.
Usefulness: 6/10
Credit: TLMSheikant
Short Hop Double Arrow Drop (SHDAD)
How to Perform: Pull out a Bomb, SH, Z-drop the Bomb, Hit B, Quickdraw (all done quickly)
Effect: Toon will pull out a Bomb, SH and drop a Bomb below him on his way up, Shoot an Arrow then Quickdraw all in the same SH.
Note: This is basically a SHDA with an added explosion at the start. (The explosion will not harm you). If your opponent gets hit by the blast of the Bomb, it will combo into the first arrow (This should work on most characters anywhere in between 0% to 200%) and then you Quickdraw which can also combo. The SHDAD could also be useful if your opponent predicts a SHDA and runs under the first arrow to punnish you, only to get hit by the Bomb then the arrow and then the quickdraw.
Stages: All
Usefulness: 7/10
Credit: DemonicToonLink
SHFF Quickdraw
How to Perform: SH, Flick the joystick down at the peak of your Jump, make sure the joystick is back to neutral, Quickdraw.
Effect: Toon will SH, Fast Fall then quickdraw.
Note: You need to make sure that the Joystick has been returned to neutral before you Hit B, otherwise you will Bomb Pull instead. The SHFF Quickdraw can also be Reversed. To do this simply Hit Backwards instantly after you quickdraw. The FF Quickdraw can also be done after doing a SH Bair or a SH Bomb Throw. One variation of this is called the RQS which you will learn about a little further down.
Stages: All
Usefulness: 5/10
Credit Pho
B-reversal
How to Perform: Jump Backwards or Forwards, Hit B then instantly Hit Backwards.
Effect (Jumping Forwards): Toon will Jump Forwards, Reverse his momentum and face the other way and shoot an arrow.
Effect (Jumping Backwards): Toon will Jump Backwards, Reverse his momentum and face the other way and shoot an arrow.
Note: This usually isn't very good for spacing. There are however some circumstances where this is very useful.
Stages: All
Usefulness: 5/10
SMS Arrows
How to Perform: Jump Backwards or Forwards, Slightly tilt Backwards B, instantly Hit Forwards.
Effect (Jumping Forwards): Toon will Jump Forwards, Reverse his momentum and stay facing the original direction and shoot an arrow.
Effect (Jumping Backwards): Toon will Jump Backwards, Reverse his momentum and stay facing the original direction and shoot an arrow.
Note: There is a slight difference between a SMS arrow and a tilted SMS. You would need to try them both to distinguish between the two.
Stages: All
Usefulness: 7/10
Credit: Fox Is Openly Deceptive
Running B-reversal
How to Perform: Run in one direction, Quickly start putting the Joystick to Neutral and Hit B then Instantly Hit Backwards.
Effect: Toon will Run in one direction, Reverse his momentum, turn around and Shoot an Arrow back in the direction he came from.
Note: For more information check out the Side B Reversal earlier on in this thread. But pretty much the timing is harder then the B-reversal, you won't slide as far as the B-reversal in the air, you can't perform this Backwards and it works better on the Summit and Pokemon Stadium 2.
Stages: All but it works better on Summit and the winter part of Pokemon Stadium 2.
Usefulness: 2/10
Running SMS Arrows
For more information about why you have to tilt run and general information, check out the Running SMS in the Boomerang section.
How to Perform: Tilt Run in one direction, Tilt Backwards B then instantly Hit Forwards.
Effect: Toon will 'Jog' in one direction, Reverse his momentum and Shoot an Arrow in the same direction he was 'Jogging'.
Note: As stated before all relevant information can be found in the Running SMS. But to sum it up, the timing is harder then the SMS Arrow, you won't slide as far as the SMS Arrow in the air, you can't perform this Backwards and it works better on the Summit and Pokemon Stadium 2.
Stages: All (same as the Running B-reversal).
Usefulness: 2/10
Credit: Fox Is Openly Deceptive
Retreating SHDA
This is not a SMS SHDA. This is a RAR, SH, B-reversal, quickdraw. There is a difference.
How to Perform: Run in one direction (towards your opponent), pivot then instantly SH (RAR), hit B then instantly hit Backwards, Quickdraw.
Effect: Toon will run in one direction, jump backwards in the original direction, Reverse his momentum and the way he is facing and shoot, then quickdraw. Once done quickly it looks like Toon runs in one direction then instantly jumps backwards (retreats) and shoots two arrows in the one SH.
Note: This is a great spacing tool and is for most characters, unpunishable.
Stages: All
Usefulness: 8/10
Reverse Quickdraw
How to Perform: Jump, Hit B just before you land and Instantly Hit Backwards
Effect: Toon will Jump then perform a quickdraw the opposite way he was facing originally.
Note: This can be done in any situation that you could normally quickdraw; it all depends on where your opponent is. For example you might want to do this move after hitting an opponent with Bair or the second hit of Nair. This could also come in handy when your running away from your opponent and you do a SH Bomb Pull then you can Reverse Quickdraw to shoot an arrow back at them.
Stages: All
Usefulness: 9/10
RQS (Reverse Quick Shot)
How to Perform: SH, Bair, Fast fall then Reverse Quickdraw
Effect: Toon will SH Bair then fast fall and quickdraw an arrow Backwards in the direction of the Bair
Note: The timing is strict. You need to do this quite quickly to make sure you don't Pull out a Bomb when you try to Fast Fall then Quickdraw. Not to mention that when you do fast fall quick draw, you still need to reverse it. But once you've got the hang of it, it's a solid move.
Stages: All
Usefulness: 9/10
Credit: Jash
Battle Christ's Arrow Trick (BCAT)
The difference between the BCAT and the Reverse Quickdraw is minimal (other then of course the first arrow in the BCAT). You really need to test it for yourself to understand the difference in timing.
How to Perform: Do a SHDA except when you Quickdraw instantly hit Backwards.
Effect: Toon will SH, Shoot an arrow then quickdraw, except Toon will turn around when he Quickdraws and the arrow will still go in the original direction.
Note: Very difficult to pull off. This is good because it means you can do a BCAT then go right into a chain of SH Bair's. You can also do the BCAT after a Fair or a Nair, simply replace the first arrow with a Fair or a Nair and the rest is the same. This is one of the weirder moves that Toon can do. Not only can he defy gravity and make the Boomerang not return but with this move he can shoot an arrow Backwards. This makes no sense scientifically speaking.....
Stages: All
Usefulness: 8/10
Credit: Battle Christ
What can Toon Link really do against you here? If Kirby vs Toon Link is 50:50, then it follows the same pattern as Kirby vs Pikachu: you now have an advantage... a slight advantage, but an advantage nonetheless. Toon Link still doesn't have to approach... if you shoot from the ground. You can easily use you aerial prowess and your newfound aiming skills to shoot from above. On top of that, if Toon Link just stands there, he will be pushed back and he will have to move up a bit. You remember what I said earlier about aiming to miss? You really should do that to mix it up. If you trick the Toon Link into moving early or anything, then you can easily hit him. Also, Toon Link can't much camp against you, being as you still have long range projectiles, you can fly, and you can stop any of his projectiles with an arrow, minus bombs, but... regardless. You merely have to use aim, skill, and quick thinking. Don't forget that Toon Link has the mastery of multiple projectiles. He may attempt to do some mixups - no he will. It is imperative to closely watch his moves and be careful - he hasn't lost any range. Run into battle bow in hand... and fire.


 . Diddy's bananas are > kirby