PART THE FIRST: THE ROYAL GUIDE/FAQ OF KING DEDEDE
by CO18
Most recent update: General info on all attacks, Down throw to Dtilt char info posted by hype, some info on tech chasing out of a down throw. Updated character matchups a bit.
A guidebook for Dedede.
Of course nothing is certain with the time weve had to play the game so
I will continuosly update this guide with all the information about Dedede we get.
Link to Zenjamin's Dedede video thread. (Almost every DDD video up there.)
http://smashboards.com/showthread.php?t=141432
Table Of Contents
1. Introduction
2. Why Dedede?
3. List of Pros/Cons
4. Advanced Techniques
5 Attack Analysis
6. Strategies
I. Recovery
II. Recovering Diminished Attacks
III. Edgeguarding
IIII. Combos
7. Character Matchups
8. Miscellanious
Introduction
King Dedede is the main antagonist in the Kirby series.
He is not evil but rather misguided and Greedy.
He is the final boss in most of the kirby games and is an awesome looking character.
What? Wheres the rest of the Introduction?
There is no need for me to write anymore.
The Best possible description of King Dedede has already been created by Tank McCanon in this thread right here.
http://smashboards.com/showthread.php?t=139061
Enjoy: I know you will.
") Why Should I Choose Dedede?
Why Should I Choose Dedede?
King Dedede is an excellent and very fun character to use.
King Dedede is the only heavyweight character with amazing recovery. This in combination with his weight makes him extremely hard to KO. He has a very useful projectile, incredible grabs, and extremely strong attacks. He has great combo ability for a Heavyweight and quick attacks which makes him a very tough opponent. He also has a devastating chaingrab on more than half the cast.
However, Dedede is a slow moving character and a big target, some of his best KO moves are somewhat laggy as well. Overall though King Dedede is a great and fun character to use and I advise anyone to join in and control his awesomeness.
List of King Dedede's Pros/Cons
Pros
- Heavyweight character
- Excellent Recovery
- Great Projectile
- Incredibly Strong
- High Priority Moves
- Great Aerials
- Insane grabbing game
- Great Range
Chaingrab on more than half the characters
Cons
- Slow Moving
- Big Target
- Smashes are a bit slow
Anyway, Dedede's pros far outweigh his cons and the few cons he does have are not really a problem.
Attack Analysis.
*Approximate percentages are in red. All were done against Mario from the center of Final Destination.
Neutral A Ground Attacks:
1. Jabs
Description : DDD swings his Hammer
Avg Damage : 6%
range: short
knockback: little
Dedede's jabs are pretty good.
Not many normal uses besides racking up damamge when the opponent isnt expecting it.
However, "Jab Faking" adds a lot more uses to this attack.
Basically at the end of the first or second jab you cancel it and do any of your normal moves.
After the third jab holding A results in DDD extending his spiral in which the opponent racks up some quick damage.
Rating: 3/5
5. Dash Attack
Description: King Dedede runs and and slams onto the opponent
Avg Damage: 13-16%
KO : 100%
Range: long
Knockback : Good
This dash attack is Dedede's faceplant from the old kirby games. Its a decent move as it is fast, has long range, and does decent damage. It is good for tech chasing your opponet.
Mix this move up after a down throw sometimes if your opponent is at a high percentage to get a kill.
If I'm chaingrabbing an opponent sometimes I intentionally stop once, to see what they try to do after your down throw.
If you notice they try to spot dodge to escape in case you mess up, then wait until they get to a high enough percentage then use a dash attack out of a down throw to punish them for it.
: 3.5/5
Tilts
6. Forward Tilt:
Description: Dedede extends his rotating hammer into the opponent.
Avg Damage: 12%
KO: 280%
Range :Long
Knockback: Little
This is a very good move.
This move is excellent for long range poking and does a good amount of damage.
It is good as a defense maneuver and helps stop incredibly fast and aggressive players.
Use this move after using Dedede's downgrab if the opponent cant be chaingrabbed because of its range and speed for some quick extra damage.
Ftilt also cancels most projectiles in the game.
Rating: 4/5
7. Down Tilt
Description: Dedede lays down in his crouching position and kicks the opponent.
Avg Damage: 10%
KO: 135%
Range: Good
Knockback: Good
Dedede's Down tilt is a good move. It has good range and is very fast. This move stops incredibly quick opponents in their tracks. This move also initiates tripping quite often. If you expect your opponent to roll away after tripping, running and grabbing them or doing a dash attack are good options. This move is also pretty useful for edgeguarding. Just stand over the edge and dtilt once the opponent gets close to the edge.
It's the quickest option for Dedede. If you're attempting to Fsmash and your opponent is just waiting until your smash is finished to try to take advantage of your ending lag and rush in, quickly use down tilt, majority of the time it will come out before your opponent gets to you which is basically a safeguard for missed fsmash's sometimes.
Dedede can also Down throw--->Dtilt many characters at the ledge which is another good option after a chaingrab.
Rating: 4/5
8. Up Tilt
Description: Dedede uses his head and hits the opponent upwards.
Avg Damage: 12%
KO: 105%
Range: Average
Knockback: Good
This move is very good. It is fast and has Good knockback. It is very good for juggling and can easily set dedede up for the use of his aerials.
Definitley a good move for racking up some damage when the opponent is at low percents and setting up combos. It's a great KO move and is great after spotdodging because of its low startup lag. Nair to Up tilt combos work very well especially against bigger characters.
Simply put up tilt pwns, it kills lighter characters in the 80-90 range and heavies in the 100-110 range, its so fast and has a large hitbox, only snake's up tilt is better(that **** snake).
Rating: 5/5
Aerials:
9. Forward Aerial:
Description: Dedede swings his hammer at the opponent in mid air.
Avg Damage: 15-20%
KO: 130%
Range: Good
Knockback: Good
Dedede's forward Aerial is a good move. It has decent speed and is moderatley strong. The move has a large hitbox extending both horizontally and vertically. You can wall of pain with fair when your opponent is at low percents which is ****. Move is great for edgeguarding because of its hitbox and its good strength.
Rating: 4/5
10. Up Aerial:
Description: Dedede sticks his rotating hammer upward into the air.
Avg Damage: 15 – 25%
Range: Good
Knockback: Good
Dedede's Up aerial is a rather good move. It has excellent range and good knockback.
It is a multiple hit attack and when the final hit(rotation of the hammer) hits the opponent that is when the knockback occurs. This move is pretty fast and racks up a good amount of damage, especially if you hit the opponent with all rotations. Move has some ending lag so if you miss, you can be punished for it.
Rating: 3.5/5
11. Down Aerial:
Description: Dedede sticks his rotated hammer down in mid air.
Avg Damage: 12-17%
KO: 160%
Range: Average
Knockback: Below Average
This is a good aerial. It does a good amount of a damage.
It has good range and priority as well.
Doesnt have much starting lag but has a good amount of ending lag.
Doesn't really matter that much because Dedede's jump cancels the lag after the dair.
If the opponent is near the edge trying to edgeguard you while youre holding on to the ledge, jump off and dair. You get high enough in the air to execute this move without having to hit the ground before its done so you cant really be punished for it. Full Hopped dairs are a great option out of the shield as well , it's hard to punish and will **** their shield.
Rating: 4/5
12. Backward Aerial:
Description: Dedede kicks backward into the opponent.
Avg Damage: 13%
KO: 130%
Range: Above Average
Knockback: Average
Definitley Dedede's best aerial(Best in the game?). This move does a good amount of damage, has solid knockback, good range, high priority, and almost no lag. Keeps your opponent grounded because it's just too amazing for any other aerial.
Great for edgeguarding and wall of pains, reverse bairs are a pretty good approach. Short hopped Bairs also work very well.
Rating: 5/5
13. Neutral Aerial:
Description: King Dedede extends his arms and legs(looks similar to an air dodge)
Avg Damage: 12%
KO: 170%
Range: Average
Knocknack: Below Average
This move is ok.... It is good for fastfalling on someone and following with a grab U-tilt or U-smash It is quick but it has only average range and little knockback.
The move is good for oppurtune moments where the opponent is in certain positions because of its speed. Other than setting up a couple of moves, it doesnt have that many uses.
Rating: 2.5/5
Smashes:
14. Forward Smash:
Description: Dedede swings his hammer over his head directly on the opponent.
Avg Damage: 24%(uncharged) 33%(Fully charged)
KO: 42% (Uncharged)
KO: 17% (Charged)
Range: Good
Knockback: Amazing
King Dedede's Forward Smash is Uber Strong.
As well as being incredibly strong it has Good range.
However, in order to get all that damage and power, this move must be sweetspotted, hitting with the sides of the hammer makes it much weaker.
In addition, this move is probably the slowest in the game.
Startup lag is insane, ending lag isnt that terrible. This move can still miss the opponent completely and as long as they are within one body length away and still do 5% damage with good knockback. Basically, randomly using this move when youre expecting your opponent to come attack is mainly where youll get your hits. You can use this move for edgeguarding as well because with good timing you can hit a recovering opponent for an almost instant KO. You can also get some fsmashes in predicting where an opponent will roll.
This move is pretty good imo. Even when you use this move, majority of the time you wont be punished if you miss because often times your opponent will just stay away when they see this because they know its a powerhouse.
Downtilt is pretty much a safeguard for this move if you miss because it comes out uber quick.
Rating: 3/5
15. Up Smash:
Description: Dedede swings his hammer upward across his body.
Avg Damage: 14%(uncharged) 21%(fully charged)
KO: 110% (Uncharged)
KO: 75% (Charged)
Range: Good
Knockback: Good
Pretty Useful Smash. It has decent speed, does ok damage, and has good knockback. I definitley prefer up tilt to this but this move is good to because It's hitbox surrounds Dedede's entire body.
Rating: 3/5
16. Down Smash:
Description: Dedede swipes his hammer on the ground in front of then behind him
Avg Damage:14%(uncharged) 21%(charged)
KO: 115% (Uncharged)
KO: 75% (Charged)
Range: Good
Knockback: Good
Fairly good move as well. I use it quite alot.
It has pretty good range and knockback. The knockback of this move is vertical, so it is good for getting the opponent in the air to set up for Dedede's aerials. Its a great KO move and has decent speed. When your opponent is constantly rolling around you, you can rely on this to punish them for it. If youre opponent is on the ledge and their invincibility frames are over, dsmash will stage spike them to oblivion
Rating: 3.5/5
Grabs
17. Standing Grab
Description: Dedede grabs his opponent with one hand.
Avg damage: Dependant on headbutts and Throw
Range: Amazing
Knockback: Depends on throw
Dedede's grab game is simply amazing. His grab range is incredible, he has an extremely good chain grab can tech chase beautifully out of his down grab which I will get more into later in the down grab analysis. And the rest are very powerful
Overall Grab Rating: 5/5
18. A attack in grab(Headbutting)
Description: King dedede headbutts the opponent while having them in his grip
Avg Damage: 3%
Adds a little more damage to the opponent when you grab them.
Nothing has been offically tested yet but about one headbutt per 50% your opponent has is a good estimate for them not breaking out.
However, I dont see people use this enough however when chaingrabbing. When you're chaingrabbing use this to get in the extra damage! Anything helps.
19. Forward Throw:
Description: King Dedede whacks the opponent out of his hand with his hammer
Avg Damage: 13%
Knockback: Good
King Dedede's Forward throw is good.
It does a good deal of damage as a throw and has good knockback as well. Good for getting your opponent off the edge to set up for edgeguarding.
Rating: 4/5
20. Backward Throw:
Description: King Dedede turns around and whacks the opponent out of his hand with his hammer
Avg Damage: 16%
Knockback: Good
Dedede's back throw is very similar to his forward throw. It is slightly more powerful than it making it one of the strongest grabs in the game and also has good knockback. Definitley good for getting people off the edge, so you can edgeguard.
Rating: 4.5/5
21. Up Throw
Description: Dedede grabs the opponent and hits him up with two hands
Avg Damage: 9%
Knockback: Good
Dedede' Up throw is probably his worst throw. Its not bad by any means but its not as useful as the others. It only does 9% damage and throws the opponent really high. You can pull off some aerials after using this but alot of the time they can just DI away.
Rating: 1.5 .5
22. Down Throw
Description: Dedede grabs the opponent and sits on them.
Avg Damage: 8%
Knockback: Below Average
Dedede's Down throw can result in an amazing chain grab.
There are 3 types of chaingrabs.
1. Dashing Grab: Just dash after them and press Z, easiest to execute however some characters can get out of it with certain moves. EX: Marth's up+b.
If you miss a dashing grab, Dedede will tumble and you can be punished for it.
2. Sheild Canceled grab: Dash after the opponent, quickly Press shield immediately followed by A. This type of grab cancels Dedede's dash and as a result Dedede slides a bit into the grab.
This is the best type of Grab and is unescapable unless your opponent can't normally be chaingrabbed.
3. Dashing Shield Grab: Run after your opponent, while still holding forward, hold Shield then press A. As of now it appears some characters can escape this to with certain moves, however for those who can't it's the most effective. The chaingrab is shorter resulting in extra chaingrabs per stage length. You can get in 2 more grabs the entire stage length of FD then you would using a shield canceled grab or dashing grab. If you do this correctly you should see a shield pop up before you grab your opponent.
Messing the timing up will ususally result in a shield canceled grab anyway or you'll just roll.
Dedede's Down throw is also an infinite.
1. You can repeatedly down throw any character that can be normally chaingrabbed against a wall.
2. A few characters can be infinited by Dedede down throwing, staying in place and grabbing quickly again.
Here is a list of chaingrabbable/infinitable characters taken from Mr. C's Infinite guide:
http://www.smashboards.com/showthread.php?t=152392
Infinite only:
Luigi
Both CG and Infinite grab:
Mario
Samus
Bowser
DK
Chain grab only:
Lucas
Pit
Ice Climbers
Diddy Kong
Ganondorf
Ness
Toon Link
Ivysaur
Ike
Captain Falcon
King Dedede
Snake
Marth
Peach
Wario
Sonic
Yoshi
R.O.B
Lucario
Wolf
Link
Charizard
Cannot be Chain grabbed:
Fox
Jiggly Puff
Pikachu
Olimar
Zelda
Mr. Game & Watch
Sheik
Kirby
Squirtle
Meta Knight
Falco
Luigi
ZSS
Dedede can also be infinited at the edge of a stage.
Downthrow---> Dtilt at the edge.
Another option for Dedede out of a down throw. Is A Dtilt after the down throw at the edge of the stage.
It just adds another killing move when your opponent is at higher percents and is unavoidable.
Thx to Hype for the list.
Rating: 5/5
B-Moves:
23. Side B(Waddle dee Toss)
Description: Dedede pulls out one of his minions and launches it at the enemy.
Avg Damage: 5%(Waddle Dee) 7%(Waddle doo) 23%(Gordo)
Knockback: Little(WDEE) Little(WDOO) Excellent(Gordo)
King Dedede's waddle dee toss is a very useful move.
The move comes out very fast making it spammable. The Wdees and Wdoos do
enough damage for what they're worth. Occasionally Gordos come out too, which are farrr stronger and have much better knockback than the "Waddles". The Gordos also come out faster and go farther than the Waddles as well.
After being thrown Wdees and Wdoos walk around the stage. Wdees can jump on people and if they walk off the edge they can hit an opponent trying to recover. Wdoos shoot a spray of electricity at the opponent when they come near. Dedede can pickup the Wdees and Wdoos and throw them back at the opponent(instantly happens).
The wdees and wdoos can be sucked up but there is no use for this because they are automatically swalloed.
Ness's and Lucas's magnet can not absorb this so dont worry but they can absorb Wdoo beam spray. Also you really dont have to worry about reflectors because the waddle dees and doos wont really come back at you.
However Gordos will..
If you Jump and press Side+B at the same, Dedede wil throw a waddle dee while jumping.
This is different than simply just jumping and throwing a waddle dee because doing that basically wastes a jump actuallying throwing the waddle dee, however Jumping and pressing Side+b at the same time results in Dedede throwing a waddle dee while jumping in one fluent motion.
Overall this move is excellent, not only is it a great projectile, but doos and dees on the field cancel alot of other characters projectiles as well as attack themselves. Rating: 4.5/5
24. Down B(Jet Hammer)
Description: Dedede pulls out his mechanized hammer and swings it at the opponent.
Avg Damage: 30%(Fully charged on ground) 16%(uncharged) 28%(fully charged in air)
Knockback: Amazing
The Jet Hammer is a sort of complex move of Dedede's.
Its start up lag is pretty bad, but its ending lag is not.
Its range is pretty good and its knockback is amazing.
When fully charged this move is a killer. However, you lose about 2% damage every second.
This move should be very useful for edgeguarding as well.
Dedede can jump with this move charged and release it in mid air.
Dedede can also can reverse this attack in mid air, meaning you can face one direction, quickly turn your direction in mid air and release the hammer quickly.
Theres a Jet Hammer glitch that may end up being useful but is too hard to consistently.
While Dedede's Jet Hammer is fully charged if you tilt the control stick slowly in a direction Dedede will sort of superslide across the stage.
Here is a video showing it:
http://www.youtube.com/watch?v=FrkWeh87t1I
Overall its not really useful, maybe something will be found out later.
I sort of found a decent use for this. If the opponent is on the ledge trying to recover to the stage, I sometimes charge up my Jet hammer, it usually scares them into jumping up and I just jump with them and they get owned. (try it)
Rating: 1.5/5
25. Up + B(Super Dedede Jump)
Description: Dedede launches into the sky and lands with great force.
Avg Damage: 12%
Knockback: Average
The Super Dedede Jump is a very interesting move. You can change the direction in which Dedede up+b's goes during a little crouching animation.
This move is different than other Up + B's beacause it doesnt grab on to ledges by itself.
Instead you must use the "SDJC" and cancel the move by either pressing down on the control stick. This move will grab onto the ledge and even "auto sweetspot" onto it. This move is also a metor smash and will spike opponents directly down.
Not very useful as an attack but is an awesome recovery.
Rating: 3.5/5
26. Standard B(Inhale)
Description: Dedede sucks the opponent into his belly.
Avg Damage: 10%
Knockback: Average
This is Dedede's inhale move, which is virtually the same as kirby's.
You press B and Dedede sucks the opponent into his belly and in order to do damage you spit them back out. This move has Super Armor as it starts which is very helpful.
This move can be used to stop agressive approaches very well which is its main on the stage use in addition to ****** shield. Use it when in the air and you see your opponent anticipating an aerial and shielding. If you're opponent is just waiting for your bair to shield grab, B reversal inhale to suck them up, spit em out over the ledge and edgeguard.
Another use for this move however, is swallowciding
Basically you suck up the opponent and fall to your death with them in your stomach resulting in a death for both of you. It is pretty dang hard to escape. You should use this if you're at a much higher percentage than your opponent or if youre opponent is on theyre last stock while youre not. They're are a few creative ways to execute this which are told in the strategies section. Swallowciding can basically turn the tide of a match for you many times.
UOTE]
Rating: 4/5
Strategies
This section is for useful strategies involving King Dedede.
Recovery
As you should know by now. King Dedede is a beast when it comes to recovering.
Use King Dedede's multiple jumps to recover as much horizontal and vertical distance as you can.
If that doesn't get the job done then you must use the Super Dedede jump.
After using King Dedede's multiple jumps use his up + b.
King Dedede's Up + B doesnt grab onto the ledge so you must cancel the jump by pressing down on the control stick.
After canceling it, this move will sweetspot the ledge.
Mix up how quickly and when you'll use up+b to recover so you're not too predictable.
For example: If you're up+bing towards the stage, your opponent will most likely try to wait for your super armor to finish and punish you, instead just cancel it and DI towards the stage, after awhile they'll anticipate this, so they'll try to mindgame as if they will try to punish you, then quickly go for the edgehog, predict this and safely land to the stage.
When on the ledge, you have some good options to return safely to the field.
Other than your standard A/roll on the ledge.
Against bigger characters it's very useful to jump and dair which usually works, racks up alot of damage and can combo into another fair sometimes. It's also not very easy to punsih which helps alot.
Against smaller characters it's not as effective unless they jump.
You can also keep your opponents from staying right near the ledge by pressing back and fairing, it will go through the stage and hit your opponent and will keep them from staying near the ledge allowing you to return safely.
Edgeguarding.
Couple of Edgeguarding techniques for Dedede.
More will be added soon.
B-Air's
King Dedede's Bair is very useful for edgeguarding. It has incredible speed and priority and is very versatile. If the opponent is at a high %, majority of the time this move will kill them which just adds to its usefulness.
If not, Wall of pained Bairs off the stage **** hard and leaves opponents helpless while you can easily recover
If the opponent also tries to recover directly under the edge, this serves as a great stage spike. Overall, bairs are definitley your most viable way to edgeguard.
F-Air
Basically the same reason for B-air, but the reason why this is so good because of its large hitbox.
You can wop fairs as well when the opponent is at low percents for the same effect.
Bairs are more useful because of their speed but fairs are very good as well.
Combos
Here are just some general combos without a very indepth report(will come later)
Full hopped Dair-->Dair
Full hopped dair--> fair
Full hopped dair-->bair
Down throw Chaingrab
Bair WOP
Fair WOP
Down throw --> Ftilt
Down throw --> Dtilt(as opponent is being chaingrabbed off the stage)
Fastfall N-air -> U-tilt
Fastfall N-air-> U-tilt-> U-tilt -> U-tilt -> U- air (Must be done with opponent at very low percentage.)
Swallowcide
What you have to do is use Dedede's Neutral B move(Inhale) and with the opponent in your stomach fall off the stage. There are a few ways to use this succesfully..
1. The opponent is off the stage and you jump off the stage to inhale them.
2. The opponent is below the stage and you either jump down or ledgehop and inhale your opponent.
3. The opponent is near the edge after knocking you off, trying to edgeguard you. Falling to the stage you inhale them.
4. The opponent has knocked you off the stage and as you are trying to recover they jump off to edgeguard, you can inhale them then and fall.
5. Youre hanging on to the ledge, your opponent is near the edge edgeuarding you.
You can ledgehop and inhale them.
The majority of the time you should use this technique if you currently have alot more damage then your opponent of if your opponent is at their last stock.
If both you and your opponent are on your last stocks, it will result in a sudden death. If you use this in a Sudden death. You win.
Character-specific match-ups
Green + Advantage
Yellow = Even
Red - Disadvantage
Bowser: 6-4(without small step) 90-10(with)
Bowser is better than people think and I find this matchup to be decent but in favor of Dedede.
Dedede obviously has a big advantage in the fact that Bowser can both be chaingrabbed and infinited so your main focus will be to grab Bowser.
Bowser's UP+B is a pain. It comes out extremely quick and racks up alot of damage.
Use your waddle dees alot in this matchup. Bowser has some pretty good approaches, F-Air, Side+B, Dash attack, Dashing grab, Approaching with fire. Bowser's that mix up their appraoches well can get pretty tough. Main counter to this is easily B-airs as it basically ***** all of these approaches. Make sure to watch out for Fire because its basically a free 15-60% depending on DI and where you are when you get caught in this.
Bowser's Uair is extremely strong so be sure to watch out for this however d-air counters this easily because of its range. Bowser's F-air is quicker than yours so you wont be using
Fair as much as you usually do but your bair is better.
Bowser will mainly edgeguard you with F-airs and Breathing Fire when you're below the stage trying to get to the ledge. He doesnt have much maneuverability off the stage because of his lack of jumping ability and poor recovery so an Air dodge will usually get you to the stage safely.
Bowser sort of has the advantage when you're close to each other on the stage. He can breath fire and get you caught for some damage. His jabs come out very fast as well as his Ftilt he has his side+b and his Up+b comes out very fast and racks up damage as well so youll want to space well with your F-tilts, waddle dees and Bair alot. Of course you still have to get close to grab him though.
Bowsers side+b aka Flying slam is usually used more than his regular grab due to its power and since it will get you in the air. Bowsercide's hurt so watch out for this and can really turn the tide of a match. You want to be aggressive edgeguarding Bowser because of his lack of recovery. The Bowser wont take many chances in the air because of his recovery and this gives you a good advantage. Wop Bairs will pretty much **** any Bowser once you get him off the stage. If the Bowser player is high enough try to force an airdoge, wait then **** him with bairs. If the Bowser player is about even or below the stage he won't try to airdodge since chances are he won't recover since his vertical recovery is very poor.
All in All, Dedede definitley has the advantage here. Use waddle dees to force him to approach, Ftilt/Dtilt his ground approach, Shield grab his fairs and you should be set. Cg him to the end of the stag, IT's smarter to down throw to a Dtilt at the end of the stage because it will be much harder for Bowser to recover since he will be lower than you if throw him.
Captain Falcon: 7-3
Diddy Kong: 45-55
Diddy can Combo Dedede pretty easily out of his dash attack.
N-air becomes your friend in this game whenever he does so.
His dash to up-smash/Up-tilt will juggle you with almost no lag and the only move fast enough to get him first is n-air.
His bananas are a huge pain. You have to be careful maneuvering on the stage as well as the bananas ruin Dedede's chaingrab. Most of Diddy's combos will come after bananas and they **** Dedede Hard.
Use his bananas as much as you can against him as well by catching them and picking them up if theyre close. Use Waddle dees alot in this matchup, having diddy approach you helps a ton. Because his bananas cover the stage so well, Keeping the game in the air benefits you, your main approach will probably be reverse bairs because of bananas. Unless there aren't bananas on the stage, you should definitley fthrow or bthrow and keep diddy in the air.
Edgeguarding Diddy under the stage is easy as pie, Jump down and **** him with bairs.
His up+b has some pretty bad starting lag so its pretty simple.
Over the stage its tougher due to Diddy's Side+b that has too much priority and covers good horizontal distance.
Overall, Diddy is a pretty tough matchup, his bananas are really what puts the match up in his favor. Just try to keep the battle in the air and edgeguard aggresively whenever possible for gimps.
Donkey Kong: 55-45(Without infinite) 100-0(with)
Donkey Kong can be both infinited and chaingrabbed so obviously your main focus will be to grab him here.
Hes big and has no projectile So he'll be the one approaching you.
Dk Has alot of range that beats out Dedede and really strong attacks.
All of His tilts and smashes have great range. His up tilt juggles Dedede at Low percents, his up air and bair are incredibly good too. Without Dedede's infinite it would be a pretty solid match with a slight favor for Dedede because of his cg.
Even though DK's air game is good, Dedede's beats him out. Full hopped dairs are a good option out of a shield, Dedede's bair spam beats out DK's a little bit, His up Air outranges DK's dair and his fair is much quicker than DK's.
DK has the advantage on the ground besides Dedede's grabs but if he can somehow avoid Dedede's ridiculous grab range he has a good shot.
It's hard to Gimp Dk, His up+b is Very quick and goes through alot of moves which is really helpful for DK.
You have to be very careful edgeguarding him because of His ridiculous spikes, Side+B, Fair, Dair.. and great up+b.
The best option is to Dtilt him after a cg so he's not as high up making it harder for him to use his spikes since theyre pretty laggy and it will be unlikely for him to recover. Watch out for his cargo stage spike too if you're near the edge at high percents he will try to grab you to attempt this.
Overall' your main focus is to grab DK and beat him in the air. Force him to appraoch you with waddle dees, Ftilt his ground approach, if he gets in close try to grab him, his only real aerial approach is his bair so try to shield grab that and you should be good.
Falco: 35-65
Fox: 55- 45
Fox is a neutral matchup imo. Waddle Dees stop laser spam so be sure to use them often and keep them on the stage. Because of that Fox will be forced to approach you. You outrange him easily with your Ftilt so he'll mainly approach you with short hopped dair, you can shield grab this in right position so do so. If fox gets you however he can combo alot of things out of his dair, up tilt juggling will rack up alot of percent on you, he can also use any of his smashes out of it, all which are good. Make sure to watch out for his upsmash when you get up into the 100% range because it so **** strong. Overall, Pressure with dees and try to shield grab his approaches is the most effective way to beat fox. Watch out for his smashes and try not to get hit out of his dair, if you do prepare to rack up quite a bit of damage.
.
Game & Watch: 50-50
Ganondorf: 65-35
Ice Climbers: 4-6
Ike: 7-3
Ike: 7:3
This matchup is one of Dedede's easiest matchups. Dedede has a projectile where as Ike doesn't, forcing him to approach where most of his attacks can easily be shield grabbed leading to a chaingrab. Once the Dedede player starts the cg and gets him off the stage, that stock should basically be over for the Ike
Ike Advantages in the Matchup:
Jabs annoy Dedede since it comes out quicker than any of Dedede's moves.
Dedede's a big targer for his strong moves.
(Dont see what else ike has in this matchup at all)
Dedede's Advantages
-Dedede is heavier than Ike
-Dedede can chaingrab Ike
-Can camp Ike easily since Ike has no projectile
-Can Shield grab most of his attacks easily leading to an easy cg.
-Better Aerials
-Outranges Ike overall
-***** Ike off the stage
Strategy- Camp Ike and Throw waddle Dees to force him to approach. He can really only approach with fairs, reversed bairs and his dash attack since Waddle dees stop quick draw. Shield grab all of his attacks and chaingrab him. His jabs are quicker than any of your attacks so if he gets in close just try to shield. You can shield grab him after the 2nd jab, so wait for the 2nd jab if you're shielding him to grab him otherwise his jab will strike you before your grab. Watch out for jab fakes, After some time the Ike will just jab fake after the 1st jab and try to grab you out of your shield, be aware of this. Other than this, you're pretty much set, just watch out for his kill moves, chaingrab him to the end of the stage, throw him off and gimp. Airdodging will cause the Ike to fall to far down and die, so he won't airdoge. Basically 1 bair will ruin his recovery so gimping is easy as pie.
Recovering: Recovering is easy against ike since he won't be too risky because of his own poor recovery. Just watch out for the occasional fair and his dair spike which are really his only 2 options trying to edgeguard you off the stage.
Good Stages against Ike:
FD
Pokemon Stadium1
Rainbow Cruise
Pretty much any stage you'll **** ike on lol.
But.. Ike does pretty well on BF and its platforms, it's one of his better stages.
Jigglypuff: 55-45
King Dedede: 5-5
Kirby: 60-40
In testing.
Link: 65-35
In testing.
Lucario: 55-45
In testing.
Lucas: 6-4
In testing.
Luigi: 60-40(without infinite), 100-0(with)
In testing.
Mario:65-35(without infinite). 100-0(with)
In testing.
Marth: 60-40
In testing.
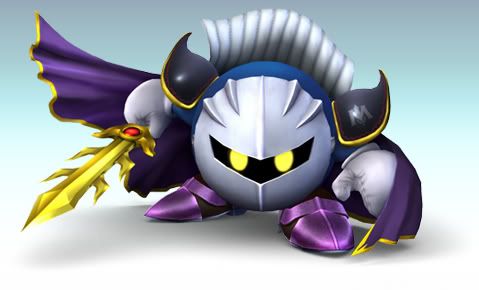
MetaKnight: 40-60
Metaknight's advantages in the Match -up.
-Much Faster
- Quicker Attacks
- Tornado is very effective against Dedede
- Can Follow-up and string attacks together well
- Great Recovery
- Great at Edgeguarding
- Has many approaches
- Hard to gimp
Dedede's advantages in the Match - up.
- Has more Range
- Much Heavier
- Can Kill Metaknight at low
- Great Defensive Options
Metaknight will be on the attack the entire match. For the most part, you will be playing defensively, using your range and projectile to your advantage.
Dedede does well at stopping most of MK's approaches
Use your waddle dees at a distance
Use Ftilt, Dtilt and Inhale to Stop his ground approach as they are very quick and have good range.
If MK approaches with a fair, shield it then dash at him into a grab.
If you expect him to approach with a dair, up tilt.
MK's nado is the main problem.
Up tilt and Downsmash out prioritize nado. The only problem with this is Downsmash takes too long to start up unless you predict he's gonna use nado before he does it and the MK sort of has to be in the air with nado, to up tilt him out of it. Bair and Inhale also go through it at certain points in the air.
Your best option is usually to shield upward unless you're confident you will hit him out and try to punish him, but eventually he'll wear and tear through the shield and catch Dedede in it. If you do get caught in it, Mash up+ airdoge to get out if it as quick as possible.
Tornado is very effective against heavyweights which is extremely annoying. It gets difficult to counter all his approaches at times because he has so many different options.
Not to mention his spot dodge that can dodge your ftilt/dtilt leading to a free dsmash/grab by mk.
If MK grabs you, 90% of the time hell down throw, air dodging directly afterwards into an up tilt usually works and is very effective.
Once MK gets Dedede in the air he can string attacks together very effectively.
I usually use dair in the air in anticaption of his up+b because during the loop, the MK player will get caught in it.
Other than that, Bair goes through mks aerials.
If you're in the air with your Back turned to your opponent often times, they'll just expect a bair and wait to shield it.
If you see this happening, B Reversal into an inhale and suck them up, spit em over the ledge and try to edgeguard.
Also Randomly inhale to throw of MK's game as well.
Mix up your throws when grabbing him, tech chase out of your down throw, fair does a good 12%, bair does an amazing 16 and sometimes you can get an up throw to up air which is a good 20 or so percent..
Also out of a down throw, if MK is close enough to the ledge. A dash attack can kill him in early 70%'s.
MK can edgeguard Dedede well where as Dedede can't really edgeguard MK if the Mk is smart.
Once MK gets you off the ledge, he will usually chase you trying to Dair/Nair/Up+B.
It's usually best to up+b as soon as you feel comfortable you'll cover the distance to the stage to prevent him from doing so.
It's Difficult to edgeguard MK on the otherhand, still edgeguard with bairs as it's most effective but often times, the MK will just side+b straight to the ledge or nado to the stage when can get you caught if you're not careful.
Overall, Mk is a difficult matchup for Dedede. He's very quick with a variety of quick attacks and approaches that can really bother Dedede especially when you add his heavy owning nado to the equation.
He can edgeguard Dedede well and rack up damage quickly if you're not careful.
Use your defensive options to the best of your ability, grab and get as much damage out of it as you can.
Be very smart and take advantage of any mistakes he makes, Dedede can kill MK well.
Dash attack out of a down throw kills at low percents. Up smash, Down smash, Fair/Bair, Up tilt can all kill MK at fairly low percents.
Fsmash randomly sometimes when theyre approaching, it gets very early kills that can change the game around and makes them more cautios when approaching.
Ness: 60-40
Ness is a moderate matchup. Youre a big target for all of his moves.
Bairs are very good in this match since its the only thing that can contend with his fair and bairs quickness and priority. Ness's pk thunder is a nusance so watch out for it.Make sure youre ready to dodge and shield pk fires because if youre hit with one it leads to bad things. He can fsmash you out of it, run and grab you and string a combo together and can repeatedly use pk fire making a little chain where you rack up major damage. Ness can be chaingrabbed so make sure to use that to your advantage.
You can **** ness pretty bad with edgeguarding since it takes time time for him to recover with pk thunder and you can also gimp him.
But when edgeguarding DO NOT get below him. Ness has the most insane spike in the game and if youre anywhere 10%+ you will have no chance of recovering if spiked.
Ness has the ability to absorb so you need to watch out when using waddle dees and there is a waddle doo on the field. In like 3 seconds Ness can absorb the waddle doo beam and heel 70% of his health so if there are any waddle doos on the field and you have the oppurtunity get rid of them.
Overall, this matchup is fairly tough but is definitley winnable. Just watch out for PK thunder and PK fire, approach with bairs and try to grab.
Peach: 5-5
In testing.
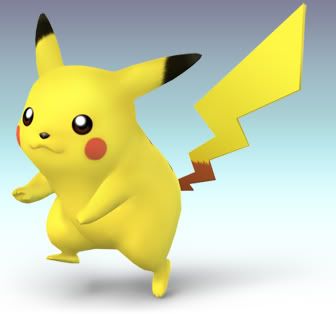
Pikachu: 40-60
In testing.
Pikmin & Olimar: 35-65
In testing.
Pit: 55-45
In testing.
Pokemon Trainer: 6-4
In testing.
R.O.B. 60-40
Samus: 60-40(without infinite) 100-0(with)
In testing.
Sheik: 5-5
In testing.
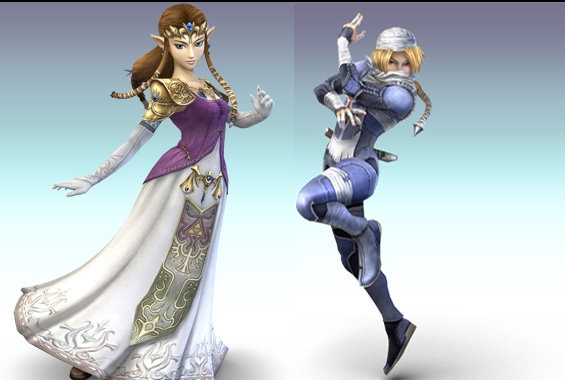
Zelda: 5-5
Snake: 55-45
Snake is a moderate matchup.
Snake covers pretty much the whole stage. He can have his down smash and down+B mines spread out. He can throw grenades almost anywhere. His side+b can get you and he can Mortar slide.
Bairs should be your main approach in this match.
Snakes Ftilt is a 2 hit series, comes out extremely fast, has crazy knockback, and its second hit has crazy range. It is so broken. Make sure you shield through the entire thing.
Luckily snake can be chaingrabbed making it easier so you definitley want to grab him as much as possible.
Snakes Nair is very effective against Dedede so you must watch out for this. Also Snake can do Nair---> Ftilt with absolutely no lag so dont try to shield grab him after his nair otherwise youll get hit with a ftilt.
You can smash DI out of nair so make sure to do so if you're caught.
I tend to use snake's down smash against him, don't really worry about it. Just avoid it and chaingrab them into it.
When recovering against Snake you almost always want to get to the ledge because his upsmash works as a crazy edgeguard and he will nair you in the air as well.
Edgeguarding snake is pretty easy which helps tons, Bairs and Fairs get the job done.
Overall, Snake being the broken character that he is is pretty tough as he is against all characters but DDD is defintley one of the most effective chars vs him because of his chaingrab and how good he is at gimping.
Sonic: 6-4
In testing.
Toon Link: 55-45
In testing.
Wario: 60-40
In testing.
Wolf: 65-35
In testing.
Yoshi: 6-4
In testing.
Zero-suit Samus: 45-55
In testing.
Miscellanious Dedede Info
King Dedede's costumes.
Thanks to Gon for the pics!
Original
Icy Blue
Purple (The best alt in any game ever IMO

)
Gameboy Black & White
Gameboy Green
Pink


 I took it all from what people wrote with the discussion, with a tiny bit of personal experience.