
Raziek
Charging Limit All Day
The Flipside of Orpheon: Things You Didn't Know and Were Too Lazy To Ask
Credit goes to Jxian for the title.
Welcome to Frigate Orpheon! (Icy Edition)
Warning: As usual, this guide is really picture heavy.
General Features
Blast Zones
Credit goes to Jxian for the title.
Welcome to Frigate Orpheon! (Icy Edition)
Welcome back to the third installment of Raziek's stage guides designed to help Marths suck less on counterpick stages! Frigate Orpheon typically is not considered a counterpick for us, so this guide is meant to give you the tools to adapt and play successfully on it, should it be used against you, or if your opponent play a particularly disadvantaged character for the stage. Of course, as I will show later in the guide, this stage can actually be quite good for Marth, as long as you play it right.
Warning: As usual, this guide is really picture heavy.
General Features
Blast Zones
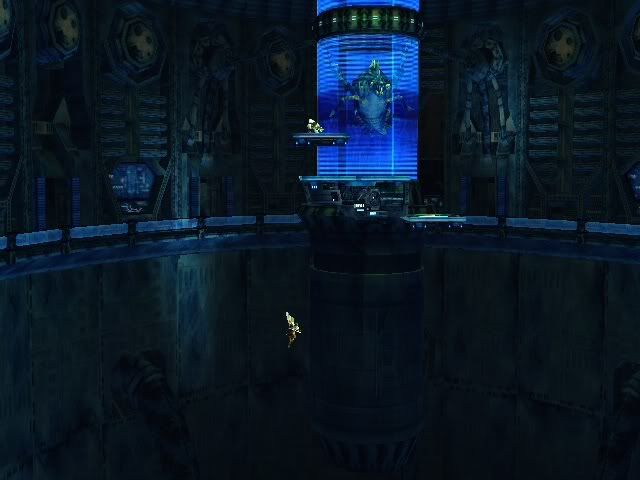
Frigate Orpheon has a pretty standard bottom blastzone. For Marth, this means we can recover from almost the very bottom. Double Jump, DB Stall, DS, and you can make it back from near oblivion. Try to avoid it if possible, but it IS an option. Fortunately, the side platforms on the second transition are often around, so recovering from the abyss should be an infrequent occurrence, since you'll certainly want to recover high on the first transition.
Orpheon's left and right blastzones are also pretty standard. They appear to be reasonably close. Not in Brinstar's league, but closer than the likes of Smashville, I believe. Due to the nature of the stage and ideal recovery paths, the plan for this stage is simple: DI UPWARDS. (But not into Snake's U-Tilt, don't be silly. )
)
Frigate's ceiling is deceptively high, but don't expect to live an eternity on it. Play it safe and you'll be fine.
One other quick thing to note about Orpheon's ledges is that its edges have a lip under the BOTTOM of the stage, that you can get sucked under when you use Dolphin Slash. Take care note to use it too close to the stage, or you may end up underneath. Reverse DS or simply move back slightly for best results.
Orpheon's left and right blastzones are also pretty standard. They appear to be reasonably close. Not in Brinstar's league, but closer than the likes of Smashville, I believe. Due to the nature of the stage and ideal recovery paths, the plan for this stage is simple: DI UPWARDS. (But not into Snake's U-Tilt, don't be silly.
)
Frigate's ceiling is deceptively high, but don't expect to live an eternity on it. Play it safe and you'll be fine.
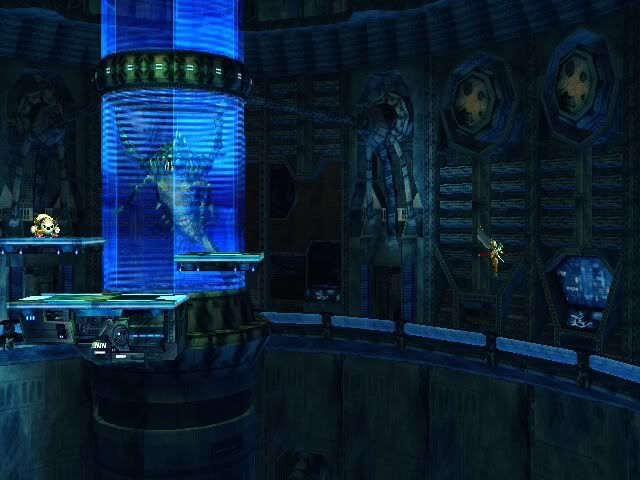
Platforms

(Platform at upper level)
(Platform at the mid-level)
(Platform at the bottom)
(Platform at upper level)
(Platform at the mid-level)
(Platform at the bottom)
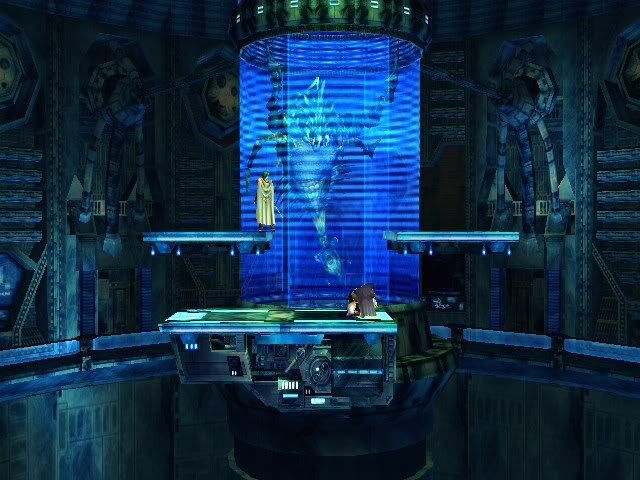
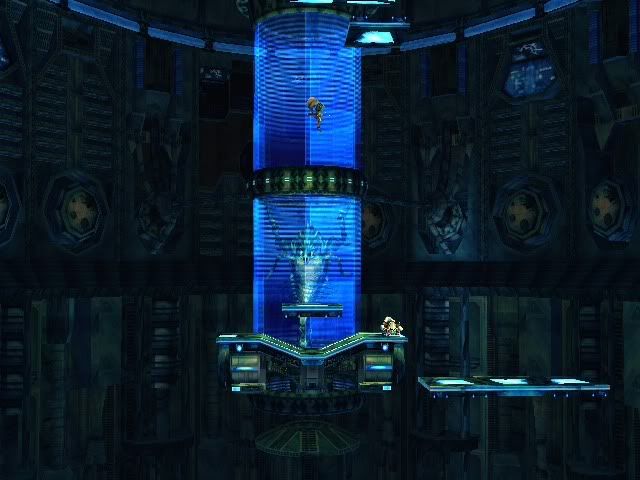
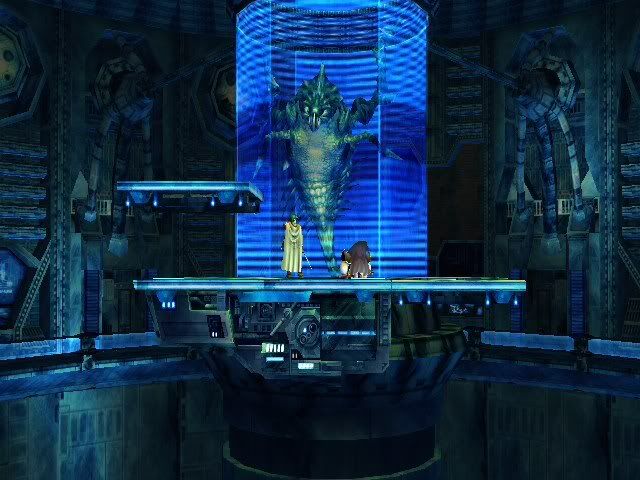
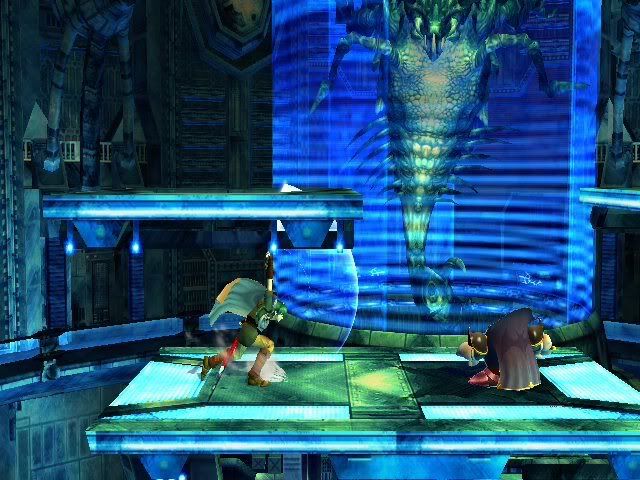
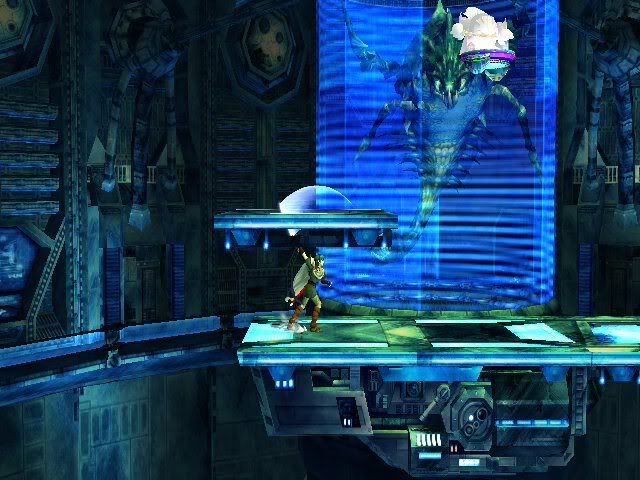
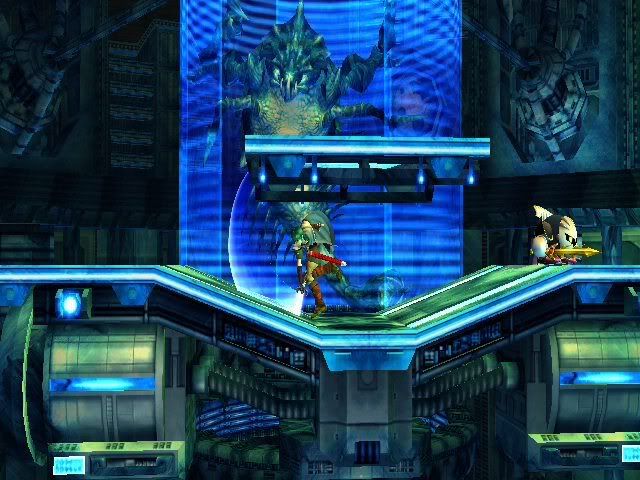
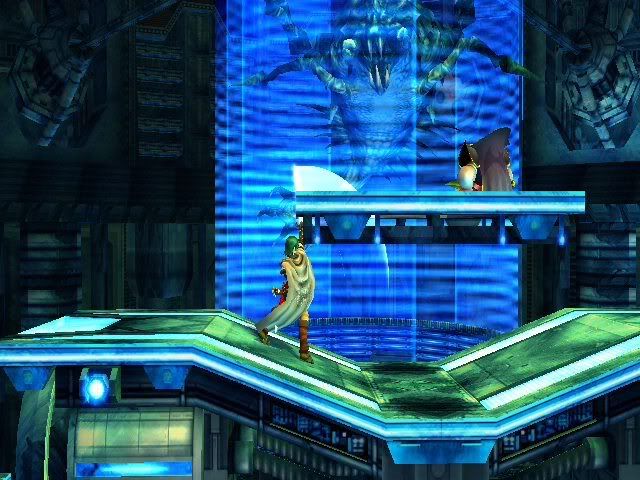
Orpheon is composed of two different phases, with different structures. Its default structure is that seen in the first picture. A singular central platform, with a single raised platform on the left, and a vertical moving platform on the right.
This moving platform has 3 different spots it can be in, and it follows a very simple pattern: it starts the match at the middle position, moves down, then back to the middle, then up, the middle, then repeats the cycle. Each step takes approximately 4 seconds, with the upper and lower steps taking closer to 5, and the middle closer to 3.
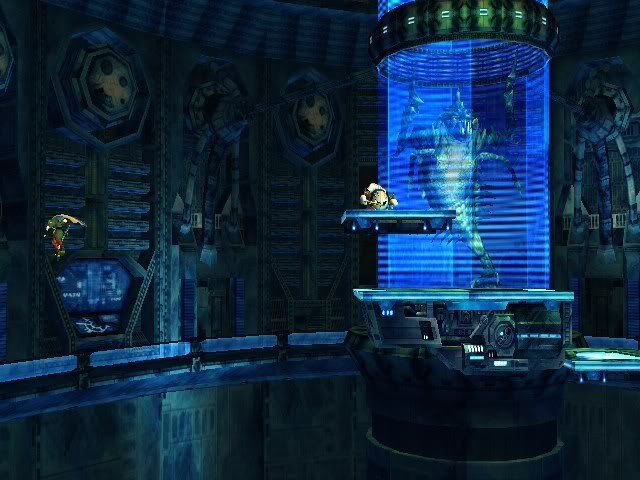
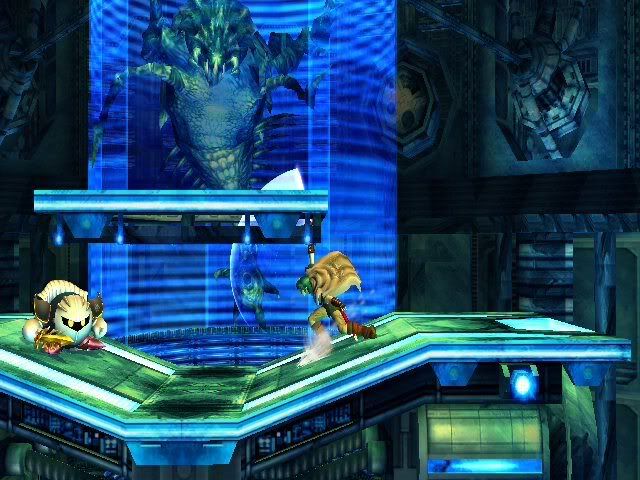
Orpheon's right platform is notorious for having no grab-able edge. For us Marths, we are very dependent on Dolphin Slash to recover, especially to the ledge. This makes that side dangerous for us, but the solution is really quite simple.
It's a campy strategy with low pay-off, so you can also opt to play OFFENSIVELY, and use the right side to gimp your opponent. Depending on what character they are, this is also completely viable. (Protip: Edge-guarding MK on Orpheon is an awful idea)
As noted before, the moving platform adds an element of strategy to the transition. When the platform is up, it is quite effective to force them onto it and edge-guarding with fair, nair or bair. When it is in the middle, I recommend playing more reserved, since you take a much larger risk if you are crossed up and sent off. If it is down towards the bottom, just camp by the ledge. If they want to come up, they're at a huge disadvantage. If you really want to be ballsy, you can try to d-tilt lock them, but that requires getting behind them, which is extremely risky. Furthermore, the platform stays down for 5 or 6 seconds TOPS, so I don't really believe the pay-off is worth the risk. Stick to camping.
This moving platform has 3 different spots it can be in, and it follows a very simple pattern: it starts the match at the middle position, moves down, then back to the middle, then up, the middle, then repeats the cycle. Each step takes approximately 4 seconds, with the upper and lower steps taking closer to 5, and the middle closer to 3.
Orpheon's right platform is notorious for having no grab-able edge. For us Marths, we are very dependent on Dolphin Slash to recover, especially to the ledge. This makes that side dangerous for us, but the solution is really quite simple.
Don't fight on that side of the stage.
As simple as it sounds, it really is that easy. If you zone almost exclusively on the left side of the stage (which is easy to do, since Marth controls the space underneath the platform extraordinarily well), it is actually quite effective to just camp the left side, venturing out only when you have a position to edge-guard your opponent on the right side.
It's a campy strategy with low pay-off, so you can also opt to play OFFENSIVELY, and use the right side to gimp your opponent. Depending on what character they are, this is also completely viable. (Protip: Edge-guarding MK on Orpheon is an awful idea)
As noted before, the moving platform adds an element of strategy to the transition. When the platform is up, it is quite effective to force them onto it and edge-guarding with fair, nair or bair. When it is in the middle, I recommend playing more reserved, since you take a much larger risk if you are crossed up and sent off. If it is down towards the bottom, just camp by the ledge. If they want to come up, they're at a huge disadvantage. If you really want to be ballsy, you can try to d-tilt lock them, but that requires getting behind them, which is extremely risky. Furthermore, the platform stays down for 5 or 6 seconds TOPS, so I don't really believe the pay-off is worth the risk. Stick to camping.
One other quick thing to note about Orpheon's ledges is that its edges have a lip under the BOTTOM of the stage, that you can get sucked under when you use Dolphin Slash. Take care note to use it too close to the stage, or you may end up underneath. Reverse DS or simply move back slightly for best results.
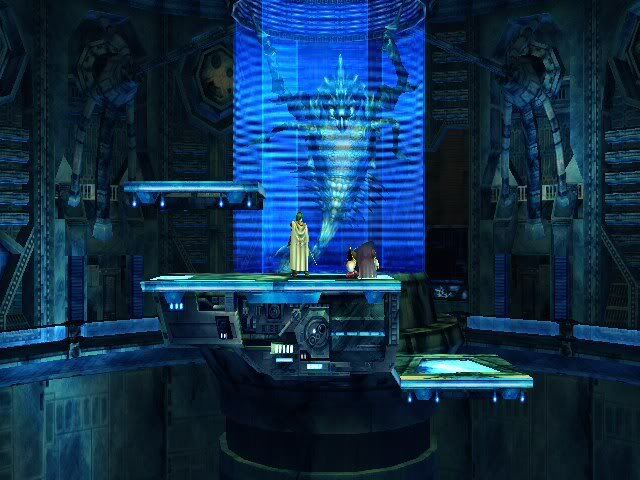
Orpheon's second transition occurs when the stage siren sounds and it flips over (more on this later), transitioning to its second, more "fair" layout. As seen above, the stage transitions into a simpler setup, comprised of a single large platform with a pronounced dip in the center, covered in a platform. Depending on your opponent, this is either really good, or really bad.
Marth can camp extremely well under the platform with his aerials and tilts, but there are characters who can do it much better, like Olimar, Snake, or King Dedede. keep this in mind when choosing this stage to counterpick, since the stage sends approximately 2/3rds of regulation time on the second transition (More info on this later.)
Also a feature of the second transition are the two platforms that like to pop in from the left and right sides of the screen, semi-frequently. These platforms, much like those on the first transition, have no edges. However, since these ones are usually popping in to SAVE you, people don't really complain too much.
These platforms come in quite close to the stage, so if your opponent is ledge-hogging and you don't think you can displace them, just stall as long as you can, pull back, and you have a pretty decent chance of the platform coming in to save you. (Certainly more than Yoshi's Island's ghost. The side platforms are onscreen approximately 45% of the time, so just hope that it's YOUR side that it's in on. Chance of being saved: About 25%. xD)
Further things to note on these platforms. When the retract, they retract QUICKLY, and outside of the blastzone. So if you land on one, don't mess around, get back on stage ASAP. To further stress this point, movement while on these platforms is affected by momentum, so if it is leaving while you jump off, you will have VERY LITTLE horizontal momentum, and will almost certainly have to burn your double jump to recover, putting you in a rather vulnerable position. Be smart, get back on the stage.
Further things to note on these platforms. When the retract, they retract QUICKLY, and outside of the blastzone. So if you land on one, don't mess around, get back on stage ASAP. To further stress this point, movement while on these platforms is affected by momentum, so if it is leaving while you jump off, you will have VERY LITTLE horizontal momentum, and will almost certainly have to burn your double jump to recover, putting you in a rather vulnerable position. Be smart, get back on the stage.
Next Up: Stage Gimmicks!

As pictured above, Orpheon's main gimmick is that the stage FLIPS in order to switch from one transition to the other. This transition is always preceded by the loud warning siren and accompanying flashing lights. This warning signal gives you about 3 seconds to get to somewhere safe, then the stage will flip. The important thing to note about the flips is that while the stage moves, YOU do not, unless you are still ON the stage. What this means is, as it quickly rotates, if you're still standing on it, you'll fall off, usually at a reasonably high distance in the air, depending on which direction the stage rotated. Note that DURING this flip, you cannot latch onto the stage's edges until it stops moving.
Now to address a silly concern: Getting star KO'd by the stage. This is an extremely rare occurrence, and should only happen if you are in an obviously bad place when it flips. In this case, our obviously bad place is in the path of whichever side rotates upwards. If you happen to be in the way of the rather solid stage as it rotates, it can and will star KO you. This is absolutely no reason to ban the stage, it's just another easy to adapt to mechanic. Given the time between the warning and the flip, it is QUITE reasonable to expect to be able to get somewhere safe. (Easiest thing to do is just jump towards the middle of the screen)
Now, on to a load of data and funny business. In order to determine if there was some sort of pattern to Frigate Orpheon's flipping shenanigans, I took 10 trial runs through a full 8-minute match, to see if I could determine a pattern. I'm pleased to say I can provide a general guideline of the trends and timing of the stage. Within the following collapse box is the data from these 10 runs, which I will elaborate on below it.
Now to elaborate on all those ugly numbers and logs.
In the first trial run, I recorded the flips, the lights, and when the platforms were present on the second transition. My data indicated that the platforms were in about 45% of the time, and that they alternated between left and right, with no real pattern to when there would be both simultaneously. As noted in the initial hypothesis, the left platforms seemed to stay onscreen for less time than the right. The left frequently visited for less than a second, while the right tended to stay longer towards 5 seconds, though both usually averaged around 3.
Recording every single platform was a huge hassle, and I so no discernible pattern worth finding, so I dropped that idea and focused on the flips and lighting. My finds were pleasing.
Firstly, on the lighting. When I refer to "Lights on" and "Lights off", I am referring to the background lighting that illuminates the Parasite Queen and the other portion of the stage. Why is this important? The stage WILL NOT FLIP IF THE LIGHTS ARE OFF.
Furthermore, the lights are always off for exactly 30 seconds at a time, so they can be used as a safety window to know that there CANNOT be a flip.
Now, onto the trends that can be drawn from the flipping and lighting. Most important thing to note, is that ALL TEN trials had a flip occur between 7:25 and 7:15. While I have heard stories of the stage not flipping at all, this leads me to believe this is a very strong trend that can be counted on.
Looking closer, we also see that after flipping to Phase 2, 22/26 times, the stage flipped BACK to Stage 2 after a mere 25-30 seconds. Trial 6 was the main exception to this trend, staying on Phase 1 for 75% of the time, in stark contrast to the other 9 trials, which all tipped in Phase 2's favor, usually around 70% of the time spent on it, even as much as 80%.
Why is this important to us? The main gripe about Frigate Orpheon is that its ledge on Phase 1 over-centralizes gameplay. Trials have indicated that Frigate spends on average, close to 70% of the time on the OTHER transition. (Even with the outlier run, it's still 66% of the time)
Anyway, this tangent is moreso intended for my cross-post in stage discussion, but I figured it would be relevant to keep here as well.
TL;DR version: Frigate spends 75% of the time on Phase 2, quit johning about the ledge and deal with it.
Onward to the rest of the relevant stuff!
Now to address a silly concern: Getting star KO'd by the stage. This is an extremely rare occurrence, and should only happen if you are in an obviously bad place when it flips. In this case, our obviously bad place is in the path of whichever side rotates upwards. If you happen to be in the way of the rather solid stage as it rotates, it can and will star KO you. This is absolutely no reason to ban the stage, it's just another easy to adapt to mechanic. Given the time between the warning and the flip, it is QUITE reasonable to expect to be able to get somewhere safe. (Easiest thing to do is just jump towards the middle of the screen)
Now, on to a load of data and funny business. In order to determine if there was some sort of pattern to Frigate Orpheon's flipping shenanigans, I took 10 trial runs through a full 8-minute match, to see if I could determine a pattern. I'm pleased to say I can provide a general guideline of the trends and timing of the stage. Within the following collapse box is the data from these 10 runs, which I will elaborate on below it.
Trial 1:
Flip at 7:17 (Now on Phase 2)
Right slide-in (7:02-6:57) (15 without, 5 with)
Left Slide-in (6:55-6:52) (17 without, 8 with)
Right SI (6:50-6:47) (19 without, 11 with)
Left SI (6:47-6:46) (19 without, 12 with)
Left AND Right (6:40-6:37(left)/6:36(Right) (25 without, 16 with)
Left (6:30-6:27) (31 without, 19 with)
Right (6:27-6:24) (31 without, 22 with)
Lights comes on (6:18)
Left SI (6:18-6:15) (37 without, 25 with)
Right SI (6:15-6:12) (37 without, 28 with)
Left and Right (6:05-6:03/6:02) (44 w/o, 31 w)
Left (5:55-5:53) (51 w/o, 33 w)
Right (5:54-5:50) (51 w/o, 36 w)
Flip at 5:47 (Lights ON) (Now on Phase 1)
Flip at 5:22 (Lights ON) (Now on Phase 2)
Right (5:17-5:16) (56 w/o, 36 w)
Left (5:15-5:11) (57 w/o, 40 w)
Right (5:07-5:04) (61 w/o, 43 w)
Left (5:01-4:59) ( 64 w/o, 46 w)
Right (4:55-4:52) (68 w/o, 49 w)
Left (4:52- 4:49) (68 w/o, 52 w)
Lights OFF (4:44) (72 w/o, 52 w)
Right (4:45- 4:41) (72 w/o, 56 w)
Left (4:42-4:41) (72 w/o, 56 w)
Left and Right (4:34- 4:32/4:28) (79 w/o, 62 w)
Left (4:24-4:22) (83 w/o, 64 w)
Right (4:22- 4:18) (83 w/o, 68 w)
Left (4:14-4:11) (87 w/o, 71 w)
LIGHTS ON (4:11)
Right (4:10- 4:06) (88 w/o, 75 w)
Left (4:06-4:05) (88 w/o, 76 w)
Right (3:58-3:55) (95 w/o, 79 w)
Left (3:56-3:55) (95 w/o, 79 w)
Left (3:48-3:47) (102 w/o, 80 w)
Right (3:46- 3:43) (103 w/o, 83 w)
FLIP AT 3:40 (LIGHTS ON) (Phase 1) (106 w/o, 83 w)
Flip at 3:15 (LIGHTS ON) (Phase 2)
Right (On during flip- 3:11) (106 w/o, 87 w)
Left (3:10 -3:08) (107 w/o, 89 w)
Right (3:01 – 2:58) (114 w/o, 92 w)
Left (2:58-2:57) (114 w/o, 93 w)
Right and Left (2:52-2:47) (119 w/o, 98 w)
LIGHTS OFF (2:40) (126 w/o, 98 w)
Right and Left (2:37- 2:34) (129 w/o, 101 w)
Right and Left (2:25- 2:25(Left)/2:21 (Right) (138 w/o, 105 w)
Left (2:16- 2;14) (143 w/o, 107 w)
Right (2:12- 2:09) (145 w/o, 110 w)
LIGHTS ON (2:07)
Left (2:06-2:06) (148 w/o, 111 w)
Right (2:01- 1:57) (153 w/o, 115 w)
Left (1:57- 1:56) (153 w/o, 116 w)
Right (1:50 – 1:47) (159 w/o, 119 w)
Left (1:48 – 1:47)
Left and Right (1:40-1:37(Left)/1:36(Right)) (166 w/o, 123 w)
Flip at 1:34 (Phase 1) (169 w/o, 123 w)
Flip at 1:04 (Phase 2)
Left (1:01-0:57) (172 w/o, 127 w)
Right (0:54-0:51) (175 w/o, 130 w)
Left (0:48-0:45) (178 w/o, 133 w)
Right (0:42-0:39) (181 w/o, 136 w)
Left (0:37-0:34) (183 w/o, 139 w)
LIGHTS OFF (0:33)
Right (0:30-0:26) (187 w/o, 143 w)
Left (0:25-0:22) (188 w/o, 146 w)
Right (0:17-0:14) (193 w/o, 149 w)
Left (0:12-0:11) (195 w/o, 150 w)
Right (0:07-0:04) (199 w/o, 154 w)
Left (0:03 to End) (200 w/o, 157 w)
LIGHTS ON (0:02)
Initial Hypothesis: Stage cannot flip when lights are off, platforms alternate, with no particular pattern for the double segments. Platforms are in anywhere between 1 and 5 seconds, left seems to stay less than the right. Seems to be a 6-second gap before and after a double platform segment, though a six second gap does not always indicate a double plat.
Time Spent on Phase 1: 2:03 of 8 minutes. 25%
Time Spent on Phase 2: 5:57 of 8 minutes. 75%
Platforms In: 2:37 of 5:57 minutes. 44%
Platforms Out: 3:20 of 5:57 minutes. 56%
Flip Count: 7
Trial 2
Start (8:00)
FLIP AT 7:20 (Phase 2)
Lights off at 6:50
Lights on at 6:20
Lights off at 5:40
Lights on at 5:10
Flip at 4:37 (1:10 later then expected) (Phase 1)
Flip at 4:12 (Exactly when expected + 1:10) (Phase 2)
Lights off at 3:33
Lights on at 3:03
Flip at 2:30 (Expected + 1:10) (Phase 1)
Lights off at 1:52
Lights on at 1:20
Flip at 0:47 (Phase 2)
Flip at 0:22 (Phase 1)
Time Spent on Phase 1: 168 of 480 seconds – 35%
Time Spent on Phase 2: 312 of 480 seconds – 65%
Trial 3
Start (8:00)
Flip at (7:23) Phase 2 *DIED*
Lights off at 6:40
Lights on at 6:10
FLIP AT 5:40 Phase 1
Flip at 5:10 Phase 2
Lights off at 4:45
Lights on at 4:15
Flip at 3:40 Phase 1
Flip at 3:15 Phase 2
Lights off at 2:45
Lights on at 2:15
Flip at 1:37 Phase 1
Flip at 1:12 Phase 2
Lights off at 0:30
Lights on at 0:00
Time Spent on Phase 1: 117 of 480 seconds – 24%
Time Spent on Phase 2: 363 of 480 seconds – 76%
Trial 4
Start (8:00)
Flip at 7:24 *PHASE 2*
Lights off at 6:50
Lights on at 6:20
Flip at 5:44 *PHASE 1*
Flip at 5:20 *Phase 2*
Lights off 4:55
Lights on 4:25
Flip at 3:50 *Phase 1*
Flip at 3:20 *Phase 2*
Lights off at 2:40
Lights on at 2:10
Flip at 1:34 *Phase 1*
Lights off at 0:52
Lights on at 0:22
Time Spent on Phase 1: 223 of 480 – 46%
Time Spent on Phase 2: 257 of 480 – 54%
Trial 5
Start (8:00)
Flip at 7:22 *Phase 2*
Lights off at 6:55
Lights on at 6:25
Flip at 5:50 *Phase 1*
Flip at 5:25 *Phase 2*
Lights off 4:55
Lights on 4:25
Lights off at 3:45
Lights on 3:15
Flip at 2:40 *Phase 1*
Flip at 2:15 *Phase 2*
Lights off at 1:35
Lights on at 1:05
Flip at 0:27 *Phase 1*
Lights off at 0:05
Time Spent on Phase 1: 115 of 480 – 24%
Time Spent on Phase 2: 365 of 480 – 76%
Trial 6
Start (8:00)
Flip at 7:15 *Phase 2*
Lights off 6:50
Lights on at 6:20
Flip at 5:46 *Phase 1*
Lights off at 5:15
Lights on 4:45
Lights off 4:05
Lights on at 3:35
Flip at 3:00 *Phase 2*
Flip at 2:35 *Phase 1*
Lights off 2:00
Lights on 1:30
Lights off 0:55
Lights on 0:25
Time Spent on Phase 1: 366 of 480 – 76%
Time Spent on Phase 2: 114 of 480 – 24%
Trial 7
Start (8:00)
Flip at 7:15 *Phase 2*
Lights off at 6:45
Lights on at 6:15
Flip at 5:40 *Phase 1*
Flip at 5:15 *Phase 2*
Lights off at 4:37
Lights on at 4:07
Lights off at 3:20
Lights on at 2:50
Flip at 2:17 *Phase 1*
Flip at 1:50 *Phase 2*
Lights off at 1:25
Lights on at 0:55
Flip at 0:20
Time Spent on Phase 1: 97 of 480 – 20%
Time Spent on Phase 2: 383 of 480 – 80%
Trial 8
Start (8:00)
Flip at 7:17 *Phase 2*
Lights off at 6:45
Lights on at 6:15
Flip at 5:40 *Phase 1*
Flip at 5:15 *Phase 2*
Lights off at 4:50
Lights on at 4:20
Lights off 3:35
Lights on 3:05
Flip at 2:30 *phase 1*
Flip at 2:03 *phase 2*
Lights off at 1:40
Lights on at 1:10
Lights off at 0:28
Time Spent on Phase 1: 95 of 480 – 20%
Time Spent on Phase 2: 385 of 480 – 80%
Trial 9
Start (8:00)
Flip at 7:18 *Phase 2*
Lights off at 6:43
Lights on at 6:13
Flip at 5:40 *Phase 1*
Flip at 5:12 *Phase 2*
Lights off at 4:50
Lights on at 4:20
Flip at 3:43 *Phase 1*
Flip at 3:18 *Phase 2*
Lights off at 2:45
Lights on at 2:15
Flip at 1:38 *Phase 1*
Flip at 1:10 *Phase 2*
Lights off at 0:30
Light on at End
Time Spent on Phase 1: 123 of 480 – 26%
Time Spent on Phase 2: 357 of 480 – 74%
Trial 10
Start (8:00)
Flip at 7:22 *Phase 2*
Lights off at 6:42
Lights on at 6:12
Flip at 5:38 *Phase 1*
Flip at 5:13 *Phase 2*
Lights off at 4:40
Lights on at 4:10
Lights off at 3:25
Lights on at 2:55
Flip at 2:20 *Phase 1*
Lights off at 1:58
Lights on at 1:28
Flip at 0:50 *Phase 2*
Flip at 0:25 *Phase 1*
Time Spent on Phase 1: 178 of 480 – 37%
Time Spent on Phase 2: 302 of 480 – 63%
TOTAL AVERAGES:
Time Spent on Phase 1: 33%
Time Spent on Phase 2: 66%
Now to elaborate on all those ugly numbers and logs.
In the first trial run, I recorded the flips, the lights, and when the platforms were present on the second transition. My data indicated that the platforms were in about 45% of the time, and that they alternated between left and right, with no real pattern to when there would be both simultaneously. As noted in the initial hypothesis, the left platforms seemed to stay onscreen for less time than the right. The left frequently visited for less than a second, while the right tended to stay longer towards 5 seconds, though both usually averaged around 3.
Recording every single platform was a huge hassle, and I so no discernible pattern worth finding, so I dropped that idea and focused on the flips and lighting. My finds were pleasing.
Firstly, on the lighting. When I refer to "Lights on" and "Lights off", I am referring to the background lighting that illuminates the Parasite Queen and the other portion of the stage. Why is this important? The stage WILL NOT FLIP IF THE LIGHTS ARE OFF.
Furthermore, the lights are always off for exactly 30 seconds at a time, so they can be used as a safety window to know that there CANNOT be a flip.
Now, onto the trends that can be drawn from the flipping and lighting. Most important thing to note, is that ALL TEN trials had a flip occur between 7:25 and 7:15. While I have heard stories of the stage not flipping at all, this leads me to believe this is a very strong trend that can be counted on.
Looking closer, we also see that after flipping to Phase 2, 22/26 times, the stage flipped BACK to Stage 2 after a mere 25-30 seconds. Trial 6 was the main exception to this trend, staying on Phase 1 for 75% of the time, in stark contrast to the other 9 trials, which all tipped in Phase 2's favor, usually around 70% of the time spent on it, even as much as 80%.
Why is this important to us? The main gripe about Frigate Orpheon is that its ledge on Phase 1 over-centralizes gameplay. Trials have indicated that Frigate spends on average, close to 70% of the time on the OTHER transition. (Even with the outlier run, it's still 66% of the time)
Anyway, this tangent is moreso intended for my cross-post in stage discussion, but I figured it would be relevant to keep here as well.
TL;DR version: Frigate spends 75% of the time on Phase 2, quit johning about the ledge and deal with it.
NEW STUFF
Ok, so I decided to finally finish up looking at my notes to make a general outline of what to expect on this stage.
Firstly, I believe Frigate can be predicted largely by following a series of If -> Then statements.
The First major split comes at the 7:27-7:17 mark. In the majority of my trials, the stage has flipped at this point. If it does, it is HIGHLY likely that the majority of the time will be spent on Transition 2. If it does NOT flip at this point, my trials show that the stage will follow a pattern based around Transition 1.
The majority of what is going to happen revolves around a simple concept: If one thing happens, the other CANNOT happen for at least "x" amount of time.
Following the first flip to Phase 2, there is a 30-40 second gap before the next event.
After this buffer period passes, one of two thing will happen:
1) The Stage flips again.
2) The Lights go out.
If the lights go out, the prediction is simple. From the time the lights go out, they will be off for exactly 30 seconds. After this, we return to the former pattern of a 30-40 second gap, followed by the same If -> then.
If the stage FLIPS, the prediction gets a little hazier. The grand majority of my trials have shown the stage focusing primarily on one transition, based on whether or not it flips at 7:17. If it DOES flip, you get a type 2. What this means, it that if it flips BACK to phase 1, it becomes extremely likely that it will flip back to phase 2 after 25 seconds. It then resumes the 30 sec Gap -> If/Then pattern.
If it doesn't flip, you get a Type 1, and it does MORE OR LESS the same thing as type 2, just changing the transitions roles. It will usually spend a mere 25 second on Phase 2 if it DOES flip, then it will flip back to phase 1.
Predicting this stage is done simply by making educated guesses based on the timing and transition type, whether you have type 1 or 2. Between the If/Thens and reading the set time gaps, you can play here quite easily.
It is regrettable that the stage still seems to have some inherently random determinants, but by and large, it is quite easy to predict. Just be aware that every once in a while, it might screw you over.
Onward to the rest of the relevant stuff!
General Play-style Overview
For those of you who have read my other guides, you've seen pretty much all of what I'm about to say before.
TL;DR version: CONTROL SPACE WITH AERIALS, CAMP LIKE A *****.
Anyway, for the rest of us, Frigate comes down to a very simple philosophy. Camp underneath platforms. It's the safest possible thing you can do in this game, and Marth is great at it. Looking at Orpheon's first transition, effective moves to camp with include:
Fair

F-tilt
U-Tilt
D-tilt (Not pictured)
On Transition two, it's more of the same...
Uair
Nair
Fair
F-Tilt
U-Smash
U-tilt
Jab
D-Tilt
(Note: This isn't effective facing outwards, but it's great for poking inwards)
Till Next time, this is Raziek, coming to you from Nova Scotia, Canada.
Currently taking requests for the next guide, I don't really have one in mind yet, though I was considering firing one together quickly for Japes, which is a pretty simple stage.
F-tilt
U-Tilt
D-tilt (Not pictured)
On Transition two, it's more of the same...
Uair
Nair
Fair
F-Tilt
U-Smash
U-tilt
Jab
D-Tilt
(Note: This isn't effective facing outwards, but it's great for poking inwards)
So yeah, Marths. Pretty standard strategy as usual. Camp and control space with aerials, tilts for pokes and walling, don't do anything stupid. As mentioned before, focus on controlling the space UNDER the platforms, and on transition 1, focus on keeping your opponent on the right. Push for momentum when the opportunity presents itself.
Till Next time, this is Raziek, coming to you from Nova Scotia, Canada.
Where?!
Currently taking requests for the next guide, I don't really have one in mind yet, though I was considering firing one together quickly for Japes, which is a pretty simple stage.