• Welcome to Smashboards, the world's largest Super Smash Brothers community! Over 250,000 Smash Bros. fans from around the world have come to discuss these great games in over 19 million posts!

    You are currently viewing our boards as a visitor. Click here to sign up right now and start on your path in the Smash community!

Make Your Move 4

Status
Not open for further replies.

MasterWarlord

Smash Champion
Joined
Aug 24, 2008
Messages
2,902
Location
Not wasting countless hours on a 10 man community

Lord Dracula
"What is a man? A miserable little pile of secrets."

+

General Summary

Dracula is the main villain in most of the Castlevania titles. He is the final boss of almost all of the games, the only exceptions being the first and last games in the series' chronology.

The Dracula of Castlevania is loosely based on Bram Stoker's character, which was in turn based on the infamous Vlad Tepes of Wallachia. The Castlevania Dracula draws some history from both, but instead of preying on maidens this one threatens whole realms with his armies at the least, and at worst is presented as the very embodiment of evil.

Dracula did not receive much characterization in the earlier games of the Castlevania series, but in later games he is depicted as arrogant, disdainful of humanity (whom he regards as petty and greedy), and somewhat abusive towards his own minions.


Videos

+ Simon vs. Dracula, from Super IV +

+ Dracula's boss battle from Dracula X: Rondo of Blood. + Both Hell Fire and Hell Meteor are in full display here.

+ The Castlevania Chronicles version of the unending battle +


Play Style

Lord Dracula, the Scion of Darkness, naturally prefers not to stoop to the level of mere mortals, and so rarely uses his actual body to fight his enemies. Instead, he relies on the infinite amount of black energy that comprises his being.

As such, Dracula players will want to use his great spacing techniques to get as much distance as they can between themselves and the opponent so they can use Dracula's incredible range to their advantage. This is key, as in a close-contact scenario, Dracula is bested by nearly every character in the game. Almost all of Dracula's standard attacks are very slow, and the hitbox for most of them doesn't reach within Dracula's totally immediate vicinity. So if Jigglypuff was coming in to use Rest on him, all but one of this melee attacks would simply go right past the little pink puffball. Thankfully, he has an incredible array of tools crafted specifically to keep his opponents away/get him away from his opponents.

Dracula is also one of the heaviest characters in the game, making him difficult to launch very far. He's also a very floaty character, falling slower than most due to him being made almost entirely of evil energy, rather than flesh and bone. Countering this obvious winning combination, he has a difficult time scoring KOs most of the time, as he has few real "KO moves", and those he does possess force him to compromise his "distance and damage" strategy by getting in close to his target.


Special Traits

+ Dracula can glide through the air, coasting along on a ghostly wind.
+ Dracula has two midair jumps. He merely pushes off the air for the first, while the second has his spinning around quickly as he rises and chuckles quietly, lifted by a wave of dark energy.
+ Dracula's Shield Roll is the longest in the game, carrying him almost twice the distance of the standard distance. A beam of energy strikes him from above, turning him into a cloud of bats, which fade into the beam as it dissipates into thin air. An identical beam strikes a long distance away in the direction you "rolled", where Dracula reforms, ready for combat.
+ Dracula's Air Dodge halts his vertical (though not horizontal) momentum, as he transforms into a group of bats, then shifts back to human form. However, once he uses one, he cannot do so again until he touches ground, then lifts into the air again.
+ Dracula never actually falls down. His helpless state (after using his recovery, or when dizzy) resembles a group of disheveled bats with broken wings, screeching faintly as they plummet slowly downward. Upon contact with the ground, they hurriedly reform into Dracula, who kneels on one knee, head bowed and breathing heavily. If Dracula is hit while in a helpless state, he returns to his normal form.
+ Dracula does not run, and has no Dash Attack.


Stats (Out of 10)

+ Offense: 4
+ Speed: 3
+ Weight: 9
+ Jump Height: 2
+ Fall Speed: 3
+ Recovery: 8
+ Range: 10
+ Attack Speed: 3
+ Traction: 5

Pros and Cons +

Pros
  • Incredible aerial versatility
  • Amazing moves for spacing
  • Large, wide ranges of nearly all standard attacks
  • Far-reaching grab and powerful pummel
  • Unconventional and versatile Smashes
  • Two powerful, far-reaching projectiles
  • Stellar recovery
  • Life-restoring move
  • Rapid attacks for fast damage-dealing
  • Sweetspot Aerial and Aerial Spike

Cons
  • Constant blind spot close to Dracula
  • Significant lag on Special Moves and most Standard Attacks
  • Final Smash requires skill and timing to use
  • Up and Down Smashes do little damage
  • A number of attacks are based on how often Soul Steal is used
  • Steep learning curve
  • Very few moves have actual knockback (difficult to KO normally)
  • Aside from projectiles, most moves don't do too much damage
  • Dracula is a pompous, arrogant jerk


Standard Attacks

A, A: Morose Attraction + Dracula throws a side of his cape out ahead oh himself, lightly damaging the enemy. Pressing A again will cause him to quickly draw the cape back inward, pulling the enemy along with it (4-6% initial hit, 1% follow-up)

Notes: The move reaches about as far as your average Side Tilt, though the hitbox is such that the move will miss enemies right next to Dracula. Pulling an enemy in close might seem counter-intuitive for Dracula at first, but sometimes this can lead to a quick Soul Steal right after.There's very little lag on this attack by itself, but doing both attacks will result in much more.

Side Tilt: Shady Vagrant + Dracula chuckles darkly as he dashes backwards, leaving a dark, smoky facsimile of himself where he was standing, which bursts apart after a second, damaging and knocking away any enemies in range (10-11%)

Notes: The backward dash (he still faces the same direction) doesn't go as far as his normal Shield Roll, rather, only as far as a normal character's. The shadow clone will explode after a second, unless an attack hits it, which will disperse it without it doing any damage. So in effect, this creates a wall between you and your opponent when you use it, making it a great tool to mix up with Dracula's standard Shield Roll for spacing purposes. If the shadow-figure is hit before it explodes, it cringes inward as it fades away, with a echoing shout of pain. However, if it goes off as planned, it triumphantly raises it's arms, fists curled, into the air as it laughs in victory while it tears apart...

Down Tilt: Penumbra + Dracula tamps his foot (though under his cloak, it's a bit hard to see), and his shadow extends along the ground ahead of him, as far as he is tall. Any enemies that are touched by it trip and take steady damage with no knockback (1-2% per hit)

Notes: The shadow extends and retracts at a moderate speed (about as quickly as Mario walks, say), but Dracula can't move until it returns, which takes just under two seconds. Also, unless the enemy is actually on the ground, this won't hit them. It's a great edge-guarding move, however, as the shadow literally crawls over the edge and down the side of the stage, knocking a hanging enemy into a helpless fall.

Up Tilt: Visitant Swarm + A small company of bats flies out from the left side of Dracula's robes after he lifts his arm and parts them. They fly above him in a circle, damaging any characters in range, before swirling back around Dracula's rear and returning to the safety of his cloak, this time the right side, which is held open for them by the Count (2-3%, multiple hits)

Notes: As it sounds, this move has tons of lag on it, and leaves Dracula open to attack from the sides throughout most of it. There's also very little knockback from the bats, though they can draw an opponent in front of Dracula if said enemy is caught in the swarm as it circles around Dracula's back, potentially leading into a Soul Steal. Emphasis on the lag though, as it is very, very substantial. The move has great vertical range, and good range to the sides (while the bats are on each side, that is) though.


Smashes


Side Smash: Love Lost + Dracula stands, body facing the screen (and player) while his head is turned toward his opponent. He lifts his arm up and points toward his enemy, while a large mass of darkness emanates from under his cloak and springs forwards. The mass travels forward the same distance as Link's Forward Smash (both swings) covers, damaging all the way, before delivering it's final attack and fading away, knocking enemies up into the air and dealing great damage (3% traveling, 17% final blow uncharged / 5% traveling, 25% final blow charged)

Notes: In a rare move for Dracula, this move hits from start to finish, with no "blind spot" close to him. However, unless an enemy is hit by the final blow, they only flinch, and won't go flying away. As Dracula is vulnerable until the move ends (which takes around three seconds), he'll usually be attacked by enemies in that situation, though the attack will still complete itself, even without him. Now, concerning the "final blow". At the end of it's course, the shadowy mass rears up to reveal it's contents...the form of a beautiful woman. Yes, Dracula uses the soul of his deceased lover, Lisa Farenheights, to destroy the humans he so hates as a result of her death (Lisa was burned at the stake for practicing witchcraft: which led to Dracula swearing revenge against all of mankind). Only her torso is visible, and what's there is skeletal from the sternum down, the rest being covered by the ragged remains of a dress. She raises her hands to heaven, as if trying to escape her ****ed service, causing the rest of the shadowy mass to course upwards along her arms, bursting at the tip of her hands and sending Dracula's opponents flying away.

Up Smash: Spectral Augur + Dracula swirls his arms around in a circle, then brings them together towards the ground, causing his cape to fly upwards as a surge of shadowy bats erupts from the mass of inky blackness underneath his robes, flying upwards on both sides of him and dealing rapid damage (2-3% multiple hits uncharged, 5% multiple hits charged)

Notes: Uncharged, this move is essentially a slightly more powerful version of his Up Tilt that strikes to both sides simultaneously. However, the bats simply fade into nothingness, rather than returning to the confines of Dracula's cape, making the ending lag almost non-existent. Again, like his Up Tilt, there's no real knockback here, and the move doesn't draw opponents in. The real reason to use this move is that if it's fully charged, Dracula will actually dive down into his own shadow, resurfacing wherever his shadow-print, created via his Down Smash, is located. If he hasn't planted one, he simply resurfaces where he dove in. Traveling through the shadow-print will use it up, letting Dracula create a new one.

Down Smash: Phantom Courante + Dracula compresses his dark will into his shadow, leaving a inky, swirling imprint of it on the ground where he stands. This shadow-print stays where it is until Dracula uses the move again or an opponent runs across it, at which point it will do damage based on how much damage Dracula has dealt with Soul Steal (5%, increases up to 33%)

Notes: The shadow-print is about the width of two Mario's usually, though it's shape is dependent on Dracula's actual shadow at the time he uses it, so on a sunny stage like Delfino Isle, it might span a much larger area. When an opponent walks or runs over it, they're sucked down into it up to their ankles as the "Souls" Dracula has stolen take their revenge on the hapless victim. The opponent will always take 5% damage minimum, though for every point of damage Dracula regains through the use of Soul Steal, that amount increases by 1 point, up to a maximum of 33%. This increase in damage resets whenever Dracula loses a life, however. Also, apart from the actual damage, the move will hold an enemy still for roughly a second while it deals it's damage, possibly giving Dracula an opening to attack. Charging this move doesn't change the damage dealt, though it will slightly increase the size of the imprint.


Aerials


Neutral Air: Black Dervish + Dracula spins once in the air as he transforms into a whirling cyclone of shadows and fluttering bats. The move draws enemies in, dealing light and rapid damage. As the move ends, Dracula reforms, still spinning. Enemies hit by the ending spin will be knocked away (1-2% bats and shadows, 10% ending spin)

Notes: Dracula is invincible for the middle portion of this move, when he's in shadow/bat form: all attacks will pass right through him, and usually result in the attacker being pulled in. It's very rare to avoid the ending spin, unless you're caught from the beginning, and have DI'd properly throughout the entire move, or the middle section only just grazes you. After the ending spin, there's a large window where Dracula is open, as he spins twice before returning to normal, and only half of the first spin deals damage.

Forward Air: Cursed Bore + Dracula snaps his left arm out ahead of him, and several tendrils of shadow stick out in long, spear-like spikes in a fan formation, dealing quick and solid damage and knockback to enemies in front and below Dracula (6-8%)

Notes: The spikes extend very shortly after his cape is flung wide, and reach a good distance away from him. They deal vertical knockback, so catching an opponent with a lower-positioned spear can send them up into the one(s) above it, dealing multiple hits. There's not much lag if the move ends in the air, but if the spears come into contact with the ground, they'll get stuck, and it will take Dracula a while to pull them free.

Backward Air: Incubic Snap + Dracula glances behind him, grins, and twists his torso around while extending an arm directly behind him. He then sharply snaps his fingers, creating a small spark of dark energy (0-1% sourspotted, 28% sweetspotted)

Notes: The most powerful sweetspot move in the game. It is understandably difficult to land, as Dracula's hand must connect with the center of an opponent, and there's about a second of delay between inputting the move and Dracula's execution of it, but if you manage to land the attack, it deals a ridiculous amount of damage, and sends the foe flying away in a random direction. Randomly spiking an opponent with this move is among the most satisfying acts in the game.

Upward Air: Hell Flame + Dracula holds his hands above his head, and creates a medium-sized flame within them. The flame damages anyone that touches it, and stays lit for a few seconds. When the move ends, the flames disperse in a quick burst as Dracula snaps both his fingers (5-6% on contact, 13-15% at moment of dispersal)

Notes: The snapping fingers here are purely for effect. The move has great priority, and is great for juggling airborne opponents. However, you must be careful: if Dracula touches ground before he extinguishes the fire, it will fall on him when he lands, as he momentarily loses his concentration. The fires fall over him, dealing 2-3% and no knockback, though Dracula isn't too happy about it, and a few bats will madly scramble out from under his smoking robes.

Downward Air: Gloomy Stride + The Count crosses his arms under his robes and looks indignantly below him as he raises one of his legs, then drives it downward, dealing damage and spiking (10% and spike)

Notes: The move is akin to Zelda's Downward Aerial, but only in that the move is largely concealed by her long gown. While the same is true for Dracula, it's much easier to spike with this move, and even if you don't manage that (the opponent must be at or below Dracula's knees, and roughly straight below, not to one side), it still deals solid damage and has good vertical knockback. If you do land the spike, a look of disgust will cross Dracula's face, as though he just stepped on something foul.


Miscellaneous Attacks


Rising Attack: Black-a-Vised Servants + Dracula curls back his arm, then throws his cape out wide ahead of him, pushing the enemy back with a gust of wind (though no damage is dealt by the movement). Several bats are sent forward, dislodged by the sudden and powerful move. The bats deal light damage and flinching knockback, though they eventually evaporate into thin air (1-2% per bat hit)

Notes: This has amazing range for a rising attack, though it only hits to one side. Also, aside from the wind push (similar in scale to Angel Ring's), the only damage comes from the bats, which travel in random patterns, dizzy and weak from the fall as they are.

Ledge Attack: The Master's Rebuttal + Dracula quickly pulls himself back on-stage, and sweeps one side of his cape out wide ahead of him. If an enemy is caught inside of it, he pulls them around with him as he spins once before tossing them out with an indignant slap to the head (5%)

Notes: A generally bad attack, as the hitbox to catch the enemy is very specific (the enemy has to be a good distance away from Dracula, and on the ground or very close to it), and unless you do catch them the cape won't deal any damage to them. However, if the Dracula player presses the A button again before Dracula spins fully about, Dracula will stop the attack earlier than usual, swatting the enemy in the opposite direction: straight off the stage. If this is done, Dracula will scoff and say "Impudent--" as he smacks his victim away.

Ledge Attack over 100%: The Master's Response + The same concept as his normal Ledge Attack, though much weaker and a little slower (1%)

Notes: You can still use the early-A trick to throw your opponent off-stage, though the knockback is much, much weaker, and in that case, no damage will be dealt.


Grabs and Throws


Grab: Loving Vice + Dracula extends his hand forward and makes a grasping motion in the air. Like most of his standard attacks, this will miss if the enemy is too close, but the range is very good, extending invisibly ahead of his hand. What actually grabs the opponent is the sheer power of Dracula's dark will.
Grab Hit: Bloody Vise + Dracula clenches his fist and rotates his wrist, pressing in on all sides of his victim with unholy power. Slow but powerful (5%)

Notes: As mentioned, the Count has a grab that's as long as the average tether grab, but if an enemy is withing the range of a normal character's grab to him, the move will miss. Also, this move can't be used as a tether recovery, despite it's similarity to tether grabs.

Forward Throw: Sudden Banishment + Dracula makes a pushing motion with his hand, and the caught foe is sent flying away as a burst of dark energy explodes on top of them (9-11%)

Notes: The blast, though relatively small, can catch other foes in it if they happen to be close enough. This is also Dracula's fastest grab, with virtually no lag on either end of it.

Upward Throw: The Count's Appraisal + Dracula motions with his hand, as if to gently lift something, and the enemy flies up into the air (3-4%)

Notes: Though very little damage is dealt, this throw has insane vertical knockback. On a stage like Sky World or Yoshi's Island (Melee), it can KO beneath 80% in the right places. It has large ending lag though, as Dracula has a penchant for watching his victims as they fly away to their inevitable doom...

Down Throw: Death Pool + The victim is plunged into the ground, straight into their own shadow (6-7%)

Notes: On normal ground, the enemy is thrust back into the open air after a second "underground", with minimal knockback. However, if they're sent into their shadow on a platform that can be dropped through, they'll be spit out of the other side, with similarly moderate knockback. A neat move to use on an opponent on moving stages, as Dracula can leap to safety while the opponent, stuck in their own personal darkness for a full second, are taken off-screen as the platform they were planted in leaves the arena.

Backward Throw: Carnal Invitation + Dracula roughly pulls the opponent toward him (1%)

Notes: The perfect setup move for Soul Steal. Unless the enemy DI's immediately and directly away from Dracula, they will almost always be caught if the Dracula player uses the Down Special as soon as they can. Though if they don't, they'll find themselves in a very bad position.


Special Moves


Neutral Special: Hell Fire + Dracula lifts his right arm, raising that side of his robes. From the mysterious folds of his attire fly three fireballs that shoot forward in a column. These go all the way across the stage, and damage varies depending on which fireball connects with an opponent (4% top and bottom fireballs, 7% center)

Notes: Dracula's first projectile fires twice as slow as Waddle Dee Toss. In other words, it's difficult to spam with. The center fireball travels slightly ahead of the other two, and is slightly larger. The vertical range this move covers is the size of a medium character, such as Link or Marth. What this means is that most characters, on the ground, will only be hit by the center and lower fires (though a small, crouching character could only take the lower), while taller fighters (Ganondorf, Ike, Link, etc.) will be hit by all three if they take no evasive action. The projectiles gather speed the farther they fly, at first only going as slow as a Nikita Missile that's turning, but possibly going as quick as Link's fully charged Arrow (though it takes about one Final Destination to pick up such speed).

Side Special: Hell Meteor + Dracula lifts his left arm, raising that side of his robes. From the mysterious folds of his attire flies a spinning, flaming rock. The meteor spins across the stage, drifting slowly toward the nearest opponent, though any enemy that touches it will take damage, and it will still continue to move until it hits it's original target or disappears after a set time (15% intended target, 8% innocent bystanders)

Notes: Unlike Hell Fire, Hell Meteor doesn't stop upon contact. It will go through any opponents in it's way, dealing very only flinching knockback, and decent damage. However, if it manages to hit it's original target (which is whomever is closest to Dracula when he uses the move), it deals greater damage and solid knockback. It also flies much slower than any other projectile in the game: slightly slower than a Nikita Missile that's turning. Like Hell Fire, the ending lag is significant, as Dracula closes his cape with an unnecessary flourish. Hell Meteor fades away after traversing distance equal to the length of Final Destination.

Up Special: Shriek of Bats + Dracula dissipates into a frenetic swarm of small bats, which fly around the level, damaging anyone they come into contact with rapid hits before reforming into Dracula's normal form (1-2% per hit, rapid damage)

Notes: You can control the swarm's flight path, but as it's a large gathering of bats, it's not as easy to control as something like Pit's recovery is. In fact, the controls bear more in common with Volt Tackle, though the bat's random nature adds a good deal of "stutter" to whichever flight path you choose, and you always rise, so you couldn't sly straight across a stage, damaging opponents as you go. The move will pull in nearby foes, taking them along with you, and dealing around 14-19% damage if caught in the swarm from the beginning of the move. There's no knockback to speak of, besides the repeated flinching the bats cause, which only serves to keep the opponent from retaliating, so using this as an outright attack is a highly punishable idea. The actual recovery range of the move is fairly standard, reaching only about as far as Fire Fox or Screw Attack if you don't maneuver left or right as you fly.

Down Special: Soul Steal + Dracula spreads his arms wide and rears back. If an enemy is next to him, he'll wrap them in an embrace, enveloping them in the folds of his voluminous cloak and turning them away from the screen while he drains their life energy (3-25%, varying)

Notes: The opponent has to be basically on top of Dracula for the move to connect (thus he "rears back" a little bit). Once you've embraced an enemy, rapidly tapping the B button will...well, let your imagination tell you what Dracula does to them as his back is turned to the screen. Anyway, rapidly tapping B will deal damage faster, in a similar fashion to Koopa Klaw (Bowser's Melee Side Special), though this is affected by the damage of the opponent. You'll always be able to pull off at least one B button press, even on an opponent with 0%. The more damage they have, the more extra hits you can get in before Dracula unfurls his cloak and casts them out of his loving embrace, doing a set amount of knockback (it's small) and no damage. Dracula recovers damage equal to 1/2 (rounded down) the damage he does with this attack. So he'll always regain at least 1%, though that's only if you don't tap the B button at all. Also, once Dracula has stolen an enemy's soul, he won't regain more life from them by doing it again until either 2 minutes have passed or they lose a stock. He can still do the attack for damage, but not life.


Final Smash: True Dracula + Dracula concentrates the dark energies within him, transforming into his monstrous, beastly true form, becoming at least twice as large in the process. This lasts for approximately 10 seconds, during which time Dracula's regular moveset is replaced with the following abilities.

A: Death Claw + True Dracula slams his claws into the ground ahead of him, then rakes them along the ground as he pulls his arms back towards himself. The attack reaches a very, very long ways ahead of True Dracula. Enemies on the ground hit by the claw slam are buried in the ground, and will take more damage as the claws are scraped along the ground, which pulls them along for the duration. Enemies in the air hit by the attack take a solid 15-16% damage, but enemies that take the full attack will take upwards of 35% (15-16% for the first hit, 5% multiple times for the retracting hits).
When used in the air, Death Claw manifests as such: True Dracula extends his arms straight downward, again burying ground-based enemies (though this is an incredibly powerful spike against airborne enemies). He then swings them out wide to both sides of his body, covering a wide area to both sides of his person, and flinging victims away. Damage is identical to the on-stage incarnation of the move.
This attack takes three full seconds to fully execute.

B: Hell Pyre + True Dracula spews a gout of flame across the floor of the stage, sweeping up any enemies in it's path, and dealing repeated damage (about 8-11% per second). When used in the air, the attack is aimed downwards, and splits in both directions as it hits the ground, though the damage is halved as a result.
This attack takes three full seconds to fully execute.

L/R: Shadow Dance + A shaft of shadowy power descends on True Dracula, which warps him away from where he was, and transports him to the space directly above a random opponent. This does no damage, takes two seconds to execute, and can be done an infinite number of times, even in the air.

Notes: The attack is very powerful, but doesn't last for very long. Most times, you'll only have enough time to pull of one or two attacks before reverting to normal. Use your time wisely.


Other Elements​


Dracula's Role in the Subspace Emissary: Castle in the Solar Eclipse +

In the year 1999, Dracula and his castle were sealed inside of a Solar Eclipse, ending his curse on mankind by sealing his power away within the eternal confines of a star. In the world of Super Smash Bros., he still resides there, trapped within the Sun itself.

As it happens, the powers of the eclipse are inexorably linked to Subspace. The creation of the Great Maze has the added effect of weakening the barrier around Dracula's Castle enough to let the Master Himself enough leeway to escape the confines of the solar body. Dracula calmly waits on a dark throne by the entrance to Tabuu's stage, calmly observing the struggle of the Smash Brothers while slowly regaining his strength. The player must confront and defeat the Count before moving on to challenge Tabuu. Upon defeat, Dracula applauds the player for their obvious skill, then melts into the shadows to explore this new world he finds himself in.

Who knows what evil Lord Dracula will create for the world...


How to Unlock +

After you defeat Dracula in the Great Maze, there's a 5% chance that when you go through a door as you replay any level, you'll be transported to Dracula's Castle to fight the Dark Lord in a final showdown. Defeat him there, and he'll be yours for regular play, as well as in your party in the Subspace Emissary.


Miscellaneous Animations

Idle + Dracula will occasionally reach up and stroke his well-kept facial hair, glance side to side with a disinterested look on his face, or simply cross his arms under his robes while tapping his foot slowly.
Crouch + An cobweb of shadowy material springs up from the ground, creating a makeshift throne for Dracula to recline on. If held for a while, Dracula will produce a delicate glass of blood-red wine from his breast pocket, sipping it occasionally. When he gets up, he tosses it to the floor, where it shatters.
Walking + Dracula glides silently forward, feet shrouded by swirling shadows.
Ground Dodge + Dracula takes on the property of smoke, becoming transparent, with hazy, undistinguished features. Unflinching (or moving, in any way), attacks will go right through this incorporeal form, but only until he returns to normal.


Taunt 1 + Dracula smooths back his hair with a hand. As he reaches up, a lone bat escapes from under his robes.
Taunt 2 + "Ah, sarcasm..." the Count says, as he ***** his head and crosses his arms under his robes. Highly patronizing.
Taunt 3 + Dracula sneers and laughs low and deep, while evil energy bubbles up from under his robes, making them swirl about his legs.

Kirby Hat + Kirby sports Dracula's prim facial hair, as well as his effervescent cloak.

Symbol + The reverse-crucifix and devil wings; a Castlevania standard.


Entry Animation + Dracula descends from the sky on a shaft of dark light, downing a glass of champagne, which he then tosses on the ground, where it shatters into pieces.

Victory Theme + The main refrain of Bloody Tears (though in the game, it's played on a large pipe organ).

Victory Act 1 + Dracula contemplatively strokes his chin while chuckling under his breath and grinning at the screen.
Victory Act 2 + "Mankind ill needs a savior such as you!" says Lord Dracula as he twirls his cape around him and dissipates into nothingness in a swirl of shadows.
Victory Act 3 + Dracula laughs in villainous fashion as he spreads wide the folds of his cape, and an endless swarm of shadowy bats fly out from within.

Losing Act + Dracula nobly applauds his opponent, while looking to the side, dejected.

Wii Remote Selection Sound + Ironic laughter followed by the flapping of leathery wings and the screeching of hunting bats.

Crowd Cheer + In a slow chant: "Master...master...master..."

CODEC Conversation +

Colonel: Snake! That's Count Dracula, also known as Vlad Tepes. He's extremely dangerous. His ambition is to conquer the human race, and it's only a matter of time before he reaches that goal.
Snake: Wait, so you're saying it's impossible to stop him?
Colonel: Not necessarily. The Belmont clan almost always foils his plans, but he's the embodiment of pure evil, so it's going to take something truly remarkable to destroy him once and for all.
Snake: ...Mmm. So any ideas? I don't think modern weaponry's going to do much against the 'embodiment of pure evil'.
Colonel: Just do your best Snake. Dracula may be immortal, but that doesn't mean he can't be hurt.

Alternate Outfits

Classic Dracula - As he appears in the final battle of Dracula X.
Symphony Dracula - Dracula's iconic appearance from the PSX classic, Symphony of the Night.
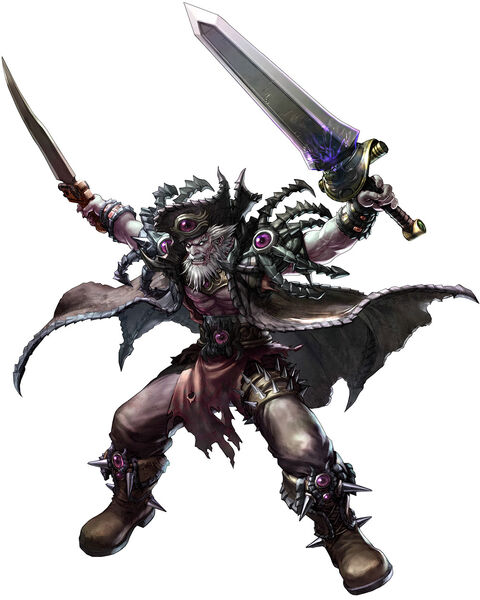
Judgment Dracula - The Master's most recent redesign, from Castlevania Judgment.


+ Trophies

Simon Belmont
+ The legendary Vampire Killer of the cursed Belmont clan.
Lord Dracula
+ The Lord of Evil, eternally reborn to bathe the world in darkness.
Grand Cross
+ Simon's Final Smash, shown destroying Lord Dracula.
True Dracula
+ Lord Dracula's Final Smash, and the ultimate form of his black heart.
Death
+ Lord Dracula's ever-faithful servant, and master of the Underworld.
Dracula's Castle
+ The setting for most Castlevania games, and the stage in Super Smash Bros.
Alucard
+ Adrian Farenheights Tepes, the son of Dracula, sworn to destroy his evil origins.
Medusa and Medusa Heads
+ The mythological beast and her innumerable servants.
Maria Renard
+ A village girl who rises to her fate, and defeats Count Dracula in Rondo of Blood.
Richter Belmont
+ While Simon may be the most well-known Belmont, Richter is the more powerful of the two.
Soma Cruz and Mina Hakuba
+ Two teenagers from the year 2035. Due to Soma's mysterious "Soul Steal" ability, mysterious forces attempt to turn him into Dracula's successor...
Vampire Killer
+ The legendary whip of the Belmont clan.
Hearts
+ The source of Simon's special abilities.
Order of Ecclessia
+ The only organization that is capable of standing up to Dracula in a time without a Belmont or the Vampire Killer.


+ Stickers

Simon Belmont (Castlevania, NES)
Classic Simon (Super Castlevania IV, SNES)
Count Dracula (Dracula X: Rondo of Blood, PC Engine)
Death (Casltevania: Aria of Sorrow, GBA)
Cross (Castlevania, NES)
Nathan Graves (Castlevania: Circle of the Moon, GBA)
Julius Belmont (Castlevania: Aria of Sorrow, GBA)
Resurrected Death (Castlevania: Dawn of Sorrow, DS)
Heart (Castlevania II: Simon's Quest, NES)
Neo Dracula (Castlevania: Dawn of Sorrow, DS)
Jonathan Morris & Charlotte Aulin (Castlevania: Portrait of Ruin, DS)
Bat (Castlevania III: Dracula's Curse, NES)
Yoko Belnades (Castlevania: Dawn of Sorrow, DS)
Succubus (Castlevania: Symphony of the Night, PSX)
Trevor Belmont (Castlevania III: Dracula's Curse, NES)
Konami Man (various)
Half Chicken (Castlevania: Order of Shadows, Mobile)
Brauner (Castlevania: Portrait of Ruin, DS)
Fleaman (Castlevania, NES)
Old Axe Armor (Castlevania: Portrait of Ruin, DS)
Hector (Castlevania: Curse of Darkness, PS2)
Reinhardt Schneider (Castlevania, N64)
Medusa Head (Castlevania, NES)
Genya Arikado (Castlevania: Dawn of Sorrow, DS)
Shaft (Castlevania: Symphony of the Night, PSX)
Shanoa (Castlevania: Order of Ecclessia, DS)
Zombie (Castlevania II: Simon's Quest, NES)
Granfaloon (Castlevania: Symphony of the Night, PSX)
Maria Renard (Castlevania Judgment, Wii)
Juste Belmont (Castlevania: Harmony of Dissonance, GBA)
Alura Une (Castlevania: Dawn of Sorrow. DS)
Leon Belmont (Castlevania: Lament of Innocence, PS2)
Skeleton (Castlevania, NES)
Eric LeCarde (Castlevania Bloodlines, Genesis)
Dracula's Castle (Castlevania: Harmony of Dissonance. GBA)
Lisa Farenheights (various)
Soma Cruz (Castlevania: Aria of Sorrow, DS)
Vampire Hunter Iga (various)


Stage: Dracula's Castle + A moonlit stage atop Dracula's famed castle. There is the main platform on top of the tower, followed by two smaller ones on either side (think Pokemon Stadium). There are another two directly above those, and a final platform in the middle of the stage, above all the others. Skyward KOs are difficult to accomplish on this stage. There are also two platforms that jut out on either side of the tower, and whenever clouds cover the moon, the stage darkens and torches set all around the stage light themselves.
Hazards include the ever-present Medusa Heads, simple Bats, and bone-tossing skeletons. The former two make their ways across the stage every now and then, dealing a few points of damage and small knockback to whatever they come in contact with, though any attack will destroy them. The Skeletons climb up the castle walls and position themselves on the platforms that stick out from the sides of the tower, and proceed to hurl bones at players on the main level. These bones damage similar to Bats and Medusa Heads, and travel in an upward arc before falling to the ground, where they can be picked up and thrown by players in the same upward arc at other players. The Skeletons can also be destroyed, though they take more damage to slay (around 20% damage), and fighting them in close-combat can result in the player being knocked off the edge of the stage, as contact with the Skeletons deals damage as well.

Item: Bible + After a player picks up the item, it flies around them in a circle for a limited time, spewing papers as it travels. If it contacts an enemy, it will deal 8-10% damage and good knockback. It also reflects energy-based projectiles, though due to it's small size and constant rotation, this rarely happens.

Assist Trophy: Death + Dracula's faithful servant emerges from the capsule, and slowly levitates towards the center of the stage. Once properly positioned, he lifts his arms into the air, holding his scythe aloft. The scythe dematerializes, and calls forth a barrage of Deathsickles--tiny scythes that materialize randomly all over the stage, and whirl in slightly-homing lines toward the nearest fighter.
Each Deathsickle deals anywhere from 3-5% damage, with slight knockback. After fifty Deathsickles have been summoned, Death lowers his hands and grips his returned scythe, before disappearing in a cloud of swirling blackness.


+ Music

Vampire Killer + The classic cool.
Vampire Killer ~ Yamane Remix + Perfectly upbeat.
Heart of Fire + A (relatively) recent favorite.
Theme of Simon Belmont + Links to the Chronicles version. This must be in.
Aquarius + The power and beauty of the electric guitar, only from Castlevania.
Bloodlines + Castlevania's shining moment on the Genesis.
Iron-Blue Intention + One of the Holy Trinity of Castlevania songs, appearing in nearly every game in the franchise.
Another Vamp Killer + From the Dreamcast vaporware, "Casltevania Resurrection".
Monster Dance + 8-bit monster slaying at it's finest.
Praying Hands + The quiet calm before an unholy storm.
Room of Close Associates + Every good game needs a good boss theme.
The Tragic Prince + Quite the symphony...
Cross a Fear + The PS: Dracula Battle remix.
Bloody Tears + A classical version fits this song best, I think.
Dance of Illusions + Richter Belmont's epic duel with the Master.
Dracula Battle 64 + Dracula's prolific theme, in 64 format.
Nocturne + Nothing more needs to be said.

You have been doomed since you lost the ability to love...​
 

Baloo

Smash Ace
Joined
Nov 14, 2008
Messages
781
You could Use Burning Leo! ( Fire )

What a wonderful idea. I Kibble doesn't use him or Biospark, I thought of a nice joint moveset for them. Of course, that's after all my others, but hey. I like the idea.
\

EDIT: Wow, big. Awesome. That is a great moveset.

Oh, I feel stupid now.
 

SirKibble

Smash Champion
Joined
May 2, 2008
Messages
2,400
@TM: Thanks, yeah, I remembered Burnin' Leo shortly after posting that. You weren't around, so I wouldn't expect you to know, but I actually did a Waddle Doo moveset in MYM3, so I probably won't use him. And I'm an old-schooler, so Capsule J > J2 for me! :bee:

We shall see, anyway. I've certainly got options.
 

Red Arremer

Smash Legend
Joined
Nov 27, 2005
Messages
11,437
Location
Vienna
Lord Dracula
MasterWarlord is in ur mym3, steelin ur movsetz

@PPL:
I'd rather have that you not feel sorry for what happened to me but rather for what you did to the harmony in this thread.
If you really are sorry, stop spamming and don't think you're the best moveset creator in this thread.

Once your 'sets have reached the quality of the standard in this contest, you can feel like a real regular. Even goldwyvern who started out sub-par is able to create averagely good movesets nowadays. I count him as such. Until you are able to make something of similar quality as his Overdrive Ostrich, you shouldn't think anyone is really interested in your creations.
 

TWILTHERO

Smash Lord
Joined
Aug 19, 2007
Messages
1,880
Location
Canada
WHOA.

That Dracula moveset is incredible MasterWarlord!!!

How long did it take you to make this?

WHOA. This blows away the competetion. HANDS DOWN. /Sarcasm
 

Kholdstare

Nightmare Weaver
Joined
Oct 10, 2008
Messages
1,440
DO YOU HEAR THE CREAKING OF BRANCHES, THE HOWLING OF WOLVES? A LOW GALLOP SPLITS THE NIGHT; THE HEADLESS HORSEMAN STALKS THE LAND!


(((DESCRIPTION)))

The Headless Horseman was originally a fictional character from "The Legend of Sleepy Hollow", a short story by Washington Irving. He has the form of a ghostly rider in cape and fancy dress, but has no head. Or rather, his head is a jack-o-lantern with sinister grin, that he sometimes has on his neck and sometimes carries, blazing furiously.

The Headless Horseman has gone beyond one character in a short story. He has become an icon of the Halloween tradition, a recognisable monster who reappears years after year, bringing fear and despair to yet another generation.

(((THE TWIST)))

The Headless Horseman may appear to be a typical fighter at first; he begins the battle with his pumpkin head squarely on his shoulders. However, as you will quickly discover, his head is in fact an item. Several of his own attacks will knock it off of his shoulders, making it a regular item that can be picked up and thrown by just about anyone. As a projectile, it flies similarly and has similar knockback to any piece of Zero Suit Samus's discarded armor. A neutral toss will do 5%, a tilted one will deal 7%, and a smash toss - which, remember, can be executed in midair in any direction - does 10%.

Before you despair, know that The Horseman cannot be wounded by his own head. If it is thrown in his direction by an unfriendly arm, it will come to him of its own accord, landing smoothly in his hands.

There are advantages to having the head on his neck, and there are advantages to having it loose in the air. A skilled player can toss it at the foe multiple times, using The Horseman's speed to grab it before they can, and so keeping them at a good range while racking up damage. To juggle between the two states, The Horseman has ways of putting the pumpkin back on his head while he's holding it.

So what can the foe do to stop this maniacal assault? They can't throw it at The Horseman, but they CAN throw it off of the side. And that's bad for The Headless Horseman. Therefore, you should never get too far from your head, and press the attack against your foe.

More details on the fine points of the concept will be found in the Specials below.

(((OVERVIEW)))

Idle Stance --- The Horseman's stance depends on where his head is at the current moment. While it's on his head, he stands slightly hunched over, his chest heaving up and down, and occasionally rears back and cackles, his pumpkin grin growing wider. If he's holding his head, he keeps it tucked under his arm, standing straight and still, while the head occasionally snickers, eyes flashing. If he doesn't have it at all, he is hunched over again, and every once in a while turns around, searching to and fro for his precious head.

Walk --- He stalks forward, feet lightly brushing the ground, purpose in his every motion. Whether he's going in search of his missing head or prowling towards a quaking foe, he knows what he want, and will do anything to get it. A relatively quick walk.

Run --- The Horseman leans way forward, his elegant cape billowing out behind him as he does so. His arms pumping furiously, and a grim expression on his face (if he has one at the moment), he moves with all the speed of an angry Sheik. Speed is one of his advantages.

Crouch --- The Horseman here drops to one knee, his hands on either side of him, looking around warily. If he's holding on to his head, he puts it on the ground next to him, where it grins and flashes its eyes. This is not at all a low crouch, even if he has no head.

Dizzy Stance --- Even the most evil and forbidding of characters must have a dizzy stance, but The Horseman's is more relevant than most. If he becomes dizzy while he has his head, it will in fact drop off, landing by his feet. He will stagger around slightly, feeling with his toe for his precious head. IT IS BAD TO BE DIZZY as they have plenty of time to pick up the head and toss it off, and punish you to boot. And if you don't have it, everything happens the same way, with them STILL having time to throw it away before you snap out of it.

Sleep Stance --- The Horseman does not require sleep. This simply causes his head's flame to gutter out, leaving it cold and dead. With his head no longer working, The Horseman cannot move, and stands ramrod straight until it lights once again.

---~~~~~~~~~~~~~~~~~~~~~~~~~~~~~~~~~~~~~~~~~~~~~---​

Height --- Without his jack-o-lantern where it belongs, The Horseman stands on par with Link. Even with it, he doesn't gain much: it may be bulbous, but it's not very substantial vertically. What pumpkin is?

Weight --- Does he even have a corporeal body beneath those fine clothes and dark green cape? Or is he nothing more than a wips of something greater, lingering in this world after an unjust death? Whatever the case, The Headless Horseman is much lighter than his size would indicate. I'd rank him on par with Pikachu.

First Jump --- In a disappointingly short primary jump, The Horseman lunges forth, his cape billowing behind him, and his hand clutching at the air around. His jack-o-lantern face bears an angry hiss, as he seeks to chase down those fools who would stand in the way of his mission.

Second Jump --- I told you that The Horseman was no longer quite human. Mysteriously, bewilderingly, once in midair, he has merely to extend his body fully and kick down with his legs to receive a sizable leap. About as good in length as Ness's second jump.

Power --- Sad to say, most of the Horseman's attacks are not fantastic in knockback terms. With his constant barrage of projectile item, and several attacks that do high damage, he has excellent damage output, but he sort of has trouble sealing the deal. A Smash-thrown jack-o-lantern won't KO until 150% on light characters, just so ya know.

Attack Speed --- The Horseman is beyond the level of mere mortals. Since so much of his offensive will be based on an item, his attacks in themselves may not be the quickest, and that's alright. Some of his attacks are good in this department, most are not. It's all the same.

Traction --- The Horseman does skid a bit as he turns; his scuffed boots just don't grip the ground well enough. He's far too sinister and smooth to trip, except in very rare situations, but he does slide a bit more than average. Only a bit.

Fall Speed --- The Horseman is more or less average in this regard. He's not heavy as a regular human, nor is he weighed down by tools, but he's also not exactly a wisp of smoke.

Range --- Very decent. Between his pumpkin barrage, his will-o-wisp attacks, and the occasional mushroom, The Horseman specializes at keeping his foes far away and too afraid to approach.

(((MOVESET)))

SPECIALS

Neutral Special --- Jack-O-Lantern Ablaze --- With a sudden wave of his hand and a cackle that seems to come from everywhere and nowhere, The Headless Horseman's head lights on fire, its grin growing wider briefly. This happens almost instantaneously, and the pumpkin goes on burning for about two seconds after the attack is executed. There is a little lag as the Horseman's body stands there, admiring its work, but this is minimal. This is an attack with diverse and plentiful uses.

Notes --- Depending on where his head is, this attack will have various functions. First use: if the jack-o-lantern is on his neck, his head becomes a small hitbox with next to no range. Foes coming into contact with the burning pumpkin take about 5% and are knocked back a ways, although not enough to KO. Since it lasts for about two seconds, this is best used by jumping into a foe while you're on fire.

Second use: If the jack-o-lantern is in his hands at time of usage, he can proceed to toss it, as the fire does not harm him, its master. If he throws it while it's burning - or, for that matter, if he lights it on fire as it's flying toward a foe - it deals an extra 5% on contact with a foe, and has 10% more knockback. This must be timed correctly, or you'll end up wasting time for nothing. Remember that a neutral throw does 5%, a tilted throw does 7%, and a smash throw in any direction does 10%. Use this whenever you can.

Third and perhaps most important use: Is your foolish mortal foe trying to pick up your precious head and toss it off the edge? The second it touches their hands, tap B to make it light on fire. This will not only cause them to drop it instantly, but also deal 5% and enough knockback to keep them from trying it again right away. Tis The Horseman's only tool against those who seek to dispose of his head, and so vital to his survival.

Fourth minor use: Apply immediately before using any of The Horseman's attacks that brandish his head. Up Smash is a great example of this; this will allow you to slip in extra damage here and there, and add 10% to your knockback. Yet another link in the chain.

Forward Special --- Feast of Flesh and Seed --- With a sudden, nasty, cackle, his head zooms off of his shoulders and flies forward at a speed equivalent to Samus's Charge Shot. It travels about as far as a thrown item, losing height as it does so. This attack suffers from lag as the head leaves him. However, if the pumpkin comes into contact with a foe during its arc, it will attach itself onto their head - or, if they have none, where it should be - making them look somewhat like The Horseman himself. This forces them into the dizzy animation, but with the slight adjustment of having a grinning jack-o-lantern on their head, which flares up ever second, dealing damage. They must mash A to liberate themselves, which is easier at lower %s, and when they finally do, the pumpkin drops and they slide backwards a foot or two.

Notes --- Every second, The Horseman's head deals 2% to its hapless victim. More relevantly, The Horseman is free to do what he likes to their helpless body. If they're too far away, I would advise using Jack-O-Lantern Ablaze, which boots up the damage to 4% per second. Alternately, if you're close enough, and they'll be trapped long enough, rush on forward and punish their weakness with a powerful attack.

This is executed fairly quickly with some wind-down lag, and has great rewards if the foe can't mash properly or is at very high %s. However, I don't suggest overusing this one, as it's somewhat inaccurate. Unless you're cautious, you'll end up consigning your own head to falling, leaving you more or less helpless. Not to mention that unless you have your jack-o-lantern on your head, this attack won't work at all; it'll just be your Neutral Special instead. The bottom line, then, is to save this for the opportune moment.

Up Special --- Path of the Will-O-Wisps --- As The Headless Horseman gestures and waves his arms about him, a veritable cloud of small, ghostly lights appears around him. During this period, he is suspended in midair, rather like Fox's or Falco's Up Special. After that period, the will-o-wisps move away from The Horseman in the direction you tilt the control stick, forming a path. The farther away from you you tilt it, the farther they will go, to a maximum length of a Battlefield platform and a half. You can also tilt the control stick to choose the angle of the will-o-wisp "platform", making it anywhere from perfectly vertical to perfectly horizontal. After about a second, you will lose control, and they will solidify, making a path that begins right at your feet. You can actively walk on this for the ten seconds it remains in existence, but your foes cannot.

In all so many words, you're creating a path that you can walk on to get to the stage. Relevantly, you can only make one while you're in the air. After you touch solid, real ground, you can make another one.

Notes --- This recovery may sound long-winded, but it only takes two seconds to execute, meaning the path forms quickly and you have to move if you're going to make it long enough and tilted enough that you can stroll on back to the stage. It's all too easy to punish The Horseman while he's just hanging there, but after that, as you've pretty much made your own platform, you can approach the stage however you want without fear of being spiked down. If you fear the foe's retaliation, stay fairly far away and just make a small platform to land on, so that you can regain your regular jump.

This has another level, though. It not only holds up The Horseman, it also holds up his head. In a pinch, you can make a vertical wall of will-o-wisps to stop your foe from tossing the pumpkin off of the edge; it'll simply bounce off of the translucent wall.

Down Special --- Mastery of the Forbidden Art --- This attack does several things depending on where the jack-o-lantern is. If it is on The Horseman's head, he will quickly and efficently take it off, cradling it under one arm, ready to toss it at foes. If he is holding it at the time of usage, he'll, rather obviously, place it onto his neck. Either result is extraordinarily quick, taking a split second to execute.

Alternatively, if the jack-o-lantern is just lying around someplace, or is in someone else's hands, or is falling, or is just about anywhere other than with The Horseman, it will hurtle suddenly and quickly through the air, seeking its master as he lets out a menacing chuckle. This has about a second's lag, and the flying pumpkin doesn't do damage and can't go through the stage, but it's still vital to his game. It doesn't automatically come onto his head, though.

Notes --- This is manipulation. With this, The Horseman can switch his playstyle instantly, wielding his head as either projectile item or part of is hitbox. Extremely important, as so many attacks need you to use this pumpkin one way or another.

The second part of the attack is also very important. It probably won't come out quick enough to save your head if it's falling - save Neutral B for that --- and it's quite a bit laggier than just picking it up, so use only if it's at a distance and you have some urgent, pressing need of it.

---~~~~~~~~~~~~~~~~~~~~~~~~~~~~~~~~~~~~~~~~~~~~~---​

BASIC ATTACKS

Neutral A --- A Treat --- In a misleadingly named attack, The Horseman extends one arm, palm facing up, and tilts his head slightly, allowing his pumpkin head to roll down his shoulder, arm, and into his hand. The pumpkin itself deals damage when it reaches his hand. If you do not proceed to tap A, he will soon raise his arm, allowing his head to roll down it and back to its rightful place.

If you have no head, this attack will do no damage, but will have The Horseman wringing his hands in anger at the loss of one of his moves; a very short animation.

Notes -- Yep, his first attack is one of those few he requires his head for. It's not the handiest, though. It takes a bit more time than it should for him to roll his jack-o-lantern down to his hand, and it only does 3% and "flinchback" (flinching knockback). However, as you are about to see, it does have some use.

Tap A --- A Trick --- When the pumpkin is in his hand, The Horseman begins to channel his fury and malice into it, causing it to burn brightly for as long as you tap. It seemlingly sucks the foe in with its multiple, fiery hits, and so can rack up a decent bit of damage before they DI out of it.

Notes --- The second part of the combo comes out in a split second, and the jack-o-lantern really does burn A LOT. Even more than with his Neutral B. Each hit may only do 1%, but it's fairly easy, especially against larger character, to keep them in close long enough to rack up 5-10% with this. This is a big reason FOR keeping the pumpkin on your head, and will make them recoil warily every time The Horseman lowers his arm.

Dash Attack --- Play of Light --- In a new breed of dash attacks - ones that make the character stop dead in his tracks instantly - The Horseman instantly cuts off his forward momentum and, extending his hand, with fungers curled into a claw, he causes three or four will-o-wisps to gambol about just before it. They fly around in little circles, close together, for about a second before fading.

Notes --- This comes out quite suddenly, and stops all momentum - sort of a horizontal Lucario Down Aerial. It may have speed, but there is only one hit and poor knockback - too much to follow up easily, too little to do any kind of damage. Speaking of damage, this one does 6%. Okay as a way of mixing up your approaches between item tosses.

---~~~~~~~~~~~~~~~~~~~~~~~~~~~~~~~~~~~~~~~~~~~~~---​

Forward Tilt --- String of Slashes --- The Horseman suddenly draws the long, elegant sword at his waist, and extends it to its full range. This first strike just causes the foe to flinch and deals small damage. However, pressing forward tilt once again will cause The Horseman to flick his wrist upwards, bringing his sword to a diagonal angle above him. Now, THIS strike is quite powerful, and shoots foes upwards. These two have quite a bit of starting lag, but the pay-off is quite decent.

Notes --- It takes almost a second for the Horseman to draw his blade, and a bit less for him to sheathe it. The strikes themselves are almost instantaneous, and can be stringed beautifully. The first shot does 4%, but the second does 7% with enough knockback to KO at 150%. The Horseman's swordsmanship is different from most every character in the game currently as he wields his rapier with incredible speed, using movements of his wrist rather than his arm.

Up Tilt --- Half-Man's Breakdance --- This is a unique attack in that it cannot be used unless The Horseman doesn't have his head on his shoulders. If he does, this one will simply have him glaring vaguely above him. However, if he does, he will flip upside down, standing on his head (well, shoulders), and will do a single breakdance-style spin, kicking foes above him with outstretched legs and multiple hit that resemble the Master Hand's drill attack in that they suck foes in.

Notes --- This one takes a moment to use and is only conditionally useful anyway, but there are about ten hits, each doing 1%, and it's pretty easy to land them all. The hitbox is sadly quite small here, though, making it easy for foes to poke you while you're off your guard with long-reaching attacks. The final hit has minimal upwards knockback while The Horseman takes a bit less than a second to get back on hit feet.

Down Tilt --- Candle-Lit Eruption --- A very quickly executed move. In a split second, the ground around his feet erupts in a gout of flame that goes up to about the level of his head before fading. This is a very short, but very sudden attack.

Notes --- Despite its extraordinary speed and incredible hitbox, this is a pitifully weak attack, as candle flames are weak and cool. It only does 4%, with horizontal knockback that's essentially impossible to follow up on - although maybe with your head, you could. Best used when you need some breathing room.

---~~~~~~~~~~~~~~~~~~~~~~~~~~~~~~~~~~~~~~~~~~~~~---​

SMASHES

Forward Smash --- Spirit's Ire --- The Horseman leans backwards, arching his back and thrusting out his chest. Some sort of white, transparent, ghostly matter emerges from it, and, as it moves forward, it becomes clear that it's a ghostly image of a frowning, mournful-looking man. This man extends himself forward, everything below his midsection still not having emerged from The Horseman, and brandishes a rapier with a single downward swing. Disjointed hitbox here in every sense of the word. He then vanishes back into his host.

Notes -- The spirit of The Horseman's mortal self takes a long moment to emerge and strike forward, but its single swing is quite powerful, doing 19% and having some nice knockback. This attack has an interesting property, aside from the way in which it comes out - when the spirit pulls back, if it made contact with the foe, all of your physical attack for the next ten seconds have bolstered range, as the attack have a ghostly afterimage that extends ever so slightly farther. However, for those ten seconds, you can't use Spirit's Ire. This is extraordinarily useful, obviously, adding to The Horseman's already nice range, but is pretty hard to pull off, as he needs a solid hit, and this is a slooow smash.

Still, try to pull it off whenever you have a good opening, as the added range can really help to keep the foe at bay when you need to pull off that vital KO.

Up Smash --- Ghost Pressure Discharge --- This attack has two different outcomes depending on whether your jack-o-lantern is on your shoulders or not. If it is, this is an extremely simple attack. There is about half a second's pause as The Horseman stiffens, and then his head pops off of his shoulder as if it were thrown from a Smash attack, flying straight up. Quickly executed, does as much damage as if you'd thrown it - 10% - and the same knockback.

If he doesn't have it, after the same amount of start-up, a large, ghostly hand reaches out of the hole that his head should rest on, travelling up about the length of a Bowser, outstretched and clawed. This hand deals damage on contact, about 12%, with fairly small knockback that depends on the angle the foe was hit at. It fades after about a second of reaching up and out.

Notes --- The first is extremely useful, even if it doesn't do much damage. If the foe is above you, it's exceptionally easy to use it, hit them with your head, then jump it and grab it in midair, chucking it at the foe yet again once you hit the ground. Very handy indeed, and nice and sudden..

The second variant isn't all that great. It lasts quite long and still has good range, but it's easy to strike the guy from the sides as he uses hit, for those very reasons. It's still very sudden, though, and hard to predict, so it's not totally without uses.

Down Smash --- Shadow and Flame --- The Horseman summons to his aid the two elements that he has at his disposal. Turning to face the screen, a wicked grin upon his head (wherever it may be), he extends one hand to either side (near his feet). He doesn't duck while doing so, like, say, Lucario does. Instantly, a ball of fire appears in the palm of one hand, and a vortex of darkness appears in the other. These stay out, swirling and blazing, for one second, before fading with very little cool-down lag.

Notes --- This attack comes out fast, but should only be used when the foe is near - it has little range. It does have good priority, though. The fireball - which always appears on the right side - has the usual properties of fire attacks; good knockback, good damage (16%), and blazing effects. It shoots foes almost directly parallel to the ground.

The vortex, though, well, that's a different story. It sucks foes nearby towards it, and then dishes out multiple hits against them as the flinch repeatedly. Each hit does only 1%, but there's a grand total of fifteen of them. It's hard to break out of it once you've been ensnared. The final hit trips the foe and knocks them to the ground; can't ever KO, obviously, but a nice way to get a foe who thinks he's going to an unbreakable approach.

---~~~~~~~~~~~~~~~~~~~~~~~~~~~~~~~~~~~~~~~~~~~~~---​

AERIALS

Neutral Aerial --- Ring of Rising Moon --- As The Horseman pulls in all his limbs, an unbreaking ring of white energy forms around him, swirling a few times before fading away. This makes a hitbox that's more or less impossible to outprioritize, but is very weak. However, if The Horseman has his head, it gets caught up in the swirling energy and swirls along with it. If a foe gets hit by THAT, the effect is much greater. At the end, the head is deposited right back on his head.

Notes --- Without your head, this attack does a mere 4% and a set amount of knockback - good thing, too, because it comes out so quickly. With it, though, and only if you aim just so that the head, which spins along with the energy, comes into contact with the foe, this does some impressive knockback and about 13% damage. This is definitely a big plus to keeping your head with you.

Forward Aerial --- Claw of the Devil --- In one of The Horseman's few literal melee attacks, he pulls his right hand back, curling his fingers slightly into a claw, his left hand slightly extended. In a quick, sudden move after this wind-up, he tosses his whole body forward, becoming nearly parallel with the ground, and drives the clawed hand forward. It has a cutting sound effect upon contact, and is actually quite powerful with unique knockback.

Notes --- What knockback might this be? Well, with this attack, upon contact with the claw, the foe is actually knocked away backwards, that is to say, behind you. Apparently The Horseman imbues even his simplest attacks with his sinister touch. This does less damage than most of his moves - 8% - but has quite decent knockback. This is best used when the foe flies out to edgeguard you; time its wind-lag properly and they'll be in for a nasty surprise.

Back Aerial --- Penumbra Mount --- A strange attack. The Horseman does not, in fact, move at all; however, a shadow that appears to resemble a ghostly horse appears beneath him. It is NOT a hitbox or even an extension of The Horseman, except when it strikes. Which it does quite quickly, almost immediately after materializing. It strikes out backward, kicking with its two hind hooves. Decent range here.

Notes --- A rather simple attack. Note that this one can in fact be bolstered by the Spirit's Ire range boost, even though it's your ghost horse that strikes. And strike he does, for 12% and disappointingly little knockback. Combined with the wind-up and wind-down as it vanishes, this is not the greatest of attacks, and well worth skipping in most situations.

Up Aerial --- Hollow Blade --- Three-swing attack. The first is as he draws his blade, yanking it out of its sheath and jabbing it straight up into the air. Second strike happens automatically after that; he essentially sharply shakes his wrist, as though he were cracking a whip, and strikes in the whole area above him, a fairly wide radius. The third strike, you must tap A for, and quickly, as the first two take less than a second. This one sees two ghostly hands reach out of the sides of The Horseman's arm, each brandishing a ghostly imitation of his own sword. This results in a three-pronged attack. All three of these take about a second to pull out; one of his best damage-racking attacks.

Notes --- This attack is extremely quick. The first strike has beautiful range, sweetspotting on the needle-sharp edge of the rapier for 7%. Anywhere else, it's 4%. Whatever the case, the foe doesn't have time to be knocked back, as the second strike comes out. This one covers a better radius, catching foes who airdodged, and does 5% no matter where it hit. This one has very little knockback even if you don't use #3. The optional third hit has excellent range, coming out at three separate angles. Again, the tip of any of the sword sweetspots for 7%. This has horizontal knockback, but not too much.

So, at best, this attack racks up 19%! Obviously, that's extremely hard to pull off, and only possible against hardly damage fastfallers, but still, some interesting potential here.

Down Aerial --- Deliverance --- This is a devastating attack, but you have to pay for it. First, it only works while he has his jack-o-lantern. In about one second, The Headless Horseman removes it from his shoulders and tosses it in the air in front of him. While it's beginning its descent, he raises his right leg as high as it could go, his toe almost touching his forehead (or where it would be), then bringsit downwards, kicking his head down with his heel. It goes hurtling at an impressive speed straight down. If it strikes a foe, it loses all momentum and bounces off of them, while they are spiked quite handily. However, since The Horseman is suspended in the air while doing this, he has no hope of recovering his head before it falls to the abyss - if you used it to spike a foe, that is.

Notes --- So what we have here is a spike that costs The Horseman his head if used without some sort of ground beneath him (and his foe). It takes some time to start up, but it has more or less unlimited range (on a certain trajectory) and is quite effective. Not the most effective of spikes, doing 9% and only really working at 50%+, but still effective. Losing your head is a HUGE setback, though; so many attacks rely on it in some way. Will you take the risk? Do you dare? Is it worth it? Ask yourself these questions before employing Deliverance.

And remember, you CANNOT use this attack without your head.

---~~~~~~~~~~~~~~~~~~~~~~~~~~~~~~~~~~~~~~~~~~~~~---​

GRAB & THROWS

Grab --- A rather simple one. No jack-o-lantern shenanigans here. Okay range; he has longer limbs than most of the cast. The Horseman grasps his prey by the throat, heaving them into the air as they flail about futilely.

Forward Throw --- Executioner's Duty --- The Horseman releases his foe, causing them to collapse in a heap. He then heaves an axe that seems to materialize in his hands AFTER he begins the swing, in a downward arc that end in the foe. They go flying forward.

Notes --- This has the best knockback of all The Horseman's throws, but not as much as you might think from the description. It can KO Mario at 100%, but only if they're on the very edge of the stage. It does about 9%. Useful if they're at high percents and you need a KO fast.

Back Throw --- Whiplash Combo --- In a single fluid motion, The Horseman backhands the foe, sending them slightly into the air. He then slips right under them, draws his sword, and swings it sharply and briefly, like a whip, against the foe neck as they fall. A damaging and awesome-looking throw, but with little knockback.

Notes --- This does 10%. It has wind-down lag as he sheathes his rapier. The knockback is rather pathetic, though. There's really not that much more to say about this throw.

Up Throw --- Void Tear --- The Horseman, still gripping his foe with one hand, causes a small black vortex to materialize in his other hand. He then clenches it into the foe stomach, causing them to bob along around it. With them held in by the vortex, he lets go, but lifts the hand that's holding them in place, lifting them with it. When it's directly above him, he pushes out, forcing both the foe and the void sucking them in to fly straight up for a certain distance before going into free-fall.

Notes -- Despite how complicated it may sound, this is quite simplistic. It does a tidy 8%, and doesn't really have exceptional upwards knockback, but the foe cannot move or do much of anything untl the vortex releases them, at the top of its arc. This isn't too long, so 95% of the time, you won't be able to punish them for it, but it has some applications in team battles.

Down Throw --- Gnashing Tooth and Hungry Fang --- While The Horseman is still gripping his foe by the neck, his head jumps off of his neck, and begins to gnaw at the foe's head furiously. He quickly drops them, whereupon the head chews them a bit longer before jumping off and landing at The Horseman's feet. The foe is knocked a short ways away.

Notes --- This throw CANNOT be used unless you have the head. The pay-off for that is a neat 13% damage and a way to separate yourself and your head while conveniently also dishing out damage. The foe can't really be punished after this throw, but you can quickly pick up your jack-o-lantern, ready to toss at a moment's notice. Or even just place it back on your head.

---~~~~~~~~~~~~~~~~~~~~~~~~~~~~~~~~~~~~~~~~~~~~~---​

FINAL SMASH

Final Smash --- All Hallow's Eve --- The Horseman cackles, a deep, rough sound that chills hearts and stops blood; the Smash Ball is his. When he activates it, the screen grows darker, as if it has gone to night. Will-o-wisps suddenly cover the screen, glowing serenely, a part of the foreground and background. Most importantly, fresh pumpkins sprout all over the screen. The number of these depends on the surface area of the stage; Final Destination would have four, Battlefield, five. Hyrule Temple would have an astonishing fifteen. And so on.

The Horseman can do with these pumpkins anything that he could do with his own head, which is different only in that it is carved. Disregarding that, he can pick them up, put them onto his head, use them for his Up Smash or A Combo, press B to light them all on fire, or summon them with Down B. If he does the last, the closest one will be the one that comes to him. These pumpkins can be picked up by anyone, but just as with his own, they can't be thrown at him. They can be thrown off of the stage, though.

Whether they are or not, they all vanish into thin air after thirty seconds. The lights fade and the night recedes, leaving the horrors of the night as nothing more than a memory.

Notes --- So you have thirty seconds with several pumpkins instead of one. Now, the obvious thing to do here is to spam B. On most stages, there won't be much room between the pumpkins to move around. Lighting them all on fire at once should send multiple foes bouncing around a bit, racking up the damage, and it's so easy to scoop one up, use it again to power it up, and then chuck it for the KO.

However, it gets more complicated in one on one, where a foe can tactically throw them off one by one. There, you'll have to subject the foe to a barrage of thrown pumpkins, Forward B assaults, burning pumpkins, full-power attacks (think Neutral Aerial or Down Aerial), and flying pumpkins. The sky's really the limit with the clever things you can do here. Keep one pumpkin on your head at all times, I suggest, while you throw the others around willy-nilly.

This is not overpowered despite its long duration because The Horseman can be hit throughout. He's not invincible or anything; he's just got more resources to tap into, making him stronger. In fact, despite all the potential, this Final Smash is probably on the lower side of the power spectrum, fitting in with DK's and Mario's as one that you have to be quite skilled to make the most of.

(((PLAYSTYLE)))

When you consider The Horseman's playstyle, you hae to remember that it should be looked at in a way pretty much different from anyone else's. His regular attacks ARE important, but not as important as usual, because so much of his attacks will be thrown items. His Specials - especially the Down Special - are going to be much more important.

Anyway, you want to keep the foe on their toes. You have close range power, long range power, and everything in between; however, you need your jack-o-lantern to have any given one of those. If the foe stops a throw or catches your pumpkin out of the air, they can easily break up your attack and close in, and you're missing half of your best melee attacks. You want to be cautious, but not so cautious that the foe can find their own openings to attack. You want to seemlessly combine the two styles - having your head or throwing it - by employing Down Special constantly.

Protect your head at all costs. Perhaps even more than Popo and Nana, if you lose it, your hopes of winning will fall dramatically. Many attacks will become weaker or won't function at all.

The Horseman has a sketchy recovery. He can go far, but the wind-up is risky. You're going to have to keep both feet on the stages. Combined with the constant risk of losing your head accidentally, and The Horseman certainly prefers the middle of the stage as his prime fighting grounds.

Plant yourself, keep up steady pressure, be careful, and guard your head. These truths are at the heart of mastering The Headless Horseman.

(((EXTRAS)))

TAUNTS AND POSES

Up Taunt --- The Horseman draws his sword and swings it about twice in the air above him, a dark grimace on his face. Murder is to follow, all know.

Forward Taunt --- "Your head will adorn my belt," The Horseman growls. A slooow taunt, he doesn't talk quickly in the least. And therefore can't be spammed like, say, "You're to sloo-oow!"

Down Taunt --- The Horseman does a salute, remembering his days as a soldier. It's obviously quite a mocking salute, as he has no real head to put his hand to. A commentary on the blindness of soldiers and of the cruelty of those who lead them. Or something.


Victory Pose #1 --- The Horseman is sitting on the ground, his head beside him, and surrounded by other carved jack-o-lanterns. As he carves out yet another one and places it beside him, they all cackle and grin simultaneously.

Victory Pose #2 --- The Horseman holds his head under his arm as he faces the screen, still as stone. There is an almost plaintive look on his face, as if he wants to be released from his hellish existences, and is disappointed that no foe can accomplish this.

Victory Pose #3 --- The Horseman clenches his fists, causing heat waves to radiate from them, and turns his head completely around so that it faces the losers. We can only guess at what kind of murderous expression he's showing them.

---~~~~~~~~~~~~~~~~~~~~~~~~~~~~~~~~~~~~~~~~~~~~~---​

ALTERNATE COSTUMES

Dark Costume --- As shown in the below picture. Completely black get-up. Very sinister. This is his default costume, as the opening picture doesn't exactly have colour details.


Red Team --- The Horseman's cape is completely red. This is the only real visual change. Let's not go overboard unnecessarily.

Blue Team --- The cape becomes blue, and most of his clothes take on some darker shade of it as well. Looks ethereal and misty, like something not quite of this world.

Green Team --- Jack-o-lantern takes a greenish tinge, as does his cape and parts of his clothes. See below.


---~~~~~~~~~~~~~~~~~~~~~~~~~~~~~~~~~~~~~~~~~~~~~---​

SNAKE'S CODEC

Snake: Colonel. Am I seeing things or is this guy really throwing his head at me?
Colonel: Your eyes work fine, Snake. Your foe is The Headless Horseman.
Snake: What a creative name.
Colonel: Focus, Snake. You won't be able to outrange him unless you can somehow get that pumpkin away from him.
Snake: Sure thing. Give me a few minutes, and I'll be eating a nice, steaming pumpkin pie.

---~~~~~~~~~~~~~~~~~~~~~~~~~~~~~~~~~~~~~~~~~~~~~---​

MISC

Entrance --- The Horseman comes in from the background on a mighty, dark stallion, holding his head high in the air. He leaps sideways off of it as it vanishes seemingly into thin air.

Wiimote Sound --- A high-pitched, maniacal cackle.

Kirby Hat --- Kirby quite simply becomes a walking pumpkin. He still has little feet and hands, but he's orange all over, and his eyes and mouth become carved like those of a jack-o-lantern. Pressing B causes him to light on fire for two seconds, rather like in The Horseman's Neutral B.

Symbol --- The jack-o-lantern of the Halloween series:


Victory Theme --- I'm stealing from the 1931 Dracula. The segment from 0:04 to 0:14, remixed, of course, is The Horseman's victory theme.

---~~~~~~~~~~~~~~~~~~~~~~~~~~~~~~~~~~~~~~~~~~~~~---​

FEAR THAT WHICH WALKS IN THE NIGHT...
 

Baloo

Smash Ace
Joined
Nov 14, 2008
Messages
781
Wow, what an amazing moveset! I'm just blown away by the sheer CREATIVITY of it.
 

Baloo

Smash Ace
Joined
Nov 14, 2008
Messages
781
This sailor will sink your soul into the stormy sea. Cervantes has joined the clash!


Stats:

Size: He's a tall human type character, matching Ganondorf's size which, despite not being that tall compared to normal humans, towers over the majority of the cast.
Weight: 7/10 Cervantes is quite heavy, being just below the lighter power characters, them being Ganondorf and Dedede.
Walking Speed: 6/10 Cervantes has no problems with walking, him being a normal human. His walk is actually slightly above average due to his height.
Running Speed: 5/10 Nothing notable here, but he's faster then the other heavy characters, not being a slow hulk.
Traction: 8/10 You won't see Cervantes sliding around much, he turns on a dime with relative ease.
First Jump: 6/10
Second Jump: 4/10
Hover: No.
Fall Speed: 6.5/10 Cervantes falls like the average heavy character, which means he falls fast without being on the level of a fast faller. The pirate still falls the slowest of the heavy characters though, not having as much weight on him as the rest of them do.
Crouch: Yes.
Crawl: No.
Wall Jump: No.
Wall Cling: No.
Gliding: No.

Basic actions:

Basic pose: Cervantes holds one of his swords above his head while the other one is at his side, his basic stance from Soul Calibur.
Idle pose: The pirate folds his arms while holding onto his swords and taps his foot, waiting for the player to make an action, annoyed.
Walking: Cervantes slowly creeps forward, somewhat zombie like. This walking animation makes him look more undead-like.
Running: Cervantes walks while still in his basic stance at a decent pace, going forward decently quickly with his size.
Dashing: The pirate puts his swords to his size and runs with long strokes of his legs and arms, them going back and forth. While not that fast, he's clearly giving his all, and it looks like a lot more of an effort then Ganondorf's running where he "huffs and puffs".
Crouching: Cervantes crouches low to the ground while putting his swords in a cross to block attacks. This can block weak projectiles like Link/Toon Link's shield, but only the weakest of them, such as Fox's laser.
Jump 1: Cervantes jumps off the ground with both feet, getting a ways off the ground.
Jump 2: The pirate captain jumps off the air with one foot like Ganondorf's first jump. We all know how good of a jumper Ganondorf is, and this one jump resembles the king of evil's terrible jumping ability.
Shield: Cervantes crosses his swords in front of his face to block as the standard Smash bubble shield comes up around him.
Sidestep: Cervantes doesn't turn to face the camera in his sidestep, unlike most characters, literally side stepping into the background.
Rolling: Cervantes crosses his swords in front of his face like in his shield animation, then crouches slightly and leaps in the direction you ordered him to. This roll is decently fast, being quite spammable.
Air Dodge: Cervantes brings up his legs and crosses his swords as he leans into the background, making himself a small well defended target.

Misc. Actions:

Sleeping: Cervantes falls onto the ground and lays down, fully stretched out. He snores in his slumber, his beard nearly going into his mouth as he does so. Upon waking up, he'll hastily wipe his beard down out of his face, annoyed.
Dizzy: The pirate puts his hands over his eyes, stumbling about clumsily.

Special Attacks:

B Down - Soul Steal: Cervantes put his two arms behind him with his swords pointed outwards, then claps them together in front of him. If Cervantes hits someone with the move, he'll impale his swords into the enemy then rip them out to steal the enemy's soul, which appears in the form of a green orb. Cervantes laughs after the attack is complete, the enemy still recovering from having lost their soul. The attack does no knockback with 9-10% damage total damage.

As it sounds, Soul Steal has some lag. Cervantes isn't particularly quick in clapping the swords together at the start (Although it's not terribly slow), and while the target can't attack the dread pirate while he's laughing, any other foes can, making this a rather dangerous attack to use in the fray of a FFA. However, there is much more to this move then first meets the eye which you might not notice when you first try out Cervantes. Once you've stolen a soul, the soul will levitate around you until it gets knocked of you, you die, or you use Soul Steal again.

You'll recieve all sorts of bonuses to your attacks when you have a character's soul in your possession, the effect you get being specific to the moves that are affected. The soul steal bonuses greatly help Cervantes' play and it's not that hard to steal a soul, but it's quite easy to knock the soul back out of Cervantes. Whenever Cervantes has a soul and is hit by any attack, there's a chance he'll drop the soul, somewhat like a dragoon piece.

The percent chance that he'll drop it each attack matches his percentage of damage, although he gets a 25% bonus in his favor ag ainst dropping it. This means that if Cervantes gets hit when he has 35% damage, there's a 10% chance he'll drop the soul. If Cervantes has 125% damage or higher, he'll always drop the soul whenever he's attacked.

Once the soul is dropped, the victim whom the soul was stolen from can pick it up to keep Cervantes from harvesting it's power, while Cervantes can pick it up to put it back into use. If someone other then Cervantes or the one whom cervantes stole the soul from picks up the soul, it won't instantly vanish, and they'll be able to use it as a throwing weapon for 6-7% damage. You can throw it over the edge to get rid of it, or you can use the soul to bait Cervantes to come to you, assuming he's interested in the soul.

If there are multiple Cervantes in a match, they can pick up the soul to use for themselves when it's dropped, although they can't steal the soul of a character who has already been a victim of another Cervantes player. Of course, Cervantes cannot steal his own soul (He can of other Cervantes players though) to get the various soul steal bonuses, and to help make it more clear which ones belong to other dread pirates they're red instead of green.

If you use Soul Steal when you already have stolen a soul, Cervantes will devour the soul, healing him of a good 15% damage and destroying the current soul, the victim who lost their soul magically getting a new one. Cervantes can only enjoy one tasty soul per life, meaning that the healing rarely gets to come into use. If you try to devour a second soul he'll simply say "Your soul makes a poor meal." and give a dismissive motion with his hand, unsummoning the soul.


B - Bullet Barrage: Cervantes puts both swords in front of him and fires a few bullets out from his swords, there not being any gun-like sound effects with this move. Four bullets come out from the swords instantly, moving very quickly and being very small and hard to see, like Shiek's needles. The bullets deal 2% damage each and a small flinch, and like Shiek's needles this move has infinite range. While you don't have the move like Shiek's needles, there's significant ending lag as Cervantes "reloads" his swords with a gun-like reloading sound effect after the move is performed. This ending lag means the attack cannot be spammed, and should mainly be used when the large range of the attack can be taken advantage of.

Soul Steal Bonus: The soul hovers behind Cervantes as he does the attack, and fires fragments of it are fired behind Cervantes. The soul fragments function just like the bullets from the sword, although they of course appear different, in the event you can see them due to them being so small. This helps cover Cervantes from the back when he does the move, and makes it an excellent move for free for alls.

B Side - Scissor Sword Grab: Cervantes sticks out his two swords in a scissor like formation to grab enemies with them, being a decently fast attack to come out. After grabbing them, Cervantes throws them down out of the grasp of his swords, sending them straight down with meteor smash like downward knockback and dealing 14-15% damage. While this move may seem overpowered, the dread pirate will still go through all the motions of the attack even if he misses, meaning there's massive endling lag if you miss, the attack BEGGING to be punished. This can be used exceptionally well to keep enemies from recovering to the stage, although you'll likely be the one going down to your doom if you somehow manage to miss, as your enemy would be a fool to not take advantage of you.

Soul Steal Bonus: The soul levitating around Cervantes sucks people towards the dread pirate as he starts the move to pull them into it, then pushes outwards afterwards to make it harder for people to punish him in case he missed. This also helps to stop people from interruping the attack if it's in a free for all. With the a stolen soul, the main negative of this attack, it's potetionally horrible end lag, is made more bearable.

B Up - Tide Rider: This surprisingly doesn't function like Squirtle's surf, and is actually a decent recovery. Water forms under cervantes, pushing him upwards about the height two Ganondorfs stacked on top of each other, giving him a large vertical recovery. The water forms into a tall tidal wave as it pushes Cervantes up, then crashes down in front of him, dealing 10-11% damage and meteor smashing foes. Cervantes goes into a helpless state once the tidal wave crashes down, meaning this move cannot be used offensively to send enemies down into the bottomless pits of the stages with a meteor smash unless Cervantes stays right next to the ledge so he can grab it. You have directional influence control over the attack while the tidal wave forms under Cervantes, but the tidal wave builds up pretty fast, giving you little time to do so. Overall, basically covers the distance DK's recovery does, but vertical as oppossed to horizontal.

Soul Steal Bonus: After the attack is complete, the soul will hover above Cervantes' head, and he'll grab onto it and ride it like Snake does with his cyper in his up special. In this state, it has all the properties of Snake's cypher, but doesn't give that much vertical distance, only horizontal. It still lasts as long as Snake's cyper though, although the soul will go back to levitating around Cervantes after the attack is over, meaning there is no cypher flying off the top of the screen to damage enemies. Combined with the regular up B, this gives Cervantes an excellent recovery.

Basic Attacks:

A - Soul Swing: Cervantes horizontally swings one of his swords quickly, doing minimal knockback and 5-6% damage. A pretty bad attack, mainly used just to get to the AAA.

AA - Sea Swing: Another very basic attack, Cervantes swings his other sword down vertically at the enemy to follow up the first attack, doing another 6-7% damage and slight knockback. Better then the first attack, but these two attacks still aren't with use on their own.

AAA - Rapid Slashes: Cervantes rapidly slashes his swords in front of him at a ridiculously fast pace, his arms going back and forth rapidly while holding the blades. Each hit of the attack does a mere 1-2% damage with no knockback and nearly no stun at all, but the attacks come out so fast that they'll likely be hit for a good few slashes. The main use of this move is against walls where enemies can be trapped against it, taking huge damage from the rapid slashes before eventually using directional influence to get away from Cervantes.

Ftilt - Anchor Knee Kick: Cervantes knees the enemy, doing below average knockback and 7-8% damage. This attack comes out very fast, but has small range and little to no priority. This attack is decent to get some distance between Cervantes in the enemy do he can use a soul steal, combos, as well as just a random attack to mix things up due to it's speed.

Utilt - Cursed Crow's Nest: Cervantes puts his swords above his head and spins them around right next to each other, making a large hitbox above his head. This attack does multiple hits, doing 1% damage per hit over 9 very fast hits. The first 8 hits do no knockback, just a slight stun, while the last of the hits does below average upward knockback.

Dtilt - Low Blow: Cervantes does a slow kick while in his crouching position, being quite slow and predictable, doing slight knockback and 7-8% damage. You'll rarely go into the crouch to use this terrible attack, the only practical use crouching has is to block weak projectiles. You'll only find yourself using this if you crouch a lot, which will most likely occur against Fox players who like to abuse their blasters. The other function of this move is to be used in a combo with the dash attack.

Dashing Attack - Sliding Kick: Cervantes puts his feet down to the ground as he slides forward during this kick, it being decently slow but doing 9-10% damage and above average knockback, able to kill at reasonable percents in a fashion like Dedede's dash attack. After finishing this attack, Cervantes will go into his crouching position (He'll only go in it temporairily if you don't hold down the control stick), any enemies hit from the dash attack will be vulnerable to a dtilt.

Ledge Attack (Under 100%) - Captain's Cleave: Cervantes does a cleaving strike with his sword as he pulls himself up, hitting in a half circle formation that does average knockback and 6-7% damage. Like Ganondorf's ledge attack, but slower with more range.

Ledge Attack (Over 100%) - Living Swords: Cervantes slowly struggles up onto his platforms as his swords do multiple hits in front of him, swirling about. Each hit does 1% damage, and there are 5 hits in the attack. The first four hits do no knockback while the final one has very slight knockback. In any case, it's enough to keep foes looking to attack Cervantes occupied.

Rising Attack (On Stomach) - Spring Lunge: The dread pirate gets up in a crawling position, then springs forward on his legs forward, doing a single slash with his swords. Has large lag for a rising attack, but does very good knockback for one and 6-7% damage.

Rising Attack (On Back) - Lazy Lumbering: The captain lazily gets up from his position, acting as if no fight was happening. While Cervantes gets up, his swords spin around at either side of him, defending him as he gets up, doing 1% damage per second. The first four hits do no knockback while the final one has very slight knockback, like his ledge attack over 100%. Very little offensive potetional, does it's attack of defending the dread pirate well.

Smash Attacks:

Fsmash - Sword Shotgun: Cervantes points one of his swords in front of him and a sound of a shotgun blast can be heard. Any foes in the range of a Bowser in front of Cervantes will be dealt 13-14% (19-20% fully charged) damage and get a pretty long stun from the move. After taking the shot, Cervantes brings his sword up against him and does a weird motion with it while a reloading sound effect is played, giving the move significant ending lag. If you actually hit the enemy with it, their stun time will match your ending lag, but if you miss you'll be extremely vulnerable. Starts up pretty fast, not having much starting lag, and also won't stun enemies if they're in the air. No actual bullets are seen or effects of the attack besides the stun, making the move "family friendly".

Soul Steal Bonus: The soul hovers around the sword while Cervantes "reloads" his sword, causing the animation to finish faster and cut the ending lag of the move by about 25%. While it's still quite the laggy move in this form, any enemies hit by the shotgun blast will still be stunned after Cervantes finishes reloading his sword, allowing him to do another one of his more quick moves to combo into it, as there isn't enough time to do a more laggy attack.

Usmash - Anchors Away: The dread pirate crouches down as he charges the smash attack, then springs up with his body fully strechted out as he releases it, stabbing his two swords up into the air apart from each other. The swords make two seperate hit boxes away from each other, as the dread pirate has his arms outstrechted as he does this attack. This does good upward knockback (Great charged) and 13-14% damage (18-19% fully charged), being one of Cervantes' few good kill moves. The move has slight starting lag, but it's nothing terrible, still being very usable, although only on foes above Cervantes. Lag isn't the problem with this attack, due to the swords being so outstrechted, enemies can go inbetween the swords to land on Cervantes and punish him (Unless they're Bowser's size), meaning Cervantes must be careful with this attack.

Soul Steal Bonus: The soul levitates up inbetween the two swords as Cervantes stabs them upwards, going up at the same time as the swords, being just as potent as the swords themselves. While it doesn't cover the entire distance between the swords, it doesn't leave enough room to fall between them, meaning it may as well cover the entire distance. This gets rid of the main vulnerabiliy of the attack, meaning the dread pirate can use this attack without fear of punishment on foes coming down at him.

Dsmash - Wild Waves: Cervantes folds his arms and laughs as waves come out from either side of him. These waves, like the water in his up special, do actual damage, not just knockback. They go around one fifth the length of final destination in range, and two waves come out from him on either side. These waves have a "Piplup" effect in that they trap you in them and deal damage as you're pulled along with the waves. The waves don't go very far before vanishing, meaning they won't pull you over the edge like Piplup. Each second in the waves does 2-3% damage uncharged and 5-6% damage uncharged, and charging the smash also increases the height of the waves, making them easier to catch enemies in. After finishing the attack, Cervantes lets out a hearty chuckle, giving the move some ending lag to make it quite punishable if you miss with it.

Soul Steal Bonus: The soul the pirate has stolen moves in front of him and sucks foes towards the waves, giving the dsmash the properties of Pikachu's in that it sucks people into it. This helps make the attack easier to rack up damage. After the duration is completed and Cervantes is laughing, the orb will push outwards with it's force, sending foes away from the pirate to make it harder to punish him while he laughs at his enemy.

Aerial Attacks:

Nair - Spinning Swords: Cervantes folds his arms and chuckles slightly as his two swords levitate around him. The attack does multiple hits and is a good damage dealer, giving decent knockback at the end. Each hit does 2-3% damage and there are a total of 6 hits in the attack, but it's quite easy to use directional influence to get out of the attack.

Soul Steal bonus: The soul also spins around rapidly alongside Cervante's two swords, slightly increasing the hitbox but more importantly sucking foes into the attack somewhat like Pikachu's dsmash. It's still unlikely they won't be able to use directional influence to get out of the attack if they got caught in it for the first few hits, so you may want to start the move a bit early.

Fair - Pirate Plunge: The dread pirate raises one of his swords above his head and then quickly plunges it down into the ground in front of him, doing 10% damage and average knockback. This attack is just fast enough to work well with short hopping, resembling one of his actual attacks in Soul Calibur when short hopped. There is some start up and ending lag to the attack, but it's nothing bad, and the lag penalty for hitting the attack into the ground is virtually non existant. This attack also works quite well in the air, as if you hit enemies with the tip of the blade you'll meteor smash them.

Bair - Gangplank Gutter: The dread pirate turns around, stabbing his two swords forward for the first part of attack as he does so, doing 3-4% damage and slightly stunning the enemy. Cervantes then rips his swords apart from each other to do what would realistically tear the enemy in half, right down the middle. The enemy either get good upward or downwards knockback based on whether they get hit by the sword going upwards or the one going downwards, as well as 10-11% damage. The sword swiping downwards does have decent downward knockback, but it's not on the level of a meteor smash or spike. This second swipe has decent KOing potetional, but it's rather hard to hit with. This move turns Cervantes around in midair like Marth's bair.

Uair - Sword Stab: Cervantes stabs one of his twin swords upwards into the air directly above him, the attack having decent upward range directly above him, but not much to the sides, the sword not being very thick. This attack does average upward knockback and 9-10% damage, and while it would be hard to hit with, the attack has little to no lag whatsoever. A decent KO move, but outclassed by Cervantes' better options.

Soul Steal Uair - Shadow Soul: Cervantes quickly puts both his swords into one hand, then lifts his hand up above his head for the soul to go up into his hand. The soul then pulses, doing 1-2% damage per hit for a total of 6 hits over 1.5 seconds, the last hit doing 3-4% damage and doing good upward knockback. The pose Cervantes strikes for the move is like Mewtwo's Usmash in Melee, although this move is performed in the air. This is a decent damage racker and the attack has a very slight suction to draw foes on, also being a decent KO move at high percentages.

Dair - Swirling Swords: Cervantes folds his arms and chuckles slightly as he lets his swords levitate like in his nair move, but the swords instead levitate below Cervantes, spinning around rapidly. The swords do 3-4% damage for a total of 6 hits over two seconds, doing slight downward knockback with the last hit. Enemies can easily use directional influence to get out of the attack, and it's rather hard to use properly to rack up damage due to the attack's length, as Cervantes will often hit the ground and interrupt the attack before it's complete.

Soul Steal Bonus: The soul levitates underneath Cervantes as he does this attack, slowing his fall speed signifiacntly as he does this attack. The soul also sucks those below Cervantes up into the swirling twin swords, making this attack much easier to hit with overall. The version of the move with the bonus is used like Wario's dair in how it racks up damage, although it's harder to hit with but with much more pay off, doing up to 18-24% damage if they're hit for all the attacks.

Grabs and Throws:

Grab: Cervantes reaches forward with both arms to hug the enemy against his body, having slightly above average range due to his size, though nothing like Dedede's insane grab range.

Grab Attack - Soul Squeeze: Cervantes squeezes the enemy in his grasp somewhat like Snake, but he does it around their torso area rather then their neck. Does 3% damage, but has large delay for a grab attack.

Fthrow - Storm Stomp: The dread pirate does rapid slashes into the enemy for a total of 6-7% damage, them falling down to the ground in pain, then Cervantes stomps on them to give them minimal forward knockback and 2-3% damage. This throw is one of Cervantes' worse throws, as it's only purpose is a damage dealer, and even then the dread pirate has better options. The only practical use of this throw is if Cervantes' other throws have fallen victim to stale moves.

Bthrow - Pirate Pitcher: Cervantes picks up the enemy by the legs, his swords levitating a little bit in front of him. He spins the enemy around himself quickly like Mario's bthrow, then lets them go in front of him for 5-6% damage. The swords will then slash the enemy coming to them in the opposite direction, doing 4-5% damage. Does exceptionally good knockback for a throw, actually able to KO at reasonable percents, although the execution of the throw is rather laggy, making it bad for free for alls.

Uthrow - Jolly Rodger Hoist: Cerantes impales his enemy on one of his swords, then brings them up above his head, flinging them off the sword upwards, doing 7-8% damage and good upward knockback for a throw. Can actually KO at reasonable percents if the KO boundary on the top of the stage is low enough. A good example of where the throw could finish someone at 120% would be standing on the platform in the Brawl version of Yoshi's Island.

Dthrow - Sadistic Cross: Cervantes releases his enemy then impales his swords into the target one at a time in a cross formation. The first sword does 4-5% damage while the second one does 5-6% damage, knocking them to the ground. Cervantes says "Cry out in pain!" as he impales the swords into his enemy, just like his grab in Soul Calibur. The attack is laggy for a throw to make up for it's high damage.

Final Smash - Captain's Crew:


When Cervantes activates his final smash, his eyes flash, a beam coming out of him like with Link's final smash. If anybody is caught in the beam, the dread pirate will rush up to the person with incredible speed and use soul steal on them, ripping out their soul by force. If multiple people are caught in the beam, then Cervantes will only target the one closest to him. If the dread pirate already has stolen somebody's soul with the regular move, then Cervantes doesn't have to catch them with the beam, them automatically becoming the victim of the final smash upon use.

Once Cervantes has stolen somebody's soul, he lets out an evil laugh and says "Welcome to my crew!". The dread pirate keeps laughing throughout the duration of the final smash, being invulnerable, and the Cervantes player controls the victim for 30 seconds (Or until they die), getting to play as them. In a one vs one match, all you can do is simply make your new crew member suicide off the edge, but in a free for all you can use them to beat up your enemies. Any kills the crew member makes count for Cervantes, and Cervantes also gets credit for KOing the crew member even if somebody else does the attack to finish them. Cervantes is completely safe from harm during the entire duration of the final smash, being invulnerable and laughing. Any scrolling stages will also stop moving for the duration of the final smash to keep Cervantes from being pushed off the screen due to being immobile, like with King Dedede's final smash.

While a guarnateed KO may seem powerful in a one vs one match, they still have to hit them with the beam or steal their soul before getting the smash ball, meaning that there is some effort put into it. Since you won't be able to have much fun with your new crew member if there are no other enemies to dispose of, you can just spam taunts to annoy your enemy for the duration of the final smash, having them suicide before the timer goes off.


Overall Play Style:

Despite being a heavyweight, Cervantes' play style actually resembles Meta Knight's more then his fellow villians in the heavyweight section. Most of his attacks are damage rackers with no knockback, and his KO moves that are available to him are few and far between. Basically, picture Meta Knight without his KO moves, and laggy finishers in their place, and you've got Cervantes' play style to some extent.The soul steal mechanic plays a decently large role in Cervantes' play style to make him a more unique addition, though. Having stolen a soul,

Cervantes is able to rack up the damage ridiculously fast with his less laggier moves, the ones that are more laggy being unappealing when the enemy is at low percentages. When a match starts, the dread pirate will want to steal a soul as soon as possible, then constantly pressure the enemy with a barrage of fast attacks. Cervantes will want to leave few openings in his attacks, as every attack is a chance that his soul could get knocked away from him, and it becomes more and more likely with each attack. Due to wanting to keep their souls under control, Cervantes players will avoid going for KOs at early percents with the dread pirate's few laggy powerful attacks (Such as the usmash) and play with his arsenal of quick moves.

Once Cervantes gets to high percents, he's in trouble. If his percentages get high enough, it's extremely likely that he'll just drop the soul whenever he's attacked, meaning it'd be a good idea to just eat it to heal 15% damage while he still can. Hopefully by this point the enemy of the dread pirate will also be at a high percentage, meaning he doesn't have to be so careful about being hit and can make use of his arsenal of slower, finishing moves. While he doesn't have a lot available, the dread pirate does have a lot more options then a speed character, although his power attacks aren't on the level of the heavyweights. Although it's a good rule for any character to avoid taking hits at high percentages, Cervantes doesn't need to worry about it that much so long as he doesn't get hit by anything big, as he's quite heavy and has a good recovery. Still, unless the dread pirate catches his enemy messing up, he'll have problems finishing off his foes.

The resemblance in play style to Meta Knight doesn't end with Cervantes having fast attacks and a good recovery, as Cervantes is also excellent at gimping his enemies. Due to being more powerful early on in fights by being able to posses a soul, Cervantes can go very far away from the platform without fear, as his soul steal bonuses give him an excellent recovery. If the dread pirate doesn't want to get KOs the traditional way, he can simply gimp them early on. While the dread pirate only has two moves for meteor smashing, his fair and his side special, the only one he truly needs is the scissor cross. If the pirate is decently low, he might fall down with his foes into the pit as he throws them down, but if he's remotely close to the platform he'll still be able to make it back to the platform with his good recovery, meaning Cervantes should take every chance he gets to gimp his enemies.

Overall, a decently balanced character, having a good mix of moves that complement each other. Unlike the average balanced character such as Mario, the dread pirate has some of his statistics higher then others while his others are low, but his traits are rare and usually are never seen on the same character. Cervantes is powerful early on in fights, but he becomes weaker as the fight goes on and gets a higher damage percentage, being the opposite of Lucario. Good Cervantes players will be sure to make the most they can of when they're at an early percentage, but once he's higher up in damage percentage it's time for the other fighter in the clash to shine.


Taunts:

Up Taunt - Fool's Challenge: Cervantes strokes his beard as he says "I salute your courage for challenging me!".

Side Taunt - Evil Laugh: Cervantes folds his arms as his swords impale themselves into the ground, letting out a evil laugh.

Down Taunt - Bothersome Beard: Cervantes attempts to do his side taunt, but the wind causes his beard to blow into his face, and he brushes the beard down back into place, annoyed.

Entrance - Soul Sense: Cervantes appears on the ground, laying down and fully strechted out, then gets up in a zombie like fashion, saying "Give me your soul!".

Results Screen Poses:

Win 1 - Dreadful Domination: Cervantes turns back to the losing characters and points to each of them individually with his swords, saying "Admit your defeat. . .and become a part of my power!".

Win 2 - Boring Battle: Cervantes lets his swords drop to the ground, shrugging and saying "What a waste of my time. . .Why did I even bother drawing my swords?".

Win 3 - Merciless Murderer: Cervantes goes into his laughing pose with his swords in the ground, saying "Those who dare to challenge me deserve no mercy.".

Loss - Regretful Respect: Cervantes throws his pirate hat on the ground in anger, stomps on it, then forces himself to applaud his enemy on their victory.

Kirby Hat: Kirby gets Cervantes' pirate hat and beard, them being enlarged to fit Kirby since the big pink puffball is larger then Cervantes' head. Upon pressing B, Kirby will spit out the bullet barrage, but instead of the reloading sound effect, Kirby will let out a small burp and rub his tummy as the animation for the ending lag.

Wiimote Noise: Cervantes lets out an evil laugh.

Symbol: Soul Edge and Soul Calibur, clashing against each other in a X formation.

Alternate Colors:

-Default
-Cervantes' clothing gets a blood red color scheme, the red being dark and faded to match his cold skin. -Red Team
-Cervantes's clothing gets a blue color scheme like the red one, but Cervantes' body also gets a slight blue tint to help make it more distinguished from his default costume. -Blue Team
-Like the red costume, but the clothing turns a pale green. -Green Team
-Cervantes returns to his normal human status before soul edge possessed him in this costume, his skin color no longer looking like that of an undead. His clothing also looks much brighter to match the skin.
-Cervantes' beard and clothing turn black, making him resemble the infamous "black beard".

Snake Codec Conversation:

Snake: So, Mei Ling, who's this purple pirate guy?
Mei Ling: *Screams*
Snake: What's going on there?!? Mei Ling? Mei Ling! Mei Liiiii-
Cervantes: Oh shut up, will you? You're so pathetically predictable. . .
Snake: What have you done with Mei Ling?!? ANSWER ME!
Cervantes: Why do you care about this foolish little girl? Whatever, her soul is weak, I won't feed on it for long. I'll give it back to her soon. But for now, I'm looking for a better soul to use. . .Yours is the only one on the menu.
Snake: Sorry, buddy, but you're gonna go back to the bottom of the sea where you came from before that happens.
Cervantes: Such a shame. . .I was hoping you could join my pirate crew. Ah well, your soul is still strong, I'll make good use of it once you're disposed of. I'm going to enjoy this. Hahahahahhahahahahahaahhaha. . .

Stage - Pirate Raid:


The large amount of wrecked ships in the picture float about in the background, while you fight on the same ship you do in the actual Soul Calibur 3 stage. This ship is torn in half, only the back half being above the water, it being what you actually play on. There are two main layers of this back half of the ship, one higher and one lower. The lower one has more room, and will be where you fight most of the time you play on the stage.

You can use the wall the upper part makes on the lower part for chaingrabbing, but a ghost pirate comes out of a door in this area every 10 seconds, swiping his sword to do 15% damage and average knockback. While you can swim in the water, there are whirlpools that have a suction towards themselves, and anything that comes into close range of them is doomed to go down to the bottom of the sea. The ship tilts back and forth very slightly in the storm in a manner similiar to lylat cruise, but not on as high of a level as the Starfox stage. Despite not giving as violent of tilts, the stage never stops tilting, never being straight for longer then a couple seconds. The stage's gimmicks are fair and the stage is quite beautiful to look at, making it a potetionally more popular stage.

Music (My main computer has no youtube access. To hear the songs, type in the actual name of the song then the game it's from at youtube.):

-Bravely Folk Song (Soul Blade Cervantes Stage Theme)
-No Regrets (Soul Calibur 3 Pirate Raid Theme)
-Eternal Struggle (Soul Calibur 2 Pirate Alcove Theme)
-Sail Over the Storm (Soul Calibur 3 Indian Port Theme)
-Ordinary Pain (Soul Calibur 2 Money Pit - Top Tier Theme)
-Blind Loyalty (Soul Calibur 3 Secret Money Pit Theme)
-Time Marches On (Soul Calibur 3 Clock Tower Theme)
-Chasing Downstream (Soul Calibur Water Labyrinth Theme)
-Worth Dying For (Soul Calibur City of Water Theme)
-Bred from the Gap (Soul Calibur 3 Kunpaetku Shrine Ruin Theme)
-Raise thy Sword (Soul Calibur 2 Ostrheinsburg Chapel Theme)
-Forsaken Sanctuary (Soul Calibur 3 Forsaken Sanctuary Theme)

Assist Trophy - Ivy:


Cervantes's daughter is summoned from the assist trophy, doing a sinister chuckle (She's evil. Check PS3 Soul Calibur box art, she's on there with Nightmare and Darth Vader.) upon being summoned. She changes her sword into a whip with a simple press of a button, then proceeds whipping it around. This assist trophy actually has semi intelligent AI, doing attacks based on how close she is to enemies.

If any enemy is above her, she'll extend it upwards and do a spinning motion with it for multiple hits, around a total of 20-25%. If an enemy is in front of her at a range, she'll do a laggy whip attack forwards for 20% and above average knockback. If an enemy's right next to her, she'll do a quick low whip attack to trip the enemy and do 4-5% damage, then do the more slow strong whip attack to follow up.

She runs directly forwards, jumping over anything in her way, respawning if she falls off the stage like Gray Fox. If there's an object she can't jump over, she'll turn around, running in that direction instead, going on with her rampage. Ivy doesn't attack enemies behind her, so that's the most simple way to avoid her, but if you're above or in front of her she'll use the long range of her whip to put on the hurt. Still, she's decently easy to avoid for players who have seen the assist trophy before, lasting 20 seconds.


Item - Treasure Chest:

This is a container item, around half the size of a crate. It changes it's appearance based on the stage it's present in, although is has a very old and worn look special for the pirate raid stage. This item can be attacked for it to slide back and forth like crates as well as ridden on top of, but it doesn't need to be attacked or thrown to be broken open. Instead, you can simply walk in front of the chest and press A to open it for the items in it to pop out. The chest doesn't instantly disappear after being opened, and can still be hit around, making it more of a unique container.

Trophies:

Cervantes: Often called "The Dread Pirate", Cervantes de Leon is one of the major antagonists in the Soul Calibur series. In Soulblade, Cervantes had a reign of terror over the world for twenty years while he had soul edge in his possession, it taking both Taki and Sophitia teaming up to defeat him. Cervantes still lived on past this attack though, hoping to regain his glory and continue his rule. . .For good. Cervantes's fighting style is quite a sight to see, mixing rapid fast slashes with slow powerful ones, making him tough to take down and hard to predict. (Soul Blade, Soul Calibur 4)

Captain's Crew (Obtained from beating All-Star with Cervantes, his final smash trophy. The trophy shows Cervantes with his swords crossed standing evily over a souless Toon Link who is leaping in front of the dread pirate to defend him.): Cervantes steals his enemy's soul, then uses the smash ball to take control of them, forcing them to join his crew. While the dread pirate may consider it an honor for anyone to fight at his side, the victim rarely feels the same way, but has no choice but to dispose of the enemies of Cervantes. When Cervantes no longer has any use of his crew members, he hastily has them dispose of themselves so he doesn't have to deal with them later. The only good crew members are loyal ones, any who question their captain deserve to walk the plank. (Super Smash Bros. Brawl)

Ivy: While Isabella had adopted parents, she didn't know it until her father told it to her on his deathbed, revealing her real father to be none other then Cervantes de Leon. Ivy has a rather unique fighting style, transforming her seemingly normal looking sword, valentine, into a whip that can extend out at will. Ivy's beauty has gained her quite the fan base over the years, making her one of the most iconic and regognizable characters in the Soul Calibur series. (Soul Calibur, Soul Calibur 4)

Pirate Raid: Among all pirates, both the great and amateur, a rumor had been widespread that Cervantes had hidden a great treasure inside a cave near the coast of spain. But in reality, this twisted tale was just bait, as Cervantes had personally gotten the rumor known so as to bring a endless fools to his hideout to feed to Soul Edge. Now countless ships lay in wrecks from Cervantes' never ending victims. . .He's made his own personal bermuda triangle. (Soul Calibur 3, Super Smash Bros. Brawl)

Treasure Chest: These treasure chests are hunted by pirates, but only the best of them manage to get their hands on the rewards that wait inside these old worn treasure chests. These treasure chests appear by magic on the battlefields of Smash Bros., and while not hard to find your fellow pirates will have a duel to the death over who gets to keep the booty. If no treasure chests reveal themselves, just remember that X marks the spot! (Super Smash Bros. Brawl)

Soul Edge: The cursed sword. . .Soul Edge is all powerful and has devoured countless souls to make itself stronger. Many have wielded Soul Edge, but they have only been forced to do the cursed sword's bidding. While many fight over the cursed sword despite this, Nightmare, Cervantes, Siegfried and Algol are the only ones to have ever actually wielded this deadly weapon, transforming into a weapon fitting for the wielder. When Soul Edge wishes to fight without a host, it uses the form of Inferno. (Soul Blade, Soul Calibur 4)

Soul Calibur: This sword was created by Algol with the sole intent of combatting Soul Edge. Only Siegfried, Xianghua and her mother as well as the creator of the sword, Algol, have ever known what's it been like to wield this sword. Like Soul Edge, Soul Calibur transforms into a weapon most fitting for the wielder, but it's the polar opposite of the cursed sword. This sword is a living being, but it's will is unknown. Due to it being based off of purified shards of Soul Edge, it could perhaps also have it's own evil desires. (Soul Calibur, Soul Calibur 4)

Nightmare: The azure knight was first born when Siegfried picked up Soul Edge, as Siegfried wasn't strong enough to resist the cursed sword, making it take him over. Nightmare used Siegfried's body as a host for many days, but was eventually driven out by Raphael. Nightmare would still live on as a seperate being, though, as Zasalamel resurrected him, now being able to live without a host. Nightmare has gained quite a few fans over the years, becoming quite iconic, showing up on the logo of the series. (Soul Calibur, Soul Calibur 4)

Siegfried: Unknowingly having slain his own father in battle, Siegfried went insane, forcing himself to believe that somebody else had done the dark deed. In this insane state, Siegfried hunted Soul Edge to defeat the imaginary killer, but upon obtaining it, he was only turned into Nightmare. Siegfried eventually broke free from Nightmare to become his own being once again with the help of Raphael, but he had no more sense then he had before, still foolishly hunting the cursed blade. Siegfried shares the star role alongside his eternal rival, Nightmare. (Soul Blade, Soul Calibur Legends)

Voldo: Voldo's fighting style is awkward, him seemingly not having a single bone in his body to bend his body into insane positions. Voldo serves Vercii, the merchant of death, whom payed Cervantes to hunt him Soul Edge before he went mad with power. Vercii has since passed away, but Voldo has blind loyalty to his master, never leaving the money pit where Vercii's treasures lie. In the event that Voldo obtains Soul Edge, Vercii will speak to him as a spirit to tell him to get more souls for the cursed sword, but this is most likely Soul Edge tricking him into doing it's bidding. (Soul Blade, Soul Calibur 4)

Taki: While usually content with being a loner, Taki saved Sophitia from Cervantes and helped her to defeat him, silencing the cursed sword temporairily. She has since been a long time rival to the dread pirate, them having many destined battles against each other. Taki also has a personal rivalry with Mitsurugi, leaving her with no shortage of enemies. Like Ivy, Taki has many fans due to her beauty, and is one of the more iconic characters in the series. (Soul Blade, Soul Calibur 4)

Sophitia: While Cervantes was able to defeat Sophitia Alexandra in single combat, Taki came to save her from the clutches of the dread pirate. While the Soul Calibur series contains many beautiful women, Sophitia is the only one that's actually married, having a husband, Rothion, as well as several children. She only has a sister named Cassandra who she's taken under her wing, showing her the way of the sword and shield. Due to Sophitia's age and her duties as a mother, soon Cassandra may have to be the only warrior under the Alexandra name. (Soul Blade, Soul Calibur 4)

Astaroth: Astaroth is only seven years old, and he's got the intelligence to match. His temper tantrums are far from childish, though, and will result in you getting an early funeral if you're the cause of one. Astaroth has worked before alongside Nightmare and Lizardman to obtain and strengthen Soul Edge, but the golem prefers to work alone. While created with the intent of getting soul edge for a cult, Astaroth had no intentions of following his orders, and instead destroyed his creators. Astaroth's brutish nature has got him a good few fans over the course of the series. (Soul Calibur, Soul Calibur 4)

Zasalamel: Zasalamel has lived many years longer then any other normal human being due to his "curse" of reincarnation. Having studied many magics, Zasalamel became immortal, living endless lives in a never ending cycle of reincarnation. While it was enjoyable at first, the pleasures of life, as well as life itself, became a meaningless to Zasalamel. He no longer wished to continue his life, but do his curse he was unable to do so. Due to this curse, this man revived Nightmare after Siegfried broke free from his will to gather the shards of Soul Edge for him, though unknowingly. (Soul Calibur 3, Soul Calibur 4)

Algol: Algol is the creator of Soul Calibur, having a history of reincarnation that makes even Zasalamel look as if he's only spent a few years on this world. He wields both Soul Calibur and Soul Edge as his weapons, being the ultimate power the world has ever known. Despite his actions, Algol is not truly evil, while motives of characters such as Zasalamel and Ivy are rather shady and bleak, showing that Algol is surprisingly one of the more good characters in the series. In his critical finish, he sits on top of his throne, showing his reign as king over the all powerful swords. (Soul Calibur 4)

Tira: Tira is a completely insane being, going from girl to girl as her old hosts become obsolete. She wants nothing but to serve Soul Edge and Nightmare and to see them be completed, and despite her complete and utter loyalty to Nightmare he considers disposing her on numerous occassions. Tira has no problems whatsoever with killing, taking pleasure in death, although if you get her in a bad mood you won't live to see her go back to her normal state. While having been in a normal family for a time, she personally disposed of them once having gone insane. (Soul Calibur 3, Soul Calibur 4)

Yoshimitsu: While some of Yoshimitsu's attacks are based off of those Mitsurugi has, he's by far the most unique character to be based off another. The silly samurai does the way of the sword pogo, among other interesting abilities. Whenever a member of the Yoshimitsu clan dies, the next in line takes their place. The clan has lived on through many generations, all the way up to the present day, as shown in the samurai's appearances in Tekken. Due to being in so many games and his humorous attacks, Yoshmitsu is quite popular and well known. (Soul Calibur, Soul Calibur 4)

Mitsurugi: Mitsurugi has two beautiful women chasing after him, although not for reasons you'd expect. Both Taki and Setsuka chase after Mitsurugi without cease, looking for vengeance on him to take his life. Mitsurugi constantly keeps on the move for Soul Edge, ignoring those who persue him. The samurai's motivation is the thirst for new battles, and any who are too weak to challenge this skilled samurai just become another stain on his blade. Mitsurugi's become decently popular over his many appearances in the series, becoming somewhat iconic. (Soul Blade, Soul Calibur 4)

Raphael: Raphael is a skilled swordsman who is hunted by countless people, and nearly lost his lives countless times to them. A young girl named Amy saved Raphael's life by hiding him from one of the greedy lords who was hunting him, and Raphael adopted her, most thankful. Raphael and Amy however fell under a curse set by Soul Edge, turning them into somewhat vampiric beings. Raphael set out to get Soul Edge so that everyone else could share their curse so that they could have a "perfect world" together. (Soul Calibur 2, Soul Calibur 4)

Kilik: Edgemaster, one of the world's greatest warriors who has never lost in battle (Though he did have a tie against Olcadan), personally trained Kilik to be the warrior that he is. Kilik travels the world alongside Xianghua and Maxi, purifying the Soul Edge shards they find along the way, doing his best to dispose of the cursed sword. Kilik's the only character in the series to be romantically involved, and he and Xianghua clearly have chemistry. Despite this, they rarely have time for their relationship, and the status of it remains largely unknown. (Soul Calibur, Soul Calibur 4)

Role in SSE:

Cervantes is first seen rather later on in the SSE, being introduced in the same scene as Ganondorf. When Ganondorf is in the computer room giving orders to Bowser and his troops to go to Dedede's castle, the screen in Ganondorf's room next turns to Cervantes (Who's name flashes accrosses the bottom of the screen for his introduction), who is standing on his pirate ship, waiting for orders. Ganondorf points at the airship Donkey Kong's being taken on, and Cervantes replies with a simple nod. After this, Ganondorf takes a bow before Master Hand as normal.

The dread pirate isn't seen again until Captain Falcon, Olimar and Diddy come onto the airship to save Donkey Kong. After the four characters defeat the enemies and save DK, Cervantes' ship arrives sailing in the sea below the airship. Cervantes lets loose fire from his cannons, and one of the cannonballs is a direct hit on Diddy. The cannonball turns Diddy into a trophy, defeating him, and Diddy lands down on the ship below. DK jumps down after his buddy to return the favor he gave for saving him, while Olimar and Captain Falcon just watch. Olimar looks like he's about to wet his pants, while Captain Falcon is more concerned with the subspace bomb factory they're about to enter, deciding to ignore the two apes.

Upon falling down onto Cervantes' ship, the dread pirate will point forward at Donkey Kong, and the subspace enemies under Ceravntes' command will come forth to attack DK. You get to use DK alone in a battle against the enemies, them not being too numerous due to you only having one character, a storm having started brewing. After defeating them, Donkey Kong will touch the base of Diddy's trophy to revive him, while Cervantes gets in a fighting position, chuckling. You play as the dread pirate against the two kongs in a battle, and after defeating them Cervantes chuckles and heads back to the captain's quarters of the ship, his work being done.

The three characters aren't seen for a couple levels, them getting a short break, but the next cutscene involving them shows Toon Link's ship coming up alongside Cervantes' massive ship, his name flashing accross the bottom of the screen. Cannons fire from the dread pirate's ship down at Toon Link's pathetic vessel and planks are layed down to make a bridge from ship to ship, the subspace enemies going accross it to raid Toon Link's ship. You play as Toon Link for a battle on the great sea on the small swordsman's ship, enemies coming in from the planks in the background. After defeating them all, Toon Link goes accross the bridges they were made to board Cervantes' ship and revives DK and Diddy, and they start heading for the captain's quarters together. You play as the three characters for the level, tranversing accross the dread pirate's massive ship. Upon getting to the deepest most inner section, you'll have arrived at the captain's quarters, causing a cutscene to start.

The three characters storm down the door to Cervantes' personnal quarters, him starteled. He is more then prepared, though, and gets in a fighting stance, chuckling. You play as the captain again this battle, having to defeat them in a three on one battle. Thankfully, you have two stock to make up for the large amount of enemies teaming up to defeat you. After defeating them, the captain revives the trophies and steals their souls out of them before they can react. Toon Link turns to to his dark toon link alt costume while DK and Diddy's fur turn black and their eyes turn red (An additional alt color for them). The three zombie pirates salute their captain, and Cervantes just laughs.

As a small side note, the subspace bomb that blows up the subspace bomb factory sucks in Cervantes' ship, meaning it's a part of the great maze. In this section of the great maze, Cervantes and Toon Link are fought, being one of the smaller subsections.

The four characters aren't heard from again until just before the great invasion cutscene, where Cervantes and his loyal crew members will go through a portal into subspace outside Ganon's Cannon, having escaped the subspace bomb with the portal. Bowser and Ganondorf are already mounted on the Ganon Cannon, ready to let it out into the real world to let all havoc loose. Bowser sees Cervantes and motions him to come up to them, pleased, but Ganondorf shakes his head and runs his fingers across his neck, deciding that the dread pirate is no longer useful to his goals. He has his guns fire down at the characters, and Cervantes angrily lets out a battle cry and charges up to where the two villians stay alongside his loyal crew. The level is the ganon cannon in subspace, the three crew members still having their dark alt costumes to show that they're still serving Cervantes.

Upon getting to the top where Bowser and Ganondorf are, Cervantes motions to the two villians with a stroke of his arm, and his three loyal crew members attack. You play as Bowser and Ganondorf against the zombified characters, only being able to use one at a time. Afterwards, a brief cutscene shows the captain's crew being trophified and Cervantes entering the fray against the two villians while they're still tired. You play as Cervantes against Bowser and Ganondorf, and you only have one stock, so it's one of the harder battles. After defeating them, the next cutscene shows Cervantes about to turn them both into trophies, but Master Hand (Not yet under Tabuu's control) emerges, smacking him down with his fist, turning him into a trophy. Master Hand picks up Cervantes and his former crew members and throws them out of subspace into the portal to the real world, successfully having saved his two commanders. Bowser and Ganondorf bow before Master Hand while he lets out an evil laugh.

The cutscene next shows the four characters coming out of the portal on the other side as trophies, flying a impressive distance. They land on the halberd where the other characters are getting ready for battle, Captain Falcon and Olimar curiously coming up to the two characters they previously fought alongside. They revive the four characters from their trophy status, DK, Diddy and Toon Link no longer being in zombie status. Cervantes humbly taking off his hat and going to "walk the plank" off the halberd, admitting defeat. Toon Link comes up to the dread pirate and puts his hand on his shoulder and motions back to the portal which they flew out of, deciding that they could use his help, and Cervantes reluctantly nods. Cervantes goes up to the front of the halberd and motions forward with his sword as Mario comes up alongside him and says "Here we go!" as the halberd takes off. The great invasion cutscene follows after this, Cervantes getting no more cutscenes to himself.

In the cutscene where Ganondorf normally betrays Bowser, Bowser dodges the shot from the trophy and turns around, letting out an angry roar. You get to choose which character you want to play as out of Ganondorf and Bowser, then you must defeat the other villian in a one vs one battle. If you play as Ganondorf, everything goes as normal, but if you pick Bowser the two villians will swap roles, Bowser being the one to bow before Master Hand while Ganondorf's the one angrily attacking Bowser's trophy and being the one to fight Dedede instead of the other way around. If you picked Bowser in the battle, you'll need to find Mario's and Peach's trophies in the subspace level to get Bowser's trophy in a cutscene like is normally done with Ganondorf. After one of the villians defeats the other in the battle, they will come up before Master Hand and bow to him as normal, but will be shocked to see the strings controlling their master. Tabuu, seeing that the villian isn't a fool, has Master Hand attack the villian, and you use the villian in a boss battle against Master Hand. Master Hand is a good bit harder then normal, having 600 HP (On intense) and his attacks doing more damage while you still have a single stock.


I'm totally original.
 

TWILTHERO

Smash Lord
Joined
Aug 19, 2007
Messages
1,880
Location
Canada
WOOHOOO!!!!!

The Headless Horseman kicks major butt!!! That is now...my favourite moveset in the entire contest.
/sarcasm
Cerealously though, it's getting kind of annoying now with the 3.0 moveset reposts :ohwell:

EDIT: Okay, now it's starting to piss me off lol.
 

Baloo

Smash Ace
Joined
Nov 14, 2008
Messages
781
OMG I LOVE THAT MOVESET BALOO!!!!!!!!!!

*Bows down and worships*

The sheer detail and creativity of the moveset astounds me. IT'S THE BEST ONE I'VE EVER SEEN!
I know. It's just natural talent, I guess. Some people are just good at this stuff. ;)
 

MasterWarlord

Smash Champion
Joined
Aug 24, 2008
Messages
2,902
Location
Not wasting countless hours on a 10 man community
LORD DRACULA


(((What is a man? A miserable little pile of secrets.)))

B: Dracula sucks blood from enemy

B Side: Dracula swipes hard at enemy

B Up: Like Pit's

B Down: Like Bowser's

Fsmash: Dracula swipes harder then B Side

Dsmash: Dracula swipes twice to each side

Usmash: Dracula swipes upwards

Nair: Dracula swipes around wildly

Fair: Dracula bites forward

Uair: Like Usmash but in air

Dair: Like Dsmsah but in air

Bair: Opposite of Fair

Grab: Reaches Out

Pummel: Bites

Fthrow: Throws

Bthrow: Kicks

Uthrow: Headbutts

Dthrow: Butt *****

Final Smash: Giga Dracula

Dracula becomes super powered and gets more knockback and damage and becomes more bigger

---~~~~~~~~~~~~~~~~~~~~~~~~~~~~~~~~~~~~~~~~~~~~~---​
 

Baloo

Smash Ace
Joined
Nov 14, 2008
Messages
781
(((What is a man? A miserable little pile of secrets.)))

Oh wow. That rivals my amazing Cervantes moveset, I mean, the extras are so original! They like,rival every other moveset made! I mean, that is a total super vote for me. Can you use all of your votes on one moveset, because if so, I'm totally doing that to this one.
 

KingK.Rool

Smash Lord
Joined
Nov 26, 2005
Messages
1,810
*phew* Passed the Kirby fanboy's test.

Sorry about that.


I'll try to do him justice! Chilly is the BEST!

Use Tac.
First thing: Chilly is highly concentrated awesome and I greatly look forward to his set.

Second: I'm still tossing about the possibility of making a TAC moveset, for my favourite helper of them all... :bee:

Technically, you don't need a name for each attack, but....i;m just saying it could get better organized, s'all. But that's just me. Other than that, cool moveset, and nice job.

*Goes back to work on Sasuke*
To borrow your smiley: XD

.... TWIL giving advice on organization. WHAT HAVE WE COME TO???

jks

Omg Thief. You Stole Hyper Ridley's Moveset From Mym 3! That Thing Got 3rd Place!
I LOVED that moveset! Srsly, how did HR come up with something like that? I wish I had that much moveset-making expertise... :bee:
 

goldwyvern

Smash Ace
Joined
Nov 25, 2008
Messages
519
Location
Holy keys locked in the jet, Batman!
okay, so in MYM5 i'll probably do a multi set "enemies i wish were partners in kirby games" were none of the characters were partners but give abilities. the candidates for the the 4(most likely) spots are:

bomber (crash)
broom hatter (clean)
bubbles (ball)
laser ball (laser)
needlous (needle)
prank (fire, cook, bomb, ice)
twister (tornado)
starman (hi-jump)
gaw gaw (animal)
and maybe more

AT candidates:
paint kirby
cool spook (light)
minny (mini)

it will be the opposite of superstar helpers! [/evilplansunfold]
 

SirKibble

Smash Champion
Joined
May 2, 2008
Messages
2,400
At the request of MasterWarlord, I have completed the following moveset. This is because Bonkers has already been included in his Story Mode, since Commander Blitzkrieg said he was making a moveset for him. Considering how little we've heard of Commander Blitzkrieg lately, I have spent the past couple of hours making the following moveset. If Blitzkrieg comes up later and posts a Bonkers moveset, I'll probably retract this one from the contest, but until then, here be Bonkers.


BONKERS
********************


Bonkers is a hammer-wielding gorilla from the Kirby universe, usually found as a mini-boss. However, Bonkers can also be called to aid Kirby as the Helper for the Hammer ability. Aside from his large hammer, Bonkers also has exploding coconuts that he can throw to attack, though he lacks this ability as a Helper. Here, as in the game, Bonkers’ primary tool is the hammer, and he employs his coconuts sparingly.


***STATS***

Size: Mid-Large
Weight: Mid-Heavy
Power: Mid-Strong
Jumps: 2
Jump (1): Mid
Jump (2): Mid-Low
Speed (Walk): Mid-Slow
Speed (Run): Mid
Traction: Mid
Speed (Attack): Mid-Slow
Speed (Falling): Mid-Fast
Range: Mid
Crouch: Mid-High
Crawl: No
Wall-Kick: No
Wall-Cling: No
Glide: No


***STANDARD ATTACKS***

Standard Combo – Monkey Slap – Bonkers reaches forward with his free hand and slaps, dealing 6% damage and weak knockback. This has decent range, but a little more startup lag than most attacks like this. The ending lag, however, is minimal. There is no subsequent combo.
[6%]

Forward Tilt – Handle Stab – Bonkers turns his hammer and stabs forward with the handle, then returns it to its normal position. This attack has a significant amount of lag on both ends as Bonkers turns the hammer, and only does 5% damage, but has a frighteningly high knockback for such a weak attack! Used properly, this move can even score KOs consistently for Bonkers.
[5%]

Up Tilt – Shrug – Bonkers hops and shrugs his shoulders, as if straightening up, causing his hammer to jump up a short distance, damaging enemies above him. The range is pathetic, and the hammer only deals 5% damage with low knockback, but this move executes significantly faster than most of Bonkers’ other attacks.
[5%]

Down Tilt – Split Kick – Bonkers drops down, facing the camera as he does the splits, kicking one leg to each side. This has moderate range, and deals 6% damage with okay knockback. The lag is also about average, making this a pretty basic move at face value. However, this move has a unique twist. Literally, a twist. Hitting the Attack button again at the right time while Bonkers is in the splits will cause him to spin, similar to Kirby during his Down Smash. This causes multi-hit damage up to 8%, making this a difficult move to punish upon its missing.
[6% or Up to 8%]

Dash Attack – Hammer Spin – Bonkers grabs his hammer and holds it outstretched while he spins around and around. He can be somewhat controlled, by tilting the direction he’s moving to speed up and tilting the opposite direction to slow down, but you won’t be able to go hard enough to turn around and move the opposite direction. While Bonkers is going, anyone who touches him receives multi-hit damage, which can total up to about 12% if the Bonkers player slows down to stay over an opponent they hit near the beginning. Bonkers travels a minimum distance of about a Battlefield platform, and a maximum distance of about half of Final Destination. You cannot cancel out of this move early, and it takes about 2 seconds to perform, with moderate lag on both ends.
[Up to 12%]


***SMASH ATTACKS***

Forward Smash – Hammer Slam – Bonkers readies his hammer behind him, then swings it forward horizontally. The hitbox is separated from Bonkers, and there is a space between him and the head (where the handle is) that won’t damage opponents, so spacing is essential. The hammer deals 20 – 25% damage, though only with moderate knockback. This attack also suffers a lot of lag, ranking among the slowest Smash Attacks in the game. The hammers head is about one Battlefield platform in front of Bonkers, and the head is about the size of a Party Ball.
[20 – 25%]

Up Smash – Tantrum – Bonkers jumps up high, crashing to the ground to damage opponents. A single jump takes a little over half a second to perform, with moderate lag on both ends. However, Bonkers can jump multiple times by charging the Smash Attack. There are only three jumps to be performed, and you’ll have to get to full charge to do the third, with a halfway-charged Smash Attack performing the second. Bonkers becomes a large hitbox during the entire duration of this move (except in the brief pauses between jumps if he’s doing more than one), dealing 15% damage and moderate knockback to anyone he hits.
[15%]

Down Smash – Coconut Bomb – Bonkers takes out a coconut, that explodes when this Smash Attack is released. The coconut has a considerable blast radius, about half that of a Smart Bomb. It does only 10% damage, no matter when it’s released, and does weak knockback as well. However, it’s hitstun is very long, which is good, because you’ll need it! Bonkers suffers from the blast as well, having an extremely long ending lag after the coconut explodes in his face. Luckily, he won’t take any damage, and the move has a pretty quick startup time.
[10%]


***AERIALS***

Neutral Air – Hammer Hurricane – Bonkers spins wildly with his hammer, hitting in every direction possible, having a range similar to Kirby’s aerial Side Special in Melee. He has minimal startup and ending lag on this move and it lasts for about a second, dealing multi-hit damage up to 10% to anyone he hits. The biggest weak point of this move is that it pulls opponents in close to Bonkers, which ensures that you’ll hit them for maximum damage, but also leaves them close enough to easily follow up your hit with one of their own.
[Up to 10%]

Forward Air – Double Swing – Bonkers spins around, swinging his hammer twice to the front. This is a lot like Kirby’s aerial Side Special in Brawl, only Bonkers has very little time between the two swings, and a lot more lag at the beginning and end of the move. Additionally, this has the extended hitbox like in Bonkers’ Forward Smash, meaning you’ll have to space this move right. The first swing does 5% damage with flinching knockback, while the second does 8% damage with good knockback.
[5% + 8%]

Backward Air – Power Reversal – Bonkers raises his hammer, then delivers a mighty blow behind him, turning himself around in the process. This move has an excellent vertical range, as Bonkers swings the hammer from bottom to top, and a decent horizontal one as well. Long lag times make this move somewhat difficult to use, but it rewards with 12% damage to anyone it hits, as well as good knockback. Once again, Bonkers ends his move facing the opposite direction.
[12%]

Up Air – Hammer Wave – Bonkers waves his hammer wildly over his head, scoring three hits similar to Link’s Up Smash. The hits essentially capture opponents, locking them into subsequent hits. The range is slightly shorter than Link’s with his Up Smash, but the hits execute with similar lag, both at the beginning and end of the move, as well as between hits. The first two hits deal only 3% damage, but the final hit deals 8% damage with moderate knockback.
[3% + 3% + 8%]

Down Air – Hammer Hold – Bonkers holds his hammer beneath him, similar to the Ice Climbers. However, he doesn’t fast fall like them, maintaining the hammer in this position until another move is used or he hits the ground. You can manually fast fall, making it similar, but he won’t do it on his own. The hammer serves as a hitbox while it’s below him, dealing 5% damage and weak knockback. However, he’s not protected from the top or the sides, so this move should be used carefully, as putting the hammer away for another attack will add some lag time to the beginning of the next move.
[5%]


***SPECIAL ATTACKS***

Neutral Special – Hammer Throw – Bonkers throws his hammer forward, it traveling indefinitely unless it hits something or someone. There is little startup lag, and the hammer travels about as fast as Link’s Boomerang if not Smash thrown. There is also little ending lag. If the hammer hits someone, it will deal 5% damage and fall to the ground, where it becomes a throwing item for any character who wants to pick it up. It will last for 10 seconds on the ground before disappearing, and Bonkers cannot use this move again while a thrown hammer is still on the field of battle.
[5%]

Side Special – Coconut Toss – Bonkers throws a coconut in a low arc, it going up about as high as he is tall and landing (if on flat ground) about two Stage Builder blocks in front of him. There is moderate lag on both ends of this move. The flying coconut deals 5% damage to anyone it hits along the way, and hits them further along its path with its knockback, making multiple hits far from impossible. Upon striking the ground, the coconut will usually disappear. However, there is a 10% chance for any coconut to be an explosive coconut, in which case it will explode upon hitting the ground, dealing an additional 10% damage with moderate knockback!
[5%, 10%]

Up Special – Saving Smack – Bonkers winds up and swings his hammer, hitting himself in the rear! This propels him upward both as a form of recovery, and as an attack. He goes directly upward, about the distance of 3 Stage Builder blocks, and deals 8% damage to anyone he hits while traveling. If used in the air, this move will put Bonkers in a helpless state after he goes all the way up. If used from the ground, it will not, but it suffers considerably more startup lag instead.
[8%]

Down Special – Earthquake – This move is a chargeable and storeable attack, similar to Samus’ Charge Shot or DK’s Giant Punch. Upon release, Bonkers pounds the ground hard with his hammer, sending out shockwaves in either direction. The shockwaves travel about as fast as PK Thunder, but just along the ground. If they hit anyone (who must be touching the ground), they’ll deal 10% damage with good upward knockback. The longer this move is charged, the further the shockwaves will go. At lowest charge, they’ll go about the length of a Battlefield platform, but at full charge, they can cover the entire length of Final Destination. The shockwaves will die if they hit a wall or ledge. Bonkers suffers some startup lag as he pounds the ground, but very little ending lag.
[10%]


***FINAL SMASH***

Final Smash – Rampage – Bonkers becomes very angry, and proceeds to pound the ground with his hammer violently. He does this 10-12 times, at somewhat random intervals. Sometimes he will pound it two or three times very rapidly, other times he will wait a couple of seconds between pounds. He will pound the ground for 15-20 seconds before stopping. Opponents who are touching solid ground when he pounds will receive moderate upward knockback, accompanied by 10% damage. It’s unlikely that you’ll hit with every pound, but it’s common for about 4 of them to connect.
[10% per hit]


***GRAB & THROWS***

Grab – Normal – Bonkers reaches forward and grabs with his free hand. This has moderate range and lag.

Pummel – Headbutt – Bonkers pounds his head into his opponent for 3% damage. This can’t be repeated very rapidly.
[3%]

Forward Throw – Grand Slam – Bonkers pulls his hammer back, then swings it hard at his opponent, dealing 12% damage and good knockback. This is a very slow throw, but very rewarding if you can pull it off. This has a lot of ending lag.
[12%]

Backward Throw – Dismissal – Bonkers nonchalantly tosses his opponent behind him. This does only 6% damage and little knockback, but it’s a fast throw, and very useful for situations where you don’t have time for a more powerful throw.
[6%]

Up Throw – Coconut’s Away – Bonkers sets his hammer down, then grabs a coconut with his now-free hand. He holds both his victim and his coconut over his head, and the coconut explodes, rocket his opponent upward with decent knockback and 8% damage. This is, once again, a rather slow throw, with a fair amount of ending lag as well.
[8%]

Down Throw – Unearther – Bonkers begins by tossing his opponent to the ground, where they take no damage, but are buried. He then proceeds to jump into the air, like with his Up Smash, crashing down on his buried victim. This powerful throw deals 15% damage and good upward knockback, but opponents at lower percentages will likely be able to escape the burial before Bonkers crashes down. They can also be hit by other players, though those players are likely to then be in Bonkers path as he crashes back down.
[15%]


***EXTRAS***

Bonkers doesn’t need all that junk. Imagine some cool taunts and victory poses, and pretend that those are here. If you’re looking for a song, a stage, or a boss, or anything else you’d like to see here, just imagine it, and tell yourself that’s here as well. Playstyle summary? Yeah, you guessed it: do it yourself if you want it so bad.

This moveset is over!
 

SirKibble

Smash Champion
Joined
May 2, 2008
Messages
2,400
For a quickie move set, I must say it looks good, Kibble. Probably not your best work, but solid nonetheless.
Far from my best work, definitely. I gave in to a few less-than-creative ideas, just because Warlord wanted this done and I told him I would, but I didn't want to spent the normal amount of time on it that I do on most movesets.

Anyway, thanks. And thank you as well to PPL and Khold.
 

SirKibble

Smash Champion
Joined
May 2, 2008
Messages
2,400
I don't think the current D3 can get better or more true to character.
This could very well be true. His Specials are already excellent. I could make a few tweaks to his other attacks, but nothing significant. What's more, the best I could do is probably to reuse some of the stuff I did with Bonkers for hammer attacks.

So thanks for the suggestion, PPL, but I don't know that I'd really be able to outdo Sakurai much there. :laugh:
 

SirKibble

Smash Champion
Joined
May 2, 2008
Messages
2,400
you see the non-partners moveset announcement on the last page, kibble? which enemies should i use?
Yes, I did. Let me give it a second look and I'll tell you my personal favorites.

okay, so in MYM5 i'll probably do a multi set "enemies i wish were partners in kirby games" were none of the characters were partners but give abilities. the candidates for the the 4(most likely) spots are:

bomber (crash)
broom hatter (clean)
bubbles (ball)
laser ball (laser)
needlous (needle)
prank (fire, cook, bomb, ice)
twister (tornado)
starman (hi-jump)
gaw gaw (animal)
and maybe more

AT candidates:
paint kirby
cool spook (light)
minny (mini)

it will be the opposite of superstar helpers! [/evilplansunfold]
Use...

Broom Hatter, Needlous, Twister, and Starman! :bee:
 

princesspeachluver13

Banned via Warnings
Joined
Nov 13, 2007
Messages
617
Location
Yep. I had it coming. Stupid apathy.
Ok, so since jimnymebob is unable to do Vexen with me, i have decided to complete him by myself. Here are his Standard Moves. BTW, "Freeze Pride" is the name of Vexen's Shield.


Basic Moves - Standards

A: Vexen yells, "Ha!" and swings his shield to deal at least 4%. At sweet spot, the move deals about 7-8%. The move has very tiny lag, and is a basic move for n00bs and veterans alike!

A combo: Vexen yells, "Ha, "Hoo," "Hah!" during his swings of Freeze Pride. The first 2 hits are horizontal, quick and weak, and the last hit is vertical and slow, but strong, causing some knockback and 11% total. This is where the 2nd part of the "combo" jimnymebob posted comes in handy. After the opponent is knocked into the air, you can follow up with another smash, preferably his side smash. This move can actually be continued with Vexen's Down Air.

Side Smash: Vexen yells "Heyyah!" and stabs with Freeze Pride at an average speed, almost like if he were punching someone. It causes about 9-10% with minimal knockback, but when sweet-spotted, this move can be a *****. When sweet-spotted it can cause up t0 13%. When at high percentages(when not sweet-spotted), this move can cause very high horizontal knockback. The best choice when finishing the A combo, although it has some lag when starting. About Speed, the startup is slow, but the ending animation(the actual punch), is very fast and strong.

Down smash: Vexen Yells, "Freeze!" and positions both hands outwards and fires small icicles in either direction. While weak(only dealing 3% per icicle), this move creates good stun against grounded opponents. But if an opponent is falling, it is not the best choice. The move has some starting lag, which means you would have to have very precise timing on when to perform the move. If the move connects, however, it renders the falling opponent helpless. Only a good choice if you know whento use it. About speed, the icicles are fired .5 seconds apart.

Up Smash: Vexen yells, "Below zero!" and causes a flurry of snowflakes to propel upwards. It has a seconds worth of lag, due to the phrase, and is only a good choice after Vexen's Up Throw. It can cause only up to 14%, making it a weak move, but can become dangerous as it has the potential for KO at high percentages due to its high knock back. It is also good for a team juggle, since a team member can jump in while the target is falling, and can use a move with good knockback.


Also, since i never got any sleep yet, i made his Specials, too. Here *yawns*

Basic Moves--Specials

B: Blizzard/Blizzara/Blizzaga: Vexen cackles and sends a flurry of light blue snowflakes forward. This move can be held, hence the name, causing a stronger, more volatile attack. Blizzard occurs when B is tapped, Blizzara is cast when B is held for 3-5 seconds, and Blizzaga is caused when B is held 6-10 seconds. Blizzard causes 5% damage with minimal knockback and 10% chance of the Freeze condition. Blizzara causes 10% damage with medium knockback and 40% chance of the Freeze condition, and Blizzaga causes 15% damage with medium-high knockback, and 60% chance of the Freeze condition. Note that Vexen is highly vulnerable when charging this move, and any damage caused to Vexen while he is charging instantly ends the charge. About speed, the flurry of snowflakes are shot at extremely high speeds when in blizzard form, medium speed when in Blizzara form, and extremely slow speeds when in Blizzaga form.

Side Special: Ice Pinwheel: Vexen yells, "You're just an experiment!" and commands shuriken-esque objects forward. This move, too, can be charged, but only to the extent of the number of pinwheels dealt. 1-3 sec. = 2 pinwheels 4-6 sec. = 3 Pinwheels and 7-9 sec. = 4 pinwheels. But, to keep the percentage from getting too high, the percentage goes down as the number of wheels goes up. If the move is used with out holding, 1 pinwheel with 10% is thrown. All other numbers of pinwheels subtract 5%. Regardless of the number of pinwheels, the knockback remains the same--medium. Note that the pinwheels seek the closest character to Vexen, and they gain speed while chasing the target.

Down Special: Ice Typhoon: Vexen yells, "Taste frost!" and creates a small whirlwind full of icicles and shrapnel around himself. Although the move itself doesn't cause any damage, and the winds only push opponents backwards, the bits of ice and shrapnel that shoot out of the winds at high speeds are dangerous. Despite this, they can be deflected if caught at the right time. The icicles cause twice their normal damage, and the bits of rock and steel cause 5% each. The move lasts about 6-8 sec., giving about an average 18% damage. While the barrier of wind is indestructible, and it is dangerous to approach, attacks such as Pit's Light Arrow and Zamus' paralyzer can pass through the wind, being that they are not actually tangible, can pass through the winds and hit Vexen, thus stopping the attack short.

Up Special: Ice Cloud 9: Vexen smugly says, "Toys." and surrounds himself with a shower of ice crystals and disappears. He reappears 10 feet away in the direction the control stick was tilted in another cloud of ice crystals, although these are just aesthetic. The ice crystals left behind have a 70% chance of becoming a veil of ice that increases the chances of tripping and a 30% chance of becoming spikes that injure anyone who touches them. If the spikes appear, each touch causes 3% damage and medium vertical knockback, in an effort to not make the character too good. The startup with this move can easily confuse this move with Ice Typhoon.


So. What do you think? I want your honest opinions! I can take it. >:)
 

SkylerOcon

Tiny Dancer
Joined
Mar 21, 2008
Messages
5,216
Location
ATX
I thought this was a competition for making serious movesets, not making a fanboy's wetdream with the most overpowered character possible.

Seriously? Have you ever even PLAYED smash brothers?
 
Status
Not open for further replies.
Top Bottom