
The Official
Link Match-Up Guide
Link Match-Up Guide

This is a Match-Up Guide for Link, with explanations on his strength's, weaknesses, and strategies against other characters in Super Smash Bros Brawl. Link is a complex character to play, with multiple strategic advantages. The point of this guide is to let you know what level of effectiveness you can expect from Link's AT's and basic strategies against specific characters. The two strategies that depend on Link's opponent to know their effectiveness are the Zair, and the Jab Cancel. These two techniques have a separate ranking system like so...
Near Useless
Hard to Use
Okay
Decent
Effective
Fantastic
I PLAN ON DOING THE CHARACTERS IN 2 DAY CYCLES. THE MORE IN-DEPTH THE ARGUMENTS GET THE LONGER I MAY POSTPONE THE CYCLE. IF AN ARGUMENT DOES NOT CHANGE SIGNIFICANTLY THEN THE DISCUSSION WILL MOVE TO THE NEXT CHARACTER.
Posting Guidelines
It is preferred that posts should appear with the following information:
Jab Cancel Effectiveness
--Explanation
Zair Effectiveness
--Explanation
Match-Up Ratio
--Explanation, and General Strategies.
The Characters:
 1. Diddy Kong 50:50
 2. King Dedede 60:40 3. Kirby 30:70 4. Snake 50:50 5. Falco 30:70 6. Donkey Kong 60:40 7. Wolf 40:60 8. Toon Link 40:60 9. Pokemon Trainer 50:50
-
-9a. Squirtle 40:60-
-9b. Ivysaur 55:45-
-9c. Charizard 60:40 10. Wario 40:60 11. Lucario 40:60 12. Fox 35:65 13. Metaknight 20:8014. Samus Aran 45:55-
-14a. Power Suit Samus 55:45-
-14b. Zero Suit Samus 40:6015. Mr. Game & Watch:random: 16. ???
:random: 17. ???
:random: 18. ???
:random: 19. ???
:random: 20. ???
1. Diddy Kong

Donkey Kong’s pal has finally joined the battle! Unfortunately, screenshots fail to truly capture the way he moves.
He scrambles around the battle, using whimsical fighting moves while wielding both his Rocketbarrel Boost and Peanut Pop Gun.
Quite simply this crazy primate will drive you... bananas.
Match-Up: 50:50
Zair: Hard to Use-Okay
He's hard to hit on the ground however since Diddy spends a good amount of time in the air it's effectiveness is situational to stall his approach.
Jab Cancel: Decent-Effective
You have to really mindgame with this one. Sometimes you'll have to complete the jab, while other times you'll be able to make them think you're just going to complete it and you can continue into a smash or grab. If your opponent can pick up on what you're doing with your jab cancel they'll have the chance to shield. It's really tenuous. However using the Jab cancel to Usmash, Dsmash, and Utilt is a fantastic method to KO, and keep Diddy in the air where he can't do as much harm.
The Nanners
Diddy Kong's bananas are THE BEST thing about him. Well... that and his immaculate dash attack and shield pressuring. To be honest, he's a pain. The things to get accustomed to doing are the following...
1. DAC+Dash catching his bananas.
2. DAC with a banana in hand. I call it "Banana Attack Cancel."
--After doing that you can near laglessly hit him with the Fsmash, or depending on proximity the Dsmash.
3. Throwing Bombs at him to interrupt his banana catches.
4. Do your best to keep his bananas under control.
He has a banana-lock similar to Falco's laser lock. Just keep your distance if he has a banana in hand.
Also while bananas are out of his control Diddy Kong has what's called a "Banana Canceled Rocket Barrel Boost."
--Quoted from the Diddy Kong forumsNow, Rocketbarrel-boost next to a banana. You need to be close enough that you don't trip, but the barrel is almost touching the banana. It will treat the banana as an attack and the barrel will fly off, but you land on the stage without falling. It's awesome mindgames. Not to mention that when you do this, the banana will fly off in your opponent's direction.
How do you deal with it?
It's not game breaking, just be aware of the bananas you gain control of and keep enough pressure on your opponent so he can't utilize this. Though most would think it automatically heads towards you, it doesn't. Generally if you use the Banana in hand DAC, you can use the banana for a near flawless approach.
Also, make sure to realize when having a banana in your control would be of assistance to you, or if it would be detrimental. Knowing when to use them or when to throw them away is very important to know when fighting Diddy Kong.
Shield Game
Diddy Kong can do a lot of powerful moves out of his shield very easily. Namely his Fsmash and Dsmash. To avoid that if you're going to Jab-Cancel make sure you finish with a move with push-back. Using something like a slower smash can spell doom for you, since he can reciprocate with a relatively powerful smash attack if he happens to spot dodge.
Edge-Guarding and Recovery
Edge-guarding Diddy Kong is easy. If the feisty little primate aims for the edge, the Zair edge-guard is fantastic. Hell a simple drop and grab edge-guard can do the trick.
However, once you've been knocked off of the stage be careful. His Dair is a very good spike that's relatively easy to get off.
Dash Attack and Shield Pressure
His dash attack is one of the other things to worry about. It has a lagless finish allowing him to go into an array of annoying moves. It's really just as, if not more, amazing than a DAC. He also has amazing shield pressure. Don't assume your shield will save you, space this guy as well as you can with your projectiles.
Glide-Tossing
Something to be aware of is his great glide-tossing game. You have to space him with projectiles well, and generally only arrow cancel if you have the small gaps after a Bomb/Boomerang toss. This video can explain it far better than I can. That video playlist also shows a couple of Diddy Kong's strategies including his banana choke grab.
Building Up the Damage
This is the only truly difficult thing about fighting Diddy Kong. He's light and hard to combo, and his defense is immaculate. However, once you get him up in the air you can build up damage relatively easily. Your projectiles are going to be your best bet in this case, since at close range his shield pressure and quick smashes can spell near instantaneous doom for you.
Finishing Moves
Luckily, the little tree-humper is light. Utilizing the Banana Attack Cancel along with well timed DAC's, Dsmashes, and Utilts can send this little punk flying. Also your Dair will send this guy back to the jungle.
Homework
Diddy Kong: The Facts, Must Reads and Videos!
Diddy Kong: Character Playing Guide!
2. King Dedede

The self-proclaimed king of Dream Land formally joins the brawl! Mechanizing his wooden mallet, he delivers a mighty, earth-shaking blow!
He joins as a member of the heavyweight class alongside Bowser and Donkey Kong.
With a fantastic chain-grab, strong swipes of his hammer, and a very random spam he's a formidable opponent.
Will Link be tossed aside or dethrone this self-proclaimed tyrant?
Match-Up: 60:40
Zair: Fantastic
King Dedede is a big boy to say the least. With his large size it makes him an easy target for Link's Zair. Once you learn to properly space it and even use retreating Zairs, King Dedede will rue the day he ever messed with the Hero of Time.
Jab Cancel: Effective-Fantastic
Some might tell me that well, your jab cancel is simply "fantastic" against Dedede. I am generally going to agree with them, but I define the rank of "fantastic" as being nearly without reciprocity. While it is wonderful against King Dedede his grab range is immense. If you space yourself slightly wrong you could end up in a chain grab, which I will have to say is simply not fabulous. This evil technique of the King of Dreamland is discussed in the next section.
Don't Get Grabbed!: His Chain Grab
King Dedede's chain grab is the primary reason he does so well in tournaments. Why you ask? Well, he can take the heavy characters like Link up to about 50%, and get them off of the stage with a Fthrow. Afterward he simply needs to float around and edge-guard you.
How do you deal with it?
Now I'm sure most of you have heard the statement, "Well, just don't get grabbed!" You've probably thought the person saying it must have been kidding. Well... they weren't. The best methods of beating his chain grab are...
1. Spacing yourself properly with your Zair and your projectiles.
2. Having a bomb in hand
--The bomb will explode mid-chain grab, allowing you to escape.
3. Spot-dodging a little bit more than shielding.
4. Knowing his grab range. His grab is quick and almost competes with a tether-based grab.
2. Having a bomb in hand
--The bomb will explode mid-chain grab, allowing you to escape.
3. Spot-dodging a little bit more than shielding.
4. Knowing his grab range. His grab is quick and almost competes with a tether-based grab.
Shield Game
This guy is probably going to spend half of his time attempting to shield grab you. Don't let it happen. If he wants to camp and throw up his shield, pressure him with well spaced Zairs and projectiles. Then if he wants to keep going for his grabs with his shield up, punch holes in it with your Dair. A King Dedede that abuses his shield is annoying, but something that you can abuse even greater if you time things right.
Edge-Guarding and Recovery
So you want to keep King Dedede off the stage? Well you have a few options that work well. His jumps while multiple are slow and can be bothered with projectiles. The true key is to get him to use up his multiple jumps so you can punish his Up+B recovery.
His options to recover with the Up+B are...
1. To allow the move to finish which leaves him wide open for a Dair
2. To cancel the move in an attempt to grab the ledge.
The second option can be thwarted by Zair edge-guarding, or just a quick drop and grab edge-guard. However BOTH of these can be simply defeated by a well timed Gale Guard.
King Dedede has a fantastic offstage game. Multiple jumps and solid aerials allow him to miss multiple times and land attacks. Not to mention he can suck you in with his neutral b, and simply walk off stage. Watch out for him if he starts to camp the edge. Having a bomb ready to throw into his mouth helps. He swallows the bomb and is temporarily incapacitated by it.
Making sure you know how to DI properly always helps. Also your tether is your best chance to recover. Outside of that make sure to pull out a bomb when you're offstage.
Remember: The bomb-heavy portfolio pays off for the heavy investor.
Projectiles
King Dedede has a solid spamming game. While your bomb beats out the Waddle Dee's and Doo's the dreaded Gordo can end you if you're not careful.
Here are his three projectiles.

1. Waddle Dee ~70% chance to appear (5%)
These aren't much to worry about, they jump around and don't do a whole lot of damage. It is suggested that you kill these suckers. You don't need any extra interference.

2. Waddle Doo ~20% chance to appear (7%)
Here's where King Dedede's projectiles get annoying. Waddle Doos while seemingly harmless can fire a spray of electricity at their opponents, stunning them for 2-3 seconds. This allows Dedede the chance to execute a deadly Fsmash or initiate his chain grab.

3. Gordo ~10% chance to appear (23%)
**** this guy. **** him and his family. King Dedede's Gordos are what make his spam useful. He can KO you. Most of the time it's when you think you're going to get a Waddle Dee or Doo...instead you get a face full of spikes. How should you deal with this?
1. Keep your distance so you have time to react.
2. Don't abuse your boomerang in the fight. It has the highest downtime of your projectiles
3. Watch it's pathing. If it's about to bounce before hitting you DO NOT SPOT DODGE. YOU WILL GET HIT. You should either shield or air dodge to get through it.
4. Just be wary of his spam.
Building Up the Damage
This part really isn't all that hard. Once you can space him well with your Zairs you should have no problem building up damage. However remember that your arrows aren't as reliable of a projectile, though Arrow Canceling isn't necessarily a bad thing since it can throw off his approach protecting you from a potential chain grab.
Finishing Moves
Luckily for Link, King Dedede engaged in far too many eating contests. He's heavy, and easy to "combo". Attempting to send him upwards will generally be the slowest methodology of killing him. Sideways attacks like your Fsmash, Fair (2nd hit), Ftilt, and Spin Attack will generally get the job done. The only upwards sending attacks one should ever against Dedede for the purpose of finishing him off would be the Dair, and the Dsmash.
Also if your timing is right due to his inexplicable ability to float, prolonged airtime and robust physique make him a perfect candidate for Link's Dtilt spike.
Homework
The Royal Guide/Faq of King Dedede
Chaingrabbing (How-To, Proper Technique, etc.)
3. Kirby

This is Kirby, Warp Star-riding citizen of Dream Land who can suck up anything. His copy abilities allow him to steal the powers of other characters!
Yeah... He’s the only character who really hasn’t changed much from his appearance in Super Smash Bros. Melee. He’s round, pink, and soft.
However he is much more lethal in this game, and not so reliant on his ability to copy his opponent.
Match-Up: 30:70
Zair: Near Useless
Kirby is really, too short to effectively use your Zair. On top of that the little spheroid of doom can also crouch to become near non-existent. The Zair however can be effective if Kirby is on a low platform similar to those on Lylat or Battlefield, or if you use a "retreating" Zair. However there are pretty much always better options than that.
Jab Cancel: Effective-Fantastic
Luckily, though Kirby is small he doesn't have a fantastically immaculate reaction time. Well spaced Jab Cancels can be accomplished with little to no reciprocity. Some of your best bets are to Jab Cancel into your Utilt, Usmash, and Dsmash. Luckily Kirby is light... that's about where our luck ends...
Forward Throw -> Utilt -> Uair
This combo is the bread and butter for Kirby when Link is at a lower percentage. It can pile on the damage even up to 50%.
How do you deal with it?
I really hate saying it again, but "Don't get grabbed". At least not at your lower percentages. Having a bomb in hand will also help you to evade this by interrupting the chain. Really, there's not much you can do other than hope the bomb explodes when you're grabbed. DI'ing upwards can also screw up the Utilt -> Uair portion of the combo.
Shield Game
Kirby isn't so scary out of his shield except for a few moves. Namely his Fsmash. You can actually hit him with some of your smashes which knock him back, and he can lunge forward with his Fsmash during your downtime.
Also if Kirby shield grabs you at low percentages it's pretty bad for you, but I already told you why.
Edge-Guarding and Recovery
Edge-guarding a Kirby can be difficult. Most of the time your options are to hit them with a projectile, namely an arrow or a boomerang. Bombs are much more useful in creating a wall to force them to be hit by another move, your Dair. If you can get him to exhaust all of his jumps it's possible to Zair edge-guard him, but his Up+B can spike. On top of that his Up+B does not sweet spot the edge, so you can land a Dair when you think he'll use his Up+B.
Recovering against a character like Kirby is a problem, even more so than King Dedede. Kirby is faster, a better jumper, and well... much better at suck-based homicides. He can "wall of pain" you clear to the kill zone, and then float lazily back to the stage and recover easily. Also he can grab release you at the edge then double dair + edge-guard: It's a game over. On top of that the little pink ball can suck you in at the edge and simply spit you out under stages like Smashville and Battlefield. Having a bomb in hand helps immaculately and your recovery moves are situational due to their limited reach. Sometimes the Up+B could save you, while other times the Zair tether is perfect. Also, tossing a boomerang in the path of your recovery can help keep Kirby from getting into the position to gimp. You simply have to use your best judgment, and recover quickly. The better the Kirby, the quicker he's going to see an opportunity to gimp you.
Oh and also, always make sure to DI properly.
Projectile
Kirby's Up+B can also be spammed on the stage. It's much slower moving and damaging than it was in Melee, simply walking not running towards him and spot-dodging/powershielding can defeat this "technique".
Building Up the Damage
While he can drop an easy 40-50% on you, you do not have as many amazing options on him. He's too light to do consecutive Utilts, and most times when you try you get a rock falling on top of your head. However, spacing him with your projectiles is how you're going to win. The issue with Kirby is that he in fact has no "real projectiles", in the sense that his Up+B takes long enough to do that it isn't a hyper-competitive spam. Alternating your timings with your Arrow Cancels, bomb tosses, retreating Zairs, and boomerangs will allow you to build up damage from a safe distance. Your Jab Cancel is also paramount for racking up the damage. It's also useful for the next section.
Finishing Moves
Well we all know that this pink ball is light. Powerful moves with upward momentum can easily kill this "loveable" ball of ... fluff? air? nitrous? Your Dsmash, Usmash/DAC, Utilt, Dair, Uair, and even your bombs are fantastic methods of killing this guy. Bombs especially because they can kill him while he's in the air if he's being particularly resilient. You can pull off the Dtilt due to his floatiness, however it's highly situational (About 1 minute in).
Use your projectiles and your Jab Cancels to keep your kill moves fresh and ready to send this pink punk sky high.
Homework
Gonzo's Brawl Community Inspired Kirby Instructional Video
Kirby & The Amazing Guide - combos, strats, and more!
4. Snake

The legendary mercenary makes his miraculous Smash debut! This law-breaking news roared around the world.
He comes fully loaded with cool and showy weapons that only he could possess. Couple them with these different worlds, and it will clear a path to new horizons.
Will Link be able to defeat this madman mercenary? Or will Snake...
Snake?
Snake!?
SNAKE!
Match-Up: 50:50
Zair: Decent-Effective
Snake is a great candidate for a Zair right to the face. He's tall, heavy, and generally you can get multiple hits on him with your Zair. The only issue is his crawl goes lower than your Zair and so does his DAC approach. It's phenomenal as a retreating move and an above average approach. Abusing it too much will get you punished while using it sparingly will allow you to keep yourself alive.
Jab Cancel: Effective-Fantastic
Snake is a large character and can be chained into combos relatively easily. Spacing your Jab Cancel is what is paramount due to the fact that his tilts have amazing range. It's definitely amazing for getting off a kill move or just juggling him in the air with the Utilt and Usmash.
His Approach: DAC and Dash -> Usmash
Snake has what is known as a very Broken Dash attack. His dash attack can not only be outright canceled into a "Mortal Slide", but an Usmash can be done immediately after he connects with his dash attack. This is his most effective form of approaching people, and getting to the edge to edge-guard.
How do you deal with it?
Luckily for Link players, we're one of the characters who don't have problems with slidey Snakes. His DAC while quick can be simply defeated by one of our many projectiles. Specifically what tends to help is Arrow Canceling. Due to his DAC moving quickly forward your arrows can stall him just enough for you to get off a Dsmash, Jab, or Grab if he's in range. To be honest, this technique isn't as useful against Link as a lot of people think it is. It's just silly and initimidating.Shield Game
Alright, time for some bad news. His shield game is actually pretty good. Most of the time coming out of his shield you will see a few moves, namely the Utilt and the Ftilt. To be honest there's not much you can do to beat these moves unless you're approaching with a Zair timed to quickly cancel itself. His shield game is great, but you only really need to approach Snake to kill him off.
Edge-Guarding and Recovery
Edge-guarding against Snake really can be a challenge. Luckily in order to not get hit by some moves Snake will have to air-dodge out of his Cypher. Use projectiles when needed to stop his return.
You can also do what I believe is called "Cypher-Stealing", which is where you grab Snake before he gets to the ledge and grab release. Since he didn't take any damage he will aimlessly fall to his doom. However since Snake is similar in Link in many respects, he has an out for such a tactic. He can drop a C4 mine and explode it on himself in midair. Take that moment to use your aerial kill move, the Dair. He puts more damage on himself, and makes it easier for you to finish him off. Just make sure you watch him properly.
Recovering against Snake can prove to be a pain some days. A lot of times Snakes will plant explosives, fire Nikita missles, and toss grenades at you. To truely be honest it isn't all that difficult to evade those. They will be explained in the next section. The only thing you should watch out for when getting back onto the stage is his Nair. It is a multi-hit attack with a final strong hit. Be wary of it's hitbox and your flightpath, otherwise it may prove difficult to get back on stage.
Projectiles and Mines
Snake has a few tricks up his sleeve, along with a few explosives.
Nikita Missile Launcher

His Side+B launches a missile which is remote controlled and can be canceled by pressing his shield button. This missile can deflect multiple projectiles and can prove to be a pain to your approach.
Stopping Nikita
Quite simply, hit Snake. Screw trying to stop the missile, you're wasting your time. Toss a bomb over it and arrow cancel. As long as you can arc your attacks properly to get around it, you should be fine. Defensively, shields help more than spot dodging.
Recovering against a Nikita
Nikita missiles are generally used by Snake players as a method to edge-guard you. While on the edge they will aim it so that you have to air dodge, and then cancel the missile so it stops where it is, and will still hit you. Combining air dodges, fast falls, and Zair tethers are what can save you against this tactic.
Grenades

Snake's grenades are his most popular projectile, why? Well he can explode two of them at once and use them defensively with methods such as Grenade Rolling, Grenade Shielding, and timing his throws properly.
Stopping his Grenade Spam
Really to be honest, all you have to do is spam back. A properly timed double arrow hop will keep him in place and make his grenades explode on him. Timing your projectiles is key to defeating him. Your spam is decent enough to stop him from continually throwing grenades at you.
Mines: C4 and Proximity Mines

The Big Bang
Snake can place C4 and Proximity Mines on the stage, there is only a slight difference between the two.
C4
-Can be dropped in the air.
-Can't be charged.
-Is remotely triggered, though can explode on it's own over time.
-Can be placed on an opponent.
Proximity Mine
-Must be placed while on the ground.
-Can be charged.
-Is triggered via proximity and other explosives.
-Can't be placed on an opponent.
Stopping the Big Bang
Snake's C4 and Proximity Mines, while good are not massively deadly. The C4 takes time to trigger, and the Prximity Mines take time to place.
Proximity Mine
You can actually use his Proximity Mines against him, even if he isn't within triggering range. Well aimed projectiles can be used to trigger the explosive, and send nearby opponents sky high.
C4
His C4 is something that you can literally, just avoid. Stay away from it, and actually after the C4 has been on the field for quite some time (about 25-30 seconds), start trying to get Snake to land on it via throws. I hear C4 can be quite sensitive to force sometimes.
Building Up the Damage
Snake is very heavy. Your projectiles in conjunction with your Zair are your best bets to build up damage safely. If you're into a bit more dangerous methods your Jab Cancels and grabs can be used to build up damage as well. If you use your smash attacks to build up damage make sure that you refrain from using them in the +125% area. You have about 40% and you can kill him with most fresh smashes with little to no say from Snake.
Finishing Moves
Again, Snake is an annoying character to KO. The grab-release to Dair is very useful, as is just a simple Dair. Forcing him to fly sideways is a much better method to kill him. Not only are you forcing him to potentially damage himself via C4 recovery, his Cypher while an annoying form of recovery is slow moving, and can be approached for a killing move quite easily. Fsmash, Dsmash and Dair are the heavy hitters against this guy. Maybe if he's in the 200% or higher range you can get creative. Really, it's all about making sure your smash attacks are fresh and ready to kill in the 150% range. Otherwise he tends to keep living far too long.
Homework
Read Everything Contained In:
Into the Fray: A Snake Survival Guide
Only one thread for Snake, but it's a long one with multiple links to various topics. Read everything, especially the parts about his grenades.
5. Falco

Falco is a pilot from the Star Fox series. He’s a cool customer who likes doing things his own way.
He has the best initial jump of all the characters, and he likes shooting his Blaster as he leaps about.
With his lasers and his reflector he kicks about, he's a real tough one to beat.
Match-Up: 30:70
Zair: Hard to Use-Okay
Sadly, while Falco is of a proper height to be effectively Zair'd it's not enough in this match-up. Due to his SHDL (Short Hop Double Lasers) he can spam aerial approaches, and his Kicked Shine (Reflector) can out space most people very easily. It makes the timing for the Zair very important. Use it against most of his approaches, approaching him with it tends to be difficult.
Jab Cancel: Hard to Use-Okay
Falco can be Jab Canceled efficiently maybe one or two times a stock. Mainly because he can break most of anything you do with his Kicked Shine. However this is a very mind games based encounter, and you can generally mess with his head by completing the jab combo, or deciding to alternate to canceling it into the Dsmash or other moves. It's very tenuous.
Don't Get Grabbed? Pizzacake!: Falco's Chaingrab
Bread anyone? Don't want it? Too bad. This technique is yet another bread and butter move of Falco Lombardi. His Dthrow chains into yet another Dthrow! This move can even offstage you into his Dair which will meteor you to your doom. It can even been done into his Broken Dash or DAC, wracking up tons of damage. Falco is one of the characters with a solid pivot grab, but slow forward approach to his grab.
How do you deal with it?
1. When in the chain grab you can break the chain by having a bomb explode in your hand.
2. When about to be grabbed you can play Kamikaze Link, and get out of the potential grab by bombing yourself.
--Also, building up the damage on yourself to about 40% makes his chain much harder to do if you DI properly.
Bombsliding is a very useful technique against Falcos who all they want to do his chain grab. Even if he wants to reflect it, 50% of the time it will reflect off of your Hylian Shield while during the other 50% it will hit you and him. In the invisible percentage is that love part where the Falco shields the bomb and you get to punch holes in his shield with your Fsmash and Dsmash.
Shield Game
Falco has some relatively quick attacks out of shield. His Utilt and Jab are very annoying moves that at low percentages can build up damage rapidly on Link. Something to be aware of however is the range of his Dsmash. His Dsmash is quick and relatively powerful. Being ready to DI properly will save you, same with being ready to DI+Zair recover.
Edge-Guarding and Recovery
Edge-guarding a Falco can be a pain in the neck. For the most part his horizontal recovery is immaculate. Zair edge-guards are effective against his vertical recovery, while difficult to execute on his horizontal. If you can force Falco into a position where he would have to use his Up+B as opposed to his Side+B, you should be golden. Generally, that's easier said than done. Building up damage on him with your projectiles generally helps to frustrate a Falco, and build up damage allowing you to KO him easier on stage. Other than a well timed drop and grab edge-guard most options are difficult.
To stay alive against a Falco you'll obviously need your #1 tool... DI. His Chain grab to Dair combo at low percentages can be vicious if you don't DI and mind game him with your recovery. To be honest, Falco will most likely not try to follow you off of the edge while you're recovering from long distances. Most likely he will spam his laser as much as possible to impede your return. To defeat this tactic you're going to need your #2 tool and bestest buddy in the whole wide world... bombs. Against Falco even I have had moments where a bomb has saved me from being meteored. His Dair connected, my bomb exploded, I flew up above him and Dair'd him for the KO. Also, never use your Boomerang while recovering. You'll end up Gale Guarding yourself. To be honest you need to alternate recovery strategies, if you become predictable you're going to get spiked. End of story.
Laser and Reflector
Falco's blaster and reflector moves tend to cause a bit of trouble for Link
I'm a firin' ma Laser!

Falco's blaster is one of the moves he will tend to spam as often as possible. His SHDL will allow him to hamper most of your approaches, and at close range combo into moves like his Dsmash. To avoid this, make sure to approach with your shield and spot dodges. Don't try running through the lasers, that would only work if they didn't stop you dead in your tracks. His lasers will be spammed, and it may take time and practice but you'll find ways through the maze of lights.
The Laser Lock
When you fall down, Falco can indefinitely lock you with laser shots. It's lame, I know. Just don't fall down on the ground.
My Bread! Hands off it!

I'm going to talk about this reflector in two different ways, the way the attack itself can affect you and the way it can affect your projectiles.
The Shine Kick
This move is a great spacing move. At close range it can stop most of your approaches it's fast, and can trip you making it's downtime nearly unseen. However, it's downtime is a great thing to be able to punish. If you can predict when he's going to use it you can get a myriad of damaging moves off on Falco.
Your Projectiles and their Effective Rate of Return
Most of your projectiles will still hit Falco, the question is... which?
Arrows
Effective Rate of Return: 30-50%
This move is easy to return, and at the same time hard to predict. Your long shots will most likely be kicked, while your arrow cancels may go unnoticed. Really it's harder for Falco to predict your arrows than most of your projectiles.
Gale Boomerang
Effective Rate of Return: 45-60%
This move has long start up and a very annoying return effect. To be honest, I'd restrict your use of the Gale Boomerang throughout the match, using it only when you know it's harder for the Falco player to use his reflector.
Bombs
Effective Rate of Return: 70-95%
Saddening how high that number is? It appears that we should be sad... if you haven't been reading most of this guide and skipped to this section. For the first 40% you want your bombs to be reflected to hit either you or both targets, so that you evade his chain grab. Outside of that remember, you have a Hylian Shield and a Bomb Slide. Both of those make it so that even if the bomb is reflected, it will hit both of you. Also vertical tosses of bombs make for the ideal form of toss, though slow to build up damage and not necessarily accurate. This isn't the ideal method to use bombs, but it's one that works in this match-up.
Broken Dash and DAC
This is fun, not only does Falco have a Dash Attack Cancel, he has a Broken Dash similar to that of Snake's. Really all you can do is be aware of it. For the most part he's going to use the Broken Dash out of the chain grab, and you should either have a bomb in hand or be at a high enough percentage to DI out of it.
Building Up the Damage
Something to realize with Falco is that it's all about keeping the moves coming. When you can get him into the air and use some of your bombs it helps a ton. Arrow cancels and well timed Jab Cancels are nice too. Mainly once you can actually approach Falco, building up the damage is easy. It's approaching him that's the hard part.
Finishing Moves
Like said above and all throughout this entry, approaching Falco is the difficult part. Most of your aerial approaches and your DAC are boned, however Bomb Sliding can lead to some nice KO's. Outside of that, the bird flies in all important directions quite well.
Homework
Only one thread, but it's a directory thread. Something you want to learn about Falco? It should be in:
Falco's tips, advanced techniques, and others
6. Donkey Kong

It’s Donkey Kong, ruler of the jungle. The original giant powerhouse makes a triumphant return!
Looks like his giant punch is still the haymaker you remember. Don’t doubt his strength or you’ll end up with the ultimate headache!
Match-Up: 60:40
Zair: Fantastic
Link's Zair is easy to hit with on Donkey Kong. Like... super duper easy to hit with on Donkey Kong. The dude is huge yet, while his arms have decent swipe range, doesn't even come close to being able to compete with Link's Zair. For like.. real reals.
Jab Cancel: Fantastic
Link can Jab Cancel against Donkey Kong with almost zero reciprocity. It's amazing. Use it, be amazing. Canceling into the Utilt at low percentages is great for building up damage. Just watch out for his grab range and you should have little to no problem.
Donkey Kong don't want much... Just to Stage Spike!
At approximately 50% Donkey Kong can grab Link and put him on his back, jump off of the stage, and stage spike Link. This seems scary, difficult to avoid but really... it's not.
How do you deal with it?
1. Don't get grabbed.
--Like for real reals.
2. Have a bomb in hand.
--Donkey don't like fire.
As long as you can tech the stage you shouldn't get spiked. At higher percentages you can actually use your Nair to stage spike Donkey Kong.
Shield Game
Due to his grab range and some quick smashes he has a good shield game. His Dsmash, Utilt, and Ftilt come out quickly. Don't underestimate this, and simply don't blindly approach his shield. You have a Zair to build up damage from a safe distance with little to no reciprocity.
Edge-Guarding and Recovery
Edge-guarding Donkey Kong is an interesting thing. Your Zair and Gale Guards are pretty much useless. Yet, regardless of that, you can simple just drop down and Dair Donkey Kong as he's moving horizontally across the screen... hoping to get to the ledge. Aiming the Dair is very important though, he has invincibility frames and amazing priority on his Up+B.
Recovering against DK will be interesting. He has an array of spikes ready to edge-guard you, and spike you with. To be honest your basic tricks apply:
1. Alternate Up+B and Zair recoveries.
2. Have a bomb in hand to cancel out spikes and prolong recovery.
3. Watch out for his Bair, it's got range and comes out relatively quick.
Super Armor and Invincibility
A few moves of Donkey Kong's have some interesting properties to them...
Super Armor! PAWNCH!
The only ability with super armor on it is the "Donkey Punch", and to be honest there are easy ways to not contest with this beast of a move.
When his "Donkey Punch" is charged up, don't use moves with a slow start up. Try to Jab Cancel into your damage builders, and simply use tipped Zairs. It will definitely save you a lot of grief.
Invincibility! Get to the Choppa!
Donkey Kong's Up+B has invincibility frames on start up. To be honest, this shouldn't be a huge problem. Simply just don't try to stab something with a Dair that's invincible. That's just a @#$!ing stupid idea.
Building Up the Damage
To be honest, just name of a move of Link's and it will build up damage quite nicely. Utilts to Usmashes are fantastic. Your projectiles and Zair on top of all of that make this match-up almost laughable.
Finishing Moves
Killing this Ape is the one problem you may come up against. He's heavy, and hard to get off of the stage. Generally you just need to be patient. If the Donkey Kong is playing defensively and you need to spam him up to all sorts of percentages. Go for it. He needs to approach you, you do not need to approach him. To setup kills your Jab Cancel is fantastic, as is a sour Zair to Fsmash. Just get used to seeing where his laggy attacks are and exploit them. He makes it easy.
Homework
DK: 101 A primer for newcomers. & General Discussion
7. Wolf

The Star Fox team’s greatest rival is Team Star Wolf. Sitting at the head of this group is Wolf O’Donnell.
Wolf fights with his razor-sharp claws in a style that’s downright feral. His high risk, high return special moves are a blast to use.
Match-Up: 40:60
Zair: Decent-Effective
Link's Zair is decent against Wolf and a paramount utility in mindgames. Though some of the times it does not connect with Wolf due to his stances and or smashes, it tends to be useful most of the time. Zair with a bomb in hand is also fantastic to mindgame him.
Jab Cancel: Okay-Decent
Though most will tell you that he doesn't have many moves to escape it, he does. His Down+B is generally a "combo breaker" and can give him the space to get out of your Jab Cancel. To be honest, it's all mostly about mindgames with this. The first Jab Cancel, you'll most likely either get it off or you won't. From there you can alternate completed and canceled jabs. Generally it's a winner against Wolf.
I think this kid is button mashing: Wolf's Smashes
Wolf's Dsmash and Fsmash are probably his best moves. His Fsmash is practically a replacement for his cruddy Dash Attack, and his Dsmash comes out relatively quick and hits quite hard. His Usmash is really only useful in his DAC, which will be discussed later. To quote my good friend Rykoshet:
FsmashAll a Wolf player has to do to be good, is attach his C-stick to his nutsack... and cough.
Wolf's Fsmash has multiple hits, as he rushes towards his opponent. He can use this to not only build up damage and KO, but he can use it to lessen the gap between him and his opponent.
Dsmash
Wolf's Dsmash is relatively quick and hits like a truck. To be honest, it's probably his best move. It hits on both sides and causes urethra tears on each side it hits.
How do you deal with it?
Shields tend to be best against his Fsmash, depending how close he is a spot-dodge can still allow for a connected hit
Dsmash
Spot-dodging is fantastic against his Dsmash. You have to get used to anticipating it though.
Shield Game
Out of Wolf's Shield generally he only has a couple things that he will tend to do. First is a Dthrow to a Smash, depending on your percentage. Just space yourself so you don't get shield grabbed. The other is generally a Dsmash, which again... be ready to spot-dodge.
Edge-Guarding and Recovery
Wolf is surprsingly easy to edge-guard. His Side+B is really one of the only things you have to worry about. Like his Space Animal companions his Up+B recovery is generally in a straight line. Zair edge-guarding is fantastic against him.
Wolf can actually do some things to keep you off of the stage. The first is his Dair. It's fairly easy to read and airdodge, however remember that sometimes airdodging can kill Link due to his fast fall speed and cruddy recovery. On top of that he will most likely spam you with his laser when you're offstage. The same tricks as always apply, have the bomb in hand so you blow yourself up.
Reflector and Lasers
Wolf, while being a space animal and being very similar to his counterparts in some respects... has a unique blaster and Reflector.
Reflector

Wolf's purple colored reflector is similar to Fox's and Falco's in that it reflectors projectiles. It is different in that it adds invicibility frames upon use. This will allow him to negate some big attacks in close quarters as well as from afar.
Laser

Wolf's laser is similar to Falco's, with a lower fire rate and one thing that sets him apart from the other members of his family of extra-terrestrial mammals. His has opening damage and knockback when he initially fires his blaster. So watch out when he starts spamming this thing and time approaches properly.
Dash Attack Cancel
Wolf's DAC is actually quite decent. It can be a surprising and effective approach sometimes due to it's multiple hits. Pay attention for this, because even though it's not his most effective kill move a slightly charged DAC can cause worlds of hurt.
Building Up the Damage
Wolf is very similar to Falco in the fact that you need to be tricky with your damage build up. Bomb Smashes help in putting on some damage and so do your Zairs. Also, properly building up damage with your Jab Cancels at low percentages can easily set the pace for the match. Approaching him with shield dashes help you get close relatively easily.
Finishing Moves
To kill this talentless SOB you have to get creative. Bomb Smashing him is a fantastic way to get in a KO if your Fsmash is fresh. For the most part, your edge-guarding is your best method of KOing him. That and your Dair.
Homework
The Essence of Wolf: A Guide to Wolf
8. Toon Link

It’s Link’s other incarnation—Toon Link. He has a slightly comical expression and big, catlike eyes.
But with his light footwork and variety of colorful weapons, he's not to be trifled with!
To be completely honest with you, the kid creeps me the **** out.
Match-Up: 40:60
Zair: Okay-Decent
On top of being relatively small, Toon Link is a very floaty character. It can cause Link some troubles most of the times with his Zair but that's not to say it's useless. He's a big enough target that you can cause some damage with it, and definitely starts up some decent combos.
Jab Cancel: Okay
Again, Toon Link is floaty and can get out of most of your Jab Canceled moves. Generally you want to use high hitting, fast moves. Your Up+B and Usmash can get the job done, as can the occaisonal Utilt.
Toon Link is like Link... but... better?
Toon Link has many advantages over Link. He's Link with similar range, slightly less power, and a much more devastating aerial game. His Bairs are very good and will generally be his common spacing tool. Most of the advanced tricks you learn while playing Link are used by Toon Link players. Such as:
Arrow Canceling
Zair with and without Bombs
Zair Edge-guards
Jab Canceling
So he knows most of what you can do, and you know what he can do.
How do you deal with it?
Shield Game
Out of shield, generally you're going to see a Toon Link using his Dsmash or occasionally shield-grabbing. One good thing about this match-up is if he whiffs a shield-grab, he suffers as much as Link does.
Edge-Guarding and Recovery
Edge-guarding a Toon Link is mildly difficult due to his inate floatiness. He can generally recover in the ways that you can, but quite simply... better. Treat it like edge-guarding yourself. You can Gale-Guard and do some well timed Zair-guard. Figure out the timing for Toon Link's bombs and know when his is going to blow up. Using that knowledge to your advantage can mean victory for you in a match.
Toon Link most likely will use every trick that you have to edge-guard. The few unique things about his edge-guards will be:
That he will Bair you to no end.
His Dair will just flat out spike you if you're not careful.
Projectile Game
Toon Link has projectiles... and I think I've seen these from somewhere else...
Bow

Toon Link's bow and arrows are similar to Links in many ways:
There's a bow
They shoot arrows
He can Arrow Cancel.
However, his arrows are slower moving and due to his floatiness and better jumps he can fire more arrows easier.
Boomerang

Toon Link's boomerang is similar to Link's in the respect that you throw it, and it comes back. Toon Link's boomerang does return damage and on top of that can be angled very sharply. It however does not have a Gale effect.
Bomb

Toon Link's bombs are similar in effect to Link's. They can be thrown and are also fun accessories to extending Toon Link's recovery. They have a larger splash radius however, they do less damage and have less knockback.
Zair
Toon Link has a Zair. It's like Link's, but shorter. He can use it to Zair edge-guard.
Building Up the Damage
Jab Cancels tend to be decent, but what you need to do with this match-up to keep on even keel with the damage build up is to do something different against this campy character. Link can technically outspam Toon Link if you watch for the weakpoints in his spam. During his downtime try to get in a bomb toss to an Arrow Cancel. The best way to make sure that you can continue to do damage to Toon Link though is to stop him from ever starting his projectile spam.
Finishing Moves
Toon Link is light, and pretty much you do not have the luxury of slow moves against him. Your Dair and Dsmash are most likely your best bets. However, Gale Guarding him can end him if you do it just right.
Homework
EddE's tips on TL (some useful, others weird) + some general TL knowledge
I think I've seen this somewhere else before...
SSBB Toon Link Guide: The Real Toon Link
9. Pokemon Trainer

No way! The Pokemon Trainer has finally arrived. And it looks like he doesn’t do his fighting directly.
Instead, he uses the three Pokemon with him—Squirtle, Ivysaur, and Charizard—to do the fighting for him.
The Trainer

With three complete characters on his side, how can this Master of Monsters, this Count of Creatures, this Leader of Lizards, this... oh $*@# it you get the point. How can Pokemon Trainer handle this mess? What does having these three Pokemon entail?
Match-Up: 50:50
My Explanation:
1. Squirtle is great, and PT can manipulate the match so that he can use him multiple times.
2. Ivysaur though a seemingly powerful adversary can get gimped off the stage pre-KO %, much easier than Link. I don't doubt Swordplay's level of skill, but wifi is crap. You'll definitely pull off quite a few more moves with spammy characters like Ivy and Squirtle than you will live. I want to set the match as 55:45 adv Link, but it's a highly untested match-up.
3. Charizard becomes our punching bag, but again... having him out is only PT's advantage if they get the first KO. Link has a slight advantage against Charizard and can pull the match towards his advantage if he can accomplish the first kill against an Ivysaur starter. Which is why I say they might start with a Charizard to stock-tank Link. Then if they cannot accomplish a KO, they can KO with Squirts and Ivy near consecutively. The match-up is odd, that's for sure. Charizard is not at a heavy disadvantage against Link, which is actually what 60:40 adv Link would mean. It's reasonable to say that a Charizard could KO a Link if he plays just right. It's also reasonable to say that if the Link is highly attentive and more skilled than the Charizard, he will have the distinct advantage at the higher levels of play.
Change Places!: Pokemon Change and Stamina
Pokemon Trainer is pretty much a "transform" character. He alternates between three different Pokemon, allowing him for multiple styles of play. The three are (in order)...
- Squirtle - Ivysaur - CharizardPokemon Change
At any given point a Pokemon Trainer can switch out his current Pokemon for the next one on his roster. Generally this will be done when either a Pokemon is "fatigued" or when they want to build up damage with one of the weaker match-ups, allowing them to switch-out upon that Pokemon's death to a more favorable match-up. Also something very important:
--Quoted from Card's Pokemon Trainer: an In-Depth Analysis & GuideWhenever the P. Trainer performs a Pokemon Change, the Diminishing Returns on all his attacks are reset back to their default value!
This means that regardless of however many times an Ivysaur uses it's Bair attack, the moment he switches to Charizard that Bair is renewed.
Pokemon Stamina
After a period of time a Pokemon will become tired. This is based off of two different things:
1. Every Pokemon has 2 minutes until it becomes fatigued.
2. Every time the Pokemon uses a; Smash Attack, Aerial Attack, Special Move, or Tilt, exactly 1 second is taken off of their 2 minute timer.
Also, when a Pokemon is tired their idle animation changes. Ivysaur's bulb droops, Charizard lowers his head, and Squirtle leans forward.
How does this benefit us?
At that point, it will be much harder for Link to be knocked off-stage or to be KO'ed. So basically, keep pressure on them and watch the timers when each new Pokemon comes out. A general rule is that approximately 1:30 into the match, the first Pokemon will be fatigued.
I choose you!: Pokemon Ordering
Most Pokemon Trainers will tend to order their Pokemon similar to these patterns:
Pattern A: Strong/Mediocre-->Strong/Mediocre-->Weak/Mediocre
or
Pattern B: Strong/Mediocre-->Weak/Mediocre-->Strong Mediocre
What does this mean to me?
Well once you know the match-ups for each individual Pokemon, you can predict what the Pokemon Trainer will do in terms of changing his Pokemon. For example:
Pattern A: Against a Link most likely if you see a PT main start with Charizard this is generally what you're in store for. Primarily they want to accomplish the following:
1. KO you with Charizard.
2. Have Charizard build up damage with his Rock Smash and Flamethrower
3. Have Charizard get KO'ed.
4. KO you with Squirtle.
5. Switch out to Ivysaur to build up damage
6. Have Ivysaur get KO'ed.
7. KO you with Charizard.
Pattern B: Against a Link most likely if you see a PT main start with Squirtle this is generally what you're in store for. Primarily they want to accomplish the following:
1. KO you with Squirtle.
2. Switch out to Ivysaur to build up damage
3. Have Ivysaur get KO'ed.
4. KO you with Charizard.
5. Build up some damage with Charizard.
6. Have Charizard get KO'ed.
7. KO you with Squirtle.
Pattern B2: Against a Link most likely if you see a PT main start with Ivysaur this is generally what you're in store for. Primarily they want to accomplish the following:
1. Build up damage with Ivysaur.
2. KO you with Ivysaur.
2. Switch out to Charizard to stock-tank and build up damage.
3. Have Charizard get KO'ed.
4. KO you with Squirtle.
5. Build up some damage with Squirtle.
6. Have Squirtle get KO'ed.
7. KO you with Ivysaur.
Pretty much all Pokemon Trainer approaches to character selection resemble these two strategies. Granted sometimes you will fight very knowledgeable Pokemon Trainers and they may be able to play Ivysaur to perfection against your Link. If that happens, well you're pretty much in for a rough fight. But remember, pressuring the Pokemon Trainer once you get the first KO is important. Generally if they get the first KO they can gain control of the match and keep it that way.
Homework Section
Pokemon Trainer: an In-Depth Analysis & Guide
Official Advance Technique List For Pokemon Trainer
Go! Come Back! Pokemon Change Guidelines and Tips
The Pokémon Center: Useful Threads Index
Squirtle

Squirtle is the little speed demon who really is all about jumping around like the ninja turtle that he is. There really is no reason for a Squirtle to be standing still for any moment, or to be grounded for that matter. Squirtle has an extreme aerial game, and out-prioritizes a lot of characters in the air. An easy comparison would be to say Squirtle is similar to Melee’s Jigglypuff with only 2 jumps.
Match-Up: 40:60
Zair: Near Useless-Hard to Use
Squirtle is a tiny little turtle. Squirt? Turtle? Get it? Anyway your Zair won't be much use to you except in retreating form. However due to most of his approaches being along the lines of short-hopped moves retreating Zairs into retreating Craq'd Fsmashes are fantastic, though highly situational.
Jab Cancel: Hard to Use-Okay
Really it's one of those times where you have to mind game heavily with your Jab Cancels. Squirtle is floaty, but not enough that Jab Cancel is useless.
It's like "wave" dashing: Shell Shifting
Squirtle has a fun turnaround animation and speed boost. Generally you've seen Shell Shifting commonly into an USmash. However it can be used to boost grab, jab, and tilt ranges as well. These abilities are where it comes into play with Squirtle quite a lot.
How do you deal with it?
1. WATCH THIS VIDEO
2. After watching that video, make sure to memorize what the approaches look like and what the potential outcomes of them are.
3. Fight some good Trainer mains. Really hands on experience is the best thing for learning this match-up. It's probably one of Link's worst.
Shield Game
Squirtle can generally do a few detrimental things out of his shield. Primarily his Utilt can be used to rack up an easy 30%. On top of that his Dthrow has amazing KO potential, so watching your spacing is crucial. To be honest, there are a million things Squirtle can do out of his shield that are all amazing. Just space yourself properly.
Edge-Guarding and Recovery
Edge-Guarding a Squirtle is relatively interesting. Squirtle's Side+B recovery isn't all that great, and you can just slap him relatively hard and he flies, stuck in his shell, going the other way. However, his Up+B is something that if you want to Zair edge-guard you need to be precise with your timing. He can angle it well, and on top of that it hurts pretty hard. You can Gale-Guard him, but again it's tricky.
Here's some worse news. Squirtle can not only wall of pain you with his amazing aerial spam, he can use his Squirt Gun to push you, like a Gale-Guard, in the opposite direction.
Super Armor and Invincibility
Some moves where Squirtle goes inside of his shell have Super Armor and Invincibility frames on them. They are his:
Fsmash (Super Armor)
Side+B (Invincibility)
Squirt Gun
Squirtle's Squirt Gun is most similar to Mario's F.L.U.D.D. It is a move where once performed shoots a stream of water out of Squirtle's mouth. This stream of water can be aimed in different directions and is used to push opponents away from the stage, gimping their recovery.
This move can be charged while mobile, and doesn't take all that long to charge up. However an uncharged Squirt Gun does have knockback, and it does damage.
Building Up the Damage
Projectiles are your best bet. Along with your occasional Jab and Arrow Cancels, pretty much you just need to keep the little guy away from you so that he can't initiate his furious aerial game against you.
Finishing Moves
Good news time! Squirtle is light! Your Dsmash and Dair will put this little guy in his grave easily in the lesser percentage range. Utilts are not terrible moves to KO Squirtle with, but due to their relatively slow start-up faster moves are definitely recommended.
Ivysaur

Ivysaur on the other hand actually is really about Range and Power. Many of her attacks make full use of her vines and leaves, and involve catching the opponent off-guard with attacks that just poke out. Because of this, it allows Ivysaur to play a very safe defensive game, and rack up a ton of damage with annoying ranged attacks.
Match-Up: 55:45
Zair: Okay-Decent
Hooray! Ivysaur is a bigger target! Generally you will tend to land with the tip of the Zair. Well, you want to land with the tip of the Zair. At close range moves like Bullet Seed and Ivysaur's USmash will ruin Link. So luckily Ivysaur is the perfect size for tipped Zairs.
Jab Cancel: Decent-Effective
Ivysaur is also a great candidate for Jab Cancels. Most of Ivysaur's aerials are not fast enough to prevent Link from effectively Jab Canceling.
Ivy? Whips? Is this Soul Calibur?: Ivysaur's Spacing and Smashes
If I had to pick the characters with fantastic spacing out of a line-up, Ivysaur would definitely make the cut. With a solid projectile game on top of aerial moves that out-space just about anyone, Ivysaur can play relatively defensive game. The moves to look out for are going to be:
Horizontal Spacing
Jab Combo
Bair
Fair
Fsmash
Dtilt
Dsmash
Vertical Spacing
Utilt
Dair
Uair
Bullet Seed
Usmash
How do you deal with it?Horizontal Spacing
Jab Combo
Bair
Fair
Fsmash
Dtilt
Dsmash
Vertical Spacing
Utilt
Dair
Uair
Bullet Seed
Usmash
Shield Game
Ivysaur on top of her decent spacing has quite a library of moves to use out of shield. Her Ftilt comes out relatively fast. Also, her Fsmash can be an unpleasant surprise if you use a highly laggy move against her shield. On top of that, Ivysaur has a tether grab range that rivals Link's. All in all, spacing her properly will keep you safe.
Edge-Guarding and Recovery
Here's the easy part. Edge-guarding Ivysaur is relatively easy. Unlike her tethering counterparts like Link, Samus, and Olimar... Ivysaur doesn't get a boost from her Up+B tether and doesn't have another jump. Count the number of jumps Ivysaur has used and get ready to either drop and grab or Zair edge-guard.
Recovery against an Ivysaur isn't all that hard. At most Ivysaur will spam you with leaves, or try to Bair. Have a bomb in hand and be ready to ruin her day if she tries to chase you off of the stage.
Projectile Game
For the most part Ivysaur players tend to spam Razor Leaves. This won't be too big of a problem. Your Boomerang cancels them out. Your bombs outprioritize and can just plain be arced over the leaves. But sadly, your arrows get eaten up. Either way, you win the spam game.
A move I count as a projectile is called Bullet Seed. Bullet Seed is a move that can ruin your day. It's the second reason why you don't hang out above an Ivysaur.
--Quoted from Card's Pokemon Trainer: an In-Depth Analysis & GuideFirst of all let me explain how the move works. You hold B, and it creates a continuous stream of bullet seeds directly above Ivysaur. The stream is infinite as long as you hold-down B. It starts off doing 4%, then 2%, and then eventually every bullet will do 1% damage. But what makes this move seriously broken is the start-up. For whatever reason, right before starting up the Bullet Seed stream, Ivysaur sort of shakes her leaves around. This hit-box is located all around Ivysaur, and what it does is it pops players directly into the stream of fire. From there, the player is literally powerless to the barrage of Bullets. There is no way to escape really.
On average, a properly DI’d Bullet Seed does around 30-40% damage.
I have seen Bullet Seed do a whopping 80% damage once when the opponent landed perfectly in the middle of the stream! Basically at that time your opponent just gets carried to the top of the Bullet Stream, and that’s when they can escape. To top it off, the bigger the target, the harder it is to DI out of it! Not only does this deal a ton of damage, but it FRUSTRATES your opponent tremendously and causes them to lose their rhythm. It’s always been said by designers that when a player loses control of their character, its one of the worst feelings they can have during a game… well that is exactly what this move does.
Seriously at any time that Ivysaur’s collision is overlapping with your opponents, Press and Hold B and watch them squirm as they take at least 40% damage. Good practice to land this move is to know the same way Jigglypuff needs to overlap the opponents to do Rest. Tech Chasing, or Rolling into the Opponent during their laggy moves also helps. As long as they get hit by the instant pop-up from the activation, they are going to take damage.
Building Up the Damage
Ivysaur is luckily a heavier Pokemon than the previously discussed turtle. Jab Cancels and your projectile spam will be your best bets of building up damage. However you must remember to keep your distance... otherwise Ivysaurs smash range and Bullet Seed could just ruin your day.
Finishing Moves
To be honest edge-guarding Ivysaur is the best method to get that KO. However, due to how light she is your smashes tend to do the trick. Using your Dair could be risky if you aim it poorly. Why you ask? Scroll up to that big ol' quote that I have. Yeah... it's like that.
Charizard

Charizards role should be fairly obvious. He got Power; He’s got Survival, although he’s a bit on the slow side. I know it may sound silly at first, but Charizard is all about doing large effect attacks, which do a ton of damage to boot. Almost all his attacks have enormous hit boxes which strike all around him, some are even very quick. Not to mention Charizard is the heaviest, and has the best recovery of the three, which allows him to be quite the killer stock-tank.
Match-Up: 60:40
Zair: Effective-Fantastic
Charizard, luckily, is a big target. This as most of you know is great for Link's Zair. The only downside is that his Rock Smash and Flamethrower attacks can actually mess up your Zair approaches if you do not space your Zair properly. Sometimes the momentum of your jump can be all that stands between you and a big angry dragon.
Jab Cancel: Fantastic
He's big, he's heavy, I like it. To be honest, it's great when you can get Charizard into a Jab Cancel. At low percentages he easily gets stuck in your Utilt->Usmash combos. Watch out though, he has a quick grab and solid grab range.
Charizard Smash!: The Rock Smash
Charizard can take out a gigantic rock from "somewhere", crush it on his head and then deal splash damage to the target in its path. It can do anywhere from 1% to a whopping 43%.
How do you deal with it?--Quoted from Card's Pokemon Trainer: an In-Depth Analysis & GuideYes you read that right. 43% from this baby if you land it correctly. DO NOT underestimate this attack! A lot of people have been saying its slow, but that is not the problem. Land this move on an opponent who is SHIELDING and you will wreck their shield, and at the same time knock them back so far that they just cannot counter you. Short-Hop into Side-B is probably the best way to use this move. Charizard takes a rock out from somewhere and crushes it with his head. The rock explodes into tiny pieces which scatter off nearby.
Shield Game
Charizard has a great shield game. Primarily he doesn't have that many moves that are all that quick, but they don't need to be quick to be faster than Link in most cases. At close range you can get caught in his Flamethrower, Ftilt, or even his Usmash. All of these can be done relatively quick. On top of that he has amazing grab range and a fantastic Dthrow with the capability of killing at about 150%.
Edge-Guarding and Recovery
Well, Charizard is one of those pesky people who can glide. So if he's high up in the air the one thing you can to prevent his recovery is by, you guessed it: Bomb wall! Make it so he has to dodge multiple bombs to get back onto the stage. Then when he's preoccupied with your bombs, simply hit him with an Uair or if he's far enough down a Dair. If he's recovering from the side or below the stage, his Up+B recovery is easily Zair edge-guarded, drop+grab guarded, and Gale Guarded. Also, on occasions due to his size you can get your super-happy-fun-go-go-time Dtilt spike on him.
Recovering against Charizard generally can be a pain if you let it be one. Most of the time he's going to be trying to shield-grab you to KO you with a Dthrow. His Dair also can spike quite easily. On top of that his Flamethrower is an excellent edge-guard technique that will make getting back onto the stage even harder. How do you get around this? Simple. Do not sit on ledges long enough for Charizard to make your decisions for you.
Flamethrower and Range
Charizard has quite deceptive range on a few of his moves, and very clear range on his Flamethrower.
How does my breath smell? Charizard's Flamethrower
This move can rack up to 30% in one go at lower percentages. While everyone and their cousin seems to think this is amazing, just remember that Link can Jab Cancel to about 55% in damage on Charizard at low %'s. Having a bomb in hand to force yourself upwards and out of his stream can help simply to surprise him. Just be ready to DI out of this and you should be fine.
CHARGE! Charizards Deceptive Range
Charizard has quite a few moves that either lunge him forward or have prolonged hitboxes. The most noticeable are his Dsmash and Fsmash.
Dsmash
Charizard stomps on the ground, basically causing a small earthquake on both sides of him. This one comes out quick. You just have to be aware of it's hitbox.
Fsmash
This is similar to Bowser's Fsmash. He lunges his head forward and into his opponent. The only difference is this one is faster and has more range.
Super Armor
On Charizard's Up+B he has Super Armor frames during the initial animation. Nothing too game breaking, just something to be aware of.
Building Up the Damage
Charizard is very heavy and can be juggled quite easily at low percentages via Jab Cancels. On top of that solid spacing with your bombs and utilization of your Zair will help you rack up the damage from a safe distance. Building up damage safely is important against Charizard, you need to get more on him than he does on you due to his strength and survivability.
Finishing Moves
Usual suspects apply for this guy. Dair, Dsmash, Fsmash, and Ftilt can all be considered solid KO moves. It is recommended that you try to freshen up your strongest moves starting around the 110% area. You can kill a Charizard at +160% with the right moves if they're not degenerated.
10. Wario

Many fans clamored for Wario to join the fray, and so now he finally makes his appearance...in his WarioWare costume.
It’s rumored that this unpredictable character will give birth to a form of martial arts that other characters cannot even see.
Fighting this Mario character can be a real gas...
Match-Up: 40:60
Zair: Okay-Decent
Wario is of a relatively tall size so your Zair will connect with him a decent amount. However due to his constant aerial game and ability to control his movements, it becomes harder and harder to hit with it. SH Retreating Zairs are amazing against Wario. Not only because of their defensive capabilities but by using the Craq walk after landing you can trap him into a retreating Craq'd smash attack.
Jab Cancel: Okay-Decent
Wario luckily has some weight to him, allowing you to Jab Cancel him somewhat effectively at the lower percentages. One thing to watch out for while Jab Canceling is how far his waft is charged.
His Air Game: Not a Fart Joke
Wario has an amazing air-pressure game. If the aerial doesn't kill it's immensely useful due to Wario's ability to "poke and prod" while in the air.
Quoted from sHell's Wario Guide.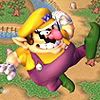
Forward Air:
Maximum Damage: 8%
First Attack Frame: Frame 5
Landing Lag: 16 Frames
Knockback: KO’s Mario at ~225% (at the center of FD with no DI)
Description: Looks almost exactly like Mario's Neutral A actually
-This move has little knockback anywhere under 100%, so basically its a comboer's dream come true when it comes to foward airs. At lower percentages you could lead into grabs(make sure to make it a shield-grab though. Some of the heavier set characters don't even leave the floor much at lower percentages) or down tilt or jab or really anything with a fast startup. At slightly higher percentages it could combo into more Fairs, Dairs, or even midair bites. This move = Mindgames.
Down Air:
Maximum Damage: 17%
First Attack Frame: Frame 9
Landing Lag: 19 Frames
Knockback: KO’s Mario at ~170% (at the center of FD with no DI)
Description: Wario goes completely upside down and spins
-This move starts and ends soooooo fast. Not only that but it also does very nice dmg but it also could link into a lot of moves if you lower the knockback enough. This is easily one of his safest approaches, and it's very enjoyable to do on people. Double Jump Dair bombs have become a very useful and standard Wario move. If you double jump and then fast fall a Dair onto the opponent you will end the move just before hitting the ground so you could literally "real" combo someone into a Fsmash or bite, or grab.
Back Air:
Maximum Damage: 11%
First Attack Frame: Frame 9
Landing Lag: 30 Frames
Knockback: KO’s Mario at ~160% (at the center of FD with no DI)
Description: Wario falls on his back...but midair <_<
-Has pretty nice knockback and is nice to switch in with your Dairs and Fairs. If not used too often, it can kill at around 130-150% depending on where your opponent is. Priority is nice'ish.
Neutral Air:
Maximum Damage: 13% (first hit 9%, second hit 4%)
First Attack Frame: Frame 4
Landing Lag: 10 Frames
Knockback: KO’s Mario at 165% (at the center of FD with no DI)
Description: Wario goes into a sky diving'esque pose.
-This aerial has basically 0 lag after it. So it could be used on someone's shield and Wario could spotdodge right afterward to avoid getting shieldgrabbed. If you do this enough though they'll catch on so switch it up with jabs, grabs, or smashes. Its also very underrated. Since it actually attacks two times its a very good way to abuse spotdodgers and/or trick people with the second attack.
Up Air <3:
Maximum Damage: 18%
First Attack Frame: Frame 8
Landing Lag: 9 Frames
Knockback: KO’s Mario at 113% (at the center of FD with no DI)
Description: Wario quickly goes on his back midair and claps his hands upwards.
-At around 100-120% if you haven't used the move too much while damaging your opponent. Foward air normally links into this if you double jump out of it. You could just shffl it if you think it'll land, or you could just find a way to pop your opponent into the air to nail one on him.
How do you deal with it?
His Farting Game: Not an Air Joke
This is the Atom Bomb of all moves. The Waft.
Quoted from sHell's Wario Guide.
Down B-Wario Waft:
Maximum Damage: 42% (fully charged)
First Attack Frame:
Charge Level Zero (about 0:00 – 0:17): Trips on Frame 16 (no damage)
Charge Level One (about 0:17 – 0:57): Frame 10
Charge Level Two (about 0:57 – 1:50): Frame 5
Charge Level Three (Full Charge): Frame 9 (Super Armor Frames 5-10)
Knockback:
Charge Time…..Mario KO% (at the center of FD with no DI)
0:56…..…..…..…..187 (Useless)
0:58…..…..…..…..98
1:00…..…..…..…..95
1:05…..…..…..…..92
1:10…..…..…..…..85
1:15…..…..…..…..81
1:20…..…..…..…..76
1:25…..…..…..…..72
1:30…..…..…..…..67
1:35…..…..…..…..62
1:40…..…..…..…..60
1:45…..…..…..…..55
1:50…..…..…..…..52
Full…..…..…..…..96
Description: Only the most humiliating KO move ever.
-Mmmm, the move of moves. When fully charged it causes 42dmg and has great vertical knockback(must hit from under opponent, Wario on the rise). The real potential of the fart is when its only half charged. The half waft takes just over 55 seconds to charge and could kill at about 60-80% depending on your opponent and the positioning. It always keeps your opponent on their toes and reluctant to make any kind of mistake. The hitboxes for both Half and Full wafts also extend upward. So if you see someone coming from above you could also stop them with the priority of the move. Full charge has super armor frames after just 2 frames of vulnerability right when you press DownB. Overall it's something people should fear.
How do you deal with it?
Shield GameTo be honest, you can only be very wary of the Waft via watching the timers. Sometimes people will want to charge the move so that they can get the maximum amount of damage against you. Most of the time they're shooting for the Half-Wafter which can kill Link generally at about 75%.
To be honest Wario is a devil out of his shield. Not only can he use his bite, which is a quick and high-priority move... he can use his Fsmash. The Fsmash is going to be a move where when you see a Wario shielding you don't necessarily want to be on the receiving end. Spacing yourself is very important against a shielding Wario.
Edge-Guarding and Recovery
Sadly, Wario has great recovery. Luckily parts of it are relatively predictable. When Wario is on his bike and preparing to use the jump to get back onto the stage, Dair edge-guarding is very useful. Remember to keep close to the stage, one well aimed Nair from Wario and you might not get back onto the stage.
Recovery against him is a different story. For the most part he has multiple avenues that all prevent recovery. His aerials can keep you at bay relatively easily, especially his Nair. On top of that if a bike is dropped on top of you, you will simply be dragged down to your death by it. Luckily, we can do the same to Wario.
Super Armor
Wario's Fsmash and Fully Charged Waft both have Super Armor frames. Nothing heavily amazing to due to prevent the Waft other than being aware of it, and for the Fsmash just make sure to space yourself properly.
Dash Attack Cancel and Broken Dash
Wario has a DAC where he actually spins across the stage. This move is really not heavily useful, but it can be used to rapidly approach Link. He also has a Broken Dash allowing him to use his Usmash after a Dash Attack connection. This move is also not very good but it can be used by Warios for the purpose of mind-gaming. It's just something to be aware of.
Building Up the Damage
Again the main thing to remember with Wario is the fact that he can easily evade most of your attacks. Using Arrow Cancels in combination with other long range attacks is what will allow you to keep him busy. Retreating Zairs into Craq'd or Pivot Boosted attacks will let you surprise him with quick moving attacks. Your DAC is a bread and butter move if the Wario favors the air, which most likely he will.
Finishing Moves
Send the garlic-scented jack@*# up. Since your Usmash will be degenerated generally your Utilt, Dsmash, and Dair will be your bread and butter kill moves. Though as I've said before, your Craq'ed attacks after a Zair can also be very useful. Namely the Fsmash.
Homework
sHell's Wario Guide
Scatman Wario
11. Lucario

It’s the Aura Pokémon, Lucario. Lucario is a Pokémon, but for some reason, there’s something lonesome about it.
Lucario’s inner power, called Aura, increases its power in proportion to the danger Lucario is in. Keep the fight lively with Lucario’s high-risk, high-reward fighting style!
Match-Up: 40:60
Zair: Decent-Effective
In this match-up the Zair is excellent spacing and is a fantastic staple. It out-ranges most Lucario's disjointed hitboxes, and can be used to quite simply combo Lucario decently, and build up the damage needed to KO Lucario.
Jab Cancel: Decent
Jab Cancels are actually relatively solid against Lucario, but not too amazing due to his floatiness and and relatively quick moves.
Spirit Bomb! The Aura
Lucario's Aura ability is possibly the most annoying thing about him. Regardless of how well you can build up damage on him, that just simply makes him stronger. Here's the exact math.
Quoted from Infi-tan's The Better Lucario Official Guide/Faq/DatabaseOriginally Posted by Rebonack
Extra Aura Multipliers
-At no stock difference the minimum and maximum total aura boost (TAB) is x1 and x2, respectively.
-At a one stock disadvantage the minimum and maximum TAB is x1.2 and x2.4, respectively.
-At a two stock disadvantage the minimum and maximum TAB is x1.4 and x2.7, respectively.
-At a one stock advantage the minimum and maximum TAB is x0.9 and x1.8, respectively.
-At a two stock advantage the minimum and maximum TAB is x0.8 and x1.7, respectively.
Aura Multiplier Damage Cap
(A,A,A) 7%-14%, 170% cap.
(Ftilt) 9%-18.1%, 167% cap.
(Dtilt) 4.8%-9.8%, 166% cap.
(Utilt) 4.2%-8.4%, 170% cap.
(DSmash) 9.8%-19.6%, 169% cap.
(FSmash) 11.15%-22.3%, 165% cap.
(USmash) 9%-18.1%, 167% cap.
(Fthrow) 7%-14%, 170% cap.
(Uthrow) 4.2%-8.4%, 168% cap.
(grapple) 0.7%-1.4%, 170% cap.
(Nair) 7.7%-15.4%, 169% cap.
(Dair) 11.15%-22.3%, 168% cap.
(Bair) 8.4%-16.8%, 168% cap.
(Fair) 3.5%-7%, 170% cap.
(Uair) 7%-14%, 170% cap.
Lil' Aura Sphere 5.25%-10.5%, 170% cap.
Aura Sphere 13.1%-26.3%, 167% cap.
Force Palm Flame 6.2%-12.4%, 164% cap.
Force Palm Grab 9%-18.1%, 167% cap.
Double Team 7.7%-15.4%, 169% cap.
That comes out to an average of 168% as the cap. Though nothing goes above 170% in terms of where its cap is. So just saying that the cap is 170 would probably be the safest, most accurate bet.
How do you deal with it?
Shield GameSimply, you need to keep your KOing moves fresh against a Lucario. You want to use your spacing game and occasional smashes to build up damage. However, once you near the 80-110% damage range you need to start thinking that you're going to KO Lucario in the +125% range. Any higher, and Lucario is far too deadly.
Lucario's out of shield attacks are all relatively useful. At low percentages he can Utilt you to rack up damage and he can easily Ftilt or simply shield grab if he wants to get some easy damage in.
Edge-Guarding and Recovery
Remember that Aura ability? This is where that's going to come in important. Edge-guarding Lucario's Up+B isn't all that hard... it does no damage. It's predicting where it's going to go and succesfully punishing it. It has some start-up so that gives you some time, but not much.
Once you're off the stage though, just remember this. You're probably screwed. Lucario's Dair and Fair are fantastic moves, even more so offstage. Once he's at higher percentages they're pretty beast moves considering they gain priority, range, damage, and knockback.
Double Team: This is getting kinky...
Lucario's Down+B is a counter-attack like move. It's really not all that impressive unless you use a very laggy attack against it. Sadly, Link has too many of these. Since this ability's KO capability is relative to Lucario's percentage, I bring you another chart:

From Infi-tan's The Better Lucario Official Guide/Faq/Database
So, again... be wary once Lucario is at higher percentages. Your laggy attacks may end up getting Double Teamed.
Getting Double Teamed is nowhere near as sexy as Double Teaming.
The Hand of Lucario: Aura Sphere and Force Palm Chaingrab
Screw DBZ! Lucario's Aura Sphere
Lucario's Aura Sphere is the identifier for how built up his attacks are due to his percentage.

From Infi-tan's The Better Lucario Official Guide/Faq/Database14: Aura Sphere Charge(neutral b)
Range: ShortShort
AP
0%- 0.5% per tick
Knockback: Usually sends your opponent upwards, plus their DI direction. AND YES, IT GETS ITS OWN SLOT. >OOOOOO Shares Diminishings with Aura Sphere, but also clears them for other moves quickly, due to the speed of the ticks.
15. Aura Sphere(neutral Bx2)
Range: Very Long
AP
0%- Uncharged: 5% max 2.5% min|Charged: 13%max, 6% min
170% Uncharged: 10.5% max, 5.25% min
167% Charged: 26.3% max, 13.1% min
Knockback: 45-degree angle of delicious. Will travel just under the full length of Final Destination. Stops at the second arrow on the opposite side fired.
Luckily, this ability can simply be negated by Link's shield most of the time. The higher his percentage the more of your projectiles he out-prioritizes. Once Lucario is above that 150% mark, do not try to beat his Aura Sphere.
Can I Touch You There? The Force Palm
If Lucario gets you into his Force Palm chain at lower percentages generally he can chain it to approximately 40%.

From Infi-tan's The Better Lucario Official Guide/Faq/DatabaseForce Palm Grab(Side B up close)
Range: Short
AP
0%- 7% to 4%
167%- 18.1% max, 9% min
Knockback: 70-degree angle. Shares Diminishings with Force Palm Flame
The best methods to beat this combo is the same ones we've been using for the last few chains.
1. Have a bomb in hand.
2. Don't get grabbed.
3. Space yourself properly.
Building Up the Damage
Here's a section that actually isn't all that hard. Lucario is a big enough target that your Zairs and projectiles can generally find a home somewhere on his person. Something I can't stress enough is that around the 100% marker you freshen up your kill moves. Otherwise, using those to build up the percentage on Lucario will do nothing for you except making your day more annoying.
Finishing Moves
The usual suspects are your bread and butter here. Your Dair, Dsmash, and Utilt are viciously strong against Lucario. The few major additions I would add would be the Fsmash and Ftilt. Pivot Boosted Ftilts and Fsmashes bridge the gap between yourself and Lucario creating the illusion of range.
Homework
The Better Lucario Official Guide/Faq/Database
The Official Lucario Playstyle Thread
Lucario Match-Up Chart/Discussion
12. Fox

Fox is just one of many so-called speed characters. His costume has been completely updated, so he’s full of fighting spirit.
Run! Fly! Move boldly! For such moves are the essence of Fox!
Match-Up: 35:65
Zair: Decent-Effective
Your Zair is excellent against Fox. It helps defeat most of his approaches, and can be used to mindgame against his reflector. He's big enough to get hit by both parts of the Zair a good bit of the time, making it a decent damage builder.
Jab Cancel: Okay
Sadly due to Fox's shine you have to worry about mindgaming when it comes to using your Jab Cancel. Otherwise, it's relatively useful.
I thought this game didn't have combos: Fox's Landing (Dair -> Dsmash/Utilt/Usmash)
Fox's Dair has little to no lag upon landing. This can be quickly followed up with a Smash attack. Generally against Link his Dsmash or Usmash will be performed for a KO, and a Utilt for damage build up.
How do you deal with it?
Simply, by being amazing. In this video here, Izaw shows the proper recovery technique against the Dsmash (4:40). As Izaw states in the video, it's entirely about reflexes. I can't tell you any other way to practice this other than in live play. It's similar to most other horizontal attacks such as those mentioned in "The Art of Link".
Shield Game
Fox's Dsmash is relatively quick and can be done out of shield very easy. It's good to watch yourself at high percentages against Fox for that reason. On top of that his Dthrow to Fair is easy to perform and can get quite a chunk of damage in against you.
Edge-Guarding and Recovery
Link can actually edge-guard Fox. Surprising... I know. While his Up+B is similar to Falco's and Wolf's, it is easier to Gale Guard due to it's lengthy start-up, though it travels for much more distance. Zair edge-guarding is also useful against Fox mainly for the purposes of stopping his Up+B's, but can do just as well for his Side+B's.
When you're off the stage against a Fox, generally you're boned. His Reflector can go through your Up+B on rare occasion... and it can spike. On top of that he has a bunch of very strong spike attacks, and aerials which can push you further to your doom.
Reflector and Lasers
Fox is similar to his space animal brethren with his ability to be "a-firin' his laser" and reflector projectiles with his Down+B.
PewPew!

Fox's blaster is fast, but does not have a hitstun. So for the most part don't try to out camp him, but don't worry about it too much since it doesn't hinder your approach.
Shine on you crazy... Fox?

Hooray, another furry punk with a reflector. On average, your projectiles won't be returned too often. Just make sure that you use things like Zairs with bombs in hand, Bomb-Smashing, or ZAC.
He can also use this to stall momentum and survive just a little bit longer.
Dash Attack Cancel
Fox does have a DAC. It's not all that amazing, however it could prove an annoying surprise.
Building Up the Damage
Your Zair is going to be the best staple for building up damage. Proper spacing is going to be the way to win against Fox, and luckily for Link his spacing does damage. Your projectile metagame will decide the outcome of this match.
Finishing Moves
Fox is light so it's not too big of a problem to KO him once you have him at a killable percentage. Your Dair and Dsmash are perfect for killing him. Bomb-smashing will definitely prove to be the "mindgame KO" that you will be able to get off at least once.
Homework
Beginner's Guide to Fox
Fox User Manual
The Art of Link (Technique Review Reminder)


 . Link's grabs are underrated. This isn't directed at you, it's just something I always say when I see something like this.
 THe difference between G&W and Meta Knight is Meta's insane priority both in the air and on the ground. Without the ground priority that Meta Knight has, G&W suffers in his ground game. And sasook, don't SH aerials against a G&W. They will always out-prioritize (is that a word?) you with Bair or Fair. Since G&W is in the air a lot though, Zair works well.
 .
.