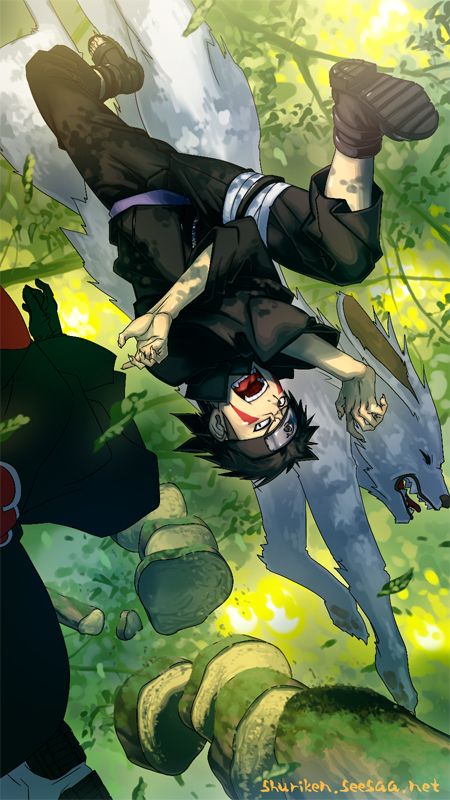
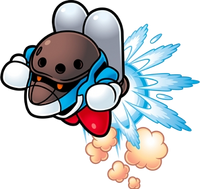
Doggy & Bear
A heroic duo from Oakington; one wise, one dense, DOGGY & BEAR join the Brawl!
Doggy & Bear can be unlocked by completing Classic mode with 25 characters, getting them to join your team in the SSE, or clearing Boss Battles in less than three minutes.
These two characters swap with their Down Special, in a fashion similar to Zelda and Sheik.
Doggy
A middle-aged, middle-class yellow lab, who lives in the small coastal suburban town of Oakington, Maryland. Doggy Dogsmackle enjoyed a peaceful dog’s life, until the evil Emperor Sibex and his army attacked Oakington, believing Doggy and his best friend Bear to be the fulfillers of a mystical Crystal Prophecy. Doggy and co. had to venture into the great unknown and defeat the tyrant to save the world from destruction. Doggy is full of unmatched endurance, wisdom, and talent on the banjo. Although he has a strict exterior, Doggy is quite playful, and loves adventures in the great outdoors.
STATS
Power: 6/10: Doggy is a well-balanced character in terms of physical strength.
Walking Speed: 4/10: Doggy strolls leisurely on two legs, as if taking an early morning stroll through the park.
Dashing Speed: 7.5/10: Doggy gets down on all fours and races forward enthusiastically, his tongue hanging out.
Weight: 6/10: Priding himself on his sleek and athletic build, Doggy is moderately heavy; he can last for a while in a fight, but it isn’t difficult to KO him.
Range: 6/10: Most of Doggy’s physical attacks have decent, above average range.
Projectile Distance: 6.5/10: Although the distance of the initial toss of Doggy’s projectile is not great at all, his projectile bounces, giving it above average range.
Attack Speed: 8/10: Being a fast-paced yellow lab, Doggy has great speed on most of his attacks.
Priority: 6/10: Most of Doggy’s attacks have above average power to halt or cut through enemy attacks.
Size: 6.5/10: Doggy is about as tall as Captain Falcon at the top of his head (not counting his long ears), but a good bit wider, being a large-sized lab.
First Jump: 4/10: Pushing off the ground hard with both feet, Doggy performs a bound that gives him below average horizontal and vertical range.
Second Jump: 6.5/10: In the air, Doggy does an agile front flip to boost him up a good distance.
Fall Speed: 7/10: Doggy can perform some impressive aerial feats with a fairly rapid fall speed.
Recovery: 7/10: Doggy has decent jumps and a useful tether recovery, but his Up Special is a bit wonky and can be difficult to use effectively.
Crouch: 8/10: Doggy gets down on all fours and lies low to the ground, like a wild dog stalking prey, his paws stretched out in front of him for better mobility and support.
Traction: 8/10: When a dog sets off in one direction, they find it difficult to suddenly alter their course. Doggy is no different.
Comboability: 8/10: With his keen intellectual abilities, Doggy can perform many handy combos and mindgames on his foes.
Wall Jump: Yes: Doggy can kick off of walls to bound to new heights.
Wall Cling: No: Doggy cannot cling to walls due to his canine claws, which are unfit for grasping surfaces.
Crawl: Yes: From his crouching position, flat on his stomach, Doggy can crawl forward quite speedily, pushing himself along with his hind legs while pulling forward with his front paws, low to the ground. He points his tail straight up while crawling, to maintain his balance.
Glide: No: Like most dogs, Doggy cannot fly.
Tether Recovery: Yes: Doggy’s grab allows him to latch onto ledges from above average range.
BASIC
Basic Combo, Hit #1: Paw Swipe: Leaning down slightly, Doggy extends his left paw and gives foes a solid slap across the face. This attack has below average range, but decent priority. The slap does minimal knockback. It inflicts
3% on foes.
Basic Combo, Hit #2: Canine Chomp: After his paw swipe (for which Doggy bends down a bit), Doggy gets down completely, on all fours, leans forward a bit while opening his mouth, and chomps nearby foes. Because he is now on all fours, this has average range; better than that of his paw swipe. This does low knockback as well. Foes can be hit with this attack if they are close to Doggy, but not necessarily right next to his mouth as he chomps. This move can cut through a good deal of attacks, making it fairly useful, as Doggy can hit foes with the third hit of this combo after he blocks their attack with his chomp. If not continued with the third hit of this combo, Doggy quickly hops back onto two feet after chomping. The chomp deals
5% with the paw swipe and
3% by itself.
Basic Combo, Hit #3: Ear Sling: After the above two attacks, Doggy (from his position on all fours, after his chomp) rears back his lab head, then shakes it forward a bit. Because of this, his large doggy ears sling forwards, dealing below average knockback to foes. This has the best range of his basic combo hits, since his ears reach the farthest, allowing Doggy to hit foes from an average distance away. However, this has weak priority when compared to either of the above two attacks. Doggy cannot continue this basic combo after his ear sling, so he rapidly springs back onto two feet once he finishes. The ear sling does
7% with the above two attacks,
5% with just the chomp, and
2% by itself.
TILTS
Forward Tilt: Tail Wag: Once again hopping down on all fours, Doggy sticks his rear end forwards, and, panting happily, wags his powerful yellow tail left to right. This attack has average range, courtesy of Doggy’s grounded position and long tail. This tail has surprising priority, although it is still not great. Also, in a similar manner to Meta Knight’s F-Tilt, Doggy can turn his tail wag into a combo; by pressing the F-Tilt input one, two, or three times, you can make Doggy wag his tail three times in a row, in different angles. This is handy, as the first wag does low knockback, while the third wag knocks foes back an average distance. No matter how many wags he does, Doggy always hops back onto his feet when he finishes attacking. The first wag does
4%, while each consecutive wag does
3%, giving Doggy a chance to score
4%,
7%, or
10% on his foes.
Down Tilt: Coffee Spill: From his crouching position flat on his stomach, supported by all four limbs, Doggy takes out a blue mug of his favorite beverage, coffee, and forcefully tilts it forward in front of him, before stowing the mug into the fur pouch on his belly. This move has two different hitboxes. The first occurs on foes who are hit with the spilled coffee furthest from Doggy, or are walking into the radius of the spill. This hitbox gives foes light damage and knockback, and has a 50% of tripping them. The second hitbox occurs on foes who are hit with the coffee mug or the spill closest to Doggy. This hitbox deals better damage and knockback to foes, and has a 50% chance of dealing fire damage. If a foe has projectiles or attacks that can pass over the coffee, Doggy should be cautious with this attack, as it has quite low priority. The spilled coffee has below average range, and disappears when the move finishes (it takes about .5 second). This attack can be used many times rapidly to trap foes against a wall and deal multiple hits, although it is escapable. The first hitbox deals about
4-5%, while the second hitbox gives about
8-9% to foes.
Up Tilt: Doggy Crunchies: Doggy pulls out a red dog food bowl filled with his favorite kibble, Doggy Crunchies, and hoists it up above his head, before stowing it in his fur pouch. With this momentum, a flurry of kibbles are launched up out of the bowl for a split second before falling back in. This is a good combo move, as the kibbles can do up to 12 rapid light hits on foes. If grounded foes are hit with the initial thrust, they are knocked into the damaging kibble, in a similar manner to Bullet Seed. However, this does low knockback (meaning foes with low damage can quickly return and punish Doggy as he’s stowing the bowl), has below average priority, and is fairly close range. Foes can Smash DI out of the kibbles with relative ease, although it isn’t really worth the effort, as the kibbles stay out for a very short period of time, and do low knockback. Grounded foes receive
2% with the thrust of the bowl and receive
1% per each of the 12 light hits, meaning a maximum of
14%.
SMASHES
Forward Smash: Bone Batter: With a flourish, Doggy pulls out…a giant bone! He then holds it back, like a deformed baseball bat, anticipating this following Smash with great zeal by wagging his tail as he charges. Upon release, Doggy takes a step forward with his left foot (he bats right-handed) and swings the bone enthusiastically. If he hits something (a foe, destructible stage part, item, etc.), he will follow through on the swing properly, watching the spot he hit eagerly. However, if he whiffs the swing, Doggy will spin around twice rapidly, losing his balance in his excitement, and not hitting anyone, despite him still holding out the bone. This Smash is fairly reliable if you know you will connect with it. Otherwise, Doggy suffers from a good deal more ending lag than if he hits his target. The bone has average reach and priority. Also, just like real baseball bats, Doggy’s bone bat has a sweetspot. If Doggy connects with foes with the thick end of his bone (the part farthest away from him), he gives them a good deal more knockback than he would with anywhere else on the bone. The knockback is above average at best. This Smash can do anywhere from
7-22% to foes. Doggy stows the bone in his fur pouch after finishing the Smash.
Down Smash: Fruitless Chase: With a playful bark, Doggy gets down on all fours and turns his upper body backwards, eying his tail with a predatory gleam on his face. Upon the release of this Smash, Doggy begins chasing his long yellow tail around and around, panting excitedly despite being nowhere close to catching it. Doggy can chase his tail in a circle up to three times in one Smash, depending on the time he charged. One foe can only be hit once per each circle Doggy runs (multiple hits are not given if a foe hits one circle twice), although multiple foes can be hit in each loop. The best knockback occurs at the very start if Doggy’s first loop; the knockback ranges from below average to decent. Although the hitbox is Doggy’s whole body as he’s running, his tail has a sweetspot for knockback (not damage). This has the least lag of Doggy’s Smashes, as it starts quite quickly and only has minute ending lag, as Doggy slumps over a bit before springing back onto two feet, unsuccessful in his chase. This Smash can do anywhere from
6-27%, if a foe is caught in all three loops (which is fairly likely for foes with low to moderate damage; other foes usually get knocked away). The first loop does the most damage.
Up Smash: Banjo Bash: Having been partly raised by a hick bulldog father named Wrinkles, Doggy is extensively learned in terms of banjo skills. Here, Doggy takes out his musical tool and holds it down, facing upwards with a concentrated facial expression. Upon release, Doggy swings his banjo in a strong arc above his head, the round white end of the banjo facing upwards. With a loud TWANG, the banjo slams foes vertically with good killing potential for foes with high damage levels. With the banjo’s metal rim, this Smash also has a great deal more priority that Doggy’s other two Smashes, the priority of which is only average. If charged to maximum potency, the banjo emits three multi-colored music notes to deal extra electric damage to foes. Although it isn’t a very speedy Smash, this move is still viable for use in serious matches. The banjo has average range as well, because Doggy holds it up high to show off his skills. However, to make up for its overall usefulness, if this Smash is spammed more than seven times in a time period of twenty seconds, some banjo strings will break, and the damage and knockback will be cut almost in half. No musical notes will come out of the banjo if the Smash is fully charged in this state, either. To recharge this Smash to its original state, Doggy must use ten different other attacks or be KOed. This Smash can do anywhere from
11-20% to foes. After swinging it, Doggy stores the banjo safely in his fur pouch.
AERIALS
Neutral Air: Canine Cannonball: Yellow labs like Doggy are as at home in the water as they are on dry land. Just like he does when entering pools and oceans in his games, Doggy tucks in both legs, holding on foot in each paw, and holds this cannonball position for about .5 second. Although he doesn’t plummet, Doggy loses a good deal of aerial momentum with this move. However, this doesn’t mean that it’s a bad move at all. With enough momentum from running, this aerial can be exceptionally effective from a shorthop, as a combo starter. The hitbox is the front of Doggy’s legs and torso. Because it is close range, this has decent knockback to compensate. Although foes can shield-grab Doggy out of this move if he’s low enough to the ground, it can knock away (and sometimes KO) foes with higher damage. This aerial does around
7-9% to foes. Foes who are hit by Doggy’s legs take less damage and knockback than if they are hit by his torso.
Forward Air: Chessboard Clobber: Back in his high-school days, Doggy proved his academic prowess by winning Oakington High the after-school Chess Club Tournament. Here, Doggy pulls out a black and white wooden chessboard (complete with all the arranged pieces) in front of him, raises it slightly, and brings it down hard in front of him. This aerial is an effective combo move to use on foes low to the ground (aerial foes are harder to KO with this). It also has the ability to spike foes with moderate force if foes are hit with the underside of the board closest to Doggy. The range extends a few feet in front of Doggy. Overall, this move gives foes good knockback, with a nice sweetspot on the end of the board. Despite the good amount of lag that Doggy faces if he lands before the attack finishes, this is one of his better combo moves. It deals
6-8% to foes. After he’s finished clobbering his enemies, Doggy stows the board into his fur pouch.
Back Air: Paw Slap: Turning around slowly, Doggy raises his right paw slightly and slaps nearby foes behind him, as if to say, “WTF are you doing?!” This aerial has a bit of startup lag as Doggy turns around (think like a speedier turn-around Falcon Punch), but does average knockback to compensate for this. The portion of the hitbox on the end of Doggy’s paw deals more damage and knockback than the rest of his paw. This has below average range; however, since Doggy extends his paw to slap, it is definitely not just close range. With the ability to KO foes with high damage levels, this aerial is an offensive gem on Doggy’s edge-guarding game. However, if used onstage, foes can shield-grab Doggy out of this move with relative ease. It deals 7-8% to foes.
Up Air:Book Whack: From behind his head, Doggy brandishes none other than his favorite realistic fiction dog book, The Art of Racing in the Rain, by Garth Stein. With the book in his possession, Doggy turns sideways a bit and does a swift flip to whack foes with the book, which he holds out, extended slightly. He places the book in his fur pouch after using it. This does decent knockback (about that of a weaker Donkey Kong U-Air), and hits at just above close range. Although this may seem slow, based on the actions Doggy does to set himself up for this, it is actually one of his best, fastest aerials. It is good for both juggling and KOing, although its priority is slightly less than impressive. This deals about
8% to foes.
BTW, The Art of Racing in the Rain is a real and great book. I highly recommend it, as it offers an excellent mature story from a dog’s point of view.
Down Air: Banjo Pivot: Once again pulling out his prized banjo, Doggy holds his instrument below him (holding it by the thin handle) and pivots it around three times, hitting foes with the round white end. The pivoting banjo can do up to seven light hits on foes (two hits per each of the three pivots, with one extra hit as Doggy stows the banjo in his fur pouch, to deal light knockback). This has the best range of Doggy’s aerials, as the banjo is fairly long, and is held out a bit. However, the range is still only average. The last hit deals light knockback, but won’t kill until foes reach insane damage levels. The other six hits are mainly to trap foes, although players can escape by using Smash DI. Doggy takes out and stows the banjo with virtually no lag in the air; however, if he hits the ground while still pivoting, he suffers from a good amount of ending lag. Because the hitbox is the round white end of the banjo, Doggy is safe from grounded foes (the banjo has respectable priority), although foes above or to the side of Doggy can easily interrupt this move. This attack deals up to
14% on foes;
2% for each of the seven hits.
OTHER ATTACKS
Downed Attack: Paw Whirl: When Doggy falls face-down, he lies quite still, his arms and legs spread out. If you press the A Button while he’s down, Doggy will lean up a bit, extend both paws to the side, and do a simple spin-jump to his feet, smacking away nearby foes. Like most downed attacks, this move does low knockback and damage, and hits at close range. However, this move is rather quick for a downed attack, and if used effectively, it can be a great combo-starter. This move deals
4-6% to foes.
Flipped Attack: Double Nip: When Doggy lands on his back, he lies there weakly, paws in the air and tongue hanging out in a ‘play dead’ style. If you press the A Button while he’s flipped, Doggy will swiftly lean his upper body back, biting foes behind him. With this momentum, Doggy will then roll from his back to all fours, biting foes in front of him, before hopping back onto two feet. Like most flipped attacks, this move does low knockback and damage, and hits at close range. However, because it can hit foes in front of and behind Doggy, this is effective for clearing foes away from the area close around him. Each bite deals
3%, meaning a maximum of
6%.
Tripped Attack: Mutt Kicks: When Doggy trips, he does a stumbling somersault, landing in the sitting position of a normal dog (haunches on the ground, sitting upright on all fours), with an angry expression on his face, as if to say, “WTF Sakurai?! What were you on when you decided to implement tripping?!” If you press the A Button while Doggy is sitting, he’ll stretch back one foot to knock away foes behind him. Doggy then follows up by spinning his lower torso forward, kicking foes in front of him with both feet, before hopping back onto two feet. Unlike most downed or flipped attacks, tripped attacks generally have the potential to KO foes with high damage levels off the side. This attack is no different. The front kick deals more damage and knockback than the back kick. With better range than his downed or flipped attacks, Doggy can use this move to repel foes who try to take advantage of his tripped status. The back kick deals
3%, while the front kick deals
5%, meaning a maximum of
8%.
Ledge Attack: Snout Shove: Doggy hangs on ledges with both paws, looking up determinedly at the stage. If you press the A Button while he’s hanging, Doggy will lunge powerfully onto the stage, sliding forward slightly to knock foes lightly away. Despite being close range (Doggy’s snout doesn’t extend from his face like most dogs), this move is useful to hit with, as it usually knocks foes over Doggy and off of stable ground. Doggy can then attempt to spike them with his F-Air, or edgeguard with his B-Air. This move deals
5% to foes.
Ledge Attack (over 100%): Slow Slash: Characters’ ledge attacks change to a slower, weaker new attack when the character accumulates 100% or more. In this state, Doggy struggles onto the ledge when the ledge attack input is released, flailing and clawing with all four limbs to recover. When he succeeds, Doggy weakly lifts his left paw and slashes away nearby foes, on two feet. This is not a good move at all; the damage and knockback are minimal, the hitbox is small, and it hits only at close range. To avoid being shield-grabbed by nearby foes, Doggy is much better off just jumping back onto the stage and using an F-Air. This deals a puny
3% to foes.
Dash Attack: Rover Rollover: From his speedy dash on all fours, Doggy throws himself forward a few feet in the air, then lands on the ground, all stretched out, and rolls over once, before hopping back onto two feet. Although this hits at close range, the hitbox is Doggy's entire body as he's rolling, so with the momentum he gets from throwing himself, the range is not a liability. Doggy's head is the hitbox as he's throwing himself. The throw usually knocks foes away from the roll. Because of this, this move is best to use for building damage or combos; the roll does more knockback than the throw, so foes with less damage are more likely to take both hits, instead of just one. The damage and knockback are nothing special, but can KO foes with high damage. The throw does
3% and the roll does
6%, meaning a maximum of
9%.
Crawling Attack: Labrador Lunge: Naturally coming along with his mental cunning and physical agility, Doggy has an attack he can trigger by pressing the A Button while crawling. Just like a wild dog, Doggy rears back and lunges forward, front paws extended and teeth bared (these are the hitboxes). Landing on foes in this state gives them one solid hit back. The longer Doggy crawls before lunging, the more momentum, power, and speed he gets with this move. The range extends from barely anywhere to slightly more than Diddy Kong's Monkey Flip. This unique move has the potential to KO foes with high damage levels off the side. Despite being tricky to use effectively in combos, this attack is quite useful in the hands of Doggy pros. This move can deal anywhere from
5-11% on foes, depending on the momentum gained.
Item Basic Attack: Paw Plow: Extending the battering item with one paw, Doggy stabs the item forward weakly. This can be done many times rapidly. The effects depend on the battering item used.
Item Forward Tilt: Labrador Lash: When using an F-Tilt with a battering item, Doggy bounds forward on two feet, slashing the item forward with both paws. This has slight ending lag. The effects depend on the battering item used.
Item Forward Smash: Piroutte Pup: When performing an F-Smash with a battering item, Doggy leans to the side, holding the item down. Upon release, Doggy spins around nimbly (almost like a ballerina), hitting foes with his item. Doggy has about as much ending lag with this move as Link does with his Spin Attack. The effects depend on the battering item used.
Item Dash Attack: Hammerin' Hound: From his dash on all fours, Doggy holds up his item, jumps up, and slams the item powerfully to the ground, like a hammer. This generally does good knockback, although the effects still vary on the battering item used. Doggy has slight ending lag for this attack.
GRAB ATTACK AND THROWS
Grab: Trainer's Tool: Out of thin air, Doggy takes out a shiny red electric dog leash (the kind used to train disobedient or slow-witted dogs) and swings it forward a bit, so that the clip part is tossed out at foes. If the clip hits a foe, it clips to the front of their neck, and Doggy pulls the leashed foe to him with a yank. This grab has above average range (from dashing or a standstill), but like most long-ranged grabs, this lags a good deal, as the clip falls to the ground and Doggy pulls in the leash, stowing it in his fur pouch. If trying to shield-grab, Doggy should be extra cautious because of this. This grab is also a decently long tether recovery (about the length of Samus' Grapple Beam), and can be released in midair to deal
4-6% electric damage to foes, although grabbing in the air cannot be done, of course.
Grab Attack: Leash Zap: With the foe leashed, Doggy holds the leash in one paw, while the foe wriggles to free themself. As a grab attack, Doggy clicks a button on the leash's plastic handle, and the foe is zapped. The first zap only does
1%, however, for each grab attack used, the damage given goes up by
1%, dealing up to
7% for the seventh grab attack. After the seventh grab attack, the victim is automatically released with good knockback. However, it becomes easier to escape after each consecutive grab attack, so unless your victim doesn't know how to shake the Control Stick to free themself, it is best not to use grab attacks, and instead simply throw the grabbed foe.
Forward Throw: Leash Lasso: With a burst of strength, Doggy raises the leashed foe above his head (holding the leash by its plastic handle) and spins them around twice, lasso-style. After two spins, the clip releases the foe with the momentum. This does below average damage and knockback, and leaves Doggy vulnerable to other foes in FFAs. Overall, this is not a great throw, unless you are trying to start a combo. Foes other than the victim can be hit; if they hit the spinning victim, they can receive
3-4% and low knockback. The thrown foe receives
7%.
Back Throw: Branch Swing: Doggy quickly turns around and unclips the victim, stowing the leash in his fur pouch. However, before the victim can react, Doggy pulls out a medium-sized tree branch (the kind used by dogs when playing fetch) and swings it to knock the foe away. This does average knockback; the best of Doggy’s throws. This can KO foes off the side at high damage levels. Doggy is not vulnerable for long while attacking, either. This gives the victim
9%. Doggy stows the branch in his fur pouch after swinging it.
Down Throw: High Voltage: Doggy grasps the plastic leash handle and turns a knob up slowly, electrocuting the leashed foe progressively more. With these multiple electric hits, the victim is jerked around several times, in a fashion similar to Bowser’s Up Throw. The multiple hits dealt to the victim (who is hit with them all) do
1%,
2%,
3%,
4%, and
1%; a total of
11%. While this is the most damage of Doggy’s throws, the shock of receiving
4% then dropping back down to
1% for the final hit trips the victim, dealing no knockback and setting the foe up to hit Doggy with a tripped attack. The speed of this move is on par with Ness or Lucas’ Down Throws.
Up Throw: Chew Hurl: Showing off some of his feral side, Doggy rapidly snatches the victim off the leash (which vanishes) with his canine teeth. Holding the foe firmly in this manner, Doggy quickly spins his head around in a circle, clockwise, building up strength, then hurls the foe up when he reaches ‘12 o’clock’ position. Although this doesn’t have the brute force to KO foes off the top, the damage and knockback aren’t too shabby. The speed of this throw is comparable to that of Charizard’s Side Throw. This deals
8% to the victim.
SPECIALS
Neutral Special: Fleabag: No matter how much he showers, Doggy always manages to catch fleas during his adventurous life. For this chargeable Special, Doggy gets down on all fours, whining piteously, scratching one ear with a hind foot. He can charge in this manner for up to five seconds before the charge stops. The effects are held after this, shown as a flash around Doggy. You can cancel the charge with L or R; the charge is saved after this as well. By tapping the B Button again, Doggy shakes his fur coat out vigorously, as if wet. However, it’s not water he’s trying to shake off; it’s those dang fleas! This move has two uses.
The first occurs on foes who hit the shaken fleas. These foes take knockback-less poison damage for several seconds; they take
2% per second, for up to five seconds. If foes hit a bunch of fleas while already being flea-bitten, they can’t receive extra damage until the first batch of tormenting fleas conclude. Charge time for this move not only increases the time the fleas can bite opponents (although not the amount of damage dealt); it also determines the range the pests fly. This can change from barely leaving Doggy’s fur to just under the diameter of a Smart Bomb. If the fleas do not hit any foes, they float back down and settle into Doggy’s fur again.
This leads to the second use. If no foes hit the shaken fleas, Doggy is given the ability to stun foes (think Zero Suit Samus’ Plasma Beam) with the itchiness. He can do this for one to five normal (not Specials or his Final Smash) grounded attacks he hits with, once again depending on the charge time, in seconds. Doggy cannot have more than five bits of this ‘flea power’ at a time, although he can recharge his supply of ‘flea-powered’ attacks. If you (as an opponent) can stand getting poison damaged, it may be advantageous to hit the fleas to avoid giving Doggy the extra (possibly more deadly) gift of stunning ability. Doggy bounds back to his feet with a shudder when he stops charging and after he shakes off.
Side Special: Toy Toss: Just because he’s a grown-up doesn’t mean that Doggy doesn’t play with dog toys. However, he prefers these youthful activities to be referred to as ‘exercise’ rather than play. In Smash, Doggy uses his toys as handy projectiles. He takes one of three toys out of his fur pouch and tosses it forward at an angle to the ground, with his left paw. This throw is almost like that of Mario’s Fireball, but with even less initial range. However, the toys all bounce to increase the distance that this projectile can travel.
The first outcome is a bright red Kong, which is a swirly, bouncy treatholder for dogs. Kongs bounce slightly slower than Mario’s Fireball, at about the same height per bounce, and can travel up to one-third of Final Destination at maximum range. They do light knockback, but it is nearly impossible to KO a foe with one. They have average priority and appear 50% of the time for this projectile. They do a light
7% to opponents.
The second outcome is a simple neon-yellow tennis ball. Tennis balls bounce quite rapidly (twice the speed of a Fireball) and rise rather high with each bounce (about Ganondorf’s height at their peak). They can travel up to one-half of Final Destination at maximum range. Tennis balls do no knockback, and inflict a minute
4% on foes. To compensate for their speed, these also have horrible priority (most basic attacks can stop one). Tennis balls appear 40% of the time for this projectile.
The third and final outcome is a spiky chewy squeaky hedgehog. Hedgehogs bounce at a very sluggish speed (about half that of Mario’s Fireball) but at the same height per bounce. They can travel up to one-third of Final Destination at maximum range. Hedgehogs do decent knockback to foes because of their prickliness. They also have above average priority, and deal a respectable
14% to foes. Hedgehogs are the rarest of the three outcomes, appearing 10% of the time for this projectile.
Up Special: Frisbee Fling: Twisting his head back a bit, Doggy grasps an orange and blue frisbee, emblazoned with a bone icon, in his mouth. For a brief period of time (about .5 second), you can angle the Control Stick in one of eight directions, similarly to the Up Specials of the Star Fox trio. After the short angling time, Doggy thrusts the frisbee forward in his mouth, while still holding it. The momentum fires Doggy forward in a similar fashion to Fire Wolf. However, the hitbox here is only the frisbee (as opposed to Doggy’s entire frontside), which does multiple light hits on foes, dealing about
3-11%, plus weak knockback on the last hit. By pressing the B Button mid-flight, Doggy can abandon the frisbee with a powerful horizontal bound (which deals one solid hit to foes, giving them
8%). Doggy can do nothing while bounding, although in desperate circumstances, it may be better than continuing with the frisbee, which disappears at the end of its path, leaving Doggy in a helpless state. Although it can easily be trapped under stage edges and lips, this is a decently-ranged recovery (about the length of Fire Fox). In the right circumstances, it can also be used to build damage on foes on the stage, although the fact that Doggy suffers from ending lag when he hits the ground may be a hindrance. If Doggy is close to a ledge after the move (not during it), he will sweetspot it.
Down Special: DB Swap: Doggy looks at the sky curiously. Right on cue, Bear falls out of thin air directly above Doggy. Bear deals no damage to foes or to Doggy; however, Doggy is squished flat under Bear’s massive weight, after which he disappears with an angry expression, as Bear looks down apologetically. You are now controlling Bear. Switching between Doggy and Bear takes only slightly longer than transforming between Zelda and Sheik did in Melee; you can switch without much hassle in an intense match, although it still may be ideal to wait until you KO your foe and switch in your small breather period. Bear has invincibility frames until the crushed Doggy vanishes after about .75 second. If for any reason you are unable to switch (like in certain parts of the SSE), Doggy still looks up curiously, but nothing happens, so he shrugs and continues fighting.
TAUNTS AND VICTORY/LOSS POSES
Up Taunt: With a flourish, Doggy takes out his banjo and plays a rapid, country-style melody, with small colorful music notes coming out of the strings. After playing, Doggy stows the banjo in his fur pouch.
Side Taunt: A small bone appears in Doggy’s left paw. Excited, Doggy tosses it over his head, catches it with his right paw, then tosses it up and catches it in his mouth, letting out a muffled bark. He then drops it into his fur pouch.
Down Taunt: Doggy hops down onto all fours, faces the screen, and lifts a hind leg, a curious expression on his face, as if wondering whether or not to take a piss. He then quickly regains his self-image and maturity by hopping back onto two feet, dusting off his body.
Victory Pose #1: Doggy stands on all fours, faces his defeated opponent(s), and howls his victory over them. As the announcer calls his name, Doggy turns to face the screen with a spin-jump, landing on two feet and panting happily.
Victory Pose #2: A frisbee, like the one from his Up Special, flies onstage. From a different camera angle, Doggy is seen racing after it on all fours. Onscreen, Doggy lunges out from the left side, snags the frisbee in his mouth in an amazing athletic bound, and lands on two legs. Crouching down, he lays the frisbee at his feet and stands back up, letting a proud bark at the screen.
Victory Pose #3: Doggy sits onstage in a comfortable wooden rocking chair, rocking leisurely while reading The Art of Racing in the Rain, oblivious to his surroundings.
Victory Theme: A light-hearted orchestrated remix clip of All-Star, from
0:49 - 0:59.
Loss: Doggy stands, clapping for his opponent(s) who defeated him. Doggy seems disappointed about his loss, and claps halfheartedly, but is mature and respectful to the victor(s) nonetheless.
ANIMATIONS
Shield: Behind his shield, Doggy holds a firm blocking pose; one paw in the air, one extended forward.
Spot Dodge: Hopping back on one foot, Doggy holds a brief flinching pose, one paw protecting his face, one in the air, before putting his foot down and releasing the pose.
Air Dodge: While aibrorne, Doggy turns onto his stomach, spreading out all four limbs, and spins once, before spinning back upright.
Forward Roll: Doggy gets down on all fours and bounds forward. When his front paws hit the ground, Doggy rapidly spins his hindquarters around 360 degrees, so he is now facing the direction he was in prior to the roll.
Backward Roll: Doggy leans his arms down, in a hunching pose, then shorthops backward, three times rapidly, before dropping the pose.
Ceiling/Floor Tech: Doggy flattens his entire body to the surface with a snort. If he rolls out of this during a floor tech, he uses his standard forward and backward rolls.
Wall Tech: Doggy holds his backside and one paw to the wall and barks as he makes contact.
Ledge Roll: If Doggy climbs a ledge without attacking, he simply trots forward a few paces on all fours before hopping onto two feet.
Ledge Roll (over 100%): If Doggy climbs a ledge without attacking and with over 100%, he weakly struggles up and slides forward on his stomach before hopping to his feet.
Idle Stance: Doggy stands on two legs, bravely and confidently, peering around the stage occasionally, sniffing to take in the new smells of the area. If the stage is windy or moving/scrolling, Doggy’s long ears will blow in the wind.
Idle Pose: If he is left unmoved for too long, Doggy will turn slightly to face the screen, fold his arms, and tap his foot with a shrewd expression on his face for several seconds, before turning away.
Dizzy: When he is stunned or has his shield broken, Doggy falls onto all fours, and stumbles around in place, occasionally shaking his head to try and clear off the dizziness, while whining piteously.
Sleeping: Making a silent yawning motion with his mouth, Doggy collapses to the ground and curls up into a comfortable yellow ball of fur, like a dog. Occasionally, a hind leg or his nose will twitch, a sign of doggy dreams. Upon reawakening, Doggy stretches his arms as he hops up with a soft woof.
Swimming: With a snort as he surfaces, Doggy swims upright, doing the doggy-paddle to swim forward. This is a speedy swim, as yellow labs love water from their experiences retrieving downed waterfowl for their masters. Doggy also has a long swim time.
Drowning: Flailing his arms madly, Doggy howls in a pained manner, his tongue hanging out in his struggle to stay afloat. When he finally succumbs, Doggy floats to his doom in a finite way, his body arched gracefully over backwards.
Item Usage: When Doggy picks up an item, he takes it in his left paw and holds it at his side. When shooting from a projectile weapon, Doggy kneels and shoots with a concentrated expression. Doggy catches items thrown his way with a happy grin, in one paw. When picking up button items, like the Franklin Badge, Doggy wears it proudly on his chest. Finally, Doggy throws items powerfully, over his left shoulder, fastball-style, with his right paw.
Assist Trophy Summon: When Doggy throws up his AT, he leans up and watches whatever he summons curiously, sniffing it.
Homerun Stance: Doggy bats right-handed, so, lifting his left foot, he pulls back his Homerun Bat, wiggling it a bit while charging. When he swings, Doggy steps down hard with his raised foot, carrying his momentum into his swing. He follows through nicely with the swing, keeping his eyes on whatever he just hit.
Attacked: Although there is nothing unique about how Doggy flies when launched, his facial expression is. Doggy squints his eyes in pain, his tongue hanging out awkwardly, whenever he takes damage.
Grabbed: When he is grabbed by a foe, Doggy jerks his head side to side, attempting to free himself from his captor’s grasp.
Footstool Jumped: Doggy is forced onto all fours when he is bounced off of by an opponent. He rapidly returns onto both feet with a hop, a peeved expression on his face.
Ladder Climbing: When climbing a ladder, Doggy pulls himself up with both paws, pushing awkwardly and unnecessarily with his back legs.
Scooter Launching: When waiting in scooters in the SSE or Target Test #3, Doggy gets onto all fours, and dangles out his tongue, excited for the fast shot ahead.
Door Entering: To enter doors or other openings in the SSE, Doggy gets onto all fours and trots in, tail wagging, ready for a new adventure.
OTHER
Entrance: A metal-barred dog cage appears onstage, with Doggy inside on all fours, as well as a green towel for bedding and red food and water bowls. With a paw swat, Doggy opens the cage with a squeak and trots out with a woof. The cage vanishes as Doggy hops onto two feet, ready to brawl.
Crowd Chant: The crowd (who sounds like a mix of men and women here) chant, "Dogg-y! Dogg-y! Dogg-y!"
Wiimote Sound: Several excited dog barks are heard if Doggy is selected to begin with. If you don't specify your choice, your starting character of Doggy or Bear is random, and no sound is heard.
Kirby Hat: Kirby gains Doggy's long yellow ears, tail, and brown nose when he inhales Doggy.
Credits Theme: All Star
Ending Cutscene: This short victorious cutscene is played after Doggy completes Classic or All-Star Mode. Doggy is first seen throwing one of each type of the three dog toys in Toy Toss on Bridge of Eldin. He then is shown releasing Fleabag alongside Donkey Kong using his head-shaking Side Taunt, on Rumble Falls. Next, Doggy is seen charging his bone-battering F-Smash and hitting a Mr. Saturn thrown by Ness, on Onett. Lastly, Doggy is seen using his Up Taunt to play his banjo in front of Cranky's Cabin on Jungle Japes. This cutscene ends with a picture of Doggy doing his cannonballing N-Air into the water on Delfino Plaza.
Classic Picture: This congradulations picture is shown after Doggy completes Classic Mode. Doggy is shown doing his tail-chasing D-Smash alongside Yoshi doing his tail-chasing Down Taunt, on Yoshi's Island.
All-Star Picture: This congradulations picture is shown after Doggy completes All-Star Mode. He is shown using his coffee-spilling D-Tilt in front of King Dedede, who uses his Inhale move to suck up the beverage. This takes place on the Cook segment of Flat Zone 2. The congratulations text for this and his classic picture is fancy orange cursive, marked by two brown doggy paw prints at the end of the word.
Pained Cry: When Doggy is hit by a powerful attack, but not KOed, he lets out a hurt dog yip, which he continues with a weak moan as he flips into the air.
Death Cry: When Doggy is KOed off the side or bottom screen boundaries, or is crushed flat by a wall or ceiling, Doggy lets out a high-pitched painful bark.
Star KO Cry: When Doggy is sent flying into the background in a Star KO, or is killed in a Stamina Brawl, Doggy lets out a miserable low dog howl as he fades away.
PROS AND CONS
PROS:
- Basic Combo has decent priority.
- Fast tilts that can combo and build damage on foes.
- F-Smash has a nice sweetspot.
- A fully charged U-Smash has damaging effects that expand its hitbox.
- A N, F, or D-Air out of a shorthop can be an effective tool for combos.
- B-Air is great for edgeguarding.
- U-Air is great for juggling aerial foes.
- Dash Attack is speedy and fairly reliable.
- Crawling Attack is useful for cutting through attacks or blocking them.
- Throws deal good damage to the foe and set them up to be comboed.
- Neutral Special allows for more mindgames, with its poisoning, stunning effects.
- Reliable projectile that has various useful effects.
- Handy tether recovery that can damage foes in the air.
CONS:
- Relatively easy to hit and combo.
- Basic Combo leaves Doggy open to punishment from the foes he hit with it.
- F-Smash has decent ending lag; even more if Doggy whiffs the attack.
- Despite its speed, foes who dodge Doggy's D-Smash can easily retaliate with a quick tilt.
- N and B-Air leave Doggy wide open to shield-grabs if he uses them from a short hop.
- Grab has awful ending lag, and is almost useless for shield-grabbing.
- Down Throw only trips the foe after they are damaged, leaving Doggy open to a tripped attack from his victim.
- Poison damage gained by foes from Fleabag is minute and encourages foes to hit the fleas to avoid giving Doggy the ability to attack and stun.
- Long-ranged foes have a clear shot when Doggy charges Fleabag; interrupting the charge cancels the effects that Doggy had charged up until this point.
- His Toy Toss toys can be easily halted in most cases.
- Doggy is easy to hit out of his Up Special.
- Up Special can be useless if Doggy is at an odd angle to the stage edge, or is caught under a stage lip. Even if he bounds off the frisbee, he may miss the ledge entirely if he is more than a Stage Builder Block beneath it.
PLAY STYLE
The first thing players may notice when using Doggy for the first time is the light, bouncy freedom felt while dashing and attacking. The closest thing to this feeling would be a faster, lighter Donkey Kong (which is still drastically different). This is meant to resemble the excitement of the life of a labrador.
When playing as Doggy, you'll want to take advantage of his speedy tilts and aerials to build damage. If the situation presents itself, charge and use Fleabag from a distance to give yourself the ability to stun foes. A Toy Toss can set foes up for easy combos, so use it often. He can also use this projectile to deal damage to foes from a distance. If Doggy has a lot of damage, it may be ideal to switch to Bear, a much heavier character. Finally, be cautious when recovering with Doggy's Frisbee Fling; if you are facing a competent edgeguarder, using the Trainer's Tool, Doggy's leash tether recovery grab, may be a better option if your foe is merely trying to hit you, not grab the edge (tether recoveries can't knock foes off edges; use the frisbee to cut through the foe in this case).
Foes facing Doggy will want to stay close to him at all times. With his abilities, he can run away with good speed and continually chip away at you with aerials or a quick Toy Toss. Use higher priority attacks to stop these. Make sure to dodge and punish Doggy for using laggy attacks, notably his F-Smash and Trainer's Tool grab. Edgeguard him aggressively to keep him far off-stage, where he can't use his Frisbee Fling or Trainer's Tool. Finally, hit the fleas during his Fleabag; minute poison damage and no knockback is preferable to Doggy acquiring the ability to stun you with a quick attack, then follow up with a Smash to finish you.
Bear
An extremely wealthy college-aged overweight grizzly bear, who lives in a massive Oakington mansion, complete with a pool, luxurious dining room, and a vast rainforest basement. Bear Munchmaster also owns an expansive vacation island in the Atlantic Ocean, named Bear Island after its owner. Bear was raised by neglectful yet rich parents, and spent most of his cub-hood looking up to Doggy, whom he met on a treasure-hunting expedition. Alongside his canine friend, Bear saved the world from destruction at the hands of Emperor Sibex. Despite his explorer’s heart, Bear is an extreme coward, and is quite dense at times. With devastating power, logic-defying body functions, and an insatiable lust for fast food, Bear is a unique force to reckoned with.
STATS
Power: 9.5/10: Bear is a very powerful character. His natural strength and unique anatomical feats grant him devastating power, and his cowardice will occasionally, although unintentionally, lend him even more.
Walking Speed: 1.5/10: Bear walks forward very slowly but surely, looking side to side nervously.
Dashing Speed: 2 – 5/10: Pumping his arms and breathing heavily, Bear jogs forward at an average pace. However, the more Bear dashes, the slower he becomes. There is a minimum speed, but this speed takes away many of Bear’s tactics. You may want to consider walking when possible, and dash-dance sparingly. If Bear stands still after getting tired, his speed will slowly rise. The speed resets if Bear is KOed or swapped to Doggy and back again.
Weight: 9.5/10: The second-heaviest character in the game, just barely lighter than Bowser. Bear is a huge obese grizzly, so he can stand up to a lot of damage before getting KOed.
Range: 7/10: Bear’s attacks generally have good reach, because of his large body and limbs.
Projectile Distance: 7/10: The maximum range of Bear’s projectile is about the range of a normally thrown item. However, it is much easier to dodge.
Attack Speed: 3/10: Bear is a great big slowpoke when it comes to the speed of his moves.
Priority: 9/10: Bear can easily cut through lots of attacks with even his weaker moves.
Size: 9/10: Bear is slightly taller than Ganondorf (because of his red cap) and as wide as Bowser, making him an enormous target in any fight.
First Jump: 2/10: Bear raises his arms stupidly as he does a tiny hop upwards. This takes him almost nowhere, vertically or horizontally.
Second Jump: 4/10: Bear flaps his paws slightly as he lowers his arms forcefully from their raised position during his first jump. Bear can maneuver this jump surprisingly well, considering its below average vertical and horizontal distance.
Fall Speed: 9/10: Bear falls like a rock, due to his massive bulk and pathological fear of heights.
Recovery: 5.5/10: Although his Up Special is surprisingly flexible for a heavyweight, Bear’s absolutely awful jumps and rock-like fall speed balance this out.
Crouch: 1.5/10: Absolutely horrible; Bear falls to the ground on his back, curls up a bit, and rocks back and forth lightly, whimpering in a cowardly manner. This is barely a crouch at all, and is mainly just a pose, as Bear can’t dodge almost anything this way. This pose has a slight resemblance to Donkey Kong’s sleeping animation.
Traction: 6/10: While Bear’s slow speed should loan him great footing, his mental instability brings it down to just above average.
Comboability: 4/10: Bear’s combos are similar to Donkey Kong’s in the way that he has several decent combos, but they aren’t nearly as effective as some other characters. Still, he can string attacks together well for a heavyweight.
Wall Jump: No: Bear is not willing (or able) to exert effort into bouncing his massive weight off walls while airborne. He’s too busy panicking.
Wall Cling: Yes: Despite his considerable mass, Bear can cling to walls. However, this ability is almost useless, as he can only hold on for one second. Bear’s had lots of experience clinging, whether it be onto chandeliers, stalactites, or traveling companions; however, he can never seem to pull his own weight.
Crawl: No: Because of Bear’s awkward crouch, he cannot crawl.
Glide: No: No matter how many times he has tried to fly in the past, he simply can’t do it.
Tether Recovery: No: Bear often learns things the hard way due to his mental density; he doesn’t bring a tether recovery to assist himself in Smash.
BASIC
Basic Combo, Hit #1: Slothful Shove: Hunching down his upper body slightly, Bear leans forward and shoves foes in front of him with both paws. This has below average range and moderate priority. Foes take almost no knockback, but this traps foes for the next combo hits, the last of which does deal fair knockback. This combo hit is great for halting a foe’s attack and punishing them with another attack in quick succession. The shove deals
4% to foes.
Basic Combo, Hit #2: Harebrained Headbutt: From his leaning position from his shove, Bear quickly slams his head down powerfully on nearby foes. This move has two hitboxes. Foes hit with the top of Bear’s head take low knockback. However, the second hitbox, which occurs on foes who are right next to Bear as he attacked, buries foes in the ground in a weak Pitfall effect. Although the foe remains buried for longer if they have higher damage, they still are buried for a shorter period of time than they are with other burying attacks, such as Donkey Kong’s Headbutt. It is advantageous to hit this on foes who have higher damage and can stay buried longer, as Bear suffers from more ending lag as he straightens up, which will leave him vulnerable to foes who escape early by Control Stick shaking. By burying foes with higher damage, Bear can hit them out with other, more powerful attacks. This move has average range and priority, and deals
7-8% with his shove, and
3-4% without (foes get more damage by being buried with the second hitbox).
Basic Combo, Hit #3: Tongue Launch: Lifting his head from his Headbutt (which is not held down with ending lag like Donkey Kong’s), Bear opens his cavernous mouth wide and shoots out his long pink tongue. This does average knockback to end this combo. However, it is not as strong as his arms or head, so Bear has slightly less priority with this combo hit than with the previous two hits. Bear’s tongue has decent range, with a hitbox on its tip. After he finishes this basic combo, Bear pulls in his tongue as he raises his upper body back to standing position; he leans down for all three hits. This move deals
10-11% with the full combo,
6-7% with the headbutt, and
3% by itself.
TILTS
Forward Tilt: Eye Pop: With a high-pitched scream, Bear leans down and freezes in place, petrified with shock. While in this position, Bear's round green eyes shoot from their sockets, comically fly forward a few feet, then return to Bear's head. This move has below average priority. The eyes do the most knockback (average knockback) as they are popping out, rather than when they are at maximum range or returning to Bear (almost no knockback). The maximum range of the eyes are about the maximum range of Bowser's F-Tilt. Bear has very little startup lag, but a fair bit ending, as he unfreezes when his eyes return. Still, this is a handy tilt for building damage and KOing foes with high damage levels. The eyes do
5-7% to foes. Foes who hit the eyes as they come out take the most damage.
Down Tilt: Grizzly Gas: From his awkward crouch on his back, Bear lets out a loud, obnoxious fart, which appears as a small, brown cloud out of his butt. This move has two hitboxes. Foes hit with the main fart cloud take low knockback. However, foes who hit Bear's butt as he's farting take fire damage and average knockback, similarly to Samus' D-Tilt. The cloud has below average range and low priority. This tilt can be used several times in a row rapidly to trap a foe against a wall (although not infinitely). Bear gets backwards momentum each time he farts, so he can uses this tilt to slide backwards on the ground, which is helpful for moving, as Bear slows down with excessive dashing. This has a 25% chance of tripping foes hit with the cloud (not Bear's butt). Foes receieve
7% from the fart cloud (the first hitbox) and
11% from Bear's butt (the second hitbox).
Up Tilt: Cap Toss: After a brief charge, Bear thrusts his big head upwards to toss up his red cap. The cap flies up a minute distance before landing back on its owner's head. This move does average knockback and has reliable priority. Despite the startup lag, Bear can use this tilt to juggle foes with relative ease. Although Bear does thrust his head, the only hitbox is the cap, which does one solid vertical hit, having the power to KO foes with moderately high damage levels. Foes take the most knockback if they hit the cap as it flies up, rather than while it is airborne. The cap loses its hitbox as it falls. This tilt deals
6-8% to foes, who take the most damage as the cap is first thrusted.
SMASHES
Forward Smash: Beastly Belch: While charging, Bear leans down and rears back, opening his mouth slightly and sucking in air. Upon release, Bear lets loose a massive belch, opening his mouth wide and widening his eyes. The belch appears as a sizeable green cloud out of his mouth, and extends to about the range of Mario's F-Smash, with just a bit more reach. The knockback is devastating, as is up there with the F-Smashes of King Dedede, Bowser, and Ike in terms of killing potential. The cloud also has outstanding priority; it is the hitbox. However, as Bear holds the pose for a second after belching, this has horrible ending lag, leaving Bear completely vulnerable to attacks. Bear also has slight startup lag as he prepares to belch. Used sparingly and cautiously, this is a great offensive tool. Foes take the most knockback if they hit the outskirts of the cloud, rather than the center. This Smash can do anywhere between
18-29% to foes unfortunate enough to fall victim to its power.
Down Smash: Bearfoot Stomp: Lifting one bare bearfoot, Bear stomps the ground with immense force, creating a small shockwaves on both sides of him, causing the screen to shake slightly. Despite being a close range attack, this Smash has great knockback, although it’s not as good as his F-Smash. Foes can be hit by the shockwaves or by Bear’s foot. This Smash has good priority, although it is very awkward to block most attacks with it. The move starts quick, but has moderate ending lag, as the shockwave occurs and the screen shakes. The move’s best use is probably for stopping rushing attacks, such as the Side Specials of Fox, Captain Falcon, or Ike; however, it is still useful for normal matches as well. This Smash can deal anywhere from
13-25%, foes taking more damage from hitting Bear’s crushing foot rather than the shockwave it generates. In the Doggy and Bear games, this move is used to stun foes or to shake items out of trees or piñatas.
Up Smash: Tabasco Breath: As he’s charging, Bear tilts his head back and starts pouring red-hot Texas Pete Tabasco Sauce from a bottle down his throat, chugging the stuff greedily. Upon release, Bear screams like Homer Simpson, drops the bottle to the ground, where it shatters, and frantically breathes a stream of fire out of his mouth, Superspicy Curry-style. This can deal the most damage of Bear’s Smashes, if a giant foe or a boss collects every single hit of the Smash when it is fully charged, although this is impossible on normal foes. However, this Smash deals no knockback. This is not a problem for Bear, as he also has virtually no ending lag with this move, and can use a quick U-Tilt to knock foes away, although they can use a quick aerial first to punish Bear, as they aren’t knocked back at all. The range and priority are the same as in the Superspicy Curry item. The length of the fire depends on the charge of the Smash. At maximum charge, Bear breathes fire for about 1.25 second. Otherwise, he keeps it going for about .75 second. If spammed more than five times in a time period of 20 seconds, Bear takes 10% every other time he uses this Smash (tabasco sauce is hot!) This effect stops if Bear uses 10 other different attacks or is KOed. This Smash can deal anywhere from
5-36% to foes.
AERIALS
Neutral Air: Bread Bash: As mentioned earlier in his bio, Bear was born into an extremely wealthy family, and therefore inherited a vast quantity of money. Here, Bear pulls some of his “bread” out of midair, in the form of a single large moneybag, marked with a green $, and holds it in front of him. Bear then spins around once, holding out the moneybag as if it were a lover in a cheesy romantic soap opera. This aerial has some startup lag (comparable to that of R.O.B.’s N-Air) as Bear extracts his moneybag. However, it does moderate knockback to make up for this. As the moneybag is held out, this move has average range, with a hitbox on the bag. This aerial has good priority, although competent foes can dodge the first part of the spin and attack Bear out of the rest of the move. However, it is difficult to shield-grab Bear while he is using this move from a shorthop. This aerial will usually KO foes with over 85%. It does
10-14% to foes, who take more damage if they are closer to Bear. After use, Bear laglessly stows his bread in the fur pouch on his stomach. And, as a small easter egg, Bear holds his bread noticeably more tightly when he is fighting a Falco.
Forward Air: Panicky Struggle: In this aerial, Bear shows you just how much of a scaredy-cat he is. Bear flails both of his arms about wildly in a circular motion, screaming gibberish all the while. Foes who hit his bulky arms are buffeted about. This aerial can deal up to five hits on foes. The first four hits trap foes (although they can be Smash DIed out of) while the last hit gives above average knockback. Bear’s flailing arms don’t stretch out that far, but this aerial is not close range at all; it can hit foes from a slightly below average distance away. The priority is below average as well. Although one arm can deal all five hits, foes who somehow hit both arms (the hitboxes) do not get ten hits, and still just get five. This aerial is best for aerial combos, as Bear lags if he hits the ground, sighing in relief, before the attack is finished (it lasts for about one second). Each of the five flails does
3%, for a maximum of
15%.
Back Air: Footlong Slash: Bear’s obesity and weight stem from his habit of gorging on his bottomless hoard of fast food. Here, Bear takes a footlong Chicken Bacon Ranch subway sandwich (his favorite food) and slashes it backwards, as if it were a sword. While his slashing animation bears a resemblance to Ike’s B-Air, this move’s properties are completely different. Bear’s sub has a bit more range than Ike’s B-Air, but has less priority and knockback. This aerial starts up laggily, but is good to use from a shorthop, as Bear lags significantly less ending this move early by landing than with his other aerials. Although foes can be KOed by this aerial if they have high damage levels, it is best used just from a shorthop, as most aerial foes can overcome the sub’s weak priority. This aerial deals
9-10% to foes. Bear rapidly swallows the sub in one gulp after finishing this move (although he doesn’t heal damage from eating this food).
Up Air: Salmon Slip: Fishing is an important side quest in Bear’s high seas adventure game, Doggy and Bear: Island Hoppers. Bear pulls out a metal bucket filled with saltwater and holds it up. On cue, three salmon leap out of the bucket into the air, one at a time, each one falling back in, before Bear stows the bucket in his fur pouch. The first two salmon barely leap out of the bucket, doing no knockback. The third and final salmon leaps several feet out and deals average knockback. While this move is a fairly fast aerial, it has weak priority. When using this move, make sure that the foe will be knocked back with the last salmon. Otherwise, they can air-dodge in between hits and punish you. In addition, try to keep Bear from landing before the move ends; he lags a lot as he keeps the bucket from sloshing out water. The first two salmon do
4%, while the last one does
5%, dealing up to
13% on foes.
Down Air: Butt Plummet: With a comical expression, Bear glances down, then, facing the screen, plummets to the ground, screaming. This move is by far the fastest of all ‘stop-then-drop’ aerials, putting even Toon Link’s D-Air to shame because of Bear’s weight. Bear falls in a backwards position, his butt aimed downwards. If foes hit his butt as he falls, they are spiked with great force. However, if they hit his legs, they take above average knockback. This move is fairly close range. Its priority is somewhat similar to the Bowser Bomb, just a tad weaker. Bear users must be cautious when using this move; Bear lags for about twice the lag of Spinning Kong when he hits the ground, flat on his back, from where he stumbles to his feet. Although it is a great spike, be careful; a foe who air-dodges it will cause Bear to plummet to his doom, as this move cannot be halted unless Bear is attacked. Bear has superarmor frames from the time he looks down to the time he faces the screen. With high startup and ending lag but excellent effects, this aerial is definitely high-risk, high-reward. It deals
12-15% to foes.
OTHER ATTACKS
Downed Attack: Push-Up Kick: When Bear falls face-down, he lies stretched out, trembling slightly, his face pressed to the floor. If you press the A Button while he’s down, Bear pushes himself up so hard that he lifts his entire body off the ground, kicking foes behind him in this horizontal pose, with only his paws holding him up. He then pushes himself onto his feet. This move does average knockback and has decent range. However, it is not useful for starting combos, like Doggy’s downed attack, as it is a good bit slower. This move deals
6% to foes.
Flipped Attack: Tongue Twister: When Bear falls on his back, he plays dead stupidly, eyes and mouth wide open, tongue hanging out. If you press the A Button while he’s flipped, Bear will stretch his tongue out and to a clumsy spin-jump to his feet. He keeps his tongue on the ground, so it spins 360 degrees around as Bear jumps up, knocking away nearby foes lightly, before snapping back into Bear’s mouth. Although it is quicker than the flipped attacks of other heavyweights, Bear’s tongue is pretty flat, meaning only grounded foes can be hit. This move deals
6% to foes.
Tripped Attack: Belly Buster: When Bear trips, he stumbles in place, flailing his arms, then collapse, flat on his face, similarly to a prolonged King Dedede Dash Attack. If you press the A Button while he’s tripped, Bear will rise and oddly bend his body into a backwards ‘C’ shape. He then spins around once in this position, like an awkward ballerina, to throw off nearby foes, before bending back into his normal position. This move’s hitbox is Bear’s extended frontside. This tripped attack has the potential to KO foes with high damage off the side. However, it has a good deal less range than Bear’s downed or flipped attacks. Bear can hit foes twice with this attack; once per each half of the 360 degrees spin. Each of the two hits deals
4%, for a maximum of
8%.
Ledge Attack: Flashlight Flicker: Bear hangs on ledges his one paw, sweating comically and whimpering. If you press the A Button while he’s hanging, he’ll hop back onto the stage, holding a red and blue flashlight in his free paw. Bear then rapidly turns the flashlight on and off in the face of nearby foes. Because it is just a small beam of light, the flashlight deals no knockback and has no priority. The flickering does four extremely rapid hits on foes at close range. However, the last hit has a 50% chance of tripping foes. This prevents the move from being useless because of no priority or knockback. All four hits will almost always hit nearby foes. Each of the four hits does
2% to foes, for a maximum of
8%. Doggy and Bear used these flashlights in the mansion exploration segment of Doggy and Bear: Crystal Quest and Doggy and Bear: Treasure Mansion.
Ledge Attack (over 100%): Log Roll: Characters’ ledge attacks change to a slower, weaker new attack when the character accumulates 100% or more. In this state, Bear tries to pull himself up, but fails, falling back into hanging position. With a slower second burst of strength, Bear pulls himself quickly onto the stage. In essence, this looks like a one-armed pull-up. Once he’s on the stage, Bear does a stationary somersault to bowl through foes at close range. The priority and knockback are both average. If you tap the Control Stick sideways as Bear rolls, he’ll roll forward a bit, increasing the move’s range by a few feet. Hitting Bear as he’s rolling forward also gives foes more knockback than if he’s rolling in place. Also, if Bear jumps immediately after rolling, he uses the roll’s momentum to jump up a great distance, quadrupling the pitiful normal height of his first jump. This can be used to avoid aggressive foes who are after Bear (he’s still got 100% + damage). This move deals
4-7% to foes. This is a reference to Bear’s ‘Bro. Move’ in the Bear Bros. series.
Dash Attack: Skier Smashup: From his slow dash, a pair of blue skis appear on Bear’s feet, with two skiing poles materializing in his paws, when the move’s input is triggered. Modeling his reoccurring skiing mishaps in the Big, Big Sky region of Doggy and Bear: Crystal Quest, Bear loses his balance and falls on his butt, with slight forward momentum. This move has two hitboxes. The first hitbox is on Bear’s skis, which he kicks up slightly as he collapses. This does decent vertical knockback and has average range. The second hitbox is on Bear’s butt as he falls. Although the hitbox is visible for only a very brief period of time and is extremely difficult to land a hit with, it does major knockback, which can kill foes with over 50% off the side. Bear has minute starting lag and about .75 second ending lag, as his accessories vanish and he hops to his feet, massaging his butt. This move can deal
8-9% with the first hitbox and
16-18% with the devastating second.
Item Basic Attack: Slothful Suck: Bear holds items inside his mouth, his cheeks expanding to hold the item more comfortably when he attains one. When the A Button is pressed while Bear is holding a battering item, Bear will extend the item a bit from his mouth for a second before sucking it back in. This is a fairly slow attack. The damage, range, and knockback depend on the item being used.
Item Forward Tilt: Tongue Twirl: When the F-Tilt input is pressed while Bear is holding a battering item, Bear sticks the items out of his mouth, holding it wrapped in his tongue, and twirls it around once, before pulling it back in. This attack is moderately fast. The effects depend on the item being used.
Item Forward Smash: Bounce-Back Belch: When the F-Smash input is pressed while Bear is holding a battering item, Bear fires the item out of his mouth a few feet, held by his tongue, powered by a belch cloud, before snapping it back in. This is quite a fast Smash for a heavyweight, although the belch cloud doesn’t inflict damage or knockback, like the one in his normal F-Smash. The effects depend on the item being used.
Item Dash Attack: Toothy Tumble: When Bear performs a Dash Attack while holding a battering item, he sticks out the item, holding it in his front teeth, and slides clumsily along the ground before hopping back to his feet and sucking the item back in. Although the effects vary with the different battering items, the knockback is generally higher than the item Dash Attacks of most other characters.
GRAB ATTACK AND THROWS
Grab: Grizzly Grasp: To grab foes, Bear leans forward and swipes at foes with both paws, trying to catch them. Although this grab starts quickly, it has about .25 second of ending lag if Bear misses his target. It has average range from a standstill. If Bear tries to grab while dashing, he’ll throw himself forward a bit to gain more range, but he’ll suffer from more ending lag as well. Foes grabbed by Bear automatically receive
2%. Grizzly Grasp is a move Bear can use in the Doggy and Bear series to shake furniture, power slingshots, and pull enemies or levers.
Grab Attack: Facepawlm: With a comical expression, Bear slaps a paw to the victim’s face. This grab attack can be performed fairly quickly, but not spammed, as Bear holds the facepalm position for a brief period of time before releasing it. Each attack foes
3% to the victim.
Forward Throw: Marlin Skewer: Bear releases the victim and, out of thin air, takes a large blue marlin and skewers the foe with its sharp bill, before comically stowing it in his fur pouch. This does
12% to foes and gives good knockback for a throw. However, the move lasts as long as Lucario’s F-Smash, and while the foe can’t escape, both Bear and his victim are left open. Used with caution, this is a great asset. Blue marlins are rare fish in Doggy and Bear: Island Hoppers.
Back Throw: Bodybuilder Bodyslam: With a grunt, Bear turns sideways to face the screen and slams his large body into his victim, who is launched backwards. Although it only deals
7%, its knockback is good, better than one would expect for such a low-damaging move. Bear could use this move in the Doggy and Bear series to crush foes or topple weak walls.
Down Throw: Super Swirly: A normal white porcelain toilet appears on the ground next to Bear, who lifts the foe with a burst of strength, dunks the foe headfirst into the crapper, and flushes. The victim spins around, like a slower R.O.B. Down Throw, accumulating
10% by choking on toilet water, before being launched out vertically. This is Bear’s most well-rounded throw, having decent damage and knockback. Toilets in Doggy and Bear: Treasure Mansion were used to find some mansion treasures, by means such a flooding floods to open doors or killing invincible electric foes.
Up Throw: Brick Breaker: In an odd move, Bear tosses his victim up lightly, while extracting a flat square piece of wood piled high with bricks effortlessly in one paw. Bear follows up by giving a devastating uppercut through the wood and bricks to hit the victim, letting out an unnecessary ninja-like scream. This hits the foe in a multi-hit fashion, similarly to a weaker Rock Smash. Although it does a whopping
16% and great knockback, it can’t be abused. If spammed more than 3 times in a time period of 20 seconds, Bear will lose his strength and drop the brick platform on his foot as he tries to punch it. He then lets out a scream, takes
9%, and lags for three seconds, hopping on his foot comically. This happens every other time Bear uses this throw from then on, until Bear uses 10 other different moves or is KOed. Use sparingly!
SPECIALS
Neutral Special: Hornet Hive Horror: A buzzing beehive appears in Bear’s paws, who drops it to the ground in shock, where it stays. If Bear is “hugging” a wall, the hive will stick to the wall. He can only have one hive out at a time, so be sure to use it well. However, Bear can pick up the hive, walk around with it, and throw it to move it. He can’t jump with it, though, and he takes
1% per each second he holds the hive, due to the swarming bees. There are three different effects a hive can be used for. Bear can only use one effect per hive. After the hive is used, it vanishes, and Bear must wait 10 seconds before using another hive. To get rid of a functioning hive, Bear must throw it off the edge, or destroy it with his Side Special. Just like in the Doggy and Bear series, beehives can be a help or a hindrance.
The first use is as a counter item. Any foe who attacks the hive will cause the swarm of bees to emerge, rapidly form into the shape of the character who hit the hive, then attack back in a formed ‘reflection’ of the attack that the hive was hit with. This does 1.3 times the damage of the attack that the foe originally used. If Bear places a hive on the edge of a stage, it can be a great edgeguard, as it will counter the ledge attacks of foes, forcing them to jump off the ledge, which leaves them more vulnerable to attacks. Jumping over a crown in a FFA and dropping a hive will also cause damaging chaos. Finally, Bear can try to drop a hive to counter a direct attack; however, this is not all that useful, as the hive can’t counter attacks until it hits the ground, after the foe’s attack has landed. One hive can counter three hives before it vanishes.
The second use is as a recovery. As previously mentioned, Bear can “hug” a wall while dropping a hive to attach the hive to the wall. If it is attached in such a fashion, the hive slowly slides down the wall, leaving behind a trail of sticky honey. The hive vanishes if it hits the floor or falls off the wall into a pit. Any character can then Wall Cling to the honey once, to aid themselves in their recovery. As Bear’s recovery is fairly short and his normal Wall Cling only lasts a second, this is great news for Bear. If he is at high damage and may have to recover, setting a hive on a wall to release the honey is a good option. On a side note, every other time Bear picks up a hive and carries it around, honey spills out onto the stage for three seconds at a time. This does nothing but slow down and hamper the first jump of characters. In both cases, the honey lasts for 20 seconds before vanishing. Only one portion of honey can be onstage at a time.
The third and final use is as a powerful charging attack. If Bear picks up a hive and throws it down, the hive smashes to bits. However, Bear still has a swarm of angry bees behind him. Comically looking back and seeing them, Bear screams and runs forward, a bit faster than his normal dash, the bees following and buzzing madly. Foes who hit Bear are given
15% and are knocked backwards powerfully, but cannot possibly be KOed, as the swarm hits them, dealing anywhere from
1-12%, but absolutely no knockback. If Bear presses down on the Control Stick, he skids to a stop and suffers this damage. Don’t run into a wall, or you’ll suffer this as well. To remain unharmed, Bear must run off an edge, let the swarm pass over the side boundary, then recover. Bear has superarmor frames as he looks back and sees the bees, but can be attacked as he runs forward, leaving the bees to continue forward, hurting anyone in their way. The bees can be easily disposed of anytime by an aerial or a projectile. Used carefully, this can be a great offensive tool for building damage, but be cautious; if you foul up, you’ll likely take the damage yourself, or cause Bear to run off the stage to his doom, which isn’t hard if you aren’t careful, thanks to Bear’s high fall speed.
Side Special: Candle Craze: Out of his fur pouch, Bear takes a lit stick of dynamite and holds it. If not thrown in three seconds, the dynamite detonates on Bear. From there, Bear has three throwing options. By tapping back on the Control Stick, Bear will lightly toss the dynamite a short distance. If this happens, the dynamite will fall stationary a few feet in front of Bear, and explode after three seconds. By tapping forward on the Control Stick, Bear will throw the dynamite a small distance (one-fourth of Final Destination). From there, it bounces twice in place, in a time period of three seconds, dealing
2-3% of knockbackless fire damage to foes, before detonating. Finally, by tapping forward on the Control Stick hard, Bear will comically look at the dynamite, scream, and throw it like a normal item, the dynamite exploding on contact with anything. Explosions deal
8-9% and below average knockback to whatever they hit (Bear can be hit by his own dynamite). Bear cannot move while holding dynamite. Foes cannot move or throw dynamite, but with the first two options, they have 3 seconds to evade. With the last option, Bear’s hesitation in throwing gives you a chance to dodge. While screaming on the third option, Bear has superarmor frames. Dynamite is a common destructive item in Doggy and Bear: Treasure Mansion, which Bear commonly mistakes as candles, stupidly lighting them to “put some light on the situation.”
Up Special: Saucer Shooter: In the Bear Bros. games, Saucer Shooters are common means of transportation. They are starred metal rectangular prisms that fire red saucers, containing who or whatever enters the device by the hatch on the bottom. Here, a Saucer Shooter automatically appears wherever Bear is, taking him in. Once Bear is in the shooter, he can’t be attacked. You have 1.5 second to drag the Control Stick in any direction. This is the direction Bear will fly in after that brief time period is up, riding in a red saucer. The default direction is straight up. Foes hit by Bear’s saucer take
11% and moderate knockback. After traveling a distance of 5 Stage Builder Blocks, the saucer vanishes and Bear enters a freefall, flailing his arms about. For the distance of the first two blocks, Bear has superarmor frames. The shots fly rather quickly, but not at super speed. Bear takes no lag from landing on the stage after being launched, unless he is fired straight down, upon which he suffers the ending lag of Bowser’s Whirling Fortress landing. Bear’s Saucer Shooters stay out two seconds after use; only Bear can use it (not other foes), but he must wait until one shooter vanishes before summoning another. This doesn’t mean Bear can’t use multiple shooters in one recovery if he follows this rule, although it is very difficult with Bear’s rock-like fall speed.
Down Special: DB Swap: Bear holds his paws together nervously, staring from side to side anxiously. Right on cue, Doggy appears behind Bear, as if he were hiding there all along, and taps him on the shoulder. With a scream, Bear jumps upwards into thin air (where he vanishes), as Doggy facepalms at the cowardice of his best friend. You are now controlling Doggy. Switching between Doggy and Bear takes only slightly longer than transforming between Zelda and Sheik did in Melee; you can switch without much hassle in an intense match, although it still may be ideal to wait until you KO your foe and switch in your small breather period. Doggy has invincibility frames until the cowardly Bear vanishes, after about .75 second. If for any reason you are unable to switch (like in certain parts of the SSE), Bear still holds his paws together and stares side to side nervously, but nothing happens, so he lowers his paws and stares forward, attempting to keep his cool.
TAUNTS AND VICTORY/LOSS POSES
Up Taunt: Out of nowhere, Bear takes a blue mug of coffee and drinks it all in one gulp. He then screams in a high-pitched voice, jumping up slightly and staring crazily at the screen, dropping the mug to the ground, where it shatters. Bear is now hyper.
Side Taunt: Out of nowhere, Bear takes a Rocky Road ice cream cone and swirls his tongue around the ice cream, licking it. He then tosses the cone above his head, trying to catch it in his mouth, only to have it land with a splat on his head. Bear stares comically at the screen like this for a second, before the cone vanishes.
Down Taunt: Out of his fur pouch, Bear takes three hamburgers and begins juggling them. However, he only juggles them around once before comically dropping them all at his feet. This doesn't stop Bear from stretching his tongue down to eat them all off the floor. Ten second rule, remember?
Victory Pose #1: Bear happily jumps clumsily around the screen, causing the camera to shake. After five jumps, he stops at center stage, breathing heavily but contentedly.
Victory Pose #2: Bear leans down, smiling stupidly and lighting fireworks to celebrate his victory. However, one firework accidentally ignites Bear's butt as it launches, causing Bear to scream and run around, his rear end aflame.
Victory Pose #3: Bear proudly heaves a Hidden Treasure Chest from Doggy and Bear: Treasure Mansion and Doggy and Bear: Island Hoppers onto center stage, holding it effortlessly with one paw. When he sets it down and opens it, however, a ghost pops out, scaring Bear senseless and causing him to dash away offscreen in a cloud of dust. The ghost stays onscreen and laughs at Bear's cowardice, facing right and hovering above the gold-filled chest.
Victory Theme: A hard-rock remix clip of Tubthumping, from
0:23 - 0:28.
Loss: Bear claps for the winner(s) who defeated him. He is quite sad, but after a while clapping, he takes an armful of milkshakes out of his fur pouch and beings drowning his sorrows in them, chugging the shakes and forgetting all about the whole fight.


 "
"