
-
Welcome to Smashboards, the world's largest Super Smash Brothers community! Over 250,000 Smash Bros. fans from around the world have come to discuss these great games in over 19 million posts!
You are currently viewing our boards as a visitor. Click here to sign up right now and start on your path in the Smash community!
It appears that you are using ad block :'(
Hey, we get it. However this website is run by and for the community... and it needs ads in order to keep running.
Please disable your adblock on Smashboards, or go premium to hide all advertisements and this notice.
Alternatively, this ad may have just failed to load. Woops!
Please disable your adblock on Smashboards, or go premium to hide all advertisements and this notice.
Alternatively, this ad may have just failed to load. Woops!
R.I.P. Kjell Anders "Nappy" Peterson.
- Thread starter SuSa
- Start date

tocador
Smash Lord
Is snake more manly then Captain falcon :O?
TwentyTwo
Smash Ace
I went to sleep and wake up and this is whats here? lol. Name's Brian Le, and I got the reference but I was too late, I could do the mascot, but I don't have illustrator and photoshop at home and seniors finish up school in like 2 days. Idk what the perfect Snake would be like, but whenever people make their dream character they always have Snake's ftilt and utilt XD.
Btw, whoever is a Ninjalink fan stop by my interview topic in GBD ^^.
Btw, whoever is a Ninjalink fan stop by my interview topic in GBD ^^.
SamuraiPanda
Smash Hero
- Joined
- May 22, 2006
- Messages
- 6,924
Check out Razer's avatar. And he also carries a sheep plushie to tournaments, because he's cool like that :DI fail at life. I still don't get the Sheep Outfit reference. But now I see how I failed at Candy and Ally.
Hm... if we were to make that a texture then we'd have to make some adjustments. The face can be a panda for sure. He can be wearing a sheep outfit on his torso. His nades could look like mints or his mortar could look like a candy cane that shoots gumdrops. His headband could be the Canadian flag. Maybe the nikita could look like thunder while the launcher could look like a storm cloud or something.Seriously. I want to make a Snake texture of all that. I'll start it when I get home today, and I'll spend weeks and weeks on it until it's perfect.
Although I won't be able to do the large Afro.don't think I can add things to a char. model, only change them. (His outfit will be a sheep costume with no head, where his face will be black and white like a Panda, I'll see if I can change his grenades to some form of candy (any suggestions?) and IDK how I'll incorperate a hockey stick....

Hrm, it still needs some work. We should complete the concept for the texture together as a community to make it pure awesome.
mofo_
Smash Ace
where do you find the Big Boss suit and the Naked Snake one? I've looked for good Snake textures but all I could find was Old Snake (that I thought was any good)
Also, the Wesker and Skullface sounds interesting

http://www.megaupload.com/?d=148LD58Z


theres also splitter snake, sean connery snake, spy from tf2, spirit snake
slikvik
Smash Master
THIS IS CANDY
omg i love snake textures!!!! someone wanna make me a candy texture? like....if there was a snake color like the lepord texture...but with rainbow colors instead...even for his headband too (make sure pink is 1 of the colors haha) and make his gernades candy and his motarslide a candy cane...and somewhere on him it said CANDY....I WOULD LOVE YOU FOREVER!!!!!!!
seriously though....someone wanna make me that lmao :-P
SamuraiPanda
Smash Hero
- Joined
- May 22, 2006
- Messages
- 6,924
Candy, you should request the bubblegum and cotton candy colors that you have on your controller :D
demonictoonlink
Smash Master
OMG guys I can DAC consistently... lol
God I wish Toon Link has Snakes DAC...and F-Tilt...and U-Tilt...and running attack...and weight...and beard... Actually, I just wish I played Snake... **** TL for being so adorable!!!
God I wish Toon Link has Snakes DAC...and F-Tilt...and U-Tilt...and running attack...and weight...and beard... Actually, I just wish I played Snake... **** TL for being so adorable!!!
hundreds of utilts
Smash Apprentice
hater!That would be terrible.
By far the worst idea I have ever heard.
Like really, he's the only reason I can play brawl instead of melee. They should've made it happen. Or at least had Mewtwo in brawl lol...also snake was going to be in melee because hideo asked for him to be, but the game was too far in production so they decided that they would put snake in the next smash game they made.
also, yeah the skull face texture is official. reminds me of the punisher movies.
luke_atyeo
Smash Hero
- Joined
- May 10, 2008
- Messages
- 7,215
wow can someone post a picture of sean connery snake, thats madness.
big boss's older design from the games made him look like sean connery.
big boss's older design from the games made him look like sean connery.
maybe snakes rocket launcher could look like a hockey stickCheck out Razer's avatar. And he also carries a sheep plushie to tournaments, because he's cool like that :D
Hm... if we were to make that a texture then we'd have to make some adjustments. The face can be a panda for sure. He can be wearing a sheep outfit on his torso. His nades could look like mints or his mortar could look like a candy cane that shoots gumdrops. His headband could be the Canadian flag. Maybe the nikita could look like thunder while the launcher could look like a storm cloud or something.
Hrm, it still needs some work. We should complete the concept for the texture together as a community to make it pure awesome.

Black_Heretic
Smash Lord
i dl'd 007 snake the other day, and i'm working on a gold and black texture, which i do with all my characters.

http://unleadedmugen.com/stacksmash/wp-content/uploads/2008/09/al_000101_0024.jpg
They already have Gold Snake, not gold and black though
and you make textures?
PIMPSLAP
Smash Lord
how about A Caiptan Falcon Snake i would give you a a mp3 for it.
Yes i do, mine looks betterhttp://unleadedmugen.com/stacksmash/wp-content/uploads/2008/09/al_000101_0024.jpg
http://unleadedmugen.com/stacksmash/wp-content/uploads/2008/09/al_000101_0024.jpg
They already have Gold Snake, not gold and black though
and you make textures?
I'm fixing stuff on it though

Elyssa Xey Hexen
Broken!
- Joined
- Aug 6, 2008
- Messages
- 19,346
This is making me want to hack the game x.x I have my own idea for snake.
SuSa
Banned via Administration
Test Stage:
http://www.smashboards.com/showpost.php?p=7428233&postcount=98
POST ONE
Personal Note:
Since my return at the Snake Boards, I have been asking myself "What is the best possible thing I could do for the Snake Boards?" After a few weeks of debate, researching, lurking, speaking, going to the bathroom, and eating some pineapples. I have decided the best thing I could do for the boards is to organize something in which all of my knowledge; no..... All of the boards' knowledge is condensed into one thread of pure win. Every detail that we have ever looked into, presented in an orderly fashion.
This concept, I thought, was just "a guide". Those standard things that most boards have, they take countless weeks of effort to create - and even more to maintain. Organizing them can take hours to create a way to display all the information neatly! I thought to myself "Is this really worth it?" I came to the conclusion that yes...yes it is. Often have I wished for a thread of this calibur, a thread so amazing that the mere sight of it will make people collapse in their chairs.
So I present to you, the result of many hours of slaving away for the benefit of this community....
POST ONE AND A HALF
POST TWO
Jab 1

Base Damage: 4
Base Knockback: 0
Knockback gain: 64
Weight Knockback: 1E/1E/14
Hitbox comes out at frame: 3
First IASA Frame: 6(for jab2 only)/16 (for everything else)
Direction: 361/80/88
Total frames: 23
Hitbox duration: 2 frames
Landing Lag: N/A
Tripping rate: N/A
Hitlag multiplier: x1
SDI potential: x1
Jab 2

Base Damage: - 3
Base Knockback - 0
Knockback gain - 64
Weight Knockback - 14
Hitbox comes out at frame - 4
First IASA Frame – 6(jab 3 only)
Direction - 361
Total frames - 25
Hitbox duration - 2 frames
Landing Lag – N/A
Tripping rate - N/A
Hitlag multiplier – x1
SDI potential – x1
Jab 3

Base Damage: - 7
Base Knockback – 3C
Knockback gain - 73
Weight Knockback - 0
Hitbox comes out at frame – 10
First IASA Frame – 47
Direction - 361
Total frames - 51
Hitbox duration - 4 frames
Landing Lag – N/A
Tripping rate – 0%
Hitlag multiplier – x1
SDI potential – x1
Forward Tilt 1

Base Damage: - All 8
Base Knockback – 32/32/1E
Knockback gain – 4B/64/4B
Weight Knockback – 14(only the hitbox that launches you)
Hitbox comes out at frame - 4
First IASA Frame – 11(for ftilt 2 only)
Direction – 275(only the hitbox that launches you), 361
Total frames - 32
Hitbox duration - 2 frames
Landing Lag – N/A
Tripping rate – 0%
Hitlag multiplier – x1
SDI potential – x1
Forward Tilt 2

Base Damage: - 12/10/9/9
Base Knockback – All 37
Knockback gain – All 50
Weight Knockback - 0
Hitbox comes out at frame - 6
First IASA Frame - 31
Direction - 361
Total frames - 46
Hitbox duration - 6
Landing Lag – N/A
Tripping rate – 0%
Hitlag multiplier – x1
SDI potential – x1
Down Tilt

Base Damage: - All 10
Base Knockback – All 32
Knockback gain - 64/6E/64/64
Weight Knockback – All 0
Hitbox comes out at frame - 6
First IASA Frame - 35
Direction – 80/75/70/70
Total frames - 43
Miscellaneous -
Hitbox duration - 4
Landing Lag -
Tripping rate(If any) –
Hitlag multiplier – x1
SDI potential – x1
Up Tilt

Base Damage: - 13 for strong hitboxes, 12 for weak hitboxes.
Base Knockback – 37 for strong hitboxes, 2D for soft hitboxes
Knockback gain – All 5F
Weight Knockback – All 0
Hitbox comes out at frame - 6
First IASA Frame – N/A
Direction – 95 for strong hitboxes, 84 for soft hitboxes
Total frames - 38
Miscellaneous – This has a lot of hitboxes.(6) No wonder it has a lot of range.
Hitbox duration – 8 for strong hitboxes, 6 for soft hitboxes
Landing Lag -
Tripping rate(If any) – 0%
Hitlag multiplier – x1
SDI potential – x1
Dash Attack

Base Damage: - 11/9/8/6
Base Knockback – 32 for strong hitboxes, 28 for weak hitboxes
Knockback gain – All 55
Weight Knockback – All 0
Hitbox comes out at frame – 5 for strong hitboxes, 7 for soft hitboxes
First IASA Frame – 2 for Mortar only
Direction – 65 for strong hitboxes, 110 for soft hitboxes
Total frames - 42
Miscellaneous – Snake’s arms and shoulders are intangible when the hitboxes are out.
Hitbox duration -8 for strong hitboxes, 6 for soft hitboxes
Landing Lag -
Tripping rate(If any) – 0%
Hitlag multiplier – x1
SDI potential – x1
Forward Smash

Base Damage: - 22
Base Knockback - 64
Knockback gain – 3C
Weight Knockback - 0
Hitbox comes out at frame - 41
First IASA Frame – N/A
Direction - 361
Total frames - 81
Miscellaneous – The rocket launcher appears at frame 6.
Hitbox duration - 2
Landing Lag -
Tripping rate(If any) – 0%
Hitlag multiplier – x1
SDI potential – x1
Down Smash
Base Damage: - All 14
Base Knockback – All 5A
Knockback gain – All 3A
Weight Knockback – All 0
Hitbox comes out at frame – minimum of 55 frames after planting
First IASA Frame – N/A
Direction – All 58
Total frames – 78 for Planting
Miscellaneous – There are 3 hitboxes that are located at 3 different places that have the same parameters.
The click sounds is at frame 34.
Hitbox duration - All 1
Tripping rate(If any) – All 0%
Hitlag multiplier – All x1
SDI potential – All x1
Up Smash

Base Damage: - 4(The Mortar Launcher),10(Mortar Shell)
Base Knockback – 0(The Mortar Launcher),5A(Mortar Shell)
Knockback gain – 64(The Mortar Launcher),43(Mortar Shell)
Weight Knockback – 78(The Mortar Launcher),0(Mortar Shell)
Hitbox comes out at frame – 11(The Mortar Launcher), 29, (The Mortar Shell)
First IASA Frame -
Direction – 96(The Mortar Launcher),65(Mortar Shell)
Total frames - 53
Miscellaneous – Thanks to Kirk for the offset data for Snake’s Mortar Shell.
A lot of Weight Knockback on the mechanism. It only hits foes on the ground.
Hitbox duration – 2(The Mortar Launcher),1(Mortar Shell)
Tripping rate(If any) – 0%
Hitlag multiplier – x1 Both
SDI potential – x1 Both
Neutral Air

Base Damage: -
1st kick 6
2nd kick 5
3rd kick 4
Last kick 13
Base Knockback –
1st kick 0
2nd kick 0
3rd kick 0
Last kick 2D
Knockback gain –
1st kick 64
2nd kick 64
3rd kick 64
Last kick 5F
Weight Knockback –
1st kick 5/28
2nd kick 5/28
3rd kick A/46
Last kick 0
Hitbox comes out at frame –
1st kick 10
2nd kick 22
3rd kick 34
Last kick 44
First IASA Frame – N/A
Direction –
1st kick 120/60/100/75
2nd kick 120/60/100/75
3rd kick 260/280/100/75
Last kick 361
Total frames - 68
Miscellaneous -
Hitbox duration – All except the last kick 4, the last kick 3
Landing Lag - 30
Tripping rate(If any) –
Hitlag multiplier –All x1
SDI potential – All x1
Auto-Cancel window – Frame 50
Forward Air

Base Damage: - 14/15
Base Knockback – All 28
Knockback gain – All 64
Weight Knockback –All 0
Hitbox comes out at frame - 23
First IASA Frame – N/A
Direction – 80/269
Total frames - 70
Miscellaneous – 269 = spike
Hitbox duration - 4
Landing Lag - 30
Tripping rate(If any) – 0%
Hitlag multiplier – x1
SDI potential – x1
Auto-Cancel Window – Frame 63
Back Air

Base Damage: - 16/14 for strong hitboxes 10 for weak hitboxes
Base Knockback – 28 for strong hitboxes, 19 for weak hitboxes
Knockback gain – 5A for strong hitboxes, 64 for weak hitboxes
Weight Knockback - 0
Hitbox comes out at frame - 7
First IASA Frame – N/A
Direction – All 361
Total frames - 43
Miscellaneous – Strange how the auto-cancel window is specified at frame 63 even though the attack is over before that. Sakurai Failed.
Hitbox duration - 20
Landing Lag - 30
Tripping rate(If any) –
Hitlag multiplier – x1
SDI potential – x1
Auto Cancel Window – N/A
Down Air

Base Damage:
1st kick 6
2nd kick 5
3rd kick 5
Last kick 12
Base Knockback –
1st kick 0
2nd kick 0
3rd kick 0
Last kick 32
Knockback gain –
1st kick 64
2nd kick 64
3rd kick 64
Last kick 6E
Weight Knockback –
1st kick 32
2nd kick 3C
3rd kick 50
Last kick 0
Hitbox comes out at frame –
1st kick 3
2nd kick 14
3rd kick 25
Last kick 36
First IASA Frame – N/A
Direction –
1st kick 266/80/80
2nd kick 266/80/80
3rd kick 266/80/80
Last kick 361
Total frames - 60
Miscellaneous - This can't be Auto-cancelled due to a programming oversight.
Hitbox duration – All kicks 2
Landing Lag - 30
Tripping rate(If any) – 0
Hitlag multiplier –All x1
SDI potential – All x1
Auto-Cancel Window – Frame 63
Up Air

Base Damage: - 14 for strong hitboxes, 10 for soft hitboxes
Base Knockback – 28 for strong hitboxes, 10 for soft hitboxes
Knockback gain – 5f for strong hitboxes, 64 for soft hitboxes
Weight Knockback – All 0
Hitbox comes out at frame - 10
First IASA Frame – N/A
Direction – 80 for strong hitboxes , 70 for soft hitboxes
Total frames - 48
Miscellaneous -
Hitbox duration -14 for strong hitboxes, 11 for soft hitboxes
Landing Lag - 22
Tripping rate(If any) – 0%
Hitlag multiplier – x1
SDI potential – x1
Auto-Cancel Window – Frame 36
Neutral B - Grenade
Pulls Pin at 10
Duration
Finishes Pin Pulling animation at 24
Duration of throws
Close Grenade Throw - 26
Normal Grenade throw - 28
Far Grenade Throw - 32
Forward B - Nikita Missile
Missile Comes out at - 43
Launching Nikita - 48 frames
Canceling Nikita - 34 frames
Base Damage: - 7(Weak Missile)/14(Strong Missile)
Base Knockback – 2D(Weak Missile)/4B(Strong Missile)
Knockback gain – 5A(Weak Missile)/46(Strong Missile)
Weight Knockback– Both 0
Hitbox comes out at frame – When the Missile makes contact.
First IASA Frame – N/A
Direction – Both 50
Total frames - Variable
Miscellaneous – There isn’t any specification in PSA stating how long the hitbox lasts.
Hitbox duration – See above.
Tripping rate(If any) – Both 0
Hitlag multiplier – Both x1
SDI potential – Both x1
Down B - C4 Plant
On the ground - 44
In the air - 33
Ground Sticky 32
Air Sticky 33
Click Sound at frame 22 on ground
Click Sound at Frame 12 in the air
C4 comes out at frame 15 in the air
C4 comes out at frame 9 for air sticky
C4 comes out at frame 21 on the ground
C4 comes out at frame 11 for ground sticky
Down B - C4 Detonate
Base Damage: - 17
Base Knockback – 28
Knockback gain – 5A
Weight Knockback - 0
Hitbox comes out at frame - 29
First IASA Frame – 40
Direction – 80
Total frames - 45
Miscellaneous –
Hitbox duration - 3
Landing Lag – N/A
Tripping rate(If any) – 0
Hitlag multiplier – x1
SDI potential – x1
Up B - Cypher
Pulls out Cypher at frame 4
Becomes a projectile at frame - 110
Base Damage: - 6
Base Knockback – 0
Knockback gain – 64
Weight Knockback– 5A
Hitbox comes out at frame - 29
First IASA Frame – 47
Direction – 361(the tripping angle)
Total frames - 119
Miscellaneous – The cypher appears to be an active hitbox until it explodes or disappears.
Hitbox duration – See above.
Landing Lag – No change. Just a different sound effect when landing.
Tripping rate(If any) – 0
Hitlag multiplier – x1
SDI potential – x1
Shield Related
Shield
1 Frame to Powershield
7 Frames to Drop shield
Forward Roll

Invincibility Frames begin at frame - 4
Duration – 14
Total Frames - 36
Note: Will make you face backwards.
Back Roll

Invincibility Frames begin at frame - 4
Duration - 16
Total Frames - 34
Spotdodge

Invincibility Frames begin at frame 2
Duration – 19
Total Frames – 26
Airdodge

Invincibility Frames begin at frame - 4
Duration - 26
Total Frames - 40
Teching and Ground Options
Tech

Invincibility Frames begin at frame - 1
Duration - 20
Total Frames - 27
Getup
Forward Tech Roll

Invincibility Frames begin at frame - 1
Duration - 20
Total Frames – 41
Back Tech Roll

Invincibility Frames begin at frame - 1
Duration - 20
Total Frames - 41
Wall Tech

Invincibility Frames begin at frame - 1
Duration - 19
Total Frames - 27
Note: Wall Jumping does NOT provide invincibility frames.
Ceiling Tech
Invincibility Frames begin at frame - 1
Duration - 20
Total Frames – 27
Get Up
Invincibility Frames begin at frame - 1
Duration - 19
Get Up Front Roll
Invincibility Frames begin at frame - 1
Duration – 19
Get Up Back Roll
Invincibility Frames begin at frame - 1
Duration - 19
Getup Attack <100%

Invincibility Frames begin at frame - 1
Duration - 21
Bone – Pivot Point
Base Damage: - All 6
Base Knockback – All 50
Knockback gain – All 32
Weight Knockback – All 0
Hitbox comes out at frame – 15/19
First IASA Frame – N/A
Direction – All 169
Total frames - 50
Miscellaneous – Hits on the back first, then the front.
Hitbox duration – All 3
Tripping rate(If any) – 0%
Hitlag multiplier – x1
SDI potential – x1
Getup Attack >100%

Invincibility Frames begin at frame - 1
Duration - 26
Bone – Pivot Point
Base Damage: - All 6
Base Knockback – All 50
Knockback gain – All 32
Weight Knockback – All 0
Hitbox comes out at frame – 16/26
First IASA Frame – N/A
Direction – All 361
Total frames - 50
Miscellaneous – Snake hits the front first, then the back.
Hitbox duration – 2/1
Landing Lag - 30
Tripping rate(If any) –
Hitlag multiplier – x1
SDI potential – x1
Ledge Options
Ledge Getup
Ledge Roll <100%

Invincibility Frames begin at frame - 1
Duration – 27
Total Frames – 50
Ledge Roll >100%

Invincibility Frames begin at frame - 1
Duration - 56
Total Frames – 80
Ledge Jump <100%

Invincibility Frames begin at frame - 1
Duration – 16
Total Frames – 45
Ledge Jump >100%
Invincibility Frames begin at frame - 1
Duration – 19
Total Frames – 51
Ledge Attack <100%

Invincibility Frames begin at frame - 1
Duration - 21
Bone – Pivot Point
Base Damage: - 8/6
Base Knockback – All 0
Knockback gain – All 64
Weight Knockback– 6E
Hitbox comes out at frame – All 24
First IASA Frame – N/A
Direction – All 361
Total frames - 56
Hitbox duration – All 3
Tripping rate(If any) – 0%
Hitlag multiplier – x1
SDI potential – x1
Ledge Attack >100%

Invincibility Frames begin at frame - 1
Duration - 43
Bone – Pivot Point
Base Damage: - 10/9/8
Base Knockback – All 0
Knockback gain – All 64
Weight Knockback – All 6E
Hitbox comes out at frame – All 41
First IASA Frame – N/A
Direction – All 361
Total frames - 70
Hitbox duration – All 3
Tripping rate(If any) – 0%
Hitlag multiplier – x1
SDI potential – x1
Grabs and Throws
Grab

Grab hitbox appears at – Frame - 8
Duration - 2
Total Frames - 30
Dash Grab

Grab hitbox appears at – Frame - 11
Duration – 2
Total Frames – 40
Pivot Grab

Grab hitbox appears at – Frame - 9
Duration – 2
Total Frames – 30
Grab Attack (Pummel)
Base Damage: - 2
Base Knockback – 0
Knockback gain – 64
Weight Knockback - 28
Hitbox comes out at frame -
First IASA Frame – N/A
Direction – 361
Total frames - Depends on your opponent.
Miscellaneous – Lighter characters = faster choking.
Hitbox duration - 1
Landing Lag – N/A
Tripping rate(If any) – 0
Hitlag multiplier – x1
SDI potential – x1
Forward Throw
Base Damage - 9
Direction - 40
Base Knockback – 3C
Knockback Gain – 41
Total Frames – Varies by Victim
Miscellaneous –
Back Throw
Base Damage - 9
Direction - 40
Base Knockback - 41
Knockback Gain – 41
Total Frames – Varies by victim
Miscellaneous – Will make you change direction.
Down Throw
Base Damage - 12
Direction -270
Base Knockback – 4B
Knockback Gain – 1E
Total Frames – 60
Miscellaneous – The opponent is free at Frame 59.
Up Throw
Base Damage - 10
Direction – 90
Base Knockback - 44
Knockback Gain – 3C
Total Frames – Varies by victim
Miscellaneous –
Movement
Dash
15 until first step
Skid
Total frames 24
First IASA frame at frame 13
Crouch
IASA Frame at frame 3
Total Frames 8
Exit Crouch
First IASA Frame 3
Total Frames 10
Jump
Total Frames 11
Etc.
Item Throw (Front)
Total frames - 21
Item Throw (Back)
Total Frames – 23
Will reverse direction.
Item Throw (Down)
Total Frames – 24
Item Throw (Up)
Total Frames – 24
Item Throw (Dash)
Total Frames – 36
Trip Related
Trip (Standing)

Invincibility Frames begin at frame - 1
Duration - 5
Total Frames – 30
Trip (Run)

Invincibility Frames begin at frame - 1
Duration - 7
Total Frames – 46
Trip (Down)
Invincibility Frames begin at frame - 1
Duration – 5
Total Frames – 40
Trip (Turn)
Invincibility Frames begin at frame - 1
Duration - 6
Total Frames – 36
Trip (Get Up)
Invincibility Frames begin at frame - 1
Duration - 16
Total Frames – 22
Trip (Get Up Forward Roll)

Invincibility Frames begin at frame - 1
Duration - 9
Total Frames – 29
Trip (Get Up Back Roll)
Invincibility Frames begin at frame - 1
Duration - 9
Total Frames – 29
Trip (Get Up Attack)
Invincibility Frames begin at frame - 1
Duration - 6
Base Damage: - All 5
Base Knockback – All 3C
Knockback gain – All 32
Weight Knockback – All 0
Hitbox comes out at frame – First 4 hits 17, and the next 4 hits, 23.
First IASA Frame – N/A
Direction – 361
Total frames - 50
Hitbox duration – All 2
Tripping rate(If any) – 0%
Hitlag multiplier – x1
SDI potential – x1
Box Taunt
Up taunt
Entry – 40
Side Taunt
Entry – 54
Down Taunt
Entry – 45
Exiting the box
Total Frames - 85 frames
The box is a hitbox at frame 66
Duration – lasts until it disappears at frame 91.
POST THREE
In this chapter you will learn about all of Snake's known advanced tactics, the names, how to perform - with video if able, the uses, and any other information that is needed to be known. It is seperated into two groups. Global are advanced techniques that every character in the game may perform. Snake specific are techniques that only Snake may perform - or other characters in very specific scenarios.
DACUS - Dash Attack Cancelled Up Smash
DACIT - Dash Attack Cancelled Item Throw
Input a Dash Attack, during the early IASA frames input a directional throw while holding an item.
RCIT - Roll Cancelled Item Throw (Glide Toss)
Shield, input a roll and quickly input a directional throw while holding an item. Timing may change distance.
JCIT - Jump Cancelled Item Throw
Input a Jump and before leaving ground input a directional throw while holding an item.
Demostration Video
ADCIT - Air Dodge Cancelled Item Throw
Input an Air Dodge and quickly input a directional throw while holding an item.
Wavebounce
Input any Special Attack except Up-B and immediately hit the analog stick towards Snake's bac.
Demostration Video
B-Reverse
Platform Cancel
Dash Attack Canceled Grab (Boost Grab)
Input a Dash Attack and during the early IASA frames input a grab. You can also input a pivot grab to perform a boosted pivot grab.
Demostration Video
SJR - Second Jump Recovery
0 Lag Landing
While holding a grenade when airborne, hold the shield button when you are about to land.
Platform Grenade Drop
While airborne hold down shield, be above a platform and just before you land on the platform press down.
Demostration Video
SMN - Stale Move Negation
Grenade Strip
POST FOUR
Meta Knight
Snake Summary:
Opponent Summary:
Down Throw Data:
Attack: Towards - Away
Roll away: Short
Roll towards: Medium Distance
Dthrow > Buffered Jab will work on this character only if they do not
input a get up attack or a roll
Jab Data:
Cannot powershield jab.
Grab Releases:
Air - Dash Attack
Air - Boost Grab (Trades hits)
Diddy Kong
Snake Summary:
Opponent Summary:
Down Throw Data:
Attack: Towards - Away
Roll away: Mid
Roll towards: Medium Distance
Jab Data:
Cannot powershield jab.
Grab Releases:
N/A
Falco
Snake Summary:
Opponent Summary:
Down Throw Data:
Attack: Away - Towards
Roll away: Far
Roll towards: Medium Distance
Jab Data:
Can powershield jab.
Grab Releases:
Air - Dash Attack
Air - Boost Grab
Wario
Snake Summary:
Opponent Summary:
Down Throw Data:
Attack: Away - Towards
Roll away: Mid
Roll towards: Medium Distance
Dthrow > Buffered Jab will work on this character only if they do not
input a get up attack or a roll
Jab Data:
Can shield jab if DI-ing away from Snake.
Grab Releases:
Air - Neutral Air
Air - Up Tilt
Air - Back Air
Air - Up Air
Air - C4 (stick)
Marth
Snake Summary:
Opponent Summary:
Down Throw Data:
Attack: Towards - Away
Roll away: Far
Roll towards: Long Distance
Jab Data:
Can shield jab if DI-ing away from Snake.
Grab Releases:
N/A
Ice Climbers
Snake Summary:
Opponent Summary:
Down Throw Data:
Attack: Towards - Away
Roll away: Short
Roll towards: Shortest Distance
Jab Data:
Cannot powershield jab.
Grab Releases:
N/A
Olimar
Snake Summary:
Opponent Summary:
Down Throw Data:
Attack: Towards - Away
Roll away: Short
Roll towards: Shortest Distance
Jab Data:
Is not hit by complete jab.
Grab Releases:
N/A
Pikachu
Snake Summary:
Opponent Summary:
Down Throw Data:
Attack: Towards - Away
Roll away: Mid
Roll towards: Medium Distance
Jab Data:
Can powershield jab.
Grab Releases:
N/A
King Dedede
Snake Summary:
Opponent Summary:
Down Throw Data:
Attack: Away - Towards
Roll away: Mid
Roll towards: Long Distance
Dthrow > Buffered Jab will work on this character only if they do not input a get up attack or a roll
Jab Data:
Cannot powershield jab.
Grab Releases:
N/A
Mr. Game & Watch
Snake Summary:
Opponent Summary:
Down Throw Data:
Attack: Away - Towards
Roll away: Mid
Roll towards: Shortest Distance
Dthrow > Buffered Jab will work on this character only if they do not input a get up attack or a roll
Jab Data:
Cannot powershield jab.
Grab Releases:
N/A
Lucario
Snake Summary:
Opponent Summary:
Down Throw Data:
Attack: Towards - Away
Roll away: Far
Roll towards: Medium Distance
Jab Data:
Can shield jab if DI-ing away from Snake.
Grab Releases:
N/A
Zero Suit Samus
Snake Summary:
Opponent Summary:
Down Throw Data:
Attack: Towards - Away
Roll away: Far
Roll towards: Medium Distance
Jab Data:
Cannot powershield jab.
Grab Releases:
N/A
Toon Link
Snake Summary:
Opponent Summary:
Down Throw Data:
Attack: Away - Towards
Roll away: Short
Roll towards: Shortest Distance
Jab Data:
Can powershield jab.
Grab Releases:
N/A
Kirby
Snake Summary:
Opponent Summary:
Down Throw Data:
Attack: Towards - Away
Roll away: Short
Roll towards: Shortest Distance
Dthrow > Buffered Jab will work on this character only if they do not input a get up attack or a roll
Jab Data:
Cannot powershield jab.
Grab Releases:
N/A
Fox
Snake Summary:
Opponent Summary:
Down Throw Data:
Attack: Away - Towards
Roll away: Mid
Roll towards: Medium Distance
Jab Data:
Can powershield jab.
Grab Releases:
N/A
R.O.B.
Snake Summary:
Opponent Summary:
Down Throw Data:
Attack: Both Sides
Roll away: Mid
Roll towards: Shortest Distance
Dthrow > Buffered Jab will work on this character only if they do not input a get up attack or a roll
Jab Data:
Cannot powershield jab.
Grab Releases:
N/A
Pit
Snake Summary:
Opponent Summary:
Down Throw Data:
Attack: Towards - Away
Roll away: Short
Roll towards: Shortest Distance
Jab Data:
Cannot powershield jab.
Grab Releases:
N/A
Peach
Snake Summary:
Opponent Summary:
Down Throw Data:
Attack: Towards - Away
Roll away: Mid
Roll towards: Medium Distance
Jab Data:
Cannot powershield jab.
Grab Releases:
N/A
Donkey Kong
Snake Summary:
Opponent Summary:
Down Throw Data:
Attack: Towards-Away
Roll away: Mid
Roll towards: Medium Distance
Dthrow > Buffered Jab will work on this character only if they do not input a get up attack or a roll
Jab Data:
Can powershield jab.
Grab Releases:
N/A
Luigi
Snake Summary:
Opponent Summary:
Down Throw Data:
Attack: Towards - Away
Roll away: Mid
Roll towards: Medium Distance
Jab Data:
Can powershield jab.
Grab Releases:
N/A
Wolf
Snake Summary:
Opponent Summary:
Down Throw Data:
Attack: Away - Towards
Roll away: Far
Roll towards: Long Distance
Dthrow > Buffered Jab will work on this character only if they do not input a get up attack or a roll
Jab Data:
Cannot powershield jab.
Grab Releases:
Air - DACUS
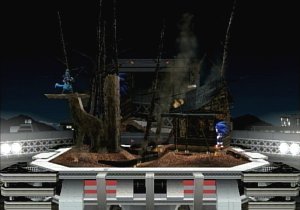
Sonic
Snake Summary:
Opponent Summary:
Down Throw Data:
Attack: Away - Towards
Roll away: Mid
Roll towards: Medium Distance
Jab Data:
Can powershield jab.
Grab Releases:
N/A
Ike
Snake Summary:
Opponent Summary:
Down Throw Data:
Attack: Towards - Away
Roll away: Far
Roll towards: Long Distance
Dthrow > Buffered Jab will work on this character only if they do not input a get up attack or a roll
Jab Data:
Can shield jab if DI-ing away from Snake.
Grab Releases:
N/A
Sheik :shiek:
Snake Summary:
Opponent Summary:
Down Throw Data:
Attack: Away - Towards
Roll away: Mid
Roll towards: Medium Distance
Jab Data:
Can shield jab if DI-ing away from Snake.
Grab Releases:
Air - DACUS
Air - Boost Grab
Ness
Snake Summary:
Opponent Summary:
Down Throw Data:
Attack: Towards - Away
Roll away: Mid
Roll towards: Medium Distance
Jab Data:
Is not hit by complete jab.
Grab Releases:
Ground - Jab
Ground - Forward Tilt
Ground - Down Tilt
Ground - Up Tilt
Ground - Regrab (if close break)
Pokémon Trainer
Squirtle
Snake Summary:
Opponent Summary:
Down Throw Data:
Attack: Away - Towards (Move back to avoid getting hit by
away hit)
Roll away: Short
Roll towards: Shortest Distance
Jab Data:
Is not hit by complete jab.
Grab Releases:
Air - Dash Attack
Air - Boost Grab
Ivysaur
Snake Summary:
Opponent Summary:
Down Throw Data:
Attack: Away - Towards
Roll away: Far
Roll towards: Medium Distance
Dthrow > Buffered Jab will work on this character only if they do not input a get up attack or a roll
Jab Data:
Cannot powershield jab.
Grab Releases:
N/A
Charizard
Snake Summary:
Opponent Summary:
Down Throw Data:
Attack: Towards - Away
Roll away: Short
Roll towards: Troll Roll
Dthrow > Buffered Jab will work on this character only if they do not input a get up attack or a roll
Jab Data:
Can shield jab if DI-ing away from Snake.
Grab Releases:
N/A
Yoshi
Snake Summary:
Opponent Summary:
Down Throw Data:
Attack: Away - Towards (Move back to avoid getting hit by
away hit)
Roll away: Mid
Roll towards: Medium Distance
Jab Data:
Cannot powershield jab.
Grab Releases:
N/A
Lucas
Snake Summary:
Opponent Summary:
Down Throw Data:
Attack: Towards - Away
Roll away: Mid
Roll towards: Medium Distance
Jab Data:
Is not hit by complete jab.
Grab Releases:
Ground - Jab
Ground - Forward Tilt
Ground - Down Tilt
Ground - Up Tilt
Mario
Snake Summary:
Opponent Summary:
Down Throw Data:
Attack: Towards - Away
Roll away: Mid
Roll towards: Medium Distance
Jab Data:
Can shield jab if DI-ing away from Snake.
Grab Releases:
N/A
Bowser
Snake Summary:
Opponent Summary:
Down Throw Data:
Attack: Towards - Away
Roll away: Mid
Roll towards: Medium Distance
Dthrow > Buffered Jab will work on this character only if they do not input a get up attack or a roll
Jab Data:
Can powershield jab.
Grab Releases:
N/A
Captain Falcon
Snake Summary:
Opponent Summary:
Down Throw Data:
Attack: Both Sides
Roll away: Mid
Roll towards: Long Distance
Jab Data:
Cannot powershield jab.
Grab Releases:
Dash Attack
Samus
Snake Summary:
Opponent Summary:
Down Throw Data:
Attack: Both Sides
Roll away: Mid
Roll towards: Medium Distance
Can crouch to avoid getup attack.
Jab Data:
Cannot powershield jab.
Grab Releases:
N/A
Jigglypuff
Snake Summary:
Opponent Summary:
Down Throw Data:
Attack: Towards - Away
Roll away: Short
Roll towards: Shortest Distance
Dthrow > Buffered Jab will work on this character only if they do not input a get up attack or a roll
Jab Data:
Cannot powershield jab.
Grab Releases:
N/A
Link
Snake Summary:
Opponent Summary:
Down Throw Data:
Attack: Away - Towards
Roll away: Far
Roll towards: Medium Distance
Dthrow > Buffered Jab will work on this character only if they do not input a get up attack or a roll
Jab Data:
Can shield jab if DI-ing away from Snake.
Grab Releases:
N/A
Zelda
Snake Summary:
Opponent Summary:
Down Throw Data:
Attack: Towards - Away
Roll away: Far
Roll towards: Long Distance
Jab Data:
Can shield jab if DI-ing away from Snake.
Grab Releases:
Ganondorf
Snake Summary:
Opponent Summary:
Down Throw Data:
Attack: Both Sides
Roll away: Far
Roll towards: Long Distance
Can crouch to avoid getup attack.
Jab Data:
Cannot powershield jab.
Grab Releases:
Air - Dash Attack
Air - Boost Grab
POST FIVE
Battlefield
Yoshi's Island (Brawl)
 Summary:
Overall this stage is a great neutral for Snake.
Smashville
Lylat Cruise
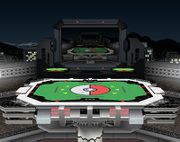
Pokémon Stadium 1


 Summary:
Final Destination
 Summary:
C4/Mine placement:
Any where
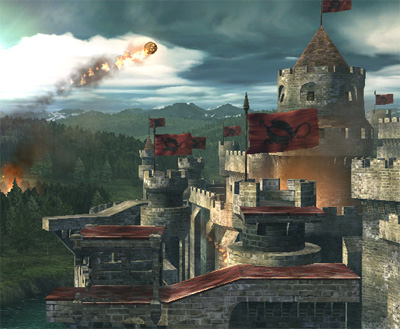
Castle Siege
 Summary for 1st portion:
1st part of the stage is small, you can get really early kills here.
1st phase: The lips can ruin a lot of recoveries, use that to your advantage against those chars. C4 is fairly difficult to see, as nades can be. The slant lets nades drop down, so you can be tricky with that. fairly low ceiling allows for early utilt KOs if you can rack up damage fast enough or if you get back to the phase with opponent at high %. The slant allows you to dodge some projectiles easier.
1st part : It's good for Snake although it's too small but it's
good for grenades. You can let the grenade slide to the slant
part. You can put C4 (Down launch) on top of a platform.
It's a great advantage against big targets and characters
like Donkey Kong, Ganondorf, Bowser. Snake's up tilt
is also good for this. When an enemy is on top of the
top of the platform, use the up tilt. But Snake can be knocked off
the stage easily because it's small. (Despite him being heavy
but at some percent maybe 50% or above.) Avoid using
Snake's recovery in this part.
 Summary for 2nd portion:
2nd part of the stage, if you can grab them near the edges, dthrow tech chasing is really easy. They'll almost always roll away from the walk-off. Camping here is somewhat more difficult though, as the statues stop your grenades.
2nd phase: Great part to be sneaky with C4. Plant it while your opponent is distracted OR in between the transition and let it fall and figure out where it is to bait your opponent into it. The pillar things are good and bad depending on the matchup. It helps against Diddy to stop bananas, but stops your camping game too. If you're playing DDD or low % vs Falco, don't be stupid and stay off the ground floor or free stock for opponent. The ceiling from the ground is REALLY high so don't waste an attempted utilt KO that you aren't sure will KO unless on a platform. As said, tech chasing is easier on this phase if you're on the ground. As said, most opponents will roll away from the blast zone when grabbed near there for fear of easy ftilt KO. If not they may just get up attack, so be prepared and punish. Your opponent may try to KO you in a similar way here too, so be careful when close to the blast zone. Don't get out smarted. Definitely the most gimmicky phase.
 Summary for 3rd portion:
3rd part of the stage is a lot like FD. Just play like you would on FD, and watch the stage's tilt when recovering.
3rd part: This is a good place for Snake too. Grenade stripping
here is the best thing to do. It will roll though the
ground (Best if cooked). Put C4s here is great especially
at the time when the stage is slanting. The
best place to put it is that the tip of the stage.
Use grenade stripping to make it explode but it's
useless against people with controlled
projectiles or stuff.
Overall: It's a good stage for Snake but don't think
that you will win for sure and you have the upper
hand or something. Your battling someone who's
better than you, you're dead or not.
Delfino Plaza
Halberd
Frigate Orpheon
Brinstar
Pictochat
Rainbow Cruise
Snake Board's Discussion:
 Summary:
C4/Mine placement:
SuSa's Discussion:
Please use and study this picture quite a bit.
Much of what I say also applies to the cast as a whole, so if someone from another forum stumbles upon this - feel free to share it. I care more about advancing the metagame than advancing my character.
Let's begin.
Okay, so that's our stage. You start off on A and go around alphabetically until you reach D, which you then go back down to A. I'm sure most everyone here knows this, but learn this stage. You will need to know about when platforms start appearing, when they dissapear, etc. Knowing how long platforms stick around or when they come around is a vital step to knowing this stage.
If you know a platform will be showing up on your right after part C, transititiong into part D - you can jump into "thin air" to have the platform come into existance and save you. This can be a lifesaver.
So get to know the stage.
Part A of Rainbow Cruise has you on a boat. Due to me not wanting to teach everyone terminology, the left side is the "front". The right side is the "back". Then there is the 'mess hall' which is the part just in front of the back that goes down into the imaginary living quarters. Then we have the sail platforms? Got it? Good.
Things to know:
Summary:
Play keepaway
Part B of Rainbow Cruise has you jumping up platforms with some magic carpets in the way, and one of the platform teeters. The goal here is to stay above your opponent and rain an arsenal of grenades and C4 on them to keep them below you. Odd enough that this is probably the one time in this game you want your opponent below you as Snake.
You can abuse the instant-grab with Grenades on this part of the stage, and I'm willing to bet we can platform cancel on every single one of these platforms to speed up your movement. So practice that platform cancelling until you perfect it.
Things to Know:
Summary:
Stay above your opponent, spam grenades and C4 like you never have before.
This part is one of the funnest, but shortest parts, if you know what you are doing. Luckily gimping Snake is a lot harder on this part than people think, due to being able to tech off the yellow blocks. The Pendulam can really screw you and your opponents up when trying to recover, so unless you are 100% sure you are going to land on it, blow yourself up with C4. Trust me, I've SD'd a few times thinking I was going to land on it and I ended up dying. It's not something you want to happen in tourney. Also, don't miss your techs on those yellow blocks if you do C4. You'll like bounce straight to your death.
Things to Know:
Summary:
Stay close to the blocks, abuse how the pendulam swings and how it can allow this blocks to 'stage spike'. Try to minimize your aerial usage, but make sure to abuse enemies recoveries when the pendulam is far and you are able to.
There is so many platforms and places to abuse on this transition, it's easily my favorite part. You can score low % utilt ko's, the horizontal edges depend on where you are - and sometimes you can score a low % ftilt KO, and the platforms allow for some fsmash shenanigans. Against DDD/Pikachu/Falco however, this transition can be one of the scariest due to chaingrabs - however we gain a stronger grab release on most of the cast when facing left.
Things to Know:
Summary:
Stay on the right side, it's the best side and we gain a lot of grab release shenanigans on the cast. Utilt kills sooner during this phase, so now's the time you'll want to land it. We have infinites against practically the entire cast against the walls - you can abuse this to hell for an early kill if you can land the grab.
Summary:
Rainbow Cruise is by far one of my most favorite counterpicks, ever. I actually got to the point that some players including Meta Knight players started to ban it against me. There is a lot of camping shenanigans and grabbing shenanigans to last a lifetime. Snake can tank pretty well with good DI but kills at really low %'s. He controls the stage at nearly all times, and there are few areas where you can truly gimp him. All of Part A, B, and D are pretty safe if you know what you're doing. Part C is risky but still hard to be gimped during.
I love this stage.
 :leek:
Pokémon Stadium 2
Jungle Japes
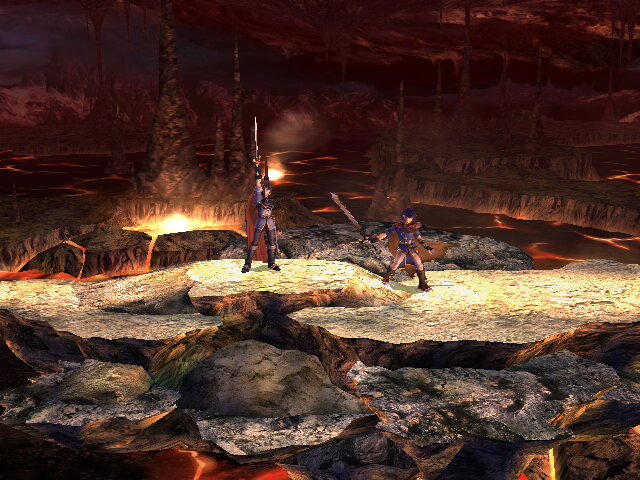
Norfair
Green Greens
 Summary:
C4/Mine placement:
Distant Planet
Luigi's Mansion
Pirate Ship
Port Town Aero Dive
Yoshi's Island (Melee)
POST SIX
POST SEVEN
POST EIGHT
http://www.smashboards.com/showpost.php?p=7428233&postcount=98
POST ONE
Personal Note:
Since my return at the Snake Boards, I have been asking myself "What is the best possible thing I could do for the Snake Boards?" After a few weeks of debate, researching, lurking, speaking, going to the bathroom, and eating some pineapples. I have decided the best thing I could do for the boards is to organize something in which all of my knowledge; no..... All of the boards' knowledge is condensed into one thread of pure win. Every detail that we have ever looked into, presented in an orderly fashion.
This concept, I thought, was just "a guide". Those standard things that most boards have, they take countless weeks of effort to create - and even more to maintain. Organizing them can take hours to create a way to display all the information neatly! I thought to myself "Is this really worth it?" I came to the conclusion that yes...yes it is. Often have I wished for a thread of this calibur, a thread so amazing that the mere sight of it will make people collapse in their chairs.
So I present to you, the result of many hours of slaving away for the benefit of this community....
POST ONE AND A HALF
The Snake Boards' Comprehensive Guide to Everything
In this guide you will find all of the knowledge that the Snake Boards has to offer you as of October 25th, 2010.
I am merely presenting data which already exists on the board - and do not claim any of the data as my personal opinion.
If something is of my own personal opinion, it will be noted with the information being presented.
Most data is presented with the use of COLLAPSE tags to make loading the entire page faster, and to remove the need of excessive scrolling.
Index
- Personal Note
- Index
- Moveset
- Jab, Tilts, and Dash Attack
- Smashes
- Aerials
- Specials
- Defensive
- Other
- Advanced Techniques
- Global
- Snake Specific
- Character Matchups
- Stage Discussions
- Misc. Data
- Directory
- Thank You's
POST TWO
Moveset
In this chapter you will learn the information regarding Snake's attacks.
It will contain frame data and an animated picture showing the move and it's hitbox if applicable.
It will contain frame data and an animated picture showing the move and it's hitbox if applicable.
Each move is organized in the following manner:
- .GIF Animated Image (if existing)
- Frame Data
Jab, Tilts, and Dash Attack
Jab 1
Base Damage: 4
Base Knockback: 0
Knockback gain: 64
Weight Knockback: 1E/1E/14
Hitbox comes out at frame: 3
First IASA Frame: 6(for jab2 only)/16 (for everything else)
Direction: 361/80/88
Total frames: 23
Hitbox duration: 2 frames
Landing Lag: N/A
Tripping rate: N/A
Hitlag multiplier: x1
SDI potential: x1
Jab 2
Base Damage: - 3
Base Knockback - 0
Knockback gain - 64
Weight Knockback - 14
Hitbox comes out at frame - 4
First IASA Frame – 6(jab 3 only)
Direction - 361
Total frames - 25
Hitbox duration - 2 frames
Landing Lag – N/A
Tripping rate - N/A
Hitlag multiplier – x1
SDI potential – x1
Jab 3
Base Damage: - 7
Base Knockback – 3C
Knockback gain - 73
Weight Knockback - 0
Hitbox comes out at frame – 10
First IASA Frame – 47
Direction - 361
Total frames - 51
Hitbox duration - 4 frames
Landing Lag – N/A
Tripping rate – 0%
Hitlag multiplier – x1
SDI potential – x1
Forward Tilt 1
Base Damage: - All 8
Base Knockback – 32/32/1E
Knockback gain – 4B/64/4B
Weight Knockback – 14(only the hitbox that launches you)
Hitbox comes out at frame - 4
First IASA Frame – 11(for ftilt 2 only)
Direction – 275(only the hitbox that launches you), 361
Total frames - 32
Hitbox duration - 2 frames
Landing Lag – N/A
Tripping rate – 0%
Hitlag multiplier – x1
SDI potential – x1
Forward Tilt 2
Base Damage: - 12/10/9/9
Base Knockback – All 37
Knockback gain – All 50
Weight Knockback - 0
Hitbox comes out at frame - 6
First IASA Frame - 31
Direction - 361
Total frames - 46
Hitbox duration - 6
Landing Lag – N/A
Tripping rate – 0%
Hitlag multiplier – x1
SDI potential – x1
Down Tilt
Base Damage: - All 10
Base Knockback – All 32
Knockback gain - 64/6E/64/64
Weight Knockback – All 0
Hitbox comes out at frame - 6
First IASA Frame - 35
Direction – 80/75/70/70
Total frames - 43
Miscellaneous -
Hitbox duration - 4
Landing Lag -
Tripping rate(If any) –
Hitlag multiplier – x1
SDI potential – x1
Up Tilt
Base Damage: - 13 for strong hitboxes, 12 for weak hitboxes.
Base Knockback – 37 for strong hitboxes, 2D for soft hitboxes
Knockback gain – All 5F
Weight Knockback – All 0
Hitbox comes out at frame - 6
First IASA Frame – N/A
Direction – 95 for strong hitboxes, 84 for soft hitboxes
Total frames - 38
Miscellaneous – This has a lot of hitboxes.(6) No wonder it has a lot of range.
Hitbox duration – 8 for strong hitboxes, 6 for soft hitboxes
Landing Lag -
Tripping rate(If any) – 0%
Hitlag multiplier – x1
SDI potential – x1
Dash Attack
Base Damage: - 11/9/8/6
Base Knockback – 32 for strong hitboxes, 28 for weak hitboxes
Knockback gain – All 55
Weight Knockback – All 0
Hitbox comes out at frame – 5 for strong hitboxes, 7 for soft hitboxes
First IASA Frame – 2 for Mortar only
Direction – 65 for strong hitboxes, 110 for soft hitboxes
Total frames - 42
Miscellaneous – Snake’s arms and shoulders are intangible when the hitboxes are out.
Hitbox duration -8 for strong hitboxes, 6 for soft hitboxes
Landing Lag -
Tripping rate(If any) – 0%
Hitlag multiplier – x1
SDI potential – x1
Smashes
Forward Smash
Base Damage: - 22
Base Knockback - 64
Knockback gain – 3C
Weight Knockback - 0
Hitbox comes out at frame - 41
First IASA Frame – N/A
Direction - 361
Total frames - 81
Miscellaneous – The rocket launcher appears at frame 6.
Hitbox duration - 2
Landing Lag -
Tripping rate(If any) – 0%
Hitlag multiplier – x1
SDI potential – x1
Down Smash
Base Damage: - All 14
Base Knockback – All 5A
Knockback gain – All 3A
Weight Knockback – All 0
Hitbox comes out at frame – minimum of 55 frames after planting
First IASA Frame – N/A
Direction – All 58
Total frames – 78 for Planting
Miscellaneous – There are 3 hitboxes that are located at 3 different places that have the same parameters.
The click sounds is at frame 34.
Hitbox duration - All 1
Tripping rate(If any) – All 0%
Hitlag multiplier – All x1
SDI potential – All x1
Up Smash
Base Damage: - 4(The Mortar Launcher),10(Mortar Shell)
Base Knockback – 0(The Mortar Launcher),5A(Mortar Shell)
Knockback gain – 64(The Mortar Launcher),43(Mortar Shell)
Weight Knockback – 78(The Mortar Launcher),0(Mortar Shell)
Hitbox comes out at frame – 11(The Mortar Launcher), 29, (The Mortar Shell)
First IASA Frame -
Direction – 96(The Mortar Launcher),65(Mortar Shell)
Total frames - 53
Miscellaneous – Thanks to Kirk for the offset data for Snake’s Mortar Shell.
A lot of Weight Knockback on the mechanism. It only hits foes on the ground.
Hitbox duration – 2(The Mortar Launcher),1(Mortar Shell)
Tripping rate(If any) – 0%
Hitlag multiplier – x1 Both
SDI potential – x1 Both
Aerials
Neutral Air
Base Damage: -
1st kick 6
2nd kick 5
3rd kick 4
Last kick 13
Base Knockback –
1st kick 0
2nd kick 0
3rd kick 0
Last kick 2D
Knockback gain –
1st kick 64
2nd kick 64
3rd kick 64
Last kick 5F
Weight Knockback –
1st kick 5/28
2nd kick 5/28
3rd kick A/46
Last kick 0
Hitbox comes out at frame –
1st kick 10
2nd kick 22
3rd kick 34
Last kick 44
First IASA Frame – N/A
Direction –
1st kick 120/60/100/75
2nd kick 120/60/100/75
3rd kick 260/280/100/75
Last kick 361
Total frames - 68
Miscellaneous -
Hitbox duration – All except the last kick 4, the last kick 3
Landing Lag - 30
Tripping rate(If any) –
Hitlag multiplier –All x1
SDI potential – All x1
Auto-Cancel window – Frame 50
Forward Air
Base Damage: - 14/15
Base Knockback – All 28
Knockback gain – All 64
Weight Knockback –All 0
Hitbox comes out at frame - 23
First IASA Frame – N/A
Direction – 80/269
Total frames - 70
Miscellaneous – 269 = spike
Hitbox duration - 4
Landing Lag - 30
Tripping rate(If any) – 0%
Hitlag multiplier – x1
SDI potential – x1
Auto-Cancel Window – Frame 63
Back Air
Base Damage: - 16/14 for strong hitboxes 10 for weak hitboxes
Base Knockback – 28 for strong hitboxes, 19 for weak hitboxes
Knockback gain – 5A for strong hitboxes, 64 for weak hitboxes
Weight Knockback - 0
Hitbox comes out at frame - 7
First IASA Frame – N/A
Direction – All 361
Total frames - 43
Miscellaneous – Strange how the auto-cancel window is specified at frame 63 even though the attack is over before that. Sakurai Failed.
Hitbox duration - 20
Landing Lag - 30
Tripping rate(If any) –
Hitlag multiplier – x1
SDI potential – x1
Auto Cancel Window – N/A
Down Air
Base Damage:
1st kick 6
2nd kick 5
3rd kick 5
Last kick 12
Base Knockback –
1st kick 0
2nd kick 0
3rd kick 0
Last kick 32
Knockback gain –
1st kick 64
2nd kick 64
3rd kick 64
Last kick 6E
Weight Knockback –
1st kick 32
2nd kick 3C
3rd kick 50
Last kick 0
Hitbox comes out at frame –
1st kick 3
2nd kick 14
3rd kick 25
Last kick 36
First IASA Frame – N/A
Direction –
1st kick 266/80/80
2nd kick 266/80/80
3rd kick 266/80/80
Last kick 361
Total frames - 60
Miscellaneous - This can't be Auto-cancelled due to a programming oversight.
Hitbox duration – All kicks 2
Landing Lag - 30
Tripping rate(If any) – 0
Hitlag multiplier –All x1
SDI potential – All x1
Auto-Cancel Window – Frame 63
Up Air
Base Damage: - 14 for strong hitboxes, 10 for soft hitboxes
Base Knockback – 28 for strong hitboxes, 10 for soft hitboxes
Knockback gain – 5f for strong hitboxes, 64 for soft hitboxes
Weight Knockback – All 0
Hitbox comes out at frame - 10
First IASA Frame – N/A
Direction – 80 for strong hitboxes , 70 for soft hitboxes
Total frames - 48
Miscellaneous -
Hitbox duration -14 for strong hitboxes, 11 for soft hitboxes
Landing Lag - 22
Tripping rate(If any) – 0%
Hitlag multiplier – x1
SDI potential – x1
Auto-Cancel Window – Frame 36
Specials
Neutral B - Grenade
Pulls Pin at 10
Duration
Finishes Pin Pulling animation at 24
Duration of throws
Close Grenade Throw - 26
Normal Grenade throw - 28
Far Grenade Throw - 32
Forward B - Nikita Missile
Missile Comes out at - 43
Launching Nikita - 48 frames
Canceling Nikita - 34 frames
Base Damage: - 7(Weak Missile)/14(Strong Missile)
Base Knockback – 2D(Weak Missile)/4B(Strong Missile)
Knockback gain – 5A(Weak Missile)/46(Strong Missile)
Weight Knockback– Both 0
Hitbox comes out at frame – When the Missile makes contact.
First IASA Frame – N/A
Direction – Both 50
Total frames - Variable
Miscellaneous – There isn’t any specification in PSA stating how long the hitbox lasts.
Hitbox duration – See above.
Tripping rate(If any) – Both 0
Hitlag multiplier – Both x1
SDI potential – Both x1
Down B - C4 Plant
On the ground - 44
In the air - 33
Ground Sticky 32
Air Sticky 33
Click Sound at frame 22 on ground
Click Sound at Frame 12 in the air
C4 comes out at frame 15 in the air
C4 comes out at frame 9 for air sticky
C4 comes out at frame 21 on the ground
C4 comes out at frame 11 for ground sticky
Down B - C4 Detonate
Base Damage: - 17
Base Knockback – 28
Knockback gain – 5A
Weight Knockback - 0
Hitbox comes out at frame - 29
First IASA Frame – 40
Direction – 80
Total frames - 45
Miscellaneous –
Hitbox duration - 3
Landing Lag – N/A
Tripping rate(If any) – 0
Hitlag multiplier – x1
SDI potential – x1
Up B - Cypher
Pulls out Cypher at frame 4
Becomes a projectile at frame - 110
Base Damage: - 6
Base Knockback – 0
Knockback gain – 64
Weight Knockback– 5A
Hitbox comes out at frame - 29
First IASA Frame – 47
Direction – 361(the tripping angle)
Total frames - 119
Miscellaneous – The cypher appears to be an active hitbox until it explodes or disappears.
Hitbox duration – See above.
Landing Lag – No change. Just a different sound effect when landing.
Tripping rate(If any) – 0
Hitlag multiplier – x1
SDI potential – x1
Defensive
Shield Related
Shield
1 Frame to Powershield
7 Frames to Drop shield
Forward Roll
Invincibility Frames begin at frame - 4
Duration – 14
Total Frames - 36
Note: Will make you face backwards.
Back Roll
Invincibility Frames begin at frame - 4
Duration - 16
Total Frames - 34
Spotdodge
Invincibility Frames begin at frame 2
Duration – 19
Total Frames – 26
Airdodge
Invincibility Frames begin at frame - 4
Duration - 26
Total Frames - 40
Teching and Ground Options
Tech
Invincibility Frames begin at frame - 1
Duration - 20
Total Frames - 27
Getup
Forward Tech Roll
Invincibility Frames begin at frame - 1
Duration - 20
Total Frames – 41
Back Tech Roll
Invincibility Frames begin at frame - 1
Duration - 20
Total Frames - 41
Wall Tech
Invincibility Frames begin at frame - 1
Duration - 19
Total Frames - 27
Note: Wall Jumping does NOT provide invincibility frames.
Ceiling Tech
Invincibility Frames begin at frame - 1
Duration - 20
Total Frames – 27
Get Up
Invincibility Frames begin at frame - 1
Duration - 19
Get Up Front Roll
Invincibility Frames begin at frame - 1
Duration – 19
Get Up Back Roll
Invincibility Frames begin at frame - 1
Duration - 19
Getup Attack <100%
Invincibility Frames begin at frame - 1
Duration - 21
Bone – Pivot Point
Base Damage: - All 6
Base Knockback – All 50
Knockback gain – All 32
Weight Knockback – All 0
Hitbox comes out at frame – 15/19
First IASA Frame – N/A
Direction – All 169
Total frames - 50
Miscellaneous – Hits on the back first, then the front.
Hitbox duration – All 3
Tripping rate(If any) – 0%
Hitlag multiplier – x1
SDI potential – x1
Getup Attack >100%
Invincibility Frames begin at frame - 1
Duration - 26
Bone – Pivot Point
Base Damage: - All 6
Base Knockback – All 50
Knockback gain – All 32
Weight Knockback – All 0
Hitbox comes out at frame – 16/26
First IASA Frame – N/A
Direction – All 361
Total frames - 50
Miscellaneous – Snake hits the front first, then the back.
Hitbox duration – 2/1
Landing Lag - 30
Tripping rate(If any) –
Hitlag multiplier – x1
SDI potential – x1
Ledge Options
Ledge Getup
Ledge Roll <100%
Invincibility Frames begin at frame - 1
Duration – 27
Total Frames – 50
Ledge Roll >100%
Invincibility Frames begin at frame - 1
Duration - 56
Total Frames – 80
Ledge Jump <100%
Invincibility Frames begin at frame - 1
Duration – 16
Total Frames – 45
Ledge Jump >100%
Invincibility Frames begin at frame - 1
Duration – 19
Total Frames – 51
Ledge Attack <100%
Invincibility Frames begin at frame - 1
Duration - 21
Bone – Pivot Point
Base Damage: - 8/6
Base Knockback – All 0
Knockback gain – All 64
Weight Knockback– 6E
Hitbox comes out at frame – All 24
First IASA Frame – N/A
Direction – All 361
Total frames - 56
Hitbox duration – All 3
Tripping rate(If any) – 0%
Hitlag multiplier – x1
SDI potential – x1
Ledge Attack >100%
Invincibility Frames begin at frame - 1
Duration - 43
Bone – Pivot Point
Base Damage: - 10/9/8
Base Knockback – All 0
Knockback gain – All 64
Weight Knockback – All 6E
Hitbox comes out at frame – All 41
First IASA Frame – N/A
Direction – All 361
Total frames - 70
Hitbox duration – All 3
Tripping rate(If any) – 0%
Hitlag multiplier – x1
SDI potential – x1
Other
Grabs and Throws
Grab
Grab hitbox appears at – Frame - 8
Duration - 2
Total Frames - 30
Dash Grab
Grab hitbox appears at – Frame - 11
Duration – 2
Total Frames – 40
Pivot Grab
Grab hitbox appears at – Frame - 9
Duration – 2
Total Frames – 30
Grab Attack (Pummel)
Base Damage: - 2
Base Knockback – 0
Knockback gain – 64
Weight Knockback - 28
Hitbox comes out at frame -
First IASA Frame – N/A
Direction – 361
Total frames - Depends on your opponent.
Miscellaneous – Lighter characters = faster choking.
Hitbox duration - 1
Landing Lag – N/A
Tripping rate(If any) – 0
Hitlag multiplier – x1
SDI potential – x1
Forward Throw
Base Damage - 9
Direction - 40
Base Knockback – 3C
Knockback Gain – 41
Total Frames – Varies by Victim
Miscellaneous –
Back Throw
Base Damage - 9
Direction - 40
Base Knockback - 41
Knockback Gain – 41
Total Frames – Varies by victim
Miscellaneous – Will make you change direction.
Down Throw
Base Damage - 12
Direction -270
Base Knockback – 4B
Knockback Gain – 1E
Total Frames – 60
Miscellaneous – The opponent is free at Frame 59.
Up Throw
Base Damage - 10
Direction – 90
Base Knockback - 44
Knockback Gain – 3C
Total Frames – Varies by victim
Miscellaneous –
Movement
Dash
15 until first step
Skid
Total frames 24
First IASA frame at frame 13
Crouch
IASA Frame at frame 3
Total Frames 8
Exit Crouch
First IASA Frame 3
Total Frames 10
Jump
Total Frames 11
Etc.
Item Throw (Front)
Total frames - 21
Item Throw (Back)
Total Frames – 23
Will reverse direction.
Item Throw (Down)
Total Frames – 24
Item Throw (Up)
Total Frames – 24
Item Throw (Dash)
Total Frames – 36
Trip Related
Trip (Standing)
Invincibility Frames begin at frame - 1
Duration - 5
Total Frames – 30
Trip (Run)
Invincibility Frames begin at frame - 1
Duration - 7
Total Frames – 46
Trip (Down)
Invincibility Frames begin at frame - 1
Duration – 5
Total Frames – 40
Trip (Turn)
Invincibility Frames begin at frame - 1
Duration - 6
Total Frames – 36
Trip (Get Up)
Invincibility Frames begin at frame - 1
Duration - 16
Total Frames – 22
Trip (Get Up Forward Roll)
Invincibility Frames begin at frame - 1
Duration - 9
Total Frames – 29
Trip (Get Up Back Roll)
Invincibility Frames begin at frame - 1
Duration - 9
Total Frames – 29
Trip (Get Up Attack)
Invincibility Frames begin at frame - 1
Duration - 6
Base Damage: - All 5
Base Knockback – All 3C
Knockback gain – All 32
Weight Knockback – All 0
Hitbox comes out at frame – First 4 hits 17, and the next 4 hits, 23.
First IASA Frame – N/A
Direction – 361
Total frames - 50
Hitbox duration – All 2
Tripping rate(If any) – 0%
Hitlag multiplier – x1
SDI potential – x1
Box Taunt
Up taunt
Entry – 40
Side Taunt
Entry – 54
Down Taunt
Entry – 45
Exiting the box
Total Frames - 85 frames
The box is a hitbox at frame 66
Duration – lasts until it disappears at frame 91.
POST THREE
Advanced Techniques
In this chapter you will learn about all of Snake's known advanced tactics, the names, how to perform - with video if able, the uses, and any other information that is needed to be known. It is seperated into two groups. Global are advanced techniques that every character in the game may perform. Snake specific are techniques that only Snake may perform - or other characters in very specific scenarios.
Each advanced technique is organized in the following manner:
- How to Perform
- A "How To" or demostrational video if one exists
- Description of AT if no video exists
Global
DACUS - Dash Attack Cancelled Up Smash
DACIT - Dash Attack Cancelled Item Throw
Input a Dash Attack, during the early IASA frames input a directional throw while holding an item.
RCIT - Roll Cancelled Item Throw (Glide Toss)
Shield, input a roll and quickly input a directional throw while holding an item. Timing may change distance.
JCIT - Jump Cancelled Item Throw
Input a Jump and before leaving ground input a directional throw while holding an item.
Demostration Video
ADCIT - Air Dodge Cancelled Item Throw
Input an Air Dodge and quickly input a directional throw while holding an item.
Wavebounce
Input any Special Attack except Up-B and immediately hit the analog stick towards Snake's bac.
Demostration Video
B-Reverse
Platform Cancel
Dash Attack Canceled Grab (Boost Grab)
Input a Dash Attack and during the early IASA frames input a grab. You can also input a pivot grab to perform a boosted pivot grab.
Demostration Video
SJR - Second Jump Recovery
Snake Specific
0 Lag Landing
While holding a grenade when airborne, hold the shield button when you are about to land.
Platform Grenade Drop
While airborne hold down shield, be above a platform and just before you land on the platform press down.
Demostration Video
SMN - Stale Move Negation
Grenade Strip
POST FOUR
Character Matchups
The character matchups here contain both the Snake Board's most recent discussion as well as the opposing boards' most recent discussion.
These matchups may be outdated, but I am merely presenting and displaying the data and currently have no plans for writing my own matchup summaries for every matchup.
If such summaries are asked for by a majority of the forum, I may change my mind.
They are organized by the BBR's most recent Tier List.
Each character is organized in the following manner:
- Snake Boards' summary of matchup, with a link; [Collapsed]
- Opposing Boards' summary of matchup, with a link; [Collapsed]
- Down Throw Data [Collapsed]
- Jab Data (if our Jab connects properly click here for more info)
- Grab Releases (if applicable)
Meta Knight
Snake Summary:
Opponent Summary:
Down Throw Data:
Attack: Towards - Away
Roll away: Short
Roll towards: Medium Distance
Dthrow > Buffered Jab will work on this character only if they do not
input a get up attack or a roll
Jab Data:
Cannot powershield jab.
Grab Releases:
Air - Dash Attack
Air - Boost Grab (Trades hits)
Diddy Kong
Snake Summary:
Opponent Summary:
Down Throw Data:
Attack: Towards - Away
Roll away: Mid
Roll towards: Medium Distance
Jab Data:
Cannot powershield jab.
Grab Releases:
N/A
Falco
Snake Summary:
Opponent Summary:
Down Throw Data:
Attack: Away - Towards
Roll away: Far
Roll towards: Medium Distance
Jab Data:
Can powershield jab.
Grab Releases:
Air - Dash Attack
Air - Boost Grab
Wario
Snake Summary:
Opponent Summary:
Down Throw Data:
Attack: Away - Towards
Roll away: Mid
Roll towards: Medium Distance
Dthrow > Buffered Jab will work on this character only if they do not
input a get up attack or a roll
Jab Data:
Can shield jab if DI-ing away from Snake.
Grab Releases:
Air - Neutral Air
Air - Up Tilt
Air - Back Air
Air - Up Air
Air - C4 (stick)
Marth
Snake Summary:
Opponent Summary:
Down Throw Data:
Attack: Towards - Away
Roll away: Far
Roll towards: Long Distance
Jab Data:
Can shield jab if DI-ing away from Snake.
Grab Releases:
N/A
Ice Climbers
Snake Summary:
Opponent Summary:
Down Throw Data:
Attack: Towards - Away
Roll away: Short
Roll towards: Shortest Distance
Jab Data:
Cannot powershield jab.
Grab Releases:
N/A
Olimar
Snake Summary:
Opponent Summary:
Down Throw Data:
Attack: Towards - Away
Roll away: Short
Roll towards: Shortest Distance
Jab Data:
Is not hit by complete jab.
Grab Releases:
N/A
Pikachu
Snake Summary:
Opponent Summary:
Down Throw Data:
Attack: Towards - Away
Roll away: Mid
Roll towards: Medium Distance
Jab Data:
Can powershield jab.
Grab Releases:
N/A
King Dedede
Snake Summary:
Opponent Summary:
Down Throw Data:
Attack: Away - Towards
Roll away: Mid
Roll towards: Long Distance
Dthrow > Buffered Jab will work on this character only if they do not input a get up attack or a roll
Jab Data:
Cannot powershield jab.
Grab Releases:
N/A
Mr. Game & Watch
Snake Summary:
Opponent Summary:
Down Throw Data:
Attack: Away - Towards
Roll away: Mid
Roll towards: Shortest Distance
Dthrow > Buffered Jab will work on this character only if they do not input a get up attack or a roll
Jab Data:
Cannot powershield jab.
Grab Releases:
N/A
Lucario
Snake Summary:
Opponent Summary:
Down Throw Data:
Attack: Towards - Away
Roll away: Far
Roll towards: Medium Distance
Jab Data:
Can shield jab if DI-ing away from Snake.
Grab Releases:
N/A
Zero Suit Samus
Snake Summary:
Opponent Summary:
Down Throw Data:
Attack: Towards - Away
Roll away: Far
Roll towards: Medium Distance
Jab Data:
Cannot powershield jab.
Grab Releases:
N/A
Toon Link
Snake Summary:
Opponent Summary:
Down Throw Data:
Attack: Away - Towards
Roll away: Short
Roll towards: Shortest Distance
Jab Data:
Can powershield jab.
Grab Releases:
N/A
Kirby
Snake Summary:
Opponent Summary:
Down Throw Data:
Attack: Towards - Away
Roll away: Short
Roll towards: Shortest Distance
Dthrow > Buffered Jab will work on this character only if they do not input a get up attack or a roll
Jab Data:
Cannot powershield jab.
Grab Releases:
N/A
Fox
Snake Summary:
Opponent Summary:
Down Throw Data:
Attack: Away - Towards
Roll away: Mid
Roll towards: Medium Distance
Jab Data:
Can powershield jab.
Grab Releases:
N/A
R.O.B.
Snake Summary:
Opponent Summary:
Down Throw Data:
Attack: Both Sides
Roll away: Mid
Roll towards: Shortest Distance
Dthrow > Buffered Jab will work on this character only if they do not input a get up attack or a roll
Jab Data:
Cannot powershield jab.
Grab Releases:
N/A
Pit
Snake Summary:
Opponent Summary:
Down Throw Data:
Attack: Towards - Away
Roll away: Short
Roll towards: Shortest Distance
Jab Data:
Cannot powershield jab.
Grab Releases:
N/A
Peach
Snake Summary:
Opponent Summary:
Down Throw Data:
Attack: Towards - Away
Roll away: Mid
Roll towards: Medium Distance
Jab Data:
Cannot powershield jab.
Grab Releases:
N/A
Donkey Kong
Snake Summary:
Opponent Summary:
Down Throw Data:
Attack: Towards-Away
Roll away: Mid
Roll towards: Medium Distance
Dthrow > Buffered Jab will work on this character only if they do not input a get up attack or a roll
Jab Data:
Can powershield jab.
Grab Releases:
N/A
Luigi
Snake Summary:
Opponent Summary:
Down Throw Data:
Attack: Towards - Away
Roll away: Mid
Roll towards: Medium Distance
Jab Data:
Can powershield jab.
Grab Releases:
N/A
Wolf
Snake Summary:
Opponent Summary:
Down Throw Data:
Attack: Away - Towards
Roll away: Far
Roll towards: Long Distance
Dthrow > Buffered Jab will work on this character only if they do not input a get up attack or a roll
Jab Data:
Cannot powershield jab.
Grab Releases:
Air - DACUS
Sonic
Snake Summary:
Opponent Summary:
Down Throw Data:
Attack: Away - Towards
Roll away: Mid
Roll towards: Medium Distance
Jab Data:
Can powershield jab.
Grab Releases:
N/A
Ike
Snake Summary:
Opponent Summary:
Down Throw Data:
Attack: Towards - Away
Roll away: Far
Roll towards: Long Distance
Dthrow > Buffered Jab will work on this character only if they do not input a get up attack or a roll
Jab Data:
Can shield jab if DI-ing away from Snake.
Grab Releases:
N/A
Sheik :shiek:
Snake Summary:
Opponent Summary:
Down Throw Data:
Attack: Away - Towards
Roll away: Mid
Roll towards: Medium Distance
Jab Data:
Can shield jab if DI-ing away from Snake.
Grab Releases:
Air - DACUS
Air - Boost Grab
Ness
Snake Summary:
Opponent Summary:
Down Throw Data:
Attack: Towards - Away
Roll away: Mid
Roll towards: Medium Distance
Jab Data:
Is not hit by complete jab.
Grab Releases:
Ground - Jab
Ground - Forward Tilt
Ground - Down Tilt
Ground - Up Tilt
Ground - Regrab (if close break)
Pokémon Trainer
Squirtle
Snake Summary:
Opponent Summary:
Down Throw Data:
Attack: Away - Towards (Move back to avoid getting hit by
away hit)
Roll away: Short
Roll towards: Shortest Distance
Jab Data:
Is not hit by complete jab.
Grab Releases:
Air - Dash Attack
Air - Boost Grab
Ivysaur
Snake Summary:
Opponent Summary:
Down Throw Data:
Attack: Away - Towards
Roll away: Far
Roll towards: Medium Distance
Dthrow > Buffered Jab will work on this character only if they do not input a get up attack or a roll
Jab Data:
Cannot powershield jab.
Grab Releases:
N/A
Charizard
Snake Summary:
Opponent Summary:
Down Throw Data:
Attack: Towards - Away
Roll away: Short
Roll towards: Troll Roll
Dthrow > Buffered Jab will work on this character only if they do not input a get up attack or a roll
Jab Data:
Can shield jab if DI-ing away from Snake.
Grab Releases:
N/A
Yoshi
Snake Summary:
Opponent Summary:
Down Throw Data:
Attack: Away - Towards (Move back to avoid getting hit by
away hit)
Roll away: Mid
Roll towards: Medium Distance
Jab Data:
Cannot powershield jab.
Grab Releases:
N/A
Lucas
Snake Summary:
Opponent Summary:
Down Throw Data:
Attack: Towards - Away
Roll away: Mid
Roll towards: Medium Distance
Jab Data:
Is not hit by complete jab.
Grab Releases:
Ground - Jab
Ground - Forward Tilt
Ground - Down Tilt
Ground - Up Tilt
Mario
Snake Summary:
Opponent Summary:
Down Throw Data:
Attack: Towards - Away
Roll away: Mid
Roll towards: Medium Distance
Jab Data:
Can shield jab if DI-ing away from Snake.
Grab Releases:
N/A
Bowser
Snake Summary:
Opponent Summary:
Down Throw Data:
Attack: Towards - Away
Roll away: Mid
Roll towards: Medium Distance
Dthrow > Buffered Jab will work on this character only if they do not input a get up attack or a roll
Jab Data:
Can powershield jab.
Grab Releases:
N/A
Captain Falcon
Snake Summary:
Opponent Summary:
Down Throw Data:
Attack: Both Sides
Roll away: Mid
Roll towards: Long Distance
Jab Data:
Cannot powershield jab.
Grab Releases:
Dash Attack
Samus
Snake Summary:
Opponent Summary:
Down Throw Data:
Attack: Both Sides
Roll away: Mid
Roll towards: Medium Distance
Can crouch to avoid getup attack.
Jab Data:
Cannot powershield jab.
Grab Releases:
N/A
Jigglypuff
Snake Summary:
Opponent Summary:
Down Throw Data:
Attack: Towards - Away
Roll away: Short
Roll towards: Shortest Distance
Dthrow > Buffered Jab will work on this character only if they do not input a get up attack or a roll
Jab Data:
Cannot powershield jab.
Grab Releases:
N/A
Link
Snake Summary:
Opponent Summary:
Down Throw Data:
Attack: Away - Towards
Roll away: Far
Roll towards: Medium Distance
Dthrow > Buffered Jab will work on this character only if they do not input a get up attack or a roll
Jab Data:
Can shield jab if DI-ing away from Snake.
Grab Releases:
N/A
Zelda
Snake Summary:
Opponent Summary:
Down Throw Data:
Attack: Towards - Away
Roll away: Far
Roll towards: Long Distance
Jab Data:
Can shield jab if DI-ing away from Snake.
Grab Releases:
Ganondorf
Snake Summary:
Opponent Summary:
Down Throw Data:
Attack: Both Sides
Roll away: Far
Roll towards: Long Distance
Can crouch to avoid getup attack.
Jab Data:
Cannot powershield jab.
Grab Releases:
Air - Dash Attack
Air - Boost Grab
POST FIVE
Stage Discussions
The stage discussions will be taken from our most recent stage discussion thread and so will not cover every stage.
I may or may not write a summary for every stage like I did for Rainbow Cruise, this will depend on community want and my ability to do so.
They are organized by the BBR's most recent Rule Set. Banned stages are not presented.
I may or may not write a summary for every stage like I did for Rainbow Cruise, this will depend on community want and my ability to do so.
They are organized by the BBR's most recent Rule Set. Banned stages are not presented.
Each stage is organized in the following manner:
- Picture of Stage
- Summary of Gameplay; [collapsed] if personal summary exists
- Personal summary of stage, if one exists; [collapsed]
Battlefield
Yoshi's Island (Brawl)
Overall this stage is a great neutral for Snake.
- Tilting of stage is perfect for grenades.
- Tilting of stage at certain parts = messing w/ Peach's Float, Falco's lasers/Phantasm, plankers.
- This maybe a small stage but camping is still possible here.
- Vertical Death Boundaries are very close, which means easy Bair, Fthrow, and Ftilt kills.
- Nades can be bouced off of Shy Guys.
- Don't land w/ aerials on the platforms (obvious)
- Nades slide off of the both sides of the stage. (Cook nades let them slide off and use them for Edge Guarding)
- Thunderstorming does not work here (SH D-air laglessly), such as Ganon or Pikachu.
- With the use of D-smash, C4, and Nades the long platform in the middle is a sort of "barrier".
- U-air, B-air, N-air and U-tilt are great for Platform Pressuring.
- Long platform allows for easier approach (for Snake), if ever need. Such as against Mario.
- Try not to stay on the long platform for very long, this lead to juggeling etc.
- Stay grounded.
- Hard toss most Nades that are thrown out , otherwise they'll end up getting stuck on the platform.
- On this stage like most other small stage, such as SV or BF, cooking your nades will help you camp, and avoid CQC. (not that Snake's bad @ CQC or anything)
- At high percents do not tech the walls. (It'll help Snake recover.)
- Place Mines or C4 towards the tips of the platforms.
- Place Mines/C4s on the portion of the stage that slightly tilts inward. This will help w/ Edguarding and aid in stopping appraoches.
- Also, for edge guarding place Mine/C4s on the very tips of the stage , which points outward.
Smashville
Lylat Cruise
Pokémon Stadium 1
- Snake doesn't do to well with the multiple transformations.
- The Dead Tree poration is pratty bad, because of the wall the tree creates (infinite CG, semi-locks, etc.).
- Some of the transformations have semi-locks.
- The Water stage's Windmill is a lot of trouble for Snake; he can easily get juggled there, and easily die there. Stay away from the windmill at death percents.
- Rock stage is pretty bad for Snake; Snake can't really "camp" here....and the other player will not appraoche you if you stand in the middle or the far right.
- The foreat portions is probably the best for snake it has 3 platforms the help snake get kills.
- Snake has trouble w/ character that can easily juggles him, and characters that have good mobilty
- Lip of stage (C4 can hit people).
- Any platform.
Final Destination
- Amazing for camping.
- No platforms=Stronger ground game needed.
- No platforms also mean a higher possibility of being juggled.
- Snake D.I. Limit is prety high;around 180% to 200% with good D.I./spacing.
- Big "Lip" to **** our recovery or help it if you tech the stage after C4-ing your self.
- DACUS/DA/U-Smash are perfect for this stage!
- Stay away from the edges unless your edge-guarding.
- Control the dead center of the stage.
- And that's it, this stage is pretty straight forward, other things having to do with stage will come with experience.
C4/Mine placement:
Any where
Castle Siege
1st part of the stage is small, you can get really early kills here.
1st phase: The lips can ruin a lot of recoveries, use that to your advantage against those chars. C4 is fairly difficult to see, as nades can be. The slant lets nades drop down, so you can be tricky with that. fairly low ceiling allows for early utilt KOs if you can rack up damage fast enough or if you get back to the phase with opponent at high %. The slant allows you to dodge some projectiles easier.
1st part : It's good for Snake although it's too small but it's
good for grenades. You can let the grenade slide to the slant
part. You can put C4 (Down launch) on top of a platform.
It's a great advantage against big targets and characters
like Donkey Kong, Ganondorf, Bowser. Snake's up tilt
is also good for this. When an enemy is on top of the
top of the platform, use the up tilt. But Snake can be knocked off
the stage easily because it's small. (Despite him being heavy
but at some percent maybe 50% or above.) Avoid using
Snake's recovery in this part.
2nd part of the stage, if you can grab them near the edges, dthrow tech chasing is really easy. They'll almost always roll away from the walk-off. Camping here is somewhat more difficult though, as the statues stop your grenades.
2nd phase: Great part to be sneaky with C4. Plant it while your opponent is distracted OR in between the transition and let it fall and figure out where it is to bait your opponent into it. The pillar things are good and bad depending on the matchup. It helps against Diddy to stop bananas, but stops your camping game too. If you're playing DDD or low % vs Falco, don't be stupid and stay off the ground floor or free stock for opponent. The ceiling from the ground is REALLY high so don't waste an attempted utilt KO that you aren't sure will KO unless on a platform. As said, tech chasing is easier on this phase if you're on the ground. As said, most opponents will roll away from the blast zone when grabbed near there for fear of easy ftilt KO. If not they may just get up attack, so be prepared and punish. Your opponent may try to KO you in a similar way here too, so be careful when close to the blast zone. Don't get out smarted. Definitely the most gimmicky phase.
3rd part of the stage is a lot like FD. Just play like you would on FD, and watch the stage's tilt when recovering.
3rd part: This is a good place for Snake too. Grenade stripping
here is the best thing to do. It will roll though the
ground (Best if cooked). Put C4s here is great especially
at the time when the stage is slanting. The
best place to put it is that the tip of the stage.
Use grenade stripping to make it explode but it's
useless against people with controlled
projectiles or stuff.
Overall: It's a good stage for Snake but don't think
that you will win for sure and you have the upper
hand or something. Your battling someone who's
better than you, you're dead or not.
Delfino Plaza
Halberd
Frigate Orpheon
Brinstar
Pictochat
Rainbow Cruise
Snake Board's Discussion:
- The Ship:
- Considered the worst portion of RC.
- Difficult to Tech Chase
- Difficult to use Mines/C4, like on normal stages.
- The wall is the last place you want to get caught.
- Most of Snake's normal game play is "weakened" here.
- Small area, which allows Snake to have good stage control.
- DACUS straight into the wall cause you Mortar to blow up on the wall.
- The Accent:
- This portion is also another difficult for Snake there is a lot to adapt to.
- C4s and Mines work great here.
- Stay away from left when going up, it's pretty much a walk off.
- ***remember you cannot fall through all platforms.
- Also, learn to adapt to the accent as you fight your opponent, this will come with practice.
- The pendulum:
- ***Remember you can fall through it.
- It's best to control the Falling Blocks.
- Side Scrolling:
- Best portion of the stage for Snake.
- Use mines, U-tilt, and C4 here these moves will kill extremely early here due to the LOW ceiling.
- Adapt to the moving stage
- This is a lot better than the ship, so using all of Snake's moves here will be a lot better.
C4/Mine placement:
- The Ship:
- The 2 small platforms.
- Towards the back of the ship.
- The Accent:
- Pretty much anywhere.
- The Side Scrolling:
- Platforms
SuSa's Discussion:
Please use and study this picture quite a bit.
Much of what I say also applies to the cast as a whole, so if someone from another forum stumbles upon this - feel free to share it. I care more about advancing the metagame than advancing my character.
Let's begin.
Know the Stage
Okay, so that's our stage. You start off on A and go around alphabetically until you reach D, which you then go back down to A. I'm sure most everyone here knows this, but learn this stage. You will need to know about when platforms start appearing, when they dissapear, etc. Knowing how long platforms stick around or when they come around is a vital step to knowing this stage.
If you know a platform will be showing up on your right after part C, transititiong into part D - you can jump into "thin air" to have the platform come into existance and save you. This can be a lifesaver.
So get to know the stage.
Part A - I'm on a Boat mother ****er
Part A of Rainbow Cruise has you on a boat. Due to me not wanting to teach everyone terminology, the left side is the "front". The right side is the "back". Then there is the 'mess hall' which is the part just in front of the back that goes down into the imaginary living quarters. Then we have the sail platforms? Got it? Good.
Things to know:
- 1) Avoid the mess hall in certain matchups. Corners are bad, and DDD can infinite you on this side. MK can also DTILT you to death, along with DK and other characters with similar wall-dtilt-locks.
- The sides aren't very big, if you're facing a horizontal killer stay near the center of the boat.
- Utilt won't kill right when this part starts. You see that to the top right? Yah, people can bounce off that and live. Don't go for a utilt right when you reach this transition from Part D.
- Abuse the only 2 platforms. You can place a C4 on the bottom platform and camp all day with nades near the mess hall.
- Bthrow against the mess hall is usually a better option than dthrow, because you can go for that fsmash. Most people don't tech, because they expect the dthrow.
- There isn't much Snake can abuse on this, other than complete stage control - which we have on most stages. Just play keep away with your opponent.
- If your opponent is on the back end, FH nairs can keep them over there and score some low-mid % KO's.
- Near the transition to Part B the front end of the boat goes down. Try not to get hit underneath that, as you'll likely die. Also avoid getting stage spiked there.
Summary:
Play keepaway
Part B - Snake learns to Fly
Part B of Rainbow Cruise has you jumping up platforms with some magic carpets in the way, and one of the platform teeters. The goal here is to stay above your opponent and rain an arsenal of grenades and C4 on them to keep them below you. Odd enough that this is probably the one time in this game you want your opponent below you as Snake.
You can abuse the instant-grab with Grenades on this part of the stage, and I'm willing to bet we can platform cancel on every single one of these platforms to speed up your movement. So practice that platform cancelling until you perfect it.
Things to Know:
- This scrolls up, so being down is bad. Keep your opponent below you.
- You can tech off the yellow blocks if you get hit at them, try to DI towards those and tech if able.
- You cannot drop through magic carpets (IIRC), so avoid them. They are bad, you will want to be able to drop down if able to. Don't limit your mobility!
- Likewise, if your opponent is on a carpet - an attack from below may own them as they try to drop through dair you.
- Before the full transition to Part C, you can tech off the yellow blocks with the pendulam. DI towards those and tech if you can.
- Be the first onto the pendulam. This is important.
Summary:
Stay above your opponent, spam grenades and C4 like you never have before.
Part C - The Pendulam
This part is one of the funnest, but shortest parts, if you know what you are doing. Luckily gimping Snake is a lot harder on this part than people think, due to being able to tech off the yellow blocks. The Pendulam can really screw you and your opponents up when trying to recover, so unless you are 100% sure you are going to land on it, blow yourself up with C4. Trust me, I've SD'd a few times thinking I was going to land on it and I ended up dying. It's not something you want to happen in tourney. Also, don't miss your techs on those yellow blocks if you do C4. You'll like bounce straight to your death.
Things to Know:
- You can drop grenades/c4/mines onto yellow blocks, and the yellow block with fall. This will place the above on the swinging pendulam. Sound awesome? It is. But it's hard to abuse.
- You cannot drop through the pendulam (IIRC), so don't try it. Stay near the part where you can best DI towards the yellow blocks to tech. This is usually just whatever is the closest part, so standing on the left edge when it's swinging to the right isn't a bad thing.
- The platforms on your left are still there for a while, if you get knocked over there during the early parts of this transition - you can land on those platforms really fast to help you recover.
- The platforms on the right appear after a certain amount of time, learn this time so you can stay over there if knocked over there. This can be a lifesaver.
- This is one of the best times to try and get a utilt KO. You can get a stage-like spike hitting them off the yellow blocks, and the cieling is low enough to get some earlier KO's than usual.
- If you read the above, you may have gathered that grenades/c4 can also be a great KO power here due to the 'stage spike' off the yellow blocks.
- Avoid using any aerials unless you know you'll be safe.
- You can bounce grenades off the pendulam by throwing them down.
Summary:
Stay close to the blocks, abuse how the pendulam swings and how it can allow this blocks to 'stage spike'. Try to minimize your aerial usage, but make sure to abuse enemies recoveries when the pendulam is far and you are able to.
Part D - The road to victory
There is so many platforms and places to abuse on this transition, it's easily my favorite part. You can score low % utilt ko's, the horizontal edges depend on where you are - and sometimes you can score a low % ftilt KO, and the platforms allow for some fsmash shenanigans. Against DDD/Pikachu/Falco however, this transition can be one of the scariest due to chaingrabs - however we gain a stronger grab release on most of the cast when facing left.
Things to Know:
- When facing left, if you grab an opponent - the stage movement effects how they break out. This allows us to walk a little and Utilt Meta Knight and a few other characters. We can even grab release chaingrab MK (99% sure) which can be useful for getting him close to the wall for an fthrow KO.
- There is one spot with a wall, if you can get your opponent on this you can pound on them with ftilts and grenades keeping them there and grab release CG them against the wall for some free %'s. Yes, you can grab release CG MK here as well. Abuse that.
- Your Utilt kills quite a bit sooner during this transition, if you're going for a utilt KO try to get it before you get to Part A all over again.
- Fsmash has a hitbox diagnolly and a bit down from it, there's a lot of platforms and against taller characters you can get some fsmash shenanigans in there. It's easier to land than you think.
- Just like Part B - abuse the platforms with platform cancels and instant-nade-grabs. In certain matchups, you'll want to stay on the platforms to avoid being CG'd to your death.
- Keep your opponent on your left side, but try to stay near the center. The blast zone for the stage is uneven that way and you'll score sooner KO's off the left side than the right side.
- During the transition to part A, you can grab release CG people against the wall into a utilt for KO's at about 30-40%. It's very very stupid and I've pulled it off in tournament.
- Be careful of the right side when it's transition to Part A. The blast zone is a lot closer than it should be.
Summary:
Stay on the right side, it's the best side and we gain a lot of grab release shenanigans on the cast. Utilt kills sooner during this phase, so now's the time you'll want to land it. We have infinites against practically the entire cast against the walls - you can abuse this to hell for an early kill if you can land the grab.
A few more stage facts
- There are a lot of uneven platforms and walls that you can rebound grenades off of.
- The stage gimps you more than the enemy does - learn the stage!
- Platform abuse is the best abuse.
- Dthrow is amazing on this stage due to the amount of short length platforms and areas to dthrow. The blast zone also limits certain reactions often, and a good dthrow tech chase can lead in low % ko's or a ton and ton of damage racked.
Summary:
Rainbow Cruise is by far one of my most favorite counterpicks, ever. I actually got to the point that some players including Meta Knight players started to ban it against me.
There is a lot of camping shenanigans and grabbing shenanigans to last a lifetime. Snake can tank pretty well with good DI but kills at really low %'s. He controls the stage at nearly all times, and there are few areas where you can truly gimp him. All of Part A, B, and D are pretty safe if you know what you're doing. Part C is risky but still hard to be gimped during. I love this stage.
:leek:Pokémon Stadium 2
Jungle Japes
Norfair
Green Greens
- Learn to tech on reaction, if you don't your gonna get combo'ed HARD. Also, mix it up, tech tech jumps or don't tech on purpose.
- Getting hit by falling blocks = Spiked
- No matter what control the center of the stage.
- Small vertical death zones = killing earlier, and dieing earlier.
- Lower ceiling = Killing earlier.
- Use nades to blow up explosive blocks this = pressure and getting kills.
- Snake can destroys the blocks with Utilt and Ftilt (for it ftilt depends)
- Side-b is pretty decent here.
- Be careful with DA / DACUS here, this will get you blown up.
- If the blocks have completely made the wall they make, set up explosives and crouches close to them. (if you opponent doesn't have items to throw)
- Wind boxes are great if your in the middle, because they're the ultimate pressure; but if your on the left or right sides of the stage and these are going expect to gain A LOT of damage or maybe even lose a stock.
- Apples these can heal a bit, but more importantly they are great items! If they hit a shield they have a lot of shield stun, and other wise they kill pretty D*** early. Once apples are out...you want to incorporate them w/ your grenades this equals, this is amazing stage control.
- U-smash can do wonders here it'll help you keep pressure on you opponent and help you keep control of the stage.
C4/Mine placement:
- On blocks
- Platforms (this is great for pressure and keeping your opponent at the left/right portions of the stage).
- The Left/right portions of the stage.
- Pretty much anywhere, except for the dead center of the stage (between the two platforms).
Distant Planet
Luigi's Mansion
Pirate Ship
Port Town Aero Dive
Yoshi's Island (Melee)
POST SIX
Misc. Data
This chapter is for all data which did not pertain to another part of this guide.
It is also to display certain data used throughout the guide, that is in relation with eachother, in one place.
It is also to display certain data used throughout the guide, that is in relation with eachother, in one place.
- C4 lasts for approximately 27 seconds. Down Smash lasts for approximately 25 seconds.
- Grab Release Data
- Down Throw Data
- Jab data
- Minimum KO %'s
- Dash Attack hits _____ off Ledge
POST SEVEN
Directory
The final chapter to our guide.
This chapter exists only to point you to current important topics, such as our current matchup discussion/stage discussion, video threads, etc.
This chapter exists only to point you to current important topics, such as our current matchup discussion/stage discussion, video threads, etc.
- Official Snake Video and Critique
- Official Character Matchup Database
- Official Stage Discussion
- The General Directory
POST EIGHT
Thank You's
I would like to thank the following people for their contributions to the creation of this guide.
The list is in no specific order, and if you feel I have forgotten you - please tell me so I may add you or tell you why I did not feel you should be mentioned.
The list is in no specific order, and if you feel I have forgotten you - please tell me so I may add you or tell you why I did not feel you should be mentioned.
- Every single person who has ever posted in the Snake Boards
Elyssa Xey Hexen
Broken!
- Joined
- Aug 6, 2008
- Messages
- 19,346
LMAO
That would be great. Although with cotton candy grenades I feel it would be like a clown Ekans. Is it possible to take the layout of a food item in place of the grenades texture? I am pretty sure there is a pineapple food item running around.
Edit: Ever since last night I've seen the snake boards pretty much being at 10+ views everytime I look here. Went from the list active to pretty active xD
SuSa
Banned via Administration
"Hm... if we were to make that a texture then we'd have to make some adjustments. The face can be a panda for sure. He can be wearing a sheep outfit on his torso. His nades could look like mints or his mortar could look like a candy cane that shoots gumdrops. His headband could be the Canadian flag. Maybe the nikita could look like thunder while the launcher could look like a storm cloud or something."
I can edit his grenades and nikita, IDK about his launcher however... the sheep outfit will be a pain to texture, and I'll use your avatar as Panda reference. The sheep outfit would also cover his feet. ;o not just his torso....
His headband will be the candian flag, because thats just too epic.
I was thinking Mint Candies (those red/white mints) for grenades... and the nikita may be able to be thunder... but IDK
I'll figure a way to add in Afro.
¯\_S.(ツ).L.I.D._/¯
Smash Legend
Cool.@SOLID
Lol, why not?
Wait, you're making an Ekans texture?SP:
Epic ideas.
When I have the 'base' mostly done, I'll make a topic with a few screenshots and take community suggestions to make:
"The Community Ekans"
My Snake is horrible, most likely because I'm not patient enough and can't stand camping.
Elyssa Xey Hexen
Broken!
- Joined
- Aug 6, 2008
- Messages
- 19,346
I dont' like camping either. I say just get in close enough and battle with the whole stage instead of one spot.My Snake is horrible, most likely because I'm not patient enough and can't stand camping.
Elyssa Xey Hexen
Broken!
- Joined
- Aug 6, 2008
- Messages
- 19,346
I cannot do it right. A fire a couple of grenades that land near them that hurt them and they come running at me. Have to cancel the camping for the time being <_<camping is fun you sillyz
Exia 00
Smash Champion
Camping is fun. I love Ftilting people away lol  <---- For SuSa ^_^
<---- For SuSa ^_^Lawlmahbawls
Smash Journeyman
I only camp vs DDD and Falco, Falco only at low% and when they are laser spammy. <__<; Way too boring of a way to play Snake, gotta be fast with lots of explosions and fun.
I'd also love to see a GAKO/KEROTAN camo for Snake, lulz.
I'd also love to see a GAKO/KEROTAN camo for Snake, lulz.
Exia 00
Smash Champion
Lol. Snake can easily control the flow and pace of the match. I take advantage of that to the best of my ability. Just bore your opponent to death and kill them in their sleep
Black_Heretic
Smash Lord
yours is better XD I like itYes i do, mine looks better
I'm fixing stuff on it though
I wish I could make textures =[
-Ran
Smash Master
Texture work isn't really hard, especially if the base is already in existence. The hardest part of making a texture is the initial composition on the 3d model 'flat' lay out. [ I can't remember the term for the view.] Really, to do what they [brawl textures] are doing only requires a knowledge of Photoshop.
Black_Heretic
Smash Lord
I don't know how to use photoshop =]
Panix
Smash Ace
Guys, I have something to mention.
I did not discover this AT, It was shown to me and I think we should figure it out.
I was messin around in a room with EZ seph and he was showing me all these things he figured out. One in which really caught my eye.
He sheild dropped a gernade. and before he even dropped his shield he picked it up again. It was like a instant drop.
thoughts?
SuSa
Banned via Administration
*face palm*
Can only be done on platforms.
Can only be done on platforms.
-Ran
Smash Master
Sometimes I feel like this is the Pit board. [or what it once was.]
SamuraiPanda
Smash Hero
- Joined
- May 22, 2006
- Messages
- 6,924
I'm starting to jump OOS after pulling a nade and quickly pressing Z to just pick it up as fast as possible. Still working on the timing to get it consistently, though. Maybe these kinds of things are why I'm called a weird Snake?
Anyways, you may not want to use my avatar as representative for a Panda. Use a pic like this instead:

Anyways, you may not want to use my avatar as representative for a Panda. Use a pic like this instead:
SuSa
Banned via Administration
Actually, your avatar was a close enough representative. Ears/Eyes/Nose = Black, everything else = White (for face)I'm starting to jump OOS after pulling a nade and quickly pressing Z to just pick it up as fast as possible. Still working on the timing to get it consistently, though. Maybe these kinds of things are why I'm called a weird Snake?
Anyways, you may not want to use my avatar as representative for a Panda. Use a pic like this instead:
I currently have 1 eye, 1 ear, and part of a face done. Poorly... then comes shading..
I'm doing like 5 pixels at a time, so expect it to be quite a while before we get this texture... Snake is complicated...
xxCANDYxx
Smash Lord
i was thinking about that...but ionoCandy, you should request the bubblegum and cotton candy colors that you have on your controller :D
actually wait...i would want that!!!!!!!!!!!!!!!!!!!!!!!!! thats an excellent idea senior panda!
who wants to make a babyblue/pink snake outfit?????? and make him throw candy??!?!?!?!?! id love your forever....
also i still would want to see a rainbow color snake....iono y but i think that would b also.....som1 should also make that with candy gernades also! :-D
either way...candy gernades is def. 1 of the best texture ideas ive ever heard haha
mofo_
Smash Ace
maybe you can ask eternal yoshi since he made a lot of snake textures
also, if you can change his explosions to pink, that'd be nice
also, if you can change his explosions to pink, that'd be nice