• Welcome to Smashboards, the world's largest Super Smash Brothers community! Over 250,000 Smash Bros. fans from around the world have come to discuss these great games in over 19 million posts!

    You are currently viewing our boards as a visitor. Click here to sign up right now and start on your path in the Smash community!

Remove Metaknight's ability to counterpick non-starter stages

niftybird

Smash Apprentice
Joined
Aug 11, 2010
Messages
75
Location
On a bike!
Seriously. You want a way to:
-keep brawl reasonable without banning RC, Norfair, Brinstar, and any stage MK really loves
-not have ridiculously restrictive stagelists
-Make the bat actually have halfway-even matchups?

This is probably gonna be it.

Now, I'm aware that banning MK will never happen. He's too prominent in the metagame. We've already started nerfing him slightly (LGLs vs. "No unbeatable planking rule"; without LGLs but with a rule against unstoppable planking, MK could just hang out on the ledge all day and wreck the **** out of the spacies, among others-the falco MU would be almost unwinnable for falco), why not go the next step that is necessary?

Nobody wants to ban RC or Brinstar. They're fair, non-random stages that heavily favor aerial combat, and favorites of chars like G&W, Wario, and Kirby. Almost every stagelist has both of these stages. However, with both of them intact, the cliche that MK automatically wins on his counterpick is, sadly, fairly accurate against most characters who do decently against him (Falco, Diddy, Snake, ICs). Can't ban both RC and Brinstar, after all.
But even if you did remove those two from the stagelist, look at what MK still has:

1. Norfair (region-dependent, VERY good for MK in most high tier matchups)
2. PS2 (region-dependent, great for MK in general)
3. GG (region-dependent, I hear it's really great for MK)
4. Frigate (all-around good for MK, and if we ban this stage, then we have officially become SSFB. Seriously, this is like a stereotypical counterpick as much as Brinstar or Japes is, and I personally would put it at "starter")
5. Halberd (yes, I'll shark the platform a lot. And this is a starter!)
6. Delfino (walls, sharking, sometimes starter, almost never banned).


Just look at this ****! No other character has either the same number of stages that they can go to to throw a match off balance, nor the same level of stupidity on those stages. Almost all of these stages are fine with, you know, any other character.

So this is why I propose that on MK's counterpick, he be given an extremely limited list of stages to choose from (think something like the typical 7-stage starter list, where the best stages are Halberd and Lylat, and you can ban Halberd, leaving MK with a mediocre stage at best). It does the following:

1. Nerfs MK in the area people john about him most-his ability to virtually automatically win round 2 (or round 3, provided he wins round 1)
2. Allows for a much more free stage list-you don't have to worry about "Okay, so MK has RC, and then Brinstar, and then Norfair...", but can go ahead and put in stages that MK might throw off balance but are otherwise fine.
3. Makes for more game balance.


Thoughts?
 

DtJ Jungle

Check out my character in #GranblueFantasy
BRoomer
Joined
Jul 29, 2008
Messages
24,020
Location
Grancypher
Introduction
Since Shiz's thread has died down (and he wasn't really still posting there anyway), I've decided to make one up myself as a place for Falco users to ask questions and discuss theory about our beloved blue bird.

For those of you who don't know me, I'm Mogwai, formerly Wesley, and I've been a Falco main since Fall of 2005. I'm not a fantastic player by any means, and if you're under the impression that I'm even in the same league as any of the true Falco greats (PC, Forward, Shiz, Zhu, Eggm, Chops, etc...), just know now that that's not the case. However, I like to think I know a good deal about Falco and the theory behind playing him, and as the Falco boards have been more or less dead since Brawl's release, I think it's time there was a new general advice/help thread and I hope I can prove adequate at maintaining such a thread.


Lesson 1: Counterpicking


For Lesson 1, I'm going to talk about counterpicking and banning stages as Falco. I'll start by talking about my general theories behind how to counterpick and then move on to how I think you should be counterpicking mid-top tier characters.

Section 1: A Little Story about Counterpicking
Around the time Scar was starting to get good at Melee, myself and a couple other Pittsburghers drove across PA to attend a Smashpocalypse tournament that Scar was holding. After scoring a win vs. Swiftbass (my last win vs. him for the record) I was knocked out of losers by Pakman and spent the rest of the day watching Scar play. It was pretty impressive to me that he had transformed from a scrubby Falcon that spammed knee and lost matches to myself to a legitimate contender for the places below M2K and Cactuar at NJ/PA tournies so quickly. Anyway, after Scar won game 1 vs. Ryoko (a very impressive peach player, for those of you who don't know), I stopped watching and went off to play some friendlies. 10 minutes later Scar came up to me.

Scar: I lost to Ryoko...
Me: Really? You looked really good game 1, what happened?
Scar: Well, he gayed me on his counterpick game 2, then I lost game 3.
Me: Well, where did you take him?
Scar: Yoshi's Story.
Me: Why would you do that?
Scar: I dunno, it has short sides, so I figured he'd die earlier...

From here, I explained to Scar that he was looking at counterpicks in very much the wrong way. See, he won game 1 the way a Falcon should win vs. Peach: run around, don't get hit, wait for an opening and combo **** them. He lost game 2 on Final Destination because he had trouble moving away from turnips and got chaingrab *****. The key here is that while one frequently worries about killing Peach, that wasn't his problem. His problem was that he needed space to move to take advantage of Falcon's considerable speed edge. Who cares if Peach dies from a knee at 60% on YS rather than 80%? If you can't move in a way to create the opportunities for said knees, that fact is meaningless.

What I'm trying to get at with this story is that the true art of counterpicking is about analyzing why you lost the last match, and picking a stage that will limit that. If you won a game earlier in the match too, that's gives you the extra information of knowing why you won that match. Using these pieces of information is much more important than any theorizing you can do about matchups in the abstract. Don't think, "Peach is floaty, gotta take em to a small stage," think about why you won/lost previous games.

To this day, Scar still tells me that our talk that afternoon completely changed the way he looked at counterpicking.

Section 2: How Stage Affects Falco vs. the Mid-Top Tiers
Part 1: Fox
Fox vs. Falco is not terribly stage dependent except for a couple exceptions. First is FD. When I first saw Bombsoldier matches, I remember thinking to myself "DAMN! Falco combos can just go off on Fox on FD!" This of course made me always try FD vs. Foxes early in my smash career and though I was frequently successful on FD, it really had nothing to do with the stage. FD actually opens up serious chaingrabbing and utilt/usmash/uair combo opportunities for Fox that would otherwise get stifled by platforms, while Falco can frequently use platforms to his advantage while comboing. Long story short: FD is not your friend vs. Fox. The other thing to take note of is that while most non-neutrals are pretty equal in the Fox vs. Falco matchup, Pokefloats is not one of them. Fox can out camp and easily shine spike you on that stage. Since most players don't pick PF, I rarely ban it vs. Fox, but if someone is known for pulling PF out as Fox, it's worth considering (Spam, I'm looking at you). Most of where you want to counterpick Foxes to is based on whether you need to limit their movement or need to be able to stay away from the edges. If the Fox is running circles around you and you just need to cramp the little bastard, take him to Yoshi's Story or Fountain. If he's all over you and keeps getting you off stage and ****** on the edgeguard, take him somewhere big like DL64, Pokémon Stadium or KJ64. In general, I find that the latter is more frequently the case and DL64 is mostly where I go, but I have had success vs. Taki and other very quick Foxes by taking them to small stages.

Part 2: Sheik
FD is the weapon of choice vs. Sheik. She really gains nothing from FD in the matchup and loses all the powerful platform needle camping that gives Falco fits when trying to approach. You lose some combo ability from not having platforms there, but with platforms out of the picture, Lasers are so far and away more powerful at controlling space than needles that it's well worth it. Again, this stage usually gets banned by Sheiks vs. Falco, but if they somehow miss on that one, take advantage of it. Neutrals are mostly good for you and when it comes to bans, you should just ban the neutral you feel least comfortable on unless you're worried about counterpicks. I've seen a lot of Sheiks take Falcos to Brinstar with pretty good success, so it's probably my most common ban vs. Sheik players, but sometimes I'll ban Story/FoD/Battlefield if I'm not in the mood to play on that particular stage. If FD isn't an option, I'll usually just take Sheiks to DL64 or PS depending on my mood, but you can also consider moving stages or Corneria if you're feeling particularly obnoxious. They're not great vs. Sheik, but they're slightly better for Falco than Sheik and if your opponent doesn't know how to play on the stage and you do, then it's worth considering.

Part 3: Marth
DL64 is your best friend in this matchup. No tipper nonsense on the platforms, no chaingrab nonsense because of the platforms, and plenty of space to run around and shoot lasers while he's trying to get his grubby little hands on you. However, most Marths these days have the good sense to ban DL64 which means you should be hoping for Pokémon Stadium on the random. When it comes to bans, you have to decide whether you're more afraid of the 0-death chaingrabs or the utilt/tipper nonsense on Yoshi's Story. I like what I can do combo-wise on Story and have played M2K enough to be terrified of the 0-death cgs on FD, so FD usually gets the ban from me. When it comes time to counterpick, KJ64 and the moving stages (Poke Floats and Rainbow Cruise) are worth the most consideration out of the non-neutrals. KJ 64 is a serious bitch to Marth's recovery and has most of the same advantages that DL64 has. It also has the added benefit of the high side platforms which are even more difficult for Marth to punish recovering to when he's standing during edgeguarding. Moving stages are great just for camping Marth and taking advantage of his limited aerial mobility, plus he's a sitting duck on PF when recovering without edges.

Part 4: Falco
It's a ditto, so no stage will technically give either character an advantage. Rule of thumb: when you feel you can gain nothing in the matchup with the stage, pick where you feel most comfortable or where you think your opponent will feel least comfortable.

Part 5: Jigglypuff
Dreamland is really bad news on the randomizer. You can run away and shoot lasers for awhile, but your most reliable and safe kill move in the matchup (bair) doesn't kill until obscene %s (with good DI somewhere in the 160-170% range from the middle of the stage). She gains so much from the extra space off stage and you gain nothing since Jiggs will kill you with edgeguards most of the time anyway. In general, I'd recommend banning Dreamland 64 vs. Jiggs because losing match 1 is basically a death sentence since she has 2 exceptional counterpick options in Brinstar and Mute City. I think Yoshi's Story is less than ideal in the matchup since you can't really run away and laser a lot on that stage, even though killing is much less of a problem there. Stadium is the ideal stage in the abstract with the low ceiling and enough space to run away and laser. The rest of the neutrals are mostly up to preference if you ask me. Since Jiggs is going to screw you over on her counterpicks, I think it's very important to do the same to her. Moving stages are an option, but PF is a bit risky IMO. A little mistake on that stage can lead to a very very quick death since Jiggs has so much mobility in the air. Cruise is a little better since a lot of the stage movement is vertical and Jiggs' aerial strength is in moving side to side, not up and down. Corneria and Green Greens also work in the Stadium sense (low ceiling and short sides with space to camp lasers), though I find GG to be a bit too random for my liking and can be a bit cramping if the blocks build up. So in general, I recommend Stadium, Corneria and Cruise as the go to stages vs. Puff but there are plentiful options, just be sure to think it out.

Part 6: Captain Falcon
The less space he has to run around and space aerials, the better. In general, I find FD and DL64 to be the dangerous stages vs. Falcon and am happy to get FoD or YS since you can keep pressure up more easily on small stages. This dynamic can be reversed if the Falcon doesn't know how to move around lasers, since they can be absurdly powerful if the Falcon can't running powershield or space full hop nair into your SHL/double jump high-low lasers. Almost every Falcon on the planet immediately bans FoD vs. everyone without thinking, so typically I'm hoping for YS on the random and banning DL64. On the counterpick, watch out for Brinstar as Lava/Acid -> knee is something that smarter Falcons love. Other than that, Falcon is pretty restricted to only being good on neutrals. Pokefloats is my pick of choice vs. Falcon since you can limit his approach options and camp his balls off. Cruise isn't very good vs. him since it doesn't provide nearly the same sort of cover than Floats does, so in cases of Floats being banned, I'd say try to cramp him on Story, FoD, or Green Greens and keep pressure on him all match.

Part 7: Peach
Pretty much the same general theory as Puff. You have the added danger of Peach's chaingrab on FD, but she has noticeably worse mobility on Floats so it gains a lot more sway in this matchup than vs. Puff. Platform stages are great vs. Peach, just don't be stupid about approaching her on the platforms since Peaches LOVE to dsmash on platforms. For neutrals vs. Peach, I'm all about Stadium and BF (Battlefield gains a lot of value vs. Peach over Puff since Peaches hate how floating and grabbing the edges works). On the Counterpick, Corneria and Floats are my primary options. I ban dreamland vs. Peaches because in case of a Mute City or Brinstar counterpick, I have a Jigglypuff and I'd rather not get screwed on a game 1 Dreamland (always think about your secondaries when banning, since you can react to stage choices for counterpick games).

Part 8: Ice Climbers
After talking with PockyD about this matchup for a few posts, I've decided to change the entry as I had forgotten some key dynamics in the matchup. While having some extra space to stay away from climbers is useful and worthy of consideration, ICs gain too much from FD to really consider banning YS or FoD. On FD, your laser games gets seriously hindered by the fact that you will only ever be hitting one climber and the other can effectively harass you with ice blocks. When platforms come into the equation, you can retreat from these ice block situations without having to get over the IC players in one jump, which can result in an up air from the IC player which can spell some trouble. The ICs are also very limited in their ability to punish recovery to platforms compared to their ability to punish recovery on FD. On FD, if you get knocked far enough offstage that forward B or up B is required to get back on, you're generally looking at a free dsmash/fsmash. If you land on a platform instead, they either need to try to awkwardly combo dair/uair into a smash/bair or just a straight bair. Either way, it both increases the difficulty of the edgeguard and generally results in a less devastating end result. When it comes to platform stages, PS is probably the best since it has a low enough ceiling for low % shine kills and enough room to utilize your lasers. After that, BF is probably next best followed by YS (early kills) and DL (room to move and laser). FoD is probably the worst after FD. When counterpicking comes along, take em to a moving stage, where the climbers are useless. Floats is way worse for them than cruise, so if they didn't ban floats, go there. Cruise is still a beating on the ICs and I typically expect the IC player to helplessly try a secondary character on either of those stages.

Part 9: Ganondorf
Ban Yoshi's and camp him. Seriously, if you want to win, don't feel guilty about it and force yourself to approach, just sit back and force him to come to you and then take advantage of openings. I lose friendlies to Ganons A LOT because I don't camp in friendlies and they'll just space a backward short hop -> fair against all my approaches and then just kill me once I'm off stage. If you take the defensive role though, there's just about nothing Ganon can do. It sucks and is really lame, but it's what you need to do as the jerk with the laser. For counterpicks, I stay away from DL64 since it takes so long to kill the King of All Evil, and though the space is really good for you, it's just tedious. Stadium, FD and Battlefield are all sufficiently in your favor that I mostly keep it simple and take him to one of them. FoD isn't good news, but it's not bad either, just camp behind low platforms and don't get hit.

Part 10: Doctor Mario and Mario
As many differences as there are between Doc and Mario, they don't really manifest themselves in how you should be counterpicking vs. them. FD is a must ban. Full hopped Pills/Fireballs are a huge pain in the ass to try to fight through as Falco on FD and they somehow force me to approach in the matchup which is no good. That on top of the chaingrab ridiculousness that they can pull on you there makes it by far the worst stage for the matchup. Battlefield is a good stage vs. them since they cannot ride up the wall with their up B while recovering, which limits their options. Pokefloats probably qualifies as cruel and unusual punishment to Doc and Mario since their aerial movement is not great and they rely so much on sweetspotting to recover. Cruise presents many of the same problems to them and seems safer, so I'd be inclined to recommend cruise a bit more than floats despite the presence of edges on the boat. As far as non BF, FD neutrals go, Stadium seems like it should be good vs. them but frequently creates the same pill/fireball problems that FD does, so it's actually my least favorite of the remainder. YS and FoD are both pretty average vs. the Marios, and DL gives you enough space to make your lasers noticeably better than their projectiles, so after BF it's my favorite vs. them.

Part 11: Samus
The whole game plan as Falco vs. Samus is to shoot lasers up until 150%ish and then space bairs for the kill. Sounds like vs. Peach and Jiggs, right? So same sorta theory, DL64 makes it unnecessarily tedious, so ban it. Samus isn't nearly as good on counterpick stages so the Brinstar/Mute City picks aren't nearly as dangerous and you're just best off banning Dreamland and try to play her on BF/FD/PF. Samus doesn't do well on most counterpicks so Corneria, Floats, Cruise, and Green Greens are all good options when you have the choice.

Part 12: Luigi
Luigi scares me most on FD even though I have a good deal of laser control, so it's my most common ban vs. them. They can just do so much off of uthrow there, I'd rather have platforms on my side. Battlefield is good since it limits their recovery options, Yoshi's story allows low % shine off the top kills and so does PS. On the counterpick, Floats is a true monster and Luigi just looks totally helpless trying to move on that stage. If Floats isn't an option, I'd go for one of the favorable neutrals or Cruise. Don't go Corneria, since he has a good fin camping game. Luigis mostly just like neutral stages anyway, so I think moving stage is the way to go on the counterpick.

Part 13: DK
I ban story since it gives you less options with lasers and DK has good up B through platform games on that stage. Lasers give you enough control on FD to prevent yourself from getting grabbed, though it's still probably the worst neutral after story. Another aerial mobility challenged character, another one I'd recommend taking to a moving stage. Neutrals are mostly fine in the matchup too, but if you really need an edge, I'd say go Cruise or Floats.


Lesson 2: Lasers

Section 1: Why We Jump Before Shooting
Part 1: Standing Lasers
Let's talk about the standing laser.


Standing lasers are terrible. You should already know that. Here's the frame data on shooting a standing laser, shamelessly stolen from Super Doodle Man's totally awesome site (http://www.angelfire.com/games5/superdoodleman/frames.html):

Standing Lasers
# of Frames until first laser after pressing B: 23
# of Frames until each subsequent laser after the first: 24
# of Frames for Falco to put away his **** gun: 34

That's right, to shoot one laser, it takes a whopping 57 frames (~1 second). If you're shooting many in a row, you get to fire at a slightly more respectable rate of 2.5 lasers/second, but you still know that when you stop mashing your little B button that you have to wait more than half a second to regain control of your character. Melee's a really fast game. Half a second is far too long to wait...


Part 2: Aerial Lasers
So now that we know that a standing laser blows, let's talk about how to still get some use out of that gun. As we all know, Falco prefers the air ("personally, I prefer the air!"), so why don’t we take a look at how the frames are different when Falco is in the air:

Aerial Lasers
# of Frames until first laser after pressing B: 13
# of Frames until each subsequent laser after the first: 16
# of Frames for Falco to put away his **** gun (still in the air): 29
# of Frames for Falco to put away his **** gun (after hitting the ground): 0 (!)

Not only is everything else about aerial lasers faster than standing lasers, but by landing mid laser, we can completely cut that infuriating half second "putting away our gun" animation. Everybody still with me? Good, cause all of you should already have known that by now. If you still don't understand yet, read Section 1 again, it's really important to understand why you don't ever want to shoot lasers if your feet are still on the ground.

Section 2: Laser Techniques
Part 1: Short Hop Laser (SHL) Variants
1.1: Stationary SHL:
The fastest way to shoot lasers at ground level, and still have control of your character when you decide to stop shooting lasers, is to short hop, quickly laser, and then quickly fast fall. This minimizes the amount of time we spend in the air to maximize the benefit we gain out of canceling the "putting away the gun" lag. The end result is the most fundamental component of Falco’s advanced laser game: the SHL:


Nothing fancy, but if you can't do this all day, don't even think of moving on to more advanced laser techs. By varying the timing of the fast fall and/or pressing B, you should be able to control whether your laser is going high, medium or low. You should be able to hit a crouching Jiggs, shield stab a DK, and hit everywhere in between. Having control over where your lasers are going is extremely useful, so play around with the following homework:

NOTE: For all homework assignments, I suggest setting damage ratio on .5 and handicap on (put yourself at 1 and opponents at 9) to minimize the distance they move from getting hit by a laser.

HW 1.1: SHL Height Control:


Plug in one extra controller while holding up (so that the stick being at neutral will be like holding down) and two other extra controllers with no stick tricks. Select Kirby or Jigglypuff for the controller that is holding down, and Mario (or any other medium height character) and Ganon (or any other tall character) for the other 2 controllers. Go to FD and position the 3 dummy characters on one side of you ordered from shortest to tallest (crouching Kirby, then Mario, then Ganon). Practice alternating which of them you are trying to hit until you are comfortable with your ability to hit any of them on command.


1.2: Reverse SHL (RSHL):
Another essential element of Falco's Laser game is the ability to turn around midair with a Laser. By pressing the opposite direction of your facing mid-air and then letting your control stick reset to normal, you can switch the direction in which your next laser will fire. Doing this from a (more or less) stationary position will result in the following:


Again, this is really, really important. Make sure you have your fundamentals down before trying to advance. Turning around midair can be used on any aerial laser technique, so just keep that in mind when reading on. If you're phantasming more than 1% of the time when doing this, keep practicing.

HW 1.2: SHL Direction Control:

COMING SOON

1.3: Approaching SHL:
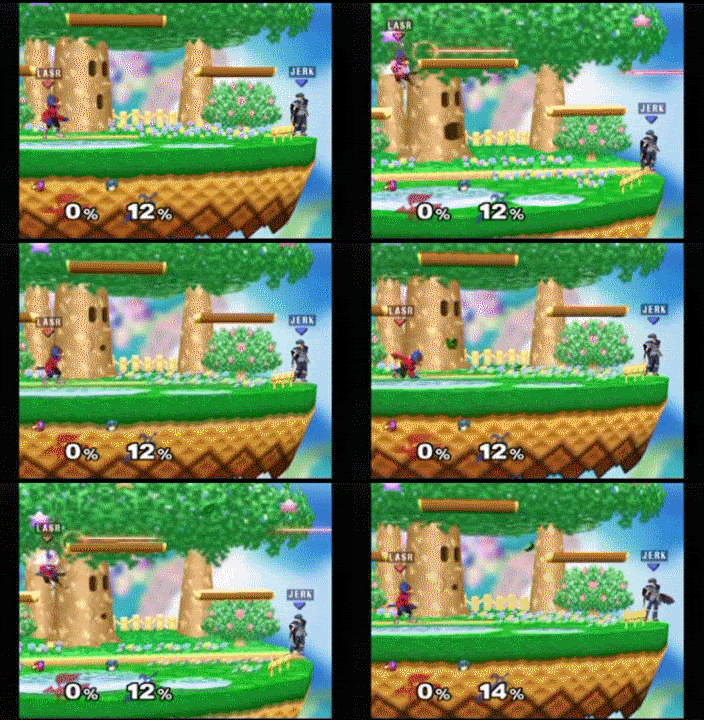
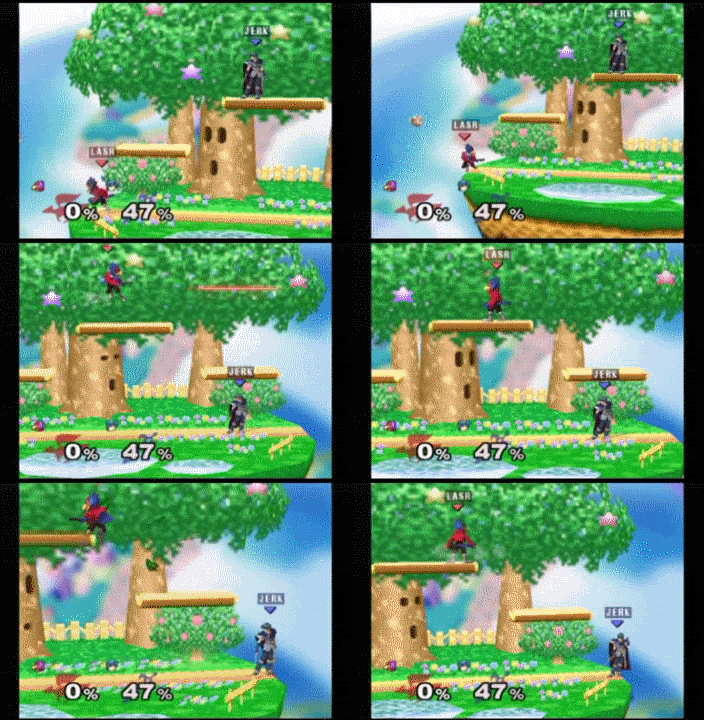
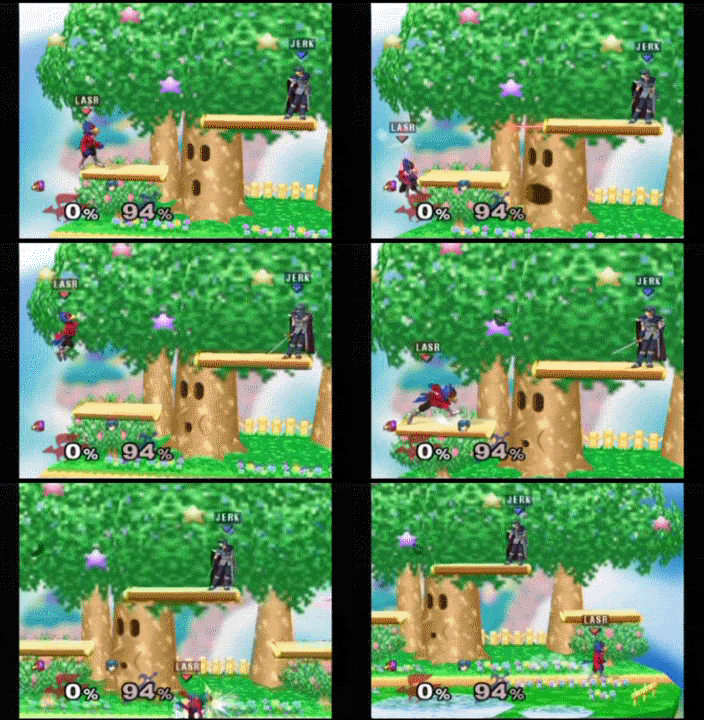
Now it’s time to exploit the other fantastic advantage of firing lasers from the air. By jumping first, we can effectively move Falco around the stage while still pestering our opponents with lasers. There are two essential techniques for moving with SHLs, the first of which involves just dashing and then performing a SHL. It should look something like this:


1.4: Retreating SHL:
Same as above, just do a RSHL instead of a SHL. The result:


Master these two as well. These techniques are your bread and butter as a Falco player, so it's important to not screw these up. Phantasms while practicing these are not acceptable. Don't shrug it off and move on, keep practicing until you don't do that anymore.

HW 1.3: Mobile SHLing

COMING SOON

Part 2: Full Hop and Double Jump Lasers
2.1: Full Hop Triple Laser:
In all honesty, this technique is just about completely obsolete. I still use it sometimes and it’s not completely terrible, but you are almost always better off with any of the other techniques in this section. The result is typically 2 lasers of almost exactly the same height at the peak of your jump and a low laser at about SHL height. There is some variation though and if you have quick timing on hitting B, you can get some variation in the result:


The nicest part about this technique is that you don’t use your 2nd jump in situations where you may get hit out of it. It’s also very easy to learn where your lasers will go depending on when you start hitting b since there is no fast falling involved.

2.2: Full Hop Double Laser (Fast Fallen):
This technique really doesn’t get talked about enough. Everyone talks about the Immediate Double Jumped Double Laser recently, and for good reason, but they seem to forget that this is even an option, especially vs. Peach. You perform this tech by just full hopping with lasers ASAP and fast falling at the peak of your jump.


As you can see, the result is a high laser followed by either another high height laser or a medium height laser. This medium height laser is a real life saver vs. Peach’s who know how to float between the 2 lasers in an Immediate Double Jumped Double Laser. This technique is also very useful when jumping to a low platform, as you can get both lasers out and still land on the low platform. It also has the benefit of not using your double jump.

2.3: Immediate Double Jumped Double Laser:
I first saw this technique used by Eggm in Falco dittos and he used it to completely outclass my Full Hop Triple Laser and keep laser control for the entire match. This tech is basically everything good about Full Hop Triple Laser in fast forward. You start with a single jump, then immediately double jump with a laser and fast fall from the peak of your jump. The result is a nice crisp high laser followed by a SHL height laser:


This technique is very fast and puts the lasers at 2 of the most useful heights and, as such, is the most popular and useful of the high laser techniques. You must be careful about its usage however. Since you are double jumping, if you ever leave yourself open to getting hit out of this, it frequently results in a lost stock.

HW 2: Controlling Your High Lasers

COMING SOON

Part 3: Ledge and Platform Lasers
3.1: Ledge Hop Double Laser (LHDL):
LHDL is a vital component to many Falcos' "recovering from the ledge" game. While holding the ledge, drop and fast fall to as low as you can while still being able to double jump onto the stage. Once you're at that point, IMEDIATELY double jump AND start firing your first laser. I do this by hitting the left-most part of the Y button with the tip of my thumb and B with the center of my thumb, but the finger technique is up to you, do what feels comfortable. After that, quickly start holding towards the stage and then tap B again to shoot your second laser. You can vary the point at which you double jump to change the height of the lasers, but it's good to know the lowest point and use that as your default as it will minimize your vulnerability and air time.


While this technique is powerful, it's also very easy to overuse. Don't forget that you have other options from the ledge and that you aren't fully covered by invulnerability in this maneuver or you'll soon find yourself victim to well spaced and timed smashes and tilts taking your stock.

HW 3.1: Low LHDLing

COMING SOON

3.2: Drop Double Jump Double Laser:
This is basically a way to look really cool and change up the height and rhythm of low height lasers that you could otherwise be shooting by just SHLing. You can do this technique near a ledge or through a platform. The first part is to either run off a ledge or drop through a platform and start fast falling. Then you quickly double jump and double laser the same way you would with a LHDL.


When running off a ledge, you are typically going to want to turn around with your lasers, but sometimes you will be using it to shoot off stage. Either way, make sure your lasers are going the way that you want them to go.

HW 3.2.1: Ledge Drop Height Control

COMING SOON

HW 3.2.2: Platform Drop Height Control

COMING SOON

3.3: Short Hop Double Laser Platform Dismount:
When moving down from a low platform to the stage, you can SHL without fast falling to shoot a laser at platform height and another laser at stage height. You can also do this when moving down from a high platform to a low platform.


3.4: Platform Laser Drop:
Another technique for moving from a platform to the stage. With this one, instead of jumping, you just drop through the platform and fire immediately from a side platform and fast fall and fire from a high platform. This is a very useful technique for platform laser games and I highly suggest playing around with this one a lot to get a good feel for it.


At this point, you have all the techniques you need to have some ballin’ lasers. From here, you just need to keep the techs sharp and use them in game to produce your collective laser game.

Section 3: Advanced Laser Theory
Part 1: Laser Spacing
Late one night after an SPOC, I was hanging out with Scar and Cactuar. This was shortly after Cactuar’s impressive performance at Evo East where he took out Forward, among others. Scar, being completely beat after running a sizable tourney, quickly fell asleep and I got to talking to Cactus about his help thread. One thing led to another and I started asking him about how he moves around lasers so well and seems to be able to completely stifle even the best Falcos’ laser games with his movement. His theories and the complexity with which he views the game are a bit too much to try to explain in a forum like this, but the part I found particularly interesting is how he sees his spacing vs. Falco.

Consider the distance covered by an approaching SHL as a unit of measurement.


Let’s call that 1 SHL in distance.

At a distance of 1 SHL, you are in good shape as Falco. An approaching SHL will put you right on top of your opponent, so if they’re sitting in shield you can just Lasergrab them. A stationary SHL is safe, as the opponent cannot adequately follow up a powershield at this distance. A retreating SHL is also safe, as not even CF can get on top of you in the time it takes to complete a SHL to get a running powershield grab. 1SHL is where Falco wants to be. So where does that leave the shmuck without the gun? As a character playing against Falco, you want to be around 0.5SHL away from Falco, as suddenly stationary and approaching SHLs become terrible options. Even without the threat of a powershield, one can typically space an aerial against a stationary SHL at 0.5 SHL, and an approaching SHL won’t come out in time to protect against any fast move your opponent can use to disrupt the SHL. This leaves only retreating SHLs as a safe option, and there's only so long you can retreat before such a move will put you off stage.

So through dashes and waveshielding, Cactuar’s Marth slowly plays distance games with your Falco until you find yourself at the dreaded 0.5 SHL distance. The trick is to be aware of this distance and when your lasers are no longer a safe option, to approach and shield pressure, play defensively, or run away and attempt to re-play the distance game. It’s not easy, and it’s not necessarily intuitive, but if you start trying to see spacing like this and pay attention to when your lasers are no longer good, you may find that you’re not getting wrecked as hard for shooting so many lasers.

Part 2: The Running Powershield
This is becoming a more and more popular tactic from Marths, Sheiks, Foxes, and CFs to counter laser games. While they still have mobility, the character will dash towards you as you fire your first laser. They powershield the laser back at you at very short range and do some sort of follow up, typically a grab. When this happens, it really throws Falcos that rely on lasers for board control off their game. Recognizing when your opponent has a chance to get you with this comes only from experience, but hopefully you’ll learn fast. In these situations, what you need is to keep your opponent guessing. As soon as he’s 100% sure you’re going to shoot the laser, you’re in trouble. I like to mix up empty shorthop -> waveland -> shine/grab against running powershielders. Doing this keeps your opponent guessing as to what your next move is going to be and is very important if you want to throw them off their game.

Part 3: A Suggestion
This may sound hard to believe, but I am a firm believer that taking a break from firing lasers in a friendly setting will vastly improve any laser-happy Falco’s game. Having arguably the most powerful projectile in the game can really become a crutch that Falcos will lean on. By taking a break, you will gain some perspective on when and why lasers are so good and when and why they aren’t. I could write 100 pages on this topic, but ultimately, experience is the best teacher. Put the gun away for a smashfest. Make a conscious effort to not shoot lasers in friendlies for a week/month. You’ll be surprised how much you learn.

Lesson 3: Approaching With Falco

Section 1: Introduction
Learning to approach correctly is something that one learns mostly from experience. There is so much feel to it that trying to explain all the ins and outs of what’s going through one’s head when they decide to close the distance as Falco is hopeless. What I’m hoping to do with this lesson is set you on the right track about how to think about your approach and learn to solve your own problems with approaching as they come up. For this lesson I’m going to try a different approach (har har, I made a funny) than with my laser lessons, and start with the higher level theory and work down.

Section 2: Musings on Approach
Part 1: Risk vs. Reward
So let’s start by discussing general risk vs. reward theory with regards to making decisions. In straight math terms, if risk and reward can be measured quantitatively, a decision is worth making if the value of success times the probability of success is greater than the value lost by failure times the probability of failure. Now I’m sure many of you are just reading gibberish in that last sentence, so let me give you an example of what I’m trying to get at with regards to Falco’s approach game.

Let’s say you think that you can combo Samus from 0-35% on a successful approach, but if you fail she will screw attack you out of shield for ~ 5% (cause you’re good and will probably crouch cancel). In this case, mathematically speaking, you only need 1/6 chance of success for this approach to be worth it (35% x 1/6 > 5% x 5/6). In other words, approaching a shielding Samus is a low risk, high reward situation, meaning that, in the long run, you’ll end up ahead even with fairly poor chances of success.

If however, we replace Samus with Marth and consider the risk being getting grabbed and comboed from 0-60% (since it’s likely between 30% and death), the situation suddenly becomes high risk, low reward, so you damn well better have a good chance of hitting to risk getting grabbed.

Of course, this is all oversimplifying what %s mean and how momentum can affect the way you play a game, but it’s certainly worth thinking about when considering whether approaching is worth it or not. Just think about what you’re risking and what happens if you succeed before approaching and you’ll get a lot smarter about deciding when to attack and when to lay off.

Part 2: Information is Valuable
Seriously, taking note to how your opponent reacts to your forms of pressure is what separates decent Falcos from good Falcos. Many Falcos have very predictable approach games and very predictable follow ups to all of them. As such, most players’ anti-Falco strategies are very predictable as well. When facing the same approach twice, most players will react exactly the same and as such, you should keep mental notes on what they do and react appropriately. That Falcon keeps short hopping over your shine and stomping you? Then start going dair -> dair, rather than dair -> shine. That Sheik keeps full hop nairing your pillar? Then start full hop dairing after the shine. Don’t underestimate the value of knowing what your opponent does when faced with a given situation. If you can learn to keep track of this and adapt, you can learn to turn your opponent’s knee-jerk reaction into a win on every approach.

Part 3: Shffling is NOT the Only Way!
Don’t sell yourself short by always shffling an aerial into your opponent or their shield. There are many other options and the more you learn to use them and stop relying on shffls for everything, the more effective your approach game will become. Some things that aren’t shffling that I like to do to create offense:
empty short hop -> waveland -> grab/shine->grab
short hop -> double jump -> waveland on platform -> drop -> fast fall dair
when they are just sitting in shield: run up -> wavedash -> walk -> shine -> grab
run up -> wavedash -> DD -> shffl
SHL -> shine/grab
There are obviously many more ways to do things, but the point is that there are a lot of mix ups that you can put into your approach game which should throw your opponent off. Changing tempo will frequently leave your opponent flustered, confused, or caught in their shield which makes your eventual approach much more likely to succeed.

Section 3: Questions About Approaching
Should I be Using Dair or Nair to Approach?
This is probably the most frequently asked question on Falco boards that can’t just be answered by giving a definition ("How do I pillar?" "How do I multishine?" and "How I mine for Fish?" all seem to come up more frequently…). The simple answer I always give to people is that if you’re worried about actually being able to hit them, use nair, otherwise, use dair. Basically, nair = lower risk, dair = higher reward. This isn’t always the case, but it’s the foundation of the nair vs. dair dilemma.

Against dash dancing opponents who I fear will powershield my laser, I will nair for the extra range. Against crouch canceling opponents I will dair for the hitstun and then follow up with dtilt. Against shields, nair is typically better because it does more %, which means it will generate more shield stun and l cancels 2 frames quicker. This is oversimplified though, since dair typically combos better and certainly shield stabs better, so again, it’s not clear cut. Essentially, be smart about it. Use the information you’ve gathered in the match about how your opponent will react and make an educated decision about whether to nair or dair.

Any Questions on Approaching?
If you have questions, please ask them and I will add them to the lesson if I deem them worthwhile. Sorry for the shortness and fragmentation of this lesson, I just sorta rambled about stuff and found that I didn’t have as much to say as I thought I did, lol. I hope it’s helpful.


Lesson 4: Falco in Teams
Section 1: The History of Mogwai in Teams
For the vast majority of time I spent maining Falco in Melee, I have been hopelessly unable to use him in teams. Going into my first teams tournament with PockyD, we both decided that our mains (Falco and ICs) were not very well suited for teams play and settled on him playing Ganon and myself playing Jigglypuff. For the first few years of my competitive smash career, Pocky and I would always team and I would rarely play anyone other than Jiggs in teams because the little ***** is unbelievably good in teams. Every once in awhile, I'd pick Falco in team friendlies and inevitably die 5 times in 2 minutes, get pissed and switch back to Jiggs.

Once Pocky moved out West, I started to play smash less and less and ended up more or less freelancing in teams. Winning in teams had become unattainable due to the increase in skill around Pittsburgh and my failure to find another steady teammate, mostly due to my inactivity. This subsequently led to me desiring fun more than victory in teams which pushed me towards more aggressive characters like Fox and Captain Falcon. I continued using those two in teams during the next year or so of sparse Melee activity and while they were always fun, I never had terribly much success with them.

As I started taking the game seriously again, I quickly found that any skill I may have had with characters had evaporated and that only Falco and Mewtwo (lol) had any residual skill left. As such, when team friendlies came up, I would just stay Falco and all the bad memories of him in teams came back to me. It just seemed so hopeless. In all the chaos that is a Melee teams match, it seemed almost unavoidable that you'd end up off stage, and once you're there, there are now two jerk offs just looking to tap you once for a free stock. I got frustrated and starting playing Jiggs again in teams, but quickly got frustrated by how much worse I was with her compared to back in the day. After a mostly poor showing at SPOC with Pakman, I decided to quit Jiggs in tournament for good. Finally, I had decided it was time for me to buckle down and figure Falco out in teams.

The only Falco I had seen be successful in teams up until this point was Reik, so I decided to think back on what made NY Conexion (Eggm + Reik) so good. The first thing that came to mind was their incredible combo chemistry. It seemed whenever they had a 2 on 1 opportunity, you were lucky to get out of it only taking 80%. They also had well thought out team strategies, such as an FD camping strat where Reik would do Full Hop High-Medium Lasers (Fast Fall at the peak of Full Hop) behind Eggm doing SHDL with Fox. If you tried to jump over the SHDL, you'd get hit by Reik's lasers, which would then drop you into more Fox Lasers. It was really annoying. Then it suddenly hit me what was wrong with my whole approach to Falco in teams. 75% of the time, Reik was the one with more stocks. Whenever their team was on one side of the map, and the other team was on the other side of the map, the Fox was in front. All this time, I had been just acting like it was singles and playing a pressure based Falco, when in reality, Falco's best uses in teams are in a supporting role. With this newfound insight, I started playing Falco in teams again and have found myself playing teams at a much higher level than I ever was with any other character.

Section 2: Why Falco Sucks in Teams
First I want to talk about all the reasons that I stayed away from Falco in teams for so long.
1. Extended combos are much less likely to happen in teams. One of the biggest up sides to Falco in singles is that you can hit someone once, then spend the next 20 seconds comboing them for 759812743932874%. In teams, it's rare that your opponent's teammate will let them get comboed for more than a couple seconds. Sure, it does come up when your team mate has them tied down, but the fact that not every shine will lead to a nice extended combo really hinders most Falcos' games.
2. He gets gimped really easily. Every time you're off stage, there's a high chance that you're going to lose a stock. Since your combos get interrupted frequently, you also find yourself off stage quite a bit more in teams. You also can get hit out of a double jump you used to try to combo, which is even more bad news. There are also two people out for your stock, again, bad bad news. This is a big hurdle to overcome. You're going to have trouble getting a decent teammate if you have to steal one of their stocks every game.
3. He doesn't have many reliable gimps. Compared to the top tier characters in teams (Fox, Peach, Jiggs, Marth, Sheik), Falco is absolutely abysmal at getting low % kills. Gimps are such a hugely powerful weapon in teams. With combos and grab games limited by the mere definition of teams, being able to just go off stage and make sure your opponent doesn't follow you back is an irreplaceably valuable tool to have.
4. He has slow horizontal speed. Have you seen Falco run? The speed at which you can make it from one side of the map to the other is very important for creating and disrupting 2 on 1 situations. The fact that Falco can't just knock 1 opponent away and then quickly come up to assist his partner is a big downside compared to Falcon, Fox, Marth and Sheik.
5. Compared to the top tiers, he doesn't have nearly the same abilities to punish a grab in a 2 on 1. Fox has usmash, Peach has the properly spaced dsmash for 5798572389473%, Jiggs has rest, Marth has tipper, Falcon has knee. Falco's best option is either fsmash, dtilt, dair -> shine, or charged usmash, but none of these really carry the OOMF of the moves I said in the last sentence. His fsmash is good, but in order to strong hit your opponent, you will frequently also hit your partner with at least the weak follow through. Ultimately, usmash -> team combos is probably the best choice, but it can be frustrating to not have a move to just get a free kill when your partner has a grab with an opponent at 80% in 2 on 1s.
6. He gets comboed very very easily in 2 on 1 situations. Being a fast faller is bad enough when 1 guy is juggling you... once there are 2 dudes doing it, it gets seriously stupid.

Section 3: Why Falco is Actually Very Good in Teams
And here's why Falco is actually amazing in teams:
1. Lasers. Holy **** are lasers amazing in teams. They cover item 4 up there and then some. The fact that Falco can't run fast ends up being completely moot when he has the best disruptive projectile in the game. Ok, so Sheik's chaingrabbing your teammate on the other side of the map? 1 laser fixes this, regardless of who it hits. Peach got a grab on your teammate at 150%? Shoot a high laser to stop the knockback from the fthrow. On top of that, lasers are amazing at controlling space, assisting your partner's recovery, keeping an opponent tied up and extending your partner's combos. In fact, there's so much to say about Lasers that the whole next section is going to be able laser in teams.
2. Despite the lack of extended combo, Falco's quick combos are still obscenely good and easy to link into your teammate's combos. While you can't spend all of a teams match going off and making combo vid material out of one of your opponents, simple combinations of dair, bair, shine, and utilt can build up a lot of damage very very quickly and leave your opponent in hitstun in a convenient location for your teammate to pick up where you left off.
3. While not great at gimping, dair kills are fantastic at mid % when your opponent is left hanging in the air off the stage. It leaves little room for DI and guarantees a lot of kills, so throw that bad boy out there whenever you get the opportunity.
4. Falco is a good 1 v 2er thanks to all his low lag moves and shine leaving very little in the way of punishable frames. While you never hope to be in this situation, it still helps having a character who can last while his partner respawns or pull out a 1 v 2 on 2 opponents with high %.

Section 4: Lasers in Teams
In all honesty, using lasers intelligently in teams is the fastest way to boost your teams Falco game to the next level. In this section, I'm going to go through the general uses of lasers in teams. Above, I described some generic laser uses that don't really require a lot of coordination with your teammate. Helping them out of a jam that they have no control over is just the tip of the iceberg though, and many of the uses require that you talk to your teammate beforehand and make sure that they have an understanding of your thought process behind your lasers.

Part 1: Helping Your Partner Out of Jam
This situation is the one I described above. Your teammate is getting combo-*****, edgeguarded, techchased, or grabbed. They have little control of their fate and are just looking for anything to allow them to reset to a neutral position. In cases like this, any laser will likely disrupt what was going on enough to buy your teammate a second lease on life, though I will note that when a powerful throw or attack is coming quickly towards my teammate, I usually shoot high to try to hit my teammate (since hitting the opponent after said powerful attack has already connected does no good). In edgeguarding situations, you want to wait until right before your opponent would start a movement to hit your partner before shooting them with a laser. In a case like a Marth trying to fsmash or a Sheik going for ftilt to fair, this is just right before they would do their attack, but if it's a situation where a sheik will jump off fair, Peach would float nair/bair, C. Falcon jump off and weak knee, etc, you must shoot much earlier to just throw them off what they're doing. I've found that most opponents get really confused and thrown off by a laser before they try to do something complex like that and just fail at any simple grounded edgeguard attempt afterward, but if you can, you want to keep shooting that way until your teammate is safe.

Part 2: Assisting Your Partner’s Recovery
This is the most basic situation that you need to mentally prepare your partner for. The situation is pretty straight forward... you partner is off stage and cannot make it back on stage due to either being edgehogged or simply not having a long enough recovery. What you need to tell your partner about before hand is that they MUST recover as high as possible in situations like this to give you a chance to give them another up B via a laser. This isn't a terribly complicated thing and it may seem like common sense to you, but you really want to make sure that your partner gets this, because it sucks when they give up and you're in a perfect situation to just laser them back to the stage.

Part 3: Keeping Your Opponents Grounded
This one is really important to explain to your partner and make sure that they are comfortable with, but if used effectively is very very potent. This is a generic 2 v 2 situation where you and your partner are on one side of the stage and your opponents are on the other side. In other words, each team has a front man and a back man. As Falco, you are the back man for your team, and what you do is fire high SHLs while your partner stays low to keep your opponents from using any aerial approaches. Once you get a hit, you stop firing the SHLs to let your partner take advantage of the opening and progress to High/ Medium IDJDL to limit the opposing teammate's assist options. This typically works best with a dash dancing Fox/Marth/CF as your teammate and the idea is to give your partner a grab so that they can send the first opponent back your way for a tech chase and move on to the other opponent. The important thing to talk to your partner about here is keeping low and staying in the dash dance (can also work with a crouching Jiggs or Sheik or simply dashing Sheik) without attempting to aerial while you're lasering. As long as they keep lower than your leading opponent and you have good laser control, you can easily manufacture openings. The nice thing is that even if you don't hit with your laser, you can force a shield and generate enough shield stun to get a free grab for your partner.

Part 4: Keeping Your Partner’s Combos Going
This situation is simply when your partner finishes a combo and you can't get there for a hit. By simply lasering your opponent you can frequently buy enough time for your partner to follow up with another move. Nothing you really have to discuss with the partner here, but it's worth considering throw combos where your partner would appreciate a laser (such as Falcon uthrowing Marth under 30%ish when Marth can still fair out, but a laser would guarantee your partner an unmolested aerial.)

Part 5: Creating Openings For Your Partner
When the teams have roughly split off into 2 1 v 1s and the 1 v1s are both at roughly neutral positions, if you have a clear shot on the opponent that your partner is pair up with, it can be huge for obvious reasons. The low lag on lasers makes the really hard for the opponent you’re paired up with to punish and really gives your team a big edge in the 2 1 v 1s style of team play since you can effectively create a 1.5 v 1 for your partner without really losing anything in your 1 v 1.

As you may have noticed for 1 and 3, high SHLs are crucial in teams, make sure you have them down pat.

Section 5: Things You Should Keep in Mind
1. Don't use your double jump to combo unless you are 100% certain you won't get hit out of it. I can't say this enough. Getting hit when you have no double jump is the worst thing that a Falco can do in teams. If you have a choice between full hop bair or full hop shine-> bair, for the love of god, don't waste your double jump for the shine if there's a snowball's chance in hell that your other opponent could hit you.

2. Pay A LOT of attention to your teammate. Even with good communication, you can't expect your teammate to keep you clued in on everything, so it's your job to make sure that when you can laser to his benefit or help extend any of his combos that you make the most out of it. It's difficult to split your attention like this, but it's certainly worth it, so practice practice practice keeping one eye on your teammate.

3. Don't do risky edge guards. If you have a mostly guaranteed kill by doing a simple edgeguard, go for it, but otherwise, you'd rather not take the chance of a reversal. Instead, use these opportunities when you knock one opponent way off to double team his teammate.

4. Laser grab is really good in teams. The limiting factor in comboing your lasers into grabs in singles is that Falco's throws suck, but as long as your teammate has good options vs. a stationary opponent, this technique proves very powerful.

5. Learn to split tech chase options with your teammate. You and your partner need to have a good feel for each other's reactions to tech chasing scenarios and keep all options covered. It's honestly not terribly difficult but I see tech chase situations blown way too much in teams to not mention it.

6. If your partner has a good aerial finisher, teach them that you will end combos with utilt/usmash/shine and that they should try to finish. If you're teaming with a CF, teach them that they should run up and knee the balls off of someone after you shine them while you keep the other opponent off. Pulling these types of cross ups are fairly difficult, but hugely powerful in teams. It requires that you, too, know when your partner is in a situation to finish for you and to lay off in these cases, but as I said in 2, you should be paying attention anyway.

7. Find a teammate you have good chemistry and stick with them. I miss having a regular teammate because building from your teams experience with someone is such a huge bonus. If you find a good teammate, don't ditch them for better singles players, as you ultimately will want to keep a consistent teammate rather than freelancing.


Lesson 5: Recovering with Falco

Section 1: Introduction
For as long as I have lurked the Falco boards, people have been complaining about Falco's recovery. “Falco’s recovery sucks balls!” they would post angrily as they finished regaling us all with another tale of a heartbreaking comeback loss to a Marth. Marth was at 250% with 1 stock left to their 0% with 2 stocks left. Bthrow -> jab -> forward B and chaingrab -> fsmash -> fair -> dair later, another Falco player is left crumbled up on the floor in the fetal position, weeping over how unfair this stupid game is.

And to be perfectly honest, there is some truth behind the overwhelming wave of johns that come with every bad beat we have to hear about Falco’s recovery. It’s not very good and one wrong decision while off stage is practically guaranteed to be the difference between keeping a stock and losing one. But the real problem is that many Falco players don’t analyze when they have made a wrong mistake and instead choose to pin every gimp and brutal edgeguard on their character’s terrible recovery.

Thankfully for all you reading this, Uncle Mogwai’s here to take you to Tough Guy Camp to teach you to stop *****ing and start figuring out how to live on your own.

Section 2: The Issues with Falco’s Recovery
Ok so let’s start off by addressing the serious issues with Falco’s recovery game.

Part 1: It's Too Short (THAT'S WHAT SHE SAID, MIRITE?)
First off, we have the marginal distance covered by his up B and forward B moves. They could be worse, but when you stack the distance covered by these moves up next to Fox’s equivalent moves, it’s easy to see that Falco doesn’t cover a whole lot of distance on his way back to the stage.

Implications:
What this means (aside from the obvious fact that if Falco is hit super far out, he can’t make it back), is that at the same distance from the ledge as a Fox, you have fewer options. In situations where Fox could either go to the edge, onto the stage or all the way up to a platform, Falco is frequently limited to either just the edge, or just the edge or the stage.

How to get around it:
This is an entirely legitimate issue in many situations, but any time you feel limited in your recovery options to the point where it cost you a stock, ask yourself if you could’ve DIed the hit different such that you were close enough to have enough freedom to live. Also evaluate how you DIed the prior hits if it was the final blow in a combo. Frequently we Falco players freak out when we’re getting comboed and foolishly DI up and in to try to stay alive, only to eat extra hits in a combo. DON’T DO THAT. Learn to DI correctly, you can set your DI away to avoid being comboed and then react to most finishing hits as they are typically telegraphed. DI away from Falcon when you’re popped up and if he sets himself up at your level, the knee is coming and then you switch to survival DI, but you wouldn’t be able to set DI to up and in and have time to react to a SH uair. Think about these sorts of things when you are playing friendlies and when you’re watching videos of yourself play.

Part 2: Up B Sucks Pretty Hard
Next we have the considerable startup time associated with Falco’s up B and its vulnerability. Since Falco doesn’t have the fire like Fox, the first hitbox from his up B comes out on frame 43 when he starts moving.

Implications:
That’s a little more than 2/3 of a second, which is brutal and gives anyone who expected you to up B free reign to come out and kill you however they please.

How to get around it:
Only Firebird when you have to or have successfully tricked your opponent into committing to an on-stage edgeguard. This issue is mostly solved by learning to recognize the situations I’ll talk about in Section 4.

Part 3: He Falls Pretty Fast
The last serious issue that people have with Falco’s recovery is that Falco is one of the fastest fallers in the game. He has the fastest top falling speed and fastest average falling speed according to M2K’s old research (http://m2k.galaxy64.com/ssbm.html).

Implications:
Aside from the on stage implications, Falco’s falling speed means that when he gets hit with a weak attack off stage, he has much less time to react before he drops beneath the ledge height. Couple this with the aforementioned vulnerable up B, and we have the formula for every Falco’s worst nightmare.

How to get around it:
React quickly and properly. Learn to react to getting shot with a laser/needle by forward Bing since the intent of the edgeguarder is to knock you below stage level to force you into your up B. Learn to not get hit by Marth’s jab and wiggle -> air dodge immediately after getting hit.

Also save your second jump until the point where your opponent can no longer hit you out of it. I’ll talk more about this in Section 4, but the gist of it is that Falco’s recovery is fine so long as you can accurately perceive and react to the situations.

OK, great, that’s it. Those three things are all there is to ***** about Falco’s recovery, that wasn’t so painful, was it? Sure, he’s got limitations and isn’t nearly as good at recovering as many characters, but it could be worse. For a reference on how it could be worse, play Ness or Zelda or Kirby or Doc or Captain Falcon or Roy for a little while, it’ll give you some perspective.

Section 3: Things about Falco’s Recovery to be Thankful For
So we’ve talked enough about the John-worthy aspects of Falco’s recovery, let’s get into talking about the good facets of it.

Part 1: Non-Linear Recovery
The most important thing here is that Falco has A LOT of recovery options. As we talked about in the previous section, they might not be the best options, but the fact remains that in most recovery situations, Falco has numerous ways to get his feet back on the ground:

Up B with full 360 degrees of freedom and auto sweetspots for downward angles.
Forward B with 4 alternative shortened lengths.
Air Dodging

He also has a few nice tools and characteristics that assist his recovery in:

A high double jump
A shine to stop his horizontal momentum, turn him around and mix up timings
A high wall jump

Compare this to most characters with more limited motion with their up Bs and only marginally useful forward Bs and you’ll notice that Falco’s recovery is relatively far from linear.

Part 2: Low Landing Lag
The next thing I want to note is that almost all of Falco’s recovery moves are unrealistically low on landing lag. Forward B and up B each only generate 3 frames of landing lag if they complete before you hit the ground, and up B only generates 6 frames if you hit the ground with it. Forward B generates 20 frames of landing lag if you hit the ground with it, but this is practically never the case, as the move is mostly going to the edge or slightly above the ground. Due to Falco’s fast falling speed, all this together means that it’s very difficult to try to punish Falco after he has completed his recovery move.

Part 3: Short Duration
Hand in hand with this aspect comes the fact that Falco’s recovery is extremely quick. If your opponent has to move a lot to get in position, they will frequently be out of position due to the fact that Falco’s total time between going off stage and attempting to recover rarely exceeds 2-3 seconds.

Section 4: Situation Recognition
Now that we’ve sorta laid out the bare-bones facts about Falco’s recovery, it’s time to talk about what actually determines if you live or die off stage.

Part 1: What is Situation Recognition
Off stage game is all about what I call situation recognition, the ability to recognize your opponent’s options and realize when one of your recovery options is relatively safe. If you double jump quickly because you thought your opponent wasn't going to jab you out of it, but then he does and you die because of it, it was a failure of Situation Recognition. Learning how to recognize a situation correctly, takes quite a bit of time, but it's important to tell people that this is something they should be doing instead of just trying to get back to the stage without paying attention to the opponent.

There are simply too many characters and play styles for me to go through every different way your opponent can be edgeguarding you and tell you what their options are and what you should be looking for while recovering, but I’m going to try to go through an example and hopefully you’ll get an idea of how you should be thinking when you’re piloting Falco back to the stage.

Part 2: An Example of How to Break Things Down
The example:
I’m going to go through the situation that is most frequently asked about. Marth grabs you near the ledge and dthrows you off stage. To start off, you must DI this away. If you DI in, you allow the Marth to turn around and dtilt you for free, which makes the situation that much worse. Ok, so let’s talk about his options and how you need to be reading his motions to best select your option.

Marth’s Options:
The most common thing for Marth’s to do in this situation is to stand on stage facing outward. The idea here is to attempt to jab/dtilt/fsmash you out of your double jump or your forward B if you DI away and double jump outward to forward B through them.

If instead you go below stage and try to up B, the Marth will either move closer to the edge and counter, move back and fsmash/neutral b or jump out and fair you, depending on their style and reaction time.

The reason Marth players love this style of edgeguarding is that it doesn’t force them to commit to an option and lets them react to everything that you’re doing with a quick move.

The next option a Marth has is to immediately dash off stage and fair, the idea being to catch Falco in his double jump.


The last thing that they can really do is WD backwards and take the edge and try to drop down and aerial you if you attempt to recover low or ledge hop aerial you if you try to recover high.


OK, so now the most important thing for you to do when you’re off stage in this situation is to try to recognize what your opponent’s plan in as quickly and calmly as possible. Double jumping immediately is rarely, if ever, your best option, so for the love of god, don’t just panic and hit jump only to have your jump jacked by a jab. Saving your double jump is absolutely paramount, as once you lose your double jump, your plethora of options that we talked about in Section 3 gets reduced to just up Bing, which means that you’re dead. EVERY SINGLE CHARACTER’S OPTIMAL EDGEGUARD ON FALCO INVOLVES KNOCKING HIM OUT OF HIS DOUBLE JUMP BECAUSE ONCE HE’S BELOW THE STAGE, HE’S DEAD.

Once you notice your opponent’s choice of how to edgeguard you, think of what it’s trying to exploit and come up with a plan to avoid getting hit out of your double jump. The reactions and counters to your opponent’s game plan are not set in stone, but to give you a sort of outline and starting point, these are roughly how I try to react to each of his options above.

How Mogwai Typically Tries to React:
He dthrows me, I see him standing on the stage facing outward. His plan is clearly to dtilt/jab me out of my double jump. I let myself fall to around the point where I could double jump and sweetspot the edge. Marf’s hitboxes are ******** and hit below the stage though, so just double jump sweetspotting doesn’t work with Falco’s sweetspot vs. a properly timed jab/dtilt. I’ve noticed over time that Marths jab/dtilt when then hear your double jump sound so my reaction is to double jump and before I’m at the point of that he can hit me, I airdodge up through his attack and back onto the stage. If I can, I’ll airdodge high and try to DI back towards the edge to avoid the re-grab, but here it’s pretty much a guessing game. If you have a wall to ride up on, also consider wall jumping into the airdodge to give yourself the extra invulnerability frames immediately after the walljump

He dthrows me, I see him dash towards the edge immediately after the throw. His plan is to run off and aerial me. If I have a wall to jump off of, I will let myself drop low and then wall jump into an aerial, forward B to the ledge or airdodge onto the stage. If there’s no wall, I’ll fall to the point of a double jump sweet spot, and either just immediately double jump sweetspot or shine for a spit second to mix the timing up and then double jump sweetspot, depending on the situation. If you have godly reactions or didn’t follow my advice above to not just double jump immediately, you can also just immediately double jump to get above the Marth and throw a quick Dair out there and hope for the best. This is not a smart option though, as every fast reactions aren’t close to fast enough to do this on reaction so if you guess wrong about what the Marth is doing and he decides to just stand there and jab or WD back into an fsmash, you’re probably dead.

He dthrows me, I see him WD backwards. His plan is to take the ledge and attempt to aerial me on recovery. By putting himself on the ledge, he has taken away his ability to hit me if I go high so that’s usually what I do. Also, most of the time a player takes the edge to edgeguard, they don’t plan on actually holding onto it so it’s frequently a good idea to jump up and up B at the level where your up B charging will grab the ledge so that when he ledgehops, you just grab the ledge and get invulnerability frames.

Section 5: Random Other Stuff
Learn to shorten your illusion and understand its sweetspots. If you crash into the stage with it, that’s not a sweet spot. If it ends a little ways away from the ledge, that’s a sweet spot.

Learn where your up B can grab the ledge while charging. Practice some firestalling and while doing so, pay attention to how far away you can be in order to grab it.

Learn to angle your up B against walls for sweetspots from below. Especially against lazy Marth players who just go for counters when you have to up B, this is hugely useful as a sweet spotted up B triggers their counter without actually getting hit.

Wall jumps give you invulnerability frames, so does grabbing the ledge. Pay attention and get a feel for how long each of these invulnerability windows lasts.

LEARN TO TECH. Training mode, proxy mines on walls, just practice practice practice until you get the timing. You have a decent window to start holding R in order to tech, just learn it and you’ll live a hell of a lot longer.

So that’s sorta it. Most of learning how to react to different situations will come with experience, but the gist that I’m trying to get you to get here is that it’s important to think and appropriately identify what your opponent’s strategy is. In friendlies, when someone hits you with something new, think about it later that night and what you could’ve done to avoid dying from it. Recovering is 50% Situation Recognition and 50% beating strong strategies for how to react into your head.


After reading all this, if you still have questions about Falco, I'm here to answer them so ask away!


Stuff past here is not Mogwai material


Random useful stuff goes here

Pillaring Frame Data from Scotu:


This is indeed the kind of **** one should quote in the first post.

Moral of the story, pillaring ain't safe vs. good play OOS.
 

Frown

poekmon
Joined
Nov 1, 2007
Messages
8,538
Location
Right here, not quite now
Over the past week and a half, I've learned so much about this game.

Many of you play this game for the surface value. The flashing lights, cool colors, lucky 'combos', and the occasional friendly victory. It's as if you are reading a Manga without knowing the language, but the pictures alone are enough for you to keep reading, or at least trying to.

You don't understand the story but the artwork is amazing.

I used to play brawl like that. Just going with the flow, not really understanding key aspects but, I enjoyed the music, the noise, but I didn't understand the game.

Until recently.

Once you're able to speak and read the language that Manga becomes THAT Much better. And you can't put it down and you understand the finer aspects of that story.

In this post, I'm gonna help teach you the language of Brawl, and hopefully you can open your eyes to the amazing game this truly is.

The Guaranteed option:
Not many things in this game are Guaranteed. Usually you have to do some prediction or guessing, and your chances of hitting are resting on the idea that your move has frame advantage/priority/etc. But there's a way to literally hit them without their consent, not get punished and have complete control of the next action. And that's called the Guaranteed Option.

Depending on the tier of your character, you might not have as many Guaranteed Options (G.O) as other characters. Some have multiple per game, and some only have one or two. The higher tier your character, the better G.O's they have. But these things only come at max, perhaps 20 times a game, assuming you're MK, and they vary depending on the MU. It's your job to find, excise, and exploit these G.O's and use them every game. And this is where reads, and conditioning, and baiting come into play, but that's basic stuff that you should know. If you'd like me to expand on this point, let me know in the comments. Otherwise, I'll move on.

I play Wario, so an example would be vs Snake, a very irritating MU. During the game, I have no reason to face him in his face, for he has to many options that cover mine. So I'm going to play very defensively. But the second he Nairs, I'm going to go in for that Shield Grab, or that Clap. Granted, this doesn't happen very often. I could wait a whole Two minutes for this to happen, and only one G.O could come every two minutes. But I'm going to wait for it. It's my free damage, my free punish, my free kill. But this is why games last so long! Which leads me into my next point.

Disconnect between playing Gay and Safe:
It's no secret, that brawl is a defensive game. Every game from top players never ends in 3 minutes. Or 4 minutes. Why? Because each player is looking for that G.O. They are searching, and exploiting their character to do so. They will camp platforms, run away, stay on the ledge ,all to find that G.O. Sometimes it takes over two minutes to find the first one, and the next one won't come for 45 seconds Later. This makes games last so long. There is a large disconnect from 'playing gay' to 'playing safe.' Playing Gay implies that you are simply running for the sake of not being hit. Such that you are un touchable for no purpose other than to irritate your opponent and hope for a clock out. Playing Safe indicates that you are just using your time to wait for that G.O. And Safety does not always mean camping the ledge or hopping on platforms. It could mean pressuring them up close in order to force frame traps and irritating options for you to punish with a G.O.

Think about it. If you play Falco and you're fighting a Pikachu, what reason do you have to walk down near him? Camping platforms it not playing Gay, it's playing Safe. you're waiting for him to slip up, and take your G.O which could be as little as a jab, or as big as a Grab. But that's not going to happen very often, because in that MU, Falco has very little G.O's against Pikachu, and that's what makes it very difficult.

Often times, matches from top players last till about the last two minutes of a match. And some players decide to switch from playing Safe, to playing Gay, simply because the time out option becomes the G.O. Though the clock was never intended for such use, it became used for that. Unfortunately there is nothing we can do about it. In short, if your matches are lasting about four or three minutes each match, you're probably playing this game incorrectly.

No such thing as 'kill percent.'
When somebody is at high percent. It's really easy for one to see that a certain move can kill them, but who's idea was it for people to infer that you must kill them at that percent? People have created definition to the idea that subsists on percent, and killing them with a certain move at a certain time. That doesn't exist. When Fox plays anybody, you know that his U smash can kill you at 100 usually. So why would that fox ever use U smash? why not just continue the match as normal? The idea behind this, is the higher the players percent, the more moves you have to kill them with, and the more options you are inadvertently stopping.

I feel an easy way to understand, is playing each stock as if you were trying to get them to 999. However if you kill them with a move, then so be it. You have the stock advantage now.


tl;dr?
If you don't have the patience to read this, you don't have nearly the amount of patience for Brawl.

If people want to read more then I'll write more. I'll leave it at these three points for now. I hope you enjoyed it. =] Thanks for reading.

Popular Competitive Philosophies
A callout to people who problematise the game they love.

When I say ‘Popular Competitive Philosophies’, I refer to discussions relating to common issues in a tournament setting. To be brief, these are issues relating to rulesets employed in tournaments and the way in which they dictate the strategies commonly employed by players in order to win.

Before I talk about a number of different, popular view points, I wish to address a philosophical issue in general that I feel relates to anybody who has ever posted an opinion on a rule regarding Brawl.

I studied Advanced Literature in my final year of high school, and the most important thing I took away from that class was that everybody’s opinion is a valid opinion. What they teach in a standard English class is rubbish. Teacher’s will present you with a magazine ad and ask you to deconstruct it to find out the author’s intent and to that I say “What does it matter what the author intends when we first haven’t established the audience?”.

By audience I don’t mean ‘Stereotypical Female between 14 and 19’. I mean ‘Anglo-saxon, white, middle class female between 14 and 19 that is heterosexual’ or ‘Middle-eastern, tanned, male between 20 and 25 that plays cricket’. The point being that the authorial intent behind the American advertisement designer’s choices lose meaning when presented to a middle eastern man who may interpret the ad in a different way (to the anglo-saxon girl) due to the cultural and ethnical values instilled in him by his development as a person.

Does that make his interpretation wrong? No.

Roland Barthes posited that the death of the author is necessary for the rise of the reader. What matters is not the intent of the author drawn by popular readings of a text, but, the limitless potential readings that can be drawn from readers of different age, sex and cultural/ethnical upbringing.

So take this scenario:

Person A says: I think Port Town Aero Dive is a viable Counter Pick because a potential 40% death caused by the Cars does not create a ban-worthy imbalance in the stage hazard’s risk : reward ratio.

Person B says: I think Port Town Aero Dive is not viable Counter Pick because a potential 40% death caused by the Cars creates a ban-worthy imbalance in the stage hazard’s risk : reward ratio.

Who is correct?

The short answer is both of them.

The long answer is that they are both correct so long as the opinion each person is asserting is backed up by a Competitive Philosophy that supports it.

“Okay, so what are these popular competitive philosophies?”

Overswarm, and KishPrime before him posited two very popular approaches to competitive smash – Originalist and Constructivist: http://www.smashboards.com/showthrea...constructivist

I highly recommend reading the whole thread opener, but to quote the main points of the two philosophies (and do no justice to OverSwarm):

Quote:
The originalist is the philosophy I agree with personally. You'll obviously see some bias in the article because of it, but I'll do my best to be straightforward.

The Originalist wants to keep the game as intact as possible. They open the game, put in the disc, and say "Is this competitive?" and decide after if they need to change anything.

The originalist often goes against the grain of common thought, and opposes knee-jerk reactions vehemently. If there are ten counterpick stages that several characters have good win rates on, the originalist accepts this as the standard of the game rather than attempting to cut them out to make a more "50-50" matchup in all cases.

The originalist is strongly opposed to surgical changes as well; the originalist philosophy doesn't really accept surgical changes except in very very VERY odd circumstances. This means if Dedede can infinite 5 characters, the originalist accepts D3 as a hard counter to those characters and tells those 5 character mains that they need to deal with it.

The originalist also has an open mind when it comes to stages. Instead of banning every stage that might be a problem, they want to wait for actual problems in the tournament scene. If someone says "Hey... Onett is broken! You can just camp the edge and win that way!", the originalist challenges him to abuse this to its fullest. If it turns out to be broken it'll be obvious in the tournament scene quickly and we'll have enough data to justify a ban. If someone asks why a stage is banned, we can tell them. Whoever the person who discovered why it was broken wins some extra money, so there's built-in incentive for testing this stuff at a high level. It won't be someone winning a few friendlies; it'll be someone winning multiple tournament matches against people trying to beat it.
Quote:
The constructivist comes at the game with a scalpel. They know the game can be better and intend to remove the fluff that creates unsatisfactory results.

The constructivist is a huge fan of surgical changes. If they see Dedede infinite DK, they wonder why anyone would ever allow that technique. It obviously eliminates DK from the game, so why not just ban it and allow DK to play in tournaments without this threat?

The constructivist doesn't necessarily do whatever knee-jerk reactions tell them to do, but they take notice of gut feelings, community outrage, and things that go against the grain of what they feel is competitive. While pictochat's hazards may have no outcome change to a series of sets, they may be unacceptable to a constructivist because they do not fit the standard of play on other stages. While the klap trap on Japes comes on a strict timer, the constructivist may not believe that timing the klap trap is a skill we should ever be tested on.

The constructivist has a very close-minded approach to stages. Instead of taking the originalist approach of "Does this stage take away anything from the tournament scene", the constructivist asks "What does this stage add to the tournament scene". There may be no problems with a stage like PS2 in tournament; it could have consistent results, a clear and obvious pattern, and no balance complaints. This doesn't stop a constructivist from saying "Why should we be playing in zero gravity, on ice, and on conveyor belts?" and banning the stage because it doesn't add substance to their idea of balance.
These two ideologies represent the most common approaches regarding competitive ruleset design and validate most, if not, every single argument I’ve ever seen for and against every stage and questionable tactic in the game.

However, I’d also like to draw the reader’s attention towards one particular quote.

Quote:
-There's no universal "this is competitive" mindset

This is the worst problem with constructivist philosophy. Two people can have the same mindset, but one can think that something is completely unnecessary in the tournament scene while others don't have a problem with it. This creates a clash of interests. Originalists don't have this, and instead clash over the interpretation of data. Over the course of time, originalists will generally get enough data to sway one side over the other. Constructivists do not. If one feels that infinites are anti-competitive because you can't do anything once you're in their grasp, but another feels they are only anti-competitive if they are near impossible to avoid, you have a clashing of values that can never be resolved.
Specifically, the fact that no one competitive mindset can truly ever be called the correct one. This essay of sorts seeks to not only present a number of popular competitive philosophies relating to Brawl, but to disempower the idea that your reasoning is any more sound than that of others (unless you both subscribe to the same philosophy), and empower the idea that everybody’s opinion matters.

Past these two all-encompassing philosophies are a number of other ones that borrow elements from one or the other, and set them in a different light, though an important thing to note is that they do not necessarily justify ruleset construction mentality, but rather, reflect their outlook on competitive play as a whole. I will touch briefly on two of them since by now you should get the idea of this article.

There are those that subscribe to David Sirlin’s ‘Play to Win’ philosophy that is generally associated with the idea that players who are seeking to win a game should do so, discounting any moral or ethical dilemmas as long as any strategy or tactic they employ is legal within the rules of a competition. I will posit nothing as fact when it comes to this mentality since these players may be originalist in regards to infinites, but constructivist in regards to stage lists.

One of this vein of thinking’s most important concepts to understand is that ‘Fun is subjective’. This means that regardless of whether you think camping is not fun to watch, it should not be factored into any kind of decision based on a ruleset.

The last philosophical approach I wish to address should actually be split into two veins of thought which I shall name ‘Definitive and Providential’. Which I personally believe has represented an important juncture in ruleset design.

The Definitive reader will strive for a smash game that features as few unpredictable outcomes and elements as possible whilst the Providential reader will oppose the removal of these elements without good reason or evidence.

Essentially, the crux of the Definitive argument is that the existence of random elements in the game makes the game less competitive in term’s of a player’s direct influence in the progress of a match.

However, the Providential reader shall discredit this by acknowledging that the existence of random elements that affect characters on a universal scale helps provide balance rather than take it away.

Item play is a key example of this; whilst the Definitivist will assert that items cause unnecessary, unwanted random elements to influence a match unfairly, Providentialists will assert that the existence of a random, universal set of attacks is actually beneficial to the balance of the cast. Arguments for many stages such as pictochat are also similar.

“So now that we know everybody is right and nobody is wrong, how can we possibly create a fair, competitive landscape for Brawl?”

It’s simple, Democracy. In that regard, the BBR has been the right step to make all along. Even if you have an informed opinion, to vote you should also be eligible to do so within your country.

But we shouldn’t be voting on ‘Ban X stage’ yet.
We should be voting on ‘Adopt X philosophy’.


And if you disagree with any of this, remember, it's okay
The point is that you're allowed to

*In this thread we are not discussing the Official BBR Recommended Rule List 3.0 as there is already a thread for that. Please stay on topic and don't wan off to other discussions.*

A common excuse I see when people complain about the new rule list is that "no one is forcing you to use our new rule list, it's just a general outline that can be used..."

By saying this it does omit any responsibility for the creators of the new rule list. However, how true is that statement? Sure we can NOT follow the rule list and do what we want, but isn't that the purpose of having a common set of rules that everyone follows? For all we know, I could set my own list of Neutrals/Counterpicks. Why not increase the time to 10 minutes instead of 8? Why not ban MK or any of the suggested stages listed in this new rule list? Because when someone runs rules that don't follow the norm, they are accused as being bias, unfair, limiting the competitive play style that Brawl has to offer, or being a scrub.

By doing anything outside of what one of the most respected and knowledgeable organizations, the BBR, my say as a tournament organizer in Kingman is easily argued against. It is because my say isn't as strong as an organization that has their rules stickied on the forum that hosts "The Largest Smash Bros Community." Anything I say as an individual that has no official status is overlooked as being scrubbish.

If the answer is just "TO's obviously shouldn't follow the new rules if they really feel that they are that bad," how will this solve the problem in the big picture. Sure for that tournament the rules can be bent into whatever is 'better,' but unless the rules can keep the same from tournament to tournament, the results will be very unstable. It is almost like playing a different game all together if rules can be easily changes from place to place.

Are we really open to follow whatever rules we want and still be looked at as a competitive community? Should we as a community follow one rule list? As tournament organizers, can we really host anything that isn't what the BBR thinks is 'recommended' without question by the players who join our tournaments? If using BBR's rules is out of the question, where do we turn to for answers for a more proper rule list?

Just a reminder, this thread isn't on a discussion for what is the "best rules list for competitive brawl." This is just a discussion about how true it is for TO's to follow whatever they want instead of BBR's rule list without coming off as scrubs, and how rules in general should be done in tournaments: different rules that can be flexible anywhere anytime, or should we as a community keep a solid set of rules that need to stay the way they are everywhere.

Official BBR Recommended Rule List 3.0
Super Smash Brothers: Brawl

This is the official rule set version 3.0 of the Smash Back Room: Brawl (BBR). The rules at any particular tournament are always at the discretion of the tournament organizer, but we recommend this rule set as a base guideline for all tournament organizers to use.

--- --- --- --- --- --- --- --- --- --- --- --- --- --- --- --- --- --- --- --- --- --- ---​

General rules:

3 Stock
8 minute timer
Items are set to "off" and "none"


  • If the timer runs out, the victor is determined first by stock and then by percentage.
  • Resolving Ties: If percents are the same or both players die simultaneously, there will be a 1 stock, 3 minute, same characters, same stage rematch.
  • All sets with the exception of winner's finals, loser's finals, and the championship are best of 3 matches (best of 5 and above should be played out for any "finals" matches)
  • In the event of a dispute, controller ports will be selected by Rock-Paper-Scissors.
  • You are responsible for your own controller and name tag. Any malfunctions or errors that occur are your responsibility, so bring an extra controller if possible and always check to make sure you're using the correct settings BEFORE a match is played. If a match is to be restarted due to controller functions, it must be agreed upon by both parties.
  • Extending Meta Knight's Dimensional Cape by leaving the ground and returning to it while invisible is banned. (For example, flicking the C-Stick up while holding down on the control stick during the move will cause this to happen.)
  • Stalling is banned.
    Stalling: The act of deliberately avoiding any and all conflict so that one may make the game unplayable. Running away from an opponent to reach a better position is not stalling, while using an infinite to run out the timer rather than to score a KO is. As such, any infinite chain-grabs, locks, etc. cannot exceed 300%.
  • Any action which prevents the game from continuing (i.e. by causing the game to crash or causing all characters to freeze indefinitely) is banned. If the Tournament Organizer or a judge can conclusively determine the player responsible for the failure, that player loses the interrupted game. Players are expected to know their characters and prevent this from happening.
  • Some interactions (for example, a throw with a wind attack) can cause one character to become frozen until being hit. If this happens, the free character is expected to capitalize on this in a timely manner; a failure to do so is stalling.


Set format (In Order of Procedure):
1. Opponents make their character select screen choices for the first match. *

2. Opponents start the stage striking procedure.

The stage striking order changes depending on the number of stages allowed. When reading this order, “1” is player 1 and “2” is player 2. The optimal striking orders are as follows:

  • 3 Stages: 2-1
  • 5 Stages: 1-2-2-1
  • 7 Stages: 1-1-2-2-2-1
  • 9 Stages: 1-1-1-2-2-2-2-1
3. Each player may announce one stage to be banned for counterpicks of the set.

4. The first game is played, using the stage chosen during step 2.

5. The loser of the previous match announces the next match's stage from either the Starter Stage List or the Counter Stage List. **

6. The winner of the previous match chooses their character.

7. The loser of the previous match chooses their character.

8. Repeat steps 5-7 for all proceeding matches.

*Double blind character selection may be called for the first match. Also, the choices made here include the character's color and whether the player will start as Samus or Zero Suit Samus, as Zelda or Sheik, or as a particular Pokemon for Pokemon Trainer.

**No player may choose a stage they have already won on in that set unless agreed upon by both players.​
Additional rules for Doubles play:

Team Attack must be set to ON.
Sharing stocks is allowed.
The controller ports will be determined in a 1221 fashion; whoever wins the RPS will choose first, then the opposing team will get their ports, and then the teammate of the RPS winner will get the last port.

If the clock expires in a team match and the total number of stocks of each team is equal, use the sum of the final percentage of players on each team as the tiebreaker; whichever team has a lower sum wins. (A player who has been eliminated has no stocks and 0%).

In team play, causing both characters of a team to become frozen (i.e. by interrupting a throw with a wind attack) is to be treated the same way as freezing the opponent in singles. Leaving only one of your opponent's characters frozen is legal since the teammate can work to undo the freeze.​
Optional Rules:

  • Port slob picks: On a player's counterpick, that player may opt to redo the port selection process with that player or team picking their port first.
  • The Mages DQ rule: After a match has been called, if a player is 2 minutes late he will receive a warning. At 4 minutes late, he will be given a loss for the first game of the set. After 6 minutes, he will be given a loss of the entire set.
  • Color Blind Rule: In team games, it may be requested that certain characters be assigned a specific team color in order to prevent any unnecessary confusion. For instance, Sonic, Lucario, or Falco may be requested to be assigned the blue team color.


Recommended Stage List:

The below Starter/Counter list has a list of three stages, followed by three sections of two stages each. In order to use this, start with the top three stages in the list, and adjust the starter list between 3 and 9 stages by going down the list and adding the next two stages until the desired number of stages is reached. Keep in mind that "Battlefield, Yoshi's Island, Smashville, Lylat Cruise, Pokémon Stadium" is a correct use of this, but "Battlefield, Yoshi's Island, Smashville, Lylat Cruise, Final Destination" is not. Go down the list; do not mix and match. Any remaining stages not used in the Starter list will be moved to the tournament's Counter list.

The Counterpick list is a list of stages that should be universally allowed as legal Counterpick stages.

The Counter/Banned list is a list of stages that may be allowed as a legal Counterpick stage or banned from tournament play based on the tournament organizer's discretion.

The Banned list is a list of stages that should be universally banned from tournament play.


Starter/Counter

  • Battlefield
  • Yoshi's Island
  • Smashville
  • Lylat Cruise
  • Pokémon Stadium
  • Final Destination
  • Castle Siege
  • Delfino Plaza
  • Halberd

Counterpick
  • Luigi's Mansion
  • Norfair
  • Frigate Orpheon
  • Pokémon Stadium 2
  • Port Town Aero Dive
  • Distant Planet
  • Pictochat
  • Jungle Japes
  • Rainbow Cruise
  • Green Greens
  • Brinstar

Counter/Banned
  • Yoshi's Island (Melee)
  • Pirate Ship

Banned
  • Mushroomy Kingdom 1
  • Mushroomy Kingdom 2
  • Mario Circuit
  • Rumble Falls
  • Bridge of Eldin
  • Spear Pillar
  • Wario Ware
  • New Pork City
  • Summit
  • Skyworld
  • 75m
  • Mario Bros.
  • Flat Zone 2
  • Hanenbow
  • Shadow Moses Island
  • Green Hill Zone
  • Temple
  • Onett
  • Corneria
  • Big Blue


Notes

This ruleset is the recommendation of the Brawl Back Room for how to run competitive Super Smash Brothers: Brawl tournaments. We do not condemn TOs for holding tournaments with alternative or even noncompetitive rulesets. It was through experimentation and open but critical thinking that we reached these recommendations, and we encourage TOs to continue the search for improvements and novelties.

However, there are rules which, after debate, we do not recommend for competitive tournaments:

  • Except as noted in the definition of stalling, the BBR is opposed to the banning or restriction of any character's infinites.
  • The Bowser suicide klaw rule present in the SBR Ruleset 2.0 has been removed.

    The BBR now recommends that the game's verdict should always be honored; a victory screen should decide the winner. Any Sudden Death (excluding time-outs) should be treated as a tie; which are resolved with a 1 stock, 3 minute, same characters, same stage rematch.
  • The BBR is opposed to the institution of a Ledge Grab Limit of any number (for any character) for use in determining the winner of a match by time out.
  • Athough the BBR disapproves of players "coaching" other players during a tournament match, the universal and fair enforcement of a rule to prevent it appears to be improbable.

Other Notes

  • Tournament Organizers should make their policy regarding the use of codes, file replacements, and the like clear. The BBR suggests that larger scale tournaments should have little to no tolerance for the use of cosmetic hacks. Those permitting use of such hacks should be advised that the uninformed use of even cosmetic changes might cause unintended gameplay changes, and even informed uses can affect the outcome of the game whenever the DVD's loading time becomes a factor.
  • Also, to avoid legal repercussions, to avoid loading time changes, and to deal with the uncertainty as to the existence of changes to the game, USB/SD loaders and DVDs not manufactured by Nintendo should not be used at tournaments.
  • Whenever time permits, pool play should precede double elimination bracket play. Pool results can eliminate players as necessary and should be used to seed the bracket. Also, the semi-final and championship sets should be in at least best of 5 format.
  • The use of wireless controllers should be discouraged because of interference, unreliability, and time hindrance, but wireless controllers should not be banned.
  • Wiimotes and Classic Controller users should know to take the batteries out of their controllers after finishing a set; not only will this save battery life, but it prevents accidental intereference and delay for tournament matches.
  • Drugs and alcohol should be prohibited due to minor involvement and potential legal issues.

A tournament whose rules follow these guidelines may include a note in its opening post (suggested beneath the tournaments title in smaller font) that reads "Follows BBR Recommended Ruleset 3.0".

None of this is my work, it is merely a compilation of others' work done by me, so you don't have to ;)


A HUGE note to all- all sets of frame data are incomplete, aside from the Ike boards.

For those of you who maintain/are working on your character boards' frame data threads, I would suggest using the Ike frame data threads as a sort of template to base your own research on.


Character Specific Frame Data-

:bowser2: Bowser: http://www.smashboards.com/showthread.php?t=206219

:falcon: Captain Falcon: http://www.smashboards.com/showthread.php?t=216778

:diddy: Diddy Kong: http://www.smashboards.com/showthread.php?t=239185

:dk2: Donkey Kong: http://www.smashboards.com/showthread.php?t=202958

:falco: Falco: http://www.smashboards.com/showthread.php?t=187546

:fox: Fox: http://www.smashboards.com/showthread.php?t=240800

:gw: Game & Watch: http://www.smashboards.com/showthread.php?t=189251

:ganondorf: Ganondorf: http://www.smashboards.com/showpost....73&postcount=2

:popo: Ice Climbers: http://www.smashboards.com/showthread.php?t=232593

:ike: Ike: http://www.smashboards.com/showthread.php?t=202837

:jigglypuff: Jigglypuff: http://www.smashboards.com/showthread.php?t=216922

:dedede: King Dedede: http://www.smashboards.com/showthread.php?t=224054

:kirby: Kirby: http://www.smashboards.com/showthread.php?t=144039

:link2: Link: http://www.smashboards.com/showthread.php?t=228233

:lucario: Lucario: http://www.smashboards.com/showthread.php?t=211488

:lucas: Lucas: http://www.smashboards.com/showthread.php?t=255033

:luigi2: Luigi: http://www.smashboards.com/showthread.php?t=175652

:mario2: Mario: http://www.smashboards.com/showthread.php?t=219407

:marth: Marth: http://www.smashboards.com/showthread.php?t=204825

:metaknight: Metaknight: http://www.smashboards.com/showthread.php?t=205614

:ness2: Ness: http://www.smashboards.com/showthread.php?t=207559

:olimar: Olimar: http://www.smashboards.com/showthread.php?t=225377

:peach: Peach: http://www.smashboards.com/showthread.php?t=246380

:pikachu2: Pikachu: http://www.smashboards.com/showthread.php?t=223901

:pit: Pit: http://www.smashboards.com/showthread.php?t=268872

:pt: Pokemon Trainer: http://www.smashboards.com/showthread.php?t=224610

:rob: ROB: http://www.smashboards.com/showthread.php?t=255281

:samus2: Samus: http://www.smashboards.com/showthread.php?t=185822

:shiek: Sheik: http://www.smashboards.com/showthread.php?t=248288

:snake: Snake: http://www.smashboards.com/showthread.php?t=258332

:sonic: Sonic: http://www.smashboards.com/showthread.php?t=233106

:toonlink: Toon Link: http://www.smashboards.com/showthread.php?t=193918

:wario: Wario: http://www.smashboards.com/showthread.php?t=210128

:wolf: Wolf: http://www.smashboards.com/showthread.php?t=194120

:yoshi2: Yoshi: http://www.smashboards.com/showthread.php?t=249046

:zelda: Zelda: http://www.smashboards.com/showthread.php?t=218082

:zerosuitsamus: Zero Suit Samus: http://www.smashboards.com/showthread.php?t=238787


Misc. Frame Data-


•Jump Squat Frame Data: this is how many frames it takes for a jump oos to actually occur for *insert character*

Also, oos upB and oos usmash are NOT effected by jump-squat, only aerials, usmash and upB both cancel the jump-squat animation, explaining why they are so fast oos as compared to aerials :) Good stuff RocketPSIence :D


Quote:
Originally Posted by RocketPSIence
Alright guys, I went into BrawlBox and got how long each animation took. Here is my findings:
JumpSquat Frame Data:

captain - 6
dedede - 5
diddy - 5
donkey - 7
falco - 5
fox - 5
gamewatch - 6
ganon - 6
ike - 8
kirby - 5
koopa - 9
link - 8
lucario - 6
lucas - 6
luigi - 6
mario - 6
marth - 6
metaknight - 5
ness - 6
peach - 6
pikachu - 5
pikmin - 6
pit - 6
pokefushigisou - 6
pokelizardon - 8
pokezenigame - 5
popo - 5
purin - 6
robot - 6
samus - 5
sheik - 5
snake - 10
sonic - 8
szerosuit - 5
toonlink - 8
wario - 7
wolf - 7
yoshi - 7
zelda - 7

Remember this is the length of the animation, so when you are calculating the first actionable frame, you have to add one.


Rolls, spotdodges, and airdodges

http://www.smashboards.com/showthrea...ighlight=frame


Ledge grab invincibility/some general info about ledge-dropping

http://www.smashboards.com/showpost....5&postcount=56


That's it for the misc. section, but item specific frame data would be amazing, such as glide toss frame data and oos item throw frame data.

Another thing that would be great is shield drop/power shield frame data. Is it the same for all characters, or is it unique to some?


New request added to the list-

Every single character's ledge frame data.

I'm thinking that if someone is thinking about doing this on their own, they could work from the top of the tier list down, as the tier list does dictate which characters need to be more or less known about ;P


Frame data people- any threads I should read in order for me to test for frame data on my own?
__________________

Welcome to the official project thread for 'Item Standard play'!
This is a moderator-approved Brawl Tactical thread.

REALLY IMPORTANT NOTICE:

GET ALL CURRENT TEST SPAWN POINT PACS AT THIS DL LINK!

It is now possible to (kind of) control spawn points of items! Allow me to explain. Early in this thread, there was a big debate over whether Brawl had a hard-coded list of spawn points for items on each stage, or if the game randomly/procedurally determined where an item will spawn. I'm happy to report that the answer is...

...BOTH!

See, in each stage PAC file, there is a section called ModelData[100], and nested deep within this file is a list of bones for each stage, some of which are assigned to item spawns. Using the positions of these bones (stored in (X, Y, Z) format under "Translation"), we can create boxes of areas where the game will allow items to spawn, at which point the game will randomly select a point inside this valid area to spawn items.

This is VERY important. This means that, with hacking, we can find the most balanced and fair areas to spawn items on each stage and restrict item spawns to only those areas!

In order to test this, anyone with Homebrew can download my hacked test PAC for Final Destination. This file restricts item spawns to the diamond in the middle of FD, high above the respawn platforms. Go ahead; turn Gooey Bombs on and see if any spawn on top of your Smash attacks now! The added height means you can react to item spawns, and the small central spawn area means that stage control is actually TOTALLY important (plus, the time it takes to go get an item and return to edgeguard means players recovering have a fairer time).

Test this out, and maybe we can hack all the spawn points to be fair and balanced on each stage!

IMPORTANT NOTICE 2:

For a little while, I have been working on a side-project in my spare time for fun, but it's turned into something I think TO's would actually like. So, I'm going ahead and releasing what I'm tentatively calling a "TO Tools Pack." The pack includes a custom-built and large-monitor/projector optimized Powerpoint that can be edited and tweaked from my template to allow tournament rules to be continuously and efficiently circulated to a large group of players, something every TO I'm sure will appreciate. Also included is a picture pack that was designed to be used either separately or (optimally) in conjunction with the powerpoint. The included picture pack allows a TO to make his stage (or item, for ISP) listing and custom build a picture of a Neutral/Counterpick/Banned color-coded stage/item select screen that allows players to quickly identify tournament-legal stages/items. What's better is that it's all easy to use (I use it with MS Paint) and it allows you to use ANY combination of stages/items and stages of legality.

You can grab the .rar, complete with Readme files, at the following link: http://www.megaupload.com/?d=TY9L4UGM.


Panda's Comments: I've decided to sticky this thread for several reasons, one of which is that there IS a small subset of people who enjoy playing with items, so this thread could be of help to them. The effort that has gone into Jack's project should be commended, and although there are still a few kinks to work out here and there, it is as close as you can get to a competitive item ruleset for now.

That said, NO TROLLING OR FLAMING WILL BE TOLERATED IN THIS THREAD. If you don't like items then don't bother participating in this discussion. This is only for those who enjoy item play, not those who enjoy belittling those who use items themselves.


Click here to visit Jack's other thread where he discusses the ruleset he has created to accompany this item list. [Jack's Edit of Panda's Edit: Since a lot of discussion now happens in this thread, I've decided to merge the thread Panda linked to with this one. The thread you are currently reading in Brawl Tactical will now function as the main discussion thread for both ISP's item list AND ruleset. I'm keeping the link here because a LOT of discussion happened there, and so without that thread, a lot of context is lost. Much thanks goes out to SamuraiPanda for his support and stickying powers.]


[NOTE: This thread concerns offical rulesets and playstyle discussion for the creation of a unified approved item listing for item-based tournament play. This thread is NOT for:

*flaming
*discussion of whether items (in general) are tournament viable
*discussion concerning the 'randomness' of items
*trying to replace any form or facet of current, established tournament play
*etc.

All of the above will not be tolerated. If you are looking to discuss whether items should be allowed in tournaments, you have come to the wrong place.]

Mission Statement:

This mission of the 'Item Standard Play' project is :

A ) To experiment to find a unified list of items that are 'approved' for item-based tournament play, as well as 'approved' playstyles and rulesets for the creation of item-based tournaments. As in any tournament format, final discretion is always in the hands of the tournament organizer.

B ) To create a scene that can/will act as a stepping stone for the introduction of casual players into the traditional tournament scene without forcing them to 'abandon' all of the conventions of casual play.

C ) To create a scene that current tournament players can go to, if they so choose, that has an alternate style of play than what they are used to.

D ) To create a unified place that tournament organizers can come to discuss, create, and advertise item-based tournament events.


Plans:

This thread's purpose is to catalog all of the information, theoretical and real-world, concerning formalized competitive item play. Just like how tier lists and rulesets go through iterations, ISP is ever-evolving as well. New advancements in Brawl's metagame can cause future changes to ISP rulesets; nothing in this thread is "set in stone". This means that we would hope that, although we currently have a formalized (and widely accepted) ruleset, more testing must always be done.

In order to be as open-minded and thorough as possible, all items must be tested in a range of various circumstances (1v1, 2v2, and FFA; all of which Online and Offline). Prior knowledge from Melee must, for the sake of accuracy and true balance, must be discarded, especially in light of the inclusion of a new physics engine (Havok). To accomplish this, we ask that those who would like to contribute to the project post in this thread details pertaining to item experimentation; the results of numerous experiments will ultimately determine future versions of our final item list.

[NOTE: Simply stating that Item A is broken is not enough; sufficient testing must occur.]

We ask that your post include:

*Number of rounds (the more rounds played, the more accuracy; note that each round must be identical, i.e., the same players, the same items, the same stage, the same characters, etc.)
*Stage played on
*Rules of match (Time/amount, stock/amount, special rules, etc.)
*Characters played
*Number of wins for each player/character
*Number of kills for each player/character
*Any other information you deem important

Also, if possible, note the relative skill of all players; for instance, if P1 is much more skilled than P2 and P3, make note.


If you have any questions/concerns/requests for the project, please contact me (JackKieser) either by PM or by AIM. Your support and encouragement is appreciated.


OFFICIAL RULESET INFORMATION:

As of 5/24/09 at 11:34 PM:

Thanks to the testing, balancing, research, and discussion of many, many people, we finally have a draft for a balanced and fair item listing, as well as a ruleset for use in tournaments. Speaking for everyone a part of the ‘ISP’ project, we can’t thank everyone enough for their help and support; this would have never happened if the community around SWF hadn’t put (at least some) of their support behind it. Special thanks go out to those who don’t even agree with competitive item play, but still discussed and debated with us to work towards a consensus.
Here is the result of nearly two months of extensive testing, balancing, and discussion:

NEUTRAL ITEMS:

(Sandbag) (Food) (Warp Star) (Bunny Hood) (Beam Sword) (Lip’s Stick) (Star Rod) (Super Scope) (Fire Flower) (Motion Sensor Bomb) (Freezie) (Smoke Ball) (Pitfall) (Mr. Saturn) (Green Shell) (Banana Peel) (Franklin Badge) (Screw Attack)

COUNTERPICK ITEMS:

(Assist Trophy) (Dragoon) (Metal Box) (Home-Run Bat) (Hammer) (Ray Gun) (Cracker Launcher) (Gooey Bomb) (Hothead) (Spring) (Unira)

BANNED ITEMS:

(Smash Ball) (Pokeball) (Containers) (Blast Box) (Maxim Tomato) (Heart Container) (Super Mushroom) (Poison Mushroom) (Starman) (Superspicy Curry) (Lightning) (Fan) (Golden Hammer) (Bob-Omb) (Smart Bomb) (Deku Nut) (Bumper) (Soccer Ball)

CHANGES FOR 2v2 PLAY:

Item Spawn Rate – Changed to ‘Medium’
(Team Healer) - Neutral
(Smash Ball) – Moved to Counterpick
(Superspicy Curry) – Moved to Counterpick
(Cracker Launcher) – Moved to Neutral

BRACKET PROCEEDINGS:

Double-Elimination

Best of Three (3) Sets, with a Best of Five (5) Finals

Matches Consisting of 3-Stock with an Eight (8) Minute Time Limit

In the event of dispute, controller ports may be decided by Rock-Paper-Scissors

No player may choose a stage they have already won on in that set unless agreed upon by both players.

Ties will be broken by lives, followed by percentages; if percentages are tied, then a One (1) Stock Sudden Death match will be played (no time limit)

Each player may declare One (1) stage and/or One (1) item to be stricken from the entirety of the set

BRACKET CHANGES FOR 2v2:

Controller ports will be determined in a 1221 fashion; whoever wins the RPS will choose first, then the opposing team will get their ports, and then the teammate of the RPS winner will get the last port.

Team Attack will be set to ON

Life Stealing will be allowed

Each team may declare Two (2) stages and/or Two (2) items to be stricken from the entirety of the set.

Color Blind rule: Should a player have a color-based disability, he or she may request in a teams match to have a specific color for their team. This is so characters such as Lucario or Sonic can be granted the blue team so that there is not unnecessary confusion.

MISC. BRACKET RULES:

Metaknight's Infinite Cape glitch is banned.

If a game ends with Bowser doing his suicide klaw and it ends in sudden death, the sudden death will be ignored and that game will count as a win for Bowser.

Any action that can prevent the game from continuing (i.e., freezing, disappearing characters, game reset, etc.) will result in a forfeit of that match for the player that initiated the action. You are responsible for knowing your own character, and must be wary about accidentally triggering one of these effects.

Stalling is banned. Stalling is the act of deliberately avoiding any and all conflict so that one may make the game unplayable. Running away from an opponent to reach a better position is not stalling, while doing an infinite grab endlessly against a wall is. Any infinite chain grabs must end quickly after 300% has been reached so as to prevent excessive stalling.

Port slob picks: On a player's counterpick, that player may opt to redo the port selection process with that player or team picking their port first.

The Mages DQ rule: After a match has been called, if a player is two minutes late he will receive a warning. At 4 minutes late, he will be given a loss for the first game of the set. After six minutes, he will be given a loss of the entire set.


MATCH PROCEEDINGS:

1st Match –

Double-blind character selection (may be waived with agreement of both players)
Each player may declare stage/item strikes
Opponents start the stage striking procedure
Match begins on stage chosen during strike


Subsequent Matches –

Loser selects stage from Neutral / Counterpick list
Winner selects character
Loser selects character
Winner counterpicks One (1) item
Loser counterpicks One (1) item
Match Begins

MATCH PROCEEDINGS FOR 2v2:

1st Match –

Controller port selection
Double-blind character selection (may be waived with agreement of all players)
Each team may declare stage/item strikes
Opponents start the stage striking procedure (1221 order as determined by RPS)
Match begins on stage chosen during strike


Subsequent Matches –

Losing team selects stage from Neutral / Counterpick list
Winning team selects characters
Losing team selects characters
Winning team counterpicks One (1) item
Losing team counterpicks One (1) item
Match Begins

Taken from SBR Recommended Brawl Stage Lists:

TOs must move stages from the starter/counterpick into either the starter or counterpick categories and must move stages from counterpick/banned into either the counterpick or banned categories.

Stages in the Starter/Counter and Counter/Banned list did not receive 2/3 majority, and therefore you are given the option to put those stages in either category, as we did not come to a consensus on it.

The SBR Recommended rule list uses the stage striking system. In this system, players take turns striking stages from the starter list until only one remains; these stages are not banned and can be counterpicked later in the set. There must be an odd number of starter stages.

Starter
Battlefield
Final Destination
Smashville
Yoshi's Island

Starter/Counter
Castle Siege
Delfino
Halberd
Lylat Cruise
Pokémon Stadium 1

Counter
Brinstar
Corneria
Distant Planet
Frigate Orpheon
Green Hill Zone
Jungle Japes
Luigi's Mansion
Norfair
Pictochat
Pirate Ship
Pokémon Stadium 2
Rainbow Cruise
Yoshi's Island (Pipes)

Counter/Banned
Green Greens
Mario Circuit
Onett
Port Town Aero Dive
Skyworld

Banned
75m
Big Blue
Bridge of Eldin
Flat Zone 2
Hanenbow
Hyrule Temple
Mario Bros.
Mushroomy Kingdom I
Mushroomy Kingdom II
New Pork City
Rumble Falls
Shadow Moses
Spear Pillar
The Summit
Wario Ware

Any rule-list that closely follows this guideline may include a note in its opening post (suggested beneath the tournaments title in smaller font) that reads "ISP Certified".

ADDED MAY 24th, 2009: Alternate Rulesets

The following rulesets have been suggested for use and tested in a tournament setting.

DugFinn / Houston 2v2 ISP:

Item List:

NEUTRAL ITEMS:

(Smash Ball) (Sandbag) (Food) (Warp Star) (Bunny Hood) (Beam Sword) (Lip’s Stick) (Star Rod) (Hammer) (Golden Hammer) (Super Scope) (Fire Flower) (Motion Sensor Bomb) (Freezie) (Smoke Ball) (Pitfall) (Mr. Saturn) (Green Shell) (Banana Peel) (Franklin Badge) (Screw Attack) (Team Healer)

COUNTERPICK ITEMS:

(Assist Trophy) (Dragoon) (Metal Box) (Home-Run Bat) (Ray Gun) (Cracker Launcher) (Gooey Bomb) (Hothead) (Spring) (Unira)

BANNED ITEMS:

(Pokeball) (Containers) (Blast Box) (Maxim Tomato) (Heart Container) (Super Mushroom) (Poison Mushroom) (Starman) (Superspicy Curry) (Lightning) (Fan) (Bob-Omb) (Smart Bomb) (Deku Nut) (Bumper) (Soccer Ball)

TESTED AT WHOBO: WHOBO Post in this thread.

(PS: DF, if I made any mistakes here, please let me know.)


OFFICIAL ITEM IMPRESSIONS:

These are the results of item testing that the 'Item Standard Play' project has been working on for the past two months. The goal of the project is to create standardized and accepted formats for item play in tournaments and in order to do this, certain criterion were established. For the sake of understanding, I will set out these criterions now:

Preservation of Risk/Reward: The basic concept of 'punishment' in a fighting game. Every move has a risk/reward value that affects its usefulness and effectiveness in any given situation, and acceptable items must preserve this vital relationship. If an item has too little risk for too much of a reward, then the item is to be deemed 'broken' and must be disabled from play; conversely, if an item has too much risk for a very small amount of reward, then the item shall be deemed 'redundant' and should be removed from play in an attempt to condense item listings (this is not as important as removing 'broken' items, however).

Acceptable Counter Systems in Place: Every move must have a counter; if there is no counter, than strategically there is no reason not to use it at all times. For an item to be considered 'balanced' it must always have at least one counter at all times. If an item does not have at least one global strategic counter, then it shall be deemed 'broken' and banned from play.

Acceptable Level of Effect on Match Outcome: Applicable to both items and stages. If an item has a dramatic effect on battle to the extent that an entire match can ride on the item's use, then the item should be considered 'broken' and banned from play. This criterion has the most grey area because items in and of themselves are designed to effect the outcome of a match. Thus, acceptable levels of interference must be maintained; small changes in match dynamics are acceptable, while items promoting 'spawn camping' and like strategies should be banned. As a corollary to this, we must also take into account if an item forces its effects on a player (for instance, by spawning on top of a player); items of lower effect can have more leeway on this rule, while items with vast effects must only be usable by player decision.
A recent addition to this list is the ‘counterpick’ list of items; previously, items were either deemed ‘approved’ or ‘banned’. This allows for a few very important changes to item play. Introductory matches in a set must maintain a certain level of integrity, and having an approved ‘neutral’ list of items, much like in the case of neutral stage picks and double-blind character selection, ensures that a significant advantage is not enjoyed by either competitor during the first match. This also allows for greater congruency with established tournament play, further bridging the divide between ‘casual’ players who are looking to enter the tournament scene and seasoned tournament players looking for new and fresh competition (both players and styles).

Using these criterions, these are the 'ISP' project's impressions on each of the 49 items available for Brawl tournament play. These are, by no means, set in stone, at least for now; however, because I wished to make a decision on each of the items at least once, I have laid out our impressions below. There will be three possible outcomes for any given item: Neutral (and accepted for round 1 play), Counterpick (and thus only available in round 2 and onward) or Banned (unavailable for the entirety of the set).

As of 7/3, this list will apply to both 1v1 and 2v2 play. Many of the items function more or less the same, regardless of ruleset. There are, however, a few key items that have significant functional differences when used in 2v2 play. In these cases, I will have a supplementary paragraph following the standard 1v1 ruling for 2v2 play. For all 2v2 rulings, assume that Friendly Fire is active. If there is not a separate paragraph for any item, assume the ruling is the same for 2v2 as it is for 1v1.

Please feel free to contest any of the below impressions with solid data that does not contradict the above stated criterion:


Smash Ball [BANNED] - Unfortunately, there isn't much that can be said about Smash Balls in 1v1 play. With most items, regardless of the character you are using, the effect of the item remains the same; Smash Balls were not designed with this in mind, however, and as such are not balanced in such a way as to give each character an equally powerful or effective Final Smash. This, in combination with frames of varying invincibility, wildly differing ranges, and the ability to change the outcome of a match in a single fell swoop renders Smash Balls out of the question for 1v1 play.

Smash Ball 2v2 [COUNTERPICK] – Smash Balls actually function quite differently in 2v2 play than in 1v1, and the reason is that you are now able to hit your teammate. The biggest flaw with Smash Balls in 1v1 was that there is little to no downfall to activating a Final Smash at any time; if all else fails, one could simply activate the move to gain invincibility frames in order to dodge a hit, and even if the move misses, nothing is really lost. If a teammate and Friendly Fire is added in, things become more complicated. No Final Smash is unable to be dodged, but many of the more ‘overpowered’ Final Smashes are quite hard to dodge indeed; this, however, counts for both your enemies and your friends, meaning that if a team isn’t well coordinated a badly placed Final Smash can (and probably will) seriously injure a teammate (the Landmaster is an excellent example of this). As noted earlier, however, every Final Smash, be it DK’s or Marth’s, is able to be dodged, so a team that has practiced around each other’s Final Smashes is at a significant advantage; even Pit’s or Dedede’s Final Smashes (which now homes in on teammates due to Friendly Fire) can be easily dodged if one practices his timing enough. It is for these reasons that we move Smash Balls to the counterpick list for 2v2 play.

Assist Trophy/Pokeball [COUNTERPICK] / [BANNED] - I wanted to keep these items separate in this assessment, but I just couldn't; they work the same, have the same faults, and affect the match in the same way. Assists and Pokeballs break all three of the criterion for a balanced item: there is no risk to using them (as all you have to do is pick them up and you gain their effects), the Assist/Pokemon summoned is invincible and in many cases can chase you down, and a single Assist/Pokemon can net even low % kills (especially in the case of the Legends and Isaac). It should be noted, however, that Assist Trophies and Pokeballs have a very distinct difference in activation methods, namely that Assists are activated upon acquisition (and thus have an accompanying animation), while Pokeballs double as a mid-strength projectile. Because of this difference, a player activating an Assist Trophy can be punished in a way that a player throwing a Pokeball cannot; this makes Assist Trophies a little less broken than Pokeballs. [As it stands, there are a few Pokemon and Assist Trophies that are vastly more powerful than the rest (the Legends and Issac come to mind), but as Keits demonstrates, even the more powerful Assists are able to be dodged. It should be noted that these overpowered Pokemon/Assists are very rare, indeed; this does not excuse them from our balance criterion, however, which is why we have decided to make them counterpick pending further tournament evidence; if it is demonstrated that uber Pokemon/Assists degenerate item play, they will be disabled. Current item players must remember that these items will not be active unless they are activated by a player, however, so whoever activates them takes these risks into account willingly. Keeping this in mind, though, powerful Pokemon spawn more frequently than powerful Assists, so Pokeballs remain banned.]

Containers [BANNED] - This refers to the Crate, Barrel, Capsule, and Party Ball items collectively. These items, on the surface, seem to be balanced. There is a large risk to using the Crate, Barrel, and Party Ball items because of the drastic movement reduction received while holding them, the only reward being another item (possibly a heavier hit on the opponent), each item has a basic counter (the large containers have abysmal range, while the capsule is easily air/spot dodged), and they usually only effect the match by releasing another item... but this isn't always the case. A rigged container will always do massive damage and knockback, and there is no way of telling which containers are rigged and which aren't. While this seems like it should be included with 'Risk/Reward', containers, by their very nature, have a higher probability than other items to spawn, and because of their bulk there is a decent chance that they can (and will) spawn in the range of an attack in progress; if this happens, a player may take damage through no fault of his/her own, damage that can and, in many cases, will kill in one shot. This happens frequently enough that these items break the third criterion by a large margin, and thus must be disabled.

Blast Box [BANNED] - This container-like item operates completely different than normal containers in that it always causes a massive explosion, but can only be triggered by a strong attack or anything with the fire/explosive property (for instance, Red Pikmin, Link's Bombs, and Din's Fire). This item shares the container's main fault, though, in that the explosion caused by it is relatively easy to set off (and can be done at a distance with many characters) and causes low % kills with ease (a dummy Mario was killed from the center of FD at ~50%). The effect that these boxes can have on a match is immense; enough to where it's risk of use cannot outweigh its effect. Blast Boxes, for this reason, must also be disabled.

Sandbag [NEUTRAL] - Sandbag is an interesting item in that, out of all of the items on this list, I would wager that it has the least impact on the outcome of a match; Sandbag’s only purpose is to be hit with attacks, and it cannot cause any direct harm to players. When hit, Sandbag has a chance to spawn a separate item randomly beneath it, but this happens rarely on the 'Low' spawn rate. The only other effect that Sandbag can directly have on a match is that the game considers Sandbag a character, and thus tries to keep any and all spawned Sandbags on screen at all times, sometimes causing the screen to rapidly change focus upon a spawning Sandbag. Sandbags have the very useful strategic purpose of being a wall to attacks, however, and this strategy lends itself to a great usefulness. Because of the strategic value and the fact that it does not violate any of our three criterions, Sandbags are balanced enough for item play.

Food [NEUTRAL] - Small items that replenish anywhere between 1-10% damage, food can have a drastic impact on matches... but only when used in conjunction with containers capable of spawning multiple food items at once. On a singular basis, food can, at most, recover a single hit's worth of health, and are usually not worth fighting over. These items inhabit a grey area in item play because they have such a small influence on battle in general, but influence the greatest part of a fight (amount of health). They have little risk to use, but also little reward. There is no 'counter' in the traditional sense, but a single hit can negate any advantage gained by using the item, which could be considered a counter. Single food items cannot have a drastic effect on battle simply by virtue of the small amount by which they heal. Items do, however, have two important uses outside of battle. Activating food for tournament play adds another item at which the game must use to calculate probability for spawning; effectively diluting the item pool and reducing the effect other items have on the outcome of a fight. Activating food also allows certain stage's background effects to be used in battle (Smashville's balloons and Yoshi's Island's Shy Guys, for example), allowing certain stages to operate at their fullest. I see no reason why food items should not be allowed for tournament play, but this may very well be an item left up to tournament director's discretion.

Maxim Tomato/Heart Container [BANNED] - These two items, much like Assists/Pokeballs, operate so similarly that it would not be prudent for me to make a distinction between the two. These items break all three of the established criterion of balance in very obvious ways. There is literally no viable risk/reward system in place, as the risk to use these items is very small, but the reward is very high (50% or 100% healed, respectively), and in a fight where every % counts, this is simply too much. There is no way to counter the use of these items, other than perhaps to prevent their usage, but this is not an acceptable counter by any means. The effect that these items can have on battle should be obvious; in many cases, each of these items could provide anywhere from a half to full heal, effectively giving a player an extra stock to work with, and this is unacceptable. These items must be banned.

Dragoon [COUNTERPICK] - This item is a tough one to nail down because it skirts the line with all three of the balance criterion. Risk/reward is in place, if only in the sense that you have to actively gather all three parts to use the Dragoon, and if the opponent happens to be holding one of the parts, you are forced to engage him/her in order to complete the Dragoon. Once the item is used, however, risk/reward breaks down, as there is no reason not to use it (and usage is automatic, so even if there was a risk, you'd have to use it anyway), and firing it launches a OHKO shot that you cannot be knocked out of. The Dragoon has many counters to its completion, but only one counter to its use: air/spot dodging and even this counter can be quite ineffective. Like any other move, prediction is key when dodging (and using) the Dragoon; any move with lag can be punished, but a smart player will refrain from this and stay mobile. The dominant strategy when using the Dragoon is to gather all three pieces (in some for) on the field, then KO the opponent without using the Dragoon, opting to KO him/her with the Dragoon after he/she re-spawns, gaining a 0% KO; this is a powerful strategy, but holds the same fault that a shot must be aimed properly and must connect. This is a good strategy, but diminishes in usefulness the better a player is a dodging and being mobile. This item will be allowed on the counterpick list to determine whether it is truly broken or if players simply haven’t learned how to dodge it effectively.

Super/Poison Mushroom [BANNED] - These items are the only two items that affect each other's viability as balanced items, which makes them unique. Alone, there is no risk/reward system in place; if only Super Mushrooms are on, there is no reason not to use them, as they give significant buffs, while if only Poison Mushrooms are activated, there is no reason to ever use them as they only give negative effects to the player. Together, however, a risk/reward system is evident. Because there is little graphical difference between them, even on a high-definition TV it is easy to mistake one for the other, and so there is a definite risk to using the mushrooms, as a player could easily be mistaken and get drastically reduced effectiveness in battle when he thought he would be getting improved effectiveness. Regardless of the mushroom, the effects are rather simply countered, as well. Poison Mushrooms may make someone easier to kill when hit, but it also makes them a harder target to hit and running away from your opponent is just as easy as it normally is; on the same token, an opponent in Super form is easy to combo due to their size and low knockback, so pressure is a very effective counter to use on a Super opponent. The main drawback of these mushrooms is that they activate on physical contact, which means that, more so than any other items (save Lightning), these items cause the most problems in terms of spawning on top of players. Both items interrupt all animations, meaning that a bad spawn can stop any attack (even a recovery attempt) dead in its tracks, which is, unfortunately, a very large problem. As it stands, both of these items have such an effect on battle that, as of now, they must be banned in tournament play.

Warp Star [NEUTRAL] - Simply put, a perfectly balanced item. The Warp Star has an interesting take on the risk/reward system, as it is a low-risk/high-reward item, but its inherent properties allow it to still maintain a semblance of R/R balance; this is due to the aiming mechanism providing a natural counter to the item's use at all times: ease of dodging. The Warp Star has a limited range of aiming, which means that many times a player can simply run out of range of the star, but even if this is not an option, all it takes is a simple well-timed air dodge for a player to completely negate the Warp Star. A great pressure item, the Warp Star is highly recommended for item play.

Starman [BANNED] - The Starman has been the subject of contention ever since the original Smash Bros. and this Starman is no different. Many view the Starman as broken because it is perceived to be a low-risk/high-reward item, but is it really? The only thing that a Starman guarantees is that the player using it becomes invincible for 10 seconds; it is still up to the player to make the most of this invincibility. If the player is unable to connect a hit within those 10 seconds, then the most that has been done is prolong the battle for 10 seconds, hardly a significant effect unless the player is purposefully trying to run down the clock. This is the inherent counter to the Starman; simply not getting hit, which is purely in the hands of the opposing player. A skilled player can easily dodge a non-invincible player for ten seconds, and should be able to do so to a player under the effect of the Starman. However, the Starman does have the disadvantage of activating upon contact, meaning that fast characters (ones that are inherently harder to dodge anyway) have the upper hand in reaching and activating the Starman first. Also of note is the fact that, because of gained invincibility, it is impossible to knock a Starman-effected player out of attack animations, thus creating another disadvantage for the opponent. As it stands, though runaway tactics are the norm now, this cannot be guaranteed in the future and seeing as this is the only counter to a Starman-effected opponent, the Starman must be banned in official play.

Metal Box [COUNTERPICK] - Causes the user to gain the 'metal' property, reducing knockback taken but also increasing fall speed and limiting the usefulness of jumps. The Metal Box puts its risk/reward right out there by giving obvious strengths and weaknesses to the user. Lateral movement properties (such as running speed) and general strength (and knockback given) are unaffected by the Metal transformation, which allows for a very balanced set of advantages and disadvantages. The Metal Box may be activated accidentally if it spawns on a player performing an attack, but this is most certainly an exception, not the rule, and thus does not affect the item's balancing very much. Does not break any of our tenants of balance, and is an overall average item. [Although this item does not break any of our criterions completely, the fact remains that this item may be activated by random spawn without the intent of either player. This property is common of the items that are on the Counterpick list.]

Bunny Hood [NEUTRAL] - The logical opposite of the Metal Box, the Bunny Hood increases lateral speed (while on the ground only) and a dramatic boost to jumping height. The Bunny Hood does not alter fall speed, character weight, or knockback given/taken, but does come with the obvious disadvantage of reduced character control due to the increased speed. For certain characters, the Bunny Ears can be a godsend while for others they can make a character nearly unplayable. A very situational item, yet the lack of character control can very visibly reduce the reward of speed, and rarely effects battle in a way that gives one player a dominant and uncounterable advantage over another. Approved for item play.

Superspicy Curry [BANNED] - Another point of contention in the Smash community, the Superspicy Curry ultimately cannot stand to the test of balance. There is no visible risk to using Curry, as the only effect on player control that it has is forcing a player to always run, which isn't enough of a disadvantage (if it can even be considered one at all) to outweigh the very great advantage of constant and hard-to-avoid damage given to the opponent. Incredible at accumulating damage, edge guarding, preventing combos and approaches, and creating a variety of setups, the Curry can be a fatal weapon even in the hands of a non-skilled player. The Curry does not provide invulnerability, however, which makes a Curry user just as susceptible to long range attacks and projectiles as ever; this one small weakness, however, does not outweigh the very powerful strengths of the item, and as such it has been deemed too 'broken' to be allowed in item play.

Superspicy Curry 2v2 [COUNTERPICK] – One of the greatest faults of the SSC was that, although Smash DI could help one escape from it, it was overpowered in the sense that its range and versatility allowed for edgeguards and setups without requiring an adequate amount of skill in return; much in the same way for Smash Balls, the inclusion of Friendly Fire changes things in 2v2. In 2v2, it is just as easy to catch a friend in your flames as it is a foe, especially if the opposing team is coordinated enough to keep close to your teammate. Great care has to be taken when using the SSC in 2v2, so we will move it to the counterpick list.

Timer [BANNED] - The Timer has the Super/Poison Mushroom's risk/reward system condensed into a single item, and as such creates its own inherent balance, but the effect of the Timer on the course of the battle outweighs that balance. The risk to using the Timer is that, on occasion, the Timer will slow all combatants down or slow only the user down, whereas the reward is the possibility of being able to drastically out speed the opponent; unfortunately, the rate of backfire is quite low, and there is no way to predict a backfire (it was once thought that the direction of the clock hand's movement hinted at the outcome of picking up a Timer, but that has since been disproven). Luckily, a player under the effect of the Timer gets the added bonus of increased air dodge length, meaning that skilled players will spend the majority of their time under the effect of the Timer spamming air dodges; even if hit one or two times, so much time is spent in air dodge invincibility animation that the user can only get a small number of hits in before the effect is over (it should be noted, however, that the length of cooldown time between air dodges is increased, as well, so strategy must be employed when dodging attacks in slowdown mode). A recent discovery, however, has yielded the finding that anyone possessing an 'electric' property attack can use the Timer to exploit the 'slowdown' effect (dramatic animation that freezes the target of an electrical attack in extra stun frames) of electrical attacks to freeze a target in place with no way for the target to move, racking up damage in a variety of ways. Because so many characters can exploit this technique, it falls out of the realm of balance and must be outright banned.

Lightning [BANNED] - Lightning has many of the same problems that the Timer does, and as such share a lot of the same sentiment. The main difference (and the point that elevates Lightning above the Timer) is that the tiny status effect is not nearly as destructive as being slowed to a crawl; at least you still have full control of your character. All of the same theories that apply to Poison Mushrooms apply to Lightning, with the added bonus of having the Lightning able to backfire on its own (much like the Timer). The level of risk involved in using Lightning is roughly 50/50 (or more accurately, 33/33/33, as there seems to be a roughly even chance that the previously mentioned effects, as well as the effect of making every player on the field tiny, will occur), and you can't get more balanced than that. Unfortunately, the killing blow to the Lightning item is the fact that it is touch activated, and thus can affect play on spawn, potentially causing a player to activate it without wanting to. As such, the Lightning will have to be banned in tournament play.

Bludgeoning Items

Because most bludgeoning items operate in generally the same way, I am going to make a general statement about this type of item and cover the individual aspects in detail afterwards.

Bludgeons all share some common characteristics that make them ideally balanced items at their core. These items, more so than most others, require a level of skill to use above and beyond what most items call for in that these items have a very finite range (when not thrown, of course). Risk/reward is usually preserved well in bludgeons because a whiffed attack usually leave the user open enough for counterattack, and a single hit from one of these weapons is usually not powerful enough to kill, unless at very high percentages. Range is their primary counter, as are all of the usual conventions for dodging attacks (because bludgeons operate, at a basic level, just like any other physical attack). As most bludgeons change the available moveset of the operating character (altered nairs, F-Smash, and dashes), they are able to change the dynamic of a fight without being the primary cause for a win.

Beam Sword [NEUTRAL] - The Beam Sword is a very balanced item, weak in knockback while still providing advantages and incentives to the holder. The extension of the Beam Sword's range upon charging a Smash attack is very useful for faking out opponents, and gives the user enough room so that even if the attack whiffs, as long as the opponent is at maximum range there is little chance of punishment. This comes at the cost of power, as the Beam Sword takes large amounts of accumulated damage and full charges in order to really shine as a KO item; once a player reaches KO point with this item, it is much more efficient to just throw the sword than to try to land a final slash (or even better, use another move to KO). Weak without being useless, the Beam Sword is great for item play and is approved.

Home-Run Bat [COUNTERPICK] - Make no mistake: when used for its F-Smash, the Home-Run Bat is a very high-risk weapon. The conservation of risk/reward simply means that the higher reward something has, the higher risk it must have as well, and the Home-Run Bat delivers on this promise. As a projectile, it is much more efficient at causing damage and kills, but it is just as easy to dodge as any other thrown projectile, be it a boomerang or a turnip. [It must be noted and considered, however, that even when used as a simple thrown item, the Home-Run Bat has one of the highest amounts of knockback in the game, and can turn the tides very easily. To allow this in the first fight of a set, the match designed to be the most equal, could cause complications in the future. This item will be moved to the counterpick list.]

Fan [BANNED] - On the opposite side of the coin, the fan is a low-risk, high-reward nightmare. Not only does cut through shields like a hot knife through Kirby, but it also traps the opponent in a near-infinite of repeated jabs that is so difficult to DI out of, you might as well call it impossible. It is beyond easy to get someone over 200% with this item and as such has been banned from play.

Lip's Stick [NEUTRAL] - Arguably the most balanced bludgeoning item in the game (possibly tying the Beam Sword, if not outright beating it), Lip's Stick embodies all three of the balancing criterion established above. It is completely restricted by its range, having a smaller range than even some regular F-Smashes. The flower contact with this item causes may drain health, but the rate of drain is completely proportional to the strength of the connecting blow, which jives with risk/reward because the longer you charge the attack, the higher damage the flower will do at the price of having a greater chance of missing altogether (if the opponent can predict well). As a basic bludgeon, it is not powerful enough to KO at almost any decent percentage without being charged, and as such can hardly be blamed in many cases for the outcome of the match. An altogether great item, Lip's Stick is approved for play.

Star Rod [NEUTRAL] - A unique item in that it is the only item in the game capable of acting as both a projectile and a bludgeon (without having to be thrown), the Star Rod opens up a lot of interesting strategies. The fact that different characters act differently when shooting stars (some characters can fire two stars in quick succession, while most are restricted to firing off one star at a time), as well as how a star can be launched from both tilts and Smashes, lends itself to a level of strategic value that other bludgeons can't compare to. Add to that an average risk/reward, average strength, and average range and you have an item perfectly suited for tournament play. Accepted for play.

Hammer [COUNTERPICK] / Golden Hammer [BANNED] - Taking the concept of risk/reward and stretching it as thin as it can, these two items wildly fluctuate between 'balanced' and 'broken' depending on who you talk to. Both items can either be low- or high-risk items, only requiring that you pick them up to use, but also being two of the most easily gimpable items in the game (Golden less so, due to its floatation ability). They can either be very low- or very high-reward items in that one shot is usually all it takes to kill at higher percentages ('higher percentages' meaning the high 60-70's for the Golden Hammer); ledgestalling, thanks to the increased amount of invincibility frames, almost always causes even the Golden Hammer to fail to connect. Hammers of the normal variety have additional weaknesses, as well. Because of the nature of the weapon, disjointed hitboxes are very effective counters (if timed properly), and certain characters (such as Luigi, for example) can even break through the Hammer to hit its user. Other projectiles seriously impede a Hammer user, making it difficult to approach, in addition to Hammer users being completely vulnerable from underneath. Characters with counter moves also out-prioritize the Hammer's attack, and due to the item's predictability means that counter-wielding characters will rarely get hit by a Hammer swing. [Even though the Hammer skirts the line of what constitutes a ‘broken item’, the sheer power behind the item should not be allowed in the first fight of a match. Similar to the Home-Run Bat’s ruling, it would be irresponsible to allow the Hammer to be activated in a neutral match, so it will be moved to the counterpick list.]


Super Scope [NEUTRAL] - The Super Scope is a very basic projectile item with a lot of added versatility, thanks to the new ability to move while firing. The ammo for this gun goes fast, as it is very easy to simply go semi-auto with it and use up half of your clip in a matter of seconds (which is significant because not every shot registers as a hit; on average, one out of every two shots will register if rapid firing, and the average drops to one every three if you are moving towards the target while firing). The ability to charge a shot to varying levels of power can be downright deadly thanks to the new movement mechanic (allowing charging and aiming at the same time, whereas before you had to hope that the enemy would fall or walk into a charged shot). Charged shots are signified by a loud noise, however, and thanks to multiple air dodges, it really isn't that hard to dodge a charged shot. The charged firing speed is just slow enough to warrant such power behind a single shot, and so we have determined that this item is balanced enough for tournament play.

Ray Gun [COUNTERPICK] - The original Ray Gun had a fatal flaw: at almost any percentage, it was exceedingly easy to kill by carrying an opponent off the edge with a volley of shots. Thanks to altered timing, DI having more of an influence on physics, lowered hitstun, and Brawl's general floatiness, the Ray Gun can now only do this at low percentages, and even then it is very possible to break out of a Ray Gun volley. Ray Gun 'infinites' notwithstanding, however, the Ray Gun is actually a very underpowered item. The shots, even at higher percentages, have a relatively low amount of knockback, and unless playing at 200%+ levels, a Ray Gun shot probably won't KO. The shots are a little harder to dodge than most other projectile shots due to their elongated hitboxes, but they are still able to be circumvented by a skilled player (or one playing an agile character), although larger or heavier characters still have trouble. Unless used to carry the opponent off the stage or thrown at the enemy, the Ray Gun simply isn't powerful enough to pose a serious threat to a competitor. [Although it is harder to do and more situational in nature, Ray Gun gimp kills do still exist, however, so this must be taken into account; as member Yuna is quick to point out, ‘If something is possible to do, people will master it.’ As such, we will move the Ray Gun to the counterpick list.]

Fire Flower [NEUTRAL] - The runt of the projectile game, the Fire Flower is a low-risk/medium-reward item that has some strategic uses and can apply pressure well in some situations. The Fire Flower has roughly the range of most of the bludgeon items (that is to say, slightly longer than the reach of a Smash attack), and the flame that it spews does little damage, but at a constant rate, which is able to trap enemies against walls. The flame knocks the opponent just far enough back to where the flame can only hit once or twice if both combatants are standing completely still. This amount of knockback is just enough to where most characters can jump over the flame, even if actively taking damage from it, and escape with relative ease. In most cases, the loss of nair and ‘A’ attacks outweighs the benefit of a constant volley of flame, and so this is a very situational item, nowhere near the level of unfairness to warrant a verdict of 'broken'. The Fire Flower, thus, is approved for item play.

Cracker Launcher [COUNTERPICK] - Easily the most brutishly powerful of the projectile items, the Cracker Launcher only has one real strategy: land a shot and continue to try to juggle the opponent. The Cracker Launcher has a lot of strength behind its shots, but at a big price: it is notoriously difficult to aim, is slow, and forces the user to lose all other attacks for the duration of use, along with the loss of a second jump (while a second jump may be used after the Launcher has been discarded, the action of throwing the item takes time, precious time that may cause a death in certain situations). The Cracker Launcher's true power comes in off-the-top kills, which are actually quite easy once a single hit has been landed (assuming the user fires fast enough). Projectile knockback is good, but not enough to place the target out of range of follow-up shots afterward, making juggling pretty easy. In addition to this, the item itself is large, lending itself two important properties: while traveling a shorter distance when thrown, throw-knockback is very, very good, and due to traveling speed (coupled with size) it is possible to be hit even when attempting to dodge (as the item may still inhabit space with the target after dodging animation is completed). The final straw, however, comes in how the Cracker Launcher’s shots interact with the user or more accurately how they don't. With any other explosive-style attack, an object detonated at the user's feet will harm the user as well. In the case of the Cracker Launcher, a player could fire an entire clip at his feet and not take a single percent of damage. [The Cracker Launcher has been a point of contention for a while now; we had banned it simply because we thought it would be better to be overly stern than overly lenient, but with the inclusion of a counterpick list, hopefully both sides will be satisfied; they aren’t a neutral item, but can be activated in subsequent matches.]

Cracker Launcher 2v2 [NEUTRAL] – The main weakness of the Cracker Launcher in 1v1 play is how spammable the projectile can be; once grabbed, there is practically no reason to refrain from firing. This dynamic changes in 2v2 play because of, like many items, the inclusion of a teammate target. Mindlessly firing shots can very well get your teammate killed, and like many other items in 2v2, this is a natural counter to its use, as a foe can stick close to your teammate to prevent you from risking catching him in the crossfire. The Cracker Launcher will be moved to the neutral list pending relevant tournament data on its use; it is very possible that this item may need to remain on the counterpick list for 2v2.

Bob-Omb [BANNED] - The main offender of risk/reward imbalance, the Bomb-Omb has a terrible habit of spawning in inopportune times and in inopportune places. The most volatile item in the game, Bomb-Ombs take very little skill to use (just throw and forget), have immense power (causing 35% damage and KO'ing at ~65%), and reward the user for a very basic action (throwing an item) by giving out extreme damage and even more extreme knockback. The very semblance of imbalance, the Bomb-Omb is banned from item play.

Motion-Sensor Bomb [NEUTRAL] - The Motion-Sensor Bomb is the very semblance of strategic item usage. Incredibly simple to use, the MSB stays on the field for a preset amount of time; unlike in previous games, if a MSB has not been detonated after this period of time passes, then it simply disappears. The MSB has decent knockback (when detonated, not when thrown), and is usually considered a low-risk/medium-reward item; it is only low-risk if you remember where you placed it, and is usually not detonated in tournament play other than by extreme accident, as they are easy to spot and easy to fight around. If both combatants remember the position of the bomb, it more than likely will never be detonated, but it is very useful as an edgeguard when set on the side or edge of a stage. The MSB is also the only explosive item that cannot detonate until after it is thrown. Very balanced for a bomb item, the MSB is approved for item play.

Gooey Bomb [COUNTERPICK] - An altogether unique item, the Gooey Bomb can be unbalanced if two characters of greatly differing speeds are playing each other due to the 'sticky grenade' mechanic; luckily, the Gooey Bomb is a pretty weak item for a bomb, usually only threatening with a KO at ~85% on most characters and only causing 22% damage on detonation (the highest kill percentage and lowest damage percentage, respectively, out of all the traditional bomb-type items). Also able to act as a sort of impromptu timer bomb when thrown on the stage, the Gooey Bomb can be used to pressure an opponent into avoiding a certain part of the stage until the bomb detonates. [In all actuality, the real reason that the Gooey Bomb causes so many balance issues is because of how they can detonate on spawn, causing accidental kills. By moving this to the counterpick list, it ensures that the players have taken this possibility into consideration and places the responsibility for the outcome squarely on their shoulders. Time will tell whether people will use this responsibly.]

Smart Bomb [BANNED] - An item built off of the concept of chaos. The Smart Bomb is incredibly finicky, having marginal chance to either fail to detonate or to misfire. What truly unbalances this item is the Smart Bomb's blast radius; it is entirely possible to miss the target but still have him/her get caught in the resulting blast, and so this item frequently rewards players who lack the skill to properly aim the bomb. Though it is possible to tap DI to the side of the explosion to save oneself from the brunt of the knockback, this item will do at about 33% damage if a player is caught in the blast, and though it cannot kill until the ~140% range, it causes dramatic effects on the battle. Due to the extreme ease of use and the disproportional amount of damage and knockback, this item has been deemed too 'broken' for item play.

Deku Nut [BANNED] - Another bomb item of disproportional power, the Deku Nut packs a serious punch for such a small item. This item has the added benefit of providing the user with a contingency plan should the nut miss the target but land nearby: instant stun status for the target. This item rewards the user whether he hits or not, causing ridiculous knockback if it connects; it is fully possible to KO with a Deku Nut at lower percentages, even around the 65-75% mark. On the flip side, it is very easy to miss with this item because of its small size (easily the smallest item in the game that can be thrown). However, the fact that even a miss can result in a stunned opponent, along with the disproportional knockback and the fact that a mis-spawned Deku Nut can result in either a kill or a stun means that this item should be banned from tournament play.

Freezie [NEUTRAL] - The Freezie is a very simple item that, considering the effect it has on a target, really isn't very intrusive when observed closely. The Freezie is a (relatively) small projectile that is easily dodged, so careful aim is required to use properly. If it connects, the freezing effect doesn't last long enough to cause a major advantage to one player, and actually has certain properties that cause it to be less broken than one would assume, mainly the fact that frozen characters take little knockback (aside from the initial knockback the item itself causes), unlike, for instance, the 'buried' effect al la DK's side-B. At lower percentages, it is possible (by a small margin) to gimp KO an opponent by freezing him/her while recovering, but the more pressing question is how one would get someone so far off of the stage at low percentages. This item, while allowing a few free hits on an opponent, simply isn't invasive enough of an item to truly be considered 'broken', and thus is approved for item play.

Smoke Ball [NEUTRAL] - A great mindgaming item. The Smoke Ball's particle cloud is, most times, not thick enough to really hide the actions of a player unless the player(s)’ obstructed color is similar to the background color of the stage. The ability to 'stick' an opponent with this item is actually a bad thing for the player using the item, as only a strong blow will knock off an attached Smoke Ball and while covered by the cloud predicting the target player's actions will become more difficult. Both players stand to gain the same rewards and risks from using this item no matter who throws it, and so this item can be deemed low-risk/low-reward (or at most medium reward, but that's a stretch) and invades only a marginal amount on the battle. Recommended for item play.

Pitfall [NEUTRAL] - The Pitfall is an interesting item in that it is an extension of an already existing Smash Bros. move: DK's side-B. The Pitfall's effect of burying an opponent is very powerful, and as any Jigglypuff player can attest to, the reward of a free charged Smash attack is no laughing matter. However, because it is an extension of an approved Smash Bros. move, this on its own cannot be enough to consider the Pitfall broken. As far as the properties of the item itself, the Pitfall is invisible when set, but it is difficult, even on a large stage, to forget where a Pitfall has been placed. Pitfalls generally last in a set state for about the same amount of time as a Motion-Sensor Bomb before automatically disappearing from play, which can be useful as a pressure item to force a player away from a certain portion of the stage. It is also a useful gimp killing item, as the Pitfall has a Meteor Smash property when it connects with a mid-air target. All in all, the Pitfall is a borderline item but is easy to dodge and has varied strategic uses, and so this item is currently approved for tournament play.

Hothead [COUNTERPICK] - The Hothead is a largely situational item, but as a projectile it is pretty powerful. It is large, which makes it difficult (in proportion to most other projectiles) to dodge, but it does have flaws. The Hothead does terribly on stages with walk-off edges as it is unable to circle around the stage like it can do on floating levels, and even on some floating levels, the Hothead can be finicky and refuse to circle around the stage; this probably can be marked up to irregular level shapes confusing the item AI. If there are floating or secondary platforms on any level, the Hothead can be easily dodged by simply staying away from the main platform, rendering it useless (aside from a pressure item). Ultimately, though, the Hothead gives the player who deploys it the advantage; it can cover stages very quickly and efficiently, does decent knockback even at lower percentages, and can grow by touching it with anything possessing the fire, explosive, or electrical properties, in addition to the fact that the player that sets it is unaffected by it. It is, however, possible to reflect a deployed Hothead with certain moves (or by perfect shielding as it is thrown) and change its master. In addition to this, the Hothead gives any character with fire- or electric-based attacks a 'mini-buff' of sorts, as a Hothead's contact with any attack with these properties causes it to grow in size, speed, and power. I would be remiss if I didn't note, however, that there are many problems with reflected Hotheads, especially if they have already been fed Fire/Electrical/Explosive attacks in that glitches exist in a few situations with a few reflection moves (for instance, Pit's Side-B) that cause even a tiny Hothead to become a OHKO killing machine, impossible to stop or reflect. The causes of these situations are currently unknown, and thus cannot be accounted for mid-fight. We will approve the Hothead for tournament play pending further review and input from the community, however we will move it to the counterpick list to reduce its possible effect on battle.

Mr. Saturn [NEUTRAL] - A (very) basic projectile with, Mr. Saturn, at first glance, is nothing to be impressed by. He does menial damage, nearly no knockback, and doesn't have any discernable strategic uses besides possibly deterring an opponent from launching an attack; hardly a threatening item. Mr. Saturn does have one strength, though: he eats through shields like none other. This, however, is really his only real strength, completely negated by simply not shielding. Mr. Saturn would be great at pressuring an opponent, except for the fact that player's can't use any A moves while holding him (pressing A in combination with anything will result in him being thrown), and so he can't really be used to force an opponent to eat an attack because of the lack of attack options a player has while holding him. Totally average in every way, Mr. Saturn simply isn't a threat, and thus is approved for item play.

Green Shell [NEUTRAL] - A powerful one-hit item, the Green Shell is the definition of the basic projectile item. The only strategy in using a Green Shell is to aim and fire, and so there isn't much that can be said about it. In terms of risk/reward, the only real risk in using a Green Shell is that it may bounce off of a stage element and come careening back towards the thrower, but this is hardly a large threat, as it is restricted to ground movement (once it comes in contact with the ground once) until it is picked up again and is very easy to jump over, even for the heavier/larger members of the roster. This item relies solely on the thrower's ability to aim and the target's ability to dodge. It skirts the line of breaking the first rule of item balance, but it is easily countered and has only a decent amount of effect on the outcome of battle. The Green Shell is approved for item play.

Banana Peel [NEUTRAL] - Unlike the Pitfall (which was based around an existing move), the Banana Peel has been introduced alongside Diddy Kong's Down-B. Unlike the Pitfall, though, these operate in exactly the same way as Diddy's bananas, having no strategic or operative differences. The easiest call out of all 49 items, the Banana Peel is approved for item tournaments.

Bumper [BANNED] - The Bumper is a highly contested item, very powerful and with simple, yet deadly uses. In terms of risk/reward, the Bumper is pretty even. Although the setter has a situational advantage in that he/she gets to choose the placement of the Bumper itself, the item does not distinguish between players, and so the setter can just as easily knock someone into a Bumper as he can be knocked into a Bumper. As an edgeguarding item, there is no equal. If set right at the edge, its hitbox denies access to the ledge while sending a possible recovery attempt back off the stage. Of course as previously noted, this strategy can backfire if the Bumper is placed before an enemy is launched (either making it harder to KO off the sides of a stage or, in extreme cases, allowing the opponent to knock the player off the stage and having the Bumper edgeguard the player instead). There is a great amount of strategy involved in using (and abusing) the Bumper, but the fact is that, when used as an edgeguard, the Bumper has no real counter, which breaks our second criterion completely. The Bumper will be banned for item play.

Spring [COUNTERPICK] - A much more balanced version of the Bumper, the Spring has a variety of uses, but unlike the Bumper, all of these uses have effective counters. The primary use of the Spring is for a vertical boost, which can assist in evading an enemy (or approaching an enemy already sent skyward by another attack). The Spring has a small chance to fall on its side, in which case it acts as an impromptu Bumper, sending players who come in contact with it careening off to the side, though not as fast nor as far as the Bumper would have. When the Spring has fallen on its side, it can be used as an edgeguarding device for opponents who approach the ledge from medium angles (when recovering from a high angle, the Spring can usually be jumped/Up-B'ed over, while low-angle approaches simply grab the ledge; the Spring's hitbox is not large enough to cover the edge). As a thrown projectile, it has decent knockback, but is easily dodged; more interesting is the ability to KO off of the top by throwing upwards at a high enemy (in which case the Spring will cause the opponent to vault off the top of the screen). There is a problem with the Spring, though, in that some characters can use it to stall and/or spam attacks without punishment. This tactic only works as long as the Spring is out, though, and so it is not the end-all-be-all of tactics. This is a problem, however, and so we will place the Spring on the counterpick list to neutralize this risk from round 1 matches.

Unira [COUNTERPICK] - On the surface, the Unira seems like an average throwing item, but beneath the surface lies a lot of properties that give the user a stark advantage. The Unira is an item that 'sets' itself by ejecting spikes when thrown or hit by an attack (strike one, seeing as it can effect play on spawn without a player wanting to activate it), and is capable of (when thrown) killing a player at ~85-95%, a decent level indeed. When set, however, the Unira gains significant properties. After it has been set, the user is immune to damage by the Unira, meaning that he/she could conceivably stand on top of the Unira indefinitely without too much danger from retaliation outside of ranged or projectile attacks. A set Unira also possesses a 'vacuum effect', meaning that if a opposing player is simply standing near an Unira (but not close enough to take damage), the Unira will move the player into damage range itself. The Unira can be deactivated by striking it, retracting the spikes and readying it for another throw, but the vacuum effect makes this difficult for characters lacking disjointed hitboxes; it is, however, possible to deactivate a Unira with any character (even Jigglypuff, with the shortest arms in the game, can turn off a Unira with a well-timed Pound). Another strategy when dealing with activated Uniras is to simply hit them into the opponent, a la the Soccer Ball item. If hit by a strong enough attack, the Unira will fly off and the spikes will remain activated until the Unira comes in contact with the ground again. All in all, the Unira is a powerful item (about as powerful as a Gordo) that gives the user a small (yet noticeable) advantage, but can be countered by a smart player. Thus, for the sake of experimentation the Unira will be allowed, but we will move it to the counterpick list pending further review.

Soccer Ball [BANNED] - A unique item, the Soccer Ball cannot be picked up at all. To use this item, it must be hit with a strong attack, after which it will fly off in the trajectory that said strong attack would have sent a player. When the Soccer Ball does this, it gains a fire aura and does decent damage, but extreme knockback. If not hit, the item is completely useless and harmless. The Soccer Ball is very harm to aim due to its activation method, but a problem occurs when the Ball spawns in the vicinity of two players engaged in close-quarters combat; in this case, 9/10 times an attack will connect with the ball, sending it into the opponent without a player meaning to do so (many times causing a kill). While Soccer Balls have some strategic value (especially in terms of air-interception and edge-guarding), its power is simply too much to be ignored, especially when it can be activated upon spawn in such a random manner. Because of this, the Soccer Ball will be banned in tournament play.

Franklin Badge [NEUTRAL] - The Franklin Badge is a great item as far as balancing is concerned. There is no risk in terms of picking up or using the item, as its effect is automatic (reflection of any projectile as if a permanent Fox-style reflector is up), but its effect on battle is important: projectile camping is rendered useless by this item, effectively forcing close-quarters engagement. This is important, especially considering the current metagame. The Badge can also be knocked off of a player with a strong enough attack, allowing the opponent to pick it up instead. A very simple item with far reaching implications, the Franklin Badge will be allowed for tournament play.

Screw Attack [NEUTRAL] - Another very simple item, the Screw Attack shares a few important properties with the Franklin Badge. When picked up, effects are immediate and automatically activated, however in this case of the Screw Attack its effect (a spinning, lightly damaging, low-knockback attack) is only used when jumping. This allows for greater use of aerial approach and footstool jumping (as the attack keeps foes close until the last shot, it is easy to catch an opponent in the attack and spam 'jump' to activate a footstool jump as soon as the attack ends). The Screw Attack can also be knocked off of the user with a strong enough attack to be picked and used by the opponent. Overall, the Screw Attack does such small damage, has such little knockback, and has such low priority that it really isn't too impressive an item and it certainly doesn't seriously break any of our balance criterion. As such, the Screw Attack is approved for item play.

Team Healer (2v2 Only) [NEUTRAL] – (Thanks go out to Swordplay and MysticKenji for information regarding the Team Healer item) The Team Healer is the only item that has no effect in 1v1 play; as a matter of fact, it won’t even spawn unless Team Brawl is activated, regardless of item switch settings. Because of this, the Team Healer is arguably the least understood item out there, and as such there are some quirks to its use that must be understood. The Team Healer operates like most projectile items in that the item does not affect battle upon pickup; rather, the effects of the Team Healer are observed when it is thrown at another player. Unlike any other item, though, the Team Healer (as the name implies) heals whoever is hit by the thrown item… most of the time. Like many other items, there is inherent risk to using this item in that the effects it has on battle is randomized (in this case, between healing damage and causing damage). In normal team play, the Team Healer will always heal a partner, but will randomly heal or hurt if it contacts an enemy; due to Friendly Fire, this now applies to both friend and foe, and so the item will randomly either heal or hurt any player it contacts. Approved for 2v2 play, use caution with this item.


ITEMS APPROVED THUS FAR:

(Sandbag) (Food) (Warp Star) (Bunny Hood) (Beam Sword) (Lip’s Stick) (Star Rod) (Super Scope) (Fire Flower) (Motion Sensor Bomb) (Freezie) (Smoke Ball) (Pitfall) (Mr. Saturn) (Green Shell) (Banana Peel) (Franklin Badge) (Screw Attack)

COUNTERPICK ITEMS THUS FAR:

(Assist Trophy) (Dragoon) (Metal Box) (Home-Run Bat) (Hammer) (Ray Gun) (Cracker Launcher) (Gooey Bomb) (Hothead) (Spring) (Unira)

BANNED ITEMS THUS FAR:

(Smash Ball) (Pokeball) (Containers) (Blast Box) (Maxim Tomato) (Heart Container) (Super Mushroom) (Poison Mushroom) (Starman) (Superspicy Curry) (Lightning) (Fan) (Golden Hammer) (Bob-Omb) (Smart Bomb) (Deku Nut) (Bumper) (Soccer Ball)

CHANGES FOR 2v2 PLAY:

Item Spawn Rate – Changed to ‘Medium’
(Team Healer) - Neutral
(Smash Ball) – Moved to Counterpick
(Superspicy Curry) – Moved to Counterpick
(Cracker Launcher) – Moved to Neutral


Other Important Info:

TESTERS:

Jack Kieser (Phaze): 3566-1264-7112
Sephi_hatu (Sephi): 0087-1978-8381
Metallic_Igloo: 3523-1714-9284
nesdude: 2492-3777-7739
Rich: 0860-3024-9262
Trexxen (Trexn): 0774-3925-3469

POSTS WITH TEST DATA / WRITE-UPS:

Jack Kieser Item Test 1
nesdude Test 1
nesdude Tests 2 & 3
Jack Kieser 2v2 Test 1
Jack Kieser 1v1 Test 2
Jack Kieser Human 1v1 Test #1
'Item Standard Play' Online Tournament (4/19/08)
'Item Standard Play' 5/24 1v1 Tournament

VIDEO EXPERIMENTS:

Bombs / Pokeballs: http://www.youtube.com/watch?v=oNkWlrubGgM
nesdude Test 1 (feat. Dragoon): http://www.youtube.com/watch?v=Scuzoo3neLQ
nesdude Test 2: http://youtube.com/watch?v=J1yRjgtnwv4
nesdude Test 3 (feat. multiple Smash Balls): http://youtube.com/watch?v=k5WvDF6eXyI

Past News
*Good news for people who want to help test, but have no idea where to start! I finally got on my computer and made a template in Wordpad to help give people direction when they are testing. The template has slots for your input and places to put data pertaining to the test setup AND results! Unfortuantely, it's not post compatible (meaning you can't copy/paste the results into a post for SWF), but I'll work on that.

The 1v1 version can be found here, while the 2v2 version can be found here. One note: make sure your margins are .5" all around, or else the formatting goes all the hell.
The Brawl Competitive Discussion, Advice & Resources Thread
*This thread is something of a work in progress at the moment

The aim of this thread is to provide all players with a centralized thread for:

  • General discussion pertaining to the current competitive Brawl metagame
  • A thread in which players may ask questions or advice pertaining to competitive play
  • An index of useful threads that players new and old a like may wish to reference
The goal of this thread is to reduce stickied thread clutter, encourage on topic posting in individual threads in the Brawl Tactical Discussion sub-forum and to further bring together the smash community by providing a general thread for it to discuss topics as it pleases without the need to justify an entirely new thread.

All the global rules apply;

- Don't SPAM
- Don't flame or harass
- Don't go off-topic
(Talk about strategies to defeat XXXX Character, not about your grandmother's cookies)

+-+-+-+-+
Resources

The following threads are a list of previously stickied and/or useful threads. It's an ongoing process to add all of these however. A majority to begin with will include a list of threads SamuraiPanda collated himself (I'll be copying them all directly from here). Also the format is mostly stolen from that thread too :)

Collated by Vyse (Me):

"Match-up Chart & List" by Rajam
http://www.smashboards.com/showthread.php?t=226315
A comprehensive match-up chart/list constructed using match-up ratios agreed upon by individual character sub-forums.

"COMPLETE Frame Data Directory" by Dekar173
http://www.smashboards.com/showthread.php?t=258564
A complete directory of frame data threads for each character in Brawl.

"Your First Tournament - A Guide to Making the Most of It" by SCOTU
http://www.smashboards.com/showthread.php?t=216416
Your first tournament may be a daunting experience at first, but with this little writeup by SCOTU, you should get by just fine :)

"A Guide to Playing Smash Competitively" by SCOTU
http://www.smashboards.com/showthread.php?t=226635
Want to get competitive but don't know where to start? Start right here!

"Theory Craft and Mix up game: Seeing where "on paper" meets "in match" ~Essay" by RedHalberd
http://www.smashboards.com/showthread.php?t=261496
Learn about common misconceptions people make when watching videos and theorizing in game scenarios.

"Smash School" by Vrael
http://www.smashboards.com/showthread.php?t=243706
A thread aimed at newer players. This thread gets new players in contact with people whom can 'teach' them about the character they would like to learn.

"Internal Character Mechanics Valukes" by Amazing Ampharos
http://www.smashboards.com/showthread.php?t=244329
A comprehensive rating list of the 11 most significant attributes in each character. A must read.

"Smash Lab Standard Terms List" by SCOTU
http://www.smashboards.com/showthread.php?t=227773
Auto-Cancel? Hitstun? What do these terms mean? SCOTU and the former 'Smash Lab' members came up with a rigid list of definitions for many terms relating to Brawl and Smash in general.

"Visible Offensive Collision Bubble PSA Archive" by AMKalmar
http://www.smashboards.com/showthread.php?t=255290
A directory of files that can be used with 'Hacked' Wii's that allow players to view the actual range of attack hitboxes. Another similar thread is found here: http://www.smashboards.com/showthread.php?t=256398

"A Complete Guide to DI and Survival" by swordgard
http://www.smashboards.com/showthread.php?t=221969
What is DI and how do I do it? This is a comprehensive guide to just that - an essential skill for all top level smashers to learn.

Collated by SamuraiPanda:

* "Playing to Learn" by MookieRah
http://smashboards.com/showthread.php?t=176650
This incredible guide explains what a "newbie" vs a "pro" is, and details the mindset that anyone intending on becoming good in Smash should have. A must read for almost anyone.


* "Keep Losing? Try this..." by cwjalex
http://smashboards.com/showthread.php?t=160643
Before you jump into any advanced techniques, or swim through walls of text and numbers, you may find this thread that covers the basics of competitive gameplay much more useful.


* "Show me something NEW - How to become one of the greats" by Gimpyfish62
http://smashboards.com/showthread.php?t=190956
Everyone's favorite Gimpyfish made this thread to encourage and guide everyone out there that dreams of becoming one of the best Smashers out there.


* "Brickwalls and Traps: The keys to victory" by Emblem Lord
http://www.smashboards.com/showthread.php?t=183816
Want to learn some more theory behind what separates the pros from the rest of the crowd? Emblem Lord's thread can help you take your game to the next level.


* "Momentum" by Omnigamer
http://smashboards.com/showthread.php?t=179124
One of my favorite threads in this list, you can learn about one of the most important concepts in competitive Smashing: Momentum.


* "~The Psychology of Smash~" by Mighty_mo76
http://smashboards.com/showthread.php?t=190258
In yet another theory thread, Mighty_mo76 bestows some knowledge that many people could potentially find useful.


* "~Beyond the Game: random words of wisdom~" by Mighty_mo76
http://smashboards.com/showthread.php?p=4918895
Tired of the theory threads yet? Well, this one details some of the basics of maintaining your game, and how you can continue to improve.


* "Character Rankings List" by Ankoku
http://smashboards.com/showthread.php?t=165954
In this extremely popular thread, Ankoku gathers and details tournament results for every character in the game. He maintains and updates a rankings list of the top tournament winning characters in this thread that has become an incredible resource to the community.


"The C-Stick Compendium - A Comprehensive Guide" by Taymond
http://smashboards.com/showthread.php?t=156176
Everything you want/need to know about the C-Stick into one awesome guide!


"The Physics of Attacks (DI included)" by Scotu
http://smashboards.com/showthread.php?p=4158733
This is an excellent read that should be recommended to most people who are new to the competitive scene of smash, although I'm sure many veterans will learn much from this thread as well.


"A better 'Super Armor List' Thread" by NoVaLombardia
http://smashboards.com/showthread.php?t=163775
You'll be amazed at how much super armor there is hidden in the game, on characters you'd least expect, too. This thread is an ongoing community effort to identify any/all super armor that can be found in the game. Help out if you can! *Updated* This new thread is actually being constantly revised and added to, which is a very welcome addition!


"Project Vertical: Kill Percents, Stage Ceilings, Character Usmash/Uair Knockback" by Thinkaman
http://smashboards.com/showthread.php?t=156908
Want the exact percent that your main can KO from the top? This thread has all the numbers you could ever want that have anything at all to do with the upwards direction.


"Weight Lists" by Mew2King
http://smashboards.com/showthread.php?t=162374
Want to know the exact weights of characters? Well look no further than M2K's extremely detailed guide. Its not just a simple list, there is a surprising amount of information!


"Character weight list, fall speed list and random things" by MrSilver
http://smashboards.com/showthread.php?t=162546
Mew2King isn't the only one who has made a weight list, as MrSilver comes in with his own method of making one. But MrSilver also includes some other interesting tidbits, as well as a good list of the fall speeds for characters.


"*IMPORTANTÉ*. In-depth analysis of attacks that trip your opponent!" by mugwhump
http://smashboards.com/showthread.php?t=149978
A very interesting thread that analyzes all those attacks that make you fall. And to top it off, mugwhump made a topic that was boring into something most more fun (and funny) to read.


"Mechanics of Tripping" by Hitaku
http://smashboards.com/showthread.php?t=162850
Tripping, without doubt the worst addition to Brawl, needed to be analyzed in all its forms. A little while back, Hitaku did quite a few calculations, and thanks to him we now know enough about tripping to debunk many rumors, as well as confirm a few. If you're only going to pick a few threads to read, this thread is definitely worthy.


"B Move Edge Momentum Shifts" by Tyr_03
http://smashboards.com/showthread.php?t=158881
One of my favorite things to do with Mario now is run off the edge while doing the cape for that nice boost. And thats all thanks to this thread on the momentum you can gain by doing a B attack while moving off the edge.


"Wall Clinging - An in-depth look at this new exclusive tech (also: Wall Jumping)" by Yuna
http://smashboards.com/showthread.php?t=142700
With a new game comes new mechanics, that we smashers are left to figure out in detail. To study a bit more about Wall Clinging, Yuna came to the rescue by figuring out many things you wouldn't expect about such a simple mechanic.


"List of Spikes in Brawl" by kamekasu
http://smashboards.com/showthread.php?t=163968
No information is ever unwelcome here on SWF, as even a list of spikes in the game can come in handy. Although, you may be surprised at how many "hidden" semi-spikes characters have!


"B-Reversal/Reverse Special List" by 3GOD
http://www.smashboards.com/showthread.php?t=166774
By now, if you've read the information before this, you should know exactly what information this thread contains. Its very handy to have a list like this nearby when you're trying to experiment with characters!


"autocancelled aerials" by Tyr_03
http://www.smashboards.com/showthread.php?t=169171
Haven't you heard? Autocancelling is like the new L-cancel for Brawl, and an essential technique to learn for some characters. This is an awesome reference to see what moves can autocancel.


"Lists of All True Combos In Brawl" by Rhyfelwyr
http://smashboards.com/showthread.php?t=168036
The word "combo" when applied to Brawl is a touchy subject for many, but Rhyfelwyr went on a quest to find out what Brawl has to offer in that area. Quite the interesting thread.


"Horizontal Aerial Movement Speed List" by 3GOD
http://smashboards.com/showthread.php?t=167952
While there is some things you may have expected, there are still a couple of surprises to be found in this list. Aerial movement refers to how much control a character has while in the air. Very worthwhile information to know about the characters.


"An in-depth look at Brawl's buffering system" by Doval
http://smashboards.com/showthread.php?t=167109
Buffering could very well be an essential skill in the future of Brawl, so having such an expansive overview of the system is an essential addition to this thread.


"Blastzones and how they work in Brawl" by Tyr_03
http://www.smashboards.com/showthread.php?t=167095
Did you know that you fall slightly faster when you are shown on-screen in that magnifying glass? Yeah, neither did I! This thread is an interesting read, although its probably nothing more than a bit more knowledge to quench your thirst.


* "Glide Toss Lengths" by BurningCrusader777
http://www.smashboards.com/showthread.php?t=172861
A guide that details the lengths of glide tosses for characters. With the glide toss being one of the most important and basic ATs of Brawl, this thread can really help.


* "All about wavebouncing" by RKey
http://smashboards.com/showthread.php?t=191605
Quite the extensive guide on how to "wavebounce" (not the official name, btw) with or without the B-stick.


* "The Superlatives - Strongest attacks in each category" by OrlanduEX
http://www.smashboards.com/showthread.php?t=174342
Simply put, the strongest KO attacks in each category. This thread is just a fun, quick read.

"Need some advice or have a question about something? Ask here!" by SamuraiPanda
http://www.smashboards.com/showthread.php?t=174236
This thread is one by the man himself. I've linked it here so that people may find it easily should they wish to view the old advice thread again.

Feel free to suggest more to me!

+-+-+-+-+

Well that's all I have for the moment. Please respect this thread, but also please have fun. The discussion in this thread is up to you guys, so as long as it's smash related, go right for it.

Don't forget to drop myself or other mods a PM if you ever need anything.


DtJ Jungle

Check out my character in #GranblueFantasy
BRoomer
Joined
Jul 29, 2008
Messages
24,020
Location
Grancypher
ellow]
The User Handbook
[/COLOR][/SIZE]

[/FONT][/B]
The Ultimate Guide for Newcomers to Smash World Forums[/CENTER]


In The User Handbook, we are going to cover key elements of how to go about utilizing the features of Smash World Forums to the fullest to really become a great and active member of the community.​

This handbook is not only for newcomers to the forum, but for all users to get a better understanding of the rules and the forums themselves. There is something for everyone in this guide. By taking a look at the guide, you might discover something new about SmashBoards.​

<---CONTENTS

<A href=#navigation>I. Navigation & Settings</a>
  • <a href=#theboards>The Boards</a>
  • <a href=#usercp>User CP</a>
  • <a href=#networking>Networking</a>
  • <a href=#settings>Settings & Options</a>
  • <a href=#connect>Connect</a>
  • <a href=#news>News</a>
  • <a href=#wiki>Wiki</a>
  • <a href=#network>About Smashboards</a>

<A href=#theforums>II. The Forums</a>
listed by category
  • <a href=#SWN>Smash World Network</a>
  • <a href=#SSBB>Super Smash Bros. Brawl</a>
  • <a href=#ST>Smash Tournaments</a>
  • <a href=#SSBM>Super Smash Bros. Melee</a>
  • <a href=#GD>General Discussion</a>
  • <a href=#G>Gaming</a>
  • <a href=#AE>Arts and Entertainment</a>
  • <a href=#PP>Password Protected</a>

<a href=#groups>III. Usergroups</a>
  • <a href=#public>Public Groups</a>
  • <a href=#other>Other Groups</a>

<---Navigation & Settings

<a name=navigation>
When you first enter Smash World Forums, you are taken to the Index or Homepage. This page gives you access links to almost everything on the site at one time.​
</a>


This button is located at the top of every page to the far left of the Navigation bar. Clicking this will bring you directly to the Homepage.​

The Boards button can also be highlighted, as it is in the above image. Moving your mouse over it automatically highlights it, and below it will appear additional links:​

<a name=theboards>
</a>

Home - Directs you to the Homepage.
User CP - Takes you to your User Control Panel, where you can customize your account preferences.
FAQ - A basic FAQ covering various SWF procedures.
Members - The list of all members registered on Smash World Forums.
Search - This gives you the option of searching the forums for specific threads, members, and blogs.
New Posts - The most recent posts on the entire forum.
Chat - A chat room for Smash World Forums. The chat is hosted via IRC on irc.globalgamers.net, in channel #smashboards.​


<a name=usercp>
The User CP</a> [In-depth]------------

The User Control Panel is where you can modify your preferences, keep track of your subscribed threads, register for group memberships, and MORE.​

The first thing you should see when entering the User CP is your subscribed threads list, which is located at the very center block. Subscribed threads are threads that you participate in and keep track of. When you are posting in a thread, you are given the option of subscribing to it.​

<a name=networking>
</a>

The thread titles in bold are those with new, unread posts. Clicking on the arrow next to the thread title will bring you to the first unread post. After returning to the User CP, the thread link will lose the bold font. This makes it easier to indicate which threads have new posts and which do not.​


To the left is the actual Control Panel. This is where all the modifications are done. There are a variety of links to choose from:​


In "Edit Your Details", you are able to fill in profile information. There are three categories:
Registration Required Information - info such as birthdate, email, and password.
Optional Information - info such as instant messenger screen names and homepage url.
Additional Information - info such as location, biography, hobbies, Brawl Friend Code, Wii Friend Code, etc.​

In "Edit Profile Picture", you are given the option of posting an extra image representing yourself.​

---------


"Contacts and Friends" Takes you to your friend list, where you can manage requests and add/remove users from the list. You have the ability to befriending those you meet throughout the forum. This makes it easier to keep in touch.

"Social Groups" takes you to the list of social groups created by members of Smash World Forums. Social groups can be compared to threads, except they aren't public, users require registration to participate in them, and they can be moderated by their creator. This makes it easier to keep things private between specific members. For example, if you created a gaming crew that develops special tactics, you would want to make it exclusive so that your information isn't leaked to just anybody. Any user can create a social group, but it is your responsibility to act as a respectful host/hostess.

"Group Memberships" takes you to a list of memberships that you can apply for. There are a good number to choose from, but keep in mind that there is a requisite that must be fulfilled in order to have a good chance of being accepted into the user group. Also, take note that not all user groups can be joined by making a request. Others may require an invite by Staff members.

For more information on usergroups, <a href=#groups>Click Here</a>.

"Pictures and Albums" takes you to a page where you may upload images and create albums for them. These are to share to those who may visit your profile.

------

<a name=settings>
</a>

"Edit Your Avatar" gives you the option to select a pre-set avatar, or upload your own.

"Edit Your Signature" gives you the option of placing or typing out a signature.


"Edit Email and Password" allows you to change your email address and password. It is recommended to change your password often, in case of any account phishing and hacking.

"Edit Options" is where you personalize things like forum layout, postbit, theme, privacy, etc. This is the root of the User CP.

"Edit Ignore List" allows users to add or remove other users to/from an ignore list. Any user on this list will have his/her posts obstructed from the owner's view. It is suggested that you use this only if you are constantly offended by the posts of a specific user.

------

At the bottom of your User CP, there is an Infraction List. Infractions are warnings given by Staff members to users that violate the Global Rules (Click). Larger offenses carry a higher point infraction value. If a user receives a certain amount of points, they will be banned from Smash World Forums, whether permanently or temporarily.


When you receive an infraction, a private message from the Staff member delivering the infraction will be found in your inbox. In the image above, it shows the post that was the cause of the infraction, the date of occurence, the expiration date, the point, the reason, and the deliverer.

The yellow block on the left shows that it is a warning. A red block shows that it is an infraction, which is worth at least one point. Take note that while most infractions expire, some are permanent. Please read and understand the Global rules (Click!).

This concludes The User CP [In-depth]


------

<a name=connect>
</a>

Second on the Navigation bar is the Connect button. This links you to the more social sections on Smash World Forums.


Notice a few of them are familiar. Let us go over the ones that haven't been mentioned yet:

Friend Finder - A SWF exclusive system that is used to connect those who are looking to play Super Smash Bros. Brawl through wifi. You look for players who have the status "Seeking Brawl" then simply contact them, accepting their challenge. You can leave all sorts of details such as rules and location. Unfortunately, this official Friend Finder is not functioning at the moment.

Stage Browser - A network of custom stages created and uploaded by users. Players who are looking to test their mettle on unique and wacky stages can come here and download a custom stage that may appeal to them. We have a unique method of transferring them directly into your game. You simply insert an SD card into your computer, download the custom stage data into it, then insert it into your Wii. The game will automatically recognize the data and it will be applied to your game.

Snapshots - Basically, a section where users can view and share snapshots taken in-game of Super Smash Bros. Brawl. Whether the shots are rare, funny, or just plain awesome, they will be here.

Social Groups -Social Groups Page as described above.

Calendar - Just the standard calendar. Upcoming events will appear on their respective dates, such as live tournaments and conventions.

------


<a name=news>
</a>

Next, we have is the News button. This appears to take you to a completely different site. But alas it just a News Portal for SWF. This button also reveals additional links:


Home - The same link effect as the News button.
About - Explains the purpose of this section.
Podcasts - This lists all the podcasts that have been posted.
Send a Tip - Gives users the privilege to send in their own News entries that must be approved by the Staff.
Smash Bag - This allows users to send in their opinions and questions about Smash.
Archive - Lists an archive of every single News entry.

The News section also contains your blog area.


Blogs that you create here are automatically duplicated into threads. So if you wish to view the thread version of your blog, just simply click "View Thread". Most people find it much easier to reply to comments posted on their blogs this way.

------

<a name=wiki>
</a>

This is the Wiki button. This leads you to SmashWiki, the Wikipedian source for the whole Super Smash Bros. series.


Main Page - This merely leads you to the home page of SmashWiki.
My Page - Brings you to your profile page if you registered for an account for SmashWiki.
My Talk - Basically a page where others can communicate with you on SmashWiki.
Preferences - Your SmashWiki settings.
Watchlist - If you subscribed to a certain Wiki page, you can receive its updates here.

------


<a name=network>
</a>

Lastly we have the Network button. This holds the miscellaneous links for the site:


About - Gives a short description about Smash World Forums.
Privacy - Directs you to the Privacy Policy, which explains the site's commitment to privacy of members.
Contact - If you need to send a message to the webmaster, use this. However, It's often faster to contact a moderator or administrator first.[/QUOTE]
 

Morrigan

/!\<br>\¡/
Joined
Mar 10, 2006
Messages
18,681
THE NEW PEACH GUIDE

INTRODUCTION
Welcome to the new Peach guide! The purpose of this guide is to provide a definitive and constantly up-to-date resource documenting every aspect of the Peach character in Super Smash Bros Brawl. This guide will cover all of her basic information and statistics, along with in-depth strategies and numbers - all within the context of competitive Smash. We in the Peach Back Room hope you enjoy and put the material below to good use!

TABLE OF CONTENTS

  1. Intro to Peach
  2. Physics and Stats
  3. Moveset
  4. Advanced Techniques
  5. Chaingrabs
  6. Vegetables In-Depth
  7. Match-Ups
  8. Melee Peach vs Brawl Peach Comparison
  9. Credits
INTRO TO PEACH
"If you don't wanna work that hard, this is not the character for you."
- Dark.Pch
Despite her initial appearance, and contrary to popular belief, Peach is a very decent character in Brawl. Peach is known for her unique float ability, effective and combo-heavy air game, safe shield pressuring capabilities, breakneck close quarters options, and random game-breaking death turnips and items. Negatively, Peach is known for her incredibly weak kill options, her light weight, and her steep learning curve.

Peach only wins in the hands of a player strictly disciplined to play on precision alone. Exact spacing, adaptive pressure, and patience are absolute requirements when playing Peach. After the first 40%, Peach's freebies are gone - the player is now required to keep a lightweight alive, and to kill without kill moves. Make it work.

Strengths

  • Float
  • Projectile item
  • Random chance to pull a Bomb-omb, Beam Sword, Mr. Saturn or Stitchface
  • Lengthy horizontal recovery
  • Large variety of combos
  • Chaingrabs on large amount of cast
  • Practical immunity to most combos, chaingrabs, and grab releases
Weaknesses

  • Lack of powerful kill moves
  • Lightweight
  • Poor vertical recovery
  • Slow fall speed
  • Slow dash speed
Current Tier List Position

S: Meta Knight
A: Snake, Diddy Kong, Falco, Ice Climbers, Marth, Wario
B: King Dedede, Pikachu, Olimar, Lucario, Mr. Game & Watch
C: Pit, Toon Link, Zero Suit Samus, Kirby, R.O.B.
D: Donkey Kong, Peach, Fox, Luigi, Wolf
E: Sheik, Pokémon Trainer, Sonic, Ness, Bowser
F: Lucas, Ike, Yoshi, Mario, Falcon, Samus, Jigglypuff
G: Zelda, Link, Ganondorf

See: The Official Brawl Back Room Tier List v4

PHYSICS AND STATS
Fitting for a princess, Peach is a light and floaty character. Unfortunately, this limits her basic movement options, but thanks to floating and advanced techniques such as glidetossing, Peach is kept from being a completly slowed character.

Peach cannot wall jump.
Peach cannot wall cling.
Peach cannot crawl.

Weight
Peach is 26th on the weight list and is the 10th lightest character below Toon Link and above Marth.
[Collapse=Weight List]1. Bowser (120)
2. Donkey Kong (116)
3. Snake (113)
4. King Dedede (112)
5. Charizard (110)
6. Ganondorf (109)
7. Samus (108)
8. Wario (107)
8. Yoshi (107)
10. R.O.B. (106)
11. Ike (105)
12. Captain Falcon (104)
12. Link (104)
14. Wolf (102)
15. Ivysaur (100)
15. Lucario (100)
17. Mario (98)
18. Luigi (97)
19. Sonic (95)
20. Lucas (94)
20. Ness (94)
20. Pit (94)
23. Diddy Kong (93)
24. Ice Climbers (92)
24. Toon Link (92)
26. Peach (90)
27. Marth (87)
28. Sheik (85)
28. Zelda (85)
30. Falco (82)
30. Olimar (82)
32. Zero Suit Samus (81)
33. Fox (80)
34. Meta Knight (79)
34. Pikachu (79)
36. Kirby (78)
37. Mr. Game & Watch (75)
37. Squirtle (75)
39. Jigglypuff (68)[/Collapse]
Air Speed
Peach is 24th on the air speed list and is one of the 9th slowest characters below Pikachu and above Ganondorf.
[COLLAPSE=Air Speed List]1. Yoshi (1.32)
2. Jigglypuff (1.27)
3. Wario (1.22)
3. Wolf (1.22)
5. Captain Falcon (1.18)
6. Sonic (1.11)
7. Donkey Kong (1.08)
7. Mr. Game & Watch (1.08)
7. Squirtle (1.08)
10. Lucas (1.05)
11. Bowser (1.03)
11. Marth (1.03)
11. Zero Suit Samus (1.03)
14. Charizard (0.99)
14. Lucario (0.99)
14. Samus (0.99)
14. Zelda (0.99)
18. Ness (0.96)
19. Mario (0.94)
19. Snake (0.94)
19. Toon Link (0.94)
22. Ike (0.92)
23. Pikachu (0.91)
24. Falco (0.89)
24. Fox (0.89)
24. Peach (0.89)
24. Pit (0.89)
24. R.O.B. (0.89)
29. Ganondorf (0.85)
29. Kirby (0.85)
29. Sheik (0.85)
32. Diddy Kong (0.83)
33. Olimar (0.82)
34. Link (0.81)
35. Ice Climbers (0.77)
36. Ivysaur (0.75)
36. Meta Knight (0.75)
38. Luigi (0.73)
39. King Dedede (0.66)[/COLLAPSE]
Fall Speed
Peach is 38th on the fall speed list and is the 2nd slowest faller below Samus and above Jigglypuff.
[COLLAPSE=Fall Speed List]1. King Dedede (2.73)
2. Link (2.67)
3. Captain Falcon (2.57)
4. Fox (2.56)
5. Snake (2.42)
6. Falco (2.39)
7. Pikachu (2.38)
8. Ganondorf (2.31)
8. Ike (2.31)
10. Donkey Kong (2.21)
10. Sheik (2.21)
12. Marth (2.10)
12. Squirtle (2.10)
14. Diddy Kong (2.00)
14. Sonic (2.00)
14. Zero Suit Samus (2.00)
17. Pit (1.99)
18. Wario (1.96)
19. Bowser (1.95)
19. Meta Knight (1.95)
21. Lucas (1.92)
22. Kirby (1.90)
22. Toon Link (1.90)
22. Wolf (1.90)
25. Charizard (1.89)
25. Ivysaur (1.89)
27. Ness (1.83)
28. Olimar (1.82)
29. Yoshi (1.81)
30. Mario (1.79)
31. Mr. Game & Watch (1.74)
32. Luigi (1.71)
33. Ice Climbers (1.68)
33. Lucario (1.68)
33. R.O.B. (1.68)
36. Zelda (1.58)
37. Samus (1.50)
38. Peach (1.47)
39. Jigglypuff (1.37)[/COLLAPSE]
Walk Speed
Peach is 29th on the walk speed list and is one of the 7th slowest walkers below Ike and above Captain Falcon.
[COLLAPSE=Walk Speed List]1. Marth (1.5)
2. Fox (1.45)
3. Sonic (1.40)
4. Zero Suit Samus (1.33)
5. Sheik (1.30)
5. Wolf (1.30)
7. Falco (1.28)
8. Diddy Kong (1.25)
9. Pikachu (1.24)
10. Meta Knight (1.22)
10. Toon Link (1.22)
12. Donkey Kong (1.20)
12. Link (1.20)
12. Squirtle (1.20)
15. Pit (1.18)
16. Yoshi (1.15)
17. Mario (1.10)
17. Mr. Game & Watch (1.10)
17. R.O.B. (1.10)
20. Luigi (1.08)
21. Ivysaur (1.05)
21. Samus (1.05)
23. Lucario (1.00)
24. Ice Climbers (0.96)
25. King Dedede (0.95)
25. Kirby (0.95)
27. Olimar (0.90)
28. Ike (0.88)
29. Ness (0.86)
29. Peach (0.86)
31. Captain Falcon (0.85)
31. Wario (0.85)
33. Snake (0.84)
34. Lucas (0.82)
35. Bowser (0.80)
35. Zelda (0.80)
37. Ganondorf (0.73)
38. Charizard (0.70)
38. Jigglypuff (0.70)[/COLLAPSE]
Running Speed
Peach is 31st on the running speed list and is one of the 6th slowest runners below Squirtle and above Luigi.
[Collapse=Running Speed List]1. Sonic (3.50)
2. Captain Falcon (2.18)
3. Fox (2.08)
4. Zero Suit Samus (1.93)
5. Sheik (1.92)
6. Meta Knight (1.85)
7. Charizard (1.80)
8. Pikachu (1.76)
9. Diddy Kong (1.72)
10. Marth (1.70)
11. Yoshi (1.68)
12. Toon Link (1.65)
13. Donkey Kong (1.62)
14. Pit (1.58)
15. Mr. Game & Watch (1.55)
16. Bowser (1.53)
17. Ivysaur (1.50)
17. Lucas (1.50)
17. Mario (1.50)
17. R.O.B. (1.50)
21. Samus (1.45)
22. Falco (1.43)
23. Lucario (1.41)
24. Olimar (1.40)
24. Wolf (1.40)
26. Ice Climbers (1.39)
26. Ness (1.39)
28. Ike (1.37)
28. Kirby (1.37)
28. Squirtle (1.37)
31. Peach (1.35)
31. Snake (1.35)
31. Wario (1.35)
34. Luigi (1.34)
35. Link (1.33)
36. King Dedede (1.22)
36. Zelda (1.22)
38. Ganondorf (1.16)
39. Jigglypuff (1.10)[/Collapse]
Spot Dodge
Peach has an average spotdodge.
[Collapse=Spot Dodge List]2-20 / 22 Link
2-20 / 22 Pikachu
2-20 / 22 Falco
2-20 / 22 Yoshi
2-20 / 22 Toon Link
2-20 / 24 Marth

2-20 / 25 Mario
2-20 / 25 Samus
2-20 / 25 Zero Suit Samus
2-20 / 25 Kirby
2-20 / 25 Fox
2-20 / 25 Game & Watch
2-20 / 25 Luigi
2-20 / 25 Diddy
2-20 / 25 Zelda
2-20 / 25 Sheik
2-20 / 25 Pit
2-20 / 25 Metaknight
2-20 / 25 Squirtle
2-20 / 25 Ivysaur
2-20 / 25 Charizard
2-20 / 25 Ike
2-20 / 25 Snake
2-20 / 25 Peach
2-20 / 25 Ganondorf
2-20 / 25 Ice Climbers
2-20 / 25 Wolf
2-20 / 25 Lucario
2-20 / 25 Ness
2-20 / 25 Sonic
2-20 / 25 Wario
2-20 / 25 R.O.B
2-20 / 25 Captain Falcon
2-20 / 25 Lucas

3-20 / 25 Olimar
3-16 / 25 Jigglypuff
2-20 / 27 King Dedede
2-23 / 30 Donkey Kong
3-24 / 32 Bowser[/Collapse]
Forward Roll
Peach has an above average forward roll.
[Collapse=Forward Roll List]5-12 / 23 Metaknight
4-19 / 27 Lucario
4-17 / 27 Pit
4-15 / 27 Zero Suit Samus
4-19 / 29 Diddy
4-19 / 29 Squirtle

4-20 / 31 Kirby
4-19 / 31 Donkey Kong
4-19 / 31 Fox
4-19 / 31 Pikachu
4-19 / 31 Luigi
4-19 / 31 Zelda
4-19 / 31 Sheik
4-19 / 31 Falco
4-19 / 31 Peach
4-19 / 31 Ganondorf
4-19 / 31 Ice Climbers
4-19 / 31 Wolf
4-19 / 31 Ness
4-19 / 31 Sonic
4-19 / 31 Captain Falcon
4-19 / 31 Lucas

3-19 / 32 Jigglypuff
4-19 / 32 Mario
4-19 / 32 Ivysaur
4-19 / 32 King Dedede
4-19 / 32 Olimar

4-19 / 33 Ike
4-21 / 34 R.O.B
4-19 / 34 Yoshi
4-19 / 35 Charizard
4-19 / 35 Marth
4-19 / 35 G&W
4-17 / 35 Snake

4-21 / 37 Wario
4-19 / 37 Link
4-19 / 37 Toon Link
5-20 / 39 Bowser
4-23 / 44 Samus[/Collapse]
Back Roll
Peach has an above average back roll, though it starts one frame later then most.
[Collapse=Back Roll List]4-19 / 27 Lucario
4-19 / 29 Diddy
4-19 / 29 Squirtle

4-20 / 31 Kirby
4-19 / 31 Donkey Kong
4-19 / 31 Fox
4-19 / 31 Pikachu
4-19 / 31 Luigi
4-19 / 31 Zelda
4-19 / 31 Sheik
4-19 / 31 Falco
4-19 / 31 Lucas
4-19 / 31 Wolf
4-19 / 31 Ness
4-19 / 31 Sonic
4-19 / 31 Ganondorf
4-19 / 31 Ice Climbers
4-19 / 31 Captain Falcon
5-20 / 31 Peach

4-19 / 32 Jigglypuff
4-19 / 32 Mario
4-19 / 32 King Dedede
4-19 / 32 Ivysaur
4-19 / 32 Olimar
4-17 / 32 Pit

4-19 / 33 Snake
4-12 / 33 Metaknight
4-21 / 34 R.O.B
4-23 / 35 Marth
4-19 / 35 G&W
4-19 / 36 Charizard

4-21 / 37 Wario
4-19 / 37 Ike
4-19 / 37 Link
4-19 / 37 Zero Suit Samus
4-19 / 37 Yoshi
4-19 / 37 Toon Link
5-20 / 39 Bowser
4-23 / 44 Samus[/Collapse]
Airdodge
Peach has the worst airdodge in the cast. It is missing about ten invincible frames during the end half.
[Collapse=Back Roll List]3-29 / 39 Metaknight
4-29 / 39 Zero Suit Samus
4-29 / 39 Diddy
4-29 / 39 Pit
4-29 / 39 Squirtle
4-29 / 39 Ivysaur
4-29 / 39 Charizard
4-29 / 39 Ike
4-29 / 39 Snake
4-29 / 39 King Dedede
4-29 / 39 Lucario
4-29 / 39 Wario
4-29 / 39 R.O.B
4-29 / 39 Olimar

4-29 / 48 Ice Climbers
4-29 / 48 Ness
4-29 / 48 Sonic
4-29 / 48 Lucas

4-30 / 49 Bowser
4-29 / 49 Mario
4-29 / 49 Donkey Kong
4-29 / 49 Link
4-29 / 49 Samus
4-29 / 49 Kirby
4-29 / 49 Fox
4-29 / 49 Pikachu
4-29 / 49 G&W
4-29 / 49 Luigi
4-29 / 49 Zelda
4-29 / 49 Sheik
4-29 / 49 Falco
4-29 / 49 Yoshi
4-29 / 49 Ganondorf
4-29 / 49 Wolf
4-29 / 49 Toon Link
4-29 / 49 Captain Falcon
4-29 / 49 Jigglypuff

5-30 / 49 Marth
4-19 / 49 Peach[/Collapse]
Recovery
Peach's recovery consists of five separate elements.

  • Second Jump
  • Float
  • Peach Bomber
  • Toad
  • Parasol
The major flaw with this collection is that none of these moves have exceptional vertical distance. Horizontal distance is covered wholesomely between float, Peach Bomber, and Parasol. Second jump is usually delegated to momentum canceling, but it can give a bit of horizontal movement (it provides near non-existent height). Peach Bomber launches Peach an excellent distance to the side and also sweet-spots the edge. Toad is used as a one-time air stall, also providing a miniature hop. Parasol is the main recovery tool, providing normally very adequate vertical reach. It sweet spots from a very far distance, and it contains a hitbox on the tip which knocks off ledge-hogging enemies allowing Peach to grab a hold (though opponents can dodge it with properly timed ledge invincibility). The Parasol can still grab the ledge backwards if it is pressed downward to close.

KO Moves
These numbers were tested on Mario from the center of FD without DI.

  • Bomb-omb 36%
  • Usmash (sweet) 80%
  • Usmash 93%
  • Fsmash Racket (sweet) 105%
  • Beam Sword (throw) 118%
  • Fair 133%
  • Fsmash Pan 135%
  • Ftilt (sweet) 139%
  • Fsmash Club 140%
  • Bair 150%
  • Beam Sword (fsmash) 150%
  • Nair 151%
  • Utilt 158%
  • Uair 161%
  • Dtilt 174%
Keep in mind that the opponents weight, directional influence, and damage percent, along with stage position and especially move decay, all play a part when KOing the opponent. Uair usually kills much earlier than listed, since it is used higher in the air. A sweet spotted fsmash racket can kill at 60% near the edge of the stage. Fair, while almost universally considered her best KO move, will likely be very stale by high percents.

MOVESET

Standard Moves

Jab (First Hit) ~Royal Slap~


Damage: 3%
Knockback: ★
Speed: ★★★★★
Range: ★★
Hitboxes: 1
Sweet Spot: No
KO at: N/A
Special Properties: Set knockback
Description: Peach slaps the opponent very quickly.

Frame Data
Hits on Frame: 2
Duration: 19
Hitbox Duration: 2-3 (2)
Cooldown: 16
Frames jab 1 can be canceled into second jab: 8-30

Shield Stun: 1
Shield Advantage: -16
Shield Drop Advantage: -9

Summary
Widely considered one of the best jabs in the game, Peach's two frame jab is her fastest and safest move. Very versatile with its speed, jab can be used as an instant interrupt against moves like Snake's ftilt, comboed into other moves such ftilt, dsmash, and grab, and used to cover landings after aerials - making Peach near unpunishable. When in doubt: jab.

Jab (Second Hit) ~Double Royal Slap~


Damage: 3%
Knockback: ★★
Speed: ★★★★★
Range: ★★★★★
Hitboxes: 1
Sweet Spot: No
KO at: 436% [Sideways]
Special Properties: None
Description: After the first slap, Peach slaps with the other hand very quickly.

Frame Data
Hits on Frame: 9 at earliest (frame 2 on its own)
Duration: 22 (if used in tandem with 1st jab: 29)
Hitbox Duration: 2 frames
Cooldown: 19

Shield Stun: 1
Shield Advantage: -19
Shield Drop Advantage: -12

Summary
Peach's follow-up jab combines the speed of her first jab with the added range of the golf club fsmash! Unfortunately though, the second jab is punishable by a number of characters out-of-shield options. For utmost safety, players are recommended to cancel the first jab into defensive maneuvers instead.

Dash Attack (First Hit) ~Lady Push~


Damage: 4%
Knockback: ★
Speed: ★★★
Range: ★★★
Hitboxes: 1
Sweet Spot: No
KO at: 720% [Sideways]
Special Properties: None
Description: Peach extends her arms and lunges forward upon hearing good or shocking news.

Frame Data
Hits on Frame: 6, 17
Duration: 37
Hitbox Duration: 6-9 (4); 17-19 (3)
Cooldown: 17

Shield Stun: 1, 1
Shield Advantage: -19
Shield Drop Advantage: -12

Summary
Quick and ranged, dash attack is one of Peach's more accessible punishing moves. The lunge forward mixed with the disjointed range of the second hit allows Peach to answer landings and punish generally "safe" moves - notably Meta Knight's Tornado. Like most dash attacks though, the move is susceptible to shield grabs.

Combos
Dsmash -> sends them behind you
Dash attack -> first hit catches them as they bounce on the ground
Running up smash -> catches them as the invincibility from their get-up animation wears off

Dash Attack (Second Hit) ~Double Lady Push~


Damage: 4%
Knockback: ★
Speed: ★★★★
Range: ★★★★
Hitboxes: 1
Sweet Spot: No
KO at: 235% [Upwards]
Special Properties: When opponent is at high % the second hit is harder to connect, since the first hit sends them out of range. After opponent is above 220%, only the first hit will connect if the attack is attempted at short range.
Description: Peach extends her arms and lunges forward. Attack happens just after the first hit ends.

*Frame data, summary and combos above*

Front Tilt ~Can-Can Kick~


Damage:
  • 13%
  • 11%
  • 10%
  • 6%
Knockback: ★★★★
Speed: ★★★★
Range: ★★★★
Hitboxes: "4"
  • Close Range
  • Average Range
  • Long Range (tip of the heel)
  • Upper Part of the move (after a few frames).
Sweet Spot: Close Range
KO at:
  • 139% [Upwards]
  • 166% [Upwards]
  • 182% [Upwards]
  • Unknown (later) [Upwards]
Special Properties: None
Description: Peach stretches backwards and throws a 90˚ angled kick.

Frame Data
Hits on Frame: 6 (max range @ 7)
Duration: 36
Hitbox Duration: 6-16 (11)
Cooldown: 20

Shield Stun: 4
Shield Advantage: -26
Shield Drop Advantage: -19

Summary
Offering fast and powerful range, ftilt is Peach's best tilt in terms of versatility. The move spaces with its sheer speed, lasting multiple hitboxes, and disjointed range, kills well vertically, and comboes to set-up juggles. It's major flaw is its significant cooldown - making it very rewarding on hit, but very punishable on miss. Careful when flashing.

Up Tilt ~Heart Bash~


Damage: 13%
Knockback: ★★★★
Speed: ★★★
Range: ★★★★★
Hitboxes: 1
Sweet Spot: No
KO at: 158% [Upwards]
Special Properties: None
Description: Peach raises both arms and unleashes a big heart-like magic.

Frame Data
Hits on Frame: 10
Duration: 37
Hitbox Duration: 10-14 (5)
Cooldown: 23

Shield Stun: 4
Shield Advantage: -23
Shield Drop Advantage: -16

Summary
One of the larger single hitboxes in the game, Peach's utilt plainly beats every character's dair. Extremely powerful in combination with platforms, the massive disjointed range halts almost everything dropping from above - including projectiles. Its startup and cooldown stop it from being incredibly versatile, but it excels in its one purpose: hitting things above Peach.

Combos
Dair > Uair > FF > Utilt - You can add an extra Dair depending on the opponent's weight.
FF Dair > Utilt
Ftilt > Utilt
Dtilt > Utilt (low percents)
Fsmash (Pan) > Utilt

Down Tilt ~Elegant Sweep~


Damage: 10%
Knockback: ★★★
Speed: ★★★
Range: ★★★★★
Hitboxes: 1
Sweet Spot: No
KO at: 174% [Upwards]
Special Properties: Meteors when opponents are really close to Peach's body when the attack connects. When used frequently Peach moves forward at a slow speed. Peach also retreats when you use down tilt and another move.
Description: Peach crouches, leans forward a little bit and throws a low angled slap.

Frame Data
Hits on Frame: 12
Duration: 27
Hitbox Duration: 12-13 (2)
Cooldown: 14

Shield Stun: 3
Shield Advantage: -13
Shield Drop advantage: -6

Summary
Ranged and virtually lagless, dtilt offers a variety of niche uses. With as much range as the golf club fsmash, dtilt is lauded as an excellent spacing move - its purely vertical trajectory only complimenting it. The end of the move has interrupt-as-soon-as frames, which allows Peach to cancel the ending lag into any action (turnip pull, pivot, jump) while sliding backwards. Dtilt is also Peach's only meteor smash, and the third strongest grounded meteor in the game.

Advanced Techniques
Dtilt Cancel Glide

Combos
Dtilt > Utilt (low percents)
Dtilt > Nair
Dtilt > Fair
Jab > Dtilt
Dtilt > Fsmash

Smash Attacks

Front Smash (Golf Club) ~Peach Swing~


Damage: 15% Uncharged, 21% Charged
Knockback: ★★★★
Speed: ★★★
Range: ★★★★★
Hitboxes: 2 (Frontswing and backswing)
Sweet Spot: No
KO at: 140% Uncharged, 93% Charged [Sideways]
Special Properties: Comes out randomly. Doesn't appear twice in a row.
Description: Peach grabs a Golf Club and swings it forward.

Frame Data
Hits on Frame: 15
Duration: 40
Hitbox Duration: 15-19 (5)
Cooldown: 21
Charge Release: hits on frame 5

Shield Stun: 5
Shield Advantage: -21
Shield Drop Advantage: -14

Summary
Possibly the best weapon out of the fsmash line-up, the golf club is Peach's most ranged move. Compared to the both the racket and pan, the club never needs a sweet spot and is easiest to work with due to its superior range. Although its hampered by fsmash's random mechanic, this can be helped by eliminating one of the weapons beforehand (such as the pan), and leaving the club a 50/50 chance of appearing.

Front Smash (Tennis Racket) ~Peach Swing~


Damage: 12% Uncharged Unsweetspotted, 16% Charged Unsweetspotted, 13% Uncharged Sweetspotted, 18% Charged Sweetspotted
Knockback: ★★★★★
Speed: ★★★
Range: ★★★
Hitboxes: 2 (Frontswing and backswing)
Sweet Spot: The very edge of the racket.
KO at: 216% Uncharged Unsweetspotted, 150% Charged Unsweetspotted, 99% Uncharged Sweetspotted, 65% Charged Sweetspotted [Sideways]
Special Properties: Comes out randomly. Doesn't appear twice in a row.
Description: Peach grabs a Tennis Racket and swings it forward.

Frame Data
Hits on Frame: 15
Duration: 40
Hitbox Duration: 15-18 (4)
Cooldown: 22
Charge Release: 5

Shield Stun: 4
Shield Advantage: -21
Shield Drop Advantage: -14

Summary
At first, the racket can be seen as her worst fsmash weapon: shorter range than the club, the lowest damage of the three, and very weak KO power. A second look yields an incredibly powerful sweet spot; located at the very tip, the sweet spot KOs below 100% at the center of FD, and at 60% near the edge. Although very small and precise to land, the racket is the most volatile of the fsmash weapons.

Combos
The weak spot of Bair > Racket

Front Smash (Frying Pan) ~Peach Swing~


Damage: 18% Uncharged, 25% Charged
Knockback: ★★★★
Speed: ★★★
Range: ★★
Hitboxes: 2 (Frontswing and backswing)
Sweet Spot: Grip of handle (inside Peach)
KO at: 135% Uncharged, 87% Charged [Upwards]
Special Properties: Comes out randomly. Doesn't appear twice in a row.
Description: Peach grabs a Frying Pan and swings it forward.

Frame Data
Hits on Frame: 15
Duration: 40
Hitbox Duration: 15-18 (4)
Cooldown: 22
Charge Release: 5

Shield Stun: 6
Shield Advantage: -20
Shield Drop Advantage: -13

Summary
Straight from the kitchen comes Peach's most damaging fsmash weapon, though the shortest ranged. The pan is advisably best used on stages with short ceilings, such as Halberd, to best capitalize on its vertical KO power. Also, the sound is awesome.

Combos
Pan > Utilt (low percents)
Pan > Nair
Pan > Fair

Up Smash ~Pirouette~


Damage: 8% Uncharged Sourspotted, 11% Charged Sourspotted/15% Uncharged Unsweetspotted, 21% Charged Unsweetspotted /17% Uncharged Sweetspotted, 23% Charged Sweetspotted
Knockback: ★★★★★
Speed: ★★★
Range: ★★
Hitboxes: 3 (Surrounding lower hits, strong hit, weak hit)
Sweet Spot: Peach's shoulders
KO at: 195% Uncharged Sourspotted, 143% Charged Sourspotted/93% Uncharged Unsweetspotted, 59% Charged Unsweetspotted/80% Uncharged Sweetspotted, 47% Charged Sweetspotted [Upwards]
Special Properties: None
Description: Peach raises one arm and spins a few times.

Frame Data
Hits on Frame: 14
Duration: 44
Strong Hitbox Duration: 14-16 (3)
Weak Hitbox Duration: 17-20 (4)
Cooldown: 23
Charge Release: hits on frame 5

Shield Stun: 6
Shield Advantage:-24
Shield Drop Advantage: -17

Summary
Dynamite with a laser beam: Peach's usmash is devastating when allowed to be landed successfully, killing most of the cast cleanly below 100% - otherwise a sour-spotted usmash kills as well as a floppy fish. Its small sweet spot range keeps it from being Peach's most consistent kill move - but with enough trickery, even just one early kill with an usmash can be enough to win any game.

Recommended Reading: How to Land an Usmash

Down Smash ~Double-Edged Gown~


Damage: 5% Uncharged, 7% Charged
Knockback: ★★
Speed: ★★★★
Range: ★★★
Hitboxes: 8 hits total, 4 simultaneously on each side.
Sweet Spot: No
KO at: 343% Uncharged, 264% Charged [Sideways]
Special Properties: Multiple hitbox attack
Description: Peach extends her dress and spins.

Frame Data
Hits on Frame: 6, 11, 16, 21
Duration: 44
Hitbox Duration: each hitbox lasts 2 frames
Cooldown: 22
Charge Release: 4

Shield Stun: 1
Shield Advantage: -23
Shield Drop Advantage: -16

Summary
While not as blatantly powerful as most smash attacks, dsmash offers a very strong GTFO option. Fast start-up, long duration, and very heavy shield poking potential all combine to make dsmash an impressive answer against spot-dodges, shields, and anything with the audacity to get in close to Peach.

Combos
Jab > Dsmash
Dsmash > Fsmash (low percents)

Aerial Attacks

Neutral Air ~Princess Twirl~


Damage: 13% Sweetspotted, 9%-10% Unsweetspotted
Knockback: ★★★★
Speed: ★★★★★
Range: ★★★
Hitboxes: 2 (Strong and weak hits)
Sweet Spot: First frames of the move.
Auto-Cancel: Yes
KO at: 151% Sweetspotted, 196%/216% Unsweetspotted [Sideways]
Special Properties: None
Description: Peach spins while airborne removing unwanted hair that leaves you with smooth, soft, radiant skin that lasts.

Frame Data
Hits on Frame: 3
Duration: 49
Strong Hitbox Duration: 3-6 (4)
Weak Hitbox Duration: 7-23 (17)
Aerial Cooldown: 26
Landing Lag: 11
Autocancels on Frame: 36

Shield Stun: 4, 3
Optimal Shield Advantage: -7
Optimal Shield Drop Advantage: 0

Summary
Plainly: nair is fast. Hitting on frame three, nair hits quickly, strongly, and has a long duration - all while being able to autocancel. Although it lacks range, nair is incredibly versatile as a combo-breaker, a combo starter or follow-up, a KO move, and probably one of her best out-of-shield attacks.

Advanced Techniques
Double Hitting Aerial

Combos
Dtilt > Nair (low percents)
Ftilt > Nair
Dair > Nair

Forward Air ~Crown Smack~


Damage: 15%
Knockback: ★★★★★
Speed: ★★★
Range: ★★★★
Hitboxes: 1
Sweet Spot: No
Auto-Cancel: Yes
KO at: 133% [Sideways]
Special Properties: None
Description: While in midair, Peach takes her crown and hits the opponent with it.

Frame Data
Hits on Frame: 16 (max range @ 17)
Duration: 54
Hitbox Duration: 16-19 (4)
Aerial Cooldown: 35
Landing Lag: 22
Autocancels on Frame: 20

Shield stun: 5
Optimal Shield Advantage (assumes hitting with F17 hitbox): 0, -2
Optimal Shield Drop Advantage: +7, +5

Summary
Peach's signature move, fair kills, combos, and spaces by taking advantage of the move's massive range and nonexistent ending lag. Its flaw is its noticeable start-up, but if it's not beaten to the punch, the move is unpunishable on shield when autocanceled correctly. A side effect of its versatility may be its susceptibility to move decay - by the time the opponent is at high percents, fair's KO potential would be severely diminished. Literally, fair may be too good.

Back Air ~Flying Hip~


Damage: 14% Sweetspotted, 7% Unsweetspotted
Knockback: ★★★★
Speed: ★★★★
Range: ★★★
Hitboxes: 2 (Strong and weak hits)
Sweet Spot: First frames of the move.
Auto-Cancel: Yes
KO at: 150% Sweetspotted, 375% Unsweetspotted [Sideways]
Special Properties: None
Description: Peach hits you with her hips.

Frame Data
Hits on Frame: 6
Duration: 55
Strong Hitbox Duration: 6-8 (3)
Weak Hitbox Duration: 9-19 (11)
Aerial Cooldown: 36
Landing Lag: 9
Autocancels on Frame: 20

Shield stun: 5, 2
Optimal Shield Advantage: -4 (hard hit then land)
Optimal Shield Drop Advantage: +3
Optimal Shield Advantage Autocanceled: 0 (weak hit bair -> ac landing)
Optimal Shield Drop Advantage Autocanceled: +7

Summary
Seen by many as the compromise between fair and nair, bair boasts both range and speed without losing much strength or duration. Able to autocancel and interesting in that it moves Peach's hurtbox significantly, bair offers a variety of uses with little sacrifice.

Advanced Technique
Double Hitting Aerial

Up Air ~Floating High Kick~


Damage: 11%/12%/13%
Knockback: ★★★★
Speed: ★★★★
Range: ★★★
Hitboxes: 3 (Bottom, center, and top)
Sweet Spot: Peach's heel
Auto-Cancel: Yes
KO at: 179% [Sideways]/161%/ 143% [Upward]
Special Properties: None.
Description: Peach launches a high kick above her.

Frame Data
Hits on Frame: 8
Duration: 35
Hitbox Duration: 8-12 (5)
Aerial Cooldown: 23
Landing Lag: 9
Autocancels on Frame: 23

Shield Stun: 3
Optimal Shield Advantage: -5
Optimal Shield Drop Advantage: +2

Summary
Another blade in Peach's Swiss Army knife, uair fills the role of juggler. Strong and quick in duration, uair's vertical trajectory kicks opponents back up into the air for more uairs, or any number of grounded retaliations. The move serves well as a KO move when higher up, and it is Peach's best move to get out of hitstun when trying to survive a KO attempt.

Advanced Technique
Uair Combo

Combos
Dair > Uair

Down Air ~Stiletto Kick~


Damage: 3%, 5% last hit.
Knockback: ★
Speed: ★★★
Range: ★★★
Hitboxes: 4 hits. Last hit is stronger than the first 3.
Sweet Spot: No
Auto-Cancel: Yes
KO at: N/A, 219%. [Upwards]
Special Properties: Multiple hitbox attack.
Description: Peach launches four speedy kicks beneath her.

Frame Data
Hits on Frame: 12, 18, 24, 30
Duration: 39
Hitbox Duration: each hitbox lasts 2 frames
Aerial Cooldown: 8
Landing Lag: 9
Autocancels on Frame: 32

Shield Stun: 1
Optimal Shield Advadvantage: -9
Optimal Shield Drop Advantage: -2
Optimal Shield Advantage Autocanceled: -3 (-5 hard landing)
Optimal Shield Drop Advantage Autocanceled: +4, +2

Summary
Peach's dair is pure pressure. Almost explosive with combo potential, a landed dair during early percents nearly always ends with a fresh 0-40% combo - that is, if the opponent isn't capable of decent SDI. Otherwise, the move can be used with floating to be a turret storm on shields, or just used out of short hops to catch spot dodges - all while landing with zero lag.

Special Moves

Neutral B ~Toad~


Damage: 3%
Knockback: ★★
Speed: ★★
Range: ★★★
Hitboxes: 6
Sweet Spot: No
KO at: 193%. [Sideways]
Special Properties: Counter move. Only activates if Peach is hit while Toad is out. Peach has invincibility frames during a brief period (just after she brings out Toad).
Description: Peach gets out her Toad and counters any hit thrown at her (excluding grabs).

Frame Data
Counters on Frame: 11
Duration: 64
Counter Duration: 11-31 (21)
Cooldown: 31

Summary
Surprisingly hard-hitting when successful, but when missed, Toad staggers with massive cooldown, allowing the enemy a punishment of their choice. While a strong wake-up against predictability for opponents, the risks involved with using Toad echo the same to Peach players: do not be predictable.

Recommended Reading: Royal Protection - A guide on using Toad

Side B ~Peach Bomber~


Damage: 15%
Knockback: ★★★
Speed: ★★
Range: ★★★★★
Hitboxes: 1
Sweet Spot: No
KO at: 240%. [Sideways]
Special Properties: Passes through people's shields, unless the shield is really small (it breaks it in that case).
Description: Peach launches herself a long distance and hits the opponent with her hip.

Frame Data
Grounded Peach Bomber
Hits on Frame: 24
Hitbox Duration: 24-46 (23)
Duration: 73
Aerial Cooldown: 27
Landing lag: 33 - # of frames into aerial cooldown
Lag After Hit: 18

Aerial Peach Bomber
Hits on Frame: 34
Hitbox duration: 34-56 (23)
Duration: 83
Aerial Cooldown: 27
Landing lag: 33 - # of frames into cooldown
Lag After Hit: 18

Summary
Peach Bomber is quintessentially Peach's high risk, high reward attack. While slow, the move is ranged and does a good chunk of damage, but when missed, the landing lag is enough for an opponent to do as they wish. There are three types of Peach Bombers: 1) the regular Bomber, 2) the slingshot Bomber which sends Peach backwards a bit before launching, and 3) the smash Bomber which gains more distance then the previous versions.

Advanced Techniques
Ledge Canceled Special

Recommended Reading: ♥Exploding Hearts: A guide to Peach Bomber♥
Up B ~Peach Parasol~


Damage: 1%, 4% last hit, 3% when umbrella is already opened.
Knockback: ★★
Speed: ★★★★
Range: ★★★★
Hitboxes: 6 (Five rising hits, the final one with knockback, and the lingering open parasol hitbox)
Sweet Spot: Last hit, when the parasol opens.
KO at: 182%. [Upwards]
Special Properties: Multiple hitbox attack. First hits have set knockback. When the attack is done Peach keeps her parasol open to increase horizontal movement.
Description: Peach jumps with her umbrella, and then opens it and starts falling slowly.

Frame Data
Hits on Frames: 7, 11, 19, 27, 32
Landing Lag: 39

Summary
While Parasol is Peach's go-to recovery move, in combat, the move offers little reward in exchange for almost 40 frames of landing lag. Relatively the move is fast, Peach is covered in hitboxes, and the move quickly launches her upwards - sometimes scoring her an unexpected KO near the top of the screen - but with Peach being one of the slowest fallers in the game, landing without harm is usually unlikely.

Advanced Techniques
Ledge Canceled Special

Down B ~Vegetable/Turnip~


Damage: *See the "Veggies In-Depth" section*
Knockback: Depends on the face of the turnip.
Speed: ★
Range: ★★★★★
Hitboxes: 1
Sweet Spot: No
KO at: *See the "Veggies In-Depth" section*
Special Properties: Peach can pull a variety of turnips, each with different damage and knockback. She can also pull Bob-ombs, Mr. Saturns and Beam Swords.
Description: Peach ducks and gets a vegetable out of the floor.

Frame Data
Duration: 29

Summary
While the individual turnips themselves can be seen as mediocre as far as projectiles go (slow, low damage, low hitstun), Peach's turnip pull puts an immensely powerful thing in her hands: an item. This grants her quick and long-ranged out-of-shield options, a variety of advanced techniques such as glidetossing, and the option to projectile camp. This is in addition to the random chance of pulling out a game-winning item such as a bomb-omb. The vast amount of doors and windows turnips open in Peach's game is why most consider it her most important and best move.

Advanced Techniques
Ledge Canceled Special
Dash Pull
Free Pull

Recommended Reading: Raving Radishes - A guide on Turnips and the wonderful things you can do with them

Grabs/Throws

Grab Attack ~Heel Stomp~


Standing Grab


Dash Grab


Pivot Grab

Damage: 2%
Knockback: N/A
Speed: ★★★
Range: N/A
Hitboxes: 1
Sweet Spot: No
KO at: N/A
Special Properties: None
Description: Peach stomps them.

Frame Data
Standing grab
Hits on Frame: 6
Duration: 29
Hitbox Duration: 6-7 (2)
Cooldown: 22

Dash Grab
Hits on Frame: 6
Duration: 39
Hitbox Duration: 6-7 (2)
Cooldown: 32

Pivot Grab
Hits on Frame: 13
Duration: 39
Hitbox Duration: 13-14 (2)
Cooldown: 24

Summary
Although not especially ranged, Peach excels in getting grabs due to the lack of lag in her moveset. Jabs and autocanceled aerials easily lead into grabs. Her pummel is of average speed and damage, but can importantly be used to unstale her kill moves.

Front Throw ~Royal Slap~


Damage: 2%, 8% last hit
Knockback: ★★★
Speed: ★★★★
Range: N/A
Hitboxes: 2
Sweet Spot: No
KO at: 234%. [Sideways]
Special Properties: None.
Description: Peach slaps the opponent's face.

Summary
Peach's signature slap, fthrow is her second most damaging throw and is very quick. At 0%, two to three throws can be landed in succession against heavy characters if unexpected. At incredibly high percents, fthrow can be used as a last ditch KO move against very light characters.

Back Throw ~Iron Hip~


Damage: 2%, 9% last hit.
Knockback: ★★
Speed: ★★
Range: N/A
Hitboxes: 2
Sweet Spot: No
KO at: 355%. [Sideways]
Special Properties: None
Description: Peach puts her opponent behind and hits with her hip.

Summary
"Dat ***" - Peach's bthrow is her most damaging throw, if only by one percent. Without consideration to positioning, bthrow should always be the first throw used due to that reason. Every percent counts.

Up Throw ~Gut Punch~


Damage: 2%, 6% last hit
Knockback: ★★
Speed: ★★★
Range: N/A
Hitboxes: 2
Sweet Spot: No
KO at: 303%. [Upwards]
Special Properties: None.
Description: Peach puts opponents above her and then she hits them with both hands.

Summary
Well, it's an uthrow. Not exceptional in most regards, but it's natural vertical trajectory is useful for positioning.

Down Throw ~The Royal Treatment~


Damage: 7%
Knockback: ★
Speed: ★★
Range: N/A
Hitboxes: 1
Sweet Spot: No
KO at: 313%. [Upwards]
Special Properties: None
Description: Peach puts opponents beneath her and she falls towards them.

Summary
Dthrow's heavy combo potential lead it to be Peach's best in terms of damage raking. Every dthrow is capable of being ended in an ftilt, utilt, fsmash, or bair. This is without considering the chaingrab on almost half the cast - for more info, see the in-depth section in the guide below.

Taunts

Up Taunt


Description: Peach gets her parasol out and spins it while saying "sweet".

Side Taunt


Description: Peach dances around moving her dress and singing "lala-la-lalala".

Down Taunt


Description: Peach does a spin then she winks while saying "aha".

ADVANCED TECHNIQUES
FLOAT "WAVEDASH"
Description: By quickly starting and canceling a float, Peach moves in an awkward and unpredictable manner.

  • Button Inputs: Quickly start and release a float while moving back and forth.

  • Difficulty: Easy

DTILT CANCEL GLIDE
Description: Taking advantage of the move's IASA frames - interrupting the latter bit of dtilt will cause Peach to slide backwards while simultaneously performing another move.

  • Button Inputs: Any action inputted after the later half of dtilt.

  • Difficulty: Easy

B REVERSE
Description: Simply perform a special move in the opposite direction Peach was facing.

  • Button Inputs: Quickly tilt control stick in opposite direction and perform Toad, Parasol, or Peach Bomber.

  • Difficulty: Easy
DOUBLE HITTING AERIALS
Description: Due to an unknown mechanic, dropping a float while hitting with bair or nair hits the opponent twice.

  • Button Inputs: When either bair or nair is landed, drop a float and the move will hit twice.

  • Difficulty: Easy - Moderate

WASPING
Description: By autocanceling Peach's bair or fair early, Peach gains a slight slide.

  • Button Inputs: Ground float, bair or fair, and release immediately.

  • Difficulty: Easy


GLIDETOSS
Description: Canceling a roll with an item throw, Peach slides in conjunction with a thrown item in any direction.

  • Button Inputs: Roll, and during the first 2 to 5 frames, interrupt with a throw.

  • Difficulty: Easy


WEAK GLIDETOSS
Description: Also known as "turnip dashing", performing a weaker glidetoss allows Peach to slide while recatching a thrown turnip - over and over again.

  • Button Inputs: Roll, immediately release control stick and press a. Recatch turnip with a, repeat.

  • Difficulty: Moderate - Difficult

LEDGE CANCELED PEACH BOMBER
Description: During the ending lag of Peach Bomber, skimming and falling off a ledge cancels any normally suffered lag.

  • Button Inputs: Space Peach Bomber to end on the tip of a ledge.

  • Difficulty: Easy
LEDGE CANCELED PARASOL
Description: After using Parasol, aiming the fall to skid off a ledge cancels any landing lag.

  • Button Inputs: Aim Parasol to just scrape a ledge while pushing forward.

  • Difficulty: Moderate


LEDGE CANCELED TURNIP PULL
Description: While running or walking off a ledge, performing a turnip pull will pull the turnip without suffering any lag.

  • Button Inputs: Run or walk off an edge, pull the turnip right before falling off, all while pressing forward.

  • Difficulty: Moderate

TURNIP FREE PULL
Description: During Peach's turn-around animation, Peach can slide while pulling a turnip.

  • Button Inputs: Perform a soft turn-around and as Peach is turning input the turnip pull.

  • Difficulty: Moderate - Difficult


LEDGE FLOAT CANCEL
Description: By abusing float mechanics, Peach can rise from the ledge while still retaining some invincibility.

  • Button Inputs: On ledge: rise from float, cancel float, and perform action.

  • Difficulty: Moderate - Difficult


BAIR TRAP
Description: Peach has an aerial jab lock by knocking characters to the ground, then locking them with the weak hits of bair or nair.

  • Button Inputs: Knock characters to the ground and quickly hit with and cancel the weak hits of either bair or nair in succession.

  • Difficulty: Difficult


UAIR COMBO
Description: Capitalizing on uair's low landind lag and knockback, Peach gains an immensely powerful and frame-guaranteed combo.

  • Button Inputs: Ground floar uair repeatedly, full hop uair, follow up with nair or double jump nair.

  • Difficulty: Difficult


CHAINGRABS
Dthrow Damage Chart
# of Dthrows - Damage
x1 - 7%
x2 - 13%
x3 - 19%
x4 - 24%
x5 - 29%
x6 - 33%
x7 - 37%
x8 - 40%

CG Finishers
Dthrow (3-6%) to:
-Bair (14%): I think this guaranteed on every character if buffered except on Marth, Wolf, and ZSS.
-Utilt (13%): Works on most characters.
-Ftilt weak (10%): Fastest one and works on everyone.
-Nair (13%): Not sure who this works on, haven't tested it much.
-Grab: On Fox, Wolf, Sheik, and CF you can buffer grab again, but you won't have any guaranteed follow ups after that.

DThrow - Down throw
BGrab - Buffered turn around grab
Grab - Normal turn around grab
RGrab - Running grab

:marth: Marth
0-7%
-(Dthrow>BGrab)x1

:sonic: Sonic
0-13%
-(Dthrow>Grab)x1 > (Dthrow>RGrab)x1

:wario: Wario
0-19%
-(DThrow>BGrab)x1 > (DThrow>RGrab)x2

:zerosuitsamus: Zero Suit Samus
0-19%
-(Dthrow>BGrab)x1 > (Dthrow>Grab)x1 > (Dthrow>RGrab)x1

:squirtle: Squirtle
0-19%
-(DThrow>BGrab)x1 > (DThrow>Grab)x1 > (DThrow>RGrab)x1

:pikachu2: Pikachu
0-19%
-(DThrow>BGrab)x1 > (Dthrow>Grab)x1 > (Dthrow>RGrab)x1

:falco: Falco
0-24%
-(Dthrow>BGrab)x4

:metaknight: Metaknight
0-24%
-(Dthrow>BGrab)x4

:fox: Fox
0-24%
-(Dthrow>BGrab)x4

:shiek: Sheik
0-24%
-(Dthrow>BGrab)x4

:dk2: DK
0-24%
-(Dthrow>BGrab)x2 > (Dthrow>Grab)x1 > (Dthrow>RGrab)x1

:ike: Ike
0-33%
-(Dthrow>BGrab)x6

:falcon: Captain Falcon
0-33%
-(Dthrow>BGrab)x6

:wolf: Wolf
0-33%
-(Dthrow>BGrab)x6

:charizard: Charizard
0-33%
-(Dthrow>BGrab)x1 > (Dthrow>Grab)x1 > (Dthrow>RGrab)x4

:link2: Link
0-33%
-(Dthrow>BGrab)x1 > (Dthrow>Grab)x1 > (Dthrow>RGrab)x4

:dedede: King Dedede
0-37%
-(Dthrow>BGrab)x5 > (Dthrow>Grab)x2

:snake: Snake
0-37%
-(Dthrow>BGrab)x4 > (Dthrow>RGrab)x3

:bowser2: Bowser
0-37%
-(Dthrow>BGrab)x3 > (Dthrow>Grab)x4

:ganondorf: Ganondorf
0-37%
-(Dthrow>BGrab)x2 > (Dthrow>Grab)x3 > (Dthrow>RGrab)x2

VEGETABLES IN-DEPTH
Below, every variation of turnip. Besides their common nicknames are their chances of appearing, with Smiley turnips being the most common, and Dot-eye and Stitchface turnips being the rarest. Also listed is their varying damage, which is dependent on how hard they are thrown and how close the opponent is.

"Smiley" 35/58

"Bored" 6/58

"Sleepy" 5/58

"Shocked" 3/58

"Laughing" 3/58

All of the above turnips are identical.
KO at: 815% [Sideways]
Regular throw: 9%
Smash throw: 12%
Regular throw with space between: 5%
Smash throw with space between: 6%
Aerial regular throw: 7%
Aerial smash throw: 7%

"Winky" 4/58

KO at: 527% [Sideways]
Regular throw: 13%
Smash throw: 16%
Regular throw with space between: 9%
Smash throw with space between: 10%
Aerial regular throw: 11%
Aerial smash throw: 11%

"Dot-Eye" 1/58

KO at: 343% [Sideways]
Regular throw: 19%
Smash throw: 22%
Regular throw with space between: 15%
Smash throw with space between: 16%
Aerial regular throw: 17%
Aerial smash throw: 17%

"Stitchface" 1/58

KO at: 137% [Sideways]
Regular throw: 37%
Smash throw: 40%
Regular throw with space between: 33%
Smash throw with space between: 32%
Aerial regular throw: 31%
Aerial smash throw: 31%

ITEMS
These three rare items share the same 1/58 chance of being pulled with the Stitchface. When that 1/58 chance comes up, another randomizer chooses between the Stitchface, Mr. Saturn, Beam Sword, and Bomb-omb.

Mr. Saturn

KO at: 838% [Upwards]
Damage: 5-8%
Special Properties: Shield Breaking

While not especially daunting visually, Mr. Saturn has the hidden capability to break shields. With the same shield sapping power of Marth's Shield Breaker attack, Mr. Saturn hits shields hard. Although due to his size, it's rare a thrown Mr. Saturn will break a shield alone, but minimally he'll cripple a shield making follow-up attacks from Peach herself a massive threat.

Beam Sword


When pulling a Beam Sword, Peach initially receives a weakened version - one with significantly shorter range than the normal sword that comes with having items on. Peach can restore the full sword by "putting it away" - Toad, Parasol, dropping the sword, and even taunting all change the sword back to its original power.

Once restored, the Beam Sword gives Peach a new jab, ftilt, dash attack, and fsmash - and notably a very powerful item throw. The new moves are exceptionally ranged, though slightly laggy. Fsmash kills at 150%, while the thrown sword kills at 118%.

Damage
Jab: 4-5%
Ftilt: 7-8%
Dash Attack: 7%
Fsmash: 11-18%
Throw: 12-15%

Recommended Reading: Peach Skywalker [Instant High Tier]

Bomb-omb

KO at: 36% [Sideways]
Damage: 31-35%

The bomb-omb is solely the most volatile attack Peach has access to. Able to kill opponents cleanly before 50%, the bomb-omb is both revered and despised - both by opponents and Peach players alike. This comes from the fact that the bomb-omb is still capable of hurting Peach. The bomb is set on a timer, and after 20 seconds it will flash red 17 times and explode. If shielded by an opponent it will bounce off and explode upon hitting the floor. Once thrown it cannot be recatched.
 

DtJ Jungle

Check out my character in #GranblueFantasy
BRoomer
Joined
Jul 29, 2008
Messages
24,020
Location
Grancypher
t's a bad idea to be just behind peach not because of nair oos, but because of fc bair oos. However, if she's in her shield and you're behind her juuust out of bair range then you're at a huge advantage. I would suggest spacing bairs on her back, however you could drillshine as well

I used to struggle with this matchup, but I recently picked up peach as a secondary and all the practice I've put into her has really exposed her weaknesses to my fox game. The biggest advice I can give you is NEVER approach. Peach's game is based entirely around turnip camping and bait/punish play. Laser a lot, probably more than any other matchup. Platform camp her, she has literally nothing she can do about it due to her really slow vertical movement.
The combination of laser camping/bairs will shut down her entire game except dash attack and turnips. Turnips are simple as long as you don't get on auto-pilot, and dash attack can be beaten by shielding it or by staying on platforms.

Try to learn how the peach is spacing her fc fairs. You can do this by dance dancing close enough to her to have her in the "I'm in danger" mindset, and see what she does. Chances are she will try to bait you into approaching, try to dash attack you and beat your reflexes because it's so fast, or fc bair/fair. After a whiffed fair is your chance to attack, but be careful--some peaches like to cover whiffed nairs with jabs/dsmashes/dash attacks. Often times the safest time to attack is to miss your opportunity on purpose and wait to see what they do when they realized they're open. You'd be surprised how often they just toss out a dash attack.

As far as general tips, don't approach with nair until she's mid-high %s because you will eat a cc dsmash. Dair is your go to approach. Shine approach can be good but it can also get you ***** by a dsmash.
Never waveshine more than once unless you're trying to get her to kill % for the usmash, because she can SDI and make it hard for you and if you miss your shine then you're looking at taking 20-60 damage from dmash
Bait a dsmash when she's above you on platforms. At high level play it becomes sort of a guessing game, you attack and they don't do it and you hit them or you attack and they do do it and you get hit. Rarely will a good peach just toss out dsmashes on platforms (however every peach knows it is an option and expect to deal with it every set)

Teching out of peaches combos is an interesting aspect of the matchup. Tech away is usually the safest route--the only way it can be punished is if they expect it and run/float that direction before you even tech. However, dash attack tech chases will often get your tech away, so if you think she's going for a dash attack then you should probably tech up, and either try to cc or buffer a roll (don't get caught by a dsmash if you do cc). Teching towards leaves you vulnerable to everything but if peach tries to get your tech away you'll usually be safe. The only way you can get hit if she tries to get tech away is if she foxtrots and can dash attack backwards or if she WDs and stops her momentum. The reason for this is her poor dash dance; this is why she is such a baiting character; she has a very short dd and cannot out maneuver you around the ledge.
 

Asdioh

Not Asidoh
Joined
Jun 23, 2008
Messages
16,200
Location
OH
So I found myself in a very amusing situation today. Since most of my friends aren't as into this game as I am I end up playing online a lot.

In this match Peach used her final smash and I screwed up a ledge grab and got caught in it. Her partner (Teams) Ganondorph used this opportunity to use the warlock punch. Unfortunately as you might know Kirby is very short and very amusingly all the punches went strait over Kirby's head. After 3 failed warlock punches the Ganondorph must have realized that it wasn't going to work so he went for a warlock kick.... with the same result.

In fact he went off the edge and must have been taken by surprise cause he screwed up his recovery and got caught on the FD ledge killing himself.

I of course watched this who thing play out laughing to myself.

Ultimately Peach used an uncharged smash as to not waste my vulnerability. I ended up not dieing that match which shocked me greatly considering in addition to this I was hammered once and got caught in a Latios/Latias storm.

I thought this board would find this story amusing so I'm sharing it.
 

Overswarm

is laughing at you
Joined
May 4, 2005
Messages
21,181
holy **** what is this forum and why in the name of all that is good aren't other forums filled with threads like these?! It's like the collective hivemind of smashboards is vomiting knowledge in every direction!
 

*JuriHan*

Smash Master
Joined
Sep 30, 2008
Messages
4,699
3DS FC
1392-4901-1779
7 Beginner Kirby Tips [Updated]

--------------------------------------------------------------------------------

Hello readers! I'd like to present you with a few beginner tips for Kirby. These should help you get started with him right away. These are just some personal tips, so if you find anything wrong or incorrect feel free to voice your disagreement. I will not amend the post because of them, however, simply because these are what works for me and i thought i'd share it with other players.


Kirby's advantages are + over his disadvantages, the former of which is applied to his speed and agility, and the latter of which is applied to his weight and strength. Out of 10, he has about 6.5 advantages, and 3.5 disadvantage, which in itself makes him a mediocre character. Compared to other characters, he isn't as souped up as them and requires extensive skill in order to succeed.

People say he's weak and underpowered, but hopefully these tips, as well as practice will have you taunting those people all the way through the matches end! Any character is good in an experienced player's hands, and Kirby is no exception


Tip 1: Respect the Rock!

Down+B is essentially your invulnerability for 5 seconds. It can protect you from Samus's Smash, and the Lava on her level. It can also withstand most explosions and attacks, but you are very vulnerable to grabs and pushes off the edge, so know when and where to use it. You can also use it to return quickly from the air, drop on a group of brawling enemies, or even to get the Smash ball in a few hits. It's a very useful move, so make sure to study it carefully

Tip 2: Kirby = Karate

One of the best things about Kirby is how he can do kick attacks in short time, and then move away from the battle, only to come back in to repeat the process. This is also observed with Fox and Sonic. This means you can do alot of damage by juggling your foes with your punches and quick kicks, which can go in all directions efficiently. His legs are also longer than they look, and can stop Ike from doing deadly slashes. It's a good idea to use these little kicks and punches, combined with your dodges, while your engaged in close battle. This way, you damage your foes, and remain that annoying puff ball that nobody can hit.

Tip 3 : Know your Limits

Kirby cannot fight people efficiently when his damage is over 120%. He will easily be sent flying across the stage, because he's light. This disadvantage, however, is traded for his speed and agility, so make sure you use those, as well as your wit, to outsmart and outrun your opponents. Kirby can also easily tackle Sonic, Fox, and Captain Falcon, simply because he dodges faster and has more counter moves than they do. The only character that presents a threat to Kirby is Jigglypuff, or Meta Knight

Tip 4: Your Hammers are your Friends

I'm so glad they removed some of Kirby's lousy moves, such as the spinning hammer and the fireball dash. Both moves didn't showcase his ability as a worthy opponent, and in the previous game he would often turn into a rock and slide off of the levels. (CPU) One thing i like about his Hammer is it's strong and if timed right, can send an opponent over 100% right out of the stage. This, along with his side smashes, are his strongest moves, and are what makes him a worthy character. His hammer hits on a rhythm, so learning this will be the difference between missing and hitting. The rhythm is AND 1 AND 2 for the air hammer. The tempo is 140 beats per measure, and he hits on the numbers. So in English, this translates to executing your hammer move half a second before your trajectory meets with your opponent. This in itself requires skill, and once you've mastered it you wont be scratching your head anymore!

Tip 5: Your enemy is...yourself?

In case you lived under that rock Kirby always turns into, he is a character that can swallow his opponents, chew on them a bit, and copy their abilities. Why would you want to do that? What's more fun than blasting Samus with that same energyball she's been spamming you with the whole match? Or maybe Fox's blaster is getting on your nerves? Or you just want to show Sonic that you can spin the tables around yourself--whatever floats your Titanic (pun intended) you're going to want to study each of the character's abilities, and how they affect Kirby. The most useful ones are ranged attacks, such as Falco, Link, and Samus. However, DKs fist in the hands of a hard-to-hit puffball, and ROB's laser are deadly on Kirby. Swallowing your enemy at the right time and using their power against them is both efficient and satisfying. However, make sure you use the power when you get it, because if it goes unused and you get beat up immediately afterwards, you may lose it quickly. You also don't retain it upon dying, so if you want Links arrows, you gotta swallow him again. Another tip with this swallow move is the suicide--pretty self explanatory. The best way to use it is when you're recovering from a hit off the stage, and you have an opponent waiting by the edge to intercept you. If your stage is close to the floor of the map (unlike Hyrule Temple) Then just as your about to hit your foe, you can swallow him and it will bring him down with you. By the time he gets out of your mouth, you will have brought him down too far, and he can easily be intercepted now. DO NOT COPY ABILITY WHEN USING THIS TECHNIQUE!!! You'll send them flying upward, defeating the purpose of this maneuver, and leaving yourself open to be intercepted.


Tip 6: Items

Kirby doesn't walk very fast when he picks up crates. He throws a fair distance as well, but what he lacks he makes up for with being able to get to his opponents quickly and jump far above them. He can essentially hover across the playfield with a smartbomb or assist trophy (if you grab it properly) and place them wherever his puffiness desires. He's also quick with guns and his sword lunges are strong and straight to the point. (pun also intended) Mastering items with Kirby is very critical to any battle, because he's light and most items will knock him far pretty quickly. However, if you're a good dodger, you should be uncontested with Kirby for pretty much any match.


Tip 7: 7 jumps

Kirby has 7 jumps f you count the Up+B move. Plus, if you combine the lateral distance you gain from hammering in the air, you'll basically be able to recover from any hit. Kirby is magical like that, and mastering his jumps, keeping track of which you're on, and knowing when and where to use it is critical to his success. Unlike most characters, he can pursue an enemy off the stage to finish a KO, and make his way back--all in under 6 jumps. He can also surive most interceptions, and if the floor of the stage is too dangerous at the moment (waluigi's in the house) he can 'hover' above the battlefield for some time before returning. Master these, and you'll be 1 step closer to mastering Kirby


Again, these are personal tips. I hope you found them useful, and i hope they make you better with Kirby, and any character. Enjoy! and don't forget to taunt all of your kills with your irresistible cute puffiness!

--------------------------------------------------------------------------------
Last edited by Planet Mars; 12-05-2009 at 07:41 PM..
 

Asdioh

Not Asidoh
Joined
Jun 23, 2008
Messages
16,200
Location
OH
SNO posted the thing I was looking for but I couldn't find it LOL
 

Denzi

Smash Master
Joined
Jul 25, 2008
Messages
3,483
Location
Cleveland, OH
II. Moveset + Frame Data

A. Attacks

The Basics !


Jab - Spinning Wings

-Damage: 4% - 2% - 1%, 1%
-Speed: Awesome, 2 frames for the first hit.
-Range: Good
-Lag: Little, 14 frames for the first hit (without any cancel)
-Techs Related: Jab Cancel​

Falco slashes once with one hand, again with another while taking a step forward, and then spins, hitting the opponent with each hand each revolution.​

Falco's Jab is one of the best in SSBB ! It's quick (2 frames), has good range, and offers a lot of possibilities.
You can mix it up as well, such as going for the full jab (A, A, A), which works suprisingly well, and your opponent has no choice but to DI away from you and can also lead into others moves (Shine, regrab, Dash Attack) if you predict his DI / reaction.
First Jab alone is also very good, and can easily lead into a grab. You have to learn the timing well though, because if you don't, the opponent will have a window of movement. Crouch Cancel or Shield Cancel don't really work, but must find the perfect timing. The crouch "cancel" (pressing down on the control stick while you press A) actually helps a bit to get this timing.
You can also do the first two jabs, and grab. The timing is a little harder, and if you don't get
it, you will end up doing a simple A, A, A combo.​

[Picture Pending]​

Dash Attack - Flying Kick

-Damage: 9% (strong), 6% (end of the attack)
-Speed: Great, 4 frames
-Range: Good.
-Lag: 31 frames on hit from the start of the hitbox.
Techs Related : Gatling Combo, Boost Smash, Boost Pivot Grab​

Falco jumps a bit off the ground and does a forward kick, knocking the opponent into the air.​

A situational move. It can be punished very easily with a shield grab if it's not spaced properly, so do not spam it. However, it does have very good speed and reach, so it can be used as a quick follow up, though often time there are better options. Its low knockback can lead at low percents into another Dash Attack, or a reverse grab on heavies.​

Better options to use with Dash Attack are DACUS [Dash Attack Cancelled Up Smash], which is known at the Gatling/DLX Combo, or Boost Smashing.​

____________________________________​

B. Tilts

The Tilts !


Forward Tilt - Frontside/Roundhouse Kick

-Damage: 9%
-Speed: Good, 6 frames
-Range: Decent / Good
-Lag: 20 frames
-Techs Related: None​

Falco kicks in front of him, simple as that. It can be angled forwards, upwards or downwards.​

The range of the move is decent. What counts most of all is its high priority.
The Ftilt is one of Falco's few midranged attacks and is an effective spacing tool: When the opponent is getting closer than you want, a well spaced Ftilt can push him back quickly, and can even out-prioritize his approach.
It's also very good to punish rolls, along with Bair.​

When angled downwards, The attack used as an 'edgeguard' move, against an opponent holding the ledge without any invincibility frames left. F-Smash can be used for the same purpose, but F-tilt is faster.​


Down Tilt - Tail Whip

-Damage: 12% (close), 9% (tip of the tail)
-Speed: Decent, 7 frames
-Range: Decent
-Lag: 20 frames
-Techs Related: None​

Falco takes his tail and sweeps it across the ground in front of him, knocking the opponent up.​

Another situational move. Aside from kills at above 150%, there's not much use for the Dtilt. However, it does poke through shields and comes out quickly. When not used often, the opponent probably won't expect it.​

The range on the Dtilt is deceiving. It extends a bit further than you would think. The knockback and damage is greater when performed closer to the opponent.​


Up Tilt -Double Swings

-Damage: 4%, 5%
-Speed: Great/decent, 4 frames for the first hit, 12 for the second
-Range: Horizontally very poor, good vertically for the second hit.
-Lag: 24 frames
-Techs Related: None​

Up tilt can be used to set-up an aerial chase with N-air to B-air, but it can be difficult to land at times. Some situations to use it in are: When your opponent is to close or when you are under him (Under a platform). The Utilt can also be used after a Dair on a grounded opponent during mid percentages. This is also a very good move to use against characters with slow down aerials because there it limits their options and resets the situation by knocking them back into the air. At low percentages, Utilt can lead into itself. The Utilt kills at about 175%​

____________________________________​

C. Smashes

The Smashes !

Forward Smash

-Damage:
-Speed:
-Range:
-Lag:
-Tech Related: Stutter Step​

Falco lifts his arms behind him and then brings them down in a fierce chop, sending enemies diagonally up and forward.​

Forward Smash is Falco's strongest smash killing at ~115%, but the long start up makes it easy to see coming and difficult to land with. It has excellent range that also reaches behind Falco's head. It has good knockback when sweet spotted, but when it's not, it will hit with little knockback (sourspot is towards the very tip of the attack).​

The Fsmash is usually unsafe when shielded since it's pushback on shield isn't great. There are a few situations where the forwards smash can be effectively applied: charging it while the person is on the ledge, in a tech chase, or after an attack that would throw your opponent off such as a SH Dair that hits or AAA combo. It's a good idea to hold back on using this move until you begin to notice patterns in your opponents gameplay, when it will be much more effective.​

Up Smash

-Damage:
-Speed:
-Range:
-Lag:
-Tech Related: Boost Smashing, Gatling Combo, Jump Canceled UpSmash, and Reverse Jump Cancelled UpSmash.

Falco does a back flip while kicking, hitting enemies with his feet as they arc upwards. The direction they are sent depends on when during the move they're hit.​

USmash is by far Falco's best killing move as it hits on frame 8 and can be set-up with using lasers, but is not as powerful as the Fsmash. It has a direction of knockback that is relative to where in the USmash the person is hit. In the beginning frames it will shoot the person vertically. After that it arcs over Falco. Hitting with that section of the USmash will send the person horizontal. Once it reaches behind Falco its knockback is reduced and the person will be hit horizontally as well. There are a variety of methods to attempt to land Falco's USmash. By using the Boost Smash, you can close distances for a surprise hit. When closer up, you can perform the Gatling combo, which can throw off anyone that tries to powershield. Other set-ups are Jab or jab x2 into UpSmash or simply punish someones lag. All methods can be lead into with lasers making it easier, but it is still difficult to hit with UpSmash. One should avoid spamming it as that will only make you more predictable and less likely for it to be fresh when you need to get the kill.​


Down Smash

-Damage:
-Speed:
-Range:
-Lag:
-Tech Related: None​

Falco does the splits, kicking out with both feet on both sides, sending opponents in a horizontal direction.​

Falco's Dsmash is a really situational move more than anything. The times you use this are when you are typically right on in front of/behind your opponent. It comes out quickly and hits on both sides simultaneously, which can make it a great move to punish rolls or as a follow up attack from another move such as Dair that spikes. It is also a good move to use out of a spotdodge, especially against opponents with slower attacks. The shield pushback on this move is also fairly decent, which means you're usually safe from being shieldgrabbed, and other close range moves won't hit you either.​


____________________________________​

D. Aerials

The Aerials !


Neutral Aerial

-Damage:
-Speed:
-Range:
-Lag:
-Tech Related: None​

Falco performs multiple midair slashes with his arms, finishing off with a final slash that knocks opponents away.​

Nair is a useful move. It has multi-hit properties that are hard to DI out of, meaning it can last in the air for a while and still give knockback compared to some single hit moves that have to be timed correctly in order to hit at all. Decent for punishing airdodges as well as hitting through platforms to pressure shields or dodges. This move can also be started mid SH and fast fallen to eliminate the final hit which allows you to lead into other attacks when you touch the ground, such as a jab, grab, or other attacks.​


Forward Aerial

-Damage:
-Speed:
-Range:
-Lag:
-Tech Related: None​

Falco goes horizontal and then spins, dragging opponents down before the final hit knocks them away.​

The forward aerial is Falco’s most situational and worst aerial, as well as being his worst move altogether. It has terrible ending lag, especially if you land before the move is complete, meaning it cannot really lead into anything. Never use this out of a short hop or anywhere close to the ground. The knockback on the final hit is decent and the move tends to drag opponents downwards if they are airborne as well. These two qualities make it a decent edge guarding tool, but it is outclassed by the backwards aerial.​


Up Aerial

-Damage:
-Speed:
-Range:
-Lag:
-Tech Related: None​


Falco does a front flip and kicks out during the animation, hitting with his feet(sweetspot) or his tail (sourspot). This move knocks opponents straight up.​

The Uair can be used for baiting an airdodge out of a falling or recovering opponent. If that happens you can follow the opponent’s descent and hit them with another aerial in the dodges cool down. Uair can also be used to follow up a Dair on a grounded opponent at mid-high percentages. Another use is hitting through platforms. Be warned that this move has sweetspot and sourspot, but the sourspot is difficult to ever hit with. If you hit with the sourspot the person will take little knockback and could react in time to hit you with and aerial, but often times it is so rare to hit with the sourspot that people are surprised and don't react, and you can hit with another aerial.​


Back Aerial

-Damage:
-Speed:
-Range:
-Lag:
-Tech Related: None​

Falco kicks one foot out behind him, holds it there for a bit, and then retracts his leg, sending opponents diagonally up and back.​

Bair is one of Falco's best aerials. It's a good tool to edgeguard with, finish up attack chains, KO and hit OoS, as well as having some other uses. It acts like a sex kick in that it's strongest when it first comes out compared to the end of the attack, but it still gives good knockback even when it's not at it's strongest. The hitbox is strongest behind Falco, if you hit with it in front of Falco that will give less knockback than the front. That can lead into others attacks at low to mid percents. This move acts as a great followup to an IAP, and is also a great move to stage spike with.​


Down Aerial

-Damage:
-Speed:
-Range:
-Lag:
-Tech Related: None​

Falco spins into a downwards kick, knocking opponents down(when hitting with the sweetspot) or upward (sourspot).​

Falco's Dair is a great move because of the Spike. it's one of the easier spikes to land as it starts up very quickly. Apart from the Chaingrab -> SH Dair which spikes, you can do a 2nd Jump while doing this move to have better success at hitting with the spike. That makes it useful for edge guarding against predictable recoveries. Aside for spiking it is useful while Falco is in the air or on the ground. When Falco is in the air the hitbox can typically hit others before their aerials hit you. When on the ground it's a good tool for setting up a tech chase if you manage to land the spike from a SH. SH Dair is also useful for spacing as it can be used and then you are able to land behind your opponent, making it difficult for them to punish on the block.​

____________________________________​

E. Special Moves

The Specials!


Neutral Special: Lasers

-Damage:
-Speed:
-Range:
-Lag:
-Tech Related: Laserlock, Platform Laserlock, B-Reversal, Wavebounce​

Falco pulls out his gun and fires off a quick laser burst. He can fire a single shot as well as multiple shots in quick succession. The lasers themselves travel onward for an unknown period of time, and stun opponents on contact.​

Lasers are without a doubt one of, if not the best, tool Falco has for taking down opponents. They don't exactly deal much damage, but every little hit brings you that much closer to a KO. They don't have much hitstun either, but that's one of the best things about them. By keeping the opponent in one place, lasers do a fantastic job of comboing into other attacks, especially when combined with their other trait.​

When lasers are fired at the right distance from the ground, Falco is able to hit the ground with no lag whatsoever, allowing him to immediately perform any action upon landing. Because of this, lasers should be fired from the air in almost every circumstance. The two most common methods of doing this are the SHL (Short Hopped Laser) and the SHDL (Short Hopped Double Laser). Both of these, when performed correctly, are great ways to implement the lasers and make getting to you a tough job for your opponent.​

Lasers, when combined with the Phantasm, can turn Falco into a living nightmare for many characters, especially those without reflectors/absorbers. By utilizing both those tactics properly, Falco is able to fire lasers at the opponent until they get close, Phantasm away to create more distance, and then continue lasering. This can be done as a general strategy when you don't know the character matchup particularly well, as a method of stock preservation at higher percents, or as a way to scout out your opponent and learn their patterns.​

Lasering from the ground should only be done in one situation, and that's Laserlocking. You can laserlock an opponent whenever they miss their opportunity to tech a fall. To perform the LLock, hit your opponent when they miss their tech and then keep firing grounded lasers until the stage comes to an end. If you're playing on a walled stage, you can laserlock the opponent against the wall for an infinite amount of time. This is a devestating technique, and is a great way to net free damage on your opponent. However, it can only be done on a flat stage, and its use is limited by the skill of your opponent. Also note: You cannot laserlock when your opponent trips.​

Lasers. Use them.​

Side Special: Phantasm

-Damage:
-Speed:
-Range:
-Lag:
-Tech Related: IAP, Phantasm Phakeout, Phantasm Cancelling, Reverse Edge Phantasm, B-reversal, Wavebounce​

Phantasm works by teleporting Falco horizontally from the place it was started to a location roughly 1/2 FD distance away in a matter of 3-4 frames. During the time that Falco moves, phantasm will leave a hitbox behind him hitting anyone that gets hit by it for 6% of damage and minor knockback.​

Phantasm is a move that is extremely useful to Falco allowing him 3 basic functions with it: Damage, Recovery and escape. Since the move has excellent horizontal movement that makes it key to Falco's recovery. The move will leave Falco in helpless state when used in the air at the end of the move. This means you will have to aim the phantasm to land on the stage or directly for the ledge. Since using Falco's FireBird is risky as it's range is limited and start-up lag very long, you'll likely be wanting to use phantasm at any chance over firebird. This makes predictable for your opponent as they can try to punish ending lag of the attack, hit you out of it, or edgehog you attempt for the ledge. To be less predictable, try to mix things up with a second jump, phantasm to the top of a platform, or Phantasm Cancelling (more in the AT section).​

This move will equally be useful to Falco on the ground as when it's used unexpectedly is nearly impossible to punish. This makes it useful to grab some quick damage on the opponent and reset your spacing if your opponent corners you against a ledge or other scenario. When using the phantasm for anything apart from recovery always apply the IAP technique (more in the AT section).​

There are a few tricks that Phantasm can also be used for. For example, Phantasm Canceling in combination with IAP can allow quick mobility across the stage and allow you to close the gap on people. This will grant you the ability to get closer to people faster and allow follow up attacks on a person's knockback. Another use is to simply phantasm in front of them as a surprise, this makes a decent match opener move as you can appear in front of them leading directly into an attack by surprise. Other tricks Falco can use Phantasm for are a few techs such as Phantasm Ledge Canceling, Phantasm Phakeout, and Reverse Edge Phantasm.​

Phantasm Mechanics
Phantasm is a unique move that few people know the mechanics of apart from the basics. This bit will explain a bit more how phantasm works down to frames, hitbox and hurtbox levels. It's not mandatory to know how this works, but it can help with decision making.

0----------1----------2

Use the image above as a model for the phantasm.

At point 0, Falco is in the start-up lag of the attack. Once the start-up lag is finished Falco will appear for a single frame at point 1. On the exact frame Falco appears at point 1, a hit box appears behind Falco, but Falco himself at point 1 is nothing more than a hurtbox. That means that any hitbox that appears at this point will hit Falco out of the phantasm. On the very next frame Falco from which Falco appeared at point 1, he will appear at point 2. Another hitbox appears in that length between point 1 and point 2 on the frame falco arrives at point 2. After that frame, the hitboxes disappear and Falco is in the ending lag of the attack.

This information my seems pointless, but is in fact very useful. It tells us that phantasm can be unpunishable when spaced correctly. If someone is charging a move to hit Falco out of the phantasm you can adujst your postition slightly to place the hitbox of said attack between the points where Falco cannot be hit (which is between points 0 & 1 and points 1 & 2).​


Up Special: Firebird

-Damage:
-Speed:
-Range:
-Lag:
-Tech Related: B-Reversal, Wavebounce, Firebird Curving, FLAMEDASH​

Falco bursts into flames and after a moment of charging in place, he will launch himself in the direction that you are holding, hitting multiple times with the final hit knocking the opponent away. There are 16 different possible angles to Firebird.​

Overall, the Firebird is a rather poor special. There is a long start up time and the hit box doesn't come out as early as you think it would. The attack also covers minimal distance. It should hardly ever be used to try to hit your opponent. Not even as a mixup, bait, or a mindgame. It can be predicted very easily; it is even easier to punish; it does not deal enough damage or knock back to warrant taking the risk of attacking with it; it does not KO, and it's priority is extremely poor. There are very few things that you should "never" do, and this is one of them.​

The Firebird is also Falco's secondary option of vertical recovery, his first option being his second jump. Up B should really only be used as a recovery when it is absolutely necessary, though the very rare mixup from phantasm is okay. Because of it's long start up time and short distance, it is easy to for opponents to edge hog when using the Firebird to recover from below.​

When finished in the air, the Firebird will lead into free fall that can be DI'd very slightly forwards and slightly more backwards. Because of the greater amount of backwards DI, it is suggested that when recovering from below, you input the Firebird Up and away from the stage and then Firebird vertically so you have a greater chance of landing on the stage if the opponent edge hogs.
When finished parallel to the floor, Falco will land and you can act after a small amount of cool down. When "crashed" into the ground, Falco will bounce off and then land, increasing the amount of lag.​

Down Special: Reflector

-Damage:
-Speed:
-Range:
-Lag:
-Tech Related: B-Reversal, Wavebounce​

[DESCRIPTION]

____________________________________​

F. Throws

The Throws !

Down Throw

-Damage:
-Speed:
-Range:
-Lag:
-Tech Related: Chaingrab​

Falco throws the opponent into the ground, jumps above them, and bombards them with lasers. The opponent is then sent out in front of Falco.​

Dthrow is without question Falco's best throw and you should be using it a lot. With it you can chaingrab most of the cast at low percents. Plus, the final Dthrow of the chaingrab leads into a guaranteed SH Dair that spikes that the correct percent, from which leads into a techchase. Once past the initial CG percents on a character Dthrow is still useful even in mid percents as it sets up for more attacks. Jab, Aerials, Dashing UpSmash, Gatling Combo and Boost Smash are all example of what can be lead into from a Dthrow at mid percents. At higher percents it loses it's shine as far as follow ups are concerned, but is still a very good throw to use.​

Up Throw

-Damage:
-Speed:
-Range:
-Lag:
-Tech Related: None​

Falco throws the oponent upward and then follows up with two upwards laser shots, which may miss at higher percents.​

Uthrow is one of those moves that can be useful, but is outclassed by other options. It works by sending the opponent straight up and at an arc. This places the opponent in a place that is typically untouchable by Falco to follow up with anything decent. At lower percents it's more useful as it places the opponent closer to you, but it's outclassed by the utility of Dthrow. If you use this throw it'll typically be in the situation where there is something that the trajectory of the throw will send someone into a stage hazard such as the piranha plant or spikes on Pictochat. It's a good idea to hold off on this throw unless the character has poor downward options. If that is the case, this throw does a good job of setting up juggles and kills.​

Forward Throw

-Damage:
-Speed:
-Range:
-Lag:
-Tech Related: None​

Falco simply throws the opponent forward.​

Fthrow is another move that is outclassed by Dthrow. It doesn't lead into in any guaranteed or many practical set-ups like what Dthrow can, and it has almost the same trajectory. that means that this move will likely be used when you want to hit someone off stage at a low angle to make it easier to edgeguard them. Other than those few situations, stick with Dthrow.​

Back Throw

-Damage:
-Speed:
-Range:
-Lag:
-Tech Related: None​

Falco Throws the opponent behind him and fires off two quick laser shots towards the opponent, Like Uthrow, these shots may miss at higher percents.​

Bthrow is a good throw to use once the CG is no longer a viable option. It always sends the opponent a fair distance away, eliminating any hopes they have of counterattacking. It's trajectory is diagonally up and behind Falco, and the lasers Falco fires can alter the trajectory slightly (especially at high percents), making it a tough move for your opponent to DI properly. It's a great move for getting your opponent offstage, and shouldn't really be used unless you're throwing your opponent toward the edge. A good method of putting yourself in this situation is to use the Boost Pivot Grab to quickly get behind your opponent.​

____________________________________​


III. Advanced Techniques


Advanced Techniques


-Name: Laser Lock [LL]
-Description: When an opponent prat falls he or she cannot do anything. Repeatedly shooting lasers at the enemy causes them to bounce infinitely as long as there is a ground. (Infinite on a wall)
-How it's performed: Shoot lasers at a opponent when he or she prat falls.
-Application: Builds damage, though it is difficult to land this.
-Video:
-Thread:​

-Name: Platform Laser Lock
-Description: Same as above, with the exception that it is done on 1 platform for a true infinite that is inescapable. It ends when the player misses a laser or waits for the pratfall wake up. [This is a 0-death when it is chained into a up smash]. The platform laser lock is even more difficult to land than a regular laser lock.
-How it's performed: Short Hop Double Laser at head level when a opponent pratfalls onto a platform. You shoot twice on the right then twice on the left to keep them from falling off the platform.
-Application: Build damage.
-Video:
-Thread:​

-Name: Immediate Aerial Phantasm (IAP)
-Description: Performing the phantasm at the lowest point possible in the air, cutting ending lag. Start-up lag is increased minimally though. Overall it is better than a normal grounded phantasm.
-How it's performed: Short Hop > Phantasm [Side + Special]
-Application: Controls space and can build damage. It can be used as an approach or as an escape. This can also be canceled like the normal phantasm for mind games and such.
-Video: http://www.youtube.com/watch?v=RhRkq-Ht5Rk
-Thread:​

-Name: Phantasm Phakeout
-Description: Phantasming on the edge of the stage might produce a "glitch" where Falco appears above the ledge he phantasmed into.
-How it's performed: Phantasm at the edge of the stage. Falco's gun holder should be level/parallel with the edge of the stage.
-Application: Mind games. Flashy.
-Video: http://www.youtube.com/watch?v=JJ-byHKq1TI
-Thread:​

-Name: Reverse Edge Phantasm [REP]
-Description: A variation of the phantasm done along the edge. [Can be done toward the direction of a moving platform. If it is moving towards the left, then dash right phantasm left.]
-How it's performed: Stand about less than a dash away from a non moving edge then dash and phantasm opposite of the direction you dashed in.
-Application: Mind-games amazing, edge hog tool, and this is a underused phantasm tactic.
-Video:
-Thread:​

-Name:Phantasm Canceling
-Description: The Phantasm is canceled at one of three possible times, the earliest covering the least distance and the greatest covering the most.
-How it's performed: After starting a Phantasm, press the Special button again at the right time.
-Application: It can be used to change the distance you coover to throw your opponent off, mix up your recovery, and live longer (the longest cancel carries you farther than a regular Phantasm).
-Video
-Thread:​

-Name: FLAMEDASH
-Description: A firebird into a slope that results in a “crash” landing. The ending lag will be canceled by the slope and the forward momentum will result in a wavedash like slide.
-How it's performed: Firebird into the bottom of a slope or small elevated area.
-Application: Like a Melee wavedash, any action can be performed during the sliding animation. It can be used to bait opponents or “mindgaming.” However, because it needs to be performed out of a Firebird, it can be seen from a mile away.
-Video: http://www.youtube.com/watch?v=C9Sugs765Uk
-Thread:Is this the original thread?

-Name: B-Reversal
-Description: Performing an aerial special attack in the opposite direction of where you were facing.
-How it's performed: In the air press the other direction then input the special.
-Application: Turn around in the air. Do a special in the opposite direction.
-Video:
-Thread:​

-Name: Wavebounce
-Description: Gain a short burst of momentum when performing a special attack in the air. For Falco, this is generally used for his lasers.
-How it's performed: When in the air, perform a special attack and immediately hit the opposite direction.
-Application: Laser spacing. Retrating lasers. Mindgames.
-Video:
-Thread:​

-Name: Dash Attack Cancel Up-Smash (DACUS) [Also known as Gatling Combo]
-Description: A dash attack that is canceled into a Up-Smash, on contact.
-How it's performed: Initiate a dash attack. When it first connects input a Up-smash. (Doesn't matter how it is done, C-stick or Up+A). The dash attack must connect with the very first few frames of the hitbox, otherwise it will not cancel.
-Application: Can combo into from a Chain Grab at low percents and racks up about 24%
-Video:
-Thread:​

-Name: Boost Smash [Snake Dash]
-Description: With the momentum gained from a canceled Dash Attack, the up smash can slide across the ground at varying distances. The greatest length achieved is about 1/3 of Final Destinations length.
-How it's performed: Dash, C-stick Down, then hit Attack + Up. (No Contact until the Up-smash comes up)
-Application: Sneak in early kills, combo potential at high percents.
-Video:
-Thread:

-Name: Buffered Dash Attack Cancel Up-Smash (BDACUS)
-Description: A dash attack that is canceled into a Up-Smash on the earliest possible moment, moving Falco very far forward very quickly as he up smashes.
-How it's performed (credit to pure_awesome):

Brawl has a 10-frame buffer window and moves at 60 fps. This means you have 1/6th of a second before your animation finishes to input control stick to the side, let it return to neutral, then when it's returned (or while it's returning), C-Stick up twice.

Yes, you have to let the control stick return to neutral before the FIRST C-stick. The idea here is you want to input a dash attack, then an upsmash, during 1/6th of a second. If you hit control stick and c-stick at the same time, the game reads running upsmash. You have to input the first c-stick while the control stick is returning (or has already returned) to a neutral position. The second c-stick inputs the upsmash.

If you're trying to learn BDACUS, I recommend first analyzing the timing for the move you want to BDACUS after. For those of you still learning, I recommend Dthrow.

To start, try buffering a dash attack using these controls with Dthrow. Perform your Dthrow, then, roughly around when Falco shoots his very last laser downwards, input control stick to the side, return to neutral, c-stick up. If you UpSmash, you inputted the Dash too soon, or you didn't allow the control stick to return to neutral. If you sliding UpSmash, you inputted Attack too late. Once you can consistently do an instant Dash Attack out of Dthrow, move on to BDACUS. All you're doing is adding a C-stick up after the first two motions.

While practicing BDACUS, if you...

UpSmash - You are performing the Dash, and probably the first C-stick, too soon or too close together.

Sliding UpSmash, but not very far - You have the motions perfectly, but are not inputting them fast enough.

Dash Attack - You have the motions properly but are not inputting them NEARLY fast enough. Specifically, the second C-Stick is coming out too late to cancel the Dash Attack.

Laser - Something's wrong with you.
-Application: Can Be used as an unexpected kill move out of rolls and getup attacks. It can also be used after a down throw at kill percents, as well as out of a short hopped double laser.
-Video: http://www.youtube.com/watch?v=WcDLKBJyQzk
-Thread: http://www.smashboards.com/showthread.php?t=271238

-Name: Reverse Jump Canceled Upsmash [RJCUS]
-Description: Falco will run and then immediately perform an Usmash in the other direction he was facing. A small amount of momentum is gained.
-How it's performed: Run > Pivot xx Jump xx Usmash
-Application: Mind games. The technique itself is relatively useless since the Boost Smash gains more momentum and is much quicker. However, it can be used to hit an opponent with the tail end of the Usmash for horizontal knockback.
-Video:
-Thread:​

-Name: Boost Grabbing
-Description: Canceling a dash animation with a grab for a little boost.
-How it's performed: Dash Attack [C-stick], then Grab.
-Application: Tiny boost range. It isn't amazing.
-Video:
-Thread:​

-Name: Boost Pivot Grab [Pivot Boost Grab]
-Description: Same as above, with the added exception that you pivot grab. The slide gained when doing a pivot grab is significantly greater than a normal boost grab.
-How it's performed: Dash Attack, Pivot Gab
-Application: Can be used in a chain grab to switch the direction that the chain grab is following. It is very flashy as well.
-Video:
-Thread:​

-Name: Jump Canceled Item Toss
-Description: A 'glide toss' that is initiated with the 'Jump' button. You can still do all the fancy tricks that you could do from Glide tossing
-How it's performed: Direction (Dash), Jump + Direction (Item Toss) Attack button.
-Application: It goes as far as Diddy's glide toss length, and it is easier to do than a normal Glide Toss. It also doesn't send you far.
-Video: http://www.youtube.com/watch?v=cVQf5k4fBck
-Thread:

____________________________________​

Iv. Gameplay

A. Overview

Overview:

Falco has the necessary tools to do just about anything. He can be very defensive through the use of lasers and phantasm, but can also be aggressive when he needs to be thanks to lasers, jabs, tilts and aerials. Falco is also one of the best at racking up damage thanks to his chaingrab, techchase game, jab and lasers. In order to play falco effectively you have to find the right balance of offensive and defensive gameplay to remain unpredictable, apply pressure to your opponent and at the same time help scout your opponent's playstyle to assist in predicting your opponent's next move.

B. Camping

Camping:

This is falco's forte. Maintaining distance with lasers and running away with phantasm to tack on damage. This is what you should be doing for MOST of the match, not all. In fact, it isn't recommend to run away with phantasm all the time because it gets predictable and can quite easily be punished. Camping should be used to analyse how your opponent will approach, refresh moves that have gone stale and of course to FORCE an approach. Falco is arguably the best in the whole cast at this aspect of the game, so use that to your advantage. Force a predictable approach, defend it appropriately and then punish with jabs, grabs (which can lead to a chaingrab :)) short hopped aerials Out of Shield (nair, bair or dair), tilts (utilt and ftilt) or run away with phantasm. Remember to mix it up between using SHDL when your opponent is far away, and use SHL when they are approaching because you have more time to react.

C. Approaching

Approaching:

There are times during the match where it is beneficial to approach your opponent for maximum productivity. Additionally, if you're not in a % lead and the opponent is avoiding your lasers, you are going to HAVE to approach at some point. In order to approach effectively you will need to know falco's best methods of approaching:

Running SHDL (optional) > Retreating Dair
Running SHDL (optional) > FF Dair BEHIND the opponent
Retreating or Crossover Bair
Empty short hop BEHIND the opponent > grab if shielding, or just punish their reaction (This works wonders sometimes, since most opponents will keep up their shield while you empty short hop in fear of an incoming aerial)
SHL > Boost Pivot Grab
SHDL > Ftilt
Anything that won't get you shieldgrabbed :)

As you can see, falco has a myriad of options when it comes to approaching, and these options become even better when complemented with smart laser usage. The important thing when it comes to approaching is to mix it up and keep it unpredictable, because EVERY approach CAN be punished if your opponent sees it coming.


D. Close Quarters Combat

Close Quarters Combat:

Falco excels in close quarters combat (CQC) as much as he does ranged combat for several reasons; he has quick tilts, quick aerials, and the tendency to grab more than the opponent, but most importantly, his jab is phenomenal. The move is very fast (quick start up and little cool down), has decent range, varying durations (it can hit once, twice, or as long as you’re pressing/holding the A button), and high priority. Jabbing is the bread and butter of Falco’s CQC. A couple effective ways of using his jab are:
-Jab once > Grab – This is best used when the opponent shields or gets hit
-Jab x 2 > Crouch Cancel by pressing and releasing down immediately> Grab/follow up – A small variation of the first; slightly more damage and allows for more follow up opportunities, but also allows more chances for your opponent to escape.
-Hold the jab – Used to rack up damage, refresh other moves, and punish spot dodgers
Feel free to jab liberally without having to worry too much about being punished for it, but always keep in mind not to be predictable.

Aside from his jab, Falco’s other close quarters tools are also very handy.
-Utilt is quick and very effective at covering Falco’s head from the opponent; it has the added bonuses of killing at very high percentages and can combo into itself at very low percentages; Utilt should not be used when the opponent is in front of you (except as a follow up) since it has a noticeable cool down and very little range in front of Falco (and a little behind).
-Ftilt is a spacing tool; when you’re just out of the jab’s range, the Ftilt will cover the distance for you and create some space; although you can use it when the opponent is close to space yourself, usually jabbing/grabbing and throwing the opponent will work better; against several different characters, from about 70%-80%, the Ftilt can lead to a laser lock if you connect, start firing immediately, and the opponent does not react quicly enough.

The different aerials are used in various situations. Dair is the most commonly used aerial in CQC and it provides the benefits of shield pressure and knocking the opponent into the air if they are grounded. However, if you don’t move away or behind the opponent while landing, the opponent can easily grab you or perform some quick attack. Use the Dair wisely. Nair is effective against opponents that are often airborne (Wario and Peach for example); if you connect with Nair while the opponent is grounded, you have the opportunity to follow up with a grab, jab, or tilt; occasionally, against certain characters at certain percentages, the final hit of the Nair can lead into a laser lock. Bair (along with Nair) is a good out of shield (OoS) option against aerial opponents; it’s not very effective at CQC against grounded opponents, but it can be used if you jump over and behind the opponent. Uair isn’t used in CQC since it’s difficult to hit grounded opponents with it and has a long start up. Fair isn’t used (ever).

The final, and for many, the most critical part of Falco’s close quarters combat is the fact that he can retreat very quick and easily. Against opponents that are nearing you, a Phantasm can work wonders at creating space. Falco’s highest initial jump is very useful at running away when the opponent is already closer than you’d like him to be.

In summary, fighting in close proximity to the opponent is another of Falco’s strong points and it shouldn’t be neglected. Your jab will be the main tool in such situations, but it can only do so much. Mix in several other attacks as well to keep your opponent guessing. Running away is always an option. And though it wasn’t discussed earlier, remember that defense is equally important (in other words, use your shield/shield grab).

E. Edgeguarding

Edgeguarding:

It is important to capitalise on your opponent's recovery. Falco may not be as good as Metaknight or ROB at off-stage combat but he can still deal decent damage with lasers, bair and ftilt. Falco should NOT be engaging off-stage combat very much, in fact he should NEVER be below the stage since he will be forced to use the slow, horrible firebird which can easily be edgehogged or gimped.

While your opponent is returning to the stage, try to inflict as much damage as possible with lasers while at the same time ruining their double jump(s). If they are high above the ledge, feel free to go for a bair every now and then to send them back out. The opponent will most likely try to sweetspot the ledge because that is usually the safest way of recovering. Fortunately, falco can capitalise pretty well when the opponent is returning from the ledge with lasers for pressure and ftilt or SH aerials to send them off-stage again (depending on what your opponent does).

Here are your opponent's options when they are on the ledge and what Falco should do to punish:

Normal Get up - Ftilt, Smash
Get up Attack - Shield, then Shieldgrab or punish OoS
Jump - Bair, Nair and Dair
Ledgehopped attack - Shield then punish

Of course, there are many ways to punish certain options, but these are just recommendations. You need to remain a good distance from the edge with lasers, and then hoefully send them off-stage again with a well-spaced move like ftilt.

F. Juggling

Juggling:

Falco will have plenty of opportunities to capitalise on an airborne opponent because he has one move that will pop them into the air all the time: Phantasm. Utilt is also great for setting up a juggle.

Falco will not be keeping the opponent in the air for very long (especially since he only has one double jump), but he can still benefit from a hit or two when a character like ROB or Snake is above him. Juggling is a term used for the act of keeping an opponent above you, making it difficult for your opponent to land on the ground. The only options your opponent has when they are above you to return to the ground are:

Double Jump
Attacking on the way down (which can be predicted)
Airdodging (which can also be baited and predicted)
Certain Upbs can help return to the ground (e.g. Zelda)

These are moves you should be using when your opponent is above you:

Uair (Continues the juggle, and can kill surprisingly well)
Bair (Sends them off-stage)
Dair (Sets up Techchase)
Fsmash (Opponent will often airdodge to avoid moevs, you can punish this by charging an fsmash)
Utilt (Send the opponent back up again)
Usmash (Kills, although range is a bit poor to hit a landing opponent)

G. Recovering

Recovering:

Falco's recovery is quite mediocre, so it's extremely important to mix it up and remain unpredictable. Falco's recovery methods are phantasm and the infamous firebird.

When sent flying off-stage, it is important to DI it correctly and cancel your momentum by fastfalling an aerial. If you're sent Vertically, DI to the right or left. If you're sent Horizontally, DI diagonal right/left (depending on which way you were sent flying). Falco's fastest aerial to cancel his momentum is the bair. So straight after you DI'ed the hit, Fastfall a bair and then, if needed, double jump.

For a more clear description on momentum cancelling, watch this video: http://www.youtube.com/watch?v=njcYW0rFmUg

One of the best "techniques" in recovering is to save your double jump. Keep in mind that when you're sent out horizontally and/or downwards, you should use your double jump immediately, but in other cases where you're sent flying up and outwards, and you don't need to double jump immediately to cancel your momentum (i.e. you're not about to die), saving the double jump can possibly mean saving your life. For one, it allows you to change your trajectory instantly so you can avoid edge guarding opponents. Not only that, but there is no landing lag, start up, or cool down to jumping. You can perform aerials after jumping and you don't go into free fall. The demise of many Falco's stem from using the phantasm too soon, too often, and too predictably. Save your double jump!

In the occasion that you've used your double jump early (whether out of necessity or habit or accidentally), ideally you want to get to the edge. Phantasm is the best method for this. However, if you opponent is standing quite close to the edge I wouldn't recommend it because they could easily just edgehog and take off one of your stocks. This is the time to recover straight onto the stage. Using the Phantasm onto a platform is also a viable solution. Just remember to keep it unpredictable (as always) because otherwise you'll be punished quite severely.

Also, LEARN YOUR PHANTASM CANCELS. They can really help with mixing up your recovery because opponents won't be expecting a short cancelled phantasm. The long phantasm increases the horizontal length of the phantasm, and you may have to rely on that if you sent quite far off-stage and cannot get back with an ordinary phantasm.

H. Killing

Killing:

Unfortunately this is one of Falco's worst attributes. He does not have a safe kill move like Snake's utilt or Wario's waft and has to rely on prediction and pressure to safely kill an opponent. Falco's moves used for killing are Fsmash, Usmash and Bair. Dair can also spike an opponent if you can manage to pull one off off-stage. Most of falco's killing options come into play at the 100%-120% range, but of course this can vary greatly depending on stage position and other factors.

Here are some ways to kill an opponent, since Falco struggles:

SHL > Boost Smash (Unfortunately a lot of people expect this nowadays)
SHDL (pinning an airborne opponent) > usmash (this is pretty much guaranteed)
Bthrow (read DI and Airdodge) > Bair
Jump cancelled Usmash OoS
Read Airdodge > Fsmash
Utilt (150%)
Ftilt (200%)

The important thing to note is that you MUSTN'T ever 'fish' for a kill. That will only result in you taking unnecessary damage because you will be repeatedly punished for repeatedly using predictable, laggy attacks. Keep you opponent at bay by pressuring them with lasers, and eventually you will find an opening. Don't be surprised if they live to 160% because that's normal. Just make sure you aren't taking any unnecessary damage and the opportunity for a kill will come naturally.


Why the hell not?
 

Sosuke

Smash Obsessed
Joined
Aug 3, 2007
Messages
25,073
Switch FC
8132-9932-4710
So I think this is defiantly the best thread in this subforum.
 

*JuriHan*

Smash Master
Joined
Sep 30, 2008
Messages
4,699
3DS FC
1392-4901-1779
it was in the melee forums

here is the pit version:


Different kind of pit players

--------------------------------------------------------------------------------

Hello it hasnt been long since i joined this site and i'm a pit/sheik user. But today im gonna tell you guys about pit.

The Illusionist- This style consist of arrow arrow blitzing and swarming.
They loop arrows around their opponent to confuse them hence the name illusion.
While they are doing this they usually would bombard the opponent with their quick
attacks. To be this style of pit you must have incredible reflexes and dodging abilities
orelse the opponent will get you off guard. The color of this Pit should be black or gold.


The Trappers- This style consist of using your spam ring and the a button.
They trap their opponent by spamming doing quick damage.
When they are finished spamming their attacks they would load up for
a power hit and send them flying. You don't need much skill for this unlike the illusionists
rather all you need is the timing. Hmmm this color could either be blue or normal.


The Deflectors- This style is mainly using your mirror shield or the ring.
They time the throwing of projectiles and when its time to relfect they do double the damage.
To kill their opponent they use the ring while sliding with the c stick.
This style is very deadly they can be untouchable at times but you have to be
good at blocking objects or reflecting them.
This style has perfect timing and cannot be beaten in reflexes.


Overall all of these styles are great so try combining them to the ultimate pit
 

Teran

Through Fire, Justice is Served
Super Moderator
Premium
BRoomer
Joined
Oct 23, 2008
Messages
37,165
Location
Beastector HQ
3DS FC
3540-0079-4988
Can we delete this **** now?
 

Sosuke

Smash Obsessed
Joined
Aug 3, 2007
Messages
25,073
Switch FC
8132-9932-4710
Toon Link's Useful Links


~New to the Toon Link Boards?


~Want to talk to the Toons?


~About the Toon Link community.


~So you decided to main Toon Link but you don't know where to start?


~So you're going against somebody and need tips on how to win, right?


~Did you just say Videos?


~Good Reads


~Toon Link mains have too much fun.


If you see any grammatical errors or broken links, OR if you have a thread you think I should put up, let me know and I'll get right on it.
_____

Update History
8/19/2010 - Added "Want to talk to the Toons?" section, added TL Xat Directory thread
7/2/2010 - Added new Matchup Thread. Moved old one to Good Reads
6/30/2010 - Changed Author of Tournament Results Thread
4/18/2010 - Hitbubbles moved to Good Reads
4/14/2010 - LOL grammar
4/10/2010 - Sticky. Thanks Sasuke.
4/9/2010 - Thread Created

Temporary summary

The Toon boards desperately need a guide and Sasuke and I didn't feel like doing it on our own so this'll have to be a community project. Here's the plan. You talk, I type. It's that simple. Below you will find the basics of a guide that needs to be filled in. I'd do it myself, but I don't know it all (I know, it's hard to believe right?).

Before you post. Make sure you know what you're talking about and that your post is not just spam. Make sure that you are on topic (I will tell you what we are currently discussing so don't fret).


Current discussion

Right now, we're talking about Toon's Combos. Atm, we are discussing The U-tilt String. What's the best way to set it up and pull it off. What do you use it for? Any misc/character specific info? Just things like that. The percentages that it true combos on will be done asap. Let's get this done. Cheers.


PS: You'll get in the credits if we end up using your idea. This goes for everything we ask for help with.


The Triforce of Toon


mini Credits/Summary.


Index

Toon Link General Info
-Toon Link in Win Waker
-Unlocking Toon Link
-Differences between Link and Toon Link
-Toon Link in Brawl

Pros and Cons

Move analysis
-Jab
-Dash Attack
-F-tilt
-U-tilt
-D-tilt
-F-smash
-U-smash
-D-smash
-Nair
-Fair
-Bair
-Uair
-Dair
-Zair
-Neutral B: Arrows
-Side B: Boomerang
-Down B: Bombs
-Up B: Spin Attack Grounded
-Up B: Spin Attack Aerial
-Grab
-Pummel
-Down throw
-Back throw
-Forward throw
-Up throw
-Ledge Attack < 100%
-Ledge Attack > 100%
-Get up attack

Combos

Killing

Edgeguarding/Gimping

Spacing

Spamming

Recovering

Momentum cancelling

Recovery options
-Off stage
-On the edge

More common AT's

FAQ

Useful (Toon) Links directory

Credits


Toon Link General Info


Toon Link in Win Waker

Toon Link is the Link from Wind Waker and Phantom Hour Glass and is distinctive from the twilight princess Link because of his Toonish appearance and different moveset. The Legend of Zelda: The Wind Waker was brought out in 2003 and slowly unravels the story of how the gods flooded Hyrule creating what was to become known as the Great Sea which is scattered with little islands that were once mountain tops. At the start of the game, Link's sister Aryll is captured by a giant masked bird whom we later find out is being controlled by none other then Ganon. In an attempt to save his sister and then defeat Ganon, Link must control the wind itself with the Wind Waker, bring power back to the Master Sword and re-assemble the Triforce of Courage.


Unlocking Toon Link

Toon Link is a secret character that can be unlocked by either clearing Classic mode with Link on any difficulty, clearing the Subspace Emissary and going through the hidden door in The Forest stage, or by participating in 400 brawls.


Differences between Link and Toon Link

There are many differences between Link's and Toon Link's movesets. The Bombs are different. Other then what they look like, Toon's blast range is larger but the knockback is weaker. This can be an advantage anyway because it means we can combo easier from them. The Arrows flight path is different. Our arrows when uncharged go considerably further. The Boomerangs are different mainly because of their returning properties. Link's returning Boomerang has a pulling affect and no damage/hitstun while Toon's Boomerang actually hits on the way back like it's supposed to. There are also many other things that are different like fall speed, jumps, aerials, Dair (our Dair spikes, falls straight down quite fast and has a push effect when he lands.) U-smash, Toon is overall much faster and many other little things.


Toon Link in Brawl

In Brawl, Toon Link is a very versatile character that has the right tools to adapt to anything the opponent can throw at you. He has few bad matchups and goes pretty close to even with the majority of the cast, so he's definitely tourney viable. You should try to blend Toon's projectile game with your swordplay and try not to disuse any one of his projectiles as they all have their uses. The projectiles give you a safe approach and then you hit them hard with some swordplay combos at close range then rinse and repeat. Generally, Toon Link's will stay in the air for the majority of the match because it's easier to spam projectiles, you can use Zair and Toon's aerials are very good. That said, there are many ways you can use him and not all ways will work for specific matchups so you should learn the different styles of play so you can adjust to the right one for that particular matchup.


Pros

-Arguably the second best projectile spam game because of his 3 projectiles.
-Great at juggling and stringing moves together to rack up big percents.
-He's quite fast over all, in the air, on the ground, even his moves are fast.
-Relatively small which can help with not getting hit.
-He's a bit light and floaty which helps a lot with getting out of Chain Grabs at lower percents.
-He has a never ending list of AT's and Tricks XD. Which helps to keep things unpredictable.
-He has great spacing tools like Zair and Nair.
-Great priority on his moves because he has a sword.

Cons

-Generally bad matchups with high tiers.
-Slow Grab and no Grab game which can limit his OoS options.
-Can have some trouble killing but not nearly as much as other characters
-Some moves are quite laggy namely Dair, F-smash, Up-B on the ground and in the air and again Grab but this can be overcome by simply not using them very often.
-Can spike but it's incredibly risky. It's either you or them that'll die when you pull Dair out.


Move analysis

A list of every move, frame data on them, pictures of the hitbubbles when they're done and when to use it/general info.
All hitbubble pictures were taken from Sasuke's and TWiNK's hitbubble thread.

Video of the hitbubbles
http://www.youtube.com/watch?v=DCRQ7h0S3q4

All Frame data was taken from Rutger's awesome thread, Filling in the Sea Chart - A Toon Link Research Thread.

All moves shall be set out in the following format.


Name of the Move

Picture of the move
Short description: (of what Toon does.)
Damage when fresh:
Frame Data:
Summary: (Pretty much everything we know about it, uses, when to use it, advantages, tricks and so on.)


Jab/Jabs

First hit


Second hit


Third hit


Short description: You have a choice of hitting once, twice or three times with this move. The first and second hits, Toon will slash with his sword doing minimal knockback and damage. The third hit, Toon will stab straight forwards with his sword which gives half decent knockback and slightly more damage.
Damage when fresh: First hit, 3%. Second hit, 2%. Third hit, 5%. All up, 10%.
Frame Data:

Jab 1.
Duration into Jab 2: 8
Duration: 19
Hit: 6
Hitlag, Fresh: 6 ..... Stale: 5
Block Hitlag, Fresh: 6 ..... Stale: 5
Blockstun, Fresh: 1 ..... Stale: 0
Frame Advantage into Jab 2, Fresh: -6 ..... Stale: -7
Frame Advantage, Fresh: -12 ..... Stale: -13

Jab 2.
Duration into Jab 3: 10
Duration: 20
Hit: 6
Hitlag: 5
Block Hitlag: 5
Blockstun: 0
Frame Advantage into Jab 3: -9
Frame Advantage: -14

Jab 3.
Duration: 36
Hit: 6
Hitlag: 7
Block Hitlag: 6
Blockstun: 1
Frame Advantage: -30

Summary: All three Jabs aren't exactly guaranteed. They can be avoided with good DI and so on. They also don't exactly reliably lead into anything. But does this make them pointless? Of course not. The Jab is after all one of Toon's quickest moves, coming out on frame 6...... which is actually a bit pathetic XD. Still, it can be used to beat spotdodges or pulled out when you spaced badly and find yourself in an awkward spot. Although it isn't guaranteed as I stated previously, you can Jab Cancel and string moves together out of your first or second Jab. Things you can string together after a Jab Cancel are, Grab, Nair, Bair, Grounded Up-B, U-tilt, D-tilt, another Jab (you bet) and D-smash. The faster the move you use, the more likely you are to make it connect. That said, it would be wise to also use safe follow ups in case they avoid/shield it, so things like D-smash are not recommended. Summing it up; they're one of our fastest options, but not our best.


Dash Attack


Short description: Toon lunges forwards and slashes his opponent.
Damage when fresh: 10%
Frame Data:

Duration: 39
Hit: 9
Hitlag, Fresh: 9 ..... Stale: 6
Block Hitlag, Fresh: 8 ..... Stale: 6
Blockstun, Fresh: 3 ..... Stale: 1
Frame Advantage, Fresh: -28 ..... Stale: -29

Summary: Dash Attack comes out relatively quickly but the duration is long. This simply means that it can be punished easily if shielded. So does this mean you shouldn't use it? You'd be a fool not too. It all relies on where and how you use it. Generally, Dash Attack should be used near the edge on a recovering opponent, on an opponent who is getting back onto the stage from the ledge or on an opponent who is standing near the edge. This is because of the angle at which your opponent gets hit, it's sort of a semi spike (they get hit out low at a diagonally downwards angle). This can mean an easy gimp kill, edgehog or spike. If used on stage away from the edge, Dash Attack has a high tripping rate which can lead to a free follow up, tech chase and possibly a kill. Finally, Dash Attack is one of the few moves that have locking properties. A Lock is when the opponent misses a tech or is hit off a platform out of their shield (amongst many other ways to set up locks) and is then hit by a move such as Dash Attack before they can get up. At that point, they are locked. Some characters can keep the opponent in a lock and even infinite them. Unfortunately, Toon is not one of these characters. But we can still take advantage of the lock. When an opponent is locked and is not re-locked/hit before they can do anything else, they have what is called a forced get up. This simply means that they have no control over they're character simply standing up where they are. So what do we do? We can charge a smash and hit them as soon as their invincibility frames are gone and before they can shield. If timed right, it is unavoidable and could get you that kill you needed. Summing it up; it's a great move if used correctly like near the edge, just don't miss or get it shielded.


F-tilt

F-tilt 1
..........

F-tilt 2


F-tilt 3


Short description: Toon Link swings the sword forwards starting with the sword behind him, going over his head and finishing in front of him in an arch that covers him from back to front.
Damage when fresh: 9%
Frame Data:

Duration: 31
Hit: 10 to 12
Hitlag, Fresh: 8 ..... Stale: 6
Block Hitlag, Fresh: 8 ..... Stale: 6
Blockstun, Fresh: 3 ..... Stale: 1
Frame Advantage, Fresh: -18 to -16 ..... Stale: -20 to -18

Summary: F-tilt may not be Toon's best move (because it's a bit slow, so like Dash Attack, you don't want it shielded) but it has its uses and should not be ignored completely. Some people who don't know the match up very well are unaware that Toon's F-tilt hits both the front and the back of him. On top of that, it has decent range. So how should it be used? One way of using F-tilt is to hit people who hang on the edge slightly too long. You should get to know how long they have invincibility frames so you can punish them for staying there slightly too long and possibly gimp them. You can take advantage of the fact that it hits on both sides of you by using it to punish rolls behind you and cross ups (a cross up is simply when the opponent jumps from in front of you and unexpectedly lands behind you which limits your options and gives them the advantage). It can even replace D-smash as a way of making sure you punish an opponent's landing lag. So if someone is coming down near you, you move towards where they look like they're going to land and they airdodge into the ground to avoid being punished but right at the last second they drift behind you, F-tilt could be a more reliable option because it hits on both sides quicker then D-smash (especially considering the opponent will only have 2 or 4 frames of landing lag). Finally, it is a reliable follow up of Zair (along with other moves like Nair). Summing it up; F-tilt is something you will only pull out every now and then as a mix up so it doesn't get it predicted but is still a very solid move and should not be ignored.


U-tilt

U-tilt 1


U-tilt 2


Short description: Toon swings his sword in an arch, front to back, high over his head.
Damage when fresh: 9%
Frame Data:

Duration: 29
Hit: 8 to 12
Hitlag, Fresh: 8 ..... Stale: 6
Block Hitlag, Fresh: 8 ..... Stale: 6
Blockstun, Fresh: 3 ..... Stale: 1
Frame Advantage, Fresh: -18 to -14 ..... Stale: -20 to -16

Summary: U-tilt is definitely one of Toon's best moves. It hits early on both sides of Toon and it isn't very laggy so it's safer to use then most of Toon's attacks on the ground. So how should it be used? At low percents it can be used to juggle the opponent a few times and then follow up into Bairs to rack up some major damage. Don't get greedy though, if you U-tilt too many times, it won't combo into anything because the opponent will be able to airdodge, double jump or Dair out of it and you won't be able to get Bair to connect. Knowing this, we can use it to our advantage as a mix up. Instead of always going for the Bair that can be avoided, you can U-tilt then shield. If the opponent airdodges or Dair's thinking to avoid the Bair, you will be given another free U-tilt and the situation is reset. Stay unpredictable. The greatest thing about U-tilt is that it is used at lower percentages as stated and it is also used at higher percentages for the kill. U-tilt is our most reliable kill move. Not the strongest, but the most reliable. In comparison, it will usually kill the opponent 20% higher then U-smash and around the same percent as D-smash. So if you need that kill, you don't need to run in and U-smash. I mean, if you get it, well great, but most people will see that coming and you'll only get punished. Sometimes it's best to spam a bit more for that extra 20% and land a much easier/safer kill move like U-tilt. Other then that, because it hits both sides of you, it can help against people who roll behind you or cross up. Summing it up; U-tilt is one of Toon's best ground options because of how fast it is and it's also quite versatile being able to juggle at low percents and kill at high percents.


D-tilt


Short description: Toon crouches and swings his sword close to the ground at the opponent's feet.
Damage when fresh: 9%
Frame Data:

Duration: 22
Hit: 9
Hitlag, Fresh: 8 ..... Stale: 6
Block Hitlag, Fresh: 8 ..... Stale: 6
Blockstun, Fresh: 3 ..... Stale: 2
Frame Advantage, Fresh: -10 ..... Stale: -12

Summary: On paper, D-tilt is one of Toon's best moves. In reality, it is often forgotten and simply not used. But why? Probably because it doesn't fit into his playstyle which is more about running away. So if you wanted to use it, how should it be used? Probably the best use for it is the D-tilt lock. This is simply where you get someone up against a wall and spam D-tilt. If done right, they will be unable to escape until around 80%. D-tilt also has tripping properties at low percents so you can use D-tilt to Nair and it should connect. Perhaps another reason why D-tilt isn't used that often is because generally, it doesn't lead into anything. D-tilt is one of your safer options if shielded and can be followed up with another D-tilt to push them, in their shield, further away so you can be even safer. It has IASA frames (interruptible as soon as) which just means that before the animation of the move is over, you can interrupt it with another move (including another D-tilt). Some things you can try are Zair to D-tilt or Jab cancel to D-tilt. They are not guaranteed as they can be shielded, but as I said before, you should be ok. Summing it up; D-tilt is rarely used but that doesn't mean it is useless. Amongst other useful things like the D-tilt lock, it is one of Toon's better options as far as frame advantage goes.


F-smash

First Hit


Second Hit


Short description: There are two hits in F-smash so you have a choice of using just one or both. The first hit, Toon slashes his sword in front of him then holds the sword at his side ready for the second hit. The second hit (which can be used straight away or delayed), Toon lunges forwards, swinging the sword from his side and then stabbing it in front of him.
Damage when fresh: First hit, 10%. Second hit, 13%.
Frame Data:

First hit.
Duration: 48
Duration into Second hit: 19
Hit: 15
Hitlag, Fresh: 9 ..... Stale: 7
Block Hitlag, Fresh: 8 ..... Stale: 6
Blockstun, Fresh: 3 ..... Stale: 1
Frame Advantage, Fresh: -31 ..... Stale: -33
Frame Advantage into Second hit, Fresh: -14 ..... Stale: -16

Second hit.
Duration: 49
Hit: 12
Hitlag, Fresh: 20 ..... Stale: 14
Block Hitlag, Fresh: 10 ..... Stale: 7
Blockstun, Fresh: 4 ..... Stale: 2
Frame Advantage, Fresh: -43 ..... Stale: -42

Summary: F-smash; our strongest killing move that is never guaranteed. If you hit them with the first hit of F-smash and the opponent knows what they are doing, you can forget about making the second hit connect. Luckily, not everyone knows what they are doing or don't expect it, so there's still a chance you'll make it connect. The problem is, some characters simply avoid it without doing anything because they are light/floaty and the ones that can't avoid it automatically can DI the first hit up and double jump or whatever away. Even the heavy characters can avoid it by DI'ing the first hit down and shielding the second hit. But is it all a lost cause? Does F-smash have no use if the opponent can always avoid the second hit? Well of course not. You just need to know how to use it. You need to get inside your opponent's head and realise that they are very afraid of the second hit of F-smash (they should be). Knowing this, how can we use it to our advantage? The fun starts when the opponent shields the first hit of F-smash. Right now, they're thinking, I'd better keep my shield up just in case he uses the second hit. So you wait. You wait till you can do anything again and you;
Grab. This screws them over if they continue to hold shield.
Turn around and charge U-smash. This is epic lols if they freak out and try to roll behind you to avoid the second hit.
Jump and Fair/Nair above their head. This works if they jump to avoid the second hit.
Run away and laugh your arse off. This messes with their heads incredibly well cause now they're thinking, darn, I just missed a good opportunity to punish him.
While waiting and not using the second hit is the best option, you should use the second hit every now and then especially if they start catching on and try to shield the first hit then run in and punish you because they predicted you'd do nothing. Don't use the second hit too often, but just enough to keep them afraid and hiding behind their shield. If they shield the second hit, you're gonna be punished every time.
Another good way to use it is near the edge. If they shield the first hit close to the edge, they will be pushed off the edge and you'll be safe (even if they aren't pushed off the edge with the first hit, the second one will push them off and you'll still be safe). Although it's not guaranteed, you can even try to push them off the edge with the first hit and instantly hit them with the second hit. With most characters, the only way they can avoid it is to airdodge asap but most people don't know that.
Finally, some trivia about F-smash. The first hit has set knockback which means that at any percent, the opponent will always be hit the same distance. The second hit has a hitbox behind Toon that can come in handy and a lot of opponents don't know about it. You can F-smash while holding a bomb, if you don't know how then you can look it up in my AT and Trick thread. Summing it up; F-smash may have been poorly designed meaning that the second hit isn't guaranteed, but it can still be quite useful if you use the opponent's fear against him. Mind games son.


U-smash

U-smash 1


U-smash 2


U-smash 3


Short description: Toon swings his sword over his head from front to back in a smaller arch then U-tilt.
Damage when fresh: Front hit, 15%. Back hit, 10%.
Frame Data:

Duration: 37
Hit: 11-15

Front hit.
Hit: 11
Hitlag, Fresh: 11 ..... Stale: 7
Block Hitlag, Fresh: 10 ..... Stale: 7
Blockstun, Fresh: 5 ..... Stale: 2
Frame Advantage, Fresh: -22 ..... Stale: -24

Back hit.
Hit: 15
Hitlag, Fresh: 9 ..... Stale: 6
Block Hitlag, Fresh: 8 ..... Stale: 6
Blockstun, Fresh: 3 ..... Stale: 1
Frame Advantage, Fresh: -20 ..... Stale: -21

Summary: U-smash is one of Toon's best kill moves if not a bit predictable. It doesn't have a whole heap of range either and to make things worse, only the front hit is deadly. The back hit is significantly weaker killing about 60% later than the front. Sounds bad right? Well not necessarily. Even though it has small range and can be predicted then punished, if used correctly, it can still be one of your main kill moves. U-smash is great for punishing airdodges to the ground. One way of baiting these is by jumping up at them as they are falling then instead of using an aerial, bait the airdodge, follow their DI and U-smash. U-smash can also be really good for tech chasing. Most of the time, if people fail to tech and you run at them, they will roll away. Knowing this, you run at them and instead of U-smashing where they are, you continue to run, they should roll with you and then you can just U-smash them. Another way to land an U-smash is to throw out a Boomerang behind them then charge and U-smash in front of them (not right in their face, but within range for the U-smash to connect). They should shield and continue to hold shield hoping to punish you when you finally hit them, the Boomerang returns which pokes through their shield and sets them up nicely for the U-smash. As you can see, it's all quite situational. There's always hoping you'll catch them by surprise and running in to U-smash, but that falls under the predictable category so it can't be relied upon. Still, it's a good choice to kill them with if they miss a laggy attack being our second strongest move and considerably quicker then the second hit of F-smash. Just be aware that some characters don't die that easily when hit vertically. I'd tell you that you can U-smash outa shield by shielding, hitting Jump then instantly hitting the C-stick up, but the lack of range on U-smash makes this sorta pointless. Summing it up; U-smash is great if you connect with it as it can mean an early stock, but if you're having trouble hitting with it, you might want to rack up a bit more damage and finish them off with one of our other kill moves.


D-smash

Front hit


Back Hit


Short description: Toon sweeps his sword out in front of him close to the ground and then swings it along the ground to hit the other side of him.
Damage when fresh: Front hit, 6%. Back hit, 11%. All up, 17%.
Frame Data:

Duration: 49
Hit: 9-17

Front hit.
Hit: 9
Hitlag, Fresh: 7 ..... Stale: 6
Block Hitlag, Fresh: 7 ..... Stale: 6
Blockstun, Fresh: 2 ..... Stale: 1
Frame Advantage, Fresh: -38 ..... Stale: -39

Back hit.
Hit: 17
Hitlag, Fresh: 9 ..... Stale: 6
Block Hitlag, Fresh: 9 ..... Stale: 6
Blockstun, Fresh: 3 ..... Stale: 1
Frame Advantage, Fresh: -29 ..... Stale: -31

Summary: While D-smash may hit the fastest of Toon's smashes (hitting on frame 9), it is also the most easily punished of all our smashes. In other words, if it is shielded or avoided in any way within close proximity to your opponent, you're going to get punished. It is also the weakest of his smashes (unless you count the back hit of U-smash) killing the opponent about 25% higher then U-smash (around the same percent as U-tilt). So how should this easily punishable move be used? While it can be used for killing, it's not recommended because of the risk involved so if you use it, you'd better be sure you'll connect with it. But where D-smash truly shines is gimping. At low percents, generally under 25%, if you hit them with D-smash, they will be hit by both hits but instead of the second hit knocking them upwards, it hits them horizontally. If used in this way near the edge, it can set you up for an early kill, so how good are your gimping skills? If you are successful in gimping them, congratulations, that may have just won you the game. The downside to this method is of course that it can only be used at low percents and you still have to gimp them. There are however, two more methods that you need to know. The second one is stage dependant but it works on any percent and flings them further away then the first one. If you go to a stage that has slanted platforms near the edge of the stage like yoshi's island brawl and PictoChat, stand right on the edge of the stage facing towards the middle of the stage and D-smash your opponent. Because of the slant of the stage, the second hit won't connect and they will get flung out horizontally. Before I go on to the final and ultimate method, there's one bit of trivia you need to know about the first hit of D-smash and that is that it has set knockback. But not just any set knockback, it has the single most broken knockback of all of Toon's moves if not the game. Now if only we could harness it's potential. Well we have. Behold the brokenness of the Bomb Cancelled D-smash (BCD). The final way to gimp with D-smash has so much knockback at such a stupid angle that it kills 1/3 of the cast with a simple edgehog. The BCD works on any stage, at any percent. It even cancels out the vast majority of what makes D-smash so bad in the first place, the lag. Unfortunately, I have run out of room to go into more detail about the BCD including how to perform it so if you want to unlock the secrets of the BCD for yourself, you'll have to look it up in my AT and Trick thread. Sorry XD. Other then that, it's not a bad idea to use D-smash every now and then to aggressively stop an opponent on the edge from getting up because it covers many options including rolling on to stage. Summing it up; D-smash is a fantastic gimping tool amongst other things, just be well aware that if you miss, you'll get punished.


Nair

First hit


Second hit


Short description: In the mid air, Toon hits out in front of him then swings the sword behind him in quick succession.
Damage when fresh: 10% either hit.
Frame Data:

Duration in air: 39
Landing lag: 15
Hit front: 6
Hit back: 13
Hitlag, Fresh: 9 ..... Stale: 6
Block Hitlag, Fresh: 8 ..... Stale: 6
Blockstun, Fresh: 3 ..... Stale: 1
Frame Advantage in air, front Fresh: -31 ..... Stale: -32
Frame Advantage in air, back Fresh: -24 ..... Stale: -25
Frame Advantage landing, Fresh: -14 ..... Stale: -15

Summary: Nair is a fantastic move. It comes out fast enough to 'combo' out of things like Zair and Bomb throw. A staple move of Toon's is of course the SH Zair (land which cancels the lag) SH Nair. It comes out so fast compared to other options that it can be a combo breaker. It hits on both sides of him which is great for many reasons, one being that if you are close enough to the opponent that the first hit of Nair hits the other side of them, it will combo into the second hit of Nair which racks up major damage for a singular aerial. It also has long range which means it can be used for spacing purposes. But even a move as great as Nair can be useless if you don't know how to use it. There are basically two ways. SH Nair and Full Hop Nair. With SH Nair, you want to use Nair as soon as you leave the ground to give you the options of Quickdrawing your landing if it's safe to do so or double jumping away before you touch the ground. You can even SH Nair then double jump instant Nair. With Full hop Nair, you want to make extra sure you use Nair the moment you leave the ground otherwise it won't hit grounded opponents. Full hop Nair is a much safer option and gives you more options because, simply put, you are higher up in the air and therefore have more time to do something before you land. Time to do what? Try Full hop Nair to Zair or Full hop Nair to angled Boomerang. The sky's the limit, or rather the blast zone's the limit, just be creative with it and be sure to mix things up or you'll get predictable. At lower percents, Nair has tripping properties meaning a free follow up. A bit of info you may need to know even though its character specific, Nair is essential when versing Olimar. It destroys his pikmin when they're on or off you and in general ***** him. Summing it up; Nair is a must use move. It's very versatile, very quick and if used properly, it's hard to punish.


Fair


Short description: In mid air, Toon slams the sword from below to out in front of him.
Damage when fresh: 13%
Frame Data:

Duration in air: 37
Landing lag: 18
Hit: 14
Hitlag, Fresh: 10 ..... Stale: 7
Block Hitlag, Fresh: 10 ..... Stale: 6
Blockstun, Fresh: 4 ..... Stale: 2
Frame Advantage in air, Fresh: -19 ..... Stale: -21
Frame Advantage landing, Fresh: -15 ..... Stale: -17

Summary: Although Fair comes out the slowest of all Toon's aerials, that doesn't necessarily mean it's slow. If anything, that just says a lot about how quick over all Toon's aerials come out. Fair is actually the quickest to end once the hitbox is out (not of course counting Zair) so once the hitbox is out, it's the hardest to punish in the air (not the hardest to punish when landing). So when pulling this move out, it's best if you start the move a little bit away from you're opponent so the hitbox can at least come out without you being hit in the start up frames. Fair is a great kill move and can be considered one of our best. To give you an idea of how powerful it is, it will kill around 5-10% higher then U-smash so you can consider it the third best kill move as far as power goes. Even better still, we can combo into it if we hit them with a Bomb first. You just need to be in the right position. Fair actually has less duration then Nair, this means that every now and then, as a mix up, you can SH Fair then if they're in front of you chuck out the first hit of Nair before you touch the ground or if they're behind you, chuck out a Bair before you land. Most people will not expect this and be hit by the Nair/Bair. Fair is pretty good off stage as well. If you hit them with it off stage, forget about gimping them, you just killed them. It's also great because using it off stage gives us plenty of time and space to use it early and thus avoid the start up lag. If they recover lower, run off the edge and Fair, if you miss, double jump and Nair/Fair them. Finally, Fair has decent range so it outspaces a lot of other moves. Summing it up; Fair is one of our best kill moves and it's weakness (coming out slow) can be overcome by spacing the start up frames.


Bair

Bair 1


Bair 2


Short description: In the air, Toon quickly swings the sword from below him to behind him and up a bit.
Damage when fresh: 10%
Frame Data:

Duration in air: 30
Landing lag: 10
Hit: 6
Hitlag, Fresh: 9 ..... Stale: 6
Block Hitlag, Fresh: 8 ..... Stale: 6
Blockstun, Fresh: 3 ..... Stale: 1
Frame Advantage in air, Fresh: -22 ..... Stale: -23
Frame Advantage landing, Fresh: -9 ..... Stale: -10

Summary: Bair is Toon's best aerial and one off our best moves over all. Bair is very fast and totally spammable. Coming out on frame 6, Bair ties only with Nair and Jab for the fastest of Toon's moves to come out. It has the fastest duration of all Toon's aerials and (not counting Zair) it has the least amount of landing lag of all Toon's aerials having a sort of semi auto cancel. But it just keeps getting better because other then just on paper being a good move, in reality, it's an amazing move. It has great range so it's useful for spacing, it can be used twice in one SH which only gets better because of the low landing lag and it 'combos' into itself. This means that you can string multiple Bairs together to rack up immense damage at low to medium-high percents. I say 'combos' because in brawl, there are many ways to escape strings of attacks because of the lack of hitstun. But this can be to some extent overcome by speeding up your Bair chain. To do this, you have to SH Bair then fast fall Bair (Instantly rinse and repeat). One way to accomplish this is by using the analog stick and A for the first Bair then use the analog stick to fast fall while using the C-stick for the second Bair. Why? Because if you use the C-stick for the first Bair, it can buffer and simply won't come out and using the C-stick for the second Bair makes it easier to fast fall. That said, if you can manage it another way, then so be it. Other then comboing into itself, Bair can combo in and out of U-tilt, into aerial Up-B, in fact, if spaced properly and at the right percents, it can combo into footstool which means SH Bair, Footstool, Dair, Pogo, Zair to Grab/SH Nair. Bair = combo starter. Something to keep in mind; you can SH Bair Zair. You just need to use Bair asap and use airdodge + A for the Zair otherwise it'll come out as an airdodge. Bair is the aerial we use to momentum cancel. More info can be found about momentum cancelling further on in the thread. Finally, if you're desperate, Bair can kill. It'll usually kill at around 160%, so if the opponent won't die and you want a kill move that will easily hit, then don't forget about Bair. Summing it up; Bair is win. It's fast, it combos like crazy and it can even kill. Definitely one of our best, if not our best move.


Uair


Short description: In the air, Toon sticks his sword straight up and holds this pose for a short period of time.
Damage when fresh: Initial hit, 14%. Lingering hitbox, 12%.
Frame Data:

Duration in air: 59
Landing lag: 21
Hit: 11
Hitlag, Fresh: 10 ..... Stale: 7
Block Hitlag, Fresh: 10 ..... Stale: 7
Blockstun, Fresh: 5 ..... Stale: 2
Frame Advantage in air, Fresh: -43 ..... Stale: -46
Frame Advantage landing, Fresh: -17 ..... Stale: -20

Summary: Uair is one of Toon's safest killing options. As far as priority goes, Toon's Uair is one of the best in the game, beating every Dair except maybe Lucario's. So what options do they have without Dair and how do we beat those options? Airdodge? Uair has a lingering hitbox or a 'sexkick' if you will, which just means that as long as Toon holds the sword up, it deals knockback and damage. So if they try to airdodge through it and you follow their DI, you'll still hit them. It should be mentioned that they can airdodge through you if you use Uair while rising, so you should try to time your jumps so you can fall with them. They could mix up the direction they fall in, hoping that you'll go the wrong way, but we have Bombs to limit their options. Simply by throwing a Bomb up at them, it means they have to avoid it or try to catch it which isn't exactly easy. So we can direct them where to go, bait an airdodge and limit their options until they are literally forced into the Uair for fear of the Bomb. If they get hit by the Bomb, sweet, extra damage and a chance to get a free Uair or the situation is reset. What can I say; Bombs and Uair go hand in hand. To make things even better, Uair kills at good percents. The initial hit kills at around 125-130% and the lingering hitbox kills at around 140-145%. This is only accentuated if used as high up as possible; a good example of this is when we kill Snake up the top of the screen after his high recovery. So because of kill power and priority, Uair is one of the main reasons why we want them in the air. Bair can actually combo into Uair if they DI it wrong and even if they manage to airdodge, Uair > airdodge. A little bit of trivia; Uair can auto cancel if you use it just before you touch the ground. Sounds useful right? Well not really, you see, there isn't any hitbox or anything except a flash of light. So if you want to laglessly pick up items when you land in a flash of light, well I won't stop you XD. Summing it up; Uair is a very safe way to get the kill and when you combine it with bombs it becomes a very reliable way to get the kill. So keep it in mind.


Dair

Dair 1


Dair 2

The hitbubbles on the sides are wind hitboxes.

Short description: In the air, Toon bobs up, grabs his sword in both hands, sticks it down below him and plummets downwards at blistering speeds.
Damage when fresh: Spike (initial) hitbox, 16%. Lingering hitbox, 13%. Damage after pogo, 8%.
Frame Data:

Landing lag: 40
Hit: 12
Hitlag, Fresh: 11 ..... Stale: 7
Block Hitlag, Fresh: 11 ..... Stale: 7
Blockstun, Fresh: 5 ..... Stale: 2

Summary: Dair is all about high risk and high reward. If you miss it, it can cost you a stock or at least a lot of damage because even if it's missed on stage, Dair has a tone of landing lag. If you don't miss, it's Toon most damaging aerial and usually puts you in an advantageous position. To make it far more likely that you'll make Dair connect, you can footstool the opponent and then instantly Dair. An example of this is stuff like Bair footstool Dair. When you hit with Dair, Toon pogos but still keeps the sword out. At this point, the hitbox is still there, you are free to move left or right, you fall much slower and you can even fast fall the pogo. If you hit them again once you've pogo'd, you will pogo again which is the same as the last pogo, at which point the Dair will soon stop and you are free to do as you will. But, if you fast fall the pogo, Toon won't pogo when he hits them again. If you fast fall from the right distance, you can hit them again, continue to fall and it will auto cancel on the ground. This is because the Dair animation has stopped just before you touched the ground. This can be very useful because it means that you can do things like Dair, fast fall pogo to U-tilt. Off stage, spiking with Toon, while sexy, is very risky. If you miss them, then you can say goodbye to your stock. Fortunately, there are a few ways to make spiking off stage much safer. But before we go into that, you need to know about momentum affected Dairs. If you get hit by anything with enough force to give you decent momentum even after hitstun in any direction and you use Dair asap, Toon will do a momentum affected Dair. He won't bob up at the start, he won't fall extremely quickly. He will slowly fall straight down for the same amount of time as a normal Dair. If you hit someone when doing a momentum affected Dair, the spike will still spike but Toon won't pogo, ever. He will just slowly fall the Dair until he can move again. If instead of just hitting Dair when you have momentum, you hit double Jump then Instantly hit Dair, you will do a Dair stall. This is where Toon rises up the same distance as double jump in his Dair animation and will stay on that horizontal level for as long as the Dair lasts. If you double jump left or right, Toon will hover left or right in his Dair animation. This can be used to momentum cancel and recover from offstage. You will read more about this in the momentum cancelling section. So now that you know about momentum affected Dairs, you can learn about the safe spike. I have no room to write about the safe spike XD so you'll have to look it up in my AT and Trick thread. In fact I don't have enough room to write about any more of the many techs you can do with Dair, so you know where to go if you want more info.
Now, Dair is also relatively safe on shield cause if you want, you can pogo off their shield and DI away. You can try to Spike your opponent through the stage if used on the edge of the stage or on certain levels because Toon's sword will reach through. Toon's landing animation has windboxes as seen above. They aren't terribly powerful but they can be used to push enemies and items away including Z-dropped bombs. Other then the obvious, you can use the stall of the part when Toon bobs up at the start to throw your opponents off just when you're about to land because it can mess them up if they try to punish your landing lag. Summing it up; again, it's high risk high reward. If you're smart about it and unpredictable when using it, Dair can be your best friend. Just don't miss.


Zair/Tether


Short description of Zair: In the air, Toon shoots out his hookshot and then pulls it back. You can laglessly cancel out the Zair by simply landing so you don't need to worry about Toon retracting the hookshot.
Damage when fresh: Always 4%, it never stales.
Frame Data:

Duration in air: 70
Landing lag - cancels into normal landing lag, i.e. 2 or 4
Hit: 11
Hitlag: 6
Block Hitlag: 6
Blockstun: 1
Frame Advantage landing: -1

Summary: Zair is one of our main spacing moves and it's also one of (if not) our best combo starters. Some quick notes just in case you didn't read understand the above; Zair will always do 4% damage and it autocancels when you land so if you land with it, you'll only get the normal landing lag frames (4 if you fast falled otherwise it's the normal 2 frames of landing lag). When using it, you want to make sure you get the full length of Zair and then instantly land to cancel it, so if you haven't already, quickly mess around with the timing so you know what the timing is. One way to use it is to SH and Zair at around the peak of your jump just as Toon's head starts moving back down. This is the best way to use it when starting on the ground. Other ways are, SH airdodge then at the peak of your jump, cancel the airdodge with Zair. This way is quite telegraphed but is quite useful when avoiding projectiles/some attacks and approaching at the same time. It's not just limited to these of course. Anytime you have enough time to pull it out and you're about to land (this could be from full or double jumps, it doesn't matter though, you're just in the air ok? Maybe you got hit up there or something.) retreating Zair is a pretty safe way of getting down without getting punished. I should probably add at this point that preferably, you want to be hitting them/their shield with the tip of Zair as it's better for spacing and less punishable. So now you have a rough idea of how to use/space it, but what about combos? There are of course no 'true combos', only strings of attacks, but we'll just ignore reality for a second. Zair to Nair is a true combo! (it may as well be). It's one of Toon's staple combos but there's no harm in mixing it up if things get predictable. How about Zair to Grab? Hellz yes. Just don't over use it and you can pretty much guarantee that you'll get that grab. Zair to Jab. If you're close enough, this is about as guaranteed if not more so then Zair to Nair cause they both come out on frame 6. If you're having trouble with spotdodgers, chuck in a Zair to grounded Up-B. How about Zair to Bomb throw? Oh yeah, I didn't explain that part yet. Pretty much, you can Tether or Zair while holding a Bomb if you airdodge first. It doesn't even have to be an airdodge for very long, you can just hit airdodge then Instantly hit Zair/Tether. Less guaranteed stuff includes Zair to F-tilt and Zair to Hyphen smash (hyphen smash is just running U-smash, this one is best used for the kill). Something you will need to know; if you use a move and then try to Zair Instantly after, it will come out as an airdodge. So how do we avoid this? Simple. Just hit airdodge then Instantly hit Zair whenever you think it'll buffer an airdodge. You'll get the hang of it. Summing it up; Zair is one of those moves that you simply can't ignore. It's one of Toon's best spacing and comboing moves.


Short description of Tether: Off stage near the edge, Toon shoots out his hookshot and it goes straight towards the edge wherever you are and latches on. Then Toon retracts the hookshot which pulls him up towards the edge.

Summary: The Tether could easily have its own section apart from Zair, but because of a lack of effort on my part XD, this is how it is. The Tether is of course just a Zair off stage and close enough to the edge after all. The Tether recovery is a great little option we have. It's three main uses are recovering on to the edge, recovering on to the stage and edgehogging. But before we go into that, I'll just explain some stuff you gotta know. You can only Tether three times without your feet touching solid ground. If you try to Tether a fourth time without getting on stage, the Tether will refuse to grab the edge, then by the time you've waited for it to retract, you'll need to recover straight away or you might not make it/get edgehogged. So keeping an eye on how many times you've used it is essential. Really basic stuff; You Tether, at this point Toon will hang down by the chain, if you hit Z again, Toon will quickly snap on to the edge, if you don't, Toon will hang there for a while then automatically retract the Tether. Generally speaking, you will want to get to the edge asap as you are vulnerable just hanging there, so when you Tether, Hit Z twice quickly. You can Chain Cancel by hitting down after you hit Tether once. This is just where Toon drops down out of the hanging by the chain part of Tether. If you tilt down, Toon will drop off and fall at the normal pace and if you Hit Down, Toon will drop off and fast fall. It's best if you have your double jump if you chain cancel from below the edge as it makes things much easier/safer. If you chain cancel directly above the edge, Toon will drop and grab the edge automatically. You can of course Tether while holding a Bomb by simply airdodging then Hitting Tether. There's more to it, but I'll get to that within the next few sections. So, the three main uses.
Recovering on to the edge, pretty much, if you're close enough to the edge to Tether but too far away to just drift towards stage and grab the edge, you may as well use it other wise you'll have to wait till Toon is below the stage and use Up-B. That said, if the opponent edgehogs and you try to Tether, it will come out as a Zair (say hello to 70 frames of lag). Even if you actually Tether the edge, the opponent can hit you out of the tether before you snap onto the edge because you won't have invincibility frames. This can lead to you getting gimped/stage spiked. So by all means, use it, just don't be predictable with it (like everything else).
Recovering on to stage. Other then a quick fake out that can bait a reaction from the opponent, the Tether renews your invincibility frames. When you grab the edge normally (let's say with an Up-B), you will be given invincibility frames but you will not be able to hit away from the edge and double jump back on stage for a little bit. When you Tether grab the edge, you will be given slightly less invincibility frames but you'll be able to hit away from the edge straight away. So as far as renewing your invincibility frames, you'll have around the same amount to double jump on stage with whether you Tether or not.
Edgehogging is a great way to take advantage of the Tether. Because it renews your invincibility frames, you can use it to stay invincible when the opponent is recovering and potentially gimp them. You can read more about edgeguarding and gimping later on in this thread, but the Tether is an essential tool in edgehogging.
Summing it up; The Tether is something you'll need to learn how to use properly as it gives you more options when near the edge which is a great advantage against most of the cast.


Neutral B: Arrows
Picture of the move

Short description: Toon pulls out his bow an arrow (from seemingly no where) and shoots the arrow.
Damage when fresh: 4% uncharged. 12% fully charged.
Frame Data:

Duration: 41
Quick Draw Duration: 25
Hit (soonest possible): 18
Quick Draw Hit (soonest possible): 2
Hitlag: N/A
Block Hitlag, Fresh: 6 ..... Stale: 5
Blockstun, Fresh: 1 ..... Stale: 0
Frame Advantage, Fresh: -16 ..... Stale: -18

Summary: Toon's arrows, while not the best projectile by themselves, are an important part of Toon's over all playstyle/spam. They have a set flight path, they move slowly and they can be seen coming/predicted even before the arrow comes out (because if they're used in the air it has startup lag and it can be predicted whenever you land, i.e. the quickdraw). All of this adds up to being easily powershielded. Good thing then that we have more then just the arrows. But before we go into that, you've gotta know the basics like the quickdraw. The Quickdraw is a simple technique that cuts out all the startup lag of the shot. It is done by Hitting the B button just before you land. So if you've got a bit of time before you land, you can quickdraw. Examples? Try SH Nair/Fair/Bair/Arrow/Bomb pull/Bomb throw to quickdraw. The SH Arrow to quickdraw is called a SHDA which simply means, short hop double arrow. This is a useful technique to get a simple and quick wall of projectiles out. It's useful for when certain characters like Falco/Fox are recovering, for outcamping certain characters like Snake or when a returning boomerang is coming back to hit them, but generally it's best used for extra projectile pressure as a mixup. Two more basic techniques are the B-reversal and the Wavebounce. The B-reversal is done by lightly tilting Backwards in the air and Hitting B or by Hitting Backwards in the air (returning the joystick to neutral) waiting half a second then hitting B. What this does is, it lets you continue to drift in the same direction as you were and simply turns Toon Link around to shoot. This can be pretty useful if you want to space the arrow. The Wavebounce is a lot different. To do a wavebounce, you need to Hit B then Instantly Hit Backwards. What this will do is it will reverse Toon's momentum and turn him around to shoot. Because of the unpredictability of reversing your momentum, the wavebounce can be used when getting back down on to stage from up in the air to throw people off or when you're about to land as a reverse quickdraw. These are the three main basic arrow techs, the quickdraw, the b-reversal and the wavebounce. Different combinations of these result in strange and crazy techs like the jerk, but as that stuff isn't exactly necessary to know let alone basic, if you want to look into that stuff yourself, you'll have to look it up in my AT and Trick thread. I cannot stress enough though, learn the basics first or you'll get confused. Summing it up; the arrows need to be used with other things like occasionally quickdrawing aerials or mixed in with your other projectiles in order to be useful. By themselves or if over used, they are easily powershielded and you can/will get punished.


Side B: Boomerang
Picture of the move
Short description: Toon whips out his Boomerang from his bag of tricks and throws it out in a straight line that can be directed up or down........ then it comes back.
Damage when fresh: The damage of the Boomerang is sort of strange. Essentially, even though it looks like it hit them once, it hits them twice. You throw it at them, they take a direct hit, they get damage from the boomerang coming forwards and instantly take damage from the boomerang going back even though it doesn't look like they should be getting hit by the returning boomerang.
Returning Boomerang, 3%.
Damage up close; First hit, 8%. Second hit, 3%. All up, 11%.
Damage from further away; First hit, 5%. Second hit, 3%. All up, 8%.
Frame Data:

Duration: 45
Hit (soonest possible): 27
Catch Lag: 19
Hitlag: N/A
Block Hitlag, Fresh: 0 ..... Stale: 0
Blockstun, Fresh: 8 ..... Stale: 6
Frame Advantage, Fresh: -10 ..... Stale: -12

Summary: The Boomerang can be considered Toon's second best projectile, but no projectile is as good as it can be without the help of the other two. But before you go and just throw it out there, you're gonna wanna know some basic Boomerang facts, stuff that every self respecting Toon should know. So you throw it, but wait, before you even do that, there's stuff you need to know. You can smash or tilt throw the Boomerang. This is done the same way as a smash attack or a tilt, only with the Boomerang. What it does is it affects the speed and distance that the Boomerang travels (so a smash thrown boomerang goes further). Which one should you use? That depends of course. What you might think is that you should obviously always use a smash thrown one cause it's better. This is incorrect however, because there are many times that a tilt thrown Boomerang can prove to be much more useful. So now that you know that, you can throw out the Boomerang right? Not yet XD. You see, there's more to it then just that. The Boomerang can be angled in different directions other then straight forwards. In fact, just throwing it left, there are 7 different angles that you can throw it in. If you're not sure that you know how to get all 7 angles, read the 'In-between Angles' in my AT and Trick thread. Now that you know all that, you may throw it out. As you would expect, it can hit them on the way back as well, but what you may not know is that the returning Boomerang has a set knockback. This just means that at any percent, they will always get hit the same distance. Well, it comes back, what then? If you do nothing, walk/run or in some cases jump, Toon will catch it (I say in some cases because you can also jump over it which will make the Boomerang go past you). Toon catching it is a bad thing. That's not to say that you should always avoid the returning Boomerang, I'm talking about the animation of Toon catching it. That animation is unnecessary lag in which you can do nothing and can get punished. So how do we avoid this unnecessary lag? Simple. By doing anything other then standing, walking/running and in some cases jumping and doing nothing. This isn't hard because there are many other things you can do, but you'd be surprised at how easy it can sometimes be to accidently catch the Boomerang. As long as you keep this in mind, the Boomerang is your friend. If you don't already know about the Phantom Boomerang, Boomerang Gliding, wavebounced/sms Boomerang, check it out in my AT and Trick thread. Something to keep in mind; sometimes it's a good idea to throw the Boomerang where your opponent isn't, for example, throwing it above them and predicting that they'll jump into it. Finally, returning Boomerang is win cause it sets up epic combos. More then that, you can Zair them into the returning Boomerang and then combo them out of that. Summing it up; the Boomerang is a versatile projectile. It has its uses going out and coming back, it can be aimed in many different directions for greater accuracy and less predictability, it can be smashed or tilt thrown, the returning Boomerang can take many different paths depending on how it was thrown and where you are, not to mention the different techs that can be done. But even a versatile tool like the Boomerang can be predictable if used incorrectly, so keep this in mind.


Down B: Bombs
Picture of the move
Short description: Toon pulls out a Bomb from behind his back, supposedly from a Bomb bag that contains an infinite amount of bombs and yet takes up no space, and then he can do many things with it including throw it at the opponent.
Damage when fresh: Anywhere between 8 and 2% depending on a few things. Detailed picture by Rutger here.
Frame Data:

Bomb pull Duration: 39
Throw Duration: 20
Hit(soonest when thrown): 8
Hitlag: N/A
Block Hitlag, Fresh: 6 ..... Stale: 5
Blockstun, Fresh: 2 ..... Stale: 1

Summary: The Bombs are our best projectile and in most matchups, Toon's best friend. Before we go on, there are some simple facts you need to know about Bombs. Toon can only have 2 bombs out at any one time. This generally isn't an issue even if an opponent catches one because of the timed explosion of the Bomb, but it's good to keep this in mind so you don't needlessly bomb pull and find that the lag of the animation was for nothing. Oh yeah, there's a timed explosion. So when you see the Bomb start to flash, just get rid of it or use it to your advantage by standing near them and shielding. While it does give you heaps of options as you will read further on, holding a Bomb does take a few options away. While holding a Bomb, you can't Grab or use any grounded A attacks other then F-smash (hold A while Bomb pulling or doing any other action so you won't throw the Bomb then hit the C-stick sideways) Dash attack (but you have to pick the Bomb up or catch it with Dash attack) and U-smash (but you have to cancel dash attack with U-smash from a dash attack which picked up or caught the Bomb). The Bomb has a tone of priority and hitstun, a large blast radius, it pressures people who shield it, it has combo ability in and out of the Bombs explosion, not to mention that it is easily one of the most versatile projectiles in the game. You pull out a Bomb and instantly you are given a vast amount of options.
These options are, but not limited to;
Throwing the Bomb in any direction (Up, down, left or right), hard throw or soft throw, in the air or on the ground including the JC throw.
Z-dropping the Bomb on the ground/platforms or simply Z-dropping the Bomb in mid air.
Invincibombing (iBomb) which could have its own section entirely as it is incredibly versatile and useful just in itself.
Other things while holding a Bomb, so stuff like Aerials (ZAC or IZAC), F-smash, Zair/tether and of course other specials.
Bomb fake outs in the air and on the ground and finally, being able to hurt yourself has its benefits. For example, the Bomb can save you a stock by getting you out of chaingrabs and giving you back your already used Up-B recovery or it can be used to make moves better like Dair (the safe spike) and D-smash (BCD).
The large blast radius is big enough to hit opponents through the stage and can hit them back up into the stage and stage spike them. This is known as the Bomb Spike. The high priority of the Bomb means that it can go through other projectiles and opponents attacks. It sets up and continues combos which can be extremely helpful when you're looking for that kill. Pretty much, Bombs limit opponent's options and can force responses from them that you can predict and punish. Being able to control your opponent, whether it be forcing them to approach, forcing them to avoid the Bomb or simply making them sit in their shield is quite helpful. The Bombs are an important part of Toon's spam game, serving a slightly different purpose to the Arrows and Boomerang. The Arrows and Boomerang can be powershielded and that's all they have to worry about, but the Bombs stick around once shielded which keeps the pressure on. The main difference is that the Bombs don't rely on the other projectiles to be an effective spam game. They can do fine just by themselves. That said, the overall spam game is significantly better when you use all three projectiles smartly. A quick mention about the iBomb, because you air dodge and drop a bomb at the same time, the iBomb acts like a counter in some regards. You dodge their attack and they get a Bomb to the face. The difference is, we can combo out of it (if used close to the ground). Being able to combo out of a counter attack sounds really good, that's cause it is. Try using it whenever you predict a MK will shuttle loop you in mid air. But that's just using it defensively. It can of course be used offensively which has pretty much the same affect except without them attacking you, it can be hard to hit with because it doesn't have very much range. What also sets it apart from other counters is that you can cancel the airdodge with a Zair which can be used if you miss them while using it offensively or to combo with once the Bomb hits them. (For further info on any of the techs, go to my AT and Trick thread.) Summing it up; Toon's Bombs are an essential part of his playstyle making it easier for Toon to safely go from his spam game to close combat swordplay and making his spam game so much better and more versatile.


Up B: Spin Attack Grounded

Initial hits 1


Initial hits 2


Last hit


Short description: Toon holds the sword out and spins around really fast on the spot doing his signature spin attack.
Damage when fresh: All but the last hit, 1%. Last hit, 3%. All up if hit from the start of the attack, depending on DI, between 10 and 12%.
Frame Data:

Duration: 82
First Hit: 11
Last Hit: 53
Hitlag for last hit, Fresh: 11 ..... Stale: 10
Block Hitlag for last hit, Fresh: 6 ..... Stale: 5
Blockstun for last hit, Fresh: 1 ..... Stale: 0
Frame Advantage for last hit, Fresh: -33 ..... Stale: -34

Summary: The grounded spin attack is one of those moves that you should only pull out once in a blue moon. That said, it shouldn't be ignored completely or forgotten about, it can be a good move, it's just really bad when it's expected. So before I go into how to use it and when to use it, you need to know why you shouldn't use it all the time. Basically, it's bad if you miss because they can just wait for it to end and punish you easily (or punish you from above/below or outrange you while you're still doing the attack), it's bad if it's shielded for the same reason that it's bad if you miss (although sometimes because it's used very rarely, they can be caught off guard and accidently drop their shield. Don't rely on this though XD.), it's even bad if you hit them with it if they are expecting it because it can be DI'd/SDI'd out of. So you get the point. Use it sparingly. Now that you know all that, how and when should it be used? Because of the multi-hitting properties of the spin attack, it's great for punishing invincibility frames. So things like spot dodges, rolls and airdodging into the ground, the grounded spin attack has got them covered no worries. It's also good to keep in mind that it hits on both sides of Toon, so if an opponent gets behind you, it's an option. The grounded spin attack can actually be charged like a smash attack. Why you would want to do this is beyond me. It does extra damage (Fully charged, between 16 and 19%), but for a move that wants to be a surprise, telegraphing it is probably not a good idea XD. The grounded spin attack also has some interesting techs when used off the edge of a platform/the edge. To find more information on how to perform them, go to my AT and Trick thread, but pretty much, it can be used to make the aerial spin attack fall instead of rise facing either direction and it can also make you drop off the edge with a flash of light and with greater control of your character facing either direction. While dropping off a platform backwards sounds interesting, you don't want to mess any of these techs up as you'll be stuck with the grounded or aerial spin attack lag. Finally, a little bit of trivia; the first hit of the grounded spin attack behind Toon can hit characters hanging on the edge of the stage and sort of has a soft semi spike effect. Summing it up; the grounded spin attack should only be used very rarely as a mix up. It's helpful for punishing any invincibility frames.


Up B: Spin Attack Aerial

First hits


Last hit


Short description: In the air, Toon will spin around holding his sword out at an angle facing upwards and the helicopter affect will make him rise quite high.
Damage when fresh: All but last hit, 2%. Last hit, 4%.
Frame Data: ......
......
Summary: There are two ways to use the Aerial Up-B, for recovering and for attacking. As a recovery move it's pretty average. It makes Toon rise quite high up and can be DI'd to the left or right. It has great sweet spot range so you don't need to aim it perfectly. It has a delayed last hit so if someone tries to edgehog you and you start the recovery from just the right distance so that the last hit will hit them on the edge, they can run out of invincibility frames just in time to get stage spiked by the last hit while you safely snap on to the edge. But there are of course some downsides. It can in fact be edgehogged if timed right. It leaves Toon sort of vulnerable on top as you can see in the picture, so many characters can spike him out of his recovery. While it can be angled, it still has a pretty obvious/predictable flight path. It won't auto snap the edge during the first bit of the Aerial Up-B (just Tether or delay the Up-B if you're that close). You need to make sure that you don't reverse the Up-B when recovering as it leaves you completely vulnerable to getting edgehogged. If you are aware of its flaws, it should serve you well. Now, the aggressive Aerial Up-B used for attacking/killing. This is a very risky move. If you miss for any reason, you can get punished pretty easily. This is because after the long attack animation that makes Toon rise (presumably while the opponent is falling if they airdodged it), the only thing you can control is what direction you drift down in. You can't attack or do anything else other than drift in one way or another trying to trick your opponent into missing you. Even if you cross up and land on their opposite side, you have the terrible landing lag to deal with. But wait there's more. Even if you actually hit the opponent in mid air, it can be DI'd out of. It generally doesn't happen, but be aware of that. So now that you know the risks, this is how it can be used. If you're starting to think that it's too risky so why even bother, then the good news is that Bair true combos into it. This makes things a bit more reliable as we really don't want to miss it. It can also be reliable for punishing airdodges. "But why use it anyway?" I hear you ask. Because it's sexy and because it can kill (obviously). This is not so much because of kill power but because it puts them so much closer to the blast zone. But if you don't feel comfortable taking the risk outside of friendly matches, then by all means, don't. It's just one of those things you need to know are going to hit which just comes with experience. If you are able to implement it into your game without too much downside, then you win. Summing it up; Aerial Up-B as a recovery move does it's job well as long as you can avoid it's weaknesses and as an attacking move, if you know it'll connect, why not use it? If you're not positive that it'll connect, it's probably not worth the risk.


Grab
Picture of the move
Short description: Toon shoots out his hookshot that will latch onto the enemy and then he retracts it to pull them in.
Damage when fresh: Well nothing yet......
Frame Data:

Standing Grab
Duration if you miss: 84
Soonest: 12
Latest: 16

Pivot Grab
Duration if you miss: 94
Soonest: 15
Latest: 19

Dash Grab
Duration if you miss: 94
Soonest: 14
Latest: 18

Summary: The Grab isn't one of Toon's best moves as far as speed and lag go but it is an absolutely essential part of Toon's playstyle. Why? Simply because without it, the opponent could just sit in their shield. It's the old scissors paper rock situation. It is a necessary mix up. We are essentially forced to use it to stay unpredictable, so we may as well make the most of it while we're at it. It does however have pretty decent range compared to most of our attacks which is useful in some situations that I'll go into. Need I remind you that you really don't want to miss this move? As you can see, it has a whopping 84 or 94 frames of duration. You can actually take advantage of knowing that a standing grab is better frame wise than a dash grab by doing running shield grabs instead of dash grabs. With all this in mind, you're gonna wanna know when you can safely get away with the grab and keep the opponent guessing. Zair to Grab is a legit true combo if you do it properly. You just want to be careful that they aren't too far away when you go for the grab as they may be able to spotdodge it. If you predict that they'll try to spot dodge it, you simply Zair to Pivot Grab. In fact that goes for any time you predict a spotdodge, you can just run past them and pivot grab. It's great for punishing landings, such as airdodges into the ground. Just be aware that the opponent can buffer a spot dodge or roll as soon as they land which can make it risky. Obviously because of it's range, it's great for punishing laggy moves that you shield even if you get shield pushed away. A great example of this is MK's D-smash. If you're quick enough, you can punish him every time. Other then that, you can risk a Jab to Grab but it's in no way unescapable and finally it's obviously safe to punish laggy attacks, but you might want to punish with something else for more damage or a kill in that situation. Unfortunately, once you get the grab, Toon doesn't really have too much going for him as you will read in the throws further down. Summing it up; the Grab is something that we have to use and we can't do without whether we like it or not. Good predictions and punishes will serve you well to ensure you can safely get away with the grab.


Pummel
Picture of the move
Short description: (Toon grabs someone then...) Toon hits the opponent in the face with the hilt of his sword.
Damage when fresh: 2%
Frame Data:

Duration: 15
Hit: 9

Summary: The pummel is often overlooked as an option once you get a grab. Sure it only does 2%, but every little bit counts. At low percents, you're probably better off not using any pummels and if you do, make sure it's only one because at lower percents, the opponent can break out of grabs much quicker. Medium percents, feel free to use 2 to 3 if you want and at higher percents you can afford to use more still. If you're pummelling for damage, the worst thing that can happen is they break out before you can throw them, so don't get greedy. One thing to note is that the pummel can force a ground release. This is only really helpful when you're on teams and there's only one opponent left. You can pummel them to death by forcing grab releases back and forth. So why shouldn't you pummel? Don't pummel if hoping to air release a Wario or MK to U-smash. Just note that it's not up to you whether or not they get air released because Toon isn't tall enough to force an air release on anyone. They will only get air released if they are stupid or unfortunate enough to hit Jump while mashing. Don't pummel if you grab a Snake out of his Cypher off the edge of the stage if his C4 is still on stage. Don't pummel if you're trying to catch them by surprise by doing a quick throw and follow up before they realise what happened (B-throw is best for this). This is because when you pummel, the game stops and they are given time to think. And finally, don't pummel if you accidently grab your team mate XD.
Summing it up; while your immediate thought might be, "The pummel gives extra damage, so why not?" as you can see, there are a few situations where it's best not to pummel. Having said that, never forget that it's an option for extra damage. We have to make the most of our grabs and pummelling is one way to achieve just that.


Down throw
Picture of the move
Short description: (Toon grabs someone then...) Toon slams them on the ground by falling onto them on his back kinda like a wrestling move.
Damage when fresh: 7%
Frame Data:

Duration: 46
Hit: 21

Note about all throws: Toon's throw game isn't anything to brag about, so usually it doesn't really matter which throw you use. The one thing you wanna keep in mind is to mix up your throws for maximum damage. They all do the same damage (7%) so if you use one throw, use another next time so that way your throws will never stale. Usually, depending on where you got the grab, you'll be in a situation where one throw might prove a better option then the others just because of the certain situation you're in. Other then that, it won't matter which throw you use as they are all not that great.

Summary: D-throw is a decent option out of the four throws. It puts them in a position just above you where you think you can combo them out of it. Due to lack of hitstun however, this usually won't happen. But the mere fact that it looks like it's going to combo is quite useful as some opponents will airdodge to avoid a follow up. Knowing this, you can punish the airdodge with a charged smash, a re-grab, a delayed aerial or anything really. Smarter opponents however, will not airdodge. They will double jump away and if they're really smart, they'll double jump away with an aerial. This too can be punished but it's a lot harder. Depending on the opponent, you just need to Full hop/double jump towards them and aerial them without getting hit yourself. It's do-able, but nothing's guaranteed. One last thing about D-throw. At super low percents, you can D-throw to turn around re-grab. Just the once though as you'd be pushing it if you tried again. Summing it up; D-throw isn't the best throw, but it's not the worst either. All the throws can come in handy in certain situations, so it's good to know what situations they are.


Back throw
Picture of the move
Short description: (Toon grabs someone then...) Toon rolls onto his back dragging them with him and kicks them over his head in one swift motion Judo style.
Damage when fresh: 7%
Frame Data:

Duration: 38
Hit: 10

Summary: Possibly our best throw just because of the angle that the opponent gets thrown in and because of how quick it is. B-throw is of course our quickest throw as you can see by looking at the frame data and it's because of this that you can sometimes catch your opponent off guard if you quickly B-throw and follow up with a Nair or if they don't tech it, you run towards them, they will most likely roll backwards so you continue running and punish them when they are coming out of their roll. The angle that they get thrown in is great when you've got your back to the edge as it throws them slightly downwards which can set up for a gimp. This doesn't mean that you should always go out for a gimp as they will see this coming. If they start catching on, they will double jump towards stage and Bair you when you try to come out. If this happens, you can just stay on stage, shield the Bair and punish accordingly. Summing it up; B-throw is our quickest throw and it sends the opponent at a low angle which can be followed up.


Forward throw
Picture of the move
Short description: (Toon grabs someone then...) Toon barges into them with his shoulder.
Damage when fresh: 7%
Frame Data:

Duration: 40
Hit: 12

Summary: Possibly our worst throw. You can think of it as a worse version of B-throw. The only thing it has going for it is it throws the opponent forwards, this can come in handy depending on the situation. There aren't really any follow ups, mind games or anything, but if you want to throw the opponent forwards off stage or forwards into a stage hazard, it will do the job just fine. The only unique thing it has going for it is the Faux Super Slide which sounds cool but is extremely situational. If you want to find out about it, look it up in the Bombs section of my AT and Trick thread. Summing it up; F-throw doesn't have much going for it, so unless you want to throw them forwards depending on the situation, you could probably do without it.


Up throw
Picture of the move
Short description: (Toon grabs someone then...) Toon tosses them just above his head then slashes them in a whirling motion.
Damage when fresh: 7%
Frame Data:

Duration: 49
Hit: 27

Summary: U-throw is our slowest throw in all regards. It sends them upwards as you might guess, which is a great position to put the opponent in depending on who the opponent is. What can I say, some characters suck when they're in the air. You can throw characters into Bombs, stage hazards and at really high percents (I'm talking around 200% here) it will kill. On stages with platforms, U-throw is useful for throwing the opponent up onto them from below and following up. Time for some trivia; while I said that all throws do the exact same damage, this isn't exactly correct. If there are more than two characters playing (like in doubles or even verses IC's) U-throw does the most damage to the third person. So if you grab someone, and then before or while you're throwing them, someone else comes in, U-throw does slightly more damage to that third person. Not only that, but the hitbox hitting the third person is pretty large compared to the hitbox of the other throws and the angle that they get hit in is ridiculous so that if the third person is at medium to higher percents, they can get gimped. This is all very nice and all, but because it's the slowest throw, it's basically not going to come in handy. Summing it up; U-throw is good simply because it throws the opponent upwards which is a bad position for some characters and can lead to follow ups.


Ledge Attack < 100%

1


2


Short description: Toon gets up from the edge while swinging his sword in an arch over his head to the front kinda like F-tilt.
Damage when fresh: 8%
Frame Data:

Duration: 55
Invincibility: ........
Hit: 27
Hitlag, Fresh: 8 ..... Stale: 6
Block Hitlag, Fresh: 8 ..... Stale: 6
Blockstun, Fresh: 2 ..... Stale: 1
Frame Advantage, Fresh: -26 ..... Stale: -27

Summary: The Ledge attack under 100% is faster than the over 100% ledge attack but is easier to punish if missed or shielded as can be easily seen when comparing the frame data. With that in mind, this would be best used as a surprise attack. It's quicker so there's less time to react but you don't want to over do it or you'll get punished. When you're on the edge, you'll usually have better options but it won't hurt to keep this one in mind (for a better idea of what your options are, go to the 'recovery options when your on the edge' section that can be found further down). While I don't have the exact frame data for the invincibility frames yet, I have been told that it doesn't cover our attack. Summing it up; The Ledge attack under 100% is better as a random option to surprise your opponent.

Ledge Attack > 100%
Picture of the move
Short description: Toon gets up from the edge and stabs his sword out in front of him.
Damage when fresh: 10%
Frame Data:

Duration: 70
Invincibility: .........
Hit: 51
Hitlag, Fresh: 9 ..... Stale: 6
Block Hitlag, Fresh: 8 ..... Stale: 6
Blockstun, Fresh: 3 ..... Stale: 1
Frame Advantage, Fresh: -17 ..... Stale: -18

Summary: While the Ledge attack over 100% is slower than the under 100% ledge attack, it is safer in some ways. For example, it is safer on shield and, while I don't have the exact frame data for the invincibility frames yet, I'm pretty confident that it has more invincibility frames. As I said in the other Ledge attack, if you want a better idea of what your options are when you're on the edge, head down to the recovering section. Summing it up; The Ledge attack over 100% is a pretty decent option but probably not the best as it has a lot of start up time and so it can be seen coming.


Get Up attack

First hit


Second hit
......... (It looks the same as the first hit but it's on the other side so a picture wouldn't hurt.)

Short description: Toon gets up while swinging his sword in front of him and then behind.
Damage when fresh: First hit, 6%. Second hit, 6%.
Frame Data: .........

Summary: The Get Up attack isn't that great an option. Bad news is, our other options like rolling aren't that great either. There is no frame data on this yet, but I can tell you from experience that it's pretty bad on shield. Logically, the second hit is safer than the first one on shield but the second hit is more likely to be shielded because it comes out later. So this is more of a surprise attack again. If you're going for the surprise, it's better that you hit them with the first attack which means they need to be in front of you. There are invincibility frames on this move, but without the frame data I'm not sure how many; I've been told that they don't cover our attack. Summing it up; The Get Up attack isn't a good option, but Toon doesn't have any good options in this situation, so being random and mixing the bad options up is what you want to be doing.


Combos

Welcome to the Combo Section! Here you will find a list of Toon's combos and everything we know about them.


Something you should note about the percents!

For each combo, I'll give starting and finishing percents taken from four characters. (Please note that this may change in the future and I might get around to doing percentages for every character.) The percentages represent the percent range that the combo will be a true combo. This means that as long as you don't stuff up, the opponent won't be able to avoid the combo. (Ok, so this is Brawl, which means that technically there are no true combos, so you do have to remember that nothing is guaranteed, but I am still quite confident in saying that in theory the combos should be unescapable within the parameters I set.) The starting percent signifies the earliest percentage that the true combo can be started on and the finishing percent obviously says the highest percent the opponent can be on before they can escape. "Why have you used four characters?" I hear you ask. Because percents will vary for each character. "Why do they vary?" There are a few reasons like how much space the character takes up i.e. how fat they are, but the main reasons are weight and fall speed that are different for each character. So what I've done is, using this weight and fall speed list http://www.smashboards.com/showthread.php?t=162546 I've taken a heavy character with a slower fall speed, a heavy character with a faster fall speed, a light character with a slower fall speed and a lighter character with a faster fall speed. If you can't see the necessity and genius of this plan then I'll explain how you will use these percents. If one of the four characters isn't the one that you wanted to know about, then you look up the weight and fall speed list and compare where the character you want to know about is in comparison to the other characters on the list. This will let you make a pretty accurate estimate as to what percents the combo will work on for any character. (Again, this may change in the near future as I may get around to testing every character.)

Please note that I have tested the percents with a friend (Tedeth) quite thoroughly, but the percents were tested in training mode. This means that they will not account for staling, and the percentage range represents the range that the combo is a true combo when the moves are fresh. What does this mean for you? Well it's actually good news for you. It means that the range of percentage will increase if the move is stale, so if you're a little disappointed or confused by the small range of a combo, just remember that in reality, you would be able to true combo further outside the percent range. Which really means that the percent range given is the worst possible percentage, which adds to it being guaranteed. If you are able to combo outside of the percents given and it has nothing to do with staling, then your opponent isn't trying to escape properly. Any other notes that are more combo specific will be made in the Summary of the combo.


The Characters chosen for the percents are:

Representing Heavy Characters that have a Fast fall speed, we have Bowser.
Bowser is The heaviest character but has the 8th fastest fall speed. The only other option would have been Ganondorf, but that would have sacrificed 5 spots in the weight list to gain 1 spot in the fast fall list.

Representing Heavy Characters that have a Slow fall speed, we have Samus.
She is 7th heaviest but has the 2nd slowest fall speed. If I was to get a slightly heavier character with a pretty slow fall speed then it would be Snake. He is 3rd heaviest but has the 19th slowest fall speed and so in order to properly show what difference weight and fall speed have, Samus was the obvious choice.

Representing Light Characters that have a Fast fall speed, we have oh.... It's between Fox and Squirtle.
Well let's see, Fox has The fastest fall speed, but he's the 9th lightest character. Whereas Squirtle has the 5th fastest fall speed and he's the 3rd lightest character. So as much as I'd love to use Fox, I'll have to do the right thing and use Squirtle who better represents this class of both lightest and fastest. Congratulations Squirtle?

Finally, representing Light Characters that have a Slow fall speed, we have Jigglypuff
There's no disputing this one. Jiggs is The lightest and has The slowest fall speed.


Ok then. This is how the combos will be set out:

Name of the Combo (very simple and obvious name, nothing fancy).

How to Perform:
(This is pretty simple. It will tell you the best way to perform the combo to ensure that it will be successful.)

Percents:
Bowser: starting% to finishing% (Remember, the percentages given do not account for staling.)
Samus: starting% to finishing%
Squirtle: starting% to finishing%
Jigglypuff: starting% to finishing%

Summary:
(This will go into things like how to start/finish the combo, what the opponent can do to avoid the combo/how to deal with them trying to escape and general info about the combo like how important it is to Toon's gameplay, how reliable it is, how easy it is to implement and perform in a real game. Just general info.)


One more time, here's the link to the weight/fast fall list. Use it to estimate the percents you can deal out and the range it will work up until on any character. http://www.smashboards.com/showthread.php?t=162546


The Bair Chain

How to Perform: There is no 'one way' to perform the Bair chain as it requires improvisation and depends on many factors. At lower percents, you would be doing things like SH, Double Bair (while spacing correctly), but as they start to get on higher percents, you will have to improvise by using a Full hop Bair or using your Double Jump and at all possible times taking advantage of the platforms. On top of that, once you get out of the guaranteed percent range, they can escape. So you'll have to follow their DI when they airdodge and space correctly. It depends on the character (some characters have invincibility frames at the start of their moves). One last thing; you should try to implement Hyro's way of doing the Bair Chain which is written in the move discussion under Bair, and that is to SH Bair, fast fall Bair. It's explained in more detail, but pretty much, it makes it much harder to escape at lower percents because it speeds things up.

Percents:

Bowser: 15% to 35%
Samus: 30% to 30% (At 25% she can footstool out and at 35% she can airdodge out. Samus is the broken.)
Squirtle: 15% to 25%
Jigglypuff: 10% to 20%

Summary: The Bair Chain is a necessary tool that all Toon's should be able to use effectively. So how do you set it up? One way is to D-throw an opponent at low percents, then depending on how high they get popped up, you can go straight into a Bair chain or you might have to U-tilt them then go into the Bair chain. For that matter, at low percents, even just a simple U-tilt will pop them up at the right height for a SH Bair. If you manage to Zair them really close up (maybe they dashed into it) then you can Zair to RAR (SH) Bair. Other then that, you'll need to improvise to start it, which isn't too hard. But the easiest way to start it is to hit them with a rising Bair (SH instant Bair) as it means you can just go straight into the second Bair. So how long should you continue the Bair Chain? Once the opponent is outside the percent range given, they will be able to escape which means there is a small risk involved by continuing the Bair chain. That said, you'll also want to squeeze as much damage out of it as you can. Just because they technically can escape, doesn't mean they will. My advice to you would be to continue the Bair chain as long as you can until you run out of jumps, hit them too far away, or see that they might be able to attack you before you can hit them. One thing you don't want is to rack up all that damage only to have them combo you right back, so sometimes it's best to play it safe and quit while you're ahead then continue the spam. But how do you end the Bair chain? Well, you can end it with a (double jump) U-air, a (footstool) Dair or an Up-B. All of these finishers aren't exactly guaranteed, but they can still work, especially if you manage to bait an airdodge. Summing it up; The Bair chain, when it comes down to it, is really about improvisation and good reading skills. If used correctly it can rack up stupid amounts of damage, that's why it's one of Toon's staple moves.


Zair to Nair

How to Perform: It's pretty straight forward. At lower percents, you SH, wait until you just start to fall back down, (DI towards the opponent), Zair, then as soon as you land Instantly SH and Instantly Nair. At higher percents, you will need to SH, Zair close up, Dash forwards a tiny bit then SH Instant Nair. Of course, it doesn't need to be a SH Zair, you could Zair out of anything, just as long as the Zair cancels at the same length. In order for it to consistently connect, this combo relies on the Zair hitting them anywhere between close up and mid length. If it hits them at full length, the chances of the Nair connecting are much lower and you will have to Instantly Dash forward as soon as you land before you SH Nair. This combo really relies on the SH (Nair) or Dash SH (Nair) being done as soon as you land. Once you get that right, the rest should come naturally. You will notice that at the start, I mentioned that you need to DI towards the opponent, well this isn't exactly true. If you DI towards the opponent, it will make life a whole lot easier and you are much more likely to land the combo, but, it will still combo if you DI Zair away, if and only if you Zair them at close range, they are on lower percents and if you dash towards them as soon as you land then Instantly SH Nair. So it's possible, just much harder.

Percents:

Bowser: 0% to 300% (In other words, it'll always work. Bowser does actually start to get out at 300%)
Samus: 0% to 115%
Squirtle: ...% to ...%
Jigglypuff: ...% to ...%

Summary: This true combo is legit when performed properly. It does a total of 14% when fresh and the Nair hits them away so you can resume spam. Knowing how to perform this combo is quite necessary for Toon's gameplay as it utilises Toon's two main spacing tools which helps in many matchups that require out-spacing your opponent. Keep in mind that after the Nair, you can Quickdraw to keep the pressure on and at the right percents, this can mean an Arrow Lock. Something you could try is to (SH) Zair to Full hop Instant Nair. This is much safer if shielded and if it isn't shielded it still combos like normal. Also, it means you can Full hop Nair then (Fast fall if you want, but you have to be perfect) land with a Zair to give you the option of repeating the process. Summing it up; This is definitely one of Toon's staple combos, so learn it.


Zair to Grab

How to Perform: ...

Percents:

Bowser: ...% to ...%
Samus: ...% to ...%
Squirtle: ...% to ...%
Jigglypuff: ...% to ...%

Summary: ...


The U-tilt String

How to Perform: ...

Percents:

Bowser: ...% to ...%
Samus: ...% to ...%
Squirtle: ...% to ...%
Jigglypuff: ...% to ...%

Summary: ...


Killing


Edgeguarding/Gimping


Spacing


Spamming


Recovering

Momentum cancelling

Recovery options from off stage and on the edge


We should have a few of the main AT's but I've pretty much got that covered so we'll link my thread anyway.


FAQ


Useful (Toon) Links directory


Credits

Rutger: For all the frame data and kill percents found in his amazing thread.
Sasuke the Sheik Main: For naming the guide, making the hitbubble pictures and for helping with U-tilt and Tether.
Twinkie: For the main picture of the guide, helping with the hitbubble pictures and for helping with D-tilt, F-smash, D-smash, Fair, Bair, Uair, Dair, Zair, Arrows, Boomerang, Bombs, Aerial Spin Attack, Grab, Pummel, Ledge attack < 100% and Get Up attack. He also helped with the Combos section, specifically, The Bair Chain and Zair to Nair.
Demonictoonlink: For helping with the pros and cons section and for helping with Jab, F-tilt, D-tilt, Nair, Fair, Dair, Bombs, Grounded Spin Attack, Grab and Up Throw.
~mjg~: For helping with Jab, D-tilt, U-smash, Nair, Uair, Zair, Bombs, Grounded Spin Attack, Aerial Spin Attack and Grab.
Hyro: For helping with Dash Attack, F-tilt, U-tilt, D-tilt, F-smash, Nair, Bair, Uair, Dair, Zair, Tether, Aerial Spin Attack, an excellent post for the Grab, Down Throw, Back Throw, Forward Throw and Up Throw.
TLMSheikant: For helping with D-smash, Fair, Bair, Arrows and Aerial Spin Attack.
Lobos: For helping with Zair.
shadow1pj: For helping with Tether. He also helped with the Combos section, specifically, The Bair Chain.
Mota: For helping with Arrows.
Near952: For helping with Grounded Spin Attack.
bad habiT: For helping with Back Throw and Up Throw.
Tedeth: For helping me test the combo percentages.
e alert: For helping me test the combo percentages.
ZXV: For helping me test the combo percentages.
Gords: For helping me test the combo percentages.


Can you think of anything else we'll need?
(Almost done!!! I just need a few more pictures and, with your help, I need to fill in the sections a bit more. So any suggestions at this point would be really appreciated.)


The Brainstorming Section
(Insert picture here)


Quick Summary

Welcome to the new Brainstorming section! Below you will find three different categories that need some serious discussion.

The first is "Over coming Toon's Weaknesses". This is where we shall list all of Toon's weaknesses, weak points and just generally things that we keep getting punished for, then we'll think of ways around the problem and potentially solve the problem all together.

The second category is "The Mysteries of Toon Link". This section will include everything that cannot be explained and has not been re-created so far. They shall be listed along with everything known about them so far and any other additional information. It is up to you to decide whether or not you want to find out once and for all, just how these things occurred. So feel free to discuss theories and ideas in this thread.

The last category is "Under developed Tricks and Possible New Techs". This is where we shall list strange properties of moves, things that we think have potential for developing into a useful tech and any techs in the list so far that I think are under developed or have a lot of potential.


Index

Overcoming Toon's Weaknesses
Getting back on stage
Area below him while in the air
Being punished when landing

The Mysteries of Toon Link
Grabbing with a Bomb
Hyro's BrokeShot
Reflecting Hyrulian Shield

Under developed Tricks and Possible New Techs
Z-dropping
BCD

This Section is for Serious Discussion Only
Serious Fox is Serious

Credit


Overcoming Toon's Weaknesses
(Insert picture here)

Getting back on stage is one glaring weakness. And I don't mean getting back to stage, I mean, once you've grabbed the ledge, you want to safely get up, but someone is standing there, what then? The problem is, Toon doesn't have very good ledge options. So let's work on this and try to think of a way around this weakness.

Another possible weakness that Toon has always had is the area under him while in the air. The reason for this is because, as all good Toon's know, Toon Link should not be using Dair very often if at all because it is extremely punishable. Some answers to this problem are simply throwing a Bomb down, but what if you don't have a Bomb? What if they are too close to throw a Bomb without getting caught in the explosion? If you have a Bomb in hand, I would suggest throwing it down at them and if they are too close, simply fast fall and Invincibomb. So I spose the real question is, what do you do if you don't have time to pull out a Bomb?

Ok so something that Toon seems to get punished for a lot is when you'll be jumping around spamming projectiles and aerials then you're opponent dashes in and punishes you when you land. So presuming you've used your double jump, how can you safely land without getting shield grabbed or punished in some other way?

Yeah I need help thinking of other possible weaknesses.... Ideas/suggestions would be appreciated.


The Mysteries of Toon Link
(Insert picture here)

Grabbing with a Bomb
Thread: http://www.smashboards.com/showthread.php?t=216810
Summary: Somewhat a legend in the Toon community. Many have tried in vain to re-create this including myself. The thread that I linked actually got locked because people were so disappointed and frustrated by not making any progress. Some lingering feelings towards the idea can still be seen today at the very thought of mentioning the idea of the possibility of Grabbing with a Bomb XD. I too have fallen for the general 'forget about it' trend and can be quoted for saying this....
Never the less, some people swear they've done it, so it's up to you to judge for yourself wether or not you would like to get it to work. You can find a small list of things that have already been tried in the thread I linked, but if there is enough interest, I will keep record of everything that has been tried so far by making a new list here.


Hyro's BrokeShot
Vid. (That's right! We have video proof!): http://www.youtube.com/watch?v=sTwGhW6NIIw
Summary: This is a strange one for more then one reason. First of all, we actually have video proof, unlike the other mysteries. Second of all, we're trying to find out how it was done, so it won't happen again, not so we can re-create it. There are a few factors to keep in mind that could have allowed such a thing to occur, but I think it might have to do with the quickdraw stopping momentum from the Snakes F-tilt (Grounded arrows generally won't slide on flat surfaces) and when Toon Instantly grabbed, you can see right at the start that the chain sort of still had momentum going backwards. I dunno. But feel free to discuss amongst yourselves just how this happened. If we theorise possible reasons for its occurrence, then we will test them. Pretty simple, quite strange. So any ideas?


Reflecting Hyrulian Shield
Summary: This is a new one, even for me. Originally stumbled upon by Flinch, the story goes like this...

But just to clarify, Toon was in the air, Lucario was on the ground, Lucario shot, Toon landed and did nothing, the Aura sphere 'tinged' the Hyrulian Shield, Toon turned around (pivoted) then somehow the Aura sphere appeared in front of Toon and went back through him in the direction of Lucario without actually harming Toon. Quite strange. This is still being worked on by Flynch, but with no recent success (I failed to re-create it as well) I can see this becoming yet another mystery. Any ideas?


If you can think of any other mysteries that you would like me to add, then feel free to let me know.


Under developed Tricks and Possible New Techs
(Insert picture here)

Ok so something that I think should be developed more is all the Z-dropping techniques. Like we have many different ways to get a Bomb on the ground/platform, but what then? What should it be used for? So far it can be used for easy 'IZAC's (Instant Aerials while holding a Bomb), temporarily blocking some opponents projectiles, using U-smash while holding a Bomb, making it slide by pushing it with Dair and things involving the Instant Bomb Throw like one version of the SHDB. But this can't be all there is to it. The point is, I think that there is still untapped potential in Z-dropped Bombs.

An obvious one that I think still needs more testing, research and discussion is the BCD. It is potentially meta game changing, if only we could find better ways to use it. So with this one, we're trying to think of more ways to perform it and potentially find some way to ensure it connects. If we can do that, this will be lethal so I think it's well worth our time to work on this. But I'm not just going to let you have all the fun, so I'll share my thoughts on this. I was thinking the other day, that a really good way to ensure this connects would be a 'forced get up' which occurs when the opponent has been locked by (in our case) things like arrows and Dash attack (as shown in Hyro's vid here). If we could get them in a lock while holding a Bomb (IZAC, Quickdraw) over near the ledge, it might be possible to ensure the BCD to connect. But yeah, any ideas like that are what we're after here.


If you would like me to add other things to this list, then let me know and I'd be only too glad to add it.


This Section is for Serious Discussion Only


Pretty simple really. Keep to the point and no trolling (unless it's funny). Other then that, go for it.
(I'll be honest, I just wanted an excuse to use that picture XD. So you don't need to worry about it really.)


Credit for the idea of a Brainstorming section goes to TWiNKatGC.


Use this thread to post videos of your recent Toon Link matches and/or combo videos. Here, they will be put into an "archive" of sorts, and you can view them anytime you wish. You can also check out some of the other Toon Link player's videos and compare your styles and learn from them in order to broaden your play style and get better yourself!​
Want to get better? Just can't see what you're doing wrong? Need help on improving your play style? No problem. post video in this thread of your matches and have others view and critique them for you! You might even be able to get help from some of the pro Toon Link players! You'll get advice on things you can improve on to better your game and hopefully help you win more matches. You can also help out your fellow Toon Link users by giving them advice on thier matches! Help them as they help you!​
No recording equipment at home? No problem. If you need any of your Toon Link matches recorded, just post your Wii Friend Code and Brawl Friend Code, and tell me you need stuff recorded. Then add my Wii Friend Code (8470 5631 0313 7590) and Brawl Friend Code (3566-1220-2303), and wait until I've confirmed that I've added you. Then, send me your replays and I'll record them and put them on Youtube for you! My Wii is hacked and has infinite replays, so don't worry about replays length. But please be sure to limit yourself to sending me FIVE 950 replays a week at maximum. if you need to send more, tell me.

Order:
- Single Matches [Player] (Listed alphabetically, and from newer matches to older matches)
- Doubles Matches [Player] (Listed alphabetically, and from newer matches to older matches)
- Combo Videos [Video Name](Listed from newest to oldest)


3des

Snake
http://www.youtube.com/watch?v=f4gywNf0ew8

Mario
http://www.youtube.com/watch?v=z3pVw6fGlYI


Akean

Marth
http://www.youtube.com/watch?v=WS31UNvCEXc
http://www.youtube.com/watch?v=XezisVS2KZQ&feature=related
http://www.youtube.com/watch?v=-pq9aGmdsfY&feature=related


Alzi

Diddy Kong
http://www.youtube.com/watch?v=s3PMU7LQszY
http://www.youtube.com/watch?v=3sWliL1IXFI
http://www.youtube.com/watch?v=T2HdoZatjww
http://www.youtube.com/watch?v=jHr05yNsCNw
http://www.youtube.com/watch?v=E8tSljoauI4

King Dedede
http://www.youtube.com/watch?v=7y7YC0FFRbI
http://www.youtube.com/watch?v=2_GZKAgxnO0&feature=related
http://www.youtube.com/watch?v=30wF...utube.com/watch?v=30wFpjuysyU&feature=related


ARC

Samus
http://www.youtube.com/watch?v=GsJNRkXY4UM

Pikachu
http://www.youtube.com/watch?v=T8GcV7b8kns
http://www.youtube.com/watch?v=uOaDrx7N8pM
http://www.youtube.com/watch?v=CkHQ5xSBD0I
http://www.youtube.com/watch?v=IkvSaxW5YbI
http://www.youtube.com/watch?v=YKUEycQgxrU
http://www.youtube.com/watch?v=6XwsFgKgW4Q
http://www.youtube.com/watch?v=c_3LPXZ2Rmo
http://www.youtube.com/watch?v=XNihpjRAmgg
http://www.youtube.com/watch?v=XYehrDvzx54
http://www.youtube.com/watch?v=FuJT6mFuNJk
http://www.youtube.com/watch?v=wHanmmKJp28


Ashraf

Link
http://www.youtube.com/watch?v=-1QSyh7JPwc
http://www.youtube.com/watch?v=03BABpa_CoU
http://www.youtube.com/watch?v=-1QSyh7JPwc


BattleChrist

Olimar
http://www.youtube.com/watch?v=D9RywjyD3ZY&feature=channel_page
http://www.youtube.com/watch?v=ZwITEyVyTTA&feature=channel_page
http://www.youtube.com/watch?v=pIb_qRclaYo&feature=channel_page
http://www.youtube.com/watch?v=nMVkEEQ7Zh4&feature=channel_page


Bomber

Sheik
http://www.youtube.com/watch?v=npfLM7yIvZQ

Fox
http://www.youtube.com/watch?v=PygJLy74Bt4


Pit
http://www.youtube.com/watch?v=E56uL4h7bDM
http://www.youtube.com/watch?v=hTln_wNDt6k


Boose

Ike
http://www.youtube.com/watch?v=4C_4QQZzOOo
http://www.youtube.com/watch?v=ITbDVn4FPoA&feature=related


CaliberChamp

Marth
http://www.youtube.com/watch?v=MXPM2m8PguY

Diddy Kong
http://www.youtube.com/watch?v=5xEUsO3oAsw


Chaos

Link
http://www.youtube.com/watch?v=nb4qlcs2-98


Cheesewizes

Ike
http://www.youtube.com/watch?v=Oc5nFuUVvH8


Chip

Peach
http://www.youtube.com/watch?v=TFc--05bD8s&feature=channel_page

Lucario
http://www.youtube.com/watch?v=TtbOSOoj8LQ&feature=channel_page

Meta Knight
http://www.youtube.com/watch?v=39nNeV2vlhg


Claus

Lucas
http://www.youtube.com/watch?v=-8HK0B8rWio
http://www.youtube.com/watch?v=tn9mgvWyLsY&feature=related


Copacetic

Snake
http://www.youtube.com/watch?v=h1yO5rRMkS4
http://www.youtube.com/watch?v=Ay-IANYUmyM

Ice Climbers
http://www.youtube.com/watch?v=QBbzMoXKxBA

Wario
http://www.youtube.com/watch?v=iZ2fQJqeevI


Corpsecreate

Falco
http://www.youtube.com/watch?v=AU99xfDRhS8
http://www.youtube.com/watch?v=w5M0kP8hPfk
http://www.youtube.com/watch?v=EAfKhdUQwSc
http://www.youtube.com/watch?v=-qKbLRmParw
http://www.youtube.com/watch?v=xHtHcjKNWXo
http://www.youtube.com/watch?v=WId1tiYqZ2I
http://www.youtube.com/watch?v=DHLeQx1kvkw
http://www.youtube.com/watch?v=ULNFKa-tObE


CraigUK

Toon Link
http://www.youtube.com/watch?v=lagFnh77YSo


Crono

Sheik
http://www.youtube.com/watch?v=cgFYntAUWo4

Marth
http://www.youtube.com/watch?v=7gck1A3JIrU


cybergeko

Luigi
http://www.youtube.com/watch?v=kz-sZWOGKYs


Dalub

Ike
http://www.youtube.com/watch?v=ex4G6CBywvs

Olimar
http://www.youtube.com/watch?v=W5WUvf6p_js
http://www.youtube.com/watch?v=AZDVI1noRag
http://www.youtube.com/watch?v=CVPihLPt-ko

Falco
http://www.youtube.com/watch?v=lg09j9XdGKc

Marth
http://www.youtube.com/watch?v=xUfrvzoEidA
http://www.youtube.com/watch?v=zD_x-9p2dwk


Decoy

Kirby
http://www.youtube.com/watch?v=6GYBvCcXIi0

Ice Climbers
http://www.youtube.com/watch?v=acnY9axKGYo

Toon Link
http://www.youtube.com/watch?v=IEl2nxwYeSQ

King Dedede
http://www.youtube.com/watch?v=qcbid4MS3gQ

Fox
http://www.youtube.com/watch?v=rWovEpT1snE


Drig

Ness
http://www.youtube.com/watch?v=eajbvL1TBgo

Ike
http://www.youtube.com/watch?v=5Fw9L0-u15s


Droughboi

Luigi
http://www.youtube.com/watch?v=ljfT8agGKus
http://www.youtube.com/watch?v=K7Klh3z1QY4


demonictoonlink

Wario
http://www.youtube.com/watch?v=VAScC3gbXiA
http://www.youtube.com/watch?v=nrmiI7ySHR0&feature=related
http://www.youtube.com/watch?v=eaXqSTjXrGU&feature=related
http://www.youtube.com/watch?v=xxR2v23KttA&feature=related
http://www.youtube.com/watch?v=jcK763LiKvM&feature=related
http://www.youtube.com/watch?v=s8A1I3vGOzQ&feature=related

Marth
http://www.youtube.com/watch?v=hHBIutwDn2M
http://www.youtube.com/watch?v=e3tr8YYN8zc&feature=channel
http://www.youtube.com/watch?v=4YFuKNLMJ4s&feature=channel
http://www.youtube.com/watch?v=WS2EToYK3tE&feature=channel
http://www.youtube.com/watch?v=1yWBUNELYbg&feature=channel
http://www.youtube.com/watch?v=iV2nyO5gQq8&feature=channel

Peach
http://www.youtube.com/watch?v=fPW19x21V8w
http://www.youtube.com/watch?v=MOGXXsx0ado
http://www.youtube.com/watch?v=8cQZgPCywUE
http://www.youtube.com/watch?v=xWwAqDXyRs8

Snake
http://www.youtube.com/watch?v=eemzjy-2cLo
http://www.youtube.com/watch?v=Gkv3FuuafO0
http://www.youtube.com/watch?v=d0hwb-tUmas
http://www.youtube.com/watch?v=JyUXeRDgrho&feature=channel_page
http://www.youtube.com/watch?v=KuJVFu---BY&feature=channel_page
http://www.youtube.com/watch?v=FXeoqkd1oY4&feature=channel_page


EJValeros

Marth
http://www.youtube.com/watch?v=iK7YC0FIB44


Excel_Zero

R.O.B.
http://www.youtube.com/watch?v=IUWbQfwGn4M&feature=channel_page
http://www.youtube.com/watch?v=D9CnLryooS0&feature=channel_page
http://www.youtube.com/watch?v=EhQHZFAovEk&feature=channel_page
http://www.youtube.com/watch?v=2n5O1Y5Vql0&feature=channel_page
http://www.youtube.com/watch?v=hQUKpbbfGJg&feature=channel_page


F5in

Pikachu
http://www.youtube.com/watch?v=egpNKxmz4R4&feature=channel_page
http://www.youtube.com/watch?v=JHOgeVTAxmw&feature=channel_page


Fezz

Mr. Game and Watch
http://www.youtube.com/watch?v=6XvUt5eE7SA
http://www.youtube.com/watch?v=g_VS8abMRXY
http://www.youtube.com/watch?v=P9KYpHy_eag

King Dedede
http://www.youtube.com/watch?v=nGiWghZQyRc

Captain Falcon
http://www.youtube.com/watch?v=hGC5UjIUvaE

Lucas
http://www.youtube.com/watch?v=gg1t44gc4Vg

Falco
http://www.youtube.com/watch?v=XggEhs3Sb5s
http://www.youtube.com/watch?v=LAaqaR6iIa0

Marth
http://www.youtube.com/watch?v=n2U_PkDZBFI

Ice Climbers
http://www.youtube.com/watch?v=ywXKcFoql94


Flea

Lucas
http://www.youtube.com/watch?v=Q_3Sk4sRGMM

Mr. Game and Watch
http://www.youtube.com/watch?v=TQyb4a-2f2k

Ike
http://www.youtube.com/watch?v=ubg5QKVRDcU&feature=related
http://www.youtube.com/watch?v=LGjOVFd-hlU&feature=related
http://www.youtube.com/watch?v=0lKX-dElzmw&feature=related


Frosty10001

Kirby
http://www.youtube.com/watch?v=j6QhmeTXtdQ&feature=channel_page


GodMeowMix

Toon Link
http://www.youtube.com/watch?v=DsX3cMadmtc
http://www.youtube.com/watch?v=QvDjz15ln84


Gregs

Captain Falcon
http://www.youtube.com/watch?v=UugDgidRh_I&feature=channel_page
http://www.youtube.com/watch?v=9ktPfTAS7yc&feature=channel_page
http://www.youtube.com/watch?v=oU1Dt-Uj5H0&feature=channel_page
http://www.youtube.com/watch?v=B7dBV6po024&feature=channel_page


Hyro

Marth
http://www.youtube.com/watch?v=FhMb87g6wk0
http://www.youtube.com/watch?v=mviEhaeaOyg

Pit
http://www.youtube.com/watch?v=3Xv80hcz278

Diddy Kong
http://www.youtube.com/watch?v=M31Mj_ppng8
http://www.youtube.com/watch?v=E8XfrDGD2UI

Wario
http://www.youtube.com/watch?v=ZwPJ2_ejoUI
http://www.youtube.com/watch?v=6vycwJaLLJk
http://www.youtube.com/watch?v=nguJRCkAz_I
http://www.youtube.com/watch?v=x3wiB3MScF8
http://www.youtube.com/watch?v=387C4VXcITQ
http://www.youtube.com/watch?v=NvyTSOQzOS4


Hyuga

Snake
http://www.youtube.com/watch?v=1m495cRsyJI


Ic0slay3r

Falco
http://www.youtube.com/watch?v=6iVjAl-xdeU
http://www.youtube.com/watch?v=LTWM6FJLOhY

Pit
http://www.youtube.com/watch?v=tj5M0qRt4yM
http://www.youtube.com/watch?v=3AlNZLQjBbM
http://www.youtube.com/watch?v=oaECi5CHuQ8

Toon Link
http://www.youtube.com/watch?v=ecmTs25NXzk

Link
http://www.youtube.com/watch?v=uvU-_1Uhxck


Jash

Snake
http://www.youtube.com/watch?v=qBVw1xUcvNk&feature=sub

Diddy Kong
http://www.youtube.com/watch?v=PqUnQCPiQ2E&feature=related
http://www.youtube.com/watch?v=PgFjjdASfjk&feature=related

Marth
http://www.youtube.com/watch?v=Vux2KCrUs54
http://www.youtube.com/watch?v=0PkmSGTz6eo&feature=related
http://www.youtube.com/watch?v=LHe0IBy2DwA&feature=related

Ike
http://www.youtube.com/watch?v=FeTpKgzzLKs&feature=related

Luigi
http://www.youtube.com/watch?v=Xy2Reu2S44c

Wolf
http://www.youtube.com/watch?v=KFugLBN3PhI
http://www.youtube.com/watch?v=94hBQAInhp8


Jeeves

Diddy Kong
http://www.youtube.com/watch?v=MXscqYbVQxY&feature=channel_page
http://www.youtube.com/watch?v=W8H_bRI7Vz4&feature=related


Jerm

Sonic
http://www.youtube.com/watch?v=Wlqbm9lfWF4

Falco
http://www.youtube.com/watch?v=XMprcvy3YAc&playnext_from=TL&videos=wMvmW0UhQ6M&feature=sub
http://www.youtube.com/watch?v=bYFEzbT9yU0
http://www.youtube.com/watch?v=-9qsAcjYmFY
http://www.youtube.com/watch?v=HhsqrOA7ZCE

Diddy Kong
http://www.youtube.com/watch?v=Ge2JsQVdbxU
http://www.youtube.com/watch?v=_oKcXELSirU&feature=sub

R.O.B.
http://www.youtube.com/watch?v=KUFVjGDL12Y

Toon Link
http://www.youtube.com/watch?v=xt63-mzgbYU
http://www.youtube.com/watch?v=O3z-gVHbPuE
http://www.youtube.com/watch?v=5m2LplmUJRI

Meta Knight
http://www.youtube.com/watch?v=Kmylfq_h_RQ&feature=youtube_gdata
http://www.youtube.com/watch?v=6kOnyFGB_uk#movie_player
http://www.youtube.com/watch?v=9DrH69_Mq6o
http://www.youtube.com/watch?v=n_Q1KXVzIcg


Jman

Snake
http://www.youtube.com/watch?v=dbCrgqkiYFc&feature=channel_page

Mr. Game and Watch
http://www.youtube.com/watch?v=NA0b38TTwe8&feature=channel


Kaffei

Ike
http://www.youtube.com/watch?v=_eyP4tf9JYA


Khai

Pit
http://www.youtube.com/watch?v=I4qOm79B40E
http://www.youtube.com/watch?v=GB0cgFwD3EM
http://www.youtube.com/watch?v=89DGk44cPlE
http://www.youtube.com/watch?v=buwtNs-9mFs
http://www.youtube.com/watch?v=ndbuhd5lzfk
http://www.youtube.com/watch?v=uFwdIG4SdJY
http://www.youtube.com/watch?v=DOKbLb0gA5E
http://www.youtube.com/watch?v=RlY5eEchsnw
http://www.youtube.com/watch?v=nYft2G8nHYw


VietGeek

Falco
http://www.youtube.com/watch?v=YDASIKHUvFo

Captain Falcon
http://www.youtube.com/watch?v=FdexmzQ4CqU


Kalm

Ness
http://www.youtube.com/watch?v=D-EsQJq8YlI

Zelda
http://www.youtube.com/watch?v=HXOQoQp8Tb4

Peach
http://www.youtube.com/watch?v=hsTCa9pWm2o

Mr. Game and Watch
http://www.youtube.com/watch?v=uv7-wvF0SC0

Fox
http://www.youtube.com/watch?v=jAQRLIocRXA


Kake

Mr. Game and Watch
http://www.youtube.com/watch?v=5fxmf0BGcoc

Snake
http://www.youtube.com/watch?v=69u-_H6JASo


KirinBlaze

Lucas
http://www.youtube.com/watch?v=y2WWlOX99EI
http://www.youtube.com/watch?v=dhArMX0_UEo


Kunai

Luigi
http://www.youtube.com/watch?v=LxvW5bT0FFs


KS136

Toon Link
http://www.youtube.com/watch?v=DOiHEB8TyRw
http://www.youtube.com/watch?v=UHwHGafzN_Q

Diddy Kong
http://www.youtube.com/watch?v=dcwelh48O2M

Donkey Kong
http://www.youtube.com/watch?v=HMjV2gLuJeU

Wolf
http://www.youtube.com/watch?v=BycOUtfhqgA

Meta Knight
http://www.youtube.com/watch?v=vrVnSv8sabM


Lobos

Lucas
http://www.youtube.com/watch?v=52ge8TbY8nY
http://www.youtube.com/watch?v=egaNAsIVUqs

Pikachu
http://www.youtube.com/watch?v=1v2Zet-RpW0

Donkey Kong
http://www.youtube.com/watch?v=1siOOz3k-S4

Mr. Game and Watch
http://www.youtube.com/watch?v=VC9h7CLN4oM


Lucia

Falco
http://www.youtube.com/watch?v=VcPfofVeo0s
http://www.youtube.com/watch?v=XquHAeiNwcE&feature=channel


Mankut8397

Snake
http://www.youtube.com/watch?v=LLAYxHlm2lQ


Medly

Ness
http://www.youtube.com/watch?v=tKWml7X_YZU

Marth
http://www.youtube.com/watch?v=uVZpuG2apCg


Melito

Marth
http://www.youtube.com/watch?v=jf5Yze1xLa0&feature=channel_page

Snake
http://www.youtube.com/watch?v=-xrJSYo8ZA8

Toon Link
http://www.youtube.com/watch?v=ep6j6K_JwC8

Ganondorf
http://www.youtube.com/watch?v=1uNb3E8JNfM

Mario
http://www.youtube.com/watch?v=fCMrDgv3aZY


MJG

Falco
http://www.youtube.com/watch?v=6bsx0GXd8Zs

Marth
http://www.youtube.com/watch?v=m7yKYknXNhM
http://www.youtube.com/watch?v=AsFSFvQIMEY

Pikachu
http://www.youtube.com/watch?v=MDJuhAp3cjE
http://www.youtube.com/watch?v=OVjnJIWmdRE

Snake
http://www.youtube.com/watch?v=lWlFAIbl0Bc
http://www.youtube.com/watch?v=AwnBRp_IsF8
http://www.youtube.com/watch?v=GhMTjCAFNjU
http://www.youtube.com/watch?v=25L0B8J8BCE
http://www.youtube.com/watch?v=iAjpBkz7Vs0
http://www.youtube.com/watch?v=d0S3k9KpsZA
http://www.youtube.com/watch?v=ooVP7xZ9rro
http://www.youtube.com/watch?v=HB8D7X9MN40
http://www.youtube.com/watch?v=qhx2B_11Xvc
http://www.youtube.com/watch?v=sgsFqouk1SE
http://www.youtube.com/watch?v=pVUieozsRlA
http://www.youtube.com/watch?v=V0qBhtfGWiA


MTR

Link
http://www.youtube.com/watch?v=uEkCyZAzyd0


Mrdc

Marth
http://www.youtube.com/watch?v=qNZKRC2bI3k&feature=channel


Near

Ness
http://www.youtube.com/watch?v=W5CkqpELnP4
http://www.youtube.com/watch?v=jepNaeBYUFA

Snake
http://www.youtube.com/watch?v=MMhfQHSwLDk
http://www.youtube.com/watch?v=W59Nw9siZtk

King Dedede
http://www.youtube.com/watch?v=10VQcPhX3U8

Lucas
http://www.youtube.com/watch?v=fpE4Mh-rc8I

Lucario
http://www.youtube.com/watch?v=Np3w2-YHUUw


Negi

Captain Falcon
http://www.youtube.com/watch?v=DZlFJ_Tza0Q

Snake
http://www.youtube.com/watch?v=BhAe1UN8zVM
http://www.youtube.com/watch?v=AoFW65veIgg

Toon Link
http://www.youtube.com/watch?v=MR0OoR_wRe8

Diddy Kong
http://www.youtube.com/watch?v=yuBcMxyiygA


Nhawk

Falco
http://www.youtube.com/watch?v=UF_tId4UdnM


Ninjaconker

Donkey Kong
http://www.youtube.com/watch?v=VhlLqxAgFGk&feature=channel_page

Link
http://www.youtube.com/watch?v=A7qPizfqhMw
http://www.youtube.com/watch?v=vZtHHYaPpK4
http://www.youtube.com/watch?v=wEW_bA5um3c

Ganondorf
http://www.youtube.com/watch?v=C5bUYqljr8U
http://www.youtube.com/watch?v=hcI5Z2brSd0
http://www.youtube.com/watch?v=jHnJlAVOzCI
http://www.youtube.com/watch?v=jHsubCrFUTA


NinjaLink

Peach
http://www.youtube.com/watch?v=DDXFTtqmYjM
http://www.youtube.com/watch?v=iDt_mxwJC58

Mr. Game and Watch
http://www.youtube.com/watch?v=BzNzsrxqxQk
http://www.youtube.com/watch?v=o8a-MToImGI

Mario
http://www.youtube.com/watch?v=HASlhPwd3Cc
http://www.youtube.com/watch?v=R48WFLiwGKc
http://www.youtube.com/watch?v=FOP3McIAGTk
http://www.youtube.com/watch?v=F8QlffbRgoE

Wario
http://www.youtube.com/watch?v=JM7_vTAwTdE


OniTheWolf

Olimar
http://www.youtube.com/watch?v=fnZlwZ1K6Ik

Sonic
http://www.youtube.com/watch?v=Rf7z9VC4XAE
http://www.youtube.com/watch?v=50oKUHe7sS4
http://www.youtube.com/watch?v=Qa8PjUBxMTE

Snake
http://www.youtube.com/watch?v=itJSRCa-KgI

Peach
http://www.youtube.com/watch?v=heF_hutWkgY

Marth
http://www.youtube.com/watch?v=_Z0lavz1gjw
http://www.youtube.com/watch?v=Qs6HtBH924U&feature=related
http://www.youtube.com/watch?v=hHsPwUDFgBc&feature=related


Pause

Lucario
http://www.youtube.com/watch?v=IUMJJR5OJXA


Pho

Marth
http://www.youtube.com/watch?v=R9X1RcvKQZA&feature=channel_page
http://www.youtube.com/watch?v=LoM3z4Mdx4U&feature=channel
http://www.youtube.com/watch?v=cfmXJ4wy3HY&feature=channel
http://www.youtube.com/watch?v=UReI0KUR6s0&feature=channel
http://www.youtube.com/watch?v=0PLi2mnyF0U&feature=channel
http://www.youtube.com/watch?v=g9nk1b8qqf0&feature=channel
http://www.youtube.com/watch?v=Id3FnUyFjuQ&feature=channel

Peach
http://www.youtube.com/watch?v=APoGpHUR1KI
http://www.youtube.com/watch?v=vGs2wYnajyI&feature=related
http://www.youtube.com/watch?v=qArGPrtkYE0&feature=related

Pikachu
http://www.youtube.com/watch?v=EX3PK3cInqs&feature=channel_page


Popcorn

Diddy Kong
http://www.youtube.com/watch?v=MgEkD6bIGW4


PrepareYourself

Pit
http://www.youtube.com/watch?v=V_JVUfOdy5E


Quivo

Diddy Kong
http://www.youtube.com/watch?v=_71PXe1X_-o
http://www.youtube.com/watch?v=4bbiqeA8YNk

Meta Knight
http://www.youtube.com/watch?v=pqLqPddfWHg

Wario
http://www.youtube.com/watch?v=sxEmSmNC0qA
http://www.youtube.com/watch?v=pqLqPddfWHg

Snake
http://www.youtube.com/watch?v=7bGRuBdPf4M

Kirby
http://www.youtube.com/watch?v=pqLqPddfWHg
http://www.youtube.com/watch?v=caXfjzmjSlo


Ritch

Ness
http://www.youtube.com/watch?v=3uyujVO5X68
http://www.youtube.com/watch?v=06tWmHHx3Z8&feature=related
http://www.youtube.com/watch?v=xfVQGViiMLg&feature=related


Rockan

Falco
http://www.youtube.com/watch?v=NTxQIIzwfrc

Mr. Game and Watch
http://www.youtube.com/watch?v=vvboLAX-kGw&feature=player_embedded
http://www.youtube.com/watch?v=bUUIJnIhCoo&feature=player_embedded
http://www.youtube.com/watch?v=6pTQQpZ4FaY&feature=player_embedded


SaiX

Marth
http://es.youtube.com/watch?v=FXTCnhaApM8


Santi

Snake
http://www.youtube.com/watch?v=MhbPofQ0QZE

Olimar
http://www.youtube.com/watch?v=oA91iJ9wRac
http://www.youtube.com/watch?v=PEFPkWPpXzE
http://www.youtube.com/watch?v=FV1zqQUlxbc
http://www.youtube.com/watch?v=XGlBTSN5TqY
http://www.youtube.com/watch?v=Ff9NGD4db6g

Sheik
http://www.youtube.com/watch?v=D77RWBdVqYM&feature=channel
http://www.youtube.com/watch?v=o_dZcPzxzk8&feature=channel
http://www.youtube.com/watch?v=xdoU-e1zUtU&feature=channel

Lucario
http://www.youtube.com/watch?v=ZDLqlb47Wxc
http://www.youtube.com/watch?v=UjpuUTupL9Y
http://www.youtube.com/watch?v=aUq7owwghms
http://www.youtube.com/watch?v=0yb-ZbXLMWE

Diddy Kong
http://www.youtube.com/watch?v=2qVzQf5r208
http://www.youtube.com/watch?v=Uo7IVn3D3JU
http://www.youtube.com/watch?v=p_-dc2BSa_M
http://www.youtube.com/watch?v=j5XR1rGV4NM
http://www.youtube.com/watch?v=X66h28lPDbI


Sasukebowser

Wario
http://www.youtube.com/watch?v=dorXO0EWl-0&fmt=22
http://www.youtube.com/watch?v=iZ1jOFoT3CU
http://www.youtube.com/watch?v=Cqr7XNRqqPk
http://www.youtube.com/watch?v=5h6RRQ2QqM8
http://www.youtube.com/watch?v=mUQZk6dfrRo

Diddy Kong
http://www.youtube.com/watch?v=m8eg8iy4k3A
http://www.youtube.com/watch?v=M1Qyx8lssRc
http://www.youtube.com/watch?v=qHn07-8mg7M


Shade

Captain Falcon
http://www.youtube.com/watch?v=ALxpx5XN3Tg
http://www.youtube.com/watch?v=N5WcTpVXpQM
http://www.youtube.com/watch?v=KFkwm_CRVDQ
http://www.youtube.com/watch?v=vRzjLgyM7ZI


Shadow

Falco
http://www.youtube.com/watch?v=m2Zah63zgds
http://www.youtube.com/watch?v=eomBnr-jNZo

Peach
http://www.youtube.com/watch?v=d8y3St8gkNI

Link
http://www.youtube.com/watch?v=c_kqLyNeOIU
http://www.youtube.com/watch?v=6uQPw0iyHz0
http://www.youtube.com/watch?v=_kYU6sQVEig

Samus
http://www.youtube.com/watch?v=tRfgS28Ld9k

Olimar
http://www.youtube.com/watch?v=cfndsgvGo50


Silex

Kirby
http://www.youtube.com/watch?v=Mkzz7WUPl4A
http://www.youtube.com/watch?v=cGcZ8zBEa1o

Marth
http://fr.youtube.com/watch?v=8LNQGFxFwwE
http://fr.youtube.com/watch?v=PBl_FkCBtvg
http://fr.youtube.com/watch?v=f_NT8mlAcGI
http://fr.youtube.com/watch?v=Yl_i55lMhT0


Slash

Snake
http://www.youtube.com/watch?v=nt1kLNBB7_c&feature=channel_page
http://www.youtube.com/watch?v=sftQgSut0is&feature=channel_page
http://www.youtube.com/watch?v=e9BlnVWO_rI&feature=channel_page
http://www.youtube.com/watch?v=no3PfADqobQ&feature=channel_page

Falco
http://www.youtube.com/watch?v=yxbllE9TUz0&feature=channel_page
http://www.youtube.com/watch?v=AYLXaThUt7U&feature=channel_page

Peach
http://www.youtube.com/watch?v=wHQ2SxvOmTs&feature=channel_page
http://www.youtube.com/watch?v=kTfqXcoAmT0&feature=channel_page
http://www.youtube.com/watch?v=QAWXKoNdgro&feature=channel_page

Lucas
http://www.youtube.com/watch?v=BIdbFpBihiA&feature=channel_page


Smasher

Meta Knight
http://www.youtube.com/watch?v=zK-lHW0gyVo
http://www.youtube.com/watch?v=pgOtwCEIfbk
http://www.youtube.com/watch?v=SPIqfbc_Twc


Smith

Pikachu
http://www.youtube.com/watch?v=4z-GWULvUG4
http://www.youtube.com/watch?v=MAyXJ1DuNRs&feature=channel_page
http://www.youtube.com/watch?v=-SyXzoIFiMg&feature=channel

Snake
http://www.youtube.com/watch?v=UJmiqFU4r0k&feature=channel_page
http://www.youtube.com/watch?v=k5aB79i9IoA&feature=channel_page

Diddy Kong
http://www.youtube.com/watch?v=LIJNh72dk8Y&feature=channel_page

King Dedede
http://www.youtube.com/watch?v=T8Azbh5Ntl8&feature=channel_page


Sneak

Falco
http://www.youtube.com/watch?v=t3KDx88Q5vI&fhm=18
http://www.youtube.com/watch?v=GTw6mcv-8pM&fhm=18

Meta Knight
http://www.youtube.com/watch?v=bKO2n-XzHKA&feature=channel_page


SUP3RCANS1R

Wario
http://www.youtube.com/watch?v=_LgKoEP9SiM

Link
http://www.youtube.com/watch?v=jLSliYsfdxs&feature=channel

Snake
http://www.youtube.com/watch?v=T_x4bzNDmhw&feature=related

Toon Link
http://www.youtube.com/watch?v=8ymXSFsQFOI


Sheikant

Snake
http://www.youtube.com/watch?v=MEmXVlXEgEU

Zero Suit Samus
http://www.youtube.com/watch?v=0yDGwXfcZF0&feature=sub

King Dedede
http://www.youtube.com/watch?v=LmxEDSa99Bk

Meta Knight
http://www.youtube.com/watch?v=MpCEuxy-SVk&feature=related
http://www.youtube.com/watch?v=rbrjFeZa-cY
http://www.youtube.com/watch?v=vKgIX8grHK0&feature=related

Kirby
http://www.youtube.com/watch?v=gSuUt-Ksrjw&feature=player_embedded
http://www.youtube.com/watch?v=RLd3fbsztZs


TAC

Toon Link
http://www.youtube.com/watch?v=XjkYUM6y16w&feature=channel
http://www.youtube.com/watch?v=Tl4Nk3LG41Y&feature=channel
http://www.youtube.com/watch?v=PwTS24rJUPI&feature=channel
http://www.youtube.com/watch?v=0IE2V12xi10&feature=channel


Teh Umby

Kirby
http://www.youtube.com/watch?v=7m8bmHI_O2o


Tempest

Ike
http://www.youtube.com/watch?v=HEy6gfSklUs&feature=channel_page

Falco
http://www.youtube.com/watch?v=zW9ASVmtZpk&feature=channel_page


TheChene

Mario
http://www.youtube.com/watch?v=r_x7Q4oQDJQ
http://www.youtube.com/watch?v=EnbOv5ET-zE
http://www.youtube.com/watch?v=oW1_pe1pZec


Thunder

Falco
http://www.youtube.com/watch?v=hKTjKlW1fgI&feature=channel
http://www.youtube.com/watch?v=VDxvx-J8Gbo&feature=channel


Tiersr4Queers

Diddy Kong
http://www.youtube.com/watch?v=dVc7KseYpLA
http://www.youtube.com/watch?v=em2WMhgh0c4&NR=1
http://www.youtube.com/watch?v=em2WMhgh0c4

Luigi
http://www.youtube.com/watch?v=vtTc7qJQ6P4
http://www.youtube.com/watch?v=kEfgrAefJEM&feature=channel

King Dedede
http://www.youtube.com/watch?v=yEPxJoiJmSs


TWiNK

Sonic
http://www.youtube.com/watch?v=RiCS48AgGIU
http://www.youtube.com/watch?v=TU6CpAb1K00&feature=channel
http://www.youtube.com/watch?v=Qo4FgDgQZSQ&feature=channel
http://www.youtube.com/watch?v=lGIcJ_Jeyao
http://www.youtube.com/watch?v=z7MlCcXGWoQ

Toon Link
http://www.youtube.com/watch?v=70FrYDK6BkA
http://www.youtube.com/watch?v=bPDpra7W0-8&feature=related
http://www.youtube.com/watch?v=bPDpra7W0-8
http://www.youtube.com/watch?v=70FrYDK6BkA&feature=related

Lucario
http://www.youtube.com/watch?v=R6KalkjAS3E

Kirby
http://www.youtube.com/watch?v=K1oDy9xJ3fQ
http://www.youtube.com/watch?v=jS8up3qclFA&feature=channel
http://www.youtube.com/watch?v=7C_GBMeNEyA&feature=channel


VietGeek

Bowser
http://www.youtube.com/watch?v=kUHkHP9EsPM&feature=channel_page

Sonic
http://www.youtube.com/watch?v=MZ0TlGFR2-s&feature=channel_page
http://www.youtube.com/watch?v=hW8LuWMN18w&feature=channel_page
http://www.youtube.com/watch?v=C2CFT0kVuGk&feature=channel_page
http://www.youtube.com/watch?v=MZ0TlGFR2-s&feature=channel_page

Marth
http://www.youtube.com/watch?v=llzh9wXQU-s
http://www.youtube.com/watch?v=Dm6bg3iJM4c

Meta Knight
http://www.youtube.com/watch?v=yNhF14APxcA

Diddy Kong
http://www.youtube.com/watch?v=XWlyWoQth94&feature=channel_page
http://www.youtube.com/watch?v=TKSrrD6TxqI
http://www.youtube.com/watch?v=qIxNM80BI-U
http://www.youtube.com/watch?v=4N-D2_wg2u4


Void

Snake
http://www.youtube.com/watch?v=-azofxuBbCw

Ganondorf
http://www.youtube.com/watch?v=r7lOPXs6Xnc


WaffZ

Olimar
http://www.youtube.com/watch?v=wzo4LHTe4FE

Mario
http://www.youtube.com/watch?v=wzo4LHTe4FE


W.E.M.P.

Falco
http://www.youtube.com/watch?v=mESic2p2zCs


Xeno

Marth
http://www.youtube.com/watch?v=ro2vylrjvF8&feature=channel_page
http://www.youtube.com/watch?v=ivxEUCxq6U0&feature=channel_page

Mr. Game and Watch
http://www.youtube.com/watch?v=rBUROYolzz0&feature=channel_page
http://www.youtube.com/watch?v=GhS20ou6XB4&feature=channel_page


Xio

Zelda
http://www.youtube.com/watch?v=a8sIhb95f3Q&fmt=18
http://www.youtube.com/watch?v=yAcl-vRBdAs&fmt=18

Ness
http://www.youtube.com/watch?v=iAPkfFNz4LA&fmt=18

Mario
http://www.youtube.com/watch?v=exrCzsTOvXw&fmt=18
http://www.youtube.com/watch?v=3jRFhyMlUvE&fmt=18
http://www.youtube.com/watch?v=Zot_ttp2b68&fmt=18


Yoshi-Kirby

Ness
http://www.youtube.com/watch?v=aQRVZf-uPro


Yuki

Snake
http://www.youtube.com/watch?v=xNoWy-L6cEg&feature=channel_page
http://www.youtube.com/watch?v=Mk3NupYH-1s&feature=channel_page
http://www.youtube.com/watch?v=pNWDIlbCriQ&feature=channel_page

Marth
http://www.youtube.com/watch?v=e-lTkiH-Tnc&feature=channel_page
http://www.youtube.com/watch?v=zB7Ct88rq1c&feature=channel_page

Meta Knight
http://www.youtube.com/watch?v=UT2KlA0zVac&feature=channel_page


Zaf

Mario
http://www.youtube.com/watch?v=ELsUYunrARE


ZeroL

Snake
http://www.youtube.com/watch?v=1a3zcH32N5I
http://www.youtube.com/watch?v=kpWT94y4B6w&feature=related


Chip
http://www.youtube.com/watch?v=ugaYpeJ5qRU&feature=related

Hyrulian Royalty
http://www.youtube.com/watch?v=dbeBxPzEGJM
http://www.youtube.com/watch?v=mWUFZ-uik0M
http://www.youtube.com/watch?v=s3QW8_aVf6M
http://www.youtube.com/watch?v=8VZsydCBEss
http://www.youtube.com/watch?v=3cG5szqm_A0

Lobos

http://www.youtube.com/watch?v=ECqdqyKEGrA&sdig=1
http://www.youtube.com/watch?v=lpPTG-rxmrE&feature=related
http://www.youtube.com/watch?v=90JbfBILNMQ&feature=related

Quivo

http://www.youtube.com/watch?v=a_ePmlT5IRY
http://www.youtube.com/watch?v=XAK6y6OKCgY

Near
http://www.youtube.com/watch?v=vZY_o05UBu8&feature=channel_page
http://www.youtube.com/watch?v=43P3IZ8Qf1U
http://www.youtube.com/watch?v=UMUvu3RstZk

Tempest
http://www.youtube.com/watch?v=XlfhH95SAiU&feature=channel_page


The Hero of Winds
http://www.youtube.com/watch?v=D1Tq16IlGWA

Flea The Flawless
http://www.youtube.com/watch?v=iNl5GtYFscc

The Boy Wonder
http://www.youtube.com/watch?v=5p9U_EnM9g4&fmt=18

Legendary Hero
http://www.youtube.com/watch?v=VWDTzUAGTK4&fmt=18

The Power Of Spam
http://www.youtube.com/watch?v=dteUWHgiy4s&fmt=18

Flea RA^ 1
http://www.youtube.com/watch?v=EKhyUsNcSvM&fmt=18

The Cel-Shaded Legend 3
http://www.youtube.com/watch?v=7jlr7PAJcPk&fmt=18

The Kid with Cat Eyes
http://www.youtube.com/watch?v=r61EG5wUGUs&fmt=18

I Prefer The Dair
http://www.youtube.com/watch?v=782MrWkw8AA&fmt=18

Toon Titan
http://www.youtube.com/watch?v=ELCRQK-f478&feature=channel_page&fmt=18

Celshaded Mindgames
http://www.youtube.com/watch?v=OqwFA1FCr1Q&fmt=18

I Don't Know What To Call This ****
http://www.youtube.com/watch?v=NaNQiCkS2HE&fmt=18

The Cel-shaded Legend 2
http://www.youtube.com/watch?v=gqNsENcMt3E&fmt=18

The Cel-shaded Legend
http://www.youtube.com/watch?v=UFW3PpVYXEg&fmt=18

Toon Nasty
http://www.youtube.com/watch?v=olL1UobnAnY&fmt=18

Bair Naked Bonage
http://www.youtube.com/watch?v=5KmxNpybHI0&fmt=18

TeAM Cruelty
http://www.youtube.com/watch?v=K3ZYphWo8bk&fmt=18

Pimpin' In Purple
http://www.youtube.com/watch?v=TfE9iHggjJE&fmt=18

Air Happy
http://www.youtube.com/watch?v=Y5OEx9bxLKs&fmt=18

Toon Link Spikes
http://www.youtube.com/watch?v=KqlEIaWoyzg&fmt=18

Truth Or Dair
http://www.youtube.com/watch?v=yHt0qdXpLvU&fmt=18

Shoot An Arrow In Me I'm Done
http://www.youtube.com/watch?v=_tMg8Wxi0so&fmt=18


Red the Ghost

Smash Ace
Joined
Jun 17, 2008
Messages
670
Location
NC
Sup guys

Doctor Mario Matchup Guide – By Dogysamich


I. – Introduction
A!! Intro
B!! Terms List


II. – Matchups
001!! – Fox
002!! - Marth
003!! - Sheik
004!! - Falco
005!! - Peach
006!! - Captain Falcon
007!! - Jigglypuff
008!! - Ice Climbers
009!! - Samus
010!! - Doctor Mario
011!! - Ganondorf
012!! - Luigi
013!! - Donkey Kong
014!! - Mario
015!! - Link
016!! - Pikachu
017!! - Young Link
018!! - Roy
019!! - Zelda
020!! - Game & Watch
021!! - Ness
022!! - Yoshi
023!! - Bowser
024!! - Mewtwo
025!! - Kirby
026!! - Pichu

III. Ender Stuff
Dogy1!! – Update Info
Dogy2!! – FAQ / Ask A Dogy
Dogy3!! – Future Guides?
Dogy4!! – Random Info of Randomness


I. – Introduction

A. The Intro


Aight. This is gunna be pretty frickin casual. I’m just pretty sick of people asking me the same question time and time again, and then people saying they’re going to post the info somewhere and it never being posted. It’s sad.


I’m not looking for some almighty Doc fame or anything; anybody who knows me knows that I could only care less. It’s just, people ask, I know, but people ask 20 times and it’s like *PUNCHES A HOLE IN THE WALL* STOP ASKING ME WHAT TO DO OMG. Or it’s like “Hey how do I deal with –insert super random character that you see once a year here- and I’m like “Hey, I clearly remember 4 specific occasions when I talked about this matchup, but who goes fishing for info on how to beat Y.Link”
This guide is by me and it’s a summation of my opinion of these specific matchups. This guide is not the “Holy Accepted Opinion” of the Doc community, so don’t hang this s*** over other people’s head. I’ll TRY to add a generic opinion, but all in all, this is me. So if you got a problem with it, don’t go lynch $mashmac, Cyphus, Bob Money, Captain Jack, or anybody of the likeliness.

This guide is also not a “how to play” doc guide. I’ll put some tricks and tips here and there, but the purpose of this isn’t specifically to teach you HOW to play doc. It’s just more of what strats work, what to look out for, yada yada. By that alone, this guide sounds like it’ll be kinda pointless and loose-form, but just go with me. It’ll work out.

My goal with this is that by the time you finish reading a matchup, you should have a fairly good idea of what’s going to happen, whether you’ve played the matchup 100 times or you don’t think you’ll EVER see the matchup

Some quick notes to know about this guide

A1. Terms List
First and foremost, this guide is going to be written assuming you know my theory of terminology. –Rough Insertion- Ya know what, screw it, I’ll explain some of my crazy jargon here, and if I miss something, hopefully it makes sense or I’ll add it later. YAH.

Dogy’s Matchups Chart
: Are done working off of this concept – if you take character A (Doc) vs character B, equally skilled, and have them play 10 matches, character A (Doc) will win _ times, and character B will win _ times.

Dogy’s Matchup Ratio:
Is based off of character advantages vs disadvantages. This will, at times, be different than my chart rating because it’s considering the characters actual pros and cons and how much they weight vs each other in the match, as opposed to just one playing another. (This one is more of theory fighter than the others)

The General Consensus
: Is based off of the “Community” opinion of the matchup

Offense
: One’s ability to start and maintain an advantage on a character. “Pressure”. This is accomplished by having frame advantage or holding a position in which the defender cannot respond to.

Defense
: The ability to defend against another’s offensive efforts and pressure. This includes blocking (shielding), evasion (mobility), and zoning (spacing).

Gimmicks:
Covers all sorts of shenanigans in and about the matchup. This will include stuff such as character properties you might not think about, somewhat outlandish setups, and just maybe some dumb facts you don’t know. *A gimmick is something that works under a special condition. I.e. Sheik’s recovery is a gimmick because you can punish it by grabbing the ledge.*

Mobility
: A character’s “physical” ability to cover distance in a short amount of time. Example: Fox is very mobile on the ground, where as bowser is not.

Agility
: A character’s ability to change direction of movement in a given area. Example: Captain Falcon is an extremely agile on the ground, while Jigglypuff is very agile in the air.

Capedashing
: SH Cape -> Wavedash with Doc.

Respect
: The concept that you have to know/accept that something CAN happen, and plan according to it. I.E., you have to respect the fact that Peach is going to CC d.smash if you keep jabbing at her.

Fear
: Preparing for a situation to the point of going to the extreme to avoid it. I.E.: Most people fear Sheik’s f.air so they never jump.

Honest (honesty)
: The practice of doing (or lack of) a motion as to check to make sure the other people won’t fall for something “so simple.” I.E. A scrubby Fox player is going to d.throw -> u.smash all day to keep you HONEST about teching the d.throw.

II. Matchups

001 Fox McCloud (a.k.a. Victory McWin)

Dogy’s Matchup Chart: 5-5 Even
Dogy’s Matchup Ratio: 48-52 Even (It’s bad to start with these “joke” numbers, but I’m actually pretty serious about this one)
The General Consensus: 45-55 Fox (40-60 on Fridays)
The $mashmac Formula for Work: Doc = (2Fox)W, where W is the amount of work you’ll have to put in.
The General Flow:
“You should be able to hold your own against a Fox player, but if you and the Fox player are at the same skill level, you're going to have twice as hard of a time trying to beat him.”!!!!11!ONEOMG! -$mashmac

Ah man. I love that quote. –laughs hysterically-

Doc/Fox. It’s not really as horrible as people make it out to be. Sure Fox has his n.air plane and FRC (shine), but so long as you know how to deal with said things, it’s not exactly horrible for Doc. It’s not like Fox outranges Doc, Doc actually outranges Fox (although with Fox’s ground speed and the small margin of reach, this doesn’t hold a great deal of weight in this matchup)

Everybody knows how dumb Doc’s edgeguard can be vs Fox (if Fox ejects, it becomes a 50+/50- guess, the +/- depending on how fast you can close distance before he blasts off), and experienced Fox players know how dumb easy it is to edgeguard Doc (Hint for Fox players, you can ledgeDROP a bair and still make it back), but along with recovery and more, Doc actually gets away from some Fox shenanigans.

1) Fox can’t kill Doc from a grab unless Doc lets it happen. Ever. Ok, I lied, but a lot of Fox players don’t know how to kill Doc from a grab, or won’t “run the risk”. The funny thing is that taking the no-kill option is still better for them in the grand scheme of things (imo).

2) Drill->Shine->Upsmash on Doc is work for Fox. A Serious 9-5, with some overtime.. I’ve been playing this game for like, years, and Chops is the first guy I remember being able to drill-shine-upsmash me consistently. Heck, I believed it couldn’t be done for a good long time, but lol. Victory McWin. XD The thing about Drill is you have ways to stop it (more than just shielding).

Anyway, more general stuff.

You can actually run your pill game if you want to, but you have to respect Fox’s speed. All that really means is that you have to either fade if you’re playing D, or start far the **** out if you’re trying to approach (or just close distance)

This match winds up being a style-vs-style kind of match. In the grand scheme of things it really should be a mesh, but melee (somehow) isn’t exactly to that point yet, so you still have Pill Happy Pat vs The Nairplane Pilot, or Mario-Doc vs Upsmash McOwn.

The last thing I’ll say before I break into some sections, and the most important thing to understand in this matchup, is that at all times you must respect what the Fox wants to do. The game is not fair. I’m not saying this trying to gripe about melee (although I actually am kinda griping), I’m being serious. One of Fox’s current meta-perks is that he can do pretty much whatever he wants and you have to RESPECT it. (Respect being the key word as opposed to allow. You don’t have to allow a **** thing to happen).

If he wants to run at you all day, you have to respect that and put up a good effort to stop it. If he wants to sit and play Halo for a while, you have to go through effort to respect it. He can pretty much do what he wants and you have to, to some degree, play his game. It sorta works to think of Fox as “the bully who gets his way”, per say.

Offense:
In this match, you won’t be doing a lot of flat-out offense. That’s because you really CAN’T do too much vs Fox’s defense unless he lets you. His evasion is through the roof for various reasons, and although his blocking defense isn’t his greatest option, he does have good punishment from it (B.airs, OoS Upsmash, OoS Shine, etc etc. He’s got choices.) So with this being said, it’ll be hard to generate an offense against him.
More specifically, you won’t be throwing out a lot of offensive fairs unless you’re psychic or he’s physically incapable of pressing buttons. Most of your offense will actually wind up being “defense”, per say. You’ll be doing a lot of preventing Fox from doing stuff. Trying to stop him from jumping out, from wavedashing (or rolling) out, etc etc. So with that said, you really want to focus on attacking where you think he’s going to be as opposed to where he is. It sounds kinda common sense if you’ve been playing this game for a while, but the subtleties are where I’m reaching at for this.

To help with this, you want to try to work Fox into a position to where he doesn’t have as many options. More often than not, that’s considered a corner. You work him to the edge of the stage, back isn’t that great of an option for him anymore. So now you have to worry about him jumping around you or fighting back (both of which is no problem for McCliggins.)
Pills are a great tool for trying to accomplish this. Fox is going to move, it’s just in his nature. He doesn’t have a reason not to. You just have to look for/predict how he’s going to move and attack accordingly. Note that, against McWin, Fox running under FH and SH pills is a completely viable option. With that said, you have to give him a lot more room when you throw pills. It’s also a nice start for when you land a knockdown as well. B.air for a knockdown, and then do a turnaround pill as you land (or where ever, depending on where you are), cuts out some options as he techs up.

In general, if you can ever attack Fox from above, go for it. Although your d.air isn’t the greatest tool ever, his u.air and u.smash aren’t too great for defense. His u.tilt is ok, but he has to be facing away from you, in which case he’s more liable to b.air anyway. So if you can jump in on him, that’s great.

Note that you don’t even have to do an aerial when you jump in, you can literally just JUMP IN as to close distance on him. Be wary of shines and all other stuff at that point.

If you can ever get close enough to land jabs, you can work a mixup very well vs Fox. Again, understand that your range is actually LONGER than his. If you space your jabs, he can’t punish them directly. He can’t grab them, he can’t upsmash, and he’s got to actually stop what you’re doing.

With all that being said, you need to still understand that working an actual offense against Fox is pretty hard. He’s got too many resourceful tools to allow you to gain and maintain a worthwhile offense.

Think of him as a shoto, lol.
Chaingrabs? 0-Death. U.throws. D.throws. They all works. Deaths from grabs. It’s pretty kool.

Defense:
This is where you’re going to have your work cut out for you. Fox has a pretty beastly arsenal of moves at his disposal. And this is where the majority of the match is going to take place, you defending against Fox.

First and foremost, you have to deal with his approach, which is more than likely going to be n.airs, d.airs (at close range), grabs, and fairly current to the game, the shine approach ( I **** you not).

Now, to combat the aerials, you want to have 2 goals going. To deal with the n.air, you want keep yourself in a position to where you can crouch. That means you want to basically avoid wavedashing as long as you’re in range of n.air. You REALLY don’t want to go in shield either, as you would then be allowing Fox to put pressure on your shield, but that’s not the bad thing. You want to be able to CC nair because you don’t want to get put on the n.air plane.

The next aerial you’ll have to deal with is his d.air. For him to realistically hit you with this, you have to be fairly close to him, so giving him a moving target will realistically solve this problem. But there’s no such thing as a fix-all against Fox (unless you’re like, Marth), so you have to be ready to actually deter him from d.airing as well. We’ll get to that later. As for the general stuff, you want to move and make it hard for him. If you put your shield up, trying to shieldgrab a d.air is completely viable option, although you always have to respect the shine afterwards. You can’t be predictable with your shieldgrabs, but understand that if he dairs and lands in front of you, he’s in range.

Note that with both of these, you can also play the levels game with Fox. If you think he’s going to sh, you fh d.air, if you think he’s going to sh, you throw out an early u.tilt (or f.tilt), or an upsmash. If you wanna be kinda gutsy with d.airs, you can opt to up+b to trade with it, “a la Fiction” (This is actually years old but hey, I’ll give him credit for bringing it up again). It is pretty imperative that you stop Fox from landing drills on you because he’s always got guaranteed stuff to do afterwards, whether it’s a kill or not.
Last but not least, you can always wavedash back against both of these moves. Not a bad tactic at all, but you can’t be predictable with it or else Fox will just jump deeper, and now you’re wavedashing. That’s kind of… a bad thing, especially considering you won’t be able to CC. You can avoid this by opting towards “I’m going to stay out of range of punish” when you wavedash as opposed to “I’m going to make sure I’m in range to punish every time.”

The next major approach you have to deal with is grab approaches. Against a good fox, this is hard to see due to Fox’s speed, which leads to his large grab RANGE (as opposed to marth who has a large grab reach, You’ll probably understand the difference between the two by the end of this, don’t worry.) But anyway, you pretty much just have to do the generic grab avoiders and just, don’t get grabbed. I’ll let you guys in on a secret that is not known at all yet, punish grabs with capes. It’s funny that I don’t have any vids of this yet but trust me, you’ll love the rewards for it. The tried and true stuff, such as retreating fairs, sh dairs and b.airs, etc etc, they all work too. DD n.air, all the usual tools, you just have to be ready for it. The turnaround for a Fox grab is pretty quick.

The last thing you have to worry about is the shine approach. You don’t want this to happen. Because this can lead to all sorts of immediate mixups. You have to stop this by throwing out tilts, smashes, jabs, JUST DO STUFF SO HE CANT RUN IN. Easier said than done, yes, but that’s what it takes to stop shine approaching. This is what’s hot in the current meta and it’s a beast to deal with if you come across somebody who can press buttons. If you think he’s going to run in and do this, you can do “stop run in” stuff. Again, remember he has short range (and shine has dumb short range), but he can fake the living s*** out of you if you over commit or you’re just, scared.

Ok, the next thing to deal with is fox pressure. Fox pressure is, without a better word to describe it, stupid. I mean, he has a 1 frame attack with low recover that he gains all sorts of perks and options from, not to mention he can just flat out attack from it (and continue pressure). Again, this goes back into the respect thing. You have to respect Fox’s ability to do just about whatever he d*** well pleases. With that being said, aside from a shine, the main pressure tool you have to look for is a jab. When you see either one of these, you have to take a stab in the dark as to what’s not going to get you wrecked. Literally. You can’t just roll every time, you’ll die. You can’t jump out every time, you’ll die. You can’t spotdodge every time, you’ll die. This becomes one aspect of mixup people don’t understand, mixing up your defense. You can look at this as one of 2 ways, making him guess what you’re going to do, trying to guess what he’s going to do and how to stop it. They’re both one in the same, but take the ideology and thought process however you want.

So with that, you realistically need o understand what ALL you can do vs mixup. Those things being; spotdodge, roll, jump, up+b (and up+b cancel), jump out aerial, wavedash, shield (or continuous shield), light shield, cc, upsmash, and probably a few more that I can’t think of atm cause I’m watching 2 setups of Modern Warfare 2. Knowing all that, you have to basically pick options that will get you away from Fox, or if you plan it right, will get you the advantage. Spotdodge gets you away from upsmashes and whatnot, allows you to get out of shield, rolling moves you and gets you out of shield as well, up+b can stop a oncoming d.air, jumping removes you from shine pressure (without rolling) etc etc. You just have to mix, match, come up with your own style, shake’n’bake whatever. This is more of a player-to-player kind of thing.
And with shine pressure, think of it as a mobile jab. But better than what hylian said about doc’s u.air years ago. Current meta now is spanimal shine->wavedash some direction -> shine -> wavedash back to spot one -> shine, etc etc. This is the kinda time where he’s looking for you to do something super dumb like roll. Don’t bite into this nonsense. It’s really a fast series of action – reaction. You can opt to wavedash or jump out and/or you can try to catch Fox with a grab or something, but just know that if you’re going to do something long and dumb, he’ll probably be right there with you.
Aight, so we’ve talked about what stuff fox is gunna to do get in, we’ve talked about basically what he’s going to do to keep pressure on you, there really isn’t too much to know about it beyond “It’s going to happen fast and it’s going to happen often.” The other stuff you have to worry about is the general, blatantly obvious stuff. Don’t run into backairs, be careful of him trying to snipe you with an u.air, yada yada.

Speaking of sniping with u.airs, lets talk about that real quick. When he gets a grab. Step one, DI somewhere. Left or right. Step 2, wait for the throw. It’s more than likely going to be up, down depending on location, etc etc, you got time, but be ready for it. If it’s up, be ready to jump. Once you hit like, 70% or so, you don’t have to jump immediately, but be ready to jump. Fox can’t ever get to you with an u.air unless you let him, but that doesn’t mean you want to jump every time. You jumping prematurely gives him the opportunity to juggle the mess out of you and just gimp you from the middle of the stage. He can land stuff like b.airs and nairs, but those aren’t as bad as u.airs.

One quick final note, lasers. Just because Fox is shooting lasers doesn’t mean you have to approach him. You just have to avoid them without putting yourself in a bad position. Jump over them, camp platforms, camp ledges, camp shield (as long as Fox is away), cape, there are plenty of options, but you just have to make sure you’re not putting yourself in a bad position trying to avoid them. Infact, your position is pretty much more important than you getting hit (because the damage really isn’t THAT much from them).

Edgeguarding:

Edgeguarding Fox isn’t exactly hard, but you have to do some guesswork. He’s realistically got 2 options of recovery, firefox and illusion. The trick comes from the timing and ways he can mix and match his recovery . Kinda like picking your meal from a buffet line, he’s got a few tricks that compliment each other.
In general,

Stopping the illusion isn’t too much of a problem, but you just have to look for it. You also have to be ready for it. You can’t be taken by surprise. You gotta be ready to do run-off nair, a bair, cape, tilts (preferably forward, but up if you think they’re going above you). You just have to be ready. The longer the move startup you choose, the faster your reaction time has to be. That’s kind of obvious, but that means that if he’s going a illusion half way in his line, you pretty much have to cape WITH him to stop him with a cape, as opposed to just pressing a as he comes in to tilt him. Cape works well for stopping sweetspot illusions because you illusion is one of the few moves in the game that actually gets interrupted by cape, which will force them to recovery from below (which at that point HAS to be firefox). If you ever land a f.tilt against illusion, you normally can immediately throw a pill and stop the following up+b (or make them up+b from lower.). You can get like, 2 or 3 pills before they’re completely out of your pill range. A dumb dogy gimmick I like is if they want to illusion over your head, u.tilt. I’ve yet to find a person that doesn’t continue to DI in while they illusion, so you know exactly where they’re going. At around 80%-110% or so, u.tilt -> dunk. You don’t want to bank on this (infact, you’re better off doing a SH nair if they want to go high), but know that the option is there. If they want to SS, note that you can just take the **** ledge. This is an option that kinda gets forgotten about in the current meta, as opposed to trying to cape or tilt them or something (Hell, even I forget to just take the ledge if I suspect a sweetspot). It works.

After you stop the illusion, or if they choose not to, you got the obvious up+b. You want to cape this if you can. Again, you have plenty of ways to deal with it, safer ways (such as b.airs and tilts), but if you want to get the end all, you want to cape this. Your goal is to get as close as possible before he goes off so that you’re covering more options (or realistically ALL) as he takes off.

A few gimmicks you have to look for when he up+bs; when he is in a position to go straight up, be prepared to edgehog him. If he’s not like, close to the stage, he has no option but to fall down onto the ledge. A lot of people (me included) like to try to hit him away again, when you could realistically just… take the **** ledge. So.. take the **** ledge. The second gimmick to look for is angling down at the ledge. This trips A LOT of people up. To stop this, you need to walk all the way to the ledge to do ANYTHING. And when I say all the way, I mean teather animation. If you want to do ANYTHING, you have to be that far to the ledge. The last thing you have to look for is him riding the wall up. If he’s looking to SS, you can grab the ledge, if he’s going to go over, you want to cape. Being able to predict this stuff solves all of this, but we’re not all psychic.

I know I’m not.
lololol

Recovery:
I mean, I could go into a long winded explanation of how to recover, but all I really need to say is come up with a plan and pray. Fox can cover all of your options.

Know that you have a lil leeway vs shinespikes, especially low ones. A lot of people (for whatever reason) fear your up+b, so use that to your advantage and BE READY TO SNIPE SOMEBODY IF THEY LOOK LIKE IF THEY’RE GOING TO JUMP OFF AND DO SOMETHING.
With Fox, also know that he can do all sort of shine tricks and fake you out too. Like, jump out, shine to stop out of your range, jump, and land back on stage. The point of something like this would be to bait you into up+bing early. So understand, it happens.

If you have some distance away from you, feel free to cape/pill backwards so that you can b.air to defend yourself. It’s not the greatest thing ever, but it’s an option if Fox wants to try to n.airplane out there.

Pills? They’re ok-a-go-go, but understand that if Fox knows where you’re going to be behind the pill, he can n.airplane THROUGH the pill and hit you.
Fox doesn’t have too much to fear on your recovery. I mean, he can ledgeDROP a b.air and still make it back perfectly fine.

Shine-On!
Fox’s shine is obviously his godsend. Like, you could argue it’s a few more moves in his moveset, but shine is the one that’s a real bane on everybody, because it’s a 1 frame attack. So, you have to be able to plan around it.
The place you’re most likely to see it is shortly after Fox comes in with an aerial. If he does everything right, you can’t shieldgrab him because he’s going to shine. So you have to respect that, wait for the shine, and try to punish afterwards. However, he could just skip the shine and go to something else, so sometimes you have to just bite the bullet and TRY to grab him. It’s not kool.

The next place you see that is any time you’d wind up next to him. Now, that’s a real BROAD statement, but think about it. Anytime you try to chase his tech, if you’re standing over his recovery from the ledge, if you try to dunk him, if you’re on his shield, he’s liable to shine from ALL of those places. Shine is like glitter, once you see it, you really can’t get rid of it. You always have to be willing to let up, let him do it, and punish it when you can.

Know that letting up doesn’t specifically mean stopping your attack. You can take shine out of the equation if you space yourself to where he can’t shine in those situations. It’s hard, but what that means is you have to leave out grabs on your ground approaches, and ONLY look to f.air on your aerial approaches (or make sure you clear him, which is HARD). McCliggins can see through this nonsense and just go where you’re going, so this isn’t a fix-all for shine.

However, your goal is to make him think twice about shining. You get him to think about it stop, then you get a lot more leeway in this matchup. Now he’s going to wind up moving more (which gives you more room), or he might start hanging out dumb bad stuff like misspaced tilts and whatnot.

You’ve gotta respect the shine at all times, but don’t fear it. You can adjust and make him afraid to use it.

Gimmicks:
-Fox’s Shine: Fox’s shine gives him the ability to turn around at any time. On the ground, in the air, wherever he wants to he has access to his backair (or he can turn around and grab ledges). You have to keep this in mind. Although you’re ok being in the air IN FRONT of fox, note that he can just shine and b.air.

-Shine->Grab: a.k.a. “The Shiz Wiz” a.k.a. “The Spanimal Grimy Trick.” At any time Fox shines to put pressure on you, if he thinks you’re going to stay in shield (or if you’re going to be slow out of shield), he can JC grab. Kind of common sense if you think about it, but the turnaround is so fast you flat out have to guess at it.

-Multishining: You can’t really beat it. Gotta move away from it.

-Shine -> Upsmash: Hilarious trick that like, nobody likes to do (cept alt275 XD). If Fox is holding his shine, he can just upsmash out of it.

-d.throw chaingrabbing: It works on Fox, and starts at 30%, but at that low, it winds up being “The Ganon Chaingrab”, in that you have to know what way they’re going to DI BEFORE you throw and you have to make the perfect grab to get them again. You can always opt to let them fall for a tech opportunity.

-u.smash chains: yeaaaaah man. You can do em. U.smash -> u.smash (or u.tilts), upsmash -> tech chasing. Yeah.

-Fox F.smash: Safe on block if spaced well. Infact, if you try to punish it, you’re liable to fall for F.smash -> F.smash (a.k.a. Chops Choo-Choo). Fox’s F.smash doubles as a mini dash (because it moves a decent distance). Just keep it in mind.

-SH Double Laser: Will never hit you as long as you’re standing. Don’t be scared by it. You can just cape/shield the lower laser and go about your business.

-High Percent Lasers: When you’re at high %, some Fox’s will still laser you, because it’s habit and the recipient’s habit is to not get shot by lasers. … Why? The laser’s not going to kill you, and it’s not going to put you in a bad position unless you let it. So with that being said, when you’re at the obvious death %s, don’t respect lasers anymore. Now that doesn’t mean you want to stand there and let Fox practice Training Day outtakes on you, but him taking on 3 damage when you’d die from an u.smash anyway is no reason for you to put your d*** shield up.

Dogy Tips vs Fox:
-Once you start getting into 80% or so (so depending on the stage you’re on), shield more and pay less respect to grabs. Think about it, Fox can’t kill you from a grab unless he makes a good read on a d.throw tech chase, but he’s going to kill you if you screw up the DI on an upsmash. Once you’re afraid of dying to upsmashes, you’re OK to give up grabs.

-D.throw –> D.smash is great at low percents to setup gimps.

002 Marth
Dogy’s Matchup Chart: 4-6
Dogy’s Matchup Ratio: 30-70 Marth
The General Consensus: 40-60 Marth
The General Flow:
Can you get in?

That is the main question of this matchup. Your whole goal is to get in on Marth, and when you do, that’s just half of the job. This is another one of those “unfair” situations. Normally with a setup like this, once you get in, you get to wail away on your opponent, but na, not with the blade. Getting in means you just have to deal with MORE of his stuff as you try to put in work on him.

Pills obviously don’t do too much but buy you time either way, so it’s not like YOU’RE going to win from long range. (although you need to try just to make sure your opponent isn’t ********. If they’ll get beat by pills, then beat them with pills.) With that being said, once Marth gets in mid range, you need to either get in or get out.

DO NOT STAY MID RANGE WITH MARTH. (Mid range = tipper range). You realistically can’t accomplish ANYTHING there. All you have is f.tilts and capes, and although both will hit, Marth gains soooooooo much more from being here.

There’s never a time where Marth is in horrible danger against you. I mean, I guess when you grab him at dunk %, but that’s realistically it. You can combo marth, but they have to be air tight because he can do all sorts of things to stop your combo. On the other hand, if Marth gets you in the air, he can pretty much have a field day on you.

So you don’t want to stay mid range (which you have to get in), you don’t want to be above him, being close isn’t completely safe, and far is not supposed to accomplish anything. So all in all, you’ve got work to do.

Marth’s main goal, on the other hand, is to straight up keep you out. Ironically, most Marth’s (especially ones who don’t know the matchup at all) will do a lot of the work for you. It’s not that they’ll never approach, but they shouldn’t be looking to approach unless they’re making you go into shield or something like that.

Offense:

This part is the real hard part of the match. You have to play some offense, straight up. But with the way Doc is and the way Marth is, Marth can shut down every offensive option you make free. It’s possible for him to stay safe the ENTIRE time.

IT’S POSSIBLE FOR HIM TO STAY SAFE THE ENTIRE TIME.

So with that being said, you have to have a no fear attitude about the matchup. This matchup is a risk-reward matchup. If you’re not willing to take ANY risks, the only way you’re going to get a reward is if the Marth screws up. In a normal match, that’s do-able, but Marth has to screw up BAD for you to get stuff.

That means you better be ready to run into some tilts, CC some aerials, and the likes.

First and foremost, you’re probably gunna be a good distance away from Marth, throwing some pills. See what he likes to do to get around pills, figure out what he likes to do with different stimulus. Does he jump when you run in behind it? Does he try some huge swing to get rid of pills? Is he dumb enough to actually sit there and block all of them? These are the kinds of things you want to look for. Understand that although Marth is fairly quick and has a good dash, he’s not going to disappear after a pill like other characters (Read: Fox) will. Marth is, more often than not, going to swing at/THROUGH your pills. He can do that with no fear. All you’re really doing at this point is checking to make sure his s*** “isn’t Pringles”.

Beyond that, the next wall you have to get through is mid-range. You basically have to play a 50/50 at this point, and that’s assuming Marth doesn’t run. You have to either jump or not jump. If you jump, you’re basically saying “Hey Marth, that’s a nice D.tilt, I’m coming over that.” If you don’t jump, you’re saying “Ok, that’s a nice n.air up there.” See the point? And realistically, you also have to look out for a f.air as well (which you’re more likely to see a f.air than n.air), but you get my drift in this. If Marth guesses right, he’s gunna knock you away (Unless he fair’d and you didn’t DI, then he gets follow up). You just have to take that risk.

*Random Dogy Theory note*This is a thing you can look at one of two ways. You can either look at this scenario as “I’m going to do this because I think you’re going to do that” or “I’m going to do this and you BETTER do that to stop it.” Both of them are realistically the exact same thing, but it’s just the thought process you have around it. It kinda touches into what kind of player you are overall (The first being more not aggressive minded while the second is) Both of them are attempting to accomplish the same goal. The only reason I mention this is because you will come to this junction every time, and you have to do SOMETHING.

Anyway, you could opt to stop at mid range and check what Marth likes to do. Or something might happen you get tripped up here. This obviously puts you at defense at this point unless he’s letting you get closer. Stay on the move vs Marth and, if you’re afraid of getting hit (which is a good fear to have), air on the side of being out of his range rather than in it.

The one big approach you should keep in mind during this match is your shield approach. So long as neither of you are near a ledge, Marth gains little-to-nothing from grabbing you unless you get tripped up in DI. All of Marth’s throws are affected by weight, and Doc is heavy enough to where you SHOULD have time to react to where he’s throwing you. (Not to mention, you also have the “logic factor” as well. If you’re near an edge, he’s probably throwing you over there). I’ll talk more about grabs in the defense section, note that your shield is a huge offensive tool in this matchup.

Run in to about midrange, shield, and then move from there. Jump out, wavedash out, MOVE THE F*** back, shake’n’bake. You’re not going to avoid this range if Marth understands the purpose of his character. I can’t stress how much you’re gunna have to *shades* deal with it.

If you’re not on top of him when he stops his zone, you still have for him to hang something out there. F.air -> u.tilt, N.air -> jabs, you’re STILL NOT IN. You’ve got to guess a few steps ahead to make it in there untouched. If you think he’s going to u.tilt, wait for it (If you’re on the ground, you can flat out duck it. U.tilt does NOT hit a crouching Doc if you do D.O.R. (Duck on Reaction))

And I have to note this because I make a bad habit out of this, Don’t think you’re coming in with a f.air. If you wanna come in with a f.air, you better make Marth do something. Better make him swing and miss, big swing at a pill, put his shield up, something. Marth stuffs Doc F.air Free. You’re gunna need n.airs, u.airs, and d.airs if you’re coming in the air. (Or just jumpins)

So, once you get in, you’re not homefree. You still have to do a lot of work. It’s like riding a bull, you have to do work and avoid getting bucked off. The thing is, since Marth not only functions well but better once you get in (he has access to grabs), you want to keep things short and sweet or else you’re asking to get interrupted. If you can get behind him (or turn him around with your cape), you’ll be in a much better position as he’ll only have 5 responses instead of like, his whole moveset. Regardless of where he is, he’s got a good response for you. If nothing else, he can side-b while adjusting his spacing.

Don’t get the thought that you’re going to beat Marth in a spacing war. If he wants to swing, you respect. Don’t like it? Play another character.

So after you see if he’s dumb, after you fight the 10 yard fight, and after you get in and maybe do something to get a reward, you have to MILK IT FOR ALL IT’S WORTH. You have to be air tight though. Anytime there’s a question if Marth can get out, he’s got options. F.airs, D.airs, loads more. I mean he can realistically kill you midair if you’re not airtight on your combos (Not with a d.air either XD).So you want to be extra careful when you combo Marth.

On the other side of this, if you know Marth loves to swing when you start combing him, you could try to bait him into more damage. You know he wants to come down with a fair? CC it and keep on going. Expecting a counter? Wait for it and f.smash. Marth can’t swing forever. You just always have to be ready for him to swing.

Defense
And him swinging is the bad part. As long as Marth is spacing well and swinging right, you aren’t punishing a d*** thing. You just have to accept that. Even if he does jack up spacing, if he knows HOW to do it, it’s bait (i.e. if you block a deep SHFFL fair, don’t always be in a hurry to shieldgrab, cause he could just move and wreck you for it.) You just want to try your best to stay away from places where he can swing at you.
First, zone Marth far range with pills. Note that his dash and run animation are low enough that he can run under pills. I didn’t say FH and I didn’t say SH, I straight up said pills. Yes, if you stand on the ground and throw a pill, Marth can straight up RUN under it. It’s not easy by any stretch, but it’s doable.

The real first, let’s talk about that midrange. Tipper range. Once you’re in his tipper range, if he’s using one of the only 3 moves he needs to beat you, you want to just get out of here. Trying to fight through is bad since you’re starting at a bad position. If and when you eject, you want to try to make it so that you don’t have to jump. I could say the obvious “you don’t want to be in the air because you’ll get f.smashed or f.aired”, but the real problem comes from if he puts you up in the air any way, you really can’t do anything until you get back to the ground. That’s not to say you NEVER want to try to jump back (and I stress jump back, because jumping in is usually asking for trouble), but don’t make jumping away from his pressure your default option.

The only exception to this is Dogy’s stupid Marth, which is a d.tilting machine.

Anyway, jokes aside, you want to look to punish something against Marth, which again, is hard to do. If he spaces well, you can’t punish anything. I just spent a paragraph saying that. So, what you wind up having to do is MAKE him space bad. Step up and step back when he’s not looking for it. You see him trying to space a fair at tipper range? Step up and block it (or CC it). You see him trying to size up a F.tilt? BACK THE F*** UP. You have to MAKE Marth mess up to get some rewards, but you also have to be ready if he’s ready for this.

In which case you have to be ready for him being ready for you being ready, which he can be ready for you being ready. And you have to be ready for him being ready for you being re~~~ YOU GET THE POINT. I told you this wasn’t going to be any kind of formal guide.

If you haven’t caught onto the idea, you’re pretty much going to be on the ground most of the time. You can’t really accomplish anything in the air, you can’t really zone him out once he gets midrange, and you can’t play a real spacing game with him to begin with, so you’re going to wind up r moving around a lot and/or staying in shield.

If you go the staying in shield route, you have to look for one thing, grabs. (Really, you also have to look for the Gate Breaker (Shield Breaker)) Grab beats shield, so you putting your shield up tells Marth to grab you. You actually gain A LOT by him trying to grab you. One plus is that Marth can’t kill you from a grab unless you let him (Hell, I want to say you actually have to HELP him with bad DI, don’t quote me), but he can’t kill you from a grab. He can put you in a bad position by tossing you up, but that’s not horribly bad because you can move around him and do all sorts of things to get back to the ground. The bigger benefit is that by trying to grab you, he gives up his reach advantage. Although Math’s grab is long, it’s not his longest attack (obviously, it’s not a sword), and it’s not longer than YOUR attacks. It’s just long in comparison to other grabs. So if he wants to grab, he’s got to give up the advantage of you being away from him. If you see a grab coming, you want to avoid it without going too far away. That means you don’t WANT to roll away from it or WD away from it (although sometimes it WILL happen).

The next thing that can happen in shield is you block something big, such as a f.tilt or f.smash. If you block a f.tilt, you can wavedash in and get a tilt or jab in return. You have to be quick to get out there though, as the turnaround is real short. If you block a f.smash, and it wasn’t tipped.. OOHHWWEE FIELD DAY. A blocked f.smash is a GUARENTEED d.smash, u.smash, f.air, or grab. Beyond that, you’re allowed to get as creative as you want to be and go to down on it (note that you don’t get a f.smash from this but you can get an u.air. Do the math)

When it’s all said and done, you’re probably not going to be perfect and you’re going to get hit. I mean, I wish I could get JV5s, but I’m happy with just winning. When you get hit, you’re obvious goal is to stop getting hit. That’s just logic. With marth, though, marth can rain down all sorts of shots as you try to get back in control.

When you get hit, your goal is to not be in the air in front of Marth. That’s his power zone. You obviously want to get away from him, but he can cover ground fairly quickly, so it’s not an easy job. With that being said, you have to be fairly tricky about how you get back to the ground. If you can just flat out DI away from him and be kool, do it, but sometimes you’ll have to bite the bullet and DI in and hope to throw him off. Constantly DIing out could result in him looking for WD F.smash, and if you’re still floating in the air, you’re everything short of screwed (you still have an airdodge).

Last, not least, and kinda just thrown in here, if you ever wind up on a platform above Marth, MOVE THE F*** AWAY FROM THERE. It’s kind of logical, but I felt like I needed to say it. Jump UP and OFF the platform, don’t EVER try to come down through it, not even if he’s blocking (That’s a trap and a half)

Edgeguarding

Aight kool, you got marth off the stage, now what? Don’t sweat it, he’s not superman off the stage. That’s not to be confused with him having a bad recovery. Not only does he have a good recovery, he can protect himself WELL on recovery .(which imo is actually more important for people who don’t have perks on their recoveries like m2)

Marth’s 2 main tools for protecting himself are going to be f.airs and side-b’s, more specifically f.airs. If he thinks you’re going to come out there and hit him, he’s gunna f.air. He’s got more options, but it’s not broke, so he’s not going to fix it.

If he has to make a lengthy recovery, feel free to start out with pills. ESPECIALLY if he has to/you think he is going to come in low. Pills aren’t going to completely break his recovery, but worst case scenario you’re tacking on damage. DJ (full double jump, not iDJ) pills, jump OFF THE STAGE and pill, not in his face but out to put pills further out. You can put some pills out there for him to work around.

With that being said, you have 4 routes for going out and hitting him. You have to either trick him into swinging early (or NOT swinging) so you can hit him in the face, come from above with some $mashmac d.air shenanigans, or you have to try to get under him. Under him will sound scary for obvious reasons (although it’s actually NOT if you know what signs to look for, which is him already using his double jump), and above is on that $mac outside of the box logic, so go with the front, mostly. ^_^

At this point, you’re trying to time him doing a side-b so you can b.air him in the face. If he’s not willing (read: dumb enough) to bite, you can try to play quick draw with him and go b.air vs Marth f.air. The worst that happens in this scenario is he f.airs you back onto the stage and recovers. If you’re ok with that, feel free to try.

If that’s not your cup of tea, you can try to take the ledge. Do all sorts of fakes and try to get him and go low and sweetspot. Jump out, cape, jump back; jump out, pill, jump back; waveland off the stage into shenanigans, you just want to scare him into going low and sweetspotting. Get on the ledge in time though, if you’re late, he’s gunna SRK you just like you would him.

If he’s going to up+b on the stage, you have a few ways to mess with this as well. If you’re on the stage, you can cape if and only if he’s actually going to up+b past the ledge (which is why it’s in this section. XD). You can also CC d.smash, which is a little harder to do, but you can actually do a grimy trick by facing backwards and CCing (This gives the illusion that you’re looking to WD onto the ledge which you can sell EVEN MORE by wavedashing in place. Dogy’s dumb audio tricks version 2). If you’re on the ledge, you can ledgedrop a cape as he comes up. You can also do the “Death to Marth” lightshield edgehog. If you’re going to try this, make sure marth actually has to sweetspot as opposed to f.airing and moving you off the ledge (although you could let him f.air you on the ledge, and then ledgedrop a b.air USING BACK, NOT DOWN, DOWN WILL KILL YOU OH GOD)

BUT MOST IMPORTANTLY, IF HE’S GOING TO UP+B ON THE STAGE AND YOU’RE ON THE LEDGE, YOU CAN JUST LET HIM UP+B, HOP UP, AND KNOCK HIM OFF AGAIN. Marth’s up+b is punishable, and if he’s up+bin onto the stage, it’s not a success until he gets control again. A lot of people DON’T do this for whatever reason, but it’s so good. You can actually fish for some dumb gimmicks (such as the reverse. You’re on the left side of the stage? F.smash him towards the right. It makes no sense logically, but logic says you should be DIing so you don’t go off the left again. What happens when you catch somebody DIing like that? (Which is then HORRID DI?) Ridiculously good on small stages)

The one thing you have to watch for in all of this is marth’s double jump. If he still has his double jump, he’s liable to DJ d.air you if he calls you. THAT’S DEVASTATING. He’s also got other nonsense that works, but that’s more of a player-by-player basis instead of the norm.


Recovery

When Marth gets you off the stage, it’s yet another situation where you have to pray. I really could sum up all of the recovery sections by saying “just practice all sorts of options, pick one, get on your knees, and pray to God your opponent does something stupid.”

Let me start with this and actually put some real meat in this section. If you float somewhere dumb, Marth can get to you. If you want to be in the same spot behind pills, he can ledgehop a b.air at you (Hell, he could just BAIR through it if he wants to), if you’re floating above the edge like a genius, he can d.tilt or F.SMASH! You can’t go above Marth, you’re Doc.

You also have to be mindful for d.air traps. If he throws you off the stage at a low %, DI AWAY so you don’t get tipped, and then don’t be so quick to up+b back. If you can catch him kool, but if he’s planning or waiting for it, he can either WD onto the ledge into a d.air (planning) or F.SMASH! (waiting). Or if you try to up+b past the ledge, he can just counter the **** up+b. (He can actually counter A LOT of stuff in your recovery)

OK! SO WITH ALL THAT ASIDE! I PRESENT TO YOU! DOGY’S TOP 7 “LOL MARTH WHY YOU GOTTA HATE” ANTI DOC EDGEGUARDS!


#7 – The FH Gate Breaker FROM DOWNTOWN! With a pill in his face!
#6 – Dropzone SHORYUKEN!
#5- The M2K Side-B-Palooza!
#4 – Momentum Boosted Counter vs Pill!
#3- The Countered Up+B Stage Spike!
#2 –The Darton Down-Air! (Ledgehop Side-B -> D.air. Shoutouts to Loud John)
#1 - The Mid-Air Side-B Suicide Spike of Justice

My point in this is that, well, Marth can LITERALLY have a field day on Doc’s recovery. You just have to pick a route, adjust accordingly, and prepare for the worst.

Getting into Marth!
It sucks. You have to do all sorts of things to get in on Marth. There are a few ways to go about it, but nothing is guaranteed. Here are some things to try out.

First and foremost, you can make him freeze up or jump if you throw ground pills at him. He can poke at them easy, and you can come in behind them with a n.air. However, the default answer for him is probably going to be to do an aerial. This is something to look for. If you see him going up, run in and just take the hit somehow. CC if possible, but if not, shield it.

Obviously, you can’t do this all the time or else he’s going to start doing retreating n.airs ALL the time, and you just get positioning. But, you can let him back up and start the process again (so long as you’re staying far enough to where he can’t do anything.) Catching him jumping also means you can dash attack in, although you have to slide pretty deep to get in.

Once you get him looking for pills, you can periodically just RUN in and defend. The key to know is that unless Marth is going to defend as you come in, you HAVE to defend. You don’t always have to pill, but you want him to think that’s the only time you’re looking to come in.

As you start knocking him around, then you have to just start messing with him. A lot of times when you try to jump in on a tech, they look to u.tilt. Don’t jump in. If you try to run in after an u.air juggle and you’re not going to make it in time, they’ll try to tilt or f.smash. Don’t run in. Now, if you’ve been keeping up with the guide, you should know that all of that IS punishable. That’s what I’m getting at. If you know it’s coming it’s punishable, but if you’re not there to begin with, you’re going to scare them into throwing it there’s a chance you won’t be there. When you get them to stop throwing the sword out (or just to hesitate), that’s when you get to take MORE. That’s when D.smash punishes on Marth F.smash turns into u.smash punish, that’s when tilt punishes on marth’s F.tilt turns into grab punishes, and that’s when you start being able to see d.tilts and jump them with a f.air.

If you can’t beat em, scare em. That way, you have a better hope at beatin’ em.

Gimmicks (And gimmicks to look for)

- Marth SH Side-B: Something that like, NO Marth does now, but it’s pretty possible. Ridiculously safe move out of shield and it allows him all sorts of options since he can wavedash, fair, double jump, or do other stuff afterwards. Infact, I imagine mentioning this will make just a little more widespread.

- Walking Marth: Note 1: Marth, at full speed, moves as fast as Doc running (No lie). Note 2: Marth walking at you is one of the worst things you (or just about ANY character) can let happen. When he’s walking, he’s got –easy- access to ANY move in his arsenal. The gimmick to this comes from his range. He’s got more leeway in when he has to attack (as opposed to you trying this, where you’d have to walk deep as hell to be able to do anything). The trick to avoiding this is to move back as you see him walking up. It sounds dumb easy reading it, but you’ll be surprised how often this happens.

-Marth Falling U.air: If for any reason you ever expect this, duck it. Marth has to be jacked up on you for it to hit, and if he tries to do Falling u.air -> u.tilt, you can just duck the u.tilt too.

-Marth’s Platform game: Don’t be on platforms vs Marth. That’s like telling you the sky is blue; if you didn’t already know that, you’ve got problems. With that being said, you have to watch for some STUPID gimmicks vs Marth if you wind up on a platform. The obvious is u.tilts and u.airs through the platform. But you have to watch for crazy stuff like falling-through-platform u.airs, delayed u.airs, side-b -> double jump shenanigans, side-b resets, and all sorts of stuff. Just, be ready and know that it’s not over till you’re back on the ground with him.

-Marth Reverse Up+b: When Marth Up+b’s, the initial tipper sweetspot is behind him. So basically, if he’s in shield and you’re behind you, he’s liable to up+b, and if you’re not ready you die. Just keep that in the back of your mind.

-Marth Corner Throw setup: Marth grabs you at low %, d.throws you to the edge (not off the stage, not to the ledge, just the “corner” of the stage. You realistically have to pick the lesser of 2 evils at this point. You’re either going to tech in place/tech away (if he spaced right, both of those will be the same) or you’re going to tech in (which is towards Marth). If you tech in place, you’re getting d.tilted off the stage. If you tech into Marth, he’s gunna grab you and do it again. That’s the generic scenario for this setup; Marth can take more options depending on how brave he is and how scared you are.

003 Sheik
Dogy’s Matchup Chart: 4-6 Sheik
Dogy’s Matchup Ratio: 40-60 Sheik
The General Consensus: 30-70 Sheik (lolwut? Probably 20-80, 10-90, or impossible XD)
The General Flow

Don’t. Press. Buttons.

Like, not literally, but Sheik is THE character that will “**** the bad habits out of you”-Lambchops.

Sheik is another one of those different matchups, but what’s odd is that most people never realize it until it’s too late (Me included). Sheik is kind of like a hurricane in that she’s fast, painful, and you probably are going to have to move the f*** out of the way, but understand that you are not completely helpless in this matchup. This is just THE matchup where you’re forced to do the right stuff because pretty much everything a sheik player would NORMALLY think to do works. (Now, when I say that, I mean the obvious. If a sheik player wants to f.tilt, it’s something that could work. Same with the other tilts, a few smashes, any aerial, etc etc. But you run across a ****** who wants to chain all day? Yeah sheik isn’t THAT dumb-easy)

Anyway, this matchup is pretty much going to be you on edge at all times. Although you get by a lot of Sheik’s nonsense as Doc, you always have to watch out for the default Sheik gimmicks that lead to big damage. IF YOU DON’T KNOW HOW TO, FOR THE LOVE OF GOD, WORK ON BUFFER ROLLING AND BUFFER SPOTDODGING. If you can’t, you’re pretty much sunk unless you have some ridiculous ability to control sheik.


Offense

N.air and F.tilt. Unless you have a SPECIFIC goal that you’re aiming for, those are the only 2 things you even need to think about. Those are the 2 moves you have that, by default, are least likely to get you hit. Now more than ever.

You try to start any stupid s*** and sheik’s gunna abbreviate it real quick. So you have to have a purpose with what you do.

Starting with your long range, Pills aren’t completely out of the equation. They NEVER are out of the problem. The thing you have to understand is that if sheik throws 2 needles, she’s cutting through your pill (one) and the second one is coming for you. So that means you can’t get too predictable with where you’re going. You’re allow to throw as many pills as you want so long as you can maintain good spacing and not end up in needle lanes (or attack range if you are close to sheik). It really doesn’t matter what you get sheik to do in this as she’s a character who, if done right, can defend against all of your offensive options behind a pill. The thing you’re looking for is any kind of pattern. That, or the patterns you can guess at.

Beyond that, all you really have to do is avoid hanging too close to sheik in general. No matter what you’re starting, if you’re not careful about what you’re doing, sheik can turn it around with a random jab, tilt, or aerial. You don’t really want to lay on the offense unless you’ve managing to keep sheik in her shield. AND EVEN THEN SHE’S STILL GOT SOME GOOD STUFF GOING.

If you can get her to stand still long enough, you want to look for a grab. Grabs against sheik are great, seeing as you can chaingrab the mess out of her (or atleast take easy guaranteed damage). Understand that you have to run PRETTY DEEP on sheik to land a grab, and she can wavedash back -> jab to put stop you.

Inspite of what kinds of crazy ideas you may have, you’ve just got to be ready to put the brakes on and stop what you’re doing.


Defense

Defending against Sheik is crazy. Not so much because of how much pressure she can put on at much, but because of when and where she can do it. Something into jab, needles, b.airs, when I think about it, the ONLY two things you really don’t have to defend against at all are her side-b and her down-b. AND HONESTLY, SHEIK DOWN-B’ING ISN’T EXACTLY A BAD OPTION AGAINST DOC. XD

The first thing, and the most important thing you need to realize about defense vs sheik, is that you CANNOT rely on hanging out attacks. If you’re going to do that, they have to be well placed and have a good purpose. If you try to mindlessly WoP, Double u.air, D.air, any of that nonsense, Sheik’s slapping it. You throw a tilt in the wrong place, sheik’s gunna slap that too.

She’s kinda like melee’s Itouch. “You gunna do something stupid? We got a slap for that.”

Ok, with the “stupid” decisions out of the way, now you’ve got to straight up defend yourself. Anytime you’re on the ground, you have to be ready to avoid a grab. Roll, spotdodge, jump, whatever you’re going to do, you just don’t want to get grabbed. It’s not the end of the world if you do get grabbed (infact, you get off EASY compared to a lot of the cast), but you just don’t want it happening. Now, I say consider jumping, and you’re thinking “Wait, why would I jump? I’m just gunna get slapped.” That’s right you’re JUST gunna get slapped. You let her grab you, and she’s going to throw you (probably down), f.tilt you, and THEN slap you. So why go further into debt than you need to?

Jumping sets up the next thing you need to look for, you need to look for sheik hanging around YOUR area. Now, you have to look past the scary figure of disjointedness and understand that sheik isn’t invulnerable. You’re just looking for holes you’re not used to. One thing you HAVE to hone in on is Sheik’s jumping around your area. You could see all sorts of variants. FH Double slaps, SH slap, n.air, b.air(s), whatever. You’ve got to watch your spacing and be prepared to jump out and n.air/u.air to stop sheik from doing more bs than she’s really allowed to do.

The next place you have to really worry about is on the ground. Sheik on the ground…. Is Sheik; she’s a threat. You’ve got to be ready to contest tilts and jabs. In general, the ground is actually one of sheik’s weakest parts of her attack, because once she throws SOMETHING out here, it’s going to be the end of it and the start of something new. Your goal is to try to set yourself up to keep the new from happening. Force misspacing, punish tilts (and stupid smashes), or place yourself to deal with sheik’s next move. There’s no golden tip I can give you to make this magically work, you just have to be ready and willing to attack.

The one thing I CAN tell you is to keep in mind that you can CC. CCing vs sheik is good, so long as you can call or create bad spacing. Run in CC, Wavedash in CC (which is kinda hard), whatever it takes. At some point and time, you can CC everything sheik has except needles. So with that, if you can get in deep enough, you can actually punish something such as a f.air with your own d.smash. Again, it’s not easy, but it’s something to mix in. (For the record, you also can’t CC Sheik’s Down+B. Think about it)

All in all, defense is what’s going to win you games vs sheik. But it’s the one thing that’s hard to see against sheik. Everything gets mashed into one thin terroristic collaboration of hitboxes and nonsense.


Edgeguarding

Edgeguarding sheik. …-rolls eyes-.

Make her up+b. If you can do that, you’re pretty much done and you just have to not drop the ball. The first thing you have to understand is that you really can’t attack sheik off stage, … she’s got a slap for that. Like, if you want to get bold, you can try to go out there and n.air, and that MIGHT work (might literally meaning maybe. It is smash we’re talking about.) But like, if you want to go out there and b.air? Oooohhwwee good luck and god speed.

Now, when you get her to up+b, you’ve just got to stay kool and keep knocking her off the stage. Sheik’s up+b has horrible landing lag, and there’s like, NO way she’s going to do edge cancel tricks. So you just have to look for dumb gimmicks. Explosion attacks, which you beat by keeping your invincibility; up+b’ing straight up, which you hold the ledge for; or going on the stage, which you hop up and send her back off (you want to send her FAR so she has to do it again.) In terms of attack priority, you’re looking at f.smash > d.smash > b.air > b.throw - D.TILT (you’re welcome 18s) > f.throw, in response to how much time you have AND how far you’re looking to send them. If you’ve got the kill, you want to take your ledgehop f.air, dunk, or f.smash.

Beyond that, there’s really nothing to edgeguarding sheik beyond the norm. Watch for airdodges if she’s close, and if she gets the ledge, BACK THE F*** UP N****. If you don’t or cant, be ready for something of the ledge, it’s probably going to be a f.air, but you could catch something crazy like a d.air if they call a spotdodge.


Recovery


Oof.

I mean, it’s like, … oof.

Uuuuum. Needles are hilarious. Save your cape for crossing “the lines”. The lines being the horizontal straight off the stage (or platform), or THE HUGE FRICKING ANGLE KNOWN AS SHEIK’S JUMP HEIGHT. The first thing you have to do is just be ready to cross either one of these. If you think sheik’s gunna throw needles, have a pill ready and cape behind it (meaning you want to save your cape). This’ll kill all of the needles, while still keeping you on track. However, if you get caught by like, ONE needle, start thinkin bout your next stock or praying to whatever higher being you pray to.

Beyond that, you have to worry about getting into range of…… sheik. Do something stupid, she’s got a slap for that. And believe me, a sheik player has no problem hopping off stage and throwing aerials when they need to. It’s like, in their nature.

Like everybody else, you want to keep sheik off the ledge. If she gets the ledge, you pretty much can’t go low or you’re going to die. Like, Sheik COULD do the right thing, let you up+b on the stage, and then throw you off again (And when sheik throws you off, it’s with that low *** b.throw, so it’s still a GOOD option). But what’ll probably happen is she’ll just ledgedrop b.air you, whiiiiiiiiiiich is you dying. So, try not to let her get the ledge.

Beyond that, you just have to not do stupid stuff. Don’t go so close she actually lands a d.smash, don’t let the forkgirl edgeguard actually work (chain edgeguard), don’t get hit with double explosion. I mean, I tell you all this, but I know you’re Doc. You can’t really help it once you get out there. But, just try.

Actually, I take that back. You better not let the Forkgirl happen. If it comes to it, keep ****ing up+bing till you punch that sheik in the jaw if they try that. Look at em, and say “Worth it.”


Raiding Fort Sheik

Attacking sheik is f***ing scary. But unless you have the lead, you have to do it. And when you have to, Sheik doesn’t have to try hard to make it a living hell for you. Here’s some things to look for.

If she goes on a platform, this is obviously annoying to deal with. You’ve got to first get in without getting pinned up with needles. You can either cape the needles, dash under them, or n.air around them. The two things you DON’T want to do is get hit (duh :p ) or shield. You’re actually ok to take a hit or shield like, one or two needles, but you don’t want the full needle storm. That’s when trouble starts.

If you do get hit, expect sheik to come down with like, f.airs and n.airs and crap. If you get her to come down then you… sorta win? I mean, you got her down, but she came down on her terms and now you’ve got to avoid getting the crap beat out of you for knocking on her front door. –Bad End, start the adventure over.

Not getting hit is kool, but it’s not the end. She might come down anyway, but if you can actually drop down and CC something, then you might get to hit her. However, she might opt to keep jumping around on the platform, as it’s still safe. You DON’T want to jump up there with her. This is where you get to do more choose your own adventure.

You could either sit under the platform, time her as she lands, and make ONE poke at her with some aerial. The pros from that is that you’re less likely to get scooped up by a d.air or slapped away. The con is if she knows you’re going to sit there, she can go around and put a b.air on you, and THEN run. *shakes fist*

The other alternative is YOU CAN HOP ON THAT N.AIR AND KEEP POPPIN THROUGH LIKE A SHARK YAYHUZZ. Doing this keep sheik on her toes as she has to constantly keep jumping or else get hit by like, a half charged n.air (You can replace n.airs with the occasional u.air so that you don’t always poke THROUGH the platform). The con for this is that you’re poking through the platform; that’s asking sheik to hit you if she can time it.

There is a plan X, but it’s actually hard to setup. Plan X is getting on a platform ABOVE her and throwing pills at her. If you can get yourself into this situation, then it’s auto win for you, she’s got to start swinging at random pills or move the hell out the way. The ONLY thing that sucks about this is if you want to drone on with pills and she comes around and slaps you for it. That’s real easy to solve, you just fade back as she comes in. You STILL have to watch for her to come in and slap you though (it’s really a 2 action phrase on your part, but sheik sees it as “I’m off the platform -> I’m running under him -> I’m going to slap him).

Once you get her off the platform, you’ve got the schematics for what needs to happen. You just have to be ready for the quick turnarounds of her going on and off the platforms.

Gimmicks (And gimmicks to look for)

Sheik U.Tilt: If it finishes, it’s completely safe. Don’t try to punish it or you’ll get hit with something else.

Sheik Grab Nonsense: Sheik MAY have like, one regrab at low%, and that’s really ALL the BS she can possibly do. No chaingrabs, no guaranteed tech chases, nothing. If she gets a grab, she’s either going to get a tilt’n’slap, a straight slap, or some other aerial (i.e. u.air). Anything beyond that, and you’re LETTING it happen. Understand that the most common thing that you’ll “let happen” is an u.smash. I don’t be mad at you if you let that happen, as you should be respecting a f.air. But like, if you let some super dumb **** happen, that’s on you.


004 Falco
Dogy’s Matchup Chart: 5-5 Even
Dogy’s Matchup Ratio: 50-50 Even
The General Consensus: 40-60 Falco
The General Flow

Lane changing.

That’s the BIGGEST scrub killer falco has. Can you handle his lasers? If you can’t, you better hope you’re playing one of those wack Falcos who forgot to pick up the extra clips.

This matchup is all about you either controlling or moving out of Falco’s lane. Unlike most characters, you can actually control a bit of area, as well as stop him from shooting from time to time, but it’s not simple.

Beyond that, you just have to be able to deal with spanimal pressure. Fend off some aerials, go toe-to-toe with some shines, the general stuff. Oh, and you gotta avoid getting the everlasting yayhuzz comboed out of you. It’s really not HORRID, you just need to look out for combo starters.

If you can get past all that, you’ve got hope. I won’t say you’re scot free because I mean, you’re fricking Doc. You’ve got stuff you can do and all, but most of your follow-ups involve putting falco in the one place he loves. Being above people ready to d.air them to mess with him (U C WUT I DID THAR?) It’s really not (horribly) lopsided in terms of what position you want to take. You just have to be able to create the space you need behind the lasers.

Offense

Ok, attacking Falco is pretty hard. It’s not hard to actually do the act of an attack, but it’s so hard to get into position because of the obvious lasers. So with that being said, don’t ever go into a situation with a set plan of “I’m going to attack” that could get changed real quick with one slight hesitation or misstep.

So the first area you probably will be able to attack from is from long range, with pills (duh). Now, understand that it’ll be **** near impossible to attack falco STRAIGHT from pills. That being because he can outjump you easy, and he can move and keep a stream of lasers going to prevent you from setting him up exactly like you want. However, you still want to try and pill him to in an attempt to either make him stop shooting lasers, or make him move around your pill.

Beyond that, you’re actually not going to be doing any specific mid or short range attacking. Falco is not a character to really stay set for any reason, and because of how he operates, you’ll REALLY be paying attention to high/low.

With that being said, if you want to approach from the air, you’re probably going to n.air. N.air is your safety net for not knowing wtf to do. The only other aerial you even want to consider a “naked” approach with is some variation of a u.air. Either one of those set you up for a pretty strong mixup op upon block, or they allow for some follow-ups on hit. Every other aerial you may use have to be used for specific purposes, normally for defense (b.air or d.air), or if you get some sort of a safe jump (f.airing a tech or f.airing any “forced’ landing).

Staying low is obvious going to require you to run deeper if you want offensive rewards, but Doc’s small size actually adds some benefits to trying this approach. First and foremost, understand that you can’t rule out dash attack at this point. It’s obviously not great to throw out ALL the time, but it does make Doc approach in a tech crouch, which is **** good for getting under falco’s lasers. Forces falco to shoot near perfectly SHFF Lasers, in which case when he’s trained to do so you can start SHing over those free. Other than dash attacks, you’re looking to make your way in, stay low, and just lay into him.


Defense


Defending against Falco is obviously THE thing that trips people up, as you will hear time and time again. If it’s not his lasers, it’s his borderline-abuseable aerisl that will just be the completely bane of your existence. But fear not! You actually can deal with Falco’s onslaught, you just need some heads up for what you’re looking for.

First and foremost, you have lasers. Now, there’s going to be a section later telling you what all you could do specific against lasers themselves. What you need to understand right now is that when Falco starts approaching with lasers, you need to control when he can come in (with Pills, usually FH to get over lasers), and then actually defend against his aerials.


Although falco is somewhat fast (he’s really not, just looks it behind the lasers and with the shine), you need to understand that he can’t cover horizontal very quickly. That means that if you keep a decent distance away from falco, he’s not going to magically warp over to you and start landing d.airs on your shield like a Fox would. So the first step to defending against Falco is to actually defend when you need to.

If you start throwing attacks too early, that’s when he comes in jumping behind you with d.airs and whatnot. So unless you’re trying to maintain space with aerials (n.air u.air and b.air, normally), you don’t want to go crazy throwing aerials all day.

Understand that, because you need to be ready for Falco to come in, you don’t always have to do an aerial when you jump. It’s perfectly acceptable to empty hop. Especially now, when misplacing a f.air will put you in shield as falco comes in. You want to avoid that as much as possible.

However, it can’t exactly be helped sometimes. Falco can come in on your shield. You want to reduce collateral damage and get out as safe as possible, maybe net some damage in the process. If falco hits your shield with an aerial, the ONE thing you can’t do is have a habit. Now, you never want to have a habit against ANYBODY (unless it’s a habit that involves you winning), but Falco is a character who can throw out a large number of attacks and cover options very rapidly. With that being said, you can’t always default to “oh, I’m gunna roll when he d.airs my shield” for the obvious he’s going to punish the roll, but you also can’t look for something such as “I’m going to u.smash OoS because he’s going to bait it.” –Looks at Shroomed. XD

You have things you can do, if he d.airs past you, you can wavedash OoS or jump away from him with a b.air, you can try to block him from coming in with n.airs u.air and d.airs, you COULD roll or spotdodge, you could just jump to avoid grabs or shines, you could stay in shield to avoid jump punishers, you could up+b to cut off further pressure, YOU HAVE OPTIONS. The thing is, you really CANNOT afford to have a habit in this situation.

Realistically, defending against Falco isn’t as bad as people make it out to be, it’s just scary because if you get hit with something major (read: a d.air or shine, normally), it leads to a good chunk of damage. It’s not that you CAN’T stop him from raining down you, you just have to be willing to try a variety of things that work rather than defaulting to a few “safe” options that really aren’t safe at all.

Edgeguarding

Watch for his up+b. If for whatever reason you call or force him to up+b, he should be dead. That’s just a golden rule to keep in mind about falco. Unlike fox, Falco’s up+b has no hitbox on startup, so IT’S PERFECTLY SAFE TO JUMP OUT THERE AND HIT HIM IF HE’S UP+BING.

Ok, so with that being said, when you get falco off the stage, you have to kinda go through “the flowchart” of stopping as spanimal recovery.

The first thing you have to look for a falco illusion on the stage, all stemming from Falco having a second jump. To stop this option, you want to try and jump before them (if you think they’re going to double jump), or fall into them if you think they’re going to fall. When you get to either place, you’re looking to n.air or b.air. If you’re on the stage, you’re looking to f.tilt (or n.air /b.air if they’re going over you.) If they’re trying to sweetspot, you could edgehog if you called it and have time, or you can try to f.tilt or cape. Cape works because it reaches below the stage and illusion is one of the moves you can actually knock somebody out of (read: cause hitstun with). More-often-than-not, if you catch him in an illusion he’s going to fall below the ledge, when you would jump out, hit him and be done.

If you block the options of the first wave and falco DOESN’T illusion into anything, you still have to look for him to illusion, if he’s still above the stage, or you want to be ready to jump out and stop and up+b. Just be ready to waveland off and do something if need be.


Recovery

When you’re far away, he’s going to shoot lasers, when you get in close, he’s going to look to ledgehop something, trick you into coming onto the stage and b.airing you off, or edgehogging you.

Throw pills like you always do to try to move him where you want him, try to avoid an edgeguard if possible.

I don’t know why I have a specific section for every character. IT’S ALL THE SAME CONCEPT, REALLY.

Roadkill


First, go read Fox’s Shine-On Section (FOXS!!!), same rules apply to falco.

This, however, is about his lasers. Don’t be afraid of lasers. You, as Doc, have MANY more tools for dealing with lasers than most other characters. The thing you have to understand is, unlike “the current meta”, your strongest position to fight lasers tends to be on the ground. That’s not to say don’t ever jump over them, because you can jump over and f.air if Falco is stupid. However, you can do a lot to start and maintain control if you stay on the ground, caping, pilling, and sliding.

There’s nothing I can really say that will make dealing with lasers easier. I mean, I’ve read all sorts of laser guide, I’ve seen all sorts of strats from practically EVERY character, and I myself have (imo) an above average laser game with Falco (and ONLY laser game, cause I mean, I love projectiles and stupid gimmicks). I however, am not so hot at dealing with them.

The problem I run into is being too one track minded. It’s like “I don’t want to cape cause he’ll stop it.” Or “I’m going to jump when he comes in.” I’m not too great at literally mixing what I’m going to do.

I also suck at moving through platforms. That is one thing that I KNOW is great against Falco’s lasers.

I do, however, have a generic *** “flowchart” for lasers vs cape, and it always pans out the same. The end result is you ALWAYS have to respect lasers, Falco realistically NEVER has to respect your cape.

Goes like this. Falco starts filming Star Wars, you get mad so you start caping. If it’s a good Falco, he’s going to shoot LESS lasers, making them more sporadic and in harder-to-spots. He’s also going to set himself up to jump over your cape. A BAD falco is either going to continue shooting lasers like a ****** or he’s going to stop all together. In the event you’ve landed a good Falco, now caping is a liability because he could either fake a laser or he could jump it and punish you. If it’s a bad Falco, He’s eventually going to start doing dumb **** like shining (which he’ll just waveshine out of), or he’s going to periodically start and stop shooting 5 million lasers.

In the end, you ALWAYS have to look for Falco shooting lasers, but he really doesn’t HAVE to look for you caping. It’s interesting.

There are plenty of ways to deal with laser though. You can.

1) Random take hits: If you do this, Falco realistically NEVER knows if it’s safe to go in unless he spaces correctly. There’s very little stun on a laser, so unless he’s jacked up in your face, you have enough time to jump and n.air upon taking the hit.
2) Shield: Kinda obvious, gotta jump out afterwards.
3) Jump around the lasers: You don’t specifically have to throw pills or aerials, but this keeps you from being locked in shield as he comes in.
4) Roll / Spotdodge: this isn’t really for the laser as it is for the approach that comes behind it. You gotta make sure that he’s actually GOING to approach behind it or else you’re getting punished.
5) Cape: You can’t really follow it up (even with Capedashing), but it allows you to throw one (or two) lasers back at him, and then move for a little bit afterwards. One kool thing to keep in mind is that you can reverse cape, so you can keep your b.air ready.
6) Pill: If he’s mid/long range, you can actually try paying little-to-no regard to lasers and throw pills. Sounds crazy but think about it, getting hit by a few lasers is like, 10 damage, getting hit by ONE pill is like 12.
7) Duck: Makes it to where he has to shoot close-to-perfect SHFF Lasers, and that opens up your ability to SH over them.
8) Dash attack: Lower than your crouch. Thing that sucks is that it’s not long range like Marth/Roys/Peach/Sheik. :/ It is low though, so that’s pretty kool.

There’s more, and you can always mix and match. That’s what you’re going for actually, the shake’n’bake. So they have no clue what you’re really TRYING to do. You just need to keep an eye out for all of your options and not just go with the easy mac shielding. That…. Is bad.


Gimmicks (And gimmicks to look for)

Falco’s Shine: Is like Fox’s in that he obviously can jump out of it and turn around. So basically, know that he can pretty much turn around and b.air at will. Some dumb gimmicks from shine you’ll have to look for are.

-Shine -> U.smash: Falco sits in shine, reflecting stuff. Seems harmless till you try to run in, and then he JC upsmashes. Hardly used (Only person I know of who uses it is Alternate275) but if you’re not looking for it, you could just run into an upsmash.

-Shine->Grab: Pressure tactic. If –spanimal- expects you to stay in shield after a shine, rather than moving away or wearing on your shield, they could just JC grab you. This means you have to be willing to roll away from or jump out from shines.

-Double Shine: Prevents you from trying to punish a shine.

Edgecancelled illusion: Usually used for fast movement across a stage, if you’re mindlessly standing under the edgecancel, it will lead to aerials in your face.


005 Peach
Dogy’s Matchup Chart: 5-5 Even
Dogy’s Matchup Ratio: 45-55 Peach
The General Consensus: 50-50 Even
The General Flow

Moooooooove b****!


*Quick note: FC = Float Cancelled*

Playing Peaches will be fairly annoying to you, not because they have any crazy advantage or anything, but it seems like they’re just in the way of everything you want to do. It’s weird, too, because it’s not like they can chase you down or anything, but they’re just always there, hovering over your every move (sometimes literally), just waiting for you to f*** up.

That’s pretty much how everything is going to go in a nutshell, Peach is just an animated wall. She’s, in large, fairly immobile and not agile at all, but you’ll be hard pressed to actually move AROUND her. All she really wants is to keep pushing till you’re off the stage, at which point you’re pretty much screwed.

You’re goal in this matchup is to basically be annoying as hell. Run and throw pills, n.air and d.air to disrupt her stuff, keep her in shield, just be a jerk. You can’t specifically BULLY her around, per say, because hanging around too long will result in you catching FC aerials, which is the LAST thing you want to deal with coming from Peach. You really just need to keep moving and make her do real work to hit you.

Peach has all sorts of problems hitting a moving target, so long as you’re not moving like a ******.

Offense

Continuing on with horrible Dogy puns, the best way to think of this matchup is a fly vs a flyswatter; the fly is obviously annoying all the way down to his presence in the room, and he’s fairly hard to hit with a flyswatter, but when he finally gets hit, it’s one of the most satisfying things in the world (for the flyswatter).

… anyway.

My point in all this is that one of the keys to your offense is to be very varied with your movement. It’s one thing that Peach is praying to whatever God she chooses that you’ll stay in one spot, she’d be perfectly content if you attacked her with simple movements. In short, you don’t want to be so hasty to go in at the first chance you get, especially if she’s swingin’ to keep you out.

It’s so easy to fall into a pattern and want to make the same approaches. The problem with doing this against Peach is that THAT’S ALL SHE’S REALLY GOT. She’s not going to chase you down (unless it’s XiF, I swear his Peach wears Nikes), but if you ever let her do so much as put an FC aerial on your shield, you’re goin through hell just to make it out.

So first and foremost, when you’re long range at pills, POUR ON THEM S***S! Again, Peach is fairly immobile and not agile, so throwing pills at her is going to do more than piss her off, it’s actually going to make her disrupt a lot of her game. Although Peach is capable of getting around pills, it’s hard for her to do it, maintain space, and be prepared to defend against your attacks LIKE SHE WANTS TO. Now that’s not to say that you throwing pills is going to make her helpless, that’s never the case with any character. However, Peach is one where you can place pills to make her use a weaker defense than she really wants to. She’s the kind of character you can shoot out of positioning if you so well please, so feel free to do it as you see fit.

When you close a little distance, you need to be ready for a lot of CCs. Peach is a character who’s real content with taking a hit just to CC downsmash you, or CC grab if she’s quick enough. You really don’t want to mess around with too much at mid range as your useful offensive tools (namely your f.tilt) requires you to be stationary. It’s ok if you know it’s going to go through, but if you’re looking to actually attack and not sure if it will hit, opt to keep moving rather than take a standing shot at her.

If you’re moving in from midrange, know that n.air and d.air are great. If you jump in with a d.air, that will stop A LOT of peach’s moves, all aerials included. You just have to make sure you actually HAVE the d.air going before you get there. N.air is good for its default air-to-air use, but you run the risk of trading or losing to range by throwing out. You don’t want either one of these to get blocked, so if you know a shield is coming, SHFFL a late u.air or n.air, try some tricky, or move out of the way.

When you arrive at the doors of fort peach, yooooou really don’t want to stay there too long. If you don’t have Peach scared, then you’re liable to catching all sorts of bad stuff. Although you’d think jabbing would be a fairly good idea (although it’s never great cause Doc’s jab isn’t great), Peach is again a character who really likes to CC. Up close, you’re asking for the obvious d.smash, so try not to jab unless you’re stopping a move or you know she’s trying to jump. All in all, you really don’t want to hang around too long, just try to land an attack or two, if you fail, get out.

As you’re putting pressure on Peach, you really want to keep an eye out for a roll. Peach has a lot of –mechanic- reasons to roll, her wavedash is fairly short, her roll is fairly quick, yada yada. So don’t be too surprised if you see Peach roll away from you. Don’t ever assume it’ll be the default answer, there’s only one character in the whole game that really relies on rolling, but just understand that Peach is a character who will roll a little more than average.

At all times, you are looking for ONE green light to run in. If you can ever call Peach pulling a turnip, you’re ok-a-go-go to run in and put pressure on her, especially if you can keep her on the ground. Although peach is the ONLY character who still has access to her aerials while holding a turnip (by way of FCing), she still CANT grab, and she CANT d.smash (along with all of her ground normals). So if you find a mindless Peach who periodically does unsafe pulls, RUSH THAT.

As for another special note, if peach is ever on a platform, go around her or wait for the d.smash. It’s coming, you just have to wait. If you’re playing one of the 5 peach players in the world who just refuse to d.smash on the platform, …. Your *** still better not jump cause they’ll do it too. WAIT FOR THAT D.SMASH OR GO AROUND HER.

All in all, you want to just keep moving. Keep your attacks coming from different angles, different timings, the whole 9 yards. You don’t really want to sit and try to wail on peach. The obvious answer is because you can’t, but if she knows you’re coming in she’s probably going to n.air or b.air and just put a stop to it. Constantly moving forces her to make a fairly good read to get you to stop (so long as you’re moving in the right places).

Defense

Defending against Peach is really a simple concept but a hard practice. Run away. You obviously don’t want to RELY on running away because you give up too much, but you want to move out of her range as much as possible. She’s Peach, she’s going to have a hard time chasing you down (I mean have you ever tried running in heels?) So, your default defense should involve movement. Wavedashing away, jump away, aerial away, etc etc. The more aways you to Peach, the harder it becomes for her to put a constant stream of pressure on you.

Obligatory CC statement here. Seriously though, people make it sound like you NEVER want to CC peach, which is a horrible horrible misconception. There is a lot of stuff that you can and NEED to CC vs peach (i.e. her jabs), but the one thing you have to avoid is being predictable with when you’ll CC. That’s when you get downsmashed, and that’s when you lose 50% to one move.

And, if you’re brave enough to stand toe-to-toe with her, it’s not exactly too hard for her to put pressure on you. The best thing she’s got is FC aerials, and they’re pretty frickin good. You realistically can’t punish ANYTHING that’s FC’d, so the best way to avoid it is to not let her put one on your shield. That meaaaaaaans you move. Obviously we’re not all perfect (unless our opponent is that bad), so the inevitable is going to happen. When it does, you’re playing rock, paper, scissors at that point. You want to move or else she’s going to do it again (jumping out with a n.air is a perfectly viable option), but you can’t do what she’s guessing at, and she can actually cover everything. You try to jump, she can jump and n.air, she can jab to keep you from wavedashing out, run after your rolls, etc etc. All of this can stem from ANY of her FC aerials, so don’t think you’re looking for a specific one.

With all the above said, know that she has a very strong jab mixup. I mean, I could spend some time talking about it, but the generic options are standard out of it (she can cover jumps, rolls, she gets spotdodge free, etc etc.) So again, you want to try to maintain some distance on defense so she can’t really lay into you.

The one thing you want to keep in your mind AT ALL TIMES VS PEACH is that spotdodging isn’t the best idea you can come up with. Peach d.smash beats spotdodge free. Now you still have to worry about grabs and other stuff, so it’s not like you can completely abandon spotdodges, but understand that Peach has a free punish anytime you want to hang one out, so don’t bank on it.

Turnip approaches. Peach’s best approach. There are a variety of ways you can deal with turnips. The obvious answer is to, duh, move. Understand that moving doesn’t always mean running away. If you’re standing far enough away when she throws it, you can simply jump over it, which keeps you from giving up ground. However, running away is also a viable option. Shielding and shield options (roll spotdodge blah blah) also work, not always the best options, especially if she’s APPROACHING behind the turnip, but they do work. The next thing you have is caping, and caping is great. There’s a catch though, you need to make sure Peach is actually BEHIND the turnip. It does you absolutely no good to cape a turnip if she jumps over (or drops under) the line she threw it from. So you have to check before you cape. (An alternate to this is cape dashing, that way you’re not standing still as you cape). You could also hit the turnip with something like a n.air or b.air, but that’s play-at-your-own-risk. The last thing you could do is catch it. Now, catching it has its own risk/reward. Obviously you risk getting hit, and if you catch it you get a turnip, but having a turnip in your hand isn’t good at all. That takes away a large majority of your moveset. So if you’re going to catch the turnip, try to make sure it’s fairly random so Peach can’t predict it coming.

Outside of those points, you really just have to watch for spacing and tricks. You always want to keep a little distance so Peach can’t put a crapton of pressure on you. If you want to stop her from coming in, D.air works great (although D.air is always great if you use it right, so I dunno why I’m giving it a special moment.)

Just, keep moving.

Edgeguarding


If you knock her too high, she gets back free, no questions asked. That is the one thing that really sucks about Peach. Putting in work and then ending with a f.air that doesn’t kill, so she just floats back and drops dead in the middle of the stage. It’s pretty horrible.

Stopping her from coming high sucks in general. You only have one thing that might work, but it’s the greatest edgeguard in the history of Doc. It’s. The. YODEL!!! (Tornado edgeguard). No, I’m not joking, it actually works if you can hit Peach with it. The two rules you need to know about yodel edgeguards are that you want to be up there before she crosses over, so that she runs INTO you (and you have time to drop out if you see her pullup and f.air), and you NEVER double jump (Unless you’re just that ******. In the event you get hit out of this, you don’t want to go flying off the other side of the stage and die because you double jumped and tornado’d.

Another, “stronger” option you have to stop her high recovery is an up+b. It won’t kill, and you don’t get to follow up on it, but your goal at this point is strictly tacking on damage. This is actually the HIGHEST edgeguard you have as you’re up+bing, so you might as well double jump if you need to.

Beyond that, you’re looking to take Peach out of her float. It’s not really hard, you just have to realize that as she’s falling, she can stop and float at anytime. You may have to catch her with some high b.airs, some reverse u.airs, whatever it takes to kill her float. It’s nothing out of the norm at this point.

When you kill it, though, you’ve got to stop her parasol. That by itself it tricky to stop. Peach gets to open and close it as she pleases, and if she gets past you, she’s going to close it to land in neutral. You want to make her go low enough to where she has to try to take the ledge, and then you can edgehog -> roll. It’s easier said than done, trust me. All in all, you want to try to stay below her and jump into her. If you’re above her, she can just drop and beat you to the ledge or ground. Either one is good for her.

In the event you catch her BELOW the stage and she has to up+b to the ledge, you actually get some grimy **** on her. If she’s floating in a position to where she won’t SS the ledge (or you’re sure she won’t quickly drop to it back up and cape her as she goes up. Caping peach as she goes up (before she gains control of her parasol) is one of the animations where getting caped causes hitstun. So yes, getting peach BELOW the stage on recovery is golden. Don’t take more risks than you need to.


Recovery

Recovering against Peach actually isn’t as hopeless as you’d think it’d be. It still blows because you’re Doc, but you can actually contest A LOT of her stuff and make yourself a suitable challenge for her edgeguard.

First and foremost, turnips. Pills, capes, and catching. Done. She’s going to try to snipe you with one, so be ready. And don’t think she’ll just throw it out. She might jump off and throw it down. At that point, you’re going to cape or catch (or up+b if you’re close enough and can time it)

Next thing to look for is the default “im going to jump out there and hit you.” The worst position for you to be in is right in front of her, as the only way you can really defend yourself at this point is if you’re backwards so you can b.air. So you want to try to pill and position yourself so that she can’t time your recovery to this point. If she’s too early/goes too far, pass through her with a d.air (or drop down on her with a n.air if you’re high enough, or b.air her if she’s behind you for whatever reason.)

Alternatively, she could drop down to the bottom of your recovery and try to attack you from there. This is actually the best place for her to attack you (for her), so you want to try to avoid this at all possible. Again, you have to pill pill pill to keep her from getting where she wants. Even though she can cut through it, her n.airing a pill can give you the time you need to get around.

The last thing you have to worry about is coming up, which means dealing with d.smash (or d.tilt). Sweetspot, or be ready to tech. There’s actually a neat gimmick you can do if Peach’s positions herself to where her D.smash will send you back out. If you di down for the first hit (I KNOW SOUNDS DANGEROUS) the first hit and then press up for the second one, you’ll go out the opposite direction she wants you to. Not fool proof, not guaranteed, but it is an option if you’ve come to terms with the fact that you’re getting d.smashed.

In the end, recovering vs peach still sucks, but it’s not horrid. Infact, you can actually deal with it so long as you do the right things at the right time. You just have to be ready and keep her from where she wants to go.

Gardening

Peach’s Turnips are her utility tool. She grows em for offense, grows em for defense, she uses them all. You gotta be ready to deal with turnips. And although it’s not hard, you need to know some things and some funny things that can happen.

First and foremost, you need to pay attention to what she pulls, but you’re not concerned unless she pulls two things.

Stitchface: Looks something like this ~XXX~ (I’ll try to fix that, but you get the idea)
Dot Eyes: Has 2 beady little eyes, looks like ( : like that guy right there.

If she DIDN’T pull either one of those, the only other thing you really care about is a bobomb.

Ok, so on average, she’s going to throw the turnip and come in behind it, duh. Regardless of WHERE she throws it from, she’s really going to approach two ways. She’s either going to float or she’s going to run. Now, she might change when she jumps to float (or if she floats the entire way), or she might drop down and run, but know that she’s doing either or. You gotta be ready to step up and go under the turnip, jump over it, or cape it if she’s coming behind it. The worst string of events is if she throws it, floats behinds it, and you shield. That’s you in a crapton of pressure. Avoid that one if you can.

On defense, you just have to literally not run into turnips. You can pretty much take them out by pilling, but sometimes you can’t wait for all that. So be ready to do the same thing, duck, jump, or cape. It’s just now, you have to be ready for how she stops you afterwards. Heck, she doesn’t even have to throw it, she can still do aerials.

Know that she CAN throw turnips out of shield. So just because she’s sitting there shielding pills doesn’t mean she can’t come straight out and throw it.

Now, if she DID pull one of those 3 listed above, that’s where some fear starts coming in. The funny thing is, because of your cape, she’s going to get AS scared, if not more than you. You can’t literally stand there and spam cape, although the window for her to slot in the projectile is small, she can just come hit you for it.

What you want to do is cape in situations where she’s normally been throwing the turnip. You want to appear psychic with your capes. If she normally pulls and throws instantly, cape when she pulls it. If she DDes around and usually throws straight out of the DD, periodically cape as she DDs. If she waits to hit your shield to throw, then don’t ever cape. You have to give off the illusion that you’re not scared, you’re prepared. In all actuality, you can be scared s***less. You just have to have a system.
If all things go as planned, you can do as much as make the Peach straight THROW THE ITEM AWAY. Now that’s some comical stuff.

Don’t bank on it, but I’ve seen and made it happen plenty of times. It happens.

Gimmicks (And gimmicks to look for)


Peach’s Float: If she’s ever floating, you can knock her out of float with cape.
Peach on Battlefield: Can’t parasol to the ledge. Melee is a dumb game like that. Random thing to keep in mind.
Peach Upsmash: Is invincible from the shoulder up. (I forget where the sweetspot is, I think it’s actually on her shoulder). If you run across a Peach who will upsmash, don’t telegraph high approaches and don’t try to come down onto the stage right on top of them. Peach upsmash will win every time, even on Sundays.
Toad: Has more range than anything you have. So if she wants to Toad a pill, be ready to block.
Peach parasol: Great Antiair. Can actually lead to setups if you fall down onto it.
Peach turnips: caping them adds more knockback to them (not sure on damage, too lazy to check atm).

006. Captain Falcon
Dogy’s Matchup Chart: 4-6 Capfal
Dogy’s Matchup Ratio: 40-60 Capfal (I still say this is my worst matchup. NOT DOC’S DAMMIT, MINE.)
The General Consensus: 45-55 CapFal
The General Flow

“Don’t get hit.”

That’s like, the only way you can stand a chance In this matchup, is you have to NOT GET HIT. It’s really not THAT bad, but everything Capfal can hit you with leads into stuff, that leads into stuff, that leads into stuff. And unlike most characters where he actually needs to knee them to kill them, he doesn’t even NEED to do that to you.

On your end, this matchup is going to feel somewhat like fighting a sheik, although it will LOOK completely different. What I mean by this is that this is yet another matchup where you don’t want to press a lot of buttons (read: Throw out a lot of attacks (for spacing)). Where sheik would just come straight through and demolish you for it, Capfal will go around you and hit you.

Really, the matchup isn’t that bad, you just have to be patient in how you go about dealing with Capfal. You can’t force anything on him because he can ALWAYS just run away, so you want to try to get him in a corner to limit how he can run away.

The two keys to this matchup are going to be your ability to DI to reduce (or stop) a combo video from happening, and your ability to force bad spacing. If you’re terrible at either one of them, this matchup is going to be long and painful short and crappy.

Offense

You’re not going to be doing a lot of this.

Straight up. Whenever you want to attack capfal, he can just move out of the way. Jump away, run away, whatever. So all of your offense is going to be fairly shortlived. His best defense is evasion. That doesn’t mean don’t try to attack him, you just need to understand that unless you catch him in a bad position, it’s not going to last long.

Now, there ARE bad positions for Capfal. Being by the edge is one of them, especially with his back to it. He doesn’t have a good backthrow, so you don’t have to fear a lot if you catch him in a corner. The second (and even better one) is catching him in shield. If you can get in his face while he’s shielding, there isn’t a whole lot he can do without you allowing it. He’s going to have to either jump out, roll out, try to force an aerial, or try some super gimmicky up+b.

Know that Capfal’s spotdodge is a little slower than average. For whatever reason, this makes a lot of Capfals spotdodge less than normal. They’ll still try rolls and jumping (and wavedashing when applicable), but they’re less likely to spotdodge you.

Again, all of your offensive spurts are going to be very short, for reasons that involve capfal moving. So say you want to throw some pills at him, you’re probably only going to throw one or two, more if he wants to just run away and stay in a corner (which won’t happen). You start throwing too many, and you’re asking him to either jump over them, run under them, or n.air through them. You can use this to your advantage and attack where he’s goin to come out, but you’re not going to be able to maintain this for too long unless you want to get tagged for it.

There really isn’t anything specific to say about attack ranges at this point. You really just have to be cautious and watch your spacing. Capfal is always going to give you a moving target, even if he stops for a second to give his finger a break. Although you can’t keep up with him in any department, you need to fake and dodge you way in so you don’t make the mistake of running into something like a n.air or side-b. He can throw out attacks to defend himself pretty well, so it’s not like you’re just going to chase him down at will.

As long as you’re staying on the offensive vs him, you want to stay close to him. The closer you stay, the further he has to move to get away from you. Although he can move TO get away from you even if you’re jacked up in his face, being close makes it harder for him to turn control around in his favor. If he’s at the end of your attack range and you try to, say, jump in and n.air him, he’s got plenty of room in his dash to move out and come back in with something like a d.air. However, if you’re jacked up on him and try the same thing, he’s got actually run a few steps (or FH BEFORE you get to him) if he wants a chance to retaliate against you.

The best place to be, if at all possible, is behind him. Yes his b.air kills, but it doesn’t come out instantly, so you can stuff it if you know it’s coming. Along with that, he’s obviously NOT going to grab you. So for him to stop you at this point, he’s got to do something crazy like d.air or move away. If you can sneak in a bs cape to turn him around, feel free. If you actually get him around, then you get a shot at something before he tries to get away.

The most important thing to remember about all this is to not get too set on attacking capfal. It doesn’t matter what’s happening, you shouldn’t be allowed to keep up an attack for long. Don’t lock into the tunnel vision.

Defense

Now, defense is where this match is going to be won.

You’ve got to practically lie, cheat, and steal everything capfal has going for him to beat his offense, but it’s completely do-able. He’s got nothing in his arsenal that you can’t stop. As long as his n.air is (and it’s dumb long), you can cut him off before he starts it, during it, or you can force bad spacing and shieldgrab it (doing something like a dash-in shield or ending up with a CC). You can keep him out of grab range with tilts, f.smash, b.air, etc etc. You can beat raptor boost with a variety of moves, or you can punish it with upsmash oos or a shield di’d grab.

He’s not impossible to stop, you just have to make a lot of rapid decisions.

Like I said in the intro, the one thing you need to keep in mind is that you don’t really want to throw out a lot of attacks. It’s not hard for capfal to move around, and you want to be ready for WHEN he attacks. If you’re too busy going crazy with double u.airs, he’ll have plenty of time to come in right behind you and attack, and you’ll have to give up throwing out an aerial or tilt and go with having to straight evade him. You don’t want to do that ALL the time, it’s only a matter of time before you screw up and get put on a highlight reel.

The biggest problem you’ll have in this matchup, aside from Capfal’s speed, is his n.air. It’s long, real long. If he spaces it correctly, it’s safe. You’ve got to keep him from doing that. There are a (in a nutshell) two ways you can go about doing this. You can either attack his n.air, which would mean you could cut through with your own n.air, stuff it with an u.air, up angled f.tilt, or u.tilt (if you’re in the middle of his arc), or jump over it with a d.air; or you could catch him in a spacing trap and punish, those being dash-in shield (Which would net you a shieldgrab at most, n.air at the least) or CC d.smash/grab. You’ve got to mix how you deal with his n.air. Although all of these work, the success depends on when and where he puts the n.air. If you only have one defense, he’ll simply put the n.air somewhere else.

DI Away from him unless it’s something that will kill you (a mid% knee or a high% u.air). Capfal doesn’t really combo as well as it seems, but you won’t be able to tell the difference if you’re constantly DIing for your dear life (read; “using survival di”). You’ve got to know when to DI to live and when to DI to not get hit again, or else you’ll keep getting hit till you die. I CANNOT stress that fact enough.

Outside of that, you have to just make constant decisions when you want to do stuff. Jumping gets you hit with u.airs, which begets more u.airs and n.airs. Shielding too much gets you grabbed, which just sucks. Rolling gets you hit with d.airs and raptor boosts. It’s just that everything leads to everything.

You have to pay attention to what causes attacks and where they go. If your capfal is DDing around unbelievably, is he trying to inch in so he can grab you, or is he waiting for you to fall asleep so he can jump in? Is he waiting for you to move near a platform so he can cut through your d an aerial or is he waiting for you to move out into the open so he can rain down darkness (U c wut I did thar?)

If you don’t pick up on your capfal’s options, everything he does will just seem completely random to you, and slot machines tend to be rigged. You’ve got to pay attention to how he fakes, what he fakes into, and what’s really real..

Edgeguarding


Edgeguarding capfal is pretty cut and dry. Unless he’s jacked up on the stage, he’s going to up+b, and you want to be ready to cape or edgehog it. If he’s going to land on the stage (far on the stage), cut him off and send him back out.

Capfal is a character that really CAN’T defense himself on recovery. Infact, unless he has a wall, he can’t do anything that doesn’t involve a huge risk. So you’ve got a lot of liberty to jump out and b.air him as you need to. And you will need to. If you’re afraid to jump out at him, you’re allowing him to do high up+bs, which gives him a chance to edgecancel into unpunishable recoveries.

That’s some gimmicky stuff, though. The main thing you’re looking for is forcing him to up+b. You want him away from the stage, enough said. When you get him to up+b, you want to play on the side of letting him go past you. I don’t mean you straight up want to LET HIM pass you, but you want to pay more attention to the ledge incase tries to double back for the ledge, which is one of his safe options. If you call him trying to pull something like this, cape it and be done. However, if he catches you slipping, don’t just freeze up. You still have tilts and aerials you can throw at him to knock him off, reset the process, and take some damage. Just whatever you do, do SOMETHING.

Recovery

Yet another crappy character to recover against.

The reason why Capfal’s edgeguard is so good against Doc is because of how wide Capfal’s edgeguard range. When you add that to how linear Doc’s recovery is, you have a situation where if you’re any sort of far away from the stage, you’re pretty much dead.

I’m not going into great detail, I don’t need to.

The thing that sucks the most about Capfal’s edgeguard is that he doesn’t need to jump out and SS knee you to kill you. He can jump out and u.air or weak knee. If he catches you at the end of his jumparc, you can’t go around it seeing as that’ll throw you too far off course. If he wants to be completely safe, all he has to do is jump out there so you pull up. You’re not going to go through him, he’s just going to u.air.

You can try your best to block him with pills or turn around and b.air him as he comes out, but both of those can lose or trade to n.air. It’s not pretty.

Be ready to let go up jump (or up) to meteor recover.


Smoke and Mirrors

Like I said before, Capfal is a very mobile and agile character. You realistically CANNOT keep him contained, you just have to try and make good guesses. However, you can’t give him so much credit and think that you can’t, like, hit the guy.

Capfal has a bunch of smoke and mirrors.

The first thing to understand is that, in all of the movement he does, whether it’s flash or not, he ALWAYS has to come to you to hit you. He has no projectiles, and although he has some long ranged attacks, they’re not ridiculous. He ALWAYS has to come to you.

The second thing to understand is that what Capfal offense and defense are very deceptive. Not deceptive in the fact that you tricked into doing the wrong thing, but you get tricked by even identifying it. You might see him take a full dash in and take a full dash out and not think a thing of it. I mean, he can dash 1/4th of most stages. In all actuality, he just tried to bait you into swinging and you’re so unaware that you didn’t make any reaction to it. Failure to realize that he’s trying to bait you causes him to eventually start coming in instead of dancing around. On the other end of it, you might see him DDing around, and you know you really can’t hit him from where he is. So you move In some. Guess what he just defended himself by making himself (virtually) impossible to hit. He can’t get in and hit you, so he’s trying to get you to step in so he can safely take a shot at you. It’s the same as Fox blowing through clips trying to come in, the only difference is Capfal’s defense is to textbook and subtle you might not even catch onto it.

Every matchup involves you having to contend with your opponent’s offense and defense, and Capfal is no different. If you can’t figure out how to deal with somebody’s offense or get through somebody’s defense, then you’re done. The thing is that Capfal’s offense and defense revolves around movement. You have to pick on how he CAN move, he does move, and what he does with his movement.

Gimmicks (And gimmicks to look for)

Capfal Reverse up+b: A lot of people want to write this off as “a capfal (or ganon) mindgame” vs cape, when really it’s taking THE safe option. Cape reaches below the ledge farther than anything you have, so if you’re on the stage, you’re taking the best option. If you see this coming, you want to edgehog it. Even if they land on the stage (which they will, without an edge cancel) you can just jump up and hit them off again, so it’s no big deal.

Capfal D.throw -> Knee: Realistically doesn’t work on Doc, so long as you DI the throw out. At low -> mid percent, you can n.air/u.air/up+b/jump out of the way. At high %, you’ll DI out of the way. The only time this ever works is at high % (ok not high, starting at like 80 or so) if the throw would send you off the stage. Other than that it doesn’t work. (Dogy note: when you start getting into the higher %s, you probably want to close your eyes when he comes in. **** IS CLOSE).

Capfal moonwalk: Is actually pretty good and somewhat dangerous since he can approach with a b.air.

007. Jigglypuff
Dogy’s Matchup Chart: 55-45 Doc (Jiggs are better than Docs right now. That’s just how it is)
Dogy’s Matchup Ratio: 6-4 Doc
The General Consensus: Something horribly dumb in Jiggs favor because Mango (and Hbox lol) exist, INSPITE THAT BOTH OF THEM ACKNOWLEDGE THAT IT’S A HORRIBLE MATCHUP FOR JIGGS.
The General Flow

Bully this dumb b****.

Out of ALL of the characters in the game, Jiggs is one that, by default, you will have the most freedom to fight against. So long as you do it right. The default Jiggs strat is to air camp, or stay somewhere in the air, whether they’re throwing aerials or not. The thing is, your pills control her airspace. Jiggs is very AGILE in the air, but she’s NOT mobile. You can straight up outrun her at will. She’s also very slow at covering verticals, so if you can clear her, you can get out of corners free.

Your goal for this entire match is to control the center of the stage. You can’t gimp Jiggles, and you really don’t want to try to edgeguard her as you have way more to lose than to gain. So you want to stay posted in the middle of the stage scrapping with her. The main thing you’re going to be looking out for is the b.air, and it’s really not as bad as people make it out to be so long as you literally don’t run INTO it.

If you ever feel like you’re losing against Jiggs, just go run around for a while. Seriously. She can’t catch you, so you can run around until you can reset yourself as you see fit. Or if you want to try to take on some free damage, go throw pills to make her throw bad aerials.

This matchup, although not free, is in your favor. So long as you stick to a safe strat, Jiggs has to overcome a lot of bs just to have a shot at you. NOTHING she has works on you. SHE CANNOT LEDGESTALL YOU, and he only rest setups she has is sniping a double jump or calling a roll/tech. However, if she ever misses a rest (which will be often if they try their normal setups), you are one of the 3 characters who get a HEAVY punish, and you are THE MOST DAMAGING CHARACTER TO A JIGGS MISSED REST. (The other 2 heavy punish characters being Fox and Mario)

Offense

You only want to fight in the middle. Period. That is the ONE golden rule you need to know for this match. Pitch a tent in the middle of the stage. Life is hard for Jiggs if you do that. You can play keep-away if you want to and just run and throw pills, that works very well against jiggles too, but when you go to fight, you want to be in the middle.

If you’re running and throwing pills, keep your distance and chuck them ****s like Sagat chucks Tiger Shots. In spite of whatever people think of Jiggs, she’s not going to magically WARP over to you. If she wants to stay in the air and contest your pills, keep out and try to tag some damage on her. She dies at dumb low percents, so anything you get is to some degree devastating to her. You gotta watch her though, she’s gunna try to move in so she can land an aerial on you. You need to stay awake and keep out of her attack range as long as she’s staying in the air. If she does get in attack range, you need to stop (obviously) or BACK DA F*** UP *****! The one sign you’re looking for in this matchup is if Jiggs gives up and goes to the ground. This is when you want to try to come in. A Jiggs player with half a brain (or one who’s not overly aggressive, rather) is eventually going to do this, as it’s a safe option. You want to time your approach as she’s coming down, not let her hit the ground and then come in. If you’re too late, she’s just gunna jump again. But yeah, you want her on the ground.

If you can’t get her on the ground, you’re going to come in with like, your default moves. CRAPTON OF N.AIR. OH MAN CRAPTON OF N.AIR. Like, I’m going to go through the basics in the Doc matchup, but N.air vs Jiggs? That’s like a Italian sub on a Wednesday, it’s soooooo good. N.air beats a lot of Jiggles attacks, so if and when you go in, this is what you’re going with. Your other default option is to try to get ABOVE her and D.air. Works very well too, although you run into some super gimmicky risks if you try to follow up.

While you’re fighting Jiggs, you want to keep up with the players jump habits. Besides the obvious “Do they use empty jumps, what aerials do they use and when”, one key thing you want to watch vs Jiggs is how many jumps a player tends to use. You want to know this not-so-much to try to snipe her out of her 4th jump, but because you’ll have a better idea of when Jiggs is going down to the ground. If you call her going down, you can start closing distance and try to put her in shield upon landing.

Keep the bomber grounded. When she gets there, KEEP HER *** THERE. She’s not helpless in shield as she can come out with n.airs or u.smash OoS (or more if you’re sloppy), but you want to do your best to keep her from going anywhere. You really don’t have too much to fear from her in her face aside from “The Mango Surprise” (rest OoS), so put some pressure on her. Her grabs won’t do anything except push you away, and she never gets a guaranteed follow up. Take whatever damage you get on her; jabs, grabs, smashes, THE SUPER AWESOME D.TILT OF D.TILTINGNESS, whatever. Damage is fatal to jigs.


All in all, you just want to keep her in the middle and keep her on the ground. Like always, you don’t want to go crazy cause she’ll find ways to slip out, but Jiggles can’t use any of her character perks to really hinder your offense. She can’t duck anything of real merit (Going off of my Kirby chart, If Jiggles can duck anything, it’ll be a long ranged F.tilt (forward or up), an u.smash, or a spaced up angled f.smash.) so feel free don’t fear catching a duck-rest. She can’t throw a rapid number of attacks, so just dodge around till you get in and put work on her.


Defense

It’s another matchup where you want to default to moving.

Jiggs can’t really put a lot of pressure on you, so don’t feel as if you need to make some super read to stop pressure. You just have to understand the gimmick behind her pressure. That gimmick is spacing. She really can’t put up a long string of offense seeing as there are ridiculously huge gaping holes in everything besides late SHFFL aerials -> something. So that means you need to play RPS and reset control.

If you ever don’t know what to do, or don’t want to take a risk, move out and start running around till you get back to where you need to. Unless Jiggs is jacked up in your face, she won’t be able to stop you from wavedashing (or even rolling away from her), which gives you room to reset. If you can’t go back, don’t be so quick to go in, try to go around her or fight her off of you.

If Jiggs is trying to push into you with Wall of Pain (WoP), you want to stop that. Her goal is really to just push you to the ledge, and if you get hit, then it’s an added bonus. Her WoP is actually the identical to EVERY OTHER CHARACTER who can do FH double b.air (you included), Jiggs just works so well because she can weave back and forth so well (air agility), and because she can throw the high option multiple times. So, just like every other character, you’re looking to come over the low option or under the high. The thing to keep in mind is that Jiggs can turn around with a jump, so if she’s WoPing with F.airs, she can turn around and b.air whenever she wants. She can also come down with a n.air.

Jiggs’ n.air and f.air are very powerful pokes because she can tap the top of your shield and dip back at the last second, moving her out of punishment range and setting herself up to poke at your next move. You have to pay close attention to where she’s going to determine what’s going to happen next. Be ready to jump, be ready to NOT jump, and be ready to move away from her. It’s business as usual, but understand that unlike most n.airs, she can choose if she wants to space the attack or the landing.

One thing to keep in mind the entire match is that unless you’re near an edge you’re ok to give up a grab. Again, Jiggs has no guaranteed follow ups on you from a grab, so if you’re worried about getting hit, or don’t know if she’s going to try to catch you jumping out, just stay in shield and give up a grab. Her grab range is very short, so she has to land next to (or run very far) to even have a shot at it, and she gets a very minute reward as long as you’re in good positions.

IF YOU GET HIT, DI AWAY. Jiggs only has a few moves that kill, her aerials are NOT one of them. So DIing in on a b.air is asking to get hit with a second b.air, and that’s when the WoP really starts. To even give yourself a chance at recovery, you need to be willing to DI out and make her work for more damage or her edgeguard. Once you’re in the air next to her, you’re already at a big disadvantage, so don’t lock yourself up.

All in all, you’re going to be making one solid decision after another to keep away from Jiggs’ offense. Stay away from her whenever possible, but if she gets you into shield don’t panic. There’s not a lot she can really do when you’re there except wait for it (or try to pound it out if it’s too low). Keep yourself away from ledges and don’t get hit.


Edgeguarding

Edgeguarding Jiggs is pretty unique in that you really DON’T want to edgeguard her. You have too much to lose by going to edgeguard her especially considering you have to her hit a few times

You want to keep most of your edgeguarding on stage. Honestly, I’d go as far as to say just let her back on and rain pills at her. If you get her far from the stage, she’s actually going to be in a horrible position when she gets back. She’s going to either land on the stage, which is a chance for you to attack her if you choose, or she’s going to the ledge, which is horrible for her.

IF YOU EVER CATCH JIGGS GOING TO THE LEDGE FOR WHATEVER REASON, BACK THE F*** UP *****. Back up and start bouncing ground pills over the ledge (it’s like, 3 or 4 character lengths away, I need to turn the game on to see it). If you position yourself right, Jiggs will wind up going through a waterfall of pills just to make it back ONTO the stage, in which case she’ll still have to land ON the stage.

If you do want to jump out and hit her, be ready for pound. You can actually DI pound so that it keeps you in front of her, but you just have to be ready for it. It’ll trade and beat b.air, so you want to try to wait it out. Cape it if you can. You can also go around Jiggs and d.air/u.air her. Jumping out and n.airing isn’t a horrible idea either, but you need to stay away from pound.


Recovery

Keep her from straight in front of you. That is your goal. Unlike most characters who get demolished by jiggs’s edgeguard, you can actually defend yourself fairly well so long as you keep her from in front of you.

If you got sent out by some b.airs, you’re probably screwed by default. You need to try to DI away from the first b.air so that she can follow up with a second one. You’re not going to die from a b.air, you’re going to die from an edgeguard. DI OUT! And then come back in.

As you’re coming in, you’re once again looking to keep Jiggles from being right in front of you. Pill to protect your space, but if she’s there, you gotta be ready to defend yourself.

You can pass through Jiggs with a d.air if she’s too early, and most Jiggs ARE going to be too early. They’re too used to helpless victims on recovery. So if nothing else, try to d.air through her if she makes it out to you. You’ve really got nothing to lose at this point, as you’re either going to hit her or she’s going to hit you. Another thing you can try is turning yourself around so you can b.air her. It works so long as Jiggs comes too far in, but it’s not the most reliable thing to do. If Jiggs does make it out there and she is square in front of you, your last ditch effort is caping. You have to time it and flip her around (as she’s not going to try to pass THROUGH you. If your Jiggs is doing this, you need to use n.airs/b.airs/d.airs.)

If Jiggs waits for you to come back to the stage, it’s business as usual for you. You wanna try to trick her off the ledge, which is really impossible, but that’s what you want. If you gotta land on the stage, you’re pretty screwed. If she actually waits for you on the ledge, try to shoot her off the ledge with some pills. If not just try your best to get into airdodge range.

Jiggs is another one of those edgeguards where you THINK it’s hopeless, but you actually have a lot more hope than you think. Don’t give up, just don’t do anything stupid.

Target Practice

A lot of people make jigglypuff out to be harder than it has to be. A lot of people like running into Jiggs strengths, whether it’s trying to constantly fight through WoPs or trying to force edgeguards that really don’t exist. You never HAVE to do that with Jiggs. You can do a lot of sitting around taking potshots. That’s how Jiggs loses.

First and foremost, you want to keep in the middle of the stage. You really have too much to lose and not a lot to gain if you try to engage Jiggs by the edges. You’re not going GIMP her unless you go above and beyond on the edgeguard, and she really just needs to jump out and hit you ONCE. So why play to her advantage?

So you’re probably thinking “OK Genius, so you expect me to just stay in the middle of the stage the entire time and have Jiggs not do anything about it.” No. That’d be a perfect world, and perfect worlds don’t exist. If you CAN do that, then you’ll realize why Jiggs absolutely hates fighting you, because you always have a safety net of forcing her to push you TO and PAST the ledge. But no, I don’t expect you to be able to hold the middle the entire time.

That’s when you have to know when to run and just take potshots at Jiggs. The thing you’re avoiding is trying to fight her straight up. That gives her a chance. You want to keep attacking her at angles she can’t handle (around her aerials, or pills to keep her throwing random aerials), and you want to keep moving until you can get BACK to the middle of the stage and get back to work. If you could take a “fight track” for the fight, it really should look like you leading Jiggs around the entire time, just taking shots every now and then.

She can’t really camp you. What’s she going to do, go to the ledge? Ok, go park yourself in the middle and throw pills. I’ve yet to find ANY Jiggs who can camp on the ledge perfectly for an extended period of time and not get hit by a single pill. It’s hard. She can’t back up or you just step up and throw pills in her way as she moves out. Now she risks getting gimped by pills (lol).

So where am I going with all this? Stop trying to stand toe-to-toe with Jiggs. You don’t have to. You can wait till you KNOW where she’s going with an aerial and take a shot at it, or you can wait till she wants to stop throwing **** and land. Until then, you keep moving around taking potshots at her. If you want to straight-up scrap with her, get yourself in the middle so she doesn’t get a free knock off the edge.

Target practice.

Gimmicks (And gimmicks to look for)

Jiggs rests: If you ever get hit by rest and you know you’re going to die, DI OUT so that you die from the side, that way you’re guaranteed to come in and punish it.

Jiggs MISSED rest: Oh you get to have a field day with this. First and foremost, CAPE. Caping a resting Jiggs doesn’t cause hitstun, so you get to rack up a ridiculous amount of damage with this. If you’re RIGHT ON TOP of Jiggs when she misses a rest, you’re allowed to take 6 capes before you need to do something else. 6 is really pushing it, so default to 5 (or 4 if you’re slow). From there, it’s your choice whether you want to f.smash, f.air, grab (to tack on a few more hits into a dunk) or do some tricky. Some tricky would include wavedash d.smash (wavedashing PAST her to mix DI), or jump in d.smash (mixed with f.air, to once again mix DI). Jiggs should be terrified of even thinking resting you because that’s a free stock if she misses.

Jiggs Sing ledgestall: Doesn’t work. You can SH cape it.
JIggs Late N.air -> rest: is the only rest setup that actually works, but you can stop it by DIing the n.air out. You just have to actually look for her to hit you with it instead of stopping short and doing something like f.smash (It’s kinda hard to see)

Jiggs Rollout recovery: Super gimmicky. If she’s trying to hit the ledge, you can cape it. If you’re at a low enough % and want to shut it out completely, just jump out and take the hit. You need to get far enough to where she can’t drift back in. If you’re a manly man, you’ll grab her (don’t try it).

Dogy Tips vs Jiggs:
-Stay in the middle. Period.
-Stay on top of Jiggs when on the offensive, she has to make dumb good reads to get a big reward.
-Count jumps. That gives you a timing for when to attack.

008. Ice Climbers

Dogy’s Matchup Chart: 60-40 Doc
Dogy’s Matchup Ratio: 6-4 Even
The General Consensus: 50-50 Even
The General Flow
Pills and F.air.

That’s going to be the majority of what you’re doing in this matchup. You actually get away from a lot of IC nonsense, but you still don’t want to play with …. Ice. You just don’t want to play into their grab game, doesn’t matter if (afaik) they have no CGs on you outside of the standards, why give them what they want when you can keep them clean of it all day.

So you want to stay away, stay on platforms, pill, etc etc. You really don’t want to be next them unless you’re drivin. Even without the grabs, they have a lot of things they can do to you. Jab mixups, (fairly) safe smashes, disjointed tilts, it’s a lot more of the hit-it-and-quit-it theory.

This matchup isn’t too bad, though. You have easy ways to separate the ICs, you can (somewhat) fight them in the air (which will lead to separation), and you can easily dispatch most of their useful desyncs and make them resort to trying to walk you down and force you off the stage.

It’s not that bad.

Offense


This part of the match is fairly simple. You either pill, or you f.air. Everything else better lead to you going away from them.

Anytime you’re away from them, you want to pill to disrupt pretty much anything they try. The good thing is pills will only hit one of them, so it stops desyncs, causes a desync, etc etc. By doing this, you’re going to keep your ICs from getting too comfy and starting up some super gimmicky stuff. You can come in behind the pills if you want, but be ready to pull up as, again, you’ll only hit one of them. The other one is going to be free to swing at you should you guess wrong vs their defense.

When you actually move in on this, you want to move all the way in. Don’t play around at midrange, you’re really just asking to get hit. You’re ok to throw a f.tilt from here every now and then, but don’t bank on it. Go all the way in.

If you can get them to put their shield up before you get there (which isn’t hard, they’ll be looking for a shieldgrab normally), you want to f.air. Doing anything else is going to get you grabbed as you have to hit two shields. You f.air their shield, it pushes they too far out to do anything except wavedash back in. Doesn’t matter what kinda shield they do.

In the event you land a grab on one of them (and the other is around), b.throw immediately. This way, you don’t give the second one enough time to hit you out of the throw (a problem that many characters have playing ics). Regardless of percent, you really have nothing to lose by b.throwing them and separating them, where as trying a d.throw is liable to get you f.smashed or grabbed.

Past that, you’re just looking to catch them in the air and whatnot. This aspect isn’t really anything new other than the fact that you always want to jump AROUND what they’re doing (i.e. don’t come straight up top if they’re going to u.air, straight In front of a b.air, etc). If you can ever land a d.air on them, try your best to follow popo’s (the lead’s) DI and taggin him afterwards instead of hitting whoever. It’s another desync point.

Defense

Don’t let them catch you in shield. That’s the one thing they’re looking for. Whether they know they can CG or not, IC players tend to look for grabs, so you need to be doing a good job of keeping them out.

First and foremost, if you really want to be on the defensive, stay on platforms. As long as you’re on the platform by yourself, they have to go through hell to get there, to get up, and then to grab you together. Your goal is to just keep them from grabbing you together. Worst case scenario, you can just jump away from them as they come up to you.

Now, if you’re not going to sit on platforms (or you’re manly and you’re on FD), you just have to keep some distance from them. It’s not exactly easy, but you’ve gotta keep them from slip-sliddin in at will. Ground pills and (spaced) f.tilts are too f***in good when it comes to this. ICs aren’t very mobile in the air, so as long as you control space in front of you, they’re going to do a lot of wavedashing into shield, which gives you time to setup and push them out again. Keep it up until you’re ready to pick them apart.

If they do get close, -rolls eyes- fffffffffffff. Jab mixups are so good because you gotta deal with like, 4 jabs. Jabs to grabs, jabs to tilts, d.smashes, retreating b.airs, yada yada. They can cover stuff pretty well and stay pretty **** safe. You DO NOT want to let them in.

When you have to move away from them (which you will have to and some point and time, melee goes on too long), think of jumping first. They really can’t do too much to a jumping target aside from tag on some damage and wait for them to come back down. If you’re above like, 90% or so, you don’t want to eat a b.air (or double b.air) cause that’s you off the stage, but you still want them to consider you jumping away from them.

Reaching at them is really a no-no, too. Like, if you’re trying to stop them from running in, you’re perfectly fine. You better make sure they’re not going to stop and f.smash, first. Not only does it beat your range free, but it’s pretty much safe (if there’s 2 of them). If they want to go down their tierlist, they can opt for f.tilt, d.tilt, b.air, or even jabs. You don’t want to hang anything out that you’ll regret in the future. It’s not the end of the world unless you’re off the stage, but don’t do what they look for.


Edgeguarding

If you can get them separated, you’ve pretty much got the edgeguard locked up. That’s your main goal when you’re edgeguarding them. If you can snipe them with a b.air, that’s pretty kool, but if you can catch them with a pill and desync them, that’s even better.

You have to knock ICs PRETTY **** LOW for them to be dead if they’re together. Up+b and Side-B are too good for recovery, although you can still hit them out of it. However, if you just separate em, none of that matters.

If they side+b onto the stage together, you need to either be right on top of them to punish it or you don’t punish it at all. They have a dumb low recovery together. However, if it’s a solo side-b, you can just hop up and toss them back off all day. It’s pretty free.

They really don’t have too many tricks in their recovery outside from the wide recovery range when they’re together. Just try to put some pills on them, b.air if you see a spot, and be ready to jump on top of them going back to the stage.

There really isn’t much to say about their recovery.

Recovery

Their edgeguard on the other hand? Is pretty tricky. If you get off the stage, you’re theoretically ****ed, and it just depends on if the IC player actually knows HOW to do it

First and foremost, you’re going to be allowed to come a LONG way before you have to contend with anything. ICs edgeguard on stage, unless it’s a solo. Even if it is a solo, he’s probably stayin on stage cause their recovery isn’t good at all by themselves. That being said, you’re got a long way to go before you even SEE signs of a fight.

When you get in close, you’re going to make the same rough choice you always do. SS the ledge or land on stage. Shooting them off with pills really isn’t going to do anything seeing as… they’re two of them. You can do it to try it to keep them from the ledge, but you’re going to do either or. If you can catch them BOTH with an up+b, you’re in the clear. If not, you want that ledge.

Gimmicks (And gimmicks to look for)
Desyncs: ICs can desync off of a variety of things, the list includes (but is not limited to)
-Rolls
-Spotdodges
-Pivots
-Dash Dances
-Empty Grabs
-Empty Hops
-Taunts
-(more)
Without explaining HOW to desync, all you need to know, as Doc, is that when you see them do one of these, expect to see a change in their attack pattern afterwards. You might see ice block chasers, blizzard shields, factory smashes, etc etc. Just, be ready.

Double Shielding: Obviously attacking IC shields involves hitting 2 shields. Main thing you need to look for is the light-full shield (Nana Light shields, popo does an almost-full shield, as Nana can’t Analog adjust). Timing an L cancel offa this is crazy, but just know it’s a lot later than you think it is. YOU HAVE TO AVOID HITTING THIS HIGH, THOUGH, or else you run the risk of getting shieldgrabbed by default.

Dogy tips vs ICs.

-Watch for Desyncs. The main one to look for are blizzard shields. Ice Block Chaser is kinda blatant, just don’t get trapped in shield by it.

-If you ever choose to attack Nana, make sure popo isn’t stalking you for a trap. ICs players are known to do that. Nana isn’t always the best option.


009. Samus
Dogy’s Matchup Chart: 45-55 Samus
Dogy’s Matchup Ratio: 5-5 Even
The General Consensus: 50-50 Even
The General Flow

The longest yard.

Dear god, this matchup is so long, no matter HOW it’s played. I’ve played campy, runaway samuses, I’ve played super aggro samuses, it just doesn’t matter. Match takes forever. It’s actually not a boring matchup if you like chess, and that’s what the match WILL boil down to. Positioning, setups for a little damage, and solid edgeguarding (not from you, you’ll probably just be doing a crapton of killing).

Neither one of you will get any long string of hits; Samus can’t and she won’t let you. So the entire match is going to be a war of wits. You’ve got to contest with her CC game, her tilts, overall range, and beast recovery while she has to contest your pills, mobility, and ability to just flat out make her miss.

Bring a drink for this one, it’s gunna take a while.

Offense


The first thing you have to do is break Samus’s CC. IT IS IMPERATIVE THAT YOU BREAK HER CC DOWN SOME. To do this, you need pills and grabs. Loads of pills, loads of grabs. Those are the only times you can hit her in CC for a while w/o getting punished. Other than that, you have to catch her in the air or catch her trying to do something. Once you put some damage on her, you can start using other moves on the offensive. A lot of them are still going to get CCd, but your goal is to make it to where she can’t PUNISH you with a CC.

While you’re working on the CC, you’re going to be trying to pop shots here and there. Unless you catch her out of CC, you’re not getting s*** for it, so don’t get overexcited. You need to do a lot of quick hit’n’run tactics. Take your one u.air you got and move, tilt her out of range and get ready. There’s just no other way to go about it, it’s slow.

The things you ARE looking to attack, however, is anytime she hangs out a smash or anytime she jumps. If she throws out a smash, ANY smash, you can get some punishment for it. D.smash gets punished with a smash, F.smash gets jabbed or tilted, u.smash is take your pick as long as you didn’t get hit. If she jumps, you want to try to be UNDER her, seeing as it’s fairly hard for her to defend herself with her d.air. Be careful if there’s a notable distance between the two of you as you’re liable to run into a bomb on the way up. Attacking from behind her is acceptable, too, it’s just her b.air can send you pretty far out if you’re not ready for it.

Outside of these things, you’re actually going to be playing very patiently against samus. Do a lot of moving (out of her range) and try to frustrate her into doing something bad. It’s not easy to do seeing as any good samus player is used to having to wait 10 years for their one f.smash. Just make sure you’re not in a hurry or you’ll run into limbs and explosions.

This is a matchup where you can afford to be really aggressive with your shield. Shielding makes samus’s day horrid, as her grab is high risk-mediocre reward. As long as you have a healthy shield, feel free to run in and try to force her to make the first move. Understand that you have to change up where you stop, as you can’t make it straight in one go (unless she’s willing to let you slam into her face.)

Speaking of shields, don’t play around her’s too much. Like, it’s not a horrible thing to hit samus’s shield, but if you come in with something crazy (like a f.air, especially a high f.air), you’re asking her to up+b. It’ll happen. You can actually DI out of an up+b and punish it, but you don’t want to take any more damage than you really need to. If you can get in with something light and shield, you can also bait an up+b. Aside from up+b, and n.air, samus really doesn’t have anything from her shield unless you like smash it. Just tread lightly. Samus having a long roll and a teather grab give her plenty of reasons to hit the eject button if you want to play with her shield.

It really isn’t rocket science to attacking a samus, it’s just patience. Unless you’re playing a scrub, you literally CANNOT run over samus. It’s just impossible. So rather than trying to force something that can’t happen, you just need to slow down and take the openings you see. It’s not like she’s going to come in and wreck shop either.

Defense

Defense. –Yawn-

In the long haul, every bit of damage counts, so you can’t let anything slide. You just need to stay calm and get samus off of you as soon as possible. She’s really not going to stay on you long anyway, but you have to show some movement or else she’s gunna try some nonsense and stay right on top of you.

First off, you’ve got projectiles. Now, inspite of how samus’s projectiles are, don’t expect to ONLY see them at long range. You have to be ready for some missile cancel gimmicks. Missiles, by themselves, aren’t really too big of a threat. Cape them, pill them, or heck, just jab them. They’re fairly low-tier on their own. Their strength comes from what happens BEHIND the missile. More often than not, you can’t just SHIELD a missile, or else you’ll get your shield pulled down by a grapple beam. You can’t always JUMP a missile, or else you’ll be jumping into a charge blast. There are plenty of ways samus can go about messing you up with a projectile. The thing you need to do is you can’t be have a pattern for how you handle it. You have to be willing to jump some missiles so you don’t get grabbed or a charge shot with it. You have to be willing to stay in shield so she doesn’t jump up and n.air you. You just have to mix and match.

Now, that’s mixups off of missiles. If samus is having a projectile war with you, that’s a completely different game. If she’s just posted up on the other side of the map throwing ****, you shoot back too. You’ll beat her in a projectile war because she has to constantly jump to missile cancel. You NEVER have to worry about being in the second lane of missiles, and your rate of fire + your cape will make samus move, even if she can consistently SHFF missile. In this, you need to be weary of where samus is going, if she’s trying to approach or run; and if she’s got a charge shot.

If she does have a charge shot, you just have to be ready to cape. As long as you’re looking for it, you can cape chargeshot on reaction. You might have to sit down and train yourself to look for the animation, but you have enough time to actually wait for it and cape it. Don’t freak out. The only time she gets guaranteed charges is when you tech. You’re ****ed at that point.

Moving past projectiles, you have to deal with a rain of tilts and smashes. Like I said in the offensive section, shielding is your friend. Unless you’re just LETTING some bs happen, Samus can’t really do a lot to beat your shield. She can poke and prod at it, hoping you’ll move somewhere stupid, but she’s not going to just GRAB you out of it unless you tape your r button down. That’s where the slow comes into all this. You really want DO want to stay in shield a lot.

If you can catch her throwing tilts, feel free to CC and try come in behind it, but understand that it probably won’t work due to her range. You could CC jabs, and pull something, but unless you’re jacked up on a tilt, you won’t get anything. Same thing for smashes.

Instead, you want to shield and WD in (or jump in). Like I said in the O section. You shield a smash, you get a smash. F. tilts get you jabs or tilts. Depending on spacing, you have to mix and match if you try to punish from a f.tilt, though, as it’s got a fairly good recovery. Don’t try to punish u.tilt or d.tilt. U.tilt is safe if it hits you, and d.tilt is safe (when spaced). If she didn’t space it, she’s got enough time to WD back and do it again if you try to WD in behind her.

Keep yourself on the ground. It seems so tempting to go in the air, especially when you can throw b.airs and d.airs all day, but you’ll lose a lot of times. Her u.air is pretty beast vs your d.air, and everything else you could try gets outranged by foot. Only go in the air when you have to, or if you know she’s not goin to throw something out.

Patience. I can’t say it enough. That’s what this matchup boils down to. You can’t FORCE anything on Samus. You just have to wait your turn to say your words and go about your business. It’s pretty long.

Edgeguarding

Edgeguarding samus is depressing. It’s like, You watch her do all sorts of slow, methodical, bomb jumps and whatnot, and you’re like “Man, my recovery takes 5 seconds and I still die.”

It’s more waiting until samus gets into range. When she gets into range, you can go out there and b.air here, or u.air, or n.air, or something. Just watch out for HER n.air, or u.air, or d.air, or something. She can defend herself from you pretty well.

If you can make it out there, you can try to go out and cape a bomb, to drop her recovery some. This is really only useful when she has no grapple beam, but it’s something different for her to look at, and might give you some random time to pull a b.air out. Don’t really bank on this.

If she ever goes below the stage, start raining pills on her. You can jump out and throw pills if she’s far out and below, but anytime she’s below, you’re looking to throw pills. You don’t really want to jump out there as she can just drop lower and do a rising grapple.

When she gets close, you’re looking for the grapple. It’s actually kinda hard to stop. Your goal is to hit her before she latches, and there are a few ways to go about it. Being on the ledge is your best bet, as you can use the invinc to go through the grapple and hit her (with a b.air or cape), or you could try to pill her. If you can’t do any of these, you want to be ON the ledge so she can’t grapple to the ledge. At this point, you’re trying to time her coming up and n.air her. If you’re feeling bold, you can just dropdown and n.air, but you’re not coming back.

If you get her grapple, the last thing you have to worry about is an up+b. Cape it. She’s probably going to make it back on stage, but if she does, it’s a free f.smash or f.air, so just cape it. If you are just 101% sure she’s going to go for the ledge, feel free to take that, but caping is so much safer at this point.

Recovery

Another crappy recovery day. All she has to do is n.air.

She’s got all sorts of stuff that works, waveland b.airs, ledgedrop n.air, missiles, yada yada, or she could just n.air and you’re going to die. The thing that really blows about this is that you can’t come above her or else she’s going to u.air. So you straight up have to avoid her on recovery.

One thing you need to watch for are projectiles. You actually DON’T want to cape them on recovery as they’ll stall you enough to force you to take the ledge. Unless you’re samus is on another planet, she’s not going to get hit by a caped projectile at this point. She’s usually doing this just so you cape it, she takes the ledge, and you’re dead cause you’re doc. So, the only time you WANT to cape is if you see she’s lagging behind on the flowchart.

If you’ve actually made it close enough to up+b, watch out for an u.tilt. I mean, obligatory SS memo here, but know that it could happen.

It’s like, …. Stuff happens, throw pills to keep her from coming out or taking the ledge, up+b sometime and hope to catch her doing something dumb, the end.


Gimmicks (And gimmicks to look for)

Samus Dash Grab: Has 2 hitboxes, so you NEVER EVER want to spotdodge it. You can just make a rule of thumb and NEVER try to spotdodge a samus grab period and you’ll be ok.
Samus Air Grapples: usually come after bombs, to add another jump into something. Don’t be thrown off by “random air grapples”

Samus Extender: can be set up ANYTIME samus whiffs a grab (ground or air). It’s not exactly the most useful thing ever, but it’s not complete trash like people make it out to be. Know that if samus misses a grab (for WHATEVER reason), she could have an extender.

Samus U.Smash: Completely duckable if you’re on the ground.

Samus Chargeshot: She loses her charge if she gets hit out of her up+b. If you ever GET the chance to do this, do it.

Dogy’s Tips vs Samus
-Patience.
-Whoever smashes a shield first is going to be the one to get smashed. Don’t do it.
-If you don’t know what to do, back up and throw some pills or shield. Gives you some time to think until she wants to get greedy.
-Never under estimate her range, especially in the air. It might take her a while to get anywhere, but she doesn’t need to chase you down, just pin you down and throw limbs everywhere.

010. Doctor Mario
Dogy’s Matchup Chart: 7-3 Doc
Dogy’s Matchup Ratio: 50-50 Kobe Bryant
The General Consensus: Ask HMW and Shroomed, they’re the only people who play Doc dittos atm imo imho bbq 1914 ~~CROSS COUNTER~~
The General Flow

No gimmicks allowed.

Of all of the matchups in this ditto (mirror) matches in the entire game, Doc dittos are the LEAST gimmicky ones ever. It’s not like Falco dittos where the first shine wins, sheiks who chaingrab the dirt out of each, or pikas who run around tail spiking each other. No. A Doc ditto realistically winds up being you playing the other player. Doc is the kinda character who can actually function against himself. All of his setups and strats generally work against himself (as opposed to characters who don’t and therefore have goofy dittos).

There’s really not a lot to say about the matchup itself, it really just comes down to your playstyle vs theirs. I’m just going to take the time to talk about some general Do’s and Don’ts with the Good Doctor.

Offense

Eh, first, let’s talk about your aerial approaches. You really don’t want to approach in the air too much, seeing as the only option you have is n.air. (When I say approach, I mean the actual act of attacking your opponent. While the act of closing distance is still approaching, that’s generally NOT the norm for terms in this game). Anyway, n.air approaching is pretty much the only thing you want to use with aerial approaches. Any other aerial you use needs a specific reason. If you want to f.air somebody, you have to make sure they can’t swing back. So you’re looking for situations when they’ve just teched, any reason where they put their shield up (as they land), etc etc. If you try to f.air any other time, you’re going to get beat out by something, it’s too long of a windup. U.airs are good, but they’re shortrange and the hitbox is only a few frames, so you want to reserve this for attacking people in the air or when you KNOW you’re going to land on their shield (at the least). “Think of u.airs as a mobile jab” –Hylian. That’s really the truth behind it. D.air is more of a defensive move for controlling space, although you can use it to pass over people. You don’t really need to ever want to ATTACK somebody with it as you really just want to prevent somebody from coming to you. B.air? You don’t really attack with this, it’s a spacing tool. If you have good SHBAWD control, you can get some good stuff off of it, but again, b.air is all for protecting yourself.

On the ground, it’s all about getting in close. You can poke at people from midrange with f.tilt, but you’re not really going to be able to follow up unless you hit or they let you. You want to get in for some jab/grab pressure. The thing you need to understand about your jab is that it’s really a gimmick. Your string CAN be interrupted, so you have to keep that in mind. With that being said, you DO need to mixup jab and jab-jab for ANYTHING you do. D.smash is real good for keeping gaps closed, but understand that d.smashing shields is asking to get punished. F.smash is a great kill move, obviously, and is relatively safe on shield, you just need to find times to get it out. U.smash is good for combos, or killing if you can catch people in the air. It’s got a “double standard” where if you hit a grounded opponent, it gives them a meteored effect, where as hitting an opponent in the air gives you the full hit. It’s actually pretty good for killing, but again, you need to catch people in the air.

Grabs pretty much follow a rule of thumb that you d.throw everybody except for fox, falco, and capfal. You u.throw those 3. There are a few situations where it’s viable to throw “heavyweights” (bowser, dk, roy, link, ‘round that fall range), which is mid range and you want combos. If you’re not looking for setups, then throw people off the stage. Whenever you can, you want to look for b.throw setups, as your b.throw throws people out MUCH farther. It sucks that both of them send people high, but take what you can get. One setup you can look for is rather than b.throwing somebody off the stage, d/u.throw them and b.air them off. It’s not really easy to setup, but it will send people off at a lower angle.

You really don’t have a lot to follow up on with Doc, so don’t think you’re going wild with combos unless you come across the one guy who’s never seen D or I in the alphabet. The little bit you can do is chase people after u.airs, which generally leads to you having to make a good read afterwards, a followup from a d.air (which normally is an u.air, but you can do b.air or n.air also), landing a grounded u.smash at low-mid%, or an u.tilt that actually sends people up.

Catching people in a d.air in the air is good because you’re GUARNANTEED an u.air, n.air, or b.air afterwards. However, if you have a good read on their DI and reaction afterwards, you could take more from them. You have to pay attention, account for weight, etc etc. If it’s a fastfaller, they’re more likely to fall down into a grab or smash of some kind, floaty (floatier) characters tend to stay in the air so you could try to land and u.tilt or go for THE DOUBLE D.AIR! Get super gimmicky and try D.air -> D.air -> F.air. THE PHYSICAL CHALLENGE! (u c wut I did thar?).

U.tilts normally come from grabs, and are kinda weird to follow up on for people. Most people (myself included) tend to u.tilt people until you can’t anymore, and at that point, you really can’t combo them anymore. Sometimes it’s good to stop one short so you can jump up and try to u.air them.
Upsmashes almost always come from tech chases. The almost part is when you punish with it. You’ll be hard pressed to just run in and upsmash, although it is possible. When you hit one, you just have to relax, watch the DI, and get at it.

All in all, your combos really don’t look anywhere as “impressive” as other combos. It’s not a bunch of high impact moves, unless you’re landing u.air juggles. That’s what people think of. You actually can get a lot by catching people with d.airs and u.tilts.

The last thing offense tools you have from physically attacking and following up are your pills, which set you up for stuff. You have to learn how to space your pills, how to approach behind them, WHEN to approach behind them, etc etc. First thing to know, bounce mechanics. Pills will bounce back to the height you throw them at. So if you FH and throw a pill, it will bounce back to FH height. Throw one at SH and it goes back to SH, etc etc. This is useful for trying to keep people from jumping out as you get in, or making people jump when you get there. Now, when you come in behind the pill, you have to know what you’re opponent’s going to do. The safest way to check this is to run in and roll back. You can obviously disguise it by doing other things (such as moving up some and jumping, or WDing back), but you want to give your opponent the illusion that you’re actually GOING to come in so you can figure out what they’ll do as you come in. You don’t want to empty hop in if you never plan on jumping in, that may cause your opponent to give you a completely different reaction than if you’re running in. As for actually coming in, it’s just business as usual, the only difference is you put a pill in front of yourself for your opponent to deal with. It’s pretty hard to actually get in front of your pill (you have to double wavedash, and you’re just begging to get hit at that point.), so realize that all the pill is going to do is give you another “waypoint” in the fight. Instead of (I approach – You defend) it’s (I pill – You Jump : I approach – You double jump), or something to that effect.

Outside of attacks, you have to be one with your movement. Doc is a somewhat mobile but fairly agile character, when on the ground. In the air, he’s pretty vanilla. So with that being said, you want to keep yourself grounded so that you can work some movement tricks. Don’t go crazy on wavedashing while you’re in attack range, as you’re putting yourself in set animations. However, if you’re just trying to cover distance, or if you’re trying to bait something, feel free. Another thing to work on is movement through DDing. Although Doc doesn’t have a wide DD, it’s wide enough to where you can creep a pretty good distance with your DD. You have to have enough control to where you can move forwards and backwards while maintaining a DD.

In a nutshell, Doc has ways to set himself up, but he really gets nothing free. You have ways to get hits and get your grabs, but you have to put in some real thought. There’s nothing that you can really abuse, per say.

****

One note related to the Doc Ditto matchup, the ONE thing to look for is how the other Doc pills. A lot of Docs love to FH pill because you can waveland afterwards. If you see a lot of FH pills, keep yourself on the ground and be ready to run under and punish. Even if you can’t make it all the way in (,,!,, DJN ^_^ ) staying grounded and weaving in and out under the pills will force them to back up and give you room.

Defense


Defense with Doc is kinda frustrating, because you normally don’t get a lot unless your opponent screws up bad. Your greatest assets to your defense is your size + mobility, and your shield. You’re not really going to defend yourself with a lot of attacks, seeing as they normally get beat in range. You still have to try, and when you do, you want to throw mobility in with it (SHBAWDs, retreating f.airs, WD back tilts, etc etc), but understand that this isn’t your safest option.

Don’t let stuff go free, though. You have to be ready to jump out and u.air/n.air people as you see. You can’t have (for the sake of our spot in the guide) the evil Doc running around f.airing all day. He really CAN’T do that, all you need to do is N.air/U.air him and keep him in check. If he’s trying to come in from too far, retreating f.air or SHBAWD away from him. Don’t just sit there and don’t just attack in place. You’ve got a lot you can do while staying on the move.

On the ground, you have to be ready to tilt/cape people to keep them from running in. Tilting is kinda obvious to the eye, but the reason why you need to keep the cape in mind is if they try to grab. Caping a grab animation is one of the times that will cause a knockdown. You can also control a huge range on the ground if you keep some ground pills going.

Outside of that, you’re going to be doing a lot of shielding and CCing. You’ve got to have little to no fear to running up, doing either, and forcing bad spacing. You don’t have good range as Doc, so you think you get to slack on your shieldgame. Learn how and when to dash-in -> shield. Out of shield, you’re not looking at a whole lot for punishment. You’ve got grabs, upsmash, n.air, u.air, and up+b. Whatever you can slide in. Upsmash and grab are the best things you’ve got in terms of following up, but you just need to have a plan and take what you can get. Your CC game is ok, it involves a lot of dashing in, too. You don’t really get too much from it, normally a d.smash. You can try some other stuff like jabs, grabs, and tilts (D.TILT GIMMICK HERE), but you’ll probably be in a hurry to throw something out, so you’ll take your d.smash and go from there.

The last option you normally have is to just flat out make them miss. Whiff punishing. Well, whiff PUNISHING isn’t really one of Doc’s strong suits, but you can make them miss and take advantage of the fact that your opponent is closer to you. This requires you to stay outside of the range, faking in and out in an attempt to bait an attack. The one thing that’s hard to pick up on while using this is what you can actually move in on. With the way the game is, it’s possible for somebody to whiff something and throw something else before you can react to it. You have to learn what to look for and when you need to continue moving.

If you’re trying to keep people from passing all over you, you have to be willing to throw out some aerials and whatnot. Double aerials are great, but you just have to maintain your spacing so that you don’t get caught. Double b.airs, double u.airs, SHBA -> double jump B.air b.air (SHBADJBABA, haven’t used that acronym in ages), you’ve got all sorts of things to keep people from running all over you. Just learn when to stop or else you’ll get sniped out of the air.

At long range, you’ve got your pills. If you’re trying to stay away from people, your goal is to force your opponent to come in from a ****ty angle. If they’re slow in the air, throw a bunch of ground pills, vice versa if their ground game is horrid. If they’re good in either or, you just want to try to take on as much damage as you can and keep yourself out of a bad place. You CANNOT keep a character out with pills alone. It’s physically impossible, don’t try. However, you can make people come in on bad terms, send them out, and start again. That’s totally do-able.

At the end of the day, Doc’s defense exists. Stick to your plan, and try to stay on the move when it’s possible. There aren’t too many times you want to straight up defend with a shield or CC as opposed to working that into your pressure, so don’t try to hang around and let people come in on it. Move around with aerials and try to find a gap where you can take initiative from your opponent.

****

More doc specific notes.

In the event he d.smashes your shield, you WD -> D.smash him back. Anytime he tries to start ANY pressure, you can pretty much wavedash away from him and get out of it. If you think he’s going to follow you, SH b.air (or n.air).

DO NOT LET HIM COME IN WITH FREE F.AIRS. If he tries to come in with some incorrectly placed f.airs, you u.air/n.air/b.air and stop that ****.

Edgeguarding


Edgeguarding with Doc is actually fundamentally easy. You’re either going to b.air, cape, or grab the ledge. Anytime you want to b.air, you’re looking for a time when you can get TO your opponent and they won’t swing back. Sometimes this is jumping clean out and b.airing, sometimes this is wavedashing off the stage and b.airing, or shorthopping off. You just have to be familiar with the angles, timings, etc etc. Caping comes with knowing when a cape will give you a benefit. If somebody’s trying to fall to the ledge, it is actually very viable to cape them so they can’t grab the ledge. If for nothing else, you’ll atleast net about 12% from them in the process, so don’t forget about it. Grabbing the ledge obviously stops sweetspots or any ledge grabbing attempts, nothing to it. When you start combining the three, that’s when you start getting crazy results. Grab the ledge so they can’t take it, and then ledgedrop cape on the way up (or ledgehop cape if they’re going over). Ledgedrop b.airs to have invincible b.airs. Etc etc. With those 3 tools alone, you can do a lot of damage on the edge.

Outside of that, you’re looking for either obvious stuff to hit (i.e., they’re right in front of the ledge, you tilt or d.smash), or you’re looking for some fairly gimmicky stuff (d.airs, pills, u.airs, AND THE YODEL!!!) All of that stuff comes from knowing when and where to throw it out. You don’t want to try to yodel somebody (down+b) if they’re low, or if their character is real good at defending themselves, where as pills aren’t extremely useful after your opponent has double jumped (you want to snipe a double jump with a pill, but if you keep pilling, then you’re giving them something to up+b into). There are some exceptions to the rules, like always, but just know that you don’t really NEED the special stuff. They’re decorations for the room known as your ledge.


***

Doc matchup notes.

If you stuff that double jump, be ready to cape. That’s greedy but it works. Realistically, if put him in a position to where he has to up+b onto the stage, he’s dead and it’s your fault if you screw up at this point.

If he’s going to pill and come in behind them, n.air.

Your main goal in edgeguarding is to get him to pull up. Jump out there. You don’t have to chase him down, he’s doc. He knows good and **** well he’s either got to fight you or die. Wreck his day for coming in to fast, or just let him drop if he pulls up. There’s not too much he can really do. If he’s above the stage, WATCH FOR THE AIRDODGE. I’d almost go as far as to say wait for it, but some people straight up forget they can airdodge onto the stage.

And don’t be fooled by tornado. If he’s in range, jump out and hit him. If he’s doing it to move you from the ledge, you have enough time to move and then get back on the ledge. It’s really a parlor trick.

Recovery

Recovering sucks.

Like, everything is a gimmick at this point. Tornado does give a small bit of distance if you can PTP, but that’s all it really accomplishes. Pilling to protect positions is good, but most people can cut through your pills or hold their position. Defending yourself if viable, but your lack of range makes it to where it’s not fool-proof.

All in all, you just have to mix when and where you decide to go in. A lot of people try to credit doc for having a good recovery because “of the threat of his up+b”. And yes, while stages spikes are the greatest thing that can happen, you have to understand that it’s pretty crappy that you HAVE to up+b in the first place. If you land on the stage, you’re getting punished for it. Thank god when your punishment doesn’t involve you going back off the stage which it should.

When you’re coming back, sometimes you’ll have to do some waiting. Obviously because you don’t want to run into an edgeguard. But here’s why it blows, you’re letting opportunities pass as you wait. Sure you’re throwing pills and whatnot as you’re waiting, but all you’re really doing is shutting your options down to sweetspotting.

It’s really not a good list of options.

You’re never going to land on a platform unless you’re recovering from practically ON the stage, you’re not going to airdodge unless you’re right ON the stage, you’re going to do a lot of hoping and praying.

It’s not abysmally bad (that’s Roy’s job), but man, recovering is pretty depressing.

*****

You know what goes here.

You want to pill on recovery to keep your opponent from jumping out, if at all possible. If you can’t stop him, then your next goal is to keep him from being right in front of you to b.air you. You maybe have to double jump and d.air through him to get around the edgeguard, but it’s either that or die at that point.

If you have to up+b, you’re screwed, and you know it. That’s like, the ONE constant in a Doc ditto. If you somehow get back past the cape, take a second to completely jank on your opponent and lower his morale some. You need all the help you can get on your recovery.

Gimmicks (And gimmicks to look for)
I mean, I guess I can throw a few dogy tricks in here for you.

Spin-Guarding: When you’re edgeguarding people, for whatever reason, you’ll get a different response depending on which way you’re facing. If your back is to the ledge, people tend to go around you as to not get baired, or they might come in faster to keep you from wavedashing on the ledge. If you’re facing the ledge, you might see people jumping up so they don’t get rained on by pills or waiting to not get caped (why I don’t know). The thing you need to realize is that a lot of people will give you different reactions. Sometimes these reactions aren’t what you want, especially if it involves jumping over you. So how do you make it to where your opponent has to guess what you’re going to set up? You spin. Just randomly walk back and forth. Easy idea, hilarious results. You’d be surprised how many people won’t jump you’re not standing there telegraphing a back air, or how many people will random airdodge as you turn around to face them. You just get all sorts of mixed results. You do have to stop when they come close and actually DO something.

Doc’s F.air: Understand that the best way to DI this and live is to NOT DI. Get the concept out of your head that you have to DI everything. That’s generally true, but that’s not law. Doc’s F.air sends you at about a 60 degree angle. DIing in sends you at like, 80 degrees, which is stupid if he’s trying to kill you off the top anyway. DIing out flatlines you, which is OK when you have an entire stage to spare (going across FD or something), but it’s stupid when you got caught in a corner. All in all, Doc’s f.air is super gimmicky when it comes to DI. I probably can’t make you believe me because you have the whole “DI everything” logic engrained in your head, but have fun flying off the top at dumb %s that you shouldn’t be dying at. ^_^

The MLG Combo: 0% F.air -> F.air -> F.air. Just some random idea I had in pools at MLG and it worked too **** good then. Still works today. No secrets about it, just chase lacks of DI.

The Kumite: a.k.a. the Kage-Kaze. B.air suicide edgeguard. Just know that you can do it as Doc to pretty much any character in the game. Great for securing a gimp.
 

Red the Ghost

Smash Ace
Joined
Jun 17, 2008
Messages
670
Location
NC
Part DEUX son

011. Ganondorf
Dogy’s Matchup Chart: 5-5 Even
Dogy’s Matchup Ratio: 55-45 Doc
The General Consensus: 40-60 Ganon
The General Flow

No fear.

This is my favorite matchup with Doc. You get to do everything you ever wanted to do, Ganon gets to do everything he wants to do, it’s just good times for everybody. Fun all around.

The matchup is pretty crazy. Your job is to just piss ganon off. You can run away and pill, you can rush him down and stay in close with n.airs and jabs, you pretty much get to go crazy in this matchup. All the while, you’ve gotta avoid getting bucked by out by ganon’s entire moveset. It’s just comical.

You actually get to combo and CG the mess out of ganon, but he’s only gotta hit you like, 3 times to make up for it. By that fact alone, you can’t afford to be too aggressive, and you can’t be too defensive.

Everything just winds up being a mad scramble.


Offense


You either want to be far the **** away from ganon throwing pills or in his face pressing buttons. Come to think of it, if you’re horrible at pressing button, you’ll probably hate this matchup. You don’t have to be uber (I’m fairly bad), but you have to be able to keep stringing stuff well enough to force ganon to move away from you.

At long range, the point of your pills is to just pin him down. Contrary to how ganon looks, and how his character is, this is actually very hard to do. His jumps are too frickin good, so he’s going to jump a lot. You want to be real hesitant on running in on an aerial ganon because there really isn’t a huge window to get in. You’ll either run into a f.air as he comes down, or a jab when he gets down. Tack on as much damage as you can and get right outside of his attack range.

From there, you’re looking to jump in and hang on for a ride. Ganon shouldn’t let you poke at him, seeing as he’s got you beat on all fronts in range. Retreating f.airs, d.tilts, f.tilts, and even his jab. Whatever he wants to throw at you is going to beat your range, so you need to slip in.

Once you get in though, you press buttons and you keep that sand n****r on his toes. You want try your best to stay low to not get sniped by an u.air (which ganon WILL throw if you linger in the air too long), however, you need to occasionally jump and do an aerial to keep him from trying SH D.air, B.air, or retreating f.airs. It’s all bout the checks and balances. Get that grab and you’re pretty much good to go. If you let up for something like an u.tilt or d.smash, then you should be done. Ganon’s not really going to hesitate too much when he sees a gap. He’s ok to take a hit as it’s hard to chase him in the air. So if and when you try to stop a jumpout with an u.tilt, be ready for him to actually jump afterwards and do something. If he’s slow you can still cut it off, but yeah, risk reward at that point.

If you can keep making good reads and keep him close, he’s going to try to roll. You’ve gotta catch the roll and stay with him. If you can’t stay on top of him, then you need to throw on the breaks. He’s liable to roll out into some retreating aerial, and you WON’T catch him. Just let him go and start over. If you read the roll, then nothing’s changed, the pileup just moved over some.

If he ever decides to go on a platform, be reaaaaaaal careful about chasing him up there. He can jump out of your range pretty easy and come back with a d.air. You’re almost better off leaving him up there, but you know good and well that won’t always work. Throw some pills and try to coax him off, or come from above him. If you can’t do either one, then understand that you’re going to have to go up and defend. You realistically just can’t attack ganon on a platform unless he’s asleep up there.

All in all, you just need to stay on top of him or stay out. You wanna make him swing and miss so you can get in, and then keep him from swinging once you get there. It’s pretty interesting to zip around while avoiding death.

Defense

Oof.

That’s what you’ll say EVERY SINGLE TIME you get hit. Ganon doesn’t have a soft hit. It’s just a whole bunch of “Oof.”

The one thing you CANNOT let happen is letting ganon push you to the edge of the stage. If he does, you pretty much have to defensively push your way back to the middle. You can’t really fight him as he can just retreating f.air, you can’t really jump past him as he can cover your whole jump are, and you can’t run by him because he’s (hopefully) not stupid. However, you really HAVE to try something. It’s more of a mix and match kind of thing. You gotta give him false hope and trick him into backing up. Make him think you’re going to roll to give yourself some breathing room, go back to the ledge if you need to. You just can’t try to take the whole 10 yards from him, he’s got that on lock.

If you can avoid that, you’re going to be ok. Ganon can’t really put a pressure on ANYBODY, all he has is pokes and grabs. They just hurt. A lot. If you’re near him, going in the air is asking him to u.air you. You can stop it with a d.air, but you have to be fairly close to him so that you don’t get clipped by the end of it. Other than that, you need to watch for him poking with aerials.

On the ground, you have to watch wavelanding lanes. Although ganon could be a good half a stage away, he’s liable to waveland in and d.tilt or something. You can keep control of this by throwing a lot of ground pills, but you just have to be ready when you leave this option open.

If ganon DOES get close to you and you put your shield up, for the love of god be ready for some jump tricks. Ganon can do all sorts of double aerial tricks, like FH D.air -> DJ (something). On the other end, he could d.air down into a grab or something if you’re trying not to jump or roll away from him. Being next to him on his terms is not kool. You can’t really throw out aerials to stop him from coming in, or you’ll get picked off, but you need to keep him honest about it. Don’t let him come in for free. Throw some aerials and back up when you can. If he gets you in shield, you want to stay low and get out of there. He’s not going to really chase you on the ground aside from trying to f.air you. If you can get away from that, you’re in the clear.

If and when you do get hit, don’t make things worse than they have to be. Like, unless you’re GOING to die from something, you want to DI out obviously, but don’t try to force your way in on ganon. It’s one thing that you never want to force your way in on somebody, but unlike most characters, he only need to hit you ONCE to get what he wants. He’s not going to combo the trash out of you, so you constantly trying to come back on him with a d.air is just helping him out. IF HE HITS YOU GO THE **** AWAY. IF HE JABS YOU ONCE, BACK THE **** UP AS THEY’LL KEEP COMING TILL YOU GO AWAY OR HIT THE DECK. Stop running into walls.
This is one match where you really need to keep moving. Ganon CANNOT chase you down, and he has nothing at long range. The best way to defend yourself is to run when you’re done attacking so that he can’t start. If you can keep him away from you when you’re not busy, he’s gunna new library pass to find some good reads.

Edgeguarding

Edgeguarding ganon is hilarious. You would think that a character like him would have an ***-terrible recovery, and at a first glance he really does. But in all actuality, ganon can defend himself on recovery EXTREMELY well, especially vs you.

If you can jump out and cut off the down+b, do it. This is actually like, the ONLY time you want to jump out at ganon, unless you know he’s not ready. He can’t do anything for a brief moment after he down+bs, so just chill out and let him come to you. You don’t need to cut him off and steal his jump, you run the risk of getting down+b spiked, and that’s just embarrassing.

Any other time, you need to just hang near the stage and be ready to stuff an up+b. You’re ok to try and b.air him beforehand, but know that if you telegraph it he’s got ways to stop it. Ganon’s double jump is fast and high enough to where he can jump around you and d.air if you’re related to Captain Obvious (-Salute- Captain Obvious.). If you try to come from high above him, he can u.air you and then recover.

Oof.

So your best bet is to just hang out and cape him/edgehog when he comes back. If he up+b’s past you, don’t fret, just get up and chuck his *** off again. Or combo the mess out of him and send him off the other side. It’s bout whatever at this point, you’re in the clear. You just don’t want to take unneeded risks and die for it. Again, he’s only looking for ONE hit.

A word of the wise; if he’s recovering high and he’s near the stage, just wait him out. When he gets about a character’s height above you (a Doc character’s height, so 2 docs in measurement), you can try to take a shot at him if you want, but any higher than that and your *** better not try it. That’s about enough time for him to double jump d.air (or dj f.air you) on reaction. You can bait it (insert dogy gimmick here), but you do NOT want to mess with this. It looks like it’d be a low-risk, high-reward situation, but getting punched in the face is getting punched in the face. That sucks.

Recovery

Uuuuum. Guess what? This sucks too.

Ganon edgeguards are like everything. They stay on that Oof tier. He can hop out and punch, he can chill and d.air, or he can do TIPMAAAAAAAAAAAAAAAAN (reverse u.air). Um, I could list some kool things here, but just know he hits.

If you’re going for the ledge, you have to sweetspot, ganon has too many options for you not to. D.air is depressing if it hits, even if you meteor cancel. It just hurts, so you want to avoid it when you can. Reverse u.air is the worst, though. Like, if you get hit with this, you’re dead. You have to go around him or stay away from him.

Pills aren’t really going to stop ganon if he wants to get out and hit you. I mean, they cut out SOME of his options, but it doesn’t stop his best option. So you can pill to try to stop him from getting in position on the stage, but once he’s there or he jumps off, you might as well stop. You’re just wasting energy at that point.

Stay away from him off the stage. That is all.

The Ganon Canon

Respect Ganon’s aerials, and his ability to position himself barely out of range and land one on you.

Like I said, Ganon looks like a character you could and want to run over, but you just can’t do it. He’s got too much range and his jumps are too good for him. So with that being said, the number one rule you need to know about fighting a (good) ganon is to not run in straight lines. It doesn’t matter if he’s literally trembling in his shield (I’ve seen a ganon do this, ironically), you running straight in is asking him to do a retreating f.air.

Ganon is a matchup that’s great for practicing offensive movement, as you’ll learn REAL QUICK whether you actually tricked somebody or not. You gotta be able to stop on a dime or when to jump over incoming jabs to get in on ganon. You think you might be ok after the first one, but then he just backs up to do a second one, second leads to third, etc etc. You have to chain your movements to allow you to weave and dodge without giving him room. You give him room, and he’s going to just expand out and start again.


Gimmicks (And gimmicks to look for)
Ganon Jab Cancelling: Only time you can even contest this is if you shield the first one jacked up in his face. Other than that, you move. Doesn’t matter if you cc it or not, you won’t win.
Ganon Grab: You can duck it if you’re a little ways out. You can also duck it with a dash attack.
Ganon’s Down+B: this move gets stopped by EVERYTHING on the ground. It’s kinda sad. Jabs clank with this. Just be ready for it, it’s not that great, but it kills if you get hit.

Ganon up+b OoS: Some ganons (and capfals, now that I think about it) will try this out of shield, as they have very few good options. There’s really nothing you can do about this on reaction, you just have to guess when it’s going to happen and BACK DA F*** UP!

Dogy Tips vs Ganon:

-Stay low when you approach. It’s not that ganon CANT stop you when you come in on the ground, but he has to be more stationary when he’s dealing with a grounded target. You take u.airs out of the equation.

-Don’t risk getting hit. If you have the chance to move away from him to avoid further damage, do it. He only wants to hit you once, but he’ll take as many as you give him.

-If he goes on a platform, stay out of his range. You can’t really do anything to him, but he can do a lot to you.

012. Luigi

Dogy’s Matchup Chart: 5-5 Even
Dogy’s Matchup Ratio: 50-50 Even
The General Consensus: 50-50 Even
The Extra Special 18Spikes Ratio: 10-90 Luigi
The General Flow

Lay it on the ground.

Fighting luigi is odd, because you would think you wouldn’t want to stay on the ground with him. In all actuality, you don’t want to be in the air with him. Although he’s an obvious thread on the ground, the threat of his aerials vs air opponents is a very good reason not to jump up with him often. Not only can his aerials combo, but his f.air by itself can beat most of your aerials one way or another.

All that aside, Luigi’s air mobility is horrible, and your ground control is awesome. You want to FORCE him to come in through the air and pick him off (as opposed to jumping in/away from him and allowing him to do the same to you). Luigi’s wavedash is obviously dangerous if you let him start on it and go where he wants, so if you control WHERE he can go with it, you’re going to kill the problem.

When it comes to it, most of your fighting vs luigi is going to be quick two or three hit spurts, then you hitting the eject button. Luigi’s love to n.air out of trouble, and you CANNOT afford to get hit by it. It’s worse than pretty much any other n.air in that it leads into combos easy (it pops you up), so you’ll want to be doing a lot of dashing out and in to get around it.

In the end, Luigi isn’t really so bad (NOT AS BAD AS 18S MAKES HIM OUT TO BE LOLOLOLOl), you just need to focus on stringing together a bunch of consecutive hits.

Offense

Try your ****edest not to jump in on him. If he’s neutral, you should lose every time.

Any jumping-in you do vs luigi have to be methodical, period. He doesn’t have an aerial that WON’T work for defense, literally. That’s not to say you never want to TRY to jump in, but you better have a good reason and a good situation. You can pull some random-tier nonsense like you would practically every other character in the game.

So with that being said, you want to keep your approaches on the ground.

At long range, you want to throw a lot of ground pills. At this point, you’re obviously not going to hit luigi cause you’re long range, but you’d like him to be in the air or coming down from the air when you get there. Not so much because you want to fight his aerials, but him in the air is easier to pinpoint (upon landing) than him already on the ground. You don’t want to try and catch a luigi who’s on ice skates. That’s some nonsense in itself. So throw get a groundpill or two going to force him to do something or jump it.

This is another matchup where midrange realistically doesn’t exist. If you can catch him here, you’re ok to f.tilt or cape him here. However, it’s hard to really SEE midrange cause he’ll be zipping in and out of it so much. You’re more concerned with pills and “OH **** HE’S IN MY FACE”. One thing to note, if you DO catch him sliding in, try to put a f.air on him as he comes in. Yes a f.air. The thing you need to look for his him WAVEDASHING in. You’re obviously aiming at a small window at this point, but being able to nail this (even if he blocks) will get you a huge reward. Either he’ll get hit, which is awesome, or you’re looking for him to block it, which pushes him back and gives him less room.

Keep him contained if possible.

You wanna cut Luigi’s skating rink down to a pond. You keep him contained in corners and whatnot, and attacking his is a breeze. He’s not going to WANT to jump, he’s really a target in the air. On the ground, you can poke, prod, and mix him up as you see fit. It’s not that he can’t defend himself, but without his wavedash, he’s got to respect your desire to come in and leave.

Whenever you land a hit on him, you don’t want to stay around him too long. Not at first, atleast. You don’t want to try chaining u.airs or d.air setups because luigi is going to n.air. For whatever reason, (I honestly think it’s just the nature of the character, nothing with game mechanics because ALL characters can do it), Luigi is prone to n.airing out of your stuff. The reason why this is so bad is, again, because his n.air sends you up, which sets YOU up for combos. So, you’re thinking “Yeah, I know this, this is why you can’t combo luigi.” First off, you’re wrong, you just have to be honest about when you combo him or you’re going to eat a n.air. But second, and more importantly, you can actually use this to your advantage. Stop and give luigi a chance to n.air. If he does, move out of the way and come on top of him again. You know he’s not going to do ANYTHING until he hits the ground anyway. It’s not like his n.air has an amazing recovery, so him n.airing is really just setting you up to come in on him again (this is a perfect time to come in with a f.air if you want to).

Eventually what will happen is luigi will stop trying to n.air (or stop doing it ALL the time), and THAT is when you get to start chaining stuff on him that shouldn’t be allowed. You still can’t go wild with him until you get him into real juggle percents (when he starts being knocked over by attacks), but when you get him to stop n.airing all the time, you open the door to take one or two more free hits that you shouldn’t be allowed to have. Keep milking it for all it’s worth, but keep baiting n.airs.

Luigi isn’t tough, he’s just a character that calls for a good set of brakes. Failure to yield at the right time will cause you to get wrecked in the middle of your own offense. It’s all bout those 3 C’s.

Contain, Catch, and Cheat. …[/horrible-dogy-puns]
*Don’t worry, I slapped myself for that one*

Defense

Defending against luigi, lol. It’s actually pretty funny, Luigi’s offense isn’t really too hot, you just need to have a good plan for both sides.

First and foremost, you’d prefer to defend against him on the ground. Although you don’t have too much of a problem with his aerials, that’s where he can generate his pressure (per say). If you let him get up there, you have to respect shorthop double aerials, and I’m talking stuff that leads to n.air (meaning he can come down and put some pressure on you). Although you can try to jump up and b.air him, or tilt him out of the air (which you should try occasionally, but not too often), the best way to limit his aerial offense is to move. Remember, Luigi has horrible mobility. If you keep on the move, he’s going to have a difficult time trying to pinpoint you because he cannot chase you in the air. Heck, you can literally walk away from him if he tries to approach from the air (you can’t ACTUALLY do it, but he’s literally that slow), so as long as you keep moving, he’s going to have to keep himself grounded.

And being on the ground is where his problems come in. You control the ground. You can dictate when he comes In with a mix of pills and tilts. The only goals you really have with these are to disrupt his wavedashes and close distance to where you’re inside his wavedash range. As long as you’re side his wavedash range, he has to walk or run towards you, as wavedashing will get him d.smashed or grabbed (or any shenanigans you want to try. I’m real fond of upsmashes).

If you’re outside of wavedash range, however, you’re going to have to watch for him skating in, obviously. Here’s the kicker; on the ground, there’s not a lot he can REALLY do that works. His jab mixup is legit like Mario’s, so that’s works. However, everything else he throws at you is easy to stop. You can realistically stop ANYTHING else he’ll do from the ground with a shield, and then punish it. Tilts, Smashes, you name it, you can shield and punish it. If you want to be extra sure on the punish, you can CC tilts (same with smashes, but at low percents.)

If you see them wavedashing back and forth, trying to aim something and make it safe, step up or step back before you go into a defense. It doesn’t matter which way you go, you’ll get something out of it. Stepping up makes them wavedash too far, which leads to you getting shield punishes, stepping back makes them more likely to miss, which gives you whiff punishes. You gotta adjust, figure out which one they’re NOT looking for (if any) and milk it.

Miiiiiiiiilk it.

You just want to keep him from wavedashing all over you. SHBAWDs work great for making him slow up, but you can’t really rely on them for an actual defense, as he can just go up and chop you for a trade. Pills are awesome, but there’s obviously a “too close” for using pills (For the record, SHFF pill is beast in this matchup. Mobile ground pills). When it’s all said and done, you’re really just lookin to mix

1) If you let him do it or not
2) When you’ll deal with it
3) How you’ll deal with it.

Them 3 C’s man.

Edgeguarding

Edgeguarding luigi. … You can go about this two ways. You can either play it safe, which will sometimes gives luigi chances he doesn’t deserve, or you can roll some serious dice on him.

In general, you want to wait through all the nonsense he’s going to do, try a b.air when he comes in close (if he’s in range), and then look for an edgehog/cape when he up+bs. HE’S GOT NO HORIZONTAL ON HIS UP+B, SO HE’S GOT TO BE RIGHT NEXT TO THE LEDGE TO DO IT. If he’s too low to hop out and b.air (which sometimes you don’t want to do anyway, you can opt to try and pelt him with pills. Pills really disrupt luigi’s recovery. Stopping the up+b is a 50/50. Half the time he’s going to shoot past the lead to hit you out of an edgehog attempt, and then fall down; half the time he’s gunna’s just sweetspot. You can eyeball the distances easy, but just know that he can stop you if you’re slow.

The only other thing you really need to look out for is his tornado. It really isn’t a threat at all in recovery, but … well, just look down in the gimmick section. I’ll fill you in there.

Now lets talk about Vegas, baby!

If you get a good read on where he’s trying to side-b, you can jump out and cape it. Caping it isn’t goin to kill the recovery, but it will make him throw a controller at you. You’re obviously rolling dice because he could misfire, but you need to consider some things.

1) Misfire is like 1 outta 12 or something like that, I dunno.
2) You could always cape respecting the misfire (actually, if you space yourself right, you can cape misfire on reaction)
3) Unless you’re at like, 70% or so, you’re not going to DIE from misfire (which actually still hurts his recovery).

So you really don’t have TOO much to lose from trying this. If you’re scared to cape (which Is understandable, I tend to shy away from it unless I’m at the throw-away percent) then you can replace Cape with b.air. Comes out faster, still get essentially the same result.

Now that you know HOW to deal with side-b, the next dice thing is figuring out where he’s aiming. More often than not, luigi looks to aim BELOW the stage (a good luigi, atleast), He wants to be out of your attack range, knowing good and well he can climb fairly far. A lesser Luigi (or a more brave one) may try to go at you or above the stage. The best way to go about this is to jump off the stage, and fall with them. SPACED OUT so you can react. If he goes further than you’re willing to travel, eject and go to the ledge.

Now, you have the when. A general rule of thumb is that the higher they are, the more likely they are to try multiple side-bs. So if they start to hold it for a long time, they’re going to look to go low.

In the end, dealin with the Lu isn’t a problem, the question is how brave do you want to be on his recovery?

Recovery

……. Um, I mean his edgeguarding isn’t anything fancy or spectacular, but it’s more than enough to deal with your crap recovery.

Luigi’s not going to chase you far off the stage because well, that takes too much time to get out there. He’s gunna keep it real close to the stage. He’s looking for some aerial, normally a b.air or a f.air, or a ledgehop n.air. You want to just throw pills at him to keep him from the ledge and disrupt him.

There really isn’t ANYTHING spectacular about luigi’s edgeguard (That I know of), it’s just super standard. Don’t do dumb stuff, that’s about all I can really say.

Gimmicks (And gimmicks to look for)

Luigi’s Tornado: For luigi to use his tornado, he has to use it once on the ground per every time he does it in the air (think of it at CHARGING his tornado). He starts the match charged. He doesn’t get a great deal of lift from this, but he gets some horizontal (that’s all he REALLY needs from this). The thing to keep in mind is that if he uses it on in the air, he’s likely to use it on the ground to charge it, and he might use it on YOU (as he can combo from it.)

Luigi SS Up+B: SHINRYUKEN! He’s got to be jacked up on you for this to work. Looks to punish techs, rolls, and spotdodges with it, normally.

Dogy Tips vs Luigi


-He doesn’t have more range than you, so if he’s predictable with his wavedashes, you can just fight him with range. If you know he’s going to come in and do something on the ground, jump it with a f.air.

-SHFF pill. It’s beast.

-CCing luigi is pretty beast. Especially his n.air. You can CC that for a LONG time, especially if luigi likes to throw it early to stop you from following up.

013. Donkey Kong
Dogy’s Matchup Chart: 6-4 Doc
Dogy’s Matchup Ratio: 60-40 Doc
The General Consensus: 7-3 Doc (rolls eyes)
The General Flow

YAFACE!

Donkey Kong. He’s a kool guy. He enjoys his work (as you can tell by his cheesy a** smile on the character select screen). He enjoys U.AIRING THE EVERLASTNIG CRAP OUT OF ANY AND EVERYBODY. :MAD: :MAD:

Dear god! You’ve got 2 things to worry about in this matchup. B.air, which is pretty beast, AND FRICKING U.AIRS. It’s soooooo hilarious. Watching you lose 50% to PSSH PSSH PSSH PSSH!. Oh lawd.

The matchup is actually pretty kool, though. Like, it’s very fair imo. You’ll spend a lot of your time far away from DK throwing pills, and just trying to contain him, and he’ll try to b.air his way closer so that he can try to land a grab. When you guys finally do meet up, one of you is either going to try to run in, in which the other can stop with a tilt or smash or something, or you’re going to try to jump, which the other can stop (ALTHOUGH DK STOPPING A JUMP WITH AN U.AIR IS UUUUUGH)

You’re going to be a little more on the offensive end because DK isn’t going to TRY and run you down. He can’t really approach too well. He can inch his way towards you with b.airs, poke, and then grab, but he doesn’t have a very useable approach move. So if you can force that on him, you’re good.


Offense

Stay on him.

Staying on top of DK is a nightmare for him. He can’t really get anything accomplished with you in his face except for pray that you screw up and let him grab or, or that you jump too far and let him u.air you. If you can avoid both of those, he’s to try to get away from you.

His shield sucks so he’s not going to stay in it for long. But I mean, if you can get it down some before you even get IN there, you make attacking him soooo much easier.

So with that being said, at long range, chuck the pills. DK is a character that you can force ALL sorts of bad things on with pills. He’s not exactly the most mobile character, so moving around pills is a chore for him. He’ll get chipped every now and then. He can swat at them to keep himself safe, but then he’s running the risk of letting you move in on him as he’s dealing with it. Be ready to do so. He can also start putting his shield up every now and then, but he does NOT want to do that. This is, however, the one thing you want to happen. If you catch him putting his shield up for pills, keep at it until his shield is gutter trash. It’s already bad as is, but a small DK shield means you can come in with some crazy stuff and he has to beat it or move. It’s reaaaaaaaaaal easy to shieldstab DK.

As you come in closer, you need to look out for tilts and his b.air. He can keep you out. You’re not going to beat him at midrange, period. His ENTIRE moveset is midrange, so he just needs to be setup to deal with you. Don’t try to mess with him here.

As you come in, if you need to get around a b.air, FH D.air is great. The alternative to this is sh u.air, if you think he’s going high. Both of them lead to you putting DK above you, which is awesome. But anyway, if he doesn’t take the bait, you move in.

Get in his face. When you get in his face, DK gets scared. He wants to grab so bad, but as long as you stay away from it, he doesn’t have too much to fall back on. If you stay low, you’re going to avoid the real dangerous stuff he can throw (b.air and U.AIR UUUUUUUUUUGH!). If he’s not in shield, the ONE thing to be weary of (while on the ground) is his d.smash. It’s fast, and it sends you out, end of discussion. Like, if you think he’ll TRY it, let him. Punish it afterwards. But you don’t want to mess with it and get kicked back out. Other than that, you have a pretty clear runway to land whatever you can while staying with him. If you get behind him, you want to look for him trying to jump and b.air and stay under it. Otherwise, it’s the same old “Don’t be where he thinks you’re going to be”. He has to make some good guesses to get you off of him.

You want that grab. Grabs are good vs DK. Heck, anything that leads to you knocking him up is good as he has a horrible time defending himself in the air. You want to do ANYTHING that puts him above you, and keep him there.

When it’s said and done, you just want to work your way in and stay there. If you ever feel the need to get out, the LAST thing you want to do is go up, especially high up. DK is looking for that and is going to pick you up off u.airs. Back out by keeping yourself low. Just keep this in mind; the closer you are to him, the lower you want to be.

Defense

Don’t. Get. Grabbed.

Just, ugh. U.airs for days come from grabs. And it’s so bad, because the default thing to do to get away from grabs is to jump away. BUT IF YOU JUMP, YOU’RE DOING THE HARD PART FOR DK. Now he’s just got to take target practice at you. So, again, you want to keep yourself grounded as he comes in. You don’t want to do it ALL the time, as you’re asking him to run in and grab, but jumping, by default, is bad.

The main thing you have to watch for is his spacing. DK realistically CAN’T just run in on you unless you let him. He’s got no real approach moves, and has to rely on makeshift stuff like n.airs if he wants to aerial approach. Realistically, he has to keep you from swinging (with b.airs) until he can get close enough to run in and grab or catch you trying to do something. Keep him away from you.

Lay on them pills. Turn his 100m dash into the 100m hurdles. Having him jump in at you is great as you can pick him out of his aerials. And again, if you catch him jumping clear in your range, you get some u.airs and d.airs. You WANT that, as you get to bump him up again. Don’t let him stay on the ground very long.

Once he gets too close for pills, you need to stay on the move. DK isn’t going to teleport over to you, so you don’t want to stand still and let him size you up. I mean, he doesn’t have anything TO size you up with, but you need to make spacing hard for him. It’s actually tricky because you have to balance between giving him too much room and running into b.airs. Mix and match where you go.

If you can time him landing and jumping again to b.air, jump at him with a d.air. FH or SH, doesn’t matter. If you get next to him with a d.air before he b.airs, you can cut it off and move pst him. You don’t have to completely stop what you’re doing when he gets close to you, you just need to be careful.

When he gets in your face, DON’T PANIC. IT’S ONLY A GORILLA, NOTHING DANGEROUS. You have to be willing to back up and give him room, as he can’t chase you down. There’s really not a lot he can do keep with you if you move early enough. The ONE thing you do have to worry about though, is if he has a giant punch. That thing is LONG, so if he has one charged, don’t telegraph wavedash or roll backwards. That’s going to get you jacked in the jaw. Hard.

The one thing you cannot do Is give up a grab. Too much nonsense can come from a grab. You have to be willing to n.air out (or d.air to try and stop a headbutt), wavedash, roll, whatever if you see him coming. DK’s grab is too good in that he can setup A LOT of stuff outside of just combos with his grab. All sorts of cargo gimmicks, stage spikes, suicides, etc etc. If he’s in your face, you’re pretty much OK to take some damage as opposed to getting grabbed.

If you’re on the run from DK, the one thing you want to TRY and avoid is running to a platform. It’s obvious what happens from this, you’re above him. It’s not the end of the world if you do so as you are putting distance between the two of you, but you can’t just STOP and take a breath when you get there, you gotta keep moving. He can jump pretty far through a platform and u.air if he thinks you’re going to jump in range, or he can SHFFL (really, “auto cancel”) u.airs if you’re going to stay there. Worst case scenario, he can poke at you with u.tilts and u.smashes. Platforms should really be checkpoints in your race to get away.

The goal in the end is to keep DK out. It’s not easy, but that’s what you have to do. Although you’re pretty dangerous when you’re up in somebody’s face, that’s ALL DK has, and his “up close” is longer than yours. You cannot let him come in on his terms. Keep him in shield up close to you, keep some distance between you till you can stop him with a pill or something, just DON’T let him in.

If he gets there, don’t panic. You don’t want to get u.aired, but being scared and trying to premature run out of corners is what’s going to cause it. Just keep backing up and wait till you can squeeze out of your situation and move out.


Edgeguarding

DK has like, no vertical. So if you can b.air him or EVEN D.TILT HIM. You’re going to pretty much destroy his recovery.

DK is the one character who is looking to go high when he can, because low is trouble for him. Be ready to jump up and b.air him and bring him down.

He really CAN’T defend himself on recovery. His defense is to up+b. So if he’s a long ways out, feel free to jump out and b.air. If you think he’s going to up+B, come over him with a d.air and then push him out with a b.air when you’re done. DK’s a character who’s real easy to scare by jumping out at. You don’t need to go all the way out, just enough to make him pull up some. Take the ledge on the way back, and b.air him down.

If he’s up+bing back to the stage, be ready to poke him with a f.tilt. As long as you knock him out and he up+b’s again, you’re ok. It’s fairly hard for him to SS, as you can just turn and take the ledge from him. Don’t let him on the stage, though. He doesn’t have a lot of recovery lag on his up+b (Its better off if you think he has NO recovery lag).

Not a lot to really be said about DK’s recovery, it’s super linear.

Recovery

Now recovering against DK……. sucks Actually isn’t bad at all.

He can’t chase you far out and he can’t chase you low. Cause his recovery blows. So yeah, you’ve got a lot of room the work with on recovery. Infact, most DKs tend to stay on stage and try to punish missed sweetspots, or edgehog. Easy mac generic.

Here’s where it gets tricky.

DK can jump out and b.air, that should be obvious. What’s hard to catch is spinning kong edgeguards. That’s ledgedropped up+bs. You CAN’T beat that. You CANNOT beat that. So basically, if DK gets the ledge, going low isn’t an option anymore.

So you HAVE TO HAVE TO HAVE TO stop Dk from grabbing the ledge. You HAVE TO HAVE TO HAVE TO throw those magical pills at him. If you can’t stop him from getting the ledge, then you still have to throw pills to make him move around and hopefully disrupt his timing. You’re not going high from far out, you’re doc. Your recovery blows. But you HAVE TO HAVE TO HAVE TO try and make his life harder than it needs to be to stop you.

You cannot just let him SIT there on the ledge and recovery. That’s how you get destroyed on recovery.

Other than that, it’s business as usual. SS to avoid normal ****, don’t hang yourself in front of the stage like a ******, you know the drill.

Gimmicks (And gimmicks to look for)
DK Up+B: DK can actually use this move similarly to Bowser’s fortress. Meaning, he can use it OoS, , he can spinning-kong-hog with it, and he can somewhat use it as an anti air. Know that the ground one DOES has a SS, which is like, right above DK as his arms start spinning. It hurts.

Cargo Hold: DK can use his cargo for all sorts of s***. The default procedure is to either cargo hold -> U.Throw -> U.air (or PAWNCH!), or Cargo Hold -> (Jump off stage) -> D.throw. A default gimp he has is to Cargo hold -> Jump off the stage -> Spike you into the stage, so be ready to tech.

DK PAWNCH! (Neutral B): He loses his charge if you hit him out of up+b. So if he ever has a charge and you see him up+b (which is completely possible), nail him out of it.

DK F.air: Meteors if it hits you from above.

DK Side-b: Meteors. It’s a hilarious edgeguard that really doesn’t work.


014. Mario
Dogy’s Matchup Chart: 5-5 Even
Dogy’s Matchup Ratio: 45-55 Mario
The General Consensus: 50.1-49.9 – You get the point
The General Flow

Ditto match +.

For all intents and purposes, this match is really a ditto, with a few small nuances here and there that you need to know. I’m not going to dwell on it because, like a ditto, there’s really nothing super gimmicky about it. You just need to play your style vs his style.

Some key things you need to know right off the bat.

1) Mario can keep your *** honest with his f.smash. What I mean by that is that if you want to **** around and be stupid in a place where he CAN put a f.smash, he’s got the ability to come up and do so, and you’ll have to :cool: deal wit it. If you ever blocked a spaced f.smash, it’s COMPLETELY SAFE. You can try to move in, but don’t you dare try to punish it unless Mario gives up.

2) Mario’s Jab mixup is legit. Like, one of the most legit ones in the game, actually.
3) He’s going to combo you more than you combo him. Just accept it and make your hits count.

4) You’re allowed to stay in the air more than him seeing as his fireballs use the decay-bounce mechanic. (They bounce at half the height they’re thrown from).

And last, but not least.
5) It really doesn’t matter too much that you kill better than he does, both of you are going to gimp the trash out of each other.

Offense


Don’t you dare hang out anything short unless you want to get punished severely for it. I actually have a big emphasis on the word HANG because you don’t specifically have to be SHORT to get punished by Mario. If you put It short, then yes, you’re going to get f.smashed, and there’s nothing you can really do about it except try to put your shield up or roll/spotdodge out of the way. However, hanging a move out there near him is begging him to u.smash, or even worse, u.tilt you. You DON’T WANT TO GET U.TILTED AT LOW %S. It’s not like you’re going to die, but he is going to rack up some damage. You don’t want that.

When you approach him, you’d do very well to get him to jump. Make him jump pills, DD around to coax him into jumping, whatever it takes. Mario in the air isn’t as scary as Doc in the air because you’re not going to die to a Mario f.air. You’ll get the trash comboed out of you if you get hit by it, but that’s not death.

If you do get him in the air, you don’t want to screw up and have to run in and shield an aerial. Again, his L-Cancel lag is lower than yours, so running in and putting your shield up again Mario is actually giving up the advantage. His is low enough to where him randomly hitting your shield with something is going to turn momentum to his favor.

Um, you don’t really have to be concerned with too much besides that. Just try to inch your way in, like always, dive in past f.smash range, and try to keep control. Be ready to jump (or possibly duck) some fireballs as you go in, don’t run into any aerials, and try to land a grab.

There’s not really too much I can say about this.

(Note: If you’re still feeling fairly lost, go read the Doc matchup if you haven’t. It’s literally the same idea)

Defense


Now this is where the difference between a Doc and a Mario are going to be most evident. Mario can flat out throw more attacks than Doc can.

If you’re staying close enough to where Mario keeps hitting your shield, you’ll literally have to let him do more than you would Doc and look for REAL gaps. If he comes in with a jab and starts jabbing the trash out of your shield, you have to let that go. You’re not going to punish him unless he stops. If he puts a b.air or u.air (or a late n.air) on your shield, you pretty much HAVE to respect what he’s going to do next. There’s nothing you can do about it unless he screws up royally (i.e. he hits the top of your shield, lands jacked up in your face, or misses an l-cancel). It’s just not the same as Doc where you could actually n.air out and make him slow down, oh no no no no no. If Mario sees this coming, he can do somethin’ bout it.

Next Mario specific thing you need to watch for is the f.smash. There are really two ways he’s going to land it. One is a setup into it (which 9.5 times out of 10 are going to be u.airs), the other being a wavedash in. When you get to like, mid% (40% till like… let’s say 80% or so), you have to be real mindful about getting hit with an u.air. You’ve got to be ready to DI the hell away from him (realistically in OR out, as he can catch both). This is the MAIN time he can catch you with u.air to f.smash. And realize that he doesn’t have to JUST u.air you, it could look something like D.air -> U.air -> F.smash (d.air -> u.air is guaranteed, remember? That’s a constant between doc and Mario). He also could d.throw -> u.air -> f.smash.

Wavedash -> F-smash is literally THE matchup specific thing you need to get used to. You won’t have a time grasping to the fact that Mario has the same setups you do, but gets more from it, and it’ll be evident that you need to not be carefree with your approaches cause you’ll run into a f.smash, but the ONE thing that’ll screw you up is failure to realize that you need to be “alert” at a slightly longer range than you would a Doc. That’s all there really is to preparing for Wavedash -> f.smash. You just need to know that you need to either stand a further out if you’re waiting on Mario, or you need to be prepared for wavedash -> f.smash.

Last thing, and it’s a quick note, if Mario is fireball approaching and you want to move, you’re green light to jump. If you jump into the fireball, that means he spaced it bad and you should have punished it anyway. If not, it’s going to decay-bounce and you’ll be away from it. Just do mind the Mario that’s probably going to follow behind it.

Aaaaaaaand that’s it.

Again, if you still feel fairly lost about what you realistically SHOULD be doing (which is possible, I’m really cliffnoting this section), just go look at the Doc section, and tack these notes on with it.

Think of the Mario section as a supplement to the worker’s wars.


Edgeguarding


Edgeguarding Mario…. Go read the Doc section for the BnB, I’m just going to give you Mario specific MnP (Meat’n’Potatoes) here.

First, he’s going to throw Fireballs like you would throw pills. His fireballs have a longer trajectory, so they’re going to be HIGHER. That means that if you want to get around them, you normally want to come from BELOW him (as you CAN’T get above him). Coming from above him would normally include you jumping from a platform.

Second, and most importantly about Mario’s recovery is that he has cape lift. That means he can cape TWICE on his recovery. This is important to know because people with Doc experience tend to get a little more aggressive if they see a Doc cape twice because they’re now hurting their recovery. This isn’t true to Mario.

Third, and kinda just icing on the cake. Mario can walljump (and can up+b walljump). Just remember he can do it. I could start listing all the stages where I’ve seen it, just know that if you can wall tech the ledge, he can probably up+b walljump.

Last, and Doc can actually do this too but Mario does it easier. Watch for the low angle up+b. Doc can do this too, but Mario has MUCH easier time doing this.

Recovery

*Points to Doc section* Yeah, there too.

Um, …. –shrugs- Watch for a f.air and meteor that trash. That’s like, the only REAL thing that’s different.

Fireballs are much more effective for edgeguarding than pills since they have a higher trajectory, so be on the lookout for those. I mean, just like most gimmicky projectile edgeguards, you can actually Smash DI them in and have it HELP your recovery, but you still wanna look out for it.

Know that Mario can cover a bigger range (further AND higher) than Doc can due to capelift. It’s not too important as, by default, it’s still a risk for Mario to jump THAT for out at you. I mean, if you’re going to be stupid and recovery the same way EVERYTIME, don’t be surprised if you see him out in China with you.

That’s really all you need to know afai-remember.

Gimmicks (And gimmicks to look for)

Mario’s Jab: If he keeps mashing a, it’s actually safe. You have to just BACK DA F*** UP or keep taking unneeded damage.
Mario’s U.tilt: ALWAYS sends people up. Don’t think you get free rides.
Mario’s D.tilt: IS OFFICIALLY WORSE THAN DOC’S
Mario’s U.Smash: Has full knockback AT ALL TIMES. AT ALL TIMES. –Kayne face-
Capelift: Mario’s cape gives him lift. If he ever does SH Cape, he can actually do any aerial (except f.air) before he hits the ground, and the hitbox will come out.


015. Link
Dogy’s Matchup Chart: 5-5 Even
Dogy’s Matchup Ratio: 50-50 Even
The General Consensus: 60-40 Doc
The General Flow

Man ffffffffffffffffffffffffffffffffffffffffffffffff**** some sword.

Like, that’s how this matchup goes. You’ll run into pretty much one of two kinds of links. The jerks who want to actually TRY and run from you, knowing good and well they need that ’03 Link, or the jerks who plant their feet, chuck stuff, and … swing. Both of them feel the same to you, you either throwing projectiles or having to deal with swords. It’s …. Ugh.

It’s nowhere near as bad as that opening paragraph may make it sound, but it’s just kinda frustrating to know that some of the dumb Link stuff will work from time to time because well, that’s what happens when you have a crap range. Try to run in and get rapid jabbed, try to jump in and get shield-spinned, it’s just… lol.

OH AND THEN THAT N.AIR :3 MMMMMMMMMMMMMMMM DAT N.AIR.

But yeah, the gist of this matchup is you running around being annoyed until you actually hit Link. And then he gets the trash kicked out of him by like, everything you do. It’s pretty hilarious. Chain mcgriddles, juggles, and then just, edgeguards. It’s another one of those kool matchups.


Offense


Attacking Link is actually pretty hard. It’s like, he’s got something to slow you down at EVERY step of the way, and even when you’re in on him, you’ve got to stay right on top or he can get out fairly easily. It’s just a lot of frustration.

At long range, you’re going to throw _ _ _ _ _. One vowel. You realistically should never hit link with one unless you’ve just caught him landing or teching or something. The only thing you want is to close distance. You’re really NOT going to get him to stop throwing projectiles, that’s just in his nature. If you do catch him slacking on projectiles, however, move in closer and continue to chuck stuff at him.

At mid range (or the edge of it, atleast), throwing stuff at him will actually PREVENT him from using his projectiles. This is the range where you can expect to get the most benefit for your mythical items of mystery. He can’t use his projectiles, and he has to defend against yours. So if you’re looking to force him to move somewhere (whether it be to you, away from you, etc etc), here’s the main place you want to chill out and lay on him at. He’s not fast enough to where he can get TO you and punish you, and he can’t throw anything at you to make you stop.

And what are these wonderful little weapons of mass destruction we’ve been talking about? PILLS! YAAAAAAAAAAAAAAAAAAAAAAAAAAAY PILLS.

And coming in behind one is awesome against Link. Yeaaaaaah man. You don’t really want to hang out in midrange with him (the part of midrange where he wacks you with a sword, atleast), because there’s nothing you can really do. You CAN poke at him with f.tilt, but he can beat that with his jab (or CC). Just, don’t spend time here.

However, you come in behind a pill, and you can hopefully catch him with his hands in the cookie jar as you zip into close range. Up in Link’s face, he really doesn’t have a whole lot he can do, especially if you made him swing first or put his shield up. If he swung, you’re probably going to get some free jabs or maybe a grab, depending on what he tried to defend himself with. Take whatever you can get at this point. But if you catch him pulling his shield up, you need to be ready. He’s either going to move or swing again (That’s… kinda how melee works.) Him swinging again at this point is going to be a n.air or spin (or something super gimmicky like a d.air). If he n.airs, -snaps fingers- ****, he got away, and you wanna try to follow him with a u.air if possible. If he spins, hope you’re blocking cause you get to punish the mess out of that. If he moved, well, he moved, hope you went with him.

That n.air stays out for days, by the way. Like, it’s arguably better than Fox’s because it stays out for 7 years and all. So if you’re looking to jump behind him and he’s n.airing, don’t be surprised if the b**** PUTS HIS LEGS AWAY AND YOU STILL RUN INTO A N.AIR. It’s that frickin good.

If he’s neutral, don’t come in from high above, you’re asking to get u.aired, or u.tilted.
Outside of all that, you really want to try to keep on the move as you attack Link. He knows he can’t RUN from you don’t want to, so he’s not going to really try. He’s just going to chill in some area and bear down when you come in. The ONE thing you’re looking for is if he pulls a bomb. It’s the same as Peach and Y.Link. You call him pulling a bomb, you run in. Hell, if he’s just HOLDING one, this is a good time to start moving in. Reason being is because while he’s got a bomb, he’s got NOT good moves on him. He can’t even do his super gimmicky air-hookshot to defend himself. He’s got projectiles, spin, and throwing the bomb.

At the end of the day, you’re going to be frustrated, that’s all there is to it. You’d think Link would be a character that you could run all over once you actually got TO him, but that’s not exactly the case. You always have to be willing to put stop or else you’ll run into a n.air.

Or a random spin attack.

And random spin attacks tend to suck.

Suck a lot.

K

Defense

Defending against Link…. –drums fingers on desk-

-Taps fingers on chin-

Well really, the best way to defend against Link is to jump away from him. Like, no matter what he’s trying to start, unless he happens to LITERALLY be next to you, you can jump away from it. It’s pretty sad. He himself doesn’t move fast enough to catch you, his f.air isn’t fast nor long enough, and unless you’re jacked up in his face, his n.air WON’T catch you. So, anytime you need to get away from Link, you jump away from him.

Now, what would you need to get away from? Well, if he’s trying to come in behind projectiles, that’s a starter. He realistically is only going to try to come in behind a bomb, maybe some reverse ‘rang gimmick. If you can’t/don’t want to cape the projectiles, then you want to back up some so that he has to run further, and then jump away should he still manage to make it in time.

If he throws a bomb at you and you want to cape it, cape it backwards. That’s the safest way to cape bombs. You CAN cape them forwards, but you run the risk of making it explode. Catching them is OK in the fact that Link can’t chase you down, so you have time to catch it and throw it back. It’s also ok in that if you screw up, you’re not really going to pay for it unless he like… dropped it and you were right there.

You’ve also got jabs. Jabs are actually tricky to deal with, because you can only get away from long range ones. If he manages to get in your face and jab, you DON’T want to telegraph jumping away from this, as this is what he can stop. I’m not saying don’t ever jump away from it, because not jumping away is asking for him to wear on your shield a bit with jabs, try to poke you with tilts, or even –gasp- try to grab you. But close jabs are something you don’t want to make a habit of jumping away from, as you’re asking to get u.aired.

The next thing you have to look for are grabs. Just like any character with a teather grab, he’s not going to just hang it out there at will. He’s going to either tech chase you with it (which you really can’t do anything about), or he’s gunna call you sleeping in shield. Getting grabbed isn’t really the end of the world till you get into high % (im talkin like… 120s?), and then it IS the end of the world. He’s got kill setups at that point. Actually, when you’re in mid%s (like, 80%s), he’s got spin attack setups. Infact, at some percent will get your double jump sniped (I can’t remember the percent off my head, as the one Link player I frequently play has a vendetta against Spin attack, lolol). But unless I’m mistaken (which is possible), it can happen.

AND THEN THERE’S THAT N.AIR. MMMMMMMM DAT N.AIR :3. If you think he’s going to n.air at you, you need to cut it off or move out the way. The hitbox lasts toooooooo frickin long, it IS tooooooo frickin long. He can actually space this and start some ground nonsense if you let him n.air all day.

With those things on the table, Link has b.airs, which he really uses to just kinda space himself and start pressure, nothing major. Everything else he throws (which are now his smashes, tilts, d.air and u.air) are all punishable. Well wait, I take that back.

Tilts aren’t PUNISHABLE by definition (as in they hit you(r shield), and you punish), but they’re punishable in that you can beat them all out. So if you know what’s coming, throw out your own tilt and stop it, or n.air/b.air if you’re close enough.

Ok, EVERYTHING ELSE is punishable. Smashes you wavedash in on and smash or grab. Be aware that if you let his u.smash finish, there’s no recovery on it. However, Link is tall enough to where you can literally duck his U.smash. D.air and U.air are like, free whatevers .

Put all that together, and your general defensive strategy vs Link is going to look something like this.

1) Move around / cape projectiles as he comes in.
2) Shield a lot. Jump away when he plants somewhere that’s not in your face.
3) If he wants to get on his n.airplane, you cut that nonsense out. (Attack it or more)
4) Punish stuff.
5) ????
6) Profit!

(you knew good and well one of those was going in here)

Edgeguarding


He’s going low, so throw a crapload of pills, or jump out there and b.air.

Like, if you put him any real distance away from the stage, that’s all he’s got, is a low recovery. NOW HE’S GOT A BEAST LOW RECOVERY, but that’s all he’s got. You want to look for the point where he’s going to pass out of your range and attack that. Either you jump out and b.air, or you pill it.

He’s not going to put up a real fight. If he does ANYTHING, it’ll be throw some random projectile while he’s coming in. This kinda thing is really a formality for being in melee. He’s saying “Hey, I’m in this game, I have all these projectiles, so I’m going to throw one. It doesn’t really DO anything, but here it is.” You don’t really have to pay too much attention to it, just get over there, get on your ledge, and do your work.
Link is THE character who’s likely to teather low, so you want to stop that when possible. Jump out and b.air or cape, stay on the stage and pill, whatever. Try to snipe him out of his hookshot. If he gets it off, try to get on the ledge so he can’t take it. Be ready to n.air him when he comes up, or to catch him as he goes over you (if he SSed).

If he’s close and isn’t teathering, you need to watch for up+bs. It’s not a big deal in hurting you, but it will stop your edgeguard. You can’t even CC punish it. So at this point, if you think (or know) he’s going to up+b, you want to be on the ledge so you can hop on the stage and punish him. Alternatively, if he’s going to poke his head over the stage (to try to push you away with the up+b), you can jump OVER the sword hitbox and hit him in the face. That’s completely viable, doable, and suggested. ^_^

Last ditch effort is a bomb jump. Realistically, he’s going to put himself in a position to where there’s NOTHING you can do about a bombjump, and if he’s trying this, you just want to take the ledge and get ready for the up+b. You DON’T want to try to snipe him with a pill after the jump as you’ll turn him towards the stage, which could set him up for the hookshot he probably wouldn’t have. Just let him go, and if he comes in, ledgedrop a b.air on him.


Recovery


Seriously, this is one of the last sections, and I’m tired of thinking of this crap. It’s all the same.

Like, ok. Link can throw projectiles at you like you THINK he should, he could edgehog and d.air you like you THINK he should. He could tilt you as you come up like you THINK he should, but he really only needs one thing to stop your recovery.

DAT N.AIR! MMMMMMMMMMMM OH DAT N.AIR :3.

Link’s n.air is the bane of your recovery, as it doesn’t give 2 s***s or a cup of monkey piss about your pills. It’s cutting straight through it. So, you want to once again pill to keep Link from getting TO the edge or setting up on the ledge. If he opts to jump out, CEASE AND DESIST ALL ATTEMPTS AT PILLING. He’s just coming through with the N.air of 1000 n.airs.

……….-shrugs again-

I mean, just to give you something interesting to read; watch out for projectile setups. Like, bombs tossed up and whatnot. Bombs being tossed and set are indicator that a combo video is about to start, and you need to like… change something. With the way your recovery is, all you can really do is try to change your timing to ruin’s Link’s timing for everything. But then you run into this guessing game of “Did he account for me trying to cape here? Etc etc.” It’s just more hoping and praying.


Gimmicks (And gimmicks to look for)
Link’s F.smash: First hit is actually a viable, good move. Don’t think you won’t ever see it.
Link’s Up+B: It’s possible for him to edgecancel into an edgehog and get a hitbox to come out. Just… dumb random info.

016. Pikachu

Dogy’s Matchup Chart: 6-4 Doc
Dogy’s Matchup Ratio: 65-35 Doc
The General Consensus: 50-50“Hey, has this matchup ever happened?”
The General Flow

Super backwards Bros.

This matchup is probably going to feel like THE oddest matchup of them all, fundamentally. I mean sure, you’ll get tripped up with other low-tier setups, or some super gimmicky high tier player, but fundamentally, this matchup will kinda leave you scratching your head for a while if you’re not used to it, and you might not figure out why.

The reason being is because… you actually outrange Pikachu (save pika’s f.smash). Not only that, but you actually have to play the game of poking at Pika and keeping him out, as you can’t really run him down. It’s just weird, because you NEVER get to do this.

When you get past that, you have to remember the number one rule of fighting a Pikachu.

“Never get above the Pikachu.”

Seriously. That is the ONE thing Pika wants. Pika wants you to be above him like Peach wants you to CC, like Falco wants you to put your shield up, like Bomberman wants you to go down that alley. You get the point. THAT’S WHAT HE’S LOOKING FOR. And if you give it to him, you’ll pay dearly. If not with a combo, then a quick tail spike. It doesn’t matter where pika is on the tierlist when you read it, tail spikes work. You really want to go BEYOND respecting it. You want to fear it.

If you keep yourself out of there, you’re pretty straight. Pika is pretty scared of your existence. You chaingrab the crap out of him, ending in a free f.smash, edgeguarding him is pretty simple, especially after you read the agility gimmick, and there really isn’t anything he can do that’s completely safe and sound for him other than run, which leads to you throwing pills at him and pestering the crap out of him.

Like always, don’t assume he’s completely helpless. Pika has plenty of ways to f*** your day up, whether you let him or not. He’s just looking not to get touched by you because all sorts of nonsense will come his direction, even if you really don’t try.


Offense

Playing offense vs Pika is kinda like playing with a dog. (Yet another random-tier dogy analogy, but ride with me, you’ll see). It’s like, you’ll run around with your dog because that’s what you’re supposed to do. If you’re going to chase him, you know good and well you can’t catch him, so you’re not REALLY going to chase him, maybe just run at him and spook him into running away. Eventually you know he’s going to come over to you, and if you want him to go away, you either need to spook him again or kinda poke and prod and MAKE him go away.

That’s how attacking pika works. Pika is fast enough to where he can outrun YOU, so you’re not going to chance him down. He doesn’t even want to be near you, so he IS going to run. With that being said, your offensive spurts are actually going to be fairly short lived outside of your combos.

Ok, so with that in mind, lets break down to the Doc stuff.

Long range, pills, obviously. At long range, Pika might look to stop your pills with a thunder jolt. Other than that, he’s going to be doing business as usual. If you can manage to get all the way in to put some jabs on him, that’s what you’re looking for. Don’t bank on it though, seeing as he’s going to move. You just want to close some distance on him.

Mid range is kinda interesting. Like, you would think that you’d destroy Pika at midrange, which you do, but you have to look out for his f.tilt. Pika’s F.tilt is a super move. It does, like, everything. It’s pretty hilarious. So, of all things, that’s the one thing you need to look out for. Everything else is fine. If you wanna poke at him, feel free, but you’re watching for a Pika f.smash, which beats anything you do so long as it gets out. You want to avoid jumping in unless you can get him to get scared and put his shield up because EVERY aerial he does is going to beat your f.air and atleast trade with your n.air.

In close, you can go to town on Pika. The one thing you want him to do is put his shield up. Him putting his shield up kills just about EVERYTHING he can do. If you get that, don’t go above him, as you’ll get destroyed by a u.air oos, but pester him however else you want. So like, whatever it takes to make him put his shield up. U.tilts to stop jump outs, d.smashes to make him want to block, whatever it takes.

All in all, you want him to block. If you can’t accomplish ANYTHING else with your offense, you want him to block. Pikachu can’t really do ANYTHING to you in block unless you’re above him or jacked up in his face. Pills, jabs, d.airs, whatever it takes, you want him in the shield.


Defense

Again, defending against Pikachu is fairly odd. You actually WANT to throw out tilts and smashes to slow him down. It’ll work, trust me.

You can f.smash or tilt ALL of pika’s aerials, so look for him to jump in and punish it. If you’re not exactly sure when or where he’s coming in, you can do retreating f.airs (or b.airs) and protect yourself.

You don’t want to rely too heavily on aerials, though, because if you jump and he doesn’t, you’re above him. And that gets you u.air’d. That’s not to say you NEVER want to jump, because then you’r asking to get grabbed, but just, don’t telegraph it.

The next thing you need to do is not telegraph a spotdodge. Pika’s d.smash beats spotdodge free. You’re obviously GOING to dodge stuff, unless you’ve got super good spacing and control, but again, you can’t telegraph it, cause he beat’s it free.

Another thing to watch out for is thunder jolts. They’re not horrible, they’re actually pretty easy to take care of. The thing is, you have to keep in mind that if you want to jump, you’re helping Pika out. Now obviously, if you don’t jump, you’re options are limited severely. Caping it is asking him to jump it and punish your cape, blocking it is, bad, if you can pill it kool, but that’s an if. So sometimes you have to jump (and d.air) and try deterring him from jumping at you. Just know that you don’t want jumping thunder jolts to be your default option. Make him guess when you’re going to do it.

In the event that pika jumps in and puts a n.air on your shield, be ready for anything. That’s where his mixup starts. He’s got an answer for anything you can do, so you have to roll dice and hope for the best (or make a good read, depending on how you look at it.)

The next big thing you have to defend against is balls hard to stop. Upsmash -> Thunder. You straight up just have to be psychic and DI an u.smash away from Pika. Even if you do it, you’re only delaying the inevitable. That thunder is pretty much guaranteed, you’re just making it harder for him. If you have enough time, you could try to cape it, which safes you. If not, you just have to be ready to airdodge (and yes, it will take something as desperate as airdodging to get away from it.)

Aside from all that, you just have to be ready to move. Like, I say that a lot in these character sections, but it’s pretty much the same all around. Pika loves a stationary target. He’s used to having to go through stuff, so you planting your feet and swinging all day is no huge problem for him. You’re not Marth. But you don’t want to JUST run from him. Not only can you NOT do it, you actually can get some rewards for trying to stuff him.


Edgeguarding
There is a sad, sad gimmick to Pika’s recovery. All you need to know is that if he’s going to use agility, you probably can cape and beat it.

The gimmick is that Pika CAN’T SS the ledge from below. It’s ********, but that’s how it is. That being said, if he EVER tries it, you just do literally WHATEVER you want and it’s going to hit him (seeing as not only will he be poking over the edge, he’ll be about as tall as you are.)

Beyond that, you’re just looking to hang out by the edge and catch him as he comes in. Pika’s recovery is GOOD. Real good. He’s can cover a range so long that you actually shouldn’t be able to jump out at him (unless you barely knocked him past the ledge), so don’t try it. You might try to fake going out and make him aim short, but it’s no big deal.

Don’t spend your time trying to pill and whatnot, you can’t chase him that far anyway. Be ready to tilt, bair, waveland bairs, grab the ledge, whatever you need to as he comes into the ledge. But most importantly, be ready to cape agility. It’s actually pretty sad how well it works.

Recovery

Recovering against Pika is yet another recovery that sucks. It’s so funny because, yeah, he’s got an app for that.

First off, all he really needs to do to stop you is jump out and n.air / d.air. He’ll recover, you… are doc. So yeah, don’t think because onstage is horrid for him that he’s gunna do bad OFF stage vs you.

So, for the kool stuff. He can throw some thunder jolts at you, and like, if you get hit with one, you’re probably done. You can look to cape one, but if you use your cape to stall, doing a second one is going to kill your recovery.

Next thing he’s got is f.tilt. This move right here. N64 taught me to had pika’s f.tilt more than ANYTHING I’ve ever been edgeguarded with. You would think that a character that small wouldn’t be able to do much with a f.tilt, but I swear to god it beats EVERYTHING when used right. It’s like. Just sweetspot, and pray to god pika doesn’t try it. You’re not going to beat it with ANYTHING. Makes no sense.

If he’s on the ledge, you have to watch for reverse tail spikes from the ledge. So like, if he’s on the ledge, yeah, you’re screwed, he’s just going for flash at that point. Just, be ready for it. He really doesn’t HAVE to reverse tail spike if he’s got the ledge, but hey, why not. You’re Doc, your recovery sucks.

Um, he’s also got thunder edgeguards. I don’t mean the scrubby on stage thunder edgeguard, I mean rejump -> thunder. Makes a wall that you can’t pass. So like, if you’re out of stalling options, you’re probably screwed at this point. It’s kinda depressing. XD

Last trick he’s got is the agility edgeguard. Most times you see this is when you try to pass from high to low, in “the line” that extends past the stage. What happens is Pikachu will agility out and then do the second one back to the ledge. The point of this is to stop your forward momentum. If you get caught with it, you’re pretty much dead as he killed your forward and he’s back on the ledge. He realistically could do ANY direction from the ledge (so I count angles in my head, dunno if Pika can hit smaller angles.)

Um, other than that, more hope and pray. Do the usual stuff, shake’n’bake, hope it works.

Air Traffic Control
I cannot stress this enough, you absolutely have NO reason to be above Pikachu. Being above the Pika is just begging him to tail spike you. The problem is, if you’re not paying attention to detail, you might not catch what qualifies for being over him.

You’ll get the memo to not fall down on him, and you’ll know to try to get away from him when he throws you up, but one place you might not catch is on the ledge.

You straight up cannot be slack when you’re dealing with a pika on the ledge. As dangerous as it looks, him ****ing ‘round on the ledges doing agility nonsense is just trying to get you to put your hand in the cookie jar. And as soon as you reach over there he’s going to chop it off. Don’t forget how dangerous being ABOVE him is.

The next place is in the middle of your combos. Now, Pika is a very comboable character. Gets the trash CG’d out of him and is just “the right weight”. The thing is, you can’t miss when you go to jump at him. If you miss for whatever reason, he’s got enough time to slip under you and throw out an u.air before he hits the ground. Guess what that is? YOU ABOVE THE PIKA. *slaps hands* NEVER GET ABOVE THE PIKACHU. You have to be extrrrrrra careful when you’re doing this, especially when you’re running towards a ledge. Nothing like thinking you’re going to get your first u.air juggle in ages, only to realize you died at 30% to some stupid u.airs.

Just respect that it’s a no-no zone.

Gimmicks (And gimmicks to look for)

Pika’s Thunder (Down+B): You can cape it.
Pika’s U.air: I honestly don’t know exactly where the spike hitbox is, or if it’s even a specific hitbox compared to hitting at a specific time. Know that it’s a thing you should expect a legit pika main to control all the time (as opposed to, say, Y.link hitting d.air meteors.)
Pika’s Agility: When the move ends (like, when he goes for the second burst, or when he’s done) pika momentarily scrunches into a tiny line that’s like, 3 times his height. It’s pretty stupid. This happens all the time, except for when he tries to SS a ledge from above.


Dogy’s Tips vs Pikachu:

- NEVER GET ABOVE THE PIKACHU.
- F.smash is dumb good in this matchup. Beats a lot of stuff pika has, and it obviously hurts. If you have any fear of throwing this out, come off of it a little bit in this matchup.
- Don’t telegraph spotdodges, he can punish those free.
-Pikas are actually real scared to go in shield, if you can get behind them in shield, they’ll panic as they pretty much have NOTHING unless you’re jacked up on them.
-Don’t chase that rat near a ledge. If he recovers and grabs the ledge, you back the **** up. If he runs over to the ledge, you try your best to coax him out. That’s pika’s ledge. He gimps like a champion.
-NEVER GET ABOVE THE PIKACHU.

017. Young Link
Dogy’s Matchup Chart: 5-5 Even
Dogy’s Matchup Ratio: 55-45 Doc
The General Consensus: 50-50 Doc (I’m kinda just makin up numbers for the public at this point)
The General Flow
Passive stalking. That’s how I look at this matchup. Y.Link is fairly mobile, although not highly agile. So you’re going to be hard pressed to flat out CATCH him, and he will do some running. The thing you’re looking for is WHEN you catch him to hurt him to the point of where running doesn’t mean anything to you.

He can’t beat you with his projectiles unless you let him. At best, they’ll just piss you off. You’ve got a cape, some pills, and you can just hit/catch anything he throws at you. That’s not to say you WANT to sit around doing this all day, because you’re liable to screw up. And getting hit by the wrong thing can net Y.Link some variant of a combo.

Beyond that, you do have to watch for his attacks. He’s got you beat with range cause, well, he’s got a sword. Doesn’t matter if it’s an overgrown knife, it still beats your range. He can keep himself fairly safe, but he can’t really put up a wall to stop you. He’s going to be doing a lot of stickin’n’movin. He’ll plant his feet every once in a while, but more often than not if he does, it’s because there’s a flood of projectiles in front of him.

All in all, this matchup isn’t bad either way. You as Doc need to watch out for projectiles and getting shanked, Y.Link has to keep a distance so he doesn’t get pummeled to death, and neither one of you really like the idea of being off the stage too much.

Offense

So yeah, the first goal you have to is get Y.link to stop running around so much. Again, he’s fairly mobile, but not extremely agile. That means he can actually RUN and move when he needs to, but you don’t have to worry about a crapton of feigning behind it (unless you let it happen).

If he’s got any distance between you, the first thing you’re probably going to watch is for him to stop throwing projectiles at you. As long as you mind your distance, you actually don’t have to be too deterred by projectiles. At long range, his boomerang “sour spots”, so jumping into it isn’t going to do too much harm. Arrows fall down, so you can look to jump those if you see one coming (or run under it if he’s doing FH arrow).

Bombs are when you’re looking to close the most distance. There are two reasons for this. First, when Y.link has a bomb in his hand, his options fall down to throwing the bomb, using a b-move, or dodging. You’d think that they’d normally throw it, but that’s scrub Y.Link. The thing to know is that you don’t have to worry about stuff such as grabs, aerials, or any normals. That means you’re allowed to apply more pressure with your shield, and he’s not going to flat out beat it. Not only that, he doesn’t have much he can do TO it immediately. Second reason why you’re looking for bombs is the act of him pulling it takes some time. With that, you could at least jump or WD towards him while he’s pulling the bomb. With that being said, the one thing you want to keep an eye out for is when does your Y.link pull bombs, and you want to start “calling” that (read: predicting with a WD, run in, attack if he’s in range, etc).

Outside of that, you’ve got his projectiles. Now, your pills aren’t actually going to beat any projectiles, just trade at best. In fact, given the opportunity, Y.Link is going to just run around your pills, but the one thing you want to accomplish from this is to get him to stop throwing projectiles. If you get him to do this, you’ve done all you need to. If you can call him pulling a bomb (like mentioned above), you can actually come in behind a pill and take the bomb out of the equation as well. But, your offensive goal with pills is to get him to stop throwing ****.

Once you get in mid range, it’s a coin toss as to what Y.Link’s going to do. He can either try to jet and go back to throwing stuff, or he can try to fight you off. If he tries to fight you, be ready to jump on top of anything with a tilt or a jab. You don’t specifically have to look for anything big at this point, as long as you’re cutting into his room. Don’t force anything as he can push you back out with a d.smash or dash attack and give himself more room. You just want to steadily cut into his space.

And once you get into his space (or if you pin him near the edge), that’s when you can start looking for bigger things. Again, you don’t exactly need to look for anything TOO big, he’s always looking to get out or land ONE specific hit. With that being said, you don’t want to hang out anything too big. Don’t be so hasty to d.smash, as that’s one thing he punishes free with a grab (which, depending on the %, can lead to a kill). Again, you don’t want to pour on too much cause he’s just looking to kick you out. You want to pretty much hover outside of range and press when you either see him hang out something (like a whiffed u.tilt), if you can punish something, or if you can start landing jabs and u.airs on him to pressure him.

All in all, your game is to just cut off his space. If you cut it off, opportunities will come. Y.Link doesn’t really get anything big from up close unless you make a mistake. You keep your mistakes down to a minimum, and he’s going to try to get out, whether it be fight or flight.

Just stalk him.

Defense


Defending against Y.Link is pretty gimmicky. Like, it’s not hard or complicated, but if you’re willing to give him too much credit, it can lead to a huge problem.

First and foremost, there are to ground rules to cover. Don’t ever be above Y.Link and don’t ever be below him. If you’re above him, he’s probably going to u.air, and you can’t beat that. If you’re below him (I mean, a good distance below him), he’s probably going to d.air aaaaaaand you can’t beat that.

Ok, with the easy stuff gone, the first thing you’ve got to worry about is, of course, the total package of projectiles. And, although you would think the cape is a fool-proof for this, it’s actually not. Caping rangs and arrows is as easy as it sounds, but caping bombs is where you’re run into a problem. To save you from all the technical mumbo jumbo, know that the cape’s hitbox will cause the bomb to explode, so you want to either cape backwards (super easy), or you have to time your cape so that the cape hitbox doesn’t hit the bomb.

Beyond that, Y.Link’s projectile game has a slight flowchart mechanic to look for. More often than not, if he throws a rang at you, he’s looking to pull a bomb. If you can cape the rang back at him, kool. If not, just know that he’s liable to do it.

You don’t want to get hit by the bomb, though. That’s worst case scenario when trying to defend against Y.Link. Getting hit by bombs leads to stuff. N.airs, U.airs, more bombs, etc etc. That is the ONE thing you really want to avoid.

Outside of bombs, most of Y.Link’s offense is not going to lead into anything immediate. He’ll look to catch you with all sorts of stuff, pretty much his whole moveset to some degree, but none of it actually leads to follow up damage. The thing you need to keep in mind is that he’s not going to look to throw out a grab too much, as you can punish the crap out of this if he misses. That means you’ve got a lot of leeway to shield, but don’t get too comfy in it.

Don’t be afraid to do move. That’s all you’re really going to do vs Y.Link. You’re going to be hard pressed to punish anything because he can space properly and make pretty much anything safe. So you have to be willing to move away from him and start over. WD back, jump out, roll, whatever you need to, he’s gotta guess where you’re going to even have a chance at it.

When you get in close, he’s going to swing, you’re going to probably block it. You gotta figure out what he’s going to do, swing again, try to chase you do, or run away. Make a right choice, and you’re back in the driver seat. There’s not a lot to it. Just don’t get tripped up on projectiles.
Edgeguarding

Edgeguarding Y.Link is easy, but it’s not. Like, he has to recover low, so you can rain pills and b.airs and whatnot, but his up+b can cut you off from stuff. So it’s like, do stuff but watch for stuff.

More-often-than-not, you can stop him with a well placed b.air, but like I said, you just have to be prepared for him to try and up+b. If you don’t come early or high above him, it’s pretty easy to get sucked into it and straight up lose the exchange with him. You don’t exactly LOSE a whole lot for trying, though, so get at it.

Aside from that, you have to be ready to deal with his hookshot. It’s not extremely long, so you don’t have to worry about chasing him to obscure do-or-die angles. He’s either going to be blatantly out of your range (too low), or in range. You can either chase him with a b.air (or d.air), or you can take the ledge and force him to jump around you. Your pick on how you want to do that.

Outside of that, be careful of him tryin to cover space with a projectile. It’s nowhere near as solid as you throwing pills in front of yourself, but if you’re going to run into it, it’s all the same.


Recovery

Um.

Watch for projectiles, although he can really just jump out, n.air, and be straight. Rangs and bombs, that’s all you really need to look for. Watch out for d.air setups, which normally stem from bomb drops.
The only other huge thing to watch for is d.tilt meteor. Like, it’s nothing amazing, as you can SS and get around it, but if you’re not going to SS, expect him to try it.

With all that, it’s the general “Your recovery sucks, you’re going to die”, logic.”

Gimmicks (And gimmicks to look for)

Bomb Shielding: If Y.Link is holding a bomb, among other options, he could just shield the bomb explosion. Don’t be too hasty to run in as you’ll get hit and he’ll just combo from it.

Y.Link Upsmash: If you let him swing all 3 times, there’s goin to be no recovery to it. Sooooo don’t run in and get d.smashed for it.

Y.Link D.air: Meteor hitbox is above him when he pulls his sword out (the startup).

Dogy’s Tips vs Y.Link:

1) Watch for when he pulls bombs, that’s a great time to do SOMETHING. Attack, put distance, whatever you’re trying.

2) If he’s on platforms throwing bombs, you can just stay below the platforms. Not so much to avoid bombs, but because he’s not really accomplishing anything except burning time. If he’s flat out camping, you want to wait for him to pull the bomb rather than when he’s coming back (because you’re liable to get d.aired)


018. Roy

Dogy’s Matchup Chart: 7-3 Doc
Dogy’s Matchup Ratio: 70-30 Doc
The General Consensus: 90-10 Doc
The General Flow

This matchup is kinda bad for Roy. Chaingrabs, combos, edgeguard setups, and worst of all, he’s the ONLY character in the game who has a worse recovery than you.

Roy having a worse recovery than you actually does wonders for you in this matchup. The main thing you need to do is just push him off the stage. As long as you snipe a double jump, you don’t even have to push him horribly far. Just to the point of where his only option is to up+b on the stage, and then you rinse repeat. It’s pretty sad.

Leading up to that point isn’t any better for Roy either. You’ll spend most of your time harassing him wherever and whenever. Forcing him to wade through pills, threatening him with a grab, he gets no breaks. In a normal matchup, where he tends to enjoy people being close to him for his SSs, he’s going to want you away from him most of the time because you’re a threat up close.

He just doesn’t have a whole lot going for him.

Offense

Watch for random swords. That’s all you really need to worry about when you go on the offensive vs Roy. Roy can do stuff to stop your offense, and actually some to turn things around on you, but most stuff he’ll try will just piss you off if it hits. Nothing major at all.

First and foremost, you’ve got pills (yeah notice the trend here in this guide). Pills are annoying to Roy. Although it’s not a problem for him to jump them, he doesn’t specifically WANT to. If you come in behind a pill and he jumps it, he’s in a pretty bad spot where one more wrong guess could have him going off the stage. And again, his recovery is actually, worse than yours. So with that, pills are a great starting place for an attack. If you can’t get him to jump one, don’t fret. All you have to do is run your plan and avoid getting hit by a sword during the nonsense.

Next, you’ll come into midrange. At midrange, Roy is going to start putting up a fight (if you would call it that). Attacking from this range is identical to attacking Marth, but it’s not as threatening. The big difference is you want to flat out avoid getting hit with a d.tilt if you can. D.tilt is Roy’s saving grace. That means you want to have a tendency to jump in on Roy rather than run. You can poke at him from out here and try to scoot him back to the ledge, just make sure he’s not firing with a d.tilt. If you get hit with just about anything else, it’s not a big problem. You should be outside of his SS range at this point, so you won’t die (too hard) if you get caught.

Now, close range is where things get crazy. He’s going to be scared of a grab, straight up. If he’s not, make him scared of it. You get all sorts of combos, CGs, setups, the whole nine yards. Beyond that, you DON’T want to be too heavy on jabs. Reason being is because Roy will be looking to CC d.tilt (or d.smash) if he knows it’s coming. He already wants to d.tilt anyway, so why not just turn the whole situation around? Aside from all that, you want to work to keep Roy in his shield. He doesn’t have a lot he can do out of his shield, and again, jumping away isn’t always his best option seeing as you can actually contend with his stuff in the air.

Roy is another character where, if you’re going to move away from him, you don’t want to go too far. Although the tip of his sword is not his sweetspot, it’s still a range where you can’t do too much. (Yes, is not his sweetspot as compared to “is his sour spot” there’s a difference). If you have to run all the way out, understand that you’re gone and you should have to work your way back in again.

The last, and most important thing to keep in mind when attacking Roy is to not be blatantly obvious with anything heavy. You don’t want to give Roy a reason to counter. A countered F.smash or F.air hurts. Bad.


Defense

More poking, more guessing. Don’t you love guesses? That’s what happens when you play a character with bad range.

First, let’s talk about how Roy is going to space this matchup (this ENTIRE matchup, really). Throughout a majority of your stock, Roy is actually going to work to keep you at the end of his sword. He’s going to intentionally space non-sweetspotted attacks. Why? Well for one, it’s easier for him to combo at this range, as you won’t go as far, but second, and more importantly, YOU’RE DOC, YOU CANT REACH HIM FROM OUT THERE. So don’t be too surprised when you find Roy “misspacing” a lot of his attacks, he’s actually setting you up exactly how he wants to. Now, when he wants you dead, he’s going to bring you a litte closer. Not too much, but enough to where he’s going to start sweetspotting. So, one of the side jobs you have in this matchup is to figure out when Roy wants to kill you and avoid kill moves when the time comes.

Roy’s offense is going to be very subtle, and it’s actually pretty deceptive. In all actuality, Roy can’t generate a lot of offense. Instead, he’ll quick switch from offense to defense, baiting out a mistake and then milking it for all it’s worth.

Watch for Roy’s Side-B. It’s fast, it pops up, it’s fairly safe, and it leads to him starting nonsense. You’ve got to learn when he would try it, how many hits he likes to do, and how you can avoid it.

You also have to look out for F.airs. F.air is Roy’s main move that can generate any kind of pressure. If you see it coming, you normally have to make one more guess afterwards, but it can’t be wrong. You could also CC the fair, especially if he tries to space it out (which would not be SS), but know that you have to pay attention to this.

The only way you could make Roy’s offense better is if you constantly stay in the air, which you may have to depending on how much he’s laying on the d.tilts. If that’s the case, you’ll have to start contending with his N.air and U.air. Both of these moves are surprisingly ok. Like, N.air is actually good, but U.air isn’t going to destroy you or anything. The problem is you can’t fight back against either of them. The solution to this is to just NOT be in the air, but again, that’s easy for me to say when I’m sitting behind a keyboard without somebody poking at my toes.

All in all, Roy’s offense is huge, it’s really a big defense. You just have to be ready to stop something and not make a bad move afterwards. You have to screw up big and let Roy land a d.tilt if he wants any notable reward from it, so just don’t slip up.

Edgeguarding


Edgeguarding Roy is pretty cut and dry. To the point of where I’m not going to make a big deal about it

When he’s out there, you gotta figure out which way he’s going. B.air him. He can’t really do anything to defend himself unless you attack him HIGH above the stage. If you don’t want to attack him, make sure he has to up+b onto the stage, hop up, toss his *** off, rinse, repeat.

Everything you do is a thorn in Roy’s side. If you’ve not used to using pills to disrupt a recovery, now’s a perfect time to practice.

That’s seriously it. I’m not trying to brush this off or anything, but there literally isn’t a lot to edge guarding Roy.

Recovery

Same thing goes to recovery. Because he can’t really recover, don’t expect him to jump out and edgeguard you, he’s gunna keep it on the stage.

That means you have to do two things, keep him off the ledge and sweetspot. If you can’t do either one of those, it’s not a huge deal as Roy will have to do a lot of work to get you off the stage again with any real distance (He has to do a perfect waveland into F.smash.

Pill to keep him off the ledge, sweetspot to avoid d.tilts and whatnot, and if you plan on shooting past the ledge for whatever reason, close your eyes and pray to god he doesn’t counter.


Gimmicks (And gimmicks to look for)

Roy’s Counter: Roy’s counter is not busted like Marth’s (yes, marth’s counter is busted). Roy’s actually has a notable startup, and it doesn’t last very long. Unlike Marth, who can somewhat hang counter out and slow you down, Roy actually has to make a good read for his counter to work.

Roy’s DED: Without going into all of his options, know that 3rd hit down beats CC.

019. Zelda

Dogy’s Matchup Chart: 5-5 Even
Dogy’s Matchup Ratio: 40-60 Zelda
The General Consensus: 6000000-400 Doc
The General Flow

Platinum Hits. That’s all it’s about.

Your purpose in this entire match is to basically be a gnat to Zelda. You just move around and just try to annoy her the entire time while avoiding getting kicked in the teeth. And it’s not like she won’t TRY to kick you in the teeth, that’s the only solid thing she has.

(It’s real sad, because she actually has MORE, but due to how this game is, some of her good stuff flat out doesn’t WORK. Such as her upsmash)

In this matchup, you basically get to be a mini-Capfal vs Zelda. You weave in and out, tackin on small hits or piling on huge damage from setups; all while not running into her walls. She can’t really do too much to attack you herself as you can just run away and start over.

So you would think that if you’re at liberty to move around and you’re going to lay into her, it should be easy right? It’s actually not. Like, it’s not hard, but Zelda actually has some solid stuff that works against you.

If she guesses right, she can actually stop any approach you choose, she can push you away if you leave yourself in a disadvantage, or she could flat out punish stuff. And her punishment, while not the most damaging stuff in the world, is pretty disheartening to look at on screen.


Offense

Run up in there, and get to work. That’s your general plan for offense. No matter where you look to start your attack from, the end result is going to be you running in there and getting stuff done.

From long range, you can throw pills at her. As upright as Zelda is, she’s not going to have a hard time avoiding your pills. (I say upright because Zelda isn’t a huge character, but because of her animations she seems a lot bigger than she is.) She’s got no problem weaving in and out while maintaining her distance, and being in the air isn’t a big problem for her. She kinda wants to be there anyway to drop platinum hits.

All in all, if she wants to just, disregard your pills, she can reflect them back at you. You do have the option to run behind them if you think she’s going to do this, go around your own pill, and punish. However, if you’re going to do this, there is actually a too early. Too early gets you hit by her neutral b. She’s going to have some recovery lag behind it, so take your time.

Once you get past there, you’re in, you got it, mid range. From here, you’re basically trying not to get bucked out again. Zelda is going to look to keep you either here or far range, so try your best not to go back out to where you realistically can’t get anything accomplished. Poking at her is ok, but know that she’s gunna look to poke back. If you poke wrong, you’re getting poked in the face with a heel. I would say you want to avoid this range, but you’re going to have to run out here when you weave in and out of close range, so get real comfy and stick to your guns.

Beyond that, you’re going to be in her face. When you get her, don’t assume Zelda is helpless. She’s got outs, and they’re completely viable. Jabs and d.smash to push you back out to midrange, crystal twirl to get out of jail, and retreating foot to create some distance. Know that Zelda’s grab has a slower-than-normal startup, so she’s not very likely to grab you. If she finds out that you’re Pringles to her d.throw -> platinum setup, she’ll be tempted to try and grab more, so don’t fall for it.

The key thing you want to know is that once you get in on Zelda, you don’t want to stray too far. You might have to dip out to avoid something, or wait out a twirl, but don’t run (or jump) real far away or you’re going to have to fight your way back in. it wouldn’t be so bad if most of Zelda’s good tools were on the ground. But they’re aerials, so one you move back, she can move back while stopping you from getting in. Again, and again, and again.

The other big note you need to know is to not smash her shield. You generally don’t want to smash shields to begin with, that gets you punished. But with Zelda, that’s the one thing she’s absolutely looking for. A smash on her shield equals a foot in your face. Everytime. Without fail. She’s not going to try to grab you, it’s slow, remember. And she’s fairly slow on the ground as is, so she’ll just kick you and be done with it. The damage (or potential damage if you’re ******** and like to DI in all the time) isn’t so bad, but the problem comes from you getting sent all the way back to square one.

All in all, you want to stay on top of her, but give her some breathing room. She’s a princess and all, so she’s got rights to do some things here and there, and you just have to let it happen. However, she’s a prick, so if you give her too much, she’ll sit there whining and complaining till she gets her way. And heaven forbid if she actually gets it, she’ll keep on going like there’s no tomorrow. (Think about this wack analogy, it actually makes a lot of sense.)

Defense

Defending against Zelda is dumb easy, you move.

Zelda’s offense is basically non-existent as long as you do stuff that stems from or leads to movement. She has no real mixups, she can’t really chase you far (have you seen those heels?), so her offense is basically to poke, poke, and poke again.

I could try to elaborate on this, but there really isn’t a lot to defending against Zelda. If you want to get out of jail, back up. Roll away, WD away, jump away. Now keep in mind you don’t get those FREE (nothing in this game is really free), but moving away is just hard for her to deal with.

With that, Zelda is the kind of character where you have to watch for tricks. Empty jumps, run bys, etc etc. It’s not to say you never have to watch for those, but Zelda is a character where she needs those things to put any kind of “real pressure” on you. I mean, you’re not going to jump out when she jumps in, you don’t want to get kicked in the face, but what happens if you jump when she lands? She’s liable to jump with you and kick you in the face. It’s not like she took a random guess, THAT’S what she was looking for.

Now, real talk, you might have to watch for stuff like deep-SHFFL b.air -> b.air, or n.air -> u.tilt (or u.smash). She’s got ways to cover your outs. If you wanna try to poke with her, she can suck you into a f.smash (which you can actually DI out of, but DIing out of it might get you d.smashed in return. So be ready). Wavedashing in on block is never a great idea unless she’s going to … not d.smash, because she can d.smash, and there’s not too much you’re going to do to stop that (as long as you’re in range). Same concept goes to jumping in on block. She’s just going to kick you. So rather than trying to hang something out to stop her pressure, just move away and reset. She can’t do ANYTHING to rain attacks on you so long as you’re willing to just move away.

Throwing obstacles in her way isn’t a bad idea, though. She’s not going to warp across any kind of huge distance, so she actually has to deal with whatever comes in front of her. She’s got to actually take the time to maneuver around pills, and she’s got to stop shorter than planned if you want to do stuff like WD in -> f.tilt (this won’t kill her offense, but it could slow her down)

My point in at the end of the day is that Zelda has to be “close” to you to get anything of merit accomplished. As long as you’re willing to move away and take control with you, she’s going to just sit there and hope you come back. That’s how she works.

Edgeguarding

Edgeguarding Zelda is pretty ho-hum. She can cover a long distance, but there isn’t a whole lot she can do on recovery.

First and foremost, you want to stay on stage, unless she’s real close to the ledge. Going out far is just asking her to up+b past you, grab the ledge, and turn your edgeguard into your recovery. That’s the worst thing that could happen. She could just, ya know, kick you. She’s in the air, and so are you. She’s got a nice long recovery, she just hates when people are at the end of it.

Beyond that, … there really isn’t much to say. She has horrid recovery on her up+b, so you want to try to make her land on the stage, get up, and punish.

Understand that she has a wide number of angles she can hit (if you’re familiar with the “inbetween” angles Fox and Falco can do with their up+bs, Zelda can do those too). That means that just because she’s slightly above or below the stage doesn’t mean she’s going to land on the stage, she could still go for the ledge if it’s open.

If she’s close to the stage though, be ready to jump out and stuff an up+b. She still has a hitbox out before she actually teleports (and she’s not invincible), so be prepared to do something like waveland off and b.air.

Although Zelda can completely recover out of your range, you actually DON’T want to try to scare her into using the max range unless you’re ready to punish her landing. The reason being is that if you’re slow and she makes it back onto the stage free, you’re now on or near the ledge and Zelda has room to back up. It’s safer to let her come in some to where her onstage option puts her a good ways away from you. That way, if you screw up (or are scared), she’s got to actually cover distance to get back over to you and do anything.

Recovery

Hey, recovering against Zelda actually doesn’t blow. Like, it’s to the point of where there’s not too much to talk about.

First and foremost, watch for din’s fire. It’s stupid, you can cape it, but you just don’t want to get hit at bad times (like below the stage where it could pop you up into a b.air or something. Do know that if Zelda WANTS to throw Din’s fire at you, one of your options may be to take it. If she shoots long, it’ll actually blow you back towards the stage. (Be aware that this could also be a trap, depending on percent)

Beyond that… it’s business as usual. Your recovery sucks, watch for stuff. Zelda is slow to get out there, but if she wants to, she could actually double jump out, kick you, and recovery perfectly fine.

One thing to know is that Zelda isn’t going to be quick to take the ledge. She’s not fast, her WD is short, she has nothing for a quick turnaround, so if you’re racing to get to the ledge, you’ll beat her so long as she’s not already facing backwards.

There isn’t too much to say about it. She has an invincible ledge stall (twirl stalling), so she could theoretically hold the ledge to the point of where you just can’t grab it. That mean’s you’d up+b onto the stage, and then get kicked for your trouble.

Gimmicks (And gimmicks to look for)


Zelda’s Upsmash: Living proof that this game is wack. You can straight up DI out of this if you get hit in the beginning. It’s pretty **** unfair if you ask me. Just, DI away from her hands and you’ll be ok.

Zelda’s F.smash: Same concept, but DI into her.

Dogy Tips vs Zelda:
-If you get kicked at low%, DI away. You DI in, you’re gunna get kicked again. You laugh, but you’re gunna forget and DI in, and get double platinum hits. And then you’ll feel ********.
-if she throws you down, DI behind her (away). DIing in gets you kicked.
-Zeldas like Dash attack. I mean, they don’t have too much to work with anyway.

020. Game & Watch
Dogy’s Matchup Chart: 6-4 Doc (Doc Port Priority) – 5-5 Even (G&W Port Priority)
Dogy’s Matchup Ratio: 65-35 Doc (Doc Port Priority) – 55-45 Doc (G&W Port Priority)
The General Consensus: 0.60-0.40 Doc
The General Flow

This match is pretty aggravating, and it’ll get worse if you don’t have port priority.

I do not joke when I say the matchup changes with port priority, and I’m not joking when I’m saying it’s a clean 10% on the ratio. You got to understand that port priority will cause you to go from having dumb-easy combos and an uber kill setup to ONLY having guaranteed tech chasing. It’s pretty annoying.

All port nonsense aside, you’re going to be dealing with a character who’s entire moveset is longer than your personal being. If it’s not truly longer, it’s disjointed. It’s just frustrating. Boxes, keys, manholes, you pretty much have to go through a minefield to get in on g&w.

But when you get in, YOU GET IN. It gets pretty disgusting when you start putting pressure on G&W. He’s pretty much has to try his best to get some distance and start throwing hitboxes out there at you, or else you’ll just run over him. He can’t sit in shield seeing as he fullshield doesn’t cover him. He also has a small grab range, small enough to where you can land f.airs on his shield and NOT get shieldgrabbed. Pretty much when you make him put his shield up, you get to put in a little work as long as you keep him there.

And that’s pretty much what happens in this match. You’re either in, or you’re out. It’s kinda like a low-tier marth. You’re not doing anything in the middle.

Offense

Offense is going to be your main time to shine against g&w. You’re going to get a huge benefit when you start putting hits on him. It’s flat out hard for him to get out of stuff once he gets his, seeing as he has no low-frame aerials. In fact, if he does get hit, he normally has to resort to something such as up+b’ing or airdodging to get away from you. So once you get a hit, keep it going as long as you can.

With that being said, you gotta get in there first. First place you’re probably going to start is long range with some pills. Don’t bank on them too much. XD Not only is g&w a fairly agile on the ground and in the air, he has more than one way of dispatching your pills. If he can’t move, he can just put a hitbox on it. So with that, feel free to throw one out and check and see if he’s crazy enough to put his shield up, but don’t bank on pills.

So you pass that and get into mid range. Ok, here, it’s like I said in the general part. You’re looking at a lowtier marth. G&W can realistically stop you from coming in if he wants to (infact, I personally believe he actually can stop you from coming BETTER than marth, seeing as a right guess is going to hit you somewhere). Because of that, you have to play some real good rock, paper, scissors to get in (or however you look at this situation. It’s one of those half full, half empty concepts). You don’t really want to spend too much time out here because you’re going to start losing left and right. The only thing you have to poke at him is your trusty f.tilt (and occasional cape), but you gotta understand that he’s disjointed everywhere he goes. It doesn’t help that he can cover all angles, too. Poking at him is going to do you no good if you can’t reach his hitbox. So just get up in there

Once you get in close, you get to do some real work to g&w. You want to make sure you get in quick before he puts distance between you two, but you always have to be mindful of his jab and d.tilt. Both of them are very quick, and both of them will give g&w some sort of reward. If you can avoid those (and the super shortranged grab), then you’re good. Keep some pretty sure on, try not to let him jump, and you’ll be able to work your mixups from there.

In general, it doesn’t really matter WHERE you come in as long as you work your way in cautiously. G&W has the means to slow you down, so you can’t just rush in at all. However, you want to aire on the side of jumping in seeing as his d.tilt is fast, is long, and gives him a knockdown if it hits. Beyond that, you just have to think along the lines of a marth. Be ready to block and backout if you need to.

You also want to use A LOT OF D.AIR in this matchup. D.air controls g&w’s ability to put hitboxes out because he has to respect that you have a continuous hitbox in near him. If he tries to put something out and gets hit, he’s running the risk of getting hit into it, and we’ve already talked about what happens when he gets hit.

Defense

Defending against G&W is pretty straightforward. You’ve got to worry about one mixup, that’s from jab, and you want to move in or out when you have to. You don’t need to stay around him and give him a chance.

For the most part, he’s going to be poking at you. Now, understand that G&W can’t l-cancel most of his aerials. In fact, if you don’t see a f.air or d.air (box or key), he’s not l-canceling it. But any g&w worth their weight is going to just throw stuff to where you can punish it. You’ve got to be mindful of spacing, and/or aerial tricks. If you expect something like a b.air to come at you, feel free to try to step in and shield to mess up spacing. Know that you have to get in pretty deep or else nothing is going to happen. Other than little gimmicks like that, you just want to stay out of the way. Punish bad spacing when you see it, but you don’t want to make the mistake of trying to come in on a spaced f.air only to trip over a manhole.

And yes, you’re going to want to move more often than not against g&w. It doesn’t matter what tier he is, you have to respect that his range beats yours easy. You can punish or move in when he messes up. Until then, respect it. If not, enjoy jumping into u.tilts and f.smashes.

One of the safer places to be against g&w is above him (above and infront/behind to be more specific). Although his n.air is huge and disjointed, it’s relatively slow. That gives you the time you need to MOVE THE F*** OUT OF THE WAY when you see it coming (or shield or whatever). You just don’t want to give him chances he doesn’t deserve. Staying near him is going to give him a chance to put a jab on you, and that’s when trouble starts.

When g&w puts a jab on you, he’s got an answer for whatever you want to do. Wanna jump, u.tilt, f.air, n.air. Wanna roll, b.air or f.air. Spotdodge, d.air. Punish and fail, d.tilt. Stay in shield, get grabbed. He doesn’t have a clue, push you out with f.smash. He’s got stuff to do, all stemming from freezing you up with a jab. JUST DON’T LET IT HAPPEN. That’s the main mixup he has.

Beyond that, there’s nothing really crazy to worry about. Maybe some gimmicky stuff here and there, but nothing of extreme merit. Do be on the for him up+bing at you if you’re high above the stage. It’ll tack on some damage, and it’s relatively safe. It’s not like it’ll kill you or anything, but I mean, you don’t WANT to take damage.

Edgeguarding

G&W has a deceptively good recovery. Not only can he move a far distance horizontally AND vertically, but he’s fairly capable of protecting himself on recovery. With that being said, you have to be careful of how you go about things.
First thing to keep in mind is that g&w’s up+b has virtually no landing lag. That means that forcing him to land is not going to lead to a direct punish. Making him up+b back onto the stage is all but out the window.

So that would mean cutting him off before hand would be the obvious answer, right? It is if your g&w likes to come in and run into b.airs, but he doesn’t specifically HAVE to. G&W’s recovery is good enough to where he can move around your edgeguard pretty well and still make it close enough to sweetspot or land on the stage. So to combat this, you’re going to have to feign pretty far out to make him pull waaaaaaaay the f*** up and cut out the stage option.

Beyond that, you just have to do some solid edgeguarding. Know that, again, his up+b has no lag landing on stage. So if you miss something and he passes you, he’s going to beat you back to the stage and be able to punish you in return.

You really want to keep him from landing on the stage if you can. If this happens and you’re right behind him, you CAN continue to keep pressure on him, but If he’s got any breathing room, he’s going to throw out an u.tilt or d.smash (or d.tilt if he’s facing the right way), or he’s just going to run back to the middle.

Recovery

*Teacher Voice* Ok class, so we know that if a character has a good recovery, they pretty much are going to destroy doc on recovery right? Right. Yaaaaaaaaay. –rolls eyes-

Yeah, it’s pretty much the same here. The good news is, G&W doesn’t really have too much flash on his edgeguard vs Doc. But… he doesn’t really need it. His edgeguard is going to be real fricking simple. Either he’s going to jump out and n.air you, or he’s not. He doesn’t NEED anything else (not to mention nothing else really works).

You want to try to deter him from jumping out as best you can. Know that although pills LOOK discouraging to him, if he’s got enough of room to actually pop the chute, a pill’s not going to stop him. That means you have to plan ahead and have a d.air going if he’s going to jump into you. A d.air is going to make him space his n.air properly or give you a free pass by if he screws up. Your other alternative is to try to get under him and u.air him away. (If you want to get real tricky/grimy, remember that you could turn yourself around and try to b.air him as well)

If he’s not jumping out, you’re not home free. G&W’s onstage edgeguard is pretty beast in its own right. It’s actually more beast than his off stage edgeguarding imo, but it’s all the same to Doc, death. When he’s on stage, you have to look out for all of these super disjointed hitboxes popping off the stage. It’s nothing out of the norm, but the outstanding one you have to look for is a d.air. Reason being is because d.air reaches below the ledge. So that means if he looks like he’s going to d.air, you have to magnet grip the ledge. Getting hit by a d.air isn’t the end of the world, seeing as it WON’T be the spike, but depending on your percent, you could get popped up into a free n.air or worse.

Beyond the d.air, it’s business as usual, don’t linger out in front of the ledge or you’re going to get slapped with something. Dropzone isn’t safe at all either because he can just dropzone n.air.

You just have to be ready for him to come at you. He can do it.


Gimmicks (And gimmicks to look for)

G&W throwbounce and port priority: Know that G&W is the only character with a weird property where if some characters d.throw him, he’ll stick to the ground rather than bounce like he normally should. However, Doc is the only character where these properties will change depending on who has higher port priority.

If you’re higher port than g&w, he’ll bounce like normal. However, if he’s higher port than Doc, he’ll stick to the ground on d.throw. You literally throw him straight into a tech chase (that’s assuming he techs, if not, you can d.smash free).

You really just need to know that if you’re lower port, you can’t rely on your d.throw to set you up. It actually changes A LOT of things, such as the threat of your throw game.


G&W D.air: Has a hitbox when he hits the ground (for a total of 2 different hitboxes)
G&W Throws: All 4 of his throws have the exact same animation.

You just have to use logic for where to DI. It’s not hard. Rule of thumb for DIing most character’s throws are: 1) If you’re in the middle of the stage, they’re going to try to throw you to set something up. Whether it be up or down (or whatever), they want to set you up for guaranteed damage or a tech chase. 2) If you’re about to die, they’ll tend to throw you into a kill setup, assuming they have one. If they can do it straight from their throw they will, if not, they’ll throw you to where wrong di will get you killed. 3) If you’re near the edge, assume you’re going off the stage. If for no other reason, because you (as doc) have a crappy recovery, and it just makes the most sense to rack damage and/or a kill from it.

Dogy Tips vs G&W:
1) D.air is your friend in this matchup. You actually can SH d.air approach and get some worth out of it.

021. Ness
Dogy’s Matchup Chart: 5-5 Even
Dogy’s Matchup Ratio: 60-40 Doc
The General Consensus: A-1Hotsauce Doc (I mean, some people think Doc can chaingrab ness lol)
The General Flow

F.aaaaaaaaaaaair. Ness is gunna be doing a lot of that sparkly nonsense. Not a whole lot you can do about it as long as he’s spacing well. Kinda just gotta go with the flow.

Beyond the f.air, this matchup is kind of backwards. You don’t want to give Ness room to start trying DjC nonsense, and you get the benefit of having a longer overall range than he does. The thing is, if you stay away from Ness and he starts trying gimmicks (PKT, PK Flash gimmicks), you could just… cape and punish. So it’s like, you pretty much can stand anywhere and be fine. Ness, on the other hand, has to watch out for pretty much anything you do. His gameplan is going to be sneaking in stuff in between your gaps. Kinda like that guy who’s in the back instigating fights like “YEAH! THAT’S WHAT’S UP.” That’s Ness.

Only place that’s off limits is above Ness. That gets you comboed to hell and back. Like, you can get around u.tilt and u.smash no problem, but u.airs? You’re running a fairly big risk/reward at that point.

Offense

All you need to really be weary of is coming in from too high.

Ness’s defense, for the most part, will make him a moving target. He can move, but he can’t really throw a lot of stuff out there to slow you down. You just have to watch for gimmicky setups (djc b.airs, pivot f.smashes).

If you’re going to throw pills, be ready to follow up on them. Ness is liable to try to sneak in a pk magnet and snag some life back. It’s totally punishable if you move in on him, but you have to actually GO do it. The only other thing Ness specifically has against pills is the ability to reflect them back f.smash. You getting hit by a pill in this situation is not the end of the world because he can’t follow it. You can, however, catch him in the bat recovery if he tries it and you’re moving in. So don’t fear this at all.

At mid range, you realistically just need to make sure you don’t run into a stray PK fire. Jump it, or be ready to move if it’s some variant of jumping PK Fire. It’s nothing major if you get hit. DI out.

Close range is where you have to start worrying about Ness for real. First and foremost, you need to watch for F.airs and dash attacks. Although they’re fairly long ranged, he’s going to look to catch you with these as you come in. Dash attacks aren’t bad, you can CC or block those and go about your business. But f.air? You have to be ready to move away from that. F.air can lead to combos, or mixups at the least. You don’t want to get hit by that.

Aside from those, the next big thing you want to avoid running into is d.tilt. D.tilt is Ness’s jab, but unlike everybody else’s jab, Ness can obviously keep d.tilting as much as he wants, and he can stop whenever he pleases. You can poke around it and jump over it, but just keep in mind that if you’re going to try to run in and grab him, he’s liable to drop down and start kickin ankles.

All of this is fun and games until you start trying to jump in from too close. Then you’re asking Ness to start using f.air and u.airs. Neither one of these are good for you because f.air beats like, everything you do and u.air begets more u.airs. And that **** sucks. : |. So if and when you jump at Ness, pay close attention to your spacing and there better not be any rhyme or reason to you jumping it. (Read: You better not pattern your aerial approaches.)

Defense

Ness is going to be coming from all sorts of angles.

FH aerial -> DjC is one thing you just have to be ready for. Pretty much anytime he FH’s, he can DjC any aerial and cover a whole new route. You just have to pick up on patterns and plan accordingly. The only one you can really stop safely is something -> DJC d.air. If you see this coming, u.air it.

Outside of that, you have to be prepared for DjC by itself. Ness jumping away from you =\= Ness jumping AWAY from you, he might just be going out to come back with a DjC, he might literally be jumping away from you. It’s like rolling dice. So be a little hesitant if Ness is jumping away from you. You don’t exactly lose anything by him jumping away, he’s giving you room which you want anyway.

Everything else is pretty standard.

His dash has a pretty long range, and he gets a nice reward if he hits, but there are so many ways to deal with it that it’s kinda sad. Move, block, CC, yadayada. ALTHOUGH YOU WOULD THINK YOU COULD, you actually can’t cape it, so don’t try. He’s gotta come pretty close if he wants to grab you, so be mindful if he’s hangin around you.

Again, I can’t stress how important it is for you to not be above Ness. He has ways to put you above him. U.throw, U.airs, U.tilt, Dash attacks, D.throws. If you ever get above him, you really don’t want to make a habit of trying to fight him. It’s not so much that you can’t beat him, but by doing so, you’re actually giving Ness a chance that you don’t need to. So when you can, just try to go around him and make him take one of his lesser options. More specifically, try to go in front of him as getting tagged with a f.air is nowhere near as bad as getting b.aired.


Edgeguarding

First and foremost, the one thing you have to understand about Ness’s recovery is that Ness’s recovery is the ONLY one in the game that is, by itself, a technical skill. If said Ness you’re playing is constantly missing SS PKT2s, missing slopes, etc etc, don’t expect him to magically start sweetspotting. This clearly means he CAN’T do it, and this is a technical flaw that you should hone in on and abuse.

Ness is another funny character to edgeguard. You’re basically looking to do two things. You either want to jump out, take his pk thunder (to stop PKT2), and then recover; or you want to NOT try to cape him out of PKT2.

Caping PKT2 is rolling some dice you don’t need to. The only time you even want to consider this is if he’s trying to sweetspot, or you’re clear out of range. Other than that, just let him have it and punish him when he lands. PKT2 has hoooooorrible landing lag unless Ness is far above the stage.

In general, Ness’s recovery isn’t anything hard to deal with. It’s a huge *** double jump. Note that, when it’s applicable, Ness is going to airdodge back onto the stage rather than PKT2. Just look for it.

There really isn’t a lot to ness’s recovery. Either he can PKT2 or he can’t. Either way, he’s still gunna look to airdodge. Just, be prepared.

Recovery

Ness can’t really abuse your recovery like a lot of characters can, but he’s got enough to stop your recovery because, you’re Doc.

-Insert Talk about normal don’t get hit by stuff.-

2 things to look for.

1) PKT. He could use this to straight up pull you away from the stage (which has to hit behind), or he could do some kind of setup where he hits you towards him and then hits you as you come out of the stun.

2) PK Fire. He could cover a straight line, he could cover down at an angle. That’s about it.

Everything else is just a super gimmick. PK Flash requires a dumb good timing to even have hopes of hitting, let alone them catching you at the right place at the right time (there IS a mixup they can do where they aim to catch you on the ledge as opposed to just hitting you as you up+b). But yes, Ness’s edgeguarding isn’t the scariest thing ever.

D.tilt edgeguards? Sweetspot.

U.smash charge edgeguard? Sweetspot.

… I mean you’re Doc. You’re probably gunna die regardless.

The Human Yo-Yo

Now, if you come across a GOOD ness player (like, I mean a LEGIT NESS PLAYER, not just a person who’s good and can play some Ness.) I want you to shake his hand for sticking with such a character.

But anyway. Ness is an odd character to look at when you find a good one. I’ve only played two good ness mains ever (plenty of good nesses, but they were just people who knew some stuff.) Following a good Ness around is actually a headache.

It’s kinda like sitting in an old car with your crazy, cant-drive relative who keeps starting and stopping for absolutely no reason. There are a lot of herks and jerks in Ness’s movement that looks, just odd. You just have to be ready for it.

It’s so funny, because Ness DJing up to a platform is the slowest thing in the world, but the waveland -> b.air that comes afterwards will happen so fast it will make your head spin. Not to mention that ness on the ground is actually a fairly fast character when WDing is involved.

You just have to be ready for some weird movement. Try not to focus on what’s ACTUALLY happening and look for the end result. It’s pretty tricky. Unless you play with said Ness player often, you’ll have a HARD time catching timings. Ness is just too floaty / fast for it.

It’s just… weird. And I used to LT Main Ness. –Shrug- Just throwing this out there because it WILL throw you for a trip if you’ve never seen/played it.

Gimmicks (And gimmicks to look for)


Yo-Yo Glitch: I could explain how it works, but I hate typing this explanation. Here’s what you need to know. If Ness hits you with an upsmash, note that a hitbox can come up from where he hit you to where he is. Warning signs for the YYG are – Ness is blatantly NOT attacking, or Ness did ONE attack, and is blatantly not attacking. If he didn’t attack at all, he’s looking for deathline. If he did ONE attack (usually a d.air, u.air, or PKT2cancel), he’s got a jacket on.

PKT2 Surprise: If Ness does a sloped PKT2 and “misses the sweetspot”, you still have to wait for him to actually FINISH the pkt2 animation and start falling back down before you hit him. He’s still an active hitbox before that time.

Ness F.smash: Reflects projectiles. Just throwing that out there.

Ness’s D.tilt: = his jab. So don’t look for jab mixups from his actual jab. Unless it’s just, a ness player who’s not in the know about Ness. (there are loads of them).

Ness on Corneria: (If that stage is still legal by the time this comes out) Stupid healing gimmick. Nothing major. You just have to stay with him.

022. Yoshi – The Beta Character
Dogy’s Matchup Chart: 6-4 Doc
Dogy’s Matchup Ratio: 65-35 Doc
The General Consensus: -i-pi Doc
The General Flow:
For all intents and purposes, this is a pretty straight forward match. There are some do’s-and-don’t that you have to abide by, but when it’s all said and done, there isn’t a lot of crazy stuff that happens.

Yoshi, by himself, is a pretty oddball character. He “has armor” on his double jump (I quote that because I don’t want to go into the mechanics behind it), he can’t JUMP out of shield, he’s got mini spotdodges built into his f.smash and u.smash, a shielding gimmick, etc etc. Yoshi’s whole goal is going to be not to get grabbed, seeing as you can chain-to-pain on him. He’s got the tools to keep you out, and he actually can do a fairly good job of just keeping away from you if he puts effort into it.

All in all, this matchup isn’t bad. Even if you don’t know WHAT to do, logic will kind-of kick in. Although Yoshi “can”, he really has a lot of things he “can’t” do that work against him.

Offense

Watch out for f.smash. That’s one important pitfall you have to look for. Yoshi’s f.smash works like a mini spotdodge because he leans back, and it actually adjusts his hitbox (Think bowser, but faster). The thing with this is that, at times, you’ll have to aim deeper than you normally would. You’d think this would be a problem, but the normal mixup from this comes from you misspacing into your opponent’s shield, they shield and punish.

Yoshi… kinda.. can’t punish from his shield, remember? He can’t jump out of it, so the only thing he has is grab (which is super gimmicky, know that the only way he can get it to work here is if you land in a certain area, AND THEN WAIT LONG ENOUGH TO LET HIM GRAB.) So although he could clearly catch you in a mistake, he realistically can’t do too much about it.

So, what else do you really have to look out for if he’s going to shield? Him light shielding. Yoshi’s lightshield has a mechanic to where he’ll slide if you hit his lightshield. (For the record, you can’t see if Yoshi is actually lightshielding as his egg doesn’t change color, you just have to take an educated guess or play your current stats. “Has he ever lightshielded me yet? Does logic say he wants to get away from me atm?” ).

Sure, he can slide away, but what’s going to happen then? You’re going to just pill your way back in. Although Yoshi has moves to cut through pills (Hell, he could just DJ through them if he REALLY wants to), he doesn’t want to stay out there in fear of having to, once again, go in shield to stop something immediately after a pill.

My point in this is that little episode is that against Yoshi, you’ve got a lot of leeway to do what you want to do. He has ways to actually defend himself (which are going to follow this paragraph), but the important thing to know about Yoshi is that he doesn’t really want to shield. That just leads to all sorts of problems.

Ok, so with that being said. You need to watch out for attacks. F.smash, we’ve already talked about, but you also have to watch for u.smashs, tilts, SH b.airs, and DjC –stuff-. Now, I’m going to blanket most of that and say “Hey don’t be ******** and run into stuff”, but I need to take a little time to talk about Yoshi’s DjC.

*Yoshi’s DjC is special in that he’s the only character who can DjC AND CHANGE DIRECTION WHILE HE DOES IT. What this means is not only does he have the ability to swoop in mid jump to put a hitbox out, he can use any aerial he wants to. With all this being said, the one thing you have to be real weary of is Yoshi jump. It seems innocent enough, but depending on the spacing, all sorts of things can happen. If he wants to actually try to turn the tables on you and attack, he could try something blatant like DjC’ing into you and n.airing from a jump, cutting you off from your f.air (that you probably shouldn’t be trying at this point, lol). But he could do something a little more elaborate like DjC’ing away, f.airing straight in front of you (so that you can’t run in any further), and then jabbing (to punish you for trying to run in.)*

The reason why all of that fits into his defense is the added benefit he has of his armor when he double jumps. One option he has, if you try to cut him off, is to just straight up double jump and work from there. He could try something such as a Dj -> n.air AFTER you hit his armor. DJ -> d.air. He’s got plenty of options. Again, all of this stems from him JUMPING in the first place, so you have to be real cautious of trying to pick him off in the air.


Defense

Defending against Yoshi, on the other hand, can be pretty interesting.

First and foremost: go back and read the *’d section above. I’m not doing this to be lazy, but to stress what kind of stuff can happen from his DjC.

Ok, beyond that, Yoshi has a lot of fairly gimmicky pressure to deal with.

The main thing you’re going to have to deal with is his jab pressure. Where yoshi’s “jabs” are good, and he has viable options out of them, you need to understand that you don’t really have too much to fear as long as you’re willing to shield and/or roll away. The reason being is that jab -> grab is NOT one of yoshi’s options. His grab is super gimmicky, remember? So with that being said, he’s never going to flat out GRAB you. If he’s looking to beat your shield, he’s more than likely going to do something that leads into swallow. Whatever his setup is, all you have to do is roll away from it (or take more if you want to punish it.) As long as you pay attention, everything leading to it is dead obvious, so you have enough time to react to it. Outside of that, you have to look for jab -> d.smash, jab -> aerials, or jab -> -some kind of bait- The key with this is to just not be too hasty. Yoshi can’t really FORCE you to do anything you don’t want to, so don’t make a mistake and jump into a trap.

The second thing you have to deal with is going to sound comical, but it’s real useful for yoshi. You’re going to have to defend against his roll. Now, the reason why I say this is because of the mechanics and animations that go into his roll. Let’s talk through some things.

1) First and foremost, once a character rolls, he’s actually in neutral. A lot of people tend to roll INTO a shield, but you don’t have to. So you can roll -> d.smash, roll -> jump, roll -> whatever you want.

2) When Yoshi rolls, he’s in the egg the entire time, when his roll animation ends, he comes out of the egg. Think about it, he’s rolling into the egg and he comes OUT of it. The reason why I say this is because if you’re not paying attention, you would think that he’s rolling into shield….

3) …But rolling into his shield IS an option, and he can use that as a bait (if he wants you to hit it and let him slide out), or he can just use that for information. If you’re always looking to d.smash there, I guarantee your Yoshi is eventually going to roll -> spotdodge -> d.smash.

Ok, so with that being said, you have to take extra care with how you deal with Yoshi’s roll. Although he doesn’t have an outstanding roll by ANY stretch of the imagination, he has one that he can use as an offensive tool. Yoshi rolling around you is going to pressure you to do SOMETHING. It might not be much, but you’re not going to just stand there and let it happen (unless you’re going for a super Dogy gimmick).

The one thing you’re looking for in this setup is what he does AFTER he rolls. You really can’t do too much to stop him from rolling period. (NOBODY in the game can straight up stop rolls, but they can punish what happens afterwards.) But look for patterns. Does he roll into his shield? Does he roll into a d.smash (You’ll see this a lot), does he roll and then move? Where is he rolling FROM? Is he rolling into f.smash (which would be roll -> mini spotdodge -> punish your misspacing). If you see nothing but THESE options, then you can do something as simple as jumping as he comes out of his roll and you’ll normally turn the tables on him. But what happens if he likes to roll -> jump? If you’re looking to do a f.air, you just got n.aired for it.

Again, none of this is actually out of the norm in a roll game. Infact, if you’ve ever played anybody who has a GOOD rolling game, this should be very familiar. The thing about Yoshi is that he IS going to roll, and his roll looks different from everybody elses. (Note –look in the gimmick section for something hilarious to do vs Yoshi’s roll game-

The next Yoshi tool you have to look for are eggs. Although they’re nothing terribly hard to deal with, understand that if Yoshi sets up an egg right, it’s going to lead to combos. A “right setup” being some shorter ranged eggs that he can actually follow. With that in mind, you really DON’T want him throwing eggs. It’s not hard to stop at all. If you can the pattern, go in when he’s about to throw one (be mindful that he can just NOT hold B and drop it in his face). If he throws one, you can Capedash it (or just cape it)). You normally can just shield it if you want to, just don’t end jacked up in his face. It’s not the end of the world if he starts throwing eggs, you just don’t want to get hit.

The last thing you need to be concerned with is aerial swallow. It’s an airgrab. That means that you don’t want to prematurely shield just because Yoshi is jumping in range. You could shield if you want to try to bait this, but hey, I’m just giving you the simple do’s-and-don’ts and you’re supposed to be molding this into your own strat and style. ^_^

Outside of those things, there’s nothing real extraordinary that you have to deal with. If he wants to f.air, cut it off if you’re in range, move if you’re not, or be prepared to read what else he’s going to do afterwards. Watch for him trying to setup stuff (mainly d.tilts to push you places, smashes cause they’re smashes, forward and up tilts to lead to combos)

Combos. Yoshi can combo. The end. XD


Edgeguarding

-rolls eyes- This dumb character.

Ok, first and foremost, Yoshi doesn’t have a third jump, so if you can ever hit him away from the stage with no second jump, you pretty much win.

Now with that being said if he’s coming back and has a second jump be prepared to play some rock, paper, armor.

Yoshi’s armor is going to make you want to punch somebody. Like, there’s really no way around it. Yoshi’s double jump -> your b.air. That means that if you WANT to b.air him, you have to either do it before he double jumps, or completely after he does it. Two things are going to happen if you refuse to respect this. He’s either going to jump through you and back onto the stage, which isn’t so bad, or he’s going to jump through AND N.AIR YOU. THE LATTER BEING THE ONE THAT MAKES YOU WANT TO SLAM YOUR CONTROLLER DOWN AND KICK THE ******* OF A YOSHI PLAYER IN THE FACE (**** YOU BLOSHI YAH YAH TRICK! SDFL($@#)* ).

Because of the armor, you actually have to take a very different approach to edgeguarding Yoshi. Where you would think to be prepared to b.air him, be prepared to f.air him instead. F.air is your only aerial that will beat armor. (When you’re looking for a move that beats it, think “strong” moves. Smashes and stuff of THAT caliber.) Note that if you ever land a f.air and it stops yoshi, he’s not going to go flying away. Instead, he’s going to just… kinda stop. If it puts him in hitstun, it’s kinda like he ran into a wall instead of him getting hit by a train. You’re probably still going to have to knock him AWAY from the ledge.

With that being said, you’re going to need to do a lot of on-stage edgeguarding, because you’re Doc, your recovery blows. F.air, smashes, and smart edgehogging. Yoshi doesn’t really have to pay a lot of respect to you jumping out at him, because he (theoretically) knows that anything you CAN do to him offstage is going to get dj’d through. So don’t expect him to fall for stuff to make him pull up.

Beyond that you really have to look for 3 things.

The first being an airdodge. THAT’S YOSHI’S THIRD JUMP (surprise! Yoshi’s got 2 and a half jumps). It’s nothing amazing, but note that Yoshi is going to do A LOT of airdodging for recovery. That’s all he has beyond his second jump. Be prepared for it.

The second thing to look for is down+b recovery. If yoshi is in line with the ledge, he’s liable to down+b straight to the ledge. If you can take the ledge from him, that’s kool, do it. If not, JUST DON’T GET HIT. Down+b from Yoshi can be a somewhat usable kill move. I mean, you’ve got to be puttin’ up mcdonalds numbers in the % count, but it IS usable. There is a stupid gimmick to look out for here too. If you’re used to looking for him to go to the ledge, Yoshi could just down+b onto the stage. Reason why this could work is the stars that come out after yoshi hits. You have to actually be ready for them (When I think about it, I don’t know if you can actually CC those stars, and I’m too lazy to turn on my cube right now and find out. Maybe in an update.)

Last thing being a side-b recovery. You can cape it, you can hit him out of it with like, anything. If you’re a manly man, you could just grab him out of it and dunk him for being ********. The thing you need to know is that he’s liable to try it because if he successfully gets past your edgeguard, he’s going to go clear to the OTHER side of the stage before he comes out of his egg. If he hit you with the side-b, he pretty much reset positioning.

So, all in all, Yoshi doesn’t have a sweetdiculous recovery, but you’re gunna have to do things out of the norm to actually stop it. Just, be prepared.

Or knock him clear the **** away so he has to DJ first.

Recovery

I really should just take these sections out and say “DON’T GET HIT. YOU’RE DOC, YOU’RE GUNNA DIE.”

Lets see, Yoshi recovery tricks.

First and foremost, Yoshi has the instant edgehog. Because his dj sends him down and because he can turn around when he djs, he can run off the stage, dj into it, and instantly grab the ledge. This is important because it takes him NO time to grab the ledge. With all of this, Yoshi is pretty much THE character you should expect to grab the ledge, which sucks for you. (I could go into my smash theory of how and why you should expect your average yoshi player to grab the ledge, just know HE’S GOING TO GRAB THE **** THING).

Beyond that, it’s the typical “You’re Doc, don’t get hit” kinda thing.

Kool stuff Yoshi can do –
He can throw an egg at you, which by itself helps your recovery. However, if he puts the egg at the right place and you get hit, he can actually combo you from this. Egg -> n.air, Egg -> d.tilt, egg -> d.smash. It’s pretty comical.

He could d.air and drag you down. Yoshi can SH D.air (no ff), drag you ALL THE WAY DOWN CLEAR OUT OF YOUR RECOVERY RANGE, dj back to the stage, waveland on, and then do the instant DJ dance while he waits for you to come back. … Ok, some yoshi players can’t (or won’t think) to do that. I can. ^_^

Super Lols yoshi edgeguard = waveland off -> reverse f.air -> recover. It’s possible. I mean I can do it, and I suck at Yoshi.

Yoshi really doesn’t have anything that’s straight lockdown on your recovery, but again, he doesn’t really need it. He can jump out and n.air if he really wants to. He’ll make it back. If you get hit, you won’t.

Gimmicks (And gimmicks to look for)
-Yoshi’s Shield (The gimmick I told you to read about). Yoshi’s shield is an egg. Duh. One thing that a lot of people do, especially Yoshi players, is spotdodge -> d.smash. (Heck, as Doc, you should do some spotdodge d.smash, you have an i5 d.smash). The thing with yoshi, like most characters, is that he hits one direction first, behind him second. However, if he’s in shield, he has to keep track of which way he’s facing because he can’t visibly SEE yoshi in the egg. However, if you cape somebody in shield, it turns them around, EVEN IF THEY BLOCK IT. Yoshi’s Egg is a shield that he can’t see himself in. He wants to spotdodge downsmash. You can flip shields around. Do the math. ^_^

-Yoshi’s F.smash and U.smash: Mini spotdodges because he leans back. Note that if you’re expecting one of these, you’re going to have to aim deeper.
-Yoshi’s D.tilt: Bootleg fox shine
-Yoshi’s F.tilt: Bootleg falco shine (no seriously, Falco’s shine isn’t set, remember?)
-Yoshi’s Neutral B: Air grab. Note that if he ever swallows you, you CAN break out before you hit the ground (You have to have a good mash ability). However, note that you don’t ALWAYS want to break that fast, because yoshi could set you up for that. You actually need to pay attention to what yoshi is doing. He could do something like start charging a f.smash and let it go as soon as you pop out (You ALWAYS pop out). So just be ready, and you might have to take a little damage. That’s your punishment for getting hit by that wackness
-Yoshi’s Eggs: If you can capedash, you can combo off of eggs yourself. Caped Egg -> F.air is golden.
-Edge-Cancelled Eggs (ECE): Yoshi tech. Yoshi ledgehops an egg, and can grab the ledge to cancel out the recovery. It’s a pretty nasty thing to deal with if you’re caught in egg range. It’s nasty if you have to deal with it (read: You’re losing). There are some ways you can actually deal with it, though. Caping eggs back at him from a distance will do nothing to him. Unless the yoshi is dumb and mindlessly gets up, he can respond to the caped egg before it gets back to him. However, doing so allows you to maintain your position. One thing you CAN do is capedash to the ledge. If you catch yoshi trying to do another ECE, he’s going to just fall down and die. ^_^ It’s pretty hilarious. The only other option, which is the safer one that Yoshi wants, is for you to STEP THE **** BACK N****! (In which case you’ll later come and PUNCH A N**** IN THE JEANS! XD)


023. Bowser
Dogy’s Matchup Chart: 7-3 Doc
Dogy’s Matchup Ratio: 65-35 Doc
The General Consensus: Doc wins because he’s a smarter version of the character that’s bodied Bowser throughout Nintendo’s history
The General Flow:

Fortress. It’s pretty good. That’s going to be the main thing to slow you down and/or stop you. A lot of this matchup is going to be you picking away at Bowser’s defense, but any and every time you leave something hangin’, you’re gunna get chopped up by the blender. It’s a pretty good move for Bowser. Get-out-of-jail free.

It’s not like Bowser can’t stop you from getting in, he has some pretty nice tools, and he’s got a **** good edgeguard if he ever gets you off the stage; his main flaw is that he’s just too big and, in the grand scheme of things, too immobile. So it’s not like he’s going to be free (if he has a clue what he’s doing). He can punish, he’s got tricks, and he’s got some fairly viable setups.

The main thing you want to do is keep moving and not pattern yourself around him. I mean, that’s a real generic thing to say about matchups, but Bowser can get some beastly rewards if he knows where you’re going to be at. U.airs, u.tilts, koopa klaws, it’s all doable, but you pretty much have to let him do it to you.


Offense

So, offense is going to be the main key to this matchup. Bowser is going to spend a lot of his time trying to set himself up. Spacing himself, shield approaches, etc etc. You just have to not fall for dumb gimmicks and put in the work to him.

In this match, you’re gunna wind up doing a lot of pill work, because that’s the bane of bowser’s existence. See, he’s too big take the easy way around pills, and he’s slow enough to where he’s not going to WANT to try much that could lead to him getting setup, so he’s going to be forced to deal with pills so long as he’s in range.

Pills are going to set you up for a lot of things against bowser, mainly grabs. You want plenty of grabs, because grabs lead to chaingrabs, and chaingrabs lead to edgeguards, and edgeguards lead to wins. The only thing that will REALLY kill you when looking for grabs is fortress. You have to pay some respect to fortress. If you can get him to throw it out there, you can punish it by itself, but you gotta make sure you don’t just run into the thing.

Other than that, you want to do a lot of d.airs in this matchup. D.air is real good at beating a lot of bowser’s moves, and constantly beating moves is going to deter him from doing them and (hopefully) put him in shield where he has to make good guesses. D.air is so good vs Bowser, you actually want just flat out do D.air approaches at times. You have to position yourself so he can’t punish you afterwards (which would normally be a fortress), but as long as you can clear his space and hit l-cancels, you’re going to be able to take some relatively free shots at him.

One random thing to keep in mind about this matchup, if Bowser is going towards the ledge below 100%, be ready for a ledge attack. Bowser is THE character who’s likely to look for ledge attacks because his is beast. It’s fast, pokes out so long, and goes straight back to the ledge. If you’re not LOOKING for it, it’s impossible to see coming as most character who go to the ledge fight from right at the ledge. The most likely time you’ll see this is from a fortresshog. But really, it could be from anything that makes him to go the ledge.

If you ever get bowser in the air, keep him there. There’s not too much he can do except for try to go on a platform or airdodge through you (save the obvious DI well). His d.air isn’t his best option seeing as you can stop, shield, and punish it, so that mainly leaves him with up+b. It’s not a bad option for him if he really needs to get out, but it’s not great either, so don’t be too surprised if you see it. As long as you don’t hang anything ******** out at him, you’re going to be fine.

Defense

Defending against bowser isn’t the worst thing in the world, but it’s odd because it comes at places you don’t exactly expect from a bottom tier character.

More often than not, what happens is you’ll want to move, but you don’t want to give bowser room. So like, you’ll have a situation where he’s moving in, maybe a shield approach or something. If you’re not going to try a grab (or try something that doesn’t get you up+b’d), you’re going to want to move so that you DON’T get up+b’d, but you don’t want to go far away or else he can keep you out of that space with a f.air or something.

Likewise, say you’re on a platform. You’re going to want to move because he probably can u.tilt or u.smash you through the platform, but you don’t want to go TOO far or else he can jump and u.air you (which, unless you’re already coming down, you’re probably going to have no chance in hell of even trading with)

Moving back (or away) is your friend in this match, but you don’t want to go too far. There’s just no other way to put it. You can’t give bowser room, but you can’t be in his face either, that’s just what you have to deal with. He can beat your range, but he can’t chase you down.

SHBAWD and retreating aerials are fairly good in this matchup, but if you throw anything other than a b.air or d.air, you have to make sure he’s not going to try to swing at you (which could beat it).

Beyond moving away, all you really need to worry about is pills to keep him from doing stuff. Again, it’s not hard to do because of how big he is. You just don’t want him to TRY any shenanigans. You can pretty much stop him from doing any real movement with pills unless he wants to try to do aerials through them. Doing so should put him in bad position of your choice.

There’s not exactly a whole lot to this, you just have to understand that you can’t GIVE bowser a lot to work with.

Edgeguarding

Edgeguarding bowser isn’t so bad. His recovery, although very long, is fairly linear. There’s not too much he can do. If he can land above the stage, he’s going to so as there isn’t a huge amount of lag on his up+b. (it really just puts him at disadvantage, and a “good read” for him will probably wind up being ANOTHER up+b to get away.)

Other than that, you just want to make sure you don’t get HIT by the up+b as he comes back. He can’t cover a lot of vertical range, so it’s not like you’ve going to do a lot of movement for that. Just get out there, put a b.air on him, or make him pull up. No need to get fancy with it.

Recovery

Bowser’s got edgeguards. Oh does he have edgeguards. Bowser’s got all sorts of tools to deal with edgeguarding. He’s kind of like, a low-tier marth when it comes to edgeguarding. He can cover just about ANY option, but his range is nowhere near as good as marth’s (due to bowser’s not-so-good recovery).

So like, you have to be ready for anything. You have to be ready for him to jump out and aerial through your pills, you have to be ready for him to try and snipe an u.air if you go over, flame breath for low angles, and d.air or edgehog if you try to ss. It’s not like he CAN’T stop you.

But then again, it’s not like your recovery is super amazing, so you should be used to this by now. (Like really, I think I’m going to take out the recovery section and blanket it as WATCH FOR ****).

The one thing you really do need to watch for is him exploiting your up+b recovery. Bowser has a pretty solid gimmick in that if he lets you up+b onto the stage, he’s just going to KK b.throw you off. If he gets this, you’re more than likely going to be stuck till you die. So, by any means possible, you have to keep him off of the ledge.

Gimmicks (And gimmicks to look for)
Koopa Klaw: Koopa Klaw is one of the 3 air throws in this game (the other 2 being kirby’s swallow and yoshi’s swallow). At any point and time, if bowser thinks you’re going to shield, he can just koopa klaw and beat your shield, even while jumping. That means you can’t bank on shielding bowser 24/7 unless you’re going to stay parked straight out of KK range. (If you’re out of KK range, he’s not going to hit you anyway).

Flame Cancel: (For whoever still has 1.0 or whatever): although this isn’t going to kill you by any stretch, you really can’t see this coming, you have to just take a guess at it (unless said bowser… NEVER empty hops). You could cape some flames back at him, but again, this isn’t going to destroy you. Just note that if you’re playing on an old version, expect bowser to just, magically start shooting fire at you. XD


024. Mewtwo
Dogy’s Matchup Chart: 6-4 Doc
Dogy’s Matchup Ratio: 60-40 Doc (I want to put this closer, but Melee’s hit detection won’t allow me to do it. I’m serious)
The General Consensus: Dark > Psychic cause apparently too many black people play doc
The General Flow:

He’s gunna nair.

This match isn’t exactly as clear cut as people make it out to be. If you find a good m2, you’ll actually be tripped up by al ~~He’s gunna nair~~ a lot of stuff. M2 actually has some good range with his tilts and b.air, he’s got A LOT of comboability leading from his d.tilt, u.tilt, and f.air and u.air, and he’s got a get-out-of-jail free card with his recovery.

M2’s biggest flaw in his desi ~~He’s gunna nair~~ design is his size. Although he’s fairly agile, his size is what gets him into a crapload of trouble. That, and the fact that his tail ISN’T disjointed (which makes sense, but it’s pretty lame in the grand scheme of things). Because of this, you’re always looking at a HUGE FRICKING TARGET of a character, overall the largest target in the game (as he’ll be stretching his tail out a lot). YOU STILL CAN’T GO SLAM IN WITH F.AIRS ALL DAY BECAUSE GUESS WHAT?

HE’S GUNNA N.AIR!

Yes, among all other things M2 has (which again, he actually has some good stuff), he’s got his God-send of a n.air. How you deal with the n.air will, in the grand scheme of things, determine how you~~HE’S GUNNA NAIR~~ you’ll do in this match. You’re not going to deter him from doing it, but if you can that opens up all sorts of opportunities. Instead, you have to work your way around it among all of the standard Doc droppers.

Offense


Don’t get it twisted, M2 is not free. In fact, offense vs a competent M2 can be fairly difficult as he has a nice long reach on all fronts.

If you’re gunna move in with pills, WATCH FOR N.AIRS. Among all of the ways he has to cut through pills, he can just n.air through them. It’s not like you can’t stop or beat his n.air, but it’s pretty good once it gets going. Beyond that, if you’re keeping him in check, he’s a big target, so don’t expect him to be doing too much movement around your pills. He can’t jump over a FH pill, and he can’t run under any pills, so has to cut through them or block.

Once you get in about mid range, you have to deal with his tilts. Again, his stuff isn’t disjointed like Marths, so it’s ok-a-go-go to poke back at him as you see fit. If you look like you’re going to jump in at him, HE’S probably GUNNA NAIR. Retreating n.air at that. If he’s got some nerve, he might take the time to turn around and b.air you. His b.air is loooooong but not disjointed. (I’ve f.aired the tip of a M2’s tail during M2’s b.air and killed him. No trade. It’s pretty dumb honestly.) So you can’t run over him, but you can get in. The other move to note for M2’s aerial defense is his U.air (and u.tilt, in a sense). If he catches you with either one of these, they’re more likely to lead to immediate rewards (read: combos) than him landing a n.air or b.air on you. Be careful not to go too wide on your approaches.

M2 has pretty good handle on the ground too. At long range, he can try to annoy you with shadow balls (charged and uncharged, he’ll mix it. Trust me). They shouldn’t really do anything beyond slow you down and/or stop your momentum should you choose to block them. Think of them as straight lined pills with a jagged path; he can’t cancel them at all, so there’s going to be a sort of delay before he does anything, but it can kill if you’re not ready.

As you get midrange on the ground, you have to contest with M2’s tilts, smashes and grab (which, he has a decent grab range, with a fairly good grab reach). His f.tilt and f.smash? Nothing you haven’t seen before, His F.smash is kind of disjointed, but just be careful not to run slam into it and die. Same with his d.smash.

The important thing to note in his ground defense is his d.tilt. This leads to immediate combos. Most notably on you, this will lead to either grabs or DJC f.airs. All you need to really know is don’t get hit by the d.tilt if you can.

When you get jacked up on him, you have to look out for the heart and soul of M2, THE NAAAAAAAAAAAIR and DjC f.air. You won’t see a lot of DjC f.airs, but it’s relatively safe on its own, and if he can get away from you (retreating fairs), he can make it real safe(ok, I say DjC, your m2 is liable to do ANY kind of F.air to get away with it).

But that N.air? :3 MMMmmmmm dat n.air. I’d ask that n.air out on a date if she was single. It’s pretty beautiful. Comes out fast (5 frames), hits around the entire body, multi hits for days, what more could you ask for? A shine. And that’s pretty much what M2’s n.air is, a low-tier shine.

After you get that first hit, though, you go to town on him. He’s huge, he’s light, and he’s floaty. That’s a combination that’s just begging you to make a combo video out of it. Keep in mind that if he gets enough distance away from you, HE’S GUNNA N.AIR. And even better for him, if you over-commit, he’ll just teleport away. He basically gets that free.

Speaking of teleports, if you ever catch him in a bad spot, be ready for him to teleport out. You’re not going to hit him unless you call it, so it’s basically free for him. The trick to this is spacing yourself so that he can’t teleport through you (that’s with regards that, more often than not, teleporting AWAY from you isn’t an option due to stage sizes). Along with his teleport, watch for his rolls. M2 has loooooooong rolls. ‘Bout as long as this guide, actually. It’s fairly quick too, so M2’s have no problems throwing out their roll.

When the day is done, it doesn’t matter if you’re somewhere higher up and M2’s at the bottom of the barrel, he’s got PLENTY of options of dealing with your offense.


Defense:

Defending against M2 isn’t catastrophic, but it’s not like he can’t do stuff. M2 isn’t going to be doing a lot of attacking, but he’s got some safe options.

At long range, look for him to try a shadow ball approach. It’s not the most solid approach by any stretch, but if he thinks he can’t get in, he’ll have plenty of room to get out, so it’s pretty safe for him.

Mid range, you’re going to have to look for his d.tilt. That … thing wants nothing more than to score some d.tilts. If you’re on the defensive, you want to stay out of this mid range because of this. You can’t really punish anything and if you jump as he’s coming in, HE’S GUNNA N.AIR!!! (or really, he CAN.) He could just let you back up, which is what you’d wind up doing.

Poking at him at mid range with f.tilts and capes is perfectly acceptable, but understand that you have more to lose than gain at this range if he wants his d.tilt.

Retreating f.airs, retreating d.airs, SHBAWD stuff, they’re all good for keeping your mobility up, which you want to do. M2 has a very good wavedash, but outside of that he is not very mobile. Not only does he have some difficulty catching a moving target, he has a hard time dealing with a mobile defense. Don’t be afraid to slowplay him some inch your way in so you can switch on the offensive.

If you ever feel the pressure from m2 and can find the opening, feel free to up+b out of there. He’s floaty enough to where he won’t get down in a timely manner to punish you, and he’s big enough to where you can land some dumb lucky hit if you guess the wrong way or something. Up+b beats a lot of his stuff, but you have to make sure it connects. You run a huge risk by going at the wrong time and getting grabbed.

And getting grabbed is one thing you never want to do vs m2. He’s got all sorts of setups from his throws, some strong, some not-so-strong. The thing you have to avoid is getting grabbed at high %. He’s looking for that up throw, every time. The “magic number”, as the m2s call it, is obvious stage dependant, but it’s not an unreasonable percent for them to look for by any stretch of the imagination (I think the lowest is like, 110s or so? Im not sure). The thing is, getting grabbed by M2 at high percents is dangerous. He’s a character that can straight up kill you with a grab.


Edgeguarding

Edgeguarding m2 sucks.

M2 has to be the most frustrating character in the game to edgeguard. Saving all of his recovery tricks for later, you have to realize that at any time you over commit to an edgeguard and m2 calls it, he can teleport straight through and go about his business. That means you actually have to outsmart something that’s psychic. It’s not impossible, but it’s just frustrating.

With that being said, the one thing you can’t do vs m2 is chase him too far out. If you chase him far out, the problem won’t just be him teleporting through you, but him teleporting through you and turning your edgeguard into his.

Because of that, you want to stay snug tight with the stage. That’s not to say don’t go off the stage, but you don’t want to go far at all. If you go attack him off stage, you want to do stuff in short bursts. Waveland b.airs, ledgedrop b.airs, basically, b.airs. Although it’s technically safe to come on him with a d.air, you don’t want to look too hard for this as you’re asking him to go under him.

The big thing to know about m2 is that if he up+b’s and doesn’t land directly on the stage, there’s no lag on his recover. That translates to (relatively) unpunishable up+bs. Don’t try to bank on it.

If he ever has to make a long recover from either way (down or out), you have to watch for his 2 gimmicks. The first being a double jump -> late aerial. The purpose of this is to give him more height on his recover. If you can call him doing his aerial, you can punish him.. The second thing you have to look for it is reverse fully charged shadowball. This isn’t a huge deal as m2 will be coming backwards in a long animation that you can just hit him out of. Infact, you really won’t SEE this at all, but just know that it can happen.

Once he gets to the ledge, though, his day isn’t done. M2 has an invincible ledge stall (If it’s NOT completely invincible, Taj is the greatest con man I’ve ever seen). It’s a pretty hilarious setup. As long as M2 has the lead, you have no option but to take the ledge. If he calls you taking the ledge, he teleports back to the stage and runs away free. The only thing you can do is hope to time him as he commits to doing down, which is a tight timing. There are ways you can bait him into going back on prematurely, but the important thing to know is you can’t hit him during this.

…. Of course, he could just n.air back onto the stage. XD


Recovery

Recovery. . . . . .-drums fingers on desk-

He can get out there. M2 doesn’t have to pay too much respect to your recovery if he doesn’t want to. The only thing you really can do is throw pills out and keep him from coming out there. He can chase you pretty far, pretty much park in front of you, and b.air. This is actually one of the few situations where he probably…. WONT n.air. XD

But regardless, the main thing you want to keep in mind is that you have a d.air. D.air and pills. They’re pretty much the only things you have to defend yourself in this situation. You don’t want to try to b.air with m2 because a trade is losing in this situation, and you’ll be hard pressed to actually BEAT his b.air since it’s… loooooooooooooooooooong. Oh, and since it’s looooong, watch out for ledgedropped b.airs, because well, his b.air is loooooooooooooooooooooong.

The biggest thing to watch for actually isn’t an edgeguard, but his edgehog. Coming from ?Guess what? YEAH HIS TELEPORT. If can coax you into slowing down (for whatever reason), he doesn’t have to b.air and knock you away, he could just teleport back to the ledge and hold it there. This works so well for him because the turnaround is almost instant, and once he chooses to teleport, there’s nothing you can do about it.
His d.air is a meteor smash, so watch for him trying to go above you and meteor smash you. It’s not a super great edgeguard, but it’s not like your recovery is anything impressive.

Beyond that, recovery is standard protocol. Pick a path, trick yourself along that path, good luck’n’God speed.

Gimmicks (And gimmicks to look for)

M2’s teleport: If his teleport ends before he touches the ground, there’s no recovery to it (technically there is, but he recovers in the air). That means you have to watch out for gimmicks such as M2 teleport approaches.

M2’s side-b (Confusion? I always get this and disable mixed up because like, the names don’t make sense for what they do or WHATEVER): M2’s Side B DEFLECTS (not REFLECTS) projectiles. So that means if he side-b’s your pill, you can run straight through it. All he’s doing it making it so it doesn’t hit him.


M2’s down b: mad gimmicky, short range projectile move. The move itself is a gimmick in that it only works if it hits you in the front (so if you can just turn around, you avoid it. Caping it works too). The super gimmick is that M2 is tall, Doc is short. You can just duck it.

M2’s reverse shadowball charge: Normally used to punish rolls, spotdodges, wakeups, just know that he can put a continuous hitbox on a spot.

Battlefield vs M2: If you don’t know, M2 can pull people through stages with his Side-B. Most known on for battlefield, although I swear I’ve seen it done on stadium as well. Know that it happens on thin stages if you go by the edge while m2 is on the ledge. You obviously don’t WANT this to happen. If he does happen, recover by caping to turn yourself towards the center of the stage (CAPE BACKWARDS YA BIG DUMMEH!) and then double jumping. If he manages to somehow pull you out of a double jump, YA DONE! Na jk, you get your double jump back.


025. Kirby
Dogy’s Matchup Chart: 8-2 Doc
Dogy’s Matchup Ratio: 75-25 Doc
The General Consensus: 65-35 Doc (70-20 from Pervatasaurus. Yes, 70-20, as in the last 10 is lost on the character select screen.)
The Super Special 18Spikes Ratio #2: 20-80 Kirby
The General Flow:
You’re completely behind the wheel in this match. This match will go as fast as you want it to. You as Doc are one of the worst nightmares a Kirby will ever see. He can’t duck anything you throw at him, save u.smash, up angled f.tilt, and up angled f.smash. He can’t realistically run away from your approaches, and he’s not exactly going to chase you down. This matchup looks pretty bad for him.

But don’t mistake this as free. Kirby still a very VERY few tools he can use to put some damage on. Tricks and traps that, if you’re unfamiliar with the matchup, might put some hurt on ya.

The one thing you absolutely canNOT let happen in this matchup is let Kirby copy Pills. Besides the obvious fact that you’re giving him a usable projectile, the real downside is that you’ll be giving him access to his best hat in the game.

Just to add some lols, it’s easy to argue that Kirby’s pill game is actually better than Doc’s. (Hell, I think Kirby’s pill game is better than Doc’s. I LT Main Kirby.)

Offense:


Again, the ball is in your court in this matchup. You pretty much have control of your destiny. There is not a lot Kirby can do to stop you, unless you let him.

However, if you let him, there actually is A LOT you can do to stop you. It pretty much goes without say that there are 2 times when you really have to be cautious vs Kirby. The first being if you’re going to ground approach and he’s not shielding (which he doesn’t have too much of a reason to at this point.)
If you’re going to come on the ground, Kirby’s got his trusty F.tilt and D.tilt at his disposal. Neither one of them are bad by any stretch of the imagination. Infact, Kirby’s d.tilt IS LONGER THAN YOUR ENTIRE MOVESET. Yes, if you’re willing to come in on the ground, you give Kirby the chance to out poke you. So if you want to approach him on the ground, you have to be careful of some

The other position where he can actually do something is with his back to you. This is actually kirby’s strongest position. From here, he can still turn around and F.tilt (although now him D.tilting takes more time), and he can u.tilt which can lead to stuff for him (u.tilt -> u.air), but most importantly he can b.air. Kirby’s b.air is pretty much his savior. I mean, that’s kind of arguable as to WHAT move Kirby lives off of, but b.air is making it to the run-off votes easy. It’s not exactly long, but it’s good. Think of it like your b.air. It’ll stuff f.airs if he’s looking for them.

Now, this isn’t to be confused with attacking strong positions of other characters, but, in the realm of defense, this is most of what Kirby has. He doesn’t get his perk of crouching vs you, you’re a small character yourself. He’s not fast at all, so he can’t outrun you (although if he is moving, he’s still liable to straight up move out of the way. I mean Bowser can frickin do that if he stays in good spots), so you can’t be mindless in this.

Aside from those points, all you REALLY have to do is use some common sense and space well. Kirby’s going to be hard pressed to punish anything unless he’s back is to you, or unless you land jacked up in his face so that he actually CAN grab you. Common sense would be along the lines of if you throw pills, note that he’s a small character and his character perk is having the lowest crouch in the game, so don’t be too surprised if he looks to run under/crouch under/wavedash under/ Cincinnatti slide under your pills.

Defense:

Defending against Kirby isn’t exactly hard, but you there’s a gimmick to it. You can’t let him get too close to you to begin with. Too close being inside his wavedash -> d.tilt range or something to that effect.

If you’re going to start by pilling him, note that you want to throw more ground/sh pills. His air mobility isn’t great. Kirby WANTS to be on the ground, so you want to make that a hazard for him. If he takes to the air, you can throw some FH pills to pester him, but you don’t really want to deter him from being there. That’s where you want him. (Granted, if he’s ANYWHERE that’s kinda where you want him.)

Again, Kirby is not fast anywhere, so it’s not like he’s going to make a ridiculous burst and zip in out of nowhere, you have to LET him do that. So with that being said, he’s a character that you can just keep backing away from if you want to play D. Roll -> Run away from his pressure on, wavedash away, he’s just a character that you can flat out move away from. More often than not, you can actually jump and d.air and he’s got to stop what he’s doing.

Put all this together, and you’ll see that most of what Kirby’s offense revolves around is poking at you. He’s hard pressed to do something that leads into something else, so all he can do is just pepper you with damage and hope to find some mistake to get you off the stage. His problem with that is that he doesn’t have anything with a lot of power. That being said, you can also opt to CC A LOT of his stuff and punish afterwards. You don’t want to make this the norm because you’re giving him damage, but it’s not a bad option by any stretch of the imagination.

The one thing you absolutely cannot do is let Kirby pin you in a corner, and you best believe he’s going to try. This idea might not be as blatant as other characters who are trying to pin you down, but that’s because this is all Kirby really has for pressure. Working positioning to push you off the stage like a zambonee. So if and when you notice you’re running out of real estate, be ready get out of the area.

Fighting out of corners is always an option, but know that again, you’re very capable of going up on a platform and going AROUND Kirby. (You do want a platform for this unless he just doesn’t have his back to you, in which case you could try to just blow by him).

….I mean, there’s not really a lot to say about this. You just have to not be careless.

Edgeguarding:

*Randomly tossed in* Kirby has 5 jumps. Just in case you didn’t know. Count them.

Ironically, edgeguarding Kirby is not too big of a problem. Although he can cover a good vertical with his recovery, he doesn’t have an outstanding horizontal.

That translates to him not flying over your head. But I mean, Jiggs doesn’t really do that either but Jiggs’ recovery is dangerous for other reasons. Kirby doesn’t really have any of that stuff.

Unless Kirby can turn around, you’re not going to have to deal with much of a fight from Kirby on recovery (which he can, but doing so is a player-to-player preference). He can defend himself, but it’s to the point of where he’s going to be more concerned with recovering. On that note, all you really want to avoid is trying to come from below him. I mean, you’re Doc, it’s kind of hard to come from below him anyway, but you’re just asking to get d.aired at that point (and, if of all character you want to come below KIRBY, you deserve it).

So like, throw pills, try to hop out for a b.air, you can even try some Capfal superman u.air nonsense if you want to, at worse he’s going to knock you back to the stage.

If he up+b’s, you can cape that free every time, or just edgehog and punish if he lands on the stage. It’s no biggie.

The ONLY thing that could possibly pose a threat to you is if he tries to stone sweetspot, and that’s a problem if you make it a problem. You can either opt to steal the ledge from him (which is risky), you can cape him as he comes out of stone, or you could try some super nonsense dropzone b.air as he comes out. If you managed to knock him into this situation, you’re normally better off letting him just have the ledge.

It’s Kirby, he needs all the breaks he can get, man.

Recovery

Your recovery, however? It’s still bad. So Kirby has ways to deal with this.

The one thing that will slow Kirby down is pills. Although he can poke through pills with f.air or b.air, it takes too much time for him to do it with f.air, and b.air requires him to be… facing backwards (which cuts his edgeguarding range), so Pills are, for all intents and purposes, ok-a-go-go.

The big thing you’re going to have to watch for is his D.air. He can chase you pretty far, and he can chase you pretty low. The problem being you’re Doc, you’re probably going to have to go low. If he lands a d.air on you, be sure to wait till the last part of it before you try and meteor cancel. ALL of the hits in Kirby’s d.air are meteor smashes, so if you eat one, you’re going to eat more damage for being hasty. On the inverse, don’t fall too far because well, you’re still Doc.

If you try to go above him, you have to watch for b.airs. It’s pretty much the standard procedure, just be careful about where you go.

If Kirby stays on the stage, you need to watch for his d.tilt, which pokes BELOW the stage, and his f.tilt. He also can SH d.airs on the ledge and pick you off out of an up+b.

Oh, and super dumb gimmick, watch for cutters from the stage. This is pretty much a slap in the face edgeguard, but if you want to hang out in that area, you give him a reason to throw it. It has a deceptively long range, but he’s got to make a deceptively good read to catch you with it.

Doctor Kirby


THE ONE THING YOU ABSOLUTELY CANNOT DO IN THIS MATCHUP IS LET KIRBY HAVE PILLS. It’s not the end of the world if he gets them, but it’s like, an equalizer if he gets them. Ironically, his pill game is better than yours. (Pills are his best hat. You can argue Falco lasers)

If Kirby ever gets your pills, then you realistically need to stop WHATEVER you’re doing to and get them away from him. You can’t have him pestering you with a projectile from dumb heights that you can’t attack him at. You also can’t let him control the ground and force you to jump into b.airs and whatnot. Kirby with pills is pretty frickin evil.


Gimmicks (And gimmicks to look for)

Kirby’s forward and back throw: Both of these throws are breakable DURING the throw animation. A lot of people think this is “broken” AGAINST Kirby, but actually if this didn’t happen Kirby would have a BUSTED mechanic of guaranteed kills from grabs. You want to know this for Kirbicides.

Kirby’s U.throw: If Kirby grabs you while he is flush on a ledge (i.e. he rolled into the ledge) and u.throws you, both of you are more-than-likely going to die (This is stage, and then ledge dependant, more often than not you both die). If Kirby is looking for a Kirbicide, this one’s guaranteed.

Kirby’s F.air: There’re 3 kicks, but there’s a 4th invisible “hit” as he hits the ground. Just keep that in mind.
Kirby’s D.air: *Points up*

Kirby’s Swallow: Is an Air Grab. Nowhere near as good as Bowser’s or Yoshi’s, but is still an airthrow nonetheless. Not really important enough to note, but know it can happen.

Kirby’s Swallowcide (Neutral B Suicide): If he grabs you near the ledge, and breaking out would not save you, DON’T BREAK OUT. You’re pretty much dead anyway, but breaking out makes it easier for Kirby to make it back.

*Swallow mechanics, for anybody who cares: If you break out of Kirby’s Swallow on the ground, you can either break on the ground or in the air. If you break out in the air, he goes up, you go down. If he swallows you, you go up and he goes down (where applicable).

Kirbicides: The most applicable time for Kirby to look for a Kirbicide is 1) When he is in the lead and 2) When he has a high % (+ you having a low %, but that’s not as important). If and when these situations come up, be careful around ledges. You’re always better off making Kirby come to you.

026. Pichu

Dogy’s Matchup Chart: 8-2 Doc
Dogy’s Matchup Ratio: 80-20
The General Consensus: Why are you playing Pichu (Alpha says 70-30 cause I’m talking to him on skype right now)
The General Flow:
This matchup is fairly wide open for Doc. There’s not a lot you exactly have to worry about. Pichu has to take all sorts of risks to get anything going, where as Doc can stay fairly safe and get ridiculous rewards. Monster chaingrabs, combos, safe pokes and pressure, great defense, there’s not a lot realistically Doc needs to do to win. Pichu has to do all the work.

You really just have to look for dumb, random gimmicks. Stuff like thunder OoS (yeah bet you’ve never seen that) or just completely dumb stuff.

Offense:

Again, there’s not too much you realistically have to feel restrained about when you take this matchup. I’m not trying to say this and blow it off as “do whatever”, but there isn’t a lot Pichu can realistically do to stop you so long as you’re not horribly wrong. The main thing Pichu has going for him is his n.air, which still gets stopped by a large portion of your arsenal.

So long as you space well, Pichu isn’t going to have too many great opportunities to do anything. The only thing you’d have to be weary of is wavedash back -> f.smash, which is disjointed. However, the tradeoff for Pichu is that if you can bait it out, it’s free damage.

Getting a grab is bad for Pichu because he’s a light midweight. That means you have plenty of time to follow up afterwards, and he’s fairly comboable.

Defense

Stopping Pichu’s offense is again, not exactly a hard problem. You can basically pick a move and stop a lot of stuff, tilts vs runins, u.tilts for jumpins, d.airs for jumpins, retreating SHBAWD, retreating fair, etc etc. It’s not exactly pretty for Pichu.

He’s going to n.air, and he’s going to n.air often. That’s pretty much “the approach” for Pichu atm. It’ll go through pills, but you can use that to your advantage and space yourself to punish his landing.

If you’re setting up a pill defense, note that Pichu is small enough to run under FH and SH pills. He’s not going to zip in like marth or sheik, but he can stay low if he wants to.

Look for thunder jolt approaches. You won’t see too many of them because Pichu will obviously take some damage from it for an overall weak setup, but note that it will happen. The one thing you want to avoid doing is jumping if Pichu is coming behind it.

You want to avoid being above Pichu for the same reason you want to avoid being above Pikachu…. Except it’s NOWHERE near as bad as being above Pika. Pichu nets all sorts of juggles if you’re above him (which actually isn’t horrid because you can beat his u.air with your d.air), but it’s one of the few things that “he has going for it”, if anything. So try your best to stay out from above him.

When Pichu is on the ledge, look for quick attack shenanigans to try to mix you up and allow him back on the stage free. He’ll take damage, but it’s better than taking damage from you.

Uuuum. Pichu’s thunder jolts climb walls. I mean, I don’t really have much to say about this matchup because it’s pretty wide open for Doc.

Edgeguarding

Just because Pichu is… horrible doesn’t mean his recovery is bad. Infact, it’s actually fairly good. He can recovery from a long distance, and can recover from pretty low, assuming he’s still alive.

Be prepared for people trying full skullbashes and whatnot. I mean, you kinda have to expect the unexpected. You can try to cape it, but risk-reward goes up the longer he charges.

Unless I’ve been misinformed, Pichu can’t sweetspot the ledge from below. Keep that in mind as Pichu recovers. I’ll explain this more in the gimmicks section. If tries to sweetspot the ledge with quick attack, cape it free.

You also have nothing to worry about from the quick attack as that it does no damage on pass through. It’s free.

Recovery

And because Pichu has a good recovery, he also has a decent edgeguard vs Doc. If you haven’t understood this yet, understand that Doc’s recovery is terrible, so he doesn’t get ANYTHING free. Even though it’s Pichu, in the event that you wind up off the stage, you can’t be predictable.

Pills aren’t failproof, he can nair through them. You can’t take the low road all times, you’re liable to get thunder jolted, and heaven forbid if you don’t want to sweetspot. That’s asking for F.smash and thunder.


Gimmicks (And gimmicks to look for)

Pichu’s Quick Attack: Same applies for Pikachu. When Pichu does quick attack, at the point where he can input a 2nd command, he scrunches up (to do the 2nd attack). During this time, his hitbox stretches to double the length. Because of this, Pichu cannot sweetspot the ledge from below, because he’s scrunch and poke his head over it. Caping this is free.

Dogy1!! – Update Info


Incase you’re wondering, I’ll update this guide as I come across/discover/get completely annihilated by new information. It’s not going to be a one’n’done kind of thing, I’ll update it sometime (don’t expect too many updates, I AM pretty lazy] but like, it’s not going to stay on 06 info if stuff changes.
The changes pretty much are going to come as I go out and see more stuff, because again, this guide is based off of MY experiences. That’s unfair, I know, but that’s how it’s going to be. I sat down and did this nonsense, so if somebody wants to add their 10 cents, they can do their own guide so we can have many opinions!
I mean, there’ve been plenty of Doc projects that fell on their face when others got involved, soooo yeah.

Dogy2!! – FAQ!

PSYCHE! NOBODY THOUGHT THIS WAS GOING TO HAPPEN LOLOLOLOL. But seriously, if people WANT a FAQ, I could make one.

Dogy3!! – Future Guides?

This is one thing people have asked me about a lot of times. I probably will do a lot more guides (for various characters in various games), and maybe a few more for Doc, who knows. I’ve been wanting to do a general fighting game guide for ages, and I think it’d be great. I just needed a starter guide for it and this is it.
But you don’t care about that.
Doc guides, I dunno, might come up with a stage guide, a how-to-play Doc guide, etc etc. I’ve always had this idea of making a how to beat Doc guide, so that you (As Doc) know EXACTLY what characters are looking for against Doc. That’d be a hard one to string together as I’d have to get help from atleast 25 different people (25, 24, some number like that, I’m not counting.

Dogy4!! – Random Info of Randomness

Ok, so, here are some random stats for this guide.

Pages in MS Word: 119 Pages (Calibri Font, 11 pt size)

Words: 68,324 (For Version 1)

Time of Completion: Nov 9 09 -> Jan 7 10. It really took me like, maybe a week’s worth of time to do it? But I’ve put this off so many times that it’s comical.

Awesome things that’ve happen since the beginning of this guide: Got a job. Listened to so much music. Learned how to write a guide. Drank so much soda it’s ********. Learned a whole new level of procrastination.

Credits: Um…. Me. I told you, this is all me, GTF OUTTA HERE LOL.

Current Song as I’m Finishing this guide: Streetlight Manifesto – Here’s to Life. (Pretty white of me, I know.)

Last matchup I studied (read: thoroughly played) before the completion of this guide: Pikachu and Sheik.

Least studied matchup in the guide: 1st, Roy. 2nd DK. 3rd, Kirby

Chairs broken during the making of this guide: 1.
 
Top Bottom