
T-block
B2B TST
Pokemon Trainer Mechanics/Advanced Techniques
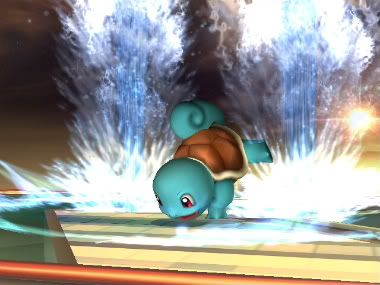
Squirtle is too cute <3
-Last Updated: Jan 16, 2010-
Squirtle is too cute <3
-Last Updated: Jan 16, 2010-
MECHANICS
Pokemon Trainer is a special character in Brawl in that he has two unique mechanics that affect his gameplay. The most prominent is the fatigue mechanic, also known as the curse Sakurai placed upon Pokemon Trainer. The other is elemental weaknesses, similar to the type system in Pokemon.
Fatigue and Stamina:
Fatigue hurts Pokemon Trainer - there's no doubt about it. Once your pokemon is fatigued, its moves will do less damage, cause less hit stun, and most importantly, give less knockback. The game actually keeps track of a fatigue value for each of your pokemon throughout the duration of your match. This fatigue value ranges from 0 to 200, and starts at 0 for every pokemon at the beginning of your match. Each pokemon has their own fatigue value, and each value is unaffected by the values of the other pokemon.
Once your fatigue hits 120, your pokemon becomes visibly tired (the "tired" standing animation occurs). At this point, your knockback is at 80% of its full power. It remains at 80% until fatigue hits 130, at which point any more fatigue will cause your moves to slowly decline further. At 200 fatigue, your moves are doing 70% of their original knockback.
As for how the fatigue value actually changes, there are a number of events that either increase it or decrease it.
- Increase Fatigue (pokemon becoming more tired)
- fatigue increases by 1 for every second that a pokemon is active
- fatigue increases by 1 for every move that a pokemon makes; exceptions to this are:
- Squirtle's jab combo - 2nd hit, 3rd hit
- Ivysaur's jab combo - 2nd hit, rapid jab
- Charizard's jab combo - 2nd hit, 3rd hit
- Charizard's glide attack
- Grab pummels
- Get-up attacks
- Ledge attacks
- walking, dashing, jumping, dodging, rolling, grabbing, throwing, and throwing items do not increase the fatigue value
- Decrease Fatigue (pokemon becoming less tired)
- fatigue decreases by 1.67 (5/3) for every second that a pokemon is in its pokeball
- fatigue is multiplied by 0.3 when a pokemon is KO'd
To take an example, let's say you start Squirtle in a match - his fatigue value is then 0, as is Ivysaur's and Charizard's. You perform 40 attacks (that are not on the above list of exceptions) in the time of 80 seconds, which is a reasonable estimate. After that 80 seconds, your Squirtle's fatigue value is going to be at 120, so he will start showing that he's tired, and the power on his moves will drop to 80%. Let's say you keep him out anyways. Assuming the same rate of attacks, after just over 50 seconds your fatigue value should be at 200, and his power will now be only 70%.
So Squirtle finally gets KO'd. His fatigue, maxed out at 200, is multiplied by 0.3 so it becomes 60. Ivysaur comes out with fatigue value still at 0 since he hasn't seen battle yet. Squirtle now begins recovering, and his fatigue is decreased by 5/3 for every second he's not out. After 36 seconds of not battling, his fatigue will be at 0 again. If, on the other hand, we chose to switch out Squirtle instead of letting him get KO'd, his fatigue value would not be multiplied by 0.3. It would stay at 200 and recover from there, meaning it would take 120 seconds to fully recover.
It's quite an obstacle to overcome, as a 30% decrease in knockback can severely hurt your KO potential. Part of becoming a good Pokemon Trainer is dealing with fatigue, but there's a lot to that and we won't get into it here.
As an aside, the game actually keeps track of a stamina value rather than a fatigue value. The stamina value starts at 100, and decreases by 0.5 for every second that passes and every attack that is performed. Fatigue starts showing when stamina reaches 40. This way of keeping track is functionally equivalent to what is described above; use whatever is easier to remember for you.
Elemental Weaknesses:
The weakness/resistance system is comparatively quite simple. It follows the type triangle that the three starters have followed in every Pokemon generation. Namely,
Fire > Grass > Water > Fire
In Brawl, a weakness means an increase in knockback. Pokemon that are weak to a type will take 10% more knockback from a move of that type. Pokemon that are resistant will take 10% less. Both weaknesses and resistances are considered here. So in summary,
- Squirtle is weak to grass, resistant to fire
- Ivysaur is weak to fire, resistant to water
- Charizard is weak to water, resistant to grass
Note that same-type resistance does not apply, and Squirtle does not resist water, Ivysaur does not resist grass, and Charizard does not resist fire. Furthermore, weaknesses and resistances are limited only to this triangle. Squirtle is not weak to Pikachu's Thunder, Ivysaur is not weak to Lucas' PK Freeze, etc.
Moves with type association:
- Fire
- Bowser- Fire Breath
- C. Falcon- Falcon Punch
- C. Falcon- Raptor Boost
- C. Falcon- Falcon Kick
- C. Falcon- f-smash
- Charizard- Flamethrower
- Charizard- d-throw
- Charizard- f-air
- Charizard- b-air
- Charizard- n-air
- Charizard- f-tilt
- Diddy Kong- Barrel Rockets
- Falco- Firebird
- Fox- Firefox
- Game and Watch- f-smash
- Game and Watch- Chef (frying pan hit)
- Game and Watch- Judgement 6
- Ganondorf- u-tilt
- Ike- Eruption
- Link- Bombs
- Lucas- PK Fire
- Luigi- Fireball
- Luigi- Green Missile
- Luigi- Super Jump Punch (sweetspot)
- Mario- Fireball
- Mario- f-smash
- Ness- PK Fire
- Olimar- red pikmin attacks
- ROB- Laser (close range)
- ROB- u-smash
- ROB- n-air
- ROB- b-air
- ROB- d-air
- Samus- Missile
- Samus- Bombs
- Samus- u-smash
- Samus- f-air
- Samus- d-tilt
- Sheik- Vanish
- Snake- Grenades
- Snake- Nikita
- Snake- C4
- Snake- f-smash
- Snake- u-smash
- Snake- d-smash
- Toon Link- Bombs
- Zelda- Din's Fire
- Zelda- Farore's Wind
- Zelda- u-air
- Zero Suit Samus- Plasma Whip
- Grass
- Ivysaur- Bullet Seed
- Ivysaur- Razor Leaf
- Ivysaur- Vine Whip
- Ivysaur- u-smash
- Ivysaur- d-smash
- Ivysaur- u-air
- Ivysaur- d-air
- Ivysaur- b-air
- Ivysaur- f-air
- Ivysaur- f-tilt
- Ivysaur- d-tilt
- Water
- Mario- F.L.U.D.D
- Squirtle- Water Gun
- Squirtle- Waterfall
- Squirtle- u-smash
- Squirtle- d-smash
This system overall seems to help Squirtle and hurt Ivysaur, while Charizard remains indifferent. Since the only moves that other characters carry are of the fire-type, Ivysaur sees more knockback from them, while Squirtle sees less. Also, this is actually a good thing for Ivysaur when it comes to Charizard's Flamethrower, Bowser's Fire Breath, and Ness' PK Fire. The increase in knockback makes it easier for Ivysaur to escape. Stage hazards such as Norfair lava, Pirate Ship bombs and Pictochat flames are also considered fire-based knockback.
Advanced Techniques
Pokemon Trainer also has a fair number of advanced techniques that can improve your gameplay and provide you with more options to apply pressure and punish mistakes. This thread is more geared towards Pokemon Trainer specific ATs, but some of the more important/useful universal techniques will be listed as well. With the exception of Baton Passing, everything listed under the Pokemon Trainer is actually common to all/most characters. See http://www.smashboards.com/showthread.php?t=187873 for a more complete list. This thread assumes you're using a Gamecube controller, with C-stick set to smash. Tap Jump can be on or off, but some ATs require different inputs if you have it off.
 POKEMON TRAINER
Baton Pass/Zero Switch - http://www.youtube.com/watch?v=BOkF2HuSaak
Description- Performed during a pokemon switch on a moving stage- the pokemon emerges from the pokeball with no downtime; Squirtle and Ivysaur get triple jumps.
How to perform-
For a more complete list, see the following thread: http://www.smashboards.com/showthread.php?t=312296
How to perform-
This can only be performed on a moving platform/stage. Get on the part of the stage that moves and get to the edge of the platform (rolling or dash attack is the most common way; see the video for other methods). Pokemon switch when you get there, and you should just fall off the platform when the switch is done. Alternatively, if you do a switch on a floor that disappears/is destroyed while you're switching, the same effect will occur. Squirtle and Ivysaur will get two mid-air jumps when you come out, but Charizard gets no jumps at all. Places where this is possible include:
- Smashville - moving platform
- Lylat Cruise - during stage tilt
- Rainbow Cruise - most platforms
- Pokemon Stadium 1 - windmill
- Pictochat - any transformation you can stand on
- Frigate Orpheon - rising/falling platform, platforms on the side, stage flip
- Pirate Ship - "shipwreck" part as prow moves up
For a more complete list, see the following thread: http://www.smashboards.com/showthread.php?t=312296
Pivot Grabbing
Description- Your character performs a grab out of a dash in the opposite direction he was facing.
How to perform- Dash in one direction, then hit backwards on the analog stick and grab at the same time.
How to perform- Dash in one direction, then hit backwards on the analog stick and grab at the same time.
Hyphen Smash
Description- Your character moves forward slightly and performs a u-smash
How to perform- Dash forward and hit up on your c-stick to perform the u-smash.
How to perform- Dash forward and hit up on your c-stick to perform the u-smash.
Stutter-step F-smash
Description- This looks like a normal f-smash with a little step beforehand
How to perform- Hit forward/backward on the analog stick and immediately after use f-smash in either direction. This extends the range of your f-smash if you step forward, or allows you to retreat a bit to space more safely if you step backward.
How to perform- Hit forward/backward on the analog stick and immediately after use f-smash in either direction. This extends the range of your f-smash if you step forward, or allows you to retreat a bit to space more safely if you step backward.
Wavebounce/B-reversal
Description- Your character performs his B-move, but with a shift in momentum in a horizontal direction.
How to perform- The easiest way to perform a wavebounce is to set your C-stick to Specials and while holding forwards on the analog stick, hit backwards on the C-stick for side-b, backwards-up for up-b, and backwards-down for down-b. However, since Pokemon Trainer benefits a lot more from C-stick set to smashes, you can also wavebounce by hitting the opposite direction on your analog stick before inputting your move. For example, if you're dashing towards the right with Charizard and jump, hit left+B immediately followed by slamming right on your analog stick. Charizard should bounce back to the left a bit before Rock Smashing to the right. Wavebounced Flamethrower is one option you have that might get Charizard out of being juggled.
How to perform- The easiest way to perform a wavebounce is to set your C-stick to Specials and while holding forwards on the analog stick, hit backwards on the C-stick for side-b, backwards-up for up-b, and backwards-down for down-b. However, since Pokemon Trainer benefits a lot more from C-stick set to smashes, you can also wavebounce by hitting the opposite direction on your analog stick before inputting your move. For example, if you're dashing towards the right with Charizard and jump, hit left+B immediately followed by slamming right on your analog stick. Charizard should bounce back to the left a bit before Rock Smashing to the right. Wavebounced Flamethrower is one option you have that might get Charizard out of being juggled.
Glide Attack Cancel
Description- Charizard does his glide attack just above the ground and lands going straight into the standing information with no lag.
How to perform- Simply land while in the duration of your glide attack. You should land and be able to do anything immediately. Jab, grab and u-smash are all good options.
How to perform- Simply land while in the duration of your glide attack. You should land and be able to do anything immediately. Jab, grab and u-smash are all good options.
SQUIRTLEShellshift
Description- Squirtle goes into his shell out of a dash as he pivots in the opposite direction.
How to perform- Hit back on the analog stick while you're dashing. This is Squirtle's regular dash pivot, but how quickly and how smoothly he turns is so special that it gets its own name, and allows for many of the following ATs. Shellshifting is simply a way of changing your direction of motion very quickly. Dart in and out of your opponent's range and try to bait attacks or read patterns that can be exploited later on. Note that you can dash in the original direction again if you change directions while still in the pivot animation, or you can wait for the pivot animation to finish and pivot again to change directions. Mix it up, and use Squirtle's great manouverability to your advantage.
How to perform- Hit back on the analog stick while you're dashing. This is Squirtle's regular dash pivot, but how quickly and how smoothly he turns is so special that it gets its own name, and allows for many of the following ATs. Shellshifting is simply a way of changing your direction of motion very quickly. Dart in and out of your opponent's range and try to bait attacks or read patterns that can be exploited later on. Note that you can dash in the original direction again if you change directions while still in the pivot animation, or you can wait for the pivot animation to finish and pivot again to change directions. Mix it up, and use Squirtle's great manouverability to your advantage.
Shellstalling
Description- Squirtle enters his shell as he does in his shellshift, but stays in it and doesn't move at all for about half a second.
How to perform- Do a pivot but let the analog stick return to neutral as quickly as possible.
How to perform- Do a pivot but let the analog stick return to neutral as quickly as possible.
Ducking Reverse
Description- After a pivot, Squirtle slides backwards for a little distance.
How to perform- Do a shellshift and as you're coming out of it, duck and crawl backwards and stand up as soon as you can. It's not super useful, but it can be used to psyche out your opponent.
How to perform- Do a shellshift and as you're coming out of it, duck and crawl backwards and stand up as soon as you can. It's not super useful, but it can be used to psyche out your opponent.
Shellslinging
Description- Squirtle is dashing forwards, then quickly jumps forward while turning around, getting a sort of "sling" to his jump.
How to perform- Dash forwards, then input a pivot and jump and the same time. You shouldn't see Squirtle turn around at all, but when he jumps he'll be facing backwards.
How to perform- Dash forwards, then input a pivot and jump and the same time. You shouldn't see Squirtle turn around at all, but when he jumps he'll be facing backwards.
Hydroplane u-smash - http://www.youtube.com/watch?v=nVACbTqdmbY @0:04
Description- As Squirtle comes out of his pivot, he slides a big distance while unleashing a u-smash. The u-smash can be charged or uncharged.
How to perform- Do a shellshift, and when you're heading in the opposite direction (but still in the pivot animation), input Up+A at the same time. Hold A if you want to charge it. If you turn Tap Jump off, you'll need to hit Up+Jump(X/Y)+A. How much you slide depends on the timing of your Up+A - maximum distance should be about half of Final Destination. This applies to all hydroplane techniques - timing is important.
How to perform- Do a shellshift, and when you're heading in the opposite direction (but still in the pivot animation), input Up+A at the same time. Hold A if you want to charge it. If you turn Tap Jump off, you'll need to hit Up+Jump(X/Y)+A. How much you slide depends on the timing of your Up+A - maximum distance should be about half of Final Destination. This applies to all hydroplane techniques - timing is important.
Hydroplane d-smash - http://www.youtube.com/watch?v=nVACbTqdmbY @0:57
Description- As Squirtle comes out of his pivot, he slides a big distance while unleashing a d-smash. The d-smash can be charged or uncharged.
How to perform- Do a shellshift, and when you're heading in the opposite direction, hit the c-stick at a 45 degree angle between the down position and the position opposite from where you're facing. If you want to charge the d-smash, press Z as you c-stick and hold it.
How to perform- Do a shellshift, and when you're heading in the opposite direction, hit the c-stick at a 45 degree angle between the down position and the position opposite from where you're facing. If you want to charge the d-smash, press Z as you c-stick and hold it.
Hydroplane f-smash - http://www.youtube.com/watch?v=nVACbTqdmbY @1:10, 1:36
Description- As Squirtle comes out of his pivot, he slides a big distance while charging an f-smash, eventually releasing it.
How to perform- Do a shellshift, and when you're heading in the opposite direction, hit the c-stick away from where you're facing and hold Z. You should be charging an f-smash aimed backwards. Note that the f-smash must be charged because it stops any sliding momentum you have when you release it. Aiming the f-smash forward (in the direction of your slide) is also possible. You need to input an extra direction - just before you c-stick you'll want to hit backwards one more time, then c-stick in the forward direction. The time between the backwards on the analog stick and the forwards on the c-stick should be so small that Squirtle doesn't actually turn around a second time. So to smash forwards, you need to shellshift, then hit backwards on the analog stick, forwards on the c-stick and Z, basically all at the same time.
How to perform- Do a shellshift, and when you're heading in the opposite direction, hit the c-stick away from where you're facing and hold Z. You should be charging an f-smash aimed backwards. Note that the f-smash must be charged because it stops any sliding momentum you have when you release it. Aiming the f-smash forward (in the direction of your slide) is also possible. You need to input an extra direction - just before you c-stick you'll want to hit backwards one more time, then c-stick in the forward direction. The time between the backwards on the analog stick and the forwards on the c-stick should be so small that Squirtle doesn't actually turn around a second time. So to smash forwards, you need to shellshift, then hit backwards on the analog stick, forwards on the c-stick and Z, basically all at the same time.
Itemplane
Description- Squirtle can perform the hydroplane f-smash while holding an item too. This is most useful in the Diddy Kong matchup, where you can keep holding the bananas while hydroplaning.
How to perform- Same inputs as the hydroplane f-smash.
How to perform- Same inputs as the hydroplane f-smash.
Forward Hydroplane u-smash - http://www.youtube.com/watch?v=nVACbTqdmbY @0:32
Description- Squirtle quickly propels himself forward out of a dash and unleashes a u-smash. He propels himself in the direction he was dashing.
How to perform- While dashing forward, quickly input backwards on the analog stick followed by Up+A. This should be done as quickly as possible for the maximum slide distance. What you're doing is you're shellshifting, cancelling your shellshift with a jump, then cancelling your jump with a u-smash. If you're having trouble with your inputs, think of it as a quarter circle. If you're dashing to the right, you need to do a quarter circle from left to up and hit A. Alternatively, you could hit diagonally up-back on the analog stick while pressing Y+A at the same time. This will register the pivot with your analog stick still in a position to u-smash, while jumping with Y. This is how you'll need to do it if you turn Tap Jump Off.
How to perform- While dashing forward, quickly input backwards on the analog stick followed by Up+A. This should be done as quickly as possible for the maximum slide distance. What you're doing is you're shellshifting, cancelling your shellshift with a jump, then cancelling your jump with a u-smash. If you're having trouble with your inputs, think of it as a quarter circle. If you're dashing to the right, you need to do a quarter circle from left to up and hit A. Alternatively, you could hit diagonally up-back on the analog stick while pressing Y+A at the same time. This will register the pivot with your analog stick still in a position to u-smash, while jumping with Y. This is how you'll need to do it if you turn Tap Jump Off.
Hydrotoss
Description- Squirtle will slide the distance of a hydroplane while tossing a held item up or down. Again this is most useful in the Diddy Kong matchup, as it can be used with bananas.
How to perform- Follow the same inputs as a hydroplane u-smash to hydrotoss up, or a hydroplane d-smash to toss down.
How to perform- Follow the same inputs as a hydroplane u-smash to hydrotoss up, or a hydroplane d-smash to toss down.
Hydrograb - http://www.youtube.com/watch?v=nVACbTqdmbY @0:45
Description- Out of a pivot, Squirtle lunges forward while doing a grab. If the grab lands, he'll slide with his opponent a decent distance. If you reach the edge and they break out when you still have momentum, you'll both fall off, which can lead to a footstool gimp.
How to perform- Do a shellshift, then hit R and c-stick away from the direction you're facing.
How to perform- Do a shellshift, then hit R and c-stick away from the direction you're facing.
Hydrojab
Description- As Squirtle comes out of his pivot, he does his jab while still getting the same slide as the hydroplanes.
How to perform- Perform a shellshift, but instead of hitting straight backwards to pivot, hit diagonally backwards-down. Once you're heading the other direction, with the analog stick still held diagonally, hit diagonally backwards-down on the c-stick. To be clear, your analog stick and c-stick should both be pointing diagonally side-down, one on each side, separated by 90 degrees. This can also be done with the analog stick diagonally-up, so your analog and c-stick would form a 180 degree angle instead.
How to perform- Perform a shellshift, but instead of hitting straight backwards to pivot, hit diagonally backwards-down. Once you're heading the other direction, with the analog stick still held diagonally, hit diagonally backwards-down on the c-stick. To be clear, your analog stick and c-stick should both be pointing diagonally side-down, one on each side, separated by 90 degrees. This can also be done with the analog stick diagonally-up, so your analog and c-stick would form a 180 degree angle instead.
True Hydroplane
Description- As Squirtle comes out of his pivot, he stands up and slides the length of a hydroplane. He is in his standing animation while he slides, so he can do any move.
How to perform- Perform a shellshift, and just before you come out of your pivot, buffer a pivot by hitting back on the analog stick one more time. Timing is the important factor here - if you input the last direction too quickly you won't get much of a slide, and if you input it too late you'll simply initiate a dash backwards.
How to perform- Perform a shellshift, and just before you come out of your pivot, buffer a pivot by hitting back on the analog stick one more time. Timing is the important factor here - if you input the last direction too quickly you won't get much of a slide, and if you input it too late you'll simply initiate a dash backwards.
IVYSAURInstant Tether - http://www.youtube.com/watch?v=cVSmzY_VRrw
Description- Ivysaur runs just off the edge and instantly tethers to it, rising up a little bit as he does it. He can then snap to the ledge to edgehog or cancel the tether and use an aerial to edgeguard.
How to perform- Run off the edge and immediately hit Up+B
How to perform- Run off the edge and immediately hit Up+B
Tether Lag Cancel - http://www.youtube.com/watch?v=cVSmzY_VRrw @0:58
Description- Ivysaur swings into the ground with his tether and lands without lag, able to perform any move.
How to perform- This requires a stage that has a platform you can land on below, or near a tetherable edge. Two good examples are Jungle Japes and Corneria, as shown in the video. Simply tether the edge from a spot such that when you swing you'll hit the platform. When you land you should have no lag.
How to perform- This requires a stage that has a platform you can land on below, or near a tetherable edge. Two good examples are Jungle Japes and Corneria, as shown in the video. Simply tether the edge from a spot such that when you swing you'll hit the platform. When you land you should have no lag.
Tether Cancelling
Description- Ivysaur grabs the ledge with a vine, but retracts it to perform an attack or to retether.
How to perform- Use up-b to tether, but once the vine reaches the ledge, tap down or back on the control stick to cancel the tether. This can be used to delay the swing that comes after tethering the ledge, and allows Ivysaur to stay farther off-stage for longer, which has edgeguarding applications. Keep in mind that Ivysaur can only tether the ledge three times without touching solid ground.
How to perform- Use up-b to tether, but once the vine reaches the ledge, tap down or back on the control stick to cancel the tether. This can be used to delay the swing that comes after tethering the ledge, and allows Ivysaur to stay farther off-stage for longer, which has edgeguarding applications. Keep in mind that Ivysaur can only tether the ledge three times without touching solid ground.
CHARIZARDInfinite Jump Renewal - http://www.youtube.com/watch?v=HEnQdqTu9CY @0:25
Description- Charizard jumps over and over while performing aerials close to the ground, seeming to never touch the ground. He can jump infinitely, as long as he is near ground.
How to perform- Use an aerial such that it will end just before you hit the ground. Then, buffer a jump so that he jumps before he touches the ground. If you do it right, you should be able to repeat the process indefinitely. It takes practice to get the timing down - try it with u-air first, since it seems to be the easiest.
How to perform- Use an aerial such that it will end just before you hit the ground. Then, buffer a jump so that he jumps before he touches the ground. If you do it right, you should be able to repeat the process indefinitely. It takes practice to get the timing down - try it with u-air first, since it seems to be the easiest.
B-reversal Flamethrower/Rock Smash
Description- Charizard uses Flamethrower/Rock Smash while reversing his horizontal momentum.
How to perform- While drifting horizontally, input neutral-B or forward side-B and immediately tap the control stick in the opposite direction. While B-reversals are not Charizard-specific, Charizard does have applications for B-reversal that are not as relevant to Squirtle or Ivysaur. The reversal of momentum can help against being juggled, as it makes your descent less predictable. The shifts in momentum can also be used in neutral positions to bait an opponent or to throw off an opponent's spacing.
How to perform- While drifting horizontally, input neutral-B or forward side-B and immediately tap the control stick in the opposite direction. While B-reversals are not Charizard-specific, Charizard does have applications for B-reversal that are not as relevant to Squirtle or Ivysaur. The reversal of momentum can help against being juggled, as it makes your descent less predictable. The shifts in momentum can also be used in neutral positions to bait an opponent or to throw off an opponent's spacing.
So there you have it - a list of today's known ATs and how to perform them. If you have any to add or any suggestions/comments/questions feel free to post them in this thread.
~T

