• Welcome to Smashboards, the world's largest Super Smash Brothers community! Over 250,000 Smash Bros. fans from around the world have come to discuss these great games in over 19 million posts!

    You are currently viewing our boards as a visitor. Click here to sign up right now and start on your path in the Smash community!

Brawl Character movesets: share, rate, and comment!

Green Shell

Smash Journeyman
Joined
Jun 4, 2007
Messages
462
My very first moveset I have made (in complete) for any character.
Proving, I really do hope that Olimar is in Brawl. =/
Well, anyways, here's the moveset I've come up with.
Critique would be appreciated. Thoughts and opinions welcomed.

Captain Olimar's Moveset

A Button:

A: Jab
% 2

A + A: Jab + Kick
% 5

A + A + A Jab + Kick + Mini-headbutt
% 8

Description of Combination: This would be a very fast move to perform, and the opponent can't escape until it's done (though they can easily avoid it because of it's short range). However, after the mini-headbutt is performed, Captain Olimar is delayed from moving for a short time of 2 seconds.

Tilts:

fA: Low Kick
Description: Similar to Falco's low kick, only in shorter range since Olimar has so 'em so short. Very fast performance, almost no lag.
% 4

dA: Slide Kick
Description: Olimar slides around starting from the opposite direction which he was facing, and then spins around to knock the opponent over.
% 3

uA: Uppercut
Description: An uppercut very similar to Mario's, a simple move which will affect the opponent rather well.
% 9

Smash:

fA: Mega Punch (no, not the Poke'mon move!)
Description: A force punch, which will send your opponent flying! Short range is included, however.
% 20

dA: Mega Kick (again, no, not the Poke'mon move!)
Description: A strong kick the can work facing either direct, Olimar does the splits and spreads his legs out to the direction which they're facing! (both sides)
% 10

uA: Headbutt
Description: How can you not see Olimar using a headbutt, with his bowl-shaped-helm? A powerful attack as strong as Fox's uA. Delay of 2 seconds afterwards. (PUNISHMENT!!)
% 20

Air Combat:

nair: Spin Kick
Description: While in the air, Olimar kicks with one leg, quickly spins around, and kicks with the other! I can easily see shffling being done with this move, similar to Marth's nair.
% 8

fair: Smash Anti-Spike
Description: Captain Olimar uses his bowl helmet to smash the opponent toward the ground, which sends them flying up into the... sky? Opposite of reverse order! Such as Dr. Mario's fair in Melee.
% 15

bair: Pikmin Offense
Description: Very similar to Mr. Game & Watch's bair. The only difference is mainly that the turtle is a Pikmin. Sorry for the cloning =/ that's what I think his bair should be though.
% 10 (if hit fully)

dair: Pikmin Offense 2
Description: Olimar uses a Pikmin to spike into the ground as he falls, if hit on an opponent correctly, it will send them hurtling towards the bottom! If uses (and missed), and you end up hitting the ground, short lag will display to put get up.
% 15

uair: Pikmin Offense 3
Description: A move which is odd, yet original. Olimar simply throws a Pikmin into the sky. No slide or boost of any way will occur when this happens, so you might not want to use it if you're trying to recover!
% 10

B Button:

B: Whistle
Description: Creates a command for the Pikmin, either attack, or halt.
% N/A

fB: Pikmin Protect
Description: Olimar throws out a random Pikmin in front of him, to save him from damage caused by projectile moves (physical attacks are superior to this protection). This move does not cause any damage to the opponent.
% 0

dB: Pick the Pikmin
Description: Olimar plants seeds into the ground (yes, even if it's solid / stone). He waits for a decent amount of time, and then the Pikmin grow. In order to get the Pikmin, you stand over where you planted them, and press A to pick them up. When this is done, you have the Pikmin in your hand. You either press (any direction) + A, to throw them. Or you hold down, to put them at your side. When placed at your side, then the B move comes to use. (5 Pikmin can be used at a time as a limit). Pikmin can be destroyed as easy as a Goomba in Adventure (melee). The color of the Pikmin picked are equally random, abilities explained below.
% 5 Pikmin = 50 (if they hit / are not killed)

uB: Save Olimar!
Description: Pikmin (two) come out from sides of the stage and race toward Olimar, grab him by the arms, and lift him toward which direction he commands! (yeah, you get to control your uB for once! control stick is used for controlling the uB) Olimar can recover from almost anywhere in the stage! The only problem is that it takes a little while for the Pikmin to catch Olimar, so practice the timing! No damage done to any opponents.
% 0

Other:

Final Smash: Pikmin Galore
Description: Yup, you've probably guessed it. More Pikmin! The Final Smash acts like your dB move, and it works with your B move as well. The only difference is that you get a number of 15 Pikmin, instead of 5. They also don't have to be planted, they are pre-planted for you! They instantly pop up out of the ground! Also, your dB move can't occur while the Final Smash is in play.
% 15 Pikmin = 150 (if they hit / are not killed)

Taunt: I don't need Pikmin!
Description: Just something I thought of. Olimar will punch at the air a few times, and do some "tough guy" fighting, to prove he doesn't need Pikmin! If an opponent gets near him while performing his taunt, then they will get a maximum amount of damage applied.
% 5

Throws:

Grab Attack: Whack!
Description: Well, the name of it pretty much gives it away. A simple whack to the opponent while holding them should be enough!
% 2

fThrow: Ground Slam
Description: Olimar grabs you with both of his arms and flips you around to follow by a smash into the ground. This throw can not kill you, even if you're at the maximum amount of damage percentage! It's a very weak throw, but stuns the opponent for a decent time afterwards, opening some combo options.
% 5

dThrow: Body Stomp
Description: Olimar smacks you into the ground, and jumps a mighty stomp onto you! With high damage you'll go soaring up into the sky!
% 10

bThrow: Pikmin Throw Combo
Description: Olimar grabs you, and performs a simple toss to his backside. Quickly, he randomly gets a Pikmin from thin air, and throws it at the opponent (it won't hit ALL of the time, but can do some pretty decent damage depending on the Pikmin).
% N/A

uThrow: Pikmin Throw Combo 2
Description: Olimar grabs you, and performs a simple toss toward the sky. Quickly, he randomly gets a Pikmin from thin air, and throws it at the opponent (it won't hit ALL of the time, but can do some pretty decent damage depending on the Pikmin).
% N/A

Stats:
Weight: Poor
Recovery: High
Speed: Average
Power: Poor
Throw: Average

Pikmin:

Purple:
The most powerful Pikmin to summon, a strong ally that will help you in any situation! Purple Pikmin can not be thrown far, as an addition to their status.
% 15
Probability: 10%

Red:
A more common Pikmin, the red Pikmin has no special abilities, in fact, it has some disadvantages! Red Pikmin have a nack to not follow to your commands, so be careful with them!
% 5
Probability: 20%

White:
Another very useful Pikmin in battle! The white Pikmin has a special ability to transfer poison to any opponent that gets to near to it! Also, the poison will affect any player that kills the white Pikmin.
% 15
Probability: 10%

Yellow:
An electrified Pikmin! If this Pikmin gets anywhere too close to an opponent, they will get a harsh shock received! This ability does not work if the Pikmin is killed, it is a short range tactic. The yellow Pikmin has the farthest throwing distance.
% 10
Probability: 20%

Blue:
The most common Pikmin to be summoned! The blue Pikmin is the most ineffective Pikmin there is, but comes to your aid regularly! The blue Pikmin is very weak, and does not have a good throwing range! However, they always listen to your commands! At least they're reliable!
% 2
Probability: 40%

And there you have it!
Constructive critique appreciated,
 

Numa Dude

Smash Lord
Joined
Nov 28, 2006
Messages
1,897
Location
America's peni.... I mean Florida
Samurai Goroh moveset

A attacks

A- punch
AA-punch punch
AAA- punch punch haymaker

Strong attacks

Side A- Punch with the hilt of his katana
Up A- flip kick
Down A- Low kick

Smash attacks

Side A- Performs two powerful horizontal sword slashes
Down A- Sword swipe to enemies legs
Up A- Spins his sword in the air above him a few times

Air attacks

Neutral air- Flip kick
Back air- Backwards sword slash
Foward air- Foward sword slash
Down air-Downward sword slash
Up air- Upwards sword slash

Grab attacks

A- Knee

Foward throw- Backhands the opponent foward
Back throw- Spins around and effortlessly tosses the opponent away
Down throw- Suplex
Up throw- Tosses the opponent upward

B attacks

B- ultimate slash- This move is taken from the episode in the F-Zero anime in which Goroh cuts a vehicle coming straight towards him in half. Goroh gets into a stance where his hand is on the hilt of his katana. Goroh will stay in that position until B is released and will then perform a powerful slash attack that will do major damage to anyone directly in front of him. The power of the move does not increase or decrease no matter how long B is held.

Side B- Samurai rage- Goroh charges foward a short distance and if he comes into contact with anything he will perform a short three hit combo with his sword.

Up B- Samurai jump- Jumps upward with his sword in a similar fashion to Marth and Roy (he will hold it differently though) and if he hits someone with the upward slash he will stop in front of them and perform a foward slash to send them flying away from him which will allow him to use the move again.

Down B- Iron will- Goroh will tense his body and anyone who hits him while he is like this will be hurt with the recoil and all damage is halved. To force Goroh out of this state you have to grab him.

Super smash- Samurai speed- Rushes foward and delivers a devastating sword combo at insane speed to whoever he makes contact with.

Taunt- crosses his arms over his chest and says "steal but never kill".

Victory pose 1-Sits in a meditative position
Victory pose 2- Sheaths his sword after an impressive looking combo
victory pose 3- Shows off his stamina by doing several impressive backflips
 

SSBZalamander

Smash Cadet
Joined
Jun 12, 2007
Messages
43
Lucario


color changes


Stats
Strength= 4
Speed= 4
Jump= 3.5
Weight= 2
Size= 3

Moveset

B= Close Combat(a powerful 5-hit combo,8% per hit with good knockback on final,deals 5% to lucario after use
B^= Iron Tail(a strong filp the sends lucario up a ways and hit foes for 20% damage with good knockback in the upwards direction)
B<,>= Extremespeed(like Fox's only faster,farther, and stronger, 15% damage) or Aura Sphere(charge up and fire a freakishly quick blast for 15%-35% depending on charge time)
BV=Counter(same as roy/marth only double the power of countered move) or Earthquake(similar to DK's but much more powerful and wider range,15%-20% damage) you choose


Super Smash= "Aura Rush" looks through his aura sight and pummels his opponent, ending with a massive Aura Sphere
 

twilight_hero

Smash Lord
Joined
Mar 21, 2007
Messages
1,011
Location
in ur Wii, savin' hyrule from t3h twilight... By t
Don't care if it's been done before, I'm doing it anyway. I'm basing this off the GCN controller. It probably won't happen, but it's possible.

Link's Moveset

Strength: 3
Speed: 3
Weight: 4
Jump: 2
Attack Speed: 3
Recovery: 4
Usage: 4

A: Slash
A(second): Counter Slash
A(third): Stab
A(repeatedly): Illusion Stab
Up-A: Half Moon Swipe
Down-A: Grass Cutter
Over-A: Vertical Chop
Smash Up-A: Triple Half Moon Swipe
Smash Down-A: Double Down Slash
Smash Over-A: Sword Slice, Double Sword Slice
Nair: Forward Kick
Uair: Up Thrust
Dair: Ending Blow (one strike instead of three in Melee)
Fair: Jump Attack (just like if you hit B in midair in Zelda games)
Bair: Double Back Kick
A (while running): Running Hack
R+A: Clawshot
A (while holding): Pommel Strike
Up (while holding): Toss and Stab
Down (while holding): Drop and Stab
Forward (while holding): Forward Stab
Back (while holding): Backward Stab
R+A (in midair): Clawshot

B: Bomb Arrow
Up-B: Great Spin
Over-B: Gale Boomerang
Down-B: Transform to Wolf Link

Final Smash: We've all seen it.
Taunt: Victory pose from TP (slashes right, then left, then twirls sword three times and sheathes it)
Victory 1 (B victory): Sheathes sword, dusts off hands, and stares at screen.
Victory 2 (Y victory): Does a Spin Attack and then sticks sword into air (beat a boss in LttP, and you'll see).
Victory 3 (X victory): Puts shield on back and leans on sword with a smile.

Kirby Hat: Link hat, miniature Master Sword and Hylian Shield (no effect on gameplay--shield and sword are not used)
Costume 1: Hero's Clothes (from TP, of course)
Costume 2: Magic Armor
Costume 3: Zora Armor
Costume 4: Dark Link (mostly shadowy black with red eyes--you know if you played TP and saw the creepiest cutscene ever)
Costume 5: A fancy purple costume that didn't make it into TP (sad cries...:()

Wolf Link's Moveset
Let's be clear here. Midna is riding on Wolf Link.

Strength: 2
Speed: 4
Weight: 2
Jump: 3
Attack Speed: 3
Recovery: 3.5
Usage: 3

A: Bite
A (second): Left Claw
A (third): Right Claw
Up-A: Upward Midna Punch (Midna becomes the weird hand)
Down-A: Low Claw Slash
Over-A: Forward Claw Slash
Smash Up-A: Leap and Slash
Smash Down-A: Low Claw Slash, Low Bite
Smash Over-A: Forward Midna Punch
Nair: Midair Bite
Uair: Upward Kick (flips over and kicks, works like Pikachu Uair)
Dair: Midna Finger Drill (Midna becomes the hand and drills down like Master Hand)
Fair: Midair Claw Slash
Bair: Midna Poke
A (while running): Running Bite
R+A: Midna Grab (extended grab, but only slightly. Doesn't grab stage in midair like Clawshot.)
A (while holding): Bite
Up (while holding): Slash and Throw
Down (while holding): Slash and Slam
Forward (while holding): Slash and Midna Toss
Back (while holding): Slash and Midna Poke

B: Energy Field (those of you who've played TP knows what it looks like)
Up-B: Teleport (Midna teleports Wolf Link in desired direction; looks like warping in TP)
Over-B: Spin Attack (Wolf Link spins around with claws outstretched. Reflects projectiles.)
Down-B: Transform to Link

Final Smash: Midna becomes her giant spider form, allowing you to go on a rampage.
Taunt: Howls into the air.
Victory 1 (B victory): Growls at the screen, then runs off.
Victory 2 (Y victory): Sits and howls at the moon.
Victory 3 (X victory): Midna tosses away an opponent that was fought, then floats over Wolf Link with a smile on her face and a fang showing. Wolf Link stares up at her.

Kirby Hat: Ears, snout, and claws
Costume 1: Normal fur and Midna
Costume 2: Red-tinted fur and Midna
Costume 3: Blue-tinted fur and Midna
Costume 4: Shadowy black fur and Midna, red eyes for both
Costume 5: Purple-tinted fur and Midna


Frankly, I'd only ever play in the shadow costume...
I know the Wolf Link costumes are lame, but what are you gonna do?
 

thefindingmoon

Smash Cadet
Joined
Jul 8, 2007
Messages
44
ooh yeah,,,
brian from quest

B^ Twister (a twister that makes him fly up and at the end he bust out and the wind goes out farther)
B" Fire bomb (a kind of circular shape explodes right around you)
B<&> Runnig water (Pillars of water shoot out of the ground while moving forward)
B v (rock)Avalanche ( medium sized boulder start falling from the sky above and around brian)

Grab
^ staff hit up w/ homing arrows to follow
> staff hit to the side with homing arrows to follow
< throws the character behind him then sprays water onthe ground that makes them skip like a rock for more damage
v throws down and makes a small quake

C/A"
^ strike up w/ staff and maybe a vampires touch
> powerstaff hit
< powerstaff hit
v fire "pillar" N64 virsion

Ariel
^ a wind cutter upwards
> ice strike w/ threes sicles slashing form the end of the staff
< strike backward with staff
v quake the ground when striking staff into it
A" staff spin

A move
all of them, variations of staff attack
 

halfdemon alchemist

Smash Cadet
Joined
Jun 22, 2007
Messages
27
Shadow the Hedgehog

weight: middle
speed: really high
strength: middle
emblem: sonic logo
defence: middle-high

B: 9 mm handgun
>B: homing attack (can be used up to 3 times in a row)
^B: chaos control (same as pikachu's quick attack but can go through solid objects)
\/B: spin dash (can be controled like jigglipuff's B attack)

A: chaos spear
combo A: 5 spears
>A: kick
^A: teleport behind nearest enemy
\/A: punch

smash >A: rocket launcher (more misiles the more you charge it)
smash ^A: kick up
smash \/A: chaos blast

midair A:
midair >A: spining kick
midair ^A: grenade
midair \/A: rolls into ball and bounces on enemies

taunt: throws chaos emerald into the air and catches it

final smash: turns into super shadow and fires 10 paraylizing chaos spears at all enemies
(10% each) then charges up a huge beam of energy and shoots it (150% and covers area the size of giga bowser)

(new item: chaos emerald that doubles strength of all holder's attacks
 

Gypsy Lee

Smash Champion
Joined
Apr 24, 2007
Messages
2,331
Location
Bethany, West Virginia
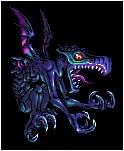
I made this for the Ridley thread:

RIDLEY
____________________________________________


STATISTICS

Jump: *****

Ridley can't jump very high, but the amount of jumps he has more than makes up for it. Ridley's first jump is average when compared to other characters. His second jump is quite mediocre, too. But, it doesn't stop at just two jumps. Like Kirby, Jigglypuff, Metaknight, and Pit, Ridley has multiple jumps. With each flap of his wings, he is carried a little higher, though they decrease in height with each consecutive jump. He maxes out at 6 jumps, including his initial "ground" jump.

Size: *****

Let me get this out of the way right now - Ridley's a beast. He's so big and ripped, that Sakurai is going to have to shrink him down to the size of a small adult elephant, so that he may compete 'fairly' against the puny humanoid characters in Brawl.

Weight: *****

Not only is Ridley a beast, Ridley is a tank. His lardy a** is tied with Bowser for heaviest character, making him difficult to knock off stage. This, combined with his great recovery, makes for a long day for your opponent.

Speed: **

Ridley has a speedy straight ahead dash, however, his size and lanky build hurt his agility. This causes for, overall, laggy moves. He isn't as slow as say, Bowser, but he sure isn't no Fox by any means.

Strength: ***

Ridley isn't as strong as you'd expect him to be. His arms are long, slender and weak. Ridley usually carries things with his feet or in his mouth, making for slow, awkward uses of items. In combat, he relies on his powerful jaws and strong dagger-like tail. He seldom uses his arms, maybe for an occassional swipe at the enemy.

Recovery: *****

Armed with several jumps, the ability to glide, and fireballs to preoccupy edge guarders, Ridley is extremely hard to keep off stage. Ridley's opponents must put their blood, sweat, and tears into each KO.

Fall Speed: ***

Ridley is large and heavy, yes. But, Ridley is also a pterodactyl/dragon, meaning he can fly, meaning he should be somewhat floaty. These two confinscate for one another, making him neither a floaty, nor a fast faller. He should be somewhere around average.

Comboability: *

Ridley is not about combos. Ridley is about run-and-gun deals, in which he comes in for an attack every now and then until the other player's damage is at a high percentage. At this point, Ridley comes in for the kill.

KOability: ***

Ridley is good at KOing the opponent at high percentages, though only at high percentages. He has a few satisfactory kill moves that get the job done when the opportunity comes.

Coolness Factor: ************************************************** *************************

I could give him a higher rating, but you get the point.


GROUND ATTACKS

Neutral A Combo

Name: Double Bite
Damage: Low
Knockback: Low
Lag: Moderate
Range: Moderate
Duration: Short-Moderate
Hits: 2
Effect: None

Description:

Ridley reaches his head out for a quick bite at the enemy. If the 'A' button is pressed a second time, Ridley will then stretch out his neck and twist his head for a second, more powerful bite.


Forward Tilt

Name: Tail Slash
Damage: Low
Knockback: Moderate
Lag: Low
Range: Long
Duration: Short
Hits: 1
Effect: None

Description:

Ridley spins around and swings his tail in front of him, slicing the opponent. Much like Mewtwo's Forward Tilt, except with more reach and slightly more knockback. This move is effective for edge guarding, or keeping an attacker at bay.


Up Tilt

Name: Headbutt
Damage: Low
Knockback: Moderate
Lag: Moderate
Range: Low
Duration: Moderate
Hits: 1
Effect: None

Description:

Ridley yanks his head upwards and hits the player in the air with his snout. It has some lag, but is hard to miss with, so Ridley is hardly ever open to a counter attack unless he completely wiffs. This move is good for juggling an opponent, but not much else.


Down Tilt

Name: Ankle Bite
Damage: Moderate
Knockback: High
Lag: High
Range: Moderate
Duration: Short
Hits: 1
Effect: None

Description:

Ridley crouches down on all fours and bites at the enemy. This move deals good damage and knocks your opponent far back, but due to lag, it leaves you open to attack afterward.


Dash Attack

Name: Dragon Claws
Damage: Moderate
Knockback: Low
Lag: Moderate
Range: Low
Duration: Long
Hits: 4
Effect: None

Description:

Whilst running, Ridley furiously slashes at the opponent 4 times, twice with each claw. Punishable, (as most dash attacks are) but useful nonetheless. This attack may be used as an alternative approach to Ridley's Forward B.


Forward Smash

Name: Devastating Chomp
Damage: High
Knockback: High
Lag: High
Range: Long
Duration: Moderate
Hits: 1
Effect: None

Description:

Ridley lunges at the opposing player with his mouth wide open and crunches them with his powerful jaws. This move is laggy and highly punishable, but is a powerful smash with long reach, making for a satisfactory finisher.


Up Smash

Name: Wing Strike
Damage: Moderate
Knockback: Moderate
Lag: Moderate
Range: Long
Duration: Moderate
Hits: 1
Effect: None

Description:

Ridley leans to his right, looking over his left shoulder, and swings open his left wing at the player above him. It's a decent smash overall, but it serves no particular purpose as far as edge guarding, KOs, etc.


Down Smash

Name: Tail Sweep
Damage: Moderate
Knockback: Very High
Lag: Moderate
Range: Long
Duration: Moderate
Hits: 1
Effect: None

Description:

This is Ridley's signature tail sweep. Ridley spins and sweeps his tail across the ground on both sides of him. The player hit is sent at a near horizontal trajectory. It is devastatingly powerful and is easily his greatest kill move.


AERIAL ATTACKS


Neutral Aerial

Name: Wing Spin
Damage: Moderate
Knockback: Low
Lag: Very Low
Range: Low
Duration: Moderate
Hits: 1-3
Effect: None

Description:

Ridley spins twice in the air with his wings spread out to his sides. It is great for knocking away another aerial opponent on either side of you.


Forward Aerial

Name: Claw Swipes
Damage: Low
Knockback: Moderate
Lag: Moderate
Range: Low
Duration: Moderate
Hits: 2
Effect: None

Description:

Ridley swings one of his claws and then the other at the player in front of him. Both swipes do the same knockback and damage, so hitting with either one will send the opponent flying.


Backward Aerial

Name: Back Slash
Damage: Moderate
Knockback: High
Lag: Low
Range: Low
Duration: Moderate
Hits: 1
Effect: None

Description:

Ridley spins around to his right, with his left claw reached out to his side, and slashes at the player behind him. It sends them at a horizontal trajectory, and it's accompanied by an awesome slashing sound. :cool:


Up Aerial

Name: Overhead Bite
Damage: High
Knockback: Low
Lag: Moderate
Range: Moderate
Duration: Short
Hits: 1
Effect: None

Description:

Ridley looks up and quickly snaps at the enemy above. This move is very damaging, but by no means is it powerful.


Down Aerial

Name: Head Splitter
Damage: Moderate
Knockback: Moderate
Lag: Moderate
Range: Long
Duration: Short
Hits: 1
Effect: None

Description:

Ridley's meteor strike. Ridley pulls his wings and arms back (as if to give some one a hug), looks down at his victim, and then swings his tail from right to left. It can, like most meteor strikes, be meteor canceled. Otherwise, it's a fast, deadly move.


SPECIAL ATTACKS

Neutral B

Name: Fireball
Damage: Very Low
Knockback: Very Low
Lag: Moderate
Range: Very Long
Duration: Long
Hits: 3
Effect: Fire Damage/Stun

Description:

Ridley shoots a bright orange fireball from his mouth (a slighty bigger and elongated version of Mario's) that travels at about the same speed and distance as that of Samus' missles. It scores 3 hits on whomever it comes in contact with, each dealing about 2% damage. It has little knockback, but stops the opponent in his tracks because of the "fire stun" (like being hit by Young Links arrows). The fireballs are sub-par as far as damage and knockback standards go, but when combined with the ability to shoot them in barrages while flying over an opponent, they become a very versatile and useful projectile.


Up B

Name: Wing Frenzy
Damage: Very Low
Knockback: None (last hit is Low)
Lag: Low
Range: Long
Duration: Short-Long
Hits: 1 up to 5
Effect: Slight Stun

Description:

When Up and B are pressed, Ridley flaps his wings once and is sent upwards at about the height of a normal jump. With a consecutive tap of the B button, Ridley flaps again and is sent farther upwards. He maxes out at 5 flaps, each one gaining less height than the last. If an opponent is struck by a wing, they are briefly stunned and are set up for another flap. It is the equivilent of being struck by a fan item, but only 4 times. The last hit sends them flying away from you. The move has little priority and deals little damage, so it's best use is for recovery (as a sort of 4th, 5th, 6th, 7th, and 8th jump). As most Up B's do, it renders you unable to move until you touch the ground, or you die (in which case, you'll just respawn back on land again).


Forward B

Name: Relentless Charge/Glide
Damage: Moderate
Knockback: High
Lag: High
Range: Long
Duration: Long
Hits: 1
Effect: None

Description:

Ridley quickly pulls his head back, screams, and gallops forward with an open mouth and claws. Right before hitting the opponent, Ridley closes his mouth and lowers his head. Upon contact, he thrusts his head and body forward, knocking the opponent back a good distance. During the duration of the charge, Ridley is completely invincible to projectiles, direct attacks, etc. Hence the name: Relentless Charge. Although recognizeable by the scream, the start up of the move is fairly quick and can be difficult to predict. However, the ending lag is very noticeable. After traveling approximately the distance as Falcon's Raptor Boost, Ridley falls over in a similar fashion. Thus, making this move easily punishable when missed. Also, the charge itself is a tad bit sluggish, but is made up for by the invincibility frames. This move is best used in close quarters, or when the opponent is projectile happy.

In the air, instead of charging forward, Ridley darts forward a short distance and open his wings, allowing him to glide. During this move, Ridley can shoot fireballs at his opponent. The fireballs can only aim ahead of him, or at about a 45 degree angle beneath him. So, the player must become familar with their timing and trajectory in order to use them effectively. Ridley continues to glide for a short time, or until he touches the ground. The trajectory of his decent is around 30 degrees less than horizontal, (or 90 degrees) so he falls rather slowly.


Down B

Name: Flame Spew
Damage: High
Knockback: Low
Lag: High
Range: Long
Duration: Moderate
Hits: Multiple
Effect: Fire Damage/Stun

Description:

Ridley crouches down on all fours in a "ready to attack" position (similar to how cats and dogs do) then draws his head back, opens his mouth, and spews fire ahead of him. As he does so, he motions his head from side to side, as if spreading the flames all over the place (but it can't be seen unless you pause the game and turn the camera angle). It works in a way that is like Bowser's Fire Breath. However, instead of eventually running out as you hold the button down, the move grows weaker after consecutive uses until it eventually dies down to nothing but smoke after the third time. The move ends once Ridley covers the ground with fire (after one side-to-side motion of his head) and stands back up in his normal position. There's a bit of lag at the beginning and end of the move to watch out for when using it.


Final Smash

Name: Plasma Beam
Damage: Very High
Knockback: Very Low
Lag: N/A
Range: Very Long
Duration: Very Long (between 20-25 seconds)
Hits: Multiple
Effect: Fire Damage/Stun

Description:

Ridley's eyes glow, and he is surrounded by the Final Smash's signature orange aura. He lets out a screech as he swoops into the air. As Ridley hovers high in the air, he pulls back his head and slowly opens his mouth. A bright light begins forming in Ridley's mouth. Then, suddenly, he lets out an unnerving shreik as a thick red beam of plasma shoots from his mouth. When it first crashes into the stage, flames burst all around it. The move is a continuing beam of plasma, and is fully aimable, allowing Ridley to direct it over the other players. When it hits an opponent, they are stunned a bit, (from the fire, like in Melee) and as long as they are under the beam, their damage sky rockets. (Probably around 25% a second). However, the move has no knockback, exept for when the laser initially hits. Small trails of flames (from where the beam has been) last for a few seconds, dealing some damage to anyone who walks into them. During the whole move, Ridley is far out of the reach of anyone, and is only able to be hit via projectile. When this happens, Ridley is briefly interrupted, but quickly continues the move again until it is finished. If the projectile has no knockback, (i.e. Fox's lasers) then Ridley is damaged by it, but not interrupted.


THROWS AND TAUNTS


Grab Attack

Name: Vicious Bites
Damage: Very Low
Knockback: N/A
Lag: N/A
Range: N/A
Duration: Very Short
Hits: 1
Effect: None

Description:

Ridley, holding the opponent in a death grip right in front of his face, bites at the poor soul caught in his clutches.


Forward Throw

Name: Tail Serve
Damage: Moderate
Knockback: Moderate
Lag: Moderate
Range: N/A
Duration: Moderate
Hits: 1
Effect: None

Description:

Ridley lifts the opponent into the air with one hand, then spins around and slashes them forward with his tail. This is a normal throw with little knockback, but it looks really cool. :cool:


Backward Throw

Name: Garbage Man Throw
Damage: Low
Knockback: Moderate
Lag: Low
Range: N/A
Duration: Short
Hits: 1
Effect: None

Description:

Ridley turns and chucks the opponent behind him like a garbage man throws garbage bags into a garbage truck. This is a mediocre throw all around, but is humiliating to the opposing player.


Down Throw

Name: Tail Stab
Damage: Moderate
Knockback: Very Low
Lag: Low
Range: N/A
Duration: Very Short
Hits: 4
Effect: None

Description:

Ridley slams the opponent into the ground, then flies a short distance into the air and procedes to stab the grounded player several times with his tail.


Up Throw

Name: Ridley Slam
Damage: Moderate
Knockback: High
Lag: Moderate
Range: N/A
Duration: Long
Hits: 1
Effect: None

Description:

Ridley flies straight up into the air with the opposing player in his grasp, then he shrieks and dives straight down with the opponent held out in front of him. He slams them into the ground, and they are sent spiralling upwards. Ridley used this cheap move alot in the Metroid games.


Taunt

Ridley leans forward, with his arms tucked under him and his neck stretched out, and shrieks. Moves his head from left to right while doing so. Alot of people may have seen Ridley do this ALOT in Metroid Prime. It's really cool at first, then after about the third time, become really annoying. When it comes to taunts though, the annoying-er, the better :).


COLORS

Purple

Though it varies through the games, (from a deep violet, to a near periwinkle hue) this is Ridley's normal color. This color would double as his costume when he is on the Blue Team in team battles. This is entirely possible, seeing how Samus used her purple Gravity Suit for the Blue Team in Melee.


Red

Originially used for promos, renders, and box art for Super Metroid for the SNES, the red colored Ridley is one of his more common depictions. In alot of the 2D Metroid games, Ridley would flash or turn completely red in rage towards the end of a fight. This color would also serve as his costume for the Red Team.


Green

This color was never used in a Metroid game, but it would give Ridley a more "dragon" or "dinosaur" like appearance. Plus, it would serve as his costume for the Green Team.

Brown

Ridley first appeared with a brownish hue in the remake of the original Metroid, Metroid: Zero Mission for the GBA. So far, it has been the only time he has been seen in a game in a color other than purple. I personally think that this costume looks terribly awesome.


COSTUMES

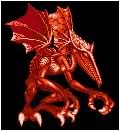
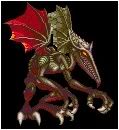
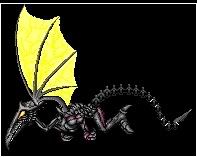
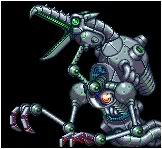
Meta Ridley

Meta Ridley appeared in Metroid Prime and will also play a role in the upcoming Metroid Prime 3: Corruption, in which he is believed to have acquired 'phazon' powers. Meta Ridley is not to be confused with Mecha Ridley. Meta Ridley is the actual Ridley that was defeated in the first Metroid, however, he was "resurrected" by the Space Pirates. Many of his body parts were replaced by robotic parts and he was fitted with weapons. Alot of people want to see this version of Ridley as at least an alternate costume because he looks like a torn up, metal badass. And I completely agree.


Mecha Ridley

This is Mecha Ridley, or Robo Ridley (usually Mecha Ridley because Robo Ridley sounds like a really lame anime character). He/it is actually a robot. It was the final boss in Metroid: Zero Mission.


Ridley X

Ridley X is Ridley, or a 'clone' of Ridley, that has been infected by the parasite, X. In Metroid: Fusion, he had been frozen in a storage compartment. Towards the end of the game, his frozen body was infected by an X. He then mutated into this guy, who looks more like a dragon then the pterodactyl-esque normal Ridley.


STAGES

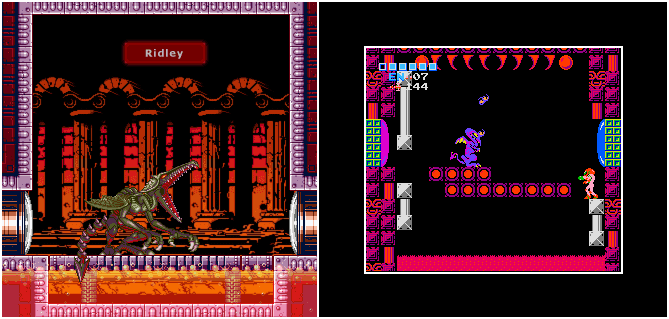
Ridley's Lair

Ridley's Lair would be a combination of the Ridley Boss Room from Metroid: Zero Mission and the original Metroid. There's one main platform that hovers over a bed of lava. In the background, you can see Chozo architecture such as pillars, statues, etc. The roof of the room is covered with spikes. If a player is hit up into the spikes, they are hit back down and by the spikes (the Bumper on Princess Peach's Castle from the first SSB anyone?) and sent back down into the lava. The lava acts like the water from Termina Bay in Melee. In other words, it doesn't burn you, IT KILLS YOU. You can also die from being hit to the left or right off screen, but the kill zones are far away, making the bottom kill zone the preferred way to KO your opponents.

Two destructible platforms hover to each side of the main platform. If hit, they topple over and fall into the burning lava below, only to rise out of the lava a few minutes later. In between the rise and fall of the platforms, a little beetle creature (I can never remember their names) floats on screen and flies around, making for a movable platform.

Rising steam from the lava is seen (what you see on the road on a hot day). You can hear the occassional blops and plops from the lava, as bubbles of it burst. With the Ridley Boss Battle Theme blasting, and the sound of crackling fire from the lava bed, a dark mood is set for this level.


Jolts_D

Smash Apprentice
Joined
Jun 23, 2007
Messages
101
Location
Indiana
I didn't see this in the list yet, so here goes:

Ryu (not Street Fighter, but Breath Of Fire...preferably, the BOFIII version adult form)
^B: Jump (leaps up about 1.5x a normal jump and crashes down on the opponent)
>B: Super Combo (similar to Marth/Roy's, but could also involve punches and kicks)
VB: Accession > Warrior (a transformation move, like Zelda/Sheik; separate moveset listed below)
B: Bone Break (like Wario's fart, more powerful the longer you wait to use it)

Warrior's moves:
^B: High Jump (uses his wings for a 2x jump on ground, 1x jump in air)
>B: Aura (much like Falcon/Warlock Punch, but takes longer to charge and reaches farther)
VB: Revert (transform back to Ryu)
B: Gambit (13%-16% damage, randomly doubles)
*NOTE: Warrior has wings and can jump multiple times (like Kirby, Jigglypuff, Metaknight, and Pit), is significantly more powerful than Ryu, a little faster, but very light-weight (much like Jigglypuff).

Both Ryu and Warrior share the same Final Smash:
Kaiser - Transformation into a gilded Ryu with yet another set of moves.
Kaiser's moves:
^B: Hurricane (creates a hurricane at Kaiser's location and he gets sent 3x jump into the air, others that get caught get thrown depending on damage)
>B: Dream Breath (a straight forward shot that puts anyone in its path to sleep)
VB: Gaea's Breath (immobilizes anyone caught nearby into the ground (like DK's >B)
B: Dragon Breath (straight forward shot; causes up to 30% damage, but no kickback)
*NOTE: While using Kaiser, he might randomly decide to use (10% chance every ten seconds after the first thirty seconds, very last frame before reverting counts) either Shadow Breath (40% chance; instant KO to anyone within a radius of Kaiser's current height) or Kaiser Breath (10% chance; instant 999% to everyone onscreen, including himself), and if it happens to land on the extra 50%, then he'll just do the charge animation (normally seen for Shadow Breath or Kaiser Breath). If Kaiser chooses to use either, he instantly Reverts (even if they fail). He also automatically reverts after 60 seconds of being on the feild.
 

halfdemon alchemist

Smash Cadet
Joined
Jun 22, 2007
Messages
27
sorry to post again but i tried to edit and i couldn't

Shadow the Hedgehog

weight: about the same as roy
speed: 10/10 (faster than pichu)
strength: 10/10 (about the same as roy)
defence: 7/10
midair strength: 5/10
emblem: sonic logo

B: chaos arrow (8%) charge for chaos spear (25%)
>B: small energy beam (20%)
^B: chaos control (same as pikachu's quick attack but can go through solid objects) (10%)
\/B: spin dash (can be controled like jigglipuff's B attack) (20%)

A: punch (5%)
combo A: punch, kick, punch, kick, punch (5% each hit)
>A: kick (15%)
^A: teleport behind nearest enemy
\/A: karate chop (20%)

smash >A: rocket launcher (more misiles the more you charge it) (15% per misile)
smash ^A: spining kick (15-25%)
smash \/A: chaos blast (15-25%)

midair A: 5 fast punches (5%)
midair >A: homing attack (can be used up to 3 times in a row) (10%)
midair ^A: grenade (10%)
midair \/A: rolls into ball and bounces on enemies (10%)

running A: charges at enemies and slashes them with samurai sowrd (20%)

can steal wario's motorcycle by pressing B next to it when wario's not on it

taunt: throws chaos emerald into the air and catches it

final smash: turns into super shadow and fires 10 paraylizing chaos spears at all enemies
(10% each) then charges up a huge beam of energy and shoots it (200% and covers area the size of giga bowser)

stage: westopolis (twice the size of hyrule temple, black arms aliens come out and shoot you every now and then)

(new item: chaos emerald that doubles holder's speed and strength)
 

Jolts_D

Smash Apprentice
Joined
Jun 23, 2007
Messages
101
Location
Indiana
I was never really fond of the Sonics games, but man, that guy with Ridley...he sure took his time :o.

P.S. I've been having trouble with edit too. It seems to work if you click on Go Advanced, though.
 

Jolts_D

Smash Apprentice
Joined
Jun 23, 2007
Messages
101
Location
Indiana
Wait a sec. I think I remember that Ridley thing from another forum. Not too long after Melee came out. It was at a forum about RM2K/3. Maybe it was somebody else, but they had it well planned out, too.

Anyway, my submission was kind of bumped out with halfdemon alchemist's re-post. Did any of you check it out?
Good? Bad? Ugly?
 

Jolts_D

Smash Apprentice
Joined
Jun 23, 2007
Messages
101
Location
Indiana
In Breath Of Fire III, Ryu can transform into different dragon forms, Warrior and Kaiser are both possible tranformations, if you have the right items to do so (the items are called Dragon Genes, and you can mix up to three of them). Since Warrior is the closest one to be agile enough for Smash Bros., he's the best choice for that, but he doesn't have to many abilities to use, so I just had him share the same Final Smash (besides, this FS is quite powerful).

Forgot to mention that Dragon Breath attacks could randomly just be Whelp Breath, instead (much weaker).
 

Korea4ever

Smash Cadet
Joined
Jul 9, 2007
Messages
29
Ice/Lightning Mage (MapleStory)

*** [...] = damage, () = description ***


A: [1%~3%] (waves wand in circular motion, releasing electricity from the tip, can be used continuously)
A^: [4%~6%~] (swings wand above character and damages with electricity)
A>: [5%~7%] (turns tip of wand into a shard of ice and stabs)
Av: [4%~5%] (jabs with wand, small chance of freezing)

nair: [8%~9%] (hits opponents near the character with ice elemental magic, may freeze)
fair: [7%~10%] (swings a piece of ice from behind above the character and downwards in an arc (meteor))
dair: [10%~13%] (jumps onto a spike of ice and drives it into the ground)
uair: [7%~10%] (thrusts wand upwards, shoots spark a very short distance)
bair: [6%~8%] (spins around with wand extended, shocks foes that are hit)

B: Thunder Spear [12%~27%] (charge attack, quite slow)
B^: Teleport (self explanatory)
B>: Chain lightning [trail: 2%~4%, front: 6%~8%, min and max rises by 2 after each hit] (like Ness' B^ but leaves a trail)
Bv: Ice Strike [7%~10%, may freeze enemy] (ice falls from a couple metres above on either side of player, continues falling until it hits something)

Grab: (zaps with electricity and paralyzes)
Attack: [2%] (hits opponent with wand)
Fthrow: [4% icicle: 6%] (throws enemy at 45 degree angle and launches an icicle for additional damage, can hit other palyers as well)
Uthrow: [5% spark: 1%] (tossed enemy upward and hits with a barrage of sparks)
Dthrow: [6%~8%] (lets go of enemy and quickly spikes downward with a jolt of electricity)
Bthrow: [4%~6%] (lets go of enemy, teleports to other side, and blasts with electricity)

Smash^: [9%~20%] (A spike of ice srupts in front of the character)
Smash>: [12%~23] (swings wand horizontally, wave of electricity follows)
Smashv: [10%~25%] (creates ice just above the character, and launches it downward (doesn't keep going beyond an edge))

Super Smash: [enter reasonable amount here] (spears of ice fall onto the battlefield)

Taunt: (juggles spheres of energy that dissipate after a couple seconds)

Winning pose 1: (twirls wand between fingers)
Winning pose 2: (waves wand around, leaving a trail of sparks)
Winning pose 3: (wand tip flashes, starts snowing)
 

Wave⁂

Smash Legend
Joined
Feb 16, 2006
Messages
11,870
Guys, now that December 3rd is designated for the release date, I think I'll stop making first-post updates. Not that I have been updating at all for the past few months. I am just officially (as official as an announcement like this can get) the I will not be editing the first post of this thread anymore.
 

bksands77

Smash Journeyman
Joined
May 29, 2007
Messages
313
Well, considering DS resembled the classic, each time you face him he learns a new move gets stronger and has more HP, old style boss, and the fact that this is a run-on sentence, you probably encountered the vast majority of moves DS ever did in the game. But replay is nice too.

Also, to attempt to stay on topic and prevent this post from being pointless, Paper Mario Moveset:

PHYSICAL ATTACKS:

AAA: Ms Mowz does her Love Slap, which had 3 hits. The first two hits are weak, the third is stronger and has decent knockback. Maybe 1/1/3%. Also, like Link, if you time it correctly you can repetedly slap doing 1 damage per hit.

Running Attack: Paper Mario holds Koops out like a shield(Shell Shield) and slides to a stop. Pushes you away from him like Y. Link's running attack. Decent knockback and great priority, 7% damage.

Ftilt: Vivian does her Shade Fist attack which lights the enemy on fire. Rather slow but powerful(sort of like Bowser's over tilt) 6% maybe

Dtilt: Paper Mario jumps up and hits a pow block, tossing enemies on both sides of him a very small distance into the air, 4-5% damage

Utilt: Goombella jumps off Paper Mario's shoulder's to hit the enemy, quick attack, 4%

Fsmash: Paper Mario's hammer attack, it can be released very quickly, or be charged longer like the Power smash. The more you charge the smash attack, the greater change you have of temporarily freezing the opponent(Ice Smash) 18-25% damage, good knockback and priority but low range.

Dsmash: Paper Mario uses his ultra hammer move, he spins approximately 3 times in a circle, hitting foes with a low trajectory. 14-19%, decent priority.

Usmash: Paper Mario uses his Tornado Jump ability. Damages enemies in a circle around Paper Mario similar to the effect of a glancing blow with Marth's Usmash. If the enemy is above him, relatively high knockback and priority, 17-24% damage.

Fair: Paper Mario uses a Fire Flower to burn opponents. Quick attack with low damage and knockback, little priority(like Samus' Fair) 1-2%/hit, 6 hitboxes(like Ness' and Samus' Fair)

Dair: Paper Mario uses Hammar Throw to throw a hammer straight down a good distance. The lag before the hammer is thrown is considerable(about a second) but keep in mind that the hammer acts as a weak spike like Zelda's Dair. Moderate priority, low knockback, decent damage, 8%

Uair: Ms Mowz uses her Tease ability, 4 of her jump out of Paper Mario, creating a bubble effect sort of like G&W's parachute. Good knockback and priority, a little faster than G&W's parachute, 8%.

Nair: Paper Mario does a bellyflop(like his stylish comand for his jump in TYD, the animation can vary with different hitboxes). In general, it is the randomness of Peach's Fsmash but all the different forms for Paper Mario have the same effect, pushing the enemy slightly upwards and away. Depending on the animation you get determines the shape and slight variations in range of the hitboxes. 5% quick attack with low knockback and moderate priority.

Bair: Flury does her Lip Lock attack and briefly kisses the opponent. This attack has very low priority and low range, about a 1/4 second start-up lag. Do 4% to your opponent and Paper Mario gains 2%.

SPECIAL ATTACKS:

NeutralB: Press and release to throw Bobbery, who will walk fowards for 2 seconds, tick in place for a second, then explode like a PK flash. Once Bobbery has actually hit the ground, you can press B at any time to make him explode, but with less damage. Allowing the attack to charge fully deals 30% damage with very high knockback, detonating as soon as he hits the ground deals 15 damage with much less knockback. Note that Paper Mario cannot move until Bobbery explodes, however, he is free to move on frame 2 of the actual explosion. Holding B allows Paper Mario to move while holding Bobbery at the fastest walking animation(level 3 I think). The damage dealt to the opponent is unchanged when performed in this manner. If you release B before his 'ticking' animation, you will be free to move about within that second. If you fail to release B before this 'ticking' animation starts, Paper Mario will stop moving and stand still for the animation. When Bobbery explodes while being heald, Paper Mario recieves 5% damage.

OverB: Flurry uses her Gale Force attack to blow foes away. This attack has moderate range and knockback. The hitbox extends Paper Mario's height, then out about 1.5x his height. The startup lag for this attack is about 1/6 of a second. You cannot move while executing this attack. If you keep the hitboxes trained on the opponent for a full second, they will be blown upwards and away, taking 18% damage.

DownB: Use Koops' Shell Toss and kick his shell away from you. The shell moves quickly and travels approximately 1.5x the range of Link's grapple hook. If you hold B after doing this attack, Koops will hover in that same spot until you release B. He can hover in midair. An opponent struck while Koops is traveling away or towards Paper Mario recieves 10% and are knocked in the general direction the shell was traveling. If they are struck by the shell while it is hovering, they are knocked straight upwards and take 4% damage. Paper Mario is free to move about the level and use his shield, first and second jump, dodge, basic comands. If you try to grab or otherwise attack, the shell will automatically shoot back to Paper Mario, and no damage will be dealt for the return trip. That is, unless he started attacking after the shell began its return trip.

*Alternate DownB: I was thinking something like this: Vivian pulls you into the ground. You automatically emerge from the ground after 5 seconds. If the opponent occupies the space directly above you at any point, you pop out and deal a surprise Fiery Jinx. This attack would blast the opponent away and deal damage proportional to how long you were under the ground for. I would say that the max should be somewhere around 35-40%(fireblade sound familiar) with only that little black circle to trigger the attack. The range is not so great(about ganon’s Utilt) min damage is 8% after half a second.

UpB: Paper Mario uses his airplane ability to transform into a paper airplane. The only startup lag is him jumping into the air as he did in the game, the transformation is almost instantaneous. He can glide towards the level about twice as fast as Peach can while floating in her upB, but he cannot move backwards. Tilting all the way back on the control stick makes him stall and begin falling straight down, pushing all the way foward = max speed. If he goes into a stall, that doesn't ruin his upB, but he does fall faster. If hit by his upB, you take 2% damage and begin to fall much as if you had been hit by a very weak tilt. If you are hit while he is jumping up but before he transforms, you take 5% damage and are gently propelled upwards. If the tip of your airplane were to hit an edge, you would automatically unfold and grab.

*Alternate UpB: Paper Mario uses his Super Jump(like G&W) to jump an incredible distance upwards with high priority and speed but little horizontal recovery distance. You can effect the horizontal travel slightly, much like Mario can, but not to the same extreme. Decent knockback, 11% damage. Also, if the alternate UpB was chosen, I wouldn't want the yoshi-assisted second jump. One strategy gives him good edgeguarding ability, while the yoshi jump gives him good recovery with that and the plane, but bad edgeguarding. I personally wouldn't want his edgeguarding to be ruined(like Yoshi's off-stage edgeguarding was) so I won't pass biassed judgement on which one to go with.

*His second jump is reminiscent of Yoshi's. The Baby Yoshi's jump is about half as high as Yoshi's, but is otherwise exactly the same. It can be jumpcancelled and the like.

His sidestep animation is the same as the animation in Paper Mario tTYD if you were to just tap R. He quickly turns into "Paper Mode" then back, so the attack misses him.

For his rolls, he goes into his "Paper Roll" mode briefly during the animation. Just to include his Papery likeness, hehe.

o0o, one easter egg that I was toying with:

Power Lift Taunt. When Paper Mario taunts, Goombella joins him. Paper Mario can taunt using any of the D-pad directions. Depending on what direction you chose, different things will happen. This is kind of hard to explain, but I will try. Lets make the Joystick a compass, up is N, down is S, etc. Depending on the direction you pressed, the attack animations will be swivaled around the compass. For example, I taunt and press "down" on the D-pad. Now I do my Uair. All the hitboxes, lag, and qualities of the Uair are unchanged, but the animation of the Uair is switched to the animation of the Dair. The opponent would then move in to attack, thinking I will be lagging, but instead be hit. It will only take maybe 2 attacks for an intelligent opponent to figure out which direction you pushed and plan accordingly. This effect works for every A attack you could perform, but not throws or B attacks. This effect lasts 1 attack for every 10% that you have obtained so far. So if you had 8%, 1 attack. 82%, 8 attacks, and so on. It would give Paper Mario a bit of an edge when he is down for the count, plus the fact that Goombella is so **** smart makes this reasonable. She also had a flower move that gave Paper Mario extra attacks, she is very strategy oriented.

Grab: Paper Mario grabs the opponent, the attack while grabbing comes about every half second from the Baby Yoshi, which assaults the opponent with his shrinking eggs from tTYD. They don't shrink the opponent, but they still do 1-2% per egg.

Fthrow: The Baby Yoshi uses his Gulp ability to grab the opponent and spit them away, causing 9 damage. Remember that this was the second most powerful partner attack in the game, so it is only fair.

Uthrow: Bobbery uses BombBlast and explodes violently, hurling the opponent skyward and causing 10 damage.

Dthrow: Vivian grabs hold of the opponent, Paper Mario uses his spin jump and ground pounds the opponent. This bounces them off the ground and into the air, perfect for chaingrabbing floaties, 6% damage.

Bthrow: animation(Paper Mario throws the opponent very gently upwards, bends foward and twists, then swings with his hammer. The twists he just put in himself cause the hammer to swing up the front of his body and over his head, knocking the opponent backwards.) 8% damage, slightly better than average knockback.

Super Smash: Paper Mario had 8 guages on his Star Power Meter by the end of the adventure, leaving 6 points for Supernova and 2 points for Clock Out. When he collects the smash icon, all hell breaks loose! Paper Mario uses Clock Out. Taking advantage of the opponent's imobility, the Baby Yoshi uses his Stampede attack, Bobbery uses Bomb Squad, Ms Mowz uses Smooch, Goombella uses her Rally Wink ability to give Paper Mario an extra attack, Koops uses Shell Slam, Flurrie uses Body Slam, and Vivian uses Fiery Jinx. While your partners are all attacking, Paper Mario is preparing Supernova. Imediately after your partners finish, Paper Mario unleashes Supernova and puts the final touch on the destruction of the enemy. Nine crazy attacks one after the other that do massive damage. I don't yet know what the effect of the Super Smashes are yet so I can't say what it would do, but I do know that Paper Mario gets 10-15% from the Smooch(10 in PMtTYD, but that's hardly final).

Taunt: Paper Mario does his appeal from the game. He basically looks to the camera and gives a thumbs up, yelling "WooHoo!"

Speed: *****
Power: ******
Weight:*
Recovery:********
Jump:*****

All out of 10

Lemme' know what you thought. Also, I'm a ditz, tell me if I forgot something importante.
i completely agree with this move set with very few exceptions

things i would change are:

his double jump should be a smaller version of his super jump, and his b^ would be his paratroopa partner from the first one lifting him up

wen u jump with him and hold the jump button he will turn into an airplane and glide, sort of like peachs float

i say his midair dodge is an aerial version of his sidestep

i love the final smash idea it sounds insane!
 

Viroxor

Smash Ace
Joined
Jun 25, 2007
Messages
803
Location
On the precipice of victory
Since we're covering all possible bases here, I'm going to make a Colonel moveset. This will be my first moveset, FYI, so wish me luck and tell me what I do wrong. For the sadly dilluded, Colonel is one of the main antagonists of Megaman X4.

Moveset for Colonel:

A: Forward slash
AA: Two forward slashes
AAA: Two forward slashes, followed by a short-range dash attack.
Forward/Backward Smash: Charged slash, like Marth's.
Up Smash: A backflip kick, like Fox/Falco's ^A.
Down Smash: Colonel stabs the ground with his sword, causing enemies at close range to get knocked back, with about 10% damage.

B: Colonel slashes and makes a small wave that travels across the stage. Repeated pressing of the button can cause two more. Cannot be spammed.
Up B: Teleport. Colonel separates into two images that disappear. The player then has two seconds to move a reticle to a certain point, at which Colonel will then appear, the two images forming back together. Cannot be used in air.
Down B: Lightning strikes Colonel's sword. Colonel then thrusts it into the ground and lightning erupts from the ground in random locations on the level.
Forward/Backward B: Colonel dashes rather quickly in a given direction, causing damage to players in his path.

Up B in Air (Only air move I've come up with): Colonel gets an extra jump. Pressing B again while in said jump causes him to fall fast and strike the ground with his sword, causing a wave to go across the ground, increasing in size. So don't press B again if you're using the extra jump to get back on-stage.


Well? Did I do good?
 

DonkeySmasher

Smash Ace
Joined
Jun 25, 2007
Messages
761
olimar

size: shorter than kirby(enough to run through some projectiles)
weight: smallest in game
strength: (medium less then mario though)
speed: medium (more then mario)
damage :consistent needs time to pluck pikmin though
reaction(attack speed after being attacked): around the same as luigi

Moveset
A-punch-seen in pikmin weak
Atilt side-rocket punch-seen in pik 2
Adowntilt-antennae sweep
Aup tilt-headbutt

Smash side-red slash- Olimar slashes with red pikmin(no need to pluck before)
Smash down- Whistle barrier-Olimar hits people with the whistle circle
Smash up-yellow stab-pokes up with yellow pik (same rules as red slash)

nair-leg split
fair-double punch
bair-backflip kick
uair-head up(same as ness)
dair-head down (same as pika)

Bdown-pikmin pluck-can pluck multiple times and pikmin follow in order they came out in
colors in frequent order is blue-yellow-white-red-purple
B-throw pikmin throw pikmin plucked in order they came out in
yellow is fast far and weak
blue is medium everything
white is weak but poisons enemy
red-is medium speed and range, strong
purple-strong, slow, smashes enemy down
Bsmash- Bitter spray (similiar to ice climb but stronger and only one way
Bup-blue throw (must have plucked blue pikmin(that's why it's most common) following you but doesn't need to be the next pikmin)- blue pikmin throws olimar -recovers like g and w's bup) can only used once like most bups

throws-don't know

final smash-spicy spray stampede

except for the smashes a pikmin can only be used once so pluck a lot and frequently
i say that 10-15 pikmin is max(except final smash)
 

gunterrsmash01

Smash Champion
Joined
Mar 25, 2007
Messages
2,533
Chuck Norris (joke but still add it)

Taunt - he laughs, and then all his opponents controls get reversed

B- snaps his fingers and all opponents gets severly damaged (not very accurate)

Smash B - lunges forward and kicks resulting in the victim losing their Smash B ability

up B - Flies. (Infinite)

Down B - meditates to quickly recover damage


Final Smash - He blows up your wii.
 

bksands77

Smash Journeyman
Joined
May 29, 2007
Messages
313
Kat and Ana

For people who don't know who Kat and Ana are, they are two ninja kindergartners from the Warioware series

Kat and Ana would be great for brawl, they would work like the ice climbers, mixed with the fighting style of metaknight.

Kat could use her dog shadow as the large sword that he has the ability to transform into and ana could use her regular katana that she usually uses

In their palette swaps they can change places just as the ice climbers did, and for alternate costumes they could wear their kimonos

Ana or whoever is in back's moves will have a little bit of lag compared to the one in front, just as the ice climbers did


Moveset:

A - Sword Swipe, whoever is in front will do this move
AA - Double Sword Swipe, whoever is in the back will do this move
AAA - Triple Sword Swipe, whoever is in front will do this move, has more knockback than the first two

A Holding - continuous sword swipes just like metaknight, the two of them alternate hits on the opponent

Tilts:

Instead of alternating they will both do the same move

Utilt: Standing over head swipe
Ftilt: Standing forward swipe
Dtilt: They sweep the ground with their katanas in a circular motion

Aerials:

Instead of alternating they will both do the same move

Uair - Over head sword swipe
Bair - Backward sword swipe
Fair - the one in back will do a forward sword swipe with very little knockback purely to push anyone to the front of the two while the one in front holds her sword over her head and swings downwards, it hits opponents forward if they are in front of them, and if the opponent is under them it works as a spike
Dair - Very much like the Fair, the one in back will do a simple downwards swipe with very little knockback purely to push opponents right under them will the one in front does a more powerful downward slash that works as a spike
Nair - Kat and Ana lock arms and swing around doing a 360 holding their swords outwards

Smashes:

Forward Smash: Just like Link's forward smash, a forward slice, and if you press A again whoever is in the back will do a second slice

Downward Smash: Just like Link and Marth's downward smash, except they both do floor slices in unison so it covers both sides at the same time, like fox and falco's downward smash

Upward Smash: Whoever is in back does an over head swipe purely to draw an opponent in, and whoever is in front follows up with a more powerful over head swipe that sends the opponent much further

Special Moves:

B - Shuriken (the weapon, not their pet bird)
I couldn't decide whether they should be thrown like falco's blaster, or if they can be charged like sheik's needles so the player could more than one at once

B> - Ninja Speed
They dash forward with a burst of speed leaving a trail of light and leaves behind them, much like fox illusion and falco phantasm, except that there are two hits do to the fact that there are two of them

B^ - Shuriken (their pet bird, not the weapon)
Kat and Ana's pet bird named Shuriken flies out and whoever is in front grabs onto it's legs, and whoever is in back grabs onto whoever is in front's legs. Shuriken brings them about the same distance and same speed as marth and roy's B^, and then it flies upwards and away

Bdown - Kat and Ana lock arms holding their swords outwards drawing opponents in for up to six hits

Taunt: Kat and Ana would face the screen close their eyes and put their swords in their holsters

Final Smash: Kat and Ana would use their ninja skills to make five doppelgangers of themselves and fly across the screen with lightning fast sword strikes like at the end of this video: http://youtube.com/watch?v=NQbpZ4CdSnE
This would only target one character

Speed:4/5
Strength:3/5
Jump:4/5
Weight:2/5
Height:2/5
 

FrozenRoy

Smash Lord
Joined
Apr 26, 2007
Messages
1,261
Location
Las Vegas, Nevada
Switch FC
SW-1325-2408-7513
Rukario = Lucario, FYI.

Yeaaaaaaah, my Rukario moveset...

Rukario
Jumping: *****(Rukario can jump QUITE well)
Weight: *** 1/2(Rukario would be slightly heavier then Mario)
Speed: ****(Rukario always struck me as fast)
Traction: **** (So I guess bad wavedasher)

B: Aura Sphere: Quickly gathers Aura around into the palm of his hands, then launches it foward. It has the knockback and damage of a medium-charged Shadow Ball and can be aimed. It explodes in a burst of aura upon hitting the ground or a wall, which will damage people caught in the small blast.

^: Sky Auracut: Charges upwards with an aura-charged fist uppercut. This goes ever-so-slightly slower then Marth's Dolphin Slash but goes a little farther, along with doing more damage with a wee bit more knockback.

>B: Bullet Punch: Quickly charges foward(Think like Fox's Fox Illusion, without the illusion part) with an outstretched fist, when this hits a foe it sends them upwards. However, when the uppercut is over 2 small piece of metal(not bullets) also go fowards following the tredectory of the uppercut. Metal Pieces do 2% Damage with no knockback and do not stop the person from flying. Can be jump-cancelled after 6 Frames.

vB: Close Combat: Punches Foward then backwards, each simply hitting the foe from them with no damage. For the next while or so after using this move, Rukario's moves do 5% more damage per hit with slightly more knockback. However, Rukario also takes 5% more Damage per hit with the same knockback increase from foes.

Nair: Air Combat: A quick punch follow by a kick(Think like Falcon's Nairs speed), The first hit has no knockback with the second hit having the knockback of about Y.Link's Nair(Slightly smaller).
Uair: Shadow Claw: Claws upwards while hand is covered in a dark aura. Medium knockback and damage.
Fair: Return: Hits the foe with a strong headbash(Think like hitting the foe with your head in their head, I don't know how to describe it...). Sends the foe foward with medium knockback and damage.
Bair: Focus Blast: Hits backwards with a condensed energy blast. Sweetspot is right at the hand. High knockback and damage at the sweetspot, but only medium knockback and low damage otherwise.
Dair: Sweeping Underkick: A swift kick under himself that spikes the foe. Think the knockback of Falco's, but with more start-up time.

Usmash: Flash Cannon: Quickly fires a silvery blast upwards, hitting foes with little upwards knockback but good damage. When the blast stops going upwards(Think just a little more then Roy's Up Smash), it explodes in a small flash that stuns with knockback but no damage. Rukario cannot hit the foe until the blast stops and starts to explode(hitting will cause no knockback or damage during this time to any foe hit). Rukario can cause the knockback-inducing explosion at any time during the blast by smashing up again.
Fsmash: Brick Break: A foward punch, this does decent knockback and damage for a foward smash. It also has the interesting ability of getting 33% of damage and all of it's knockback through a shield.
Dsmash: Earthquake: Hits the ground with his fist, sending shockwaves to the left and right of him. Getting hit with the fist does little damage and no knockback, while the shockwaves do high knockback but little damage.

Dash attack: Bump and Push: Hits foward like C.Falcon's dash attack, but when it connects he swings his arm foward in a powerful swipe. The dashing does minor damage and just enough knockback to send them in range of the arm swipe, which does medium knockback and damage.

A: Backhand: A quick backhand
ftilt: Gut Punch: A quick punch to the gut, mild knockback/damage.
utilt: Force Palm: Quickly extends arm upwards, hand a palm. This move does no knockback, but has decent damage and the added effect of stunning a foe for longer then the lag of this move most of the time(about 66%, methinks, the rest of the time the stun is slightly less then the lag).
dtilt: Hidden Power: Puts palms together in a prayer-like look, small white spheres appear all around him(think the range of Yoshi's Down-B stars). The spheres mainly do knockback, with little damage. If anyone touches Rukario during this time, he quick reacts and stops the prayer-like palm to a quick punch in the direction of said foe. However, the spheres dissapate if this happens(or when the move is over).

Grab a: Grab: Grabs the foe.
Grab attack: Bone Rush: Hits the foe with a bone. 3% Damage.
Upthrow: Vacuum Wave: Quickly throws the foe up, sending a wave upwards. The throw does very minor damage with little knockback, while the shockwave does medium damage and Marth Up-throw-esque damage and knockback.
Downthrow: Low Kick: Throws the foe down, then stomps on them hard. The stomp sends foes foward and up with good damage and low knockback(Like Marth's Foward Throw in knockback).
Fthrow: Fling: Quickly flings the foe foward, higher knockback then Fox's Fthrow but less damage.
Backthrow: Rock Smash: Quickly turns around and jabs the foe in that direction with a rock-shattering punch. Turns Rukario backwards. Medium-high knockback with low damage.

Super Smash: Hyper Beam: Sends forth a giant beam of destructive energy foward. Very high damage and knockback.

Taunt: "Hado-awari-ne-addy!" (Japaneese for "the wave is in me", which is his catchphrase from the movie.)
English Taunt: "The wave is in me."(I prefer it to stay Japanese like Marth/Roy's, though)

Wining pose 1: Stands right in front of the camera, closes his eyes and creates a small blue aura around him.
Wining pose 2: Holds out both his hands to the side of him, outstretched, then creates two blue aura sphere's in his hand.
Wining pose 3: Uses hidden power, the spheres staying there the whole duration of the winning pose.
 

Ogre_Deity_Link

Smash Lord
Joined
Jul 9, 2007
Messages
1,445
Location
Central New York
Oni Link (Fierce Deity Link)

A-button

A: Oni Link slashes quickly upward once. If A is not pressed again, Oni Link will merely settle back into his normal stance. However if A is pressed again....
AA: Oni Link executes another quick slash downwards with more damage. Like the attack above, if A is not pressed again, he goes back to his normal stance. Otherwise...
AAA: Oni Link will thrust forward and slash to the side. This move has two-fold advantages. One, it increases the range of his melee attack slightly. The other is that it can hit enemies who are in side-dodge.

*******

Smash-A: Oni Link performs a modified version of Link's Mortal Draw. The knockback on this is extremely large as well as the damage dealt, but the after-lag is increased dramatically as well.

Smash-A Stance B: Oni Link slashes downward once with great force, bouncing the opponent off of the ground for moderate to heavy damage. If the A button is pressed again, he will hit them upwards dealing moderate damage and allowing players to combo them with other moves in the Stance-B

Smash-UpA: A copy of Marth's Smash-UpA only with a slightly horizontally wider radius because of the way the Helix Blade is shaped.

Smash-UpA Stance-B: Jumps slightly and does Link's Half-Moon Swipe only Oni Link does it full circle, slamming an airborne opponent into the ground.

Smash-DownA: Oni Link does a sweeping kick for moderate damage and moderate knockback. Lag is minimal for this attack.

Smash-DownA Stance-B Punches downwards one way and then Punches downards the other way.

***************

Tilt-ForwardA: Oni Link does a single fast horizontal swipe.

Tilt-DownA: Swings his blade diagonally downards.

Tilt-UpA: Uppercuts with the hilt of his blade.

**************

Nair: Spins his blade around him vertically twice. Can be performed twice in the air.
Bair: Slashes backwards. This knocks the enemy upwards.
Fair: Slashes violently forward. This attack is Oni Link's spike attack because it will throw opponents sharply dowards.
Dair: Sticks out his elbow and plummets to the ground.

**************

Neutral B: Oni Link fires a blue laser disk fowards. The range on the attack is immense, but the damage as well as knockback is negligable. The only advantage to using this attack is the immense stun time it causes upon impact.

Forward B: Oni Link quickly flashes through the enemy. (Ala Falco/FOx Illusion) However, the damage/stun isn't applied until a few seconds later, in which it hits the opponent for 5 hits of 2% damage. This attack also has no knockback of which to speak.

Up B: Teleports ala Zelda/Shiek, only in a flash of shadowly looking material. This attack has the additional bonus of possibly teleporting INTO a stage. (The player will appear on the ground above the point into which they teleported) However, this extra effect only has a 30% chance of working.

Down B: Changes between Stance A and Stance B.

Stance A: Attacks are much faster and have less lag. Damage is decreased and rolling/running speed is also increased.

Stance B: Attacks are slower, but have increased damage and knockback. Running/Rolling speed is decreased as well.

*************

Taunt: Sticks his sword into the ground, throws his head back and laughs evilly.

Super Smash: "Lunar Massacre" Oni Link bum-rushes the nearest player and begins to do a series of lightning quick slashes while Majora's Moon rises omniously in the background. The second to last slash throws the enemy high in the air and Oni Link jumps up with them. The last hit throws the enemy down onto Majora's Moon, which is then sent crashing into the stage, hitting the other players.
 

detonator512

Smash Cadet
Joined
Jul 14, 2007
Messages
29
Yoshi w/ Baby Mario moveset

AAA-Bite, Bite, Headbutt
Dash- Baby Mario Jumps off Yoshi's back and starts throwing punches while crying

SMASHES:

A>- Egg Toss Across
A^- Egg Toss Up
Av- Tail Swipe

Special

B- Watermelon Seed Spit
B>Baby Mario throws fireball
Bv- Ground Pound
B^- Bird from Yoshi's Island Take them to saftey and will hurt anything getting in it's way

Final Smash- Super Baby Mario (Gets his cape and is invincible and can hurt you for 20-25 seconds)- 40-60%
 

X-x-Dyce-x-X

Smash Master
Joined
Feb 27, 2007
Messages
4,294
Location
Some town in New Jersey Mains: Link, Falco, Ganond
Stance A: Attacks are much faster and have less lag. Damage is decreased and rolling/running speed is also increased.

Stance B: Attacks are slower, but have increased damage and knockback. Running/Rolling speed is decreased as well.
Love the moveset. Fierce Deity needs to show up in Brawl one way or another. Question though: what do his stances look like?
 

twilight_hero

Smash Lord
Joined
Mar 21, 2007
Messages
1,011
Location
in ur Wii, savin' hyrule from t3h twilight... By t
Third moveset. This time for MMLink. Keep flames to yourself.

Character Name
Mask Link

Weapon
Gilded Sword, Hylian Shield (keeps in front like in Melee)

Stats
Strength: 4
Speed: 4
Weight: 2
Jump: 3
Attack Speed: 4
Recovery: 4
Usage: 4

A: Slash
A(second): Counter Slash
A(third): Stab
Up-A: Half Moon Swipe
Down-A: Crouching Stab
Over-A: Vertical Chop
Smash Up-A: Triple Half Moon Swipe
Smash Down-A: Crouching Stab, Slice, and Shieldbash
Smash Over-A: Vertical Chop, Horizontal Slash, and Flaming Stab
Nair: Forward Slice
Uair: Up Thrust
Dair: Sword Plant
Fair: Jump Attack (just like if you hit B in midair in Zelda games)
Bair: Midair Slash (comes around and hits with both hands; also turns him around)
A (while running): Running Hack
R+A: Hookshot
A (while holding): Shieldbash
Up (while holding): Toss Slash (tosses up, jumps, and does an attack like Marth's uair)
Down (while holding): Drop and Stomp
Forward (while holding): Stab and Kick Away
Back (while holding): Backward Kick and Spin Attack
R+A (in midair): Hookshot

B: Deku Stick (does a Spin Attack with a Deku Stick)
Up-B: Song of Soaring (Ocarina shows for a second, and the song rings out, then he gets wrapped up in the coccoon and flies in the direction you move the Control Stick)
Over-B: Deku Nut (tosses a Deku Nut; if it hits, leaves an enemy stunned like with Mewtwo's Disable)
Down-B: Bombchu (pull it out, press A or vB again to use get it going)

Final Smash: Fierce Deity Link Transformation
Basically the same as Bowser's, except he becomes Fierce Deity Link. You can't use any of your B moves, but you also are invincible to damage and knockback.

Taunt: Plays Song of Healing
Victory 1 (B victory): Becomes Deku Link and floats offscreen with the Deku Flowers
Victory 2 (Y victory): Becomes Goron Link, punches the air, and rolls offscreen
Victory 3 (X victory): Becomes Zora Link and dives into a nearby pool after hurling the fins at the screen

Kirby hat and costumes remain the same from Melee's YL to Brawl's ML.
 
Joined
Jun 26, 2007
Messages
1,403
Location
koopa cape located at the end of rainbow road
I've got a Chibi-Robo moveset for ya

Size: about the same as a single ice climber
weight: equal to mario
power: fairly weak, equal id say to young link
jump: with robotic limbs probably pretty good so i would say the same as capt falcon

Ground Moves:
a-combo: right jab, left jab, then a quick headbutt
a>: a straight kick to the side, not to strong
smash>: a double handed thrust while holding onto his plug for added damage (if the end of the plug connects there will be some electrical effect along with the damage of the attack)
a v: a quick split hitting both sides of the robo
smash v: lays on back and quickly spins with limbs and plug extended (the plug has a longer reach then the arms and legs)
a^: identical to mario's, a weak uppercut
smash^: again, the same as mario's, a headbutt sending your foe skyward. But robo holds the plug on top of his head while doing this and thus the is extra electrical damage
running a: does a baseball slide with his plug held in between his feet

Airial attacks:
n-air: spins just like kirby, except with the addition of the plug
f-air: a karate stlye kick
b-air: does a double back kick ending up in the superman position
d-air: does a link style sword stab, except with his plug
u-air: same as d-air except pointing up

B-moves:
B "Robo Canon": In the game the robo gets an arm cannon almost identical to samus's, firing the same kind of things (balls of energy) so for this move the robo will have the arm cannon and fire the energy balls, but not be able to charge them. He will also fire them at the same rate as falcos laser gun.
B> "Plug-In": He will throw his plug in the direction he is faceing (which will cause some damage) then he will be pulled along and cause even more damage. this can be charged like luigis and pickchus/pichus headbutts.
^B"Propeller": sprouts the propeller from his head and shoots upward. Can then float slowly to the ground. (identical to peach's parasol move)
V B"Garbage": Pulls garbage out of his head and throws it at foes. The garbage could be scraps of paper, candy wrappers, cookie crumbs, or other boxes, even at times random items (Again very similar to peach's vegi throw move)

Final Smash: Plugs his cord into a generator and supercharges his battery, resulting in a massive explosion of energy discharge

so there it is, its the best i could think of at the moment.

oh and I almost forgot for his shield the cup he uses as a shield in the game will appear
 

twilight_hero

Smash Lord
Joined
Mar 21, 2007
Messages
1,011
Location
in ur Wii, savin' hyrule from t3h twilight... By t
Listen, this character starts out as Young Link. If you transform, he becomes Adult Link.

Red indicates a possible Meteor Smash

Hero of Time (Young)

Weapon
Kokiri Sword, Deku Shield

Stats
Strength: 2
Speed: 4
Weight: 2
Attack Speed: 3
Recovery: 3
Usage: 4

Attacks
A: Slash
A (second): Counter Slash
A (third): Stab
A (repeatedly): Illusion Stab
Up-A: Half-Moon Swipe
Over-A: Vertical Chop
Down-A: Grass Cutter
Up-A (smash): Triple Half-Moon Swipe
Over-A (smash): Sword Slash, Double Sword Slash
Down-A (smash): Double Down Slash
Nair: Hylian Kick
Fair: Midair Swipe
Bair: Double Back Kick
Uair: Up Thrust
Dair: Sword Plant
A (while running): Running Hack
R+A: Boomerang (throws it; if it hits an enemy, it brings the enemy to him)
A (while holding): Hilt Strike
Up (while holding): Upward Slash
Forward (while holding): Forward Kick
Back (while holding): Back Kick
Down (while holding): Flying Elbow

Special Moves
B: Fairy Slingshot
Over-B: Deku Nut (throws it, leaves 'em stunned for a second--like shield-breaking stunned)
Up-B: Spin Attack (like YL's in Melee)
Down-B: Transform (to Adult Hero of Time)

Hero of Time (Adult)

Weapon
Master Sword, Hylian Shield

Stats
Strength: 4
Speed: 2
Weight: 3
Attack Speed: 3
Recovery: 3
Usage: 4

Attacks
A: Slash
A (second): Counter Slash
A (third): Stab
A (repeatedly): Illusion Stab
Up-A: Half-Moon Swipe
Over-A: Vertical Chop
Down-A: Grass Cutter
Up-A (smash): Triple Half-Moon Swipe
Over-A (smash): Sword Slash, Double Sword Slash
Down-A (smash): Double Down Slash
Nair: Hylian Kick
Fair: Midair Swipe
Bair: Double Back Kick
Uair: Up Thrust
Dair: Sword Plant
A (while running): Running Hack
R+A: Longshot (1.5 times as long as Hookshot in Melee)
A (while holding): Hilt Strike
Up (while holding): Upward Slash
Forward (while holding): Forward Kick
Back (while holding): Back Kick
Down (while holding): Flying Elbow

Special Moves
B: Fairy Bow
Over-B: Megaton Hammer (if it hits, drives 'em into the ground like DK's over-B)
Up-B: Spin Attack (like Link's in Melee)
Down-B: Transform (to Young Hero of Time)
 

lyonartime333

Smash Rookie
Joined
Aug 14, 2007
Messages
20
Location
west virginia(the state not western virginia)
the black knights move set

this is my move set for the black knight from fire emblem 9(ike's nemisis)

THE BLACK KNIGHT

power: 4 (slightly weaker than ganon)
weight: 4 (slightly lighter than gannon)
jump: 2
recovery: 3
attack speed: 3
attack range: 5(very long sword)

weapon: Adolite(a large black claymore he uses with 1 hand)

A: a quick horizantal slash
AA: a vertical slash downward
AAA,ect.: stabbing motions like links, at about half the speed
A<- ->: a vertical slash upword that stuns the foe for about a half second
A up: an upword slash
A down: a low slash at the legs

A smash <-->:a 2 handed baseball bat like swing
A smash up: a stab straight up in the air(like marths but with a larger range)
A smash down: slams his sword into the ground, hitting all those near on the ground

A air: slashes 360% around him
A air<-->: thrusts sword in corisponding direction with medium knock back
A air up: slashes sword above his head
A air down: stabs sword into the ground(like links)

B: earth shacker_stabs sword into the ground creating cracks in the earth in the direction that he is faceing. the longer B is held down the further the cracks wil go, and the more damage the will inflict.(can be stopped by getting hit)CANNOT BE USED IN THE AIR

B<-->: impale_dashes forword very quickly.(about half as far and as fast fox's B<--> move) if there are foes in front of him, he impales THE FIRST person he reaches on his sword and throws him or her in the air.

B up: teleport powder_(recovery) teleports a few yards (about as far as mewtwo's move)in the direction you tilted the control stick.(up OR down)

B down: parry_enters a unique stance for 1 second, if attacked by a close quarters move(punch kick ect.) he blocks the atack with his sword and the opponent gets stunned for a half second, if attacked by a projectile, he knocks it back.

taunt: he puts his sword in front of him and rests his hand on it(any1 whose played the game before will recognize it) and says "is that all there is?"

thats my build, rate it plz:)
 
Top Bottom