• Welcome to Smashboards, the world's largest Super Smash Brothers community! Over 250,000 Smash Bros. fans from around the world have come to discuss these great games in over 19 million posts!

    You are currently viewing our boards as a visitor. Click here to sign up right now and start on your path in the Smash community!

Takes more than one to make a League: Other Pokemon Trainers

Status
Not open for further replies.

FalKoopa

Rainbow Waifu
BRoomer
Joined
Dec 16, 2012
Messages
32,231
Location
India/भारत
3DS FC
1650-3685-3998
Switch FC
SW-5545-7990-4793
1. Okay
2. Red is the Marth of the Pokémon franchise. Surely that is enough.
3. Yes, Kanto. :p

Basically Red is favoured as his pokemon, mainly Charizard and Squirtle are more famous and iconic than Gold's.
 

Opossum

Thread Title Changer
BRoomer
Joined
Aug 10, 2011
Messages
33,466
Location
This Thread
NNID
OpossumGuy
3DS FC
4742-4911-3431
Switch FC
SW 2859 6322 5208
Also, Red's been to Unova as well.
 
Joined
Dec 29, 2012
Messages
1,628
Nothing against two trainers, Gold be the other so we could relive the Mt. Silver battle in Heart Gold and Soul Silver.

Pikachu, Jigglypuff, Red, Gold, and Zoroark/Genesect
 

Opossum

Thread Title Changer
BRoomer
Joined
Aug 10, 2011
Messages
33,466
Location
This Thread
NNID
OpossumGuy
3DS FC
4742-4911-3431
Switch FC
SW 2859 6322 5208
Bleh. Mewtwo and Lucario > Zoro/Genesect and Gold. :p
 

Opossum

Thread Title Changer
BRoomer
Joined
Aug 10, 2011
Messages
33,466
Location
This Thread
NNID
OpossumGuy
3DS FC
4742-4911-3431
Switch FC
SW 2859 6322 5208
Generation representation doesn't even matter. If the Pokemon merit inclusion, they'd be added. I just don't feel any Gen V Pokemon really warranted addition. The same goes for Gen II. They wouldn't be added only because a remake exists, and people are generally devisive over another trainer, so I feel Gold/Ethan will be passed over.

So in all, I'm really only expecting Brawl Pokemon + Mewtwo.
 
Joined
Dec 29, 2012
Messages
1,628
Generation representation doesn't even matter. If the Pokemon merit inclusion, they'd be added. I just don't feel any Gen V Pokemon really warranted addition. The same goes for Gen II. They wouldn't be added only because a remake exists, and people are generally devisive over another trainer, so I feel Gold/Ethan will be passed over.

So in all, I'm really only expecting Brawl Pokemon + Mewtwo.
In a way it does, especially the over-repping of Gen 1 possibly in SSB4.

If that was the case with just adding Mewtwo, they would just be skipping out on the latest two gens.
 

Opossum

Thread Title Changer
BRoomer
Joined
Aug 10, 2011
Messages
33,466
Location
This Thread
NNID
OpossumGuy
3DS FC
4742-4911-3431
Switch FC
SW 2859 6322 5208
Once again, representing each generation doesn't even matter. If it did, we'd have gotten Plusle and Minun in Brawl. Hell, we almost didn't even get Pichu in Melee, seeing as it wasn't originally planned. Sakurai doesn't care about generation representation. The Pokemon themselves warrant their inclusion, not their generation.
 
Joined
Dec 29, 2012
Messages
1,628
Once again, representing each generation doesn't even matter. If it did, we'd have gotten Plusle and Minun in Brawl. Hell, we almost didn't even get Pichu in Melee, seeing as it wasn't originally planned. Sakurai doesn't care about generation representation. The Pokemon themselves warrant their inclusion, not their generation.
I know but that doesn't mean no character from Gen 2, Gen 5, and possibly even Gen 6 warrant inclusions themselves.
 

Swamp Sensei

Today is always the most enjoyable day!
BRoomer
Joined
Jan 4, 2013
Messages
37,999
Location
Um....Lost?
NNID
Swampasaur
3DS FC
4141-2776-0914
Switch FC
SW-6476-1588-8392
I know but that doesn't mean no character from Gen 2, Gen 5, and possibly even Gen 6 warrant inclusions themselves.
The only ones from those generations that could possibly warrant inclusion are Pichu (we all know how that turned out) and Zoroark (who is becoming less and less popular every day).

I like how you skipped Gen 3. Oh wait. You don't like that one. :troll:
 
Joined
Dec 29, 2012
Messages
1,628
The only ones from those generations that could possibly warrant inclusion are Pichu (we all know how that turned out) and Zoroark (who is becoming less and less popular every day).

I like how you skipped Gen 3. Oh wait. You don't like that one. :troll:
Oh I like Gen 3, one of my favorites alongside Gen 2.

But Gen 3's chance was Brawl. Not SSB4.

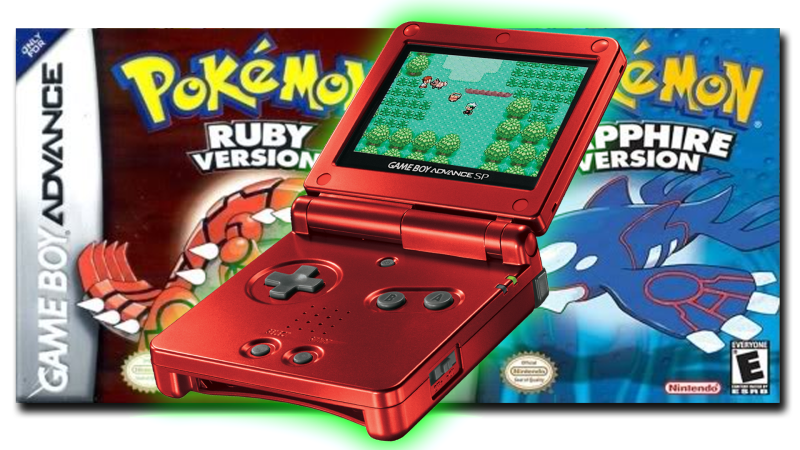
There would have to be Gen 3 Remakes.......like these


Maybe Emerald next year for the 10 year anniversary
 

Swamp Sensei

Today is always the most enjoyable day!
BRoomer
Joined
Jan 4, 2013
Messages
37,999
Location
Um....Lost?
NNID
Swampasaur
3DS FC
4141-2776-0914
Switch FC
SW-6476-1588-8392
Oh I like Gen 3, one of my favorites alongside Gen 2.

But Gen 3's chance was Brawl. Not SSB4.

There would have to be Gen 3 Remakes.......like these


Maybe Emerald next year for the 10 year anniversary
Yet you bring up Gen 2? Which already had a character?\

Admit it. That's just bias.
 

N3ON

Gone Exploring
BRoomer
Joined
Jan 6, 2008
Messages
21,444
Location
Vancouver
We got the Pokemon Trainer we did because of his Pokemon, not because of remakes. All the remakes did was affect his appearance.
 

Opossum

Thread Title Changer
BRoomer
Joined
Aug 10, 2011
Messages
33,466
Location
This Thread
NNID
OpossumGuy
3DS FC
4742-4911-3431
Switch FC
SW 2859 6322 5208
Waitwaitwait...you are suggesting a character so that they represent not a particular game, but a particular boss battle?

In that case, give me Marowak. He represents the whole Lavender Town subplot in RGBY/FrLg...
 

N3ON

Gone Exploring
BRoomer
Joined
Jan 6, 2008
Messages
21,444
Location
Vancouver
We all know if we're now going to get Pokemon reps in Smash based on single battles, Youngster Joey's Rattata is the only way to go. :troll:
 

Diddy Kong

Smash Obsessed
Joined
Dec 8, 2004
Messages
25,969
Switch FC
SW-1597-979602774
All I really want is Pikachu and Mewtwo. Wouldn't care much for anything else.
 
Joined
Dec 29, 2012
Messages
1,628
Waitwaitwait...you are suggesting a character so that they represent not a particular game, but a particular boss battle?

In that case, give me Marowak. He represents the whole Lavender Town subplot in RGBY/FrLg...
Well he represents Gen 2 overall being the trainer

The battle is just extra
 

Arcadenik

Smash Legend
Joined
Jun 26, 2009
Messages
14,152
NNID
Arcadenik
Objectively, the only Pokemon we really need in Smash is Pikachu. The rest are just fluff. For SSB4, I would like to play as these extra Pokemon:

2nd gen starters, because Pokemon Gold was my first Pokemon game

3rd gen starters, because Pokemon Sapphire was my second Pokemon game

Meowth, either solo or paired with Arbok and Weezing as a team (switch Poison types with Down+B), because I really liked Team Rocket in the anime, especially in the older episodes

I just want to play as new Pokemon, not keep on playing with the same Pokemon (except Pikachu) from the first three Smash games for the rest of future Smash games. Pokemon isn't a series with the same cast of characters in every game like Mario is. Same goes for Fire Emblem (except Marth) and Zelda (except Link and Zelda).
 

AEMehr

Mii Fighter
Moderator
Joined
Jun 16, 2009
Messages
7,702
Location
SoCal
Victini would be cool. Probably a better rep for Gen 5 than both Zoroark and Genesect. Since it's still actually being marketed.

I don't really see any use for another Pokemon Trainer. Seeing as we don't want to get rid of what makes the current one unique. GENERATION ONE MASTER RACE
 

Bowser D.X

Brawl Player
Joined
Jul 22, 2010
Messages
470
I actually would prefer it if Brendan's Pokemon were Swampert, Combusken and Treeko.
 

Diddy Kong

Smash Obsessed
Joined
Dec 8, 2004
Messages
25,969
Switch FC
SW-1597-979602774
Victini... How that brings back memories. :p

Prefer the Brawl roster + Mewtwo over mostly anything. But if I could, I'd kick out Jiggz for Blastoise of coarse. :009:
 
D

Deleted member

Guest
I haven't played Pokemon since Gold & Silver. I think each trainer should use different types. Not just Fire, Grass and Water. There should be a trainer that uses Psychic, Ghost and Dark. Or Ground, Rock and Fighting and so forth. Also each Pokemon should be bipedal/standing on two legs (Ivysaur being an exception).
 

JOE!

Smash Hero
Joined
Oct 5, 2008
Messages
8,075
Location
Dedham, MA
Fair warning: I plan on nuking this thread with content soon.

Warning: the switch to the new SWF kinda messed up a bunch of formatting :/
 

JOE!

Smash Hero
Joined
Oct 5, 2008
Messages
8,075
Location
Dedham, MA


That's right, I'm back and this time I have an ALL-STAR team with me!

TIME-TESTED TEAM-UP:
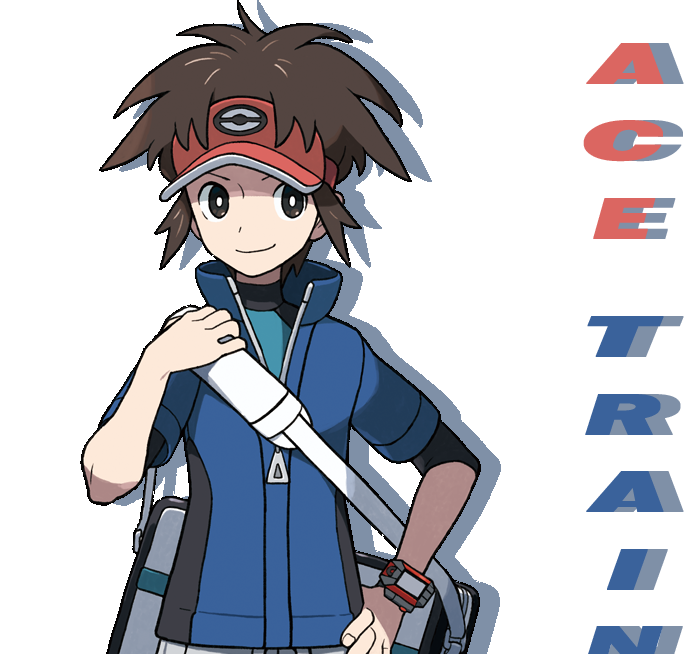
Ace Trainer JOE! brings his all-time favorites to the field, 6 in all and one from each generation of the Pokemon franchise! Wait... what's that Z you ask? Well, JOE! has a special, never before seen Pokemon all the way from the Zelend Region he's bringing to Smash to showcase his time in Pokemon Tabletop Adventures! Who said the games all had to be from the handhelds?

TRAINER SYSTEM 2.0:
As many of you may remember, the original Trainer JOE! featured the "Trainer System" which allowed you to pick and choose your team of 3 from a roster of 6 in any order you desired. To recap, at the character select screen you will see a :pokeball: in the bottom left corner of ATJ's portrait. When you click that, you will then be able to select your team from 6 mini-portraits with a number (1-3) indicating their order once selected, with you able to un-select a Pokemon by clicking them again. If you do not click the :pokeball:, your team will be randomized.
Order is very important as although stamina is gone, each Pokemon has their own HP and Stock! So there is a good deal of strategy in who you'll want out first, or who'll bring up the rear as once a Pokemon bites the dust, you can no longer switch to them for the remainder of the match. The only exceptions to the rule are time matches where there is a 15 second penalty before the defeated Pokemon is revived (starting after the next in line is summoned to the re-spawn platform), and in matches where there are more than 3 stocks, in which case it works like in the Story-Mode if there are extra stocks: the first to die gets the extra stock, and so on. Unlike the first Trainer JOE!, if there are less than 3 stocks remaining, you will only have that number of Pokemon, with each of the 6 actually having a Down Special to use when solo this time around!
Speaking of Down Special, here is the big change in Ace Trainer JOE!: Double Battles. Unlike TJ!, who had one Pokemon at a time on the field, ATJ has 2: the 1st Pokemon you chose as your Playable/Team 1 and your 2nd pick, that moves around the field halfway between the backdrop where ATJ is and the Team 1 Pokemon (which allows everybody to walk around without bumping into each other), that is designated as the Support/Team 2, with the 3rd acting as your reserve.
In play, your Team2 Pokemon will walk around by itself as if it were a CPU in training mode set to "Walk" and occasionally jump on a platform if it is over the main floor, and will hop off of moving ones once they begin to move off-stage. In case they hop off and grab an edge remember they are somewhat in the BG, meaning they cannot edge-guard you or your foe. While in Team2 mode, they actually behave a lot like a Pokeball Pokemon would and use their own Team 2 Special if a foe is in range, make sure to capitalize on these moves with your Team1 Pokemon! Like some Pokeball Pokemon your Team2 Pokemon is attack-able, but immune to Knockback Growth, meaning it will only suffer set KB between Mario and Samus' Ftilts when hit. This is good seeing your AI controlled team member isn't that easy to pick off (if they do get flung off the edge, they will behave like a training room CPU and use their jumps+recovery to get back), but at the same time 3/4ths of the damage from the attack is carried over when you swap them over to a playable state, so make sure to cover both sides of your party at once!
SWITCHING GUIDE:
3+ STOCKS: :stick2:+:bbutton: = Team1 Swap. :stick2:+(:bbutton:+:abutton:) = Team2 Swap.
While the conventional switch remains for Team 1 and the Reserve Pokemon, you can also swap between the Team2 Pokemon and the Reserve by pressing Down+(B+A), which can then allow you to use the conventional method to make the formerly Team2 Pokemon playable and so on.
2 STOCKS: :stick2:+:bbutton: = Swap control between Team1 and Team2.
Losing the conventional switching, when there are only two Pokemon on the field you may quickly swap control between them with Down+B. Abuse being able to take control of two places at once to try and take back the lead!
Note: There is a half-second cool-down for switching Pokemon at this stage.
1 STOCK / STAMINA MODE / SPECIAL: :stick2:+:bbutton: = Team2 Special.
When down to just 1 Pokemon left, you exchange swapping for a proper Down Special, and play the Pokemon as their own character as you try to snag a victory at the last moment!


SMASH 4 CHANGES:
This being in SSB4 General and all, I feel as if I should point out that Ace Trainer JOE! will be incorporating some features I'd like to see in the next installment to the Smash series, such as the universal removal of random tripping :mad:. Some moves will still cause tripping to create a sort of "prone" status to abuse, however.
SUPER SMASHES: :bbutton:+:abutton:
In Brawl, when you broke the smashball you lost the use of your Neutral Special since that then activated your Final Smash. This is alleviated in SSB4 by mapping it to the simultaneous B+A input as well as introducing the Super Smash, a powerful but limited special move, to be used when you do not have a Final Smash handy.
Super Smashes are generally limited by either Ammunition (noted by a counter next to the character portrait, showing how many Armor Pieces ZSS can throw before she's used up her Super Smash), a Timer (Mario's FLUDD Spray/Hover Super Smash can only be used when a bar under his character Portrait is full, with each use draining it only to refill with time), or when a Special Condition is met (such as when Olimar has 3 or more Flower Pikmin, allowing him to perform his "Pikmin Carry" Command-Grab), but a few Super Smashes here and there are a combination of the 3 mentioned here and often vary in power depending on the amount of Ammo (lower ammo = higher power, dont waste it!), Time to recharge (longer recharge, better power) and the Condition that needs to be met (the harder/more situational, the better the reward).
As for Ace Trainer JOE!, each of his Pokemon have a Team Combo as their Super Smash, that both requires Team1 and Team2 to be within a character length of each other to perform (Solo Pokemon lack a Super Smash), as well as usually a timer or other effect between uses. Each different pair has their own unique Super Smash, mix and match Pokemon to see all 15!
DYNAMIC AIR-DODGE:
A compromise between Brawl and Melee, you may only air-dodge once but do not go into special fall afterwards unless you press a direction with it. Pressing :rtrigger: without :stick5: input will do a Brawl Air Dodge, following your momentum. Pressing :rtrigger: and :stick6: on the other hand will do a Directional Air Dodge, which stops any momentum you had prior as you shift mid-air, but also means you have to try and DI back to safety while in special fall. Due to Directional Air Dodge returning, Wavedashing/Wavelanding also comes back via :xbutton:+:rtrigger:+:stick1:/:stick3: close to the ground, allowing for precise spacing while moving between platforms or simply while in combat on the ground. Remember, while only a few characters -really- benefit from Wavedashing, Wavelanding is a handy technique on most stages for proper spacing and evasion.
SMOOTH LANDING:
While most Aerial moves Auto-Cancel when you land with them, some come with landing lag that can range from mild heavily punishable. This is alleviated in Smash4 with the ability to Lag Cancel Aerials by pressing a :ltrigger:/:rtrigger: during the landing lag of a move. Depending on when you press the input, you can reduce the landing lag by 1/4th or even 1/2 the normal time! This makes heavier moves a bit less risky to perform close to the ground when you finally master the timing and spacing for the cancel, and faster moves a tad less overwhelming as it'll be much harder to get their 1/2 lag sweet-spot.
HIT-STUN CANCEL THRESHOLD:
In Brawl, you could cancel hit-stun very early by pretty much any action, where in Melee you couldn't really cancel it until the stun was over (and don't even mention 64's crazy hit-stun). Smash4 introduces a threshold to cancel hit-stun once you are hit hard enough to start leaving a smoke trail as you fly through the air, you can cancel the stun with any action. There is a bit of a catch, however: the harder you are hit/higher %, the harder it is to cancel the stun, acting like escaping a grab in some ways in how you have to mash the input you want to cancel with slightly to escape before it's too late. The new threshold both allows for offensive comboing to take place at low-mid% without it being easily interrupted as in Brawl, as well as survival to be a bit easier once flung off-stage at higher% (with skill) than it was in Melee. On the topic of survival, it should be mentioned that fall-speed in Smash4 is much like 64 in that it is between Melee and Brawl, allowing for a bit more air fighting than melee, but keeping a bit faster pace than Brawl.
UNIVERSAL Z-AIR:
No longer limited to those with tethers, every character has access to a Z/Grab move once airborne. While there are no "throws" from the air, some characters do have a special throw of sorts instead of an attack (Such as Lucario doing a Grab-Only Force Palm that meteors opponents downwards, or Captain Falcon doing his UpB Grapple Attack with 1/2 the damage and Knockback, and no explosion or added movement), others can transition their Z-Air directly into their standard grab by holding on and pummeling the opponent as they fall back to the ground (Such as Diddy's Zair where he pummels the foe like with Side B until they either escape or touch ground), and others merely have an attack like Link or Samus for theirs. Unlike Link or Samus, non-tether Z-Airs do not extend the range of which you can grab an edge. It's a nice addition for most characters, but then again a lot of their Aerials are more reliable to land and/or more rewarding than their Z-Air, but you can always find a use for it with practice!


FINAL SMASH: TEAM RESTORE
A simple, yet certainly game changing Final Smash when activated: JOE! will rush to the foreground and apply a Full Restore to each of his Pokemon, as well as sending out the reserve once in the backdrop again and using a Full Restore on them as well (he is invincible while doing this/the action is semi-cinematic). This brings the whole team's %'s back down to 0 and eliminating any sort of status effects on them. Using this wisely can easily turn the battle back into your favor by giving the team a fresh start!

PLAYSTYLE:
Like his predecessor, Ace Trainer JOE! is a very complex character due to the sheer amount of time it takes to master him and all his various assets (half of learning him is just picking your favorite combination/team of Pokemon). He is probably even harder to master than the original due to the Doubles mechanic giving way to a layered playstyle based on the amount of stocks you have left, on top of the dynamics that come with controlling 2 Pokemon at once through switching/super smashes.
An example of the layered playstyle can be seen by saving your best Pokemon as the reserve, and keeping it there (or in team2) in case you have to go solo with it, allowing you to finish strongly in when your two other team members eventually fall while trying to keep your favorite fresh for battle. Alternatively, you could also constantly switch Pokemon through the course of the match, confusing your foe with a barrage of different characters every few moments, especially when down to two stocks where you can swap back and forth, leading to awesome combo potential!
30 different pairings, and a total of 120 different teams leads to an incredibly deep, yet rewarding character to master. He's not an Ace Trainer for nothing!


Phew... that was a long intro, huh? Let's take it a bit slow from now on and reveal the team one at a time. Speaking of time... we'll start off back around 1998 in the First Generation games!
 

JOE!

Smash Hero
Joined
Oct 5, 2008
Messages
8,075
Location
Dedham, MA
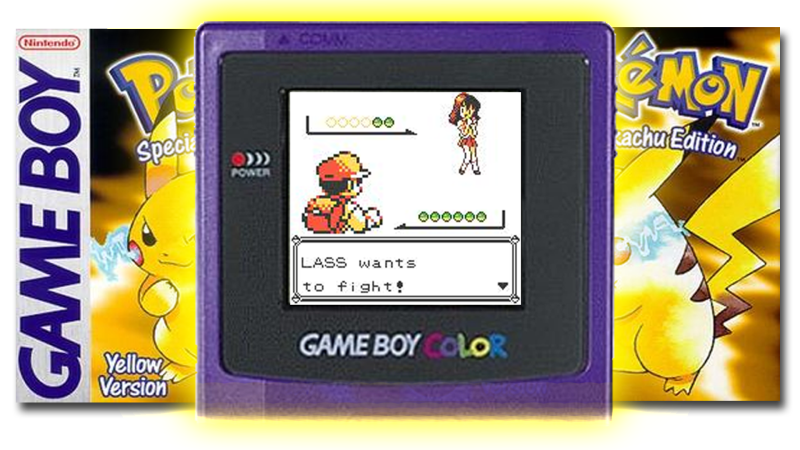
Pokemon Yellow was my first ever outing into the Pokemon world, as a birthday gift back around when it first came out. I of course had some exposure to it beforehand (what kid didn't?) but simply never had a copy of Red/Blue for myself. It was there that I eventually found one of my all-time favorite Pokemon, one of the four that needed a friend's help to get, and possibly the king of Generation 1 outside of the legends themselves...


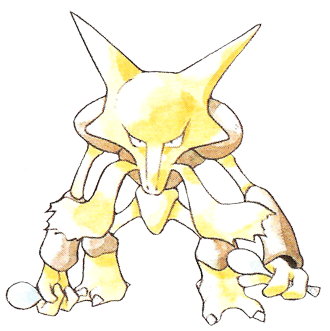
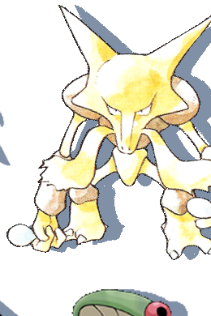
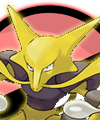
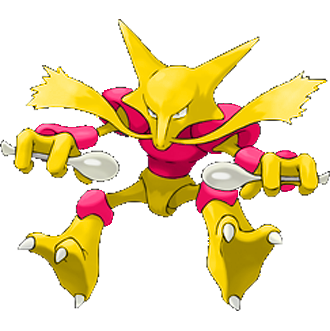
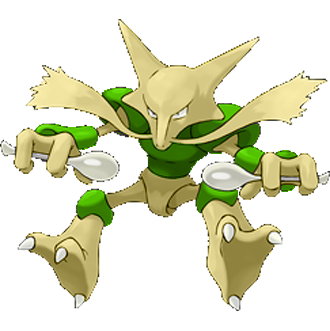
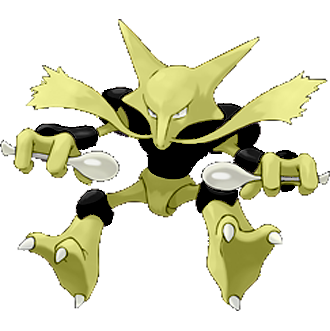
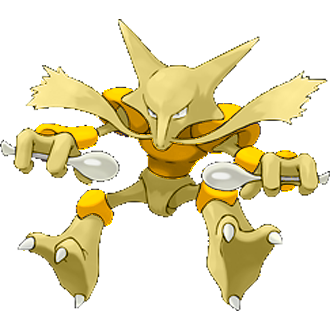
ALAKAZAM
A Pokémon that can memorize anything. It never forgets what it learns -- that's why this Pokémon is smart.


STATS:
Size: 5 (Similar in height to Falco, even with the slightly hunched posture)​
Weight: 5 (Slightly less than Sonic)​
Run: 9 (Slightly behind Fox as he "skates" along the floor)​
Air: 3 (Poor top speed, but can maneuver well side to side. His jumps are a little odd in that he has a below average ground hop, with an excellent second jump, going almost twice as high due to his telekinesis.)​
Fall: 5 (Mediocre but on the more floaty-side)​
Traction: 1 (Due to his telekinesis moving him about, he often builds up momentum along the ground, leading to an excellent Wavedash like with Luigi, as well as the weakness to being pushed while shielding.)​
Alakazam has a mediocre crouch, and no special tricks like wall clinging or crawling, but it should be mentioned that all his dodge animations have him Teleport, which can lead to some very tricky ways to evade attacks.​
SPECIALS:
Neutral Special: Psybeam
Crossing his spoons in front of him in an X, Alakazam then swings them open to send out a multicolored beam of energy as thick as Wolf's Laser, but as long as Falco's. Made of wobbly rings along a center "beam", the projectile travels around at Yoshi's Dash speed and has infinite range, hitting foes for a decent 9% with minor hit-stun and having the peculiar effect of passing right through opponents as well as shields!​
Once it actually has hit something or someone, it's hitbox is lost unless it is reflected, in which case it regains it's hitbox. A tricky move for sure, players would be wise to use this as a means of racking damage or as a mind game for faking out foes who think the hitbox is active, and taking advantage of how you can dash faster than it travels. The only downside seems to be that you have to wait till it leaves the screen to shoot another one.​
Side Special: Confusion
Raising a hand and sending out a blue pulse of psychic power similar in range to the projectile portion of Lucario's own Side B, Confusion is a Command Grab for anyone unfortunate enough to be snagged by Alakazam. Once caught, Alakazam has 1/2 a second to freely move the foe around with the control stick at Squirtle's air speed, giving you great control and about a maximum range of a Stage Builder Block to move foes. Once the 1/2 second is up, the blue aura fades from the foe as they receive a minor push effect in the direction they were sent, as well as 5% to both themselves and anyone they hit while Alakazam flies them about. Beyond being a great tool to reposition the opposition, Confusion will also work on catchable items such as Pokeballs and even Crates, as well as halt his momentum if he catches something!​
Up Special: Teleport
A signature move of his, Alakazam can appear and disappear like magic across the stage, and actually has two ways of performing the trick! The first is the obvious use for it as a recovery, as he envelops himself in multicolored, psychic energy before zipping back to where he first appeared on the stage. When I say where he first appeared, I really mean it since he will appear right where he came out of his pokeball last, either from the spot where he made his entrance animation, where he was switched in, or even mid-air where the re-spawn platform was! While a seemingly perfect recovery at first, you have to take into account two things: 1) his momentum does not halt while the move starts up, combined with his mediocre weight means he'll won't last too long when being knocked around, and 2) if the foe catches on to your trick, it wont be that hard to intercept Alakazam when he reappears.​
When on the ground, both Alakazam and his Team2 partner are both surrounded by psychic energy, and switch places with half the lag of the aerial version (granted they also receive half the lag when coming out, whereas the Aerial version is relatively lagless on re-entry)! The uses for this should be readily apparent with how the team dynamic works, especially when you can swap between Pokemon right after!​
Team2/Down Special: Reflect
Making an X with his arms again, Alakazam projects a multicolored, circular aura around himself about 2x the size of his shield at full strength, before it shrinks down to the size of his normal shield just a fraction of a second later. those hit by the first part will take about 3% and be lKB'ed in the exact opposite way they were heading when they hit it with about the same strength as Mario's Ftilt. For everything else, namely projectiles, they will also be reflected back just like if they hit a mirror, traveling in the opposite angle they hit the aura.​
While Alakazam will do this whenever a projectile comes his way while on Team2, it is important to note that he will also do this to friendly projectiles (remaining friendly to you), including his own Psybeam if you get the positioning right!​
Note: Projectiles isn't the only thing Alakazam can reflect with this, as his Synchronize ability can be activated if he is suffering from any sort of status ailment with the first hit of Reflect, passing it on to those it hits!​
STANDARDS:
Forward Tilt: Spoon Toss
Alakazam shoots out one of his spoons using his mind (which is comparable in size to a Capsule) about the same distance of Ike's Ftilt, and dealing 4% with minimal knockback on the way out as well as when it zooms back to his hand like Link's boomerang. He is also able to angle it up and down slightly as he tosses the spoon, and can act as soon as it reaches it's maximum distance. This allows him to move around as it homes back into his hand and hopefully score a second hit.​
Up Tilt: Spoon Toss
Same as his Ftilt, only without the ability to angle the toss, he will shoot a spoon upward high enough to hover above a platform before homing back into him. He cannot perform another tilt until he has a spoon back in his hands, luckily they return at his dash speed.​
Down Tilt: Spoon Toss
His last tilt has him slide a spoon along the ground, reaching out as far as DDD's ftilt and having a decent chance to trip standing opponents for 3%, before acting like the other tosses and returning to him for 4%.​
Jab: Kinesis
With an outstretched arm Alakazam makes a small spark of psychic energy that pushes foes back for 4%, as well as tying all his tilts together with his signature move; Kinesis.​
When he does his jab after a Spoon has been tossed out, it will also spark with a hitbox for 4%, as well as levitate in place until somebody hits it. He can only have one of these "traps" out at a time, and the Spoon will return to him like normal once he either uses Kinesis again (either normally or on another tilt) or if somebody hits it. Remember to be tricky with your placement so you can bait foes into traps, set up combos, and in general mind-game your foes!​
Note: If Alakazam is KO'ed or switched out when a Spoon is active on the field, it will simply teleport back into his pokeball with him. He can also Reflect the spoons when they return to him to "replay" the tilt from his new position while solo.​
Dash Attack: Tele-Strike
As he dashes forward Alakazam will teleport forward about the same distance as one of Lucario's rolls, hitting when he disappears and reappears for 8% and mediocre knockback as he skids to a halt. A useful tool to make a quick escape, or to just go through the opposition.​
SMASHES:
Forward Smash: Elemental Punches
Back in the day, Alakazam was commonly seen packing these moves since they all counted as special attacks, and they are still important to him here in Smash4! Reeling his hand back as he charges the move, the element engulfing his hand and spoon as he does so, he will then swing his spoon forward the distance of Mario's cape for a devastating strike!​
Like with Peach, his Fsmash has 3 different variants but always goes in order of Fire, Ice then Thunderpunch. Fire Punch does the most Knockback of the three, dealing 14-20% in a single hit and killing Mario at around 115%. Ice Punch has added range as his spoon emits an icy aura for 14-20%, but killing Mario at around 150%, and Thunderpunch does the most damage with emitting multiple hits adding up to 18-25%, but has the least power of the three and is best used as a set up or punish due to the high hit-stun as it wont be killing Mario till around 200%. A great Smash all around for him if you land it, but it is a bit easy to see coming with telegraphed beginning and end lag, much like Sonic's own Fsmash.​
Up Smash: Psycho Cut
Levitating his spoon a slight distance from his hand as he charges, Alakazam will then charge it with psychic energy like with Kinesis as he swings it in a big arc over his head, just like Ike! Dealing only 12-17%, Psycho Cut is surprisingly powerful and is able to kill Mario at about 130% off the top if he is hit at the highest point of the arc. Otherwise, Alakaam's Usmash is decent as an anti-air due to low knockback growth (it only becomes dangerous at higher %) and it's relative speed, comparable to Wolf's Fsmash in animation time.​
Down Smash: Psyshock
Closing his eyes as he charges, his body is surrounded with psychic energy, he will unleash it around himself in a flurry of psychic sparks adding up to a whopping 20-28%! Having great speed and covering his whole body, Psyshock is a punishing GTFO move, but unfortunately has the same kill potential as Shiek's Dsmash, which is nothing to write home about.​
AERIALS:
Neutral Air: Psychic
Taking on a "meditating" pose midair, Alakazam focuses his psychic power into bumper-sized sparks of energy on either side of him! Hitting twice each, the first hits occur diagonally up on his right side, and diagonally down on his left for 12% each and enough KB to start killing around 110% near an edge. After those flash briefly, smaller sparks appear on the other diagonals for 6% each, and linger for 2x the duration of the former, but for 1/2 the knockback. His laggiest, but most powerful aerial, Psychic is his go-to moves for aerial kills if you can manage to land it despite it taking as long as Bowser's Dair to pull off (with hefty landing lag, it is impractical to try Short-Hopping this aerial as you usually land before even getting the first hit off).​
Forward Air: Kinetic Saw
Holding his arms forward, he levitates a Spoon in front of him and spins it rapidly with psychic sparks each time it rotates. A good damaging move due to it's range and multi-hit properties, adding up to 18% if you manage to keep a foe in for the whole duration like with Fox or Falco's Fairs.​
Bair: Psychic Push
Turning around and mimicking Ness with outstretched palms, Alakazam creates a single spark of psychic energy from his palms that deals 10% and can kill at around 140% at an edge. On top of this, the outer area of the spark has a weak repel/wind effect if it doesn't hit a foe directly, and leaves Alakazam turned around midair.​
Dair: Gravity
Leaning forward and facing the camera, Alakazam pushes downward with an open palm, the air around his hand warping with psychic force as he pushes down at anyone below him. Foes hit by his hand will receive 10% and be sent downwards with meteor KB, and even if they manage to just get hit by the pulse of psychic force they will receive 5% and automatically Fast Fall while in hit-stun.​
Uair: Telekinesis
Looking skyward, Alakazam pushes an arm up forcefully and creates a spark with an open hand, hitting anyone above himself for 9% and mediocre KB that is perfect for juggling. If a foe is hit by just the spark and not his hand, they receive only 4% and find that their fall speed has been reduced while in hit-stun.​
THROWS:
Pummel: Psychic Assault
Alakazam has a rather average grab, with a bit of extra range in front of his hand before levitating his target in place with psychic energy before him. Tapping A will have Alakazam assault the foe's head with sparks of psychic power for 3% each at a rate comparable to DK's pummel.​
Forward Throw: Blink
Grabbing on to the foe, Alakazam performs his dash attack with them in tow. When they reappear, the foe is tossed forward with mediocre KB and an extra 7% tacked onto their HP. Like with his dash attack, this throw can move the two of them off-stage.​
Back Throw: Future Sight
Alakazam swings the foe behind him much like DK's back throw, with the foe flying through the air and having a peculiar spark around their head like with his pummel. Two seconds after they've been flung, the spark will activate and the foe will be hit for 10% and very high hitstun, even if they dodge!​
Performing this throw again if the target already has Future Sight on them will simply reset the timer, but that can also be useful for throwing them off so you can be the one who takes advantage of it when it goes off.​
Dthrow: Disable
Locking eyes with the foe, Alakazam sends out a hypnotic pulse of psychic energy that puts them into their "broken shield" state! Disable does no damage, but Alakazam's portion of the animation takes as long as Bowser's Dthrow to pull off, which can limit this throw's use until high % when you are sure to take advantage with a hard hit.​
Note: Disabled foes have anti-grab armor while disabled.​
Uthrow: Lift
Raising his hand like Yoda when he lifted the X-Wing, Alakazam's victim slowly rises up while in their "grabbed" animation to a maximum height of Alakazam himself over his own head while taking 8% over the course of it all. Alakazam has a decent frame advantage with this throw, being able to act about a tenth of a second before the victim is.​
Z-Air: Levitate
Repeating his Grab animation midair, Alakazam will simply hold a foe in place in their grabbed animation for 1/2 a second, leaving him free to abuse the situation in any way he pleases, granted he lands the grab in the first place.​
TAUNTS:
Up Taunt: Meditation
Alakazam hovers in place in a meditation pose for a moment, before returning to normal.​
Forward Taunt: Spoon Bending
Alakazam holds his arms straight out and bends his spoons forward while saying his name, the spoons bending back as he returns to normal.​
Down Taunt: Orbit
Alakazam relaxes for a moment and closes his eyes as his spoons orbit around himself momentarily before catching them one at a time.​
TRAINER TIPS:
Well, that was a blast from the past. Alakazam's organization is even old-school!
Speaking of blasts, Alakazam's main role on the team is a sweeper using his speed and high-power psychic moves to land KO's when they're most needed. Diving a bit deeper however, you come to realize that Alakazam's game really revolves around memory and mind games when he is on the front lines. Between his Kinesis standards and Confusion alone, you should have no trouble wracking up some damage by tossing foes into multiple hitboxes, especially with set ups like Uthrow and Bthrow to get the ball rolling. When things do go south however, it is best to switch out Alakazam for somebody a bit more durable as even with teleport on his side, his lowish weight and medium frame can make it pretty easy to land kill moves on him.
In the mean time, his Psybeam should be on the stage as a mobile hitbox to keep aware of, especially when swapping him to Team2 so he can reflect it to renew the hitbox and keep it around to help his team mates build up damage. Team mates can also use his Reflect to bounce their own projectiles to try and catch foes off guard, making Alakazam an oddly defensive Team2 choice in regards to his Sweeper role.
All in all, you'll definitely have to keep a sharp mind when dealing with Alakazam on the team to get the most out of this high powered psychic Pokemon.


Next time, we'll be going to the year 2000 to take a look at the Gen2 Pokemon on the team. Here's a hint: You've seen him in MYM before!​
 

JOE!

Smash Hero
Joined
Oct 5, 2008
Messages
8,075
Location
Dedham, MA
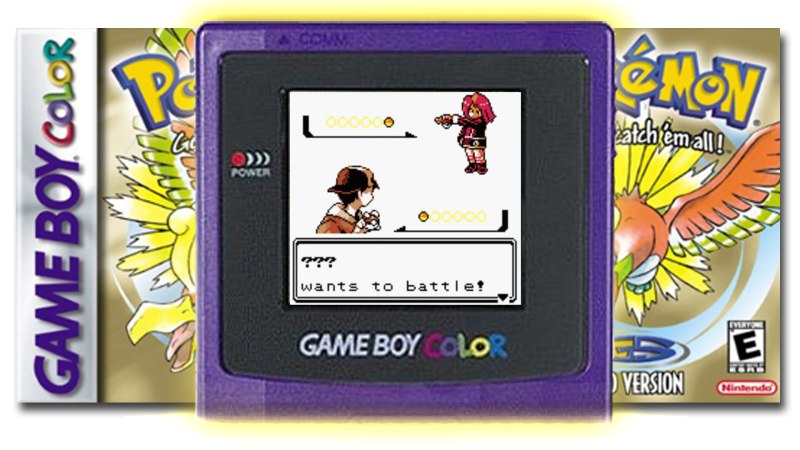
Although Yellow was my first, it was Pokemon Gold that really hooked me into the series. With the brand new world of Johto, as well as being able to go to Kanto, new Pokemon, new types, better graphics, the whole package reeled me in! I can't even say how many times I've replayed Gold/Crystal on my old Gameboy, even today I occasionally pop it in (it doesn't save anymore though...) and remember the fond memories of my very first Gen2 Pokemon...


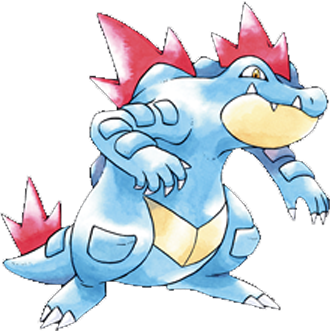
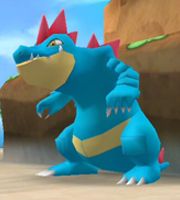
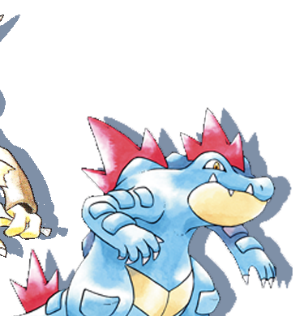
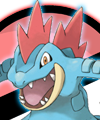
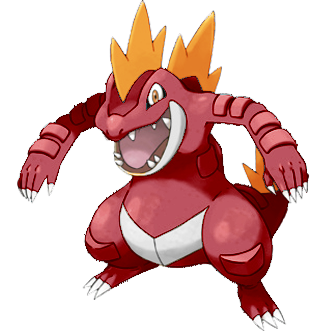
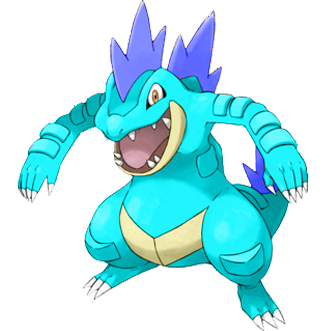
FERALIGATR
When it bites with its massive and powerful jaws, it shakes its head and savagely tears its victim up.


<STATS>


Size=10 At 7'07", Feraligatr stands eye to eye with Ganon (the spikes on his head touch the bottom of platforms), while being as wide as fellow starter Charizard.​
Weight=9 In terms of weight, he measures between DK and DDD on the scales. Often surviving well past 140% or more on bulk alone.​
Run=3 Not the fastest runner out there, just behind Squirtle.​
Crawl=6 When he moves to all fours his speed problem changes dramatically however, doubling to match DK's dash as well as making him a much shorter (but longer) target.​
Air=5 Nothing too special here, with all around average stats for his jumps/mobility, though a tad on the slower side for top air speed.​
Fall=7 A bit faster than the average character, Feraligatr's gravity is best compared to Marth's.​
Traction=8 Pretty solid while being pushed around or dashing, Feraligatr unfortunately has a rather lackluster Wavedash, and should probably crawl back and forth quickly to space due to his impressive Dtilt covering him when needed.​
Feraligatr is a fairly standard heavyweight in most respects with a unique fast-crawl for locomotion. But like with any predator, you want to move slowly before surprising the foe with a burst of speed...​
<SPECIALS>


<NEUTRAL B = HYDRO PUMP>
Closing his jaws shut and rearing his head back a bit, water is seen splashing around his mouth as he charges up the move for up to 2 seconds and pulsing with a blue aura at max charge much like Squirtle does. The charge is optional, but will stay with you until you use it up. Anywho, when you release the move by tapping B, Feraligatr will shoot out a ball of water about the size of Yoshi's eggs (along with the ability to angle the shot much like the egg toss, but with range varying from Luigi's Fireball to Yoshi's eggs based on charge) that explodes on impact for 8-16% based on charge. The size of the water burst also changes with charge, ranging from 1/2 to a full platform worth of spread, but curiously it will always trip the foe and push them away instead of doing any conventional KB, though the push strength is increased with charge from 1/2 to a full platform's distance while they're prone. Obviously this doesn't trip foes mid-air, but the push is certainly welcome when using the move like artillery to space and set up an approach given his sluggish movement.​
While 2 seconds may seem like a lot to charge up the move, Feraligatr's Torrent ability will thankfully shave off 1/2 a second for every 50% damage he takes, which can really help turn the tides in a pinch!​
<SIDE B = SURF>
Shooting water all around himself, Feraligatr propels himself forward and actually swims in the torrent of water as he slips along the ground the distance of 1.5 platforms at the speed of Sheik's dash. Foes hit by him as he shoots forward will take 10% and light KB as well as be pushed along with him by the water in a perfect position for a follow up once the move is over. Or, he could always just jump-cancel the move as long as he's grounded, and make use of his wavedash to scoot forward and follow the foe on the ground, or just hop up and use an aerial approach to mix it up.​
While airborne Feraligatr will perform a death roll as he surfs, hitting multiple times for a total of about 15% with all the hits before going in to special fall. Unlike most SideB's of this nature, his follows gravity and will slide off platforms and edges until it finishes, so jump out of it if you mess up your spacing!​
Oh, and one more thing: Hydro Pump charges this move too! In fact, all his specials, smashes and some of his throws are charged up by HP, and take away the charge once used much like HP itself (they only use a full charge of HP, not variable charge). For Surf, this means an increase in distance traveled to a max of 2.5 platforms, and a damage buff of 16% when grounded, and a whopping 25% while in the air!​
<UP B = WATERFALL>
Feraligatr will boost straight up with speed and height not unlike GW's own Up B, trailed by a stream of water just like with Surf that pushes foes straight down with force like Squirtle's Water Gun in Brawl. Anyone above him as he boosts up takes about 6% from his body, and minor KB away from him. Hydro Pump will increase the speed at which he travels from GW's Up B to Marth's, as well as increase the push effect of the falling water below himself to help try to gimp foes below.​
Like with Surf, Waterfall is jump-cancelable, but only just before the apex of the move. You cannot use Waterfall again after jump-canceling, but you can at least do another special, aerial or directional air dodge before going into special fall.​
<TEAM2 SPECIAL / DOWN B = DIVE>
When foes get near Feraligatr when he's on Team2 he will slam down on the ground with his huge arms, creating a big splash of water with a roar! The splash surrounds his whole body but is more or less point blank with a hitbox similar to Ike's eruption, dealing 13% with high vertical KB. If Feraligatr has Hydro Pump active, the hitbox will increase in horizontal range up to the size of Charizard's Dsmash around himself, while retaining the vertical height.​
When done from the air you forgo the slight start up lag as Feraligatr nose-dives toward the floor, hitting anyone on the way down for 9% before hitting the floor with a much more damaging splash! For every 1/10 of a second you plummet, another 1% damage is added to the splash, so combined with a JC'd Waterfall...​
<STANDARDS>


<JAB = SCRATCH>
Simple, but effective: Feraligatr rakes his claws in front of him with alternating swipes for 3% each, about as fast as the first two hits of Wolf's jab with mediocre range and negligible KB.​
<FORWARD A = BITE>
Lunging his head forward with jaws opened wide, he snaps down hard for two hits of 7% and great horizontal KB, able to kill around 140%ish near edges. The bite is slightly angle-able up and down, and has Feraligatr step forward slightly to give it range not unlike DK's overall. It should mainly be used as a punisher however due to noticeable, and punishable, start up as he lunges, and a bit of cool down as he returns to a neutral pose.​
<UP A = SPIKES>
Shrugging up with a bit of a hop, Feraligatr slams his row of spikes upwards for 8% with light vertical KB. Perfect for low-% strings and juggles, take advantage of his entire back and tail being a hitbox to wrack up some easy damage on those above you!​
<DOWN A = TAIL WHIP>
Turning his whole body while on all fours, Feraligatr lashes forward with his mighty tail to smack anyone before him for 11% and great horizontal KB at the tip, able to kill at around 130% near edges. While hitting with the body of his tail isn't nearly as powerful, it can still be useful given the sheer speed of the move, rivaling Yoshi's Utilt in how it comes out near instantly with a bit of recoil afterward. Great for covering yourself while crawling, or trying to poke at defenses/recovering foes near the edge.​
<DASH ATTACK = WATER RUSH>
As he dashes forward Feraligatr will create some water on the floor below, allowing him to slide around easier as he performs a shoulder bash at the opposition that is much like Falcon's in terms of damage and power, but the decreased traction allows him to slide the distance of Wolf's Fsmash while doing the move. While a little laggy at the start, Water Rush makes up for it with being Crouch Cancelable, IE: if you crouch during the move it will be canceled into well... your crouch, but retain the momentum! Combined with Surfing and Wavedashing, you can make up for your sluggish movement with bursts of speed and sliding to close in on your prey.​
<SMASHES>


<FORWARD SMASH = AQUA TAIL>
Leaning toward/away from the camera as he charges, Feraligatr will swing his tail in an arc, slamming it in front of him with a splash of water at the tip for 14-20% and enough power to kill at around 120% uncharged when near a side. With telegraphed beginning and end lag to the move as he winds up, then turns back around, it's fortunate the splash of water will push foes from him for a bit of defensive use. Like all his smashes, Hydro Pump will cut charge time down to a minimum of 1/4th of what it usually is for full effect, as well as increase the splash made from just beyond his tail to the size of Lucario's Fsmash.​
<UP SMASH = SUPERPOWER>
Clasping both hands together and bringing them down and to the side as he charges, Feraligatr swings upward in a mighty double-handed smash! Dealing 15-21%, it shares similar properties to Marth's Usmash in it being a mostly vertical hitbox as well as extreme power when you hit with the apex of the swing, being able to kill easily at 100% on most stages. However, while it comes out with speed like Marth's, he suffers from the exertion after using it with hefty cooldown comparable to the time it takes Ganon to choke then drop a foe (about 1/3 of a second). Thankfully, Hydro Pump alleviates this issue with a full charge, cutting the end lag down to nearly nothing!​
<DOWN SMASH = RAGE>
Feraligatr clenches his fist and grinds his jaws in anger as he charges this smash, releasing his rage with two mighty stomps as he roars and causes water to erupt up to his waist from the ground where his feet stamp down! Unlike his other smashes, Rage has a multitude of hitboxes, his body hitting twice for 6-8.5%, and the water splashes adding up to 10-14%, for a potential total of 22-31%! Like most attacks of this nature though, it is very rare to have all the hits connect, but at least the ones that do will count more with a fully charged Hydro Pump, boosting the potential damage to 31-43%! As for KB, the first stomp will do light-medium KB, with the second hitting harder and able to kill at around 140%, useful for a later KO or punish due to the move lasting as long as Link's Dsmash.​
<AERIALS>


<NEUTRAL A = THRASH>
Every part of Feraligatr's body thrashes about, his tail going up and down, jaws open and shut, claws rake back and forth, even his legs kick out as his massive frame becomes a hitbox! Foes hit during the beginning motions of his thrashing are hit away for 12% and decent KB, not enough to kill until high %'s near edges/offstage mind you, where later hits deal 7% and minor KB that is useful for follow ups. Lasting as long as GW's Nair, Thrash is useful when short-hopped for comboing or in the air as a defensive measure.​
<FORWARD A = SLASH>
Lifting a claw above his head, Feraligatr quickly slashes the air in front of him for 7%, with the hitbox just in front of his face dealing 9%. With speed close to Toon Link's Fair, Slash is a great combo tool as well as offstage killer/gimper when sweet-spotted.​
<BACK A = SLAM>
Looking back and lifting his tail to his back, a moment later Feraligatr crashes it back down for 14% and spiking force! The lag is comparable to DK's "Slam Dunk" Fair, but due to his tail's size it should be easier to set up for the kill if you get a good read on the foe.​
Alternately, this can be used as part of a damage racking "pillar" combo: Up Tilt > Waterfall > jump Cancel > Bair > Fast Fall > Up Tilt > Repeat. Short Hopped+L-canceled Bairs on standing foes can also be a good approach for popping them straight up to the air.​
<UP A = WATER GUN>
Looking up, Feraligatr waves his jaws back and forth as a jet of water pours out to cover an area similar to Mario's Up Air. Like with fellow starter Squirtle, this water gun sprays out multiple hits adding up to 14%, but has little to no KB. Good for pressure from below or light juggling.​
<DOWN A = SNAP>
Leaning forward, Feraligatr performs what is essentially his Ftilt at a 45* angle downward for two hits of 6%. While a good deal quicker than his Ftilt, the KB is noticeably weaker, only able to kill offstage starting at around 150% for most characters.​
<THROWS>


<PUMMEL/Z-AIR = CRUNCH>
Feraligatr hisses as he makes an exaggerated chomp forward towards his foes for a bit less distance than Ftilt, catching them in his mouth with an animation similar to Wario's bite with them comically hanging out of his mouth. Tapping A will deal quick hits of 2% like with Yoshi's pummel.​
In the air, Feraligatr will simply catch his prey and fall down to earth with them where he can then pummel and throw them. Feraligatr's jaws are unique in that it while he has one of the laggiest non-tether grabs on miss, it takes about 20% more effort to escape his grab.​
<FORWARD THROW = HYDRO CANNON>
Going to all fours to brace himself, Feraligatr launches his foe from his mouth with a jet of water measuring 1/3 of battlefield in length! This throw can easily hit multiple foes as it hits multiple times for 15% total, but deals no actual KB as it moves the foe(s) forward.​
Hydro Pump when fully charged will double the length of the water jet to cover 2/3 of Battlefield in a mighty blast!​
<BACK THROW = STRENGTH>
Rearing his head to the side nearly all the way behind himself with foe still trapped, Feraligatr then swings 360* and releases with a great amount of force! Dealing 9%, the foe is launched with diagonally upward KB able to KO at around 170% at a ledge.​
<UP THROW = GEYSER>
Similar to Hydro Cannon, Feraligatr looks skyward before shooting the foe up with a torrent of water, only this time the jet is as tall as Ivysaur's Bullet Seed. Also unlike Fthrow, Geyser actually does KB along with 8%, but unfortunately only enough to start killing at about 280% even with the added height. Hydro Pump can fix this however, for a full charge will double the power of Geyser and boost it's KO range to about 140%!​
Geyser also lingers for about 1/4 of a second after the foe is tossed, and will actively push anyone else that touches it to the tip and KB them too.​
<DOWN THROW = SPIT>
Simply put, Feraligatr spits out the foe at a 45* angle before himself. This is by far his fastest throw, taking nearly no time to deal 6% as well as set up a chasing opportunity as the foe skids across the floor in front of him.​
<TAUNTS>


<UP TAUNT = ROAR>
Feraligatr says his name triumphantly:​

<FORWARD TAUNT = FIST-PALM>
Feraligatr punches his fist into an open palm and leans forward with a growl.​
<DOWN TAUNT = INTIMIDATE>
Feraligatr gets on all fours and opens his jaws with a slow, menacing, alligator hiss.​
TRAINER TIPS:
Feraligatr is all about ferocious, close quarters combat, and while he may not look it, he carries bursts of speed to follow up on that playstyle.
The main thing to be aware of when playing as Feraligatr is your various movement options, as unlike other characters he isn't consistent in how he moves about the stage. While grounded, you can choose between crawling up, Surfing, or using Dash Attack to crouch cancel a move sort of like a DACUS if it weren't limited to Usmash. But before all that it'd probably be a good idea to shoot a Hydro Pump at them to think about as you rush them, as dealing with watery artillery as well as a charging Feraligatr is probably the worst case scenario for most anybody. Once you get in, you can try to get them to the air with with a variety of moves to try and Pillar them as mentioned with his Bair, or continue a forward assault with Fsmashes, Bites and Grabs. After bullying the foe, make sure to find time to start to charge up your Hydro Pumps to boost up your moves, as after trading some % it should be a bit easier to find the time to prepare. Be wary though of Feraligatr's two weaknesses: 1) he has a blind spot directly below himself while airborne, and 2) he lacks any real diagonal recovery, with his best shot being a Jump Canceled Waterfall > Surf.
In the end, Feraligatr is probably one of the most reliable of the team choices from the roster as even though he may not be as fast, kill as easily, or even be as long-lasting, his combination of traits and unique movement should always keep him as a go-to pick for many teams.
TEAM OPTIONS & SUPER SMASHES:
WITH ALAKAZAM : WHIRLPOOL
Alakazam and Feraligatr join forces to create a platformed-sized Whirlpool on the ground! Animation-wise, Feraligatr is seen spraying a jet of water towards the floor, as Alakazam "stirs" his spoons above it, using his psychic power to turn it into a pokeball-deep vortex of water over the next half a second. Any enemy that moves over the whirlpool will find themselves pulled to the center at the rate of Brawl's PS2 conveyor belts as well as suffering from a 50% chance to trip when they try to dash. When they hit the center, they will be bombarded with a "cape" effect as they are turned around against their will every 1/4 second until they escape.
Whirlpools last for 10 seconds at a time, and have a cooldown of 5 seconds one the last Whirlpool dissipates.
------
Both Pokemon can easily benefit from the Whirlpool by capitalizing on floundering foes by taking the chance to charge up Hydro Pump, set up Spoons, or just approach in general. But specific synergy between the two include Alakazam using Feraligatr's Dive as a punisher by Teleporting on the ground when a foe approaches, sending them skyward with a splash to their surprise for Alakazam to follow with either an Fair/Uair to damage, or Nair for a kill. Feraligatr can easily use Alakazam as protection from projectiles that can plague him even with his crawl/surf, as well as extend the usage of his Hydro Pump by bouncing them off of Reflect to catch foes off gaurd.
In general, Feraligatr would probably be best used first in the fight to beat up foes, then using Alakazam to "sweep" them with his mobility and powerful KO options for a win.


Up next is a Pokemon first seen in 2003, but may be one of my more recent additions to the team. Here's a hint: He was unique in two ways before GenV!​
 

JOE!

Smash Hero
Joined
Oct 5, 2008
Messages
8,075
Location
Dedham, MA
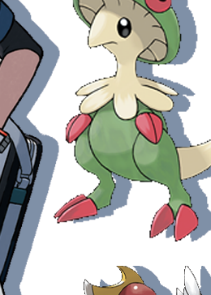
Okay, kinda cheating here since I never actually played Gen3 outside of an emulator, but I did play Colosseum to death, and that counts right? I guess that's what happens when you fall out of handhelds while in high-school, but at least looking back I've found some pretty cool Pokemon in Gen3, like this little guy...


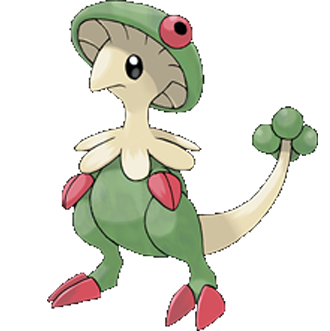
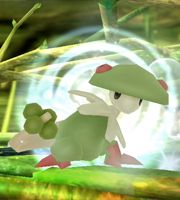
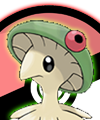
BRELOOM
The seeds on its tail are made of toxic spores. It knocks out foes with quick, virtually invisible punches.


STATS 1..2..3..
SIZE: 4 Breloom stands just as tall as fellow fighter Lucario, minus the ears. His long tail makes him notably wider than his blue counterpart however.​
WEIGHT: 4 Breloom weighs in between Toon Link and Peach on the scales, often living to around 120% with decent DI.​
RUN: 3 More at home jumping, at least he outpaces Ike.​
AIR: 9 With kangaroo-like frame comes kangaroo-like jumping! Breloom has a pretty intense air speed, rivaling the likes of Captain Falcon with decent acceleration. Combined with a great set of jumps, it's more likely you'll hop about to approach instead of run.​
FALL: 6 Breloom falls just a tad slower than Wario.​
TRACTION: 5 Pretty average here, but his average traction combined with high air velocity does make for a pretty decent Wavedash. In fact, it could be considered better than his normal dash when maneuvering in and out of combat!​
Smaller than the last two, Breloom is also noticeably more springy. You'll often find yourself being twitchy with him as he lends towards WD's for movement, as well as having a lot of air-time due to his stellar movement up there.​
SPECIALS Effect Spore!
NEUTRAL SPECIAL: SEED BOMB
Breloom hops up a little and back flips his own width backwards as he lobs a green, Pokeball-sized Seed Bomb forward while in the air, much like Mario's fireball in speed as it bounces up to a platform away before detonating in a Kirby-sized poof of "spore" effects like Ivy's. The bombs also explode on contact, dealing 8% and KB similar to Samus' Morph Ball Bombs, but unlike them or fireballs he can only have 1 out at a time.​
While the projectile is nice, the real power of Seed Bomb is it's ability to reset positioning and approach/retreat, thanks to two things, the first being the ability to angle the toss up and down right before he throws the seed. Tossing a seed bomb upwards will lob it high enough to land and roll on a platform overhead, otherwise it'll explode midair about a character width away, while angling down has him roll the seed along the floor about 2 platforms before it detonates, losing the bounce but gaining distance. The second being his ability to cancel the flip with an Air Dodge at any point after the bomb's been tossed. This of course means that you can Wavedash back and forth or Waveland onto platforms. Combined with the angled bomb toss you can really mix up your spacing behind explosive cover!​
SIDE SPECIAL: FOCUS PUNCH
Pressing and holding Side B will have Breloom stretch his arm behind him as his fist glows red with built-up focus. After a full second of uninterrupted charge, you can unleash the pent up energy in a mighty punch forward for 25% and enough KB to kill around 85%! The range leaves a little to be desired, mirroring Jigglypuff's Pound, but at least you boost forward a bit like said move, and can walk back and forth and even jump as you build your focus. Alternately, you can keep some forward momentum while you charge the punch if you do it out of a (wave)dash, but cannot change direction as easily until you slow down to your walk.​
A bit situational due to the wind up, if only you had a sort of substitute for you to take the hits that could interrupt... oh hey, Team2! But, if you panic you can always let your fist fly early without the preparation, dealing a measly 8% and hitting like Mario's Ftilt. The "flubbed" punch does not boost momentum and has barely any KB, but has the same fast punch animation (they both activate as fast as Diddy Kong's first Jab!) and can easily get a jump on a foe trying to punish you for hiding behind a team mate.​
UP SPECIAL: SKY UPPERCUT
Breloom hooks a fist skyward, swiftly launching himself Feraligatr's height above his head before fast falling back down to earth. Anyone hit by his fist will be sent reeling in their Footstooled animation with fixed hit-stun that follows the height of the uppercut, as well as taking 12%. Useful for defense in that it will reset most combat situations when the foe gets up close, acting as a combo-breaker, as well as an anti-air by bringing foes down to the ground in their reeling state. If you want to go on the offensive, Sky Uppercut also allows Breloom to On-Hit-Cancel into an aerial if he hits a baddy, but he will still fast fall immediately after.​
If used offstage, Breloom will stretch his arm out the length of 1/3 of a platform to try and tether onto an edge if he's in range to try and save himself if he can't reach the edge from the jump alone, otherwise you'll find yourself fast-falling to your doom.​
TEAM 2/DOWN SPECIAL: SPORE
If anybody happens to get too close to Breloom while he's on Team2, he'll unleash his famous Effect Spore all around himself just like Wario's low-charged Down B! Er, well not -just- like that, the comparison was more for the radius and timing of the move and such, since it makes a Spore cloud around himself... meh.​
Anywho, Spore's effects vary based on the enemy's % when they come in contact with it. From 0-60% they will become Poisoned, taking 1% every 2 seconds for the rest of their stock (non-stacking). From 61-120%, the Spores affect foes more strongly and actually Paralyze them momentarily, as if they were hit by ZSS' Dsmash, and past 120% is when it affects them the strongest by putting them right to Sleep!​
A great asset to any team combo to get some free Damage over Time, or to set up big hits at later %, Breloom can also use Spore while solo to great effect. In fact, his Effect Spore carries over to his Tail Club (you know, where the Seed Bomb pops off from?) where any hit made by it during a tail-attack will do extra hit-stun, as well as an extra 3% over 3 seconds worth of poison, complete with spore gfx!​
STANDARDS Super fast punches = Priority
JAB: DYNAMIC PUNCH
Breloom does a pretty good impression of Mario's Jab combo, with two faster jabs for 2% each, followed by a slightly stronger kick for 4%. What comes next though if you choose to keep tapping A is nothing like Mario, as he unleashes an absolute flurry of stretchy punches that takes up an area the size of MK's jab in front on him! This can be held indefinitely, and does an impressive 10% per half-second, but with start-up lag and little hit-stun unlike other jabs of it's type. Luckily the flurry of random hitboxes should make it confusing for foes to DI out of for a while!​
F-TILT: MACH PUNCH
Breloom reels a fist back before launching it forward a whole 3/4 of a platform away! Dealing 9% with light KB, this is your primary move to use while grounded, especially when it only takes as long as Yoshi's Ftilt!​
Unlike most tilts, angling Mach Punch actually changes it's properties. Up-Angled Mach Punch is a ranged uppercut, traveling about 3/5 of a platform as he hooks the punch upwards dealing 8% and minor vertical KB. Angling down has him shoot both fists down at a 45* angle for 10% and medium power, with 1/2 a platform's reach. Remember to use each angle accordingly, with Mid being a poke, High being a launcher, and low being a punisher!​
U-TILT: TAIL FLIP
Breloom back flips in place with his tail extended, knocking anybody in reach with it for 8% and medium upwards/diagonal KB. Relatively quick and with some good range, this is a go-to juggle move at low % (especially when you hit with the tip!).​
D-TILT: LOW KICK
Crouching down, Breloom kicks a leg outward quickly for 4%, and is able to tap repeatedly once it's extended to loop the move quickly like with Pikachu's jab. Great when used with his jab to get % up quickly, or to just pressure shields.​
DASH: HEADBUTT
Although he won't dash much, Breloom's dash attack is surprisingly strong as he uses his mushroom cap as a battering ram as he runs forward a small distance, shooting foes forward for 7% and enough horizontal KB to kill around 180% near edges.​
SMASHES Here be kill moves
F-SMASH: DRAIN PUNCH
As he holds his fist to the side while charging you can see Breloom loading his hand with what appears to be seeds before lunging out with a haymaker with reach like Mario's own Fsmash. The punch takes about as long as ZSS's fsmash, but with notably more power as it does 14-20%, killing around 140%.​
But what about those seeds you ask? Well, if he hits somebody with the punch, a spore gfx will be seen as the foe becomes "seeded" with Leech Seeds! Shown by the foe sprouting well, a little green sprout from their head, damage done to them by either Breloom or his team mates will be returned as healing for 1/4th the damage dealt for the next 10 seconds. Leech Seeds can't be stacked, but hitting them again will extend/renew the timer where leeching off of them will work.​
U-SMASH: MEGA KICK
After a charge animation resembling the first few frames of his jump, Breloom hops up and assumes the classic "sex kick" pose. Extending his right leg out toward the enemy as he slowly falls from a height of a platform above ground, dealing 4-6% and negligible KB.​
While a sex kick is all well and good, the real meat of this move is when you press A again, kicking out with his left leg for 16-22% and enough horizontal KB to kill as early as 110%! After the second kick Breloom will back flip off the foe dramatically, giving the move some end lag to an otherwise super-fast smash. Be careful with the timing and spacing of this killer, as unlike his punches the kick is low range, and timing the second kick must be crucial or else you'll be out-prioritized easily.​
D-SMASH: BULLET SEED
Facing toward/away from camera as he charges, Breloom can be seen holding hand-fulls of leech seeds in each hand. On release, he launches two clusters of seeds for multiple hits adding up to 8-11% on each side at a downward 45* angle, covering a platform radius in total. As he crosses his arms, his body also becomes a hitbox for 10-14%, and decent vertical KB that can kill around 170%.​
Taking as long as Sheik's Usmash to pull off, it's not too challenging to hit foes with a cluster of seeds. But what about the other side that hits the floor? Well, being seeds and all there's a 50/50 chance they will imbed themselves into the floor, and after 5 seconds pop up as the little sprout seen when a foe is seeded. Another 5 seconds later, and it turns into a blue Oran Berry! The berry is a food item that heals for 2%, not much compared to normal leech seed (especially after 10 seconds), but hey, an Easter-Egg never really hurt now has it?​
AERIALS C-C-C-Combos!
N-AIR: SPINNING STRIKE
Breloom swiftly does a front flip, hitting foes with his tail for 11% and mediocre KB as he spins 360*. Taking about as long as Luigi's Uair, this move is best used for defensive or pressuring purposes (esp with the club's poison damage).​
F-AIR: DOUBLE PUNCH
Breloom stretches one arm out 1/2 a platform at a 25* angle upwards, immediately following with the other at a 25* angle downwards. Each hit does 5% and nearly any KB, but the speed and range make it a perfect approaching tool from the air especially when the whole animation is only as long as DK's Nair. L-canceling this aerial will usually result in only 1 punch coming out, but that should be enough to at least combo into Ftilt.​
B-AIR: TAIL SMACK
Looking back, Breloom wags his tail up then down once, hitting for 13% and enough KB to kill at around 140% at an edge, but low enough growth to combo into itself at lower %'s. A slightly different approach option than Fair due to 1) being backwards and 2) doing more damage (poison!) and KB, while being noticably slower, Tail Smack is best used to try and edge-guard foes who are trying to recover high.​
U-AIR: STRETCH PUNCH
Much like Mario's Utilt, Breloom punches upwards about 1/3 of a platform while dealing 7% and light KB, perfect for juggling and poking at foes above you!​
Stretch Punch has another feature though, that may not be obvious at first: a sweetspot at his mushroom cap. If you hit a foe here just as the move comes out, it deals 14% and enough vertical KB to start killing around 140% when up high. Luckily, you have Sky uppercut to get up there and land the move!​
D-AIR: FORCE PALM
Breloom shoots two arms downward, reaching a distance of 1/3 of a platform and making an upside down "T" with his hands, very similar in animation to Wolf's Dair. Dealing two hits of 5%, Force Palm deals variable KB (usually diagonal) based on Foe DI, and is better used as a pressure/landing tool vs shields. However, if you do happen to put some force behind it via Fast Falling, his open palms become a meteor hit, launching opponents down! While useful on stage to pop a foe up, be careful off-stage since you know, fast falling with a tether recovery isn't the best of ideas.​
THROWS Free heals
GRAB+PUMMEL: LEECH SEEDS
True to form, Breloom has a bit extra reach for his grab, it being in many ways like Lucas', except not disjointed. For his pummel, tapping A repeatedly will have Breloom deliver rapid punches for 1%, with each punch containing a Leech Seed. This means that not only will pummeling repeatedly heal you up, but doing just one pummel then throwing will set up you or your team mates for easy HP gain!​
F-THROW: SPRINGBOARD
Breloom leans back and balances on his tail, feet on the opponent's chest before propelling himself a character length forward using his tail like a spring! This deals 8% and is a bit on the slow side for a throw, it has identical KB to Ganon's Ftilt! The fact that it only does 8% however puts a bit of a damper on the actual kill power though, only managing to start killing around 150% at an edge.​
B-THROW: SUPLEX
Breloom lifts his opponent over his head while leaping backwards about 2 character lengths, slamming them headfirst into the floor with meteor power that pops them upwards for 10%. Useful to combo out of, and more interestingly, possibly gimping foes as you meteor them off an edge! (Luckily Breloom stops at edges, he wont suicide with one of his own throws.)​
U-THROW: BARREL ROLL
Like with Fthrow, Breloom leans back on his tail, but this time he makes himself horizontal as he begins to kick the foe repeatedly, sending them spinning in the air above him and taking multiple hits adding to 12% before being knocked diagonally upwards with mediocre power. One of his more damaging throws, Barrel Roll can also inflict damage on others who come in contact with the spinning victim, getting hit much like Sonic's Usmash!​
D-THROW: STOMP
Breloom tosses the foe to the ground and leaps upwards, his arms still holding on to the prone foe as physics then take over as he snaps back down as if pulled by rubber bands, stomping on the foe for 10% and sending them reeling diagonally downwards across the floor! Like with Bthrow, this is used mainly for follow ups, especially with a low angle Seed Bomb!​
Z-AIR: GRAPPLE PUNCH
Like with his grab, Breloom shoots an arm out about 1/3 of a platform, attempting to grab anyone (or any edge!) he can. If he succeeds, he will pull himself towards the foe (halting any momentum he had, and changing it towards them) with his other fist ready to meet their face for a 9% punch with mediocre horizontal KB. While great for resetting the pace of a battle/helping against potential edge-guarders, his other aerials are generally better for direct combat situations. Like Sky Uppercut, this can tether onto an edge.​
TAUNTS Just for fun!
U-TAUNT: HAPPY DANCE
Breloom kicks his legs out in a little victory dance while exclaiming his name for a moment, before returning to his serious fighter's stance.​
S-TAUNT: WARM UP
Breloom gains a serious looks and jabs twice lightly, then does an uppercut while saying "Brel-Bre-Loom!"​
D-TAUNT: LEFTOVERS
Breloom sits down and pulls an Oran Berry from behind his back, happily munching on it for 1/2 a second before getting up to a neutral pose again. A laggy taunt for sure, but at least it heals 2%!​
TRAINER TIPS:
Let's address the 800lb Slaking in the room here: Breloom's biggest weakness is when he's in open air, IE off-stage. A tether recover that when it misses, auto-fast falls you isn't the best thing to rely on when dealing with people flying around you off the edge, so it'd be best to play to his on-stage strengths, got it?
On-stage, Breloom is a status-spreading, combo-machine. His combination of great air speed and fast, long reaching tilts and aerials make it incredibly easy for him to build momentum and really put the hurt on a foe with a dizzying array of punches. However, Breloom is also a master of retreating and spacing due to those same attributes, especially when he makes use of Seed Bomb to occupy the foe as he adjusts his positioning, or Sky Uppercut to do a traditional re-set. The constant back and forth to keep the foe where you want him, as well as yourself on Terra-firma with such high air movement, can make Breloom quite a technically challenging character, but very rewarding to have as part of a team due to his great Spore Team2 special, Leech seeds and general ability to wrack up damage and pull out surprise kill moves when he finds opportunity. Always be on the look out for chances to use Focus Punch or Usmash when your team mate has the foe occupied!
TEAM OPTIONS & SUPER SMASHES:
WHILE ON TEAM2 : ASSIST
Unlike all the other Pokemon on the team, Breloom's Super Smash remains static no matter the pairing, and only changes based on which team he is on currently!
Assist stays true to Breloom's fighting-type by having him perform a traditional Assist for his Team Mate on Team1, which he can do every 5 seconds. Breloom's Assist has him leap forward a good distance with Nair, L-cancel it, and immediately go into his full Jab cycle, holding Dynamic punch for 2 seconds before stopping and leaping back to behind his Team1 partner (unless they have their back to the edge, in which case next to them). Alternately, if Breloom is called in to Assist vs a foe at 100% or more, he will do an Up-Angled Mach punch after his Nair, and retreat with an Up Angled Seed Bomb to try and set up the foe better for a kill, instead of wracking damage.
WITH ALAKAZAM : ASSIST
Alakazam's Assist has him Dash Attack forward towards the opposition, then catch them in Confusion while in hit-stun and toss them back towards Breloom for him to attempt an intercept. He then rolls backwards to re-set his position.
Like all Assists, this can only be done every 5 seconds.
------
Alakazam and Breloom are fairly similar to each other in gameplay, with the former being a more heavy hitter compared to the latter's quick and careful approach to combat, and generally compliment the same type of players. However, Alakazam probably gets much more mileage out of Breloom as a team mate than Breloom does, as Spore and his Assist can do wonders for setting up Alakazam's powerful kill moves. Breloom can work with Reflect a bit with his Seed Bomb, but in general he'll mainly use it as a wall of sorts to try and work in his own kills via Focus Punch. Alakazam's Assist is also great in combination with his Usmash, or comboed from his Fthrow. In general the two are pretty interchangeable while playing and a constant switching approach is recommended to get the most out of the pair.
WITH FERALIGATR : ASSIST
Feraligatr rushes forward with his powerful Surf for his Assist, battering through campers and all sorts of nasty things to set a course for Breloom! Luckily for Feraligatr, Assist-Surf doesn't send him into Special Fall if done off a ledge, but it will still use Hydro Pump's charge if he has it. Time it wisely!
Feraligatr Jumps back to where he was when using this Assist, which can lead to Aerial Dives for more carnage.
------
This pairing is best when Breloom is front and center for most of the fight, using Feraligatr to soak up hits (building his Torrent!) as well as act as a set-up for Usmashes and Focus Punches. If the foe is being troublesome, hit em with a Dsmash/Pummel/Fsmash and swap to the gator to hit them with one of his huge smash attacks, healing him a bit for the trouble as well as putting the foe in a situation of dealing with a bursting heavyweight that heals as it beats on you! The key synergy here is how each team mate protects the other either by tanking/healing, with each of them being able to provide solid damage racking in the process.


Jumping ahead to the year 2007 in the next set, and on to the DS! Here's a hint: This Pokemon caused quite a stir in 1997, guess it's younger version wasn't ready for TV!​
 

JOE!

Smash Hero
Joined
Oct 5, 2008
Messages
8,075
Location
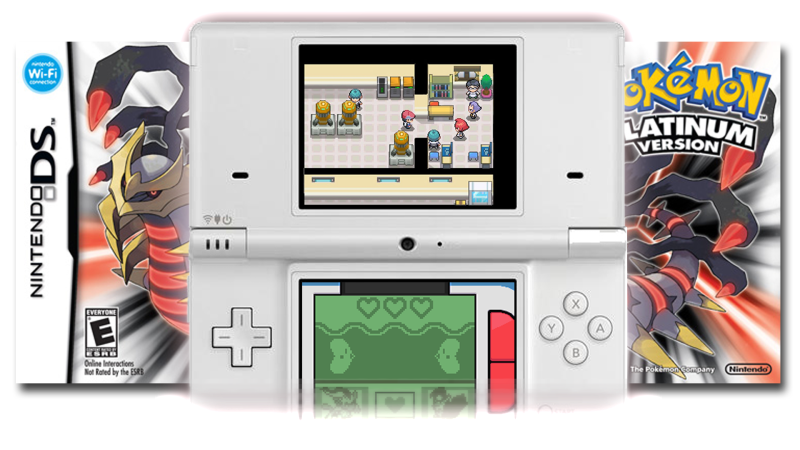
Dedham, MA
If 3rd gen is where I dropped out of Pokemon for a bit, 4th gen is where I dived straight into from the drop. After getting a DSi for Christmas, I became curious about the Diamond/Pearl games since all my friends had it, and from what I saw it had cool graphics and Pokemon (yeah I actually like a lot of 4th gen mons, get at me). Luckily, my brother had Platinum lying around and he didn't want to play it anymore, giving me the chance to rediscover an old favorite...


01010000011011110111Porygon-Z01101111011011100101
Additional software was installed to make it a better Pokémon. It began acting oddly, however.


01010011011101000110StatZ01100001011101000101
SIZE_2 Hovering just above the ground, Z's frame is as tall as Lucas, though obviously much thinner due to the tail giving the extra height.​
WEIGHT_2 Z weighs just as much as a certain 2D fighter who also jumped right out of cyberspace.​
GROUND_6 Above average, Z floats about at around Yoshi's speed.​
AIR_8 Much like Lucas again, Z has near identical air speed to the mother-boy. Unlike him however, Z possesses 4 jumps as he boosts upwards with what appears to be digital energy, matching ROB for each jump.​
FALL_8 Offsetting his aerial acrobatics, Z happens to also fall like a rock, sitting between Link and Sheik in this aspect. But at least it makes him slightly harder to KO vertically as well as letting him return to earth quickly with his Fast Fall to avoid aerial combat when needed.​
TRACTION_10 Polar opposite of fellow team mate Alakazam, Porygon-Z has near perfect traction. This means that his shield nearly ever budges (allowing for prime Out-Of-Shield counter attacks, and approaching), he can tech along the ground and come to a halt much faster, lets him dash-dance very quickly (he doesn't slide at all in the animation), and he has virtually no reason to Wavedash. Really, it only moves him like his own width, and he's pretty skinny already...​
Z has a bit of a grab-bag of stats, having overall above average movement, low weight and size, and high fall speed and traction. It will be tricky to get a hold of his odd movement for sure, but it will certainly be rewarding when combined with his moveset seen below!​
010100110111000001SpecialZ011000010110110001
Neutral_Conversion
Z concentrates as he becomes surrounded by what appears to be a Color Wheel separated into 3rds. The wheel obscures his head and tail a bit, but a mini-porygon cursor appears to take Z's place while he floats in place (his fall speed plummets to that of Jiggly's while Conversion is active).​
The selected color will, as in the games, change Porygon-Z's type from Normal to that of what he selected. In this example, the player selected BUG from Alakazam's wheel, with the other two options being PSYCHIC and GHOST. Z's ability to Download and Adapt to data around him allows conversion to choose types based on the Pokemon in Team2, meaning he can potentially swap from Normal to one of 6 other types! If he is alone however, conversion will switch him to ELECTRIC, a familiar setting to him from cyberspace. Selecting the center of the wheel will turn Porygon-Z back to NORMAL.
As for the actual effects of Conversion, his abilities to download and adapt will change his stats based on type, as well as change his Side Special! See below for details on the stat changes.​
[collapse="Stat_Change"]​
/BASE_Stats
Weight | 00
Dash|000000
Air|00000000__
Fall|00000000
Jumps|0000
Damage|-
Each segment equals a number, so his Weight = 2, has 4 jumps, etc. Fall speed is also important for Z as he gains resistance to Vertical KO's as well as the ability to do potent Short-Hopped aerials combined with L-canceling.​
/ALAKAZAM_Types

PSYCHIC_Conversion
Weight | 00
Dash|0000000
Air|00000000__
Fall|0000000
Jumps|0000
Damage|-
GHOST_Conversion
Weight | 0
Dash|000000
Air|00000000__
Fall|00000000
Jumps|00000
Damage|-
BUG_Conversion
Weight | 00
Dash|000000
Air|00000000__
Fall|00000000
Jumps|00000
Damage|-1% to all
/FERALIGATR_Types

WATER_Conversion
Weight | 00
Dash|000000
Air|000000000_
Fall|00000000
Jumps|000
Damage|-
ICE_Conversion
Weight | 00
Dash|000000
Air|000000000_
Fall|0000000
Jumps|0000
Damage|-
DRAGON_Conversion
Weight | 0
Dash|000000
Air|00000000__
Fall|00000000
Jumps|0000
Damage|+1% to all
/BRELOOM_Types

GRASS_Conversion
Weight | 00
Dash|00000
Air|00000000__
Fall|000000000
Jumps|0000
Damage|-
FIGHTING_Conversion
Weight | 00
Dash|000000
Air|0000000___
Fall|00000000
Jumps|0000
Damage|+1% to all
POISON_Conversion
Weight | 000
Dash|000000
Air|0000000___
Fall|00000000
Jumps|0000
Damage|-
/BISHARP_Types

DARK_Conversion
Weight | 00
Dash|000000
Air|000000000_
Fall|00000000
Jumps|0000
Damage|-1% to all
STEEL_Conversion
Weight | 000
Dash|000000
Air|00000000__
Fall|00000000
Jumps|0000
Damage|-1% to all
FLYING_Conversion
Weight | 00
Dash|00000
Air|00000000__
Fall|00000000
Jumps|00000
Damage|-
/ARMANTLE_Types

ROCK_Conversion
Weight | 000
Dash|000000
Air|00000000__
Fall|00000000
Jumps|000
Damage|-
FIRE_Conversion
Weight | 00
Dash|000000
Air|00000000__
Fall|00000000
Jumps|000
Damage|+1% to all
GROUND_Conversion
Weight | 00
Dash|000000
Air|0000000___
Fall|000000000
Jumps|0000
Damage|-
/BASE_Types

ELECTRIC_Conversion
Weight | 0
Dash|0000000
Air|00000000__
Fall|00000000
Jumps|0000
Damage|-
[/collapse]​
Side_Tri_Attack
Bringing his arms to his beak, Z creates a large pixel at each point (one red, one yellow, one light blue) before bringing his arms and head back to form a white triangle between the pixels as it launches sideways with a "Pory!", spinning so players can see the triangle clearly as the speed of Luigi's fireball and range of Fox's Laser. The start-up animation takes a tad longer than Wolf's blaster, and is the same for all of Z's various Side Specials (though some have exceptions when it comes to their fire rate, they all share the same animation regardless of speed). Curiously all his projectiles have the same SFX as the Ray Gun item.​
As for his base attack, Tri Attack will deal 10% with hit-stun to those hit by the sides of the porygon-sized projectile. If hit directly by one of the corners, the foe will suffer from either light knockback instead of hit-stun (Red), added 2% damage (yellow), or experience a large blue "flash" that can hit multiple enemies (light blue). With practice you can learn to space Tri Attack so that the spinning has a better chance to hit with the desired point, but for the most part it is just a great projectile with decent range, speed and damage, even if the fire rate leaves a little to be desired.​
As mentioned, Tri Attack actually changes based on what type Porygon-Z is currently as he Downloads TMs from his database to use, with Tri Attack only being his NORMAL attack! Each new projectile adds a new dynamic to the pairing Z got the type from, and can be a real boon when you swap out the other Pokemon to mix and match the effects.​
[collapse="Projectiles"]​
/ALAKAZAM_Types

PSYCHIC_Conversion_PSYBEAM
Psybeam is exactly the same as Alakazam's, special properties and all, though with pink-pixels replacing the waving psychic energy. If you keep Alakazam out along with Z, just imagine the fun you could have with double Psybeams?​
GHOST_Conversion_SHADOW_BALL
Z creates a large ball of dark-violet pixels before him that moves forward at the pace of Jigglypuff's walk for 1/2 a second, before launching forward at Sonic's Dash Speed for a max distance of 3/4 FD. Foes hit by Shadow Ball take 12% with mediocre KB in the direction Shadow Ball was moving, but the real strength is being able to stagger the shots for both mid and long range combat, as the slow-moving portion can easily deter close combat from Z, and mess with approaches from afar.​
When reflected, it moves slowly again before launching out.​
BUG_Conversion_SIGNAL_BEAM
With fire-rate similar to Mario's Fireballs, Z fires a weaving beam of light-green pixels that zig-zags in and out of the main stage, as well as up and down slightly as it travels the distance of Tri Attack. Hitting for 7% and some hit-stun, Signal Beam is sure to confuse opponents with it's erratic movement, making them unsure on how to avoid it!​
/FERALIGATR_Types

WATER_Conversion_BUBBLEBEAM
Z sprays a platform-length line of 7 blue, pokeball-sized pixels in front of himself. Each linger in mid-air and float up and down like, well... bubbles. The pixels "pop" on contact with enemies for 1% and matching hit-stun, and seeing as they last until popped, Z can certainly fill the stage with a mine-field of pixels!​
ICE_Conversion_ICE_BEAM
With half the fire-rate of Tri Attack, Z shoots a thin, solid beam of light blue pixels the length of 2 platforms that hits all foes in it's path for 10% and light knockback. If an enemy is unfortunate enough to be hit by the very end of ice beam, they will be frozen in place and an easy target for your team mate to wail on.​
DRAGON_Conversion_DRAGONBREATH
Z unleashes a Platform-size spray of Violet and Orange pixels as it he were breathing fire at the foe. Dealing 3 hits of 3%, one of the hitboxes will stun the foe like ZSS's dsmash on impact, making the risk of using the closer-ranged move with 1.5x more lag than Tri Attack all the more worthwhile.​
/BRELOOM_Types

GRASS_Conversion_BULLET_SEED
Z unleashes a spray of little green pixels mike a machine gun, dealing upwards of 20% in one go! Great for damage, it unfortunately only has Platform-range, and no KO power to speak of (like Ivy's bullet seed in Brawl). At least it's horizontal positioning combined with his multiple jumps should prove useful.​
FIGHTING_Conversion_FOCUS_BLAST
Z launches a high-speed, dark red ball of red pixels the size of kirby towards the foe, exploding on impact for 16% and medium KB to all those it his in it's DDD-sized explosion. Focus Blast has range the length of FD as it travels along at Falcon's Dash Speed, but like Psybeam only one can be on-screen at a time. Useful for off-stage or just high-% KO attempts.​
POISON_Conversion_SMOG
A bit of a mixture between the previous two, Smog has Z shoot a purple ball of pixels at Sheik's dash speed forward, but with infinite range. On impact, Smog will erupt into a DDD-sized "cloud" of purple pixels, causing hit-stun and 4% initially. The remaining cloud however will continuously deal 1% every 1/4th second to any enemy touching it for the next 5 seconds.​
/BISHARP_Types

DARK_Conversion_DARK_PULSE
Z creates a thin, half-moon shaped wave of dark-grey pixels in front of him that moves forward at Mario's dash speed, up to 3 platforms away. As it travels, Dark Pulse will actually grow from Porygon-Z's height to about 3x his height at max distance, making it very hard to avoid. On impact, Dark Pulse hits for 8% and just hit-stun.​
STEEL_Conversion_FLASH_CANNON
Z creates a mass of silvery pixels nearly 1.5x the size of himself to be launched with stats identical to Tri Attack in terms of speed/damage/range. On impact however, the ball will explode into a pulsing area of bright, silver pixels the radius of Smashville's Platform, obscuring anything inside for the next 3 seconds. Make sure to take advantage of the confusion!​
FLYING_Conversion_AIR_CUTTER
Z creates a crescent of white pixels 1.5x his height (think cutter form Kirby64) that spins forward at Sheik's dash speed up to 3 platforms before fading away. Air Cutter is only stopped by solid parts of stages, and will hit foes for 7% while pushing them about 2/3 of a platform with it's wind effect.​
/ARMANTLE_Types

ROCK_Conversion_POWER_GEM
Z sprays out 12, tiny brown pixels in a "cone" that starts as big as his torso, and expands to 3x his height at 2 platforms away at which point it'd become trivial to dodge each pixel as the space between each would be massive. Useful for it's spread-shot with each pixel dealing 2% and minor KB, a point-blank blast is even better, as all the KB stacks together and is able to kill at Mario around 160%!​
FIRE_Conversion_FLAME_BURST
Z fires a single, spinning, orange pixel outward with the same stats as Tri Attack when it comes to size/range/speed. On Impact with an enemy, Flame Burst will deal 8% and minor KB to the target hit, as well as emit a huge ring of fire horizontally from the target about a platform in either direction for 4% and hit-stun. Flame Burst will detonate on any solid object that -isn't- part of the stage such as character-made walls and the like.​
GROUND_Conversion_MUD_SHOT
Z launches a tan bunch of pixels that's about the same size of a Ray Gun blast out at Sonic's dash speed, striking foes for 9% and pushing them backwards a little. On impact, the tan pixels will fall apart and fall to the ground below where they impede enemy movement in a spot 1/2 the size of a platform, forcing foes to walk across and stopping dashes in their tracks. These pixelated "traps" last for 10 seconds before fading away.​
/BASE_Types

ELECTRIC_Conversion_ZAP_CANNON
Z creates a sphere of yellow pixels the size of Bowser before him over the course of half a second, before shooting it forward at Jigglypuff's walk speed where it continues on for 2 platforms before dissipating. IF a foe makes contact with the sphere, it will expel all it's sparking energy into the foe as they take 24% damage, and enough KB to kill Mario at 120%. His go-to move for emergency KO's when he's all alone.​
[/collapse]​
Up_Trick_Room
Porygon-Z quickly creates a greenish, translucent digital grid 1platform long, 1platform wide, and 1platform tall. Once on the playing field, the Trick Room will last indefinitely until "used" by either Z or his team mates, but more on that in a moment. As for the immediate effects of the TR, any enemy that attempts to pass through it will find that they are slowed to 2/3 speed just like with the setting in training mode! more an annoyance than a flat-out hindrance to the foe, it still helps you and your team out with certain areas being a tad less favorable for the opposition to hang out in.​
But what about recovery you ask? Well, this is where the "used" part comes in. There can be as many TR's as you have stocks on the team (with non-stock matches allowing one per 1:30 on the maximum timer, so an 8 minute match would allow 5 for example, but a maximum of 8 may be on the field at any one time) and is indicated by the stock icon becoming a square instead of a circle, and gaining a green glow. While stacking TR's does not increase the slow effect if they overlap, it will increase the area that foes are effected by them. Back to recovery, if Z or one of his team mates happens to be KO'ed, they will instead be backed-up via a TR and appear out of it with a slight push in the direction they got knocked out from, but permanently deleting that TR in the process, returning one of your stock icons to normal. Kind of acts like a net to catch friend and foe alike, doesn't it?​
TR also has a 3rd use to Z when it comes to interacting with his own moveset, as his Projectiles will act differently depending if they pass through a Trick Room, as will various other attacks depending who is in the Trick Room! Click below for specifics on his Tri Attack changes.​
[collapse="Projectile Properties"]​
TRI_ATTACK |Like with Alakazam, Tri Attack will cycle through Fire>Ice>Electric as it passes through each Trick Room. Fire will cause the entire TR to become a hitbox for 4% that knocks any enemy away with mediocre KB. Ice will turn the TR light blue for 1 second, completely stopping any foe inside in their tracks. Electric turns the TR into a pulsing hitbox that hits like Pikachu's Dsmash, often trapping foes in hit-stun while dealing around 8%.
PSYBEAM|Psybeam will regain and/or retain it's hitbox while passing through.​
SHADOW_BALL|Shadow Ball will move slowly through a TR only to speed up again upon exiting.​
SIGNAL_BEAM|Signal Beam will ricochet wildly along the sides and corner of TR's before exiting in a straight line once again, though often with a different height.​
BUBBLEBEAM|PIxels from Bubble Beam will float freely at jigglypuff's walk speed while inside of a TR, and are not limited to just up and down.​
ICE_BEAM|Any foe inside a TR when Ice Beam strikes them will be frozen regardless of range.​
DRAGONBREATH|Dragonbreath will "pulse" through all TR's you perform the move through and hit anyone inside for 4% before coming out the other end like normal, but with 1/2 the range it normally has.​
BULLET_SEED|Bullet Seed's Pixels ricochet wildly while inside of TR's.​
FOCUS_BLAST|If Focus Blast detonates inside a TR, the blast lingers as an active hitbox for the next 5 seconds with the same properties until it is hit again.​
SMOG|Smog will turn TR's purple for the next 5 seconds, causing them to damage foes 1% every 1/4 second for the next 5 seconds.​
DARK_PULSE|Dark Pulse grows 2x as fast while traveling through a TR.​
FLASH_CANNON|If Flash Cannon detonates in a TR, it and all overlapping Trick Rooms will have it's "bright pulse" effect.​
AIR_CUTTER|Air Cutter becomes 1.5x faster and longer-reaching after it passes through a TR.​
POWER_GEM|Pixels from Power Gem stop spreading at 1.5x Z's height until they exit a TR.​
FLAME_BURST|Flame Burst's burst of fire comes out vertically if detonated inside a TR, causing a circle to shoot out in all directions, not just side to side.​
MUD_SHOT|The "traps" left behind by Mud Shot last until the TR that they were created in are gone.​
ZAP_CANNON|Zap Cannon's "range limit" is put on hold until it exits the TR's it's passing through.​
[/collapse]​
Team2=Down_Lock-On
With an animation identical in time to Mario's Cape, Z forms a targeting reticule directly in front of him that will then attach to foes until hit by an attack. When on Team2, Z will then fire his SideB a the foe once they've gotten at least a platform away.​
The reticule looks like this, with the interior color changing based on what player you are.​

To help with hitting his target, Lock-On also makes his Side B home-in on them! The homing is very strong, comparable to Samus' locked-on missiles from the prime series, and it certainly helps that dodging no longer gives invulnerability while the target has the reticule on them, making them either have to manage their shield or eat a hit!​
Curiously, Locked-on foes also move at 1/2 speed instead of 2/3 speed while in a Trick Room.​

010100110111010001StandardZ011100100110010001
Neutral_Glitch
Z shakes rapidly in place, making a "brrzt!" sound like when a computer works too hard or malfunctions as he shakes about in all directions. While he glitches, Z becomes a hitbox for 5% and mediocre KB to anything he touches over the next 1/4 second, accompanied by an electrical graphic to those he touches.​
If performed inside a Trick Room, the entire TR will deal 1% to all it touches with an electrical graphic.​
Forward_Tail_Drive
Z lunges his torso and tail forward like Squirtle's Bair, his head and arms staying where they were when he does this, hitting foes for 10% and enough KB to kill around 160% at edge as he first lunges out, and 6% with reduced KB for the remaining time before returning to a neutral pose.​
While Tail_Drive can't be angled, it possesses some very unique IASA (Interruptable As Soon As) properties probably due to some sort of glitch in the game's code. Anyways, the IASA Frames just as his hitbox becomes "weak" allow him to perform any of his other standards while the hitbox remains, putting his unused body parts to work! this includes Glitch, but it seeing as it lacks IASA like the other moves, it's best used to "recharge" Ftilt so it does 11% and good KB once again.​
Up_Horn_Drive
Z's head spins around a few times as it lunges upwards to strike with his horn, hitting foes for 8% at the lunge, and lingering for 4%. It doesn't do too much KB, only enough to start juggles like with Luigi's with the initial hit, but due to Z's internal positioning system, he'll always perform this move at the center of his torso, meaning it will follow Ftilt as it lunges when you combine the moves through IASA, which combined with Glitch can create quite a hitbox.​
Down_Spin_Drive
Z's arms begin to circle each other like rotors as they swiftly dip down to the ground and hit foes for 12%, but rather weak KB, comparable to Utilt's only horizontal. Before returning to neutral the arms deal 8% and much weaker KB like all his other tilts, and much like Utilt his IPS makes sure his Arms are always in-line with his tail, meaning they'll follow Ftilt when it goes either forwards or backwards, allowing Z to potentially "sweep" around himself.​
Combine all his standards to create new hitboxes to keep the opposition guessing, as well as away from your fragile frame.​
Dash_Agility
As he dashes, Z will streamline his body and jet forward about a platform's distance at twice his normal dash speed! As he does this, you'll notice his body flashing orange, indicating the boosted stat as he plows into foes for 10% and mediocre KB.​
Interestingly, if Z boosts through a Trick Room with Agility, it will also briefly flash orange! Any ally that also happens to be inside will also find themselves flashing orange for the next 5 seconds, experiencing the effects of the Bunny Hood item.​
01010011011011010110SmasheZ01101000011001010101
Forward_Tackle
Z's arms spin in place, each at opposite ends as his head rocks back and forth while he charges, before launching forward like a rocket! Similar to his Dash Attack, Z will move forward about 2/3 of a platform but without streamlining his body, hitting foes for a massive 18-25% with KB that can kill Mario at 120%... backwards. Yes, tackle's KB shoots the victim the opposite direction Z was facing, it seems he still has that glitch from his cameo in melee. Still, the power alone can make this a good KO option when you are able to line it up right, and it'll certainly throw off a foe's DI!​
At the end of the move, Z is still seen spinning his arms for a moment as he re-calibrates his position, giving the move a bit of end lag. Like his standards this move also has a unique "cancel", but it can only be done exactly halfway during his end lag. Pressing any button at that frame will have Z snap to the nearest Trick Room as he recovers, instead of standing there in harm's way. I guess some odd programming can come in handy after all.​
Up_Magnet_Rise
Z glows orange like with Agility as he charges this move, causing anybody in a Trick Room he happens to be in while charging both jump and have decreased gravity for 5 seconds. Anywho, upon release Z will rise up as the name suggests, spinning on his Y axis high enough to touch the bottom of Battlefield's top platform before falling down at 1/2 his current fall speed (unless he decides to Fast Fall, regaining his normal speed). Foes hit by Z on his ascent will take 15-21% and rather lackluster KB for a smash, killing at around 180-160%, but with little to no end lag to speak of.​
Down_Double_Team
Z vibrates like with Glitch as he charges, though with no hitbox to speak of, before dashing back and forth about 1.5 Platforms at such a fast speed that after images are seen at the center where he started and the two ends! Foes hit by Z as he dashes back and forth with a "whirr" will take 15-21% with Diagonal KB that can kill around 170-150% near ledges. Double Team actually has him snap back and forth so fast, his after images are only hit-able every 3 frames of animation! What this means is that if a foe were to try and hit you out of the move during the half-second duration, there's about a 66% chance they can hit you at any one area, though wide-area or long-lasting moves obviously have a better chance. Like with Usmash, this has little end lag as he vibrates slightly to stop himself.​
A trick with this smash is it's ability to be angled like most Fsmashes (although unseen on any other smashes for some reason). Angling the move will change where Z appears when the move ends, holding down or no input will default to the center with the other directions popping him in said direction. This makes Double Team a great tool for evasion as like with his standards, it turns trying to hit him into a guessing game as well as a spacing one.​
01000001011001010111AerialZ01100001011011000101
Neutral_Glitch
Z's neutral air is -exactly- the same as his Jab, this means his unique IASA is up here too!​
Forward_Beak_Drive
Z pecks his head straight forward for 12% and KB that can kill horizontally around 150% near ledges, and sticks around a brief moment after as a hitbox for 8% and weak KB. During that time other aerials can still be performed, like with his standards.​
Back_Rotor_Drive
One of Z's wings will begin spinning horizontally, resembling Pit's Uair behind him as it hits for 12% and medium KB, and lingers for 8% and weak KB after the first hit, with it lasting about 3/4 of a second. Rotor Drive will always stay behind Z's body, which is helpful when using his cancels.​
Up_Flip_Drive
Z's body orbits his head vertically and performs a fairly standard "flip kick" maneuver for 12% and mediocre KB away from himself. What's unique about the move however is that the window for IASA is massive, starting right as his body begins to move! Use this to "drag" other aerials along for the arc. Z's torso always goes around his head, meaning it will travel with Fair.​
Down_Drill_Drive
One of Z's wings will spin vertically down below himself at a slight angle, reaching lower than his tail as it hits multiple times for a maximum of 20% if all hits connect. This can either be used as normal "drill" maneuvers are used, as a means to Lcancel > Grab vs shields, or as a way to add a lot more damage to Uair due to it always staying in the same spot near his tail.​

01010100011010000111ThrowZ01101111011101110101
Grab+Pummel_Selection
Z creates a mini-trick room in front of himself about the size of his head to catch foes with, with speed akin to Marth's grab. Once a foe is caught, they'll be seen frozen in the frame of animation they were currently in while caught, as well as have a personally sized Trick Room containing them.​
Pressing A will have Z energize the trick room while rotating it with his arms/wings/whatever you want to call them, they're pretty interchangeable with the little guy. As they rotate you will see their model flipped on their X, Y or Z plane as they are shocked for about 4% at a medium pace for a pummel.​
Forward_Drag_and_Drop
Z's electric cage will float forward at Sheik's dash speed after he gives it a bit of a push, and after traveling about a Platform away spikes the foe down at the ground for 10%, leaving them prone if they do not tech the throw. If done off-stage, the foe must quickly meteor-cancel to avoid certain doom. While the foe is traveling, they can be damaged but have super armor until propelled from their cage.​
If the Mini-TR happens to go inside a normal TR, the foe will instead be spiked down out of the furthest TR away. If there is only 1 then it won't be teleported and they will be spiked as normal, except with 2/3 speed reaction time as they try to get up.​
Back_Recycle_Bin
Z's arms spin slowly as does the caged foe, circling around himself at about Mario's Dash speed after a brief moment. The cage will circle Z counter-clockwise about 3 times before the foe is released sideways for 8%, but in the mean time Z can dash, walk and jump just fine while the foe orbits him as a sort of barrier against attack!​
If Z travels through a TR while performing this throw, the foe will be transferred to the new location and will be flung for 8% in the direction they last pressed before being sent to the Trick Room. Z will still have the mini-TR circling him for the throw's duration, able to take one hit for him before going away.​
Up_Upload
Z says "Porrryyy...ZZt!" as he uploads data into the foe, dealing a whopping 15% to them, but at the same time dealing 5% to himself before they are ejected upwards for decent vertical KB, it won't kill anyone unless you're already up high however.​
If performed in a TR however, the connection seems to be amplified and Z's throw becomes more powerful, able to kill on average at 150%!​
Down_Download
Z says "Porrryyy...ZZt!" as he downloads data from the foe dealing only 5%, but in turn gaining 5% worth of healing! After getting the data he needs, Z will simply release the foe a little distance away like with Bowser's Dthrow.​
If performed in a TR, like with Upload, the power of this throw is improved as he now steals 10% worth of HP, and knocks the foe a bit further away as well.​
Zair_Defense_Curl
Z envelops himself in a personal-sized TR with a tap of Z, which is good for taking 1 hit before fading away into nothingness. Z is immobile while protecting himself in this manner, but falling on people/those who touch it as it first comes out will receive 5% and mediocre KB away. If he manages to actually hit somebody with it, it will also be destroyed, otherwise it lasts for 1 second.​
If Z moves into a TR while using Defense_Curl, he will be able to float around freely inside the TR and use his specials until he is either hit or presses a non-special input.​

01010100011000010111TauntZ01101110011101000101
Up_Malfunction
Z seems to spaz out a little while saying "P-P-POrrrrrygon" before returning to normal.​
Forward_Taunt_Drive
Z says "Por-ry-gon-ZZzzzzzt!" while making a seemingly threatening action toward the opposition.​
Down_Reboot
Z feigns defeat for a moment, before reversing the action to go back into neutral.​

TRAINER TIPS:
Porygon-Z is best described as "Support" for the team. His sheer variety of moves that affect both himself, the foe and his team are just staggering (and the sheer variety in general, even the way he plays changes slightly each time he changes type), especially Trick Room alone. It gives you extra lives! That said though Z will need a lot of support from his team in return, as Trick Rooms are his only from of Recovery beyond his jumps, combined with a high fall speed and tiny weight... ick. Make sure to constantly keep the foe guessing with Z to get the best mileage out of him, to both rack up damage quickly and make sure the team is properly upgraded.
Unlike the two "sweepers" we've seen before him, Porygon-Z doesn't really have that much power to his name, but instead has heaps of damage he can lay onto foes from all his projectiles and debuffs, making it quite easy for others to jump in and land a finishing blow. While on Team2 he acts as a sort of support-gunner for your main mon, locking on and blasting away if they dare to get in his sights. Speaking of Team2, if you're playing Z you need to keep a watchful eye on who you're Downloading from with his Side B's being great in some match-ups with certain team mates and all that. For example, against a camper with Breloom and Feraligatr on the team, you could take Smog from Breloom, switch Z to team 2, and swap to Feraligatr to approach the foe with Surf/Waterfall while they're forced to move from the poisonous pixels left behind from Smog. Of course, you could always just swap to the projectile you find most fun, as they all work with all the possible combinations of Pokemon on-screen, he's like a little version of the whole set ain't he?
TEAM OPTIONS & SUPER SMASHES:
WITH ALAKAZAM : NASTY PLOT
Porygon-Z and Alakazam seem to link-minds if both of them have a projectile out on-screen and activate this Super Smash. Until hit, the two will follow each other as one, firing projectiles together with the same input! Whoever is on Team1 has control, with Alakazam or Porygon-Z floating alongside their partner as if they were stuck together as they combine shots, and the Team2 still able to activate their Down Special when the conditions are right.
The coolest part about this Super Smash is how it lingers when one of them switches, with either the Team 2 mon sticking by your side (as best they can) and firing their own projectile with you, or Alakazam/Porygon-Z doing what they've been doing until they are hit out of the move.
------
It's only fitting that two Special-Attackers get along great. Both of their Down Specials especially work wonders when paired, able to home in and bounce projectiles everywhere = a bad day to be the enemy. In general this pair will play ultra-offense with Alakazam being more powerful and Z being more campy. They are generally interchangeable throughout the match, but Z will often find himself in Team2 after setting up his Trick Rooms / Passing abilities to Alakazam for him to then ruin the foe's day with with his superior kill power.
WITH FERALIGATR : DRAGON'S RAIN
Feraligatr looks to the sky and opens wide, Z floating behind and creating a mini Trick Room inside his gaping jaw to amplify what comes next: Feraligatr proceeds to shoot a Dragon Pulse through the Trick Room, which shoots out a large sphere of Pixelated Dragon-Energy (violet and orange) to the top blast zone. This whole action takes about a second to perform. Once fired, both Pokemon are free to move about as normal, but the Super Smash won't -truly- activate until after leaving the screen. Moments after it leaves, it will begin raining down Violet and Orange pixels over the area of Battlefield at a rate of 10 pixels a second over the course of 5 seconds. They fall randomly around the stage and pass right through foes, hitting them for 5% each and some hit-stun.
A great maneuver for both offense and defense as foes are pinned down by the falling energy, easy targets for either an approaching Feraligatr or Blasting Porygon-Z, it can only be done every 2:30 minutes.
------
As with most of his pairings, Z will often find himself in the backseat for both his own safety and for sheer ranged support, with each of his Downloadable Conversions benefiting Feraligatr's gameplay. Players will often find themselves using Porygon-Z first to set the pace with Trick Rooms and generally keeping the foe at bay with Tri Attacks, before swapping to Feraligatr for most of the fight there on end. Between stocks you may find the time to swoop in with Z and boost up Feraligatr with Agility as well, which can lead to some huge problems for the foes.
WITH BRELOOM : ASSIST
Porygon-Z will rush in with from the air as he performs a flurry of rapid, random inputs towards the foe, becoming a flurry of hitboxes for the next second before jumping back to where he originally was. Breloom can easily capitalize on his lingering Glitchyness to use as either a defensive wall to lob seed bombs and escape pressure, or to combo off of as the foe is hit by the various hitboxes.
Like all assists, this can only be done every 5 seconds.
------
Porygon-Z and Breloom are fairly interchangeable here, mainly due to their Assists working off each other to lead into huge strings of combos both up close and afar. In this pair it may actually be Z taking most of the spotlight though as he can soften the foe up from the safety of range and Trick Rooms, with Breloom providing further support from either Poison, Paralysis or Sleep. Once beat up enough, just swap in Breloom to land one of his mighty finishers on the target for the win. In most cases though this pairing is mostly preference based on who is played more compared to most other pairings.


Next up is GenV, the realm of the original Trainer JOE! Here's a hint for who it is: he is based on both a popular Japanese show, and a very old game.​
 

JOE!

Smash Hero
Joined
Oct 5, 2008
Messages
8,075
Location
Dedham, MA
Well, we're here in the latest Generation, and my personal favorite: Black and White! By the time this rolled around, I was already deep into the series again, especially the metagame with Pokemon Online and learning about the "inner workings" of Pokemon, so to speak. The games also saw a revolution in terms of the story (as seen in the first Trainer JOE!) as well as a slew of new abilities, moves and Pokemon, the most of any gen so far! Hmm, speaking of all this metagame stuff, I think we've gone through enough so far to introduce part of the set within the set:
DUAL COMMANDS
What are they?
Dual Commands are inputs that can control the Team2 Pokemon's actions while playing as the Team1 Pokemon as JOE! commands the second team with his other hand at the same time as the first. An important aspect of both the next member of the team, as well as gameplay with ATJ in general. There are 5 commands total, and each have their own nuances to keep track of, but mastering these can really give you an edge in teamwork vs the opposition.
Note: Team2 will not perform their Team2 special if within 1 platform of Team1 unless Team1 isn't performing any actions in said range for at least 1/2 a second.
TEAM1 SHIELD :rtrigger:/:ltrigger: = TEAM2 GRAB :zbutton:
Pressing Shield at any distance will have Team2 perform their grab. By default, the Pokemon will then simply perform their pummel over and over with the normal properties unless commanded to do something else during that time. Upon grab-release, the victim has anti-grab armor for 1 second.
If the Team2 Pokemon is airborne, they will perform their Zair. Neutral Air Dodge will also count as a "shield" input for this command.
TEAM1 DODGE :rtrigger:/:ltrigger:+:stick5: = TEAM2 F-TILT :stick6:+:abutton:
Dodging/Rolling while within a platform of Team2 will have them perform their Ftilt, which can be especially useful with the likes of Alakazam, Feraligatr and Breloom as their tilts are all long ranged (and powerful in Gator's case) to use as cover when rolling past them.
Directional Air Dodge also works for this, and as such Wavedashing near the Pokemon can command them to attack. If the Pokemon is airborne or has the foe grabbed, they will perform their Fair or Fthrow when this command is issued. In the case of the latter, the foe has only a mere 1/2 second worth of anti-grab armor.
TEAM1 TAUNT :dpad: = TEAM2 N-SPECIAL :bbutton:
Inputting a Taunt will command Team2 to perform it's Nspec, no matter the distance. Be wary of the positioning of this however, as laggy taunts of wrong-facing Pokemon can end up being punished hard. The taunt command can be done in the air as well, but will cause the Team1 mon to be inactive for 1/4 of a second as JOE! gives the other his command.
Note: Specials that are either held or charged will have the Pokemon hold it until instructed to do otherwise, with pressing taunt mid-taunt being able to cancel the special. Z is a special case here, as Conversion will select the Top Left color on the selection wheel for the Pokemon in Team1 with him, and then go clockwise from there with each press of Taunt.
TEAM1 JUMP :xbutton:/:ybutton: = TEAM2 THROW :stick7:/:stick9:
If your partner has the opponent grabbed, Jumping within a platform of them will have them perform their Uthrow. Alternately, if you are jumping within range of another throw (Usually Bthrow, but they can Fthrow at times too), they will attempt to throw the opponent towards you with that throw instead. As with the Ftilt command, opponents have 1/2 a second worth of anti-grab armor.
TEAM1 THROW :stick7:/:stick9: = TEAM2 JUMP + N-AIR :xbutton:/:ybutton:+:abutton:
Opposite of the last command, if you have an opponent grabbed and throw them into the air near your Team2 partner, they will jump up and attempt to intercept with their Nair. Depending on the throw, it is also possible to buffer in Fair with a Dodge, Zair with a Shield (you do not give foes grab-armor), or even Nspec with a taunt!


With that all said, It's time to introduce somebody who not only has special Dual Commands of his own, but was also almost in the original Trainer JOE!...
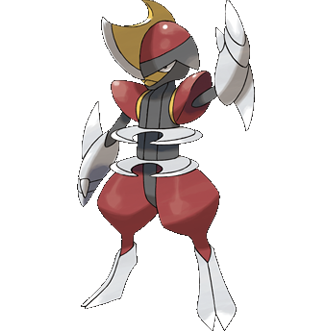


It leads a group of Pawniard. It battles to become the boss, but will be driven from the group if it loses.


STATS
SIZE 6 Bisharp is rather tall, sitting between Ike and Link in this aspect (minus their swords).​
WEIGHT 8 Given his metal armor and size, Bisharp is fittingly heavy, and actually mirrors ROB's weight.​
RUN 4 Bisharp is tied with Breloom in run speed.​
AIR 5 Bisharp has average air speed, and his jumps aren't really much to write home about with both being about equivalent to Link's.​
FALL 9 Bisharp has metal armor, of course he's not gonna be floaty.​
TRACTION 5 Bisharp also has average traction, allowing for decent wavelands/dashes unlike the previous Pokemon.​
Bisharp has mostly average stats, with outliers in both Weight and Fall Speed. Like Feraligatr, his sheer weight will add a lot of staying power to him and allow him to survive well past 100% naturally. Unlike Gatr, his recovery isn't as versatile, which may hamper him slightly in the long run.​

NEUTRAL
METAL BURST
Bisharp goes from his neutral pose to the one seen in his official art above, with the hand raised and all that, as B is held. As the move is charged, Bisharp appears shinier and more metallic as a shining GFX travels up his arm to indicate the amount of charge up till it hits his fingertips after a full second. Once done, he will wipe his arm to the side (also seen above) and take on a metallic sheen and/or flash silver indicating a maximum charge. If you are curious about all the metal talk with the shinier texture and silver flash, well that's because the more he charges the more of a Metal Box effect he gains. Specifically, every 1/10 of a second of charge will gain him 1/10 of a Metal Box effect, ultimately increasing his weight and fall speed by up to 2x their current values, adding 10% worth of Heavy Armor, but reducing his Dash to 1/2 it's normal value.​
While taking damage will reduce the timer of your Iron Defense like the normal item (Base of 10 seconds, getting an actual Metal Box will not stack), Bisharp can manually shed the coating by Tapping B to create a shock-wave from the middle of his body the size of Lucario's Dsmash for 10-20% and enough Horizontal KB to kill Mario at 160-140%!​
While great on it's own for additional defense, it is amazing when you consider how it stacks with his ability: Defiant. In Smash, Defiant allows Bisharp to both keep his focus while clashing with an opponent's attacks by allowing him to "Parry". Parrying has a small window of activation just as you clash with an attack, during which you can send out another attack (or the same one) without any start-up lag, and half the ending lag! On top of this, attacks out-of-shield are 1.2x more damaging to allow him to counter those who try and give him any pressure. When combined with Metal Coat Defiant can allow him to simply plow through other attacks using the Heavy Armor even as he clashes with them, resetting the foe as he continues attacking, and even use up his Metal Burst charge by parrying as he clashes and causing the attack to deal 1.4x the normal damage on hit!​
Given the shorter range on most all of his attacks, Bisharp's ability to parry and deal more damage from shield is something very important to adapt to while playing him, especially when you can build up some armor and choose to make your counter attacks all the more devastating.​
SIDE
METAL CLAWS
Bisharp reaches to his chest and pulls out a circular blade that looks a lot like one of his Torso-Blades, and tosses it forward like a frisbee from hell with speed like Toon Link's Boomerang. The blade itself travels as fast as one of Shiek's needles, and will curve back to Bisharp with great homing ability after traveling a maximum of 3 platforms, hitting foes for 5% and some hit-stun, before ricocheting off of them and back to Bisharp. Bisharp can have two of these blades out at once with one of them having to return to his body to toss another, and can angle the toss at 45* intervals.​
Speaking of ricochets, the Metal Claws will ricochet off of anything, including platforms, opponents, and each other! While they return to him automatically after ricocheting off of something (unless they hit more stuff on the way back), Bisharp's own hitboxes can hit them back out easily for more spacing and damage opportunities!​
UP
NIGHT SLASH
With start-up of about 1/4 of a second as Bisharp brings one of his arms to the side in a "ready" position, you will then move in the direction pressed during this time at speed similar to DK's run speed, much like a Spacy Up-B, and hit anyone in your path for 5% and mediocre KB as you cut a dark trail in the stage about a character length behind you that can hit foes as well. Once released, Nigh Slash behaves more like one of Sonic's Spin-dashes than a Spacy Recovery as you can move back and forth, and even jump by pressing Up as long as you hold down the B button for up to 2 seconds before skidding to a halt with noticeable sparks from his steel feet. Releasing the move will also have Bisharp bring the "dark" blade forward for a final slash as he skids to a halt, dealing 10% and stronger, but still mediocre KB unless he releases directly on top of a foe, in which case the Night Slash will deal 15% and strong enough KB to kill Mario vertically at 150% or lower depending if you jumped with it.​
If you start this move in the air, Bisharp will lunge forward in the direction chosen about the same distance as Lucario's Extreme Speed, but with slightly less angle-ability in exchange for the damage. Ending Night Slash mid-air will put him into Special Fall. Unlike all his other attacks, Night Slash is actually Transcendent, meaning it is exempt from his Defiant-Parry system (though it still does more % out-of-shield).​
TEAM 2 / DOWN
SUCKER PUNCH
If any hitbox is present within 1/2 a Platform of Bisharp as he activates this special, he will lunge out at 2x his dash speed in any direction as he homes in, as well as 10% heavy armor (stacking with Metal Burst!) to rip at the offender with a 12% hitbox that leaves a black "tear" effect on the field like with Night Slash, able to kill most foes at around 130% near edges.​
Unlike other counters, this can be evaded if you move more than a platform away from Bisharp as that's the max distance he'll lunge, as well as just move sporadically/shield/roll just in time. Or, given that it has essentially the same end lag as Falcon's Side B on whiff, it's equally as punishable if Bisharp messes up his prediction. That said, this makes for an amazing Team2 maneuver given the opposition most likely won't be watching for a surprise attack from Bisharp while dealing with the controlled Pokemon. By himself, Bisharp can also lure Foes into this with Metal Claws in order for them to try and approach, only to then hit them with this and maybe even chase with Night Slash.​

NEUTRAL
FURY CUTTER
Alternating swipes with his blades, Bisharp will slash at a speed comparable to Wario's jab in a loop of: Horizontal Right, Vertical Up, Horizontal Left, Vertical Down, repeat, indefinitely as long as you tap A. Interestingly, each swipe only does a mere 1% with hit-stun unless you end up hitting something, at which point the next swipe will hit for an additional 1%, capping at 5% per strike! While it might not sound like much, each hit will add up very quickly if the foe stays put.​
Metal Claws are best bounced back with this move, and when they hit, they count as a strike to add damage!​
SIDE
BRICK BREAK
Bisharp pivots counter-clockwise and slashes his left blade forward in a "backhand" like fashion, traveling forward a character length as he pivots around. The hit only deals 8% and a small amount of KB, but it's speed and range make it ideal for following a parry, especially when you can angle it. Especially useful when you use it to parry by itself, as you can move forward twice, or if the opponent tries to defend themselves seeing as the backhand from the blade will deal 2x shield damage as it hits with the hook of the blade (40/177hp to be precise).​
UP
IRON HEAD
Mimicking DK, Bisharp swings his axe blade down in a huge vertical arc that covers above and directly in front of him for 12% and strong diagonal KB.​
His slowest tilt (again, DK side B), it at least leaves a huge hitbox above himself to clash with aerial approaches, since in Smash4 they'll be bringing back the ability to clash with those, haven't you heard?​
DOWN
LOW SWEEP
Bisharp swings his legs out while digging a hand into the floor to use as a pivot, swinging himself out like Mario's Dsmash and hitting for 6% and low vertical KB. Extremely quick, it works great as a counter to then hit a foe with any of his other standards as it can pop them up or parry other "pokes" easily.​
DASH
CIRCLE KICK
Bisharp speeds up just a tad as if you pressed dash again and flings his body head over heels to strike out at foes in a devastating double-kick maneuver. Acting as sort of a reverse sex kick, the hitbox as he flips hits for 8% and is rather lackluster in terms of power, whereas the aerial stomp forward deals 13% and has enough horizontal power to kill a foe near 130% at an edge. After the kicks he lands in a crouch position as he skids on the floor with a bit of end lag.​
Similar to both Ftilt and Utilt, the moving hitbox is perfect for intercepting attacks to make use of your unique spacing game. Delving deeper, you remember how he dashes again to get the momentum for this? Well, that momentum also carries over to Dash-Attack-Cancel maneuvers! DACUS, Boosted Grabs, and Boosted Item Tosses will travel very far and have a cool "skid" effect when Bisharp uses them, and interestingly he can also Jump-cancel this move, giving him about 50% more air speed than your average dash-jump.​

DUAL COMMANDS
MULTI-SMASHES
As stated before, Bisharp has some unique Dual Commands with his smash attacks. No matter the distance, when Bisharp begins to charge a Smash, his partner in Team2 will perform said smash! Thanks to his experience as a pack leader, the other Pokemon will take some command from Bisharp and look to him for combat advice, which allows for this. That's not to say Bisharp's smashes aren't special on their own though, as you'll see they each come with a dark side-effect...​
SIDE
VENGEFUL SLICE
Bringing both bladed arms to the side as he charges, Bisharp will unleash a 3-part frenzy of slashes forward with each tap of A, much like Link's Fsmash. The first two hits are each diagonally downward slices in front of him, taking a step between the first and second and dealing 7-10% each, with surprisingly light KB for a smash. The third hit has Bisharp stab both arms forward for 10-14% however, taking another step and hitting hard enough to start KOing Mario around 135-115% near edges.​
As you may have assumed, this has multiple hits for a reason: Parrying. You see, if Bisharp uses this to counter an attack with one of the first two hits, the next hit will not only be faster, but make him take a quicker step to extend the range as well as dealing the same increased shield damage as Ftilt (anywhere between 35/177 to 70/177 shield damage) regardless of whether nor not the opponent is shielding the attack! Noticeable from the sparks flying from his blades once continued from a Parry, Bisharp will make sure to punish the foe for trying to test his blades by lowering their defense significantly.​
UP
TYPHOON'S EDGE
Taking an arm to both his front and back as he charges, upon release Bisharp will jump and spin his body in a deadly pirouette as all the various blades on his body hit repeatedly for a total of 18-25% and KB similar to Samus' Dsmash when Bisharp lands, sparks flying from his feet as he skids to a halt.​
Taking as long as Mach Tornado when tapped to perform, the intense spinning caused by Bisharp hopping to the air will actually pull foes in towards the blades with strength like DDD's Inhale! Once sucked into the blender, landing with Bisharp will spike foes down into their prone state, forcing them to get up in some manner which can lead to a delicate tech-chase situation.​
DOWN
PAYBACK
Crossing his arms in front of him as he charges, Bisharp will then swing his arms behind him, slashing for 8-11% and mediocre KB, and after a brief moment swing both arms blade-first outward in front of him to rake at foes for 10-14% and KB that can kill diagonally at 140-125%. Although Usmash may take a bit longer overall, this is usually considered his slowest smash due to the pause between hits, making it as slow as Wario's Dsmash overall.​
That said, the pause is actually beneficial to Bisharp as he has Super Armor during it! If a foe were to strike him during the pause, he will immediately lash out with the second hit with visible "dark" trails like with his specials. This indicates that the foe now has Bleed Damage, as well as the feint black slashes over their midsection. Bleed Damage will deal 1% every 1/3 second for the next 5 seconds to the victim, and 1/4 of a second is added per every successful strike by Bisharp thereafter. If planned right, this can be an amazing way to punish foes through sheer damage alone.​

NEUTRAL
AERIAL ACE
Bisharp does a diagonal Slash in front of himself for 4%, a Kick for 5%, then swings in a 360* arc with his head-blade for 6%. Each hit does weak KB, except the spin which does mediocre KB in the diagonal the foe got hit from. Like in the games, it is near-impossible to avoid the myriad of attacks thrown out here, and it's a great tool for a variety of situations for Bisharp including intercepting other aerials, and just general combo set-ups.​
FORWARD
X-SCISSOR
Bisharp crosses his arms before lashing out in an X slightly diagonally down before him. Lingering a moment and hitting for 7% and mediocre KB, hitting at the exact point his blades cross (indicated by a few sparks) will deal 14% and high horizontal KB, enough to kill Mario at 120% off-stage! If you don't want to kill just yet, the sweet spot isn't active for a moment which allows Bisharp to put on the pressure well enough with the initial hit, and doesn't come out at all if you L-cancel the move. The large hitbox and placement makes this a good option for air-to-ground parrying.​
BACK
SLASH
Bisharp turns around mid-air with a Diagonally upwards slash from his right arm at a speed comparable to Wolf's Bair. Hitting for 11% and with enough KB to kill at around 130% at an edge, Slash is great for aerial conflicts due to both it's turn-around and speed, as well as how Bisharp actually reaches out for the slash with range comparable to MK's Dair (if turned sideways).​
UP
DUAL CHOP
Slashing one blade above his head in a small arc, Bisharp swipes the other as the first retreats in one fluid motion to create a long-lasting hitbox that hits 4x for 4% each hit, one for each blade either swiping in or out. If a foe manages to get hit by all 4 hits, the last will have vertical KB similar to Yoshi's Uair and able to kill off the top at higher %, but otherwise this can be of great use when attacking foes from below platforms, or when hopping up from below the edge when recovering.​
DOWN
BUZZSAW DROP
Making a "T" pose, Bisharp will spin rapidly like with his Usmash and fall a short distance before regaining control. The drill does up to 22% damage total, and interestingly will not cancel unless you complete the animation mid-air, or manually L-cancel the move. Short Hopping this will allow Bisharp to remain spinning on the ground (with the neat sparks GFX at his feet) until the attack is done, really putting pressure on the foes!​

PUMMEL
ASSURANCE
Bisharp has a rather unremarkable grab, and his pummel is no better at 3% every 1/3 second as he smacks the opponent back and forth with his hand.​
If the grabbed victim is taking any sort of damage while grabbed however, such as bleed damage or Team1/2 attacks, Bisharp will instead stab the wound with his metal hand repeatedly, causing 5% every 1/4 sec instead!​
FORWARD
FOUL PLAY
Bisharp delivers a vicious headbutt with his axe blade, stunning the foe for a moment as they clutch their face (like with the Curry animation) for 4%, and as they're stunned he has just enough time to deliver a grounded X-Scissor to them for 6% and high horizontal KB, but generally not enough to kill until very high %. At least the X-Scissor can hit multiple targets.​
BACK
SAWMILL TOSS
Bisharp hooks the opponent with one of his blades and takes them for a ride: spinning twice at a different diagonal each turn like with his Dair and Usmash before launching the foe either straight or at a diagonal based on your input during the spins. While Bisharp winds up, his various blades slice up both the foe and anyone around him for a total of 12%, but neither this or the throw have any real knockback power to speak of as the flung foe has a set KB of about 2 platforms, with very little added on with %.​
UP
FLING
Letting go of the opponent, Bisharp will perform a flip-kick to their chin that sends them vertically for 7% and surprising KB that sends them flying hard enough to start KO'ing off the top around 140% when you're on a platform, and lower the higher you go. While fairly standard for a throw, the flung opponent also serves as a handy tool for Bisharp, as they act like a projectile with a hitbox for 3-13% and decent KB depending on their weight as they travel upwards.​
DOWN
BLADE-DROP
Bisharp rolls backwards with the foe in tow, landing on his back as they fall face-first into his torso blades and take some nasty damage, 9% with Bleeding! As the foe gets knocked behind Bisharp in a reeling state, he performs his standing-tech to get back up and hopefully keep on the foe to keep them bleeding out.​
ZAIR
FAINT ATTACK
Bisharp's Zair is somewhat unique in that it works like a traditional Zair, except without a tether. Pressing Z instead will have Bisharp flash black like with his Special Darkness slashes, and phase slightly like Lucario's Double Team. As this occurs, he is also seen bolting forward up to a Platform's distance in a pose reminiscent of Fox/Falco's Side B for 6% and light KB to those he touches at the end of it, unable to perform it again until he touches ground. Like with all Zairs, if used after/during an air dodge, he will special fall after the animation finishes, and like with Tethers he will snap to an edge if in range, though it's significantly shorter than both normal Tethers and Night Slash.​
Unlike other Zairs however, Faint Attack itself can be canceled into either an Aerial, Air Dodge, or Jump (if he hasn't already) while giving him his max air speed right away, making cool things such as Fair > Faint Attack > Cancel into Bair or another Fair possible. Mastering this Zair can be a real boost to Bisharp's overall mobility in the air when used right, even taking in his fall speed and mediocre jumps into account.​

UP
METAL SOUND
Bisharp runs his blades against each other slowly, creating a really cool "Shhhhhiiiinnngg!" noise. If an opponent is within a platform of him as he performs this, the noise will make them face him if they weren't already, unless they were performing any sort of action.​
SIDE
TAUNT
Bisharp raises his hand up, then waves it in front of his face while mocking the foe with "Bish..... arp", the latter as he ends the taunt (sounds like something else at first, huh? :troll:). Like with Metal sound, this will make foes turn to face him, except it has half a platform's range but with a guaranteed turn-around towards him if the foe isn't doing any sort of attack that moves them like Wolf's Fsmash.​
DOWN
SCARY FACE
Bisharp does the kind of thug "thrust" forward with his face and shoulders as his eyes glint, saying "Sharp!" as he does so. Like all his taunts, this will turn the foe's attention if they are within half a platform of him, but unlike the other two, this scares foes and makes them turn away from him.​
These effects aren't really vital to his gameplay at all, but at least they're fun to mess around with if the foe wasn't paying attention.​
TRAINER TIPS:
Bisharp is the tactician of the bunch when you boil everything down: using quick, short movements, tricky moves, clashing parrys, shield play both vs his and opponent's shields, and spacing/priority in general to get the edge on the opposition.
That said, it never hurts to play dirty with him. Setting up foes to approach you with Metal Claws is what most Bisharp strategies start off with, but running in with Night Slash or Faint Attack can work too, but those two don't buy you a little time to charge up Metal Burst. From here you essentially keep baiting and punishing attacks, hard, and take full advantage of Dual Commands to send out long ranged smash attacks, sending foes into your aerials, or shielding just for your partner to grab, then charge a smash out of shield so that it's stronger. The options for **** mo... excellent team combos are nearly endless given the nature of Bisharp's attacks to keep foes at bay in order for you to position everything just right to finish them off. Even on Team2 he's a menace as any attack geared toward your controlled Pokemon can be met with a Sucker Punch to the gut from Bisharp, swinging the momentum in your favor once more (especially if sucker punch clanks, holy crap...). Essentially, Bisharp being on the field turns the game almost into a chess match with both you and the opponent having to think twice and out-predict the other due to his dark blades and commanding presence being able to change the flow of battle off of just one misjudged attack.
TEAM OPTIONS & SUPER SMASHES:
WITH ALAKAZAM : GUILLOTINE
This super smash requires a foe to not only be within range of the pair in order to work, but also be -between- them, it's definitely worth it though.
Once initiated, Alakazam will hold the foe in place with confusion, them visibly struggling as Alakazam recedes to the background slightly with Bisharp walking away from the two, up to a Platform away unless A or B is pressed, otherwise he'll start the attack once he reaches max distance. Once a platform away, Bisharp will raise his arm up in his signature pose and glance back at the trapped foe with a glint in his eye, before dashing back with both blades leaving dark trails like with Night Slash, striking the foe for 20% and high KB normally, unless you manage to tap A or B -just- as you touch the foe. In that case, the crossing blades will deal an incredible 40% with base KB rivaling Jigglypuff's rest. Yeah, they are pretty much toast at that point.
Unlucky for you, Alakazam's grip weakens as the foe struggles, with them being able to escape with normal grab difficulty and turning Bisharp's lunge into a normal Night Slash for all intents and purposes. This is where interrupting the move may come in handy, as although it's at it's best when Bisharp has the time to prepare the move fully, manually striking will hit for 7-14% and have either mediocre or "decent" KB depending on the distance and f you hit A/B at the right time.
Timing is crucial for this Super Smash Killer to work, as not only is the clock against you with the foe being able to escape (better wrack up that damage!), Alakazam and Bisharp can only attempt to do Guillotine only once per 2 minutes, and that's with the other requirements!
------
Alakazam works *very* well on Team2 in this pairing, with all his throws, smashes and Ftilt (more on that in the next set!) working extremely well with Bisharp's normal game-plan. An especially mean trick is to Dsmash or Usmash in close proximity, as the respective multihit moves will trap foes perfectly to be hit by the finishers that follow. Other than just meshing well with their "bread and butter" so to speak, Bisharp can really have fun with Metal Claws with proper spacing, as hitting them off of Alakazam's Reflect against an opponent, only to then bounce of him, back to the opponent, and back to Reflect, etc, can really frustrate a foe into making some stupid decisions, and maybe make them face the Guillotine for it. Alakazam may be seen in the backdrop more often than playable due to his relative frailty, but depending on the situation he can really take the spotlight with his ability to switch places with Bisharp to mix up both of your positioning, and Sucker Punch in general making foes weary of trying to punish Teleport.
WITH FERALIGATR : HONE CLAWS
Bisharp and Feraligatr face each other and swipe their claws/blades at each other, making clank/shing noises and visible sparks. Once that is done, you will notice that each of their hands now have a "glint" to them for the next 15 seconds. What does this mean? Well, they both just sharpened each other's attacks to now activate Bleed Damage on every attack (except any pure-water hitboxes like Hydro Pump (moves that can hit with Gatr's body will still do bleed damage), and any non-blade moves like Dash Attack). A truly fierce combination, the effect is even put on pause if one of them switches out, the timer resuming when they're in play!
Unfortunately, Hone Claws can only be performed twice per match with a little "blade" ammo indicator next to the playable Pokemon's portrait when both are on the field. Make use of the effects wisely!
------
This pair is best played apart from each other, and with constant switching involved as Bisharp's ability to send out a foe to be Fsmashed by Aqua Tail at range, or Hydro Pump pushing a foe in range of Sucker Punch is just too good to pass up. Making use of their various burst mobility tools, the two should try to keep ample space for the foe to be juggled between them and to make use of throw commands from the two, especially Hydro Cannon > Pretty much any charged smash of your choice. Unlike most of Feraligatr's pairings, this one is really up to preference on who gets more playtime over the other, especially when they both can get Hone Claws.
WITH BRELOOM : ASSIST
Bisharp will do a short hop only to lunge forward with Faint Attack, and cancelling it into a Dair as soon as he's at the opponent's position. Otherwise he'll just do Dair at the end of it. Once Dair hits, depending on his distance from the ground he will Lcancel and immediately perform Usmash, continuing his re-inaction of a living Buzz-saw and absolutely tearing into the foe. During all this, Breloom is of course free to launch leech seeds at the trapped opponent to get free heals for Bisharp as all the hits add up to % gained, or add to the offense by using him as a spinning substitute of pointy death to charge up a Focus Punch behind, and hitting the prone foe left behind!
Like all assists, this can only be done every 5 seconds.
------
Bisharp and Breloom work best when they stick very close to each other, with Bisharp usually in front of Breloom as commanding him will almost always reach through Bisharp to hit foes with Grabs, Leech Seeds, Seed Bombs (especially funny when his taunts turn the foe around to get seeded in the face (smirk) ), Mach Punches, and even his Grab all reach past Bisharp's width. This can be abused either way as with Bisharp in front, Breloom is free to just do his cool fighting shenanigans with a Sucker Punch/Ftilt/Grab safety net he can attack past for protection, and support while Metal Bursting with leech seeds. An especially potent trick is to have Bisharp grab a foe then Dynamic Punch them fully, the increased pummel + free hits from the multi-jab can totally ruin somebody's day. Like most of Bisharp's pairings it boils down to preference, but be careful with these tow as while they like to stay close, that opens them up to both being hit and sent offstage, their least favorite place to be.
WITH Porygon-Z : SHARPEN_APP
Z creates a mini-trick room before him, only for Bisharp to slash at it with his dark energy, turning into a black, D20-shaped object that floats in place, and resembling a Smash Ball in size. When hit by melee attacks, the warped trick room will send out 3-10 pixels depending on the strength of the attack, that actually home in on enemy targets and hit for 1% each and some hit-stun, traveling as fast as Metal Claws with near perfect homing within a Platform's distance. This "App" lasts indefinitely, but only has 75% stamina before it shatters in a small explosion for 10% and mediocre KB. Hitting it will also push it away a bit in the direction the attack would normally send the object, and yeah bigger hits move it slightly more.
This Super Smash is great not only for the two of them by supplementing their ranged game, but also for the 3rd team member who wants to give it a go (such as Breloom who can hit it fast and from afar!). Unfortunately, Z only has enough juice in him to make 4 over the course of a match.
------
Porygon-Z definitely takes a back-seat here as Bisharp shreds the oppostion, using not only SHARPEN_APP, but Z's awesome projectiles (Air Cutter, Dark Pulse, Flash Cannon) to confound the foe to fall prey to Bisharp's tricks and punishes. The fact that Trick Room slows down foe reaction is a god-send to Bisharp as well, given that he can really just take his time to play with his prey as they try to fight back once he's got the positioning he wants. Just be careful with Bisharp given his pretty limited recovery distance, or you'll find your trick rooms being used up more often than you'll like.
Oh, and remember Z's weird Fsmash? Well, that's a perfect move to launch foes back towards Bisharp with here! Really, Z goes all out on the "Support" role here and unlike Alakazam, doesn't have much business being in the foreground once he's set up the field for Bisharp to command.
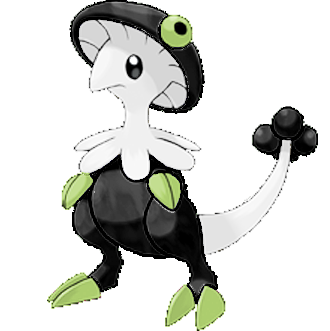


Well, we made it through all 5 generations! Next up is a brand-new Pokemon from my own Zelend region, maybe you can guess it's type from the clues in Porygon-Z?​
 

JOE!

Smash Hero
Joined
Oct 5, 2008
Messages
8,075
Location
Dedham, MA

TRAINER TIPS:
Armantle is definitely the group's tank, but with a twist in how he supports the team through stage manipulation and passive damage as well.
The key to victory with Armantle is to know when to switch not only your Pokemon, but also your stance, as Shield allows for a free wall for your team mates, and Crawling/Standing have their own nuances that effect how he plays, especially on Team2 with his differing Ftilts. In general, he may be out as the lead Pokemon, to set up then be put on Team2 for his wonderful Overheat to add damage while his friends take advantage of the new platforms and slopes with their superior movement options. or, he could be a hidden threat to come out mid-match and turn the tables, hard. That said, Armantle dreads being the last one standing due to his lack of reliable KO moves outside of Eruption and Earth power juggles (Up Smash helps a lot here), as well as how easy it is to gimp him given his lack of real recovery options. Support Armantle and he'll carry the team to a red-hot victory!
TEAM OPTIONS & SUPER SMASHES:
WITH ALAKAZAM : STEALTH ROCK
Armantle performs Ancient Power in a wide area, a Kirby-sized rock popping out in even intervals taking up a Battlefield's length of distance. Alakazam then levitates each one at a random height between 1/2 the distance between a platform and the ground, and Mario's height while standing on the top BF platform, with no time limit as to how long they last normally.
That is until a foe comes in contact with one, causing it to shatter for 6% and mediocre KB in one of 4 diagonals depending on where they hit the rock. This Super Smash has no timer, but instead must wait until every rock is destroyed in order to be used again, which can come sooner or later depending on if you are facing an agile foe, or one who is actively attacking the rocks to get rid of them, etc. Unlike other super smashes, this also has a bit of lag to it on start up, leaving the pair a bit vulnerable if used mid-match.
------
Armantle and Alakazam are BFF's. Armantle's "free" damage over time combined with Alakazam's reliable kill set ups, as well as Alakazam's ability to teleport Armantle to recover him on top of Armantle providing a wall for Alakazam to hide behind make for incredible synergy. That said, it takes a lot of "baby sitting" of the other when playing the two as when you're playing on Alakazam, you need to be aware of Armantle at all times in case of rescue, and when on Armantle you need to make sure Alakazam isn't getting bodied, as you need to swap quickly or position yourself as a wall.
WITH FERALIGATR : STRENGTH
Armantle goes into his shield state and Feraligatr then lifts him up off the ground with a grunt. Damn, sheer force is a cool ability! Anywho, from here Gatr can use his new massive rock as a weapon, being able to walk, jump and turn around as well. Inputting a dash will have Gatr put Armantle down and charge forward, pushing him along with ease for an invincible hitbox dealing 8% and mediocre forward KB, making for an incredible approach (as long as a foe doesnt jump over and hit Gatr, ending it). This move lasts until you either travel 2 platforms, hit an edge, or press any input, ending Strength.
Pressing Up will have Gatr raise Armantle over his head, able to then throw the massive weight either Forward, Backward or Upwards for 12% and enough KB to kill around 130% reliably. Even Gatr isn't strong enough to really fling Armantle around like this however, and he will only travel about a Ganondorf if tossed forward/backward (with the back throw being slightly shorter in exchange for a bit more height to arc), and half the distance when tossed up (but he also crashes down). Inputting any of the throws will end Strength, but pressing Down will return to the basic Strength stance. (Note: if you happen to toss Armantle off an edge, he will heat up again and DI/Jump toward the ledge with Team2 ledge snap, meaning he can't be ledge-hogged, but still gimpable if a foe's on his toes.)
Pressing Down normally will have Gatr slam Armantle to the floor, creating a shockwave like DK's Down B for 14% and minor vertical KB. Alternately, if a foe happens to be right under Armantle as he comes down, they will be sent downward for 14% and Spiking KB if at en edge/in the air, or be pitfalled if grounded! Not the most versatile option, but it can set the foe up for a quick follow up as it instantly heats Armantle up, allowing for either Pokemon to attack.
Probably the most versatile of the Super Smashes, Strength has a 20 second cool down between uses, with attempting to try it again showing Gatr being too tired to lift Armantle.
------
The two heavies of the team predictably synergize by stacking their strengths, but also share some of the same weaknesses, namely heavy projectile use. Fortunately their combination of water and lava controlling space (Ancient Power can provide some cover, letting Hydro Pump be used like Artillery), combined with Gatr's unique movement options across Armantle's rock formations can surely give them an edge in combat. More importantly their high KB attacks and staying power will make it easy to secure momentum in a match, leaving foes pressured to retake lost ground, especially with how Armantle's Smashes become so dangerous when he has Gatr to set an example.
WITH BRELOOM : ASSIST
Armantle will hop forward and perform Nair towards the foe, landing about halfway through and either using Jab if he was Standing Prior, or Ftilt if he was Crawling, then follow it up with Fossilize. Either way, this creates a great defensive Assist for Breloom as even if the foe tries to approach again after being Punched/Roared, Fossilize makes for a scary thing to come in on. To top it off, Breloom could always hop in and get some armor!
Like all assists, this can only be done every 5 seconds.
------
Breloom and Armantle have some of the same synergy as Alakazam+Armantle, but are slightly different in how Breloom's Leech Seeds and Spore both make for easy healing and damage for Armantle due to his passive damage abilities. Due to this, Armantle will msot likley take a back seat to Breloom for most all fights after setting up a wall or platform for Breloom to work with, and then be used for his Assist, Overheat and wall properties to further help Breloom's offensive game.
WITH Porygon-Z : HYPER BEAM
Armantle braces himself and opens wide, a white hot glow coming from his mouth as Porygon-Z quickly forms a mini Trick Room in his mouth to amplify the blast with his energy. A brief moment later, Armantle shoots forward a pixelated, white, screen-shaking beam of energy from him to the blast zone for 25% and KB equal to Falcon Punch, easily killing at 80% near edges.
This powerful attack has a meter the two of them must build up in order to use, having to wrack up a combined 120% total in order to charge up the Hyper Beam. Try using Porygon's F-throw to get a foe offstage for a good set-up!
(Note: Hyper Beam cannot be reflected, absorbed or clanked with, but can be shielded provided the foe can react fast enough.)
------
These two have stage control perfected between the various formations and lava Armantle provides, and the amazing utility of Trick Room from Z. Though either works in either team, Armantle will probably find more benefit being playable while tanking the hits for Z (after he's put up some TR's of course), and baiting foes near Z to get locked-on and assaulted from range. Though of course, with Z playable you can transfer your Usmash and Dash attack to Armantle to help with his mobility issues, then swap back in. Overall the pair plays a bit more methodically than the other combos, opting to let the environment they created mess with the foes before taking advantage with a well placed KO move.
WITH Bisharp : ROCK SMASH
Requiring a foe to be in range of the Super Smash activation as well, Armantle will Fossilize the foe at Bisharp's command. From there, Bisharp will take aim at the rock, testing his blade against it for a weak point twice, before performing an exaggerated Ftilt as he turns and does a mighty backhand with the hook of his blade, shattering the rock into a dozen pieces! This will deal 16% +6% per rock shard the foe hits (there are 8 total) on his way outward at a diagonally up angle that can kill between 150-110% based on if they hit a bunch of shards from the exploding rock.
Foes can escape the move just like with normal fossilize, but escape or no, Bisharp and Armantle can only attempt the maneuver every 15 seconds.
------
Bisharp has interesting synergy with Armantle in that you'll almost never want Armantle on Team1. And why would you when Bisharp has command of stage altering, sky-filling smash attacks whenever you seem fit? On top of this, Lava and Overheat will increase Bisharp's grab game due to his jab and stack with bleed damage, as well as make foes more "jittery" and prone to mistakes in spacing as they try to avoid all the stage shenanigans, making them easy prey. If you do feel like playing as Armantle here, Bisharp does offer some great bonuses in the form of Heavy Armor on a variety of moves, which can prove useful if you have Bisharp in reserve and have Armantle out with somebody else.


We finally got through all 6 Pokemon! Which ones are your favorites? Also, stay tuned for the wrap-up post expanding on the team dynamics, as well as a Special Announcement!
 

JOE!

Smash Hero
Joined
Oct 5, 2008
Messages
8,075
Location
Dedham, MA

A simple playstyle section wouldn't be enough for this set, so lets take this post to look "Under the hood" of JOE!, so to speak.

I've talked about my history with the Pokemon series in each set (shown above), but what about my history with Pokemon in MYM? To date, 23/31 of all my sets have been Pokemon sets, making up 10.3% of all MYM pokesets, ever. Why so many? Well, coming into Brawl the one character I was most excited for was the Pokemon Trainer, since you know: 3 sets in one! Unfortunately they didn't quite pan out like I wanted them to in-game, but the idea stuck with me enough to create my first "real" set: Rival Trainer in MYM6.
After breaking the MYM Ice, my love for the series pretty much set itself up to keep appearing as my sets, especially when Pokemon have already available artwork, moves, essentially a whole mass of material to draw from for inspiration. A favorite technique of mine has been trying to incorporating their base stats into their Smash-Stats, with things such as their base speed determining their Ground Speed, based off of Charizard and Pikachu's base 100 equating to about 7/10 in Brawl. Or, taking high attack and either implementing it as a heavy hitter, or simply a very offensive/combo oriented playstyle. I guess I always found it a fun challenge to portray the pokemon as I see them in both personality and moveset/abilities to you guys.
Speaking of abilities, did you know every pokemon in ATJ actually incorperates all abilities they have? Alakazam has Synchronize explained in Reflect, but Magic Guard is also put in via Teleport, meanign direct KO methods must be used against him due to his immunity to Gimping/Edgegaurds/etc. Feraligatr's Sheer Force is shown not only through his Super Smash with Armantle, but with how generally powerful all his moves are, with all but Jab being able to kill reasonably. Breloom's Technician comes out in how all his moves work from a literal technical standpoint, and Poison Heal comes out of Spore + Leech Seed, as poison damage will heal him 1% a second since they are being damaged by him still. Z's Download/Adaptation are combined in his N/Side Special, but Analytic comes from his Trick Room interactions requiring careful planning and reaction based on what's going on at the time. Bisharp's Defiant has been covered enough, but Inner Focus and Pressure both are wrapped into the same clashing and rush-down style, as well as Metal Coat. Armantle seems to be the only one who openly states all his abilities!
To wrap this up, the reason behind the trainer sets as some have asked is to pretty much circle back to Rival Trainer and expand on the "trainer system" in a manner that could actually work and be fun. And to circle back further, here is the inspiration behind ATJ:
  • Alakazam: Mewtwo, Eelektross, Reuniclus, Y2X
  • Feraligatr: Feraligatr (Rival Trainer), Velociraptors, Octillery, Salamence, Emboar, Krookodile
  • Breloom: Spiderman, Chikorita, Toxicroak, Simisage, Archeops, Sonic the Remix, Player99
  • Porygon-Z: Mewtwo, Samus Remix, Octillery, Reuniclus, Player99, Y2X
  • Bisharp: Velociraptors, Spartan Warrior, Forretress, Toxicroak, Krookodile, Archeops, Y2X
  • Armantle: Quilava, Spartan Warrior, Forretress, Salamence, EED Soldier, Emboar, Krookodile, Rhyperior
  • Ace Trainer JOE!: Sonic the Remix (JOE! Generations with organization), Trainer JOE!
I'm sure some of you have seen all that, and I'm glad to say I've come full circle from where I've begun, to where I am now. Now, lets get on with the actual strategy parts, shall we?
MECHANICS REVIEW:
Just a re-cap on how everything works, feel free to skip past if you've got it already!
TRAINER SYSTEM 2.0:
At the character select screen you will see a :pokeball: in the bottom left corner of ATJ's portrait. When you click that, you will then be able to select your team from 6 mini-portraits with a number (1-3) indicating their order once selected, with you able to un-select a Pokemon by clicking them again. If you do not click the :pokeball:, your team will be randomized.
Order is very important as although stamina is gone, each Pokemon has their own HP and Stock! So there is a good deal of strategy in who you'll want out first, or who'll bring up the rear as once a Pokemon bites the dust, you can no longer switch to them for the remainder of the match. The only exceptions to the rule are time matches where there is a 15 second penalty before the defeated Pokemon is revived (starting after the next in line is summoned to the re-spawn platform), and in matches where there are more than 3 stocks, in which case it works like in the Story-Mode if there are extra stocks: the first to die gets the extra stock, and so on. Unlike the first Trainer JOE!, if there are less than 3 stocks remaining, you will only have that number of Pokemon, with each of the 6 actually having a Down Special to use when solo this time around!
Speaking of Down Special, here is the big change in Ace Trainer JOE!: Double Battles. Unlike TJ!, who had one Pokemon at a time on the field, ATJ has 2: the 1st Pokemon you chose as your Playable/Team 1 and your 2nd pick, that moves around the field halfway between the backdrop where ATJ is and the Team 1 Pokemon (which allows everybody to walk around without bumping into each other), that is designated as the Support/Team 2, with the 3rd acting as your reserve.
In play, your Team2 Pokemon will walk around by itself as if it were a CPU in training mode set to "Walk" and occasionally jump on a platform if it is over the main floor, and will hop off of moving ones once they begin to move off-stage. In case they hop off and grab an edge remember they are somewhat in the BG, meaning they cannot edge-guard you or your foe. While in Team2 mode, they actually behave a lot like a Pokeball Pokemon would and use their own Team 2 Special if a foe is in range, make sure to capitalize on these moves with your Team1 Pokemon! Like some Pokeball Pokemon your Team2 Pokemon is attack-able, but immune to Knockback Growth, meaning it will only suffer set KB between Mario and Samus' Ftilts when hit. This is good seeing your AI controlled team member isn't that easy to pick off (if they do get flung off the edge, they will behave like a training room CPU and use their jumps+recovery to get back), but at the same time 3/4ths of the damage from the attack is carried over when you swap them over to a playable state, so make sure to cover both sides of your party at once!
SWITCHING GUIDE:
3+ STOCKS: :stick2:+:bbutton: = Team1 Swap. :stick2:+(:bbutton:+:abutton:) = Team2 Swap.
While the conventional switch remains for Team 1 and the Reserve Pokemon, you can also swap between the Team2 Pokemon and the Reserve by pressing Down+(B+A), which can then allow you to use the conventional method to make the formerly Team2 Pokemon playable and so on.
2 STOCKS: :stick2:+:bbutton: = Swap control between Team1 and Team2.
Losing the conventional switching, when there are only two Pokemon on the field you may quickly swap control between them with Down+B. Abuse being able to take control of two places at once to try and take back the lead!
Note: There is a half-second cool-down for switching Pokemon at this stage.
1 STOCK / STAMINA MODE / SPECIAL: :stick2:+:bbutton: = Team2 Special.
When down to just 1 Pokemon left, you exchange swapping for a proper Down Special, and play the Pokemon as their own character as you try to snag a victory at the last moment!


DUAL COMMANDS:
What are they?
Dual Commands are inputs that can control the Team2 Pokemon's actions while playing as the Team1 Pokemon as JOE! commands the second team with his other hand at the same time as the first. An important aspect of both the next member of the team, as well as gameplay with ATJ in general. There are 5 commands total, and each have their own nuances to keep track of, but mastering these can really give you an edge in teamwork vs the opposition.
Note: Team2 will not perform their Team2 special if within 1 platform of Team1 unless Team1 isn't performing any actions in said range for at least 1/2 a second.
TEAM1 SHIELD :rtrigger:/:ltrigger: = TEAM2 GRAB :zbutton:
Pressing Shield at any distance will have Team2 perform their grab. By default, the Pokemon will then simply perform their pummel over and over with the normal properties unless commanded to do something else during that time. Upon grab-release, the victim has anti-grab armor for 1 second.
If the Team2 Pokemon is airborne, they will perform their Zair. Neutral Air Dodge will also count as a "shield" input for this command.
TEAM1 DODGE :rtrigger:/:ltrigger:+:stick5: = TEAM2 F-TILT :stick6:+:abutton:
Dodging/Rolling while within a platform of Team2 will have them perform their Ftilt, which can be especially useful with the likes of Alakazam, Feraligatr and Breloom as their tilts are all long ranged (and powerful in Gator's case) to use as cover when rolling past them.
Directional Air Dodge also works for this, and as such Wavedashing near the Pokemon can command them to attack. If the Pokemon is airborne or has the foe grabbed, they will perform their Fair or Fthrow when this command is issued. In the case of the latter, the foe has only a mere 1/2 second worth of anti-grab armor.
TEAM1 TAUNT :dpad: = TEAM2 N-SPECIAL :bbutton:
Inputting a Taunt will command Team2 to perform it's Nspec, no matter the distance. Be wary of the positioning of this however, as laggy taunts of wrong-facing Pokemon can end up being punished hard. The taunt command can be done in the air as well, but will cause the Team1 mon to be inactive for 1/4 of a second as JOE! gives the other his command.
Note: Specials that are either held or charged will have the Pokemon hold it until instructed to do otherwise, with pressing taunt mid-taunt being able to cancel the special. Z is a special case here, as Conversion will select the Top Left color on the selection wheel for the Pokemon in Team1 with him, and then go clockwise from there with each press of Taunt.
TEAM1 JUMP :xbutton:/:ybutton: = TEAM2 THROW :stick7:/:stick9:
If your partner has the opponent grabbed, Jumping within a platform of them will have them perform their Uthrow. Alternately, if you are jumping within range of another throw (Usually Bthrow, but they can Fthrow at times too), they will attempt to throw the opponent towards you with that throw instead. As with the Ftilt command, opponents have 1/2 a second worth of anti-grab armor.
TEAM1 THROW :stick7:/:stick9: = TEAM2 JUMP + N-AIR :xbutton:/:ybutton:+:abutton:
Opposite of the last command, if you have an opponent grabbed and throw them into the air near your Team2 partner, they will jump up and attempt to intercept with their Nair. Depending on the throw, it is also possible to buffer in Fair with a Dodge, Zair with a Shield (you do not give foes grab-armor), or even Nspec with a taunt!


FLOW OF BATTLE:
A huge part of ATJ is how dynamic he becomes based on how many stocks (Pokemon) he has left. Playing with 3+ stocks is an entirely different game than when you have 2, and when you're down to the wire with 1 you have access to all sorts of new variables than before. This is even more pronounced depending on the standard stock count in Smash4, you could either see 3 stocks as in brawl, or 4 as in melee. This can completely swing the dynamic as then it may not be as big a deal to have an "expendable" Pokemon, as they could snag the extra life, as well as extend 3mon play for about 1/2 the match.
On the note of "3mon", the first 1-2 stocks (lets assume 4 stocks due to the more offense oriented nature of Smash4, that and 4) are vital as they set up the most momentum for your team, as well as give you the widest array of options. You have access to all 3 interactions and Super Smashes to build off of, as well as the ability to swap out to confuse and counter the foe's actions on either team. If you manage to secure a solid lead here, you should be golden.
That said, the gold may fade quickly after your first Pokemon is finally lost. When down to just 2 Pokemon, you are then limited down to just 1 interaction and Super Smash, a mere third of what you'd have normally, but gain the ability to swap between Pokemon without having to actually "switch". This can be an incredible asset to your game, as just imagine having say.. Bisharp and Breloom together, and at different parts of the stage. You can literally extend combos by tossing the foe to the other and switching control! Be wary of the cool-down between switches though, as relying on it too often can get you punished.
When you finally get down to the last man standing, it's gonna be an uphill battle no matter the mon. Most likely they will be beat up, stage effects will be gone, and they are literally on their last limb. Not all is lost however, as they gain the ability to actually use their Down B on command, making them a "proper" character! This can be either a set-back or a boost depending on the player, but more often than not this last ditch effort can be the difference between defeat and victory for ATJ.

POKEMON ADVANCED:
GENERAL:
  • Command Canceling: By inputting commands during other animations (such as Short-Hop and taunt, canceling the "inactive" period with your landing animation) you can get around some of the pitfalls of Dual Commands. A great example is to Wavedash inside of Ftilt-Command range, as it will count as a Dodge for the command.
  • Interactions: Did you know each pair of Pokemon has their own unique interaction? For example, if Breloom has Leech Seeds on an opponent, Feraligatr's water attacks will make them grow, causing them to heal much more! Check out the Team Builder below for more details.

ALAKAZAM:
  • Teleport Rescue: From the ground, Alakazam will instantly swap places with the Team2 Pokemon. This can be used as a rescue method as when his partner gets flung off-stage, he can safely warp them to the stage where he is, and then easily warp back himself!
  • SHFFL: Alakazam can land-cancel Psybeam, causing him to have barely any lag while firing it if he lands mid-animation.

FERALIGATR:
  • Movement: Feraligatr has 3 unique movement tools at his disposal, one for each direction. Especially useful is Waterfall and it's jump-cancel, as if you still have your Double Jump available, it can be possible to recovery by Waterfall>Jump>Side B! Dive has great use too (when you can actively use it) as other than be a harder hitting DK Down B that doesn't just hit the ground, it is also a great anti-pressure tool all around as it lets him shoot down from juggles and just make space in general.
  • Grab Game: Gatr's grappling is extremely potent with his stronger Grab duration, combined with Jump-Canceled Side B's, you can jump-cancel a grab from nearly any distance!

BRELOOM:
  • TRIPLE FINISH: Keeping with the fighting theme, did you know Breloom can activate a Super-Assist? If Breloom wracks up 60%, and has both partners alive, his portrait will glow indicating he can perform a "Triple Finish". Pressing A+B will now send out all 3 Pokemon at once to perform a special Combo move, check Breloom's Teams in the Team Builder for more info!
  • Sky Uppercut: A huge asset to Breloom's game is his UpB, doubling as both a surprisingly versatile recovery and an excellent onstage combo-maneuver. When recovering, Breloom can extend the range like with his Zair by about 1/3 of a platform above his fist, hooking on to the ledge as a tether. In Smash4, tethers have been re-worked so that they do not count as "occupying" the edge, allowing not only Tether-only characters to have their own unique gameplay, but for Breloom to still hang on even if somebody is there trying to block him! On-stage, Sky Uppercut has priority similar to Marth's Up B making it great for up-close spacing games when you connect. Even better is how you can cancel it into an aerial or Zair, adding to the offensive!

PORYGON-Z:
  • Quick Conversion: Conversion can be performed and canceled by tapping B then the direction of the type you want to change to. Canceling refers to when you tap B again while converting to cancel the animation without selecting a type, speeding up the process.
  • QCBlast: Using the above technique, it is possible to do have 2 types of projectiles out at once, simply by Shooting one, Quick-Converting, and shooting another!

BISHARP:
  • Cast-Iron-Camping: After coating yourself with Metal Coat, you can essentially just go to town with Metal Claws in order to -force- any foe to approach you. This is ideal for Bisharp mains who feel the need to always be baiting and punishing the opposition.
  • Quick Dual-Smash: Any amount of charge time will activate the Dual-Command smash, so even holding the input for a fraction of a second can activate it. Best done with Fsmash due to being able to stop after 1 hit.

ARMANTLE:
  • Fossil-Boost: Fossilize will actually push Armantle backwards a tad mid-air, this can be used to recover by Wavebouncing (face forward, pres Side B in the other direction then immediately press toward the stage) for a horizontal boost!
  • Ledge Extension: Ancient Power actually has a range of about 1/2 a platform in front of Armantle. Knowing this, it can be possible for him to do this off-stage when facing an edge to save himself!

TEAM BUILDER:
Here's a treat for you guys, an online Team-Builder!
Simply click on each Pokemon's portrait to proceed and find out all about each and every team you can think of!
(for those want to see the combinations all at once regardless of order, there is a link to a chart at the bottom of the page)


CHOOSE YOUR STARTER!

EXTRAS:
ALTERNATE COSUMES:
[collapse=Alakazam]​
[/collapse]​
[collapse=Feraligatr]​
[/collapse]​
[collapse=Breloom]​
(Note: For god knows why Photobucket messed with the edges of the last two :c )​
[/collapse]​
[collapse=Porygon-Z]​
[/collapse]​
[collapse=Bisharp]​
[/collapse]​
[collapse=Armantle]​
[/collapse]​

EVENT MATCH: CHAMPION JOE!
Using ATJ, pick any team combination you want, then fight off against the 19 you didn't pick in a 5-round tournament mode!
Winning this Event Match unlocks the 5th "Gold" costume slot for your Pokemon.


SPECIAL VICTORY MUSIC:
If you win a match without losing a single Pokemon, this theme will replace the normal Pokemon Fanfare.


UNLOCKING POKEMON:
Unlike other trainers, ATJ has to actually "catch" the rest of his roster through various methods. Starting with the first 3 Pokemon (Alakazam, Feraligatr and Breloom), you will have to encounter the remaining three through one of three ways:
  1. Pokeball: Porygon-Z, Bisharp and Armantle each have a 1/200 chance to appear from a Pokeball when ATJ is playing, and lacks any of them on his roster. You will have to KO them as they wander about performing their Down B to "capture" them, then win the match. The chance of encounter increases to 1/100 on stages relating to the Pokemon (rocky/fiery stages increase odds of Armantle, dark or foreboding areas promote Bisharp, and high-tech areas increase Porygon-Z)
  2. Story Mode/Event Match: Capturing the Pokemon in the Story Mode will of course unlock them after you complete story mode, and beating CHAMPION JOE! will unlock a new Pokemon each time to beat each difficulty.
  3. Other Players: Lastly, simply defeating other players online who have already unlocked a Pokemon you are missing may unlock said Pokemon for you.


-FIN-


Swamp Sensei

Today is always the most enjoyable day!
BRoomer
Joined
Jan 4, 2013
Messages
37,999
Location
Um....Lost?
NNID
Swampasaur
3DS FC
4141-2776-0914
Switch FC
SW-6476-1588-8392
Wow....

I'm impressed.
 

JOE!

Smash Hero
Joined
Oct 5, 2008
Messages
8,075
Location
Dedham, MA
While the pokemon can change, the concept behind the "trainer system" here is the highlight. What do you think?
 
Status
Not open for further replies.
Top Bottom